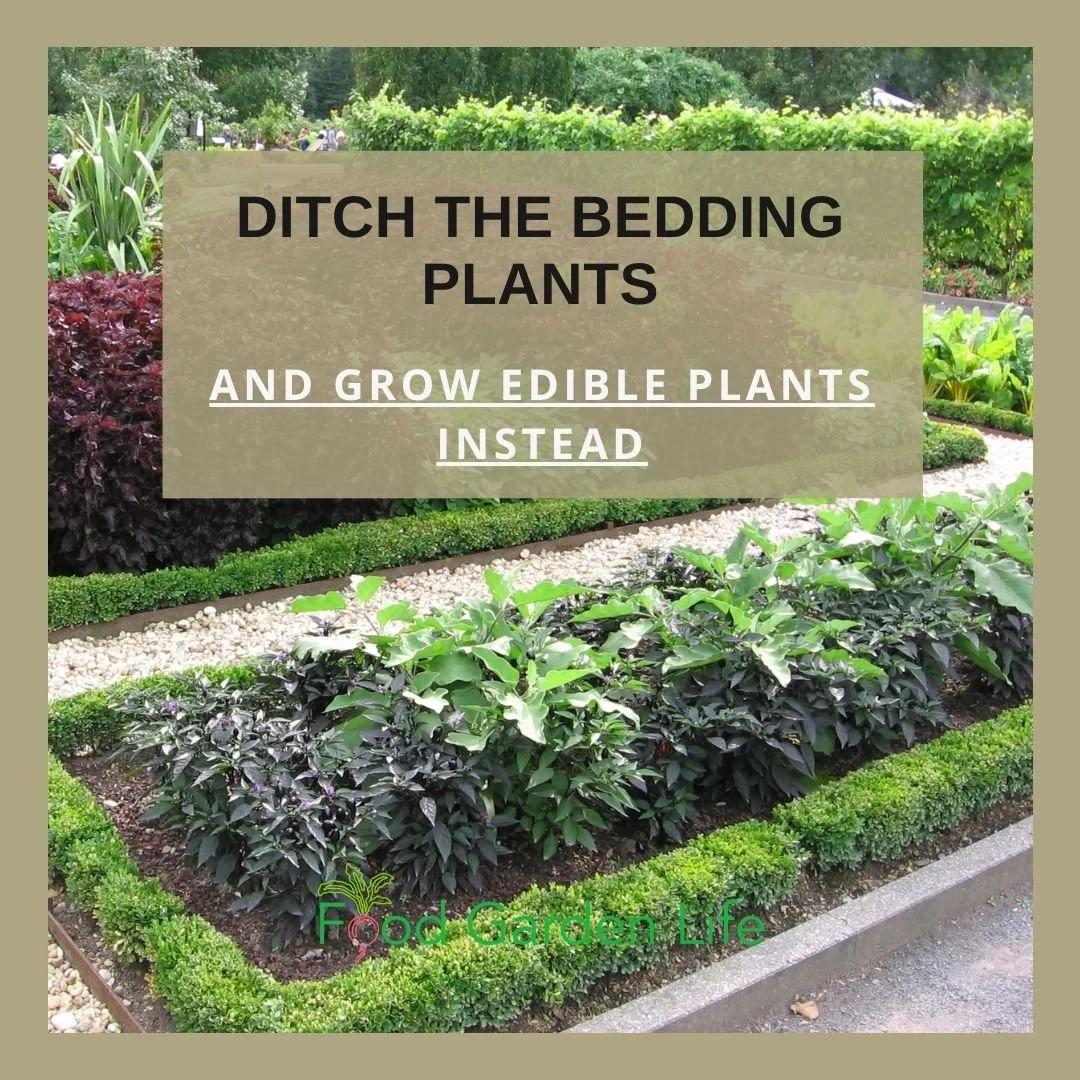
Move Over Bedding Plants...and Try These Edible Garden Plants Instead
Replace some of your bedding plants with edible plants! Find out how to choose suitable crops to use as bedding plants.
by Steven Biggs
A Few Plants for Edible Landscaping
Attractive? Check.
Low maintenance? Check.
Edible? Check.
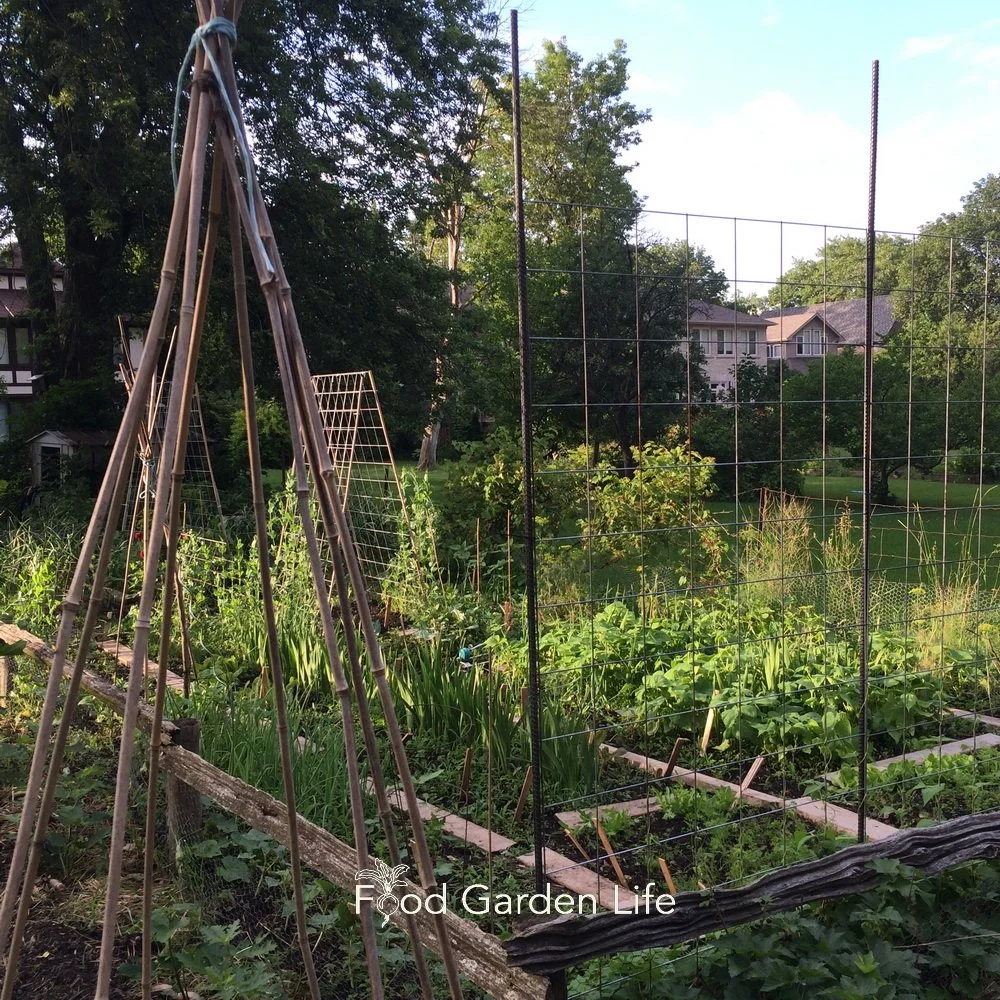
The peppers were the finishing touch in my front-yard edible landscape. Right by the sidewalk. A nice pop of colour.
What had been my front lawn three months before was an edible front yard—edible plants including salad greens, herbs, vegetables, fruit bushes, and edible flowers.
I was enjoying the mix of colour, height, and texture as I popped one of those peppers into my mouth.
Sound the fire alarm. My face lit up scarlet. I grabbed a basket and, between hiccups, plucked all those hot peppers…worried about hot-pepper misadventures with the school kids that go by twice a day.
So the hot peppers were not a home run.
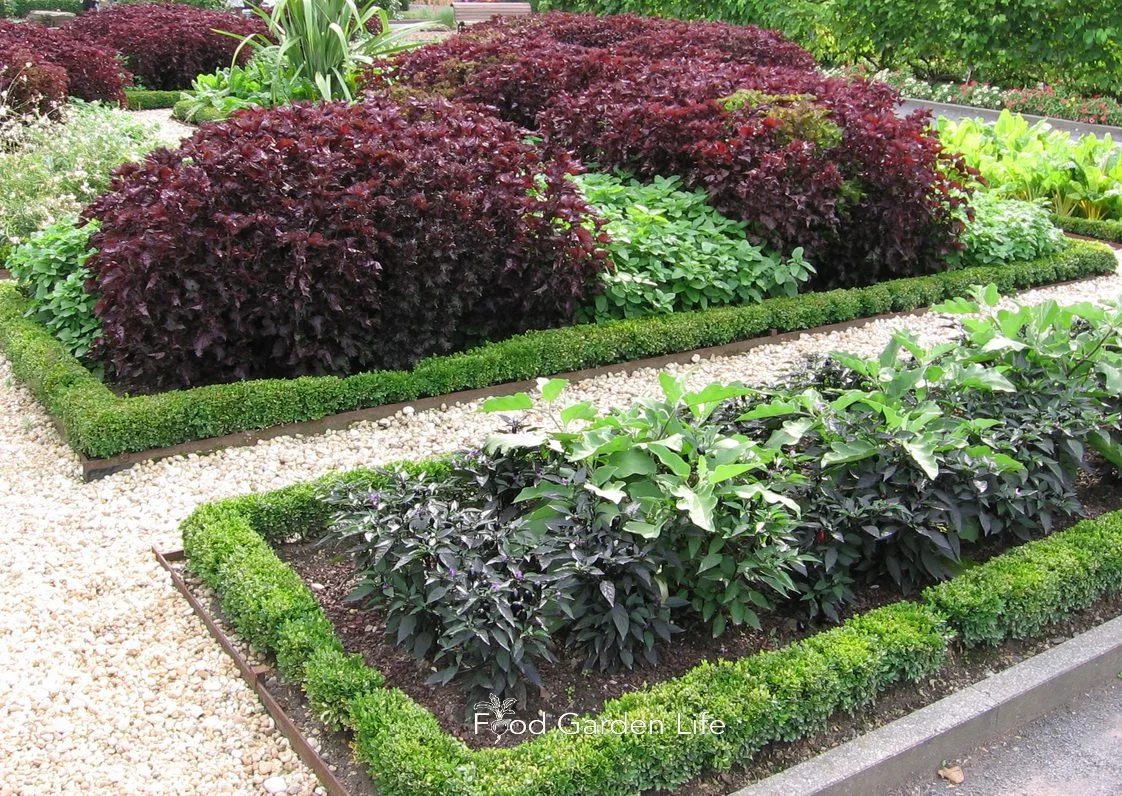
But with those little scorchers harvested, I left the pepper plants. They had dark green leaves and compact form. Nice bedding plants nonetheless. Just not next to the sidewalk.
If you’re interested in edible plants for edible landscaping, keep reading. This post gives you design ideas and top crops for using as edible bedding plants.
What’s a Bedding Plant?

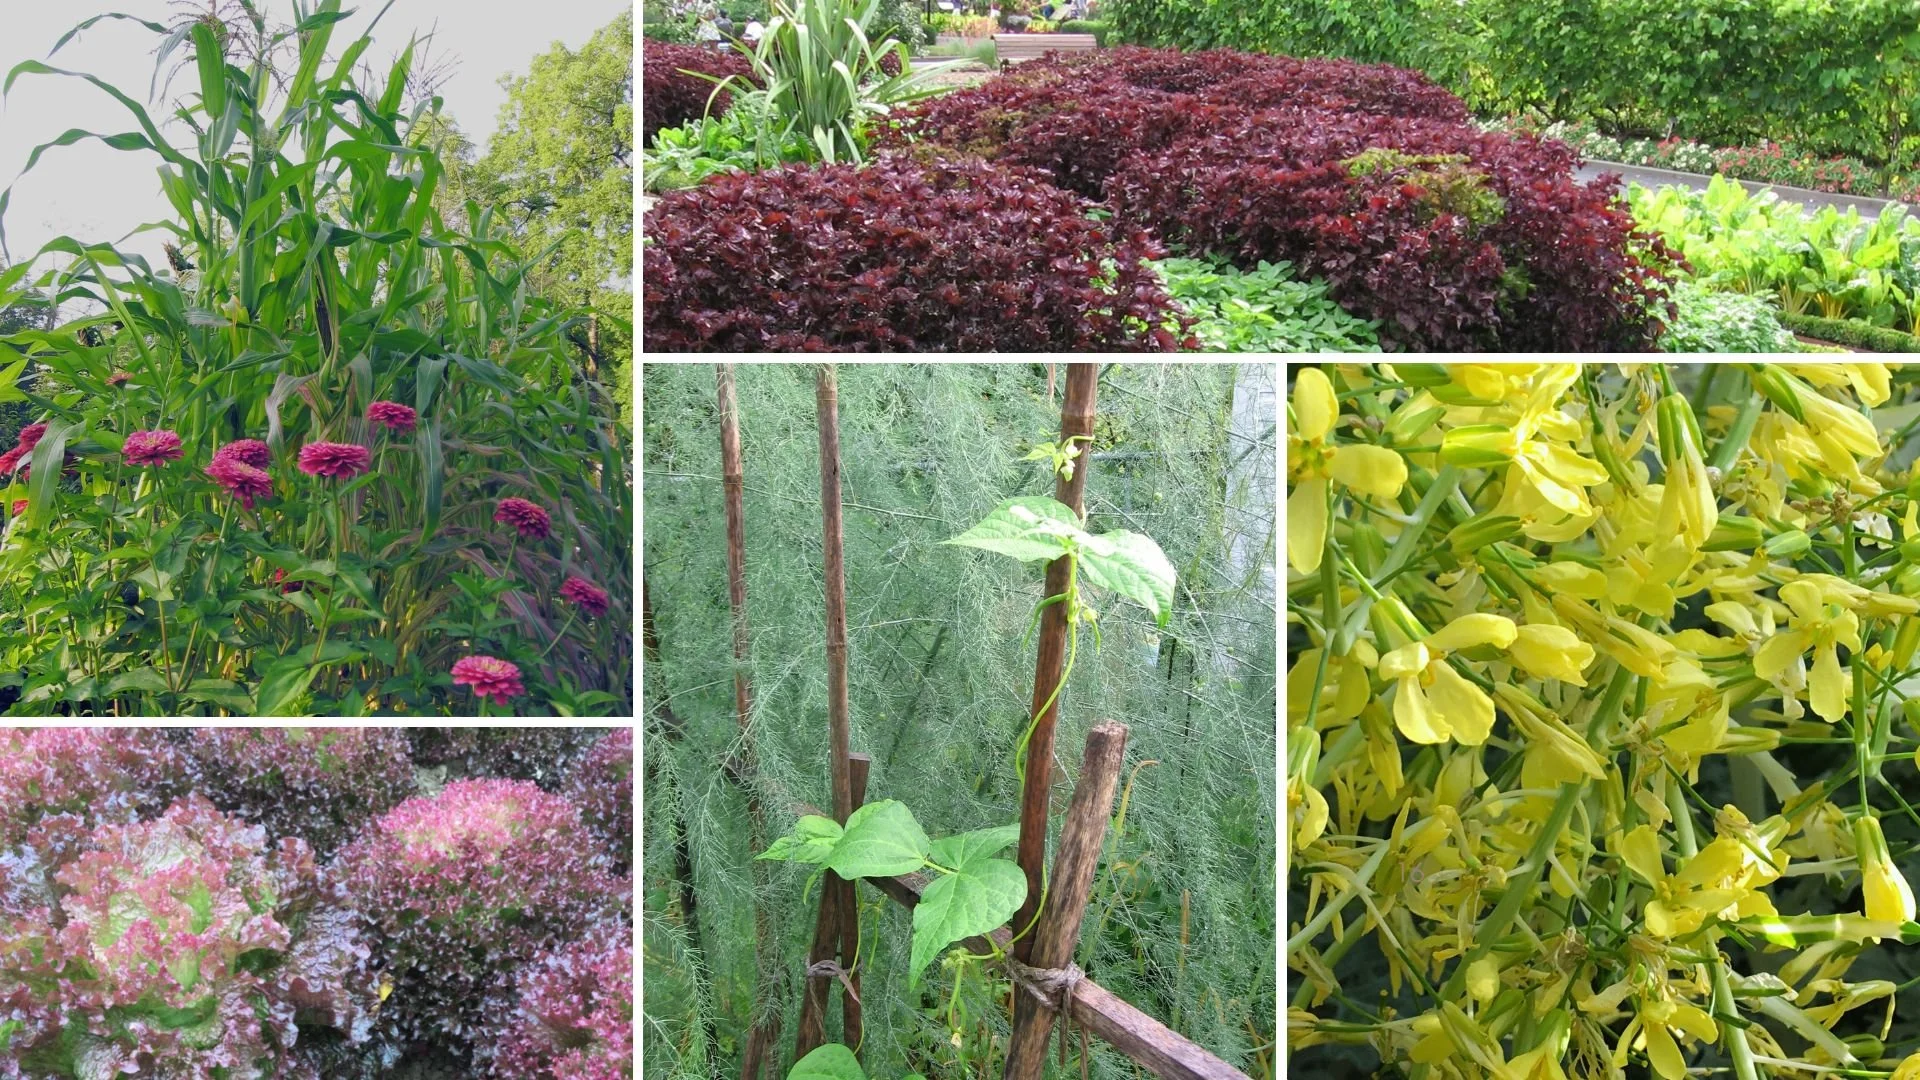
Bedding plants are display plants for seasonal plantings. Here’s a good example, at Butchart Gardens in BC.
Bedding plants are display plants for seasonal plantings. Garden bling. So choices usually combine fast-growing, colour, and resilience.
Some, like coleus, have fabulous foliage. Many have showy flowers. Commonly they’re flowering annuals—though not always. Others, like fuchsia, are tender perennials.
But what they have in common is that they’re typically transplanted into a garden to give an immediate show. Then they’re yanked out at the end of the season.
Lots of common vegetable-garden and herb-garden plants can fit the bill as bedding plants in an edible landscape.
What Makes a Good Bedding Plant?
A good bedding plant is low maintenance. It doesn’t need pruning or staking. You don’t need to hold its hand.
For summertime plantings, a good bedding plant also performs well through the heat of the summer.
Why Use Edible Plants as Bedding Plants?
Using edible plants to make ornamental plantings—instead of traditional bedding plants.
I have nothing against flowers. I go overboard planting flowers every year.
But like many home gardeners, I never have enough space to grow all of the plants I want to grow.
So if I can kill two birds with one stone—edibles for both eating and appearance—count me in. Give me space in the flower garden for some veggies…I'll make it into an edible landscape.
Bedding Plants Through the Seasons
Pin this post!
Most ornamental bedding plants are planted after the last spring frost, but there are exceptions. The most common is pansies—which shine on despite a frost.
(If you didn’t know, pansy flowers are edible!)
You might see plantings of ornamental kale and cabbage in the fall. They soldier on through fall frosts while most bedding plant snivel.
(You can eat ornamental cabbage and kale—though they’re bred for looks, not as gustatory delight.)
Just as plant choice can keep the curtains open longer for a flower garden, choosing the right edible bedding plants keeps an edible landscape looking tip-top into the fall.
Designing Edible Landscapes with Edible Bedding Plants
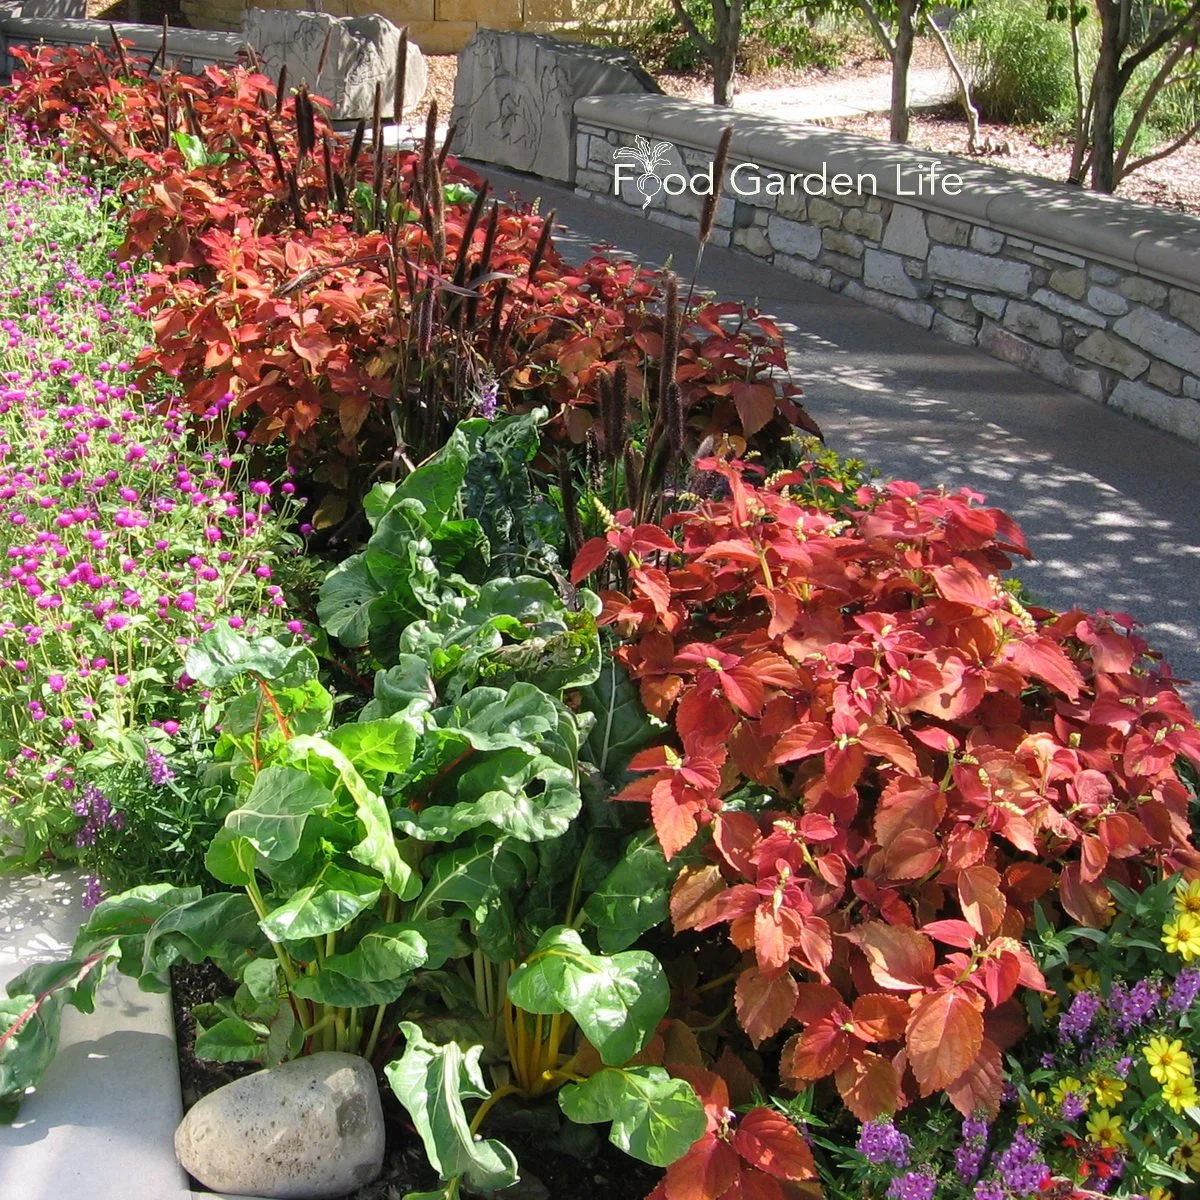
Swiss chard hanging out with some ornamental bedding plants.
The way you use bedding plants depends on the situation and your taste (sorry about the pun.)
My advice? Be wildly creative and do something that your neighbours aren’t doing. Gardening can be more than practical; it can be creative, too.
(It should be creative, that’s the fun part!)
To get your creative juices going, here are three broad ways of using bedding plants in your edible landscape:
Formal. Think of public display gardens with formal flower beds and symmetrical patterns. (If you’re a detail person, this might be up your alley.)
Informal. This is where you’re getting playful with colour and texture and not constrained by having one big formal flower bed. Like icing on a cake, you “ice” the garden bed…a smear of bedding plants here and there.
Carpet. I once worked at a company where we made the company logo from bedding plants. That’s carpet bedding. We’re talking about a tightly planted, intricate pattern. Like painting with plants.
5 Edible Bedding Plants to Start With
Here are five edible bedding plants you can start with. There are lots more (including the pansies and kale I mentioned above.) But these five edible plants are all work horses, easy to find, and give a good mix of colour and texture.
Swiss Chard. Such an underrated plant. While so many of its leafy-green brethren make haste to flower and die, Swiss chard just grows leaves all summer. And along with green varieties, there are red, orange, yellow—even striped red-and-white varieties. Find out why Swiss chard is also a great choice in the fall garden.
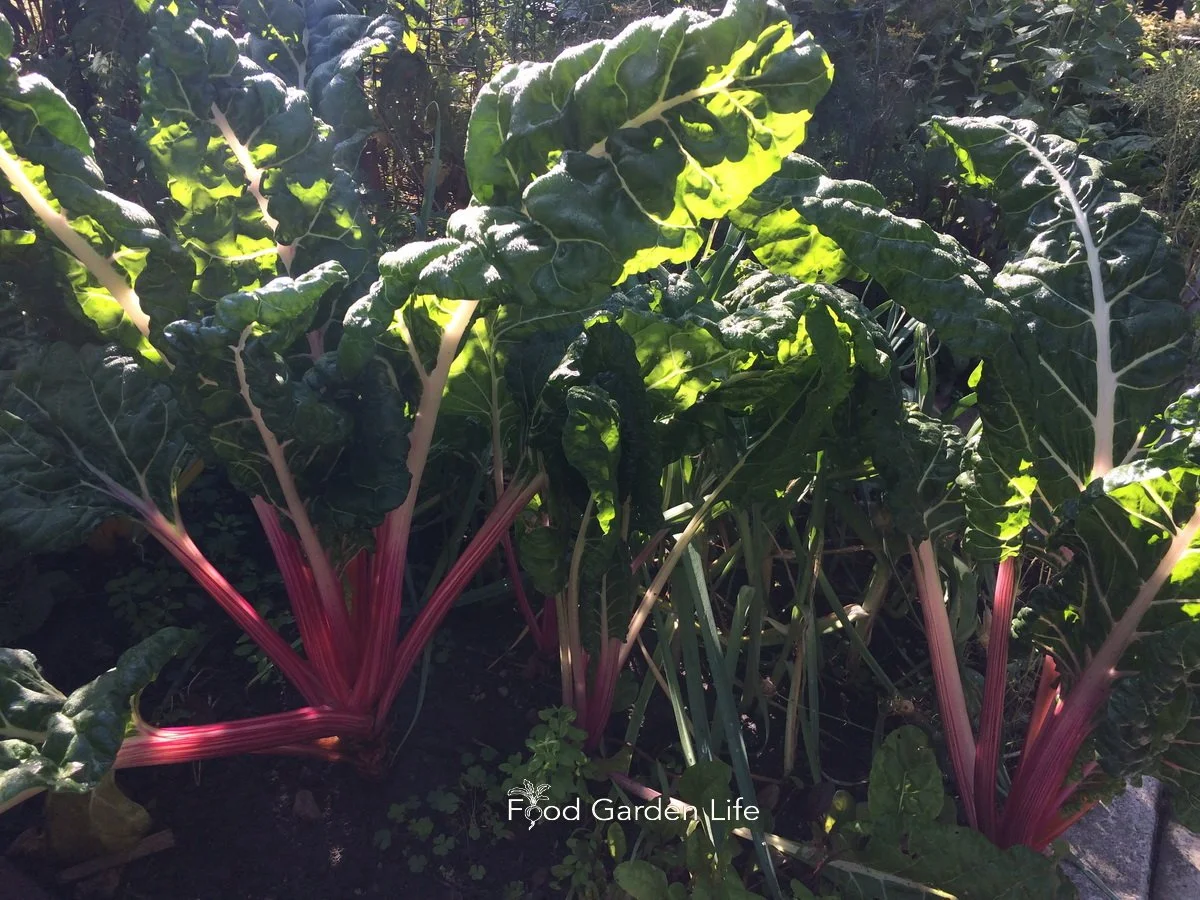
Swiss chard. This underused leafy green makes an excellent bedding plant.
Parsley. The world needs more parsley. Seriously. Beyond garnishing a cheese tray or bulking out your bruschetta mix, parsley is a performer in the edible landscape. Great for edging borders. Planted in larger blocks, curly-leaf parsley is a brush-stroke of texture. And it lasts nicely even as fall frosts fell heat-loving crops.
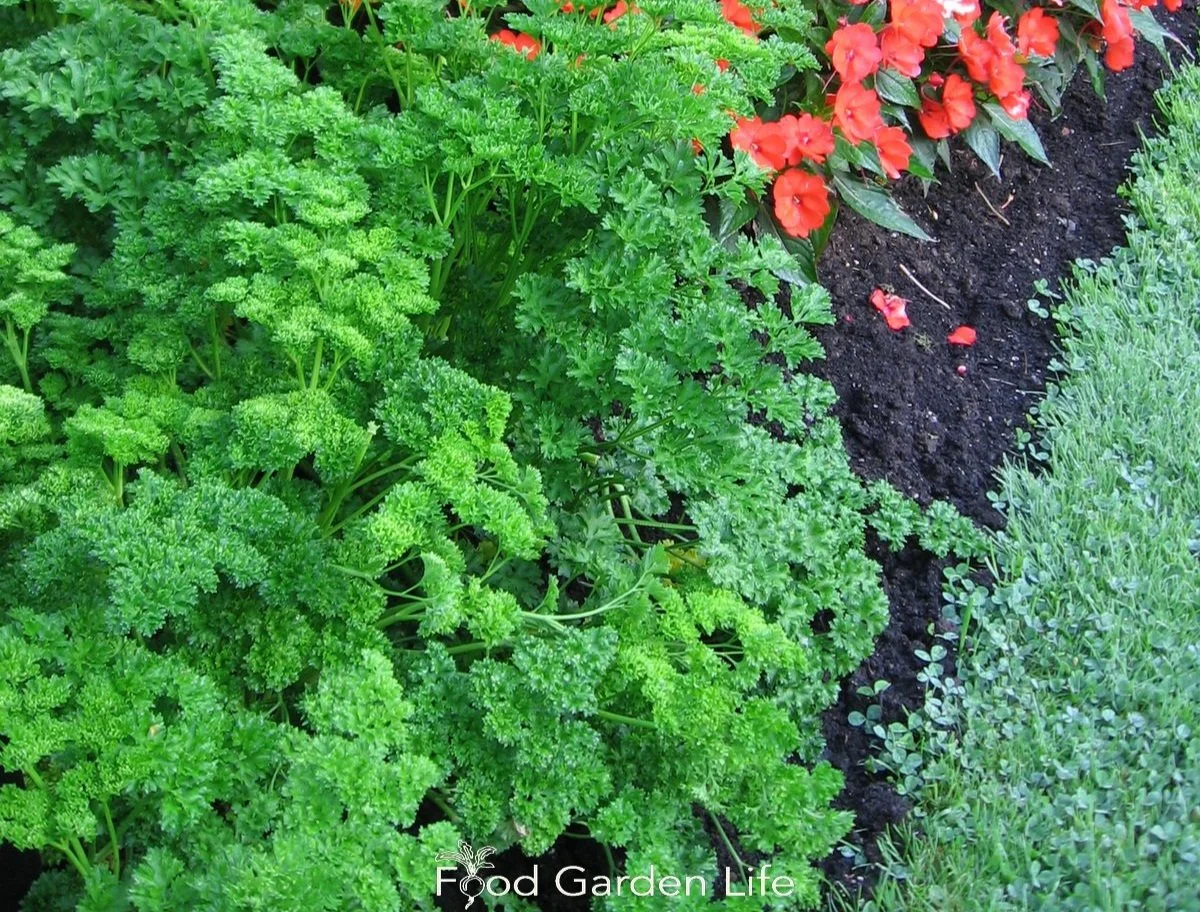
Parsley. A top-notch bedding plant.
Cardoon. How many edible plants can you describe as elegant? This one has a touch of class. I was riveted when I saw cardoon punctuating the landscape of the historic Spadina House mansion in Toronto. What a bold beauty this plant it! Find out more about cardoon.

Cardoon. An elegant bedding plant!
Basil. From compact, little-leaf varieties to more gangly family members, you can choose from quite a range of plant and leaf sizes. And for leaf colour, remember there’s red and purple, as well as green. The compact basils are great for carpet-style designs. Keep in mind that basil, after a spell of cold fall weather, will quickly pack it in for winter.
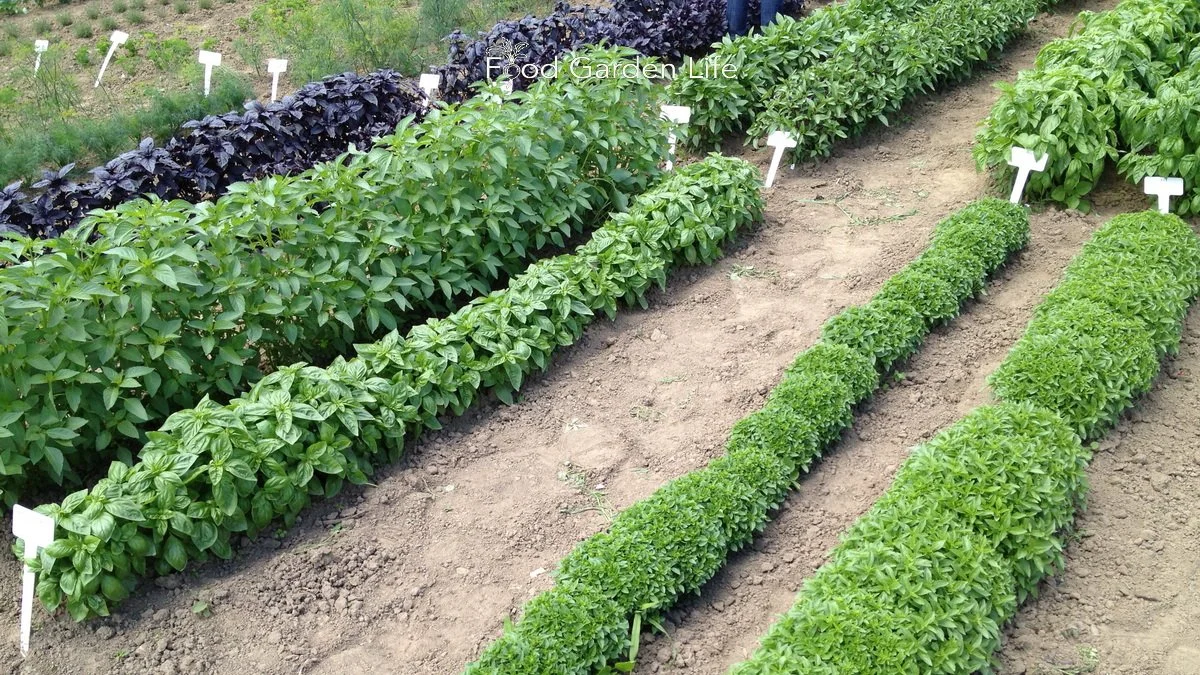
Basil. So many choices…here’s a shot from a trial garden.
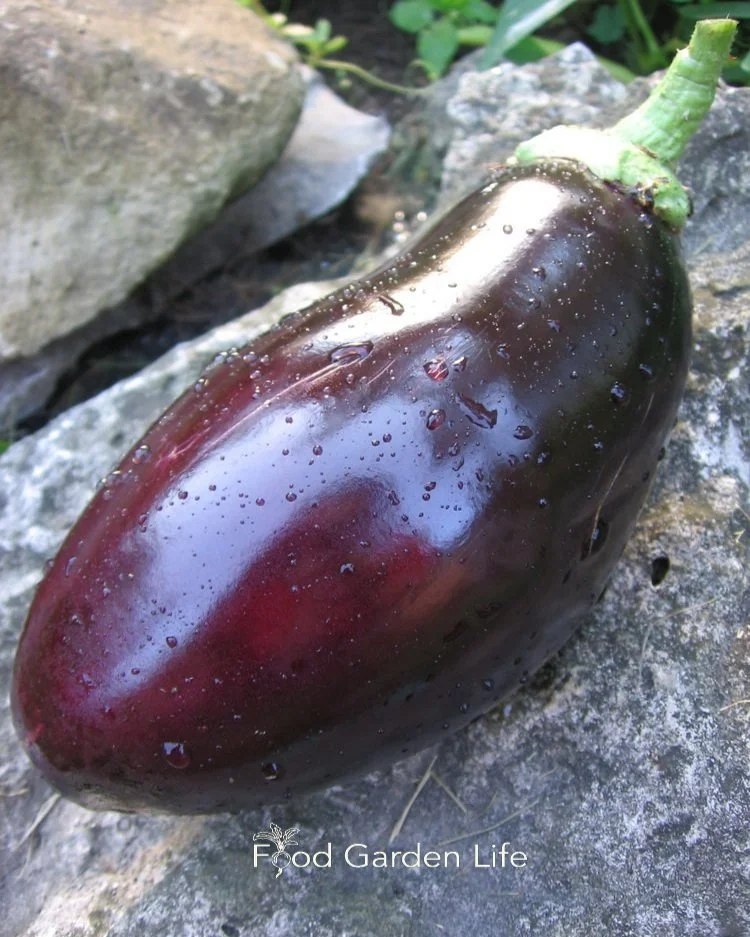
Eggplant. Compact plant. Attractive flowers. Beautiful fruit. Eggplant can be front and centre in an edible landscape. I love the small-fruited varieties with interesting colours, such as red-fruited eggplant or the skinny striped ones. Eggplant as a bedding plant? I bet your neighbours aren’t doing this!
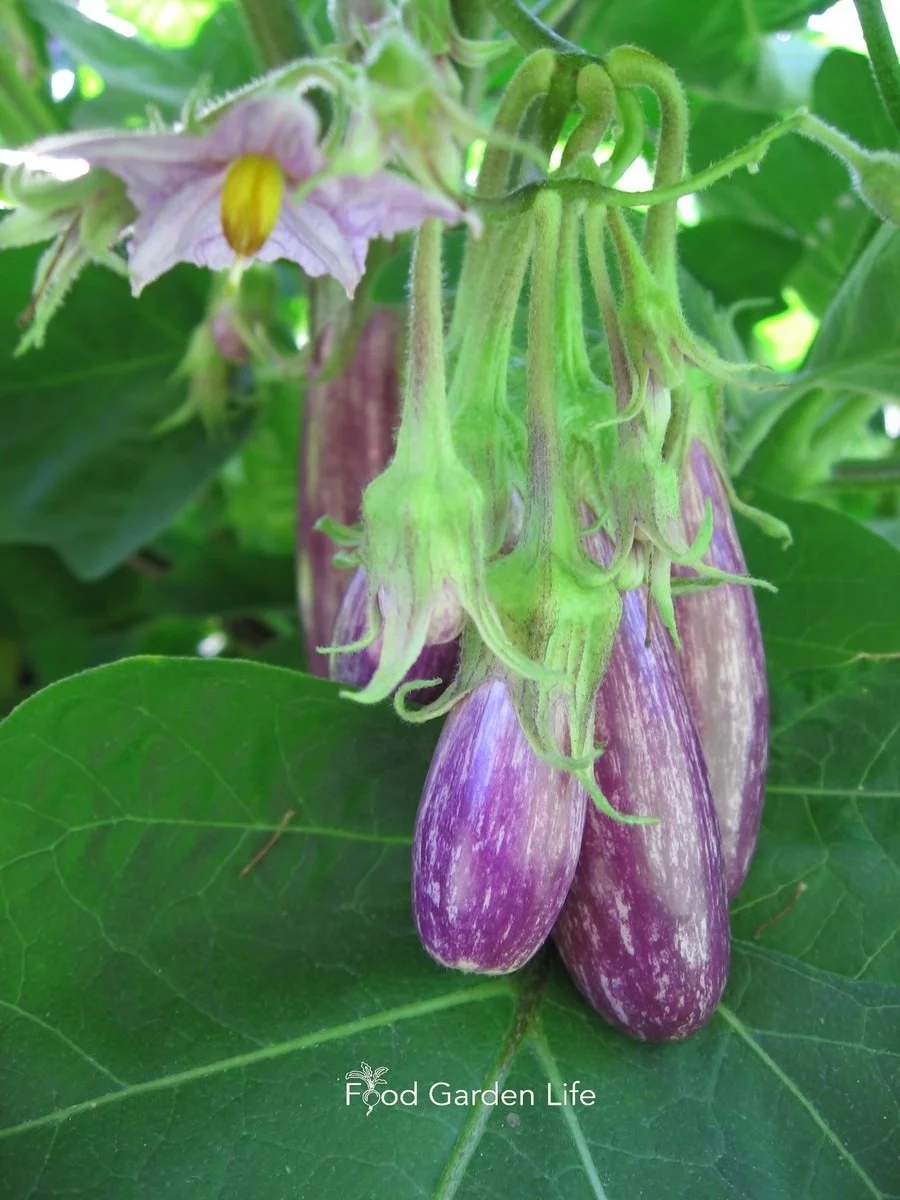
Eggplant. Even if you don’t love eggplant, you have to admit it’s beautiful!
Find This Helpful?
Enjoy not being bombarded by annoying ads?
Appreciate the absence of junky affiliate links for products you don’t need?
It’s because we’re reader supported.
If we’ve helped in your food-gardening journey, we’re glad of support. You can high-five us below. Any amount welcome!
Courses
Here’s a course that guides you through creating an edible garden you love. It’s my ode to edible gardening. You’ll find out how to think outside the box and create a special space. Get the information you need about a wide range of edible plants.
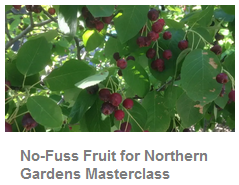
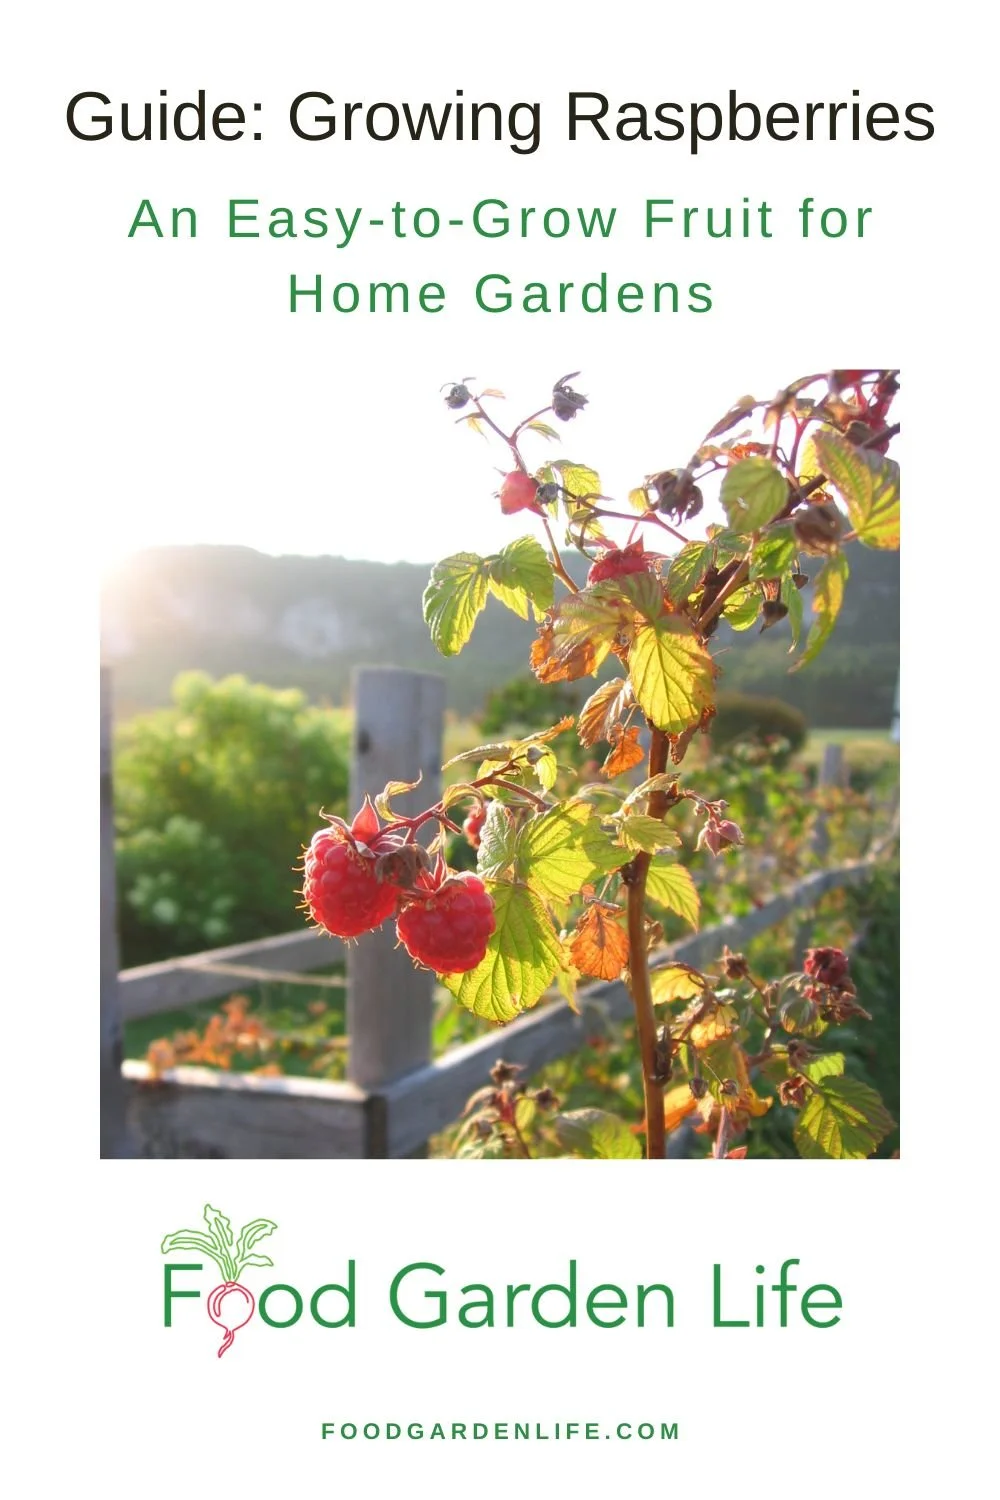
Guide: Growing Raspberries (high yield, NO fuss fruit)
This article explains how to plant and care for raspberries in a home garden.
How to Grow Raspberry Plants
At the back of my aunt and uncle's house was a berm made of heavy yellow sticky clay. It was the soil excavated from an addition to their house. The contractor just dumped soil and rubble at the back of their yard.
And it became their raspberry patch.
Raspberries are well suited to the home garden because they’ll thrive in imperfect conditions like that hard-packed berm.
A home gardener can take a very systematic approach to raspberry care…or a hands off approach. Both work with raspberries. (Though by investing some time, you increase the harvest.)
If you want to find out how to grow raspberries, get ideas for using them in the landscape, and find out top tips for raspberry care, keep reading. This post tells you how.
Primer for Growing Raspberries
Let’s start with some raspberry basics.
How Raspberries Grow
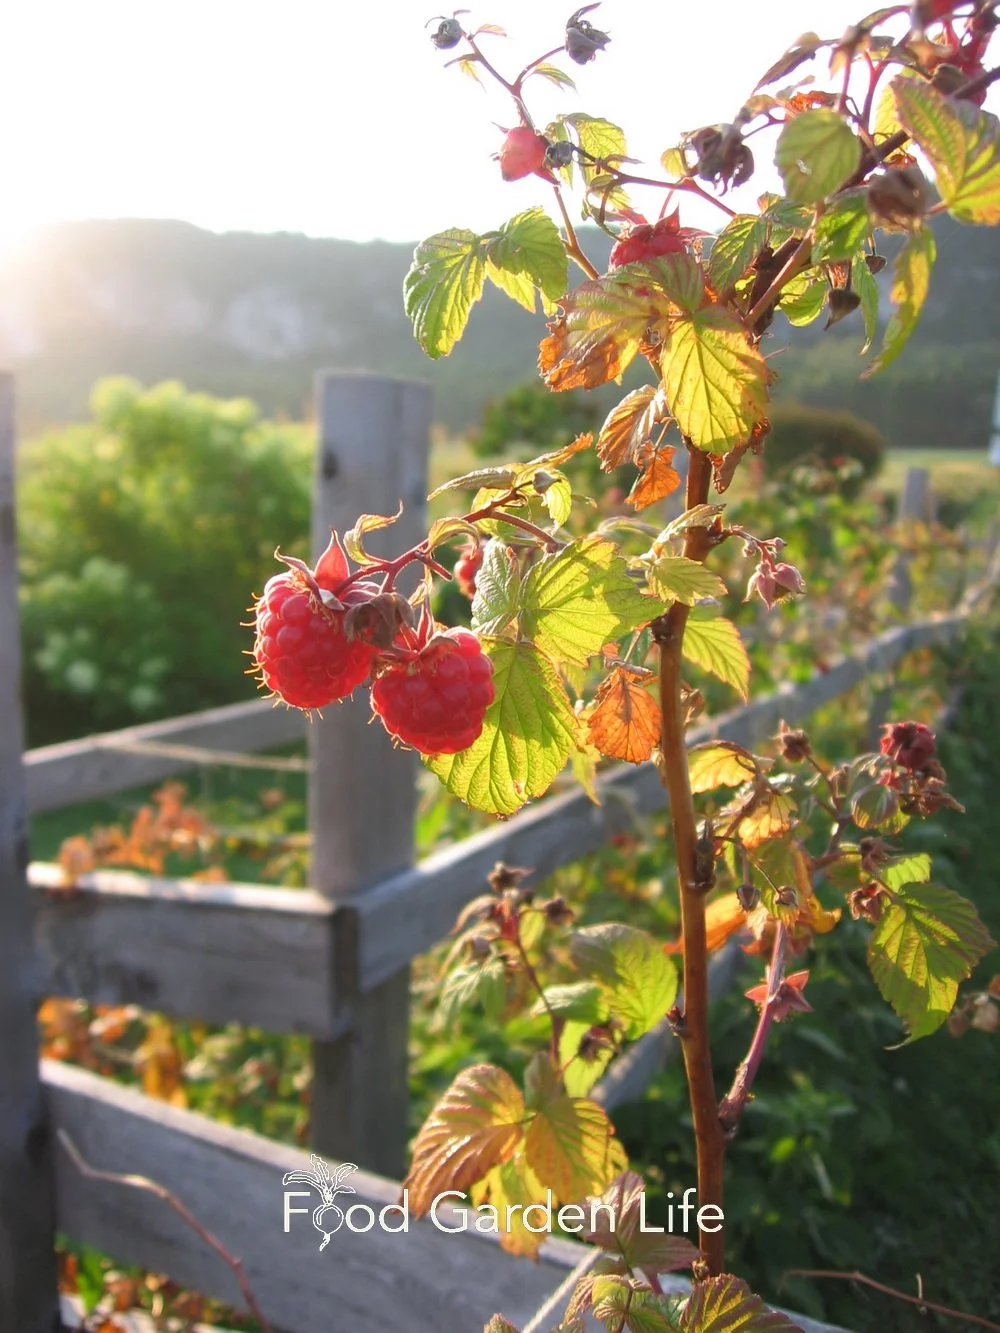
A raspberry plant has perennial roots, but the canes live for only two years.
Raspberry bushes have perennial roots (meaning it lives for many years) but the tops—called the “canes”—live for only two seasons.
First-year canes are called “primocanes.” They start out green and tender, and get brown and woody as the season progresses.
Second-year canes are called “floricanes.” Floricanes flower and produce fruit, and then die at the end of the season.
Raspberries that produce fruit on the floricanes are called summer-bearing raspberries or summer-fruiting raspberries.
But some varieties of red and yellow raspberries grow a later crop of fruit on primocanes. These are called everbearing raspberries, fall-bearing raspberries, autumn-fruiting raspberries, or primocane raspberries.
Raspberry Fruiting
Raspberries are late to flower, so flowers are not likely to be hit by late frosts.
You don’t need multiple varieties to get fruit because raspberries are self-fertile. You will get fruit even if you have only one plant.
Here’s when raspberry fruit ripens:
Fruit on floricane-fruiting varieties ripens early summer through to midsummer.
Fruit on fall-bearing varieties ripens mid to late summer. If winter is slow to arrive, you can harvest raspberries until there’s a heavy frost.
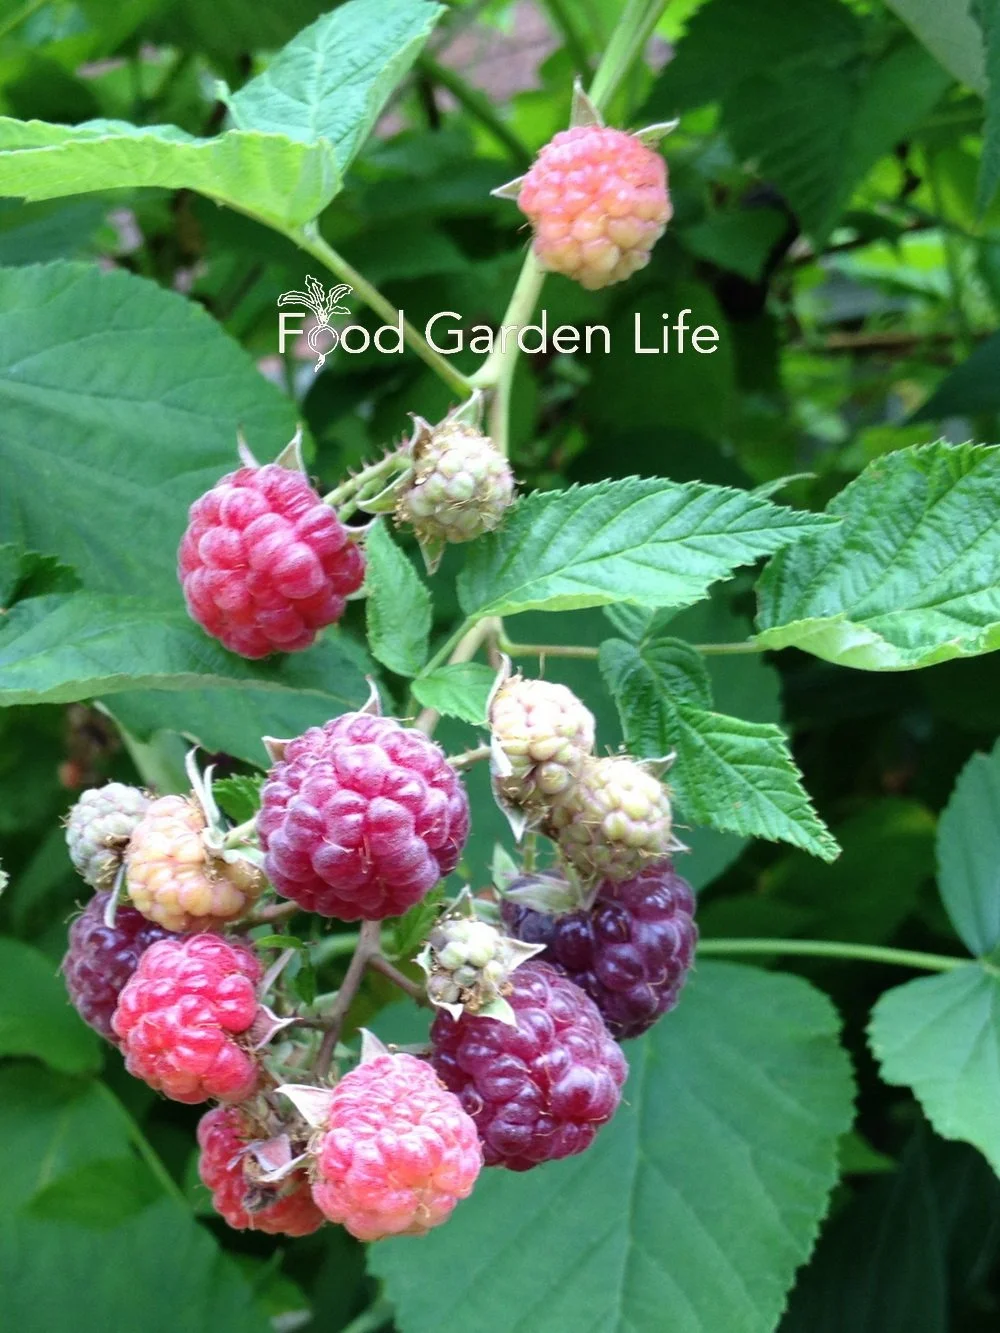
Raspberry Growth by Fruit Colour
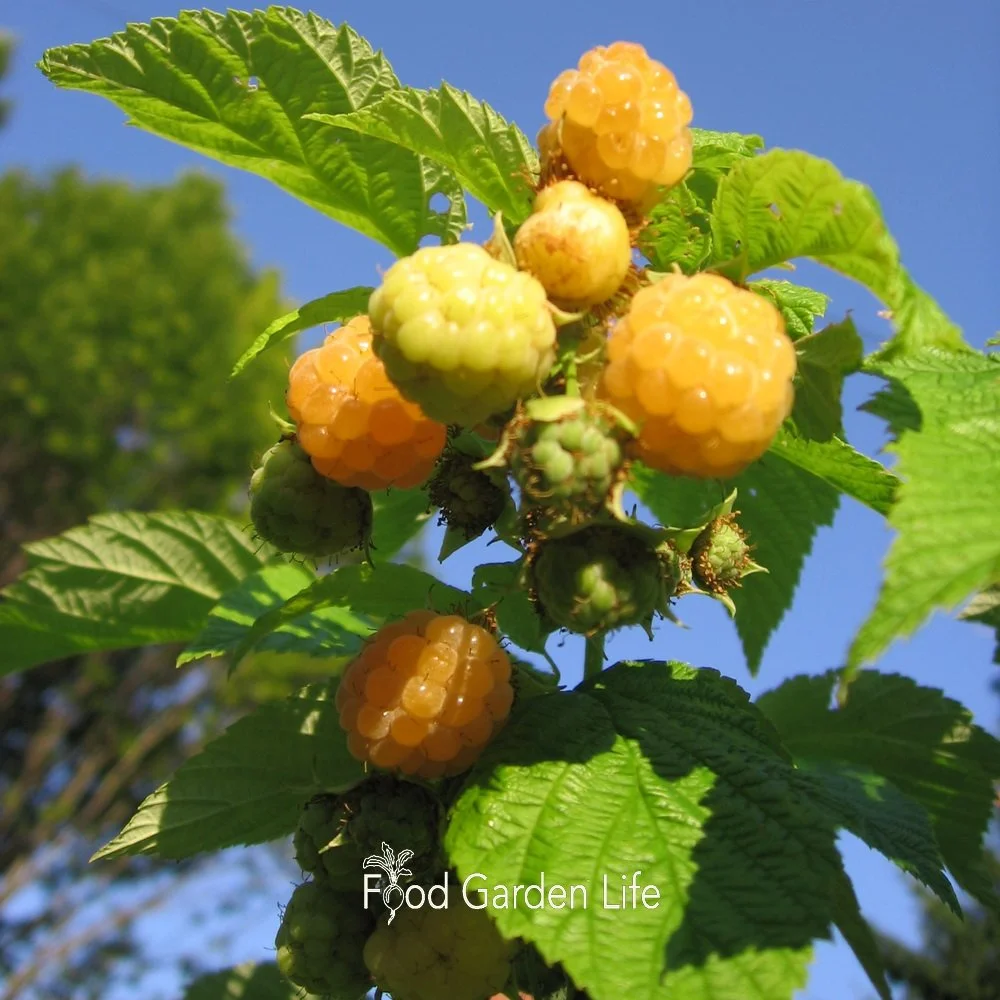
Yellow raspberries are the same species are red raspberries.
There are red, yellow, black, and purple raspberries. The red raspberries and yellow raspberries are the same species. Black raspberries are a different species. And purple raspberries are a hybrid of red and black.
Red and Yellow Raspberries
Red raspberry and yellow raspberry plants send up new canes from the base of existing canes. New canes also grow from the roots. That means that they don’t remain in a clump, and plants spread out in all directions.
Black and Purple Raspberries
These grow in a tidy clump, with new shoots growing from the base of the clump.
Where to Plant Raspberries
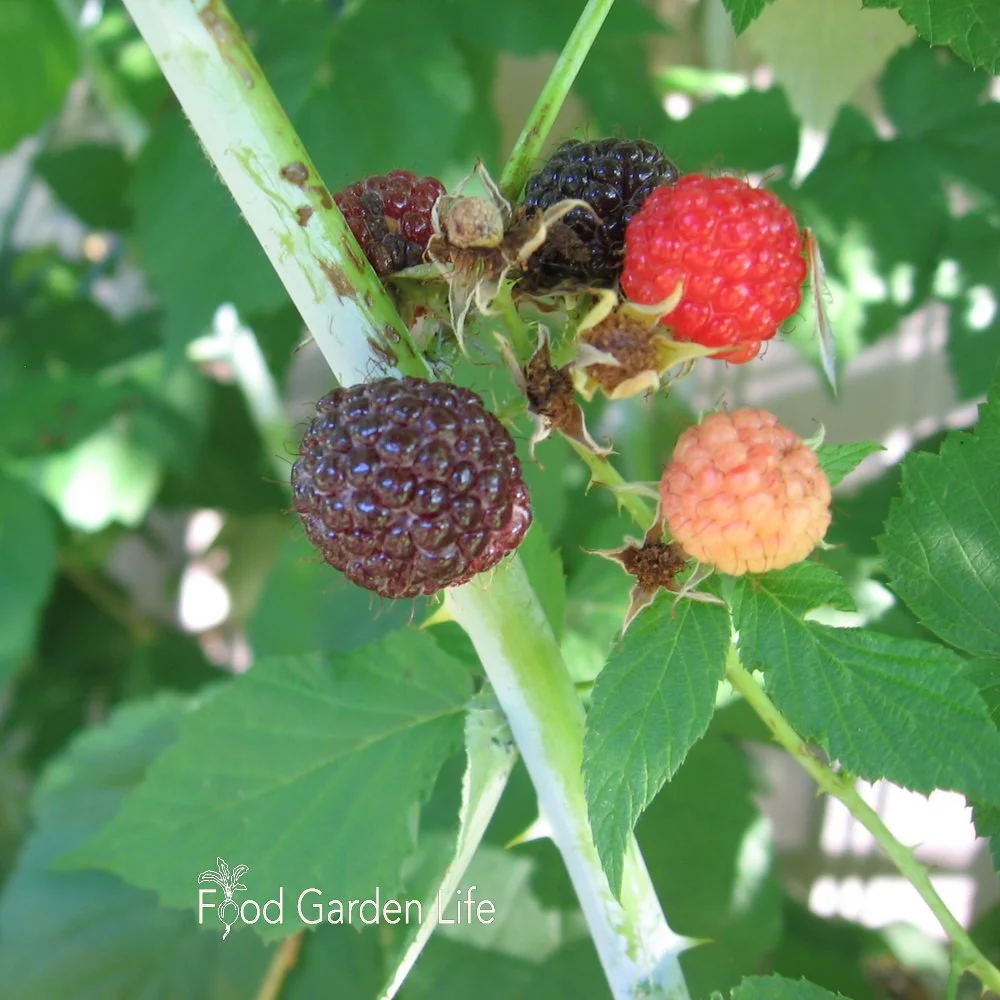
Black raspberries.
If you want to grow raspberries by the book, look for full sun and a rich, well-drained soil.
But in a home garden setting, we don’t always have the ideal conditions that a market gardener might have.
You don’t have to give raspberries the prime real estate.
They grow in a wide range of soils. Very sandy or very heavy clay are the least ideal—both situations can be helped by adding lots of organic matter. The ideal pH is around 6, though they can do fine on many soils.
They don’t do well in soil that’s continually wet. So avoid wet locations. Or, if you only have a wet location, consider raised beds.
Raspberries are affected by a disease called verticillium wilt. There are a few common plants that we grow in home vegetable gardens that also get verticilium wilt: the nightshades (tomato, eggplant, pepper, potato) and strawberries. If you've been growing these and you've had wilting and dieback, this is a red flag. Put your raspberries in another part of the yard.
Planting Raspberries
Purple raspberries.
A raspberry patch can last many years. So set it up right.
Your first step is to get the soil in good shape by adding lots of compost.
Next, make sure there are no perennial weeds.
Raspberry Spacing
How you space raspberry plants depends on how you’re fitting them into your yard. However you do it, though, your red and yellow raspberries will fill in the spaces soon enough.
Rows Make Picking Easier
Raspberries are easier to pick when you grow them in rows. If they’re in a patch, you have to blaze a trail for picking…and that might mean scratched arms!
I like rows that are at least 60 cm (2’) wide. Wider than that and they’re more difficult to pick. Leave 60-90 cm (2-3’) between plants. Because black and purple raspberries have long, arching canes, you can space them a bit farther apart.
Raspberry Hedge
Your neighbours might take issue with me for mentioning this…but what about a raspberry hedge as a way to separate yards? Because they sucker, a raspberry hedge creeps outward—so be prepared to rein it in.
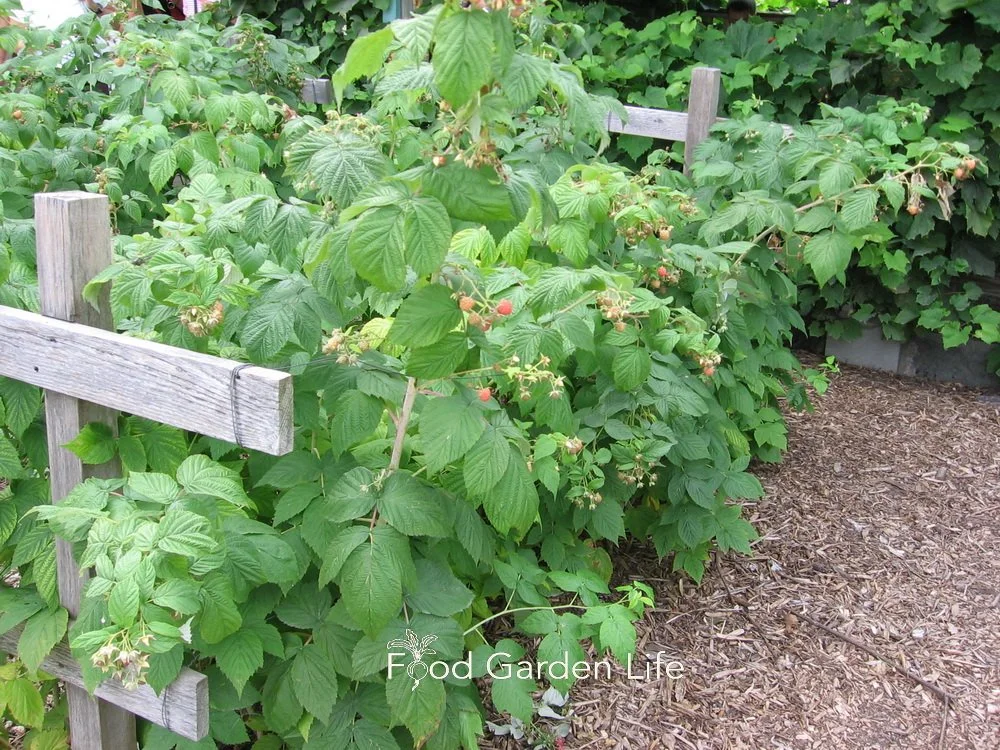
Raspberries in the Home Landscape
Beyond rows or hedges, wherever you plant them, keep in mind that raspberries spread.
This is a plant that’s perfect in a spot with natural boundaries—like a space framed by a house and a patio.
In the wild, raspberries often grow in partial shade, at the forest edge. Think of this if you’re creating a layered landscape or a food forest.
I’ve seen commercial raspberry production in high tunnels, both in the ground and in pots. This is more work than most home gardeners want, but it gives the gardener more control of conditions, meaning the chance to boost yield. It also extends the fall harvest window.
Raspberry Care
Weeding
In an established raspberry patch it’s difficult to remove perennial weeds like thistle or bindweed. So don’t let them get established!
Raspberries have shallow roots, so don’t deeply cultivate the patch. You can scuff the surface or spot-dig bigger weeds.
Even better, minimize weeding by mulching your raspberry patch. This also helps to hold in moisture.
Trellising
Trellising raspberry plants with a T at either end of the row, and wires strung in between.
A simple way to support raspberry canes in rows is to have a horizontal wire running the length of the row on either side of it. To do this, install posts at the end of the row and put pieces of wood across the posts, so they’re T-shaped. Then run wires from one T to the other. The wire can be 1 – 1.5 metres off the ground—depending on how tall your canes are (which depends on the variety and the growing conditions.)
In short, you’re just getting canes to grow between horizontal wires, which prevent them from leaning too far away from the row.
A variation for those growing a skinny row of raspberries is to have a single wire down the centre, and then tie each cane to it.
Note: Fall-bearing types can get tall and top heavy when laden with fruit. If so, trellising help keep canes upright.

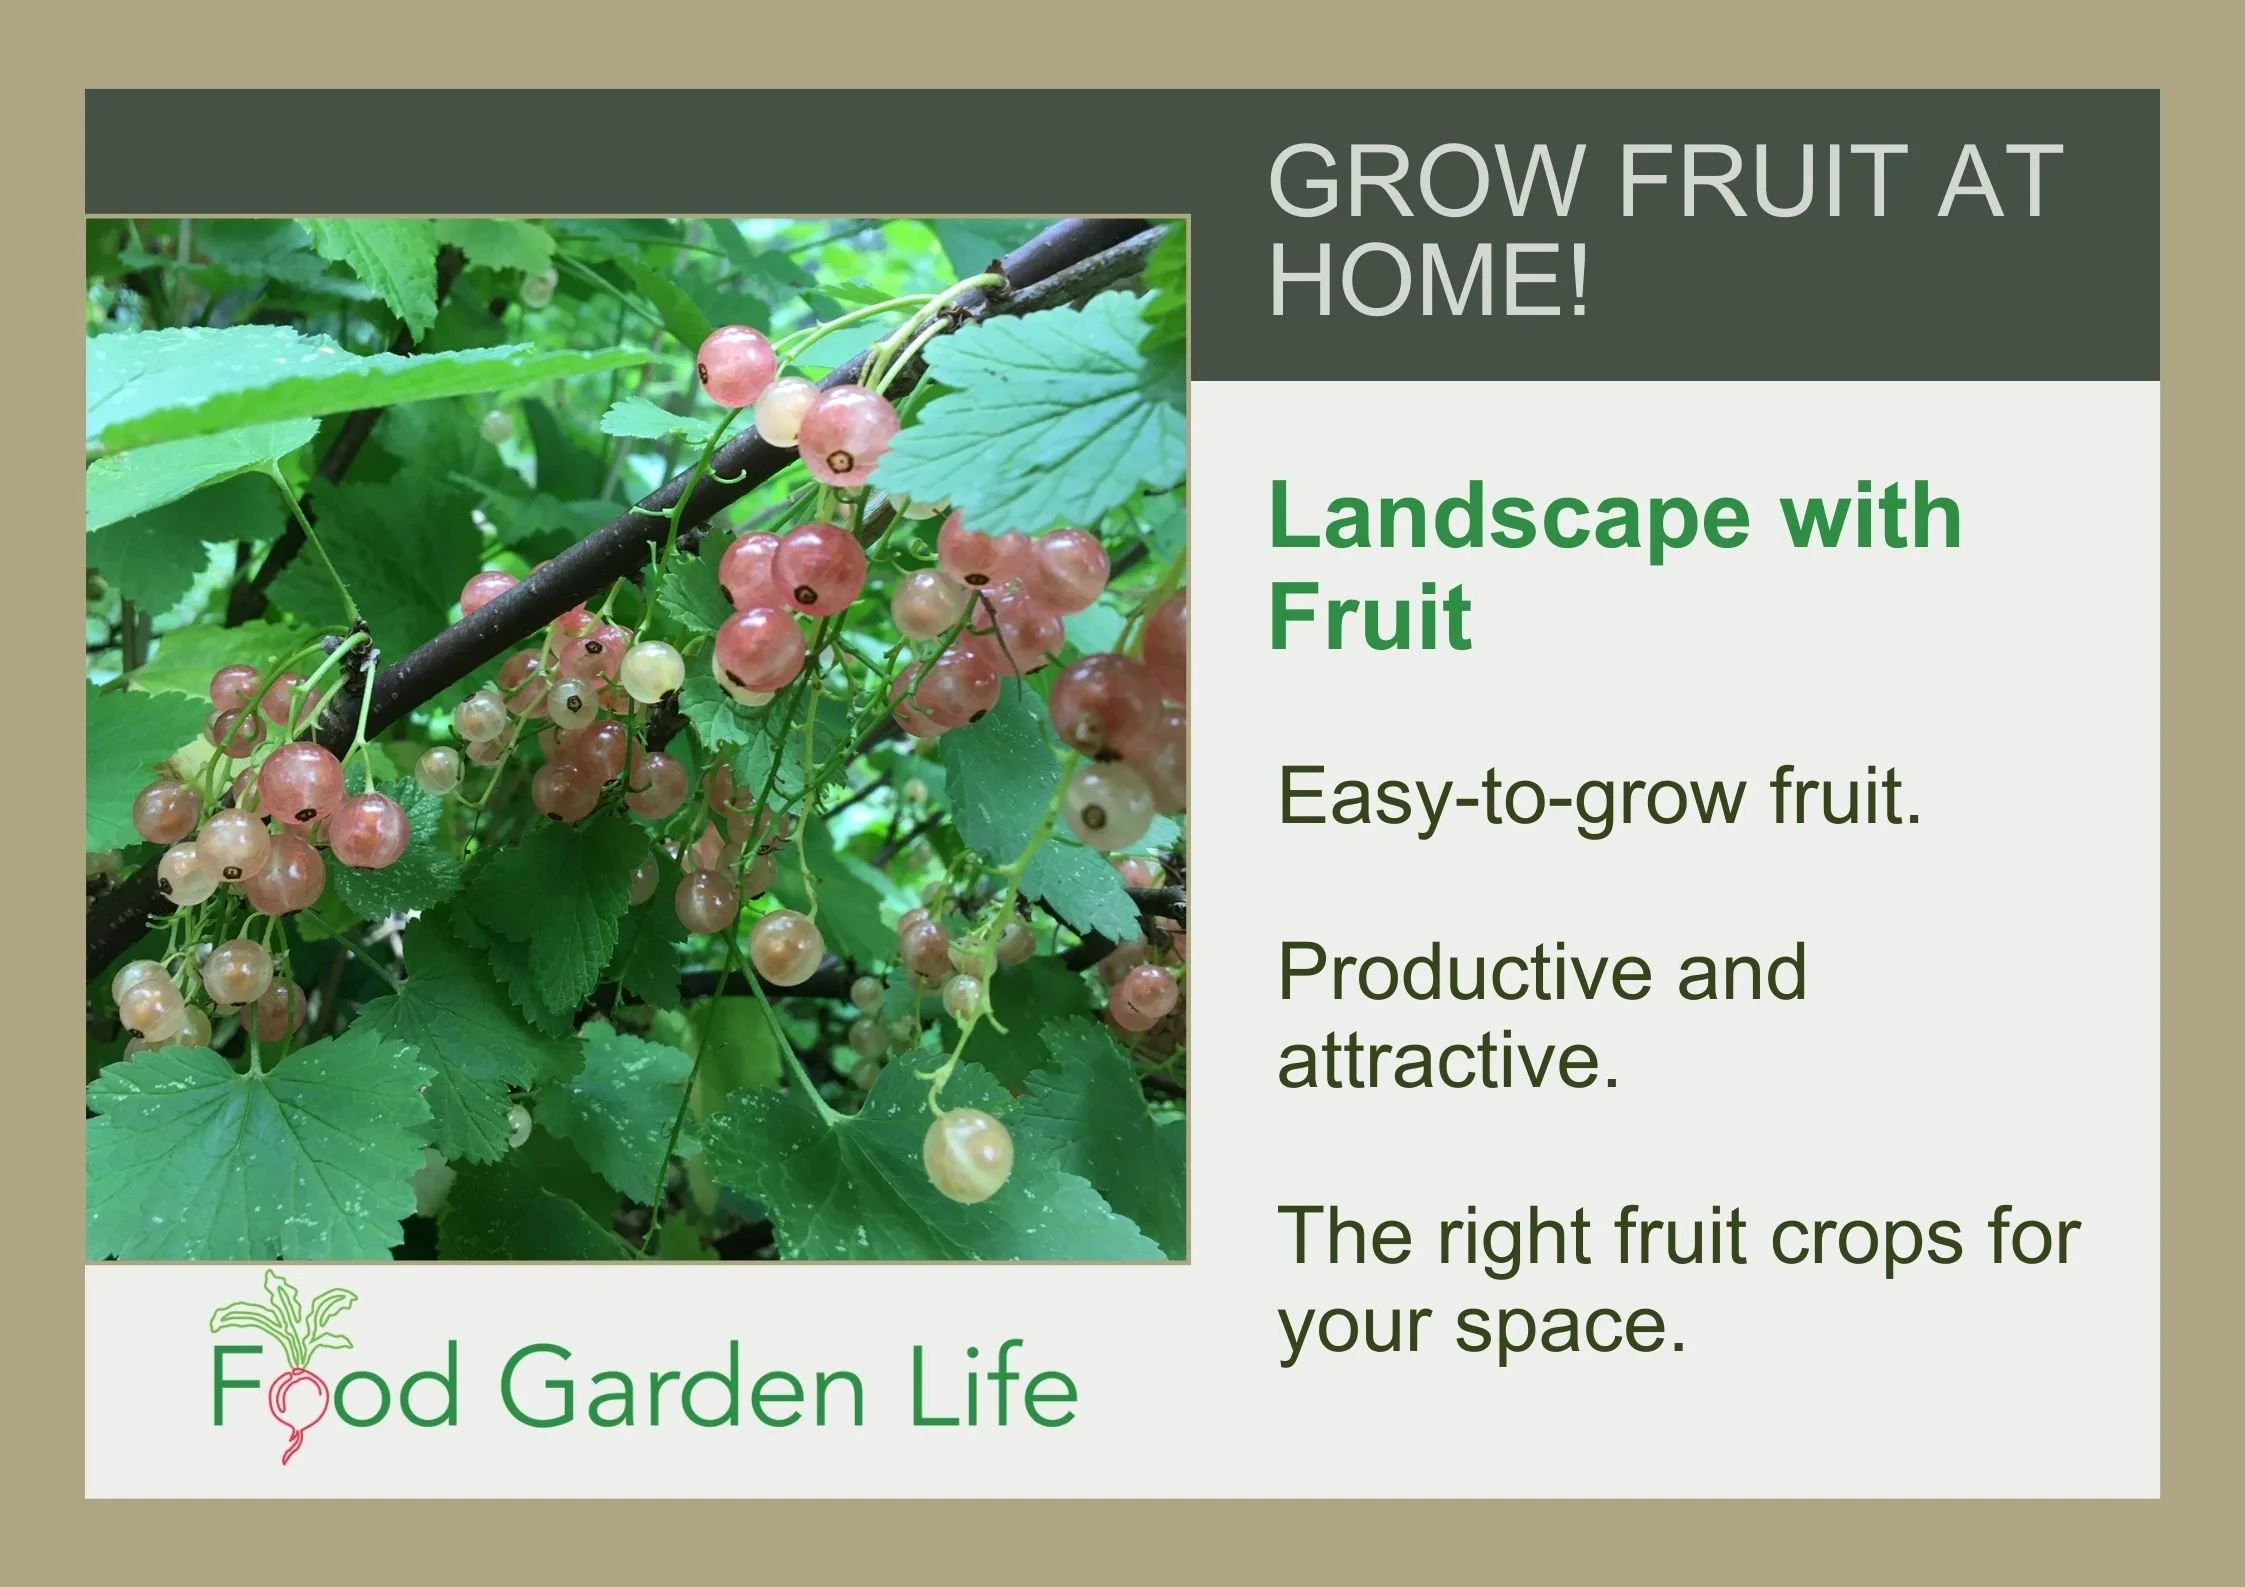
Landscape with Fruit
That’s easy to grow in a home garden!
Pruning Raspberries
If you let every cane grow, you’ll have smaller fruit. If you thin out canes, those remaining give more—and bigger—fruit.
If you’re managing your raspberries more intensively, you might opt to prune twice a year, with summer pruning and dormant pruning. You’ll still get raspberries if you don’t prune, but you can optimize production (and have a nicer looking patch) with regular pruning.
Summer Pruning
Prune out weak primocanes. Thicker, more vigorous canes give more fruit.
I aim for 30 cm (12”) between primocanes, bearing in mind that in a wide row there can be more than 1 cane in a 30 cm (12”) span.
Pinch tips of new black and purple raspberry canes mid-summer to encourage side branching.
After floricanes finish fruiting, cut them out (you can also just wait to do this later, while the plant is dormant).
Dormant Pruning

These floricanes will be pruned out at the end of the growing season.
I prune in the fall. In colder climates, prune late winter or early spring pruning so winter dieback can be removed with pruning.
Prune red (and yellow) raspberries back to 1.2-1.5 metres (4-5’) high before growth begins. This encourages more side shoots…meaning more fruit.
Cut back side branches on black and purple raspberries by half before growth begins in the spring.
Here’s an Idea: If you have fall-bearing raspberries and want only the fall crop, cut all of the canes to the ground in the spring before growth begins.
Water
Water raspberries during dry conditions to prevent dry, seedy fruit.
Raspberry Varieties
Here are things to think about as you choose raspberry varieties:
Hardiness
Summer or fall bearing
Taste
For summer varieties, there are early-, mid-, and late-season varieties
When it comes to varieties, it’s worth doing your homework to see which varieties are recommended for your area. Hardiness varies between varieties. Taste varies quite a bit too—so as you’re looking at zone ratings, see how the flavour is rated.
If you have a short growing season, there might not be enough time for fall-bearing raspberries to ripen. That’s because ripening stops and plants start to shut down with the first hard frost. To find out more about taste and what varieties do well in your area, ask other gardeners—or check in with a nearby pick-your-own farm.
In areas with winter thaws followed by extreme cold, where winter dieback is a concern, an early-fruiting primocane raspberry has the advantage of not relying on overwintering canes
Black raspberries not as cold hardy as red and yellow raspberries.
Challenges
Competition
My main competition for berries is my kids. But for many gardeners, it’s birds. Because canes are fairly low, netting, or growing in a net tunnel, are options.
Decline
A raspberry patch usually goes into decline after a few years. Start a new patch, on another piece of ground.
Raspberry Propagation
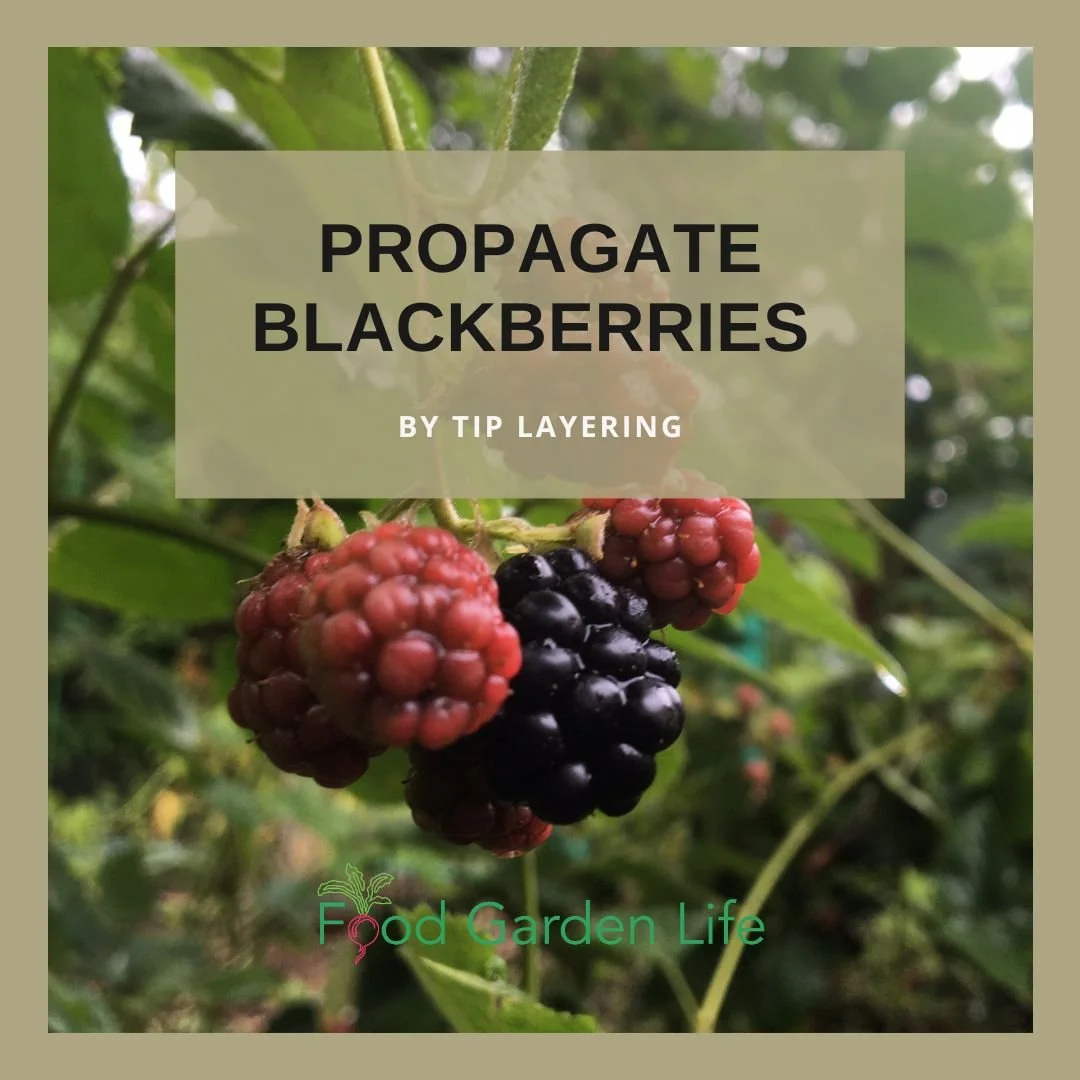
This article tells you how to propagate blackberry plants.
Use a spade to divide clumps in the fall, or in the spring before new growth begins. Spring and fall are also the time to dig up wayward suckers from red and yellow rapsberries.
Black and purple raspberries can also be propagated by tip layering. Here’s an explanation of tip layering for blackberries; it’s the same process for purple and black raspberries.
Buy Raspberry Canes
Many garden centres sell potted raspberry plants. The advantage to container-grown plants is that the planting window is much wider. But they cost much more than bare-root plants.
Dormant bare root plants, with roots washed of soil, are shipped in late winter and spring. These are available from many online nurseries—and the price per plant is considerably cheaper than potted plants.
FAQ – Grow Raspberries
Pin this post!
Do raspberries grow in shade?
They tolerate partial shade well, though the yield is less than in full sun. My productive black raspberry patch gets only a half day of sun.
Does frost affect raspberry flowers?
It can, but because the flowers are late to open, it’s rarely a problem.
I want to renew my raspberry patch with new plants. Can I put it where my current patch is?
It’s better to choose a fresh piece of ground, if that’s an option. That’s because raspberries planted where there were recently raspberries growing might not do as well. If your old patch had disease, it can affect the new plants.
Why does my raspberry fruit crumble?
If the ripe berries crumbles when you pick them, the problem might be poor pollination. This can happen when the weather at the time of bloom is rainy or overcast.
Can raspberries grow in a pot?
Yes. Raspberries grow well in containers. As with any container-grown crop, success depends on providing a large enough container, and sufficient water and feed.
More on Raspberry Plants
And here’s more on how to tip-layer blackberries and black raspberries.
Find This Helpful?
Enjoy not being bombarded by annoying ads?
Appreciate the absence of junky affiliate links for products you don’t need?
It’s because we’re reader supported.
If we’ve helped in your food-gardening journey, we’re glad of support. You can high-five us below. Any amount welcome!
More on Fruit Crops
Articles: Grow Fruit
Visit the Grow Fruit home page for more articles about growing fruit.
Here are a few popular articles:
Courses: Grow Fruit
Here are self-paced online courses to help you grow fruit in your home garden.
Home Garden Consultation
Book a virtual consultation so we can talk about your situation, your challenges, and your opportunities and come up with ideas for your edible landscape or food garden.
We can dig into techniques, suitable plants, and how to pick projects that fit your available time.
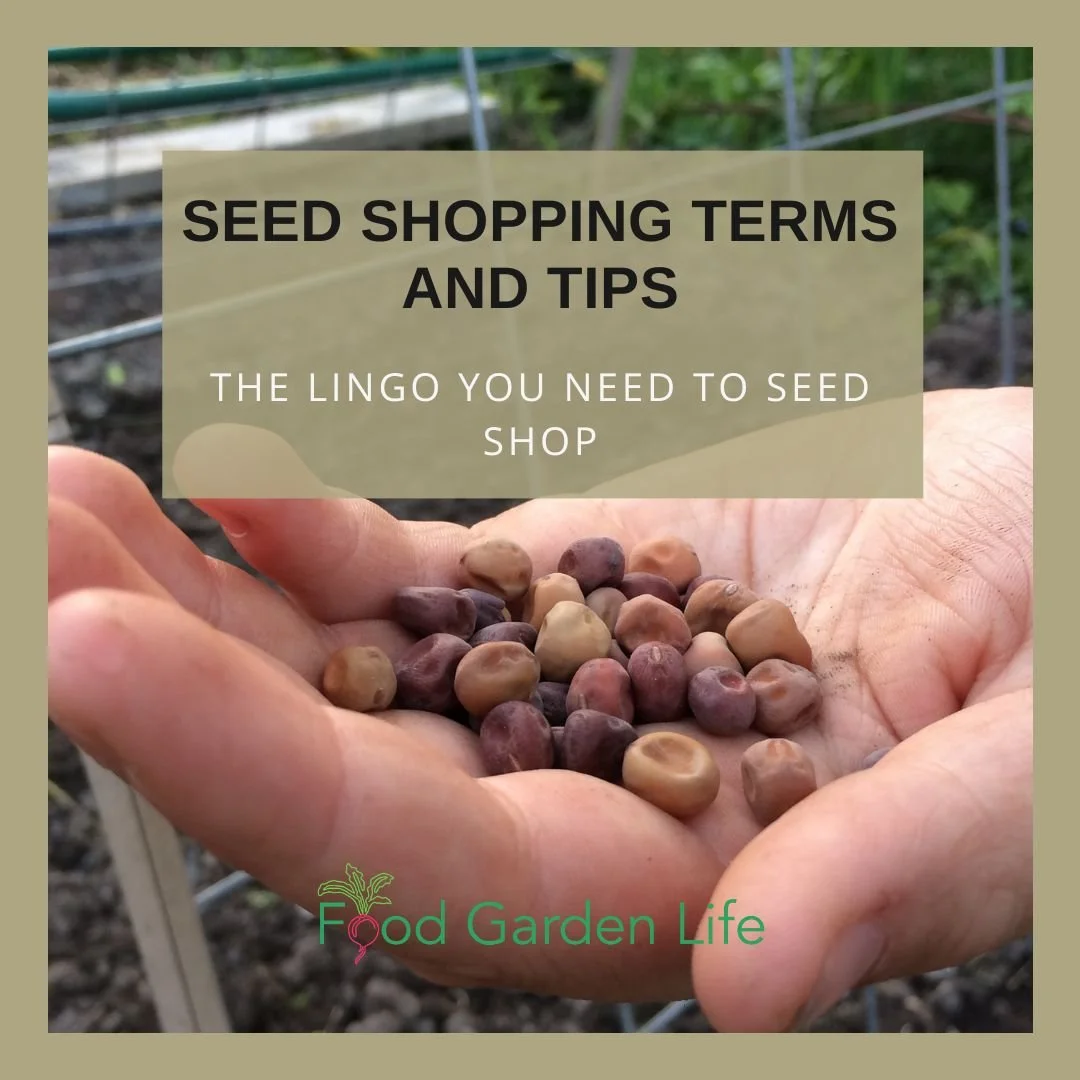
Seed Shopping Smarts: Know The Lingo So You Can Get The Best Seeds
What’s your seed-shopping vocabulary like? Brush up on your seed lingo in this glossary of seed terminology so you can choose the best seeds for your needs.
By Steven Biggs
Best Seeds for Your Needs When You Know The Lingo
Get the best seeds for you needs when you know seed terminology.
When I worked at a marketing and communications company, there was a linguistic divide in our office.
The in-house application developers had a vocabulary that was incomprehensible to those of us working the phones.
As an outsider who wasn’t too tech savvy, it took me a while to absorb the new vocabulary.
Specialized Seed Vocabulary
It’s easy to feel like an outsider when you encounter specialized lingo. And it’s not just in the tech sector. (My father-in-law doesn’t realize I miss most of what he’s telling me when he shows me under the hood of his car…and now I have a son who has a whole vocabulary around mountain biking!)
Gardening has specialized vocabulary too. And I’ll be glad if you find this this glossary of seed terminology helpful in choosing the best seeds for your garden.
Glossary of Seed Terminology
Here are common terms that you’ll find when you seed shop. Knowing what they mean will help you get the best seeds for your situation.
This glossary of seed terminology will explain important seed vocabulary.
Annual
An annual plant has a one-year life cycle. It flowers, makes seed, and dies in one year. Common annuals include veggies such as beans, lettuce, and spinach.
(To confuse things, some of the so-called annuals that we grow in northern gardens live more than one year in warmer climates—but die in our cold winters, so we treat them as annuals. But actually, they’re not. A good example is fuchsia.)
Biennial
A biennial has a two-year life cycle. The first year, it makes leaves; and in the second year, flowers and forms seeds. In the veggie garden, a number of common crops are biennials, but we usually harvest from them during the first year and then remove them. Unless we’re saving seeds. Parsley, Swiss chard, and carrots are biennials.
Botanical Name (Scientific Name, Latin Name)
This is the official two-part name, often italicized. Useful when we want to make sure there’s no confusion around what plant we’re dealing with.
Common Name
This is the everyday, plain English name. The only problem is that sometimes the same name gets used on more than one plant. Bluebell is a good example. That’s why, when in doubt, you can check the Botanical Name to make sure you’re ordering what you want.
Cotyledon
This is the name of the first leaves that emerge when a seed germinates. You might see this word when seed shopping because transplanting guides often talk about “seed leaves” or “cotyledon leaves” when explaining when to transplant your seedlings. They look different from the “true” leaves that come afterwards.
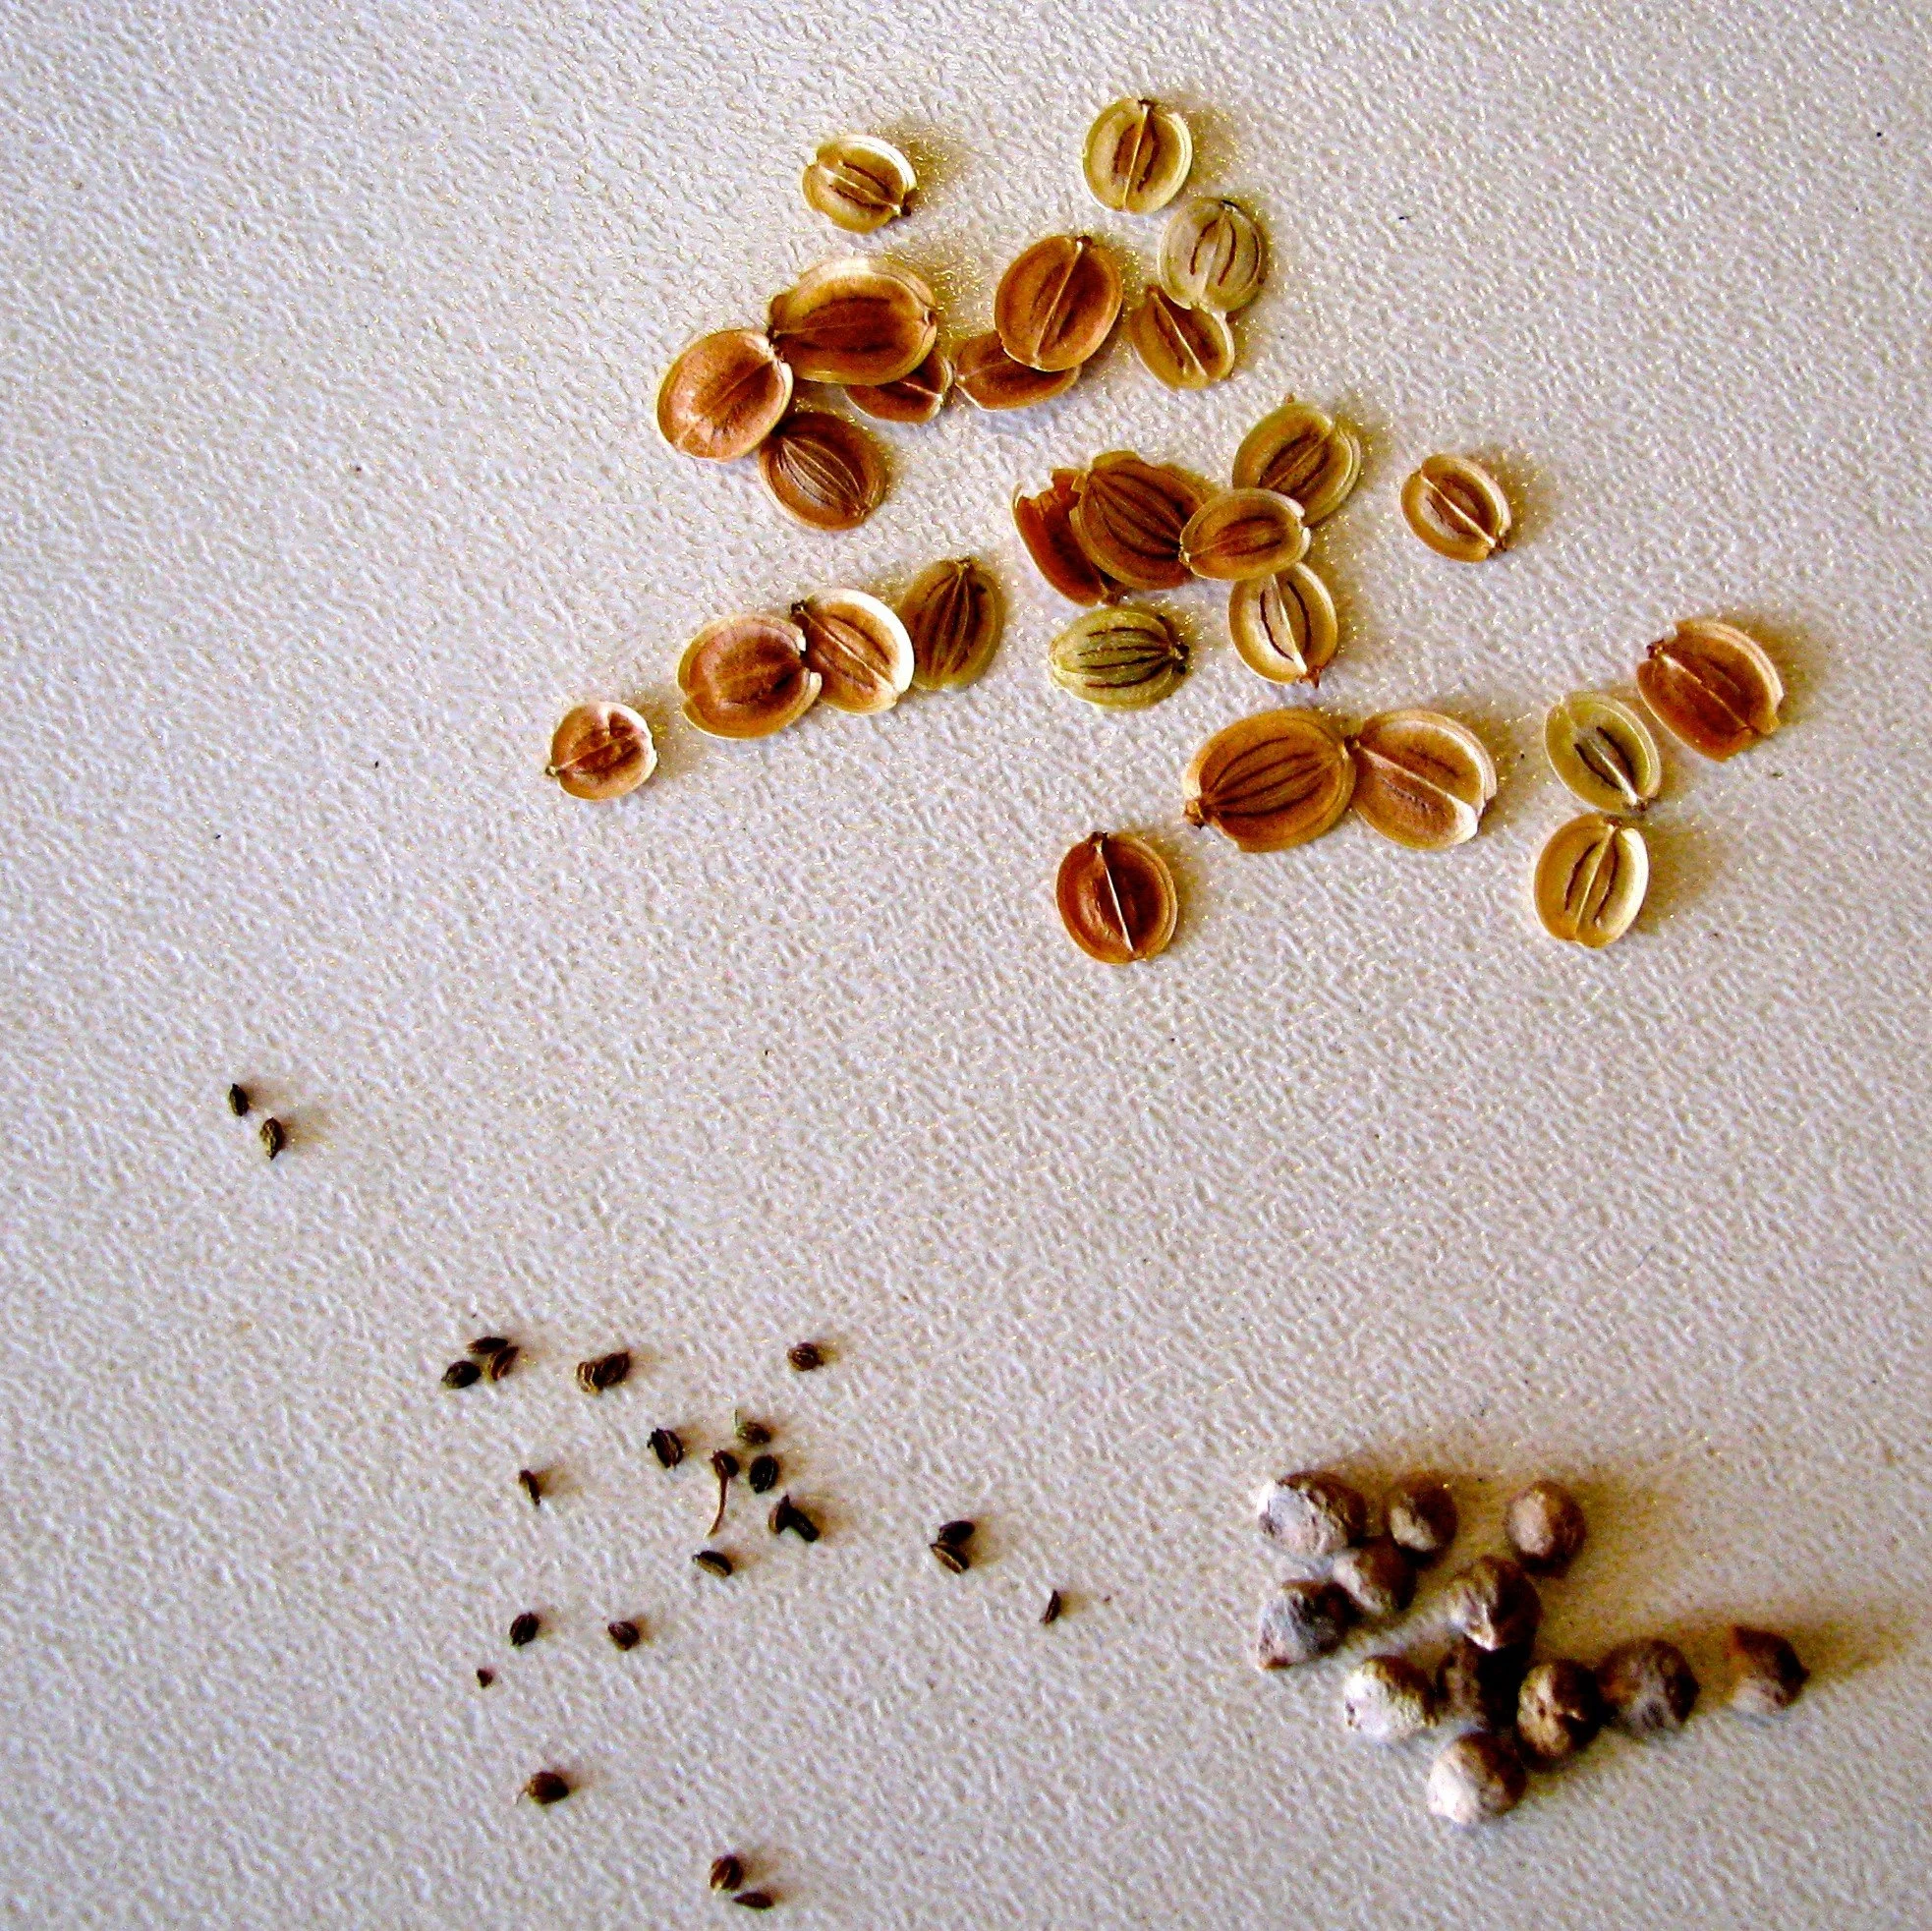
Many common garden crops are biennials. Parsnip (seeds at the top) is a good example of a biennial in the vegetable garden.
Cultivar
This word comes from “cultivated variety.” It just means a variety intentionally grown by humans. People often use this term interchangeably with “variety” although there are also naturally occurring plant varieties—which is why the distinction. If you see a name between single quotes (‘ ‘) it’s likely a cultivar name. A cultivar can be an open-pollinated or a hybrid (see below).
Days to Maturity (Days to Harvest)
An approximate number of days until harvest. This number is always approximate because many things (weather, growing conditions, the stage of harvest) have an effect on it.
For crops we plant directly in the garden, it’s the number of days from seeding until harvest; while for crops we start indoors as transplants (e.g. tomatoes) it the number of days from transplanting in the garden until harvest.
Dioecious
Dioecious plants have male and female flowers on separate plants. In the veggie garden, asparagus is an example of a dioecious plant.
Direct Sow (Direct Seed)
Pea seeds, an example of a crop that we usually direct sow.
This is when we plant seeds in their final, outdoor destination. Crops that are commonly direct seeded include carrots, beets, beans, and peas.
Germination Rate
Seed companies test germination. (At least I hope they do!) If you see a percentage on a seed packet, it indicates the germination rate from a germination test—and this should give you an idea of what sort of germination you can expect at home under good conditions.
GMO (Genetically Modified Organism)
Many people understand this to mean a plant into which genetic material from another plant or life form is inserted. What’s confusing is that the way this term is often understood and the official definitions differ.
The exact definition depends on who you ask and where you are. Here’s the official definition used by the Government of Canada.
“A genetically modified (GM) food is a food that comes from an organism (plant, animal or microorganism) that has had 1 or more of its characteristics changed on purpose. Organisms can be modified by different processes, including: conventional breeding techniques, like cross-breeding or mutagenesis (a change in the genetic make-up of an organism caused by chemicals or radiation); modern biotechnology techniques, such as genetic engineering; gene editing.”
Here’s what can be confusing: The wordy definition above includes traditional breeding…the sort of breeding that might have given us some of our heirloom varieties. What many people want to avoid is “genetically engineered” seeds. Genetically engineered seeds are mostly found in commodity crops (think canola and corn) – and are not sold to home gardeners.
Harden Off
When seedlings are moved from protected conditions such as indoor grow lights or a greenhouse, they are “hardened off,” which means they are gradually acclimated to the brighter light, different temperatures, and wind outdoors.
Hardy Annual
An annual that tolerates some frost and cool conditions. For example, a common hardy annual vegetable is arugula—which, if you let it make seed, you’re likely to find growing up on its own in your garden while there are still cool conditions.
Heirloom
Like the word “natural” in the health food sector, “heirloom” is one of those fuzzy, poorly defined words that marketers adore. There’s no precise meaning. But, in general, it means an older open-pollinated variety.
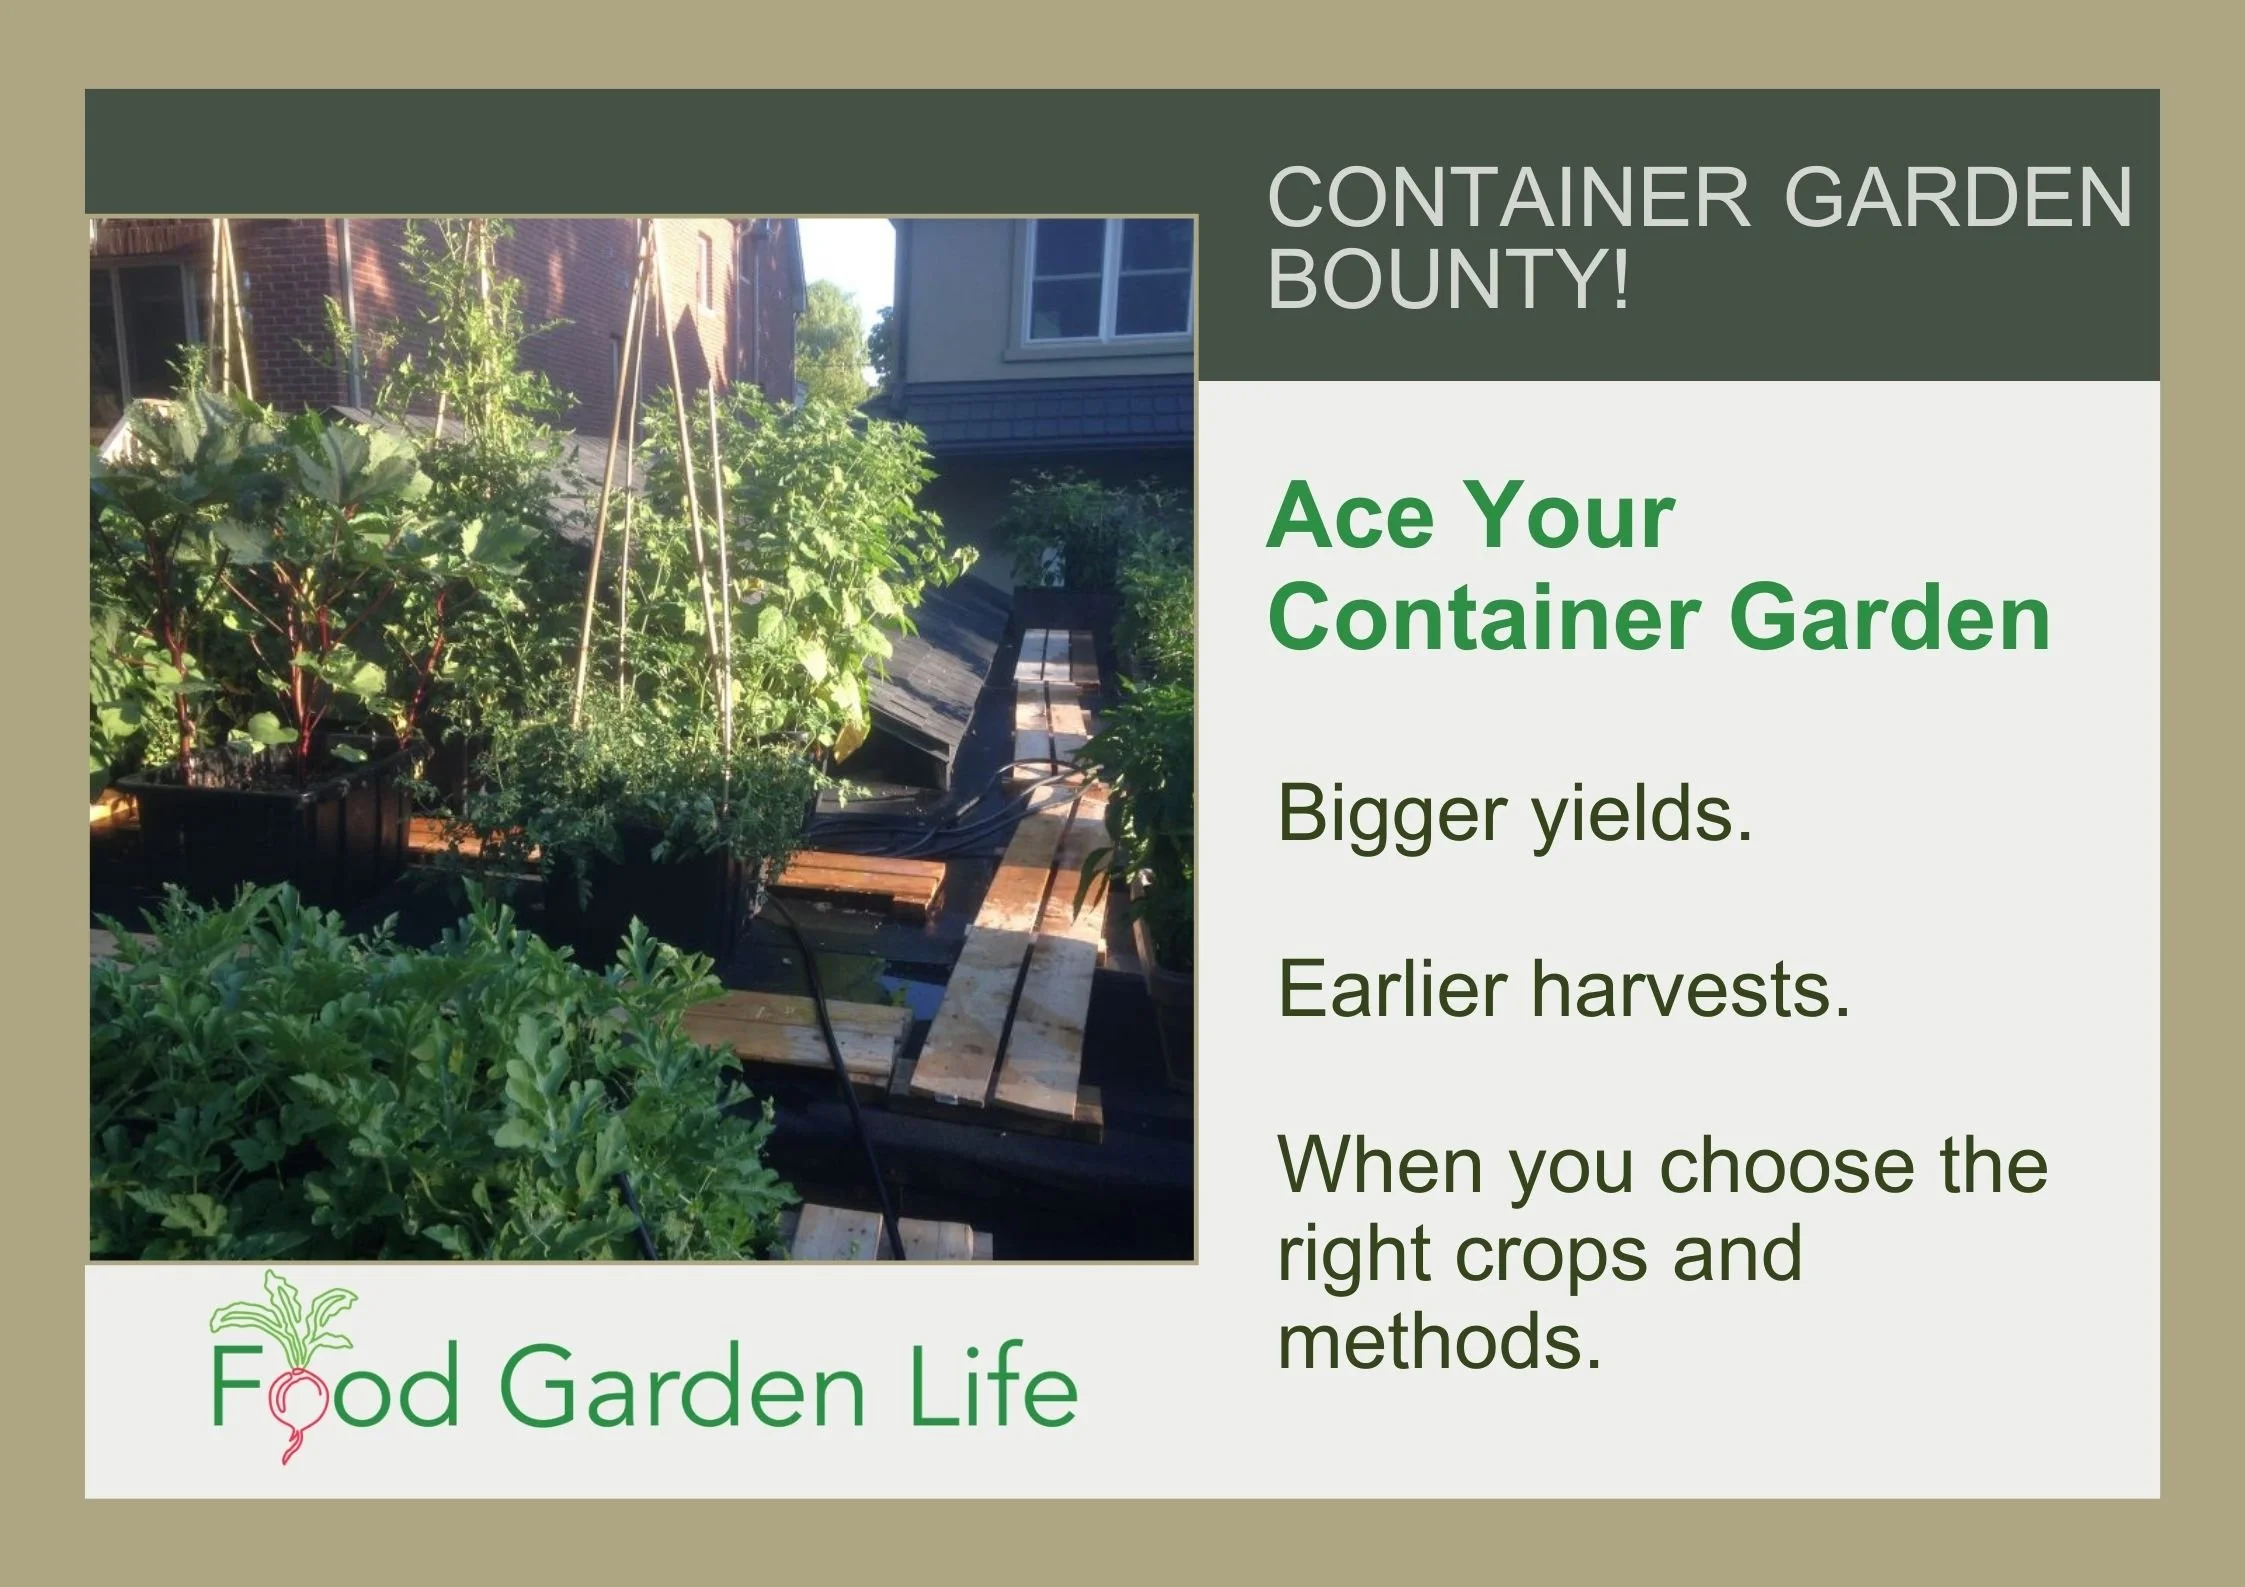
Grow a Container Vegetable Garden
And get an early harvest of crops that usually take too long!
Hybrid Seeds
Hybrid seeds result from cross-pollinating two varieties with desirable traits. In the seed industry, it’s done in controlled conditions, so there’s no chance of an errant pollen grain giving something different.
Hybrid seeds tend to be more expensive because of the labour needed to make the cross. Hybrids are often made to have desirable traits such as disease resistance and vigour…and they’re also made because it’s an industry.
If you see the term “F1,” that refers to the first generation of seed after the cross. That’s usually what’s for sale at seed vendors. When you save seeds from a hybrid plant, it will probably be different from the parent plant.
Hybrids occur in nature too, but the hybrid seeds you find at vendors will have been deliberate. When people are new to seed shopping they sometimes wonder if hybrid has something to do with genetic engineering—and it doesn’t. It’s entirely different.
Last Frost Date (Average Last Frost Date)
The date in the spring when—on average—there isn’t any more frost in your area. It’s figured out using historical weather data.
This date is like a marker post for seed sowing. When a seed catalogue recommends starting tomato seeds 8 weeks before your average last frost date, this is what it’s referring to.
This date is also used when deciding when to move seedlings into the garden. (But remember…an average last frost date means that some years there is frost after that date.)
Monoecious
Monoecious plants have both male and female flowers on the same plant. Melons are monoecious; and if you look closely, you’ll see some of the flowers have little melons-in-waiting next to the female flowers, while the male flowers have none.
Open Pollinated (OP)
Open-pollinated bean varieties are easy to save seeds from because there is not usually much cross-pollination with other varieties.
Open-pollinated varieties are stable varieties that you can save seed from and get plants that are like the parent plants. Some open-pollinated varieties are heirlooms; some are recent.
Note: To get seeds like the parent plant, there can’t be “cross-pollination” with other varieties. Some types of plants mostly self-pollinate (they have perfect flowers, see below), so you’re likely to get seeds like the parent plant without doing anything special. But some plants have separate male and female flowers—meaning insects might pollinate them with pollen from another variety. Squash is a good example. In that case, open-pollinated varieties are grown in isolation when saving seed.
Organic
Generally understood to mean that the plants the seeds come from are not treated with synthetic fertilizers and pesticides. The thing to keep in mind when seed shopping (food shopping, too, actually) is that there are organic certification bodies—agencies that make sure a producer adheres to a set of standards. So you might come across seed that a seller says is organic—but is not “certified” organic.
Parthenocarpic
This refers to varieties that can make fruit without pollination. The resulting fruit has no seeds. You’re most likely to see this term as you browse cucumber varieties.
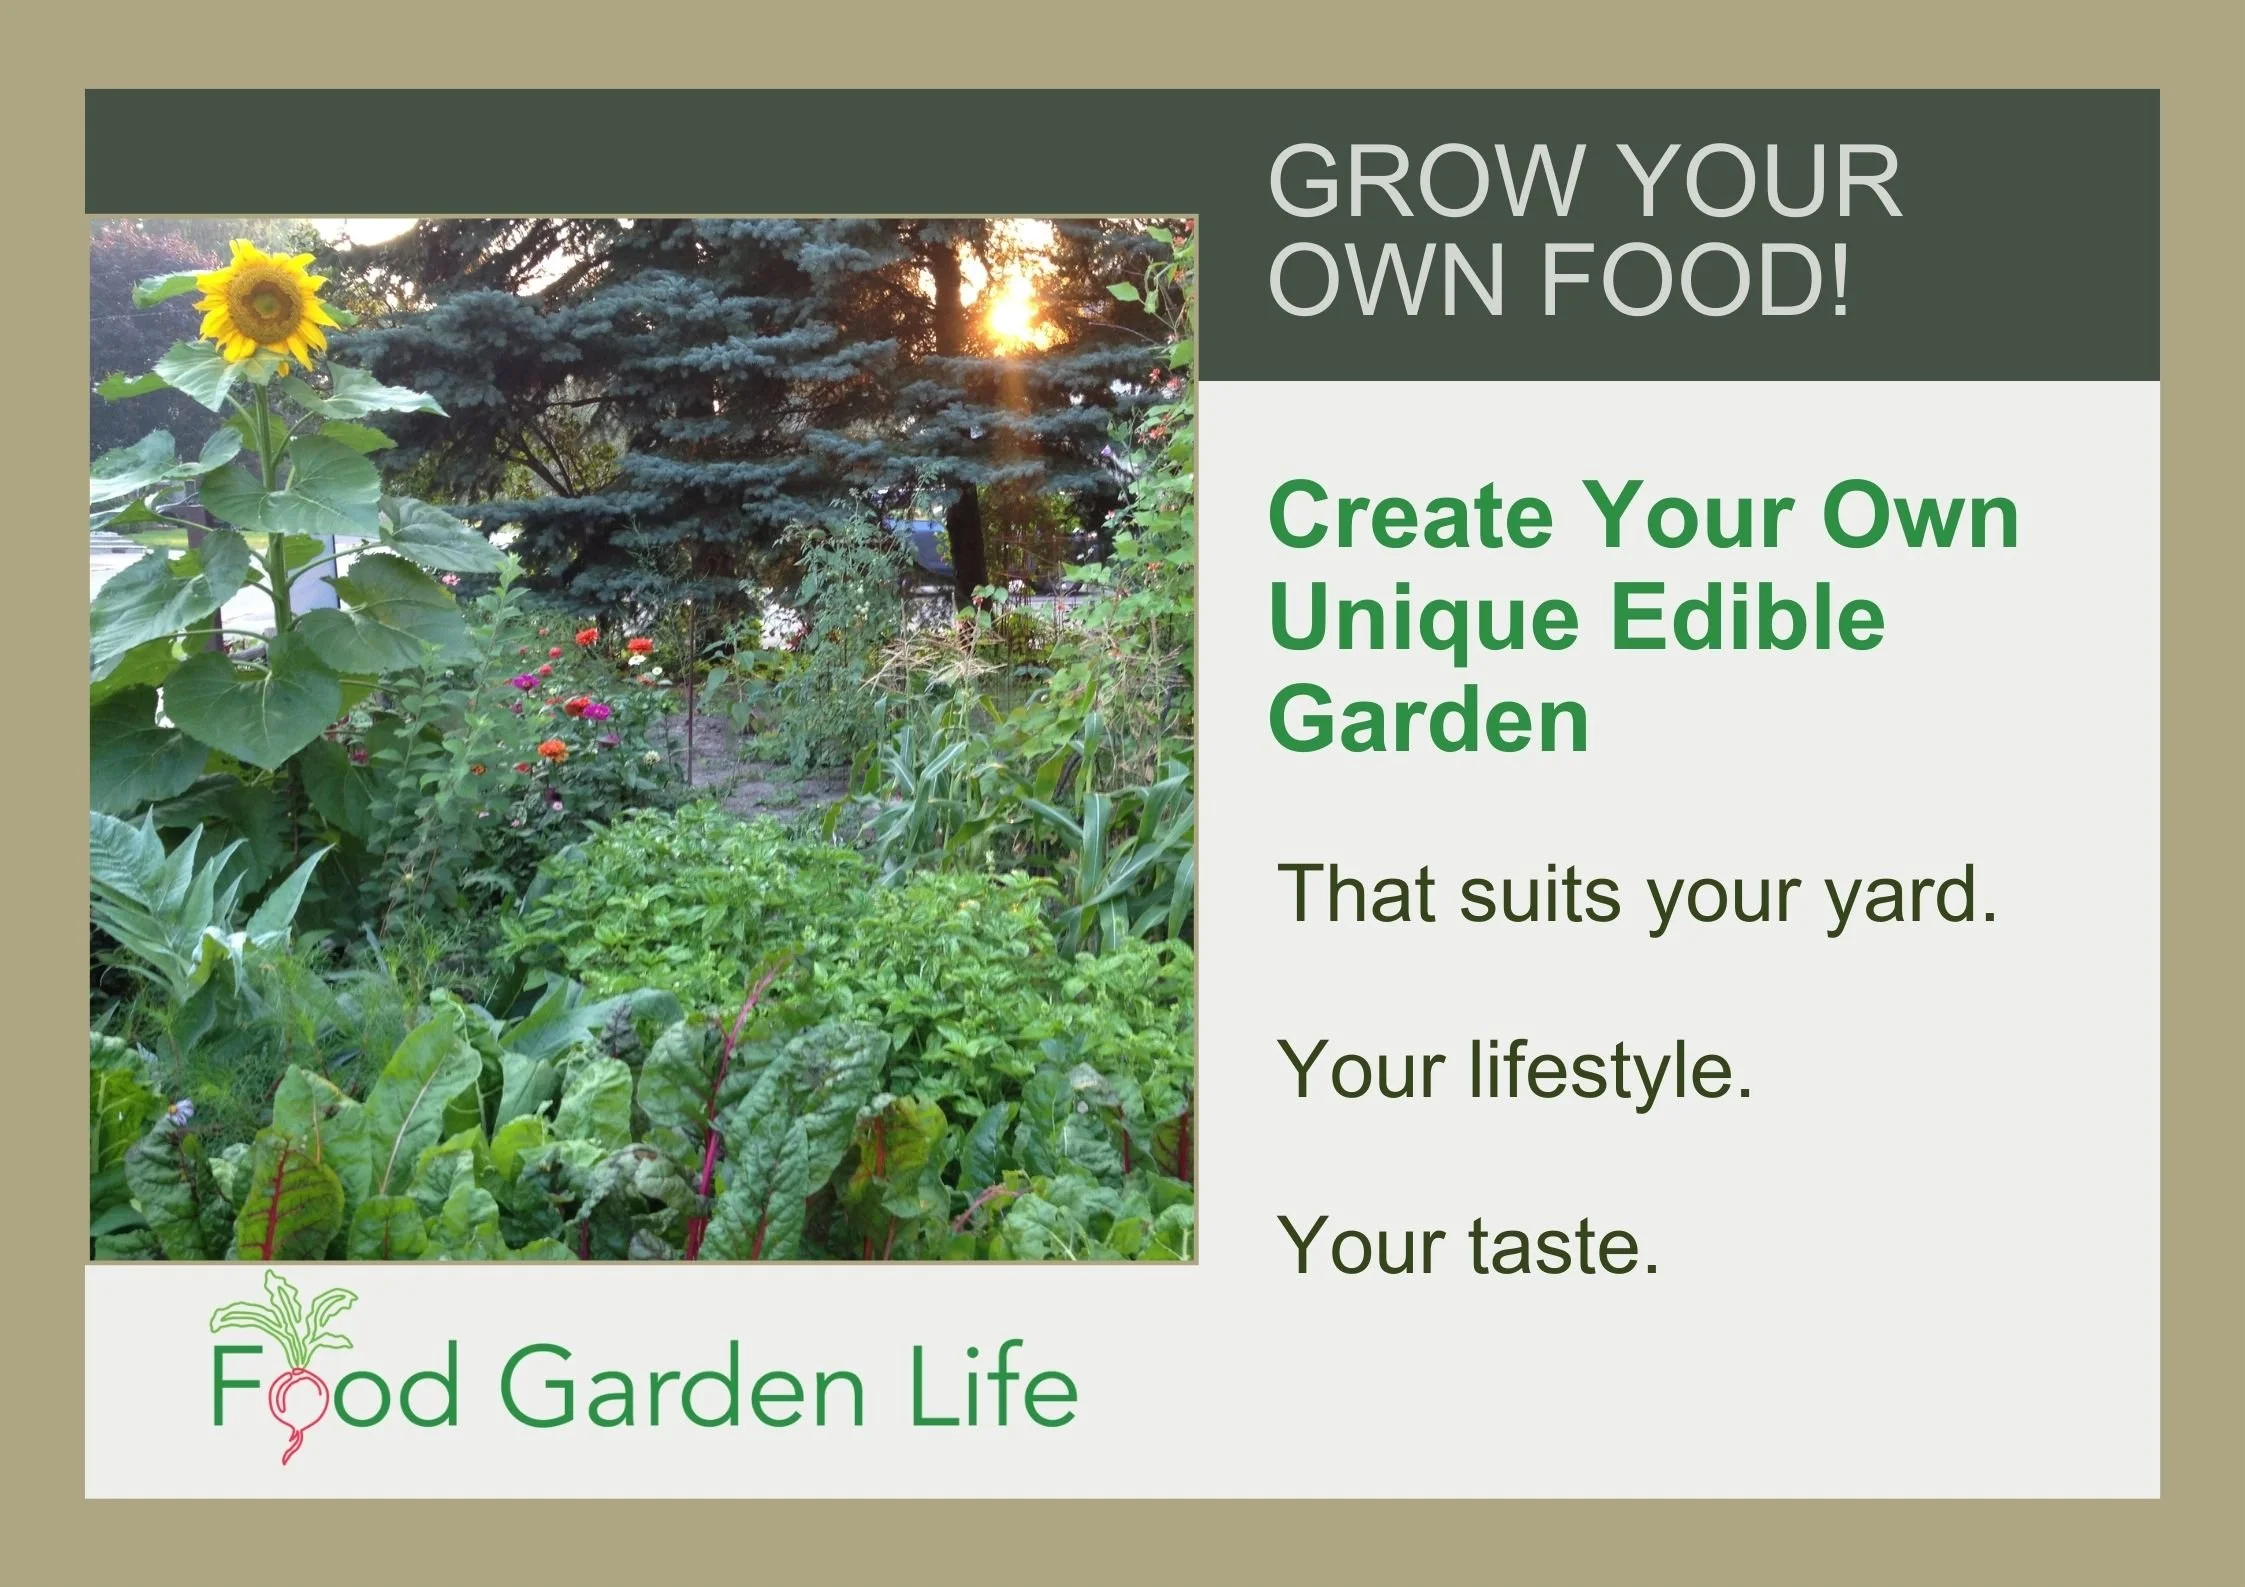
Create Your Own Unique Edible Landscape
That fits for your yard, and your style!
Pelleted
Sometimes small or irregularly shaped seeds are coated with clay to make them easier to handle or dispense with seeding equipment. These “pelleted” seeds are usually more expensive.
Perennial
A plant with a life cycle spanning a number of years.
Perfect Flower
A flower that has both male and female parts.
Set
Onion “sets” are small, pre-grown onion bulbs that you can plant directly in the garden instead of growing onion seedlings. It’s a great option if you don’t have a lot of indoor space for growing onion transplants.
Tender Annual
An annual plant that does not tolerate frost. We usually start tender annuals indoors, in warm conditions, and then transplant them outdoors when there is no further risk of frost. A good example of a tender annual is basil…which quickly wilts in protest in cool weather.
Transplant
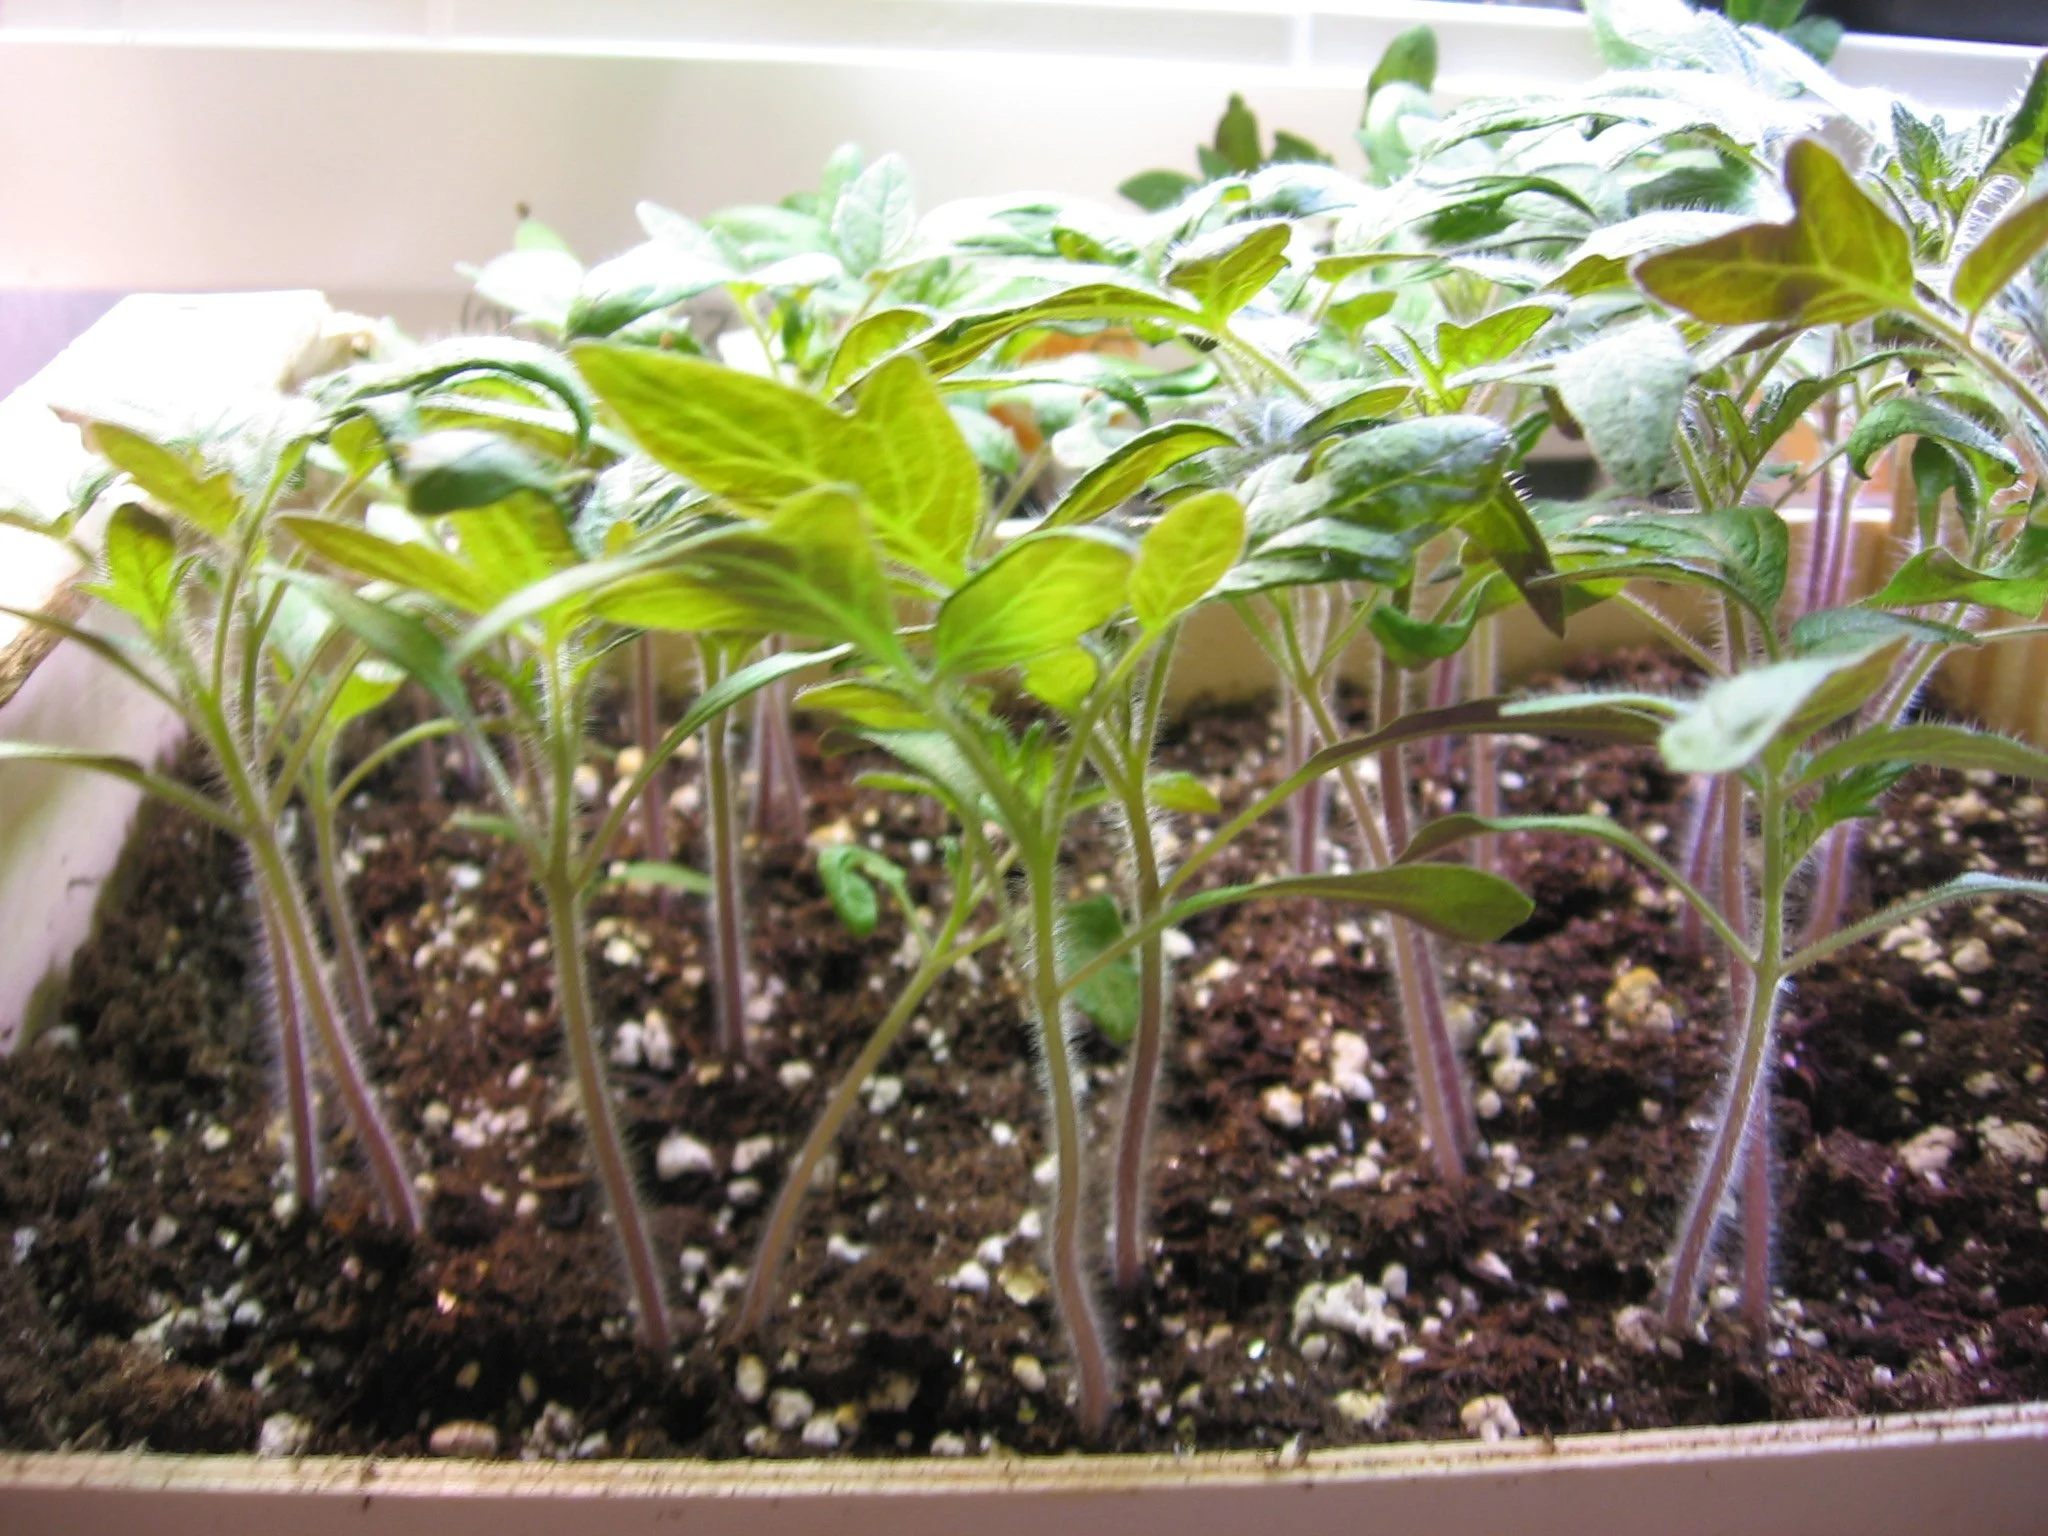
Tomato seedlings, or “transplants.” We use the word transplant as both a noun and a verb.
The word we sometimes use to refer to the little seedlings that we start indoors. Of course, it’s also the act of replanting—transplanting—the little seedings. So both a noun and a verb!
Treated Seed
If you’ve ever seen a pink pea or bean seed, it’s been treated with a fungicide. That treatment is done to prevent rot in cold, wet soil. If you don’t want seed that’s treated, look for “untreated” seed.
Untreated Seed
Seed that has not been treated.
Crop-Specific Lingo
Beans

Pin this post!
Bush bean plants are shorter, and tend to have an earlier and briefer period of harvest. Depending on the variety, they might or might not need support.
Pole and runner beans get quite tall, and will need support. The harvest is later, and the harvest period is longer.
Peas
Vining pea varieties, like runner and pole beans, get quite tall and have a longer harvest window.
Squash
Bush squash are compact (at least for a squash plant!).
Vining (running) squash have long stems that spread far and wide.
Tomato
Determinate (bush, patio) tomato plants get to a certain size and then stop growing. They are relatively compact, and flower and fruit in a shorter time. Even thought they are compact, they are not self supporting—so if you like your tomato plants off the ground, use a stake or a cage.
Indeterminate (vining) tomato plants keep growing and making fruit as long as conditions permit. They get very tall if the growing season permits. (This is the sort of tomato used in greenhouse tomato production here in Ontario: Plants are grown up twine, and as they get taller and taller, the twine is lowered and the base of the stem is coiled on the ground.)
There are also semi-determinate tomato varieties.
Dwarf tomatoes are very compact, making them a good choice for growing in planters. They often grow 60 - 120 cm tall (2-4’)
Micro-dwarf tomato plants are tiny, only 15-30 cm (6-12”) tall. Perfect for a window box. Just adjust your yield expectations accordingly with such a small plant.
Find Out about Seed Shopping in this Podcast
Find This Helpful?
Enjoy not being bombarded by annoying ads?
Appreciate the absence of junky affiliate links for products you don’t need?
It’s because we’re reader supported.
If we’ve helped in your food-gardening journey, we’re glad of support. You can high-five us below. Any amount welcome!
More on Vegetable Seeds
More on Growing Vegetables
Vegetable Gardening Articles
Vegetable Gardening Courses
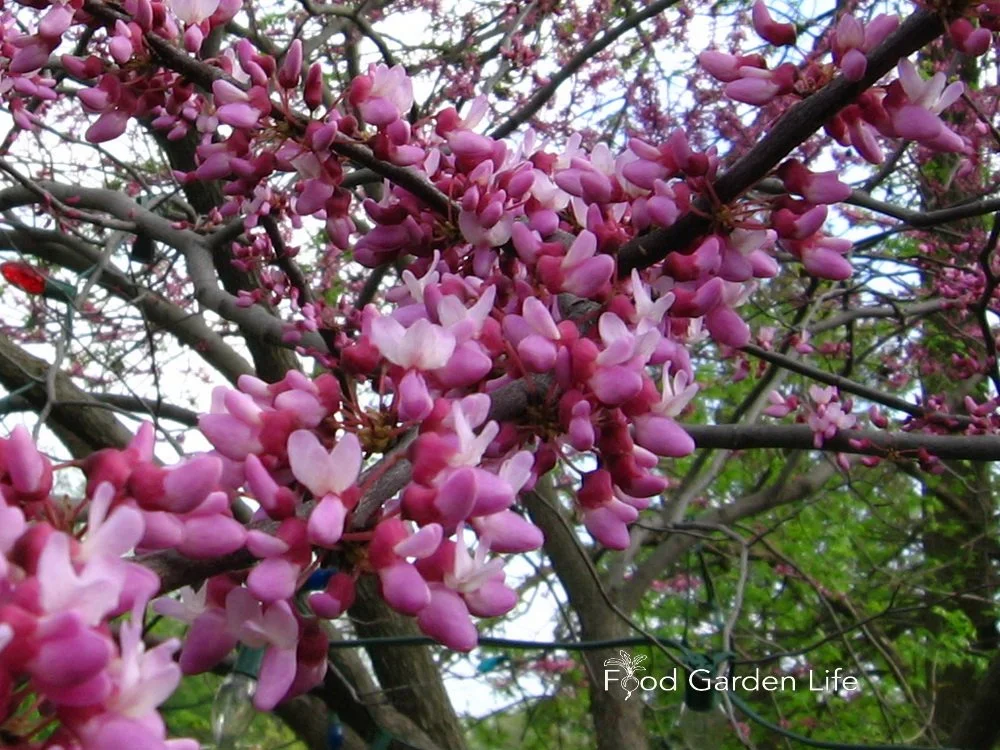
Edible Flowers: Flowers You Can Eat (AND how to use them)
Edible flowers: Find out which flowers are edible—and how to use them to spice up your cooking and culinary creations.
Edible Flowers for Your Garden

Bee balm (bergamot) is an edible flower that’s a good fit for a perennial border.
When I taught at a college with a farm-to-table horticulture and culinary program, the chef asked us to harvest small zucchinis with the flower still attached at the end. A pedestrian ingredient elevated to gourmet.
Yet they often fly under the radar. You can fit edible flowers into a vegetable garden, herb garden, edible landscape, and beyond. You might have some growing there already.
Once they’re on your radar, you’ll see them everywhere.
If you’re wondering what flowers you can eat, keep reading. This post explains where you can grow them, lists easy-to-grow edible flowers, and has ideas for creative ways of using them.
How to Grow Edible Flowers

Use bachelor’s buttons petals to decorate a cake, or dried in a tea.
Because edible flowers grow on a very wide range of plants, there’s no one-size-fits-all growing advice. Many are sun loving. Some tolerate some shade. While many are annuals, there are shrubs and trees too.
Success growing edible flowers is a matter of selecting the right plant for the right growing conditions.
Some of my favourite edible flowers are the ones that self-seed in my garden, meaning they come back year after year without me having to plant them. I like gardening that way.
NOTE: Not all flowers are edible. So don’t eat it if you’re not certain it’s edible. Start with small amounts if it’s the first time you’re eating a flower. As with any food, some people can have sensitivities.
Calendula (pot marigold) self-seeds in my garden. I let a “hedge” of calendula frame one of my potager beds.
Where to Grow Edible Flowers
Edible Flowers in the Vegetable Garden
There are lots of edible flowers to be found in a vegetable garden.
Here are some of my favourites.
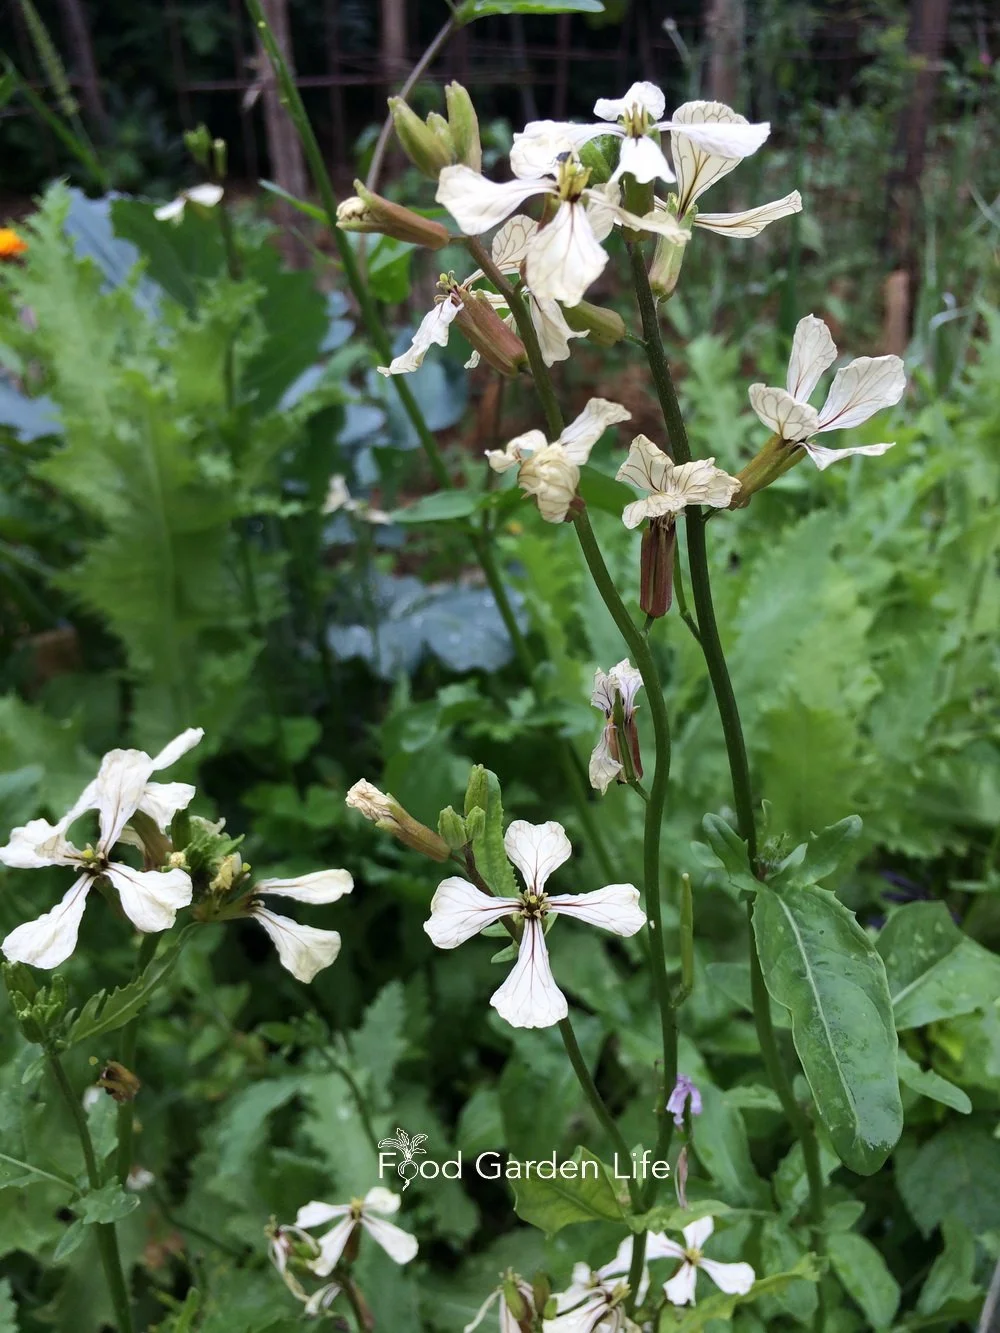
Arugula flowers are edible and have a peppery taste similar to the leaves.
Arugula. Like the leaves, these small flowers are peppery. They’re nice atop a salad or a savoury soup.
Broccoli. We grow broccoli to harvest before the flowers open…but if your broccoli beats you to the punch and the flowers open, you’ll have cheery yellow flowers to toss into a salad or use as a garnish.
Fennel. Clusters of small, bright yellow flowers have a delicate anise flavour. I’ve seen a chef tap fennel flowers over a white plate to decorate it with the brightly coloured pollen. Along with Florence fennel, there’s bronze fennel, a short-lived perennial in my garden zone (and an invasive in others…). Find out more about bronze fennel and other edible perennials.
Pea. Flowers taste like…peas. As well as the flowers, you can also eat young shoots and tendrils. Caution: Flowers of peas we grow as a vegetable (Pisum sativum) are edible; flowers of sweet pea (Lathyrus odoratus), grown as a cut flower, are poisonous.
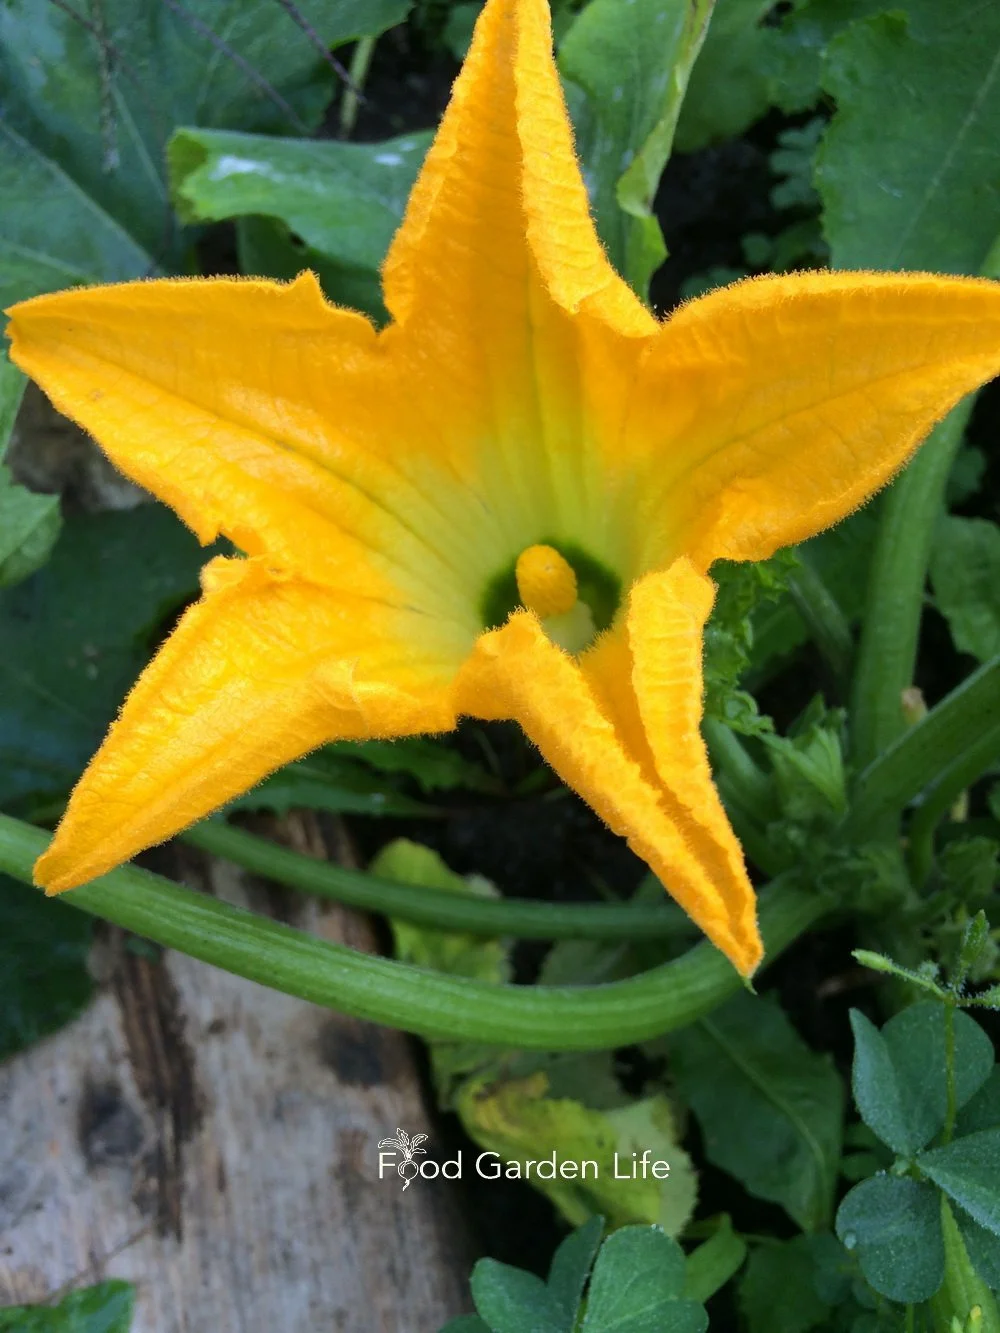
This squash flower is calling out for a wedge of cheese, some batter, and a bath in the deep fryer!
Runner bean. Along with edible flowers, runner bean flowers have long enough stems to make excellent cut flowers. In my garden, they’re a magnet for hummingbirds too! Runner beans are also a top crop for vertical gardening: Find out more about vertical gardening.
Squash. Slightly sweet taste. Stuff whole flowers with a wedge of cheese and batter and deep fry. Or, slice and serve atop a bowl of soup for a dash of bright yellow or throw into a stir fry just before serving.
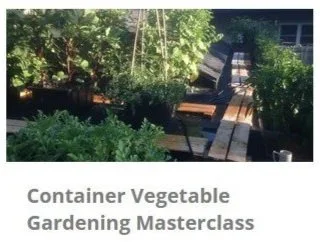
All of these veggies can thrive in container gardens. I teach people how to grow great container vegetable gardens in my this masterclass.
Edible Flowers in a Potager or Kitchen Garden
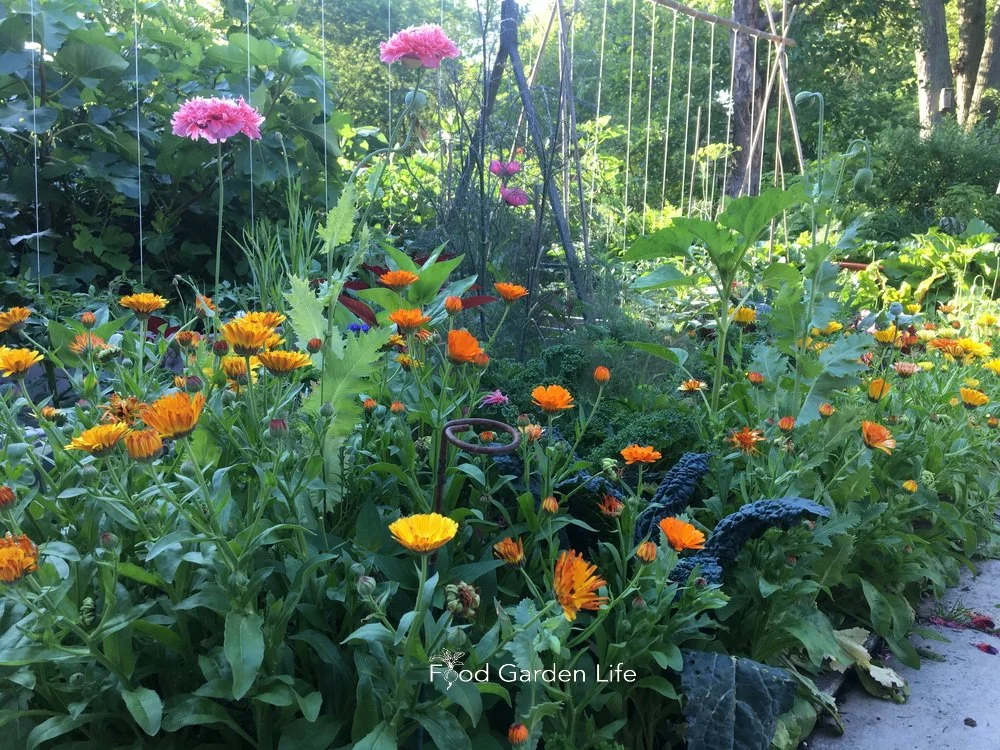
I like to think of potager gardens as grazing gardens: Instead of large quantities of each crop for preserving, we’re growing smaller quantities to pick and eat fresh on an ongoing basis. I like a grazing garden with lots of annual flowers in it for cutting…and eating.
Bachelor’s Buttons. Flowers come in blue, pink, and white. Eat fresh, or dry to add colour to your home-made tea blends. Or sprinkle some petals over the bowl of whipping cream you’re putting out for dessert.

Calendula petals are a homegrown saffron substitute, great for colouring rice.
Calendula. Great for colour, though not a lot of flavour. Pluck off the petals to add to salads or dress up a plate. Use dried petals to add colour to rice dishes—a homegrown saffron substitute.
Rose. Pluck some rose petals to chop and add to a fruit salad. The lower, white portion of the petal can be bitter, so before using them, do a taste test—and remove the white portion if needed. Edible flower expert Denise Schreiber recommends rose-petal ice cream.
Sunflower. Use these brightly coloured and mildly bitter petals as a cheerful garnish.
Edible Flowers for Containers and Container Gardens
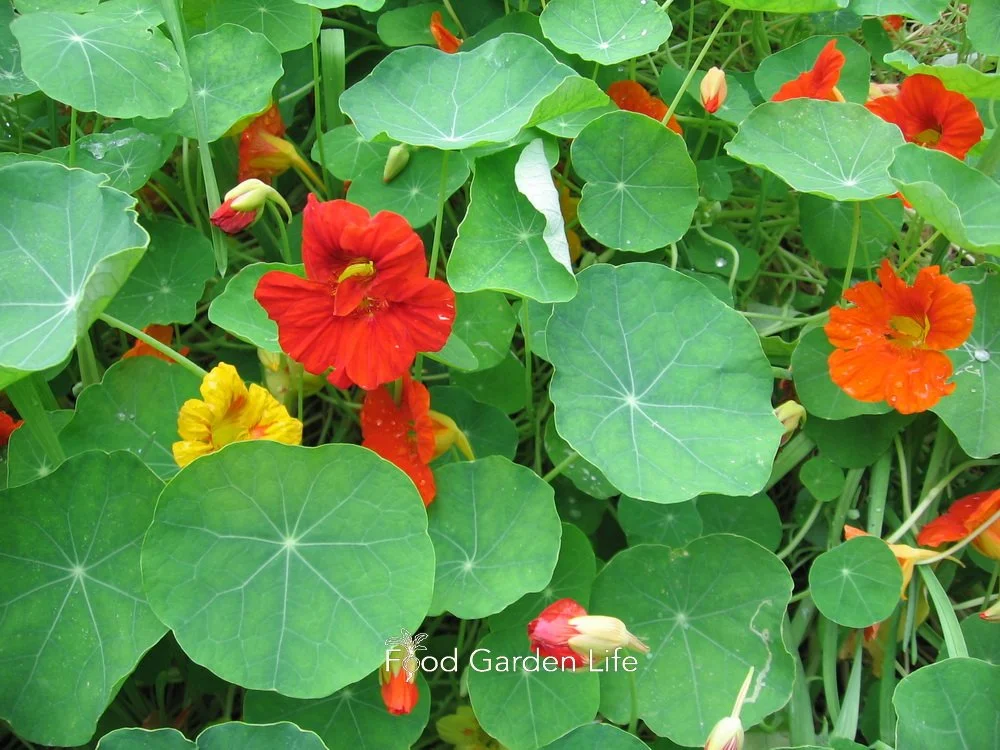
You can eat the whole nasturtium flower. It has a peppery taste, like the leaves.
Many well-known edible flowers are grown as annuals, and many are well suited to growing in containers.
Here are a couple of my favourites.
Begonia. Tuberous begonia petals have a citrusy taste and a firm texture.
Nasturtium. Unlike some flowers, where you must first remove petals from a corky core, you can pop a whole nasturtium flower into your mouth. Like the leaves, the flowers have a peppery flavour. (See below…rinsing before eating can be a good idea!)
Edible Flowers for an Edible Landscape
Here are ideas for perennials, shrubs, and trees with flowers you can eat for an edible landscape.
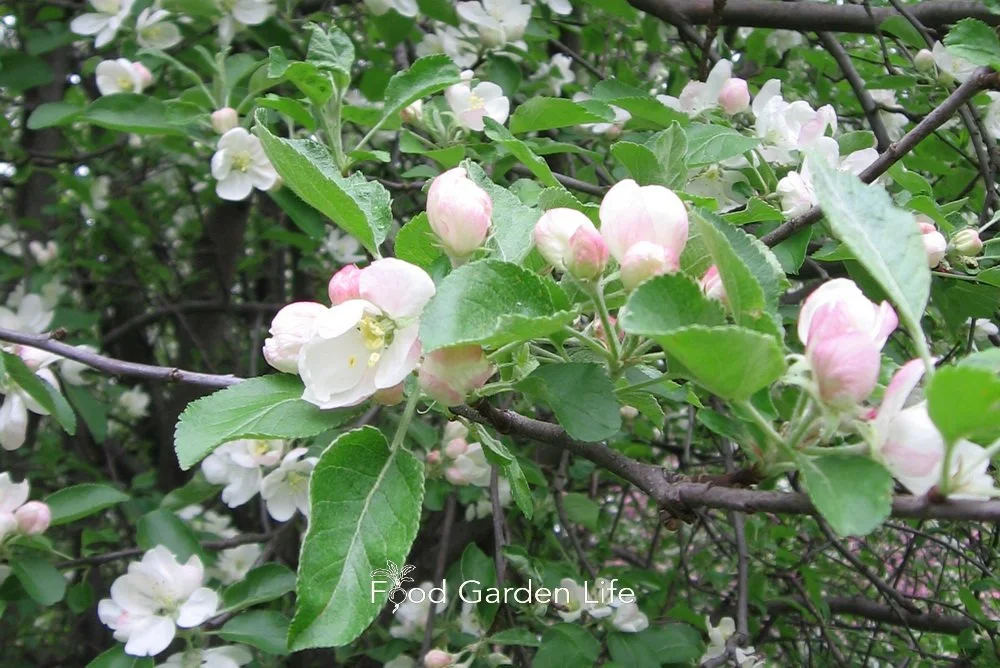
Apple blossoms have a floral flavour.
Apple. These blossoms have a floral flavour.
Bee Balm. A.k.a. monarda, pluck these slightly spicy petals to dry for tea or use fresh tossed into a fruit salad.
Daylily. Use the flower bud in stir fries instead of snap peas. Dice the flowers to throw into frittatas and pancakes. Or…what about an open flower to hold a scoop of ice cream—instead of an ice cream cone!
Elderberry. Use these sweet-smelling flowers fresh in fritters. Dry them for tea. Or to make cordial or elderflower champagne. Don’t graze on raw elderflower—this is a flower that should first be processed.
Redbud flowers taste sweet.
Lilac. Sweet, with a little drop of nectar in the throat. When I was a kid we’d pluck these from my parents’ hedge and suck on them to extract the sweet nectar.
Linden. Dried linden flowers make a lovely tea. My Aunt Anna had me pick them for her from the lindens that lined the front of her apartment building.
Eastern Redbud. Sweet little pink flowers that are out early in the season.
Create Your Own Unique Edible Landscape
That fits for your yard, and your style!
Edible Flowers in a Herb Garden
Basil. The flowers taste like the leaves. I pluck off these wee flowers to sprinkle over a salad or a bowl of tomato soup.
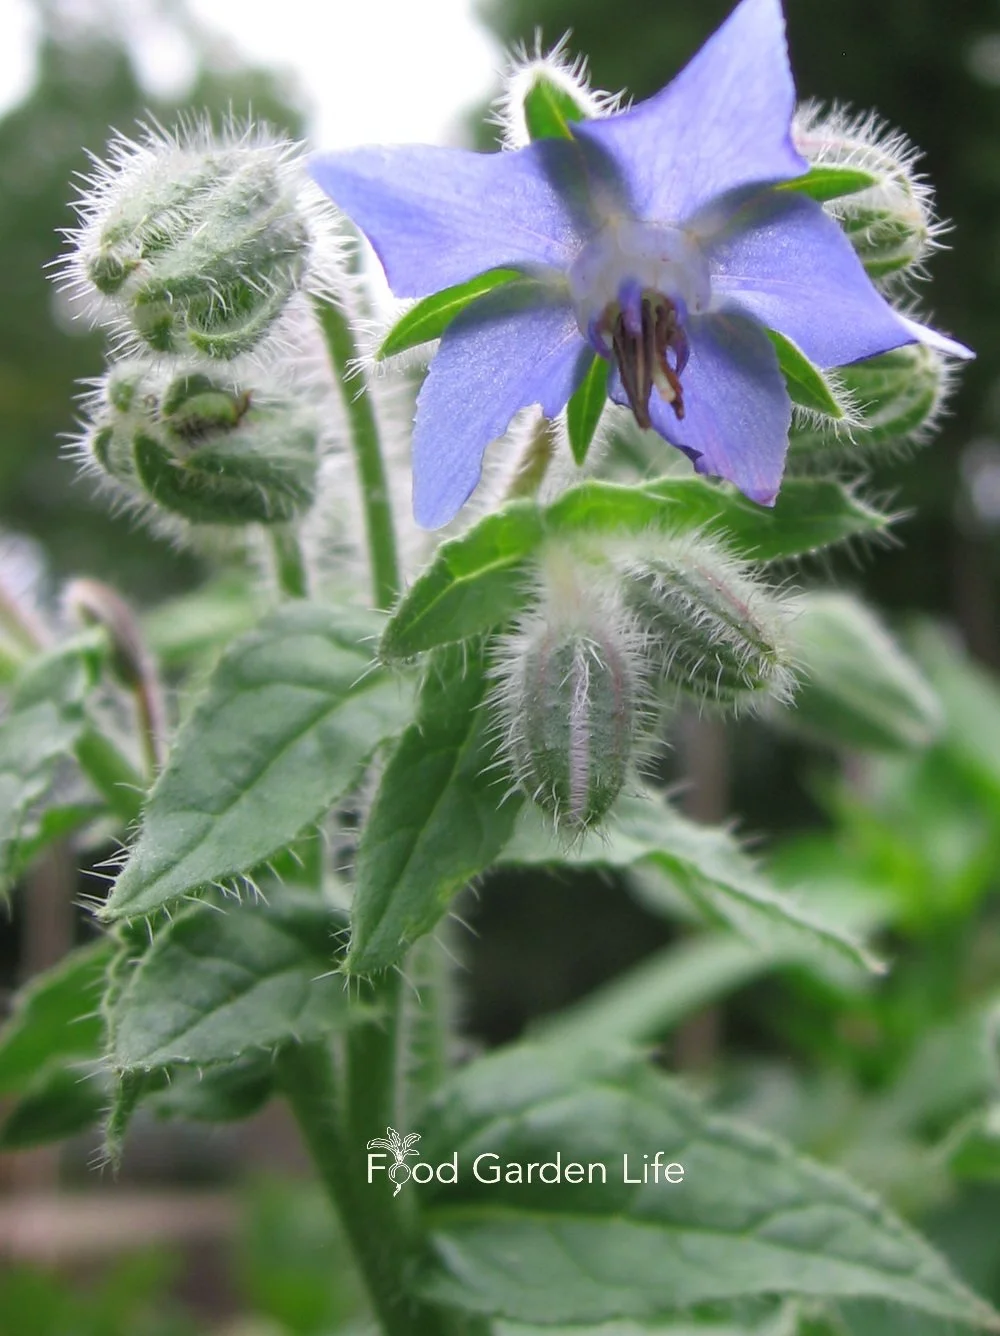
Borage flowers taste a bit like cucumber.
Borage. The sky-blue colour of borage flowers is a visual delight in the garden. Float these cucumber-flavoured flowers in a pitcher of water. This is a plant that reliably self-seeds in my garden.
Chive. Pull apart the flower heads and then sprinkle these onion-flavoured flowers over a curry!
Cilantro. This herb always flowers more quickly than I want…and as it flowers, it stops growing new leaves. But all is not lost, because the flowers, too, are edible.
Dill. Like fennel, these heads of small, yellow flowers are edible. I use a whole dill stem with leaves and flowers when I make a crock of dill pickles.
Garlic Chive. Use in the same way you do chive flowers. They look nice when you float them in a bowl of water.
Lavender. Float lavender flowers in a summery drink. One of the most unusual—and delightful—ice creams I ever had was a lavender-flower ice cream.
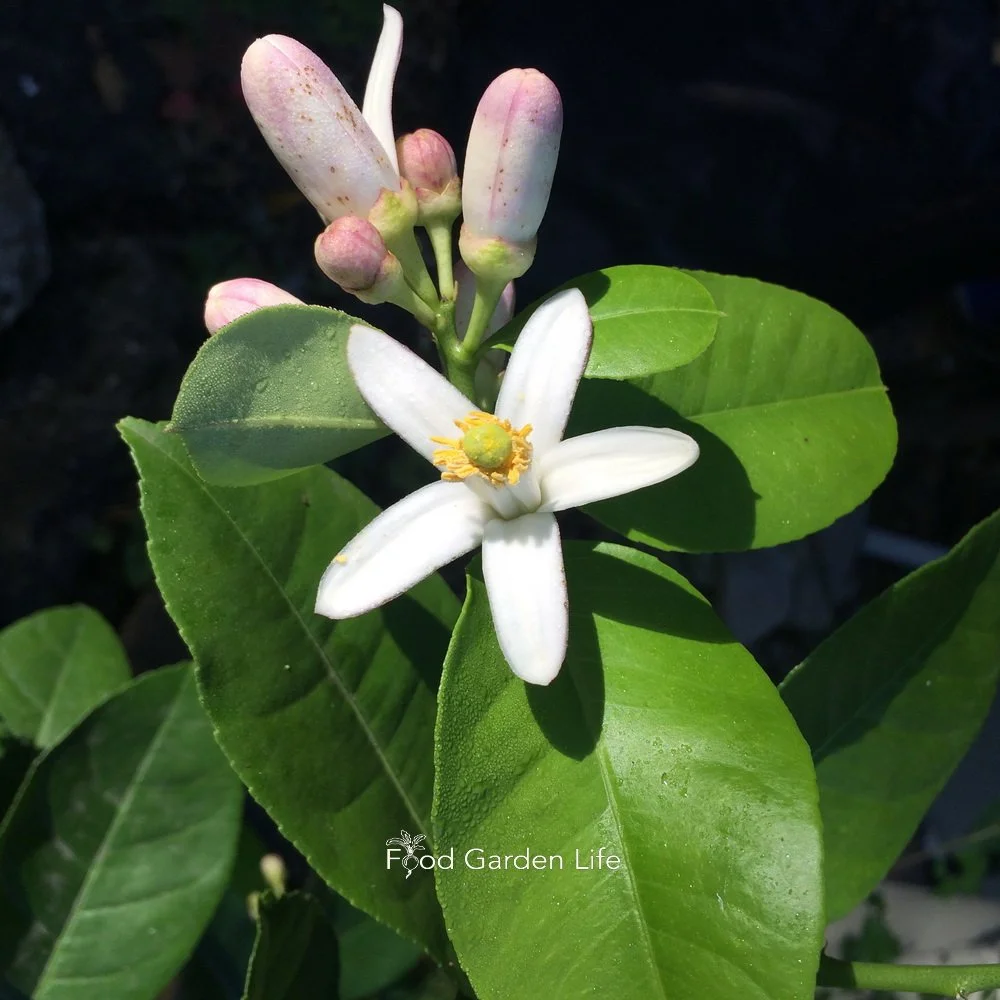
Lemon flowers have a very sweet smell and taste.
Lemon. I wasn’t sure where to put lemon in this post, so I’ve included it with herbs, since the leaves are used much like bay leaves. The flowers have a sweet smell and taste. Dot them on the thick whipped cream you spread over a summery fruit flan. Find out how to cook with lemon leaves.
Here’s a course about how to grow lemons in a cold climate.
Lemon Balm. The flowers have the same lemony taste and smell as the leaves. Eat as many flowers as you can, because this is one plant that’s quite naughty when it comes to self-seeding everywhere.
Mint. Shunned by many gardeners for its aggressive ways, mint flowers are a nice touch with something sweet…I’m thinking blueberry compote. (If you’re worried about mint taking over your garden, just grow it in a pot. That’s what we did when my daughter came home with 19 types of mint.)
Oregano. I love oregano with anything tomato. Or, how about a herb butter dotted with oregano flowers.
Rosemary. Like the leaves, the beautiful blue flowers have a resinous, unmistakable taste.
Edible Flowers…in the Lawn!

Chamomile. Apple-like smell. Use dried for tea, or fresh to adorn a plate. This herb is quite tolerant of being shorn like a sheep, making a chamomile lawn an unusual option.
Dandelion. I don’t know many gardeners who set out to grow dandelions, but they usually invite themselves to your lawn anyway. I harvest dandelion leaves and flowers from my lawn every spring. Pick when young, as they become more bitter when older. Pluck the petals from the centre of the flower before using.
Thyme. Like chamomile, here’s another herb that’s useful to create a lawn. When choosing a thyme variety for your edible-flower lawn, keep in mind that some types of thyme are low and creeping, while others are more upright and woody, making them less suited to using for a lawn.
Sweet Woodruff. The small, white flowers combine sweetness and vanilla. I also love the glossy, dark green leaves.
How to Harvest Edible Flowers

Pin this post!
When to Pick Edible Flowers
Pick flowers as close to when you’ll use them as possible for the best colour and flavour.
Storing Edible Flowers
Store wrapped in damp paper towel, in a sealed plastic bag in the fridge. The damp paper towel keeps the humidity high, without the flowers actually sitting in water.
Cleaning Edible Flowers
When flowers have an open structure, you can quickly spot any uninvited guests.
But if a flower has hiding spots, do give it a good rinse—or even a soak.
(I say this because once made a salad with fresh nasturtium flowers. As soon as I dressed the salad, an army of aphids marched out of those flowers. I think I ate the salad anyway…having bragged about it to my colleagues. A bit of protein...)
Tip: Edible Flowers That I Wouldn’t Eat
I don’t eat cut flowers from the store. Who knows what’s been used on them. Same with plants from the garden centre. Come to think of it, flowers from the roadside too.
Find This Helpful?
Enjoy not being bombarded by annoying ads?
Appreciate the absence of junky affiliate links for products you don’t need?
It’s because we’re reader supported.
If we’ve helped in your food-gardening journey, we’re glad of support. You can high-five us below. Any amount welcome!
More on Growing Food
Food Gardening Articles and Interviews
For more posts about how to grow your own food, head over to the library of posts.
Food Gardening Courses
Home Garden Consultation
Book a virtual consultation so we can talk about your situation, your challenges, and your opportunities and come up with ideas for your edible landscape or food garden.
We can dig into techniques, suitable plants, and how to pick projects that fit your available time.
Vegetables to Grow: 12 Tips to Choose What’s Best for Your Vegetable Garden
Choose the best vegetables to grow in your garden with these 12 crop-choosing tips.
by Steven Biggs
Choose Which Veggies to Grow in a Garden
12 tips to help you choose vegetables to grow.
“Grow radishes!”
It’s a recommendation I often hear given to new gardeners. That’s because radishes are easy to grow. And they grow quickly.
True.
But in my house, it’s the radishes that are still on the veggie platter when everything else has been devoured.
So while the easy-to-grow crops are part of a good vegetable garden plan, there are other things to think about too.
Keep reading to find out how to pick vegetable crops and varieties for your needs and situation. Instead of being prescriptive and telling you what you should grow, this post gives you 12 tips to help you choose which vegetables to grow.
1. Grow What You Love
So back to the radishes, there’s no point growing what you won’t eat—even if it’s easy to grow
Even if it’s nutritious.
Grow things you’ll enjoy eating.
2. Grow for How You Cook
I love big slabs of eggplant that I can marinate and grill, so I grow large-fruited eggplant varieties
As you choose crops and varieties, think about how you’ll use your harvest.
Here’s an example:
I love big slabs of eggplant that I can marinate and grill—or use to make eggplant parmesan. So I always go for large-fruited eggplant varieties
For tomatoes, I like to make sauce all winter, so I grow good sauce-making varieties
3. Rule Out Some Crops
There might be crops that aren’t a fit for your garden. I’m talking about space hogs—and crops that will probably be a frustration.
Space Hogs
Some crops use up a lot of space—more than makes sense in a small garden.
For example:
I love Brussels sprouts. But they’re big plants that tie up the same patch of garden for an entire season. So I leave them to the market gardeners.
I love edamame too. But for the amount I get considering the amount of space they take in the garden, they’re not my top choice.
Unnecessary Frustrations
Depending on what your situation, there might be crops that disappoint—or frustrate—you.
Here’s are examples:
Corn. I love corn. So do all the raccoons around here. So I don’t grow it. I don’t need the chest pains!
Tomatoes. Some people prefer cherry tomatoes to big beefsteak tomatoes because that way there’s lots more tomatoes to harvest. That way, the gardener gets lots even if wildlife steals some.
4. Try Something New
Have you added something new to your garden? I like to grow something new every year.
Recently it was celtuce, a.k.a. stem lettuce. It’s easy to grow and fun to cook with. Not a new crop at all…just new to me.
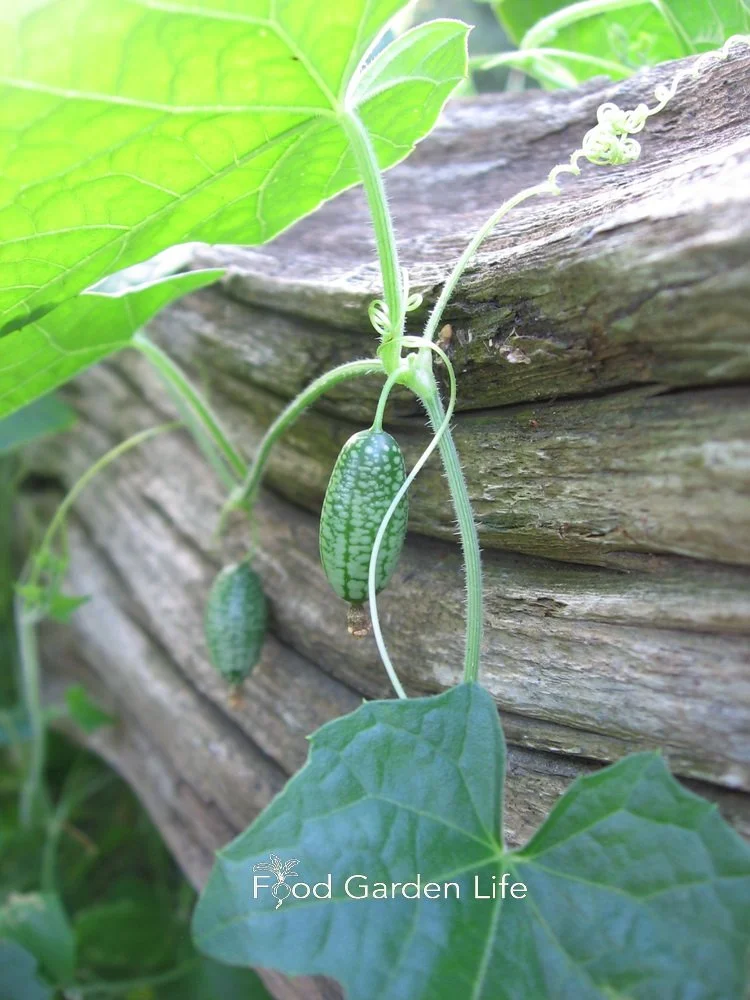
20 years ago I grew cucamelons for the first time and have grown them ever since.
20 years ago I tried cucamelons and have loved them and grown them every year since.
Look for neat varieties (e.g. a pepper variety I love is the corkscrew-shaped ‘Corbacci’
Or branch out into a crop from a cuisine you’re not familiar with (okra was new to me…but after I learnt a Cajun fiddle tune I wanted to learn how to make Cajun-style gumbo soup…and now I aways grow okra for making gumbo soup!)
5. Consider Diseases
Variety choice sometimes helps with disease problems. For example:
Downy mildew ravaged my basil for a couple of years. So now when I’m getting basil seeds, I look for mildew-resistant basil varieties
There’s no totally blight-proof tomatoes, but there are blight-resistant varieties, worth adding to the mix in a garden so that in years when blight decimates the tomato patch, there are still a few plants producing late in the season
6. Pick Crops for Small Spaces
If space is a challenge, crop choice can often help you harvest much, much more.
Crops for Vertical Gardening
If you’re gardening in a small space, choose vegetable crops that you can grow upwards on trellises, tee-pees, or fences.
If you’re gardening in a small space, choose veg that you can grow vertically. When you grow upwards, that frees up space on the ground—so you can fit more into a small space.
Here are a couple of my favourites:
Runner beans. I love runner runner beans! The flowers are edible, great for bouquets, attract hummingbirds. Oh, did I mention there’s beans too! (If you’re in a maritime climate, you might find runner beans produce more than pole beans.)
Zucchini: Many zucchini varieties have a bush-like growth habit, and the plant can take up a fair bit of space. But if you grow a climbing zucchini variety, it won’t take up as much space…so there’s room to plant more in your garden.
Grow a Container Vegetable Garden
And get an early harvest of crops that usually take too long!
Plants with Multiple Edible Parts
You might also think about plants with more than one edible part, so in a limited space you’re getting multiple harvests from one crop
Radishes have edible seed pods.
Snap peas (you can eat the peas and the pod…and don’t forget young tendrils)
Squash (eat the flowers, the squash…and shoot tips!)
Beets (both leaves and roots are edible)
Radish (along with the roots, the seed pods are edible)
Find out more crops with more than one edible part.
Hear a chef talk about using squash shoot tips and other uncommon ingredients.
7. Choose for an Early Harvest
Look for crops and varieties that can move up your first harvest.
For example:
I like broad beans, which can be planted far ahead of all the other types of beans
Look for fast-maturing varieties (I grow fast-maturing arugula and spinach varieties in my cold frames in late winter because I want that first harvest as soon as possible)
Do the same with your beets, carrots, tomatoes and other crops
To choose faster-maturing varieties, compare the days-to-maturity information with other varieties (often called “DTM”)
8. Remember Fall Harvesting
Parsley holds up well when fall frosts arrive.
Remember to add in cool-season crops that keep producing as fall frosts arrive.
Cabbage family
Kale
Celery
Parsley
9. Choose for a Short Growing Season
If you’re dealing with a short growing season, there might be some crops you don’t want to bother with. I have friends who won’t grow eggplant and pepper.
More ideas:
Bush beans give a quicker, more concentrated harvest than pole and runner beans
Look for varieties that mature more quickly (e.g. we love Cream of Saskatchewan watermelon, which ripens melons much more quickly than watermelon varieties grown in warmer zones.)
When it comes to tomatoes, there are lots of early-maturing tomato varieties
10. Grow for Year-Round Enjoyment
Many gardeners like to enjoy the harvest year-round. If that’s you, here are some ideas:
Grow dry beans that you can easily store for later use
Look for root crops that store well (these tend to be varieties that grow larger roots)
Thought of kohlrabi…there’s a storage variety too
You can harvest leeks right through the winter when there’s a thaw
Get more crop ideas for year-round enjoyment.
11. Plan an Edible Landscape
Looking for attractive veg to add an ornamental touch to a landscape?
Here are ideas:
Asparagus looks great at the back of a perennial border, with its tall, ferny foliage
Runner beans have beautiful flowers
Lovage is a perennial with a celery-like taste, great for the perennial border
Eggplant has beautiful flowers
Kale is a great way to add colour and texture into a garden
Here are more perennial edibles.
Sometimes shade is a challenge in an edible landscape. Here are fruits and vegetables that you can grow in the shade.
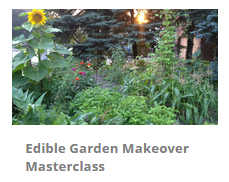
If you’re serious about edible landscaping and want to create an awesome out-of-the box edible landscape, check out this course.
12. Crop Substitution for Less Work
Pin this post!
Keep your workload to a minimum through crop choice!
Here are examples of the type of thinking you can use to make less work for yourself.
Leaf celery instead of stalk celery. Stalk celery takes lots of water and feeding to get tender, crispy stalks. Leaf celery doesn’t make big stalks—you just get lots of leaves on short stems, and it’s far less bother if you don’t mind consuming celery this way. (I chop it into soups, stews, and salads for that same celery taste.)
Ground cherry instead of cape gooseberry. I actually prefer the taste of cape gooseberries…but they need a longer growing season, meaning I have to start the seeds earlier, and then give them prime, hot, garden real estate to get a decent harvest. Ground cherries are far easier to grow. (Find out more about these two different husk cherries.)
Broccoli instead of cauliflower. Not only is cauliflower more finicky, to get snow-white heads it must be blanched, which is often done by tying leaves over the head with an elastic. It’s a lot of bother compared to broccoli, which requires no blanching.
Squash instead of potato and sweet potato. Squash is far less work. Instead of transplanting sweet potato plants, you just poke squash seeds into the soil. And instead of digging out sweet potato roots, you just snip squash from the vine. You still get the sweet, orange ingredient for baking.
Find This Helpful?
Enjoy not being bombarded by annoying ads?
Appreciate the absence of junky affiliate links for products you don’t need?
It’s because we’re reader supported.
If we’ve helped in your food-gardening journey, we’re glad of support. You can high-five us below. Any amount welcome!
More on Vegetable Garden Planning
More on Growing Vegetables
Vegetable Gardening Articles and Interviews
For more posts about how to grow vegetables and kitchen garden design, head over to the vegetable gardening home page.
Vegetable Gardening Courses
Wood Ash for the Garden: What You Need to Know
Find out whether wood ash is good for your garden. It can be used as a fertilizer and to make the soil less acidic.
By Steven Biggs
Fireplace Ashes for the Garden?

I have happy memories of cooking holiday roasts over charcoal with my dad. He taught me how to cook over charcoal—and he drilled in the importance of NEVER leaving a barbecue full of ash out in the rain.
Wet ash in a barbecue is like road salt on a car…corrosion just waiting to happen.
Yet many people spread wood ash on the garden.
Actually, sprinkling ash around the yard isn’t anything new. And in an era when people pay attention to how much waste they generate, it seems to make sense not to send wood ash to landfill.
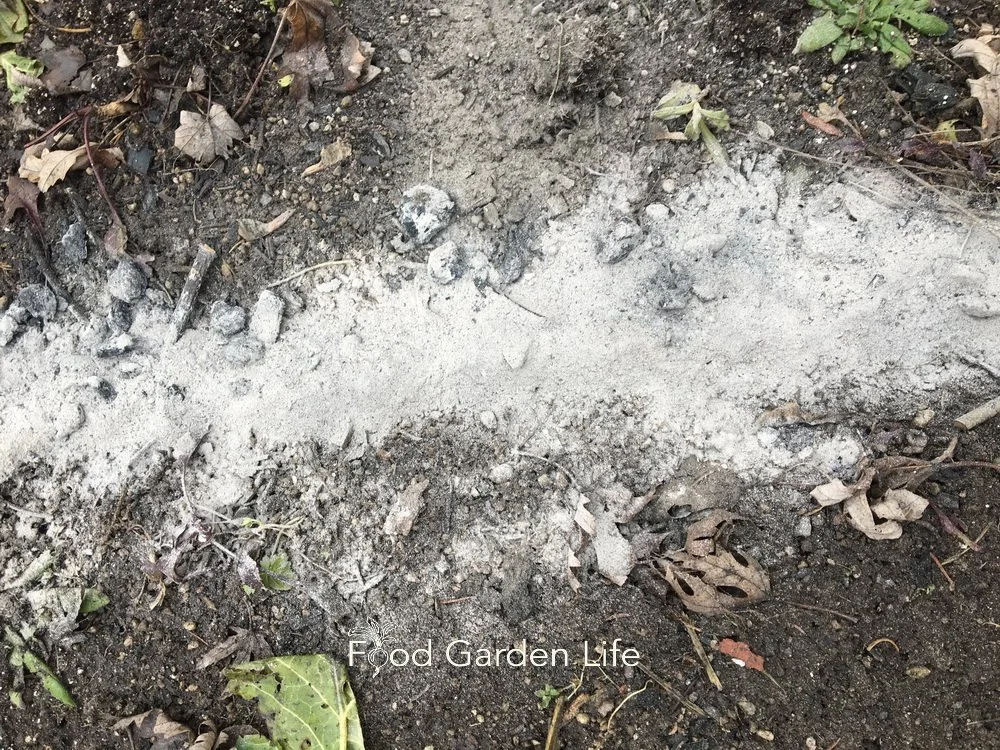
My neighbour Al always sprinkled wood ash around his garden. I’d see the ash as the wind blew it over the fresh snow, and ash specks peppered the sidewalk.
Whether wood ash is good for your vegetable garden depends on your soil and how you’re using the ash.
Thinking further back, I remember as a child, playing on my grandmother’s gravel driveway and eagerly collecting the nuggets of coal clinker from decades before, when ash from the coal furnace was sprinkled around the yard.
But is ash good for the garden? The answer depends on what type of ash it is, how you’re using it, and your soil.
If you’re wondering about using ash in your yard, this post tells you more about wood ash, ways to use it—or when not to use it.
What’s in Wood Ash
Wood ash contains a lot of plant nutrients, including potassium, phosphorus, calcium and magnesium. There are other minor nutrients too.
The amount of the various nutrients in your wood ash depend on the type of wood you’re burning.
The other thing to know is that wood ash is alkaline. So in the same way that lime is used to make soil less acidic, so can wood ash. (More wood ash is needed than lime, though wood ash is faster acting.)
Using Wood Ash in the Garden
Ash has two uses in the garden:
Fertilizing
Reducing the acidity of some types of soil
Whether wood ash is beneficial in your garden depends on soil nutrient levels and soil pH (which is the measure of acidity or alkalinity.)
When soil is too acidic or alkaline, some nutrients get “locked up.” The nutrients might be in the soil—but unavailable to plants. That means:
Ash applied to acidic soils can make more nutrients available by making the soil less acidic (more alkaline)
Ash applied to a soil that’s already alkaline can sometimes make the soil more alkaline to the point that nutrients become unavailable
That’s why you might come across the advice not to use wood ashes on soils with a pH over 6.5.
Don’t Know Your Soil pH?
Pin this post!
Some sources say not to use wood ash in the garden without testing your soil first.
What’s a gardener to do if you don’t want to have the soil tested…but don’t want to unnecessarily send ash to landfill?
I’m not a proponent of soil-testing hypochondria, so I understand. Garden soil is often highly disturbed and highly variable, so one garden bed can be quite different from an adjacent one. (If you guessed that I don’t test my soil, you’re correct.)
Keep reading and get a few ideas.
What to Know About Wood Ash if You Don’t Plan to Test the Soil
Like many things in life, moderation is key.
Soils with high levels of organic matter and clay can resist pH change—so the occasional sprinkle of ash isn’t a problem. I sprinkle some wood ash the slightly alkaline clay soil in my vegetable garden; it’s got lots of organic matter, and I don’t put on a lot of wood ash.
You can also sprinkle in ash as you add new layers to the compost heap. The organic matter in the compost absorbs the nutrients so they’re not washed away. Organic matter also lessens the change to pH.
Using Wood Ash in the Garden
If you’re using wood ash in the garden, remember that it’s not a complete fertilizer. It doesn’t have any nitrogen, for example.
Here are tips for using wood ash in the garden:
On bare soil, sprinkle on wood ash at least a couple of weeks before planting, and then rake or dig it into the soil.
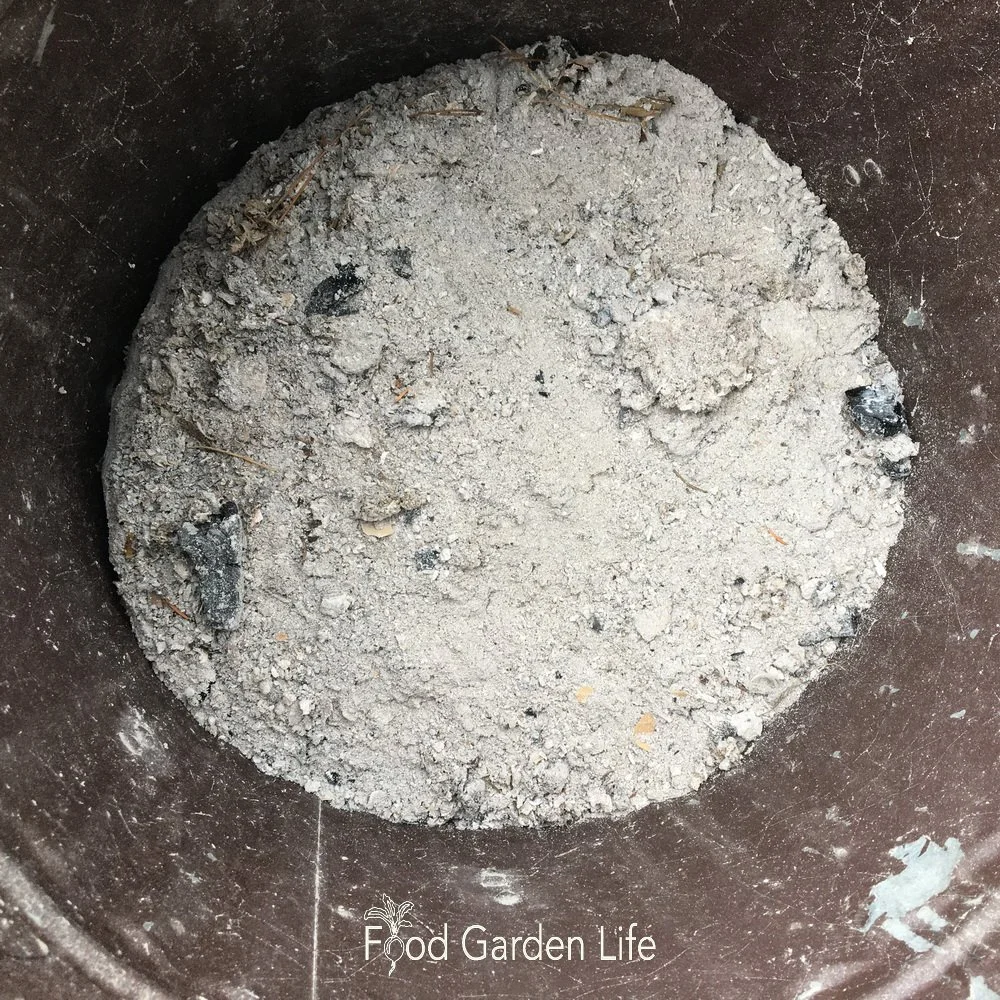
If applying wood ash to the soil and you don’t want coarse bits, sift out big unburnt chunks (hardwire cloth works well, though you can skip this step if you’re putting your wood ash in the compost)
On bare soil, sprinkle on wood ash at least a couple of weeks before planting—but not too far ahead because it’s soluble and nutrients will wash away
Rake or dig in the wood ash—you don’t want to seed into ash, and mixing with soil at least a couple of weeks beforehand gives it time to start breaking down
Don’t apply wood ash near germinating seeds, because they can be easily damaged by the high salt levels.
Don’t overdo it…keep it to once per year because too much wood ash (or too much of many fertilizers) can make some nutrients unavailable to plants

Use only wood ash. Don’t use ash from cardboard, briquettes, pressure-treated timber, or painted woods.
If you heat with only wood, you might find you have more ash than you have garden to spread it around. Don’t make heavy, repeated applications in the same part of the garden. Consider spreading some over the lawn, or sprinkling in some with new additions to the compost pile.
Your acid-loving plants such as blueberries, raspberries, azaleas, and rhododendrons won’t appreciate ash treatments. Skip these plants, even if you have an acidic soil. (And potatoes too, because alkaline conditions encourage the disease potato scab.)
Types of Wood Ash
Ash from wood burned in stoves, fireplaces, and outdoor fire pits is suitable. So is ash from hardwood lump charcoal.
Stick to wood ash: Ash produced from cardboard, coal, briquettes, pressure-treated wood, and painted woods can contain stuff we don’t want in the garden, including heavy metals.
Storing Wood Ash
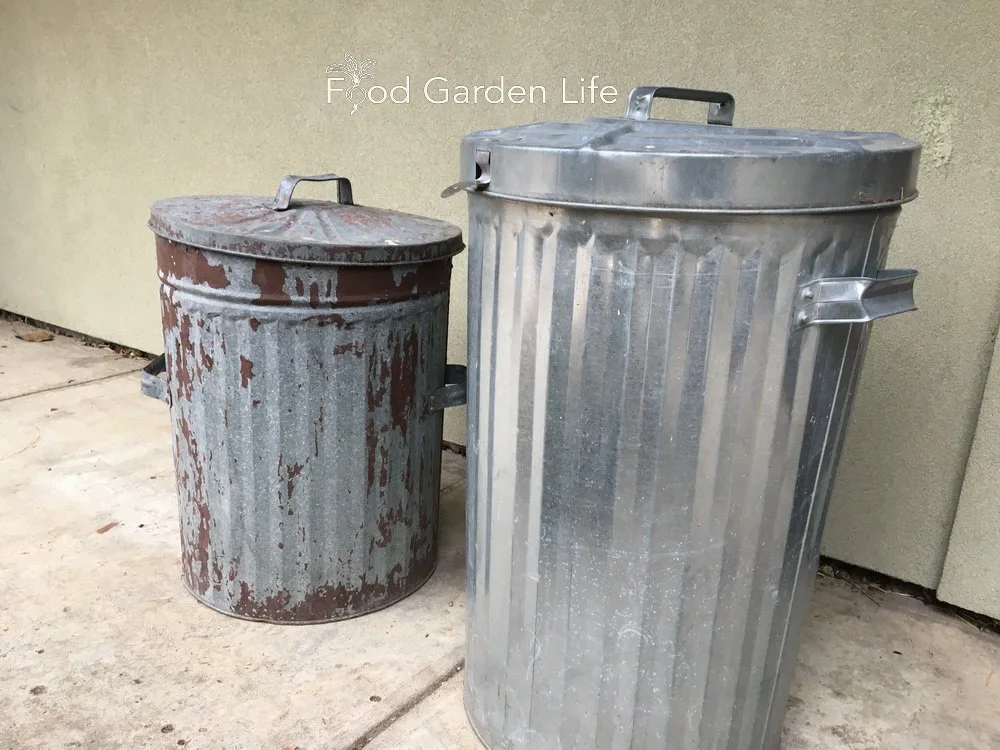
Keep wood ash dry until you use it.
The potassium in wood ash is soluble, meaning it leaches out with rain. So keep the wood ash dry until you’re ready to use it in the garden.
Other Wood Ash Uses
Wood ash has long been used to make lye for soap. I don’t make my own soap, but I do use wood ash to clean the windows of my wood stove. I dip scrunched up newspaper in water, and then into wood ash before rubbing it on the glass. It’s an excellent glass cleaner.
Wood ash is caustic, meaning don’t breathe it in, and mind your skin and eyes.
Find This Helpful?
Enjoy not being bombarded by annoying ads?
Appreciate the absence of junky affiliate links for products you don’t need?
It’s because we’re reader supported.
If we’ve helped in your food-gardening journey, we’re glad of support. You can high-five us below. Any amount welcome!
More on Soils
Soil and composting Articles and Interviews
For more posts about how to grow vegetables and kitchen garden design, head over to the soil and compost home page.
Edible Gardening Courses
Want more ideas to make a great kitchen garden? We have great online classes that you can work through at your own pace.
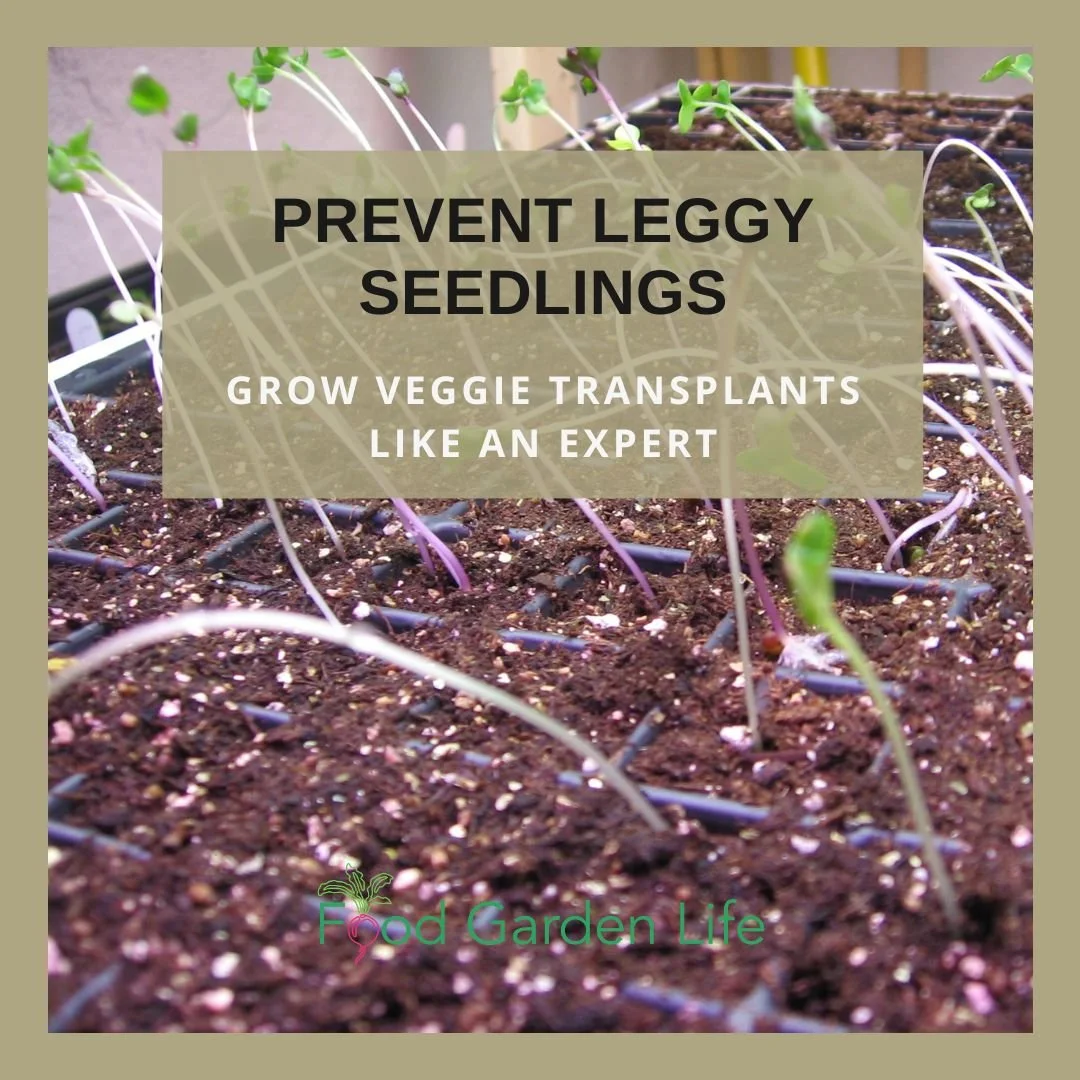
Prevent Leggy Seedlings and Grow Vegetable Transplants Like an Expert
The best way to solve the problem of spindly seedlings is to prevent them from getting that way in the first place. Find out how.
By Steven Biggs
Your Seedlings are Leggy? Keep Reading!
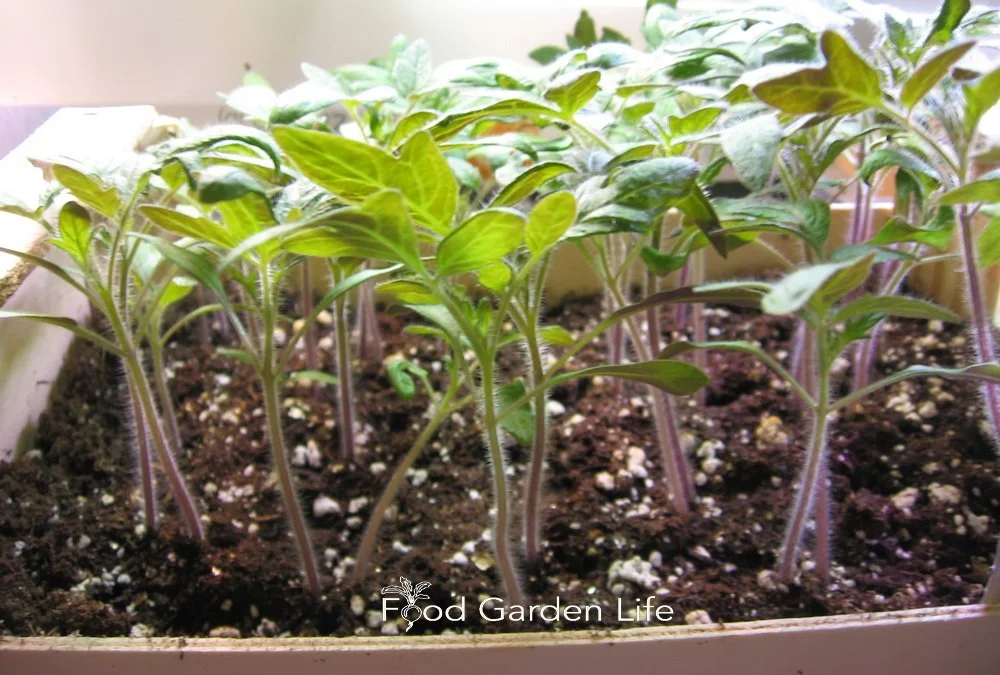
If your seedlings are doing the downward dog, this post is for you.
When young seedlings are so fragile that they fold into two, they don’t stand a good chance of success once you transplant them into the garden.
Yet leggy seedlings is a common problem for home gardeners starting seeds indoors. That’s because in a home setting, conditions are often less than ideal.
But there’s good news.
Even if you don’t have perfect conditions—even if you don’t have a greenhouse—you can grow healthy seedlings that will thrive. It’s just a matter of setting up your seed-starting area so you can give small seedlings:
An appropriate temperature
Enough light
A suitable potting soil
Combine these with a suitable container, and you’re away to the races. You can grow strong and healthy plants.
This article tells you how much light you need, what you need to know about temperature, what to look for (and avoid!) in a potting soil, and how to choose a suitable container. Get these four things right, and you’ll prevent leggy seedlings.
Heat to Sow Seeds Indoors
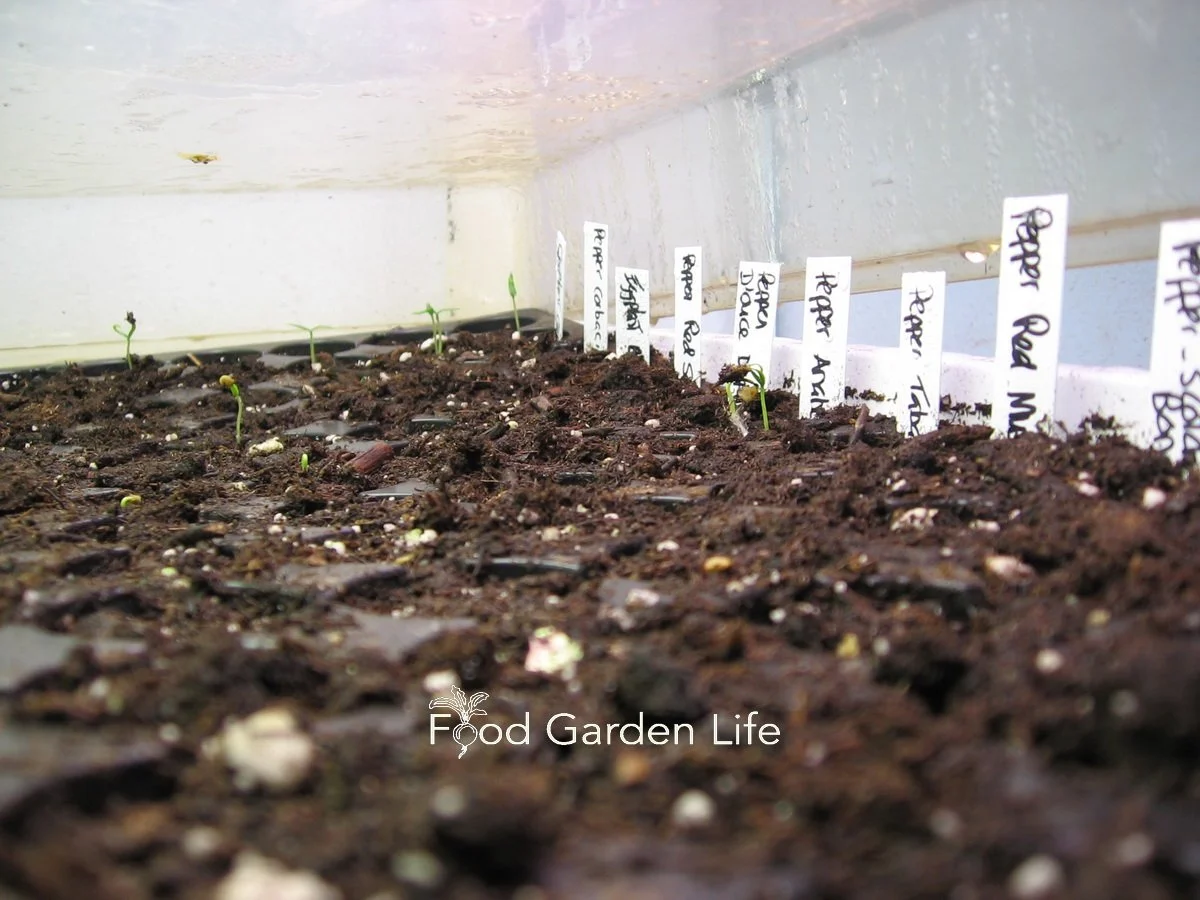
Warmer than room temperature to germinate, cooler than room temperature after germination.
If you see different seed-starting temperature recommendations for different crops, don’t sweat it. You’re probably starting all of your different crops in the same indoor space anyway.
Here’s the big picture, a simple way to think about temperature:
When you start seeds indoors, a temperature a bit above room temperature is helpful for faster, uniform germination
Once your seeds germinate, a temperature slightly cooler than room temperature helps to keep your seedlings more compact
Higher Temperature for Germination
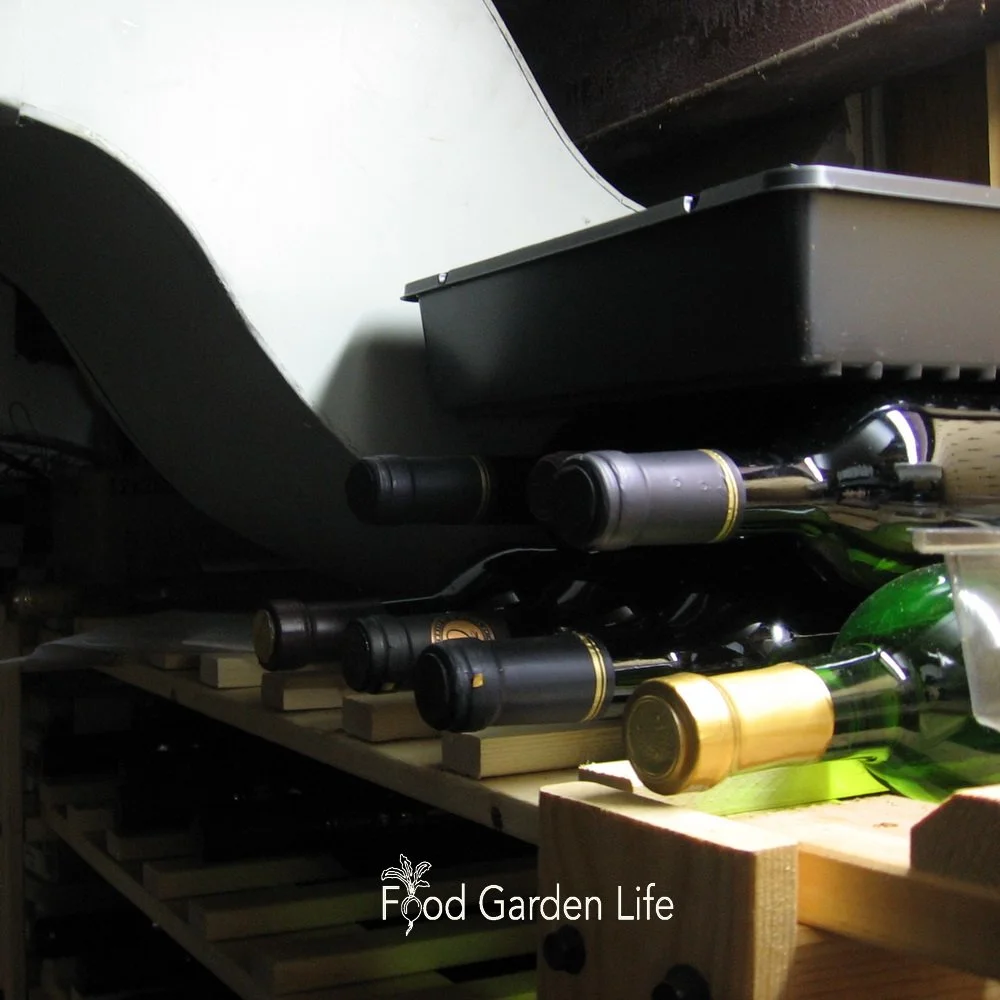
Speed up germination with more heat. Seed tray beside a heat duct to speed up germination.
You can raise the soil temperature without turning your house into a tropical conservatory. Just use what’s called “bottom heat.”
Bottom heat refers to heating the soil from below. There are purpose-made heat mats, like heating pads for plants, that go underneath pots and trays. With a heat mat, you’re only heating a small area.
Here are other ways you might be able to give your seeds bottom heat:
Heated floor
Hot-water radiator
An appliance that gives off heat (my former beer fridge was always warm on top)
In a previous house, I put seed trays beside basement heat ducts (over top of my wine rack!) to get seeds to germinate quickly. They sprouted seedlings faster than the trays in a cooler location.
Hold in Heat
Along with heat from the bottom, hold in heat and keep the humidity higher during the germination period. There are commercially available humidity domes for trays, or you can use clear plastic bags or cling wrap.
Cooler Temperature for Growing
Once seeds have germinated, a cooler temperature helps to develop sturdy stems. So remove the heat mat if you’re using one, and if you’re using a cover, set it ajar to let out some heat and humidity.
I grow seeds in a basement room with the heat ducts closed. It’s slightly cooler than the rest of the house and the temperature works well for raising seedlings.
Sufficient Light
Insufficient light is one of the things that will cause lanky seedlings.
There's a wide variety of grow lights available for home gardeners. But if you’re growing vegetable transplants indoors, you don’t need fancy grow lights. That’s because you’re not trying to grow the crop indoors for its entire life cycle.
All you’re trying to do is to get a healthy seedling to transplant into the garden. And once it’s in the garden, it gets full sunlight.
Grow Lights
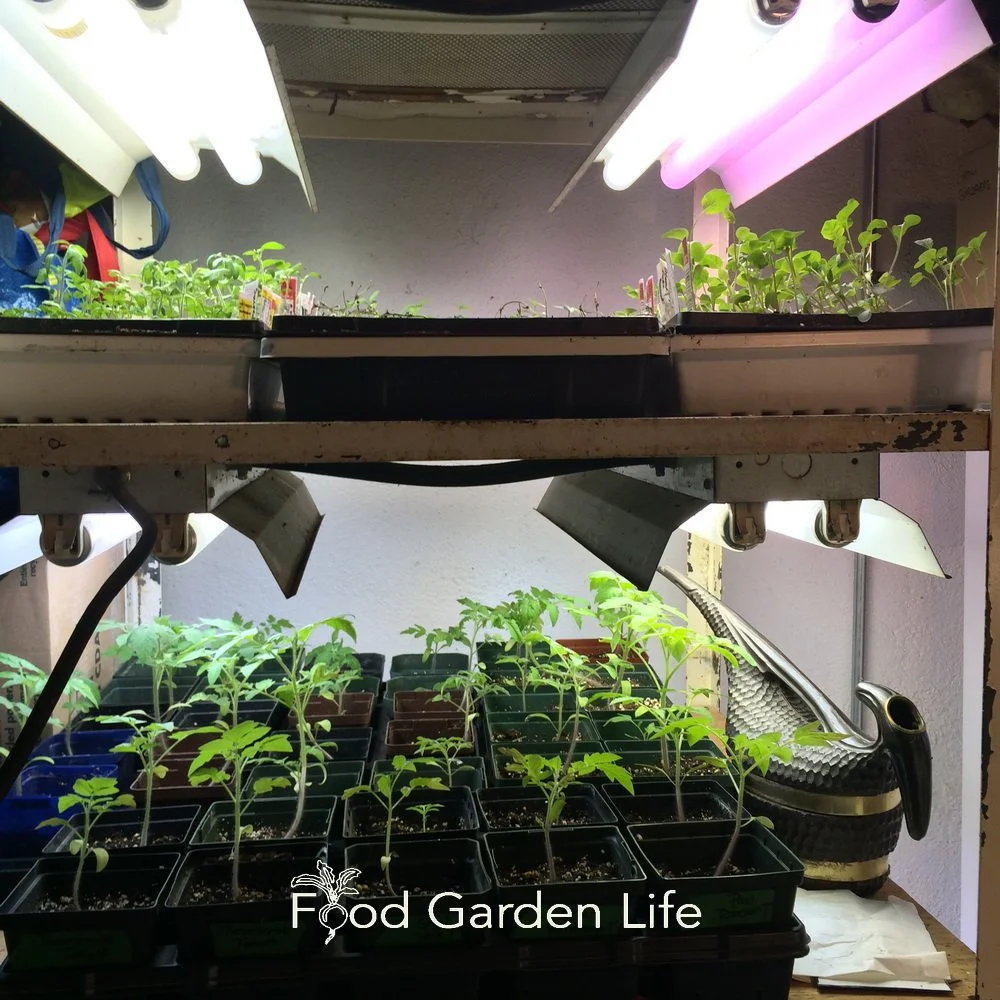
Adequate light is important; but there’s no need for perfect light because seedlings get full sunlight when moved to the garden.
I still use fluorescent lights because that's what I have and I'm on a limited budget. You can buy fancy schmancy lights; there’s no need.
If you’re using artificial light, consider the distance of the seedling from the grow light. Some grow lights have adjustable lights that can be moved close to seedlings, and then moved up as seedlings get taller.
If, like me, you don't have that option, place something under the seedlings to raise them up, closer to the light source. (Mandarin orange crates work well in my setup!) As the plants get bigger, lower them so they’re not touching the lights.
Natural Light
If you’re using natural light, the brightest windows are usually south-facing. One challenge is that south-facing windows can be hot. Warmer temperatures can cause leggy seedlings. A simple solution to this is to place a fan in the area to disperse the heat.
Soil
Even with good light and a suitable temperature, if you have poor-quality soil, your seedlings might flop!
When it comes to soil, the top two things to think about are:
Use a light soil with lots of air space to allow excess water to drain and small roots to grow
Choose soil that’s free from pests and diseases
Create Your Own Unique Edible Landscape
That fits for your yard, and your style!
Disease in Potting Soil
Little seedlings are delicate and they're vulnerable to attack by disease. In a seed-starting environment, the most common disease is what’s called “damping off” disease. This fungal disease can come with the soil—so one of the easiest ways to prevent the disease is to use soil free from damping off.
Here’s how to lessen the chance of damping off:
Don’t reuse potting soil for starting seeds (unless you’re planning to heat sterilize it)
Don’t use garden compost for seed starting; it has more microbial activity—which is great in the garden—just not ideal for indoor seed-starting
Potting Soil Shopping Tips
Big bales. It’s buyer beware with potting soil. Some potting soils are great…some suck. The large compressed bags (a.k.a. bales) that are sold to commercial growers tend to have consistently better quality because commercial growers are more discerning. Big bales are also much better value. They’re compressed, and often quite dry—so also less likely to have eggs of pesky fungus gnats.
Finely-ground potting soils. There are seed-starting potting soils that are more finely ground, the idea being that big particles can get in the way of small seeds. This makes sense in a commercial setting where uniform, perfect germination is a must. It’s absolutely unnecessary in a home-garden setting. Don’t waste your money.
Skip the meal deal. Seeds germinate and start to grow using energy stored in the seed. Don’t buys soil with added fertilizer; it can actually burn tender seedling roots.
And…If you see soil on special at a big box store for a couple of bucks, remember that a bargain isn’t always a bargain.
Grow a Container Vegetable Garden
And get an early harvest of crops that usually take too long!
Containers
When I worked in the horticultural supply industry we sold various seedling trays, pots, the “cell packs” used in commercial seedling production.
Many of these are available to home gardeners, though not necessary.
The key things to think about with containers:
Drainage holes to allow excess water to drain
Not contaminated with damping off disease (see Reusing Pots and Trays, below)
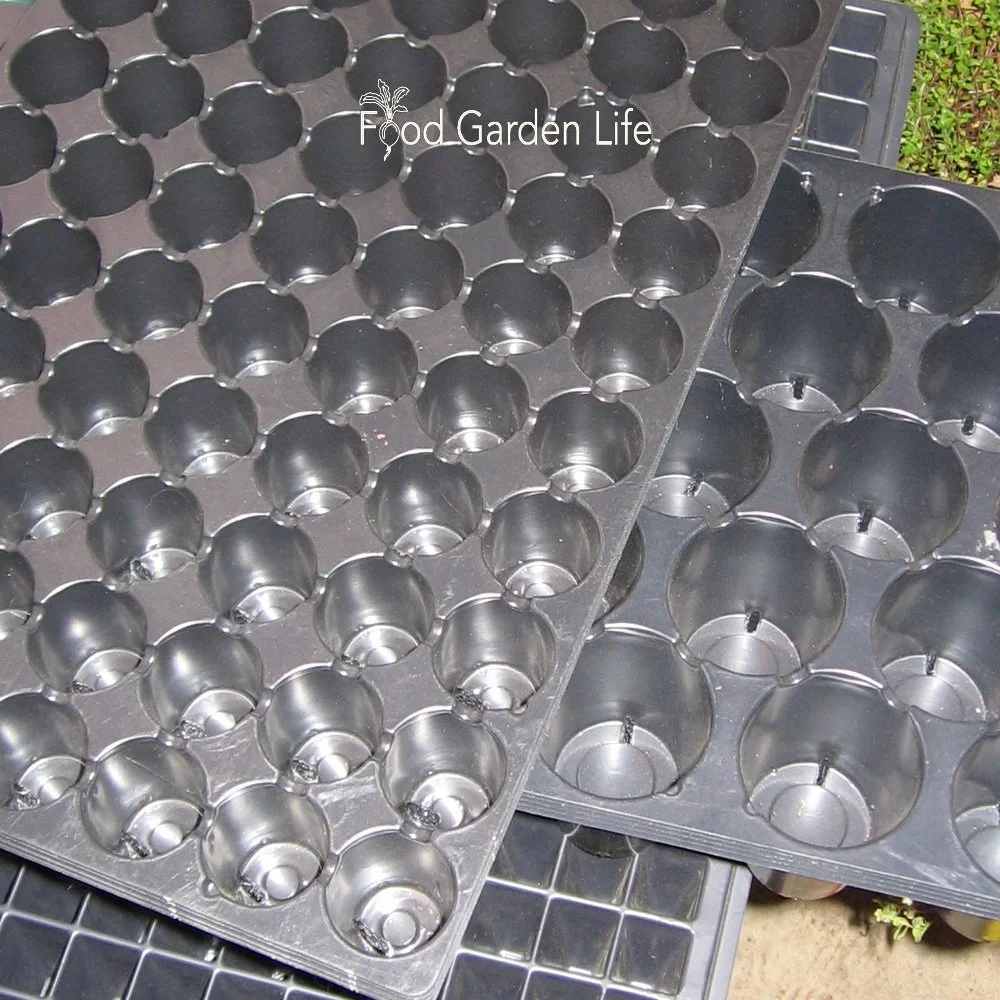
Plug trays for starting seeds indoors. Not necessary, but useful when you grow lots of the same thing.
Container Type and Size
If you’re growing a lot of one type of seed, you might like to have containers that are the same size because it simplifies watering. When my daughter raised hundreds of tomato seedlings, I got her what’s called “plug trays” so she could grow lots of small plants in our small space. They all had the same amount of soil, and dried out at the same speed.
I don’t use the expanding peat pellets. I think they’re gimmicky.
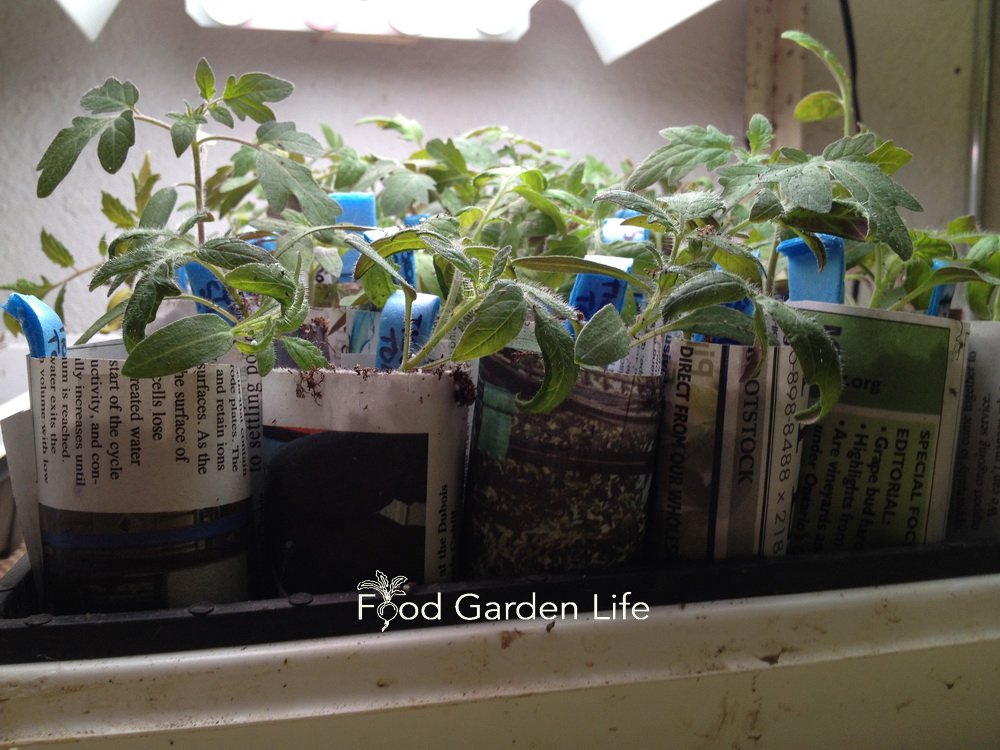
Use What’s in Your Recycling Bin
I am a big fan of scouring the recycling bin for seedling pots. For example:
Yogurt containers
Mandarin orange crates (my favourite for lettuce seedlings)
Tubs for mushrooms
Using a mandarin orange crate to grow tomato seedlings.
Tips when using recycled containers:
The volume of soil in different containers will vary—so water accordingly
Put holes in the container for drainage
Reusing Pots and Trays
If you're reusing pots and trays, it’s a good idea to first sterilize them to prevent damping off disease. That’s because any soil crusted on the container from the previous year can harbour the disease. If you haven’t had damping off disease in the past you might be OK…but personally, I don’t risk it. So I sterilize them.
When damping off disease attacks seedlings, it can wipe out a whole tray in just a day or two. It can be quite devastating.
Cell packs drying after washing and sterilizing to prevent damping off disease on seedlings.
Here’s what I do to sterilize containers:
Soak containers in water
Scrub off any crusted soil
Place them in a solution of 10 parts water with one part bleach
Let them air dry
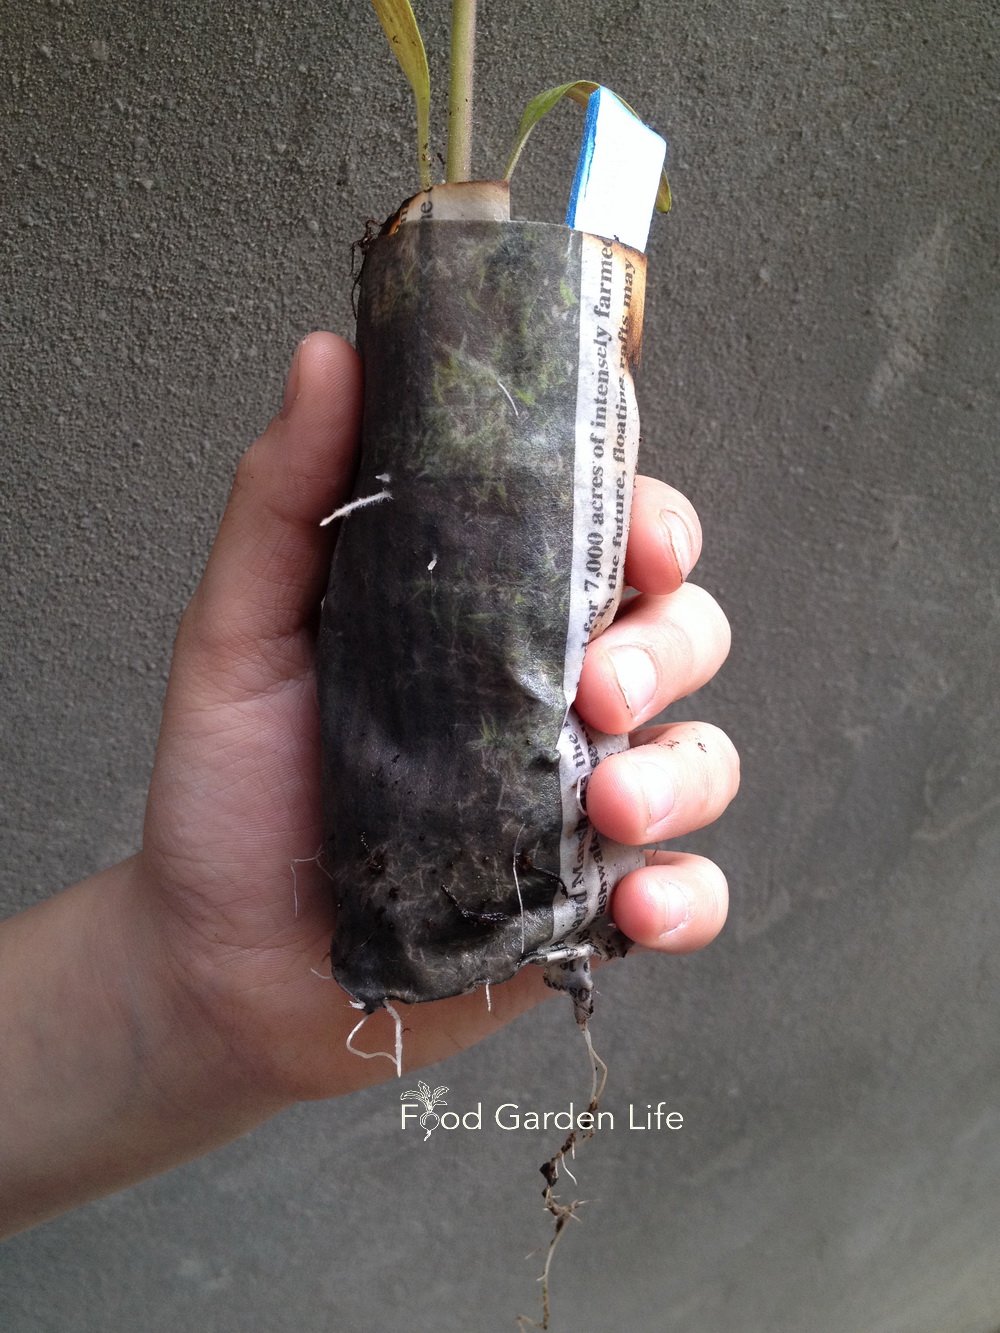
What About Fibre Pots?
There are a few types of fibre-based biodegradable pots. Recently I saw some made from cow dung! Some people make newspaper pots, or reuse toilet paper rolls for seed starting. In principle, you can plant these pots straight into the ground, but there are a couple of caveats.
The pots wick out moisture, away from plant roots…and they can dry out quickly. So watch the soil moisture to make sure that it doesn't get too dry for your seedlings.
Later, when you transplant seedlings in the garden, if the lip of the pot is above the soil level, it'll wick the water away from around the roots, so the soil around the roots can be drier than the garden soil. So tear off the top of the pot—or bury it. That solves the wicking problem.
FAQ – Leggy Seedlings

Pin this post!
Can you fix leggy seedlings? Can leggy seedlings recover? Can you fix stretched seedlings?
You can’t correct leggy seedlings...but if the seedlings aren’t too far gone, you can change the growing conditions so that the seedlings grow thicker stems.
Why are my seedlings flopping over? Why is my plant growing tall and skinny?
It can be too little light, too much heat, excess moisture—or a combination of these.
Can I bury leggy seedlings deeper? Can I fix leggy tomato seedlings?
In many cases, no. First of all, very thin stems can easily be crushed. And most seedlings don’t do well when planted deeper than the level they’re been growing at. Leggy tomato seedlings can be an exception—they do well when planted deeper—but it will depend how long, skinny, and delicate the spindly seedling is. Better to avoid the leggy seedlings in the first place!
Find Out About About Seed Starting in this Podcast
Find This Helpful?
Enjoy not being bombarded by annoying ads?
Appreciate the absence of junky affiliate links for products you don’t need?
It’s because we’re reader supported.
If we’ve helped in your food-gardening journey, we’re glad of support. You can high-five us below. Any amount welcome!
More on Vegetable Seeds
More on Growing Vegetables
Vegetable Gardening Articles and Interviews
For more posts about how to grow vegetables and kitchen garden design, head over to the vegetable gardening home page.
Vegetable Gardening Courses
Want more ideas to make a great kitchen garden? We have great online classes that you can work through at your own pace.
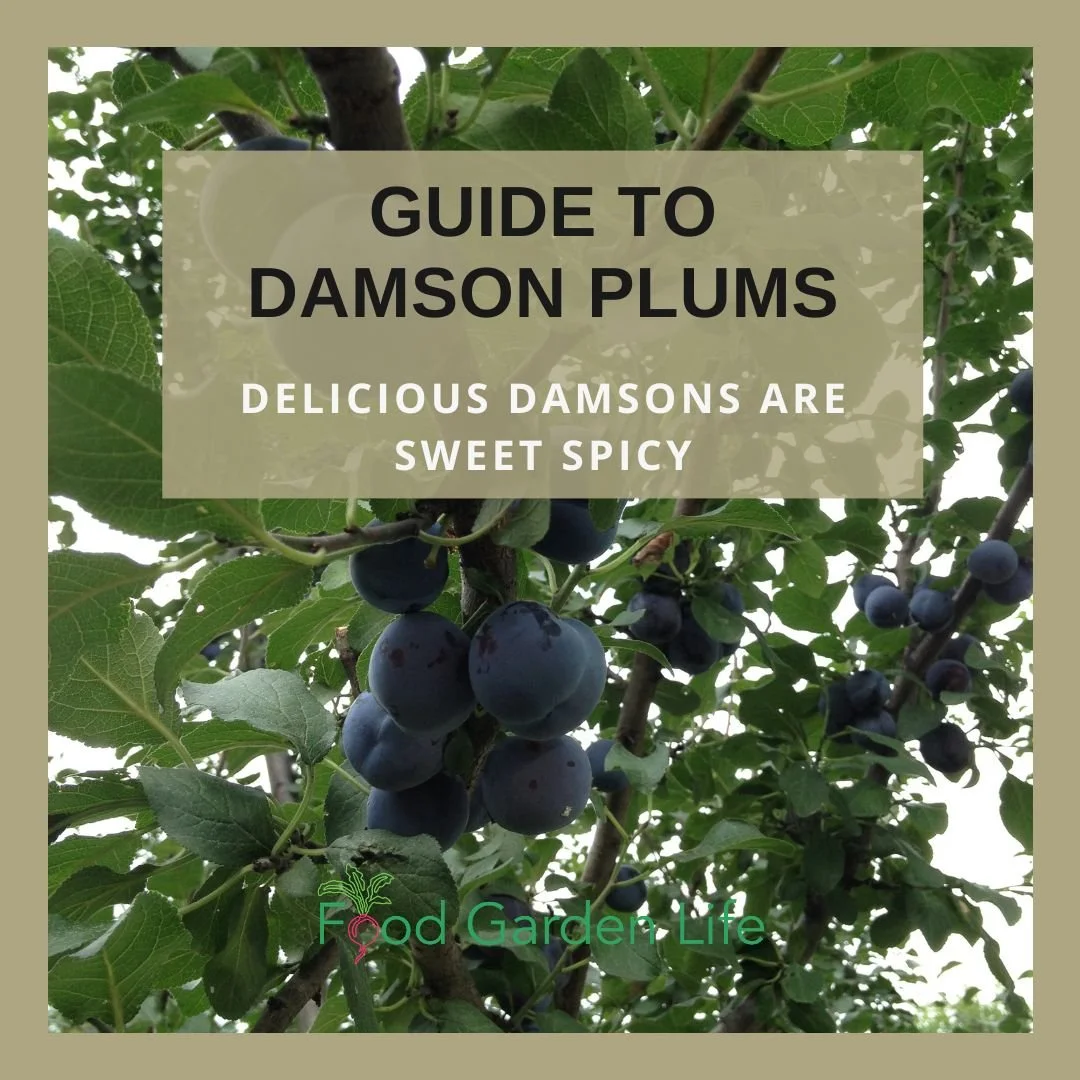
Damson Plums: This Forgotten Fruit Combines Dry, Sweet, Spicy, and Bitter (and it’s a perfect home-garden crop)
Find out how to grow this forgotten fruit that has a rich, complex flavour. It’s a gem in the kitchen, and easy to grow in a home garden.
By Steven Biggs
Disappearing Damsons
I remember when Nana started to ration the jam. The damson jam.
She was running low on her homemade damson jam. And what was left was reserved for damson tarts—one of her specialties.
She couldn’t get damsons any more.
Why the fuss? Because damsons have a special flavour and make marvellous jam. They’re the ultimate plum for cooking, with a rich, complex flavour that combines sweet, spicy, slightly sour, and a touch of bitter.
I was just a kid at the time. Since then, I’ve rarely seen damson fruit or damson trees for sale. Too bad, because it’s a unique fruit that’s well worth a place in a home garden.
But they’re not completely forgotten.
When I drove through the Kamouraska region of Quebec, I took a detour especially to visit Maison de la Prune, a small damson orchard and museum in what was once a major damson production area. I came home with damson syrup, and sweet and savoury jellies.
Keep reading to find out more about this special plum, and how to successfully grow it.
Hear a Damson Expert Explain What’s Special About Damsons
What is a Damson Plum?
Damsons (Prunus insititia) are smaller and not as sweet as their cousin the European plum (Prunus domestica). (Quick plum primer…it’s a big family, including Japanese plums, P. salicina, North American plums, P. americana, and the cherry plum, P. cerasifera.)
A damson is a small, oval-shaped plum. The skin is often a deep blue-purple colour, with yellow flesh, although there are also yellow-skinned varieties. They’re a “clingstone” fruit, meaning that the flesh, which is quite firm, is attached to the stone. Like many fruit in the plum family, the fruit has a waxy “bloom” on it, giving fresh damsons a silvery hue.
Damsons are self-fertile—meaning only one tree is needed to get fruit. They bloom in early spring, with fruit starting to ripen in late summer.
How are Damsons Different From Other Plums?
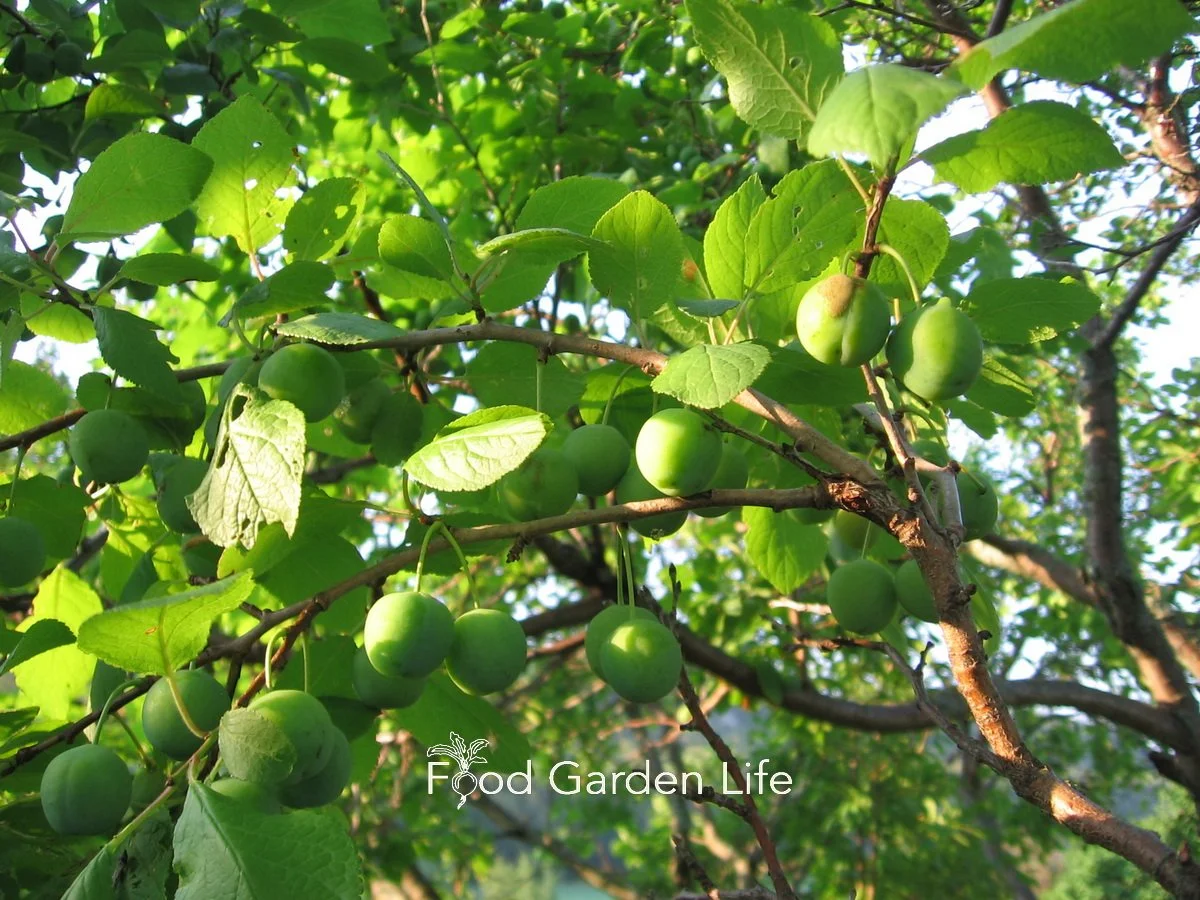
The damson is smaller than the European plum. These damsons will ripen to a purple colour.
When it comes to the plant itself, the trees have a more compact growth than other domestic plums, developing a gnarled shapes as they get older.
The fruit is smaller too, with more stone and less fruit than other domestic plums—up to one third stone. The fruit is also drier than European plums and Japanese plums.
While damsons are sweet, they’re also slightly astringent, giving them a complex flavour and making them superb for cooking. (Perhaps less attractive for fresh eating, though I love them.)
Along with the astringency comes a spiciness and sweetness that sets them apart from domestic plums.
What is a Bullace?
It’s worth noting a couple of other relatives that are sometimes included when talking about damsons. Along with damsons, Prunus insititia includes bullaces, and St. Julian plums.
St. Julian plum is mostly grown as a rootstock for grafting damsons
The round bullace fruit is smaller than damsons, ripening later, and has a less complex flavour
The bullace is different from the sloe (Prunus spinosa) which is bushier. If the sloe is new to you, look up sloe gin. (I know of sloes because my dad had a bottle of sloe gin when I was growing up.)
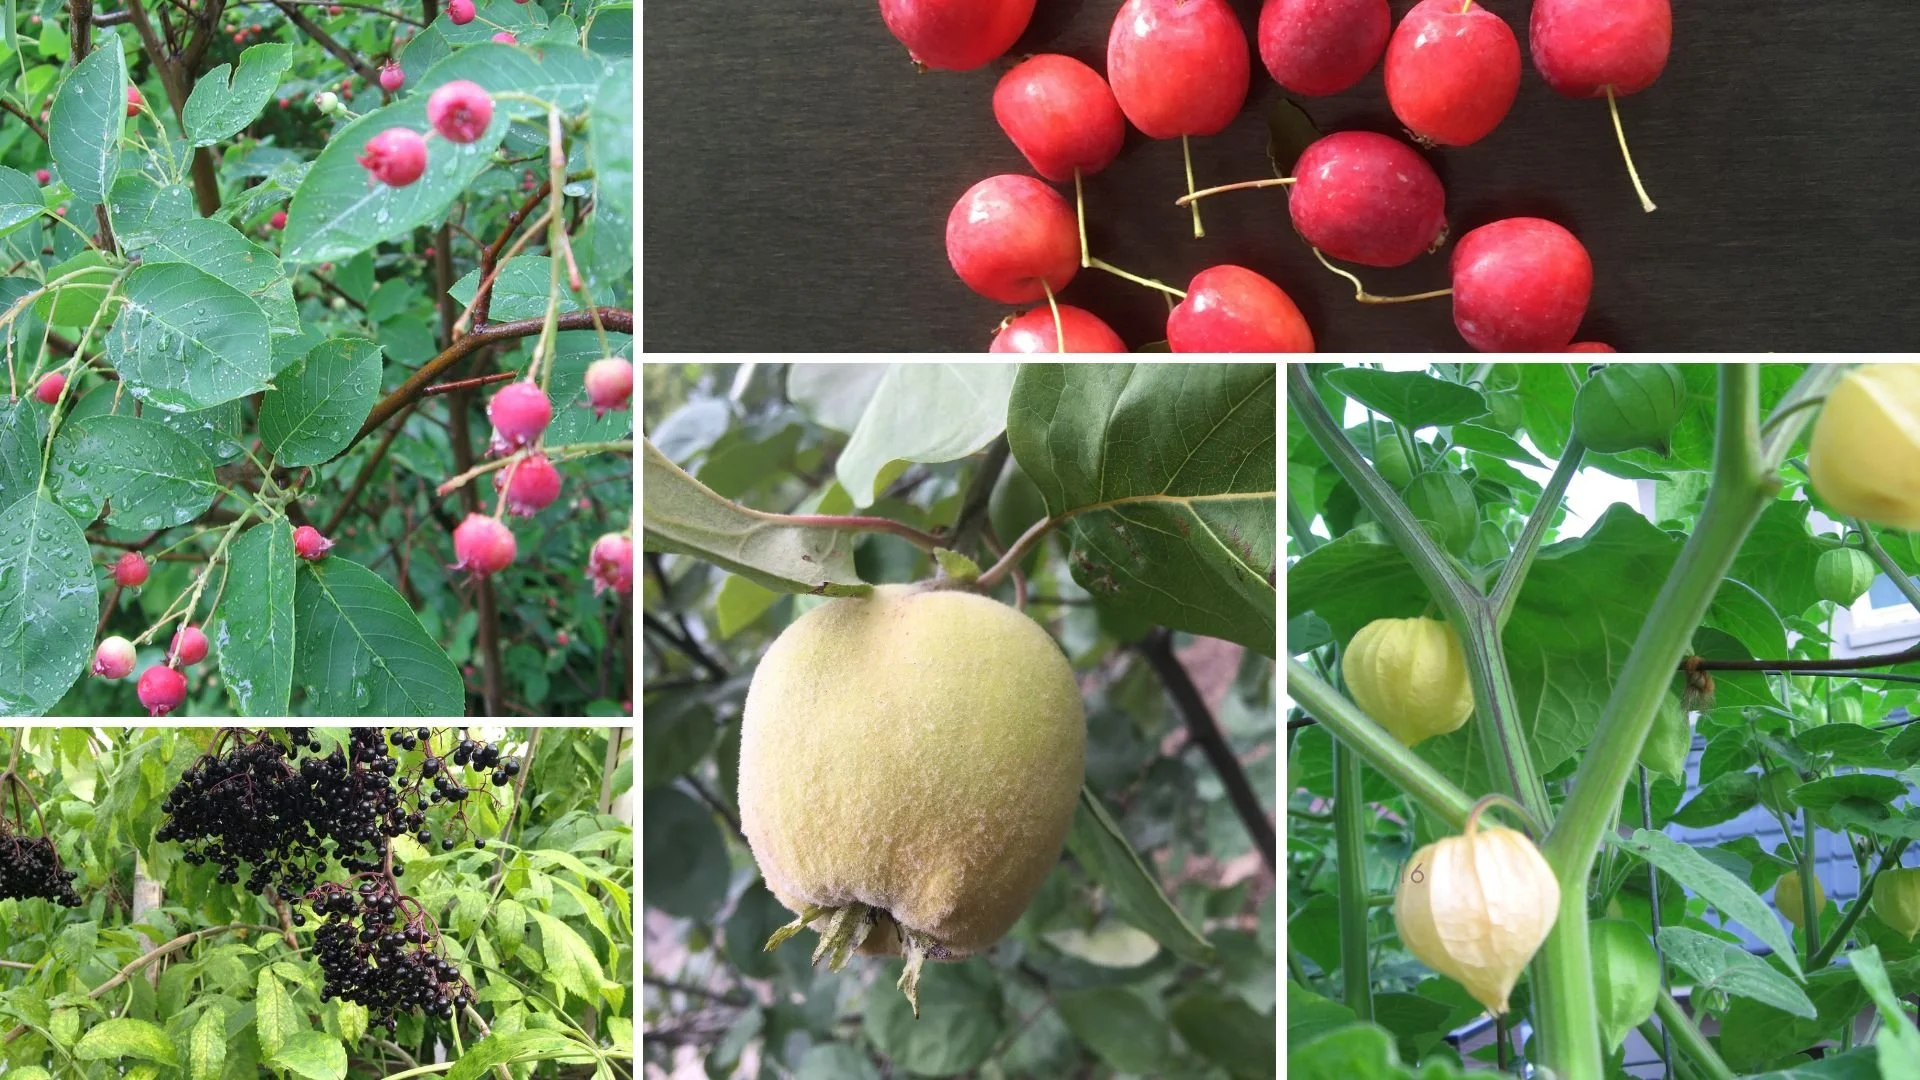
Landscape with Fruit
That’s easy to grow in a home garden!
How to Grow Damsons
Planting Damsons
The first thing to know is that damsons are self-fertile. This means that you can plant one damson tree and get fruit.
Like other fruit that flower early—while there’s still a risk of frost—choose a location where there’s less chance of flowers getting hit by frost. This means:
Avoid low-lying pockets that get heavy frost when other parts of your garden don’t
If you’re in an area with late spring frosts, a north-west-facing slope can be safer than a south-facing slope (it might seem counter-intuitive…but they’ll bloom earlier on a south-facing slope, meaning more chance of frost damage)
Hear a fruit expert talk about site selection in cold climates.
Where to Plant a Damson Tree
Full sun is best for damsons. They tolerate semi-shade if that’s all you have.
Damsons grow in a wide range of soil types. Avoid acidic soils and soils that dry quickly—meaning sandy soils.
Stake newly planted trees for a year to prevent shifting.
Spacing When Planting Damsons
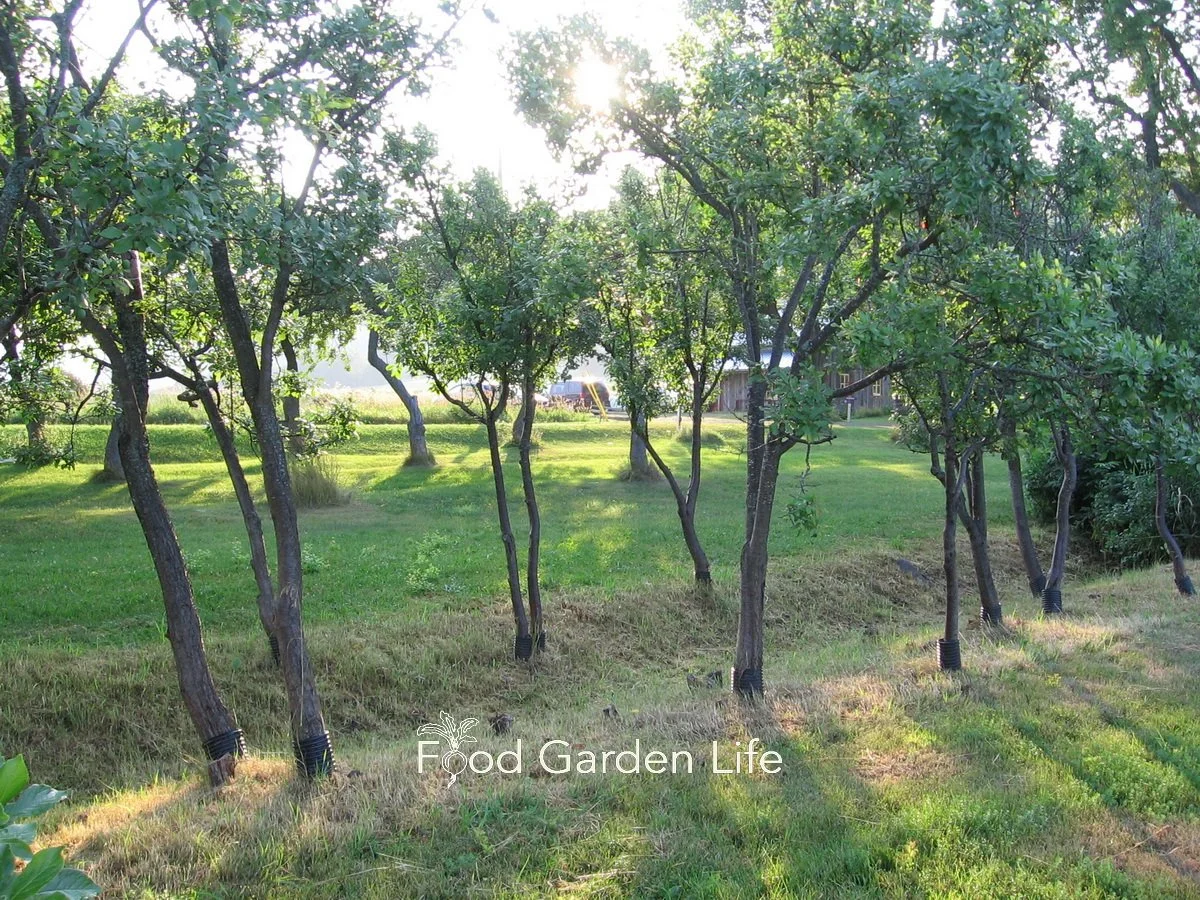
Damsons are a relatively small tree.
Here are a couple of considerations when deciding on spacing between damson trees:
With grafted trees, the tree size and optimal spacing depends on the rootstock
Space between trees allows air flow, which helps reduce disease pressure
In a home garden setting, there are often competing needs for a small space. In that case, you might want to be creative with spacing. For example:
Plant more than one damson tree in a hole – a clump of damsons
How to Care for Damson Plums
Below is more information about how to care for damsons. But to sum it up quickly in case you’re already a fruit grower: Treat damsons as you would other plums.
How to Prune Damson Plum Trees
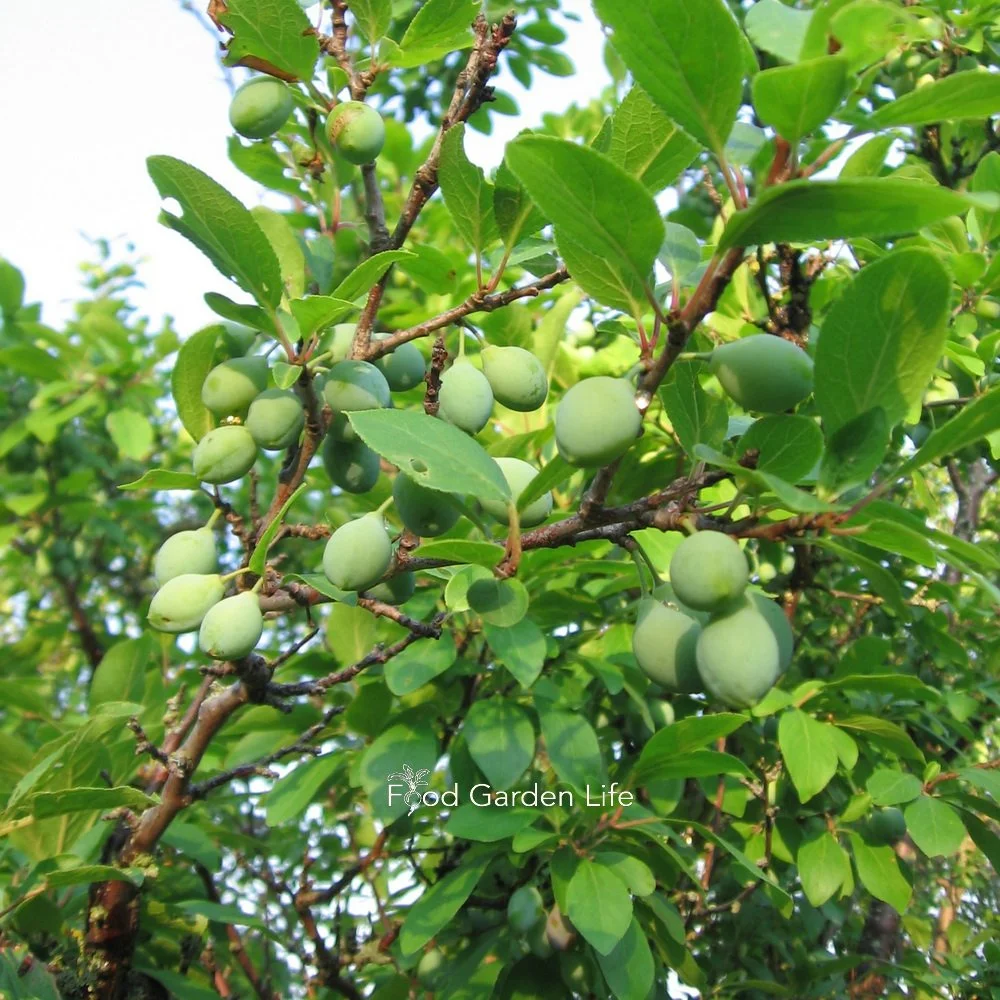
Damson fruit in mid summer. They have a golden-yellow flesh when ripe.
If you’re growing damsons in a hedge, you might take a hands-off approach to pruning.
When you’re growing damsons as separate trees, use pruning to shape the tree into a framework of branches that gives good strength, and allows air circulation and ease of picking.
A tree from a nursery might already have a framework developed. If it’s a young tree, you can develop the framework of branches yourself. Damsons can be formed into central-leader style trees, vase-shaped trees, or into a bush. For a bush, picture a short trunk, with branches coming out above that.
Pruning fruit trees is an entire article unto itself, but here are top tips:
Avoid narrow, v-shaped angles
Don’t make sloppy cuts that leave a nub of branch beyond a bud
Remove crossing branches
Aim to keep the canopy of the tree open, to allow air movement
Like other stone fruit, damsons don’t respond well to attempts to train them into cordons.
Prune in late winter.
Protecting Damson Blossoms from Frost
With a well-chosen site you’re less likely to have frost damage in the spring…but if there is a late frost, and if your damson tree is small enough, a simple cover might protect the blossoms.
Drape the plant with burlap or horticultural fleece. (I’ve even covered tender plants with an old shower curtain!)
Damson Hardiness
Damsons are very cold hardy. There’s no question of hardiness here in my Toronto garden.
I’ve seen Canadian nurseries listing damson varieties hardy into Canadian Plant Hardiness Zone 3, and American nurseries suggesting USDA Zone 5. Here’s a list of nurseries that sell fruit trees.
Consider zones a general guide. Conditions within a zone can vary—and microclimates allow gardeners to push zone boundaries. There can be “frost pockets” in low-lying areas, and moderate areas near large bodies of water.
With grafted plants, hardiness depends on how hardy the top (scion) is—and how hardy the bottom (rootstock) is.
How to Propagate Damson Plums
Damson Seeds and Suckers
In times past, damsons were commercially propagated using seeds and suckers.
Seeds. When grown from seed, many damson varieties “come true,” meaning the new plant is like the parent. If you want to seed-grow damsons, first stratify the seed, and then sow in a pot or directly in the garden.
Suckers. Suckers are the shoots that come from the base of a mature plant, and already have roots. This is an easy way to get started if you know that the tree is not grafted. (If it’s a grafted tree, a sucker might actually be coming from the rootstock.)
Grafting Damsons
Most commercially produced damsons are propagated by grafting.
Under some conditions, damson trees can grow up to 6 metres (20’) tall. But if conditions are not as good—or if trees are grafted onto a rootstock that restricts growth—they’ll be smaller.
This means that it’s good to know how rootstock can affect damson tree size.
Here are common damson rootstock:
Large. Myrobalan B, Brompton
Medium. St Julian A
Small. Pixy, VVA-1
Damson Harvest
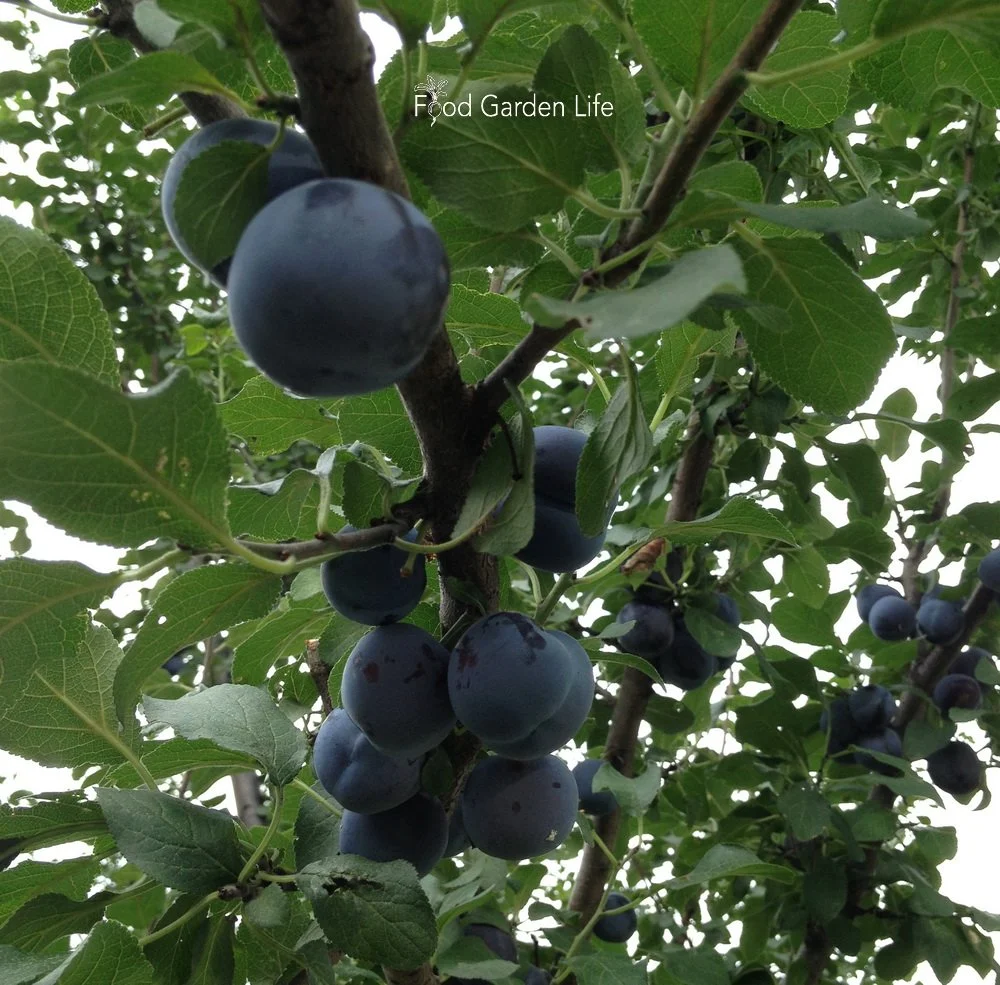
Pick damsons as they develop colour and as the fruit becomes softer to the touch.
Damsons ripen in late summer and early fall.
When are Damson Plums Ripe?
Pick as the damsons become soft to the touch. (You can pick them earlier if making gin.)
Why Damsons Sometimes Fruit Every Second Year
It’s common to have what’s called “alternate bearing,” meaning a large crop one year, and then very little—or nothing—the next. This happens because when a fruit tree carries a heavy crop, energy goes to the ripening of that crop—and flower buds are not formed for the next year.
You can prevent alternate bearing by thinning fruit.
Damson Pests and Diseases
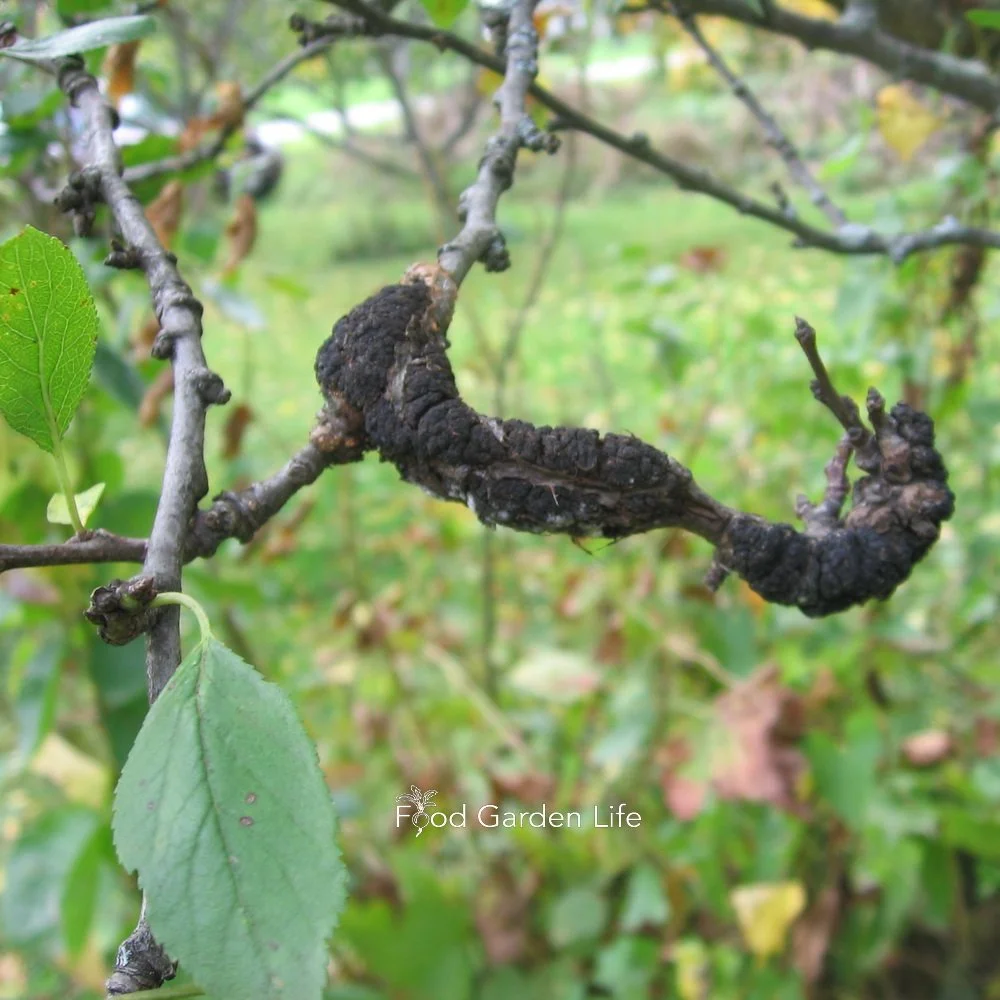
Black knot disease.
Mice and rabbits often gnaw on fruit tree bark over the winter. While damson trees are young, use a spiral tree guard around the trunk for the first few winters to protect the bark from rodents.
Black knot is a fungal disease that affects many plants in the plum family, including damsons. Some damson varieties have more black-knot resistance than others. You can recognize black knot by the black, woody growth encircling a branch. (My kids called it poo on a stick when they were little.)
If you see black knot, prune the affected branch back at least 20 cm (8”) below the knot. Don’t leave the pruned-off branch near your damson trees because the knot provides inoculum for more infection.
Damson Recipes
I started off by telling you about my Nana’s damson plum jam. It was so delicious because of the balance that the damsons give, with the combination of fruitiness, sweetness, spiciness, tartness, and a little bit of astringency. Damsons are excellent for jams, fruit butters, and for making fruit cheese because they contain a lot of pectin.
Because they’re “clingstone,” the fruit is usually separated from the stone after cooking.
There are many more ways to use damsons. You’re more likely to come across these in the UK, where there’s a longer tradition of cooking with them.
Damson chutney
Pickled whole damsons
Damson vinegar
Damson gin
Use them where you would use other tart fruits. And think of using them with savoury dishes—not just sweet. That’s because the combined tartness and astringency work well with rich dishes.
(And if you don’t have the time or inclination to spend a lot of time in the kitchen, stewed damsons are a true delight. When I lived in the UK there were damsons in a nearby hedgerow. I’d stew them, cooking with a bit of water and sugar until soft enough to the damson stones. Then I’d eat them with clotted cream.)
For more recipe ideas, I recommend the book Damsons: An Ancient Fruit in the Modern Kitchen.
Where to Buy a Damson Plum Tree

While you might not see damsons at garden centres, specialist fruit tree nurseries often carry them. If ordering online, look for bare-root trees so shipping costs are lower.
Here’s a list of fruit tree nurseries.
The choice of damson varieties in North America tends to be limited. I’ve most often seen damsons sold as Blue Damson.
(You sometimes see them sold as “Damas Bleu,” as there’s also a long history of damson production in Quebec. If you want to delve into that, here’s a fun book: Les Fruits du Québec: Histoire et traditions des douceurs de la table, by Paul-Louis Martin, who is the proprietor of Maison de la Prune that I mentioned earlier.)
In the UK there is a wider selection of damson varieties. I have a 1926 text that lists Blue Prolific, Bradley’s King, Farleigh Prolific, Quetsche, Rivers’ Early, Shropshire Prune, Merryweather. If you search UK nurseries, you’ll see many of these are still available.
Using Damson Trees in Garden Design
Damsons are good choice for a home garden because they are self-fertile. That means that in a small space, you only need one tree to get fruit.
Here are ideas for using damson trees in garden design.
Edible Landscapes and Food Forests
Damsons work well in edible landscapes with a mixed planting of edibles, and in a food-forest setting. Like many fruit trees, they do best in full sun, but tolerate the sort of partial shade that you can get in an urban edible landscape or on the periphery of a food forest.
Home Orchard or Stand-Alone Specimens
A more traditional planting gives each tree enough space to fully develop. The amount of space needed for well developed, well-spaced damson trees depends on the rootstock.
Hedges and Hedgerows
In my own garden, my damsons are part of a fruiting hedge. There are damson and other plum trees in a long row, underplanted with currants and gooseberries. At ground level are strawberries. It’s still rather neat and tidy, but damsons could work well in a less formal hedgerow or windbreak too, mixed with other small fruit.
Here’s a chat with a small fruit specialist to get ideas for less common fruit for a hedge.
FAQ: Damson Plums
How long should I stake a damson tree?
Pin this post!
Remove stakes after the damson tree is established and has rooted into the surrounding soil, usually after one season.
Why are so many fruit dropping off in early summer?
There’s a natural fruit drop in early summer. As long as there are lots of fruit remaining on the tree, everything is probably OK.
Do damson trees fruit every year?
Not always. If there’s a heavy crop one year, there might not be a crop the following year. This is called alternate bearing. You can thin fruit to reduce alternate bearing.
What is the botanical name for damsons? Why am I seeing two different botanical names for damsons?
Good question. You might find damsons as Prunus insititia or as Prunus domestica subsp. insititia. That’s because plant taxonomists sometimes rename things.
Find This Helpful?
Enjoy not being bombarded by annoying ads?
Appreciate the absence of junky affiliate links for products you don’t need?
It’s because we’re reader supported.
If we’ve helped in your food-gardening journey, we’re glad of support. You can high-five us below. Any amount welcome!
More on Fruit Crops
Articles: Grow Fruit
Visit the Grow Fruit home page for more articles about growing fruit.
Here are a few popular articles:
Courses: Grow Fruit
Here are self-paced online courses to help you grow fruit in your home garden.

Home Garden Consultation
Book a virtual consultation so we can talk about your situation, your challenges, and your opportunities and come up with ideas for your edible landscape or food garden.
We can dig into techniques, suitable plants, and how to pick projects that fit your available time.
Fig Leaf Panna Cotta Recipe
Looking for an easy-to-make, unusual dessert? This is a fig-leaf panna cotta recipe that will have your guests asking for seconds!
By Steven Biggs
An Easy-to-Make Fig-Leaf Recipe

My guests nodded without hesitation when I offered seconds. “Refreshing!” they declared.
Cool, creamy, refreshing fig-leaf panna cotta is a nice way to finish a meal.
(And leftovers are pretty nice for breakfast!)
Cooking with Fig Leaves?
I first learned about cooking with fig leaves when Toronto Chef David Salt got in touch asking for fig leaves. It was October. “Sure,” I said, “Take as many as you’d like, they’ll soon drop.”
Later that fall, David invited me to his restaurant to sample fig-leaf grappa, fig-leaf ice cream, and fig-leaf cheese. (Click here to read about those tasty creations.)
The idea when using fig leaves in cooking is to extract the flavour of the leaves, and then remove them. They’re pretty fibrous, fine to eat if you’re a goat. If you’ve been around figs trees on a warm day and basked in the sweet smell, that’s the flavour we’re pulling from the leaves.

To me the flavour of fig leaves is somewhere between coconut and toasted almond, but with a note of green.
To me the flavour of fig leaves is somewhere between coconut and toasted almond, but with a note of green.
In her book Dandelion & Quince: Exploring the Wide World of Unusual Vegetables, Fruits, and Herbs, author Michelle McKenzie describes flavours of coconut, pear, and vanilla. (She has other fig-leaf recipes too.)
So is a fig leaf a herb? A veg? I’ll leave you to mull that over.
What’s Panna Cotta?
Let’s back up in case panna cotta is new to you. It was to me.
My family culinary tradition includes custard, where sweetened cream is thickened with egg.
In a panna cotta, sweetened cream is thickened using gelatine.
Panna cotta means cooked cream in Italian—so think of it as a custard set with gelatine instead of eggs.
And here’s something interesting: Fig sap causes milk to coagulate, so in this recipe there are two things at play to give you a thick dessert: The effect of the fig sap, and the gelatine.
Where to Get Fig Leaves
If you grow figs, you’re set. If you don’t grow figs, don’t bother to look at the supermarket—you won’t find them. Instead, find a fig grower in your area.
There are more home fig growers around than you might expect, even in cold places. (If you’re looking for fig growers, here’s a fun chat with Toronto Joe on the ourfigs.com about the online fig community, which could be a good way to find fig growers.)
Getting Flavour from Fig Leaves
When freezing fig leaves, I put them in a stack and then slide that into a resealable freezer bag.
Time is the key to pulling out flavour from the fig leaves. That usually means soaking leaves for a day or two in cream (fat soaks up the flavour).
But if you want to get out the flavour more quickly, use frozen fig leaves. I discovered this when I froze fig leaves for use over the winter. Freezing breaks down the leaf, so the flavour releases much more quickly.
When freezing fig leaves, I put them in a stack and then slide that into a resealable freezer bag. This way it’s easy to remove a few at a time.
Serving ideas for Panna Cotta
Ramekins are a common way to serve puddings, custards, and panna cotta.
I’ve also served fig-leaf panna cotta in mason jars. And one time I used some of the tea cups that my wife Shelley treasures, tea cups that were her grandmother’s. We don’t serve high tea…so it’s nice to be able to use them for something.
This is an easy-to-make fig-leaf panna cotta recipe.

Ramekins are a common way to serve puddings, custards, and panna cotta. I’ve also served fig-leaf panna cotta in mason jars.
Top Tip for Panna Cotta
Give yourself at least 6 hours for the gelatine to set. If you’re serving panna cotta for supper, make it first thing in the day – or, even better, the day before.
Once it’s made, cover and refrigerate until you serve it.
FAQ Fig-Leaf Recipes
Can you make fig-leaf panna cotta without sugar?
I like the sweetness…so I’m not sure why you’d do that. But if you’re on a low-sugar diet, consider a sugar substitute for sweetness. I once had guests on reduced-sugar diets, so I used no-sugar, low-calorie monk-fruit sweetener and it turned out fine.
What about fig leaf custard?
Yes, you can make custard with a fig-leaf flavour too. Just steep the fig leaves in the milk or cream for a day or two as you would with fig leaf panna cotta.
Fig Leaf Panna Cotta Recipe
I use frozen fig leaves for this recipe because it’s faster. That way I don’t have a big bowl of cream with fig leaves cluttering up my fridge for a couple of days.
Ingredients
8 fig leaves, frozen beforehand
6 cups of heavy cream or whipping cream
2 cups whole milk
2/3 cup granulated sugar
¼ tsp. salt
2 tbsp. unflavoured gelatine powder
Directions
Soak frozen fig leaves in cream for 2-3 hours (or, if using fresh fig leaves, for 1-2 days – refrigerated)
Remove fig leaves and discard (they’re for the flavour…you don’t eat them)
In a small bowl or cup, sprinkle gelatine over 1 cup of milk and stir to dissolve the gelatine
Put cream, salt, sugar, and the other cup of milk into a saucepan
Heat the saucepan on low until steaming (I never rush heating milk or cream because I’ve burnt them too many times…)
Remove saucepan from heat and stir in the milk-gelatine mixture
Pour into ramekins and refrigerate, covered, until set (usually 4-6 hours)
Hear Chef David Salt Talk About Fig Leaves
Find This Helpful?
Enjoy not being bombarded by annoying ads?
Appreciate the absence of junky affiliate links for products you don’t need?
It’s because we’re reader supported.
If we’ve helped in your food-gardening journey, we’re glad of support. You can high-five us below. Any amount welcome!
Looking for More Garden-to-Table Cooking Ideas?
More on How to Grow Figs
More Fig Articles
Head back to the fig home page to search for fig articles by topic.
Fig Books

Fig Course
Fig Masterclass
The self-paced online fig masterclass gives you everything you need to know to grow and harvest your own figs in a cold climate!
(We also run it live once a year. If you’re interested in knowing when we next run the live online fig “camp” I’ll announce it in my newsletter. Hop on the newsletter list here.)
Vegetable Seed Guide: When to Start Seeds Indoors
Find out when to start vegetable seeds indoors.
By Steven Biggs
When to Plant Vegetables
Not sure when to start planting seeds indoors?
If you time planting well, your seedlings will be big enough to survive transplanting into the garden.
But don’t start seeds indoors too early: Earlier planting and bigger seedlings is not always better.
That’s because a seedling that’s stuck in a pot for too long, waiting to go into the garden, gets stressed. And sometimes stressed transplants don’t bounce back, even once you plant them into the garden.
(Late in the planting season big box stores often have discounted transplants: wilted, root-bound cauliflower, cucumber, and chard that have simply run out of steam…don’t be tempted!)
If you’re wondering when to start seedlings indoors, keep reading. This guide tells you when to sow seeds—and how to know when to sow seeds.
Why Start Seedlings Indoors
Start seedlings indoors to get a jump start on the season and to protect them from weather and pests.
There are two main reasons to start seeds indoors.
In cold climates, season length limits harvests—and starting seeds indoors give a longer window of growth for the crop.
Indoors, we can control conditions and prevent pest damage, giving small seedlings a chance to get started at a suitable temperature, without getting mown down by bugs.
When to Start Seeds Indoors
Luckily, vegetable seeds don’t all have to be planted at the same time. You can spread out seed sowing from mid winter through spring—when you start sowing some seeds directly in the garden.
The guidepost for choosing when to start planting seeds indoors is something called the average last frost date—or simply “last frost date.” This is the average date of the last spring frost in your area. (It’s an average, so some years there is a frost following this date.)
If you don’t know your average last frost date, a good place to start is by asking local gardeners, or checking with local seed vendors.
Work Backwards from the Average Last Frost Date
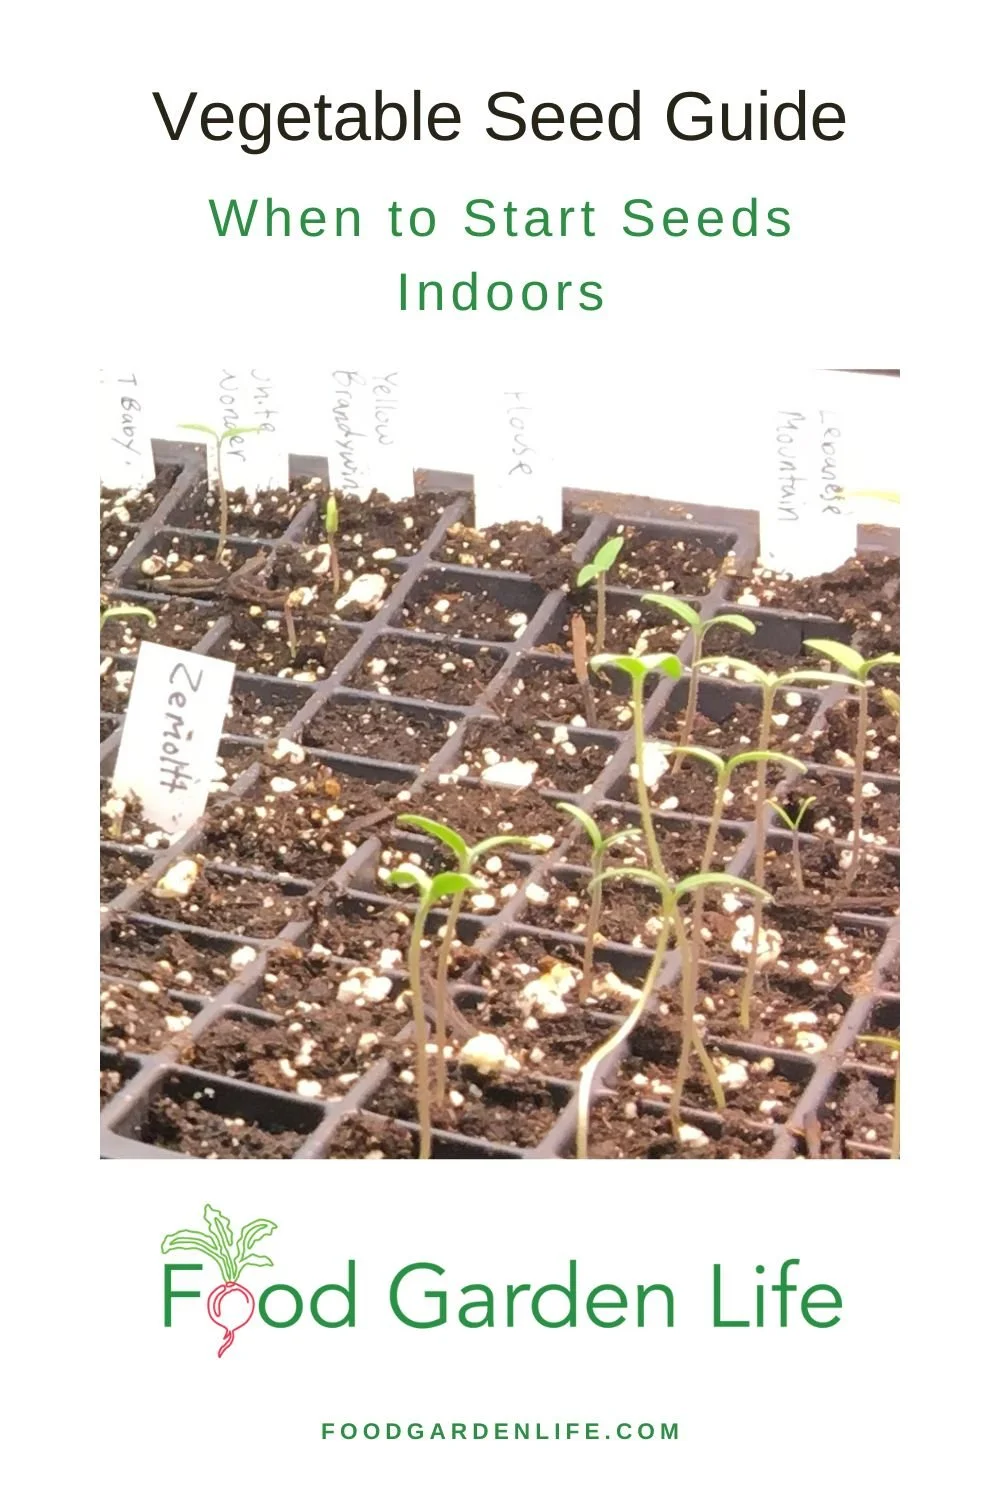
Pin this post!
Once you have your last frost date, you just work backwards to get the sowing date for all of your different vegetable seeds.
It’s your guidepost.
Workback: When to Plant Vegetables
Below is how many weeks before the last frost date I sow my vegetable seeds.
Keep in mind that none of this is cast in stone. You have a window of time for seed sowing. It doesn’t have to happen in one specific week.
That means that if you miss the mark with your celery seeds, and forget to sow them at 10 weeks, don’t sweat it. Sow them at 9 weeks, and your celery transplants might just be a bit smaller when you put them into the garden.
This list is a work in progress. If you have a favourite vegetable crop that’s not on here, e-mail me.
10 Weeks Before Last Spring Frost
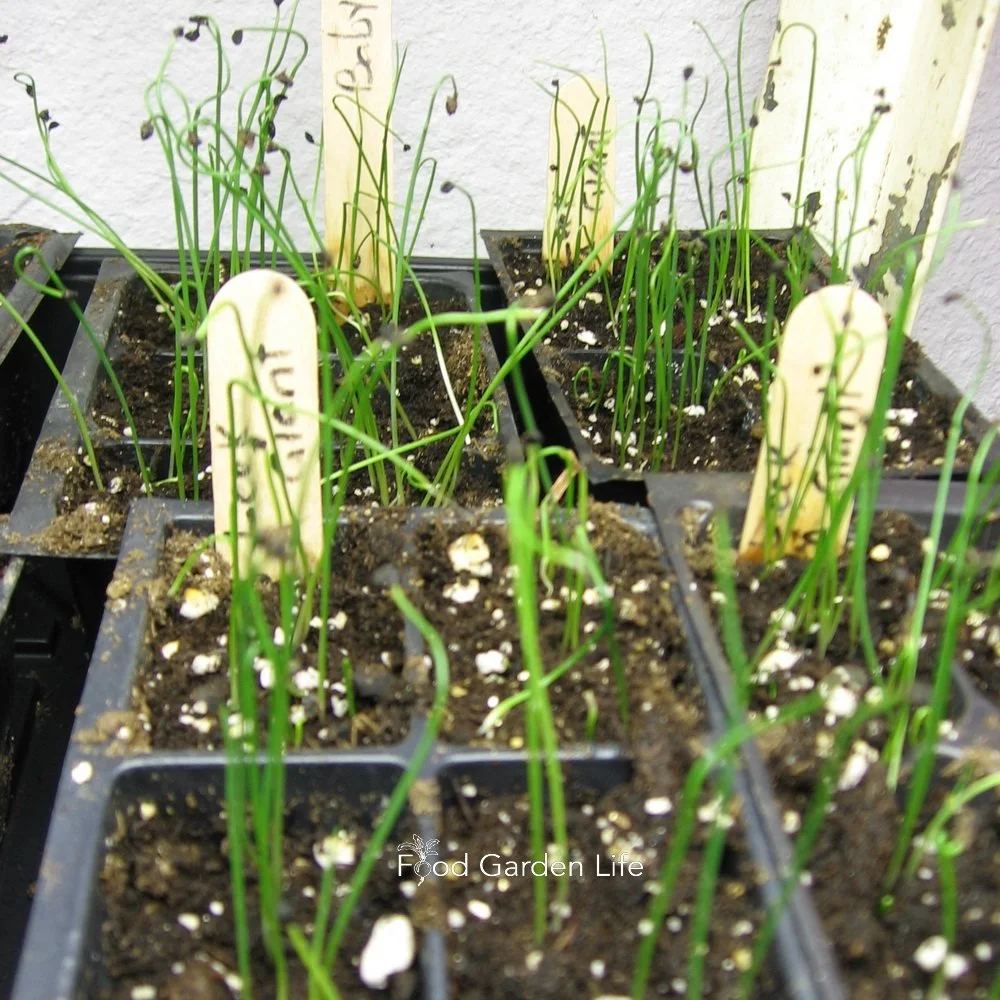
Leek seed are some of the first seeds that I plant indoors, 10 weeks before the last frost date in the spring.
Indoors
These are the first vegetable seeds that I start indoors, under lights.
celery, eggplant, leek, onion, pepper, parsley
8 Weeks Before Last Spring Frost
Indoors
tomato
Find out how to grow tomato plants from seed.
7 Weeks Before Last Spring Frost
Indoors
more tomatoes (we like our tomatoes here in the Biggs household!)
6 Weeks Before Last Spring Frost
Indoors
lettuce, cabbage family (broccoli, cauliflower, Brussels sprouts, kohlrabi, kale)
Direct-Seed in the Garden
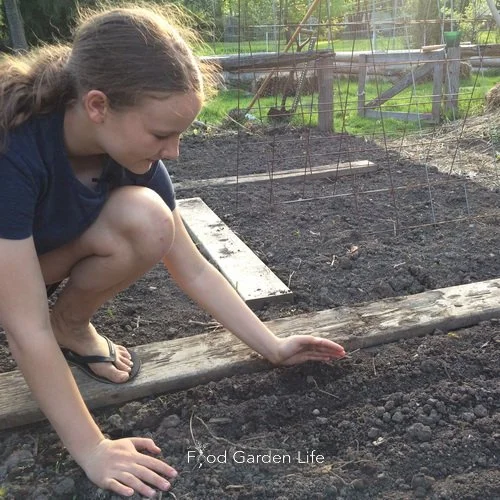
Direct-seeding carrot seeds in the garden 6 weeks before the last frost date.
This is also when I start to direct-seed some cold-tolerant vegetable crops in the garden. These include:
broad bean, carrot, pea, spinach, lettuce, turnip, dill, parsley
Plant or Transplant in the Garden
plant onion sets (small, pre-grown onion bulbs), and transplant onion seedlings
4 Weeks Before Last Spring Frost
Indoors
melon, basil, cucumber, squash, pumpkin
Direct-Seed in the Garden
radish, beet, chard, more lettuce
Plant or Transplant in the Garden
cabbage family seedlings
seed potatoes
2 Weeks Before Last Spring Frost
Direct-Seed in the Garden
corn, cheater beans*
*With beans, we usually wait until the soil is warm and there’s no further risk of frost. That’s because bean seeds can rot in cold, wet soil—and if young bean plants get hit by frost, they’ll die. But some years are warmer than others, and if it seems warm, I like to cheat and get in an early row of “cheater beans.” If they do well, I get beans sooner. (If they get nipped by frost, no big loss; I’ll just replant.)
Plant or Transplant in the Garden
lettuce
gladiolus bulbs (I know…they’re not a veggie, but I like to grow this cut flower in my veggie garden, reminds me of Grandma Q)
The Week of the Last Spring Frost
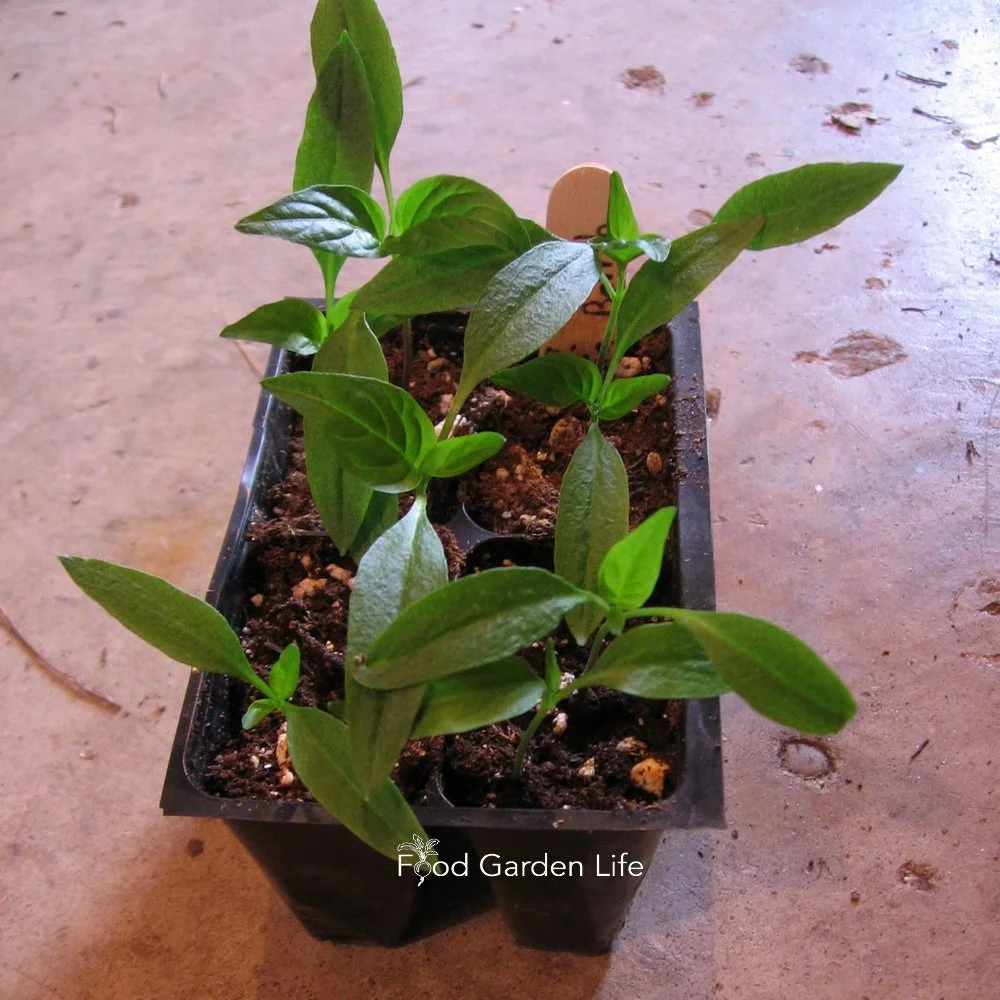
Wait until 1-2 weeks after the last frost date before transplanting pepper seedlings into the garden. They HATE the cold!
Direct-Seed in the Garden
beans, cauliflower, cucumber, squash
Transplant in the Garden
tomato (some people plant tomatoes a week or two after the last frost date…I’m impatient, so I plant them, but protect them as needed)
1-2 Weeks Following the Last Spring Frost
Direct-Seed in the Garden
Now it’s time to direct seed the cold-hating crops!
lima bean, edamame, melon, basil
Plant or Transplant in the Garden
Make sure the temperature will be over 10°C at night
celery, melon, pepper, eggplant
sweet potato slips
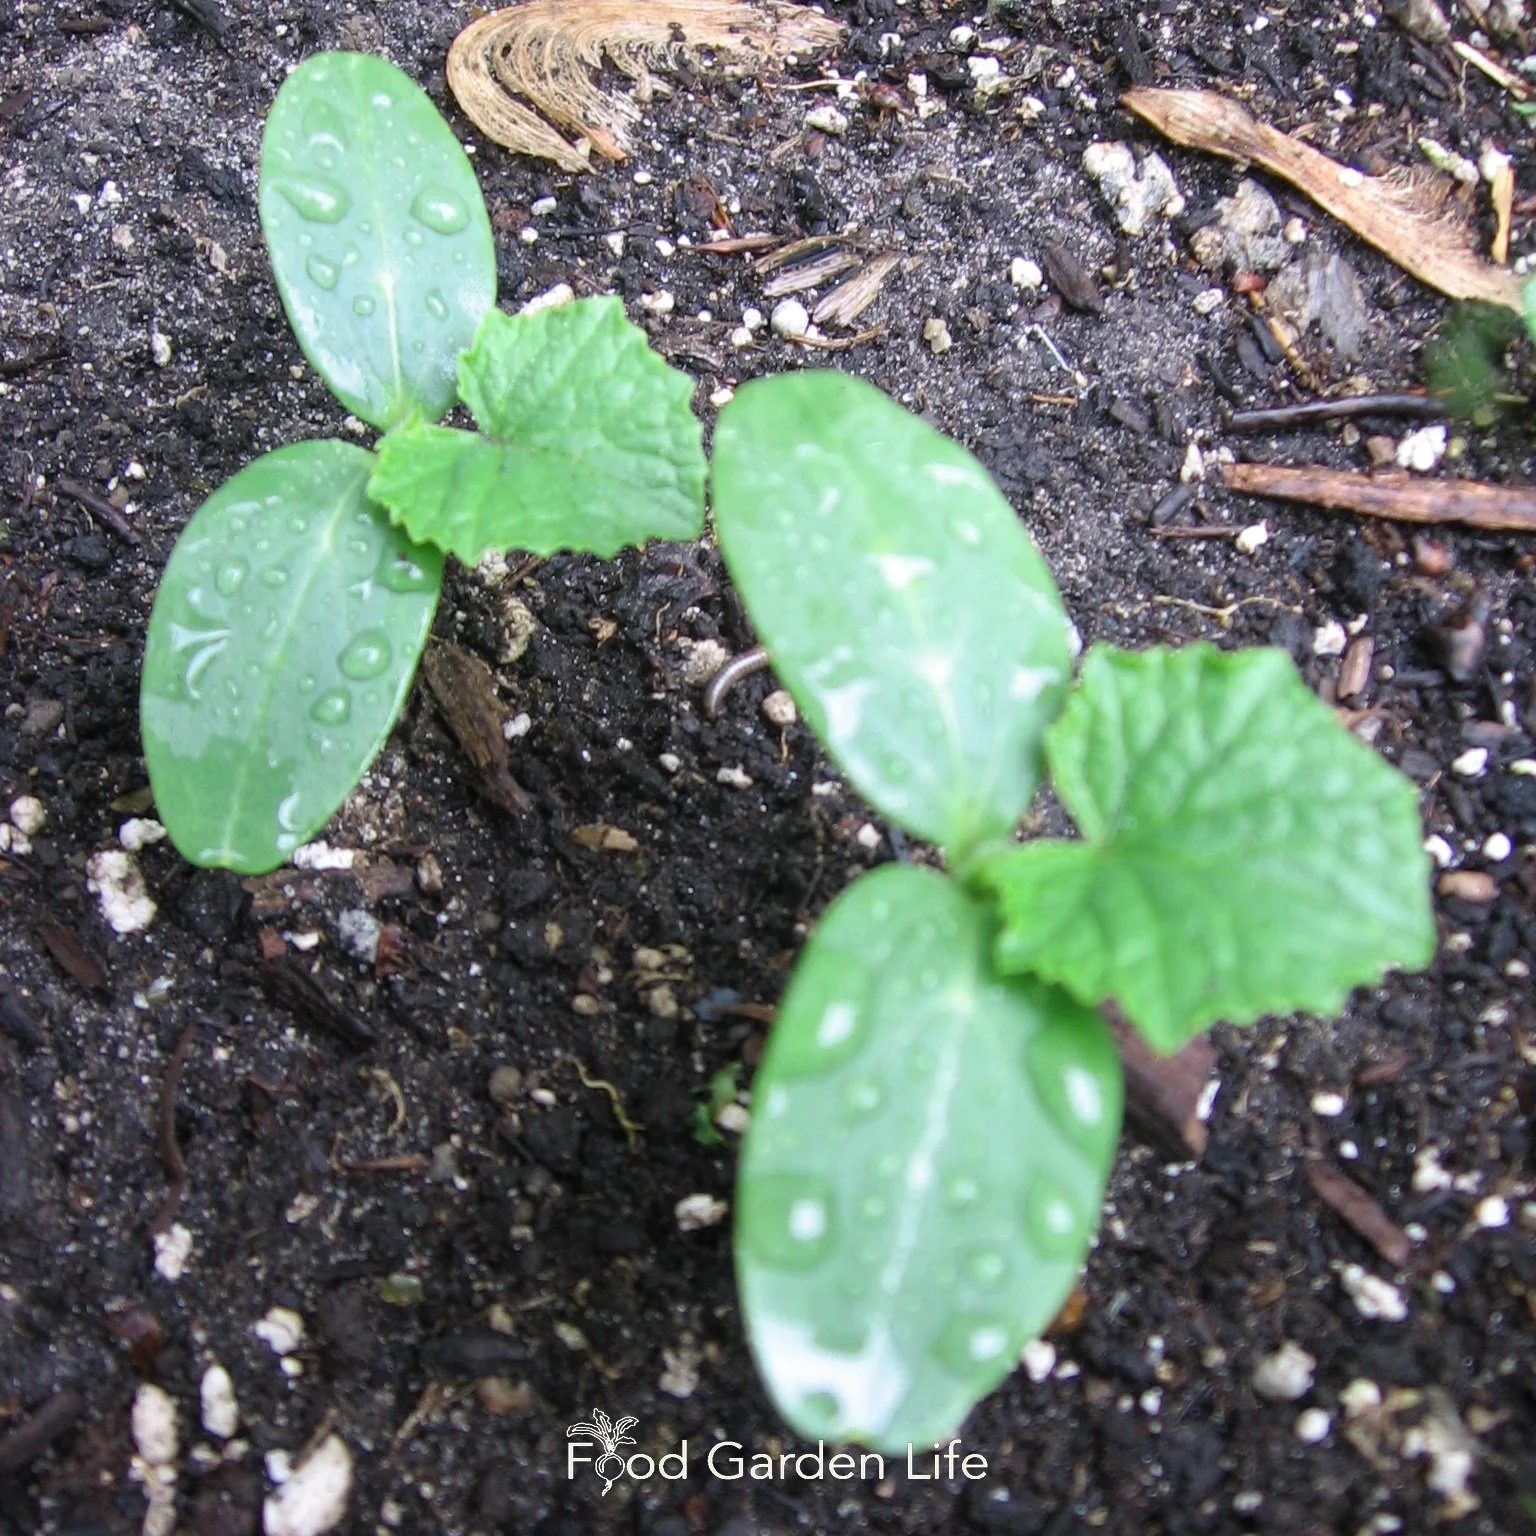
There are some crops that I start indoors, and also sow directly in the garden later. These cucumbers are sown directly in the garden.
You might notice that some crops, such as melon and basil, are in my list above twice: seeded indoors, and then directly sown outdoors. That’s because you can do it both ways, and having the same crop in two stages of development can give you a longer harvest window.
Make Successive Plantings
Don’t forget that after the initial planting of many of these crops, you can make successive plantings so that you have an ongoing harvest. That means after your first sowing of beet seeds, make more, at two-week intervals. Same with carrots, and leafy greens.
How to Stay Organized
If you’ve looked at my planting dates above, you might be wondering if there’s a simple way to stay organized.
There is!
I sort my seed packets by starting date. I’m a visual person—so no spreadsheets for me!
Seed packets organized by planting date, so that I don’t forget to plant anything!
I simply make stacks of seed packets, organized by when they should be planted. Then, I mark my calendar for the various seed-starting dates—flagging 10 weeks, 8 weeks, 6 weeks, etc.
When the given week rolls around, I grab the seed packets for that week.
More on Vegetable Seeds
Find This Helpful?
Enjoy not being bombarded by annoying ads?
Appreciate the absence of junky affiliate links for products you don’t need?
It’s because we’re reader supported.
If we’ve helped in your food-gardening journey, we’re glad of support. You can high-five us below. Any amount welcome!
More on Growing Vegetables
Vegetable Gardening Articles
Vegetable Gardening Courses
Grow Microgreens at Home for Easy-to-Grow Salad Greens all Year
How to grow microgreens indoors. The setup is simple. The materials are easy to get. There’s no need for fancy lights or equipment.
By Steven Biggs
Growing Microgreens at Home is Easy
Pea shoots grown at home: All you need is a handful of dried peas, a pie plate, potting soil, and a windowsill.
On a recent trip to the grocery store I noticed small containers of pea microgreens. Gulp…a whopping $4.99.
The same amount of pea microgreens grown at home takes only a handful of dried peas, a pie plate, potting soil, and a windowsill.
Growing microgreens costs pennies—and it’s easy.
The setup is very simple. The materials are easy to get. There’s no need for fancy lights or equipment. And you can grow microgreens indoors any time of year.
Keep reading and I’ll tell you how to grow your own microgreens.
What are Microgreens?
Microgreens are immature plants. They’re often vegetable or herb plants. There are a few other fun ones, like sunflower and corn (deliciously sweet!)
They’re harvested while the plants are small and the stems still tender. Harvesting means cutting off the tops. Seems brutal, but it’s a short-term crop.
Why Grow Microgreens?
They’re easy to grow, quick to mature, and inexpensive: A perfect indoor crop for home gardeners.
I have a big garden, with lots to harvest into the fall and early winter. But microgreens are my go-to green crop for winter. When I want a green salad mid-winter, instead of lettuce or other leafy greens, I chop up microgreens.
If you’re already a microgreen connoisseur, another reason to grow microgreens at home is that you can grow microgreen crops you won’t find at the grocery store.
Grow microgreens with different tastes:
Spicy (e.g. radish)
Sweet (e.g. pea)
Bitter (e.g. lentil)
Nutty (e.g. sunflower)
A colourful tray of fresh microgreens.
And microgreens with different colours:
Light green
Dark green
Red
Purple
Crops for Home Microgreens
There are many different plants suited to a crop of microgreens, including vegetables, herbs, flowers—and others, like some common field crops!
Before you grow something into a microgreen, make sure it it’s edible. I’ve listed many microgreen crops below. If in doubt, see what seed vendors sell for microgreens.
Vegetable Seeds for Microgreens
Here are vegetables that are commonly grown as microgreens:
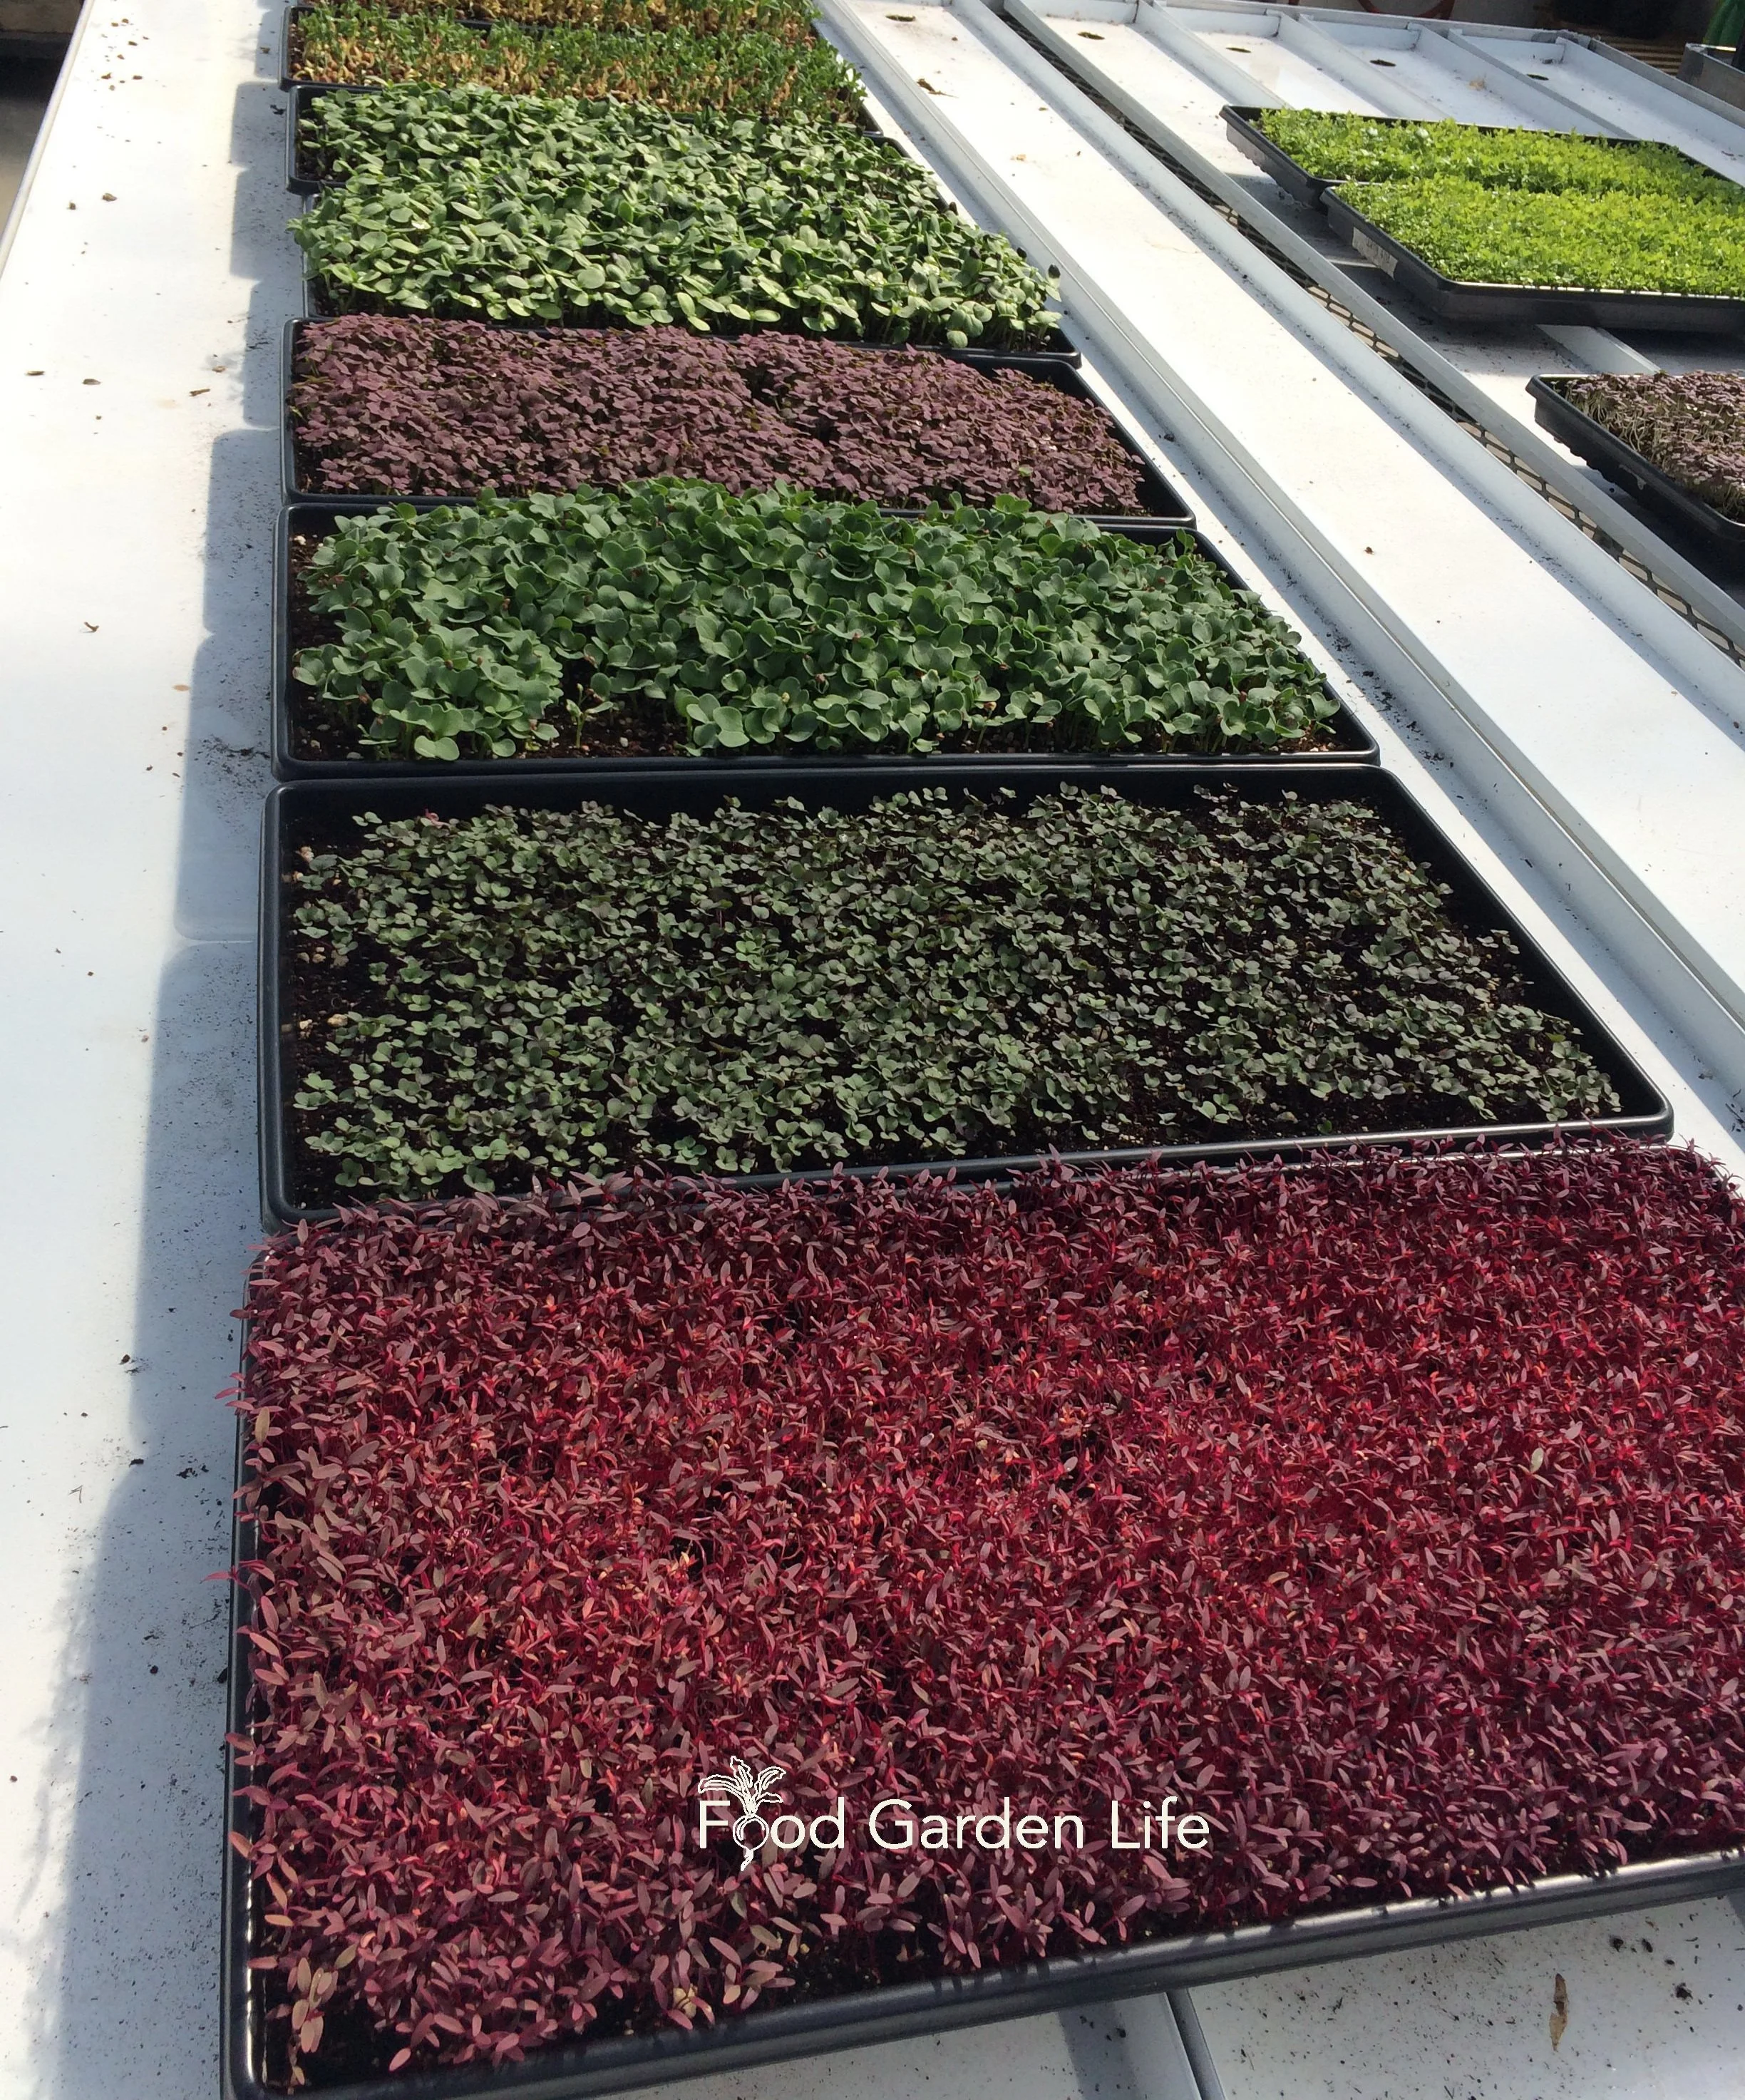
Grow microgreens from many different types of seed, giving you different tastes, textures, and colours.
amaranth, arugula, beet, broccoli, cabbage, carrot, chard, cress, dandelion, kale, kohlrabi, mizuna, mustard, onion, orach, pac choi, pea, radish, tatsoi, watercress
Herb Seeds for Microgreens
Here are herbs that are commonly grown as microgreens:
basil, cilantro, dill, fennel, lemon balm, parsley, shiso, sorrel
Flower Seeds for Microgreens
Here are flowers that are grown as microgreens:
borage, celosia, marigold, sunflower
Field Crop Seeds for Microgreens
Here are field crops that can be grown as microgreens:
alfalfa, barley, clover, chickpea, corn, lentil, quinoa, wheat
Microgreen Seed Mixes
There are also seed mixes with more than one type of microgreen seed, giving a blend of taste and colour.
My favourite is pea microgreens—a.k.a. pea shoots. They’re sweet, crunchy, and easy to grow. I also love sunflower microgreens for the delicious nutty flavour. (The husk of the sunflower seed is easy to remove as the sunflower microgreens get bigger.)
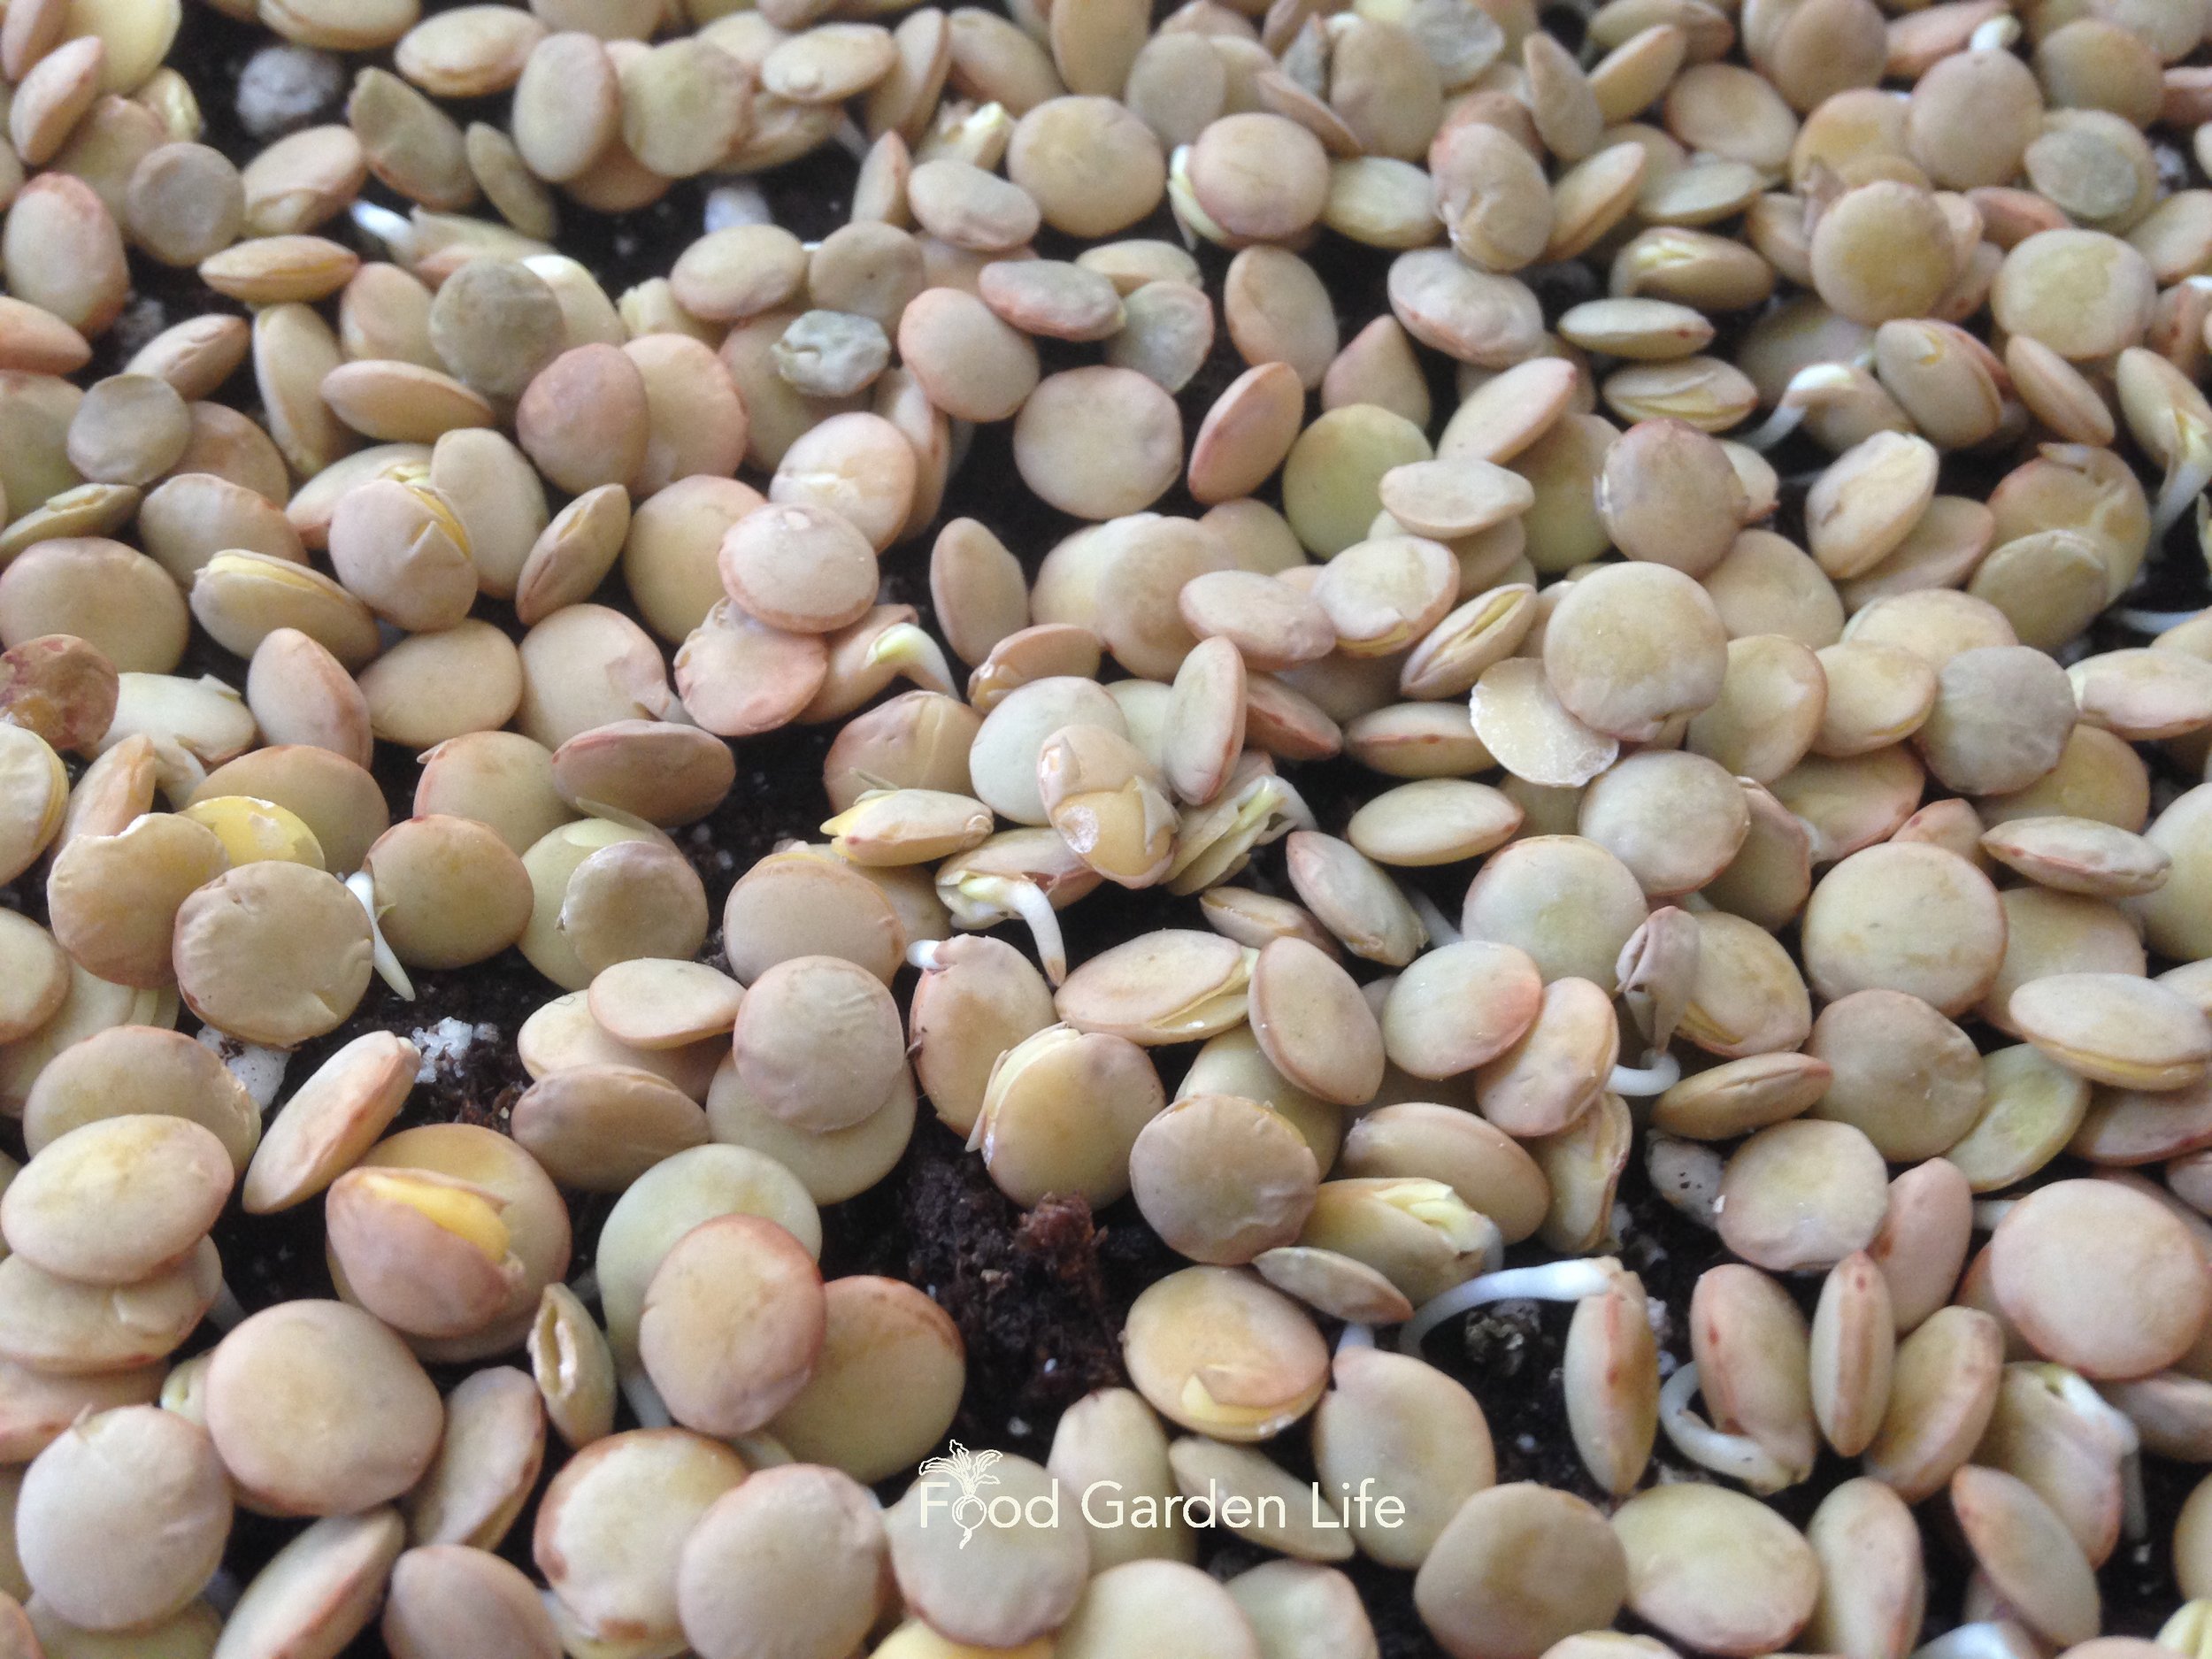
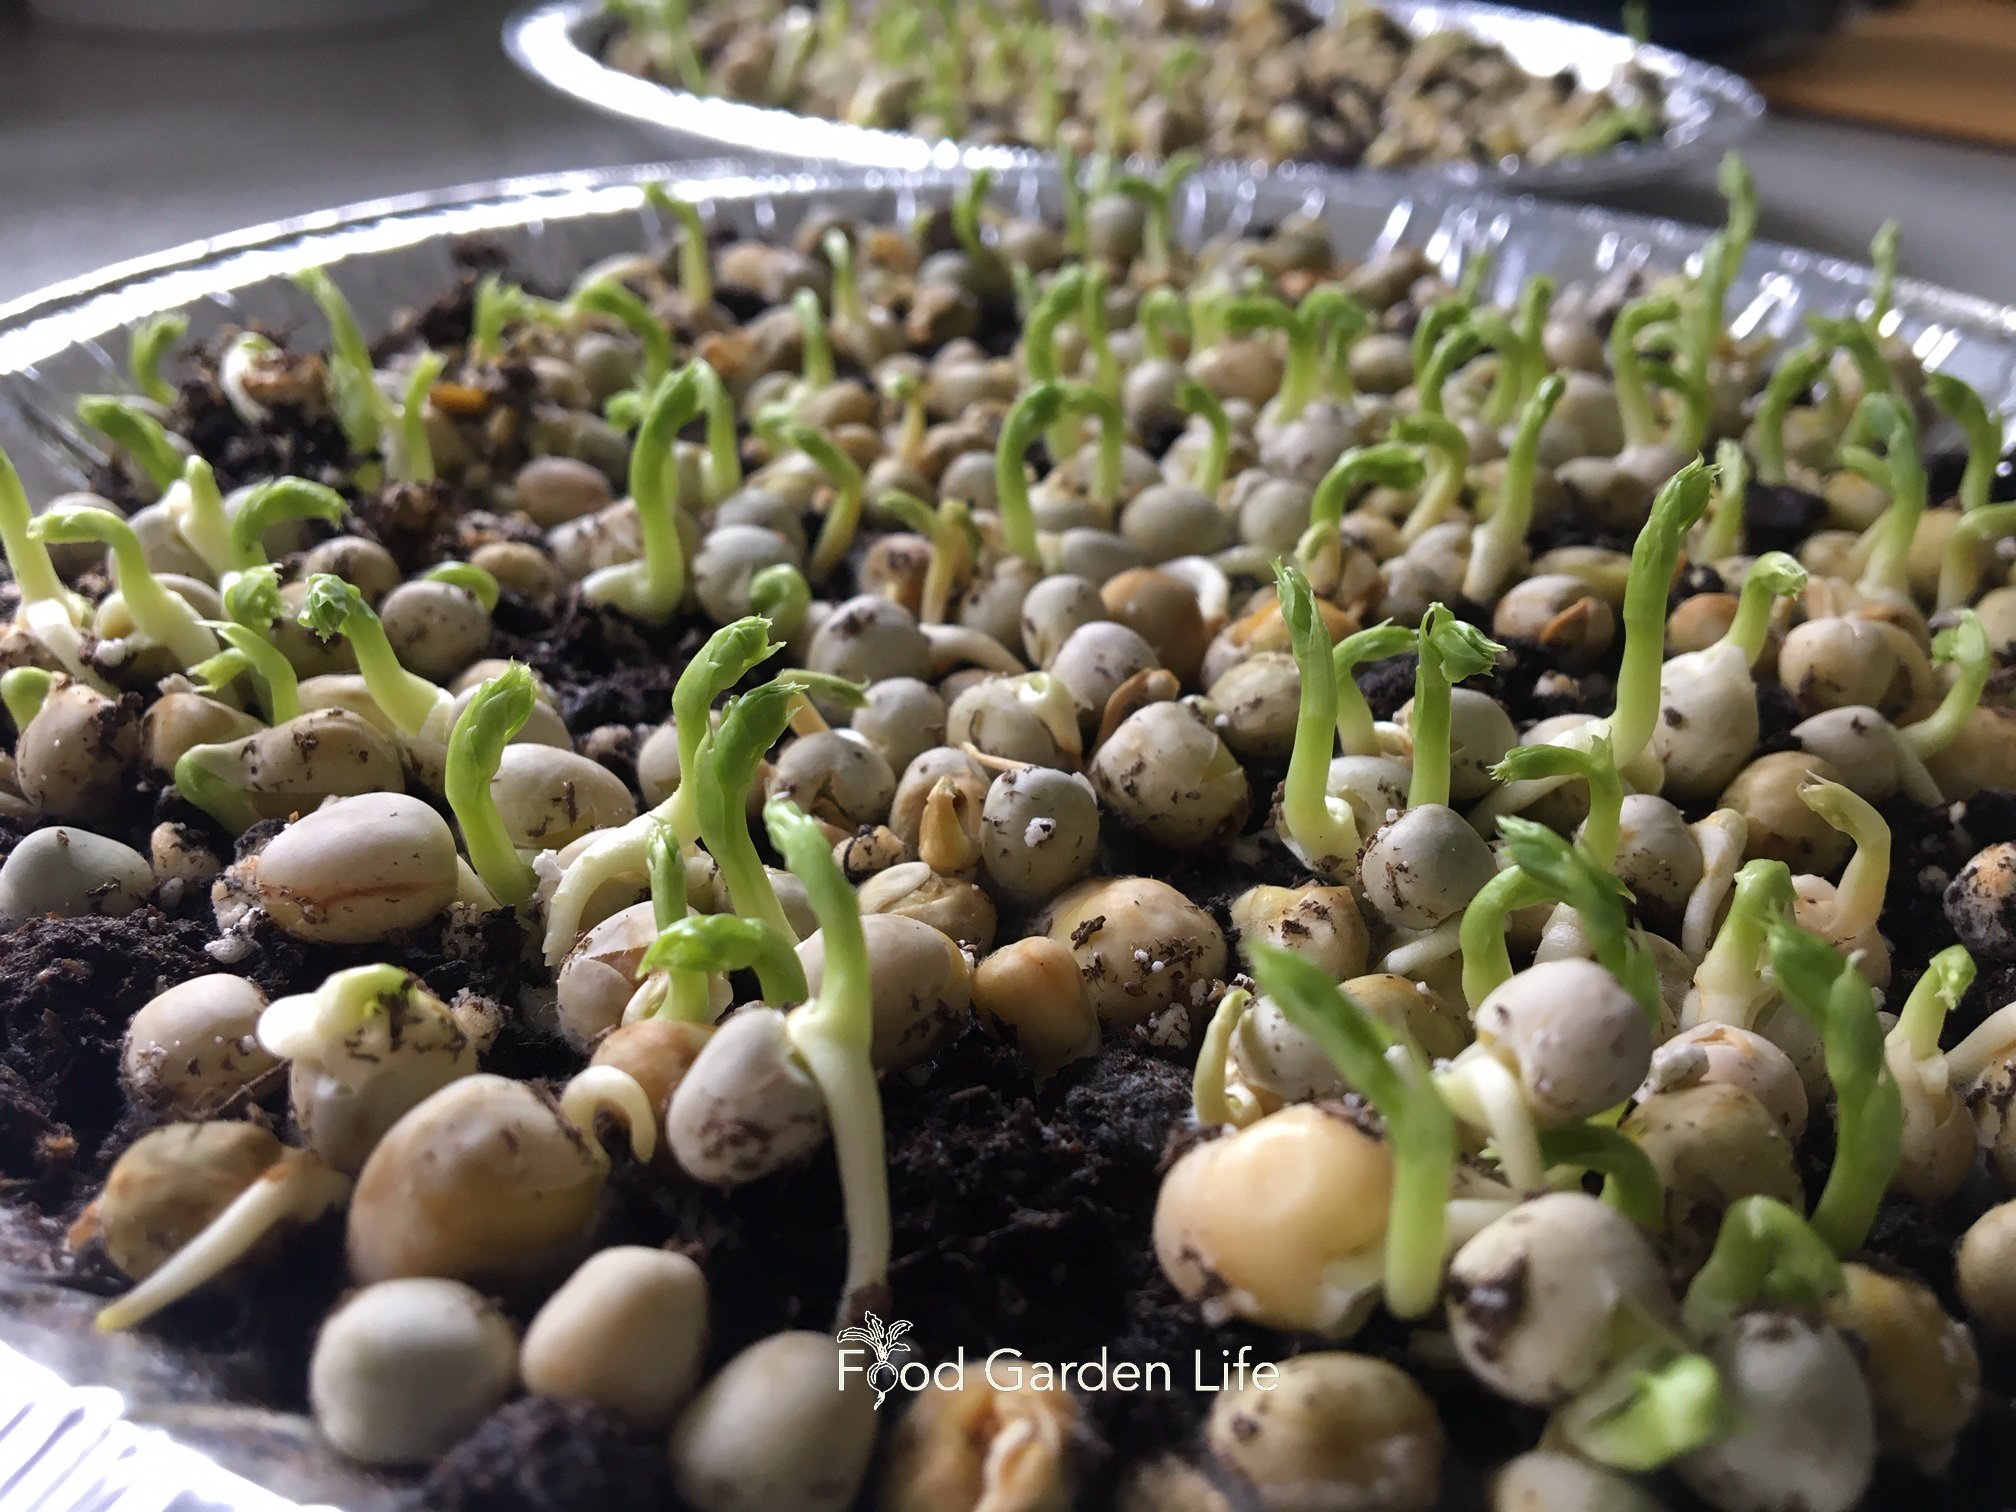
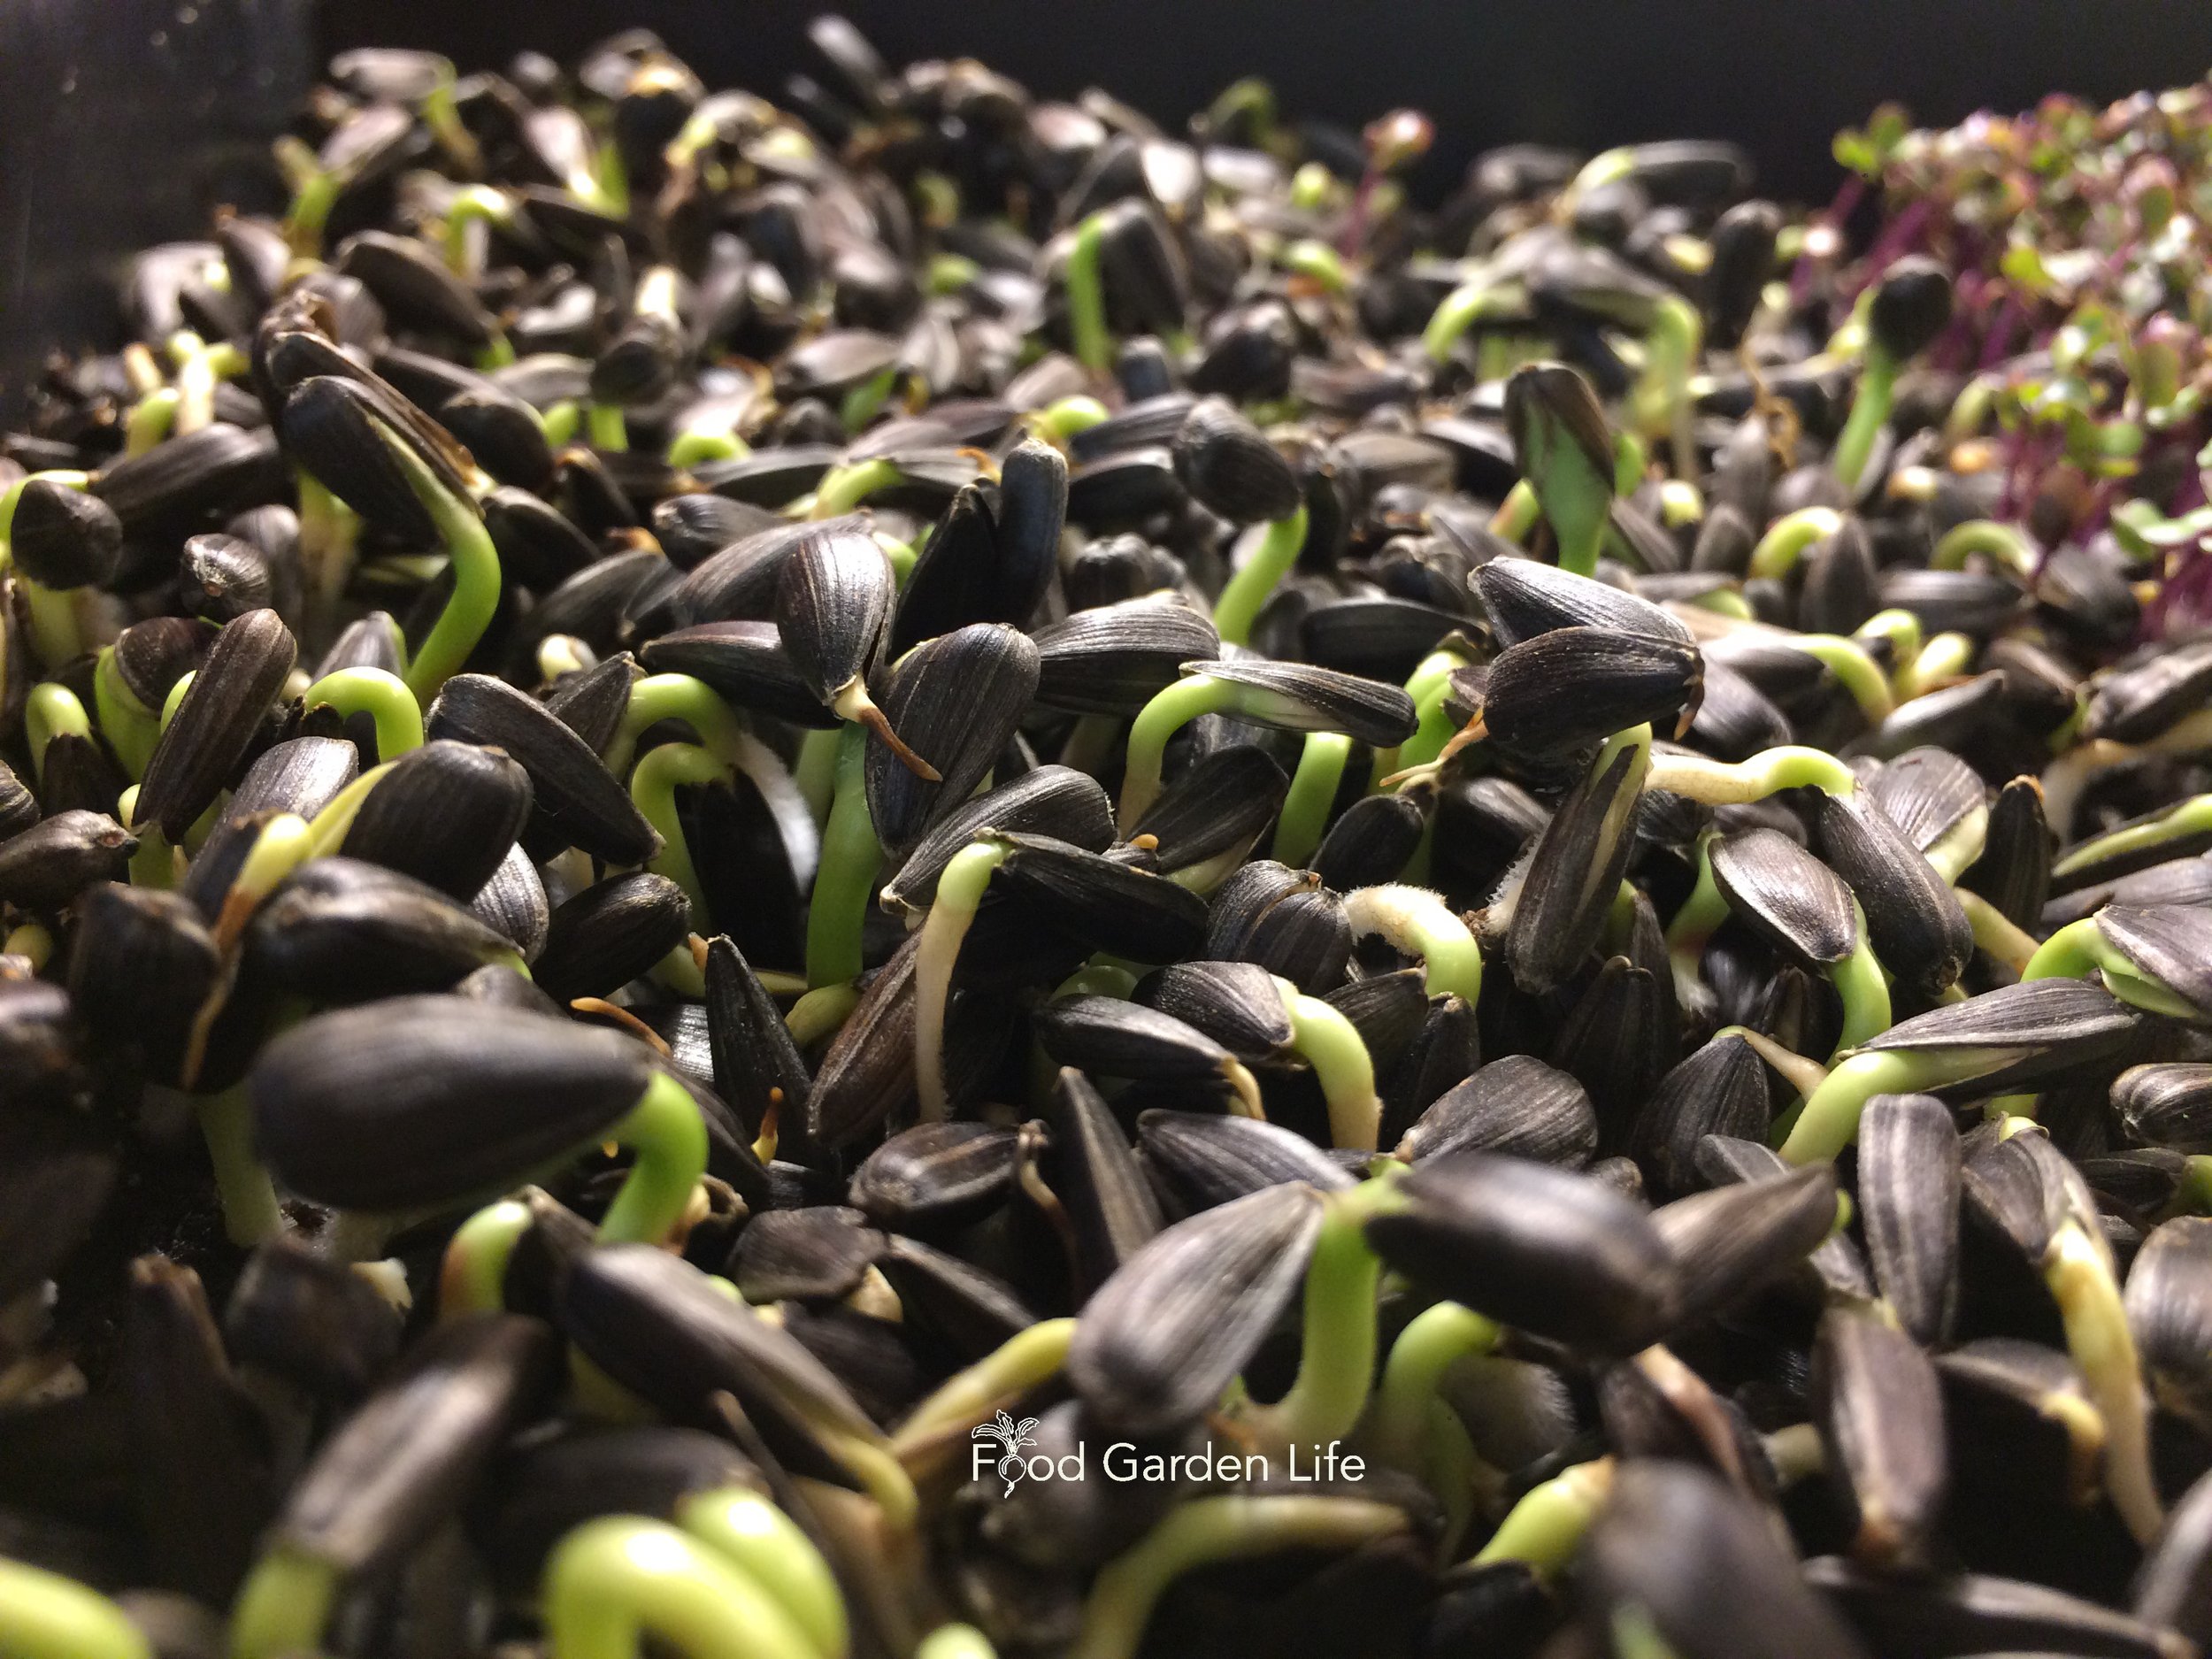
Buying Microgreen Seeds
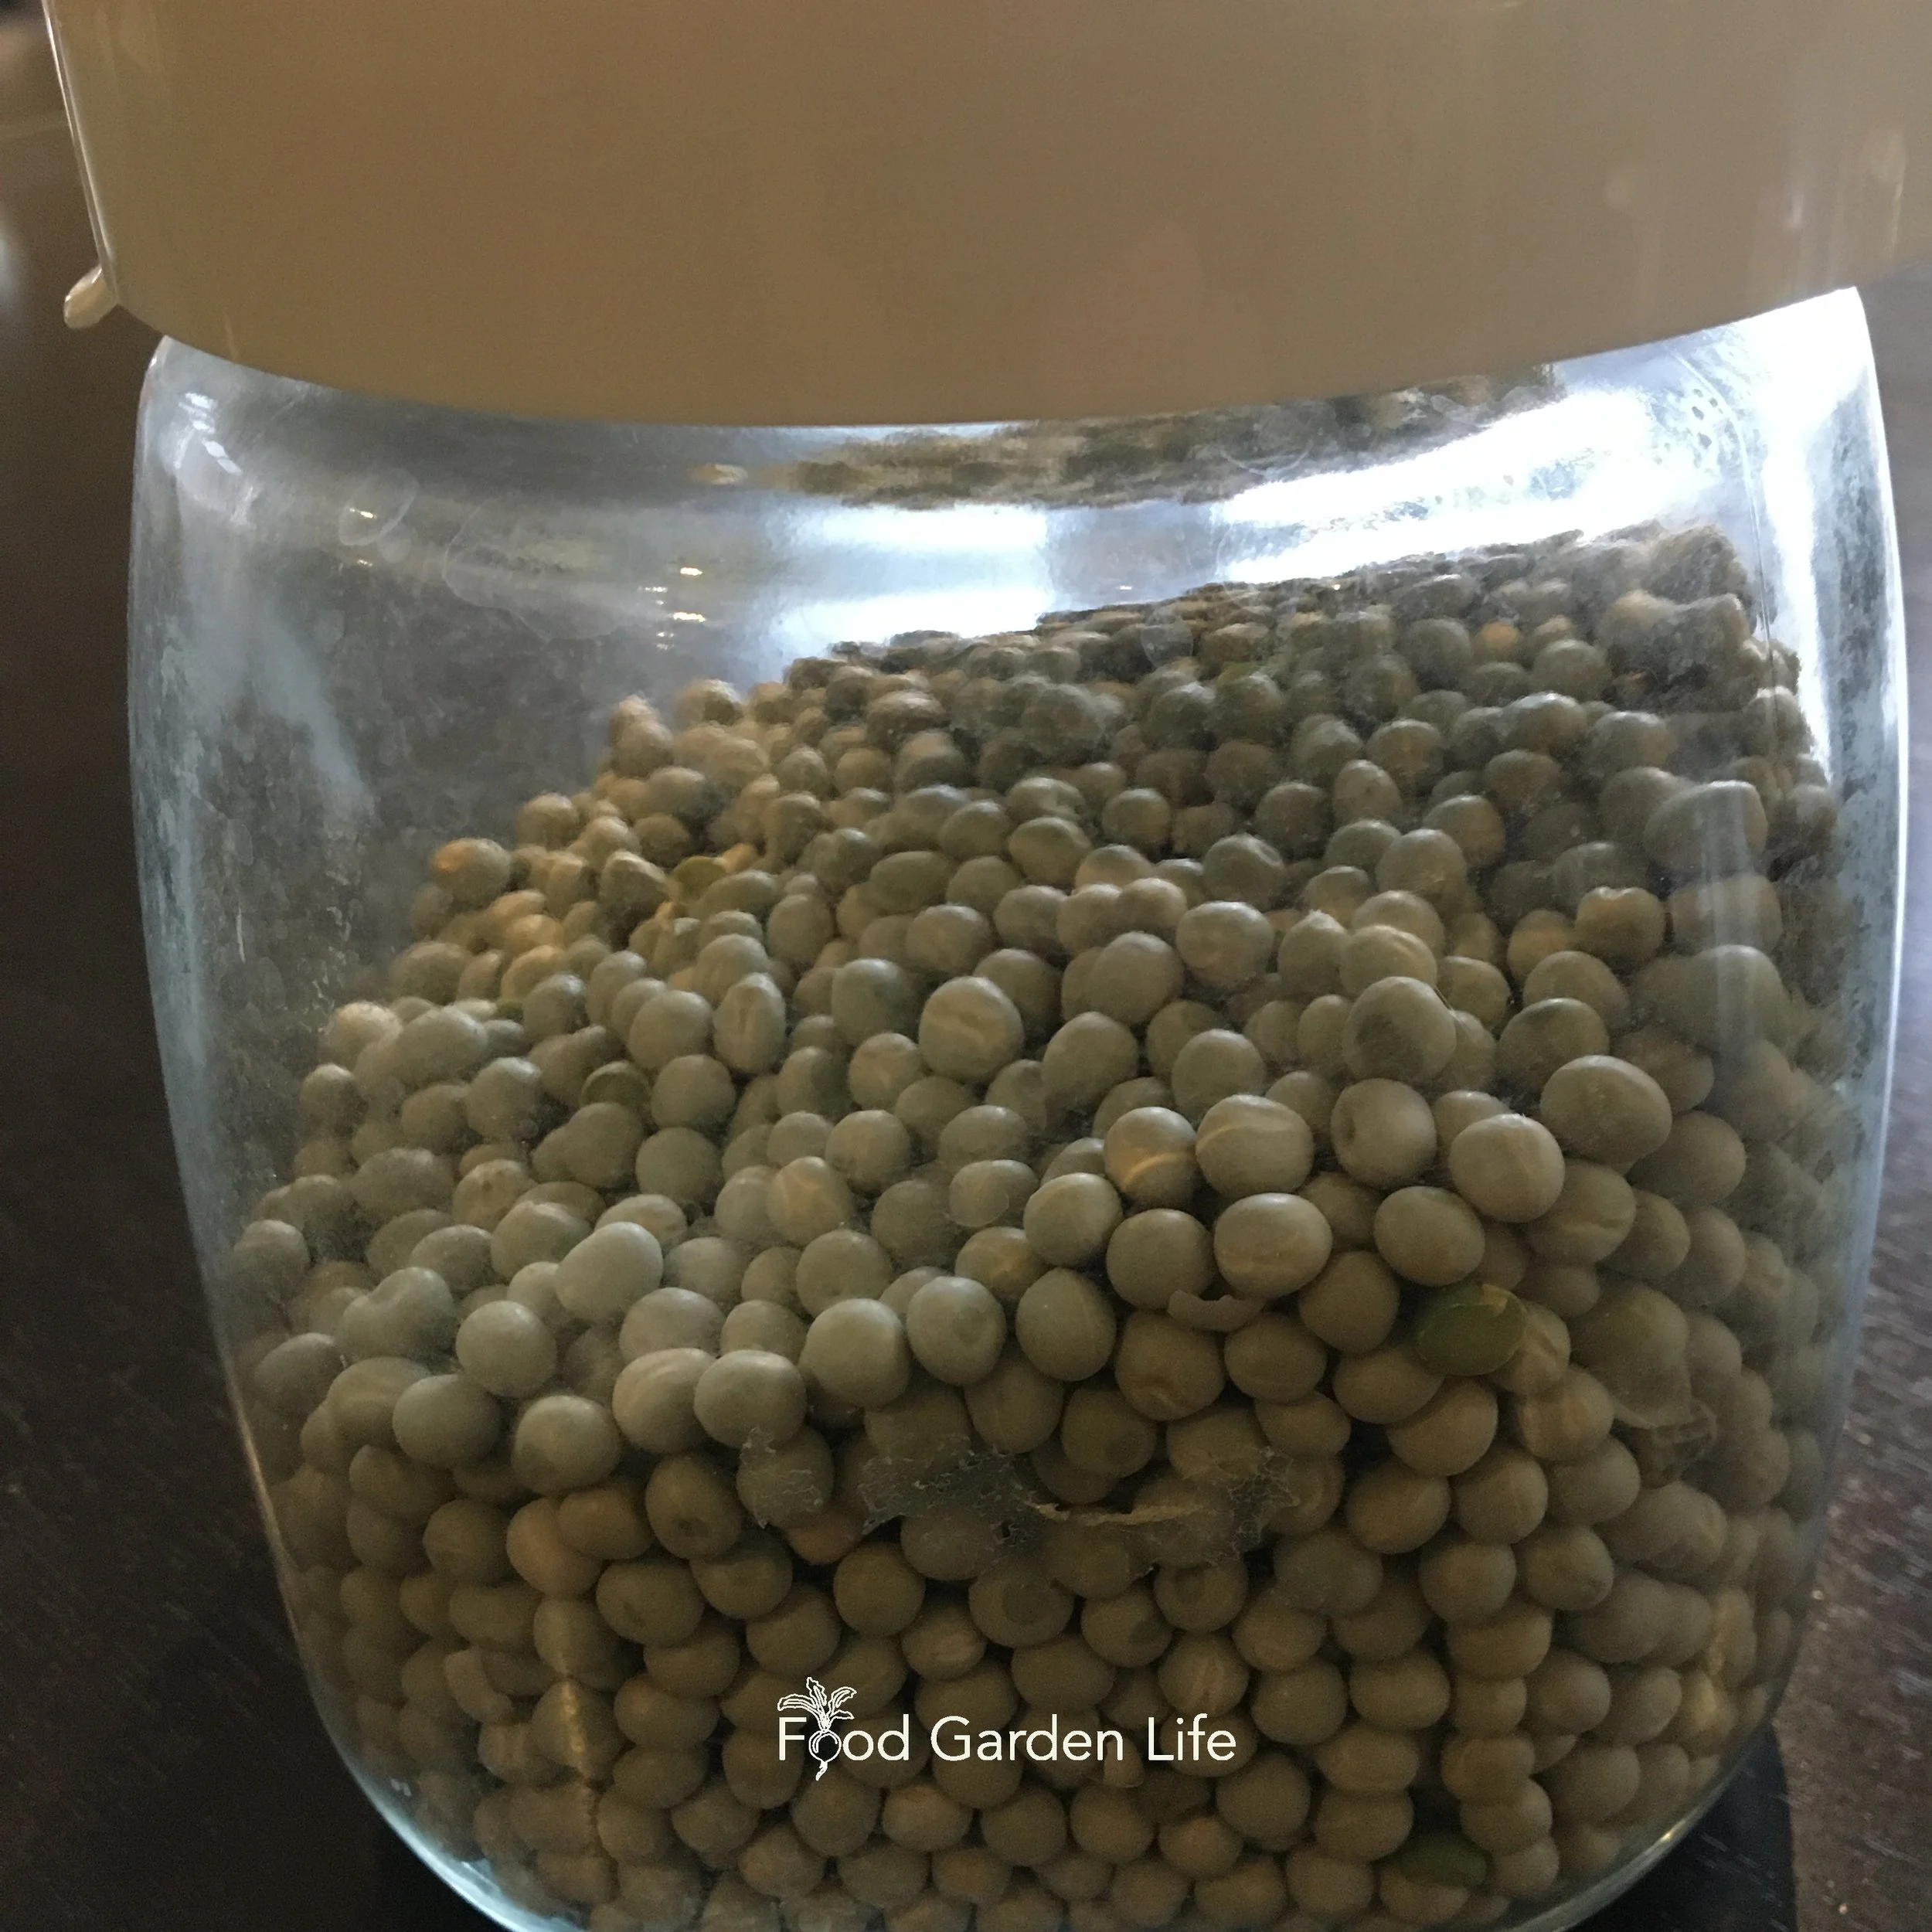
Dried green peas from the grocery store.
When shopping for microgreen seeds you might come across the interchangeable terms “sprouting seeds” and “microgreens seeds.” It means the seeds are untreated and uncoated. They’re usually sold in a larger volume than seeds intended for the garden—so it’s better value. And in some cases, it means that the seed company tests the seed to be sure there’s no contamination with pathogens.
I use dried peas and lentils from the grocery store—the same dried whole peas used for cooking.
Stick with food grade seeds from the grocery store or seeds sold for microgreens.
Seed sold for planting in the garden is sometimes “treated,” which usually means with fungicides. Treated seed is not suitable for growing into microgreens.
Wondering where to buy seed? Here’s a list of seed companies.
First Microgreen Crop? Give Peas a Chance
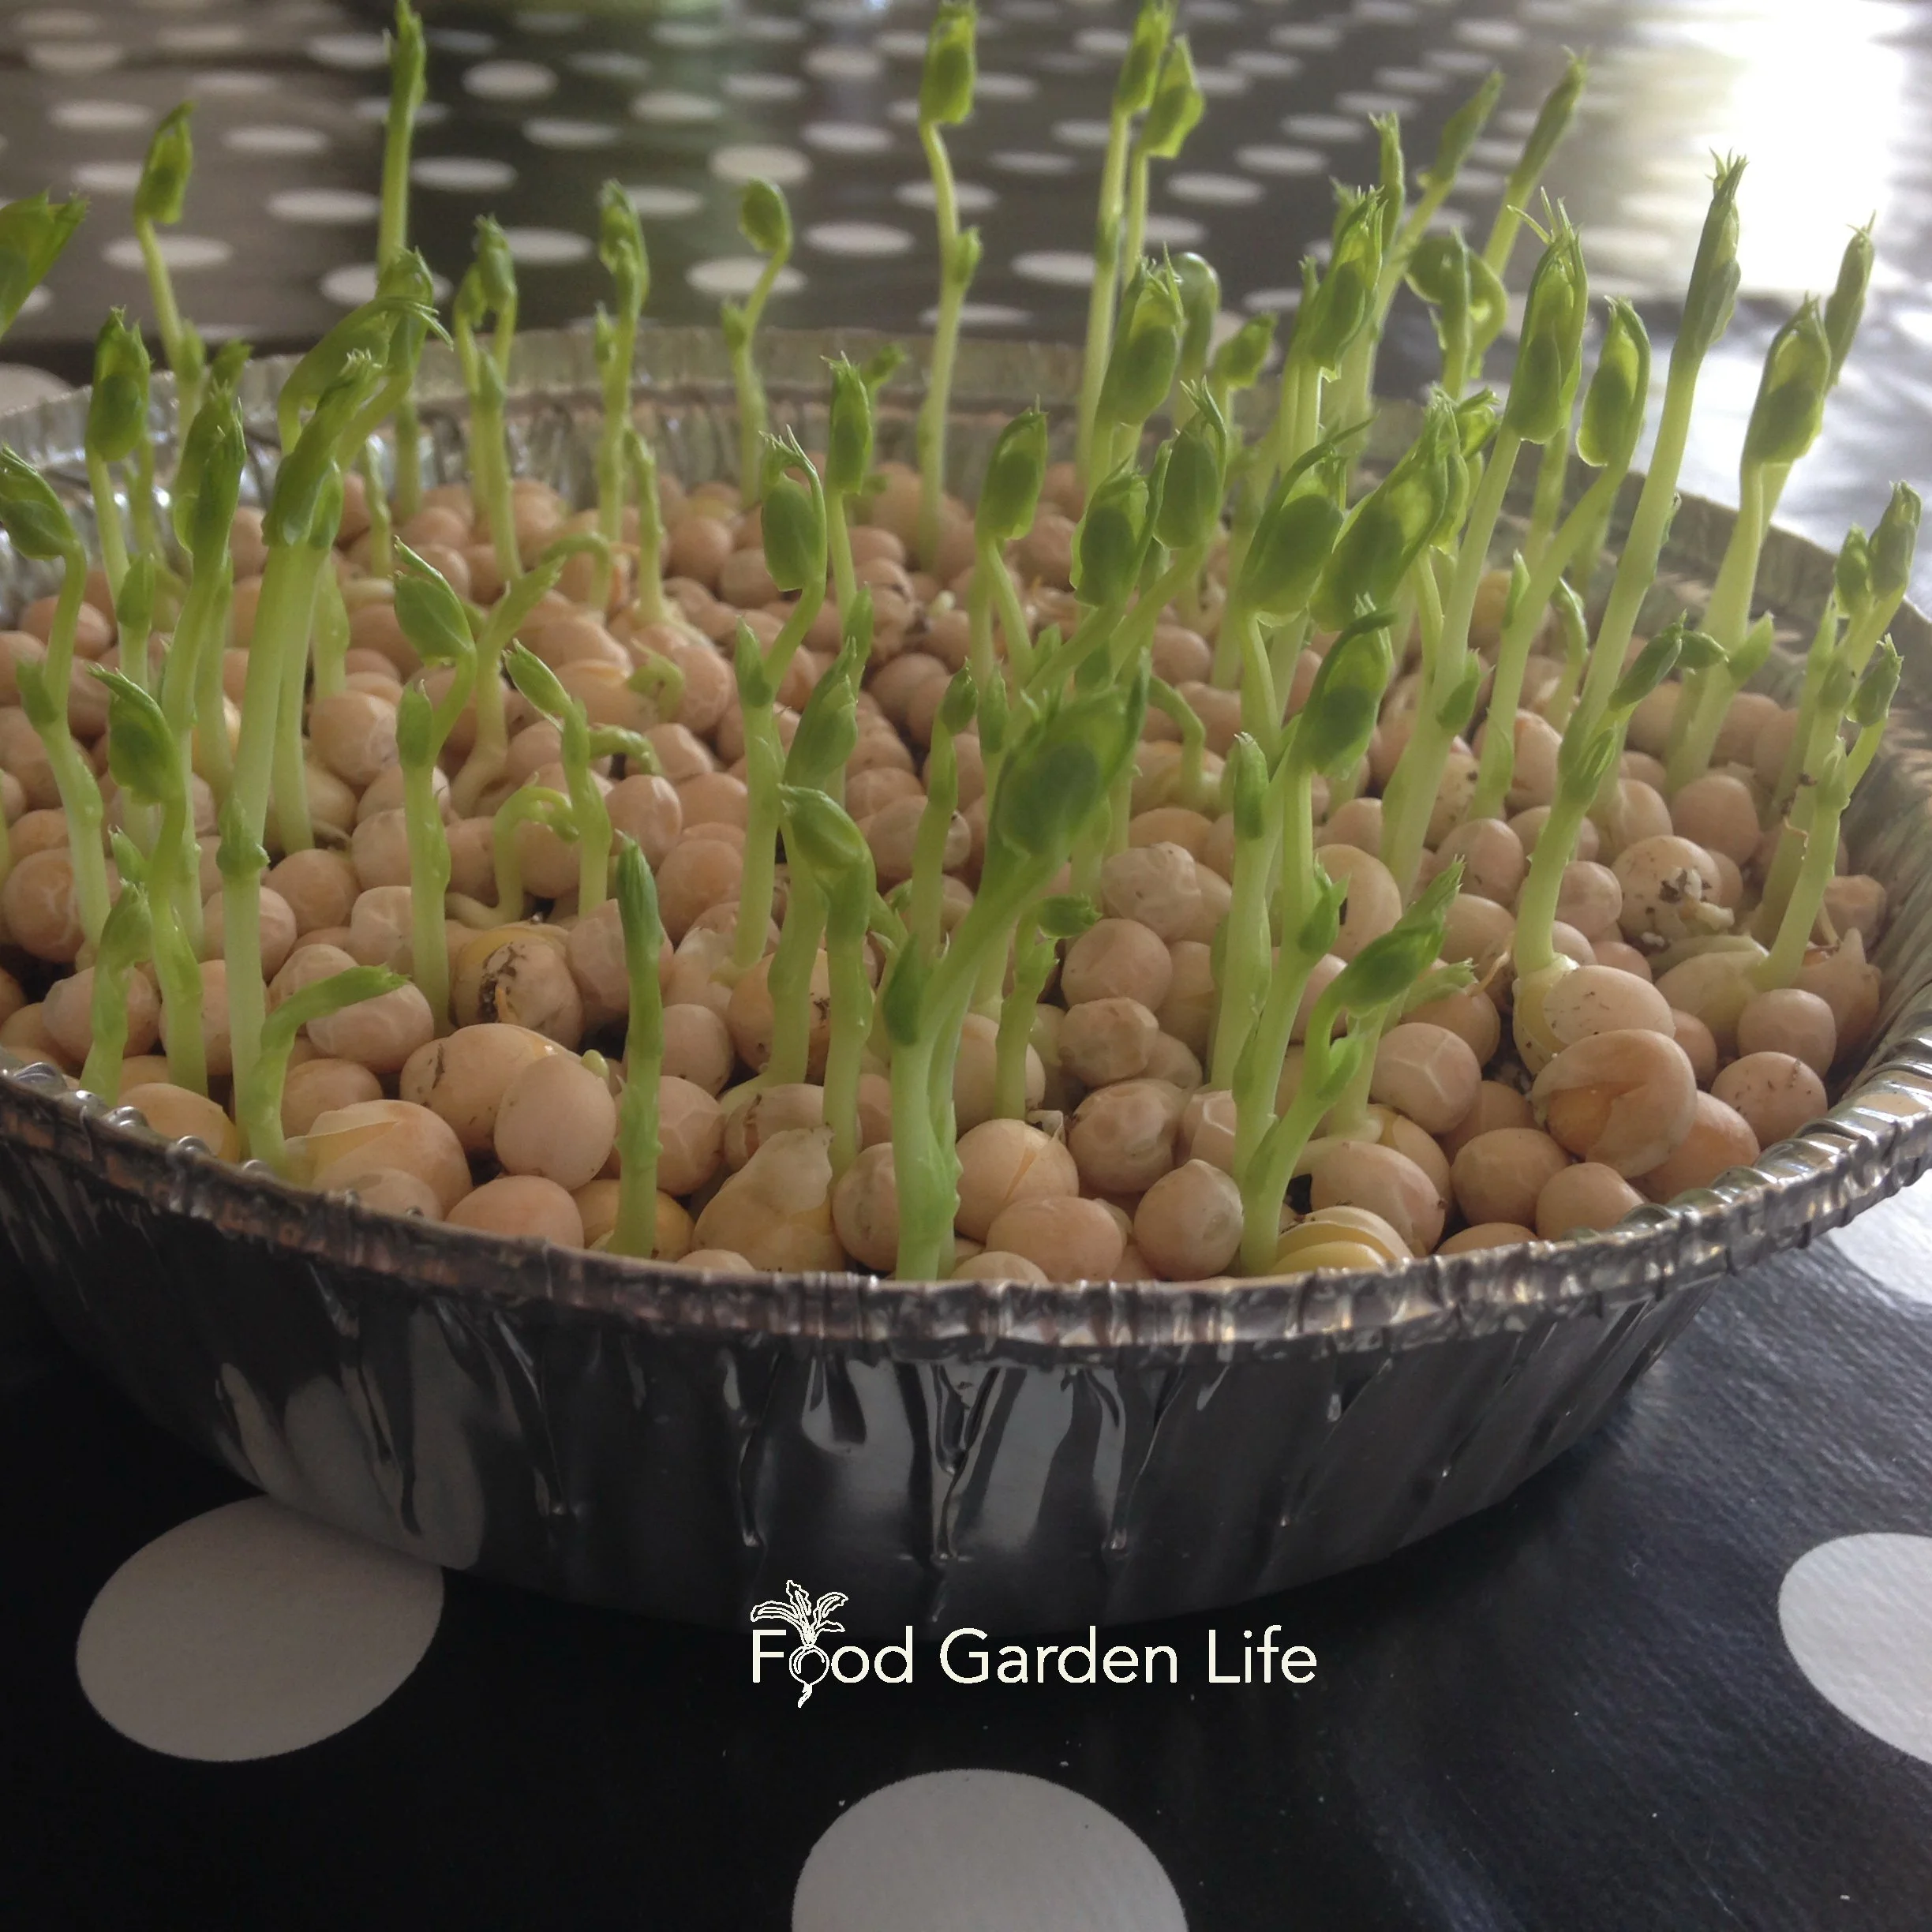
First time growing microgreens? I like the peas-and-pie-plate approach. It’s easy!
I recommend pea microgreens (also known as pea shoots) as a first microgreen crop. Dried peas are easy to find at the grocery store, easy to grow, and have a sweet flavour—much like snow peas and snap peas.
It doesn’t matter whether you use green peas or yellow peas—the key thing is to use whole peas, not split peas…they won’t grow!
How to Grow Microgreens at Home
Choose a Location to Grow Microgreens
When you grow microgreens you’re using the energy saved up in the seed. The goal is a tender young stem and leaves that you cut off and eat as a green. That means you don’t need bright light. It doesn’t matter if the plants are gangly.
Supplies for Growing Microgreens Indoors
Here are supplies to grow microgreens at home:
Seed
Potting soil
Container
Spray botte (optional)
Soil for Microgreens
The potting soil is to hold moisture and let the microgreen plants anchor themselves as they grow. You don’t need to supply nutrients because the plants are using energy stored in the seeds. Start with fresh soil every time—don’t reuse soil.
Moisten the potting soil before planting.
Use a soilless potting soil. Coir or peat moss as a growing medium work well too.
Containers for Microgreens
There are lots of options for microgreens containers. You only need to have about an inch of potting soil, so any shallow container works.
Here are examples:
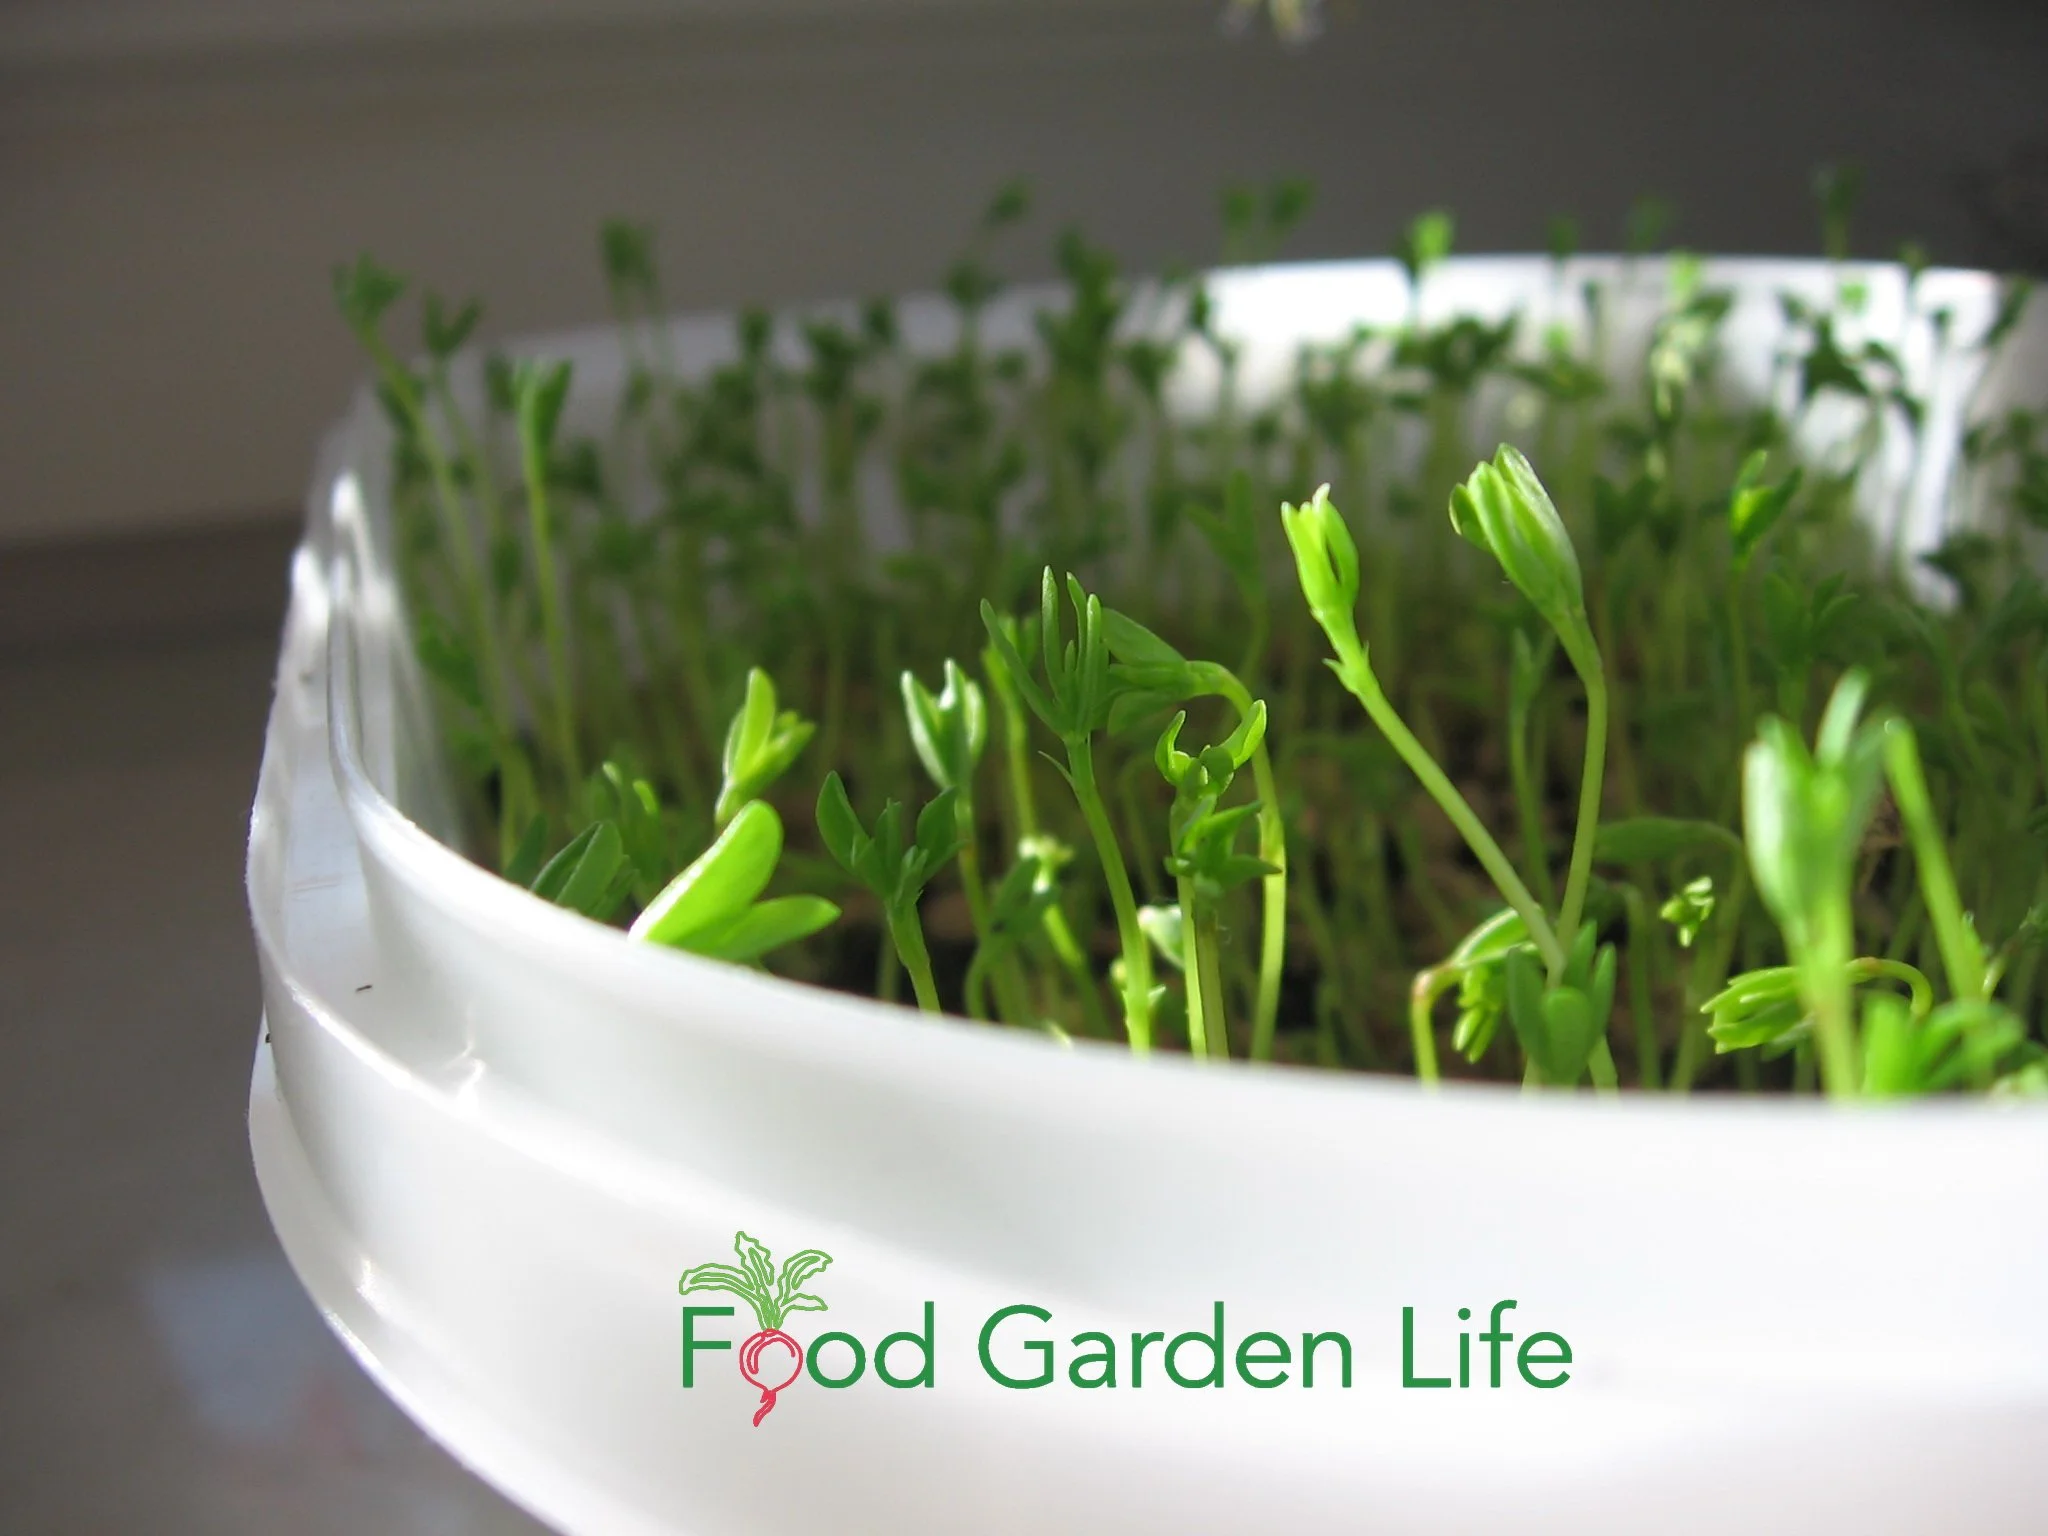
Lentil microgreens growing in a plastic container.
A standard 10”x20” plant tray
A pie plate
Takeout containers
Smaller containers dry out faster, so you’ll need to water more often.
If you trust your judgement with watering, don’t make drainage holes. But if you think you might overwater, punch a few holes in the bottom of your container.
Spray Bottles
A spray bottle for microgreens is optional. I don’t use one. Some gardeners use a spray bottle to avoid splashing around small seeds. Instead, you can water carefully with a gentle stream of water.
How to Plant Microgreens
Soak larger seeds such as pea, lentil, and sunflower overnight. (Soaking gives a faster, more uniform germination.)
Put an inch or two of potting soil in the container.
Put seeds on top of the soil, spacing them so that they’re close to each other, but not covering each other. Don’t cover seeds with soil.
Water so that the soil is moist but not wet. (You want the soil moist, not wet...don’t float your seeds!)
Place under lights or on a windowsill.
Pea Microgreens Step by Step
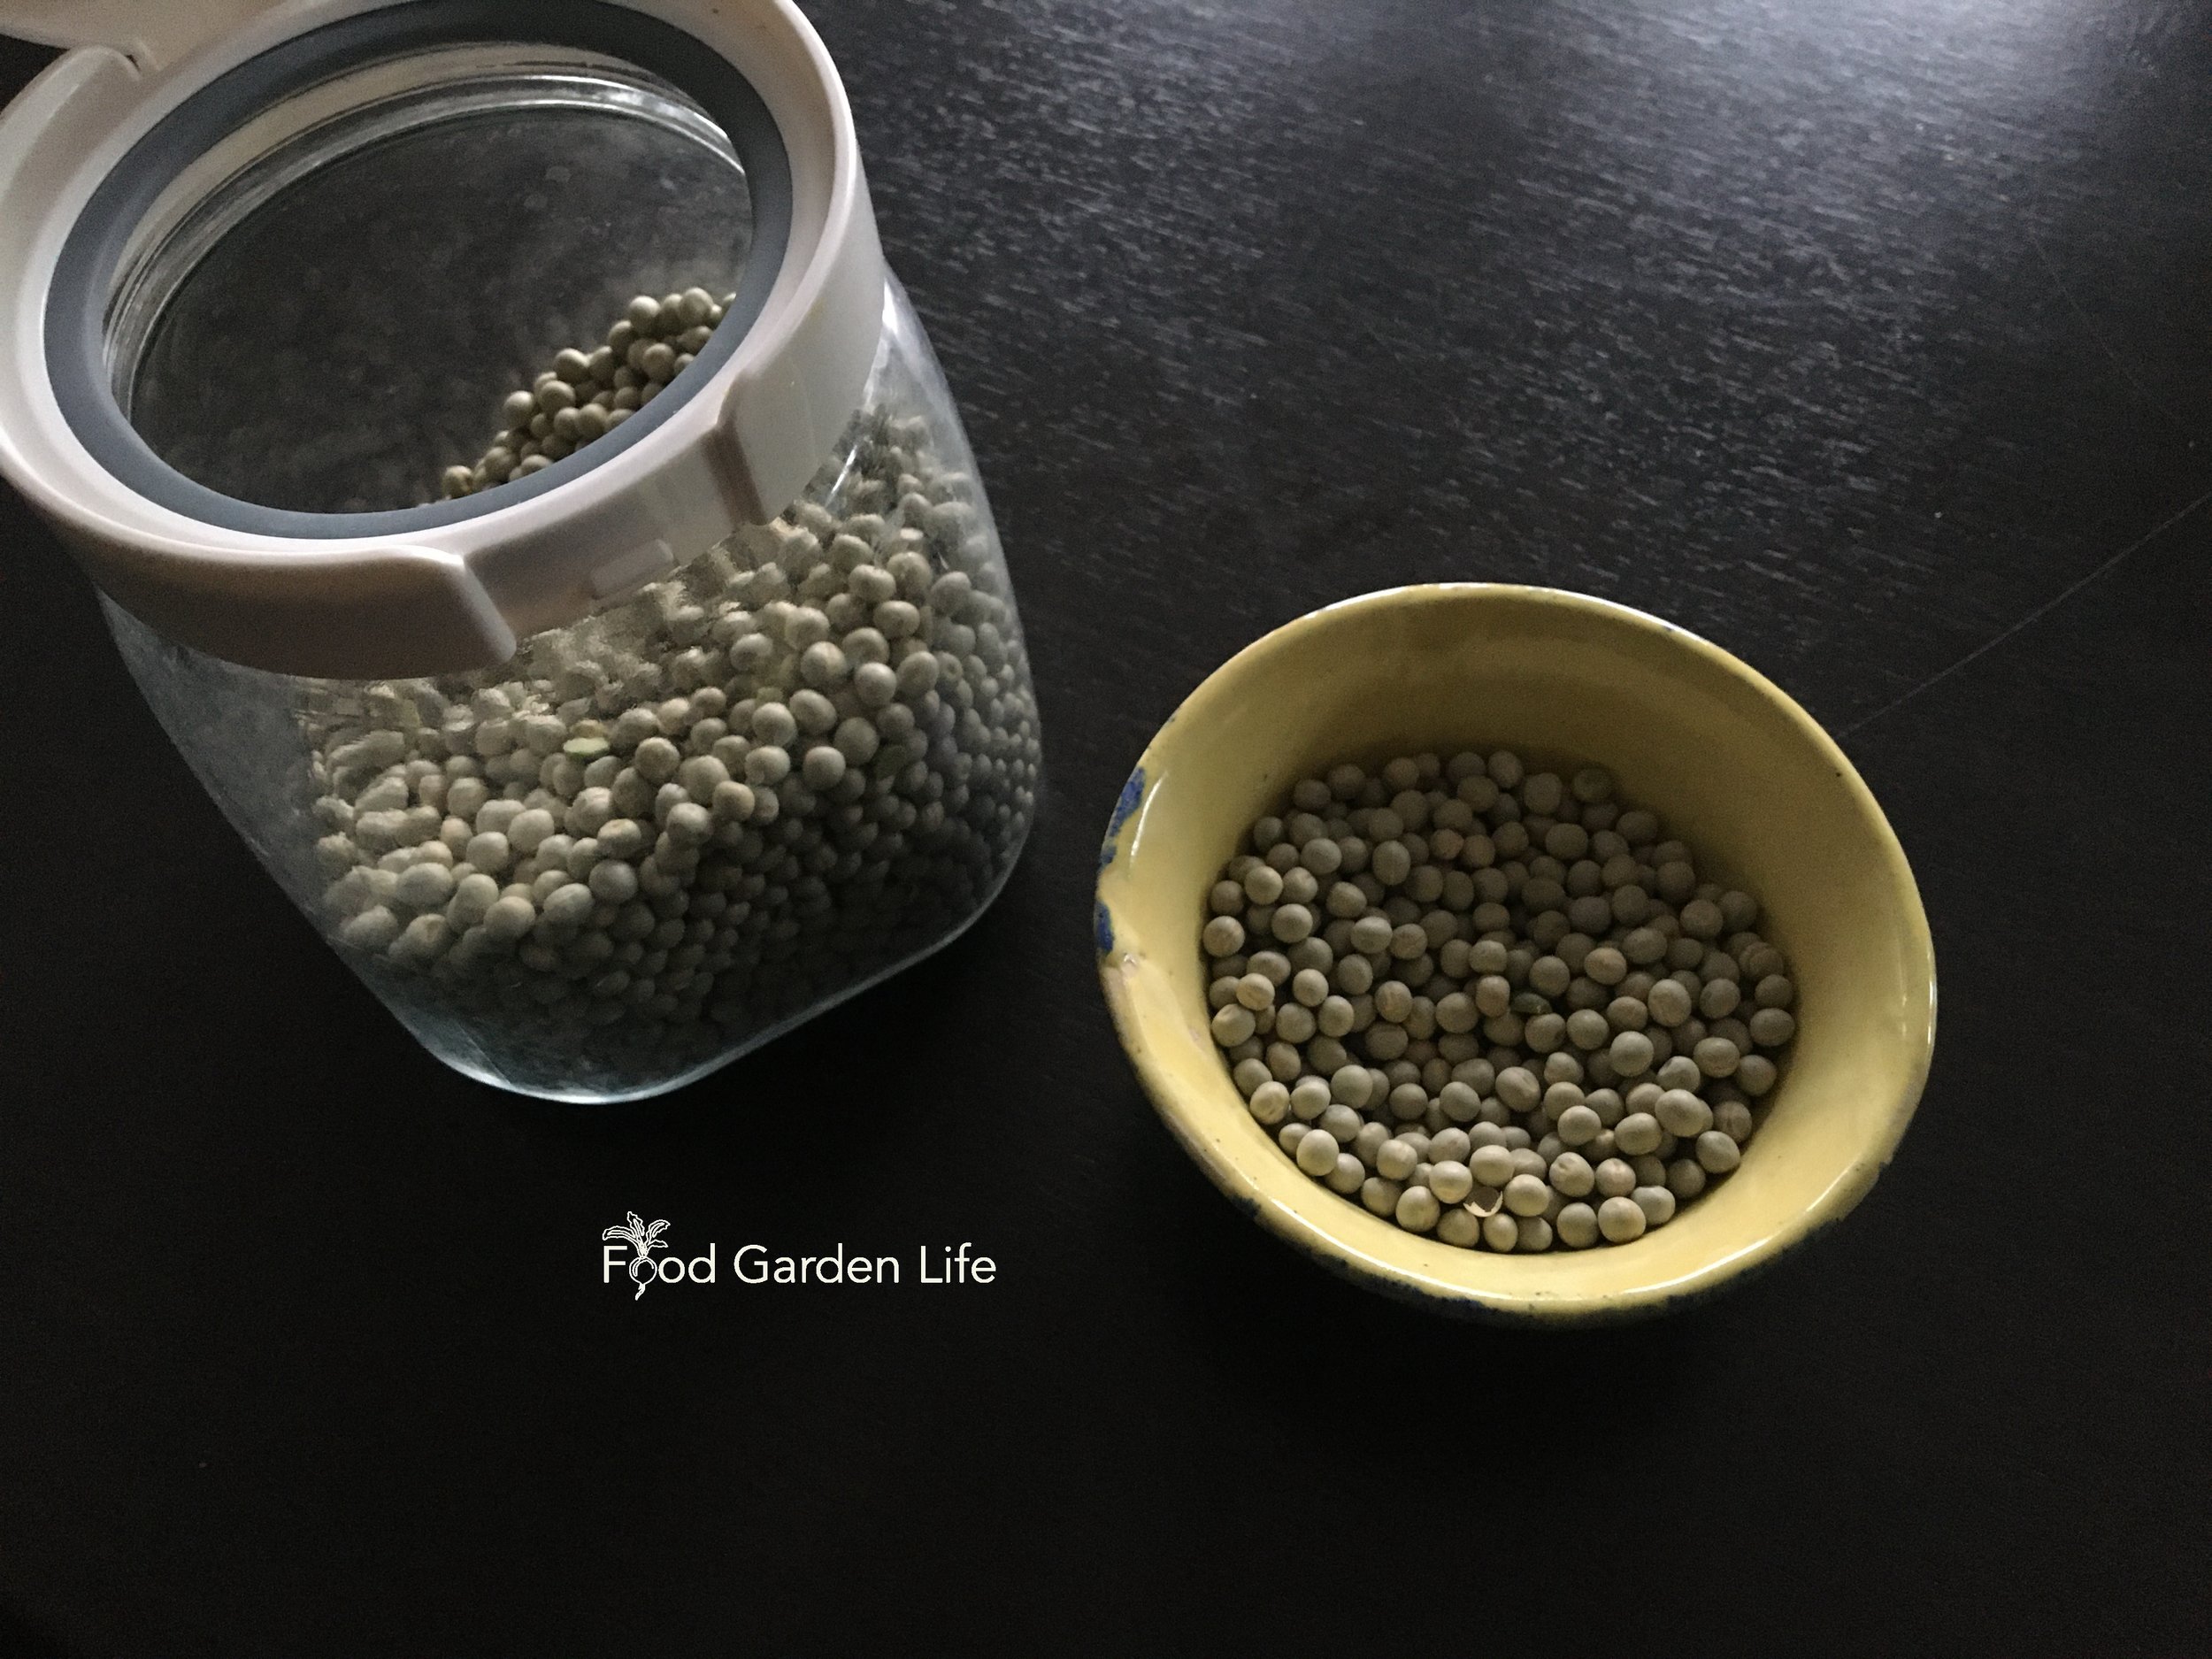
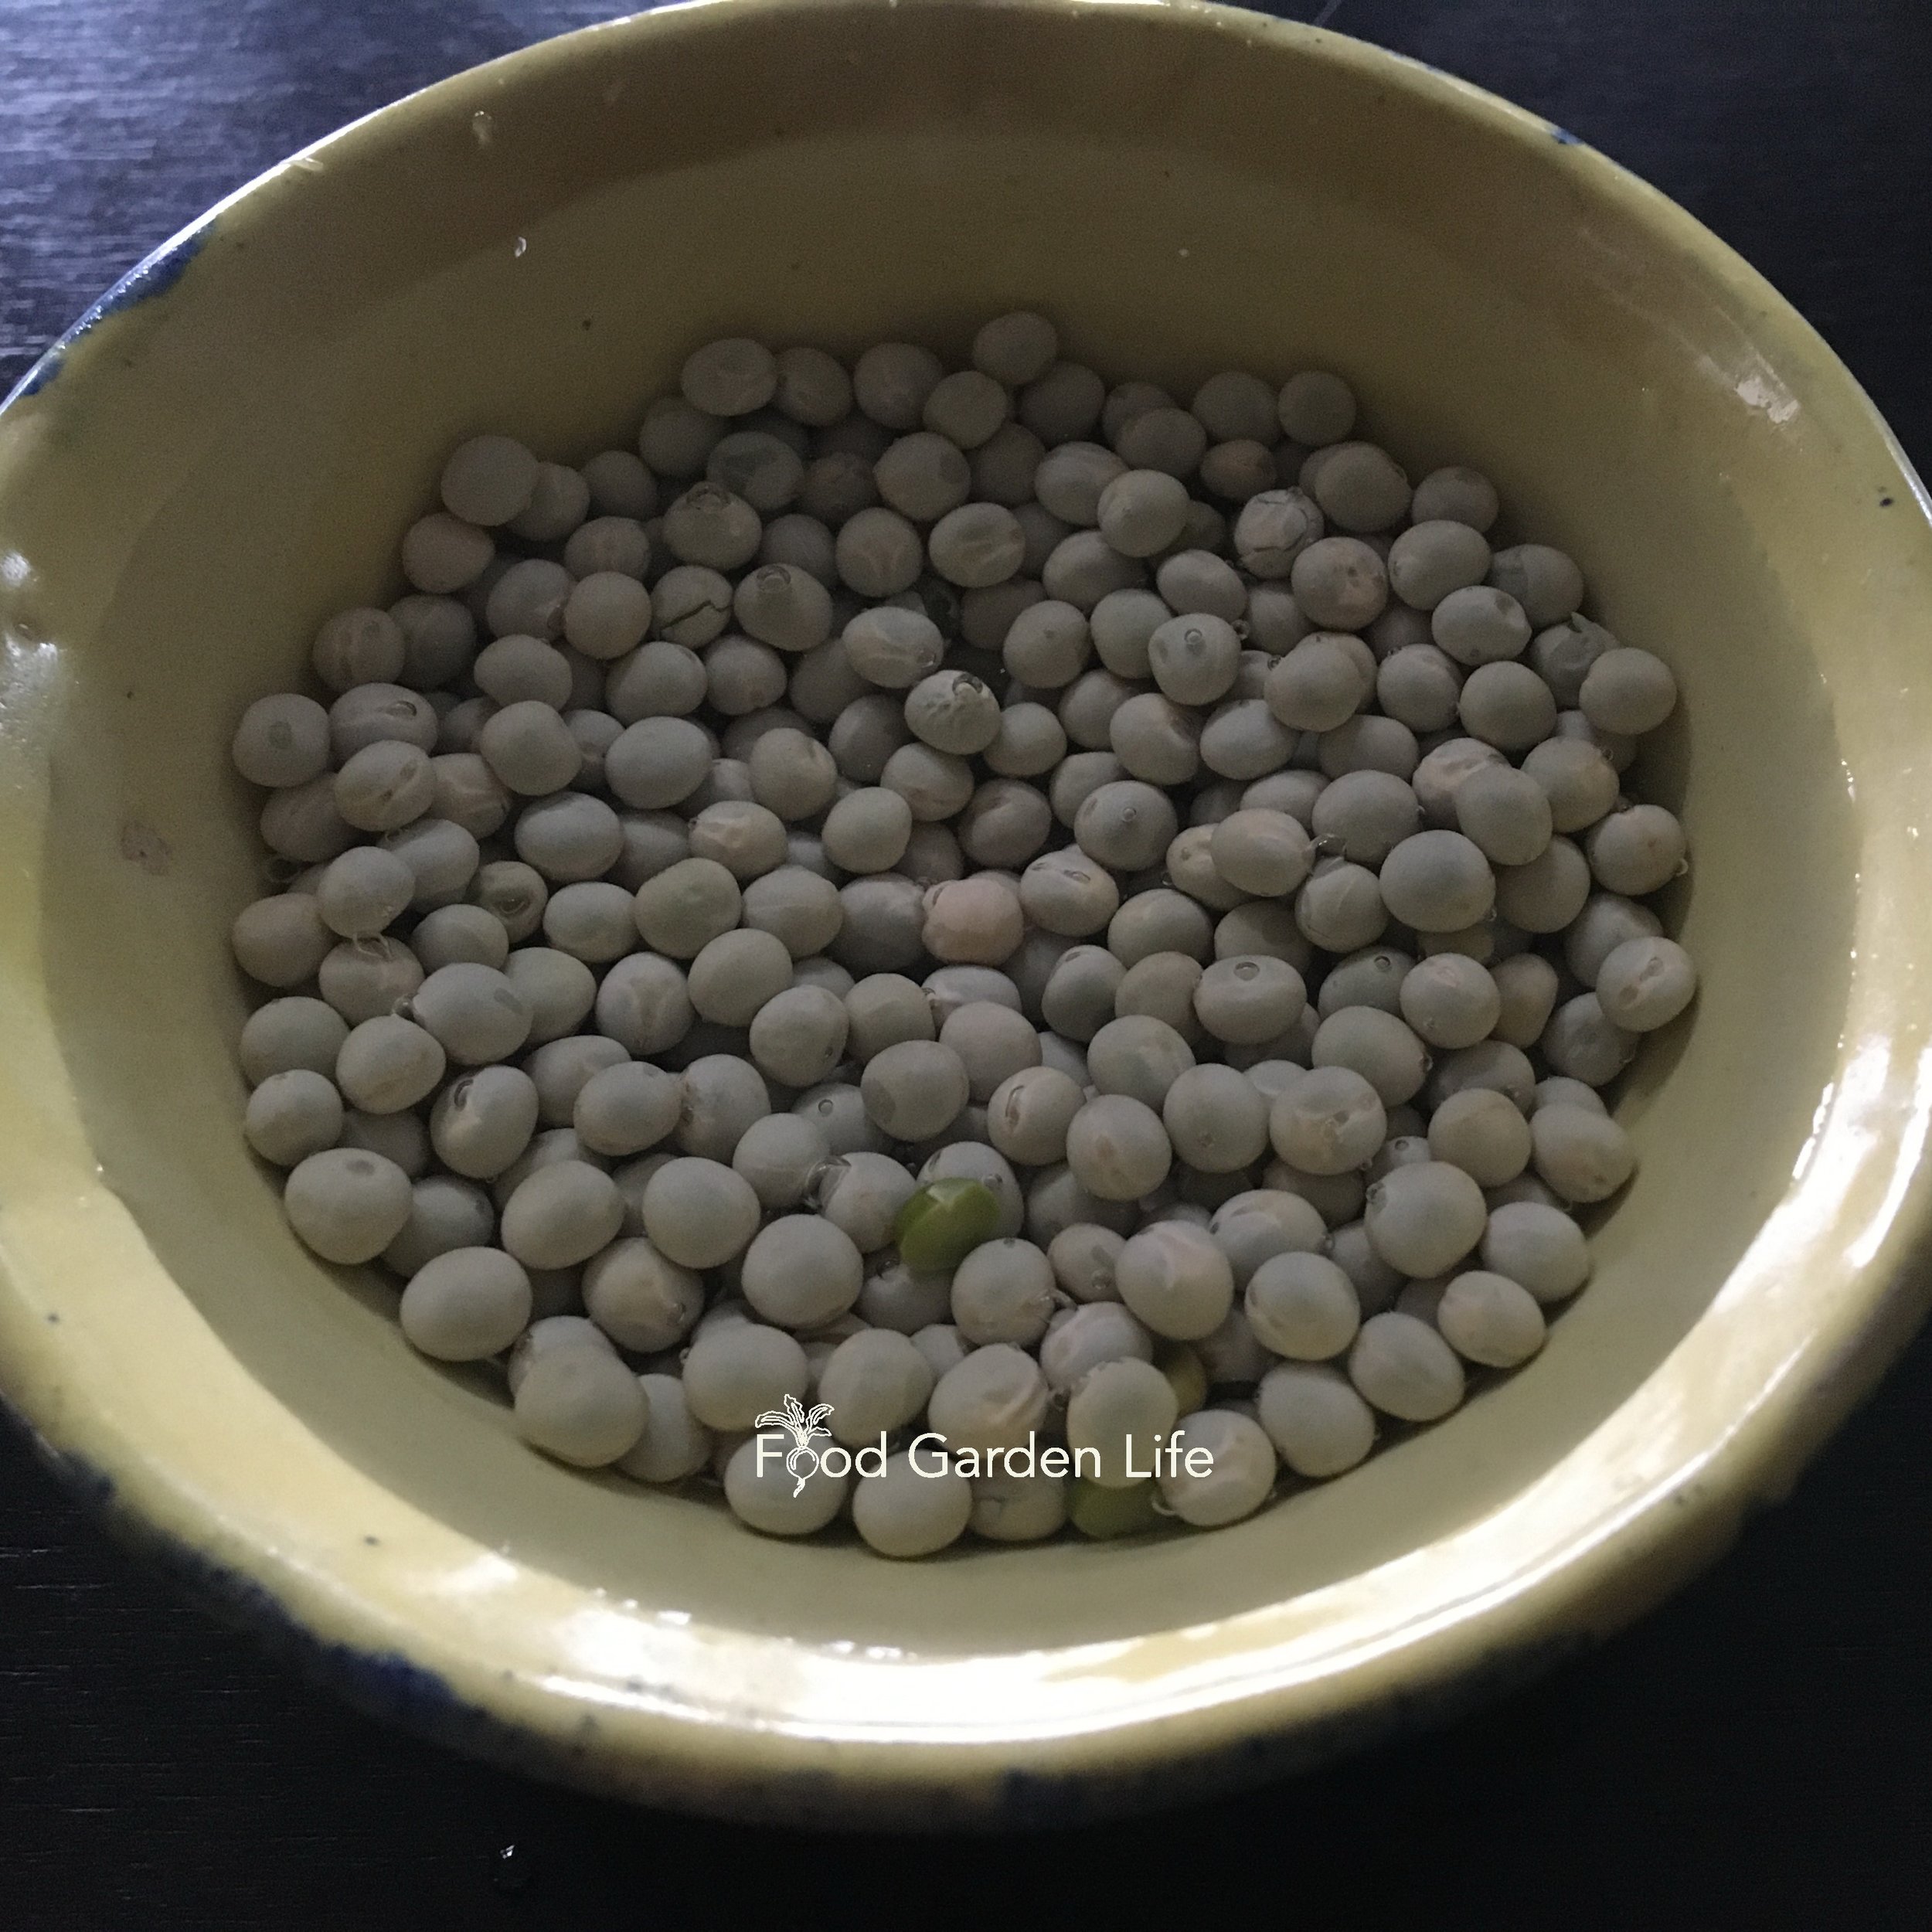
Top Tip: When seeds are in contact with the soil you get a faster, more uniform germination. Put something heavy over the microgreens after sowing. The weight pushes down on the seeds so that they are in contact with the soil. (I stack my pie plates full of seeds.)
Don’t do this: Don’t fertilize them. There’s enough stored energy in the seed to grow the microgreens until harvest.
Location for Microgreens
Growing microgreens under lights. Less light is OK too.
You don’t need perfect growing conditions, so make do with what you have. If you have a bright window or set of grow lights, these work well.
Low light is also OK too, because the plants are growing using energy stored in the seed. I’ve grown them on a dim countertop.
The warmer the temperature, the more quickly the microgreens grow.
Seeds sprout more quickly in warmer conditions. Here are ways to give your microgreen seeds more heat:
A heat mat
A sunny windowsill
The top of a hot-water radiator
A heated floor
Growing Your Microgreen Crop
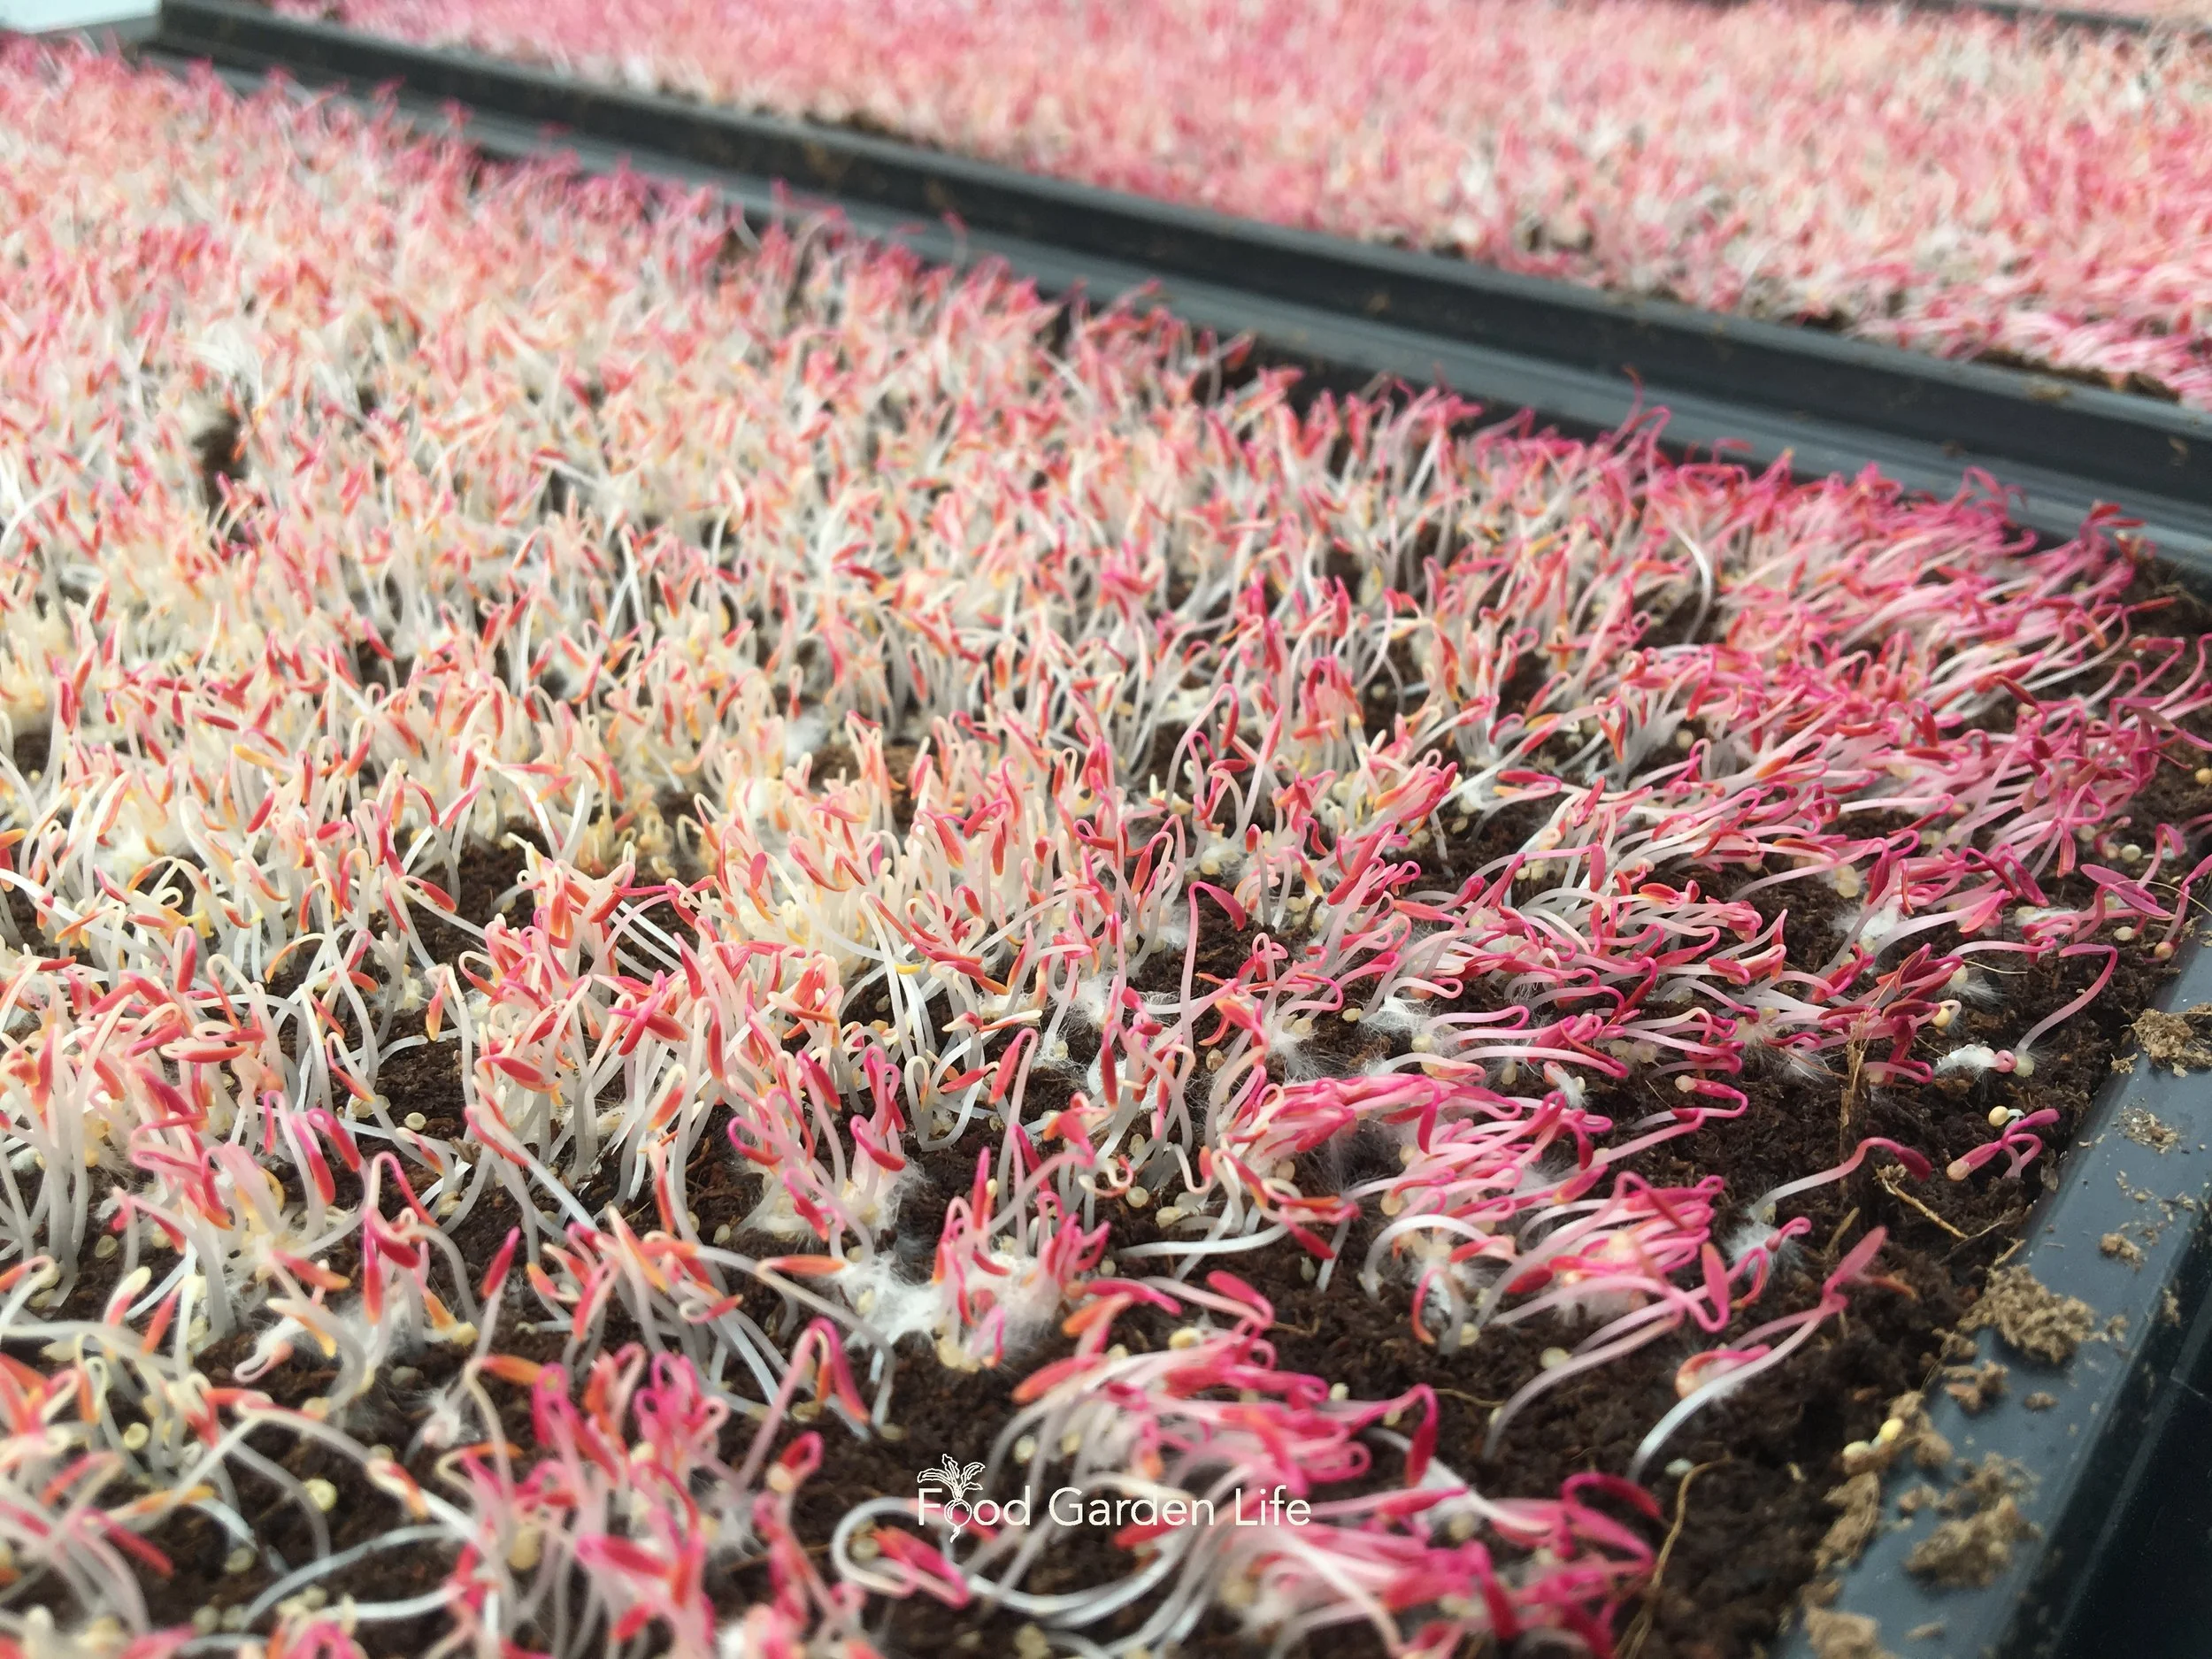
If you put something heavy on top of the seeds, remove it after a couple days. These amaranth microgreens were covered a bit too long…but they’ll bounce back.
Check daily to make sure the soil is moist and to see if your seeds are germinating.
If you put something heavy on top of the seeds, remove it after a couple days.
Harvesting Microgreens
Harvesting Pea Shoots
When I grow windowsill pea microgreens over the winter at room temperature, I expect to harvest them about 2 weeks after sowing.
Harvest microgreens when they get 3-4 inches tall, a size when they are tender and not fibrous.
The first cut is the largest. There might be a couple more smaller harvests with pea shoots. (Not all microgreens regrow from what remains after harvest.)
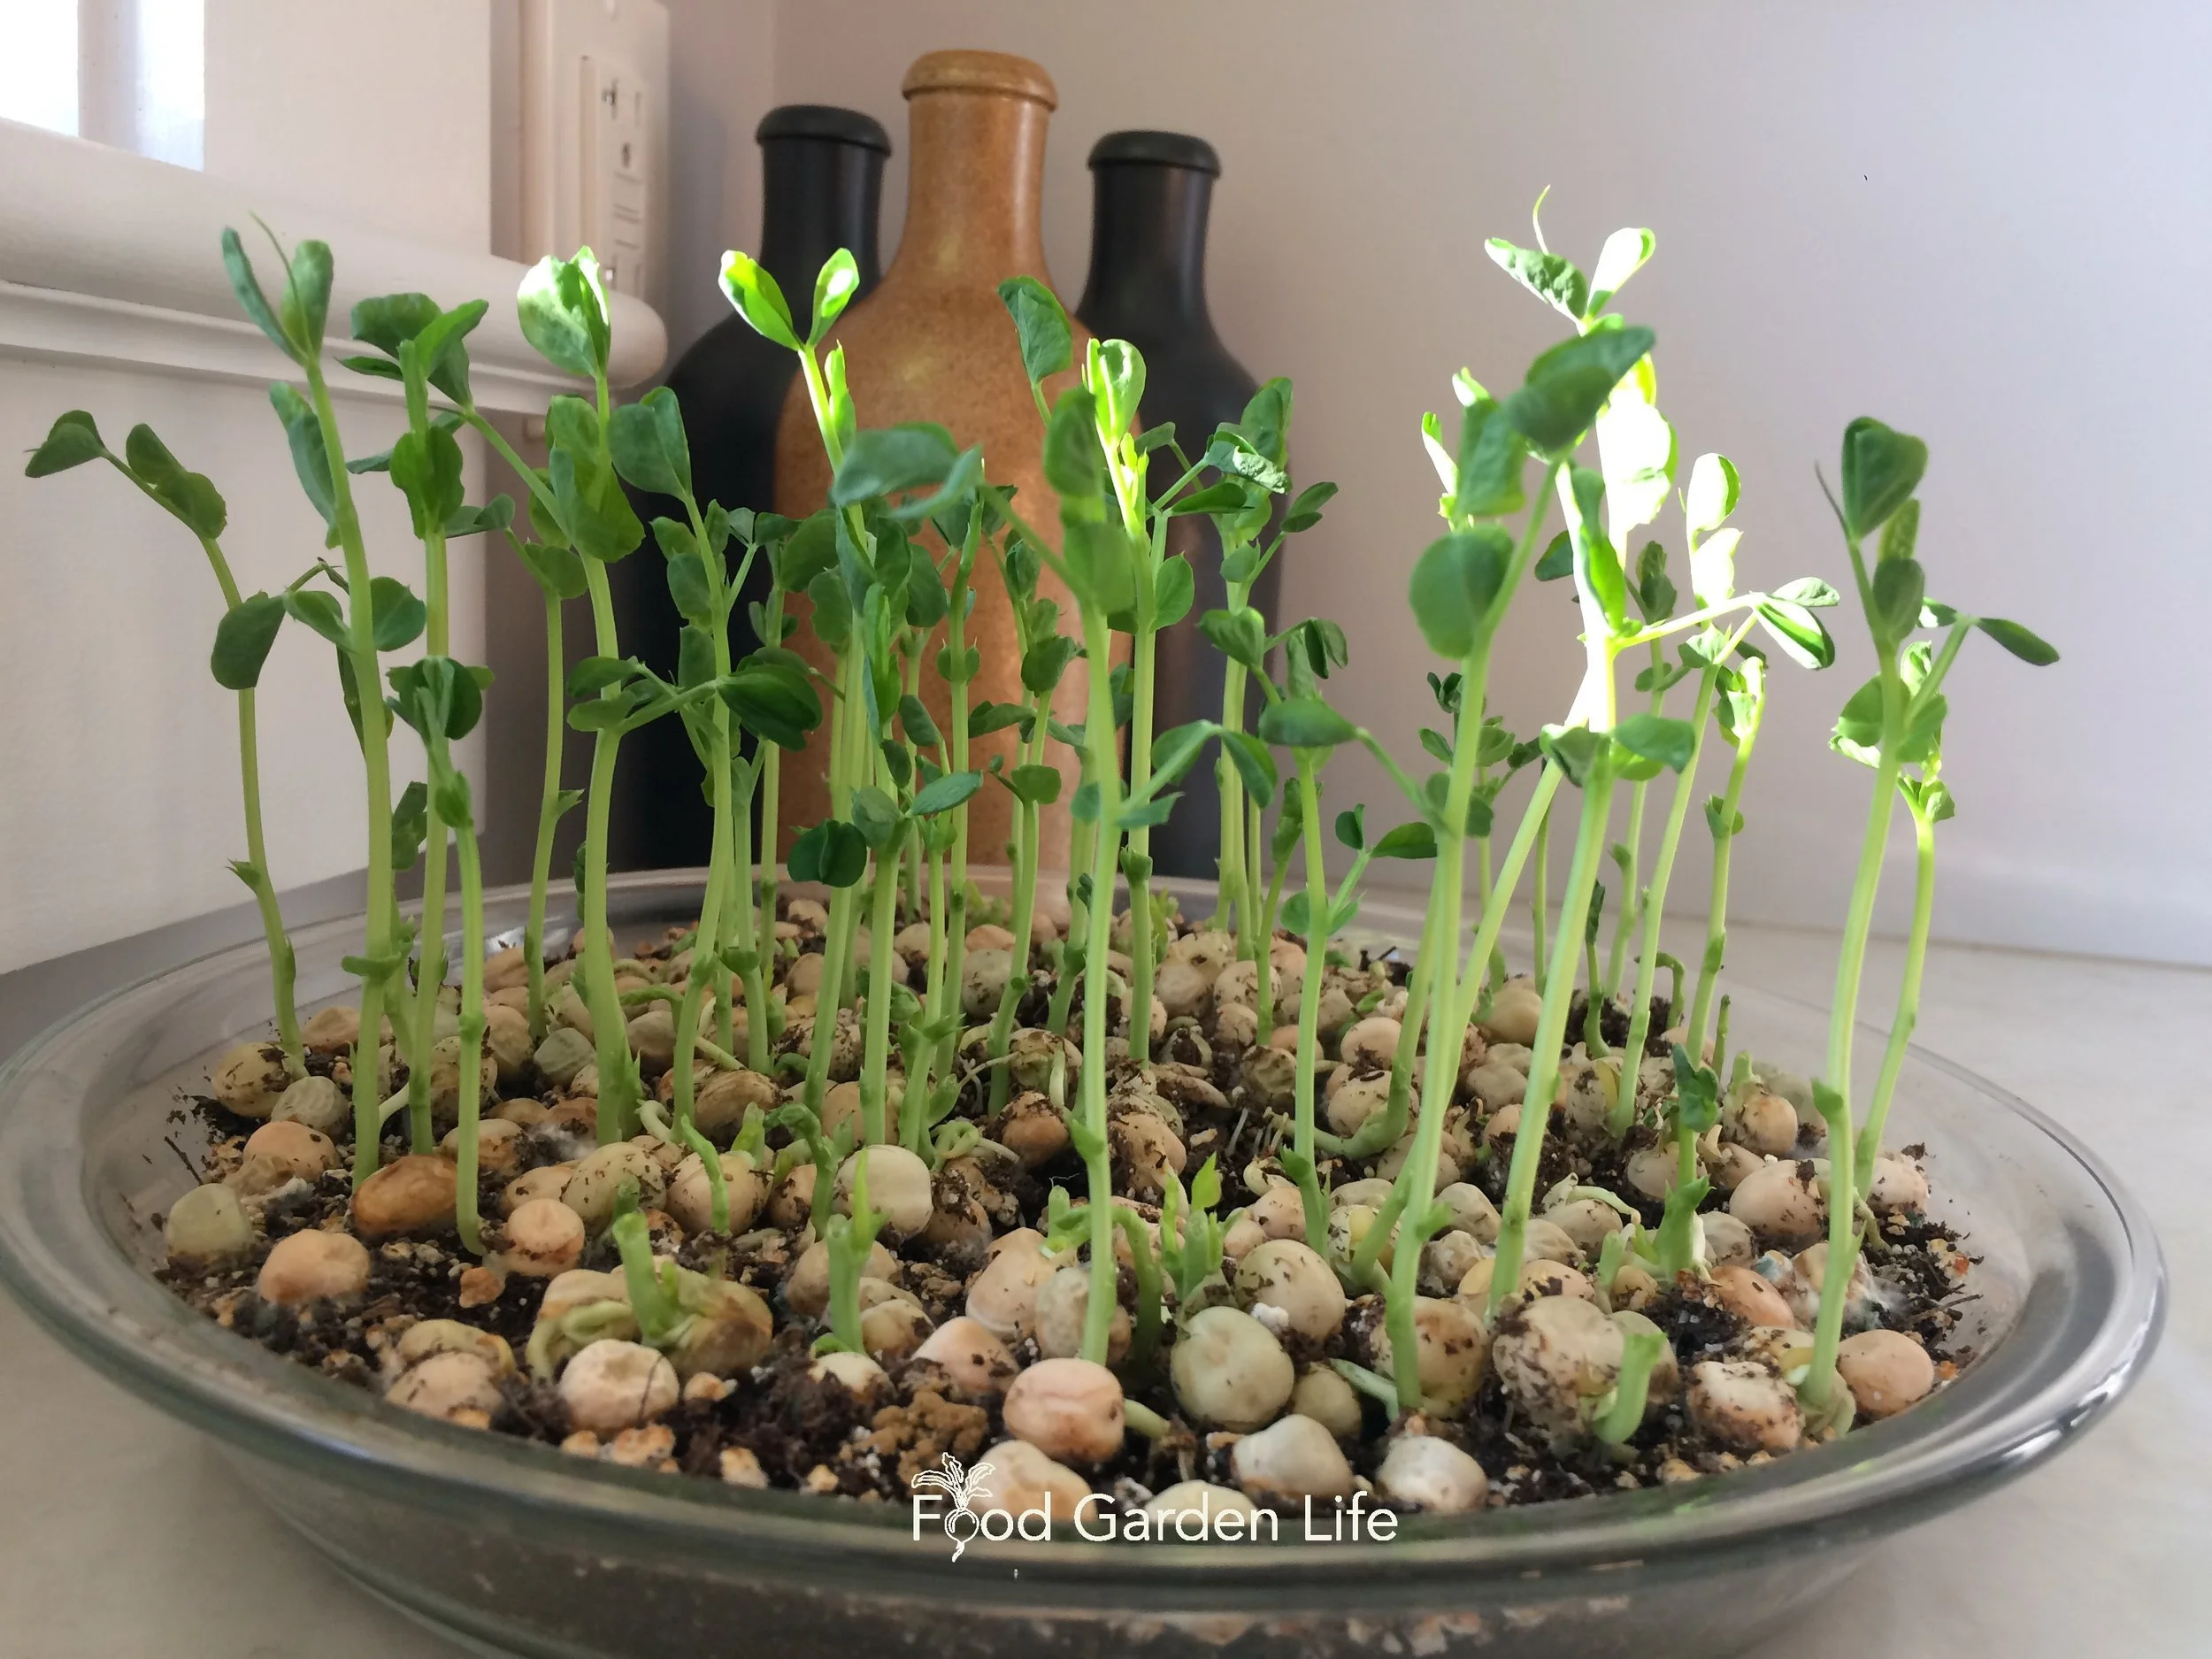
Spotty germination in this container of pea microgreens because the potting soil got too dry.
When the energy in the seeds is used up and they no longer send up new growth, compost them.
Harvesting Other Microgreens
The height and time to harvest depends on the microgreen crop. Most crops are harvested before a second set of leaves grows.
Harvesting Microgreens: Here's a Hack
In commercial operations growers often use shallow trays so that it’s easy to harvest microgreens with a knife. (With a deeper tray, the edge of the tray gets in the way of cutting close to soil level.)
My daughter grows our microgreens in shallow trays: it’s worthwhile if you’re planning to grow lots.
How to Store Microgreens
If you have more microgreens than you can use at once, store them the same way you do leafy greens.
I wrap them in damp paper towel, and then put them in a plastic bag, in the fridge.
Great for Gardening with Kids
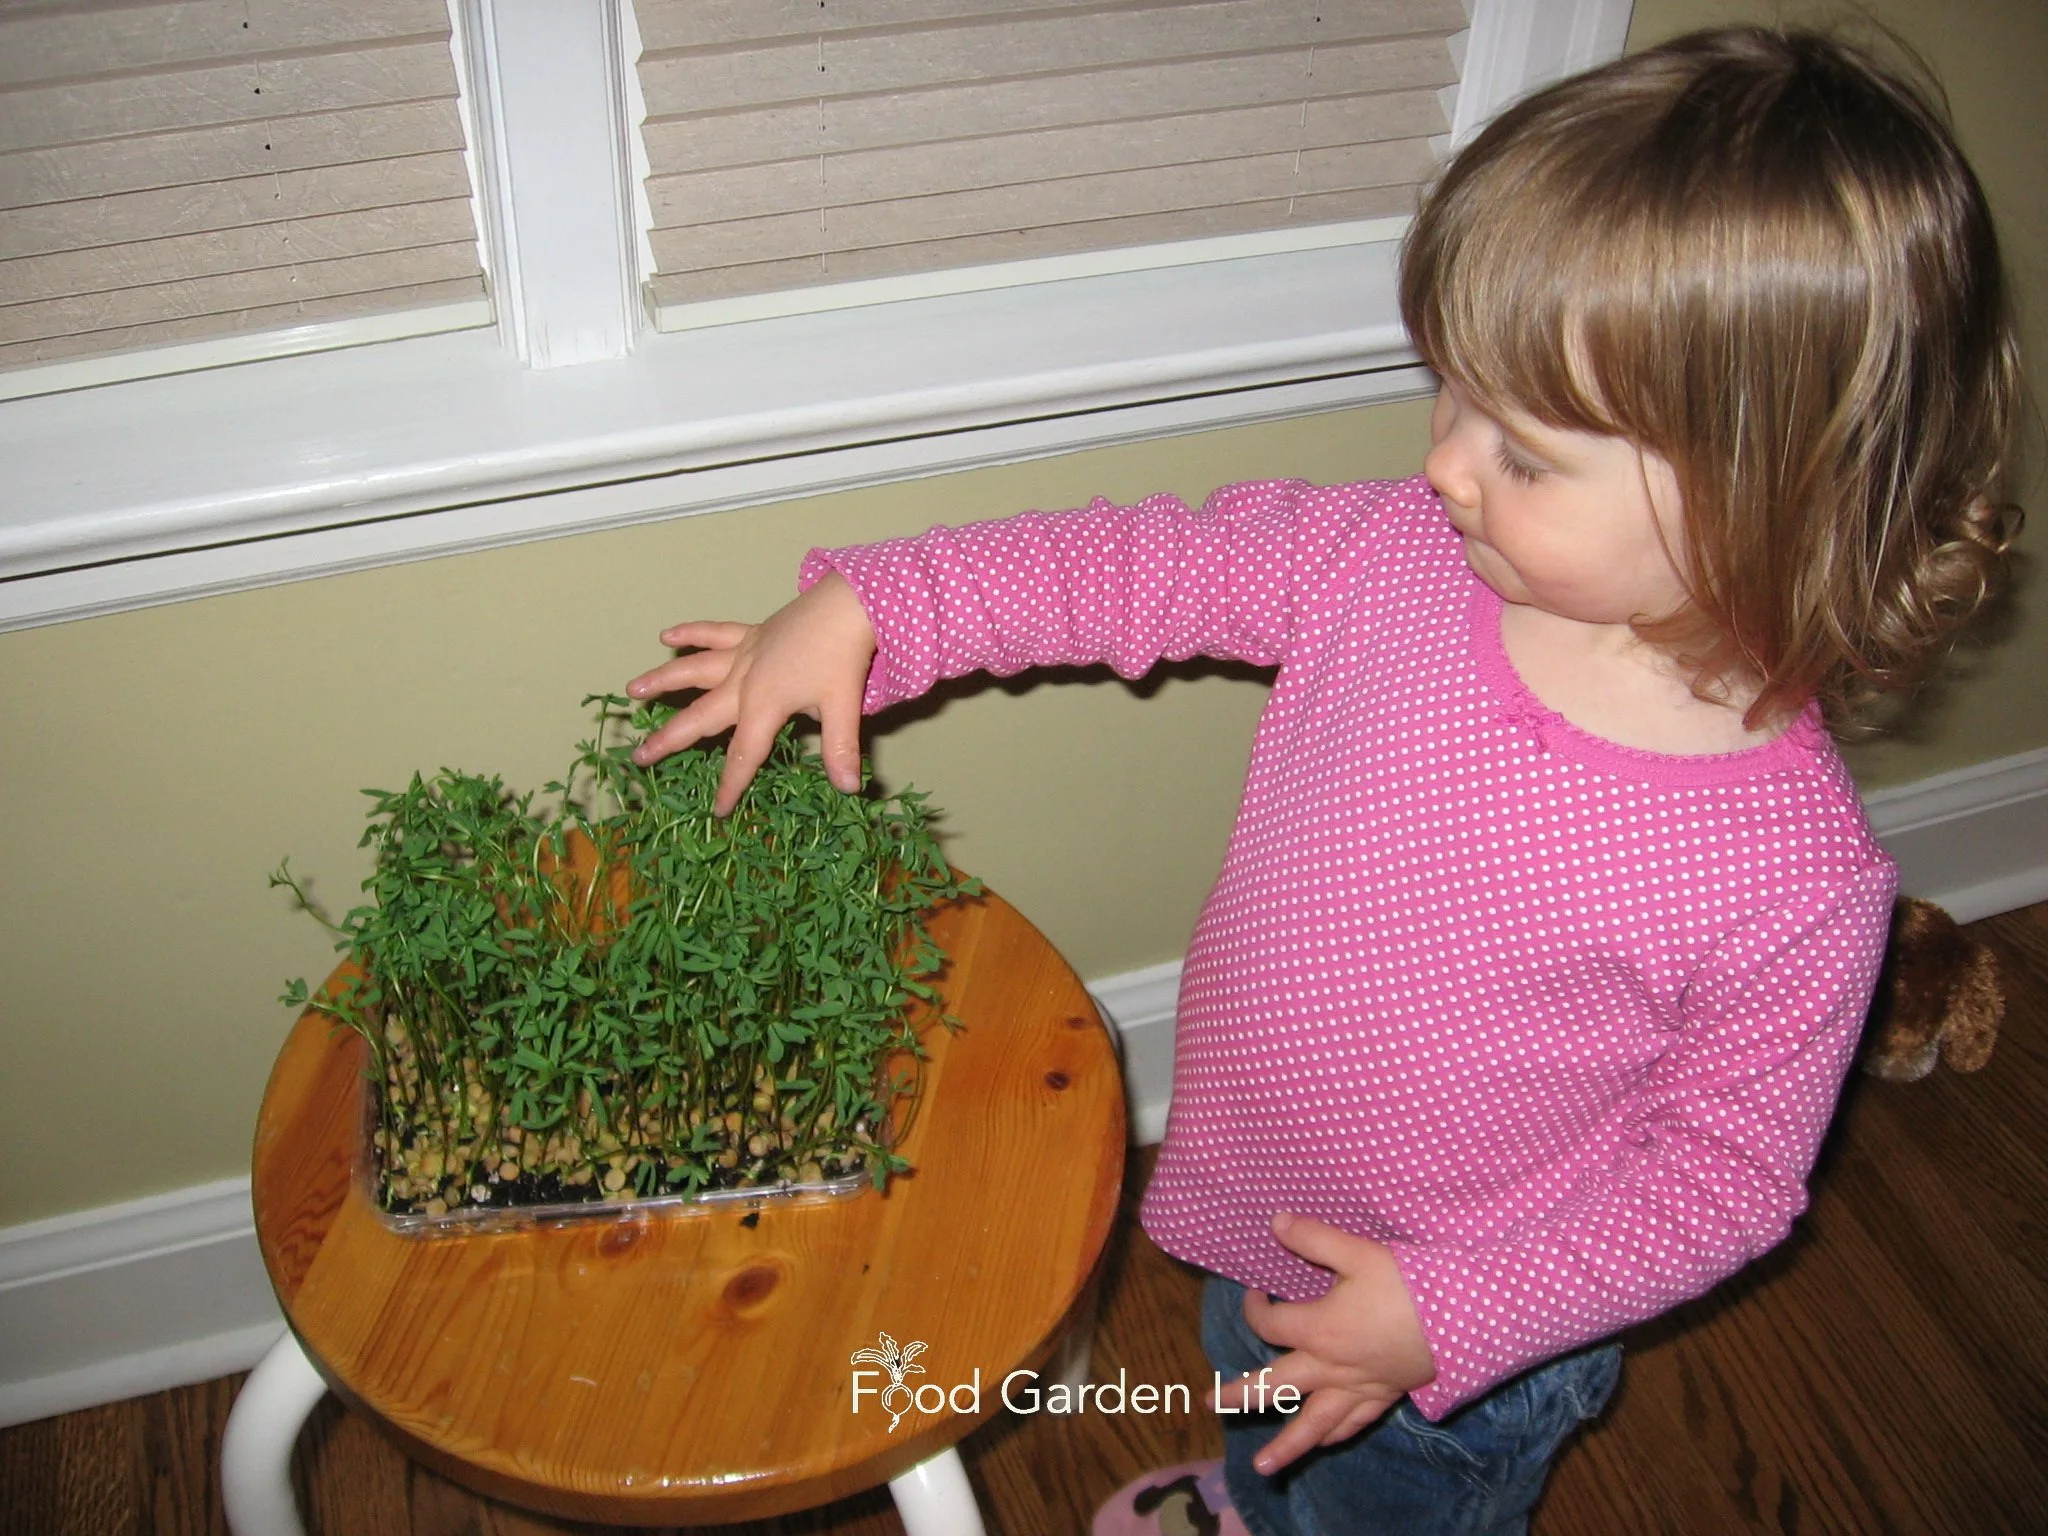
Growing microgreens is an easy and fun gardening project to do with children.
My hunch that pea shoot tendrils would be fun to tickle my kids with was what prompted me to grow microgreens in the first place.
The tendril-tickling got lots of giggles, and the sprouts were a crunchy and sweet—perfect for kids.
Growing microgreens also turned out to be a fun project to do with the kids.
If you grow microgreens with kids, start with pea shoots: They’re fairly big and easy for kids to handle.
Microgreens on the Menu
If you’re not used to eating microgreens, it’s not hard to incorporate them into the menu.
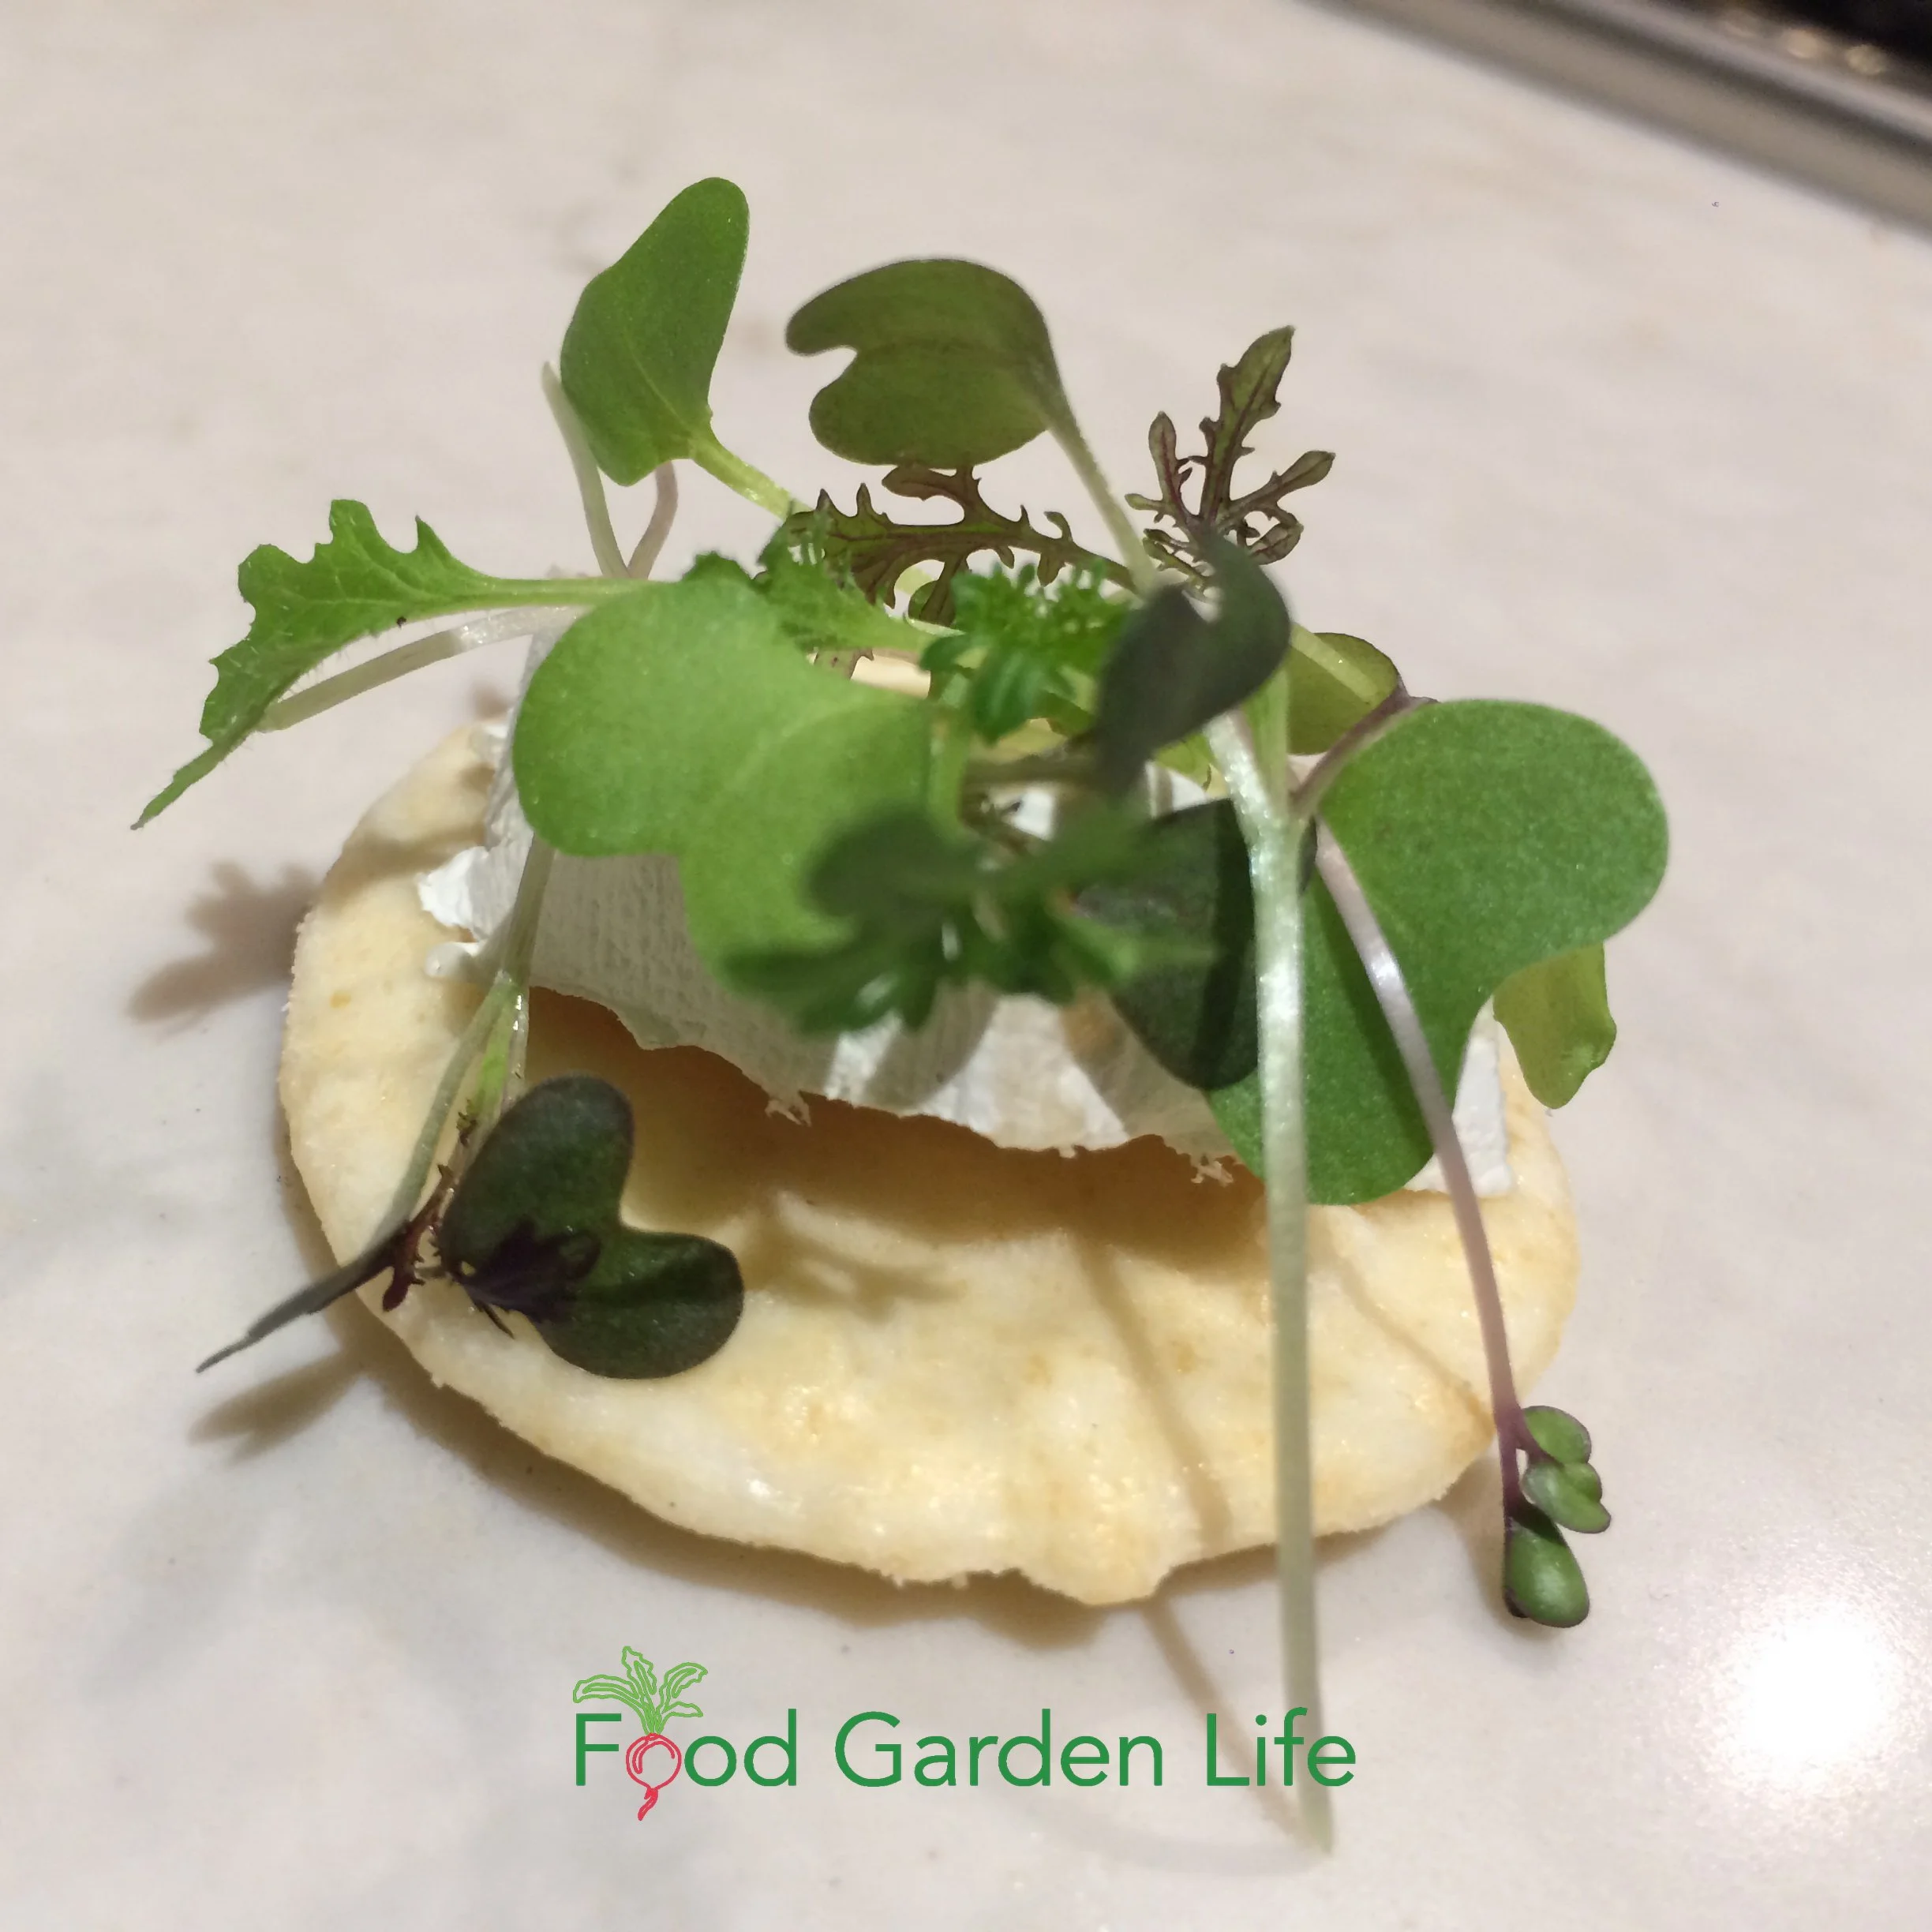
Microgreens as a finishing touch on a cracker with cheese!
Here are ideas:
Salads (our fav is chopped pea microgreens with toasted sunflower seeds and diced halloumi cheese)
Microgreens as a garnish
Served atop stir-fries
In sandwiches, instead of lettuce
FAQ: Growing Microgreens Indoors
What’s the difference between microgreens and sprouts?
Sprouts are grown in warm, humid, dark conditions, without soil. You eat the whole thing—including the roots.
Microgreens are grown in light, on a thin layer of potting soil. You eat the top—but not the roots.
I don’t bother growing sprouts. They require more attention. And there’s more chance of microbial contamination because the humid, warm, still conditions for growing sprouts are ideal for microbes to multiply.
Are microgreens safe?
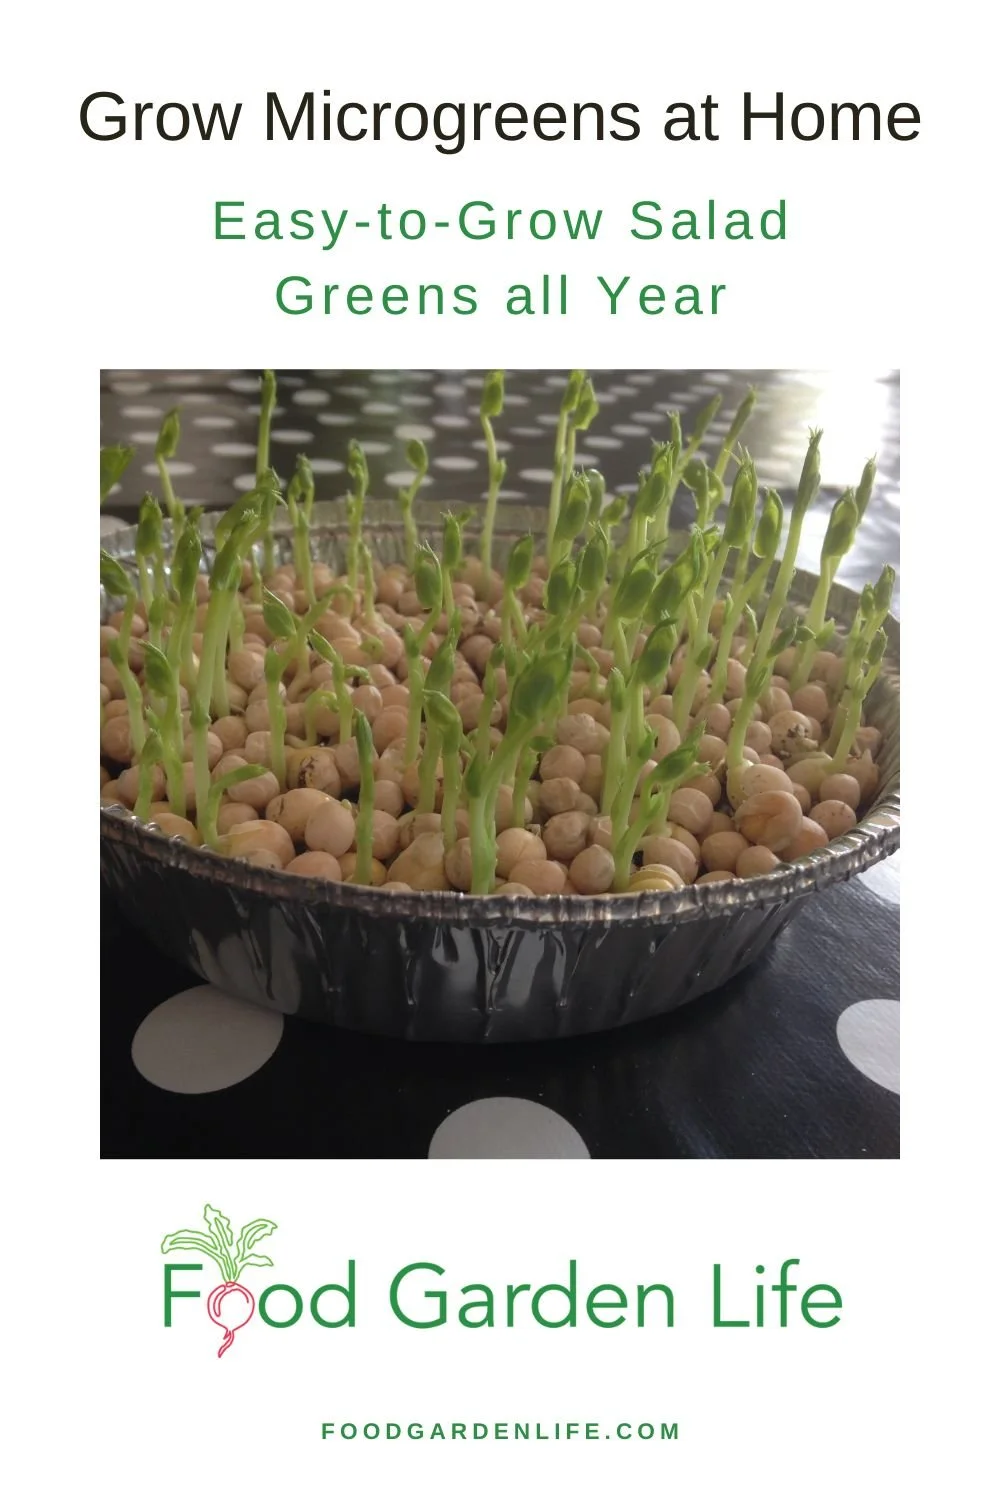
Pin this post!
Many people associate sprouts with foodborne illness, a result of well-publicized cases of Escherichia coli (E. coli) and salmonella bacterial contamination.
By extension, people wonder about microgreens too. But there’s a difference between sprouts and microgreens.
Microgreens are exposed to light and air movement, making conditions less suitable for bacterial growth on microgreens. (Sprouts grow in conditions that are like a microbe incubator—in warm, moist conditions in a closed container.)
Do microgreens regrow after cutting?
It depends on the crop. Pea seeds and some of the larger seeds do send out another shoot after they're cut back. Many of the smaller seeds don't regrow once they're cut back.
But sometimes it looks like microgreen seeds are regrowing: It's seeds that didn't yet germinate starting to grow.
Find This Helpful?
Enjoy not being bombarded by annoying ads?
Appreciate the absence of junky affiliate links for products you don’t need?
It’s because we’re reader supported.
If we’ve helped in your food-gardening journey, we’re glad of support. You can high-five us below. Any amount welcome!
More Indoor Food Garden Ideas
Articles and Interviews
For more posts about how to grow vegetables and kitchen garden design, head over to the indoor food garden home page.
Courses: Edible Gardening
Want more ideas to make a great kitchen garden? We have great online classes that you can work through at your own pace.
Edible Gardening Consultation
Book a virtual consultation so we can talk about your situation, your challenges, and your opportunities and come up with ideas for your food garden.
We can dig into techniques, suitable plants, and how to pick projects that fit your available time.
Planning a Kitchen Garden that Awes (in Purple!)
Make a kitchen garden with a mix of your favourite crops.
By Steven Biggs
Grazing the Kitchen Garden
How to make a kitchen garden you love.
My family doesn’t think it’s unusual to hear the back door open and close as I cook supper.
They see me come in with a fistful of herbs. Or a colander with vegetables, fresh fruit, and edible flowers.
I think of it as grazing: Picking what’s ready from my kitchen garden: Small portions of a wide variety of ingredients for our meal.
What’s ready in the garden inspires what I make for supper.
Along with a varied, continuous harvest, there’s something else I think about when planning a kitchen garden: Creativity. A great kitchen garden touches the senses. Taste is obvious, smell too. But there’s also touch, sound, and sight.
If you’re looking for great kitchen gardening ideas, keep reading. I have ideas for you about how to make a kitchen garden you love.
Planning a Kitchen Garden – and Having Fun Doing it
The planning stage of gardening can be intimidating. There’s crop spacing, crop timing, succession crops, crop rotation, and more…
So before I throw out ideas for you, here’s my top advice: Have fun. The compost pile takes care of things that don’t go as planned.
Next suggestion: Be playful with style and design because it’s a personal thing. A kitchen garden plan is a personal creation. (And the fun part is that every year you can create something new!)
What is a Kitchen Garden?
How is a kitchen garden different from a vegetable garden? It depends who you ask.
When I think of a kitchen garden I think of a mix of edible plants including herbs, vegetables, fruit, edible flowers, and flowers for cutting. That sets it apart from a traditional vegetable garden geared towards large harvests for canning, freezing, and storing.
Create Your Own Unique Edible Landscape
That fits for your yard, and your style!
Creative Kitchen Gardens
More than a Vegetable Garden

It was late fall and this kitchen garden was getting tired, but the playful design and colour theme still shone through.
However you define a kitchen garden, don’t just make it functional. Make it something that gives you a jolt of delight when you see it.
For example, this fall I took a trip to the William Dam Seeds trial garden. It was late in the season and things were past their prime. But I was still riveted by what remained of their playful purple-themed garden. It was a mix of flowers, veg, and herbs.
Purple kale, purple basil, purple cauliflower, purple beans…and more.
There were lots of edibles. There was also a hefty dose of flowers. And the garden gave a wallop of colour. It had height. It was fragrant. And it was a playful pinwheel design.
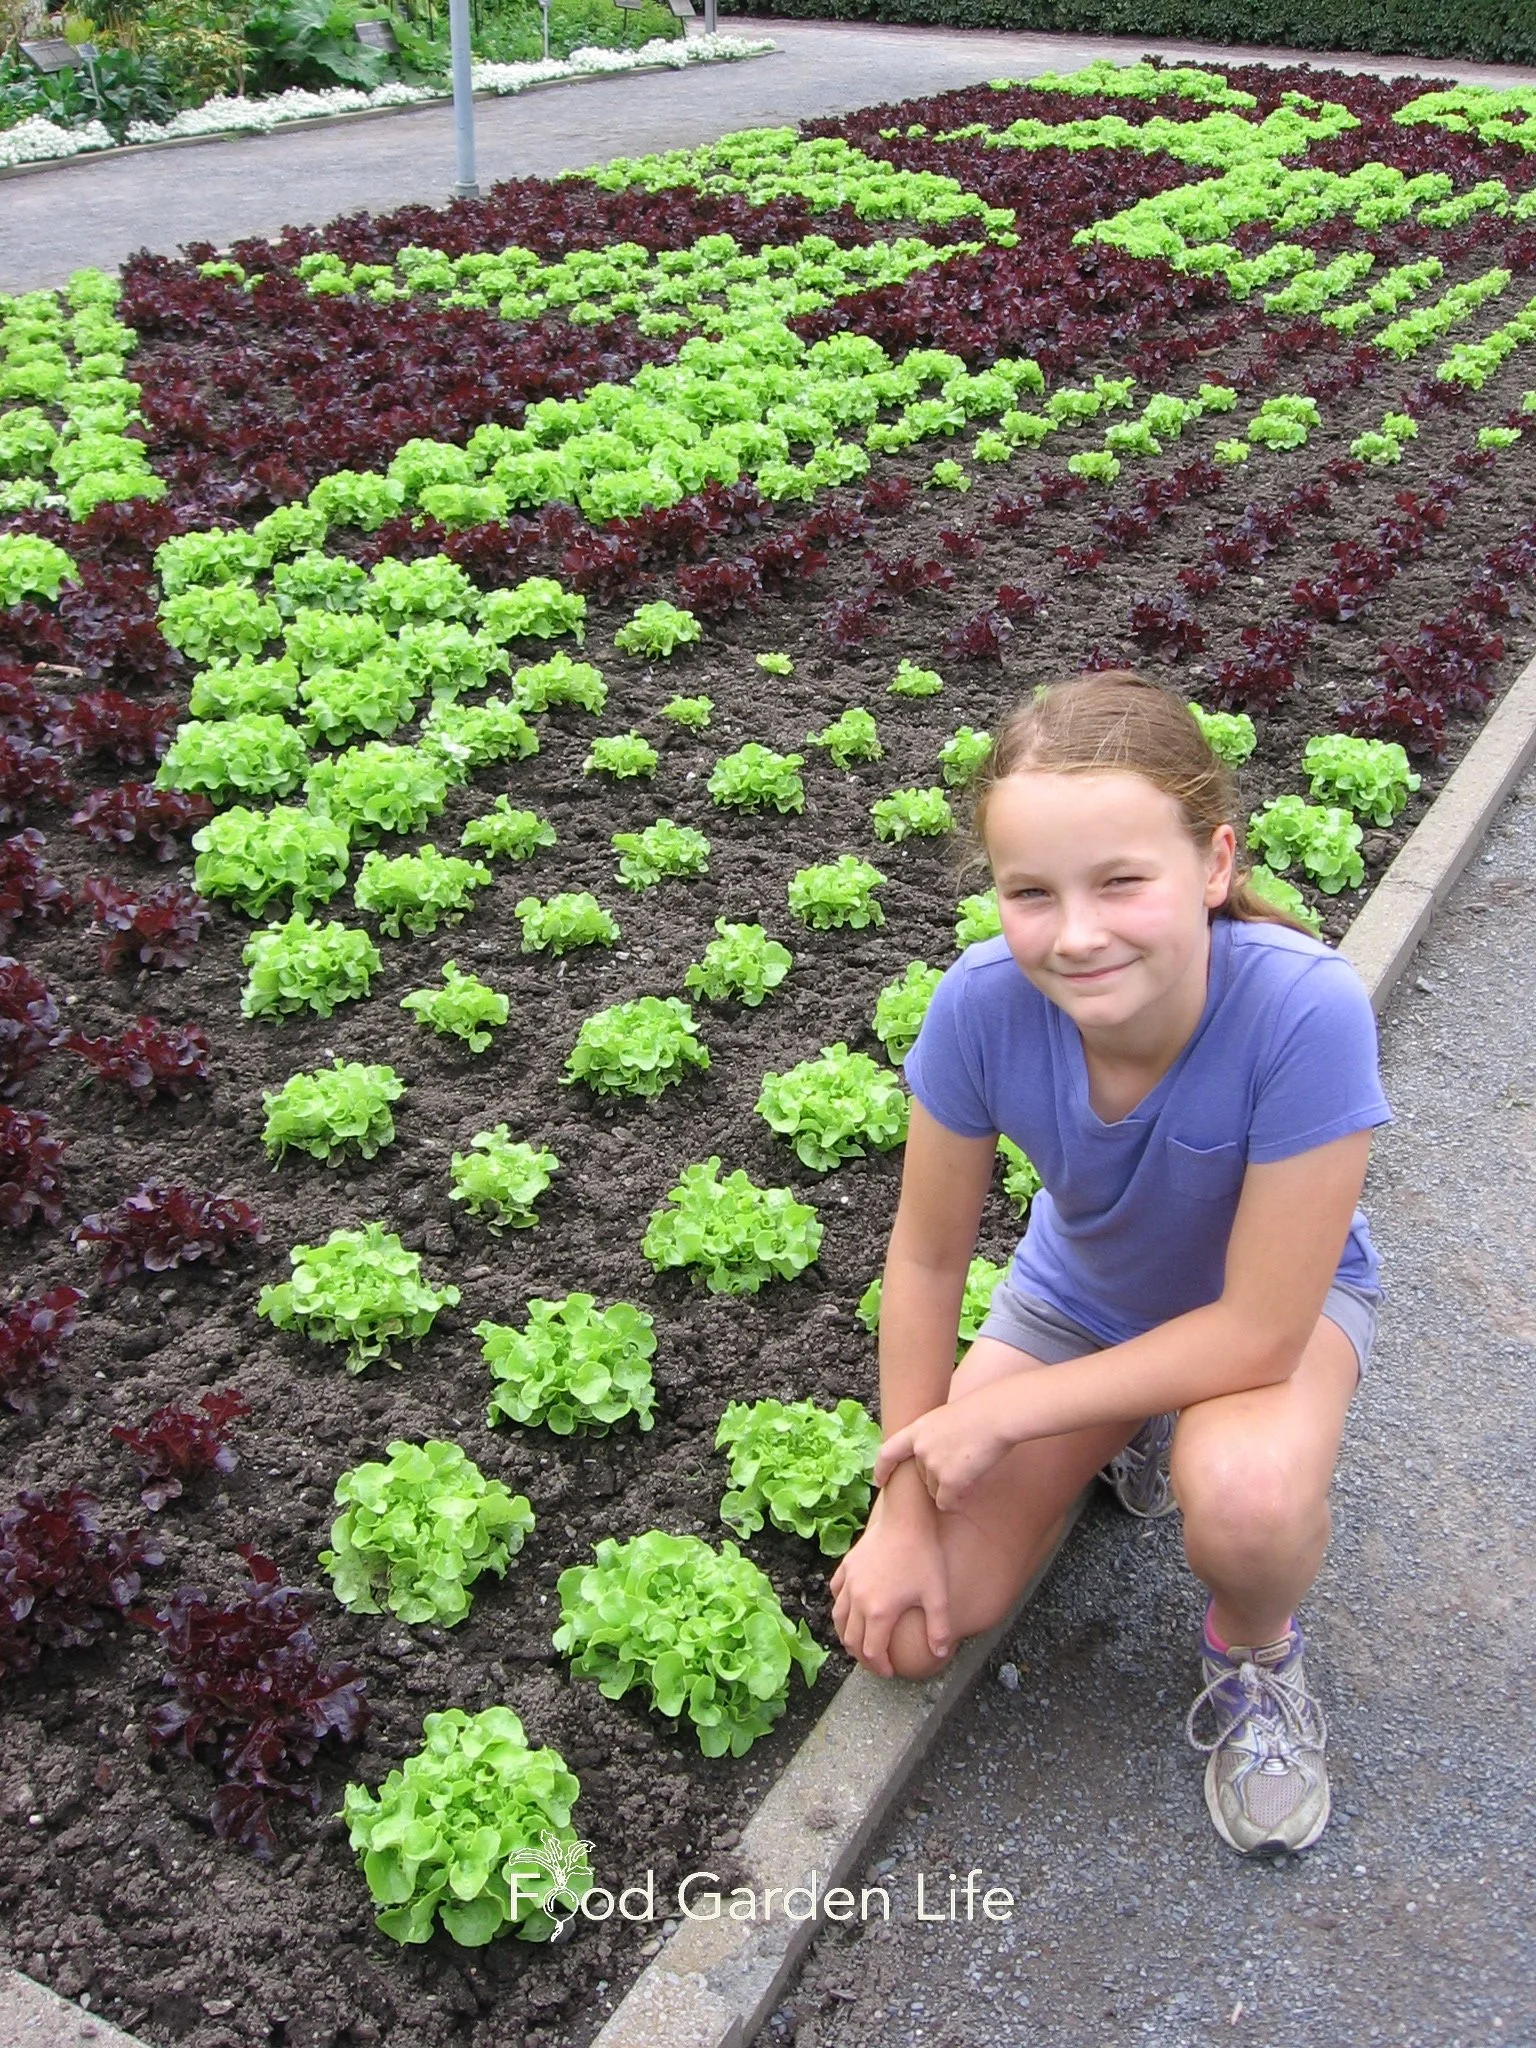
My daughter Emma and I were intrigued by the use of patterns and shapes in the Food Garden at the Montreal Botanical Gardens.
I’m not suggesting a purple-themed garden for everyone. I mention the purple-themed garden to help you think about making your kitchen garden special for you.
So think about:
Colourful crops
Texture
Shapes and patterns
Plant-themes (e.g. lots of lettuces!)
Here’s a fun idea…a dragon-themed garden for kids (seriously! See below.)
Creativity is what makes kitchen gardens shine.
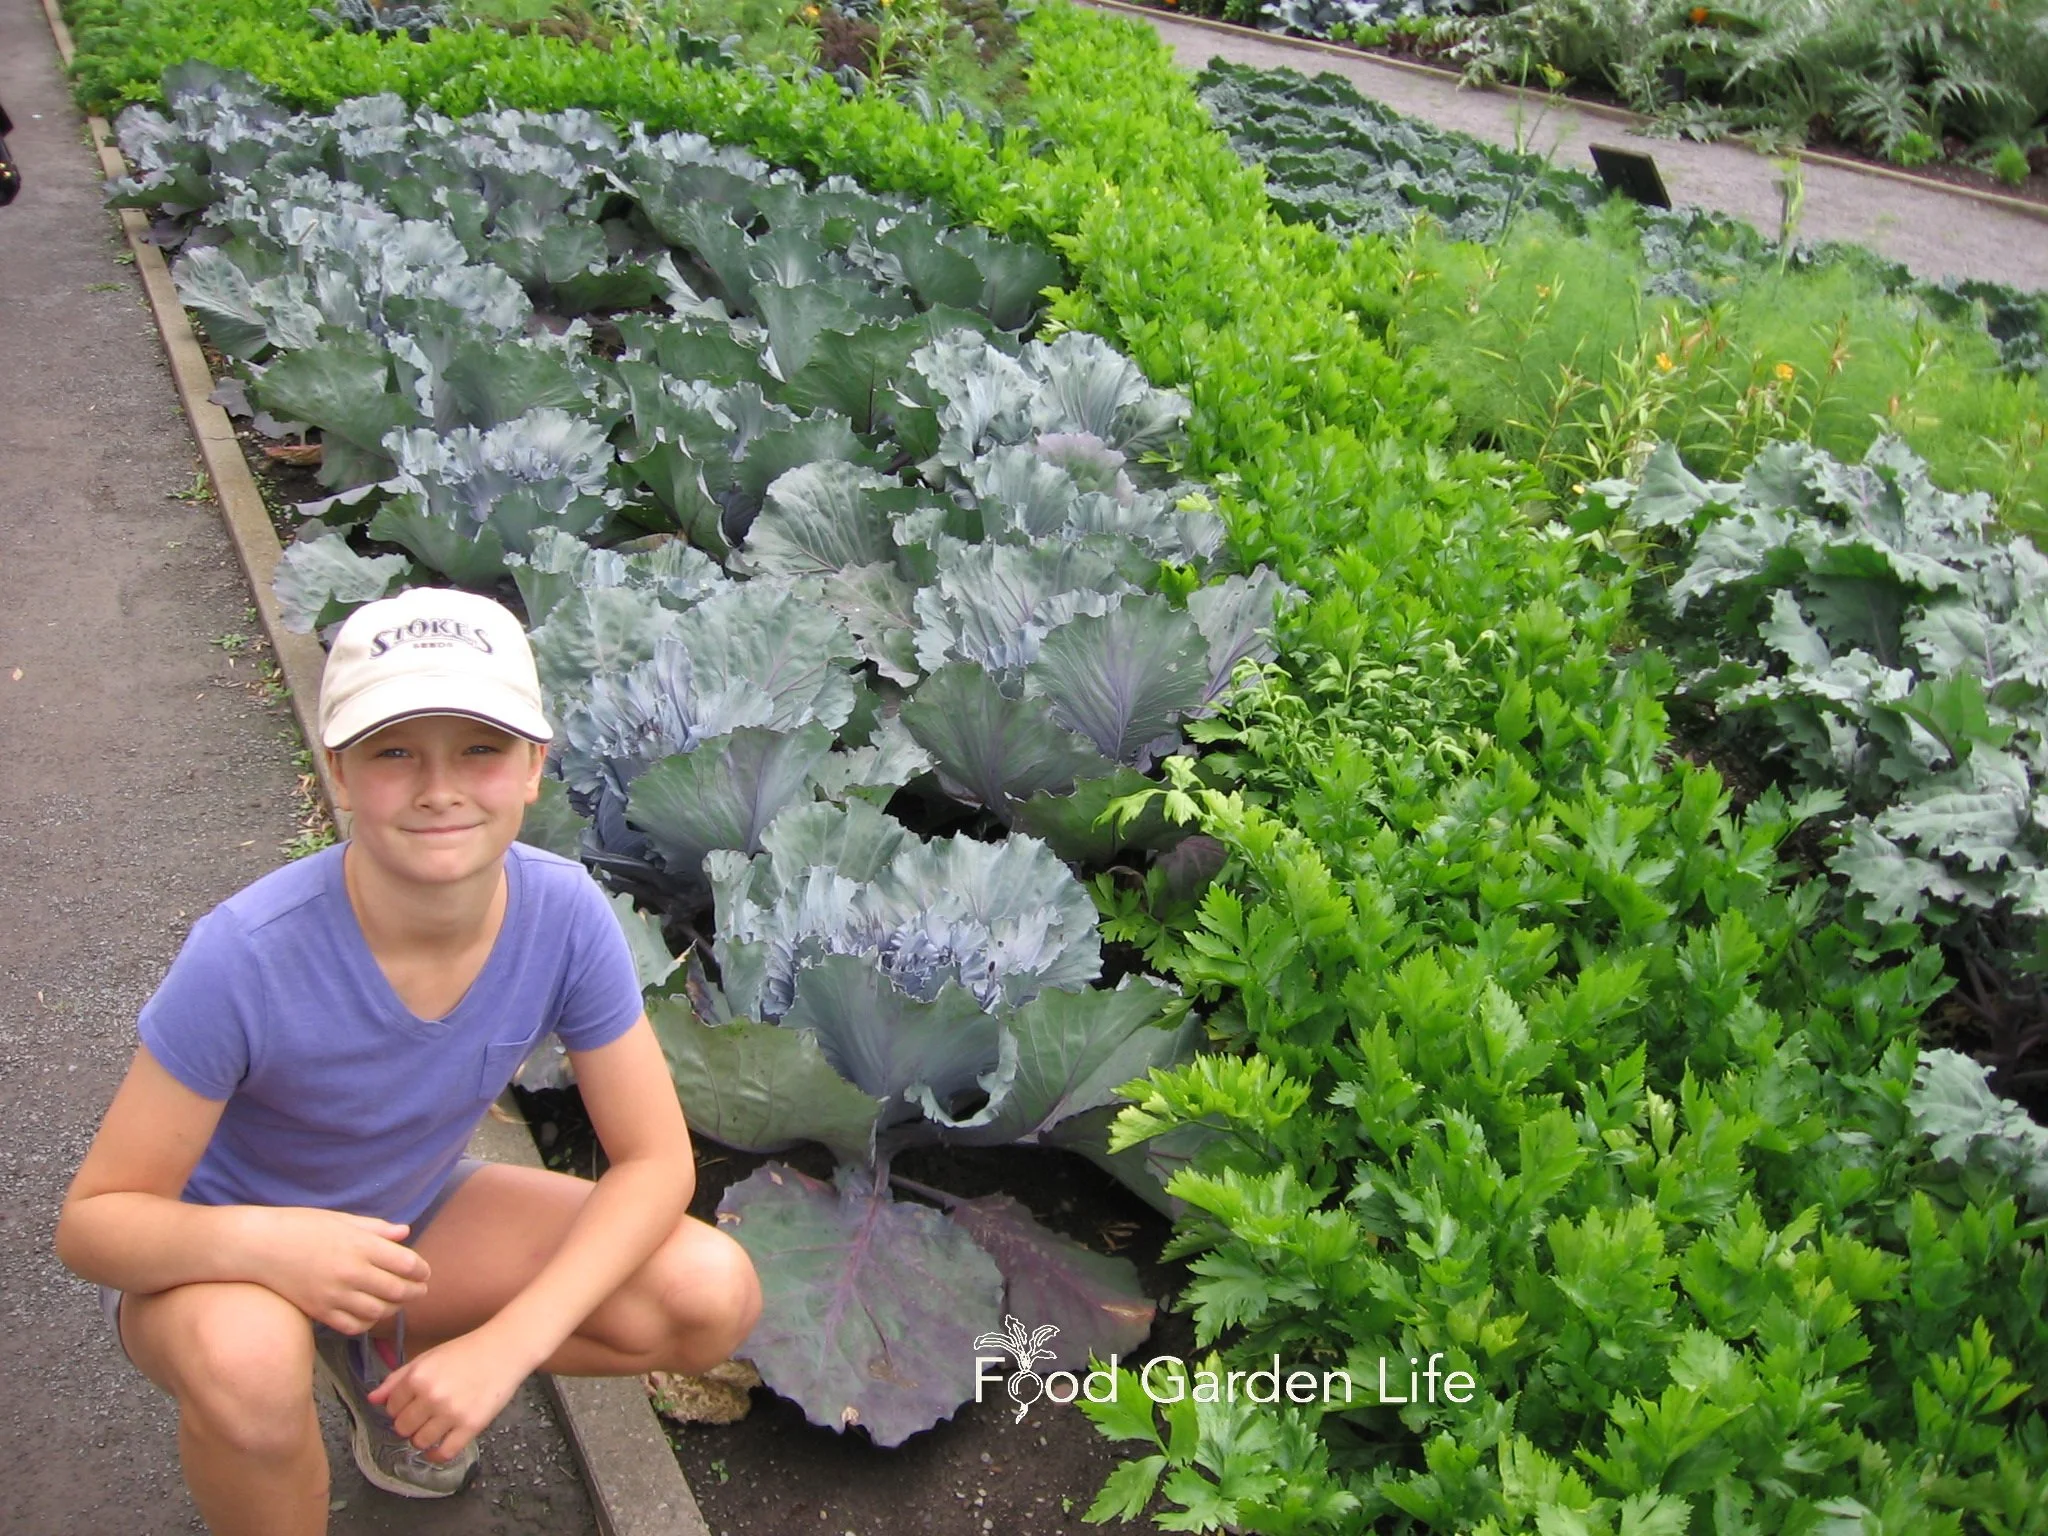
Don’t be afraid to play with texture in the kitchen garden! Here’s an X of celery between cabbage plants at the Food Garden at the Montreal Botanical Gardens.
Purple-Themed Fun
The purple trial garden reminded me of the purple-themed kids garden my daughter Emma included in her book Gardening with Emma.
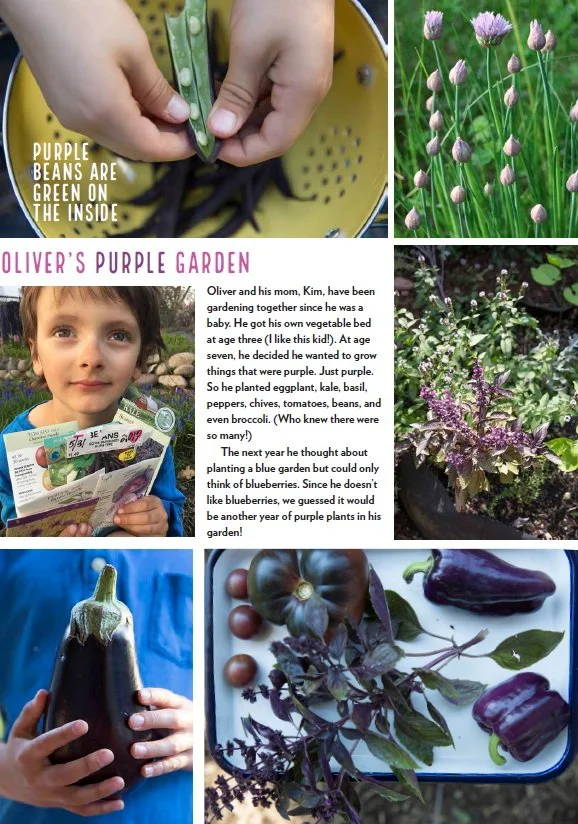
From the book Gardening with Emma.
The gardener, Oliver, was 7 years old. He told his parents he wanted a purple-themed garden.
When Emma got in touch with him for the book, Oliver was growing these purple crops:
Eggplant
Kale
Basil
Broccoli
Peppers
Chives
Tomatoes
Beans
More Colourful Edibles
I was thinking about Oliver’s purple kitchen garden, and jotted down purple crops in my garden that we can add to his list of purple crops:
Lavender
Purple peas
Purple mustard
Purple bok choy
Bronze fennel (OK, looks purple to me!)
Purple-leafed elderberry
Purple asparagus
Purple might or might not be your jam. If it’s not, think about what delights you.
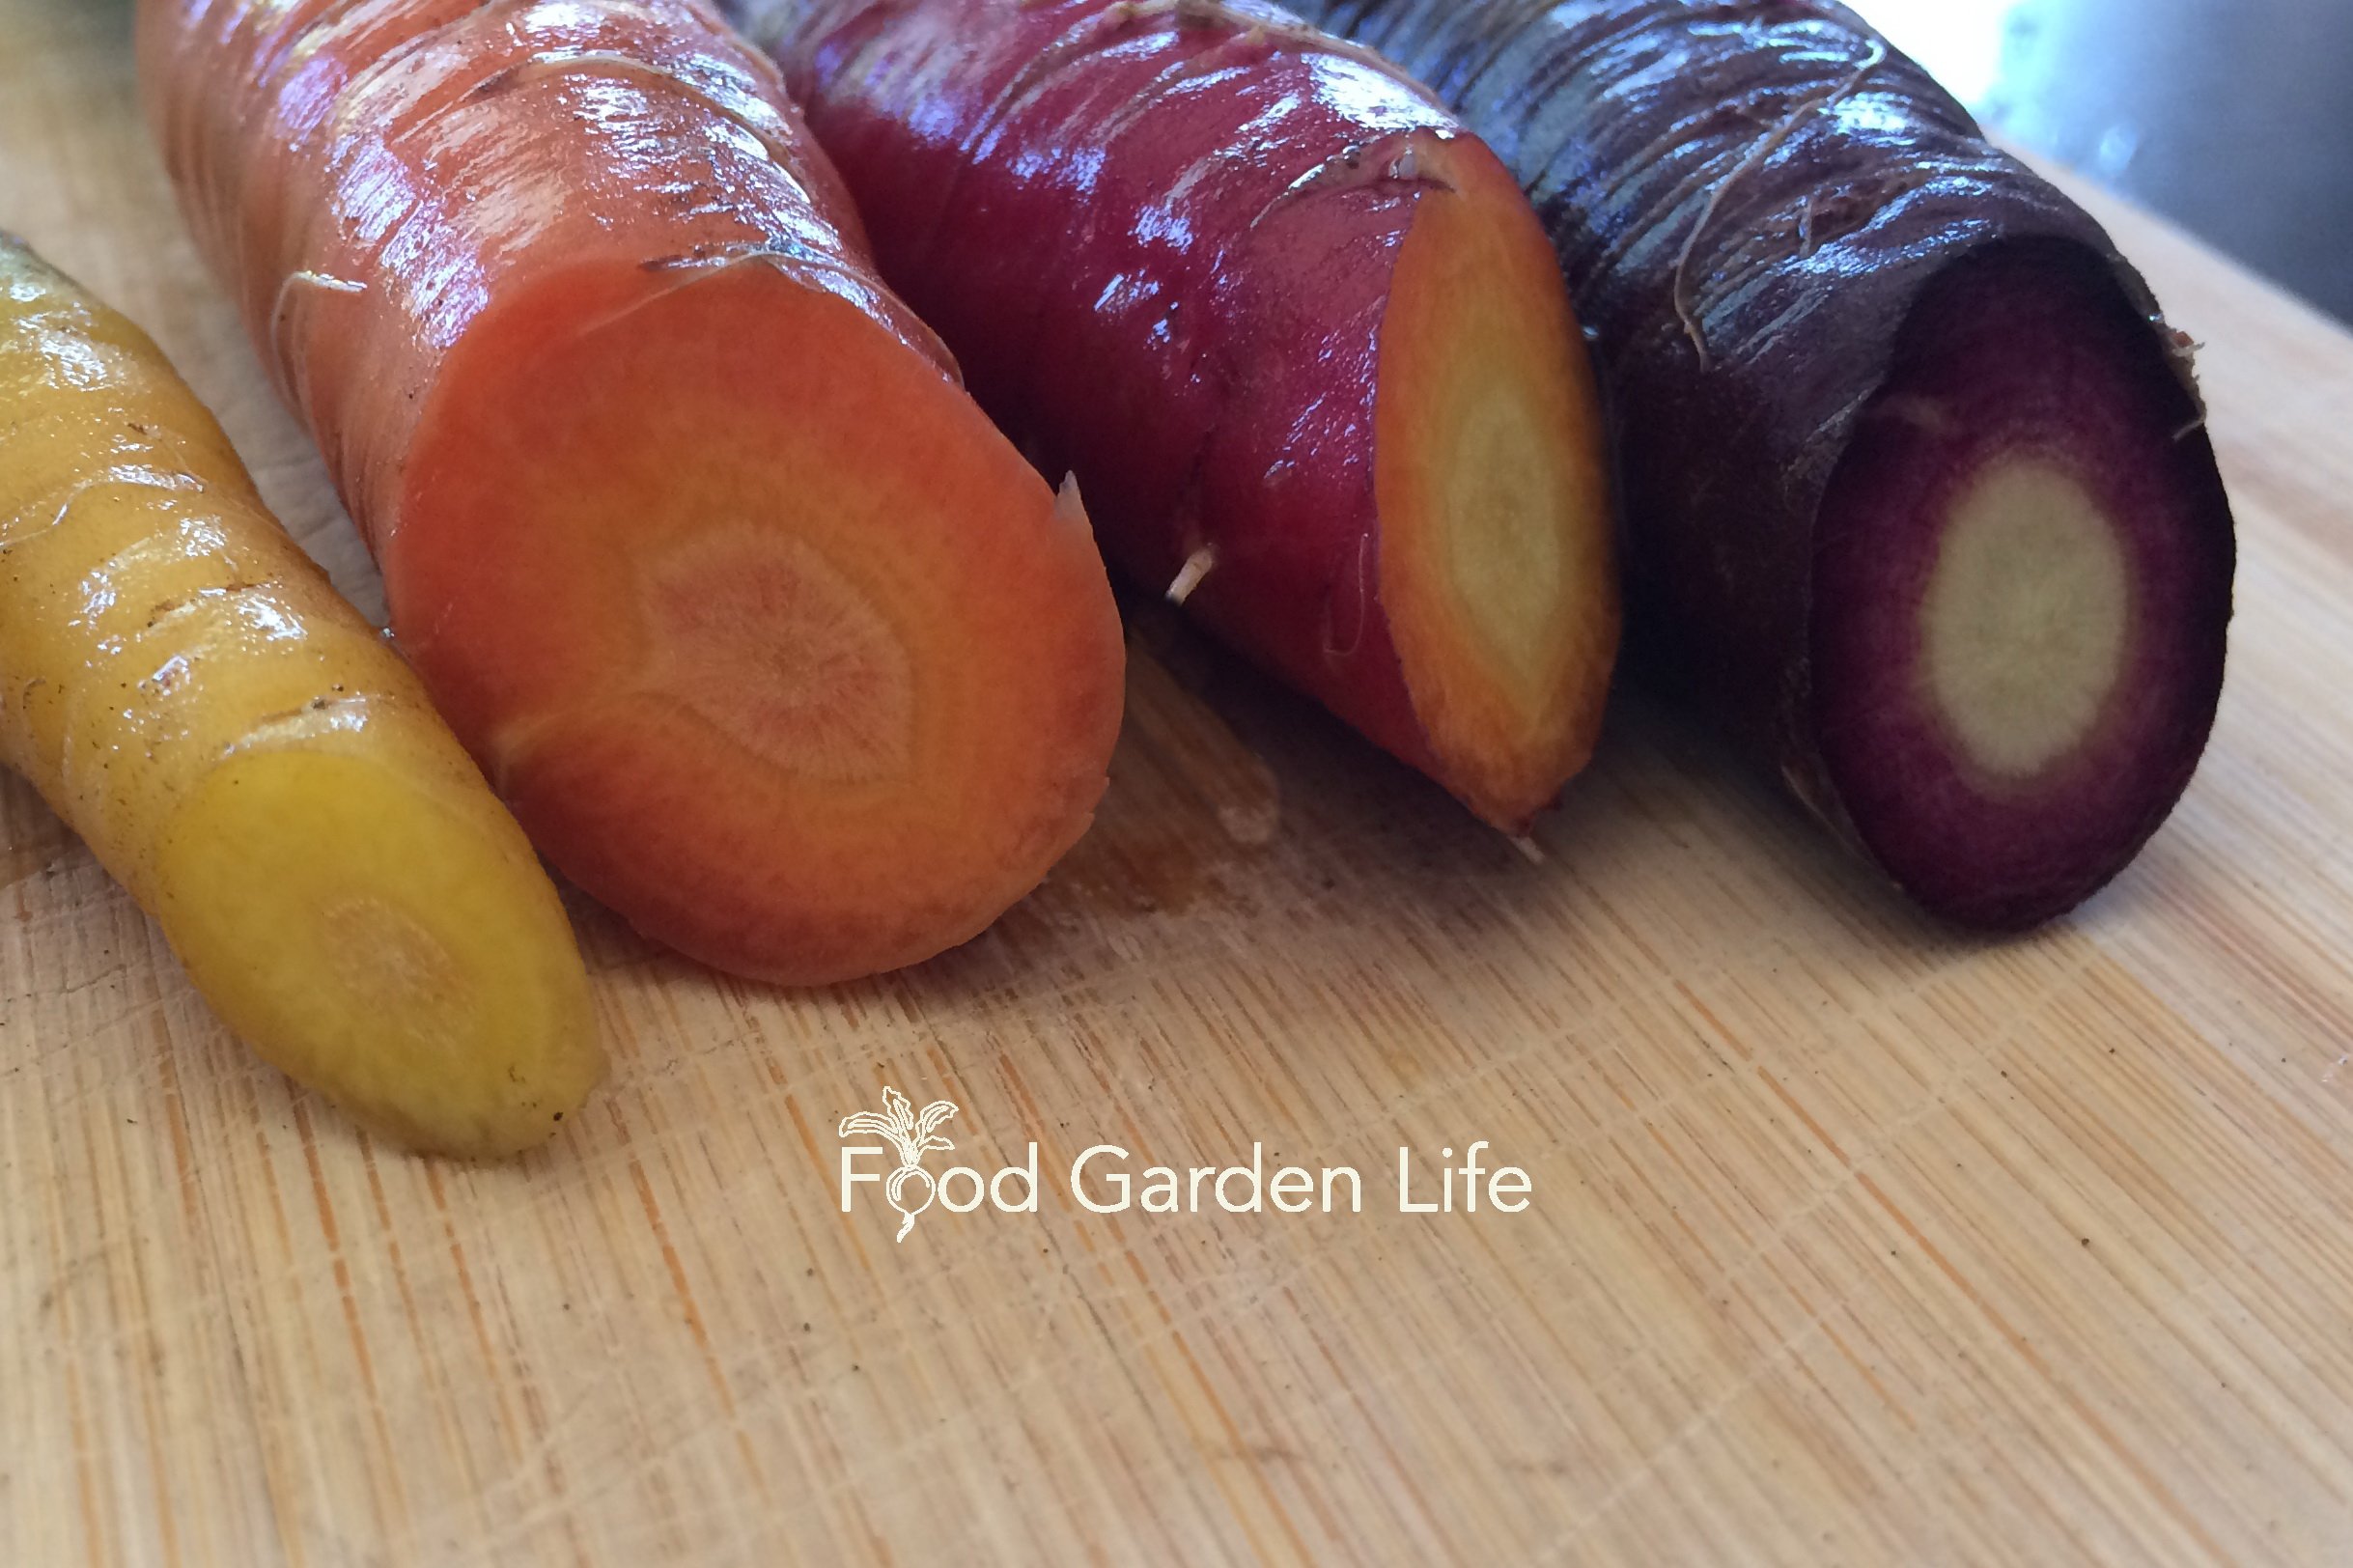

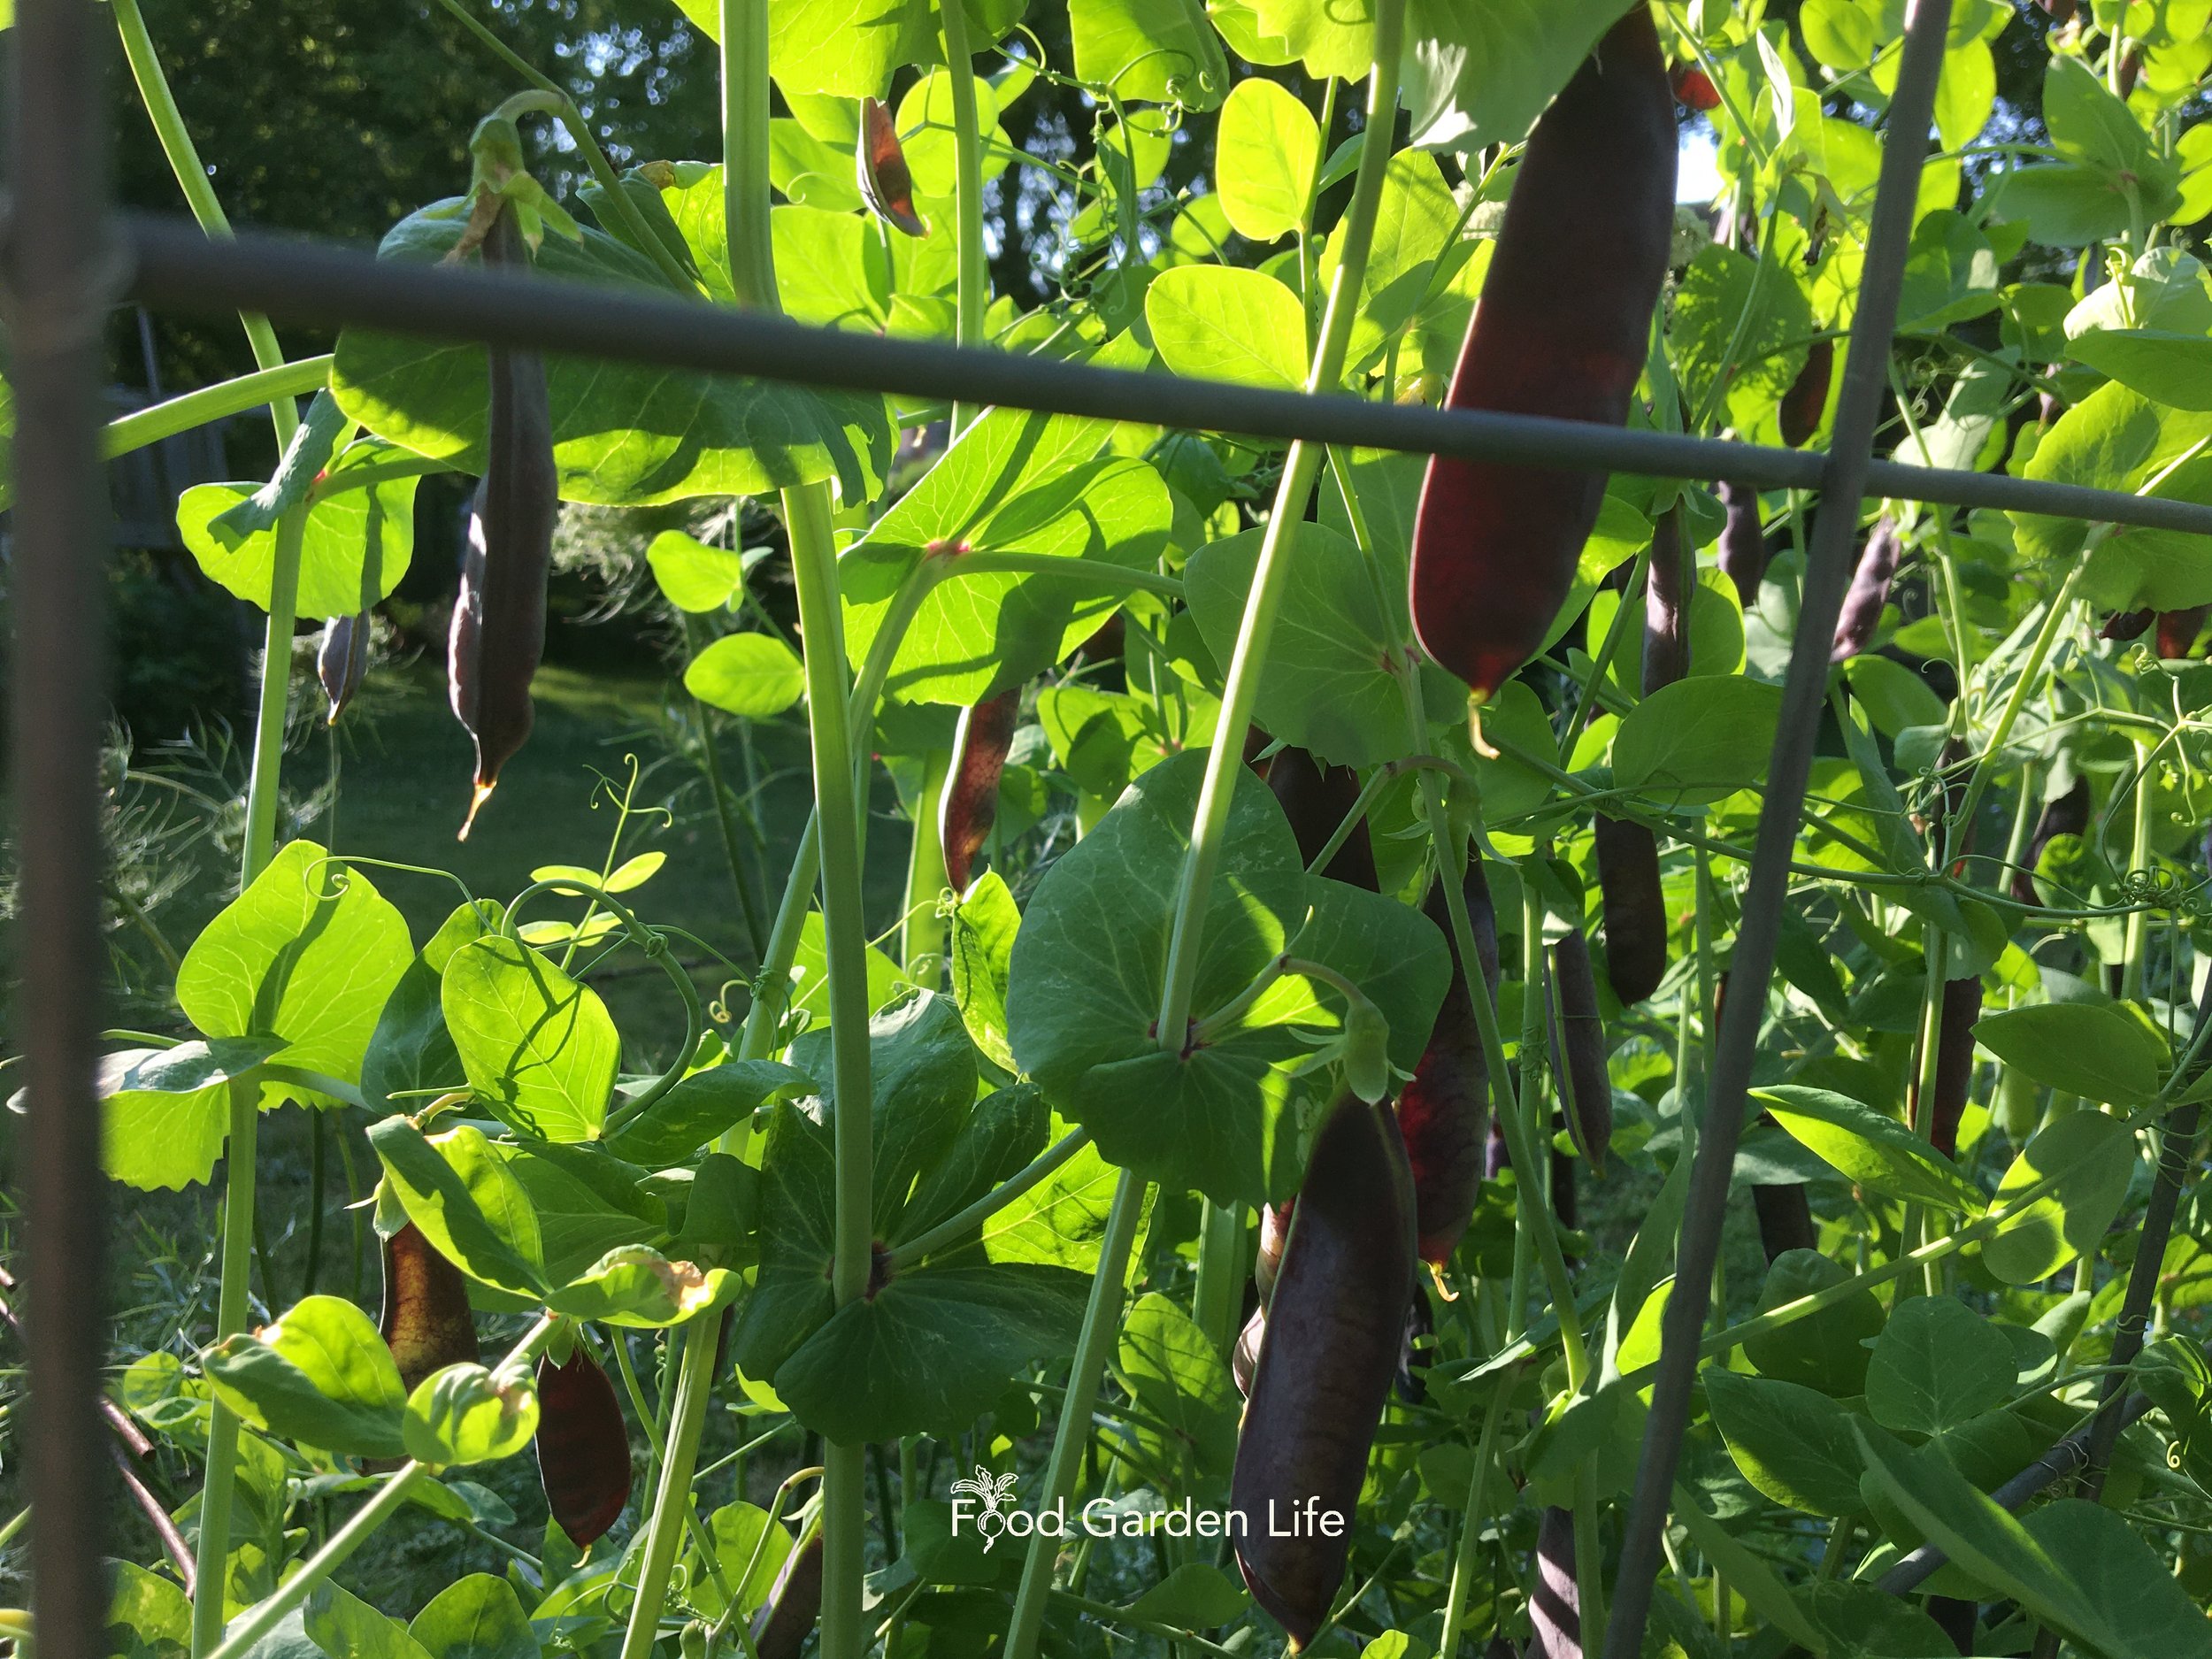
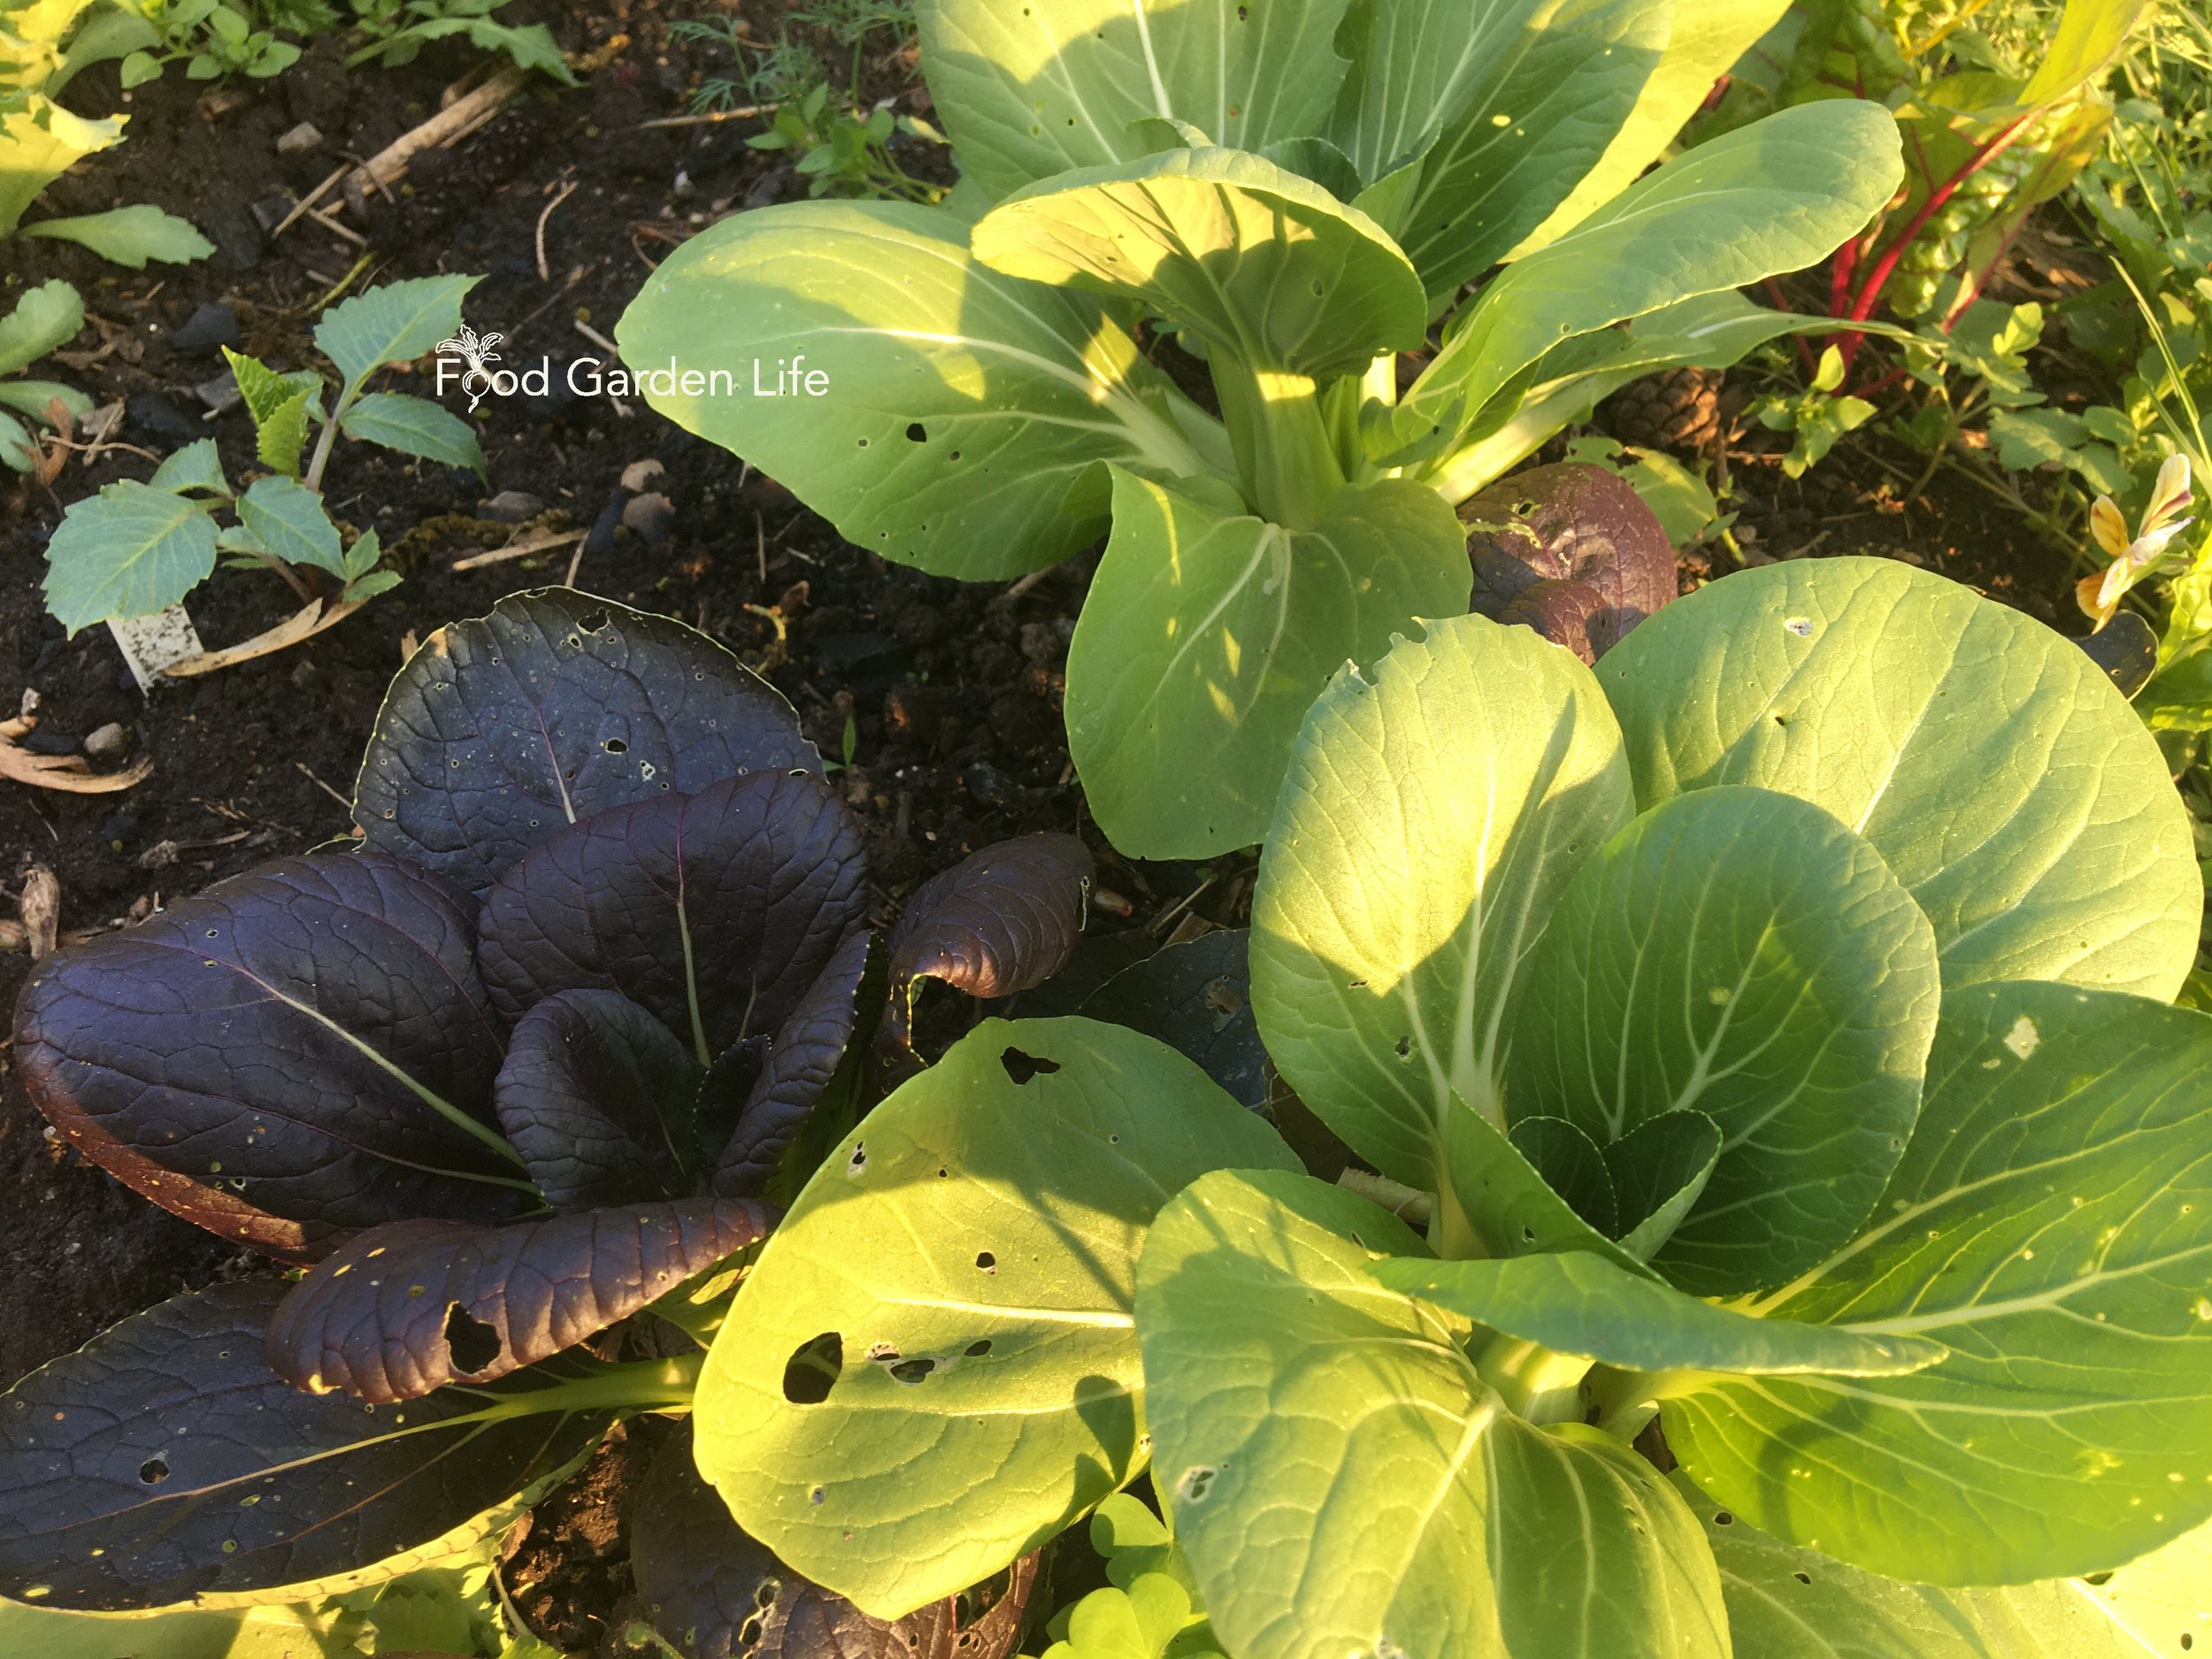
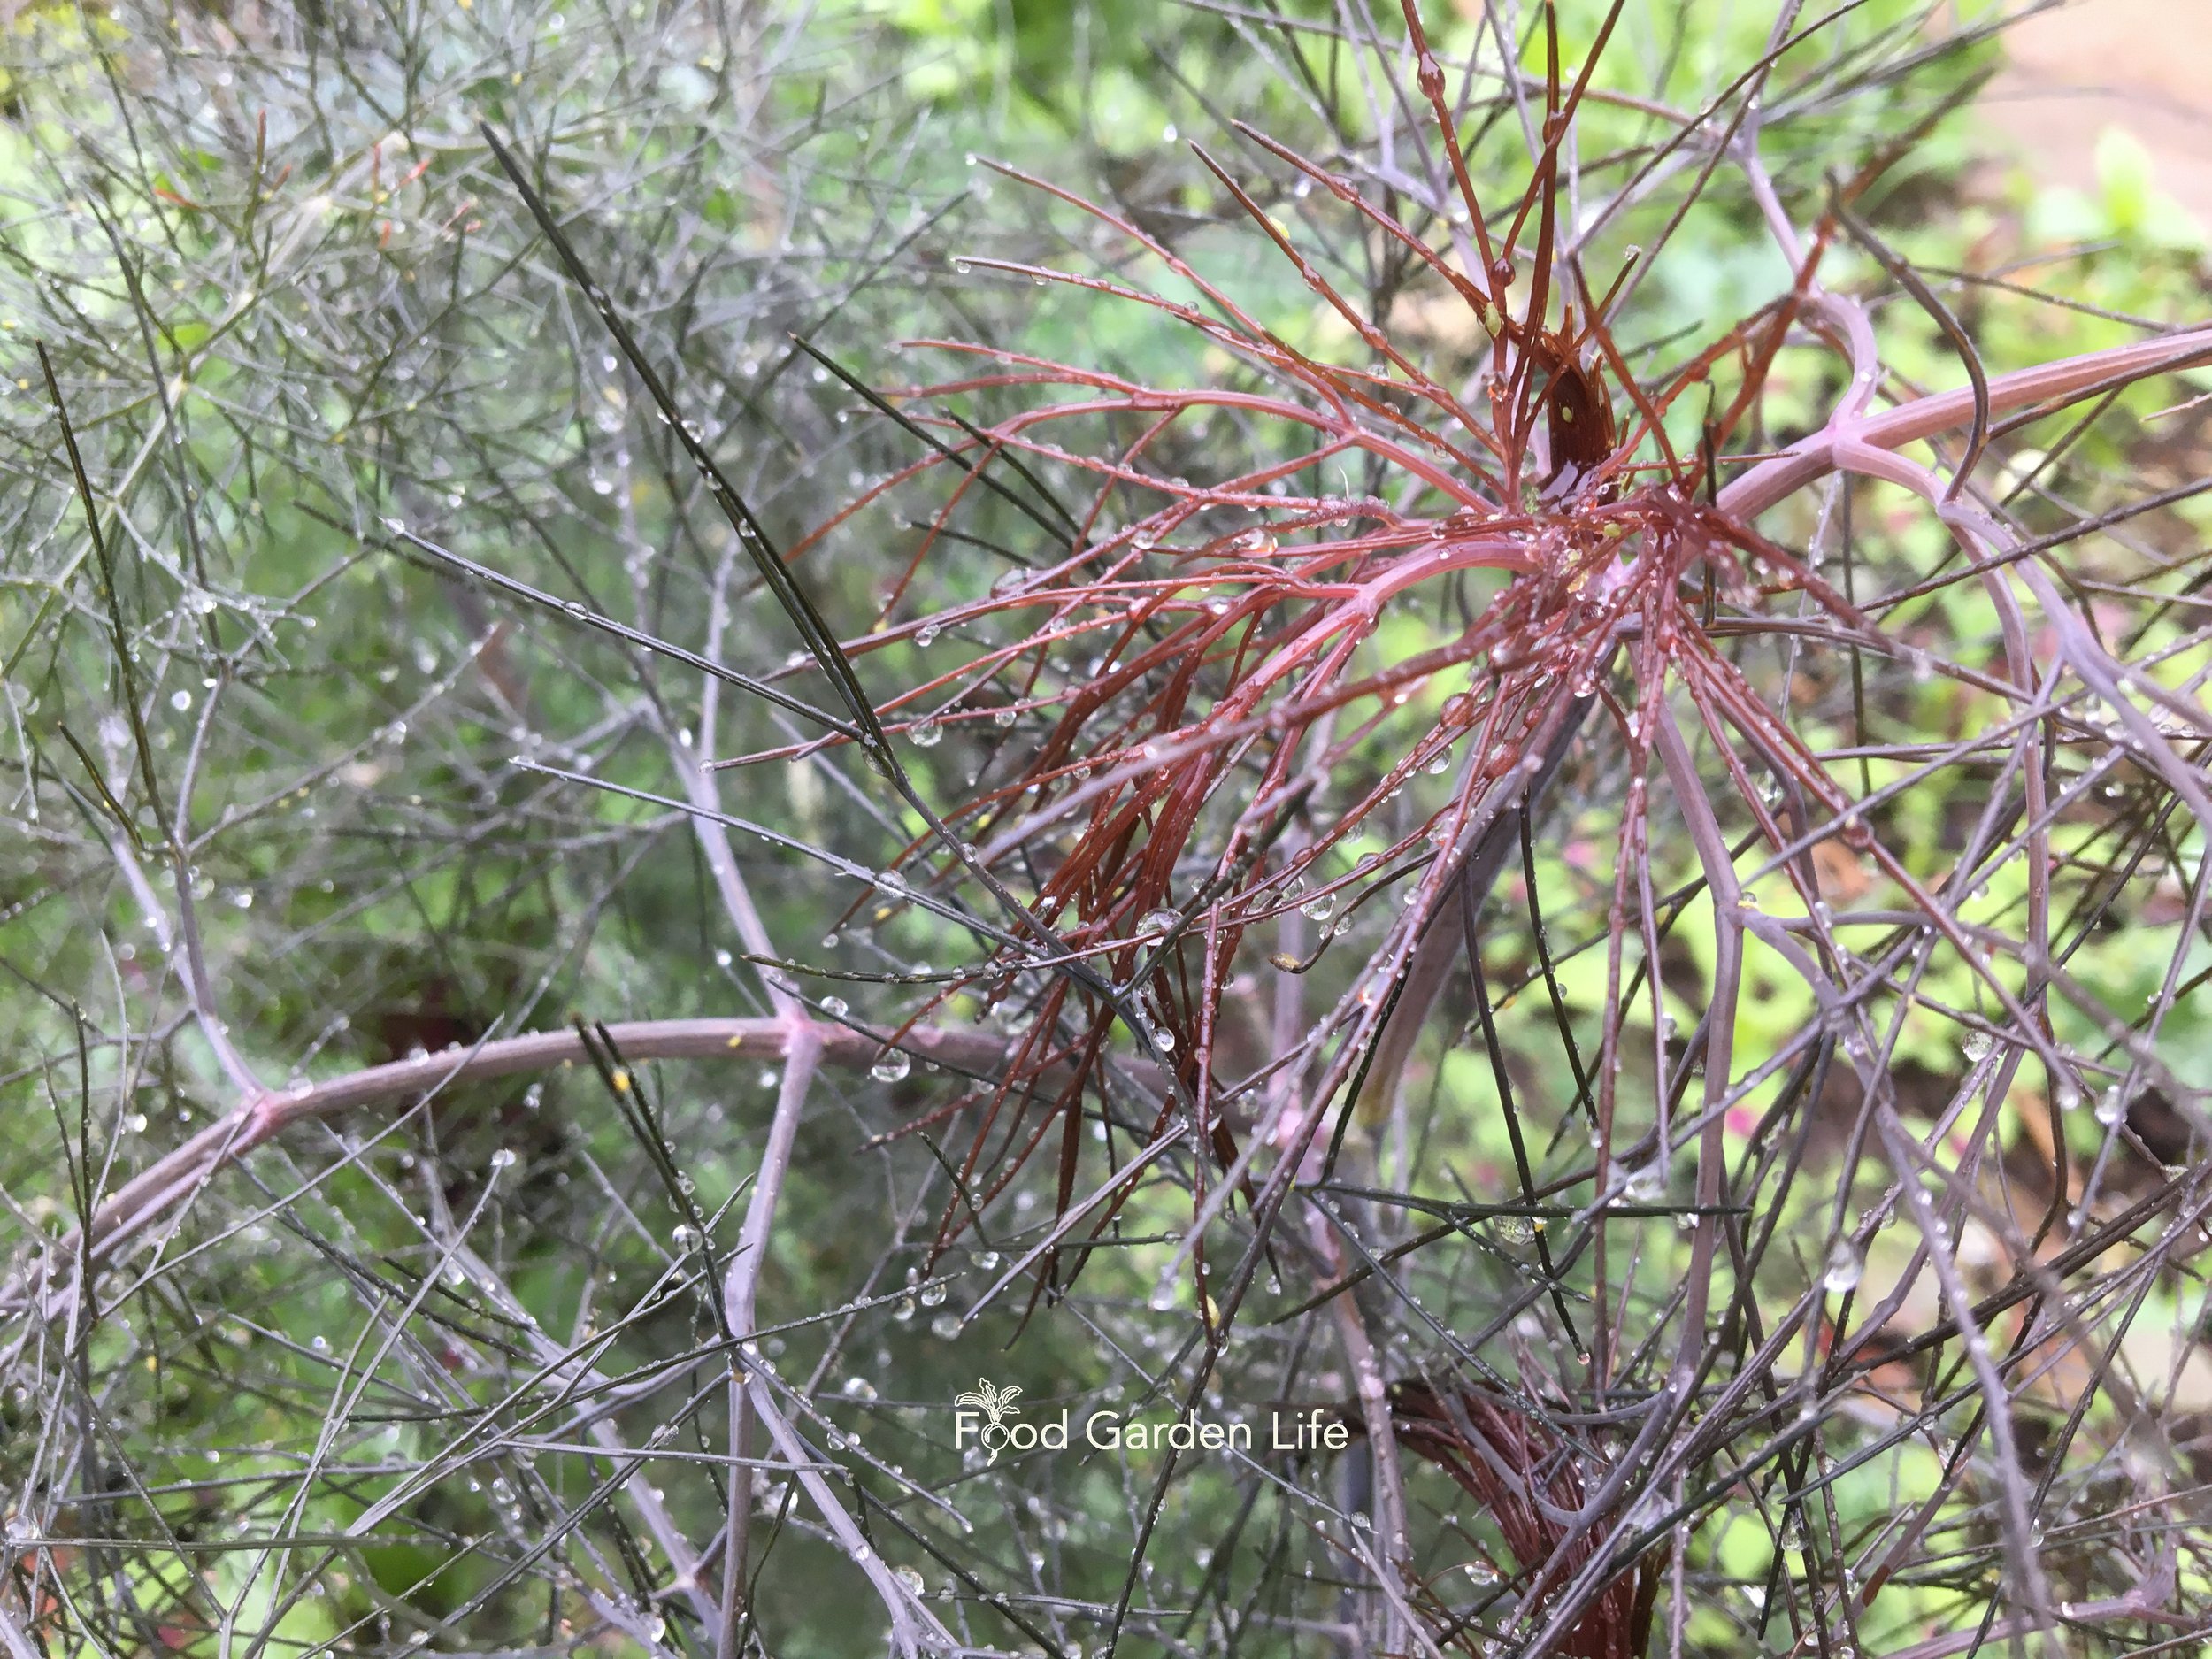
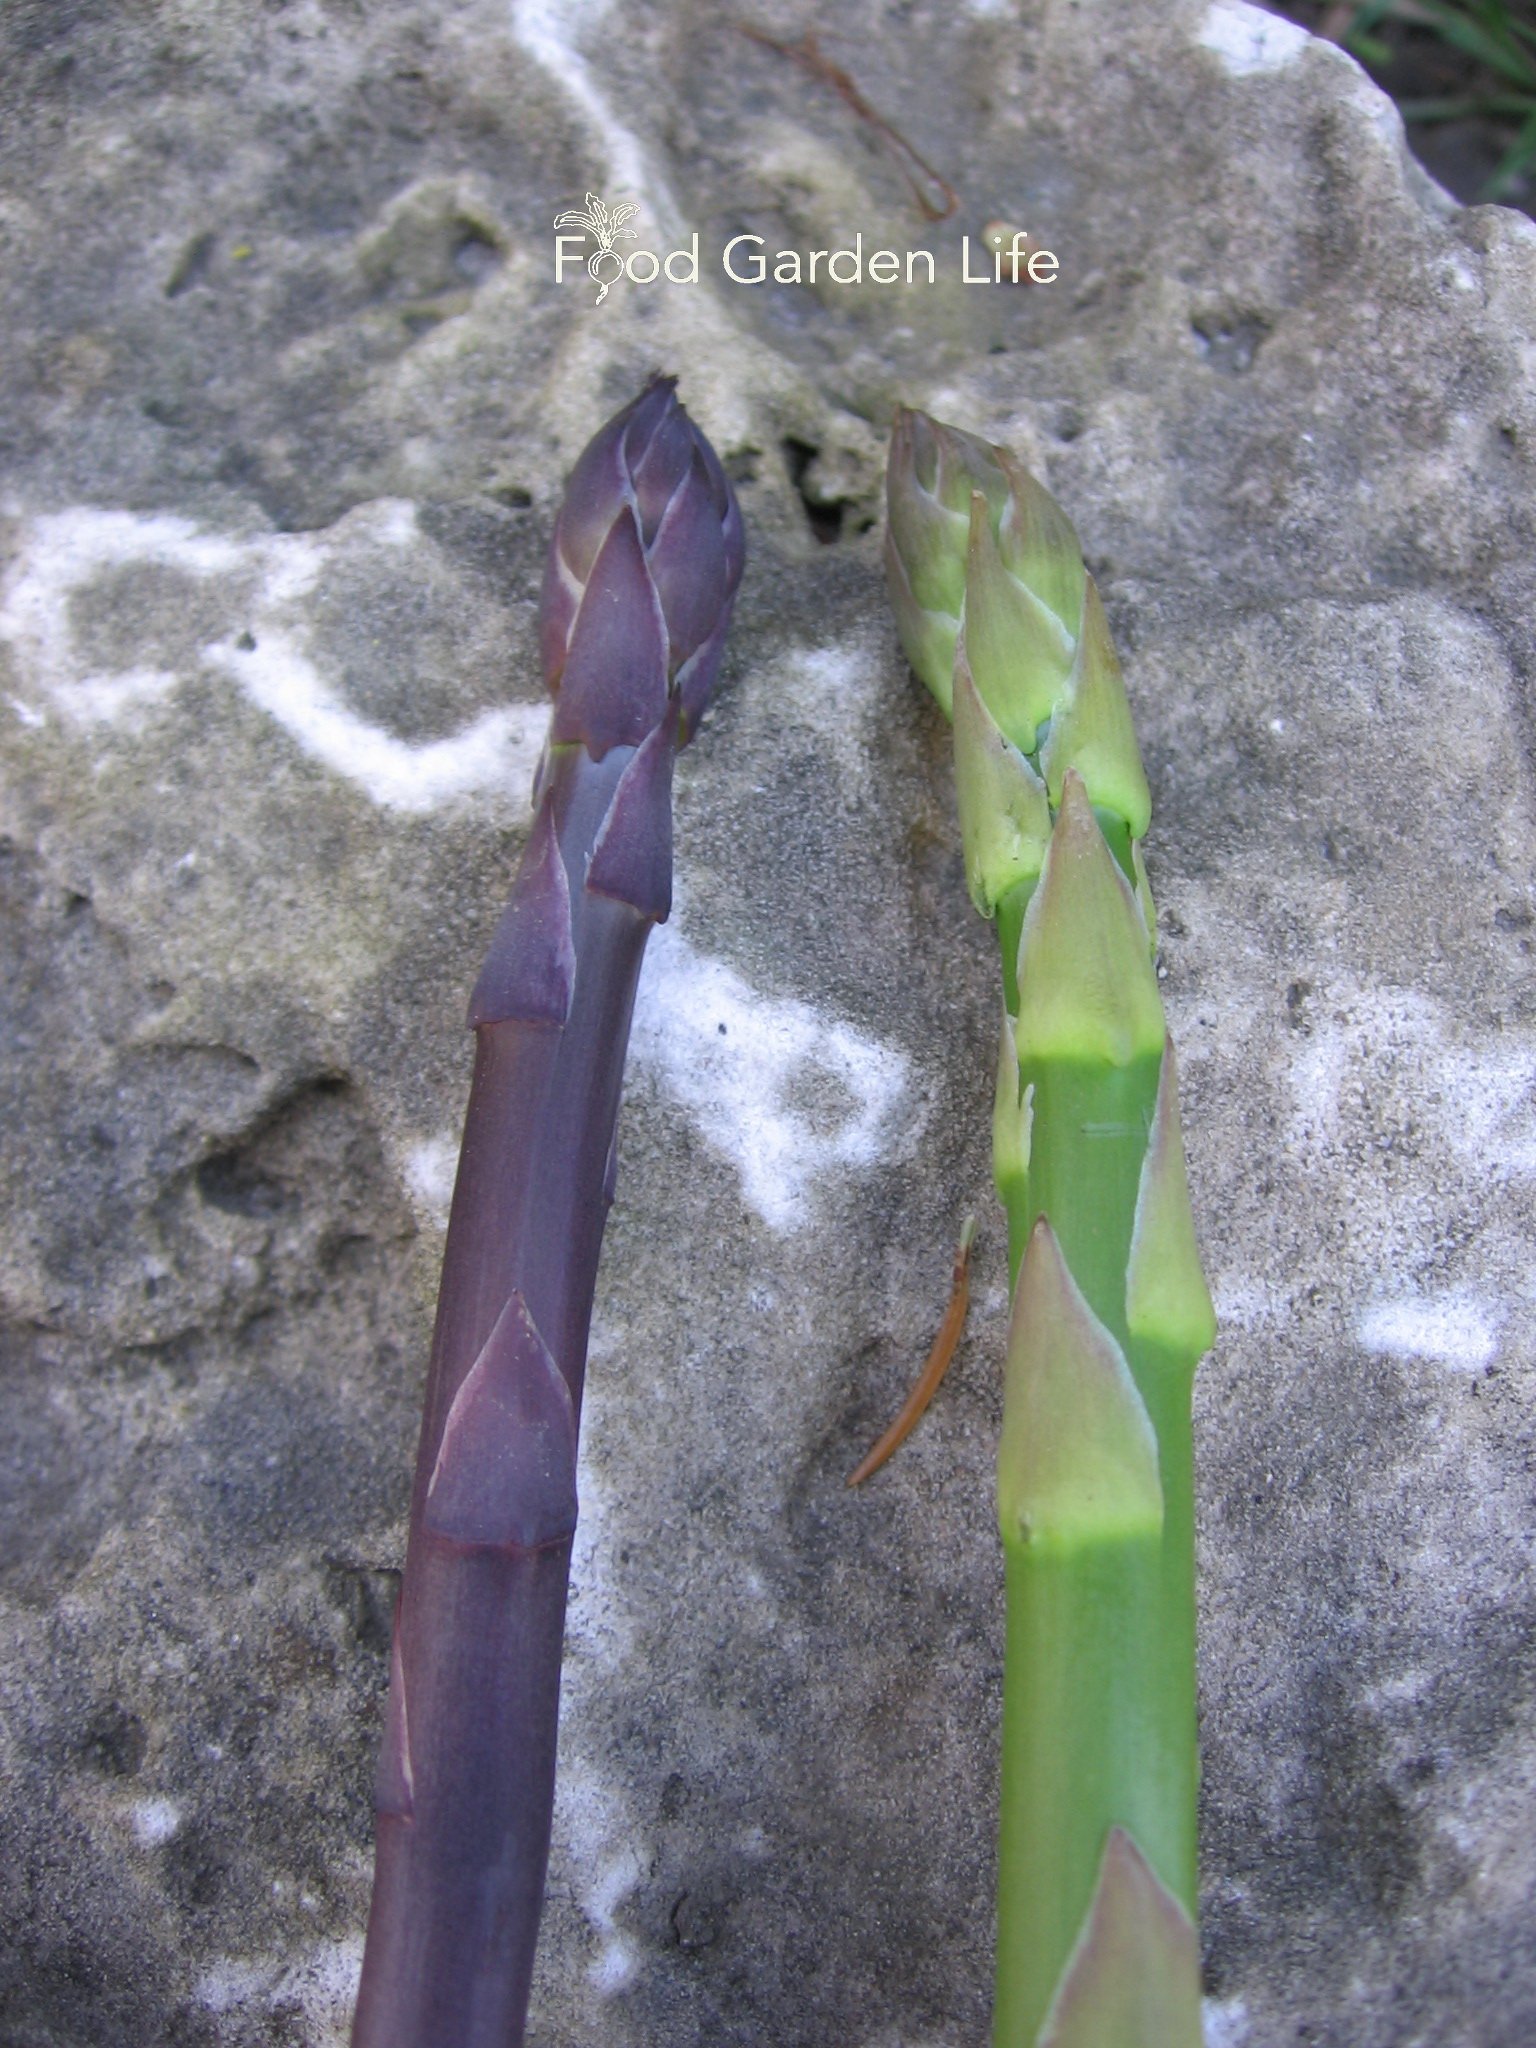
Where to Put a Kitchen Garden
Every yard is different. Every gardener is different. So there’s no one-size-fits-all answer when it comes to the best location for a kitchen garden.
But my top advice is to think about how you use your yard. Here are questions to think about:
Can it be somewhere close to the house if you want to dart outside for ingredients?
Do you want to see the kitchen garden from the house?
Where do you have growing space available?
Where in your yard are the growing conditions suited to a garden?
Kitchen Garden Plants
My own kitchen garden has annual vegetables, perennial vegetables, herbs, edible flowers, cut flowers, and fruit trees.
I’m a big believer in weaving flowers into a garden. They looks nice. They attracts pollinators. And they attract beneficial insects (small parasites and predators that help to keep pest populations in check.)

A summer succession crop of lettuce between established cabbage and artichoke crops.
Some crops (e.g. lettuce) don’t last the whole season. As you choose crops, take these short-lived crops into account and plan for succession crops to follow them. (Here’s a guide to succession crops.)
Most importantly, grow things you like to eat. Then add in a few new crops to broaden your palate.
Interested in edible perennials? Check out these edible perennials.
Growing vegetable crops in containers? Here are my favourite container vegetable crops.
Kitchen Garden Layout
How to Start a Kitchen Garden
Layout is a personal thing. I geek out at the mention of traditional French potager gardens.
My kitchen garden doesn’t look quite like a potager—but I took inspiration from that style as I added brick walkways, terracotta pots, and a mix of edibles and flowers for cutting.
Your kitchen garden layout might include raised beds, a cold frame, and large containers. It's up to you.
What is a Potager Garden?
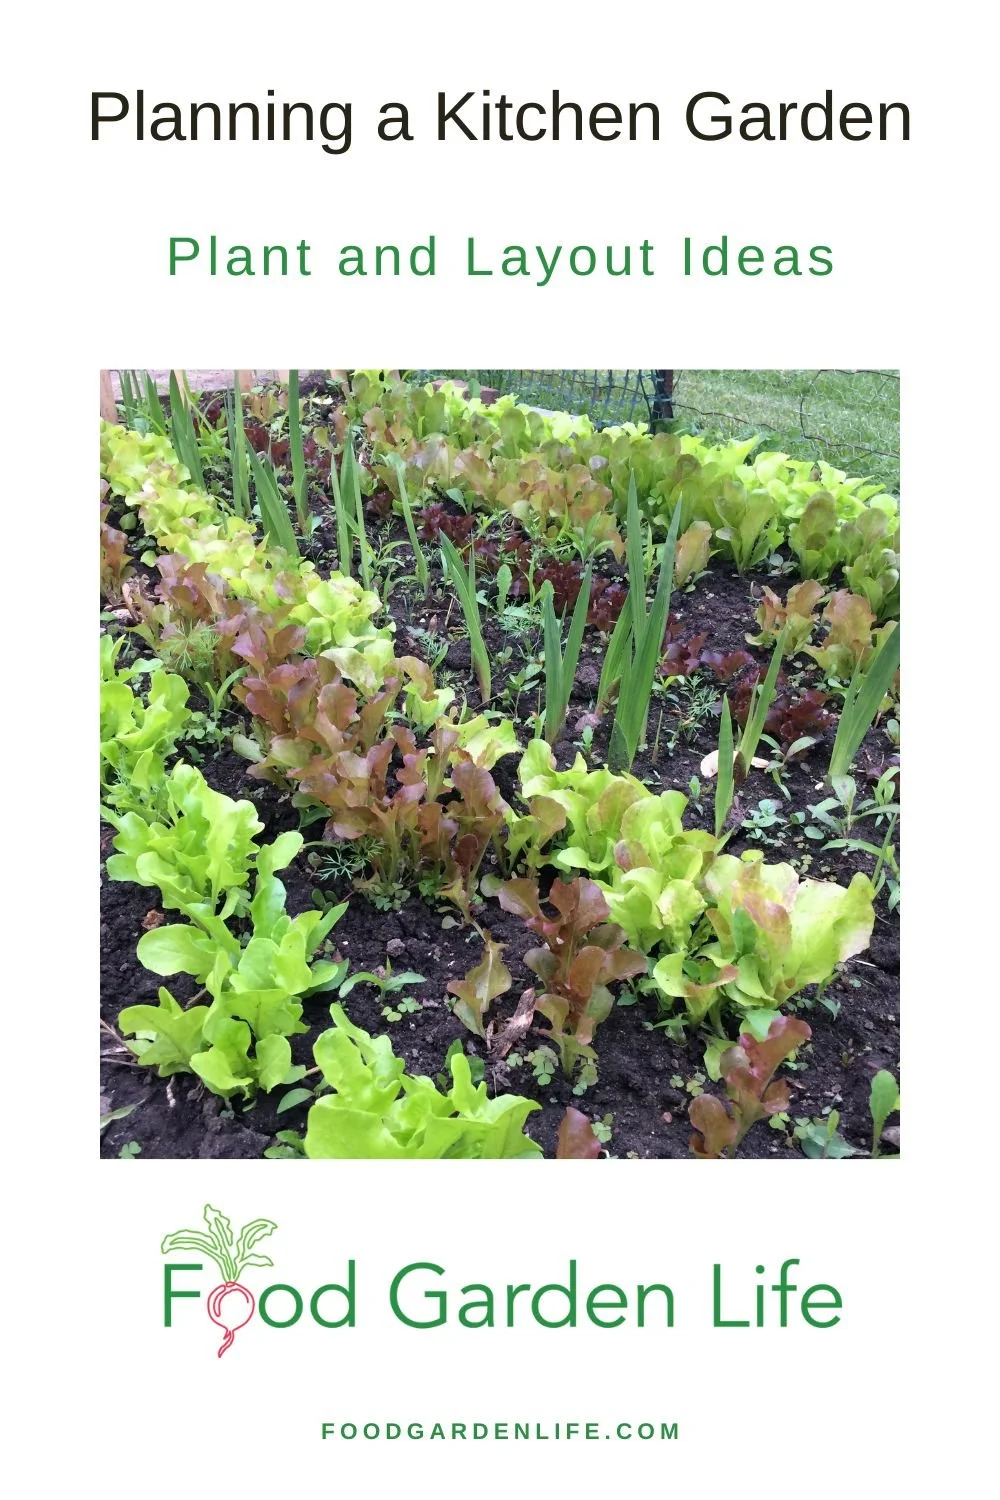
Pin this post!
Think of it as a traditional French kitchen garden. Potager gardens blend colourful flowers, salad greens, fresh fruits, and herbs. There's often symmetry. There's often a focal point.
Oklahoma garden designer Linda Vater loves to create elegant edible gardens. Her work is inspired by the tradition of the potager garden. Get Linda’s tips for making an elegant edible garden.
I love this: Landscape architect Jennifer Bartley says, “The potager is more than a kitchen garden; it is a philosophy of living that is dependent on the seasons and the immediacy of the garden.” Get Jennifer’s tips for designing a kitchen garden.
Spacing in a Kitchen Garden
Experiment with Spacing
Recommendations on seed packets are often geared towards field-scale production, and towards fully mature crops. If you’re planning to harvest baby lettuce, it needs less space than a large, mature head of lettuce.
Another way to look at spacing is through the lens of rows versus blocks. I talk about rows and blocks in this article with 7 garden layout ideas.
Top Kitchen Garden Tip
Be wildly creative.
More Fun Theme Gardens
Fun Kitchen Garden Ideas for Kids (and Adults too!)
In Gardening with Emma, my daughter has a rainbow spread of veggies. Perhaps a rainbow planting in your kitchen garden?
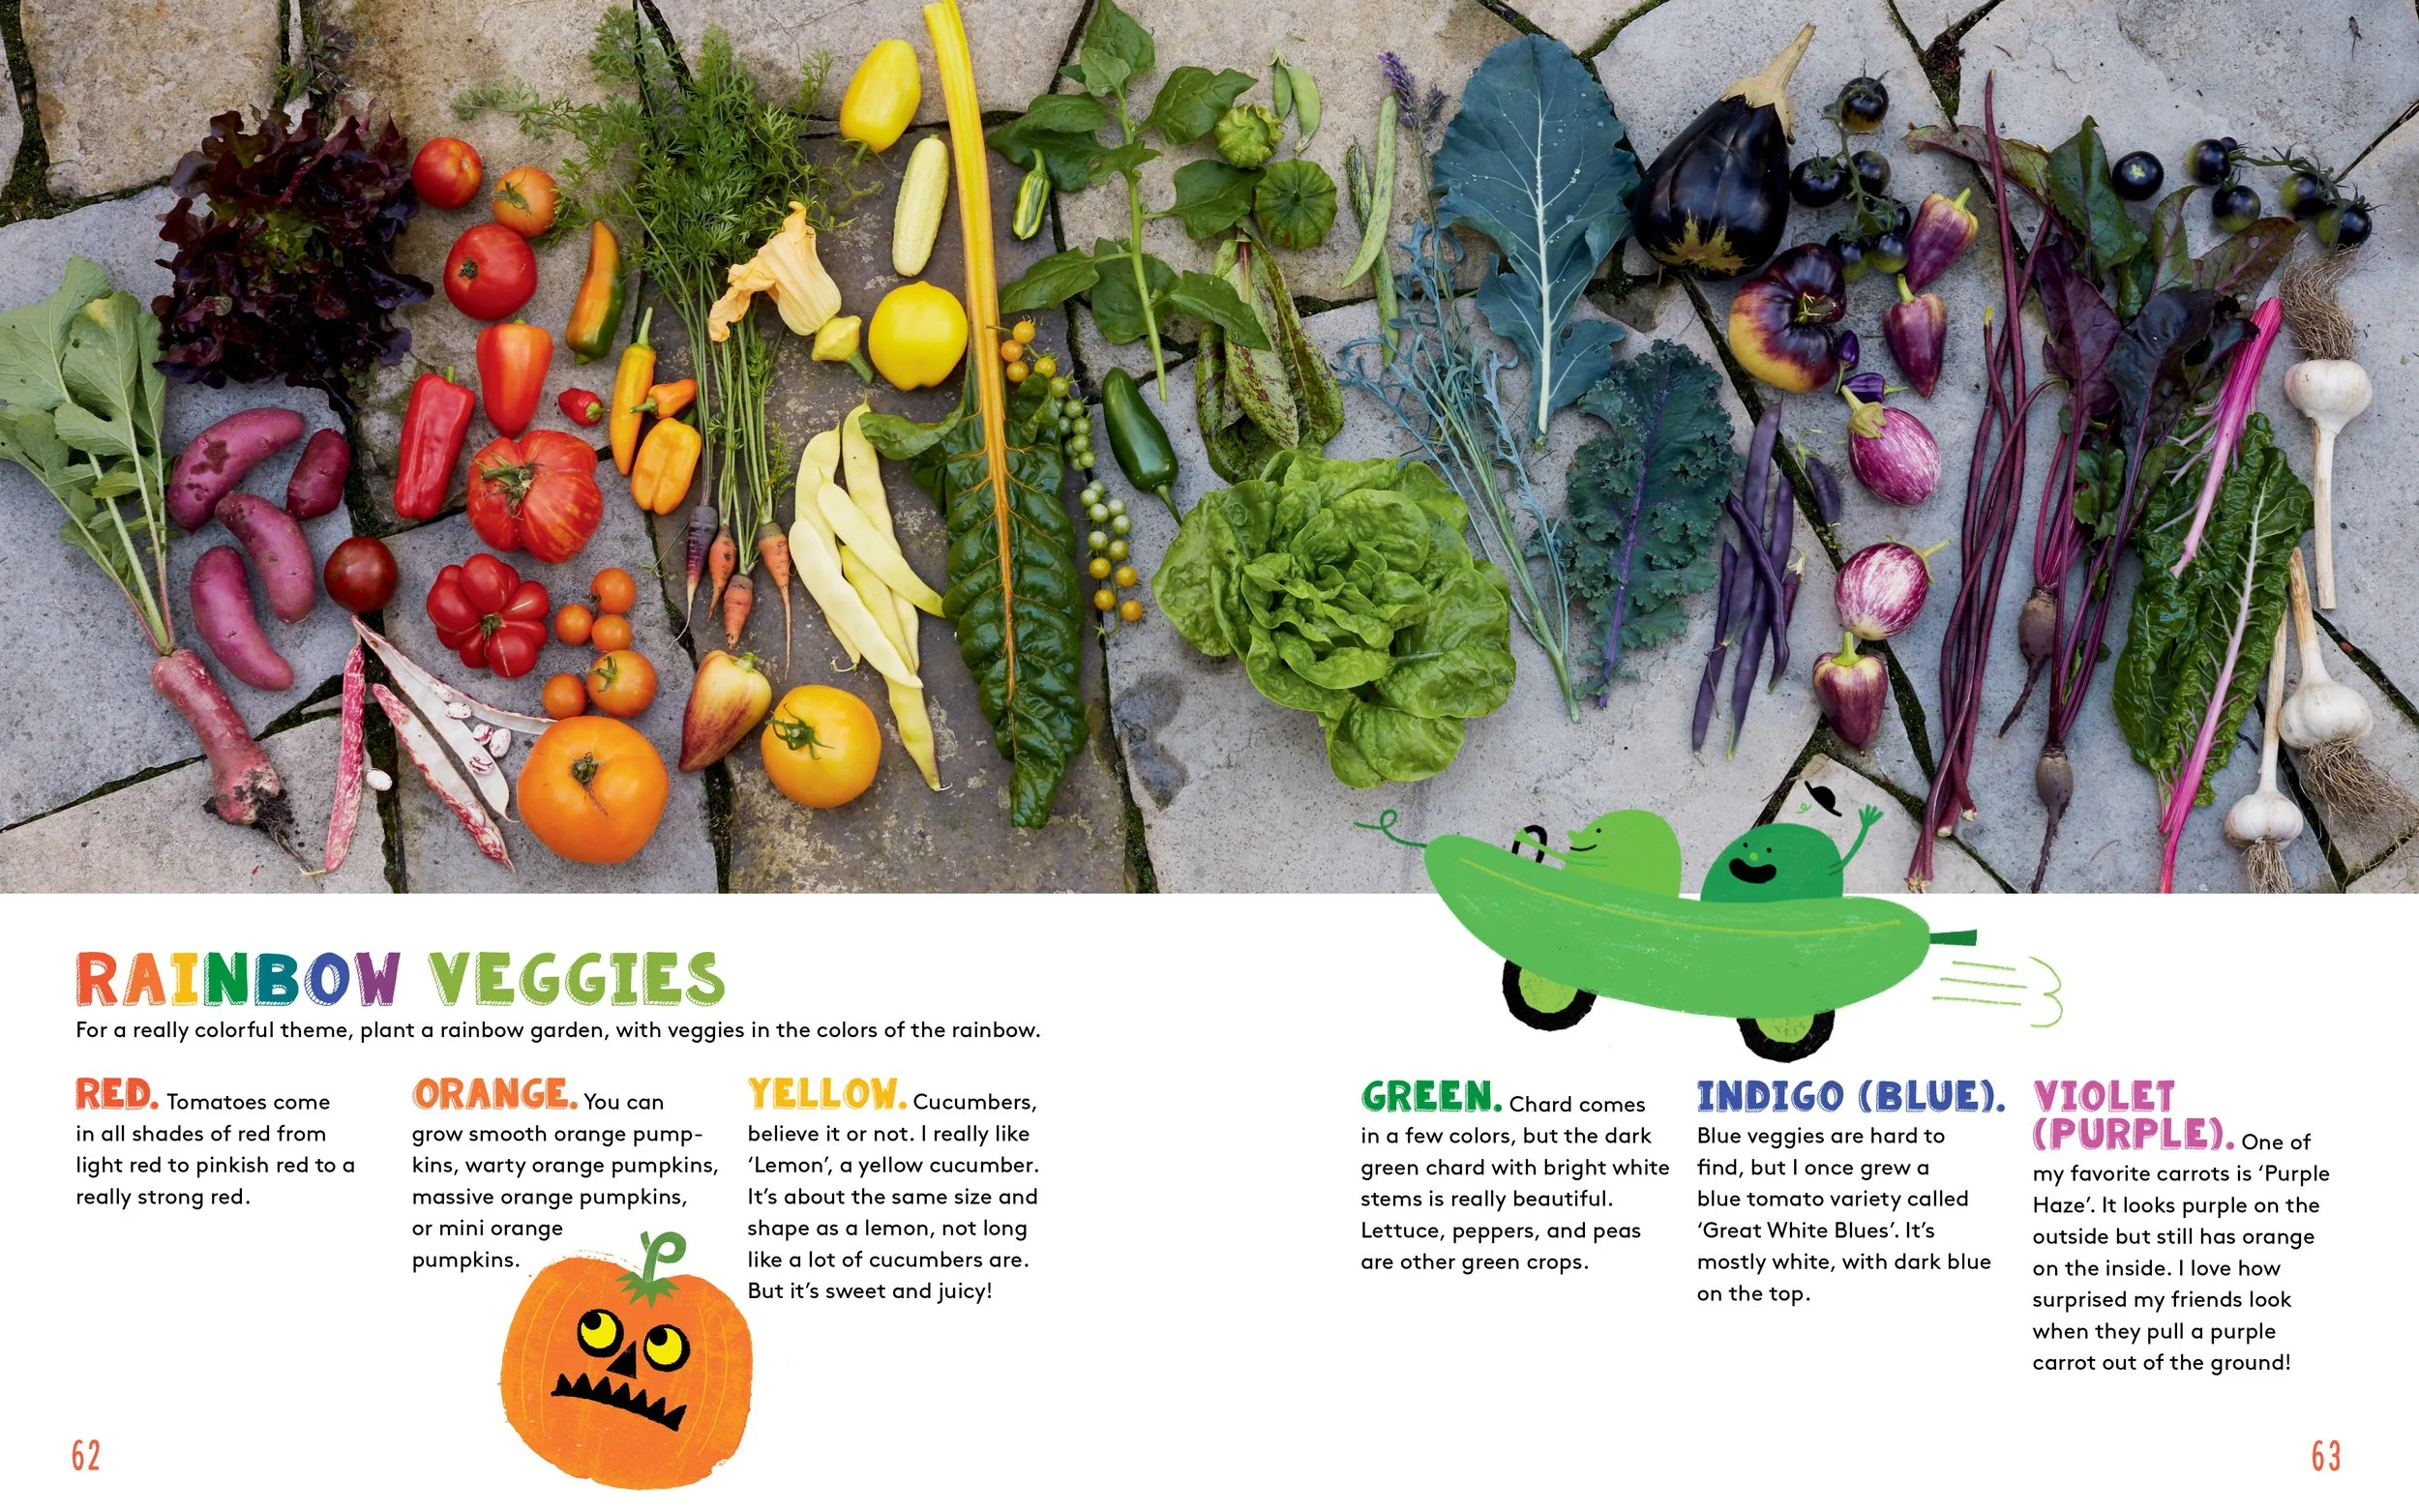
From the book Gardening with Emma.
How About a Dragon-Themed Garden?
Emma and I gave a talk about kids gardening once and the next day a parent emailed to say that her son came home inspired to grow a dragon-themed garden!
Any kids you want to inspire to garden? Get ideas for dragon-themed plants.
Find This Helpful?
Enjoy not being bombarded by annoying ads?
Appreciate the absence of junky affiliate links for products you don’t need?
It’s because we’re reader supported.
If we’ve helped in your food-gardening journey, we’re glad of support. You can high-five us below. Any amount welcome!
More Kitchen Gardening Ideas
Articles and Interviews
For more posts about how to grow vegetables and kitchen garden design, head over to the vegetable gardening home page.
Courses: Edible Gardening
Want more ideas to make a great kitchen garden? We have great online classes that you can work through at your own pace.
Kitchen Garden Consultation
Book a virtual consultation so we can talk about your situation, your challenges, and your opportunities and come up with ideas for your kitchen garden.
We can dig into techniques, suitable plants, and how to pick projects that fit your available time.
How to Make Crème Brûlée for Gardeners
Learn how to make creme brulee with a perfect, thin crust of caramelized sugar.
Crème Brûlée Recipe for Garden-to-Table Living

It’s like a thin coating of ice on a pond. You can’t quite see what’s below…but you know what’s there. The thin, amber-hued sheet of caramelized sugar over top of this dessert is as important as what’s underneath.
An assertive tap with a spoon, and you’re through—and into the creamy custard.
I’ve never had a kitchen blowtorch. Using the broiler, I could never get the sugar to melt into that perfect, thin, brittle sheet of caramel.
When I got a weed torch to flame-weed my flagstone walkways, I had a vision. And it had nothing to do with gardening.
My family thought I was nuts as I carried the tray of custard to the garden.
But they smiled as their spoons clinked through the brittle topping.
I’m pleased to say that a weed torch is versatile for garden-to-table living (though I don’t recommend using it in the house!)
Ingredients
3 cups whipping cream (35% cream)
1 tsp vanilla extract
6 egg yolks
1/4 cup granulated (white) sugar for the custard
¼ tsp. salt
Granulated sugar for the top (Just use granulated sugar…no need for darker “raw” sugars. Plus, with granulated sugar you see darkening as the caramelization happens, and it’s easier to know when you’ve torched it enough.)

Crème brûlée with blueberries. You can get the perfect, brittle topping with granulated (white) sugar, no need for fancy raw sugars.
Directions
Make the custard early in the day if you want this ready for an evening meal.
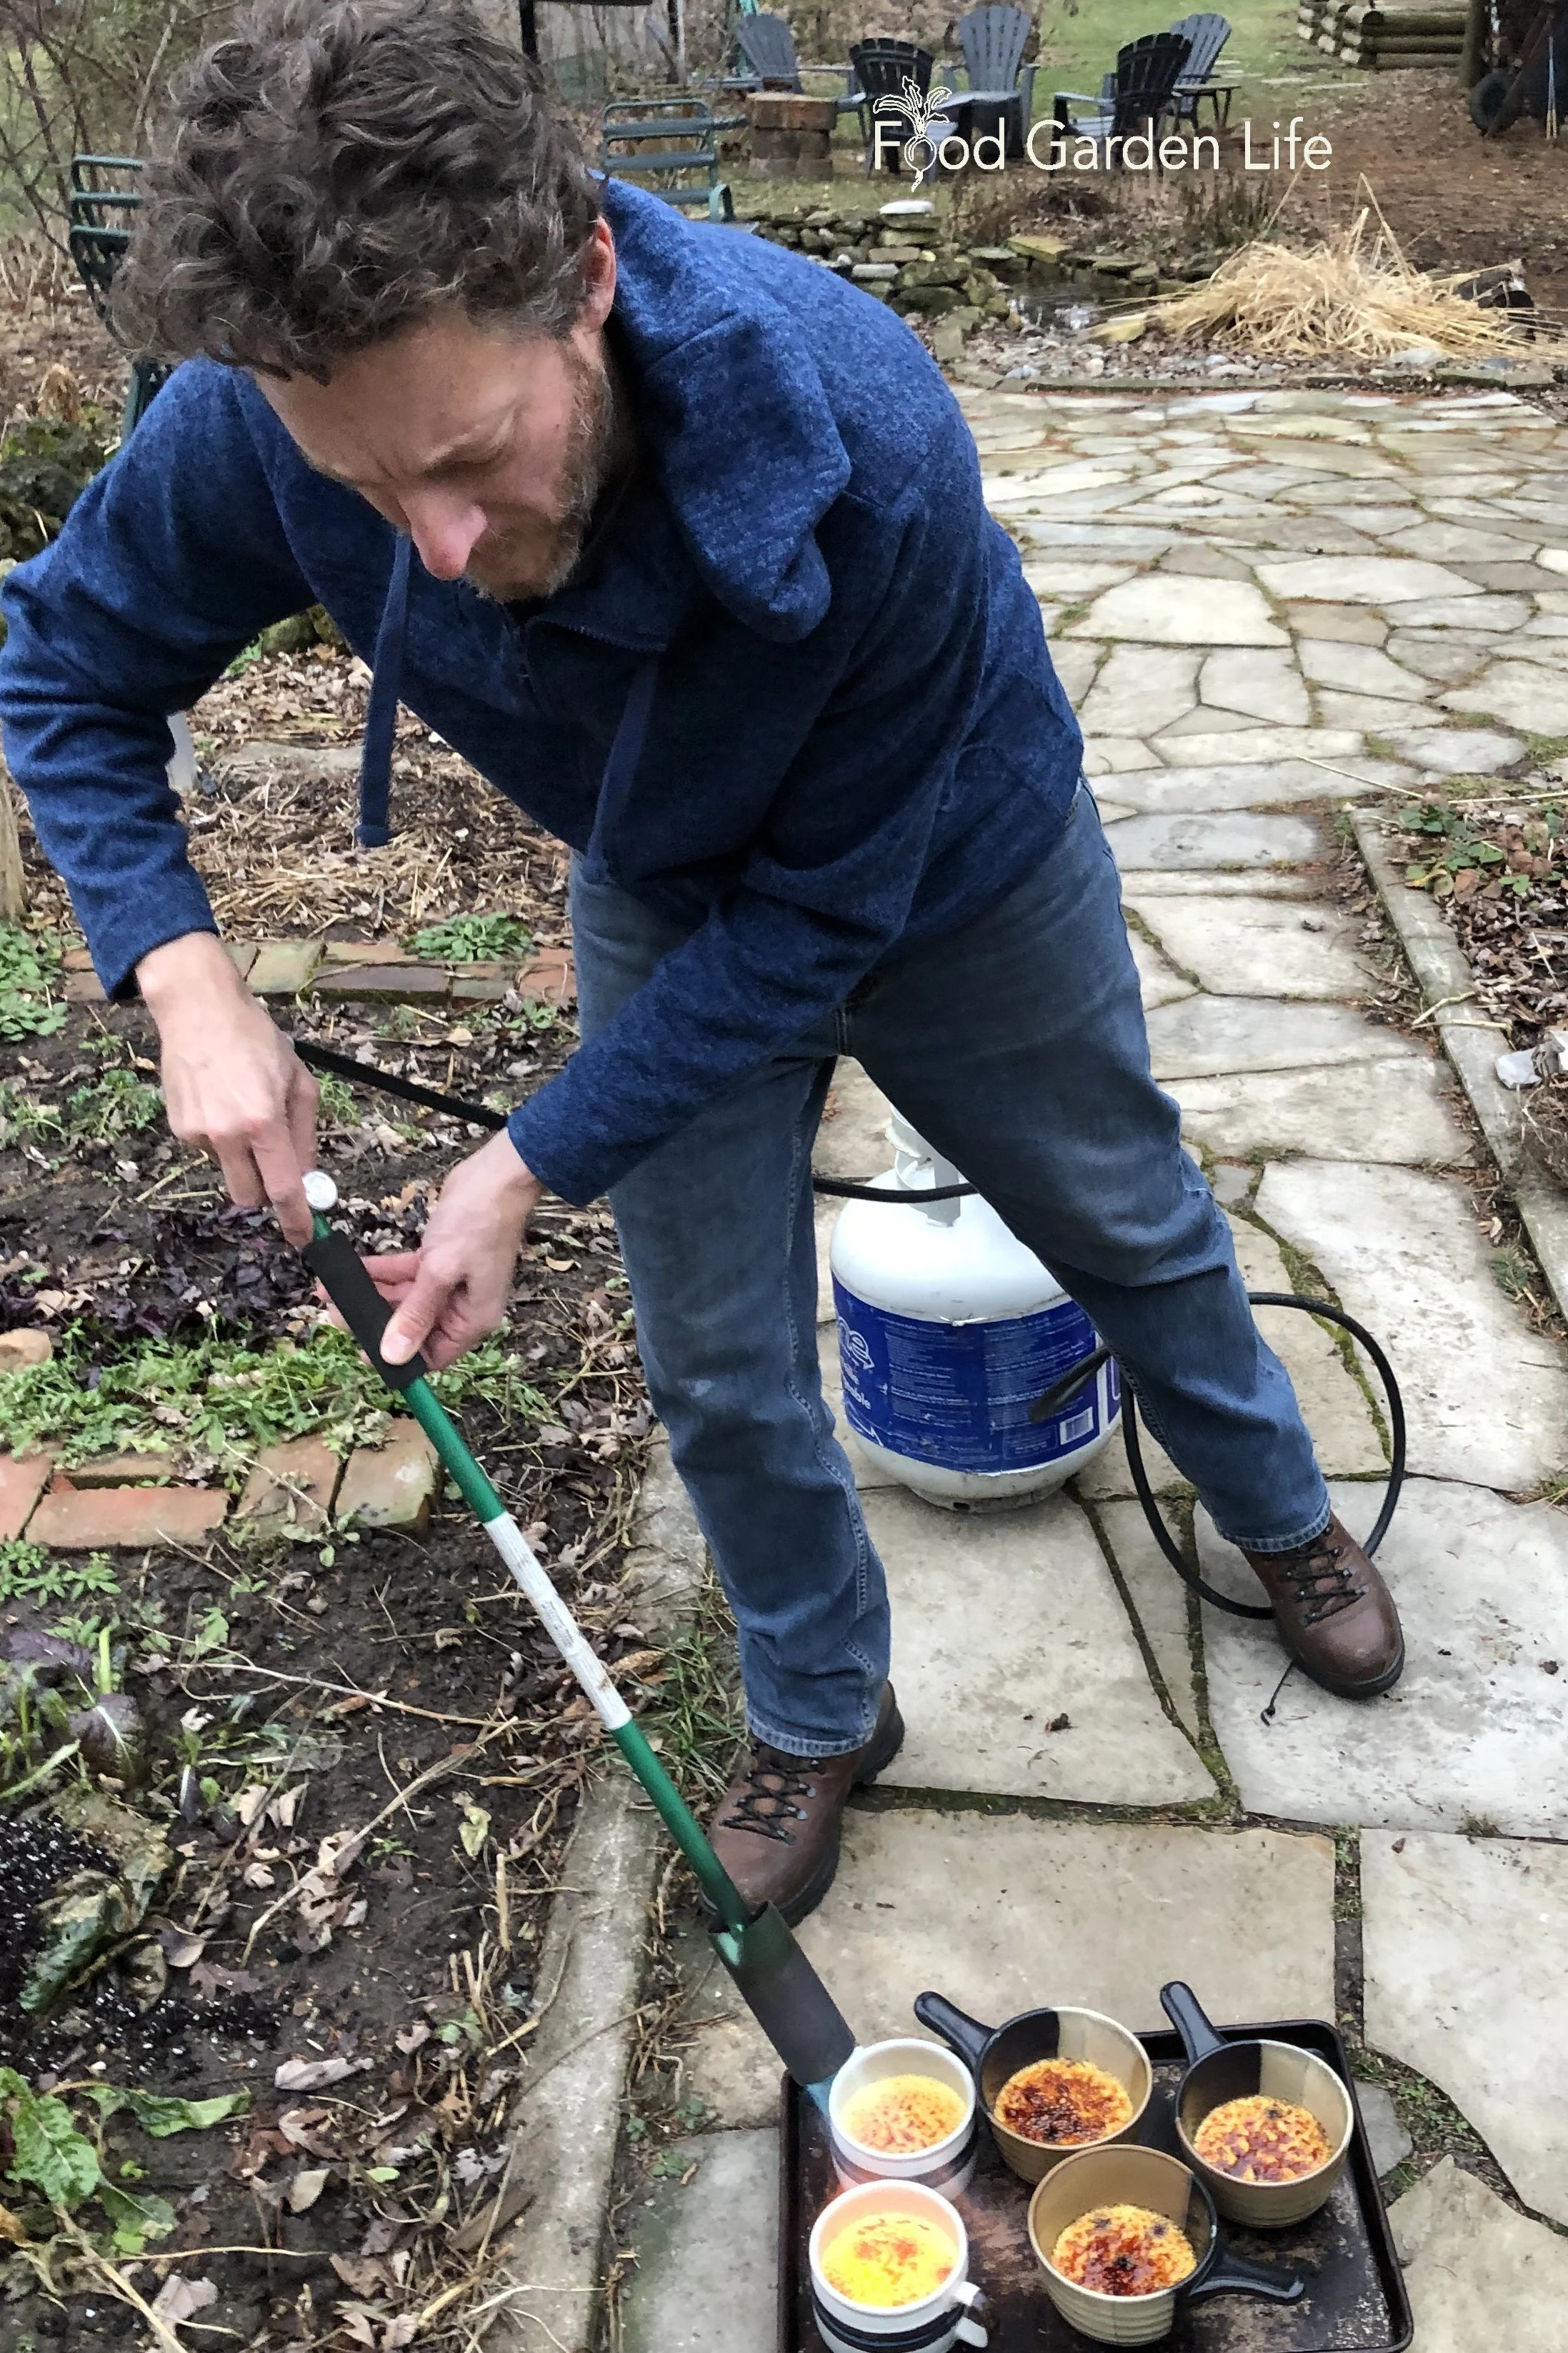
Keep the torch moving to prevent burning the sugar.
Preheat oven to 325°F
Heat cream in a saucepan until it’s steaming, but not boiling
Whisk together egg yolks, salt, and sugar
Slowly add hot cream to yolk mixture as you continue whisking it (do this slowly…you don’t want to make scrambled eggs)
Sieve the cream-yolk mixture to remove any stringy bits from the egg yolks
Whisk in vanilla
Divide up into ramekins or other heat-proof dishes
Time for the water bath: Put the ramekins into a deep pan (I use a roasting pan) and add boiling water up to about half the height of the ramekins
Bake 30 minutes
Remove from roasting pan to cool
Refrigerate uncovered for 4 hours
The last step is just before serving: sprinkle sugar evenly over the top, so that all the custard is covered, and then flame it with your weed torch
The goal is a dark, golden-brown layer, and the trick is to keep the torch moving so it doesn’t rest in any one place and burn the sugar…brown is good, black is not
After you’ve torched them, give them 5 minutes to cool before you serve your guests
Wait for the accolades
Pin this post!
Variations
Add Fruit
I love putting blueberries or raspberries in the custard, after it’s cooled, and before I pop it into the fridge to set. The tanginess plays well with the richness of the custard.
Bigger Bowls
Why limit yourself to small ramekins?
I like to use the larger, oven-proof bowls we use to make French onion soup!
Like Creamy Desserts?
Another one of my favourites is panna cotta, an egg-free custard that’s set with a bit of gelatine.
Like crème brûlée, it goes nicely with berries.
But we do something different. We make it with fig leaves. You don’t eat the leaves—but steep them in the cream to pull out the fig-leaf flavour. I’d describe the flavour as somewhere between toasted almond and coconut.
Here’s my recipe for fig-leaf panna cotta.
Find This Helpful?
Enjoy not being bombarded by annoying ads?
Appreciate the absence of junky affiliate links for products you don’t need?
It’s because we’re reader supported.
If we’ve helped in your food-gardening journey, we’re glad of support. You can high-five us below. Any amount welcome!
More Garden-to-Table Cooking Ideas
Guide: Grow Globe Artichokes in Cold Climates
Yes, you can grow this Mediterranean vegetable even if you're in a cold climate. This guide tells you what to do to harvest your own homegrown artichokes.
By Steven Biggs
Planting Artichokes for the Delicious Flower Buds
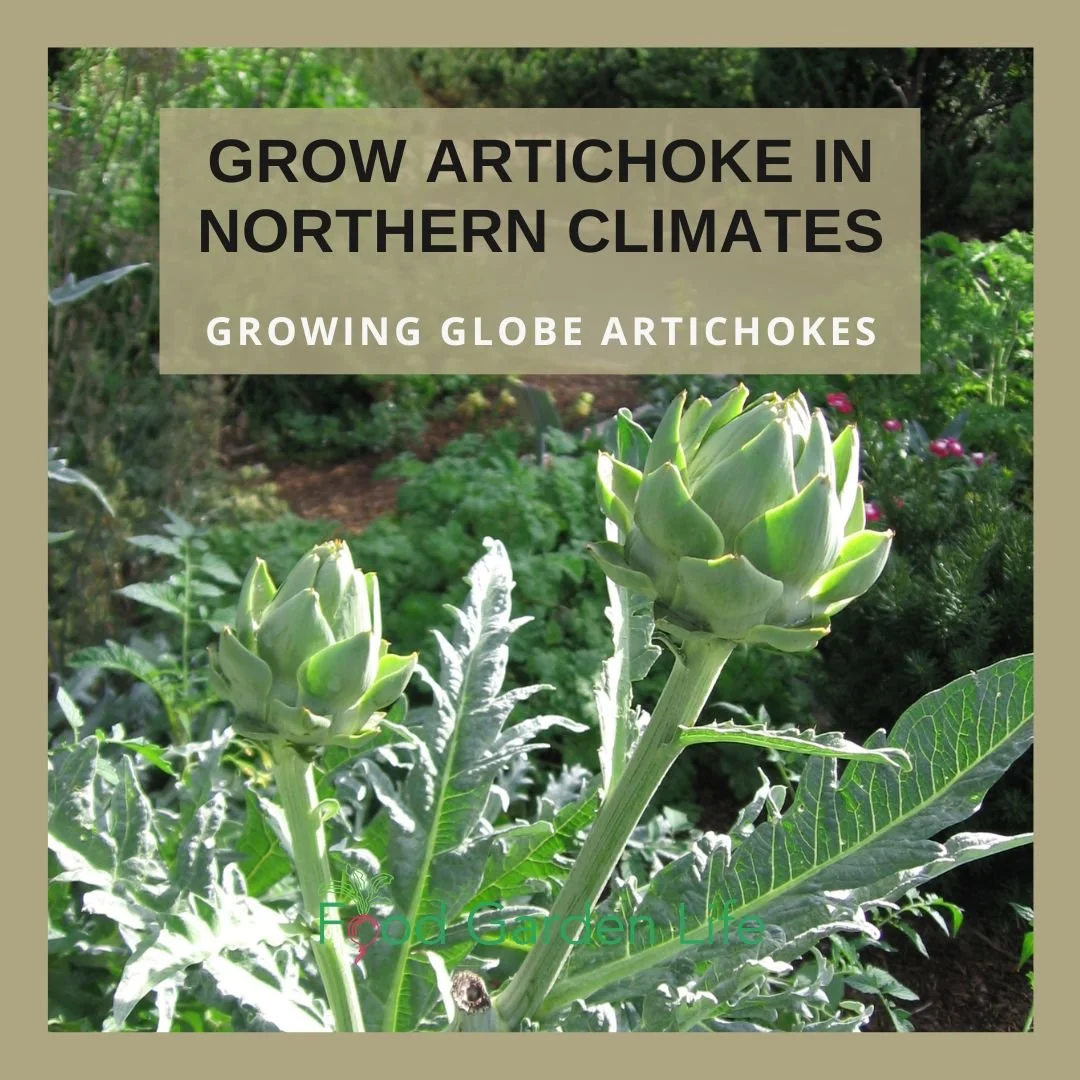
Growing artichokes in cold climates is done differently than in milder climates.
“Dad, make lots of garlic butter!” It’s the first thing my kids say when I tell them I’m cooking fresh artichokes. Fine with me! I love the garlic butter as much as they do.
Besides the taste (and the garlic butter) there’s another thing I love about globe artichoke: It’s slow to eat, so there’s lots of time for family banter. We chat as we peel off bracts, dip them in butter, and repeat.
It’s the antithesis of fast food.
In our household we just call them artichokes. But some people call them globe artichokes – and in the UK you might hear them called French artichokes. (And if you like Latin names, Cynara cardunculus, var scolymus.)
Whatever you call them, you’re eating unopened artichoke flowers. Edible flower buds! (Unlike Jerusalem artichoke, where you’re eating a tuber.)
It can be a challenge to grow artichokes in cold climates. Keep reading, this article will explain how to grow your own artichoke plants and get flower buds.
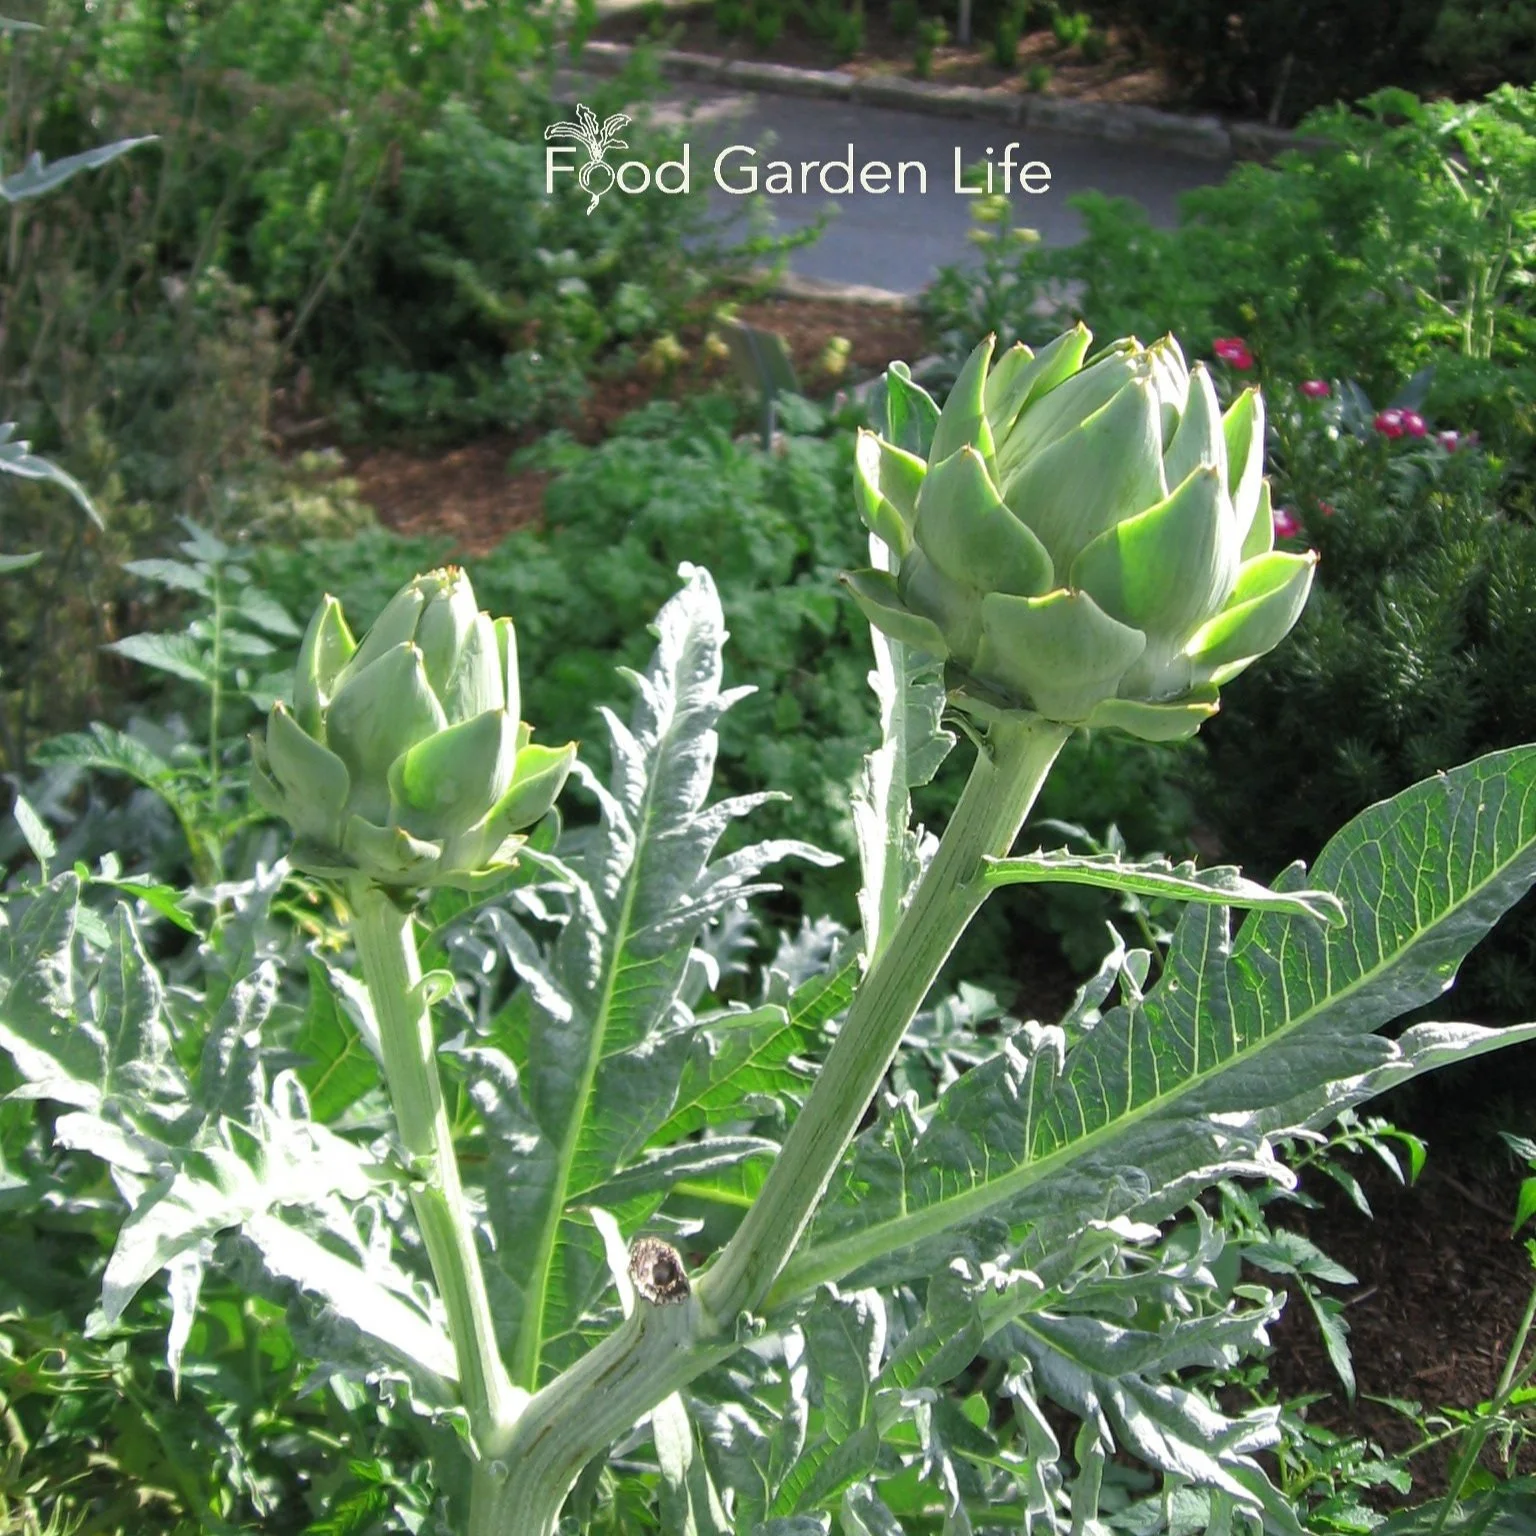
You can grow artichokes in northern climates…with the right variety, temperature, and timing.
Growing Artichokes in Northern Gardens
Artichoke is a tender perennial, meaning that it lives for a number of years where there are mild winters. But in a colder, northern climate, it does not survive the winter.
That means northern gardeners grow artichoke as an annual. (I have tried digging up mature plants in the fall to overwinter in my cold cupboard…but, frankly, it’s not worth the bother.)
In warmer areas, artichoke can be a big plant. But in the cold-climate garden, one metre (3’) high and wide is the biggest I’d expect…and probably smaller.
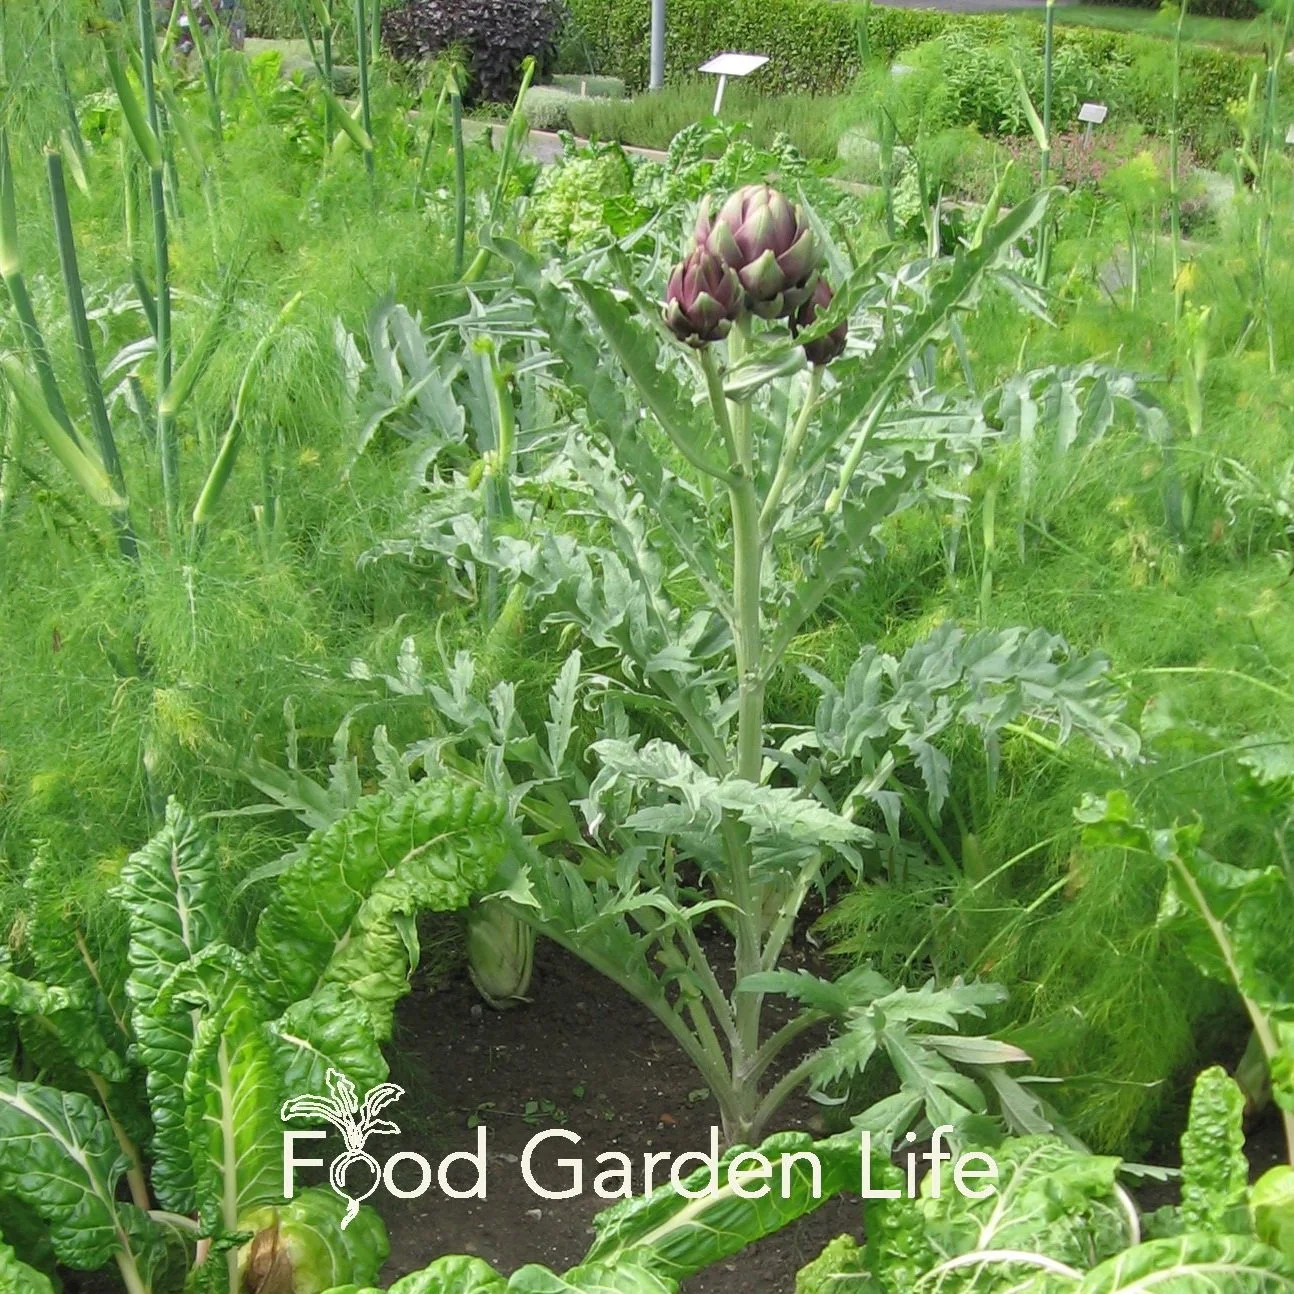
In cold climates, artichoke can be grown successfully from seed
How to Grow Artichoke in a Cold Climate
In areas where it survives the winter, it is often grown from “offsets,” which are side shoots that come up from established plants. These are cut off and rooted to make new plants.
If you’re in a cold climate, you probably won’t find offsets for sale. The alternative is to grow artichoke from seed.
That’s what I do.
Don’t think of seed-growing artichoke as second best. I know of a farm near where I live, in Toronto, that grows first-rate seed-grown artichokes on a large scale.
Just make sure you have a long enough growing season, upwards of about 100 frost-free days.
Grow Artichoke from Seed
Start artichoke seeds indoors, 8-10 weeks before the average last frost date for your area. Plant seeds about 6 mm (1/4”) deep. A warmer temperature helps with germination, so I put mine on a heat mat. (Hot water radiators or heated floors are good heat sources too!)
Once your artichoke seedlings are up and growing, take them off the heat.
I usually plant 3-4 seeds in a small pot. Once they’ve grown a second set of leaves, I separate them and give them their own pots.
Trick
Like many seed-grown perennials, flowering in the first year isn’t assured. To get flowers in same year that you grow your artichokes from seed, you give your young plants a cool-temperature treatment.
It seems counter-intuitive to a lot of gardeners. We’re used to coddling our seedlings. And that’s true for lots of the heat-loving crops we grow such as tomatoes, peppers, eggplants.
But…artichoke plants are different. And the cool-temperature tweak helps induce flowering.
So here’s the idea:
Imagine a young artichoke seedling growing in a warmer zone, where it grows as a perennial: The first year it makes leaves, then it lives through the mild winter, and then, finally, it flowers in its second year
You don’t have the luxury of a second year because your cold winter temperatures will kill your artichoke
But…you can expose your artichoke seedlings to cool conditions before planting them into the garden
And those cool conditions before transplanting into the garden do the same thing as a winter would – they move the plant into flower-production mode
Chill Treatment for Artichoke Plants
Another way to provide a chill treatment to artichoke seedlings is with a stint in a fridge…but make sure they don’t dry out, as fridges have a drying effect.
Move artichoke plants outdoors when they won’t be exposed to frost, but will still get a week or two of cool temperatures.
Ten to 14 days of temperatures less than 10°C (50°F) helps to get flower buds to form.
Artichoke Seed
Get artichoke varieties known to produce artichokes buds in the first season when grown from seed.
Two well-known varieties are:
‘Green Globe’
‘Imperial Star’
Planting Artichoke Plants in the Garden
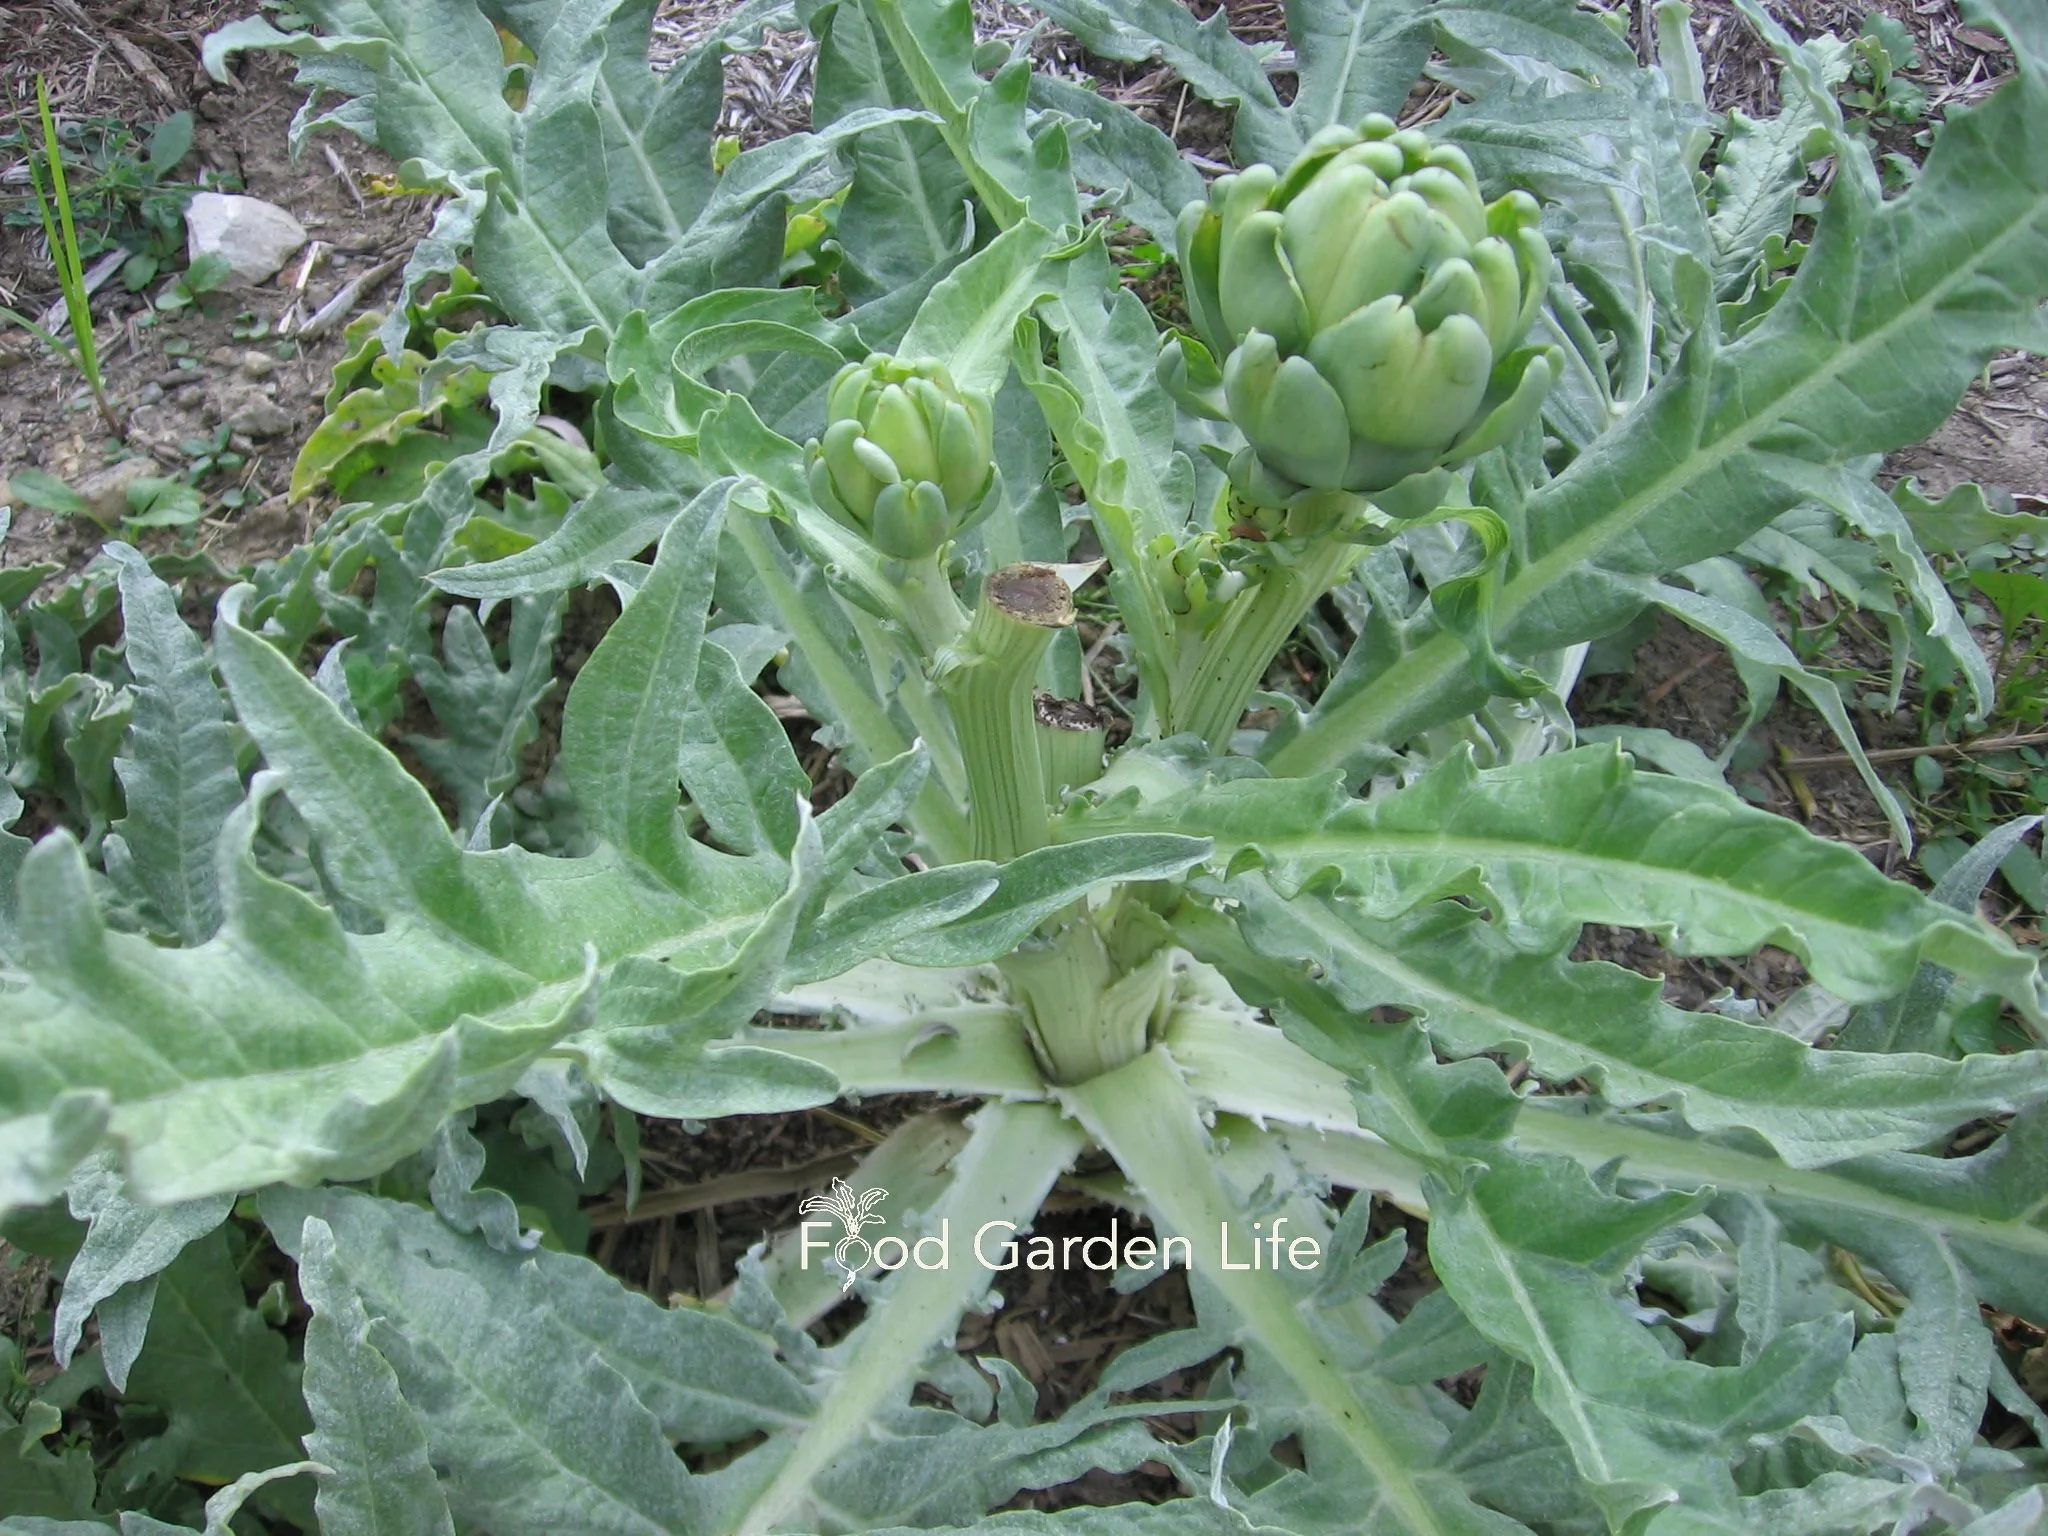
Artichoke plants won’t grow as large in cold climates, so a spacing of up to 1 metre (3’) between plants is ample.
Artichoke plants can grow very large plants in areas where they survive the winter. So you might come across recommendations to space them as far apart as 1.5 metres (5’). Don’t!
Spacing: In cold climates, plant artichokes 1 metre (3’) apart
Light: Full sun is best
I’ve seen artichoke plants grown in straw-bale gardens, 2 plants to a bale. Find out more about straw-bale gardening.
Care
If your goal is large artichoke buds, remember that there is a main, central flower; and there will also be secondary flowers. I leave them all to grow, and get 5 or more artichokes from a plant.
But…gardeners out to grow large, prize-winning artichokes can prune off secondary flowers. (But don’t discard them! Use these in the kitchen as baby artichokes, see below.)

Get Your Fig Trees Through Winter
And eat fresh homegrown figs!
Top Tip
A lot of people think of Mediterranean climates – hot sun and dry conditions – when thinking of artichoke plants. They survive these conditions. But for the best crop, give your artichoke plants conditions that encourage uninterrupted growth. (And, remember, very dry conditions interrupt growth!)
Top Tip: Well-fed soil and ample moisture for uninterrupted growth
Challenges
Most years, artichoke plants are pest- and problem-free in my garden. On occasion, black aphids stop by for a visit. If beneficial insects don’t dispatch the aphids, insecticidal soap will clear them up.
Harvesting Artichokes
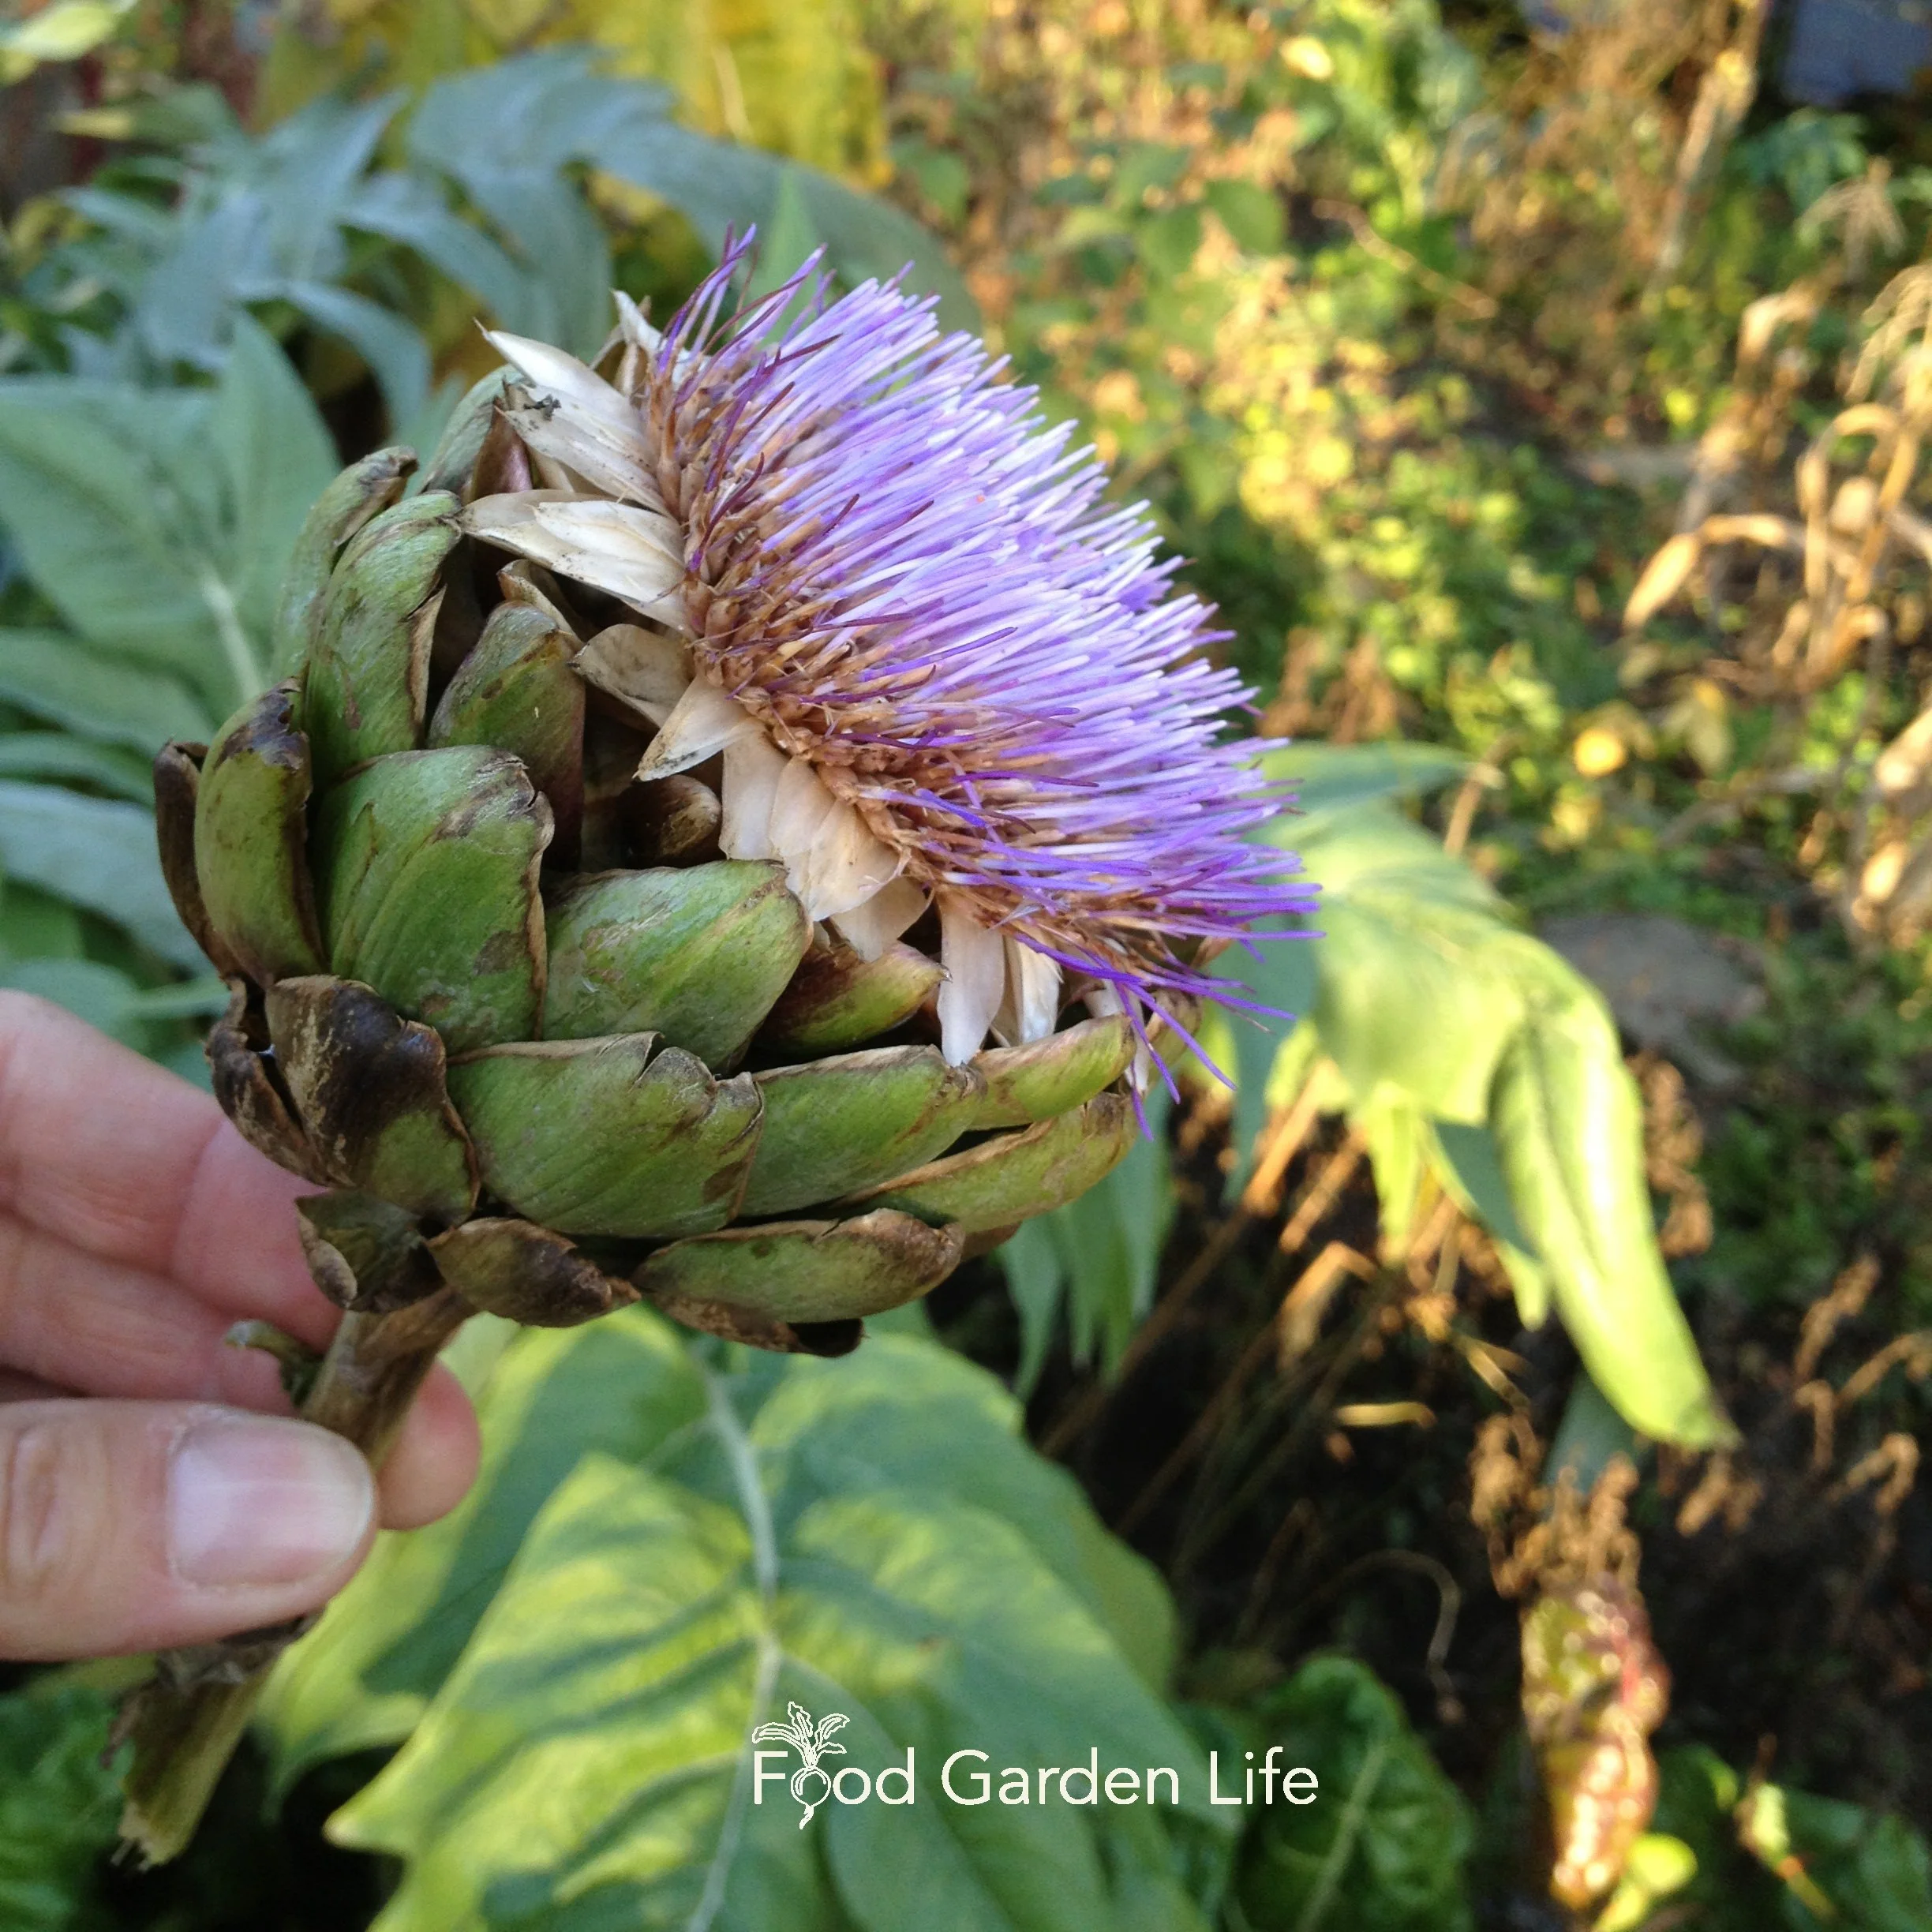
Harvest artichoke before the bracts open into a thistle-like flower.
Harvest artichokes before the bracts start to separate. You want them to be compact.
If you leave the flowers too long and they begin to open, you will get purple-blue thistle-like flowers.
They’re beautiful – but past best-eating.
Artichoke Harvest Tip
As you harvest artichokes, don't cut back the stem any further than you need to. You'll get side shoots from the same flower stalks. These secondary artichokes are not quick as large as the first ones, but just as tasty.
How to Eat Artichokes
For those new to artichokes, you’re peeling off the bracts, dipping them in the butter, and then dragging them against your teeth to scrape off the flesh on the inside. You don’t eat the bracts; they’re too fibrous.
And about those bracts…well, they look like petals. And some people call them scales. (I’ve seen people call them leaves, too.) But, technically, botanically, they’re bracts.
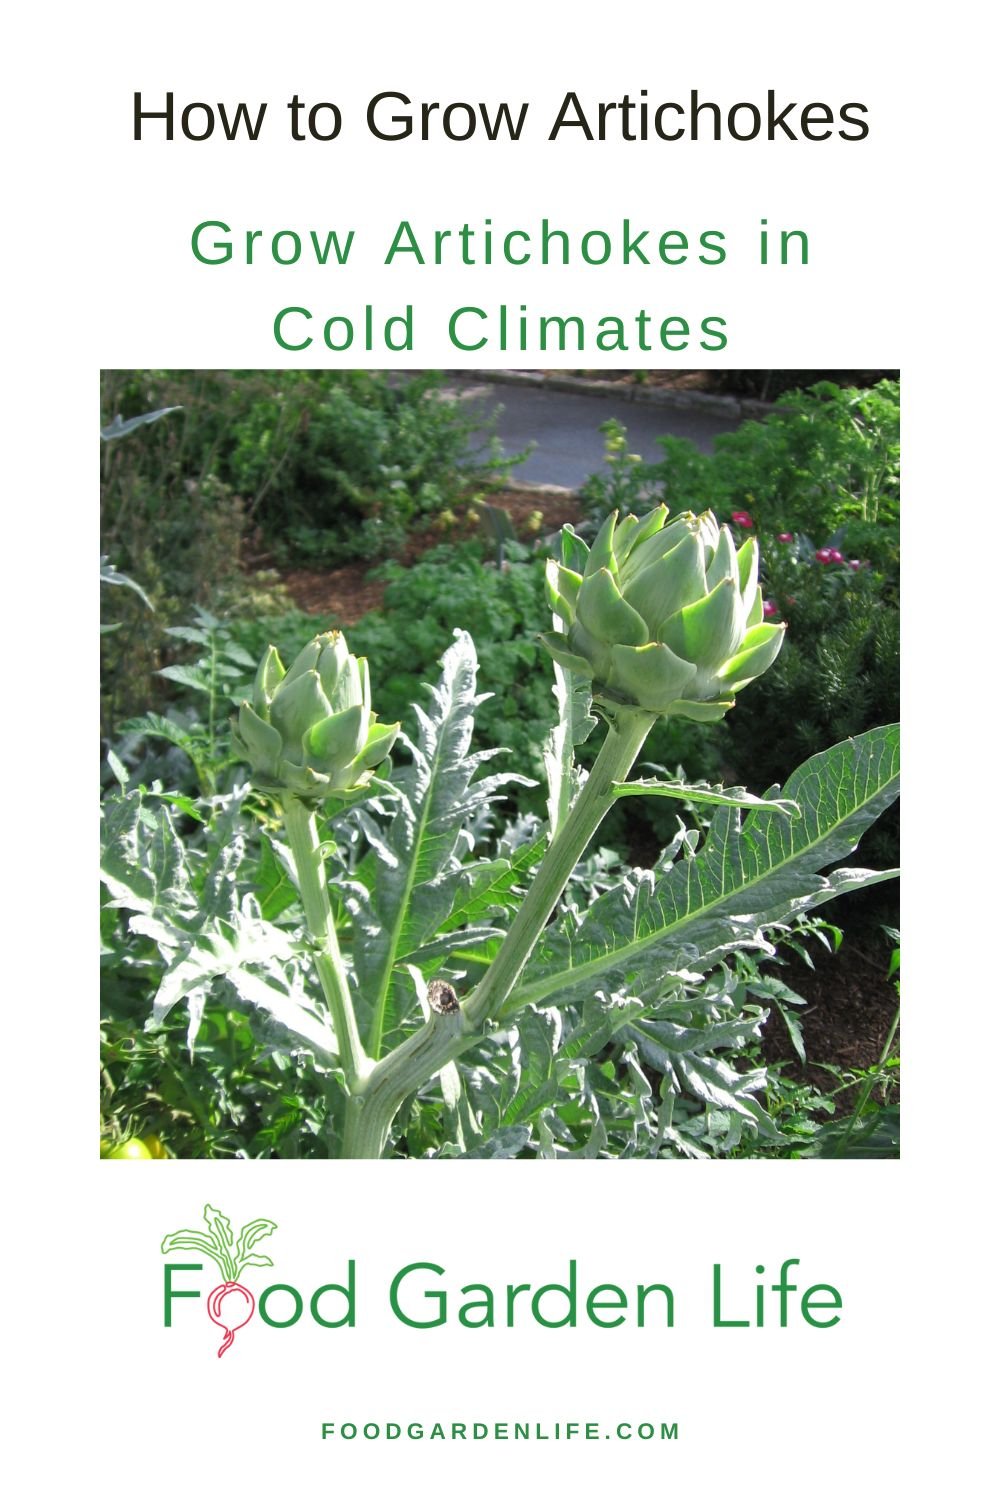
Pin this post!
As you get to the centre, there’s a cone with many small bracts. The bottom of these is usually tender enough to bite right off.
Beneath these, you come the hairy “choke,” a fibrous mat that you scrape off and discard. You don’t eat it. Use a spoon or your fingernails to dislodge the choke, but keep the thick saucer-shaped bit below. It’s called the heart – and artichoke hearts are the prize. Bathe them in butter dip before eating.
To Cook Large Artichokes:
Cut off the stem flush with the bottom of the artichoke
Remove the smaller, lower outer bracts
Use a knife to cut off the top of the artichoke (I take off the top quarter, and find that a bread knife works best to cut through the fibrous bracts)
Steam 30 minutes, top facing downwards (some people boil them, but I prefer steaming them)
Drain well and serve with garlic butter
And don’t skimp on the garlic butter. For a half pound of butter, I usually add a half teaspoon of salt, a crushed clove of garlic, and the juice of half a lemon. Where there are kids in the house demanding extra butter sauce…you can stretch it out by adding olive oil instead of more butter.
To Cook Small Artichokes:
When they’re still small, some of the stem beneath is still probably tender enough to eat. And you’ll be eating the choke too.
Halve artichokes lengthwise
Put in skillet with hot olive oil, garlic, salt and pepper and brown for a moment
Add lemon juice and water and braise until the liquid has evaporated and they’re tender (how much lemon juice will depend how tangy you like them…so play around with it.)
These braised baby artichokes are great as a side dish or on a salad.
Artichoke Plants in Garden Design
If you have a small garden, keep in mind artichoke plants are space hogs. There are more practical food plants you can grow in a small space.
But they are delicious. And they are really beautiful.
The jagged silver-grey leaves have a whitish underside. I love the colour and texture they bring to the edible garden. (Although they never quite look as good once the artichokes are removed.)
And lastly, if you like the look of artichoke leaves but don’t like to eat artichoke, grow cardoon, the leafy cousin to the artichoke.
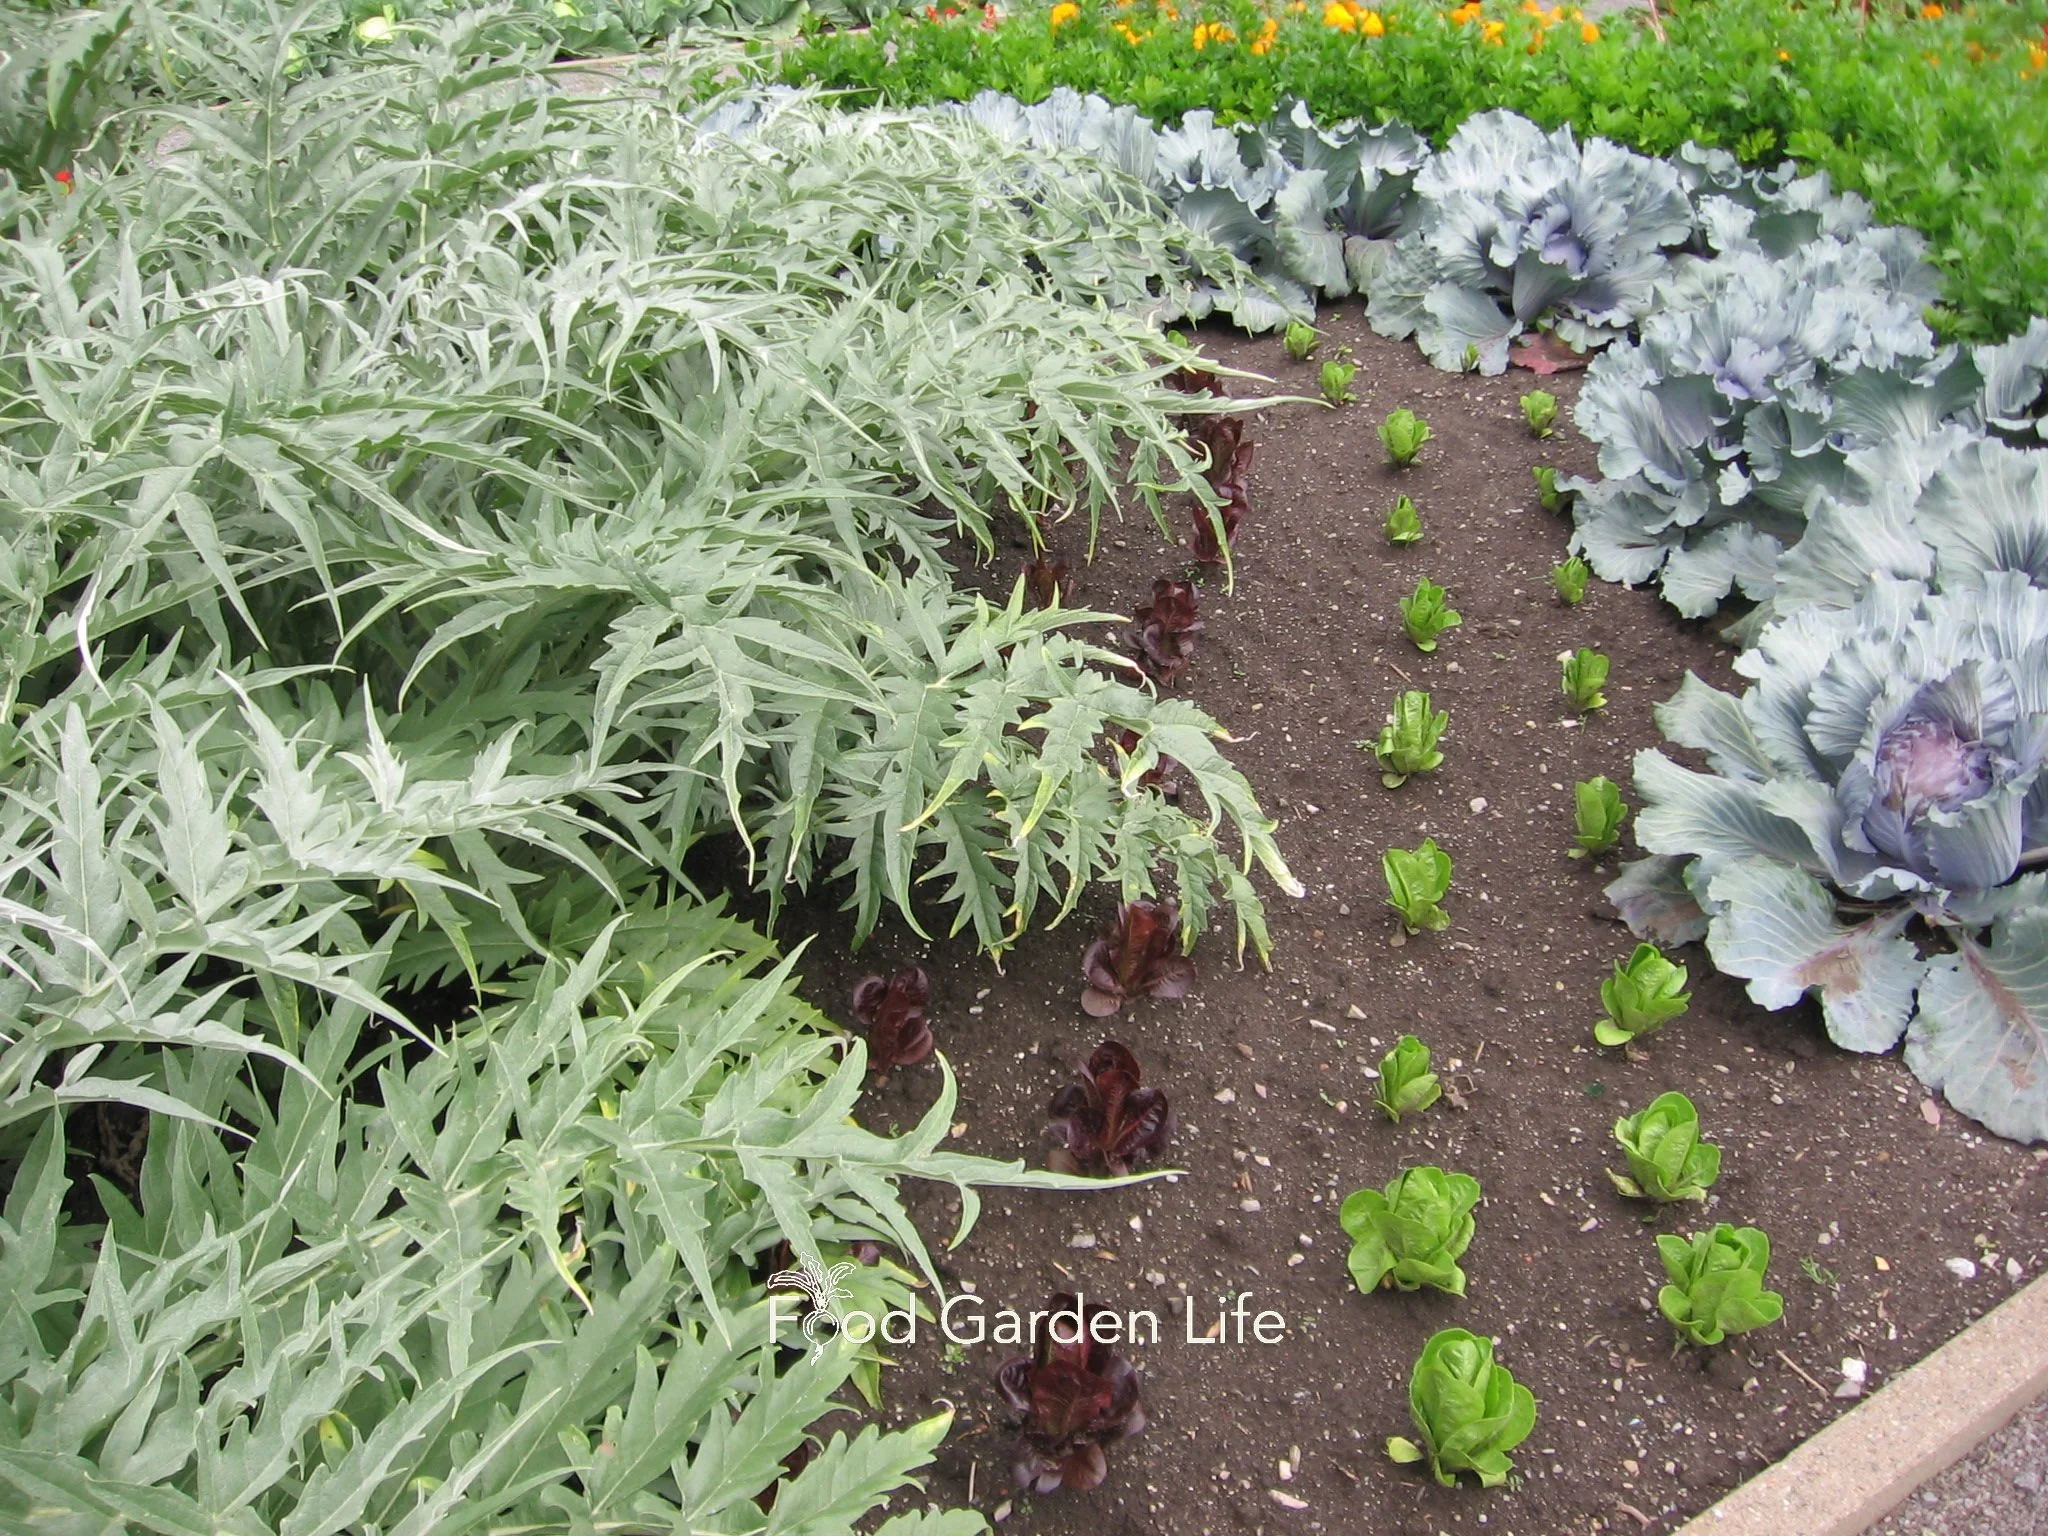
Garden design with artichoke: Use it to add colour and texture to the edible garden.
Find This Helpful?
Enjoy not being bombarded by annoying ads?
Appreciate the absence of junky affiliate links for products you don’t need?
It’s because we’re reader supported.
If we’ve helped in your food-gardening journey, we’re glad of support. You can high-five us below. Any amount welcome!
More Vegetable Gardening Ideas
Articles and Interviews
Courses: Edible Gardening
More Mediterranean Crops
Articles and Interviews
Courses: Figs and Lemons

Hi, We’re Steve and Emma!
We help people grow food on balconies, in backyards, and beyond—whether it’s edible landscaping, a vegetable garden, container gardens, or a home orchard.