
A Canadian Gardener’s Bookshelf
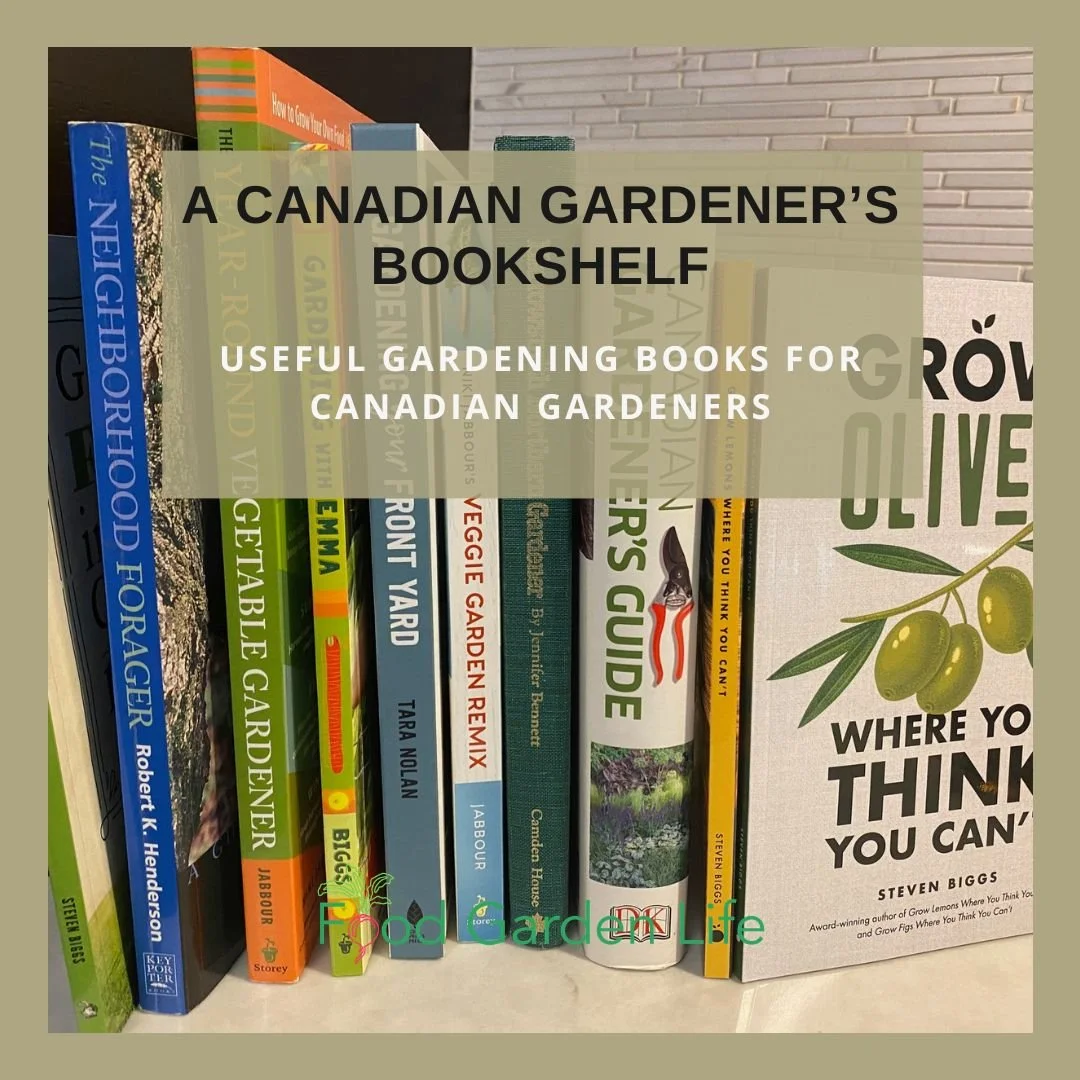
Useful gardening books for Canadian gardeners, plus older titles worth hunting down
I love a good gardening book.
I also know that Canadian gardeners sometimes have to read gardening advice with one eyebrow raised. We have zone envy. Or there are plants or products we can’t get here.
That does not mean every Canadian gardening book applies across Canada. Gardeners in Victoria, Toronto, Winnipeg, and St. John’s deal with very different conditions.
But Canadian garden writers often begin with familiar realities: short or unpredictable growing seasons, cold winters, regional differences, small urban spaces, and the need to make the most of the season we have.
Here are books I think are useful, distinctive, or simply enjoyable for Canadian gardeners. This is a personal list, not a ranking. I know some of the authors, and I have co-written or published several of the books near the end. I have included those because they fill particular niches, but I will identify them clearly.
Last updated July 2026.
A broad Canadian gardening reference
Canadian Gardener’s Guide, 3rd Edition
Canadian editor: Lorraine Johnson
This is a useful place to start if you want one broad reference covering food and ornamental gardening.
It includes plant selection, garden care, common problems, landscaping projects, native plants, short-season vegetables, cold frames, and rain gardens. The Canadian editing does not make every recommendation universal, but it gives the book a more useful frame of reference than many general gardening encyclopedias. I highly recommend it, I’m a big fan of Lorraine’s work.
Vegetable gardening and a longer harvest
Four books by Niki Jabbour
Halifax-area gardener Niki Jabbour is a thought leader in vegetable gardening. She’s written four books that complement one another really well. Together, they cover season extension, crop protection, unusual vegetables, and food-garden design.
The Year-Round Vegetable Gardener
Start here if your main goal is to stretch the harvest beyond summer.
The book covers succession planting, cold-tolerant vegetables, cold frames, tunnels, and other ways to keep harvesting through colder parts of the year.
I like that winter is not treated simply as the point when the gardening books get put away.
Growing Under Cover
This is the choice for gardeners interested in row covers, low tunnels, cold frames, shade cloth, and other protective structures.
It goes beyond keeping plants warm. Covers can also protect crops from pests, wind, intense sun, and increasingly erratic weather.
Niki Jabbour’s Veggie Garden Remix
Choose this one if you’re tired of growing the same vegetables every year.
Niki introduces unusual vegetables and lesser-known edible plants from around the world, often beginning with a familiar crop and suggesting more adventurous relatives.
Groundbreaking Food Gardens
This is the most design-oriented of the four.
It gathers 73 food-garden plans and ideas from gardeners, growers, and designers with very different spaces and goals. Instead of presenting one perfect layout, it shows how many forms a productive garden can take. Good way to get your creative juices flowing.
Listen: Hear my conversation with Niki about favourite vegetable varieties, or hear her ideas for growing under cover.
Raised Bed Revolution
Build It! Fill It! Plant It! Garden Anywhere
Tara Nolan
Raised beds can solve many problems: poor soil, difficult drainage, awkward spaces, accessibility needs, and the simple desire to stop kneeling in the mud.
Tara combines practical growing advice with a wide range of construction and layout ideas. It is especially useful if you want to build something more considered than a traditional coffin-like four boards arranged in a rectangle.
Backyard Bounty
The Complete Guide to Year-Round Organic Gardening in the Pacific Northwest
Linda Gilkeson
This is deliberately regional, and that is its strength.
It is particularly relevant to gardeners in coastal British Columbia and the Pacific Northwest, where mild winters, wet weather, and a long, cool growing season create different possibilities from those in most of Canada.
West Coast Gardening
Natural Insect, Weed and Disease Control
Linda Gilkeson
This is a detailed reference for gardeners looking for organic ways to identify and manage pests, diseases, and weeds.
Again, its strongest audience is in coastal British Columbia and the Pacific Northwest. Gardeners elsewhere will still find useful principles, but should interpret specific pests and timing through their own region.
For serious vegetable growers
These books are written primarily for market gardeners and experienced growers. Home gardeners may not need every crop plan, financial calculation, or production system, but the underlying ideas can transform how a productive garden is organized.
The Market Gardener
A Successful Grower’s Handbook for Small-Scale Organic Farming
Jean-Martin Fortier
Quebec grower Jean-Martin Fortier explains his approach to biointensive growing on a small acreage.
The book covers permanent beds, soil preparation, crop planning, hand tools, efficient work systems, and producing more without relying on large machinery.
You probably do not need to apply every commercial practice to a home garden. But its questions are valuable: Which jobs create unnecessary work? How can beds be organized more efficiently? How can a small space produce more without simply becoming a larger burden?
Listen: Hear my conversation with Jean-Martin Fortier about profitable small-scale farming.
The Winter Market Gardener
Jean-Martin Fortier and Catherine Sylvestre
This practical guide focuses specifically on winter vegetable production for small farmers in northern climates.
It covers crop planning, protective structures, tools, pests, diseases, crop selection, and storage. Catherine Sylvestre brings extensive experience with greenhouse production and cold-season growing in Quebec.
It is aimed mainly at commercial growers, but serious home gardeners using tunnels, cold frames, or an unheated greenhouse will find plenty to study.
Fruit trees for home gardens
Growing Fruit in Northern Gardens
Sara Williams and Bob Bors
This is one of the most useful broad references for growing fruit in cold Canadian climates.
Saskatchewan horticulturists Sara Williams and Bob Bors cover fruit-growing fundamentals, hardiness, site selection, planting, care, pests, and diseases. The book ranges widely, from apples and other tree fruits to grapes, berries, haskap, sour cherries, and less familiar fruits suited to northern gardens.
Bors brought decades of experience breeding cold-hardy fruit at the University of Saskatchewan, while Williams was an influential Prairie garden writer and horticulturist. Their combined perspective makes this especially valuable for Prairie and northern gardeners, although much of the information is useful anywhere cold winters and short growing seasons limit the usual fruit choices.
The book is written for home gardeners rather than commercial orchardists. Distribution is now limited because the original publisher closed.
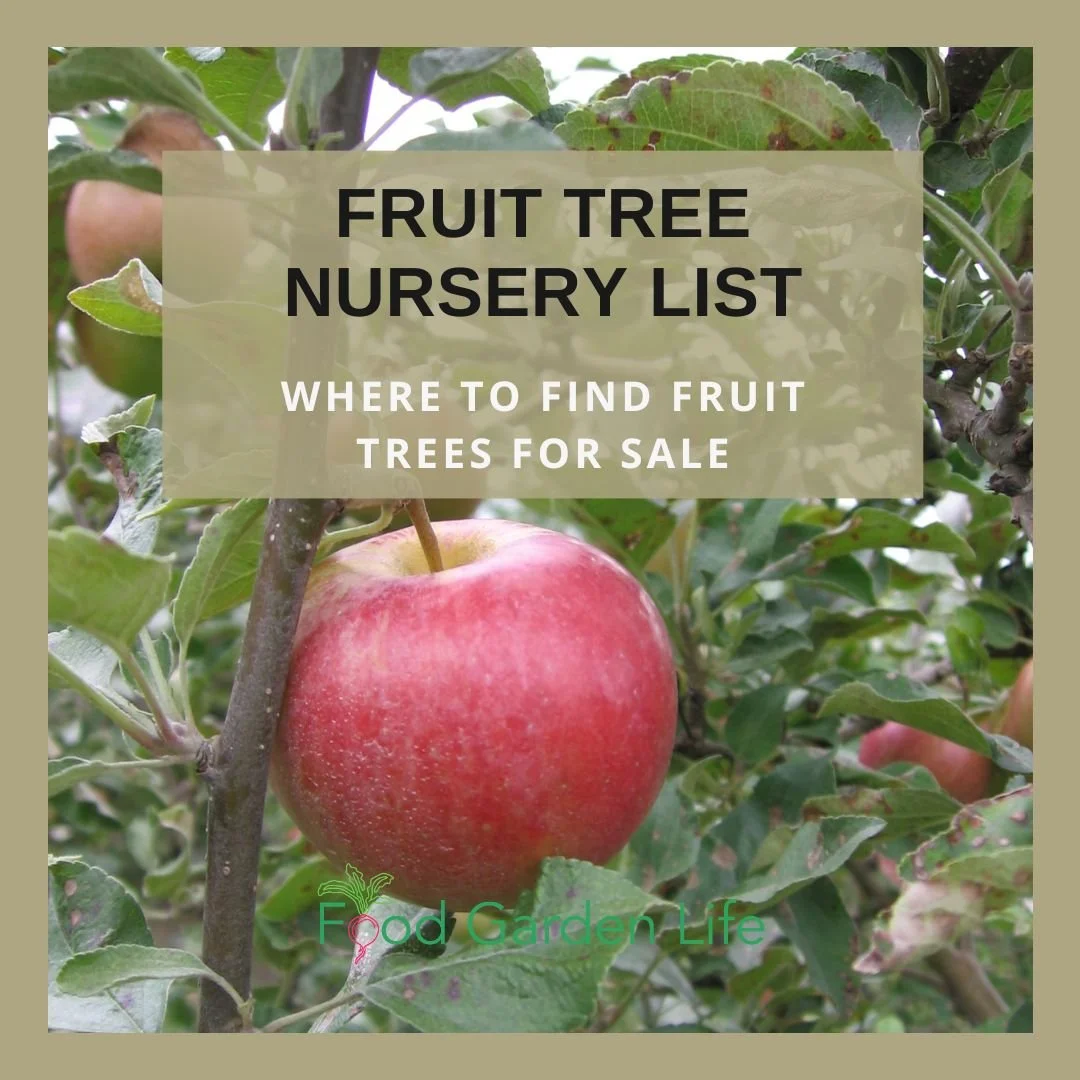
Designing a Fruit Tree Garden
How to Choose Fruit Trees That Thrive in Your Climate and Space
Susan Poizner
Fruit-tree mistakes can take years to reveal themselves. The wrong tree might grow too large, need a pollination partner you do not have, or be poorly suited to the climate.
Toronto fruit-tree educator Susan Poizner begins before the planting hole is dug. She helps readers consider climate, available space, pollination, tree size, location, and garden design.
This is the book I would recommend first to someone planning a new home orchard or adding one or two fruit trees to a yard.
Poizner has also written specialist books about pruning and grafting. Her earlier book, Growing Urban Orchards, is a more story-driven look at choosing, planting, pruning, and caring for fruit trees in backyards and community orchards.
Listen: Hear my conversation with Susan Poizner about choosing, pruning, and caring for fruit trees.
Storing the harvest
The Complete Root Cellar Book
Building Plans, Uses and 100 Recipes
Steve Maxwell and Jennifer MacKenzie
Growing food is only half the story. Eventually, a gardener has to decide what to do with the carrots, potatoes, apples, squash, and other crops that arrive all at once.
This Canadian book combines Steve Maxwell’s building knowledge with Jennifer MacKenzie’s food expertise. Both bring deep practical experience to the subject.
It includes detailed illustrated plans for four types of root cellar, including possibilities for people without a traditional basement cellar. It also explains temperature, humidity, ventilation, crop requirements, and managing stored produce.
The second part contains 100 recipes using stored fruits, vegetables, nuts, and preserves.
It is useful both for someone planning a full-sized root cellar and for a gardener trying to improve a smaller cold room or improvised storage space. It takes the food-gardening bookshelf beyond growing and into keeping the harvest edible for more than a fortnight. (And it inspired me to build a cold cellar!)
Listen: Hear Steve Maxwell discuss food storage and root cellars, and hear Jennifer MacKenzie share root-vegetable ideas and recipes from the book.
Food gardening beyond the backyard vegetable patch
Gardening Your Front Yard
Projects and Ideas for Big and Small Spaces
Tara Nolan
The front yard is often the largest unused patch of sunny ground around a home.
This book explores ways to use it for food, pollinator habitat, rain gardens, pathways, privacy, and more interesting landscaping than the standard lawn-and-foundation-shrub arrangement.
It is useful for anyone interested in edible landscaping or in making a front yard do more than hold the house back from the street.
Listen: Hear my conversation with Tara Nolan about making better use of the front yard.
The Regenerative Garden
80 Practical Projects for Creating a Self-Sustaining Garden Ecosystem
Stephanie Rose
This is a practical introduction to working with natural systems in the home garden.
The projects touch on soil, water, biodiversity, food growing, plant communities, climate, and the reuse of garden materials. It makes regenerative and permaculture ideas approachable without assuming that you have acreage, livestock, and a beard full of straw.
Listen:Hear my conversation with Stephanie Rose about regenerative gardening.
Garden Alchemy
80 Recipes and Concoctions for Organic Fertilizers, Plant Elixirs, Potting Mixes, Pest Deterrents, and More
Stephanie Rose
This is for gardeners who like to understand and make the materials they use.
It includes recipes and projects for potting mixes, fertilizers, soil amendments, plant preparations, and pest deterrents. It is practical, hands-on, and particularly appealing to people who enjoy experimenting.
Listen: Hear Stephanie Rose discuss garden healing and ideas from Garden Alchemy.
Native plants and pollinators
100 Easy-to-Grow Native Plants for Canadian Gardens
Lorraine Johnson
This was one of the foundational Canadian books about using native plants in gardens.
The third edition profiles plants for different regions, sites, and growing conditions, with advice about plant combinations and garden use.
It is an excellent starting point for gardeners who want to add native plants without turning the project into a botany graduate thesis.
A Garden for the Rusty-Patched Bumblebee
Creating Habitat Gardens for Native Pollinators: Ontario and Great Lakes Edition
Lorraine Johnson and Sheila Colla
This book focuses on Ontario and the Great Lakes region.
It explains how to create pollinator habitat in yards, community spaces, boulevards, and balconies, and includes detailed profiles of native plants and the pollinators they support.
The regional focus is useful rather than limiting. Gardeners elsewhere can look for resources that identify the plants and pollinators specific to their own area.
Houseplants and indoor gardening
The New Plant Parent
Darryl Cheng
Many houseplant books give rigid instructions: water every Tuesday, provide “bright indirect light,” and hope the plant has read the same book.
Toronto author Darryl Cheng takes a more thoughtful approach. He explains light, water, nutrients, growth, and changing plant needs so readers can make better decisions rather than follow a fixed care recipe.
It is one of the strongest books for building a genuine understanding of indoor plants.
The New Plant Collector
Darryl Cheng
This follow-up is for people moving beyond their first assortment of common houseplants.
It covers unusual and collectible plant groups, propagation, and the changing needs of plants as they grow. Start with The New Plant Parent for fundamentals, then move to this one when the plant shelves begin colonizing additional rooms.
Gardening with children
Gardening with Emma
Grow and Have Fun: A Kid-to-Kid Guide
Emma Biggs and Steven Biggs
A disclosure is clearly needed here: Emma is my daughter, and I co-wrote this book with her. What a fun project!
The book grew from Emma’s experiences as a young gardener. It includes food growing, unusual plants, garden projects, playful designs, and ideas for exploring outdoors.
What makes it different is the kid-to-kid point of view. It is less about adults assigning worthy gardening activities and more about what a child might genuinely find fun.
It is suited to families, school libraries, classroom gardens, and children who are curious about plants but not keen to sit through a lecture from Dad.
A Canadian garden journal
Canada Gardener’s Journal
This is a garden journal and planner rather than a conventional how-to book.
It provides space to record planting dates, varieties, garden jobs, harvests, weather, and observations, along with seasonal information and a Canada-wide source directory.
The award-winning journal was originally developed by Margaret Bennet Alder, then carried forward by Helen and Sarah Battersby. I’m now its custodian, responsible for keeping it useful, practical, and rooted in the experience of Canadian gardeners.
Memory is an unreliable filing cabinet, especially where variety names are concerned. A journal helps!
Listen: Hear Helen Battersby tell the story of Margaret Bennet-Alder and the journal she created.
Garden writing and plant lore
The Untamed Garden
A Revealing Look at Our Love Affair with Plants
Sonia Day
Not every gardening book needs to tell us when to sow the beans.
Longtime Canadian garden writer Sonia Day explores the stories, history, myths, botany, and peculiar human behaviour surrounding plants. She looks at why particular plants have attracted, delighted, enriched, poisoned, and occasionally obsessed us.
This is a book to read for pleasure rather than a manual to keep beside the potting bench. Day’s humour and curiosity make it a good choice for gardeners who enjoy the stories behind the plants as much as growing them.
Escape to Reality
How the World Is Changing Gardening, and Gardening Is Changing the World
Mark Cullen and Ben Cullen
Gardening is not only about producing flawless tomatoes or persuading the lawn to behave.
Mark Cullen and his son Ben look at why people garden and at the changing place of gardens in our communities, environment, and daily lives. They explore subjects such as food growing, biodiversity, community, mental well-being, and the ways a younger generation is reshaping gardening.
This is more reflective than a conventional garden manual. It is a useful choice for readers interested in what gardening can contribute beyond the boundaries of an individual yard.
Mark Cullen has been one of Canada’s most recognizable gardening voices for decades, while Ben brings the perspective of a younger urban gardener. The combination makes this a fitting book for a shelf devoted to the Canadian gardening experience.
Older books worth borrowing or hunting down
An older gardening book may contain outdated product recommendations or plant names. That does not mean the whole book has expired.
Some older Canadian titles contain regional experience, personality, and practical observations that newer books do not entirely replace.
Check your public library first. Used-book shops and online used-book sellers are also worth exploring.
The Neighborhood Forager
A Guide for the Wild Food Gourmet
Robert K. Henderson
This book looks for edible plants in neighbourhoods, gardens, vacant lots, and other everyday landscapes rather than sending every would-be forager deep into the wilderness.
It combines plant information with culinary uses, history, folklore, harvesting, and preservation.
Listen: Hear my conversation with Robert K. Henderson about neighbourhood foraging and wild food.
Ecological Gardening
Marjorie Harris
Marjorie Harris brought an ecological point of view to Canadian gardening long before the word “ecological” appeared on every second bag of potting mix.
The book argues for attractive, abundant gardens with less reliance on pesticides and unnecessary chemical inputs. Her lively voice is part of the appeal.
It is out of print, but remains worth borrowing or buying used.
The Harrowsmith Northern Gardener
Jennifer Bennett
One of my favourite books. This influential book treated northern gardening as a subject in its own right, rather than an inconvenient variation on advice written farther south.
It was later revised and published as The New Northern Gardener. Either edition is worth picking up if you find a good copy.
Ecological Fruit Production in the North
Bart Hall-Beyer and Jean Richard
This self-published Canadian book was written by two Quebec nursery owners for gardeners and orchardists growing fruit in northern conditions.
It covers tree fruits, berries, varieties, pruning, soil, pests, and ecological approaches to fruit production. Its attention to cold-region growing and less-common northern fruit makes it distinctive, even decades after publication.
Some recommendations, sources, and terminology will inevitably be dated, so use it alongside current regional information. But the authors’ practical experience and northern perspective are difficult to replace.
The book is long out of print and can be hard to find. Check library catalogues and used-book sellers. A copy discovered at a sensible price is worth rescuing.
Lois Hole’s Vegetable Favourites
Lois Hole
Lois Hole’s straightforward Prairie perspective has helped generations of gardeners.
This book covers practical vegetable growing for cooler climates in a particularly approachable voice. Depending on the edition, you may find it under the title Lois Hole’s Northern Vegetable Gardening.
No Guff Vegetable Gardening
Donna Balzer and Steven Biggs
Another disclosure: I co-wrote this book. Now out of print, I still think it earns a place on this reader list because it was written specifically for Canadian home vegetable gardeners, with a deliberately practical and informal approach.
Listen: Hear my recent conversation with Donna Balzer about favourite vegetable varieties.
My cold-climate specialty books
I write about crops that home gardeners are often told they cannot grow.
These are current titles, so this section is plainly self-interested. They are included because there are few books devoted specifically to growing these crops in pots and cold climates.
Grow Lemons Where You Think You Can’t
A practical guide to varieties, containers, watering, feeding, pruning, pests, propagation, and overwintering lemon trees where they cannot remain outdoors all year.
Grow Olives Where You Think You Can’t
How to Grow an Olive Tree in a Pot
A guide to keeping olive trees in containers, managing winter storage, shaping the plants, and providing the conditions needed for flowering and fruiting.
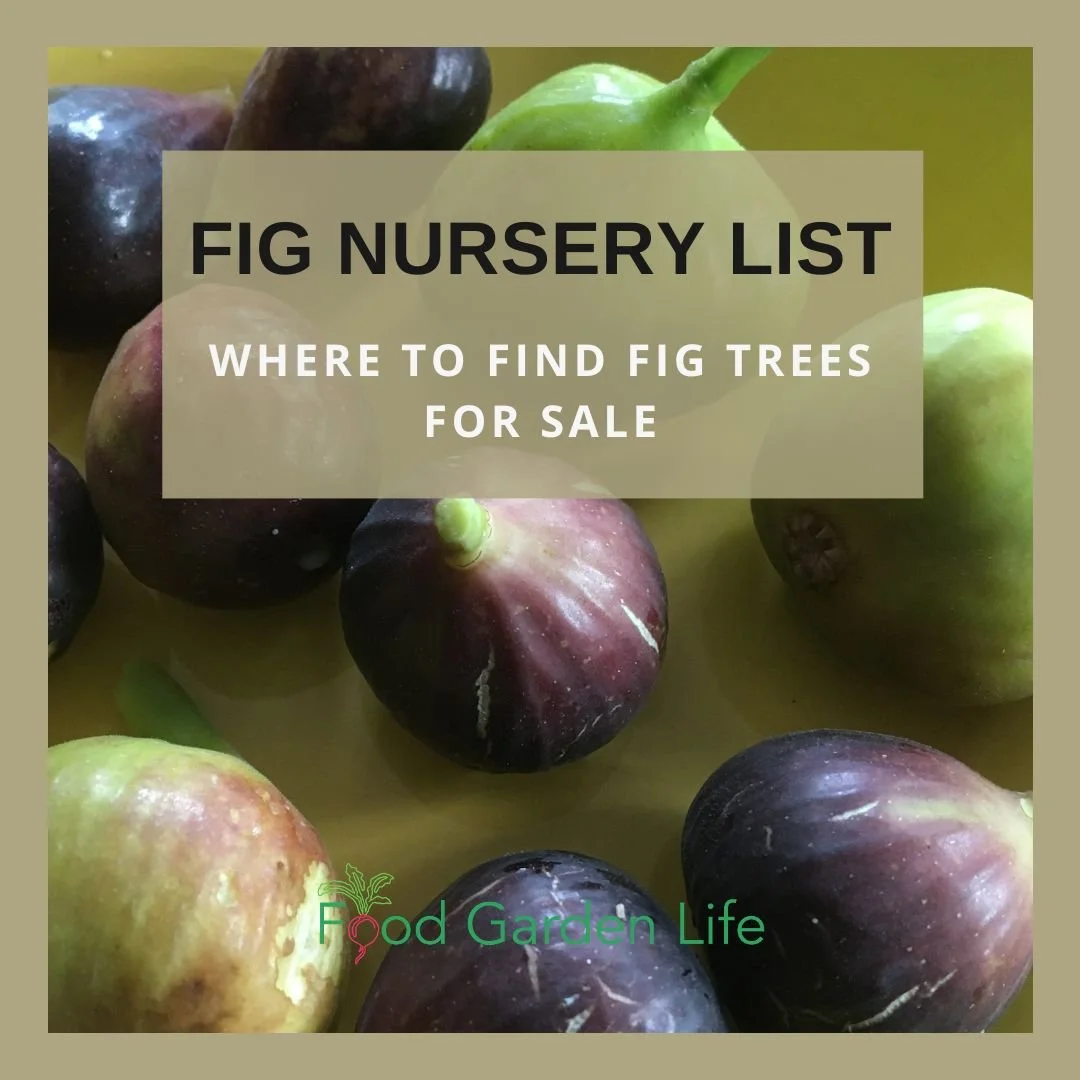
Growing Figs in Cold Climates
150 of Your Questions Answered
A concise question-and-answer guide to fig varieties, pruning, propagation, containers, ripening, and winter protection.
Grow Figs Where You Think You Can’t
Growing Figs in Cold Climates and Pots
A substantially expanded edition is coming in 2026, with detailed information about varieties, containers, training, propagation, overwintering, ripening, and the experiences of cold-climate fig growers.
What belongs on a Canadian gardener’s bookshelf?
There is no single perfect Canadian gardening shelf, just as there is no single Canadian growing season.
A useful collection might include:
One broad Canadian reference
A vegetable-growing book suited to your climate
A regional book written close to home
A book about season extension or winter harvests
A fruit-growing or native-plant guide
A book about storing and using the harvest
A practical reference you will consult repeatedly
One older book with a distinctive voice
Something that makes you want to try an idea immediately
Read widely, then adapt what you read.
A planting date is local. A useful principle can travel much farther.
And don’t overlook public libraries. They’re an excellent place to sample books before deciding which ones deserve permanent residency beside all of your seed catalogues.
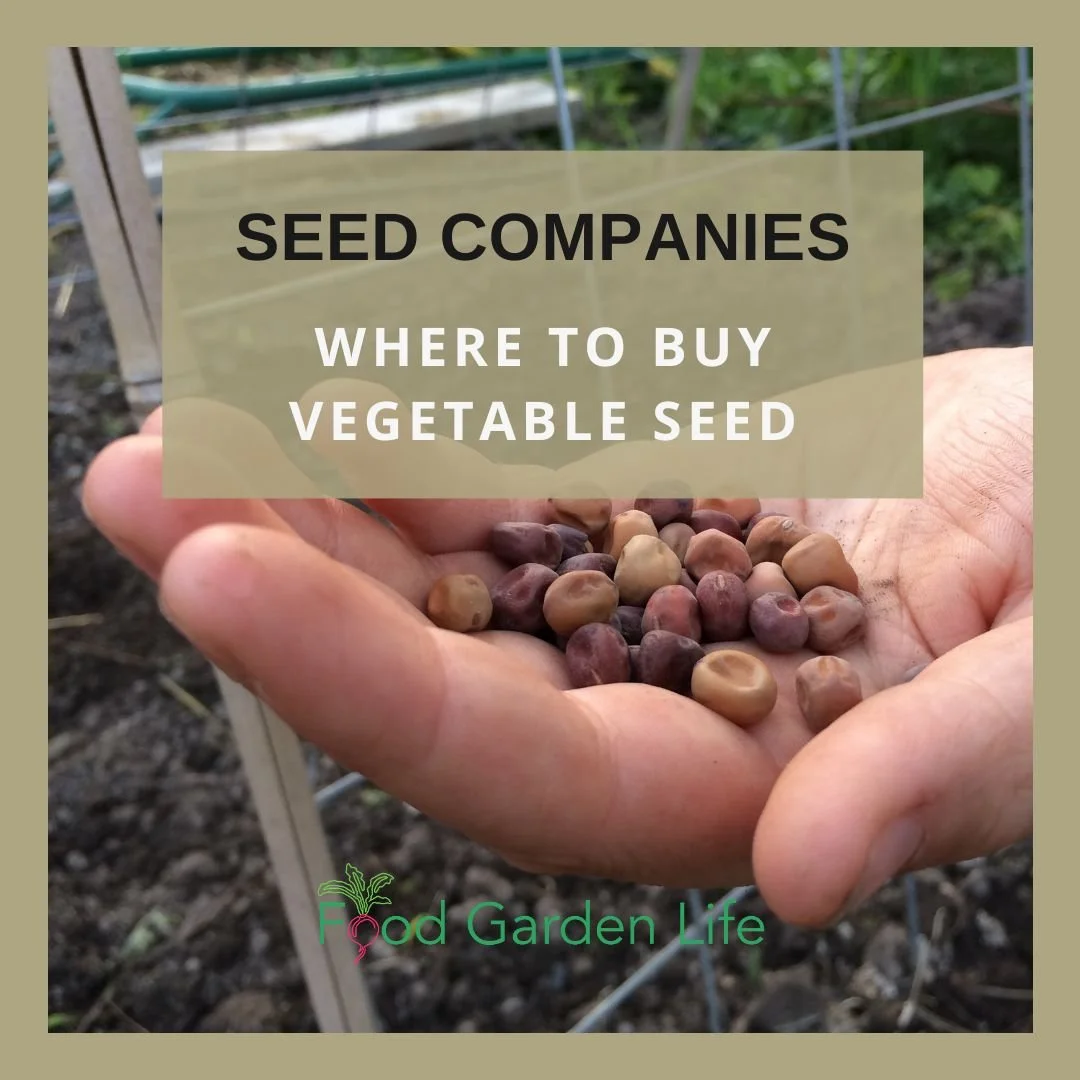
Seed Company List: Where to Buy Vegetable Seed
Where to buy vegetable seed.
By Steven Biggs
Buying Vegetable Seeds Online
I get a lot of messages from people wondering where to buy vegetable seed. So I hope this list helps you find a seed company with the veggie seeds you’re looking for.
This list focuses on seed companies that have a good selection of vegetable seeds. Some have print catalogues—some sell seed online.
This list is a work in progress. If there’s a seed company or seed catalogue you recommend, please e-mail me so I can find out more about it.
Before you browse vegetable seed suppliers, get started with Tips When Shopping for Vegetable Seeds, below.
Tips When Shopping for Vegetable Seed
Here are tips to keep in mind as you get ready to order vegetable seed.
You Don’t Always Have to Shop!
To start with, you don’t always have to buy seed.
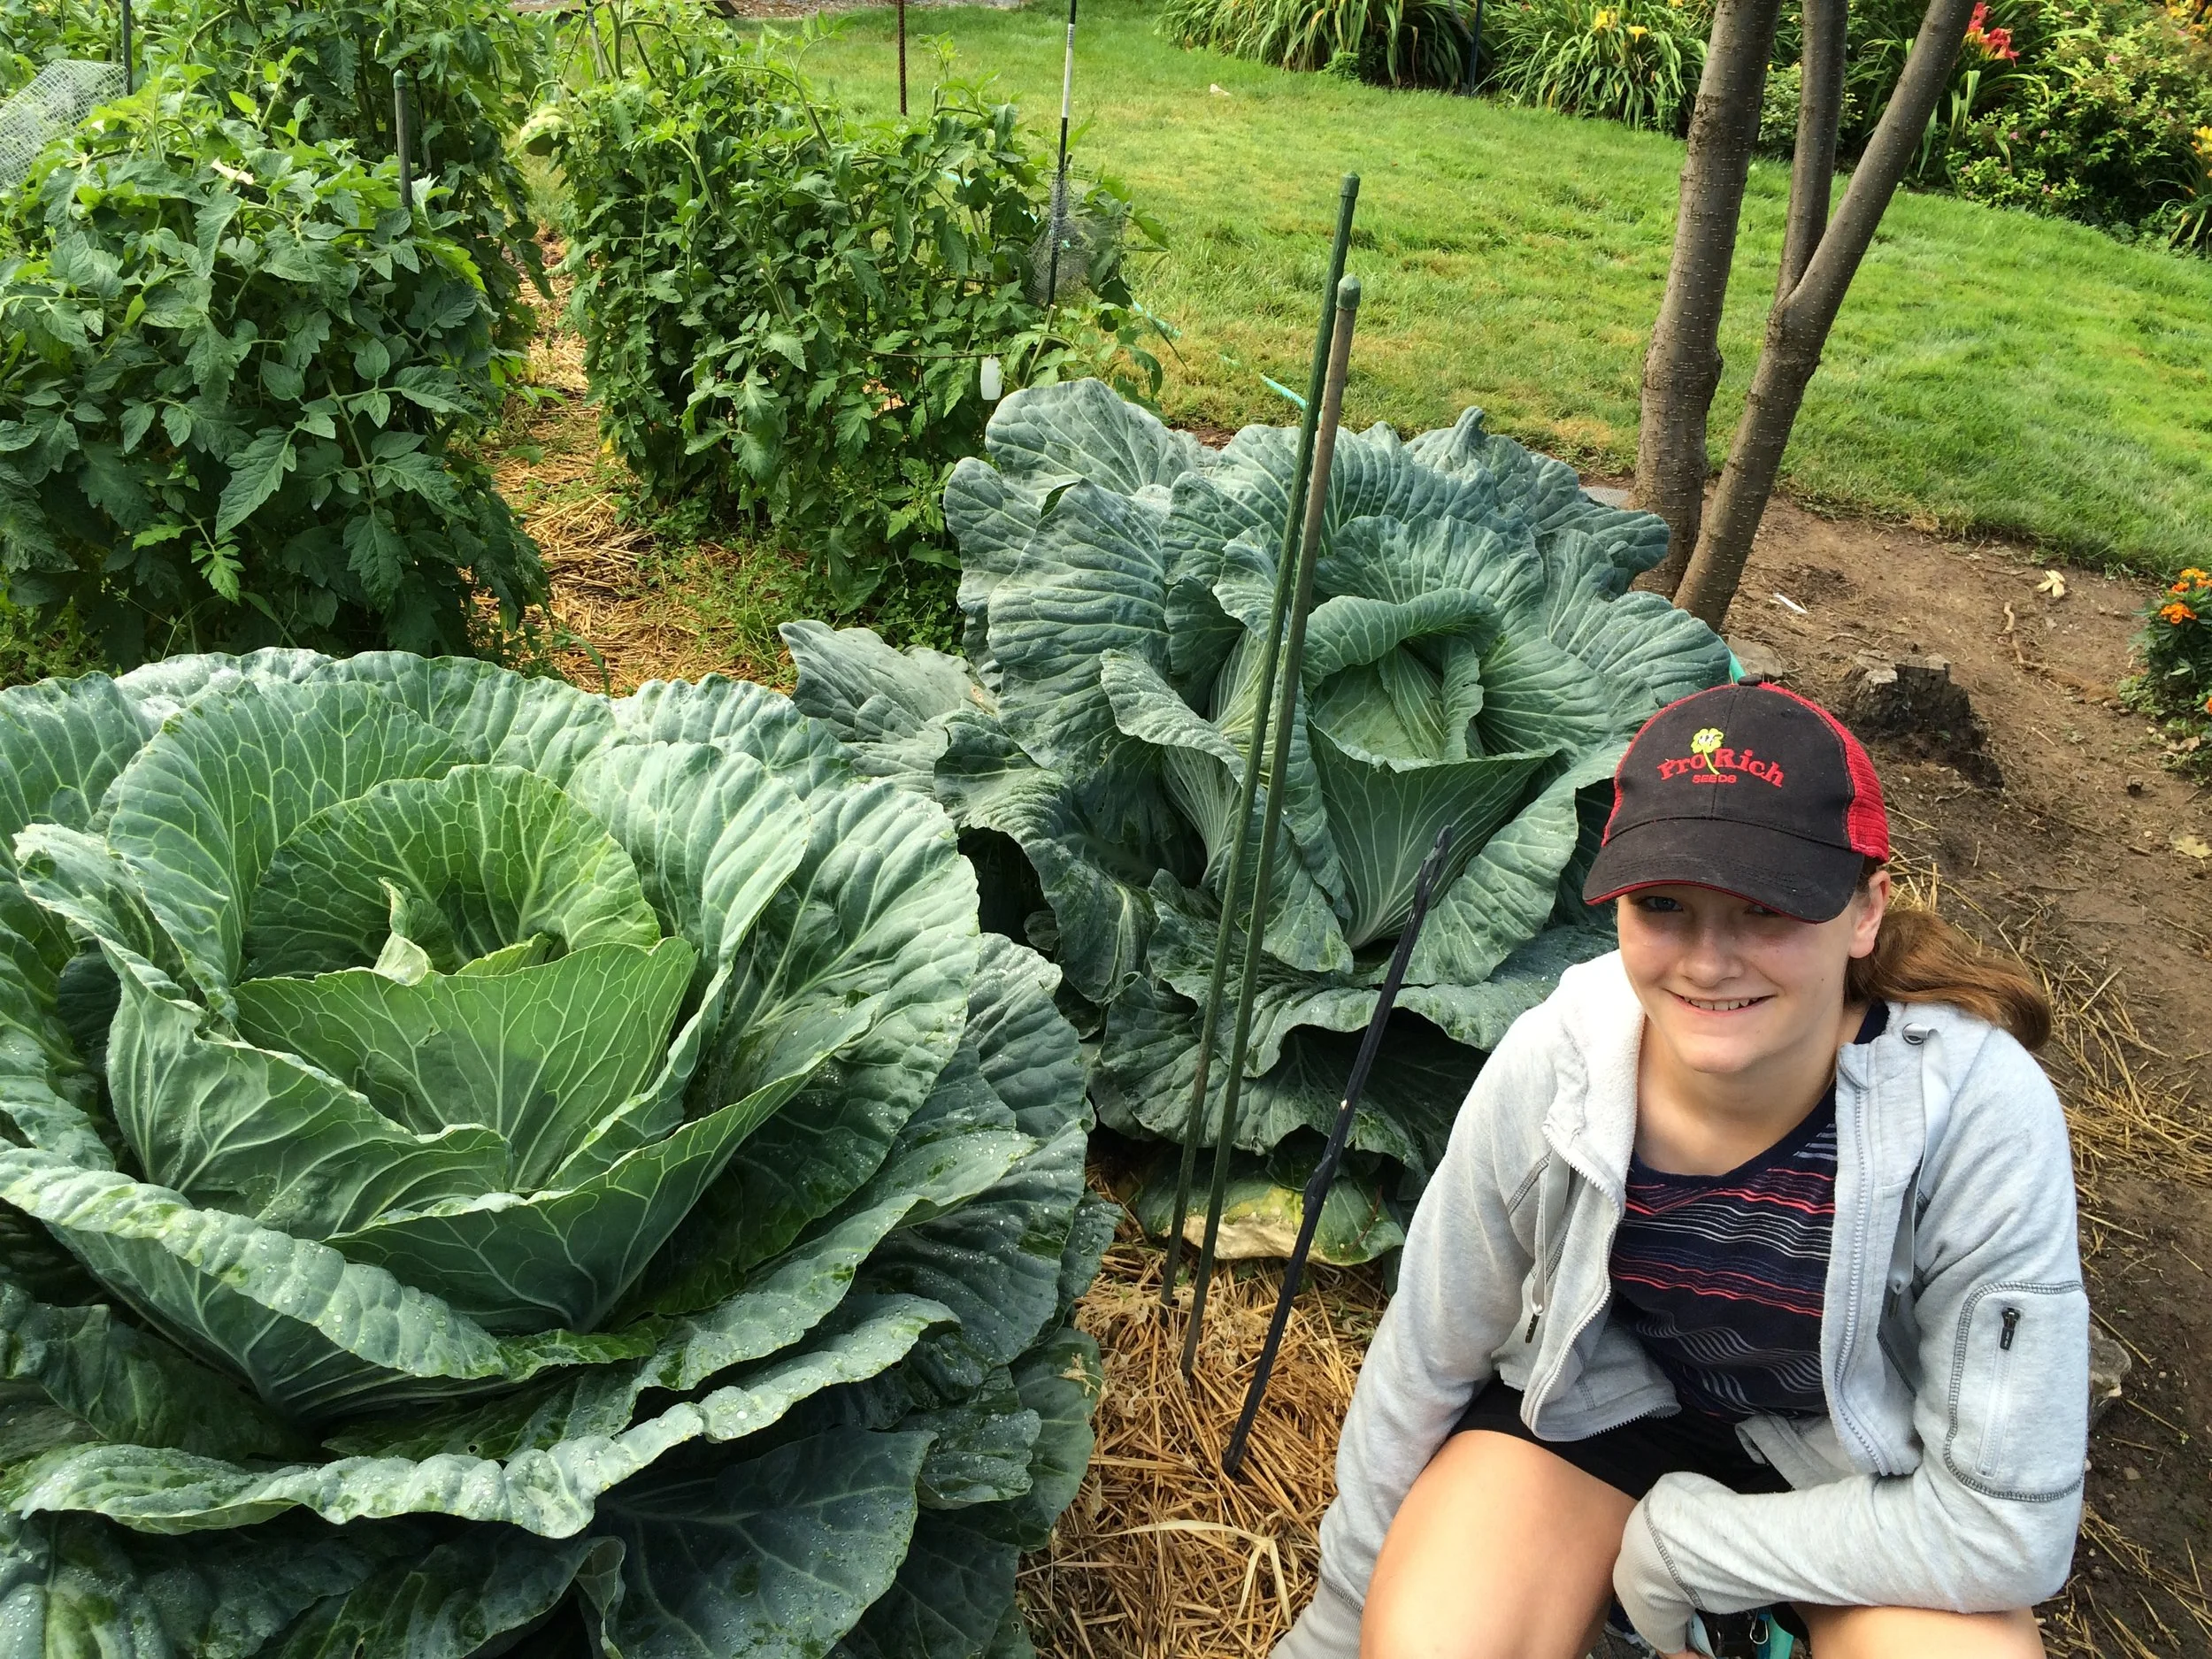
Emma and I at a GVGO field day, finding out how experts in this club grow giant vegetables. Members get free seed.
Many gardeners save seed—and are often eager to share favourite varieties. (My three favourite tomato varieties came from friends who shared the seed with me, and now I save the seed and share it with my gardening friends every year.)
Seeds of Diversity is a Canadian organization focused on protecting seed diversity. It has an annual member seed exchange. You can also visit the website to find Seedy Saturday events across Canada. These events feature seed swaps and often include a retail component with seed vendors.
Seed Savers Exchange is an American organization focused on preserving biodiversity in food crops. It collects heirloom seed varieties to store in a large, nongovernmental seed bank, and operates an online seed exchange where members can search and swap seeds.
Seed Libraries operate in many areas. Sometimes they are hosted by municipalities—sometimes by other organizations. I’ve seen some hosted by libraries—libraries with books! The idea is that gardeners can “borrow” seeds, and at the end of the year, having saved seeds, “return” seeds to the library.
A garden club can be another way to get seed. For example, Giant Vegetable Growers of Ontario (GVGO) is a garden club focused on growing giant pumpkins and giant vegetables. Members get seed when they join.
Interested in the idea of seed libraries? Tune in to hear Ben Cohen, the author of Saving Our Seeds, talk about seed libraries on the Food Garden Life Show.

Grow a Container Vegetable Garden
And get an early harvest of crops that usually take too long!
About Seed Companies
Local companies don’t always sell locally grown seed. Actually, not all seed companies grow seed. Many buy seed in bulk from around the world and then repackage it.
Still others grow some of what they sell and then get other local producers to grow what they don’t produce.
Some small companies grow everything they sell.
Some seed companies have trial gardens to test and showcase varieties before selling them…a worthwhile trip if you have one nearby.
As you read seed catalogues and browse seed websites, you’ll see that different seed companies have different specialties:
A regional focus—only selling seed grown in a certain region
Untreated or organic seed
Heirloom or open-pollinated varieties
New hybrid varieties
Ordering Vegetable Seed
Need an introduction to seed-related lingo? Not sure exactly what heirloom vegetable seeds are? Find out more about the language of seeds in my glossary of seed terminology.
New seed catalogues start to show up in my mailbox (and e-mail inbox!) late in the year. Shipping usually begins early in the year. The closer to planting season you leave your ordering, the more chance your order will get bogged down in the last-minute rush of orders.
Because I like to test crops and varieties, I often order from a lot of companies. But this is not a cost-effective way to seed shop because there’s usually a minimum shipping fee for each seed company. So if you can find everything you want at one seed company, you might save money.
One more thing: Find out how the company you’re ordering from deals with out-of-stock items. Some companies will ship what they have and then keep a back-order for what’s not available; but some companies will substitute a similar variety.
Cross-Border Shipments
Some seed companies don’t ship out of country because of the extra paperwork to sell in another jurisdiction.
(The last time I tried to order my favourite sweet pea seeds from the UK, the seed company no longer shipped to Canada! But sometimes companies will have another company distribute seeds elsewhere…and this was how I got my hands on my favourite sweet pea variety—the one my late cousin Jill grew.)
When You Receive Your Seed Order
Unpack your order and check to make sure that you have everything.
See if there are any back orders.
Seed Company List
Canada Seed Companies
Looking for Canadian seed retailers? Here’s a list of Canadian companies selling vegetable seed, flower seed, and microgreen seed. Remember: Some companies grow everything they sell; others are resellers. So, if you’re looking for Canadian-grown seed, check with the company to find out if its seed is produced in Canada.
A'Bunadh Seeds
Cherhill, Alberta
Open-pollinated and heirloom seeds for zone 2B gardens and above.
Annapolis Seeds
Nictaux, Nova Scotia
Owner Owen Bridge started the business in 2008 as a high-school-aged seed saver. Great place to find unusual veg like Bolivian cucumber and Jamaican burr gherkin. Seeds are grown in the Maritimes by Owen and other small-scale growers.
Atlantic Pepper Seeds
Harvey, New Brunswick
Specializing in hot peppers! And if you’re interested in landscaping with edible plants, they have a section with ornamental peppers.
B.C. Eco Seed Co-op
BC-grown vegetable, flower, herb, and grain seed for sustainable farming and gardening.
Berton Seeds
Toronto, Ontario
Specializing in seeds imported from Italy.
Casey’s Heirloom Tomatoes
Airdrie, Alberta
Wide variety of heirloom tomato seeds, all raised by the owner, Jeffrey Casey.
Cicada Seeds
Errington, British Columbia
Specializing in perennial vegetables, along with some herbs and flowers.
Circle Farms
Calgary, Alberta
Seeds for the Canadian climate and a emphasis on heirloom and open-pollinated varieties.
Eagle Creek Seed Potatoes
Bowden, Alberta
Specializing in seed potatoes.
Ferri Seeds
Warkworth, Ontario
Fruit, veg, and quite a few hard-to-find seeds.
Floribunda Seeds
Keene, Ontario
Specializing in seeds for the cottage garden.
Gaia Organic Seeds
Ottawa, Ontario
Organic veg, flower, and herb seeds.
Grand Seeds
Dunnville, Ontario
Organic veg, flower, and herb seeds.
Greta’s Organic Garden
Montreal, Quebec
Good assortment of veg, herb, and grain seeds.
Giant Vegetable Growers of Ontario
Komoka, Ontario
Not a seed company, but an association for people interested in growing giant vegetables. Members receive giant vegetable seeds. Lots of fun!
Halifax Seed
Halifax, Nova Scotia
Canada's oldest continuously operating family-owned seed company, established in 1866.
Hawthorn Farm Organic Seeds
Mount Forest, Ontario
Organic vegetable, herb, and flower seeds.
Heritage Harvest Seed
Fisher Branch, Manitoba
Heirloom flower and vegetable seeds, and ancient grains.
Incredible Seed Co.
Bridgewater, Nova Scotia
Good selection of veg, along with herb and fruit-tree seeds.
Kitchen Table Seed House
Wolfe Island, OntarioMartha’s Garden Seeds
Organic vegetable, flower, and herb seeds.Martha’s Garden Seeds
Martha’s Garden Seeds
Regina, Saskatchewan
A family-run Saskatchewan seed company specializing in heirloom, open-pollinated, and sustainable flower and vegetable seeds.
Salt Spring Seeds
Salt Spring Island, BC
Heritage and heirloom seeds. Good information on the website about saving your own seeds.
Tourne-Sol Cooperative Farm
Les Cèdres, Quebec
Specializing in open-pollinated seeds. This co-operative farm has a neat model: It’s a worker's cooperative. Hear about what they do in this interview we did on The Food Garden Life podcast.
Lee Valley
Wide range of garden tools and books, including seeds.
Matchbox Garden and Seed Co.
Caledonia, Ontario
We see Hanna Jacobs, founder of Matchbox Garden and Seed Co., at Seedy Saturday events here in Southern Ontario and are fans of her heirloom and rare vegetable seed varieties.
Mumm’s Sprouting Seeds
Parkside, Saskatchewan
Seeds for growing sprouts and microgreens.
No Coast Seeds
Wroxton, Saskatchewan
Open-pollinated seeds for short-season gardens.
OSC Seeds
Kitchener, Ontario
Ships garden seed from coast to coast across Canada.
Pepper Merchant
Ottawa, Ontario
Specializing in pepper seeds, sweet to hot.
Prairie Garden Seeds
North Battledford, Saskatchewan
Small family-run (father-daughter) seed company. Veg, grains, and cereals.
Revival Seeds
Mosher Corner, NS
Family-run seed company specializing in organically grown, open-pollinated heirloom vegetable, herb, garlic and flower seeds.
Richters Herbs
Goodwood, Ontario
More than herbs, a great selection of unusual vegetable seed too. My daughter and I have given a number of gardening seminars at Richters over the years—and we’re big fans of this family business. (Don’t ask me about the time we came home with 18 varieties of mint!)
Sage Garden Greenhouses
Winnipeg, Manitoba
Great selection of vegetable seed. Co-owner Dave Hanson is a CBS Radio gardening columnist—and we teach gardening courses together. This company leads the way in how horticulture of the future can look, with compost-based fertilizing, wood-fibre biodegradable pots, and geothermal heating in the greenhouses.
Small Island Seed Co.
Mill Bay, British Columbia
Rare, cold hardy, and perennial food crops.
Stokes Seeds
Thorold, Ontario
Sells vegetable seed to commercial growers and home gardeners. It’s a family-run business, and I’ve visited the trial gardens and the seed-sorting facility as a member of a Garden Writers Association.
Sweet Rock Farm
Gabriola, British Columbia
Small, farm-based seed company recommended to me by some of my students.

T&T Seeds
Headingley, Manitoba
Seeds, accessories, and fruit plants by mail order. Also a garden centre if you’re in the area.
Urban Harvest
Warkworth, Ontario
Great source for organic and heirloom veg seeds. We’ve hung out with founder Colette Murphy at many seed events. I credit her with helping to stoke my daughter’s seed addiction!
Veseys Seeds
Charlottetown, Prince Edward Island
Usually the first glossy seed catalogue to arrive in my mailbox in December.
West Coast Seeds
Delta, British Columbia
Wide variety of untreated seeds.
Wild Rose Heritage Seed Company
Alberta
Specializing in heirloom vegetable seeds.
William Dam Seeds
Dundas, Ontario
Long one of our favourite seed companies, with a broad selection of vegetable seeds. It’s in our neck of the woods, so we like to see what’s growing in the trial garden.
Find This Helpful?
Enjoy not being bombarded by annoying ads?
Appreciate the absence of junky affiliate links for products you don’t need?
It’s because we’re reader supported.
If we’ve helped in your food-gardening journey, we’re glad of support. You can high-five us below. Any amount welcome!
Grow a Container Vegetable Garden
And get an early harvest of crops that usually take too long!
USA Vegetable Seed
Adaptive Seeds
Sweet Home, Oregon
Seeds grown in the Pacific Northwest, with a focus on unusual and resilient seed varieties. We’ve grown some fantastic kale from here!
Baker Creek Heirloom Seeds
Mansfield, Missouri
A focus on heirloom seed and unusual crops. We love the Whole Seed Catalog, their glossy guide that makes me wish I had a 10-acre garden!
Founder Jere Gettle has joined us on The Food Garden Life Show to talk about seeds. Tune in to hear him talk about how the the 12-page photocopied price list he put out as a teenager grew into what he does today.
Bene Seeds
California
Specialized in tasty tomatoes. Founded by the late tomato breed Fred Hempel.
Fedco Seeds
Clinton, Maine
Worker- and consumer-owned co-operative. (You can join and be a member!)
Happy Cat Farm
Kennett Square, Pennsylvania
Heirloom veggie seeds, with lots of tomatoes. “An heirloom, seed to sauce farm.”
High Mowing Organic Seeds
Wolcott, Vermont
Serving both vegetable gardeners and commercial growers. Good selection of veg seeds.
John Scheepers Kitchen Garden Seeds
Bantam, Connecticut
Vegetable, herb, and flower seeds.
Johnny’s Selected Seeds
Winslow, Maine
Employee owned. Lots of great online growing resources. Serves commercial growers and home gardeners.
Renee’s Garden
Felton, California
Focused on varieties suited to home gardeners. Founder Renee Shepherd curates seeds from around the world, testing them in her own garden.
Row 7 Seeds
New York
Vegetable seeds chosen for taste.
Territorial Seed
Cottage Grove, Oregon
Wide selection of veggie seeds and other edibles.
Victory Seed Co.
Irving, Texas
Vegetable seed for home gardeners. And…they sell the dwarf tomato varieties released by the Dwarf Tomato Breeding Project.
Wild Boar Farms
Citrus Heights, California
With a reputation for unusual and wildly popular tomato varieties, tomato breeder Brad Gates at Wild Boar Farms focuses on flavour.
Hear our chat with Brad on The Food Garden Life Show.
Find This Helpful?
Enjoy not being bombarded by annoying ads?
Appreciate the absence of junky affiliate links for products you don’t need?
It’s because we’re reader supported.
If we’ve helped in your food-gardening journey, we’re glad of support. You can high-five us below. Any amount welcome!
More on Vegetable Gardening
Articles and Interviews
Looking for more information about growing vegetables? Drop by the Grow Vegetables home page for articles and interviews.
More Sources for Plants


Beat the Fall Frost: Early Ripening Tomatoes for Northern Gardeners
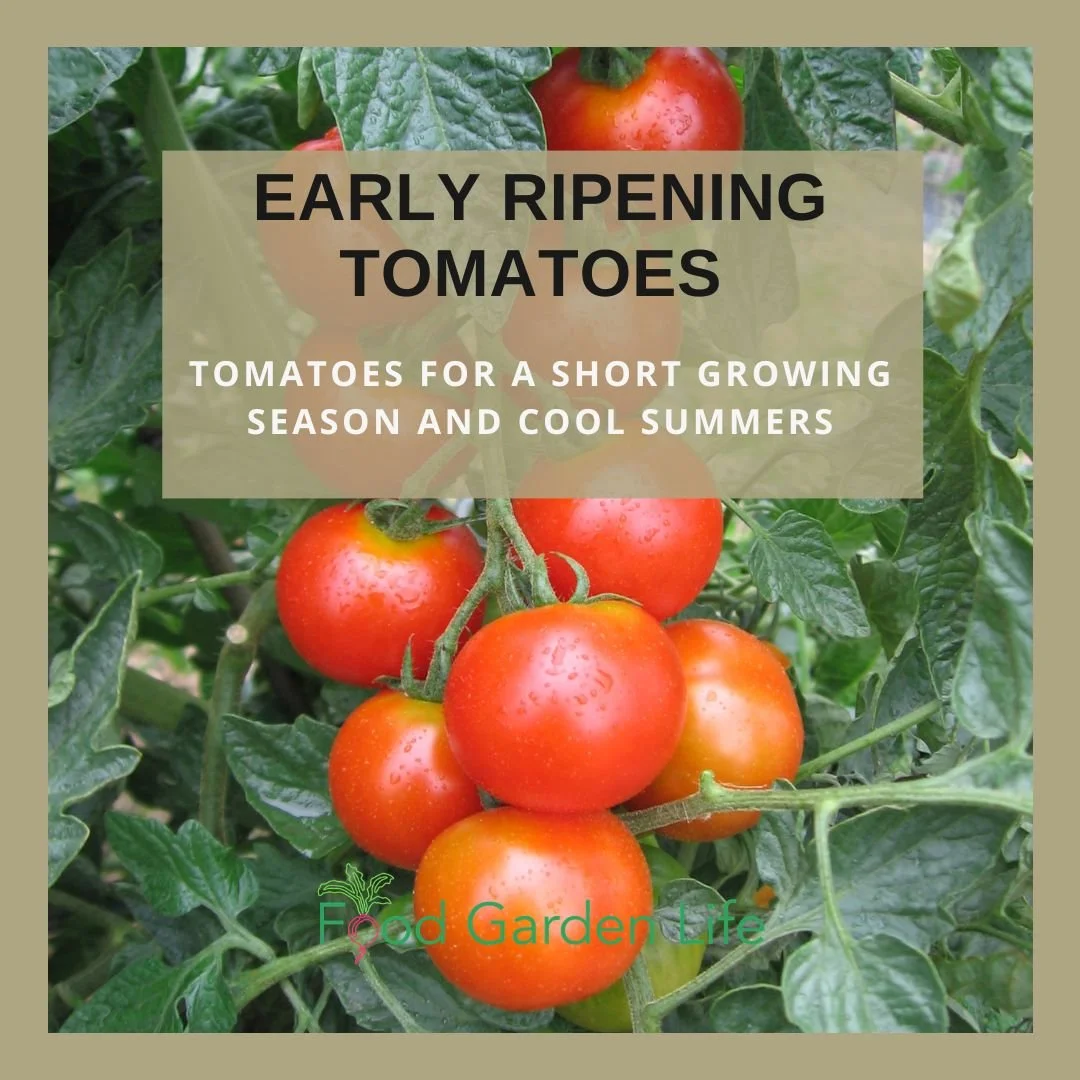
Short-Season Tomatoes
If you garden somewhere with late spring frosts, early fall frosts, or cool summers, you know the struggle: never enough ripe tomatoes before the first fall frost threatens to end tomato season.
The solution? Early-ripening tomato varieties suited to short growing seasons and coolish summers.
Instead of waiting 85–95 days for large beefsteak tomatoes that rarely ripen in time, northern gardeners can harvest ripe tomatoes in as little as 50–65 days — sometimes even earlier with protection.
Here’s the gist of this article:
What “early ripening” and days to maturity (DTM) mean
Top tomato varieties for cold climates (including tomato varieties with a Canadian pedigree)
Tips to boost your harvest in a short season
In my own Toronto garden (Canadian Plant Hardiness Zone 6a) I have a long enough season and the summer heat needed to ripen large, juicy beefsteak tomatoes. But I grow early ripening tomatoes too, as a way to get the earliest possible tomato harvest. One other benefit of early maturing tomatoes is that in years when late blight rears its head I’ve already enjoyed lots or ripe tomatoes!
What Makes a Tomato “Early Ripening”?
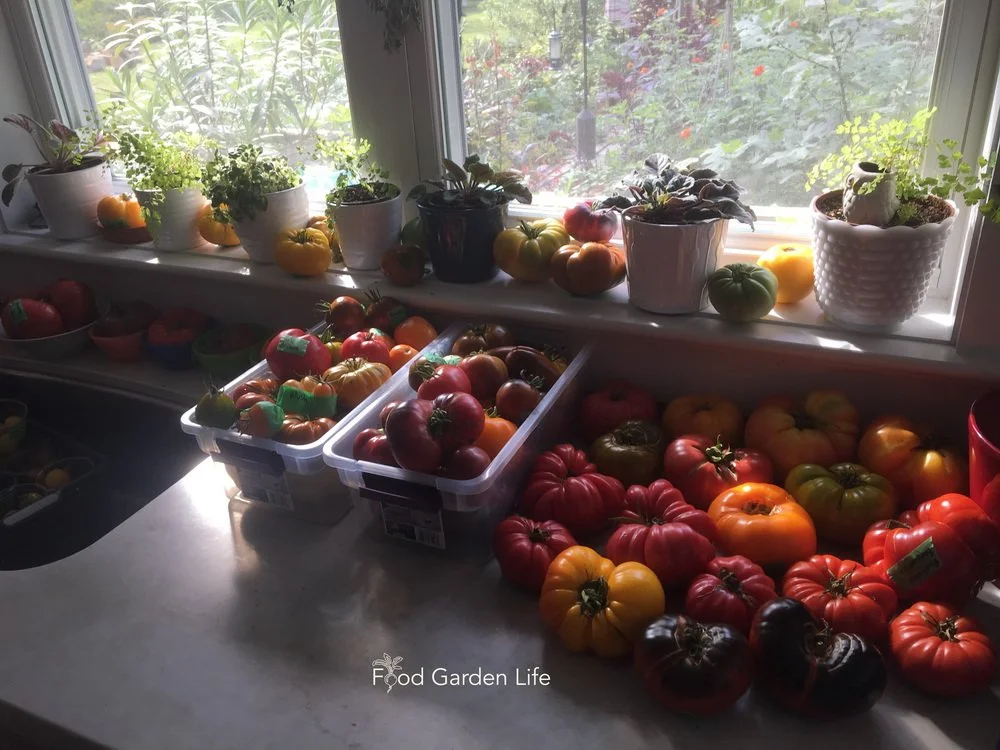
I grow lots of beefsteak and other “late” tomato varieties. But I always grow a few early tomato varieties so that I have ripe tomatoes earlier.
There are a few things to think about when it comes to tomatoes for a short growing season:
Days to maturity
Timing: Early to late
Fruit size
Cool-temperature tolerance
Understanding Days to Maturity
Days to maturity (DTM) is a relative measure that gives you a clue to how long a tomato will take to ripen. Don’t think of DTM as an exact number of days before you have a ripe tomato in your hand: It’s always approximate, because many things (your climate, the weather, growing conditions) affect ripening speed. But DTM is a great tool when comparing one tomato variety with another.
(By the way, for crops that we plant directly in the garden, DTM refers to the number of days from seeding until harvest; while for crops we transplant into the garden (e.g. tomatoes), DTM refers to the number of days from transplanting into the garden until you harvest your first ripe tomato.)
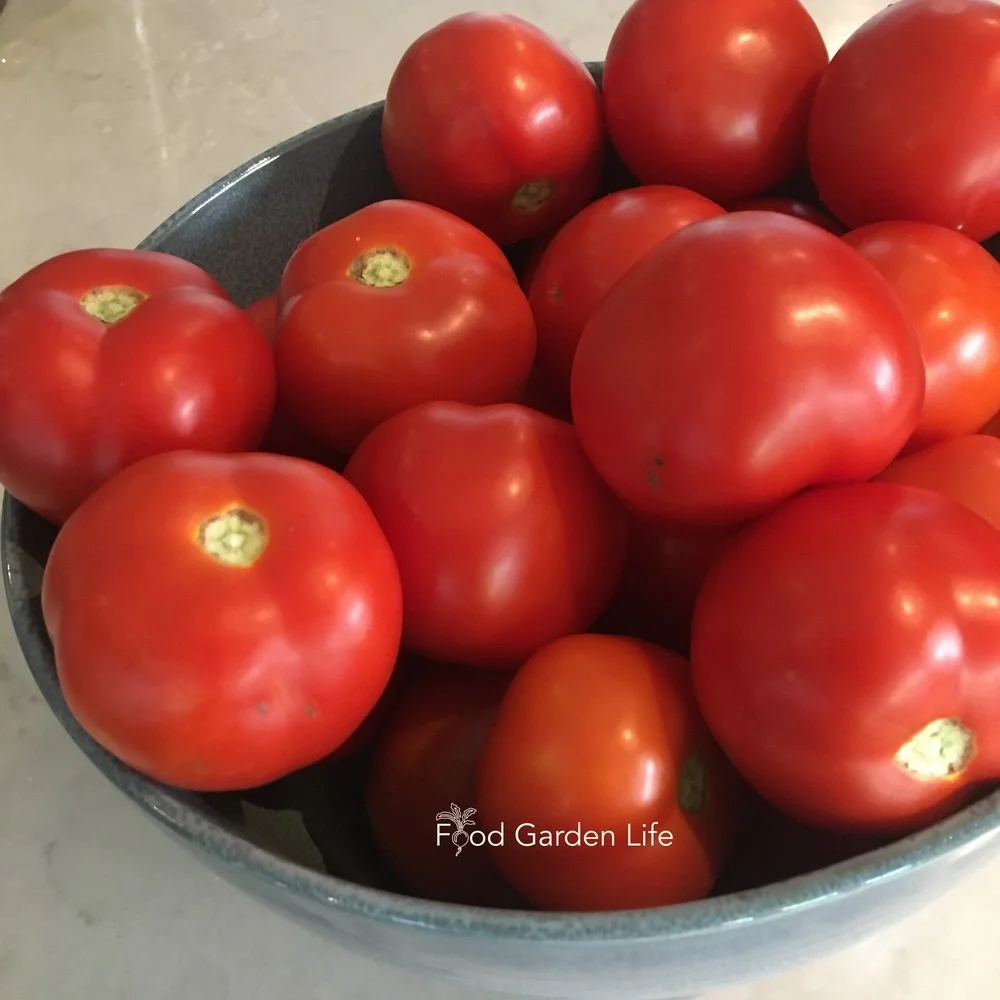
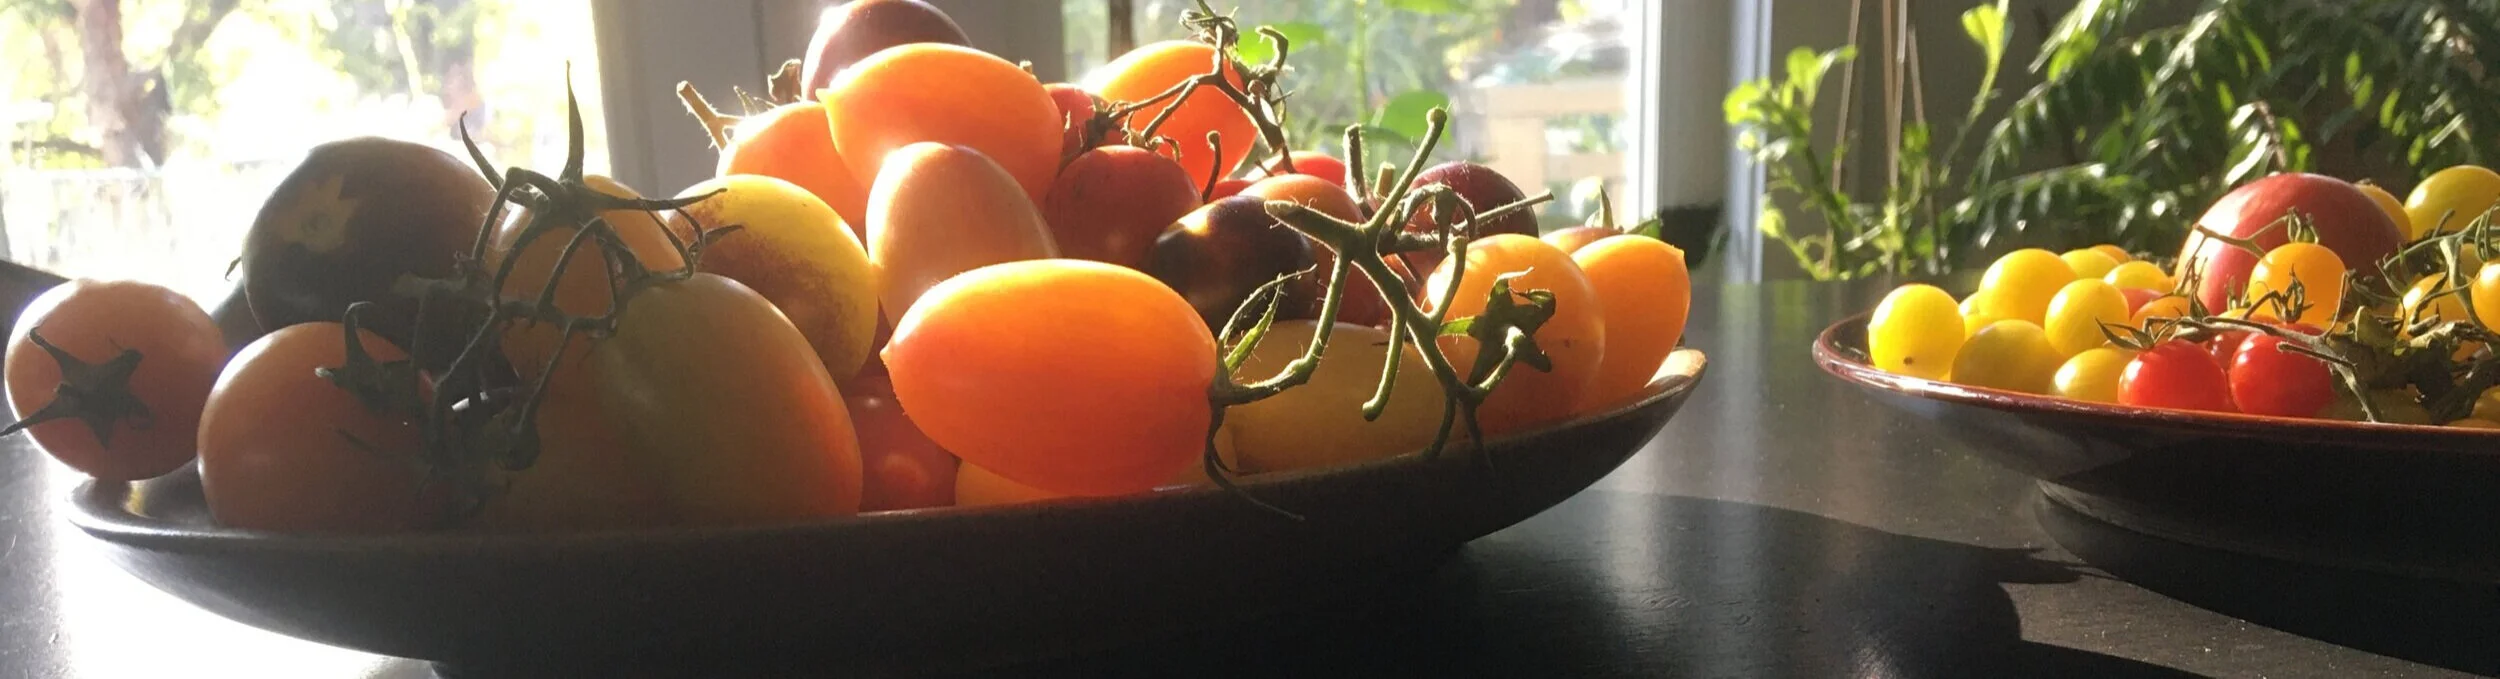
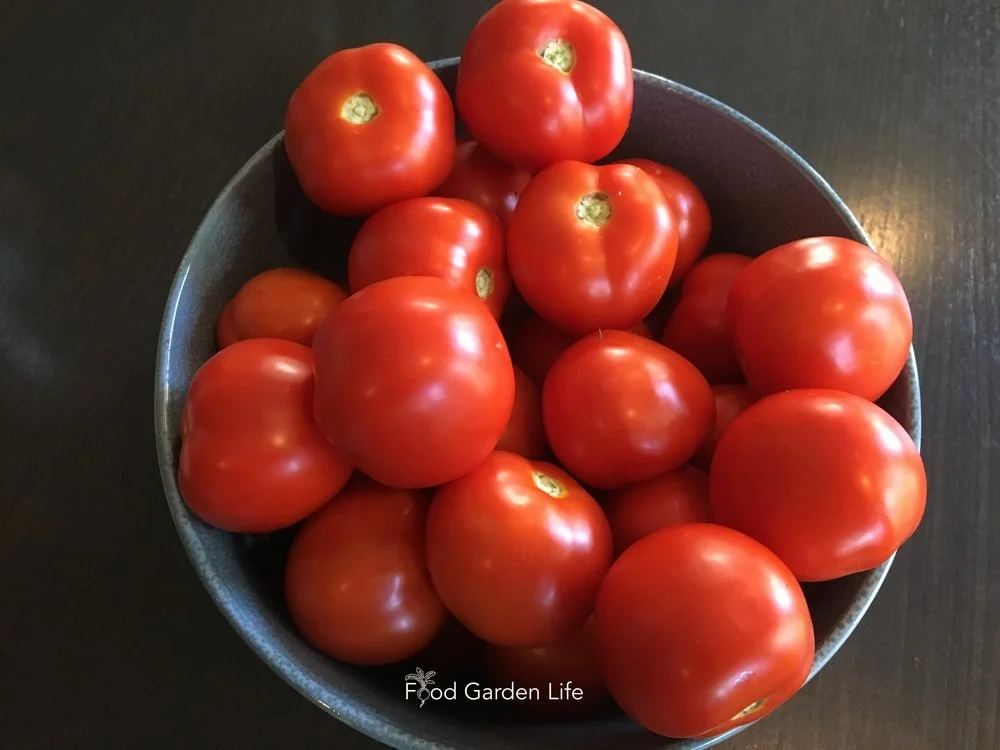
A bowl of early ripening tomatoes.
Timing: Early Maturing Tomato Varieties
As you investigate early maturing tomato varieties, you might notice that some sources give a days-to-maturity rating, while other sources simply categorize tomatoes as ultra early, early, mid-season, and late. So you might wonder how to compare varieties if ripening speed is explained differently.
Use this guide:
Ultra-early: 45–55 days
Early: 55–65 days
Mid-season: 70–80 days
Late: 80+ days
Fruit Size and Plant Type
Smaller-fruited tomato varieties often ripen more quickly than large beefsteak types.
Smaller-fruited varieties and determinate varieties (bushier plants that set fruit in a short window of time) very often ripen more quickly. When I teach gardening classes, gardeners in cool coastal climates often tell me they focus on cherry tomatoes and small-fruited tomato varieties.
Cold Temperature Tolerance
When you see a tomato variety described as cold tolerant, it doesn’t mean it will thrive in cold conditions—because tomatoes are a heat-loving crop. It just means that the cold-tolerant tomato varieties can set fruit at temperatures slightly lower than other tomato varieties. It’s not a huge temperature difference, often just a few degrees, but it can be enough to give you tomatoes sooner. And that matters where the growing season is short.
5 Great Early Ripening Tomato Varieties for Cold Climates
These early ripening tomato varieties are proven performers for short growing seasons. They’re also widely available, so they’re a good starting point if you’re new to growing early maturing tomatoes.
1. Glacier
Gives small, red slicing tomatoes. Early and cold-tolerant. 55 days.
2. Stupice
Early, great flavour, and cold-tolerant. Small, red slicing tomatoes. 55–60 days. Great taste. This is my favourite early ripening tomato.
3. Sub Arctic Plenty
I’ve grown this super-early tomato variety for years. Reliably the first tomato in my garden. 45–50 days. Can’t argue with that!
4. Evan’s Extra Early
Good flavour. This mid-sized tomato is from Dr. Ieuan Evans of Alberta, a cold-climate gardener who also released the Evan’s Cherry. 57 days.
5. Early Girl
This is a hybrid tomato that’s been around since the 1970s and is widely available. It’s still around because it’s early, has a good taste, and keeps well. ~57 days.
Early Ripening Tomato Varieties with a Canadian Pedigree
Because of the short growing season in many parts of the country, and the cool, coastal summers in other areas, there are many early maturing tomato varieties from Canada. Sometimes the variety name gives it away—though not always. If this interests you, here’s a list of Canadian early ripening tomato varieties.
Atom
Beaverlodge Slicer
Cabot
Centennial Rocket
Early Alberta
Early Lethbridge
Early Hi-Crimson
Evan’s Extra Early
Glacier
Itabec
Kimberley
Manitoba
Maskabec
Porter’s Early Brookpact
Rocket
Russian Saskatchewan
Scotia
Siberia
Siberian
Sophie’s Choice
Sub-Arctic Cherry
Sub-Arctic Maxi
Sub Arctic Plenty
Summerdawn
Superbec
Usabec
Wentzell
This list is a work in progress. If you like a variety that should be on this list, email me.
Ready to go further?
If this article helped, the next step is the Tomato Overload Masterclass. If you're not ready for a course, grab my 20 Food Garden Hacks guide and I'll send more practical tips by email.
Final Thoughts: Short Season Tomatoes
Pin this post about early ripening tomatoes!
Choosing an early maturing tomato variety is a simple way to harvest more tomatoes in areas with a short growing season or cool summers. It’s also a way gardeners in warmer areas can enjoy an earlier tomato harvest.
FAQ: Short Season Tomatoes
What is the earliest ripening tomato variety?
One of the earliest is Sub Arctic Plenty, clocking in at under 50 days.
Can tomatoes grow in Zone 3?
Yes. Choose early varieties and use season extension techniques in the spring and fall.
Find This Helpful?
Enjoy not being bombarded by annoying ads?
Appreciate the absence of junky affiliate links for products you don’t need?
It’s because we’re reader supported.
If we’ve helped in your food-gardening journey, we’re glad of support. You can high-five us below. Any amount welcome!
More on Vegetable Gardening
Articles and Interviews
Looking for more information about growing vegetables? Drop by the Grow Vegetables home page for articles and interviews.
Course: Tomato Overload Masterclass
Want to up your game growing tomatoes?
This self-paced course helps you choose great varieties, grow great seedlings, give plants the care they need, and enjoy an abundant harvest.
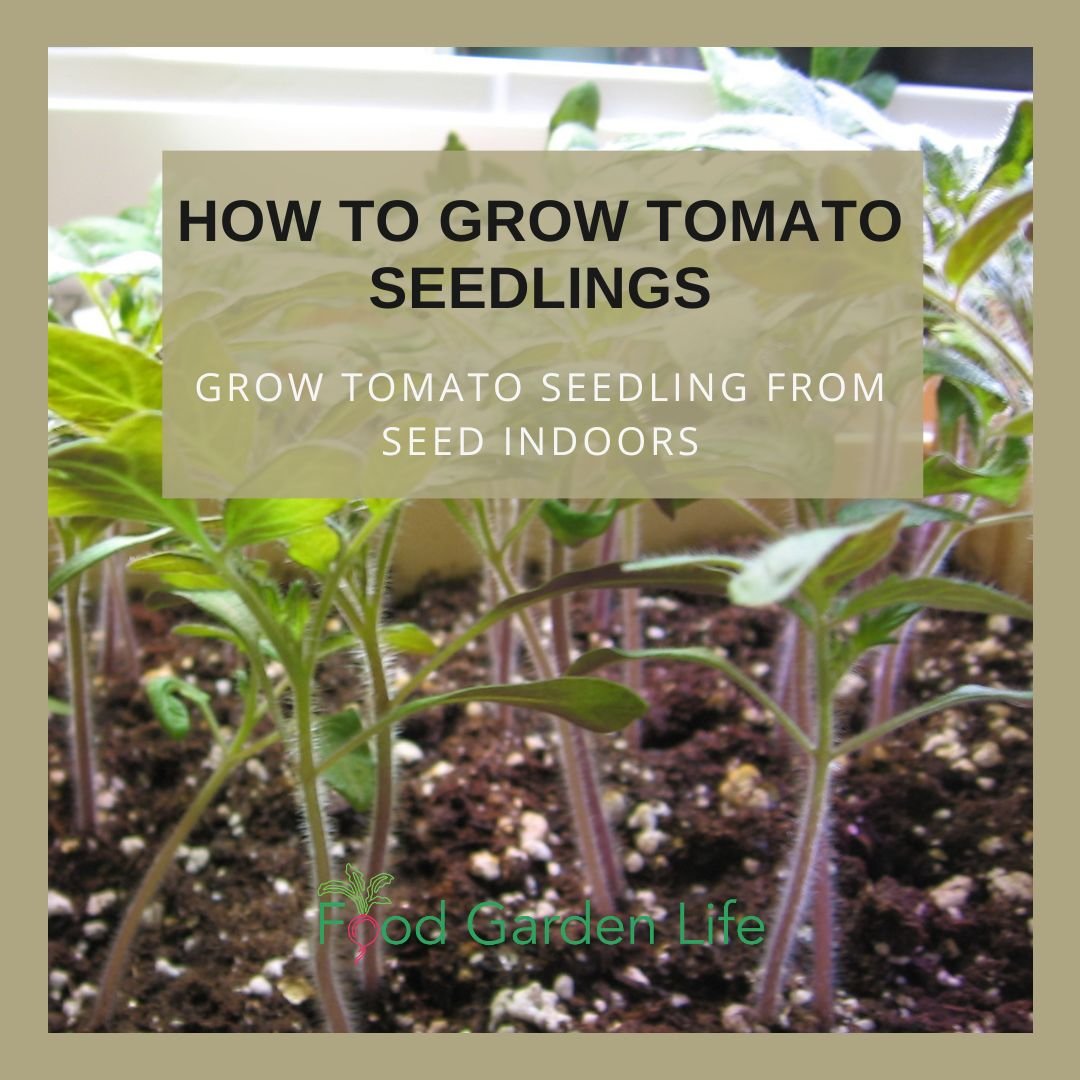
How to Grow Tomato Seeds Indoors
A complete guide to growing tomato seeds indoors. Tips, supplies—and what to avoid.
By Steven Biggs
Learning How to Plant Tomato Seeds
How to grow tomato plants from seed.
When I was 10 years old my grandfather helped me sow tomato seeds. My first yellow-fruited tomatoes.
I had the perfect teacher. Dido was a life-long gardener and retired market gardener.
He was visiting us from Calgary that spring. We didn’t have much in the way of seed-starting supplies at our place. So he just grabbed an unused wash basin. We put a couple of inches of potting soil in it, sprinkled seeds on top. And then a thin layer of soil.
I gave lots of yellow tomatoes to the neighbours that summer!
His no-fuss approach to gardening coloured mine. There are lots of great supplies, gadget, and tricks…if you want. But you can also make gardening—and growing tomato seeds—really simple. And in a home-garden setting, I think simple is good.
In this article I share ideas about how to grow tomato seeds in a way that suits your situation.
Choose a Tomato Variety

Find out how to grow tomato plants in a way that suits your situation.
Before planting, select a variety that gives you what you want.
Here are things I think about as I choose varieties:
Colour
Size
Taste
How long it takes to mature
Plant stature (determinate tomatoes, indeterminate tomatoes, dwarf tomatoes…there are even micro-dwarf tomatoes)
Disease Resistance
How I use the tomatoes (sauce, sandwiches, packed lunches)
Storage properties (there are storage—a.k.a. “keeper” tomatoes!)
Find out about “keeper” tomatoes.
Get tomato-choosing tips in this article by my tomato-crazy daughter, Emma.
Got problems with squirrels? Cherry tomatoes might be better than big beefsteak tomatoes because there are more tomatoes to go around. Here’s a guide with 50 ways to foil squirrels.
When to Start Tomato Seeds Indoors

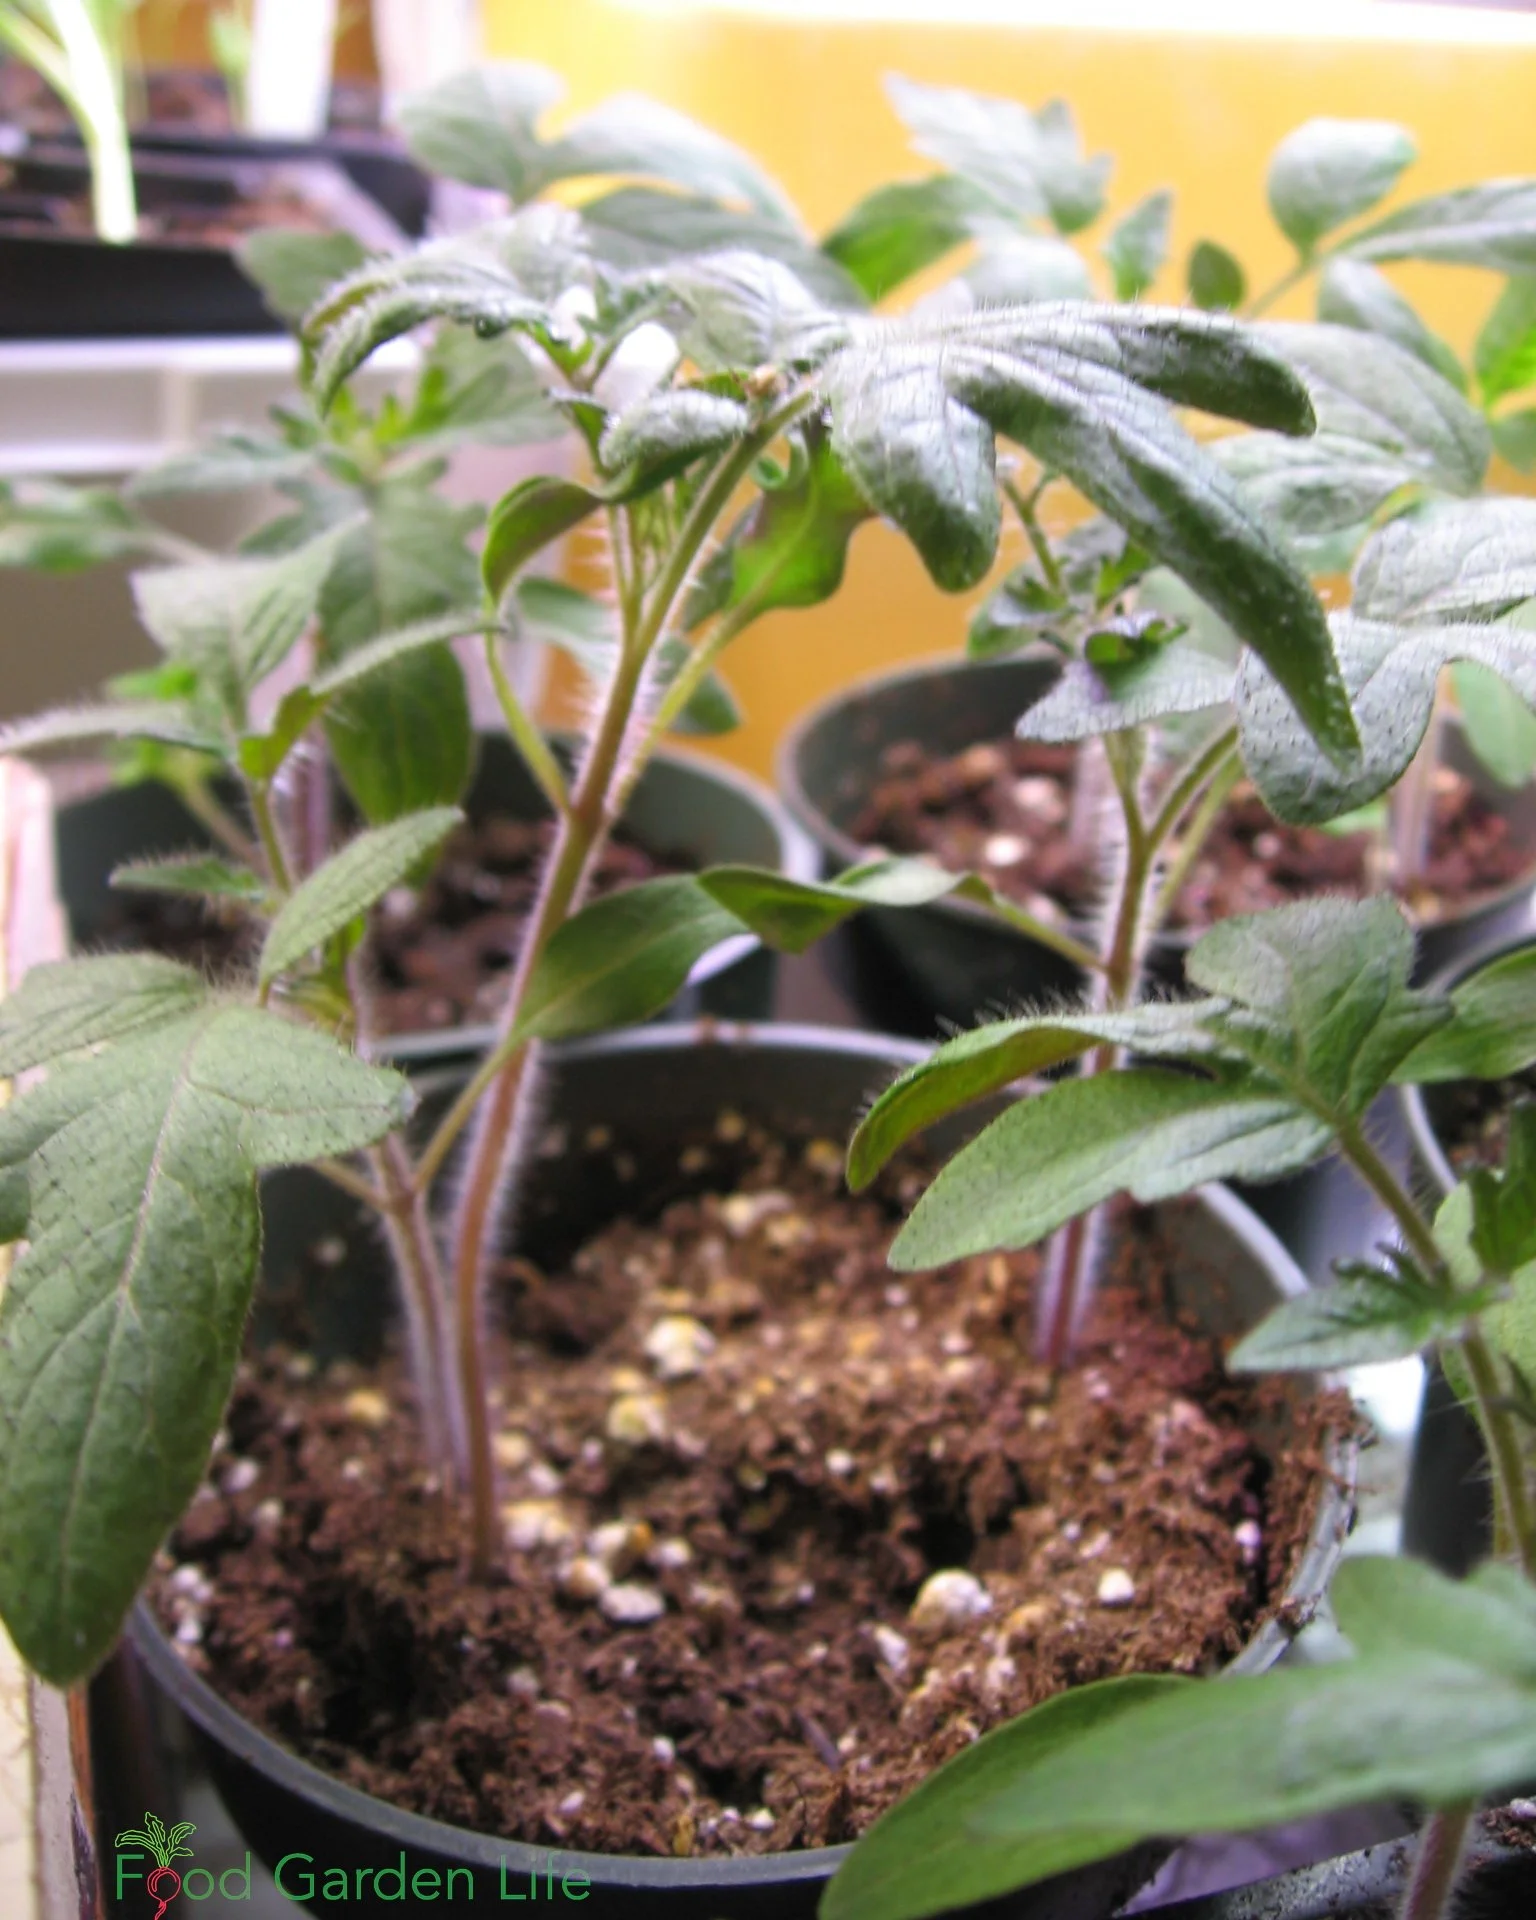
Start tomato plants indoors to get a head start on the growing season. These tomato plants are growing in a wooden mandarin orange crate.
We grow tomato seeds indoors to get a head start on the growing season. That head start gives us an earlier harvest.
When it comes to timing, the date of the last spring frost is our guidepost. You’ll often see this date called the “last frost date” or “average last frost date.”
Find out the average last frost date for your area, and then count backwards 6 to 8 weeks.
For example:
The average last frost date around here is mid May. So working backwards 8 weeks, I know that I should be starting tomato seeds indoors around mid March.
This is not an exact science.
So don’t sweat the exact date.
Aim for approximately 6-8 weeks. But don’t start too early, because you could end up with leggy seedlings.
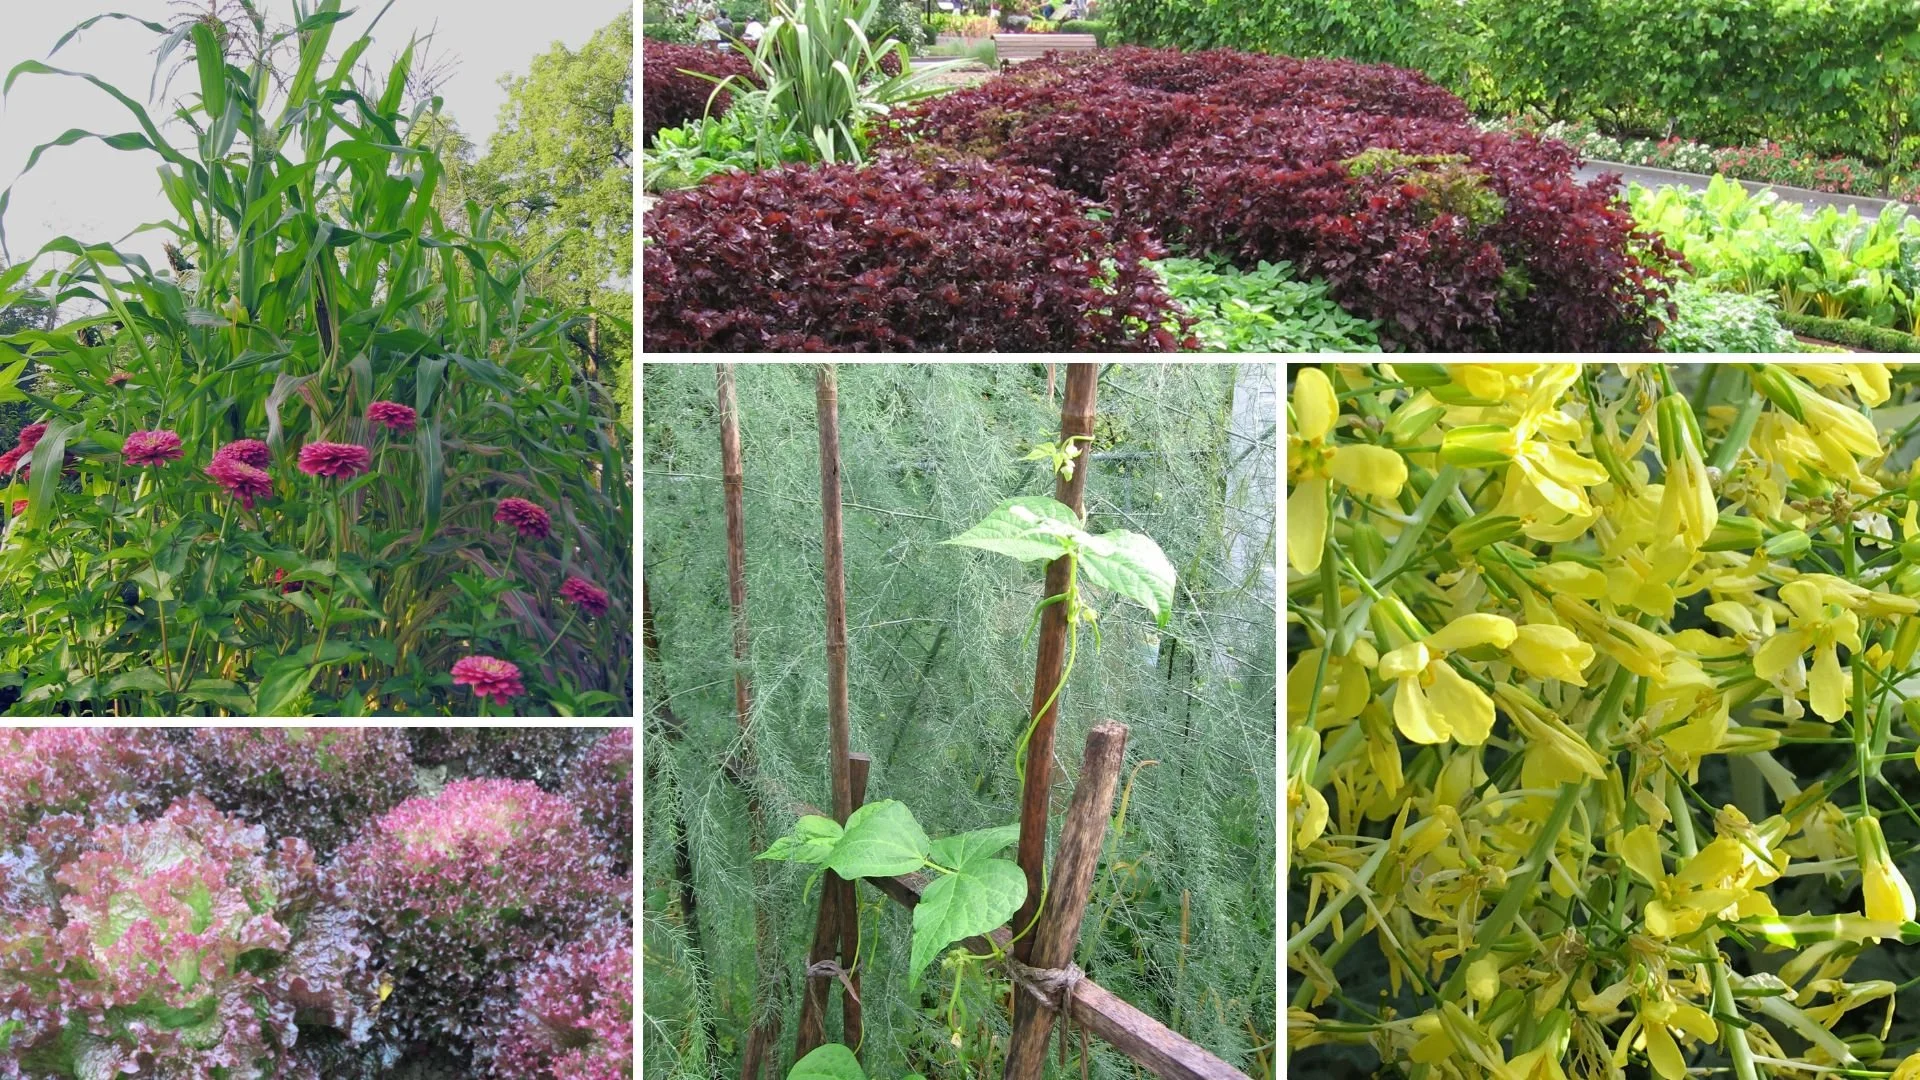
Create Your Own Unique Edible Landscape
That fits for your yard, and your style!
Supplies for Growing Tomato Seeds Indoors
The supplies you need when growing tomatoes from seed depends on your approach to gardening. As I mentioned above, you can keep it pretty simple.
Cell packs are a good option if you’re growing a lot of seedlings.
Here are basic supplies:
Potting soil
Pots or containers (ideas below)
Labels
Seeds
Optional goodies:
Heat mat
Fan
Dome or cover
Containers for Starting Tomato Seeds
You can buy purpose-made containers for starting seeds. Or you might already have things you can reuse for seed-starting. (Horticulture creates a lot of plastic waste…and a bit of creativity with seed-starting containers is a great way to generate less waste.)
Here are ideas for seed-starting containers for tomatoes:
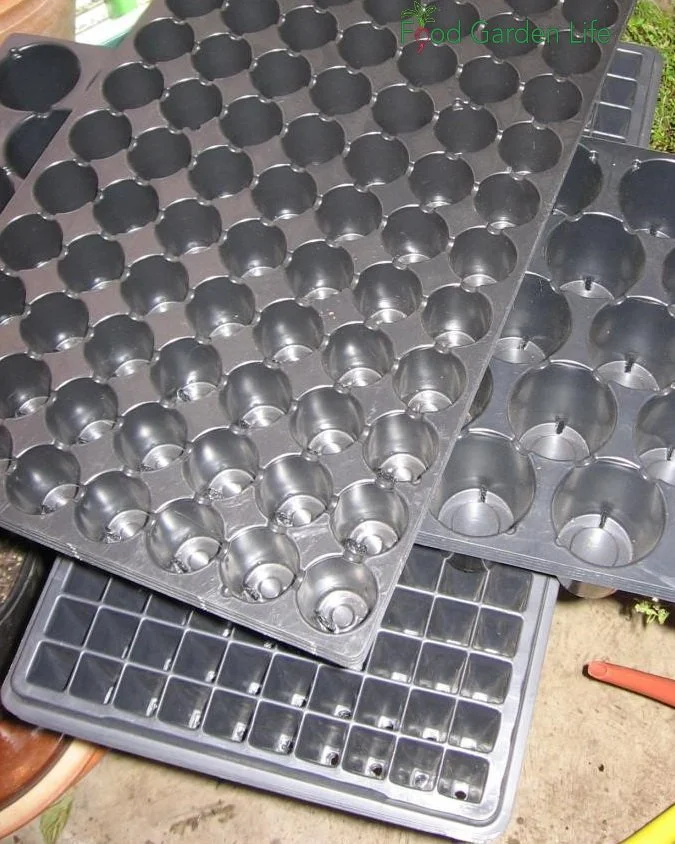
Plug trays are an option if you want to start lots of seeds.
Cell packs. These are the plastic containers with multiple holes, often used for bedding plants – a good option if you’re growing a lot of seedlings.
Plug trays. Plastic trays with a number of smaller holes, more commonly used in commercial greenhouses.
Pots.
Crates. I’ve used wooden mandarin orange crates.
Newspaper pots. Remember that paper pots wick moisture and dry quickly, so adjust your watering accordingly.
Egg cartons. Like egg shells, below, too small for growing tomato plants to the final transplanting size, but if it’s all you have, they’re OK for getting seeds started before transplanting into a bigger pot.
Egg shells? Don’t bother. There are lots of cutesy pictures online of seeds growing in egg shells. My suggestion is don’t bother, they’re impractical.
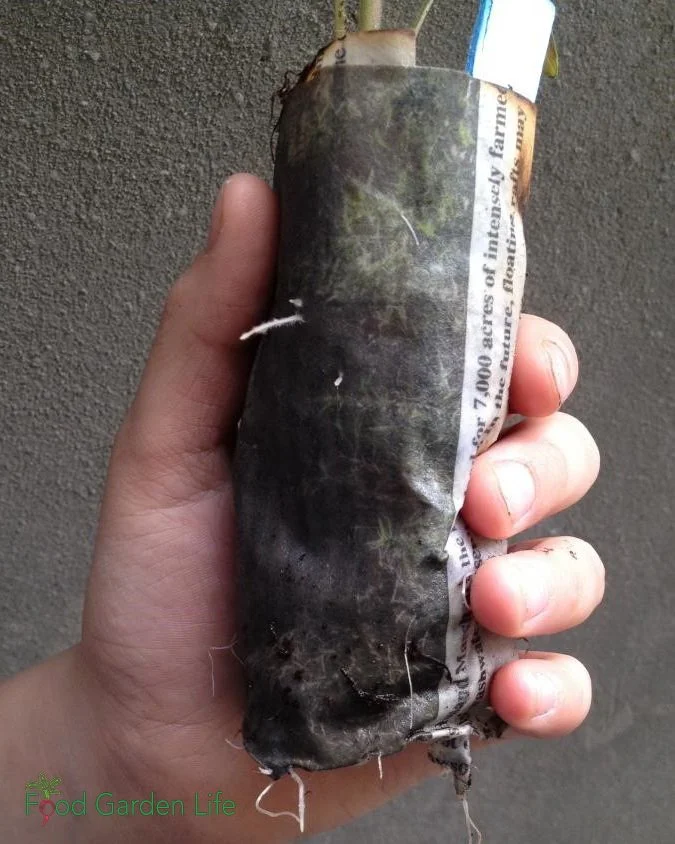
Newspaper pots are easy to make. They can be planted directly into the garden as the roots grow right through the newspaper.
If you’re using biodegradable, natural-fibre pots (peat pots are common, and I’ve even seen pots made from cow manure) a word of caution: Bury the entire pot when planting in the garden, or the whole thing is a wick, wicking water away from plant roots.
Soil for Starting Tomato Seeds
Top Tip: Don’t use garden soil.
That’s for two reasons: First, many garden soils have a structure that packs down, preventing little roots from growing. The other thing is that garden soil can harbour diseases that kill young tomato seedlings.
Use potting soil.
You might see potting soils specifically for seed-starting. These are made with ingredients that are more finely ground, so that there are no chunks of material blocking the way of little germinating seeds.
You don’t need the finely ground potting soils.
A general-purpose potting soil is fine. (A finely ground seed-starting mix is important for commercial growers who need uniform, optimal seed germination; but in a home garden we usually have more seeds than we need, so having the odd coarse chunk in the soil is no big deal).
If the soil is dry, moisten it before using it.
Light for Your Tomato Seedlings
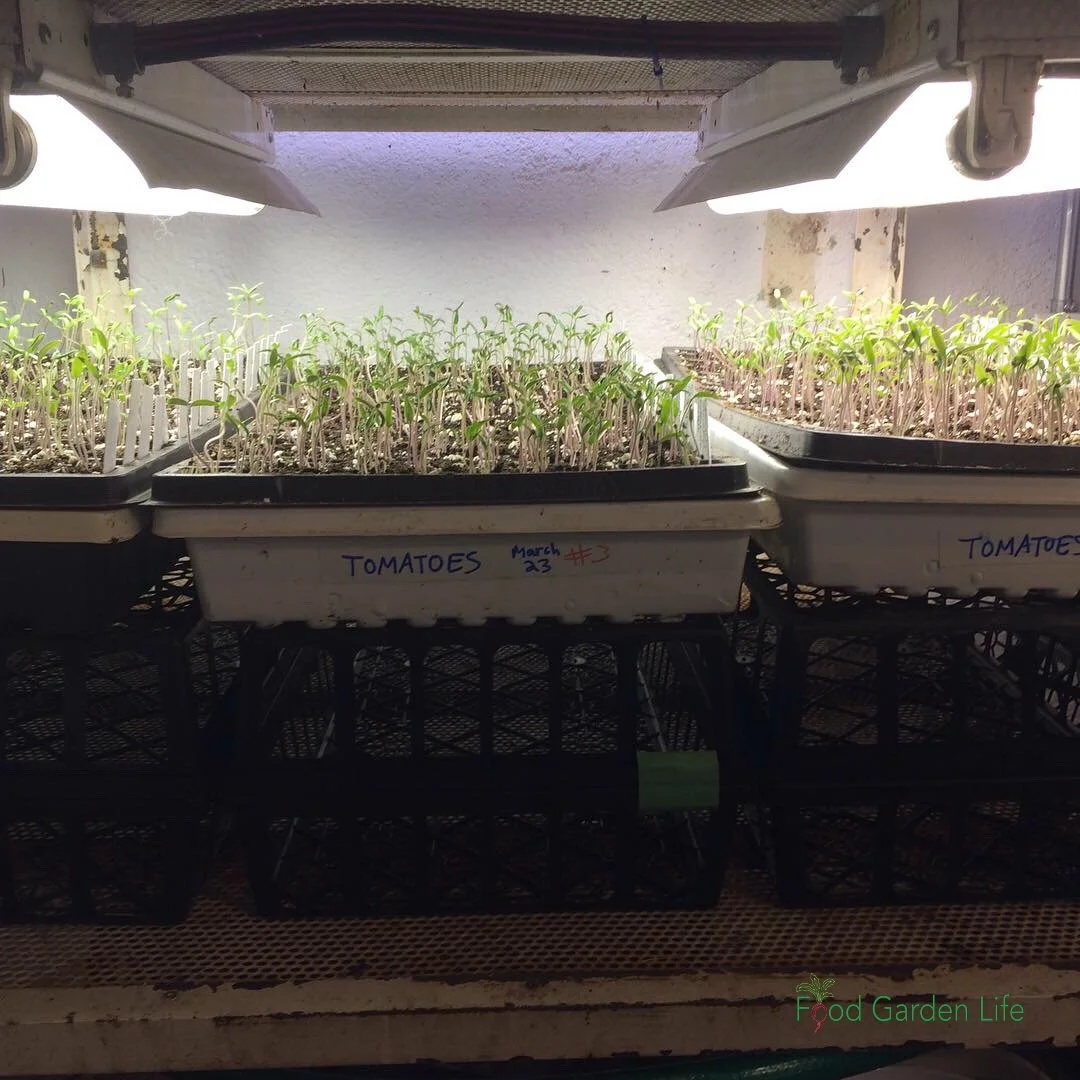
Grow lights for growing tomato seedlings. I use fluorescent lights. Note that the trays are propped up to be as close as possible to the lights.
Good light is important for growing compact plants. When there’s not enough light you end up with leggy plants that topple over.
There are lots of lighting options. The simplest and least expensive is to grow seedlings in a bright window (south facing is best.)
If you don’t have a bright window, you can start seeds under lights. There are many types of lights available.
Here’s the thing to know: Your tomato seedlings don’t need the same light as an indoor hydroponic vegetable crop.
You’re not trying to create perfect conditions to grow a plant right through to harvest. The lights just need to be good enough to give you healthy, fairly compact tomato transplants.
So save yourself some money and don’t go overboard on lighting.
My lighting for growing tomato seedlings is fluorescent shop lights. You don’t need full spectrum lights, nor do you need the strongest lights. Remember: You’re growing a young plant to transplant outdoors – where it will spend the rest of its life in sunlight.
Some grow light are adjustable, allowing you to move the lights close to the seedlings. Mine aren’t, so instead, I prop up trays of plants closer to the lights by putting something underneath them.
Use a timer so that you don’t have to remember to turn the grow lights on and off every day. I leave mine on for 16 hours a day.
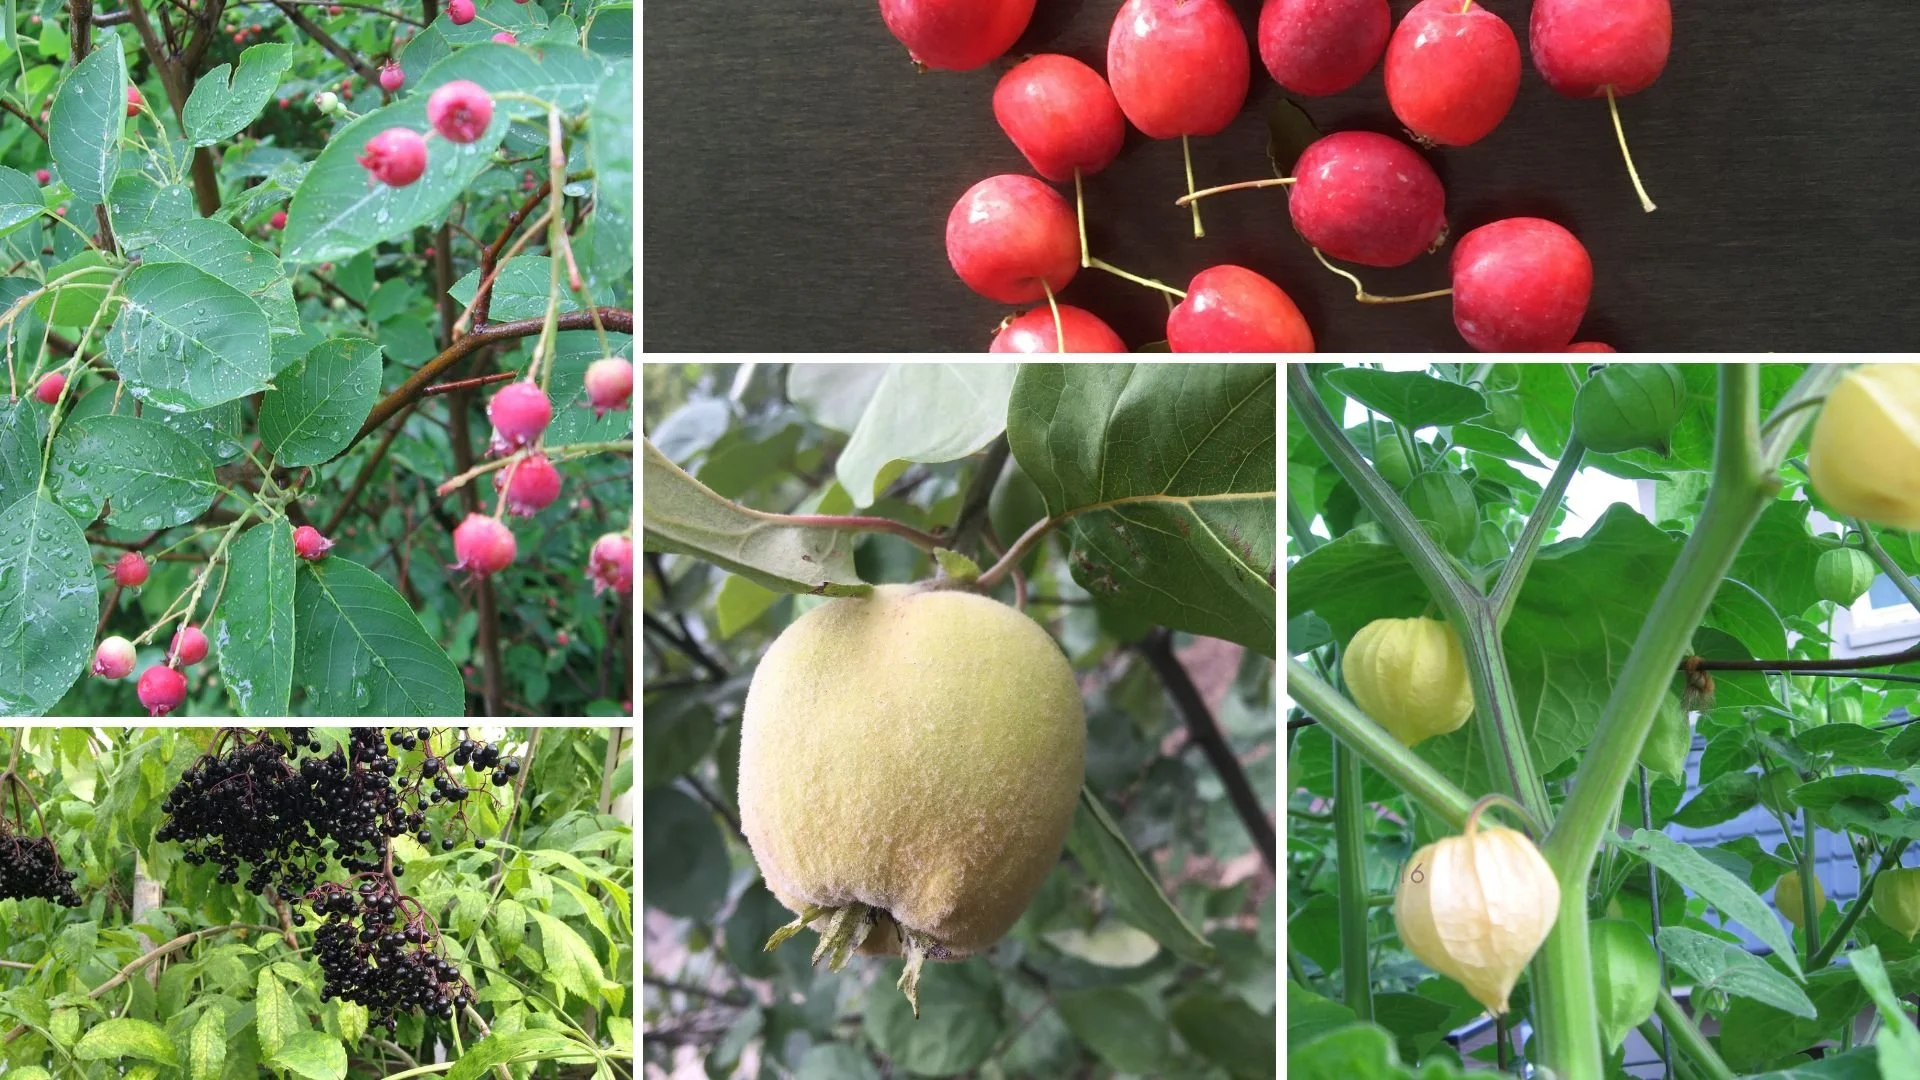
Landscape with Fruit
That’s easy to grow in a home garden!
Planting Tomato Seeds
Fill your container with soil, leaving a bit of space at the top.
If you’re planting an individual seed, place it on top of the soil
If you’re planting a number of seeds in one container, space them out on top of the soil
Then place a thin layer of soil over the top. You don’t need to put much soil over the seed: Cover with a depth of soil similar to the seed width…up to about one-quarter inch. (Too deep and they might not grow.)
Then tamp very gently and water. What we’re trying to do by covering with soil and tamping is to make sure the seed is in contact with soil, which helps with uniform germination.
Wait a minute. Have you seen the recommendation to make a small hole, put a seed in the hole, and then cover with soil? There’s a gizmo called a dibbler that’s used to make holes. And some gardeners make holes, and even use a toothpick for precise seed placement. That’s fine too. There are many ways to plant tomatoes. My opinion is that this sort of precision is needed in a commercial operation…but I don’t need it for at the home-garden level.
Tomato Seeding Density
Not sure how many seeds to put in each container? Depending on how many tomato plants you’re growing and how much space you have, you can seed more or less densely:
Grow 2-3 seeds per pot, and then thin out extras as the tomato plants begin to grow.
Low Density
If you have lots of space and aren’t growing a lot, give each seed its own pot or section within a cell pack. One seed per pot takes up far more space initially. But if you want to keep things very simple, this is a good way to do it because it can cut out the step of transplanting later on.
Remember that a bigger pot dries out more slowly; water them accordingly so they aren’t waterlogged.
Tip: It’s rare to have every single seed germinate. To avoid having empty pots where seeds haven’t germinated, place 2-3 seeds per pot, and then thin out extras as the plants begin to grow.
High Density
If you want to start more seeds in less space, plant more than one seed in a container, and then separate and transplant them as they get bigger.
Labelling
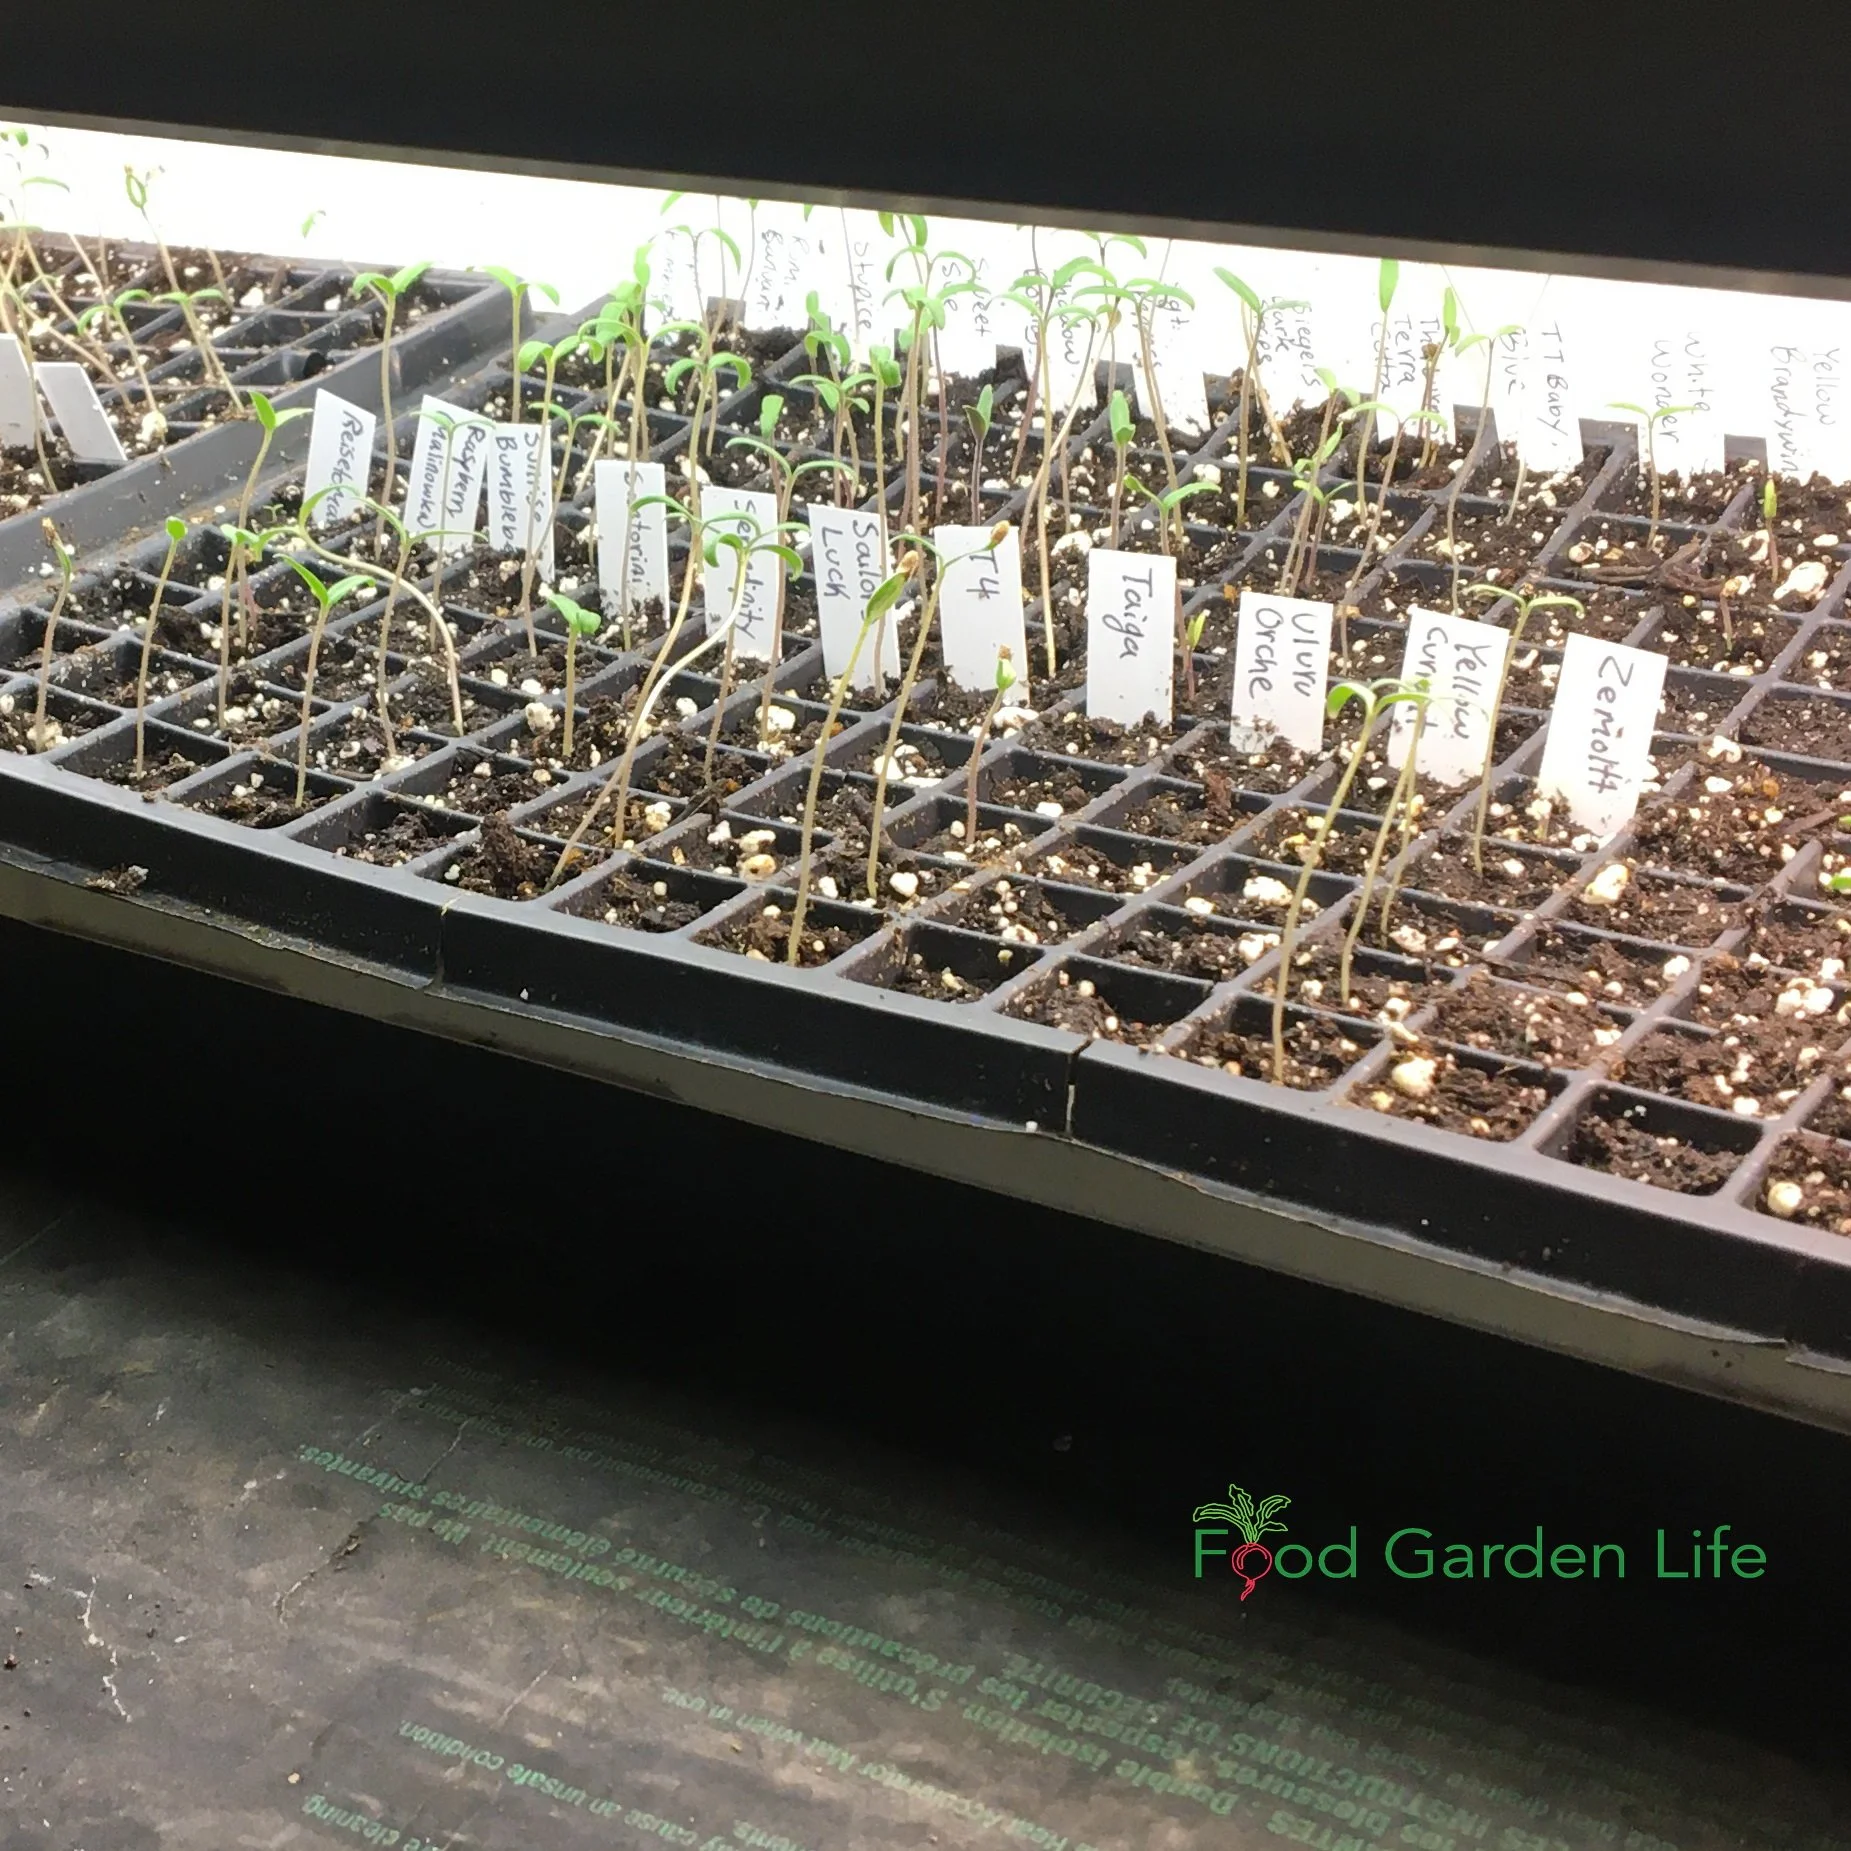
A tray of labelled tomato seedlings.
If you’re growing more than one variety, label them as you plant them. There are years I was sure I’d remember what was what…and I forgot.
You can use purpose-made plastic labels; or, if you want to use less plastic, wooden popsickle sticks or wooden tongue depressors work well (but don’t last all summer.)
If you’re using pots or cell packs, you can also just write the tomato variety name on masking tape, and then stick it on the container.
Hygiene
Damping off disease can wipe out a whole crop of seedlings quickly. It’s a fungal disease that moves around your growing area along with runoff from watering plants. It gets there in contaminated soil and on previously used equipment and pots.
The easiest way to avoid damping off is to use disease-free soil and clean supplies. If you make your own potting soil using compost, consider sterilizing it. Many commercial potting soils are made with peat and inert ingredients—and these tend to be disease free.
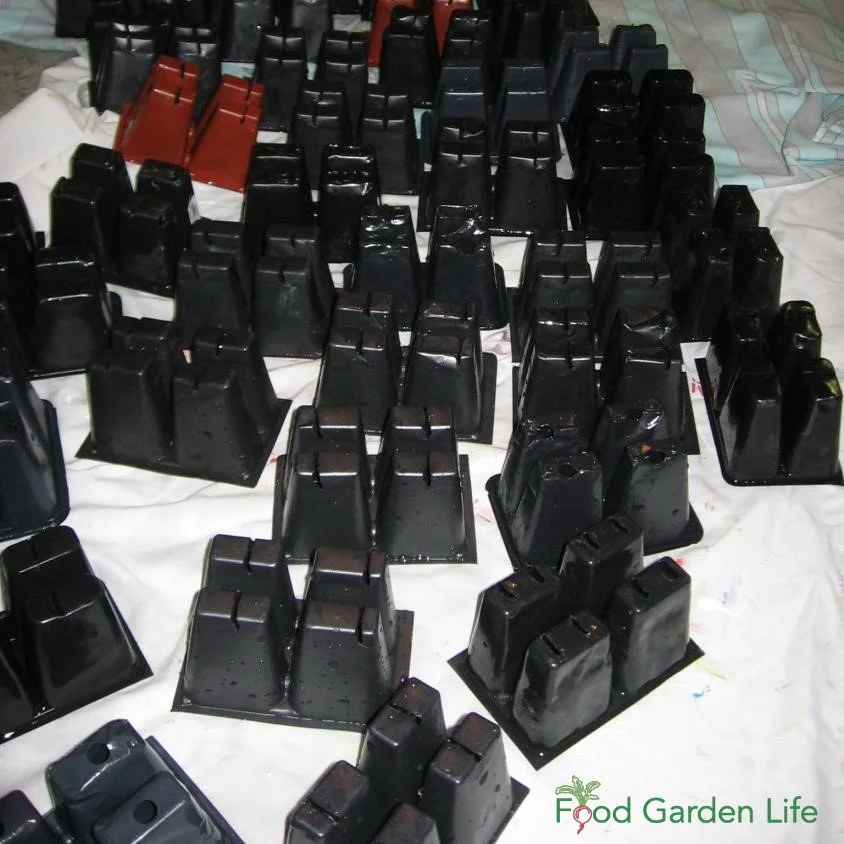
New pots and cell packs are likely disease free, but if you’re reusing pots and cell packs, sterilize them. First, scrub off any soil that’s caked on. Then dunk them in a solution of 10 parts water with 1 part bleach, and then let them air dry. (Note: This is a strong smelling solution, so I do this outdoors or in my garage.)
How Many Seeds to Grow
Planting extra tomato seeds is cheap insurance against plants lost to accidents.
I always grow extra plants.
Then I share leftovers with friends.
Conditions for Germinating Tomato Seed
Temperature

No heat mat? No problem. Find a warm spot to germinate tomato seeds. Pictured here: Germinating a flat of tomato seeds beside a heat duct near the basement ceiling — a warm location. (The wine is unrelated…I didn’t have a lot of space in that house!)
Room temperature is fine for germinating tomato seeds, but you can speed up seed germination if the temperature is warmer.
Here are ways to give your seeds warmer conditions:
Place them on a heated floor
Set them on top of a hot-water radiator
The fluorescent fixtures in my light tray give off heat, so if I put seed containers on the rack above
Some appliances give off heat – check to see if the top of your fridge is warm
Or get a heat mat (a water-resistant heating pad for plants)
Once a half to three quarters of the seeds are up, I remove the container from the heat.
Humidity
As a seed germinates, it needs moist surroundings until it grows roots and can take up water on its own. If it dries out at this vulnerable stage, it’s game over.
But the air in centrally heated homes over the winter is often quite dry.
You can keep the humidity higher right around the seeds by covering them.
I use the clear plastic domes designed to go over top of plant trays.
Or, cover a tray with a sheet of glass or plastic; or cover an individual pot with a plastic bag.
Another option is to use plastic cling wrap
Remove once the seeds emerge.
Light
Don’t worry about light for tomato seed germination. Some types of seed need light to germinate; not tomatoes.

The seedlings on the left are uncovered, to get air circulation. The seeds on the right are covered with a plastic cover to keep the humidity high during germination.
So in summary, as you’re getting your tomato seeds to germinate, think warm and humid. (In a previous house, I’d germinate my seeds atop a shelf in the basement, near the heat duct at ceiling level, where it was nice and warm.)
Conditions for Growing Tomato Seedlings
Once your tomato seedlings are up and growing, the best conditions are different from what we want when germinating seeds.
Light and Temperature
As seedlings begin to grow, we want bright light and cooler temperatures. That’s because with warmer temperatures, growth is lanky. With cooler temperatures (combined with bright light) the plants will be more compact and sturdy.
See if there’s a cooler spot near a sunny window. In my case, my grow lights are in the basement, in a room that is cooler than the rest of the house. It’s perfect for growing tomato seedlings.
Humidity and Air Circulation
High humidity while seed germinate is good.
But as the plants grow, we want lower humidity and some air circulation, which reduces the chance of fugal diseases. The moving air also gives stronger stems. (Some people use a fan to improve air circulation.)
So in summary, once the tomato plants are growing, you want cooler, brighter conditions than for germination.
Caring for Tomato Seedlings
Water
It’s easy to kill seedlings by overwatering them.
Keep the soil moist, but not sopping wet. Moist, but not waterlogged.
If in doubt about the amount of moisture in the soil, use your finger. (Whatever you do, don’t waste your money on a gadget that tells you soil moisture!)
Wondering about bottom watering? A lot of people “bottom water” seedlings. This just means sitting a container in water so that water wicks upwards. The reason is that a strong jet of water from a watering can can move around seeds and soil. So feel free to do the bottom watering if you like, although I find that watering gently, by putting my finger over the tip of the watering can to slow the flow of water, is enough to prevent making a potting soil sinkhole.
(If you forget to water and your seedlings flop over, there might still be hope. I remember the seedlings I grew with Dido: we came home one day and they were flopped right over…looked like they were doing yoga. He shrugged and watered them—and they sprang back up within an hour.)
Feeding Tomato Seedlings
Check your potting soil mix to see if it contains fertilizer. Some do. And if it contains fertilizer, you might not need to feed.
Otherwise, once your plants have a few leaves, you can begin to feed them. I use a water-soluble fertilizer.
Don’t overfeed. It can damage delicate seedling roots. (I feed at half of the rate recommended on the label.)
Transplant tomato seedlings after they get “true leaves,” the second set of leaves that comes after the “seed leaves.” These plants are beginning to grow true leaves.
Note: Don’t worry about feeding before the seedlings have a couple of sets of leaves. They’re still drawing from stored energy in the seed.
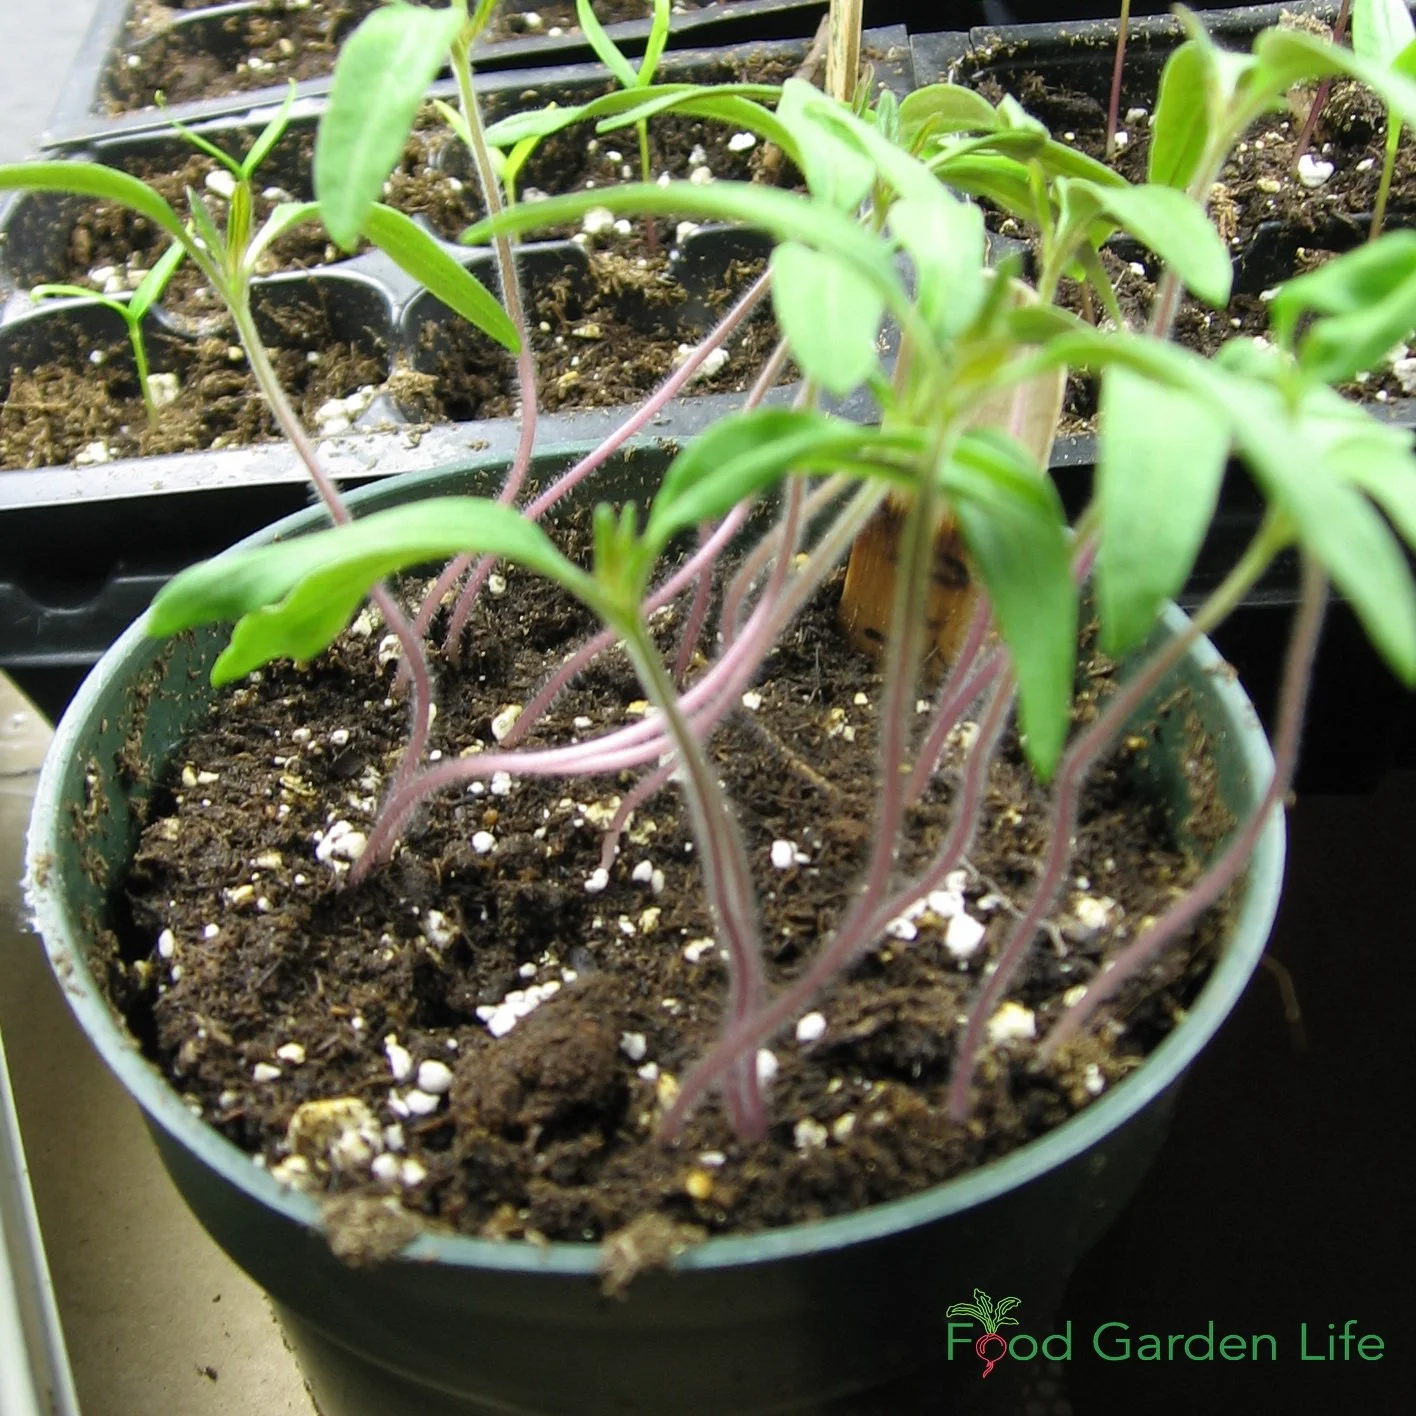
Thinning and Repotting
If you planted a few seeds together in a container, once they get big enough to handle, you can separate them and give them more space.
If you planted a few seeds together in a container, once they get big enough to handle, you can separate them and give them more space.
Transplant tomato seedlings after they get “true leaves.” The first leaves that appear are “seed leaves” so it’s the third and fourth leaves that are the true leaves. You’ll quickly see the difference.
I use a popsicle stick or pencil to tease apart soil and gently lift up a seedling and its roots. (There are purpose-made gadgets for this…not necessary.)
When picking up seedlings, hold them by the leaves. That’s because it’s very easy to crush the stem. (If you crush a leaf, it can grow a new leaf…if you crush the stem, it’s game over.)
Transplanting Tomato Plants in the Garden
Moving tomato seedlings outdoors to a cold frame in the spring so that they are hardened off for planting into the garden. If the light is bright, we cover the top of the cold frame with something to shade the plants below.
When it’s time to move your tomato seedlings to the garden, there’s one last thing to remember: Your seedlings have grown in the house, in moderate conditions. Once they’re outdoors, the light is brighter, the temperature swings, and there’s wind.
So we “harden off” seedlings, which simply means we get them used to outdoor conditions.
We do this by putting the plants outdoors, in the shade, for a few hours each day. Give them a longer stint in the sun each day, and keep doing this for at least a week.
Got lanky tomato plants? If you have lanky plants, with more stem than you want, you can bury a lot of that stem. That’s because tomato plants will send out new roots where you bury the stem. So just dig a deep hole, or make a trench and lay the plant on its side.
FAQ - How to Grow Tomato Seeds
Can I plant tomato seeds directly in the garden?
Yes, but your harvest will be weeks behind plants started indoors. (Tomato plants sometimes come up on their own in the garden where tomatoes fell to the ground the previous year…but the harvest is late.)
Should I soak my tomato seeds?
No, it’s not necessary.
Can I save my own seed?
Absolutely. It can be as simple as smearing some seeds on a paper towel, or you can clean them more through a fermentation process. In our household, I do the former, while my daughter does the latter.
Note: If you save seeds from hybrid tomato varieties, the seeds you end up with will be different from the parent plant. If you plan to save seeds, look for “open pollinated” varieties.
Is it too late if I start my tomato seeds only 4 weeks before the last frost?
No, but your harvest won’t be as early.
Can I start my tomato plants 10 weeks before the last frost?
Yes, but when they’re started indoors early, there’s more chance of ending up with lanky plants, unless you have very good growing conditions. If I had a greenhouse, I’d consider starting a few plants earlier—for an earlier harvest.
Where can I find the average last frost date for my area?
The easiest way is to do an online search. Some seed companies list dates, as do some master gardener groups and extension agencies.
Find This Helpful?
Enjoy not being bombarded by annoying ads?
Appreciate the absence of junky affiliate links for products you don’t need?
It’s because we’re reader supported.
If we’ve helped in your food-gardening journey, we’re glad of support. You can high-five us below. Any amount welcome!
More About Growing Tomatoes
Hear Tips from Tomato Experts
Course: Tomato Overload Masterclass
Want to up your game growing tomatoes?
This self-paced course helps you choose great varieties, grow great seedlings, give plants the care they need, and enjoy an abundant harvest.
Kohlrabi Made Easy: Grow This Weird Little Veggie in Cold Climates
How to grow kohlrabi.
By Steven Biggs
Growing Kohlrabi in Home Gardens
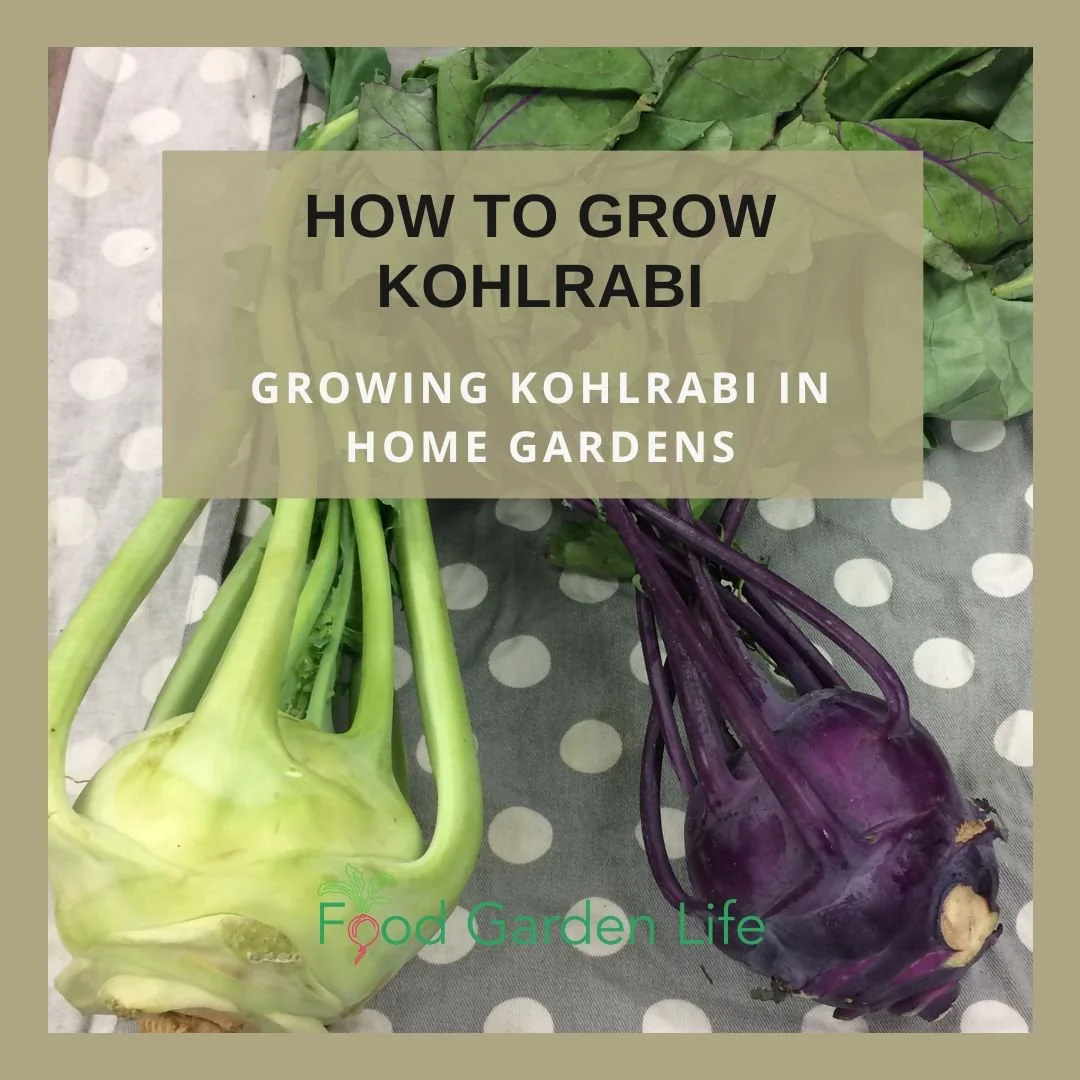
THREE CHEERS for one of the most photogenic veggies out there.
To my kids, kohlrabi looked like flying saucers. When I look at kohlrabi from the right angle I see a person having a bad hair day.
Whatever your imagination paints it as, it’s both attractive and unusual, making it a nice fit for an ornamental edible garden.
It’s also easy to grow, quick to mature, and versatile in the kitchen.
If you haven’t tasted it before, I’d describe the flavour as a cross between a mild apple and mild turnip. Let’s call it turnip light!
In this post I’ll talk about how to grow kohlrabi and how to fit it into your garden.
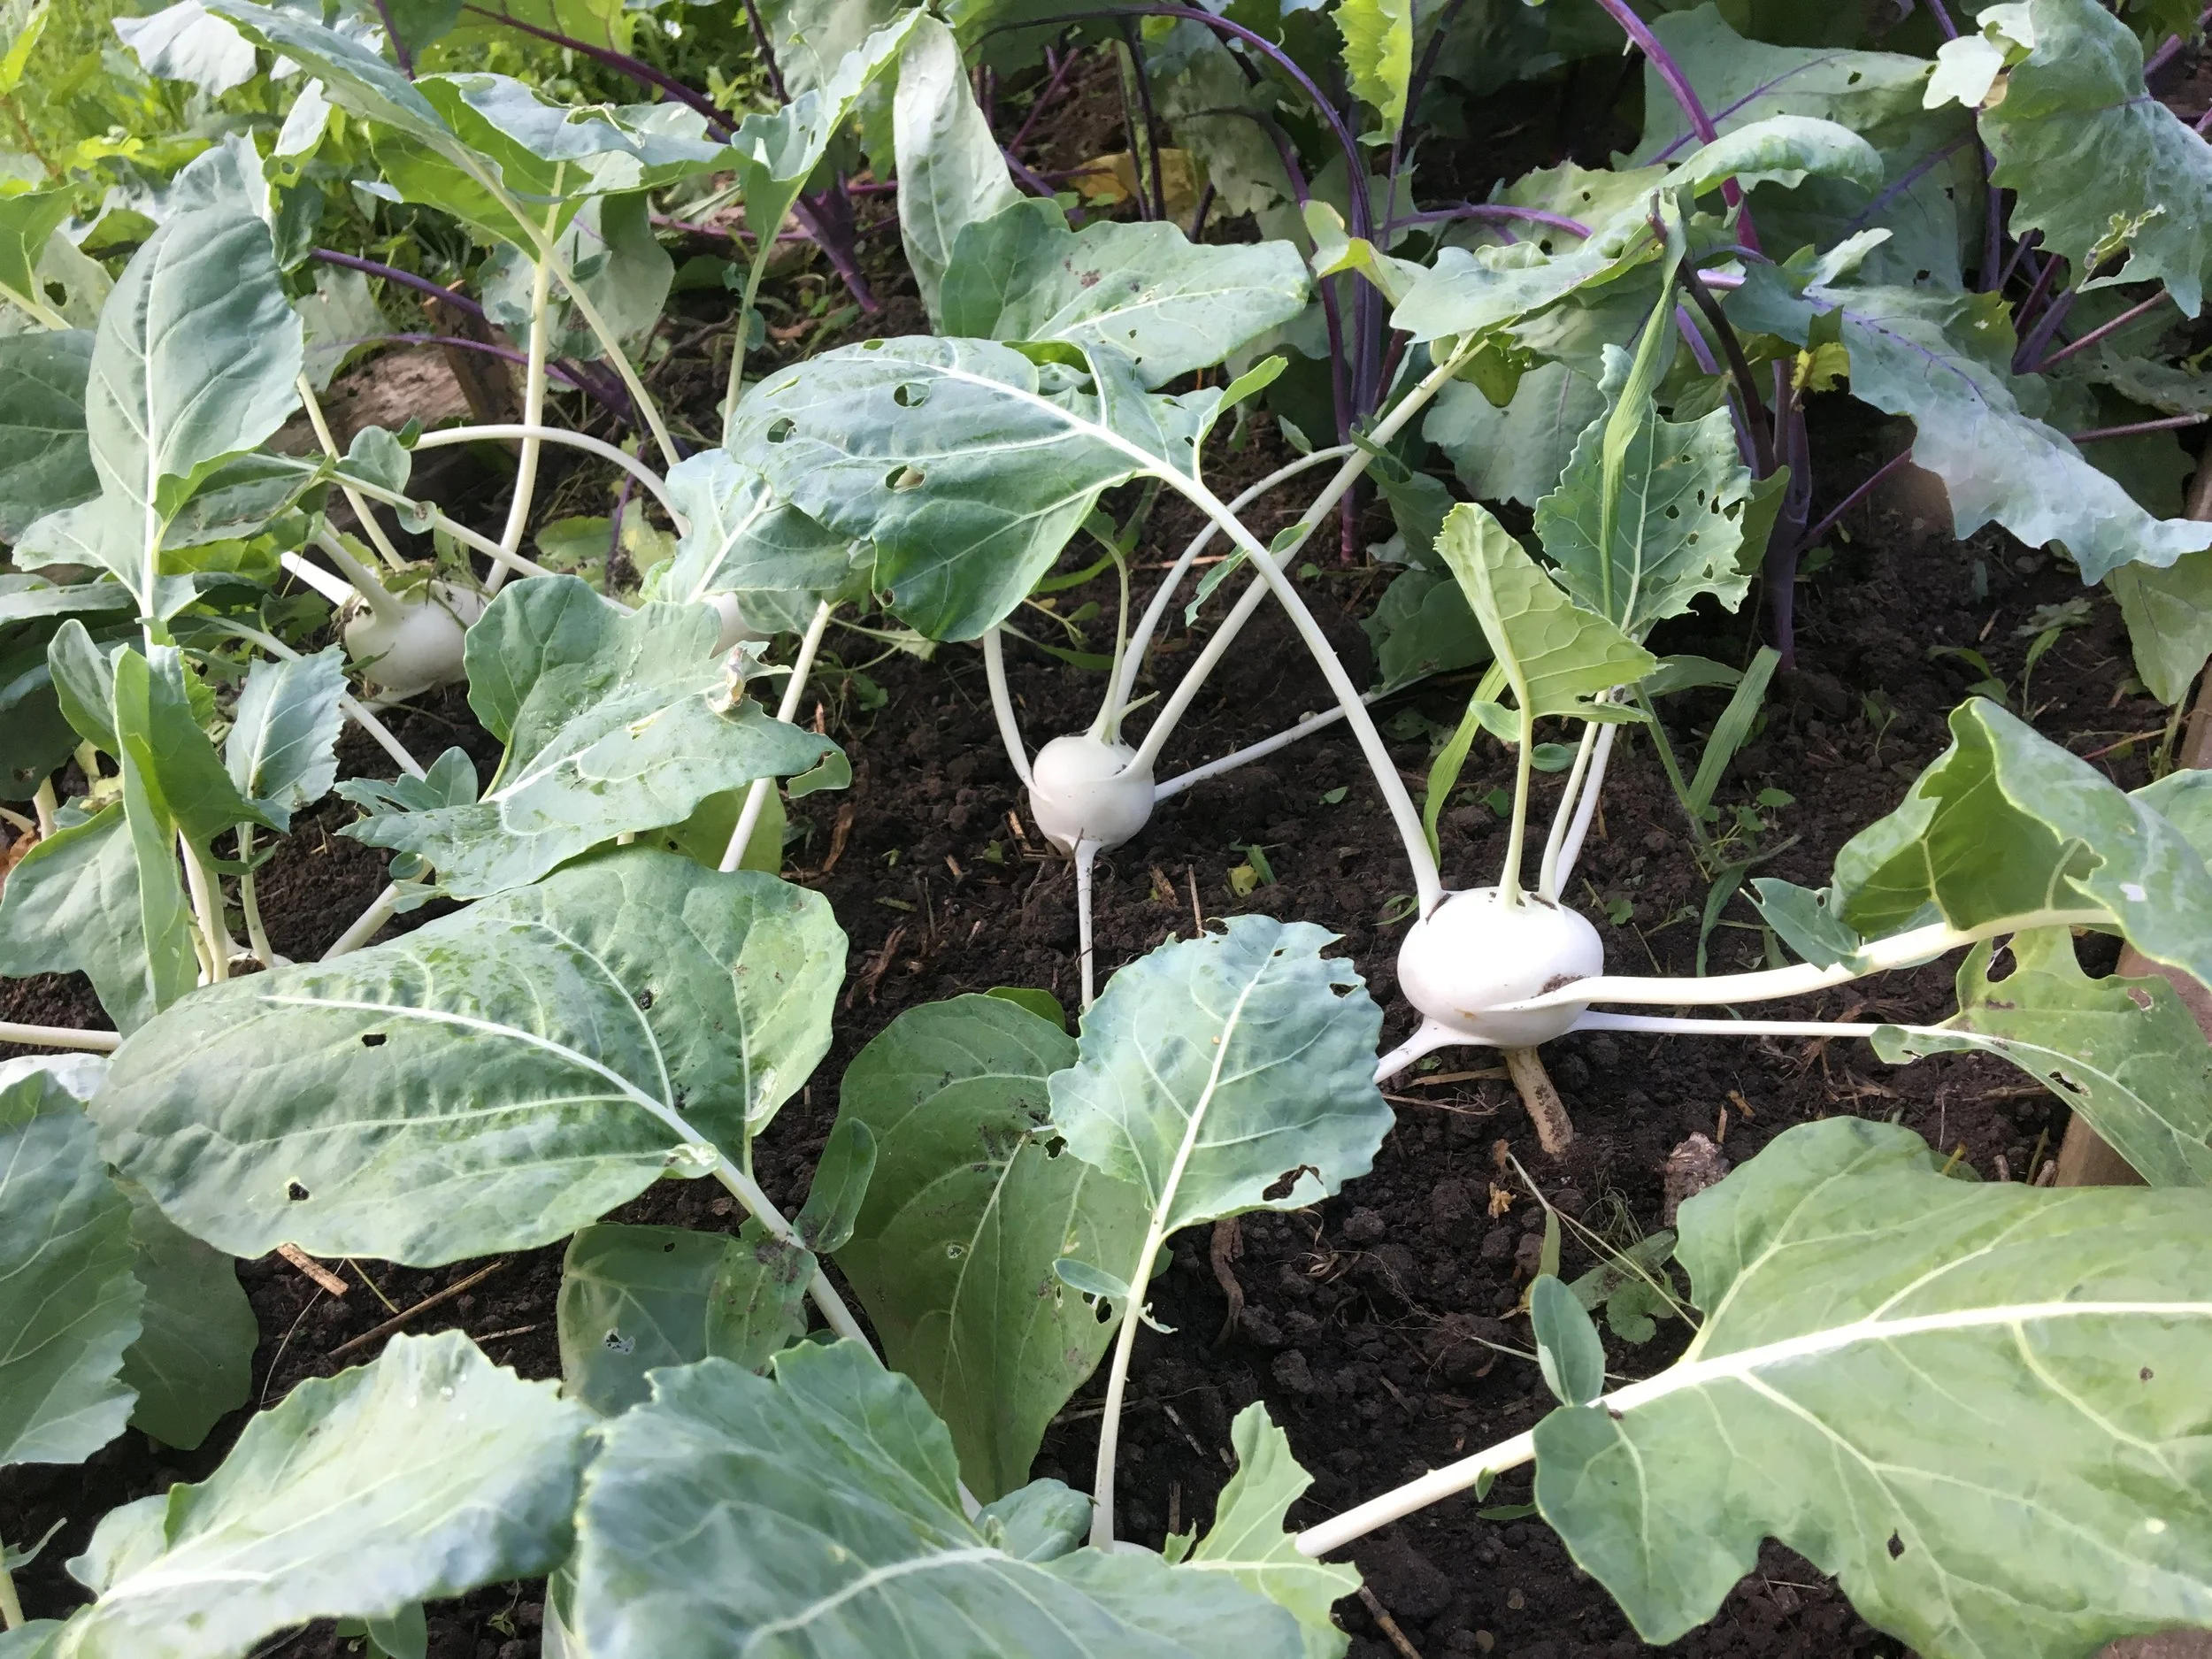
It Starts as a Rosette
Kohlrabi is a member of the cabbage clan. It has an edible stem that fattens up right above the soil level. Before the stem plumps up, though, the plant is a rosette of leaves. As the stem thickens, the symmetry of that rosette remains, with leaves projecting out from the bulb-like stem.
Top Tip for Kohlrabi Success
Here’s the key to your kohlrabi success: Fast, uninterrupted growth.
To get that type of growth, grow it in well-fed soil, with cool temperatures and consistent moisture.
Site
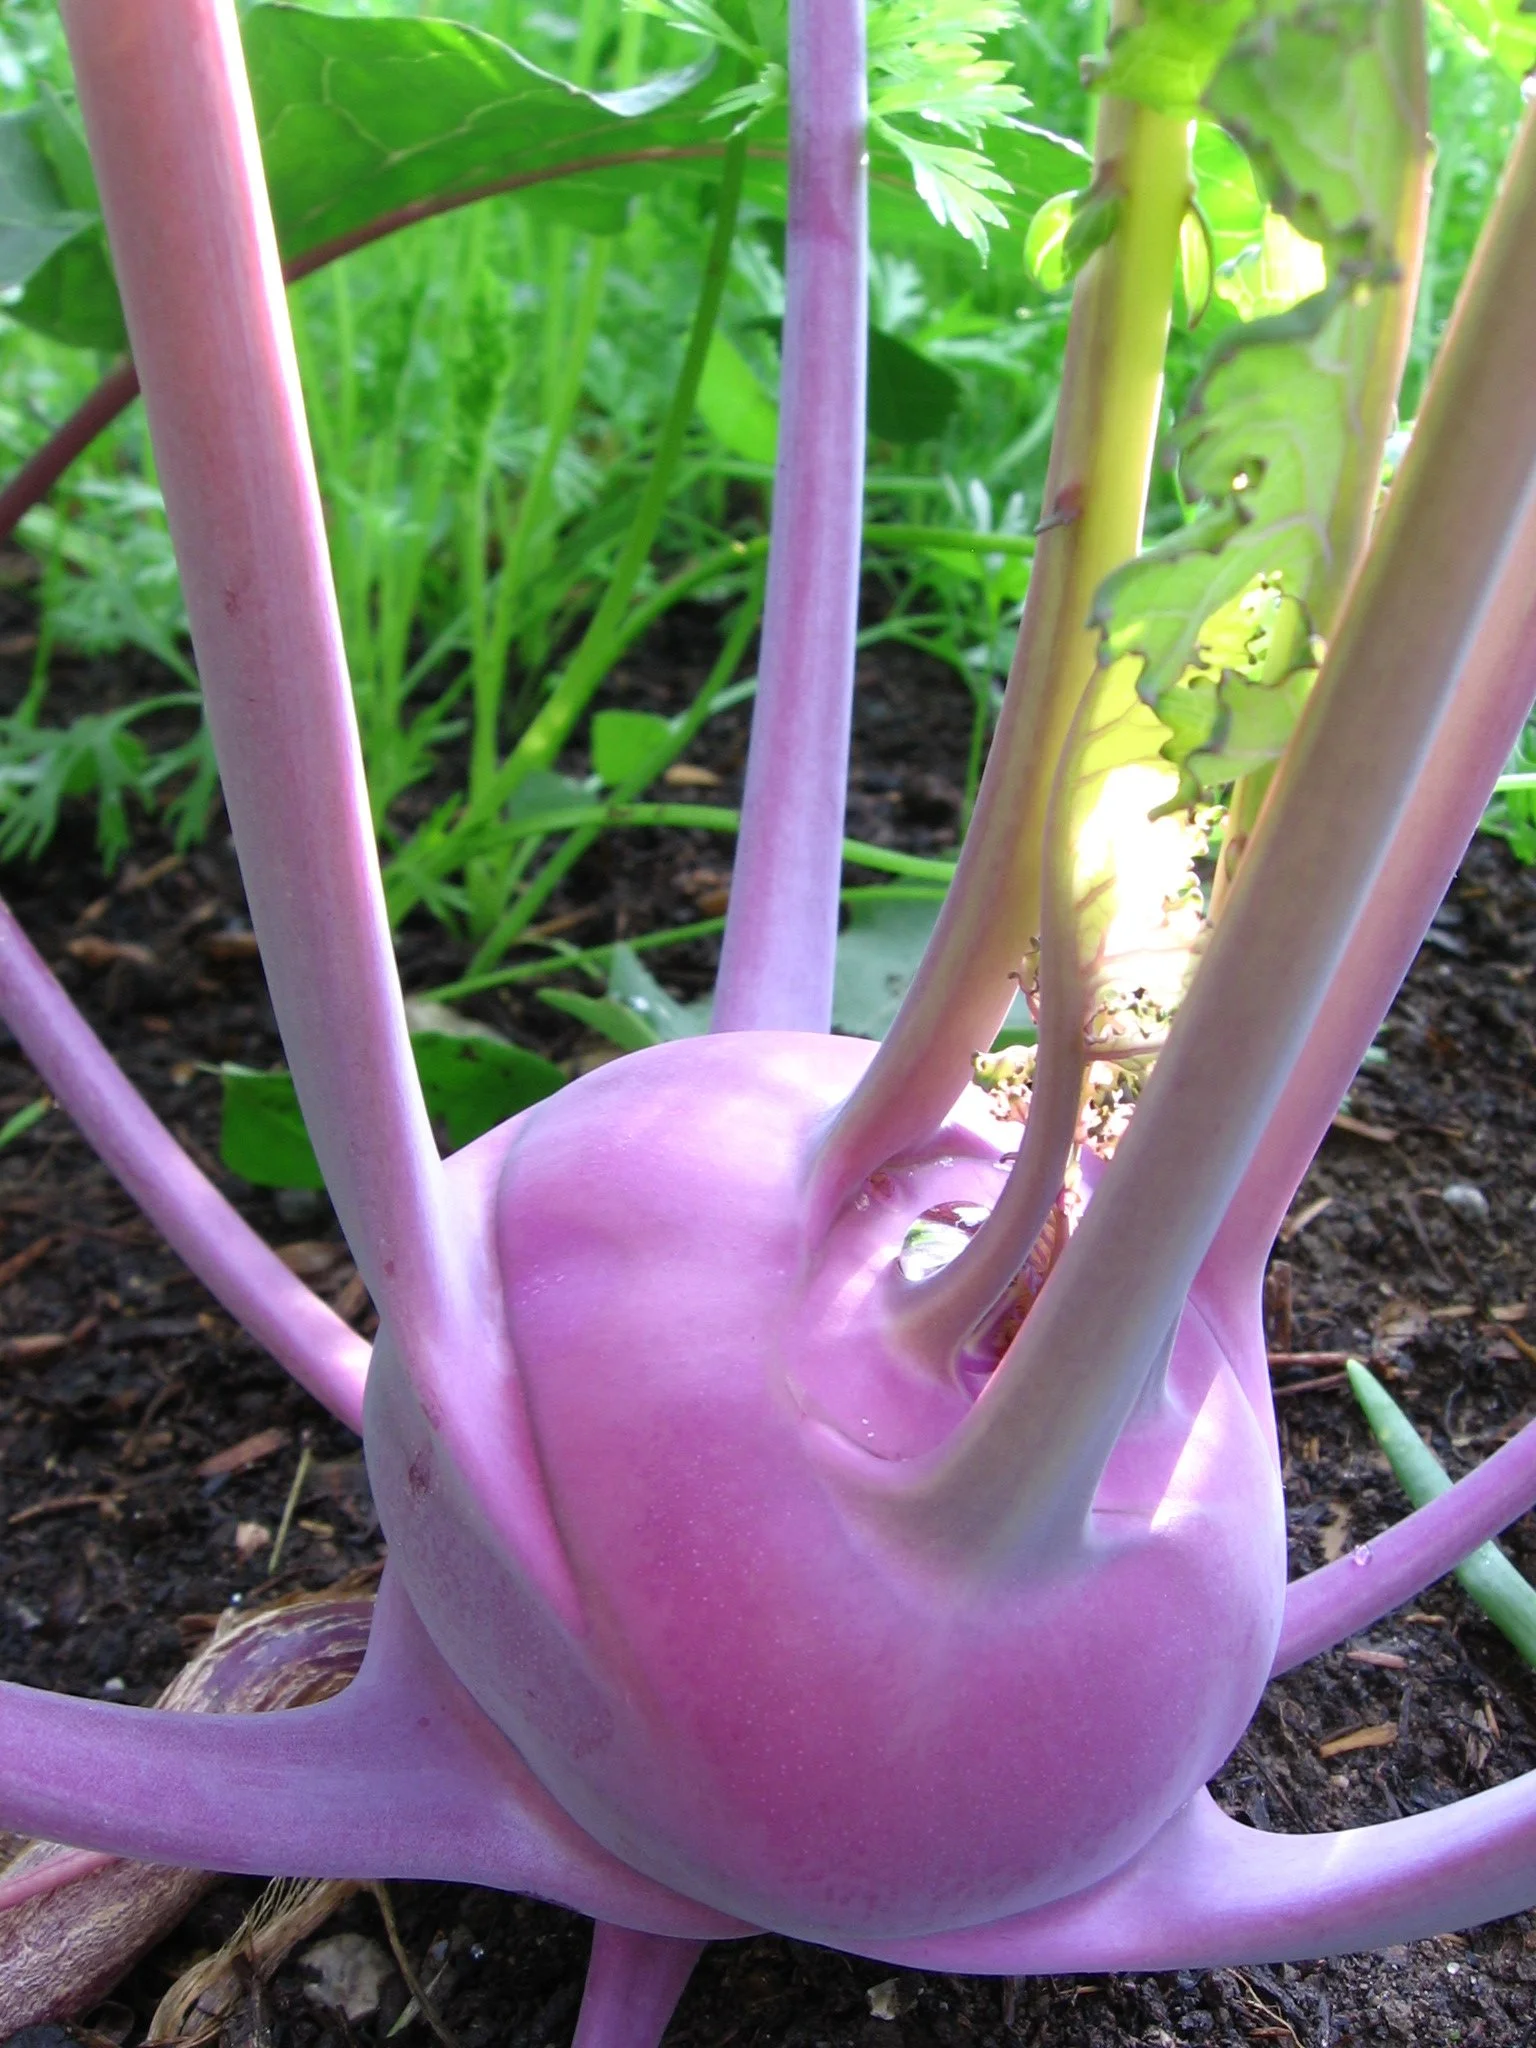
Kohlrabi is an easy-to-grow vegetable that is versatile in the kitchen.
Like its cabbage cousins, kohlrabi grows best in soil with lots of organic matter
A spot with full sun is best (although I’ve had decent results growing kohlrabi in partial shade)
Grow Kohlrabi from Seed
Kohlrabi is easy to grow from seed, indoors or outdoors. I don’t usually bother starting them indoors in the spring, but it’s an option if you want the earliest possible harvest. If you start them indoors, there’s no need for a heat mat.
Sow seeds approximately 5 mm (1/4”) deep
Outdoors: Start sowing about 1 month before the last spring frost
Indoors: Start kohlrabi transplants about 1 month before you plant to move them to the garden
Here are a couple of ways to get a longer kohlrabi harvest:
Start additional seeds every 2-3 weeks
Grow more than one variety, choosing varieties that take different amounts of time to mature
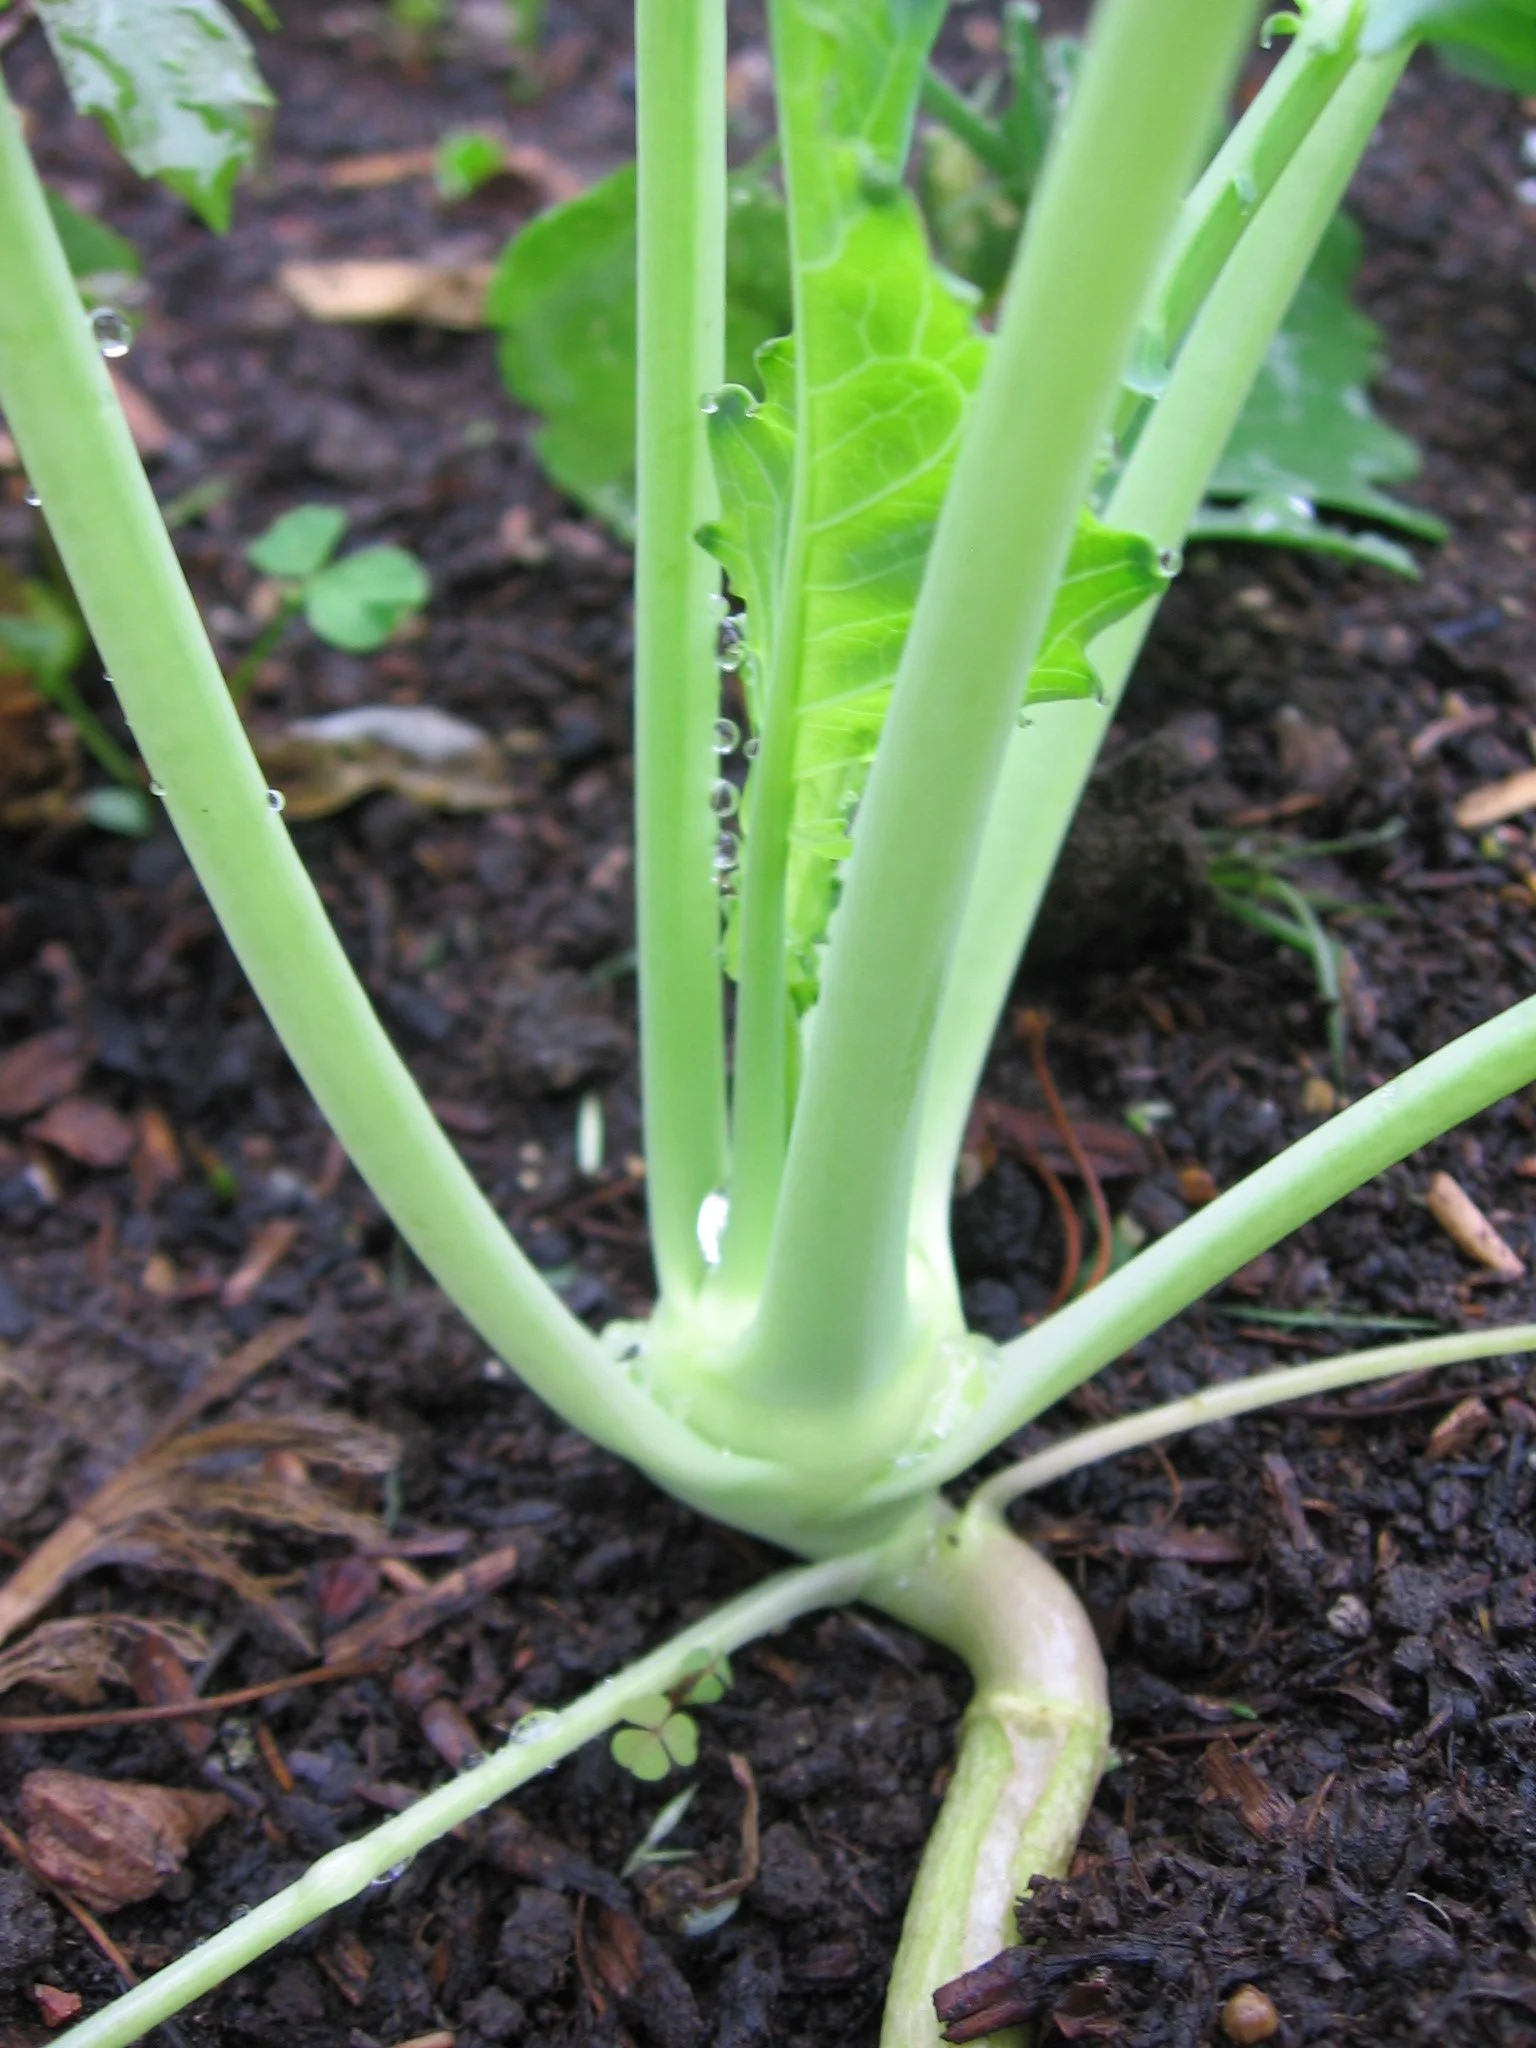
A young kohlrabi plant, before the stem has started to fatten up.
Note: While kohlrabi plants are tolerant of cold weather, a hard freeze can cause young plants to bolt – to jump right to the flowering stage. That would mean no thick edible stem. So there’s a limit to how early you can plant them out.
Kohlrabi as a Summer Succession Crop
When kohlrabi is a succession crop, I like to pre-start seedlings indoors (or outdoors, in another part of the garden). That way, I have transplants ready to go once the desired space opens up.
While I rarely start spring kohlrabi indoors in the spring, I find it’s the best way for me to grow kohlrabi for summer succession because:
It allows me to have a tighter succession...with larger plants ready as soon as the space is open
The hot, dry summer weather that I get here is not ideal for outdoor seeding
Note: Depending on growing conditions in your area – and how much attention you give your garden over the summer – kohlrabi might or might not be a suitable summer succession crop. Dry conditions can cause erratic growth and give a woody texture with a strong, bitter flavour.
Grow a Container Vegetable Garden
And get an early harvest of crops that usually take too long!
Spacing
Thin kohlrabi plants to give a spacing of approximately 10-15 cm (4-6”) apart.
With direct-seeded kohlrabi, I usually plant them more densely than recommended. Then I thin out the row as the stems begin to fatten, enjoying an early harvest of young kohlrabi.
Kohlrabi leaves are edible, so if I thin out any plants before the stems enlarge, I can still add the leaves to a salad!
Planting more densely is also cheap insurance against losses and poor germination.
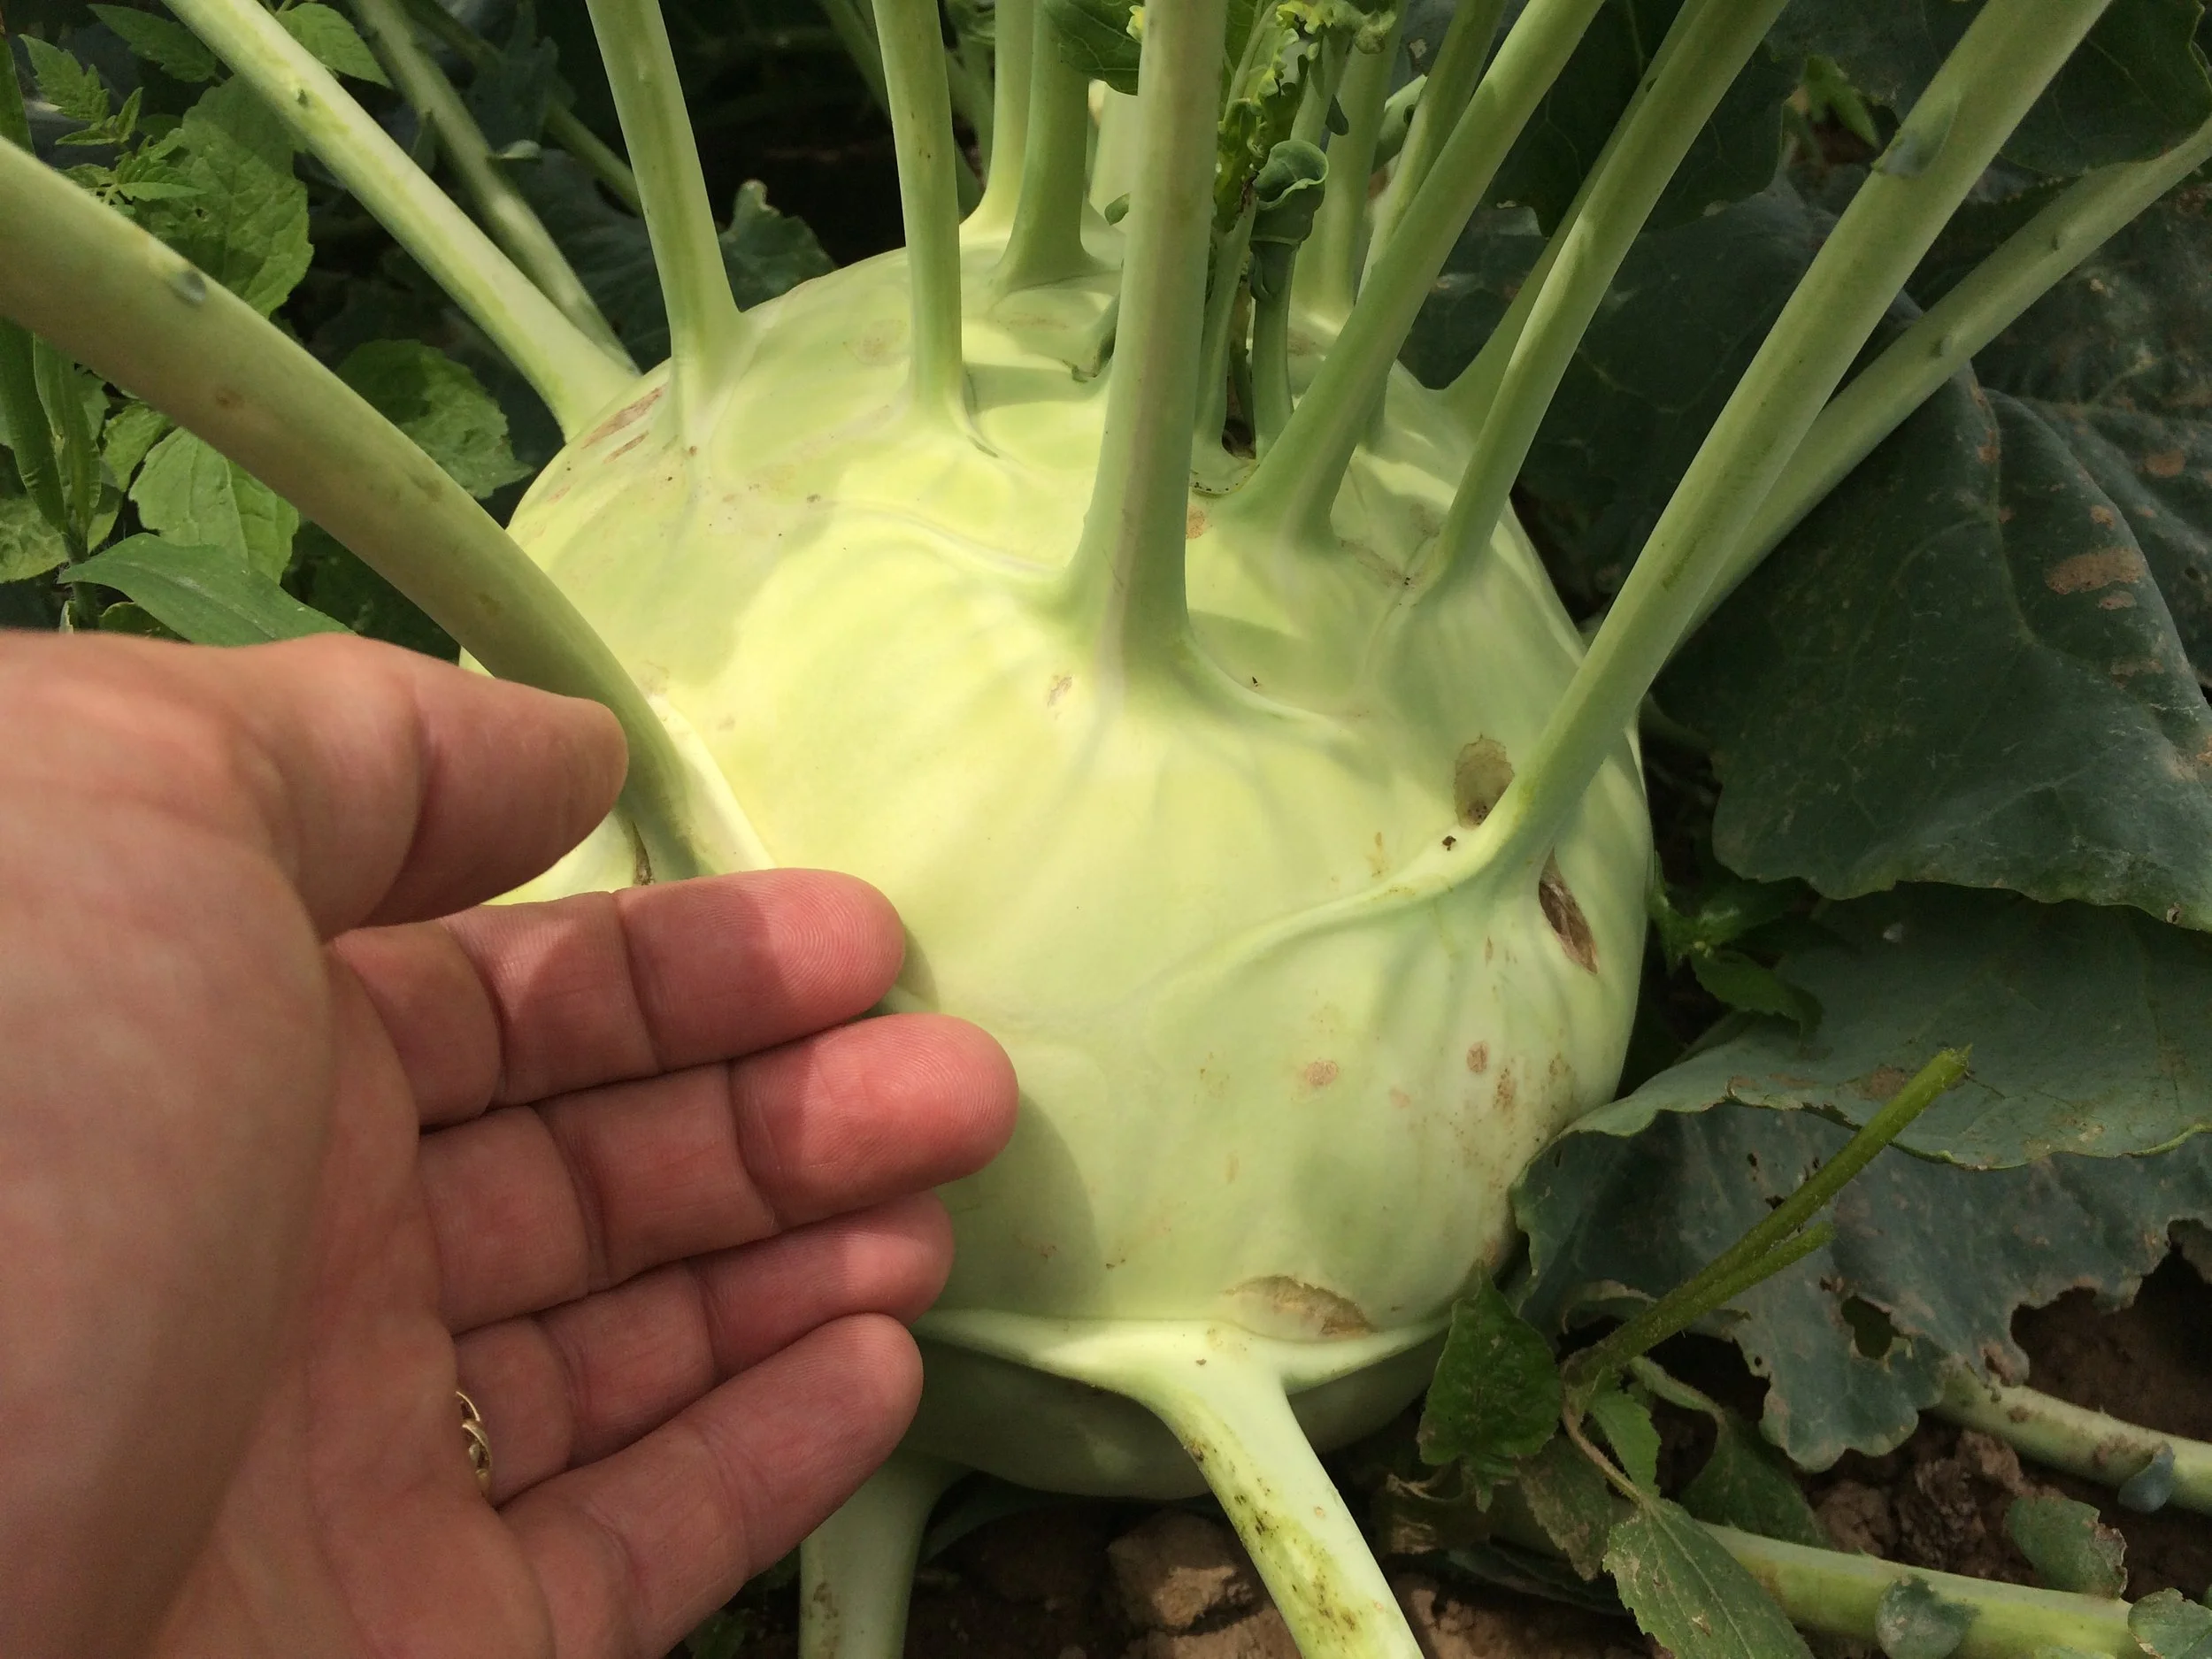
If you’re aiming to grow larger kohlrabi, increase the spacing a bit – and look for a variety know for size.
Sow the seeds approximately 5 cm (2“) apart
Thin to 10 – 15 cm (4-6”) apart
Space rows 30cm (12”) apart
If you’re aiming to grow larger kohlrabi, increase the spacing a bit – and look for a variety know for size.
Challenges
I find the early crop is not bothered much by pests. But later sowings and summer-succession transplants are growing when there are more pest pressures in the garden. That means young seedlings can be vulnerable to flea beetles, cabbage worm, and cabbage looper. An easy solution is to cover young plants with a floating row cover.
Where possible, rotate crops to minimize pest and disease pressures. That means it’s best not to plant kohlrabi where you’ve had you’ve had related crops (broccoli, cauliflower, collards, kale, turnip, rutabaga, cabbage, bok choy, Brussels sprouts, and mustards) in last 4 years.
Harvest and Storage
Kohlrabi usually take a couple of months to mature. Pick when they’re anywhere between the size of a golf ball and a tennis balls. Remember: smaller will be more tender.
Kohlrabi is frost hardy, so there is no rush to harvest it in the fall.
In the Kitchen
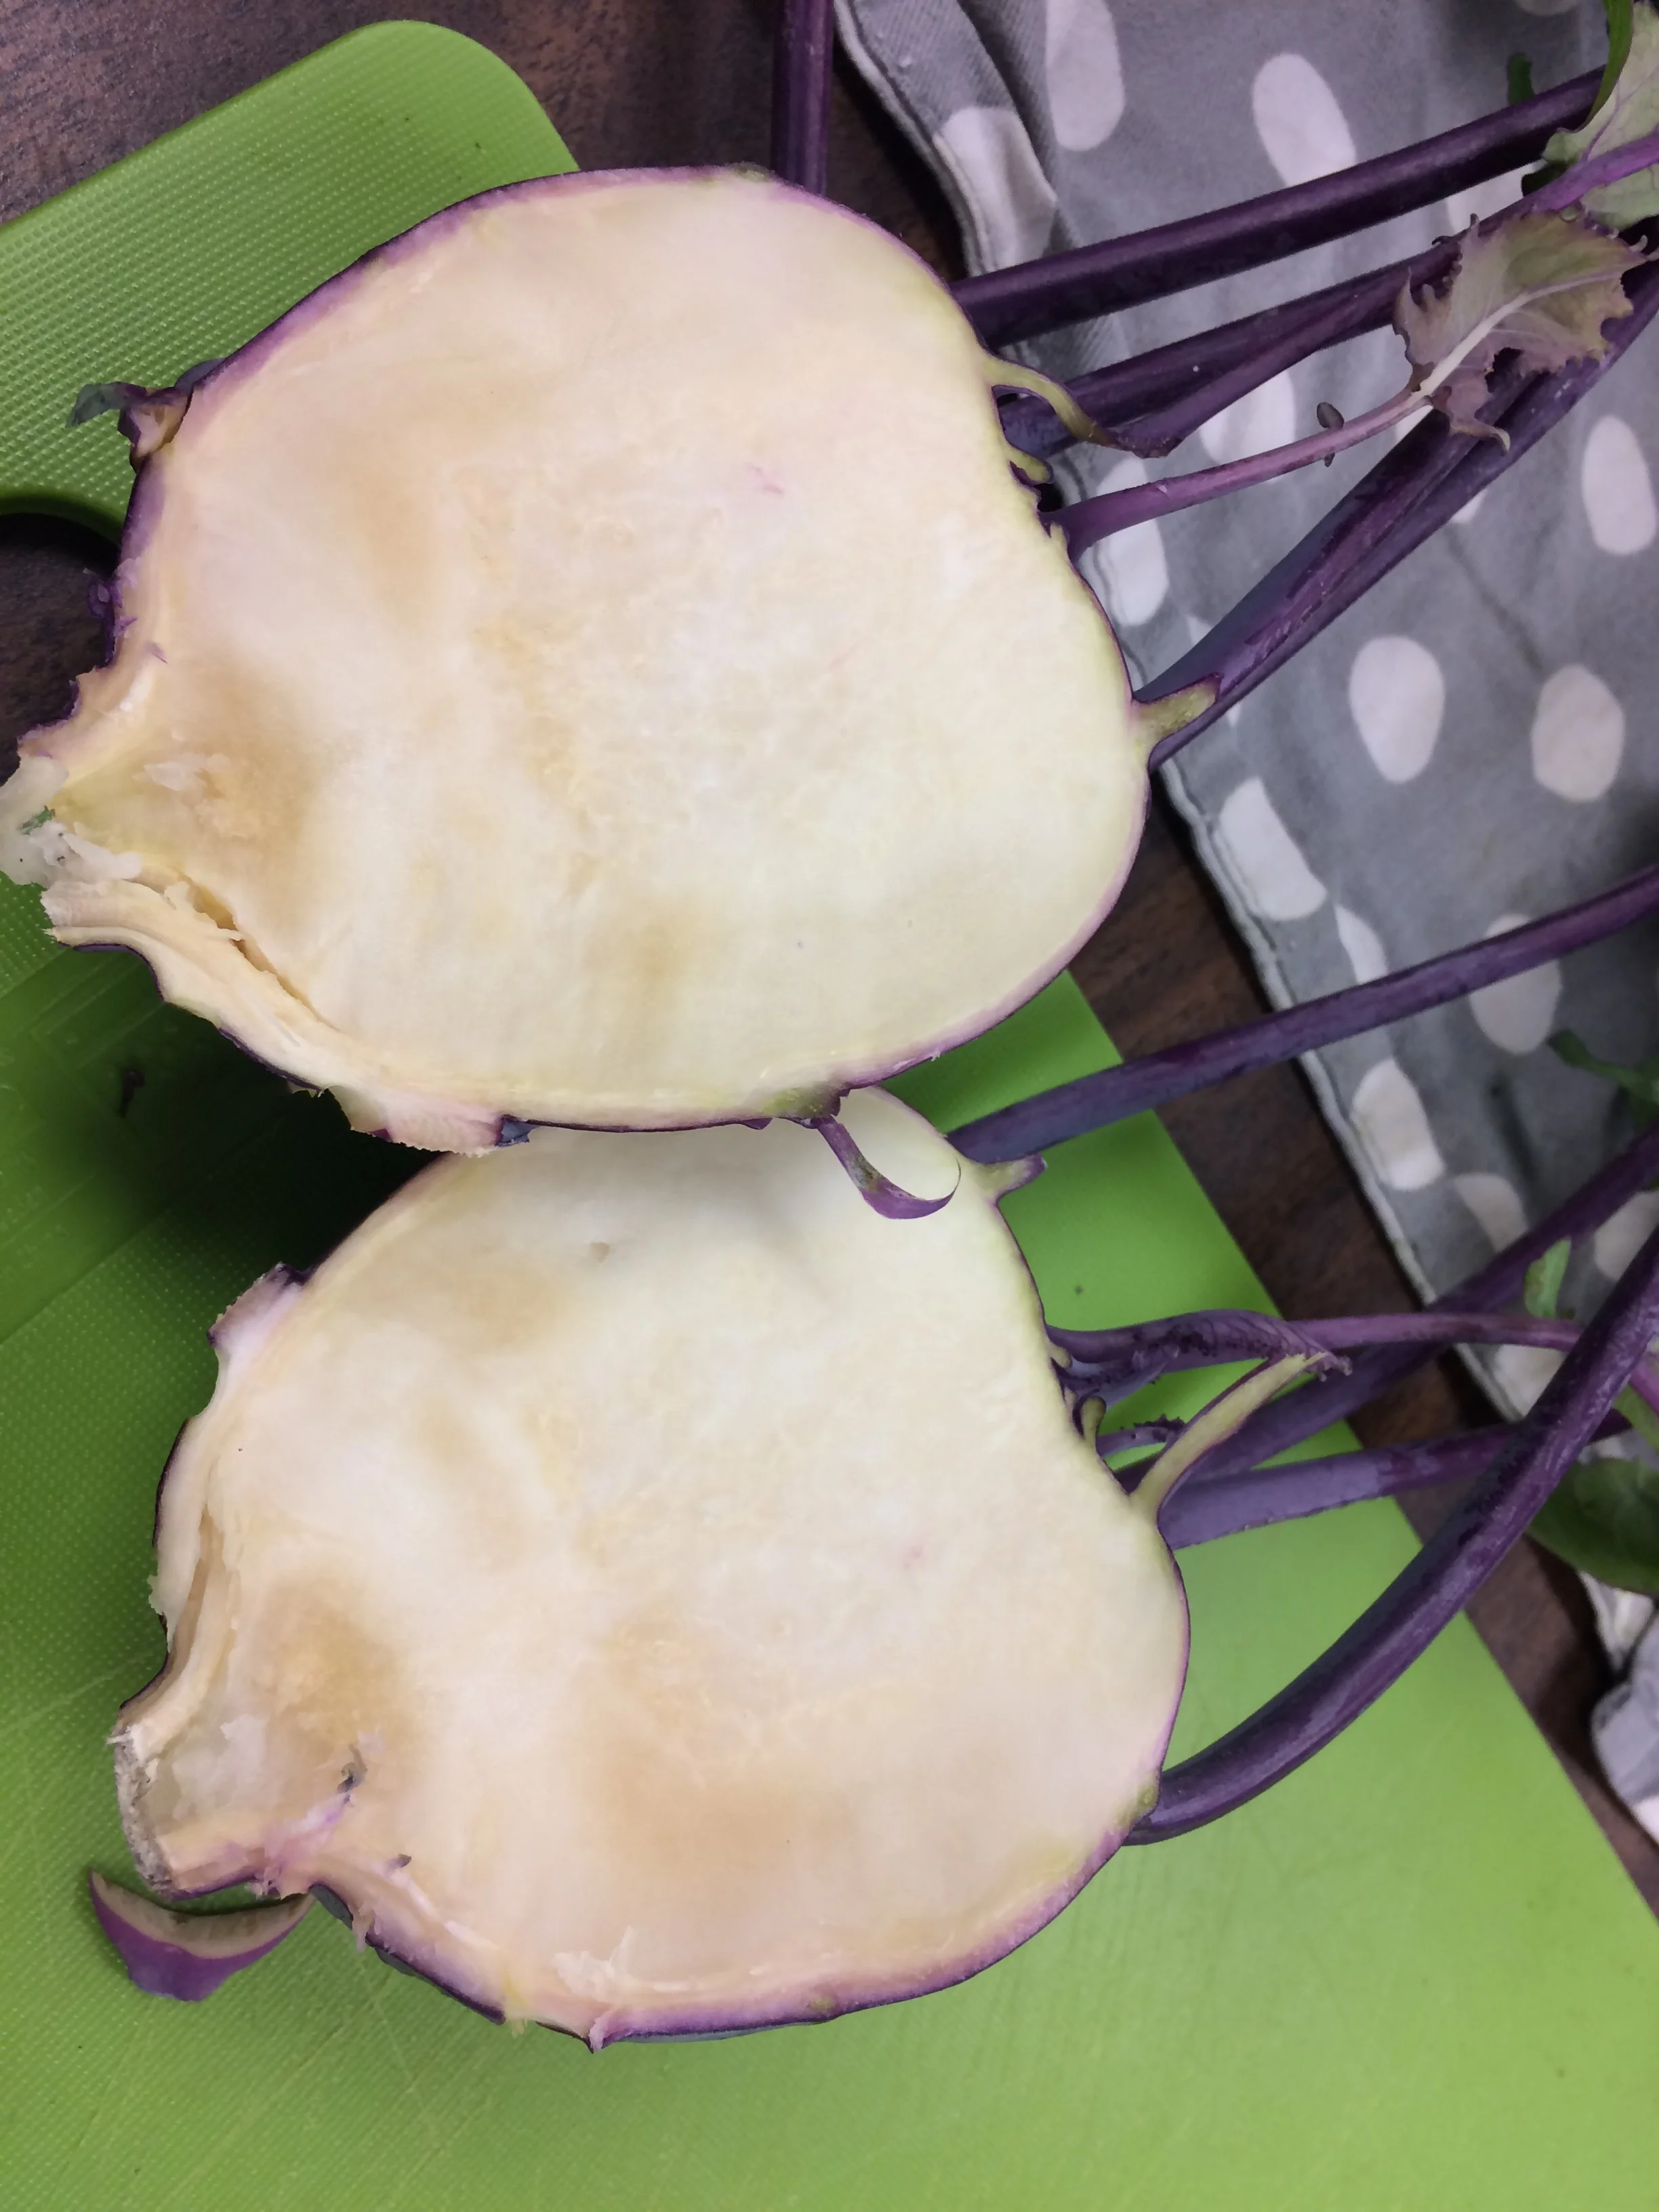
Kohlrabi is versatile in the kitchen.
You can eat kohlrabi raw or cooked. Either way, peel it first, because the skin can be tough. I prefer to use a paring knife (sometimes a potato peeler gets stuck on the spots where the leaf joined the stem.)
Here are some ways I’ve enjoyed serving kohlrabi:
Sliced, on a veggie platter
Grated, in slaws and salads
Poached (in white wine with butter is nice!)
Cut into ribbons, and added to a stir fry
Cubed and added to curries
Remember: The young leaves and leaf stalks are edible too!
Not Sure Where to Start?
A simple way to use raw kohlrabi is to grate it and then make a slaw. Here’s how:
Mix together some grated kohlrabi with a grated apple
I peel the apple first, so the white flesh of the apple and kohlrabi blend together
Use a slow-to-brown apple variety if you have one (at the moment, Pink Lady is my favourite)
Add salt, a dash of red wine vinegar, and olive oil.
That’s it!
Find This Helpful?
Enjoy not being bombarded by annoying ads?
Appreciate the absence of junky affiliate links for products you don’t need?
It’s because we’re reader supported.
If we’ve helped in your food-gardening journey, we’re glad of support. You can high-five us below. Any amount welcome!
How to Keep Squirrels Away from the Garden
Deter Squirrels and Repel Squirrels

Ideas to keep squirrels out of your food garden.
Squirrels can cause a lot of damage in a home food garden. They get into fruit crops, nut crops, the vegetable garden, and potted plants.
In a home-garden setting, they can be more of a problem than they are for commercial growers. That's because small, enclosed home gardens often have fewer natural predators. And because some people like watching squirrels, and actually feed them on purpose.
But there are ways to keep squirrels away, and to deter them from pilfering your crops. Keep reading if squirrels make your blood boil: This article has 50 ideas to safeguard your garden. (If you're a squirrel lover who purposely feeds them, this article is not for you.)
Key Takeaways
Keep squirrels away from your food crops using a combination of strategies:
Make your yard less inviting to them.
Make it difficult for them to get to your crops and garden beds.
Natural predators can help, and so can pets such as cats and dogs.
Plan your harvest so that you beat them to it.
Choose crops and varieties that are less likely to be bothered by squirrels.
Use repellents to make your garden less attractive.
Understand Squirrel Behavior
We'll get to a number of specific strategies you can use to prevent squirrels spoiling your harvest, but first, let's understand why they're attracted to your garden.
What Do Squirrels Eat?
There are lots of food sources for squirrels in a home garden. They feed on nuts, seeds, fruit, and insects.
Squirrels are not fussy eaters. They're omnivores. That means they feed on a variety of things including nuts, seeds, fruits, and insects. Oh, let's not forget the tulip bulbs or Halloween pumpkins! I've even caught one digging up my carrots in the fall.
For a squirrel, your garden is a buffet. And its diet changes seasonally depending on what's around.
What Attracts Squirrels to Your Garden?
If you put out food for the birds, that's a big-time squirrel attractant. Even if you feel smug about the squirrel baffles that keep them from your bird feeders, bird are as tidy as toddlers: They spill seed onto the ground. So the squirrels just feast at ground level.
If you're growing food, unfortunately, that's attractive to squirrels too. Fruit, seeds, bulbs...
They need water too, so ponds and bird baths make your garden more attractive.
What Else do Squirrels Do? Other Types of Squirrel Damage
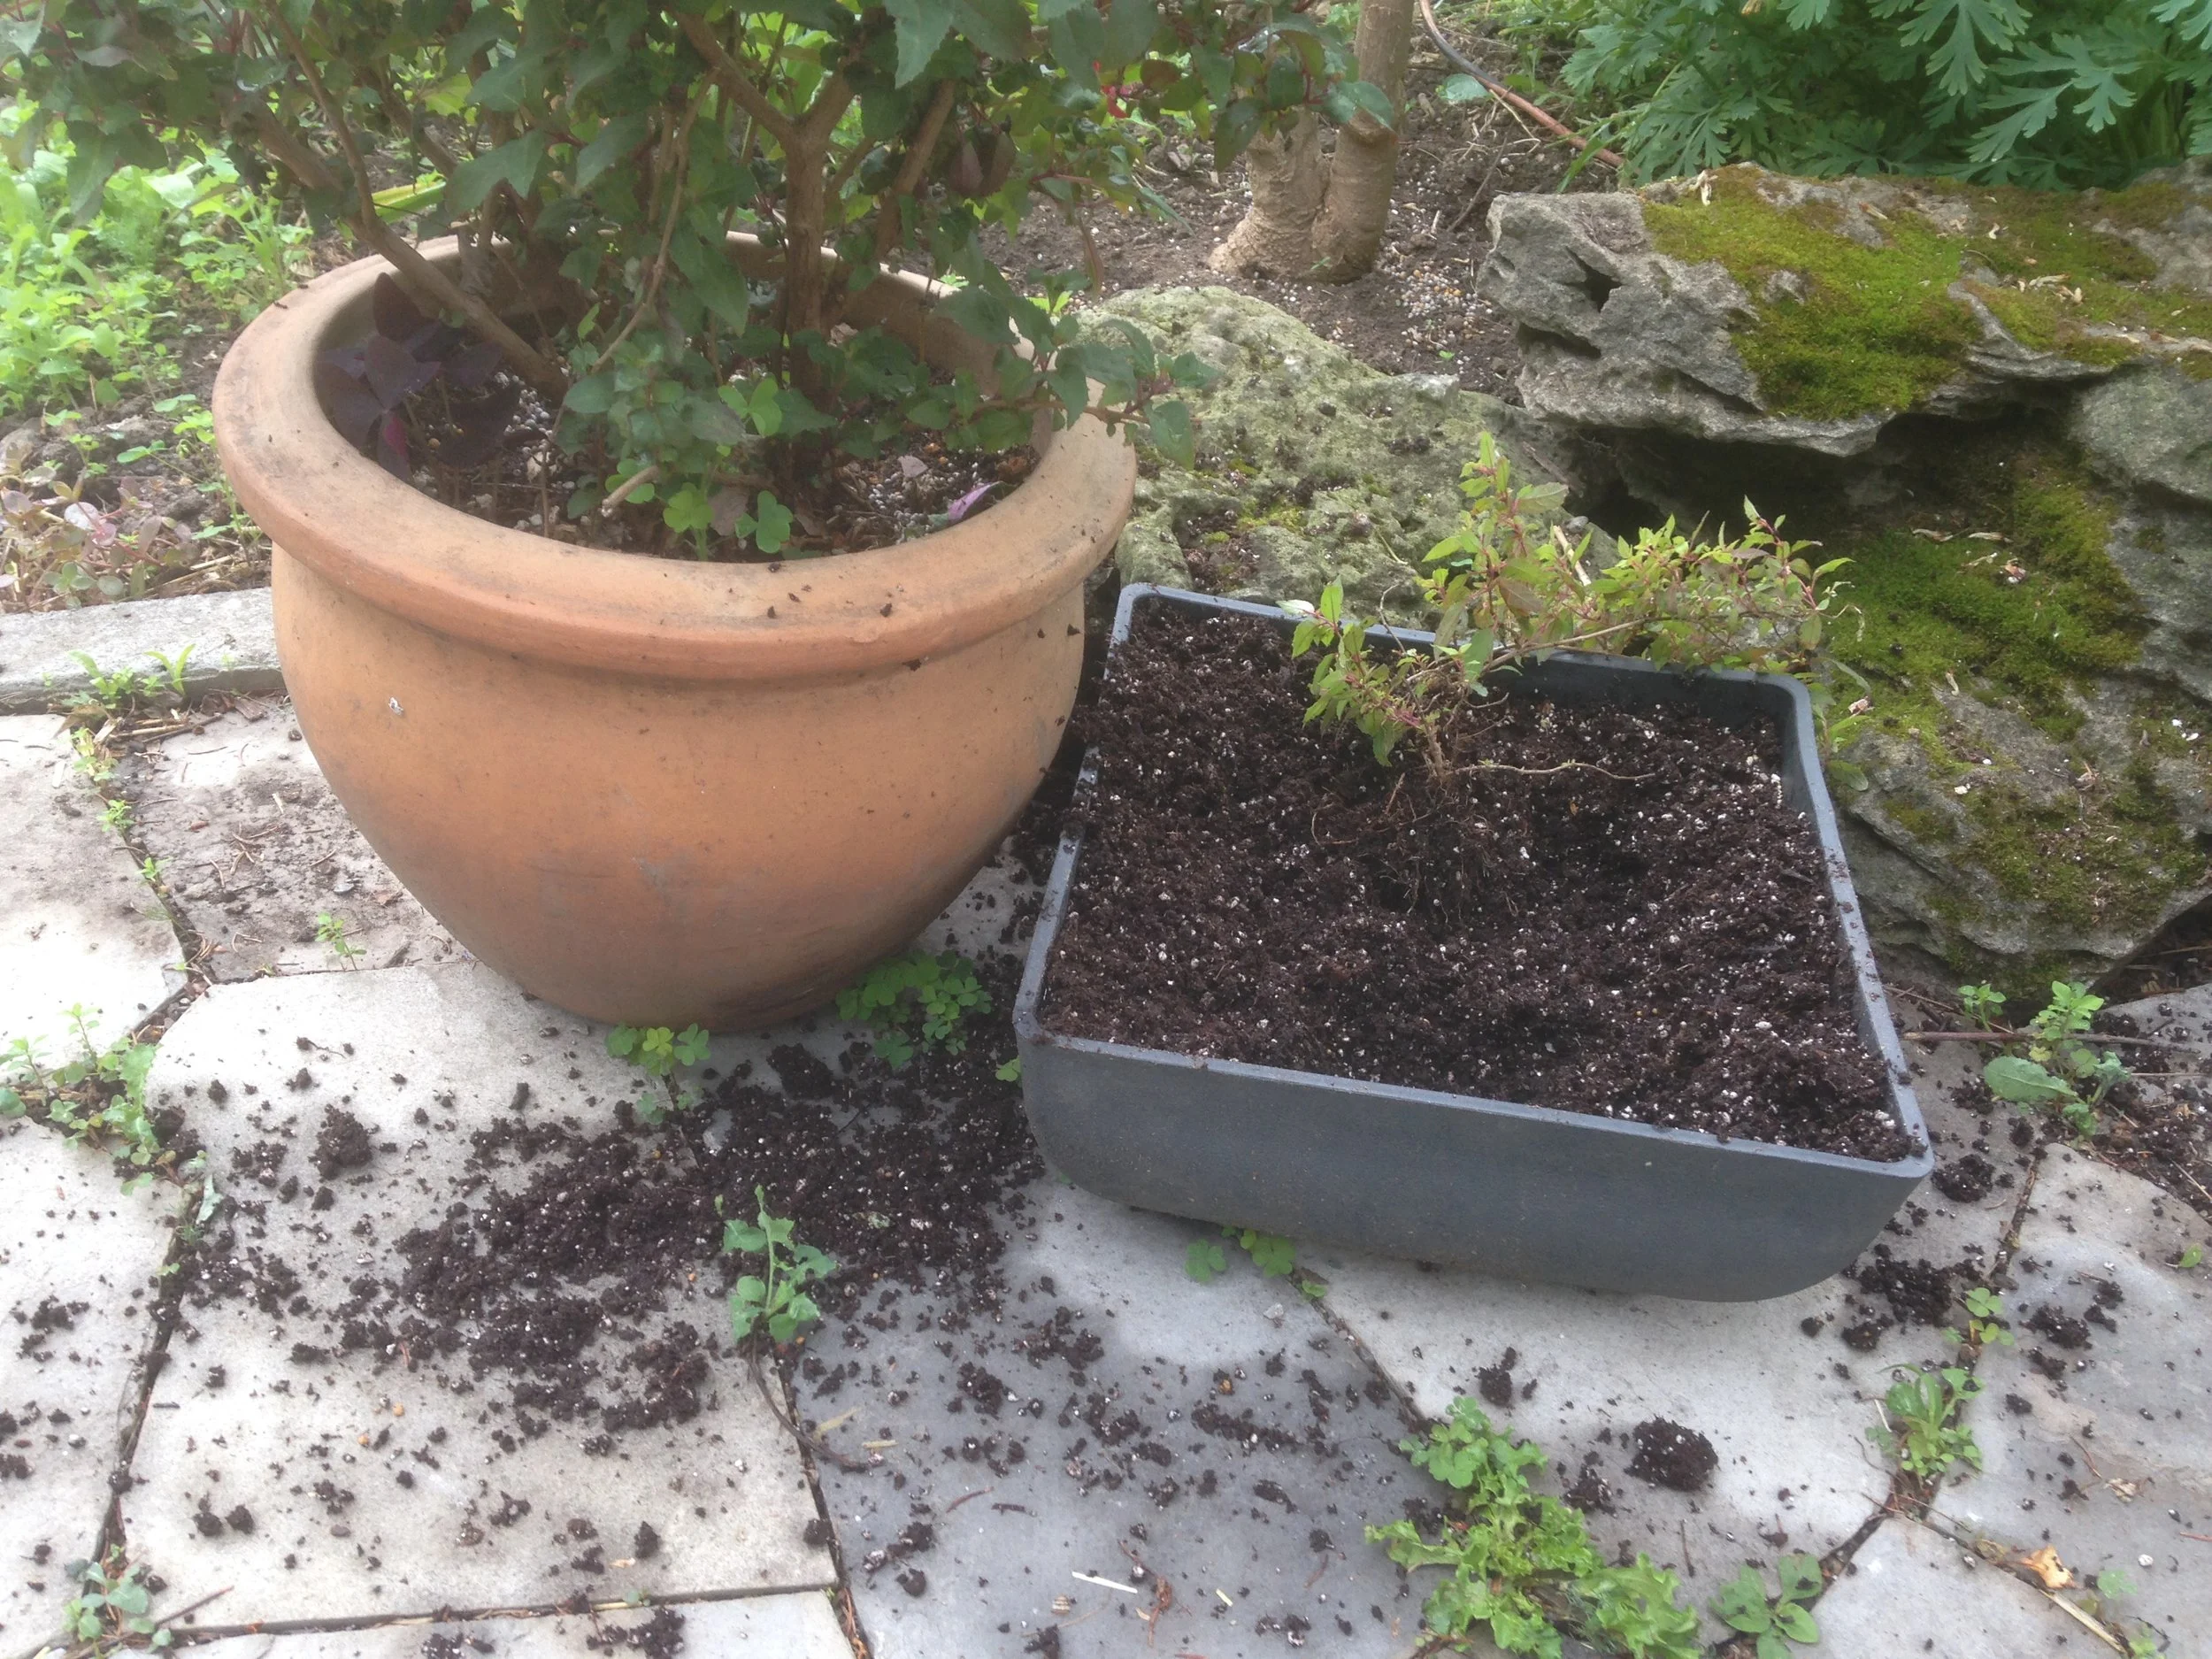
It’s common for squirrels to dig around potted plants (and often dig them right out!)
Squirrels dig up newly worked garden beds and newly transplanted plants. That digging can be a downer if you've just planted seeds or transplanted seedlings. The digging often becomes less frenzied through summer, as they occupy themselves with other sorts of damage.
If you find the end nipped of tree branches, that's probably squirrels too.
One day I noticed a squirrel skulking around with branches in its mouth. Turned out it had chewed most of the fruiting branches from one of my espaliered apple trees so it could make a nest nearby.
Squirrels and Balconies
Balcony and rooftop gardeners might deal with squirrels too. Friends with a balcony garden on the 22nd floor asked me how to deter squirrels. To my surprise—and theirs—they kept finding nuts in their balcony planters, and their plants strewn on the floor. They described watching the squirrel descend the flat face of the building, head first. No fear.
Will the Squirrels go Away?
Squirrel populations go up and down, depending on the availability of food, on disease pressures, and how many predators are around.
And some years new squirrels come along that are smarter than the others...and figure out how to hack your squirrel-proofing. Don't worry, their life span is much shorter than yours.
So if you're in the midst of a really frustrating year, don't give up! They will go away.
Remember
In a home garden, we don't have the time or resources to grow a perfectly managed crop like a commercial grower. You might lose some of it to squirrels. But using some of the ideas below to deter squirrels or repel squirrels, you can still harvest lots for yourself. So don't sweat imperfection. Just start the gardening year knowing they will steal some stuff, but that you still have (some) control.
50 Squirrel-Busting Ideas for Your Garden
Keep Crops Out of Reach to Deter Squirrels
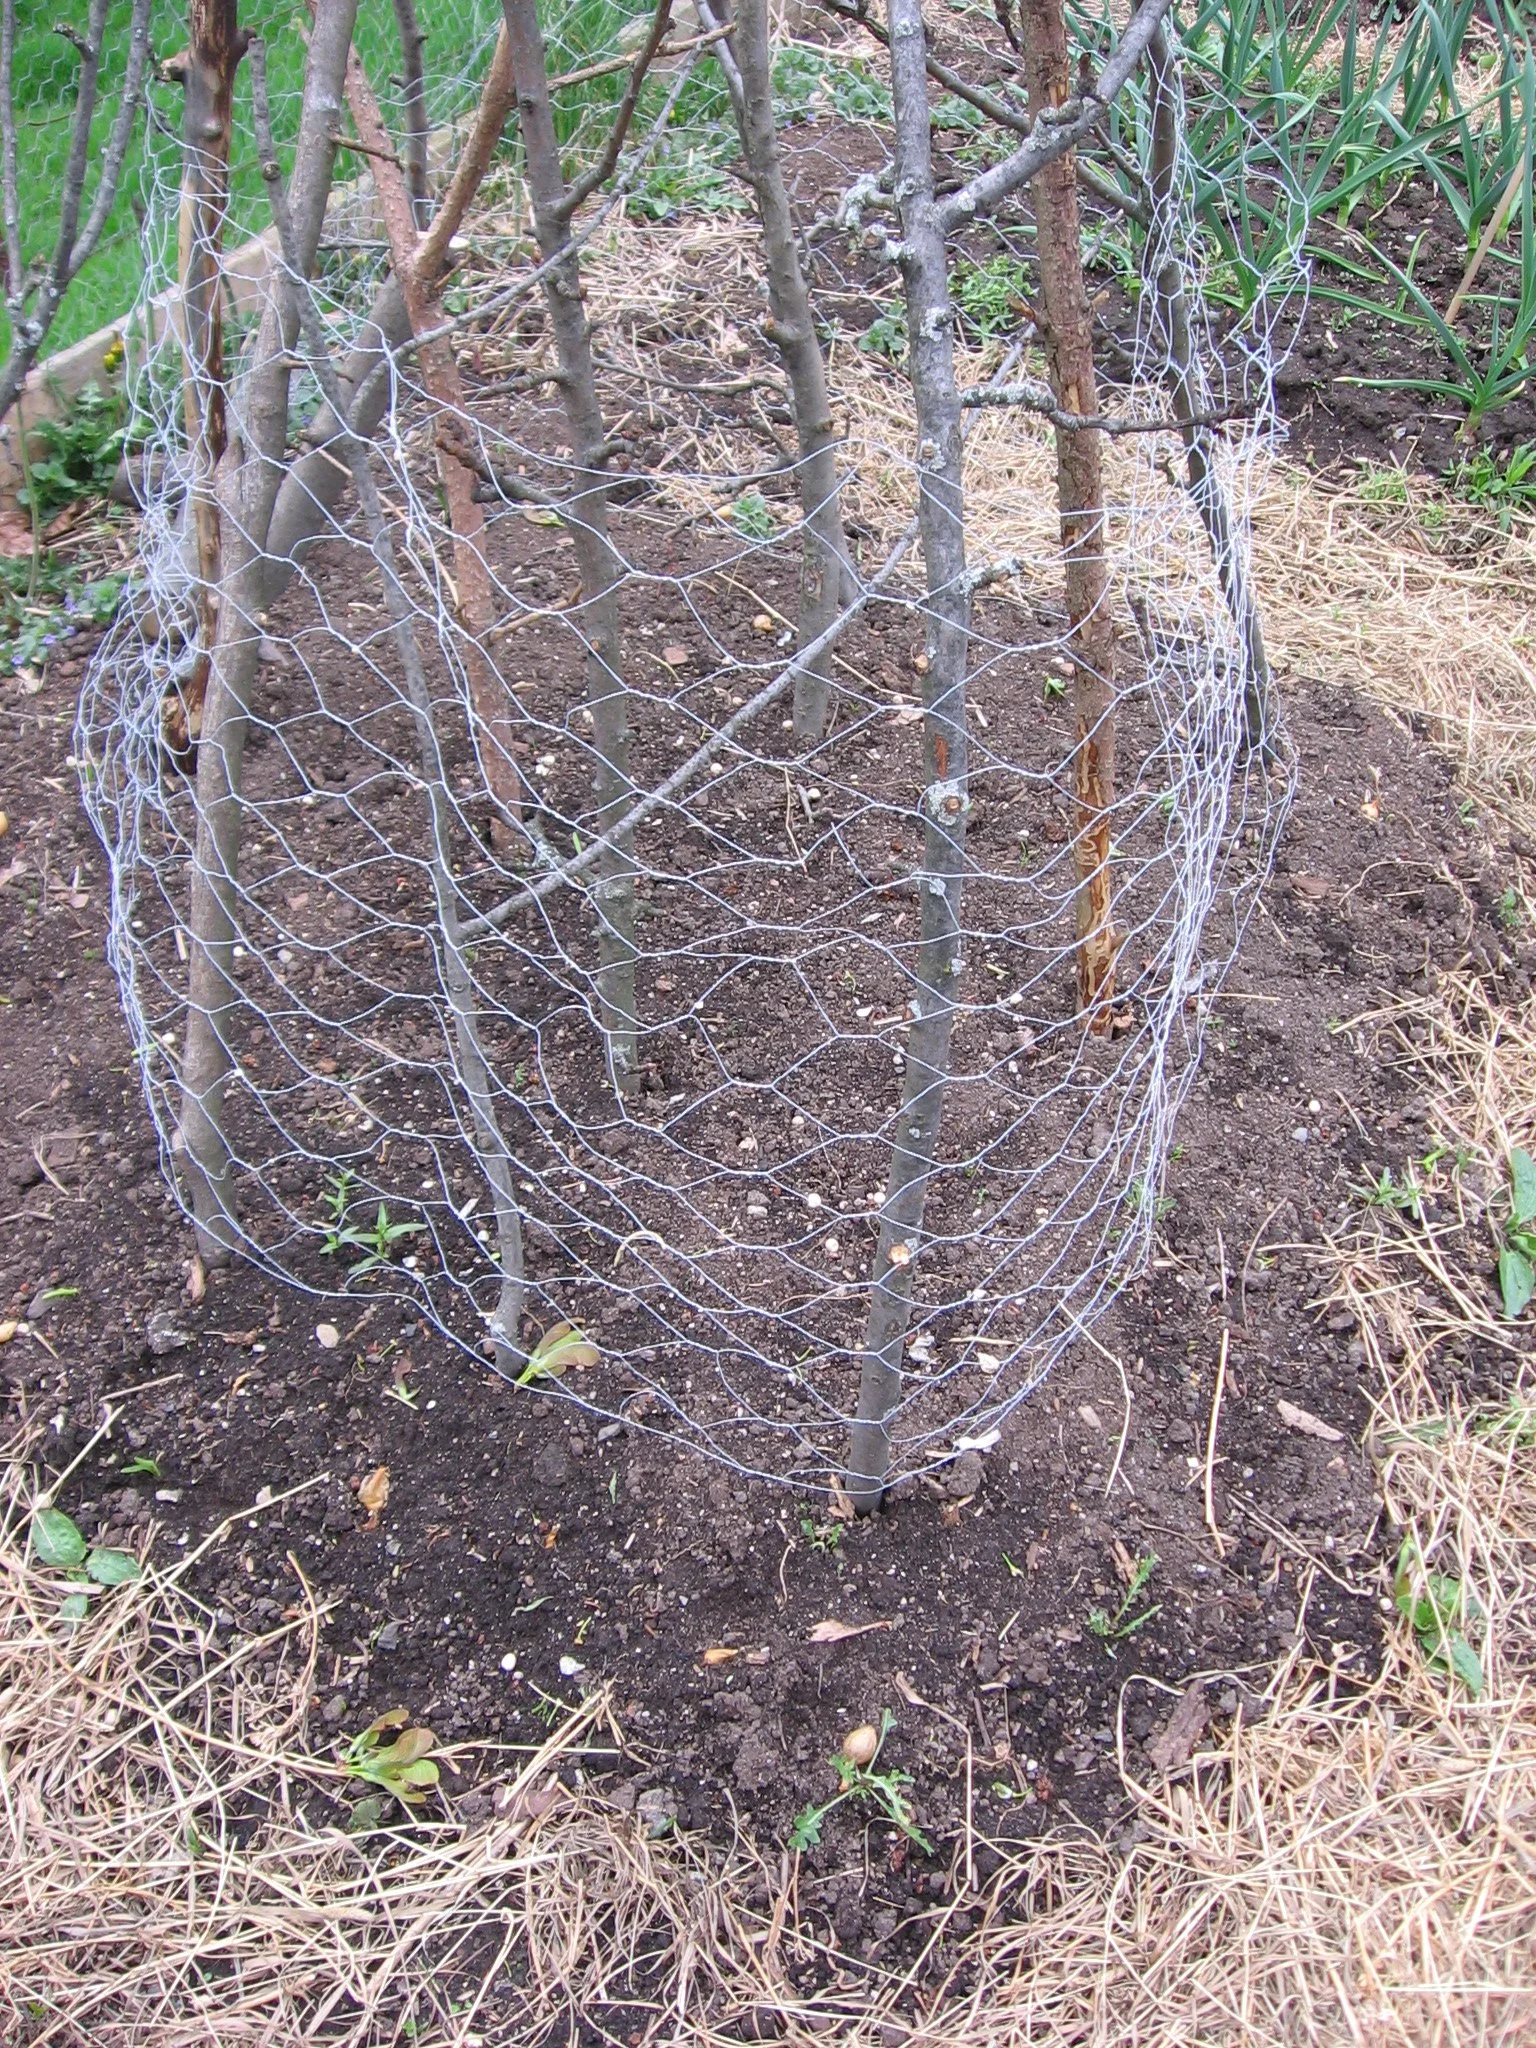
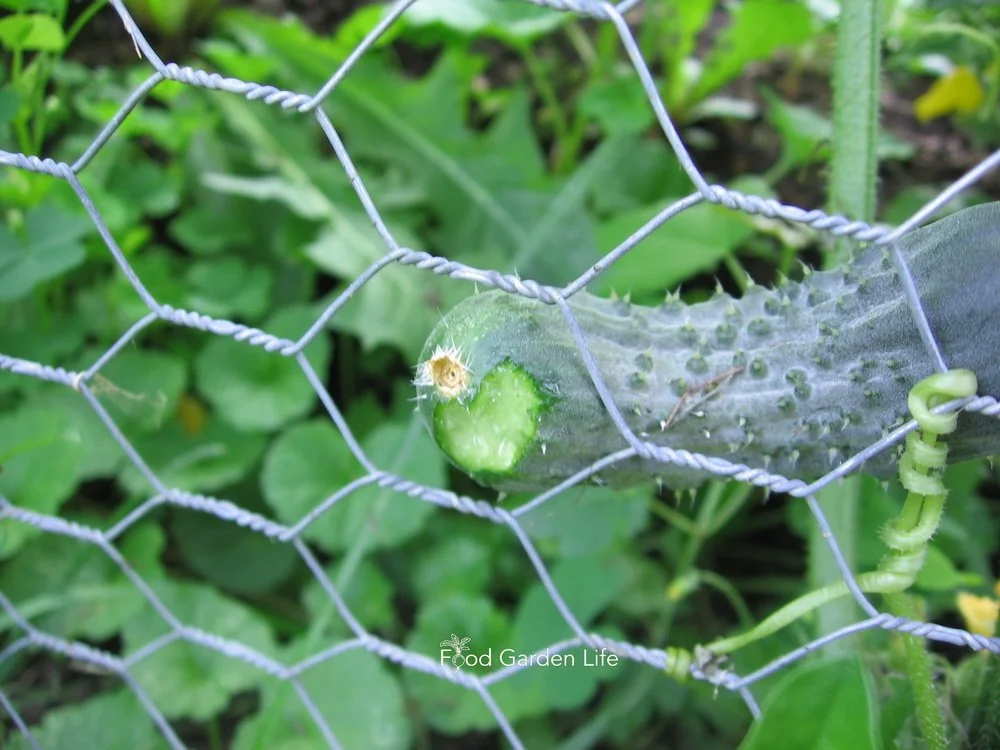
One way to deter squirrels is to exclude them, to prevent them from getting to your crops. They can’t dig up this newly planted bed protected by chicken wire.
Keep squirrels away from your crops using simple tactics to exclude them.
Be Cagey. When our rooftop melon crops were relentlessly destroyed, I put a big wire cage over top of the planter. This is not practical for large gardens. Nor is it pretty. But in some situations it's a practical solution. (Simple to put together with hardware cloth or chicken wire, zip ties, and bamboo poles.)
Cloak the Rows. A floating row cover (a.k.a. horticultural fleece) is a fabric that goes over top of the crop. It's usually used to hold in heat—but it's also an excellent squirrel deterrent. You can put the cover right over top of low-growing garden plants such as leafy greens, or use small hoops under the fabric for taller crops.
Protect Seeds in Pots. Squirrels often dig newly planted seeds from pots and containers. You come home only to find soil everywhere. Put a chicken-wire cover over the top of the pot or planter. Then remove it once the crops are growing. If the squirrel pressures are bad, leave it all season and let the seedlings grow right up through the holes in the wire.
Save Potted Plants. You can also use wire when potting up individual plants. Use wire cutters to make a hole in the wire for your plant to grow through. I saw an entire container garden grown in a squirrel infested neighbourhood using chicken-wire pot covers.
Trays Over Rows. Nothing is more discouraging that planting a row of seeds in the garden only to have a squirrel come and unplant them. Put upside-down web trays over newly planted seeds. Better yet, pin them down with a rock or brick so that if there's wind, they won't blow away. Great temporary way to discourage squirrels!
Flower Pots Repurposed. Same idea as the trays, above, except suited to a smaller area.
Wire Over Garden Rows. For the incorrigible diggers, you can temporarily lay chicken wire or hardware cloth over a newly seeded patch of garden.
Repurpose Cold Frames. The cold frame gives you something onto which to fasten chicken wire. Now you have a protected space for low-growing crops such as strawberries...and squirrels love strawberries.
Make a Tree Unclimbable. If squirrels are scaling a fruit tree, you might be able to sheathe part of the tree trunks in slippery metal, so they can't get to the tasty fruit above. Just keep in mind that squirrels do jump--and might be able to jump from an adjacent tree or fence...so this tactic doesn't work in all situations. The sheathing must be high enough above the ground and the tree far enough away that they can't just jump into it.
Skewer Teepee. Haven't tried this one, but a student told me how she protects newly planted tomato plants from being dug up by inserting pointy skewers (the sort used for kebabs), pointy side up, in a teepee formation around a plant or around the edge of a pot. Makes it unpleasant for the furry fiend to try to reach over it. I've also heard of people installing a row of upturned plastic forks to accomplish the same thing.
Transplants Instead of Seeds. Seed-grown sunflowers in the garden don't always work for us. Seeds get eaten before they can grow. That's when sunflower insurance comes in handy: We also start a few sunflower seeds indoors, and then transplant the seedlings into the garden a bit later.
It'll Come Out in the Wash. We've resorted to upturned laundry baskets as defensive measures for pumpkins. Ain't pretty. But it works.
Sheer Determination. A reader who is a custom drapery maker reports covering entire pots of tomatoes with sheer fabric, with a few supports to hold up the fabric. She notes that it's a bit of work to lift the fabric for harvest, but worth the effort. Sheer fabric, she says, is usually 118" wide, and sold by the yard. So a 3-yard piece of fabric is enough for a big pot of squirrel-foiling folly. Fun way to bring down the curtain on tomato theft! (Thank you Diane!)
Bottled Up. Thanks to a reader for this squirrel proofing hack for cucumbers. Take a 2-litre pop bottle, remove the label, and punch a few drainage/ventilation holes. (Soldering iron works well!) Once a cuke has formed, insert it into the bottle. If the plant is trellised, tie the bottle to the trellis. For really long English cukes (or luffa gourds or snake gourds), cut off the bottom of the bottle to allow it to grow longer. Or, force-fit your gourds into the shape of the 2L bottle! (Thank you Jurgen!)
Drink to Their Health. The bottle idea above makes me think of the pear liqueur my neighbour Dave talks about, with a large pear inside a bottle from which there's no way of retrieving it. Same idea as above: The fruit is inserted into the bottle while very small. Bet they can't chew through a glass bottle!
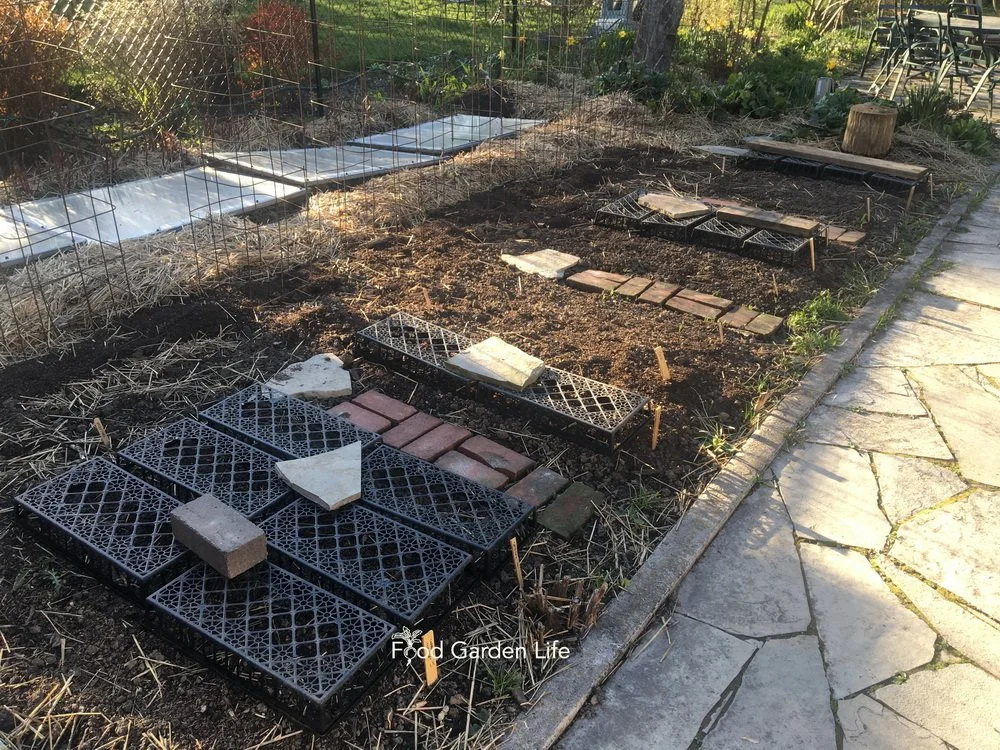
Plastic web trays that are used for transporting plants are a simple way to protect newly planted areas of the garden from digging squirrels.
Container Veg Gardening Course

Out of Sight, Out of Mind
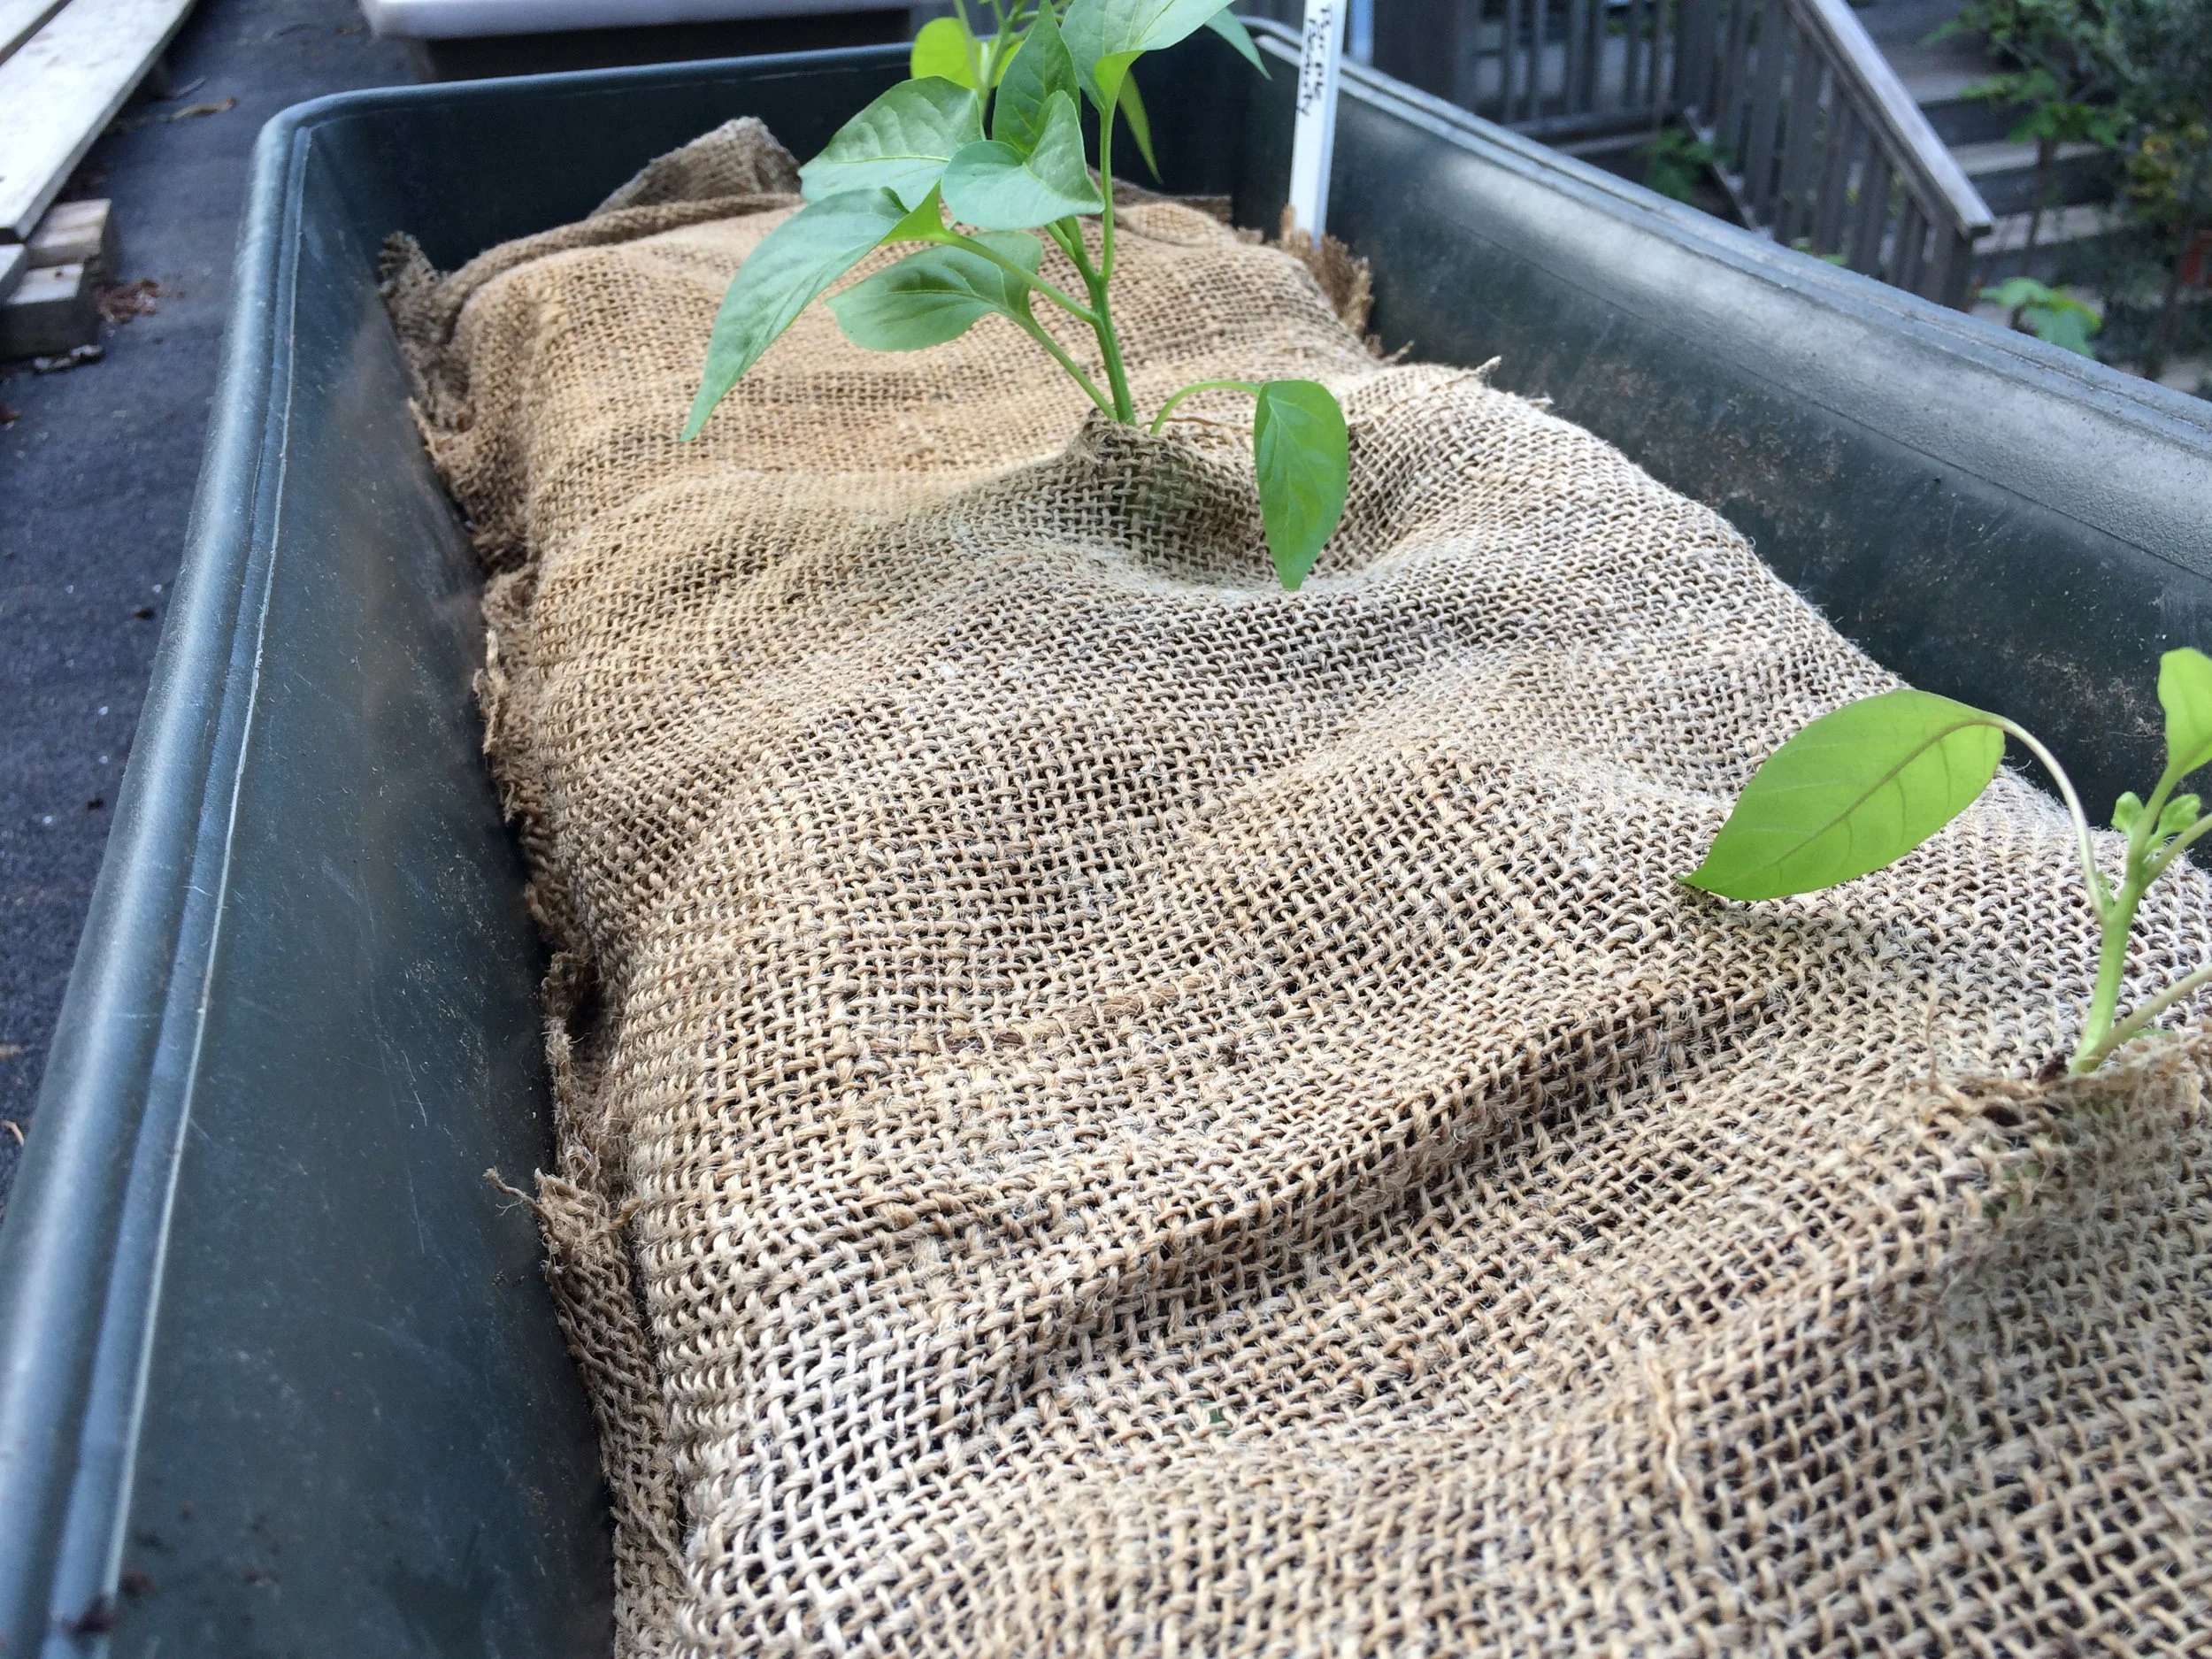
Putting the soil out of sight can really help reduce digging in newly planted containers. Pictured here is burlap.
Hide the Soil. When it's out of sight, it's out of their wee minds. Sometimes just putting the soil in your planters out of sight prevents digging. They don't see the soil, they don't dig. When I fill up planters with transplants, I first cover the soil with burlap, tucked in at the sides. I use a razor to cut an X for each plant, and then plant into it. A great thing about burlap is that it's a natural fibre that breaks down over the summer, and the scraps left at the end of summer can go onto the compost pile.
Mulch It. Same idea as the burlap above, but use a plastic mulch film over the soil, either in the garden or in your planters. I don't care for the appearance of the black biodegradable plastic mulches, but they do help cut back on digging. They also hold in soil moisture.
Bag it! I put organza bags over prized fruit such as my pawpaw and my Cox's Orange Pippin apples. There's been an occasional year where a wily squirrel figures out it can chew through the bag, but most years it works nicely. (The white bags are very conspicuous, but green ones blend into the landscape a bit better.)

Biodegradable plastic mulch is another way to cover the soil in containers, so that squirrels are not tempted to dig up newly planted crops.
Accept Help
You can't be there all day to chase squirrels away from your crops. But maybe there are other creatures that can help prevent squirrel damage.
(And I should also note here that I encounter wildly varying mindsets when it comes to what I share below. For some gardeners, squirrels are garden pests—and just like weeds, they don't want them in the garden. Other gardeners appreciate them as a form of amusement, and think of them as part of nature that they don't want disturbed. I'm with the former, or I wouldn't be writing this post.)
Pets and natural predators can be one of your squirrel-proofing strategies.
Get a Dog. One reader told me he doesn't have squirrel problems; he has a 120-pound German shepherd. (Thank you, Steve!) It’s worth noting that not all dogs have the knack. The squirrels torment a nearby pooch...they run back and forth along the fence, as the dog runs back and forth along the ground barking at them.
Get a Cat. My fig mentor Adriano told me squirrels weren't a problem for him because he had a cat. (I got a cat once...turned out to be a lover, not a hunter. It spent the day accosting passersby on the sidewalk, purring, did nothing to prevent squirrels having a party in my garden.)
Watch Like a Hawk. Red-tailed hawks dine on squirrel in the big tree behind my house. We heard two red squirrels telling off a hawk one day. It quickly picked off one, and then returned for the other. Two-for-one special. The red tails hang out in my yard because I didn't clear-cut all of the big trees.
Don't Forget Foxes. The summer foxes moved in a couple of doors down from us, there was almost no squirrel thievery. The sassy squirrels were quickly dispatched. Those that remained didn't seem eager to come out of the trees. The foxes made a den under a neighbour's shed. I'm glad he didn't try to scare them away.
This Didn't Work. When my kids were small I gave them sling shots and a bag of dried chick peas, thinking is was a perfect way to chase squirrels. We ended up with a hummus-like chickpea sludge on the garage roof. It didn't keep squirrels away...merely had them darting out of range.
The Right Timing Helps
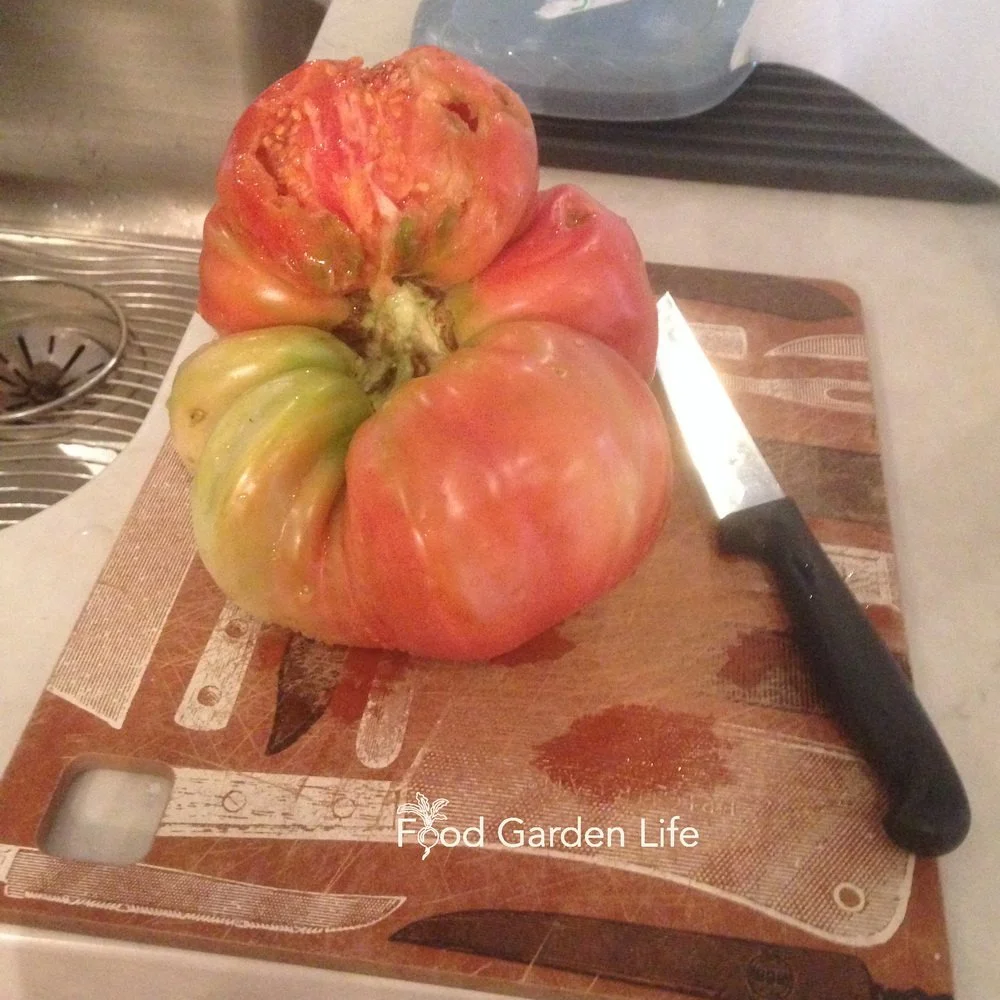
We should have picked this tomato a couple of days earlier, and then we would have had the whole thing…but we left it until it was pretty ripe, and a squirrel ate part of it.
Like many things in life, timing and patience can help you harvest more.
Go Back Later. When your newly sown seeds are repeatedly desecrated by squirrels in the spring, you'll want to pull out your hair. Exasperating. Or you find your potted plants unpotted! But sometimes if you wait a week or two, there's enough else going on in the garden that the critters find something else to do. Problem resolved.
Harvest Earlier. If you leave a big, juicy tomato on the vine until it's perfectly ripe, it might temp them. Pick it a couple of days earlier, though, and it's all yours. No nibbled-off sections. Tomatoes, like many other fruit, continue to ripen once you pick them, so you don't lose anything with this tactic. It works for apples, and melons too.
Crop Choice
Cut your losses through crop choice.
Bite This! Grow chili peppers and other hot peppers, which squirrels find distasteful. Contrast these to nice, plump bell peppers which they'll surely nosh on.
Small Wonder. Grow berries and small fruit such as currants and saskatoons. Even if they snack on a few, there's loads left for you. Contrast that to a dwarf apple tree, where they might take a bite out of each of the dozen apples on there.
Forget Big Apples. And if you must grow apples, try a culinary crab apple. ('Dolgo' makes a lovely apple sauce and a divine ice cream.) With crabapples, you get lots of smaller apples instead of a few big ones, so there will be some for you even if the squirrels steal a few.
Bye-Bye Beefsteak. When you have a tomato plant with a half dozen lovely big beefsteak tomatoes, and lots of squirrels about, you're setting yourself up for a blood pressure spike. Because they'll want to taste each of them. But if you plant a cherry tomato variety with hundreds of smaller fruit, there's lots for you too.
Go Green. I haven't seen research to back this up, but I feel like my green-when-ripe tomato varieties and my green figs fly under squirrel radar.
Knight in Shining Armour. We love litchi tomatoes, a spiny tomato relative that's really quite delicious. The plants, though, are quite ferocious. Horrid to work with. And the fruit are clad in a squirrel-proof spiny armour.
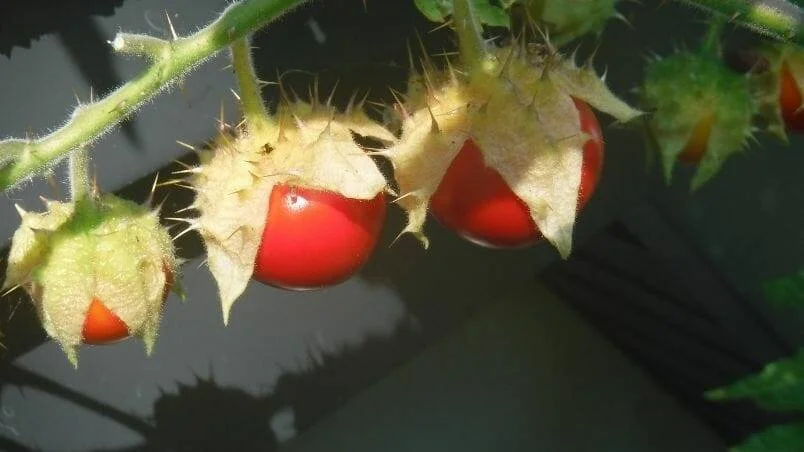
Litchi tomato is covered by spines. The covering finally opens as the fruit ripens. They’re a great crop where there are heavy squirrel pressures.
Repel Squirrels
Over the years, I've heard of all sorts of sprays and scents that people swear by. None have been as effective for me as cayenne pepper, see below. There are many scent deterrents. Some scattered in the garden, some sprayed on. The main thing to remember is that they usually need frequent reapplication.
Feeling Hot, Hot, Hot. A hot pepper decoction sprayed on your prized fruit can make it less appealing to squirrels. It’s a fair bit of work: you need to make the decoction and reapply it after rain. This sort of diluted spray is gentler and more controlled than sprinkling powder, which can irritate animals if it gets into their eyes. As with any deterrent, the idea is to discourage—not harm.
Make it Nicer to go Next Door. In the same way you put burglar alarm stickers on your windows so burglars will go next door, grow something that squirrels don't like—so they go next door. I interplant flower bulbs such as tulips (which squirrels love to steal) with daffodils and fritillaria, which squirrels hate. Imagine that, you can plant bulbs to discourage squirrels!
If you like the idea of interplanting, here’s more (thanks Gail!): Plant bulbs like a layer cake, with tulips (which squirrels like) on the bottom, and then a layer of soil followed by narcissus and daffodil (which the squirrels don’t like). Of course, this does nothing to halt the bud-nipping as they’re about to flower…
Make Your Yard Less Attractive
Don't make your yard a gathering place, where they'll happen upon your strawberries or tomatoes when they come for a daily dose of bird seed.
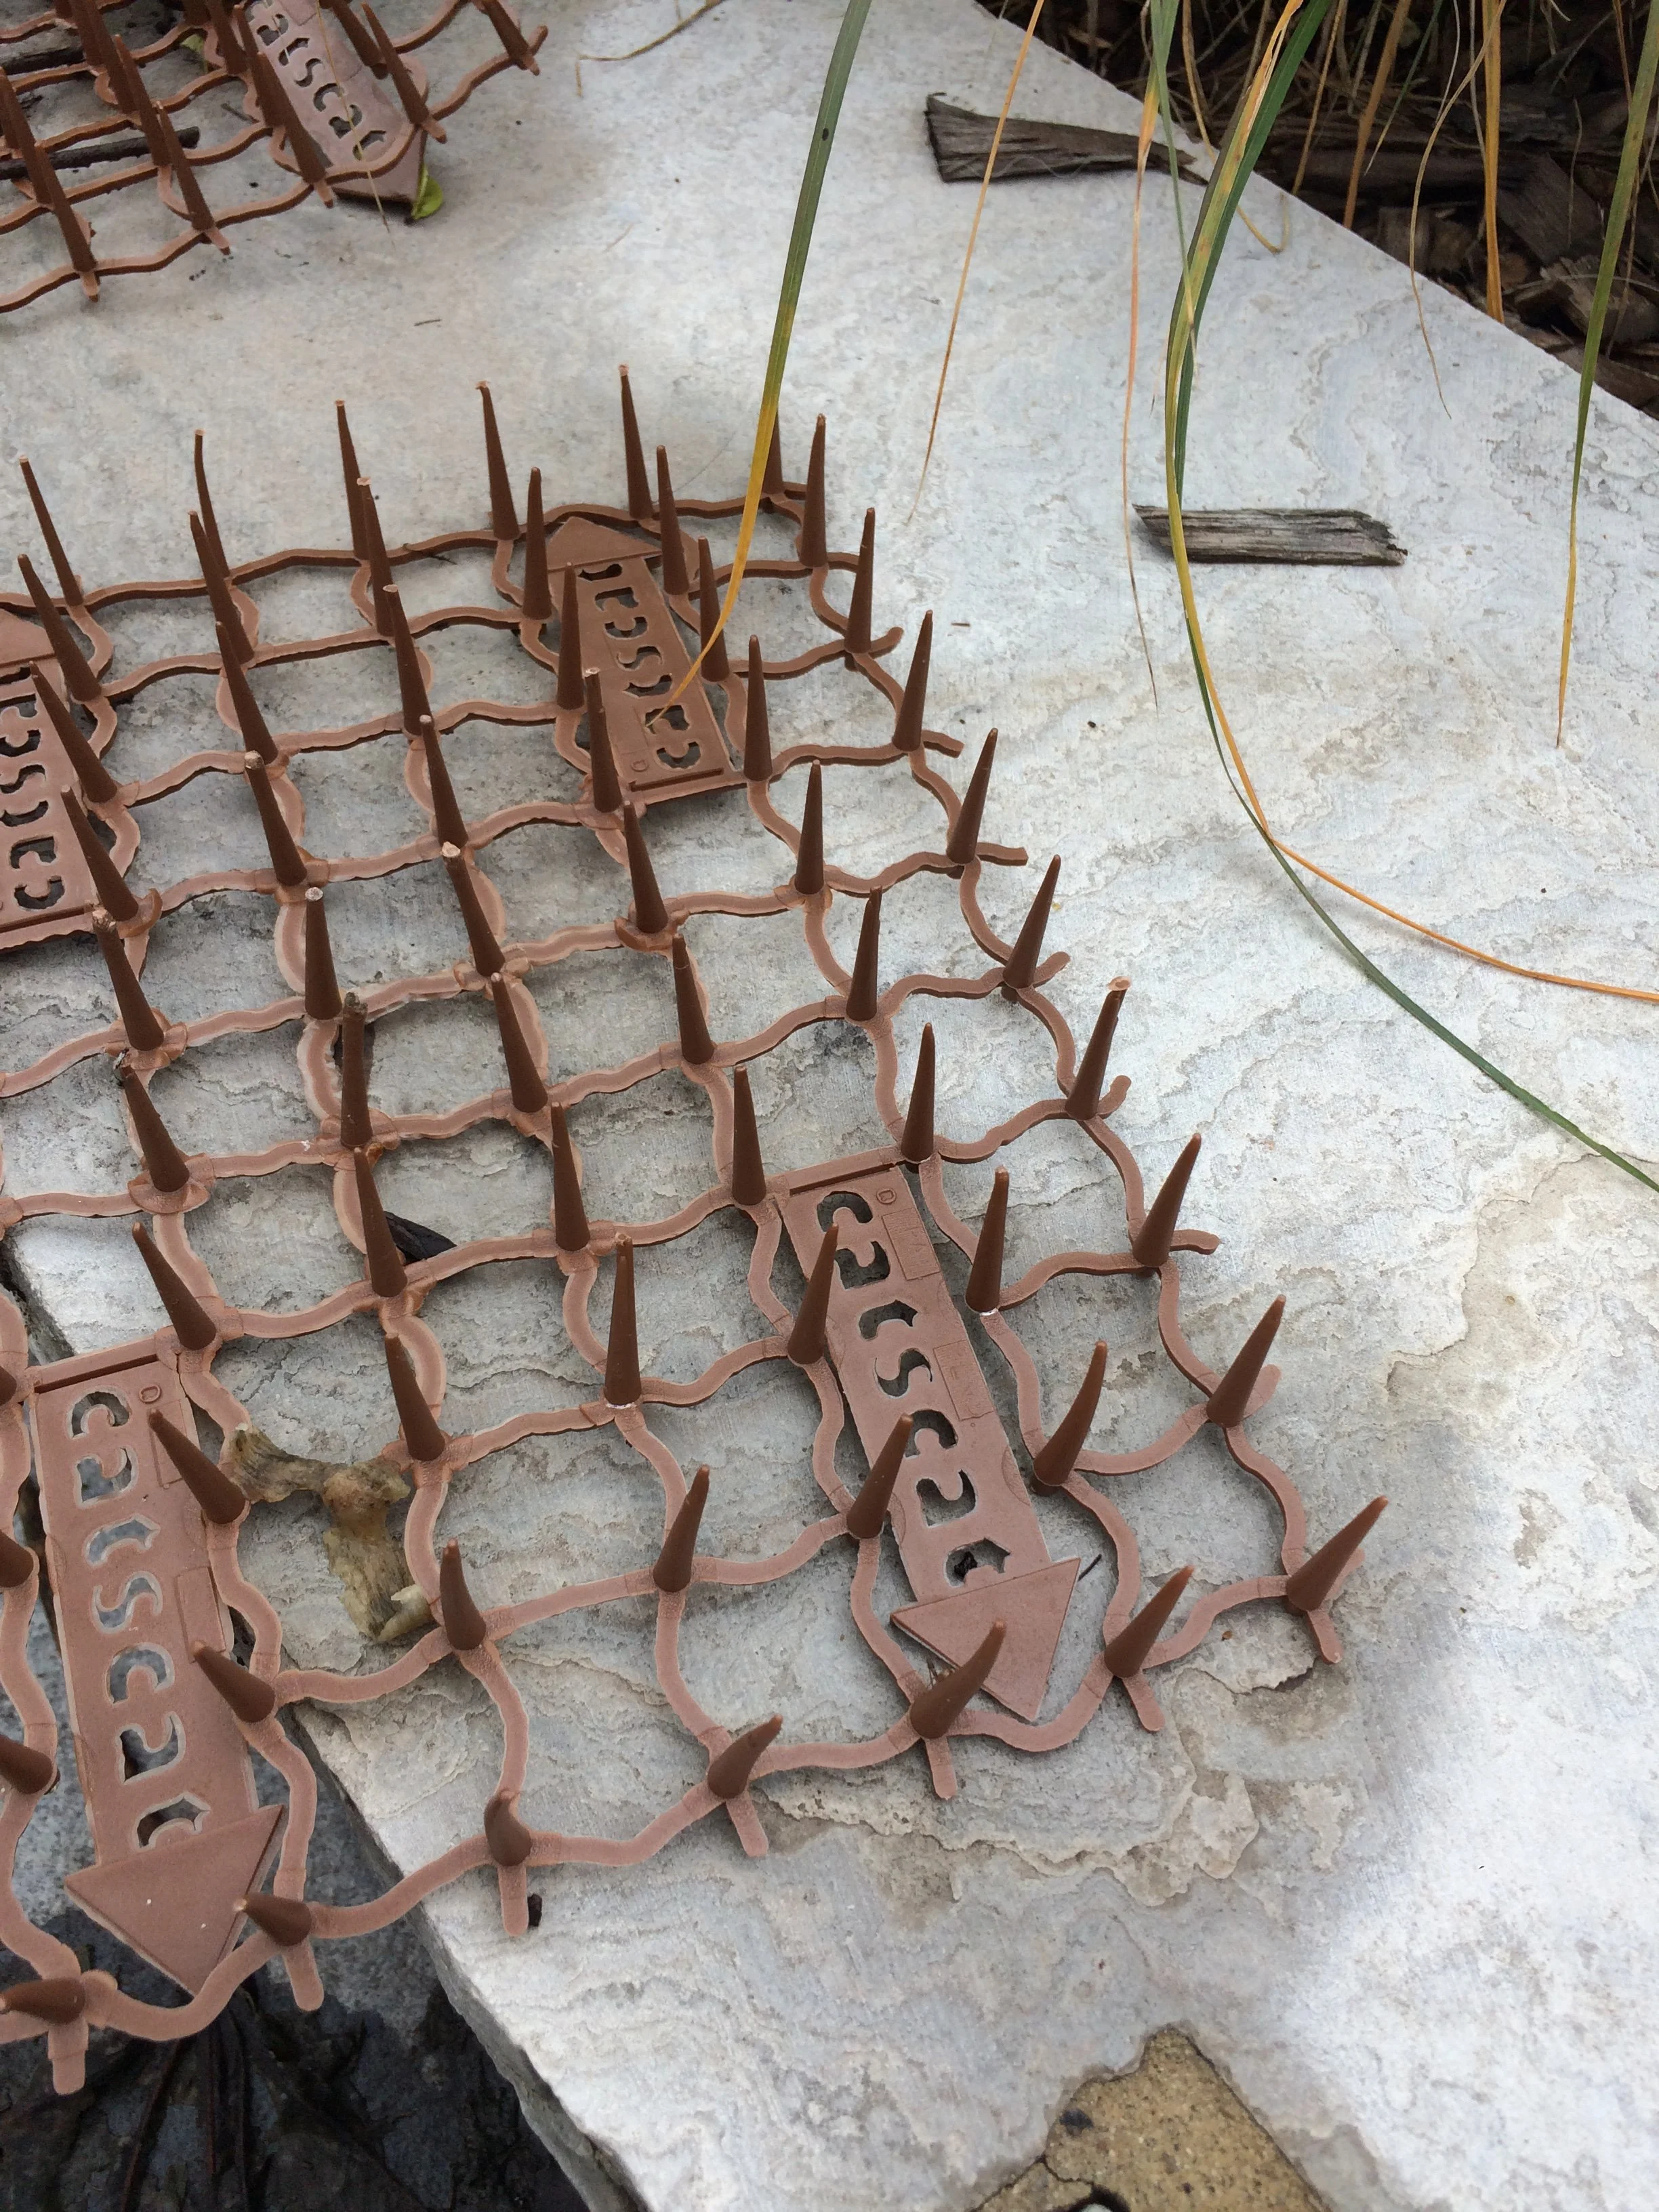
This sort of spike mat is often used to deter pigeons, but can also make it difficult for squirrels to launch themselves towards somewhere you don’t want them, such as a bird feeder.
Baffle Them. As a gardener who enjoys bird watching, I don't propose you get rid of your bird feeder. But do get baffles or a squirrel-proof bird feeder. There's still bird-seed spillage, but at least you're not serving up a smorgasbord.
Flip Them the Bird. A neighbour finds that hanging the bird feeders on a clothes line isn't enough. They soon figure out how to get to them. But put noodle over the clothesline, and as the pool noodle begins to rotate under the creature's weight, the thief flips off! (Thank you, Mary!)
No More Acrobatics. A neighbour has squirrel baffles on her bird-feeder poles. But the squirrels quickly figured out that they could launch themselves from her deck railing—and about half the time, reach the feeder. Quite amusing to watch, actually. Spiky mats (often used to keep pigeons off of window ledges) on the deck railing cut short the runway for the launch.
Feed Birds Seasonally. Have the squirrels been in the habit of hanging around under your bird feeder all winter? Break the habit. Don't put out feed through the growing season.
Good Housekeeping. I'm not a believer in garden perfectionism, but I do tidy up when my neighbour's black walnut tree unloads bushels of black walnuts into my yard. No point making my yard a destination for bushy-tailed beasts. If your yard is littered with other favourite treats such as acorns, pine cones, fallen nuts, and fallen fruit, tidy up.
For Your Sanity
It's OK to Yell. Mom had a bird feeder outside her kitchen window. The squirrels appreciated it. And every so often she'd fill a pot of water, open the door, yell, and fling the water at them. They'd soon be back, but she felt better. I'll sometimes open the door and say rude words if there's one sitting on my deck railing with a fig.
It’s OK if your kids yell too. Anna writes, “My (not-at-all-scalable, and only-effective-during-waking-hours) solution is my six year old. She chases them out of the garden—usually shouting. Obviously not an effective solution if she's sleeping or at school. She's pretty effective at getting rid of hungry pigeons too.“
Slide Show. It can be fun to smear Vaseline on a bird feeder pole simply to watch squirrels climb it and slip and slide back down the pole.
Landscape with Fruit Course
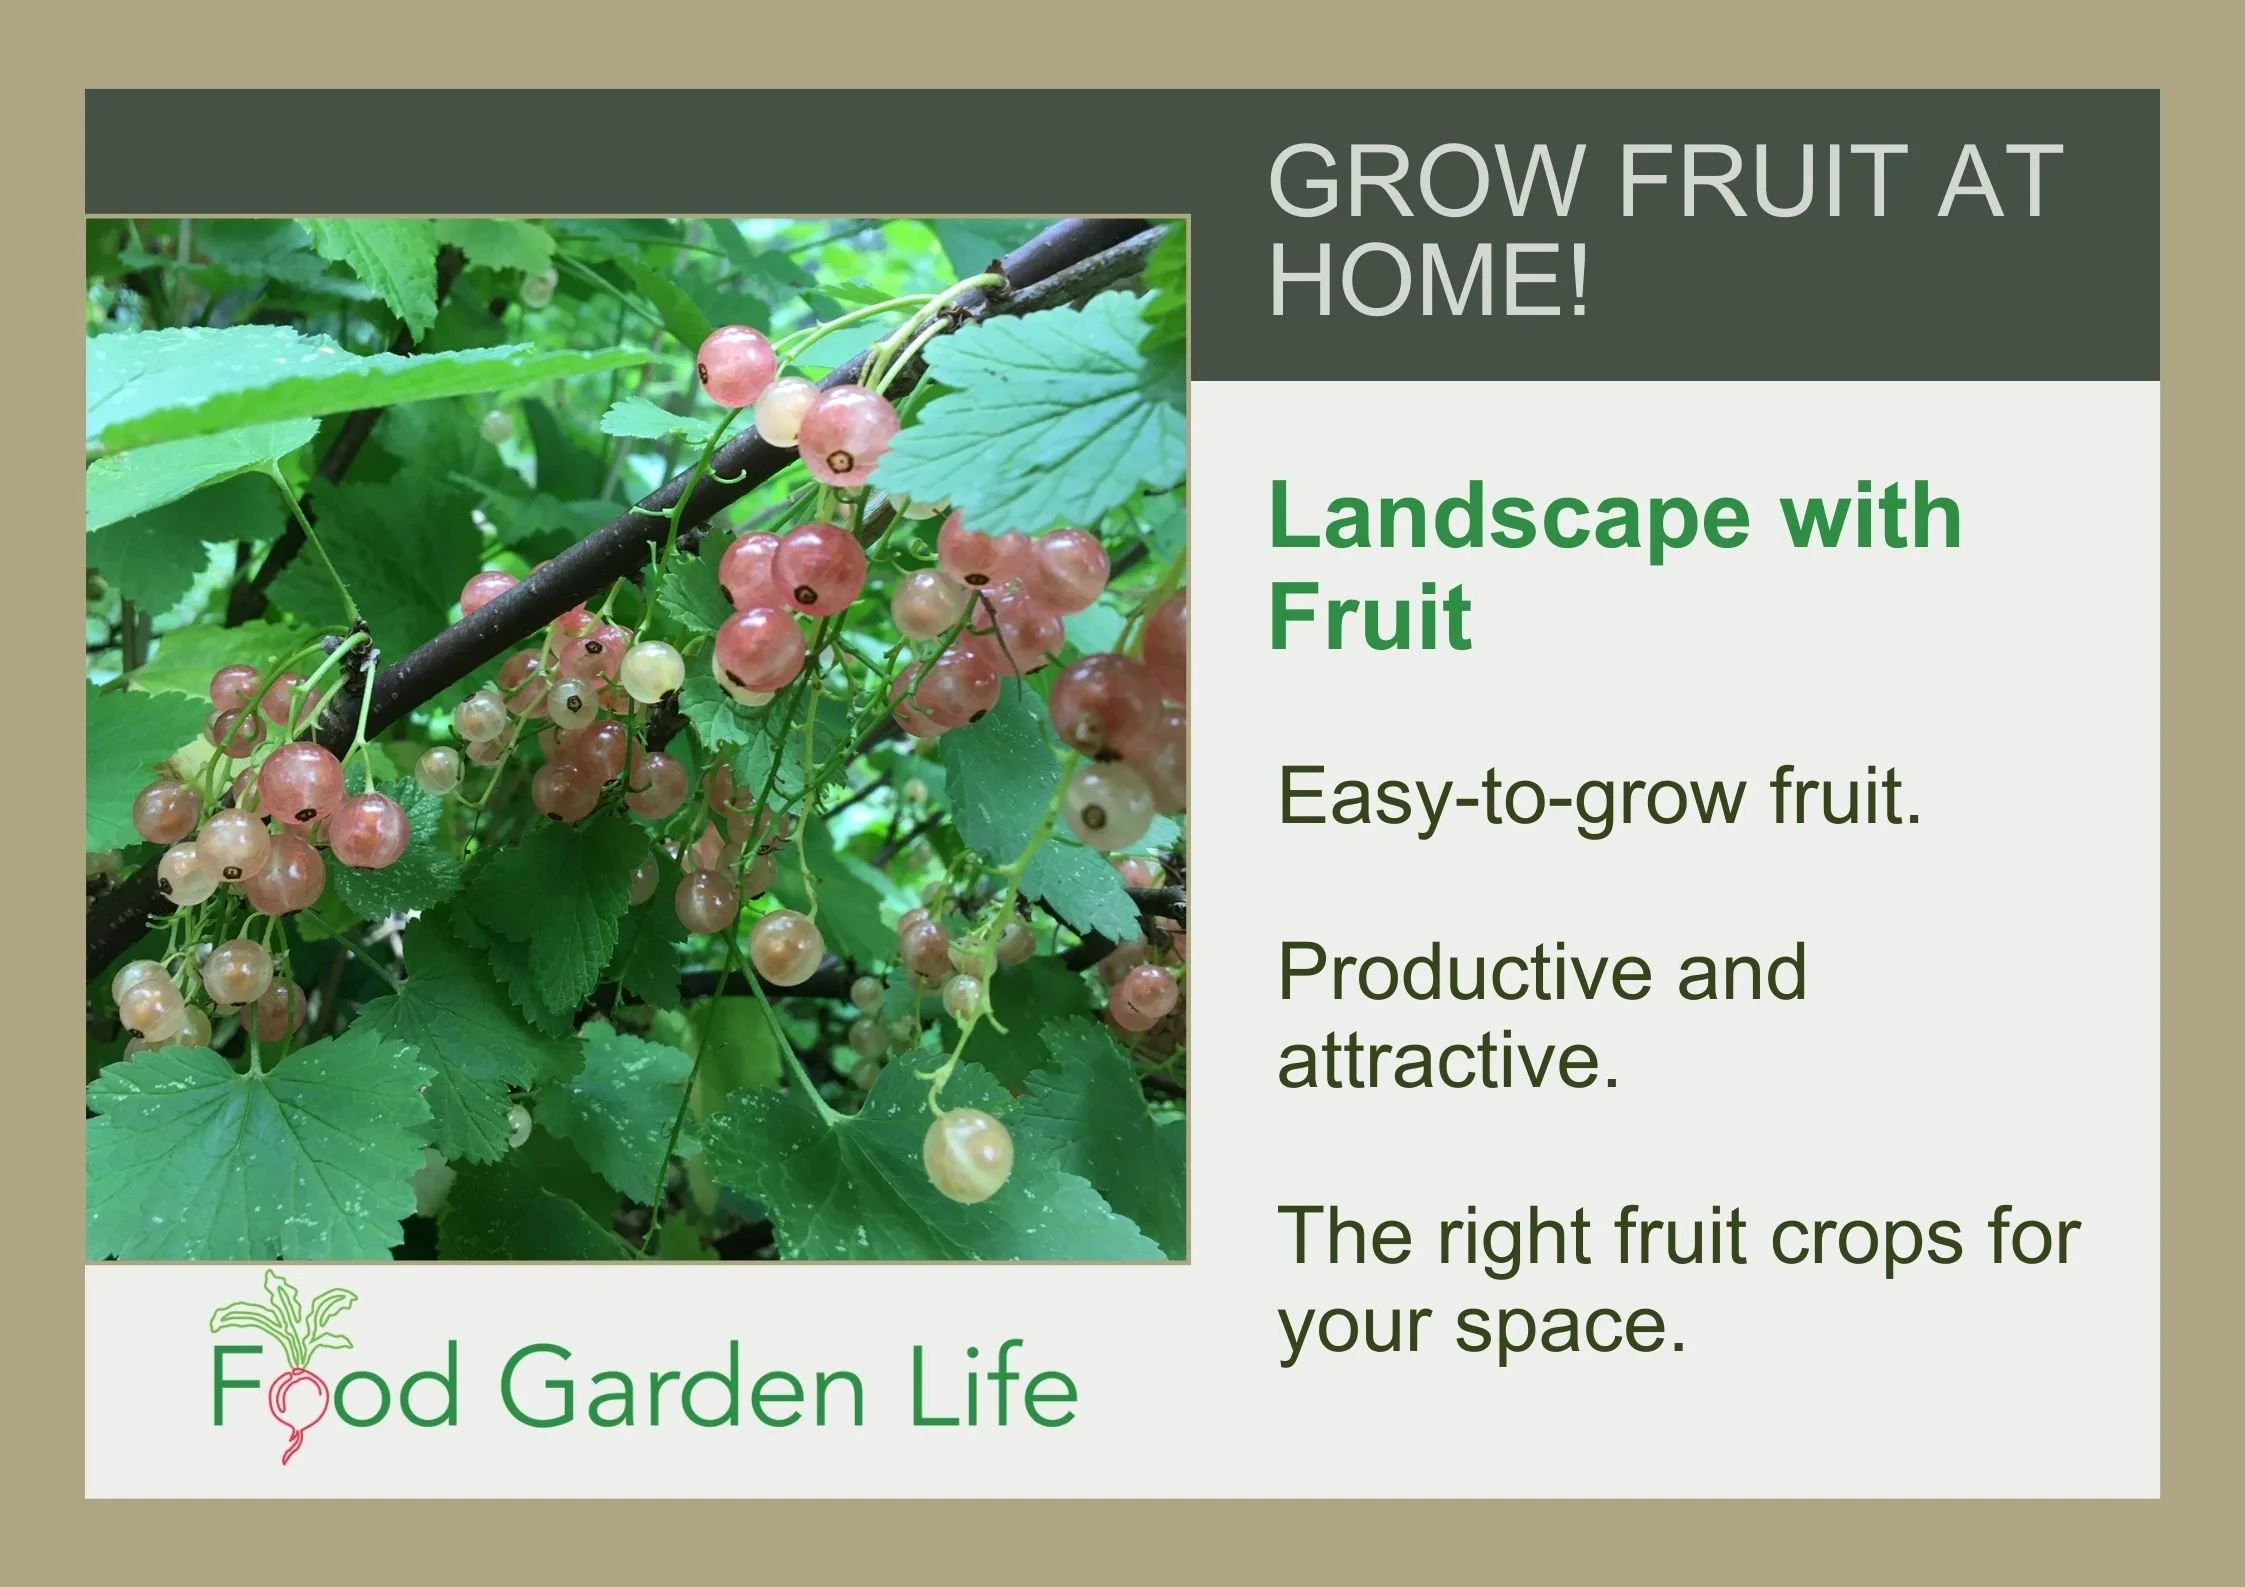
Things I Haven't Yet Tried
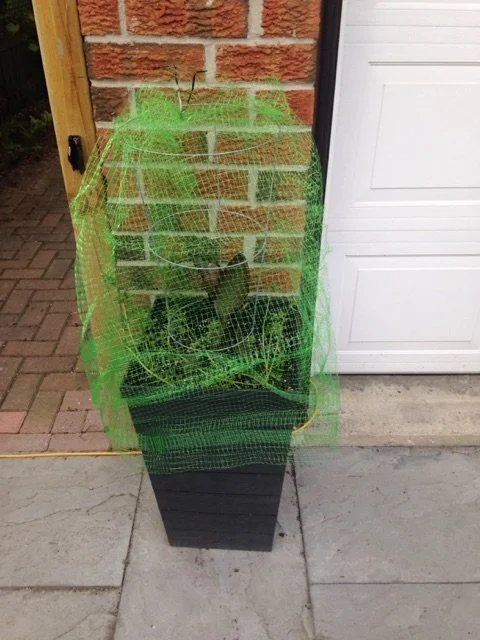
Plastic bird netting to keep squirrels away from a flower pot.
Squirrels Have you Tearing our Your Hair? Try this! A reader writes that she uses hair from her hairbrush around tulips to deter red squirrels from nipping off tulip flowers. She's planning to do the tomatoes next...but it takes lots of hair, so collect it all year to be ready for summer! (Thanks Sandra!)
Decoys. Plastic owls or snakes. Though I've seen these used as deterrents by giant pumpkin growers, I recall the squirrels climbing the pole with a plastic owl in my parents' garden...so I'm not sure.
Hot Sauce. Some people swear by hot sauce. I'd just go for a cayenne pepper decoction. Cayenne powder costs less. And why make your garden smell like a plate of chicken wings from the pub?
Plastic Netting. I've known tormented gardeners to put a shower cap of plastic bird netting over planters. Prefer netting that’s barely visible? Black netting is another option. (Thanks Kathleen!) If you're growing something that they really want to get to, a physical barrier such as wire mesh will give better protection.
Motion Activated Sprinklers. A friend found that a motion activated sprinkler solved the problem of raccoons eating all his figs. So you might want to try it with squirrels...though I suspect you'll find you have a high water bill, and an overwatered garden.
More Scents. Some people swear by peppermint oil, coffee grounds, garlic, or even chive plants as squirrel repellents. I don't have an opinion as I haven't experimented with these. The main thing to remember with scent-based repellents is that you must reapply frequently. Recently I’ve heard people talking about using the dry, pelleted hen manure that we can buy here, though I haven’t experimented with it.
Quench the Temptation. Suzanne writes that she's heard squirrels take a bite of tomatoes because they're thirsty. So she's put a bird bath near the veg patch. Not scientifically proven, but she's finding it works. (Thanks Suzanne!)
Straight Shooter. In urban areas, squirrels might be considered wildlife and afforded protection. Not so in many rural areas. I've had rural readers write to say that with a good dog and a .22, they don't lose their crops. (Thanks Esther!)
Do you have experience with any of these? Or other squirrel repellents to report? I'd love it if you email me to tell me.
I Wish I Could Find a Study…
What’s the Scoop on Poop? A number of garden centre employees have recommended pelleted chicken manure to me as a squirrel deterrent. And there are lots of blog posts touting it. But I have yet to find research that digs into chicken manure as a squirrel repellent. If the chicken manure does work, it could be because of a couple of things: The odour is a deterrent; or the odour masks smells that cause squirrels to dig.
Don't Waste Your Time
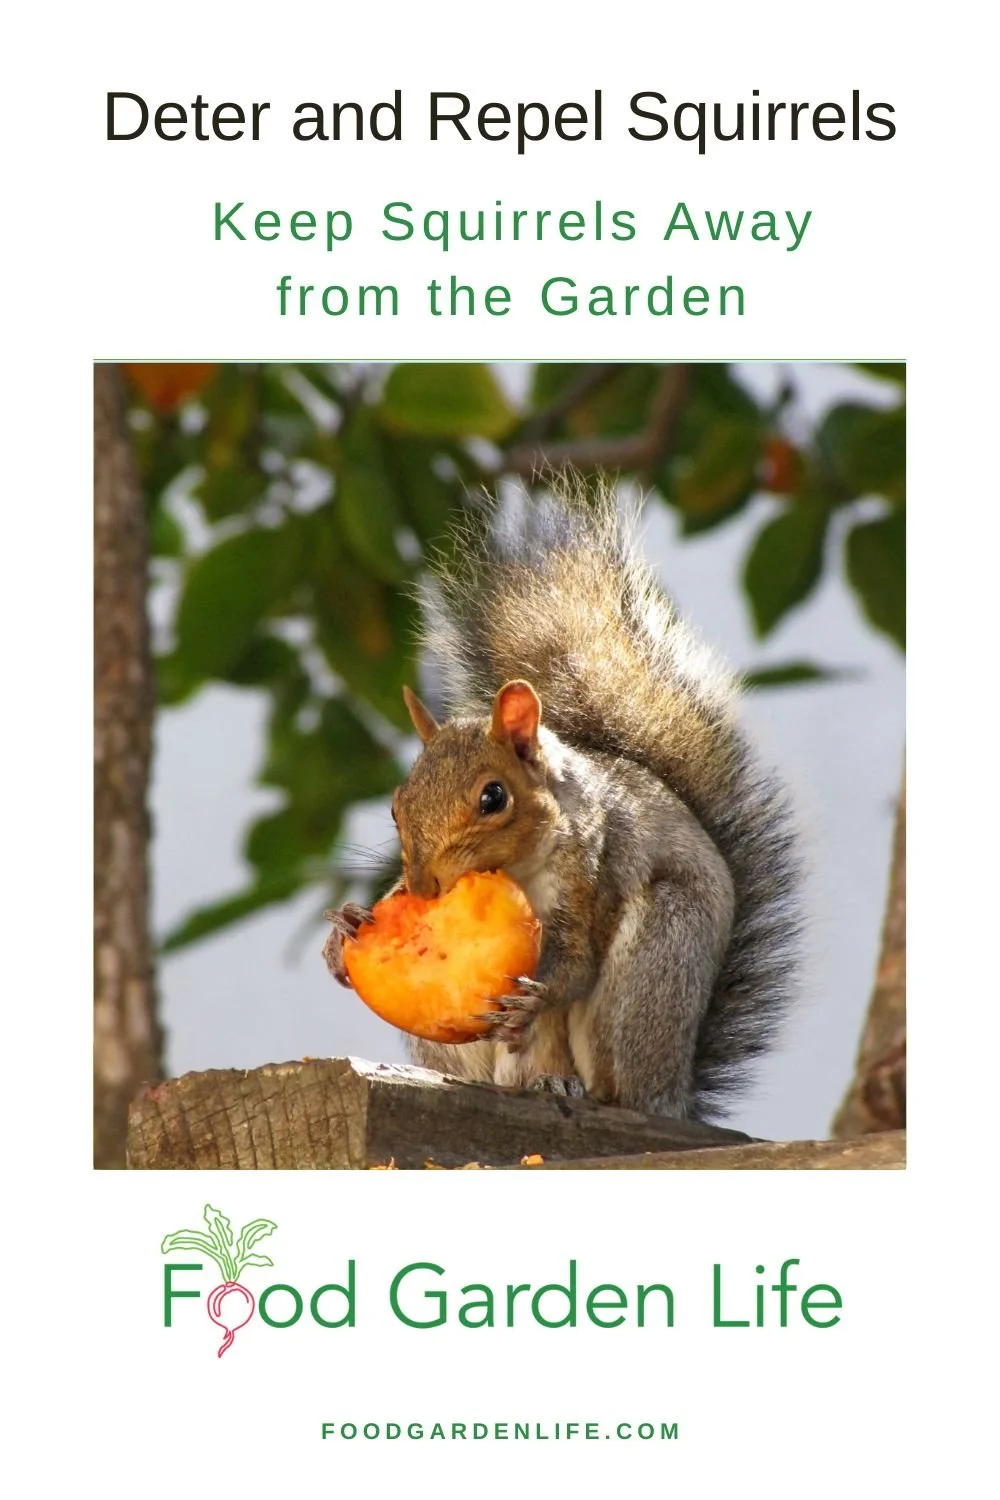
Pin this post!
Don't Blow Your Top. I was out for a stroll one night when I saw my neighbour Joe chasing a squirrel. The squirrel had the last of the dozen apricots from his dwarf apricot tree. He didn't get the apricot back. Squirrels will outrun you.
On the Dot. My neighbour Bob thought he'd save his fruit crops by trapping squirrels and relocating them. He'd drive 3 km, across a very busy, 6-lane road, to a natural area where he'd release squirrels. When he became suspicious that he was still seeing the same squirrel, he marked an orange dot with spray paint on its back. Yup, same squirrel.
Pee. I once lived in a rental house with an attic overflowing with squirrels. They were always pouring out of the holes they'd chewed in the soffit. I could hear them up there. Sounded like a square dance. The landlord swore by the predator urine (I think coyote) that he paid big bucks for, bathing the roof of the house with the stinky granules. The pest-control technician who he finally dispatched laughed when I mentioned the urine. "Doesn't work," he said.
When All Else Fails
Gardening should be a pleasure. Use a combination of the ideas so that you can harvest more. And know that, as a home gardener, you’ll probably have more losses to pests than a commercial grower. But you can still harvest lots for yourself.
Suck it, squirrel!
Find This Helpful?
Enjoy not being bombarded by annoying ads?
Appreciate the absence of junky affiliate links for products you don’t need?
It’s because we’re reader supported.
If we’ve helped in your food-gardening journey, we’re glad of support. You can high-five us below. Any amount welcome!
Food Gardening Articles
Food Gardening Courses
Find out how to grow more great food at home with our online courses. We have both live and self-paced courses.
How to Make a Wicking Bed: A Raised Garden Bed that Keeps the Soil Moist
Harvest more and water less when you grow in a wicking bed. Find out how to make a wicking bed.
By Steven Biggs
Harvest More and Water Less with a Wicking Bed Garden
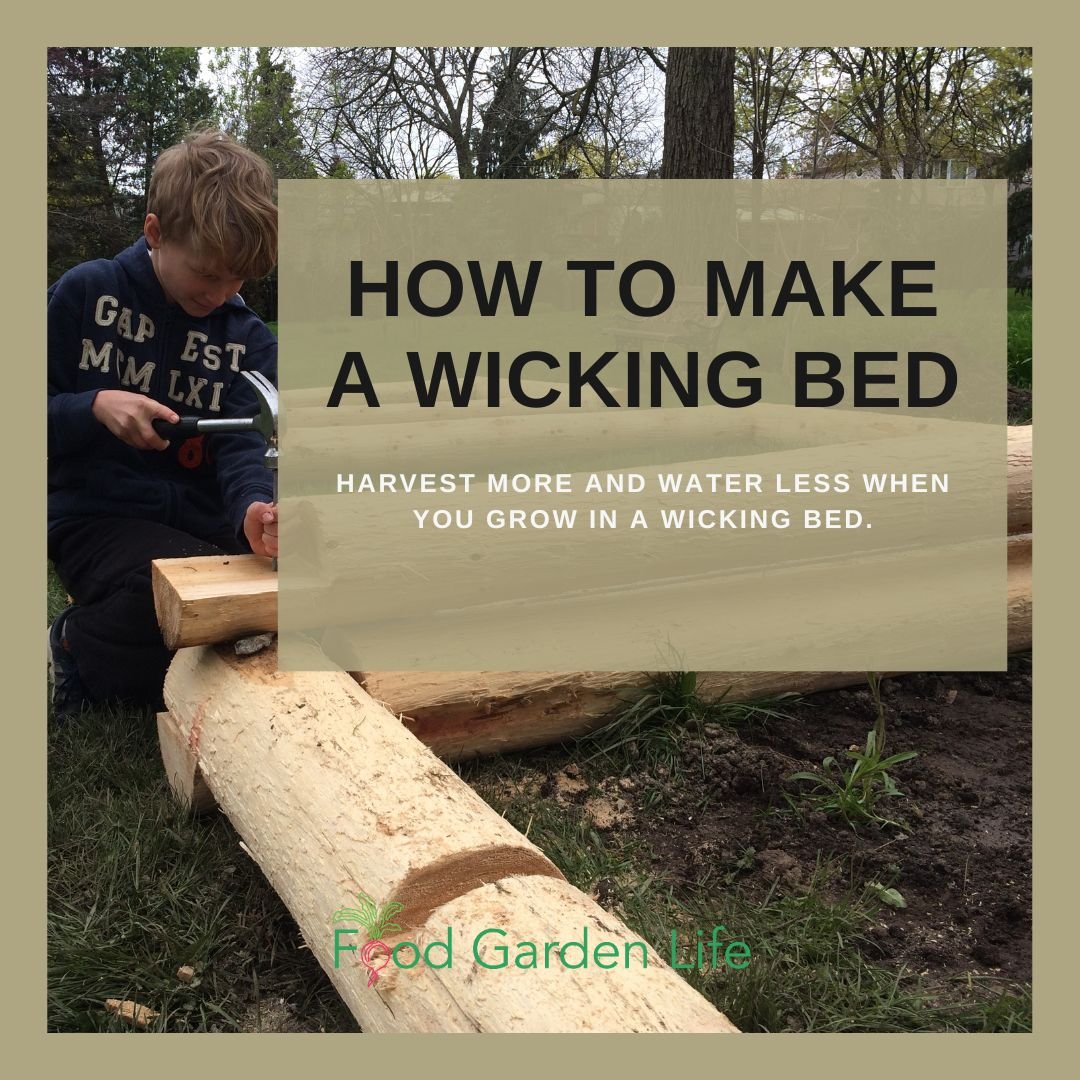
The potting mix in the wicking bed will wick moisture up to where plant roots can get it.
Wicking beds are a great way to maximize the use of space in a small garden. That's because this sort of raised bed keeps the soil continuously moist.
And that continuously moist soil is great for your crops.
With ample soil moisture, you can plant more densely. And with ample moisture, your crops produce more for you.
There's one other benefit of a wicking bed: You spend less time watering. Instead of frequently watering by hand or setting up a sprinkler, now you can fill up your wicking bed with water...occasionally.
Want to water less often? Want crops that thrive because they get consistent soil moisture? Keep reading to find out how to make this type of self-watering garden bed.
What's a Wicking Bed?
A Raised Garden Bed with Plumbing!
A wicking bed is simply raised bed with a water reservoir (a water storage area) at the bottom.
Water moves upwards (it "wicks") from the reservoir into the soil layer above. This "wicking" is the same ideas as what happens in an oil lantern as oil moves up the wick.
Wicking beds work the same way as sub-irrigated planters (a.k.a. SIPS or “self-watering” pots): Water wicks upwards into the soil above through capillary action. But while a sub-irrigated planter is often small enough to be picked up and moved, a wicking bed is a large, stationary raised bed.
Continuous Moisture Means Less Plant Stress
And Higher Yield
When there isn't enough moisture in the soil for plants, it's a stress.
And that stress affects yield.
Because the soil in a wicking bed remains moist, the plants don't have water stress. Without that stress, the increase in yield can be considerable.
(Of course, no one minds the time saved by having to water less frequently!)
Even in the heat of summer, when the plants are quite big, we water our wicking beds about once a week.
We turbo-charged our production by growing our vegetable plants in wicking beds.
Another Reason to Use a Wicking Bed
Edible Gardening near Black Walnut Trees
Our neighbour's large black walnut tree is beautiful. But walnut trees give off a compound called “juglone.”
And juglone affects the growth of many plants…including tomatoes.
We tried growing tomatoes in the backyard many times…and they always died.
We solved the problem by growing tomato plants in wicking beds. That's because the tomato plant roots never get into the juglone-contaminated soil below.
Find out about juglone-tolerant plants for gardening near black walnut trees.
Want to Ace Your Container Garden?
Find out about top crops, how to choose the right soil, feeding your plants, and what to look for as you're choosing containers. More on Vegetable Container Gardening Class.
Make Your Own Wicking Bed
Wicking Bed Design - Be Creative!
Be creative! You might want to make a wicking bed from salvaged material—or maybe you want a bed that ties in with the aesthetic in your landscape. (I think a red-brick wicking bed would look nice in my garden! One day…)
Later in this post you'll see photos of wicking beds that I made with my kids. I used cedar fence posts. But there are all sorts of materials you can use to make them.
Not sure what to build your wicking beds with? Here are thoughts to start with:

Be creative with the materials you choose for your wicking beds. We used cedar fence posts to make our wicking beds.
Find something that ties in with the aesthetic in your garden
Choose materials that are good value
See if you have materials on hand that you can reuse as you make your beds
Here's why I chose cedar fence posts:
They are long-lasting and not much more expensive than dimensional lumber
I didn't use treated lumber because it's not suitable for edible gardening
I didn't use dimensional lumber because raised beds made with dimensional lumber often sag outwards over time
I used pond liner to create the reservoir because I already had liner from a former pond
Wicking Bed Workings
The Raised Bed
There are many materials you can use to create the frame for your wicking bed.
I've seen wicking beds made from:
Large plastic bins
Intermediate bulk containers (IBCs)
Cinder blocks
New lumber
Recycled wood
The Reservoir
The bottom of your wicking bed must hold water. It's the water reservoir.
If you're making the wicking bed from a container that is closed at the bottom (for example, an intermediate bulk container), you won't need to line the bottom of the bed to create the water reservoir. (Instead, you'll drill a hole at the top of the reservoir level for excess water to drain away.)
If you make a wicking bed from wood or stone, it won't be sealed at the bottom. So you'll need to create a reservoir at the bottom to hold water. Do this by lining the bottom of the bed with some sort of liner. Choose a material that is durable enough so you won't need to take apart your wicking bed to repair a puncture. Pond liner is very durable, and widely available.
The Plumbing
A wicking bed has a "fill tube" that extends up above the soil layer. You might also see this called the "inlet pipe."
Down below, the fill tube reaches into the reservoir area. This tube is how you add water to the reservoir. Simply put your hose into the tube and leave the hose running until the reservoir is full.
Ideas for what to use to make a fill tube:
Dishwasher drain hose (that's what I used, as it's big enough that I can put the hose into it when filling the wicking bed)
PVC pipe (sometimes called a PVC inlet pipe)
Downspout
You also need to have some way for excess water to escape once the reservoir is full. So that your plants don't have wet feet after heavy rain or if you fill it for too long!
In other words, once the reservoir is full, any additional water drains from the bed.
Ideas for an overflow:
In the case of my own wicking beds, the liner only extends up to the height of the reservoir level, so and excess water drains out behind the liner and through the cedar posts...no fancy fittings or overflow tube required
For IBCs and rigid beds, drill holes at the desired overflow level
Some gardeners also install an overflow pipe or overflow tube through the hole...looks a bit more tidy
The Wick
The water moves upward from the reservoir into the soil mix through capillary action. In other words, it wicks.
But for it to wick properly, it has to be able to move up and along something. Luckily, gravel works well. So gravel is often used to fill the reservoir area.
This might sound strange to you, filling an area intended for water with gravel. But there can be lots of open space between particles in some types of gravel...and that space is perfect for holding water.
The type of gravel available to you depends where you live. Some people use pea gravel. Around here, it's easy to get what's called 3/4" "clear" gravel which has only large rocks. That's what you want. Make sure the gravel doesn't also include fine particles too, because fine particles fill up the space that we want for the water.
A layer of landscape fabric over top of the gravel prevents soil from filling up the spaces in the gravel.
The Soil
Don't cheap out on soil. It's critical.
The soil must have good wicking action. Capillary action.
And to have that, it should have lots of air spaces within it.
So don't use straight top soil. It often packs down too much. A high quality potting mix or soil amended with lots of organic matter is better suited to making a wicking bed.
IMPORTANT POINT ON SOIL: The water will only wick upwards so far. That means if the soil is too deep, water won't wick all the way to the zone where your plant roots are. Aim for a soil depth of 30-40 cm (12-16").
Other Options
There are many ways to make a wicking bed, so if you research the topic don't be surprised when you find all sorts of variations.
Plumbing! If you're a do-it-yourselfer, you might be interested in hooking up a water supply and shut-off! I've seen videos where people demonstrate this sort of set-up, using the same sort of plumbing supplies used for toilets. When the water level gets low, this sort of system automatically refills the reservoir.
Weeping tile. A perforated pipe or drain tile in the bottom area along with the gravel permits water to quickly move through the reservoir. It also means you don't need as much gravel. You’ll see weeping tile in the pictures of my wicking beds, below.
Materials List for My Wicking Bed
Here's what I used to make wicking beds.
Cedar fence posts.
Pond liner. The pond liner holds water in the bottom of the bed. Once the sides of the pond liner are folded upwards and fixed into place, it creates a shallow water storage area at the bottom of the bed—about as high as the weeping tile.
Weeping tile.
3/4” gravel. Use “clear” gravel, which means that it does not have smaller pieces of gravel that will fill up the spaces in between. That way the space is available to hold water.
Dishwasher drain tube. To create a fill tube, sometimes called an inlet pipe.
Landscape fabric. Its purpose is to keep the soil from filling up the weeping tile and the spaces between gravel.
Soil. I used a mix of high quality potting mix blended with compost.
Steps for Making a Wicking Bed
Cut posts to length and notch the ends.
Place notched posts directly on the ground. Level the ground first.
Nail spikes into the corners of the posts to keep them in place.
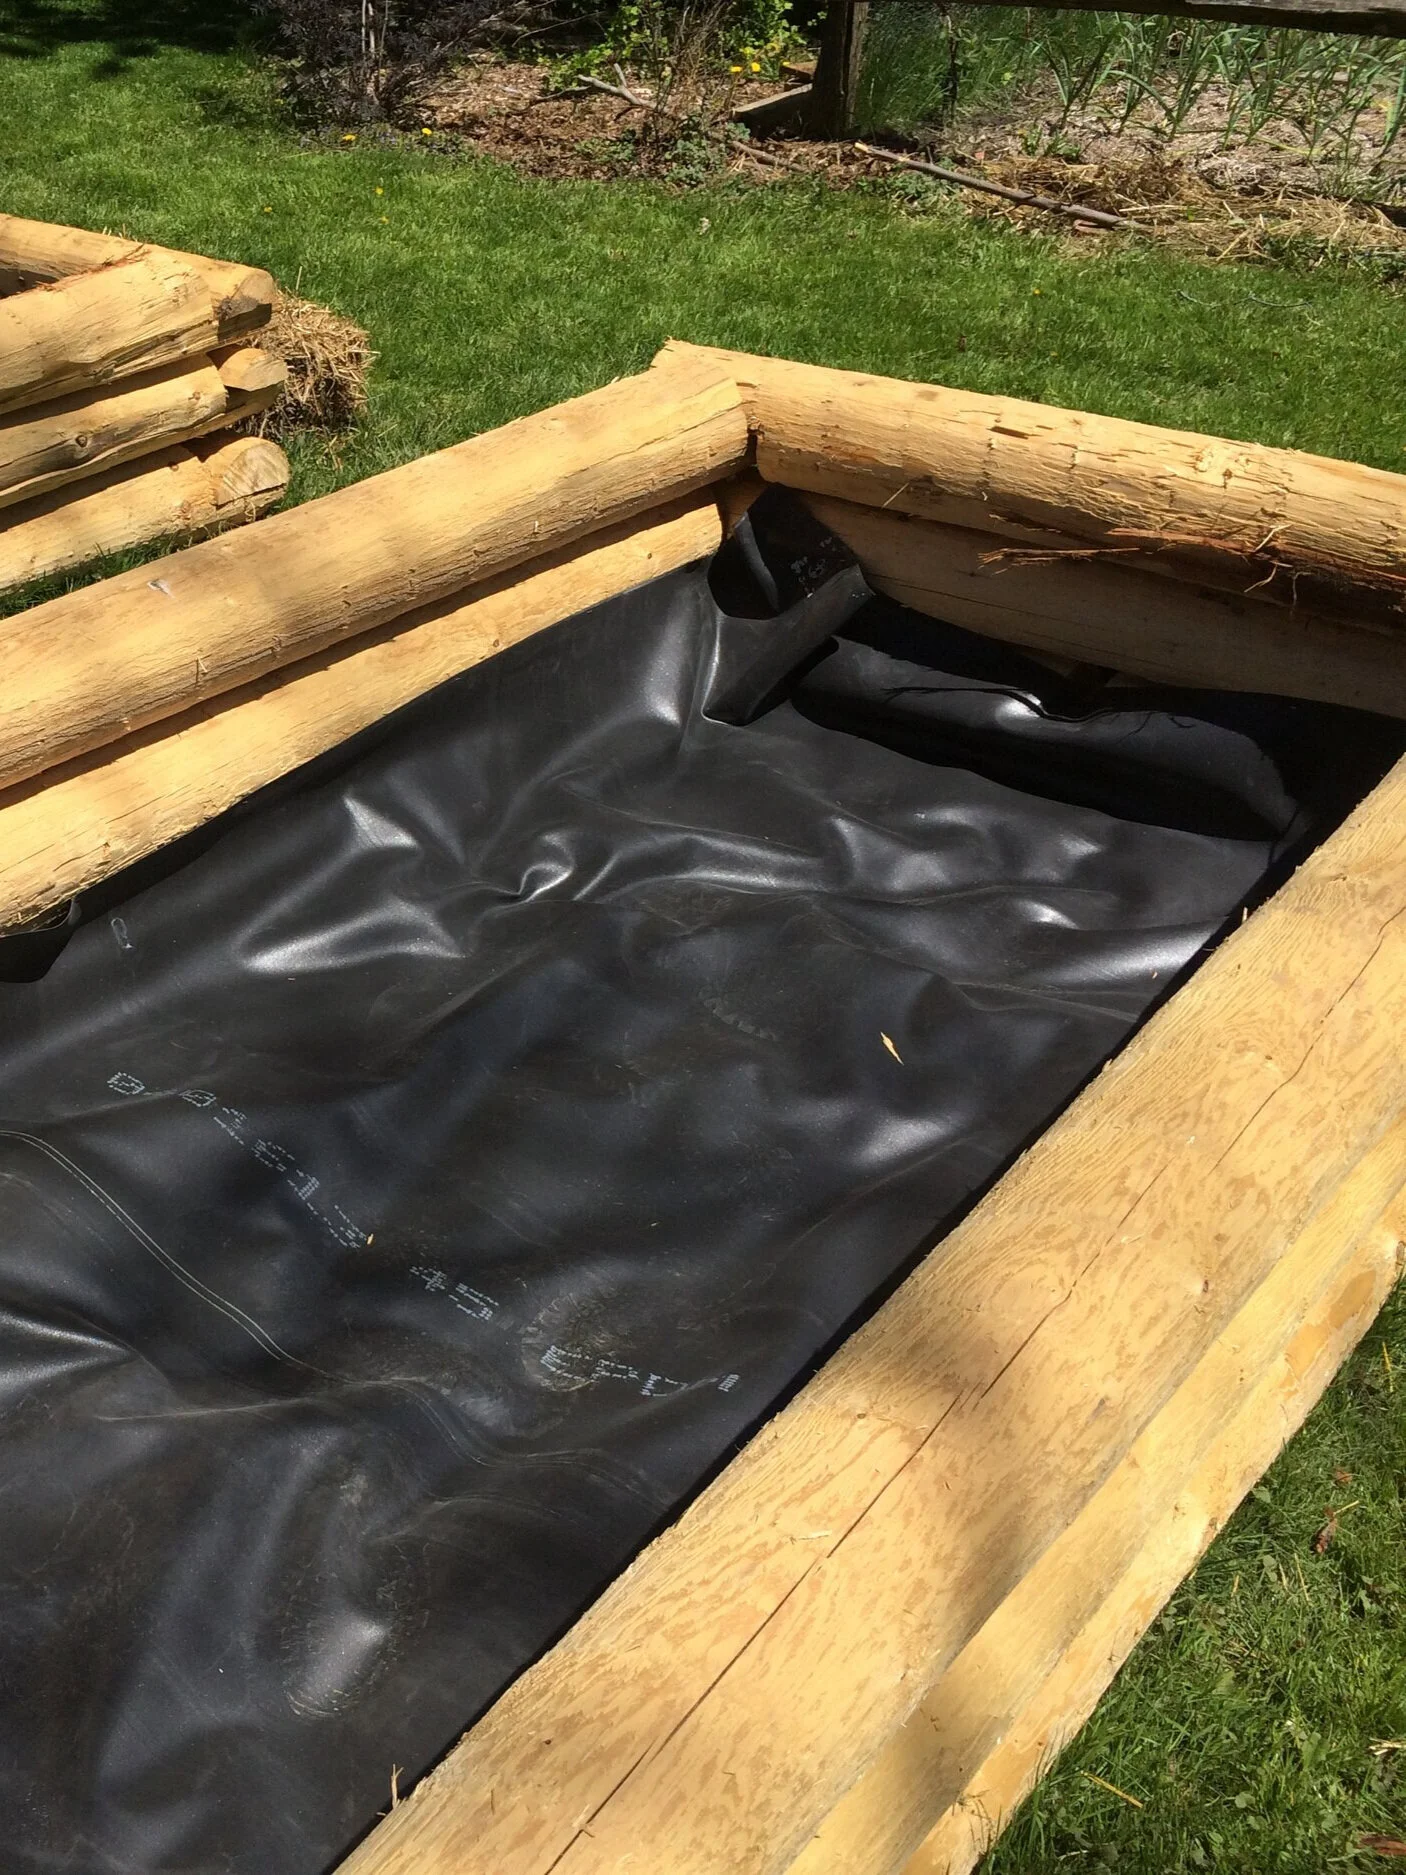
Install liner at the bottom by placing it on the ground, and up about 8-10 inches at the side. Secure temporarily with staples, to keep it in place until the gravel pins it into place.
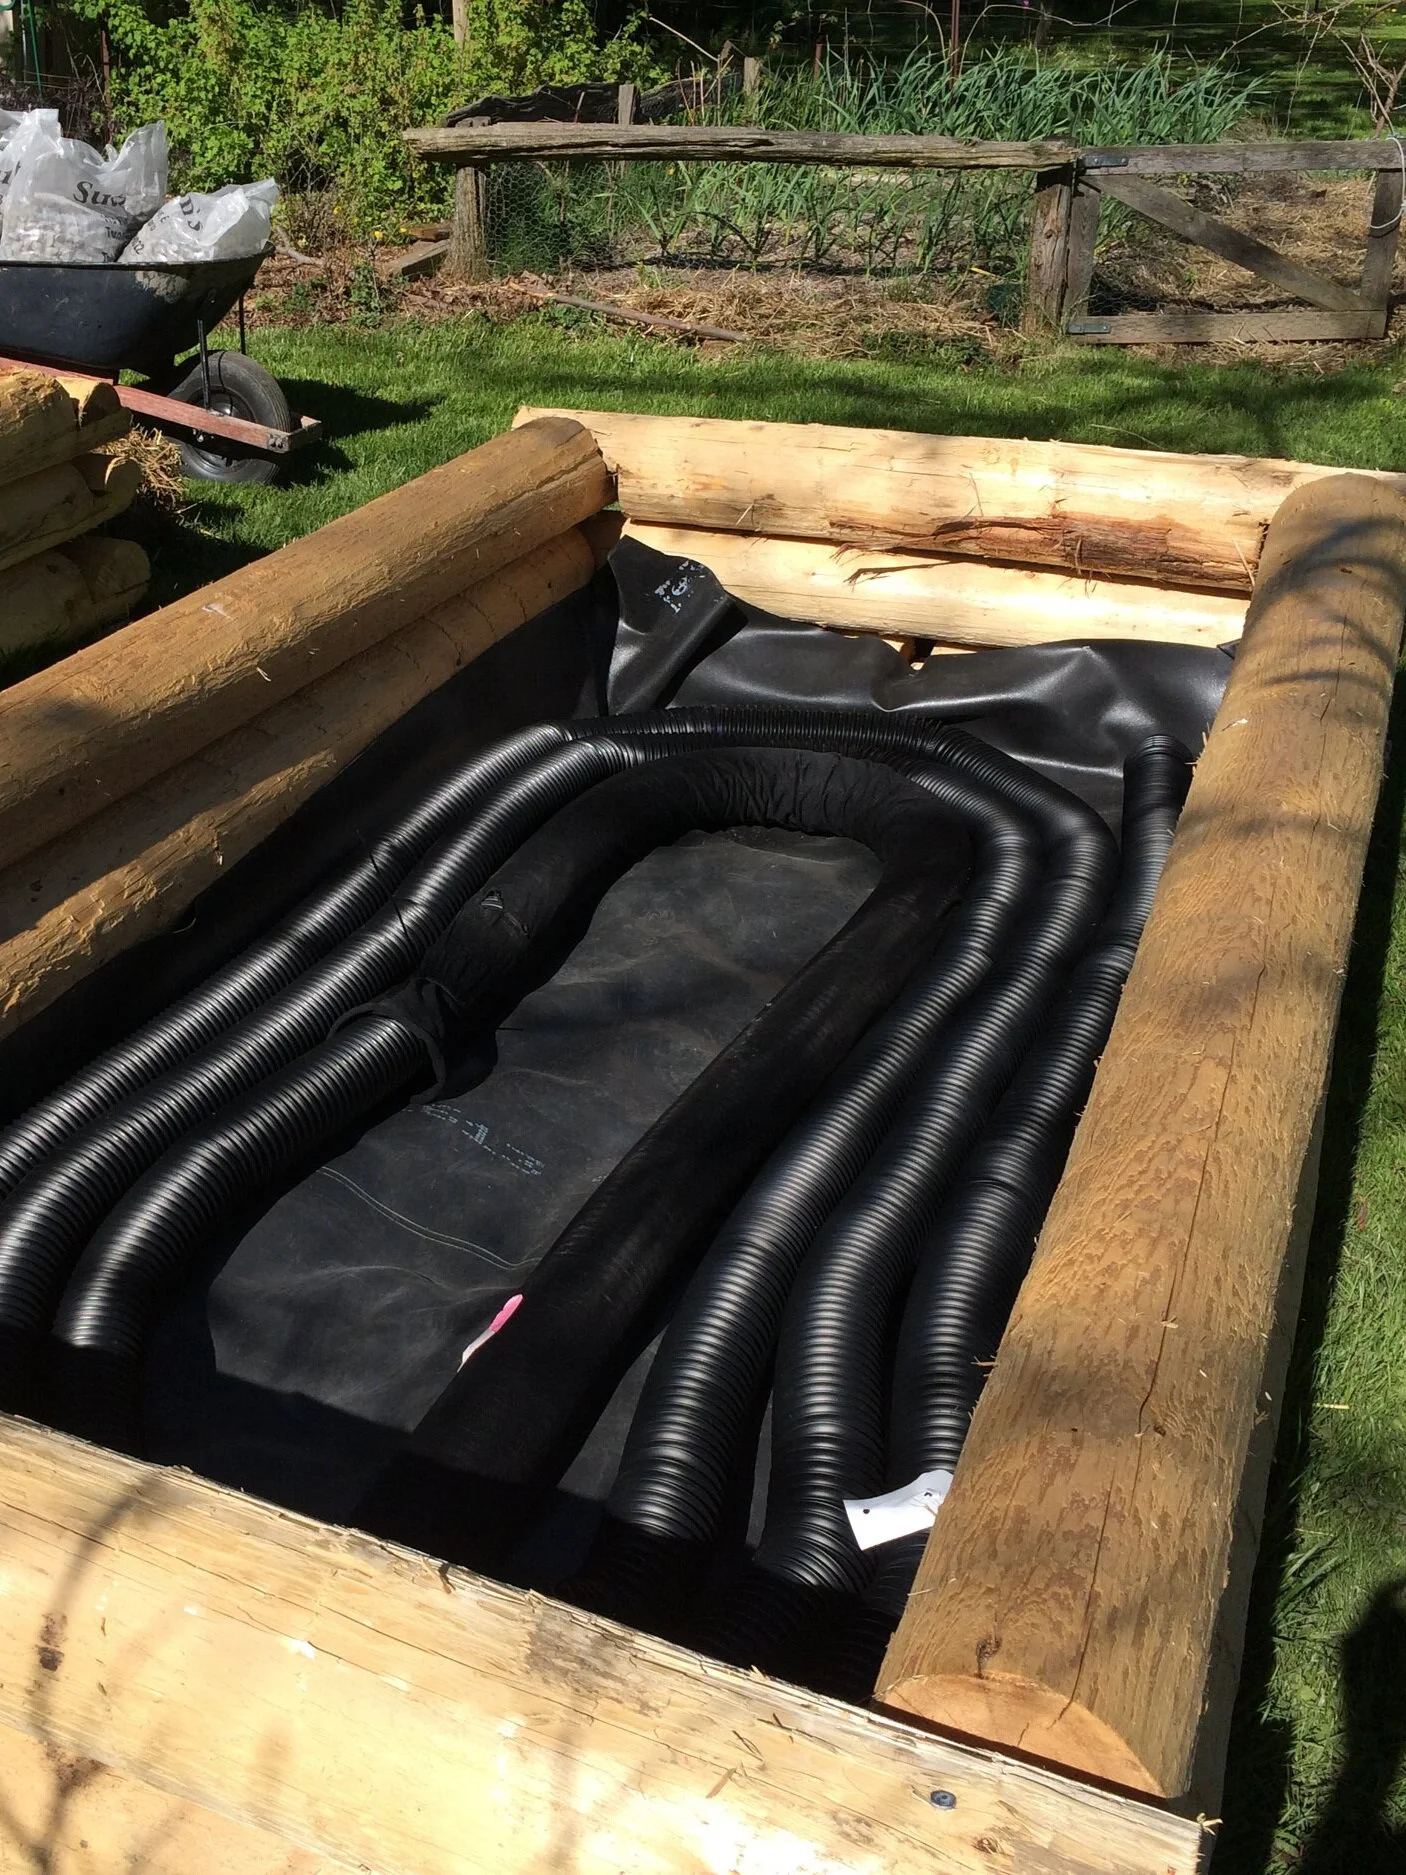
Place coils of weeping tile in the bottom. The tile permits water to quickly move through the reservoir, and it also holds up the soil above.
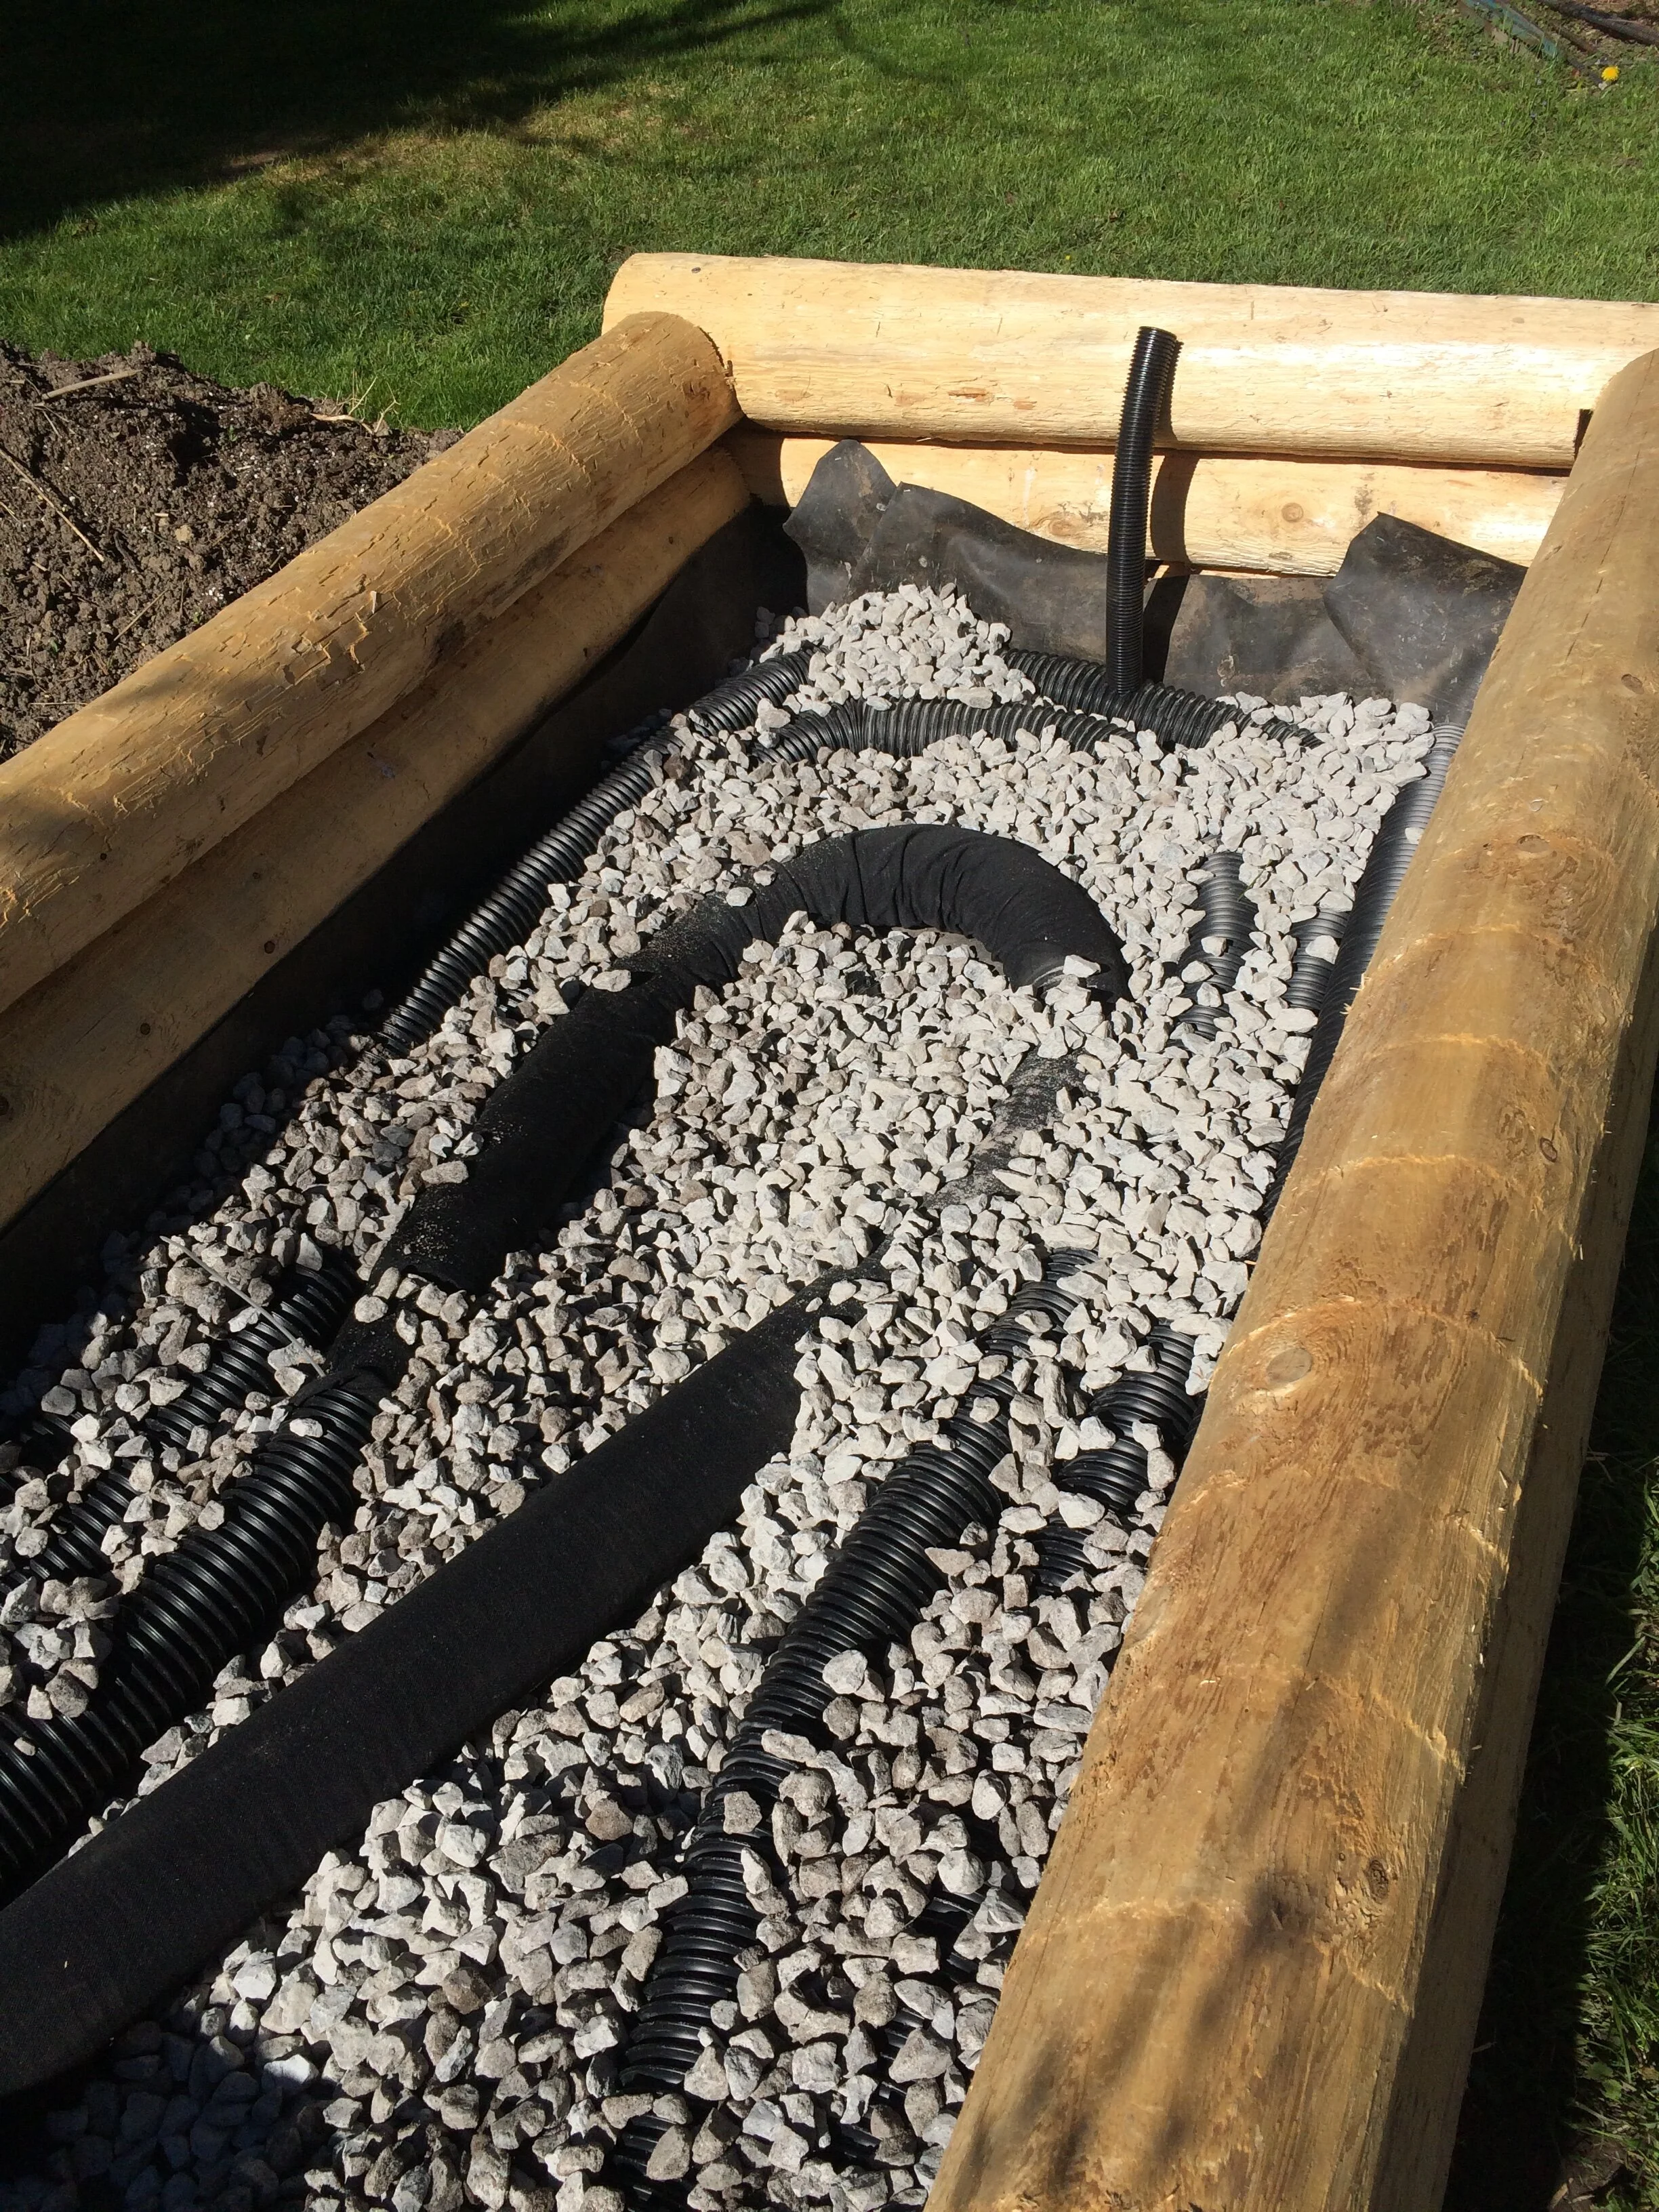
Add gravel. It supports the weight of the soil above, while the spaces between the pieces of gravel fill with water. Water moves upwards through the gravel by capillary action.
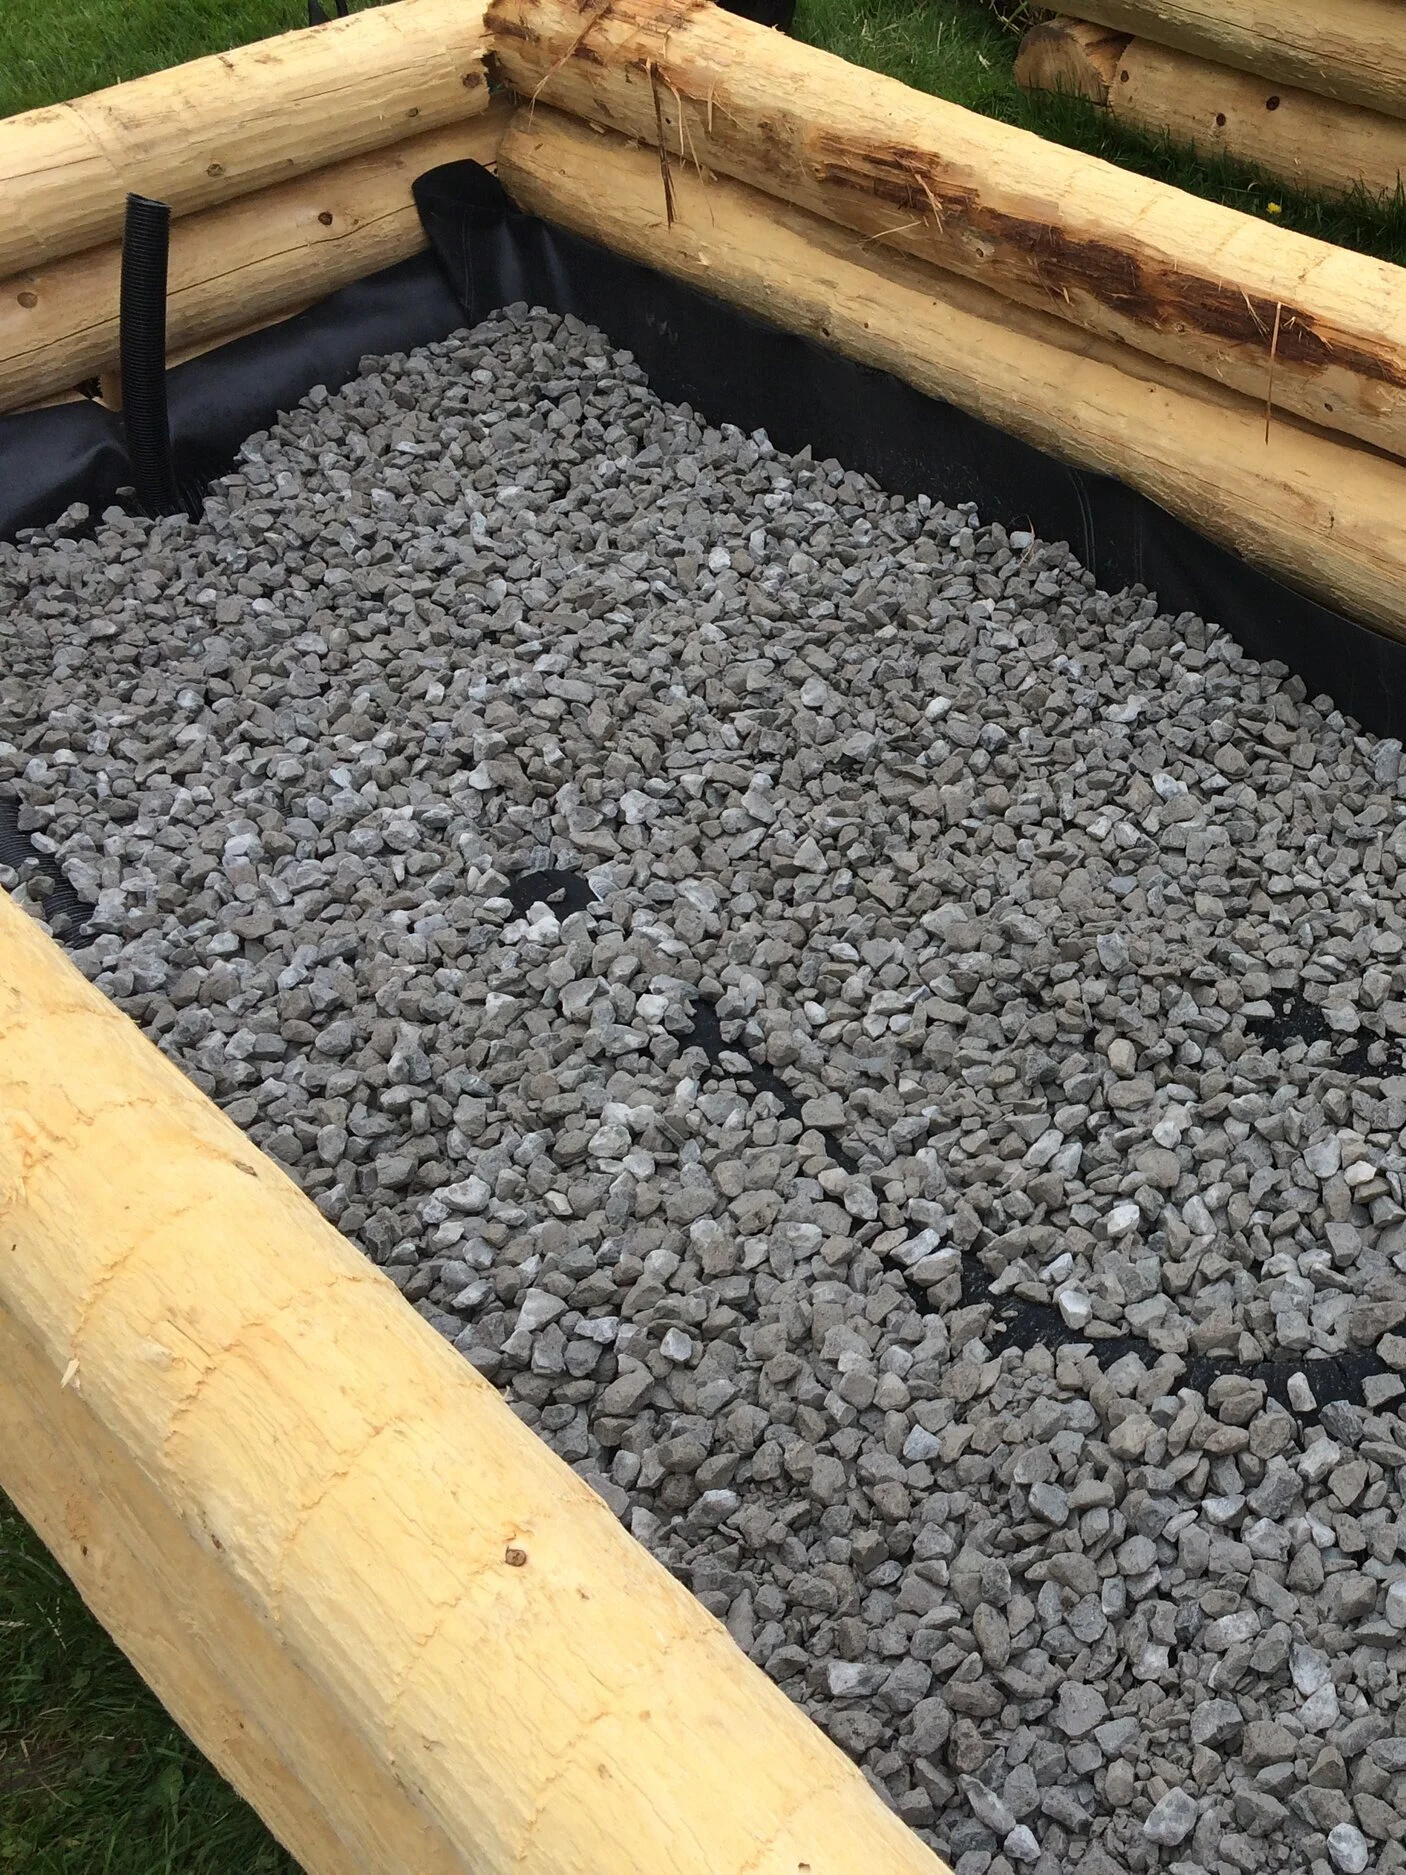
Note the fill tube at the far end, a piece of drain hose installed into the weeping tile. This permits filling of the reservoir with a hose after soil has been added.
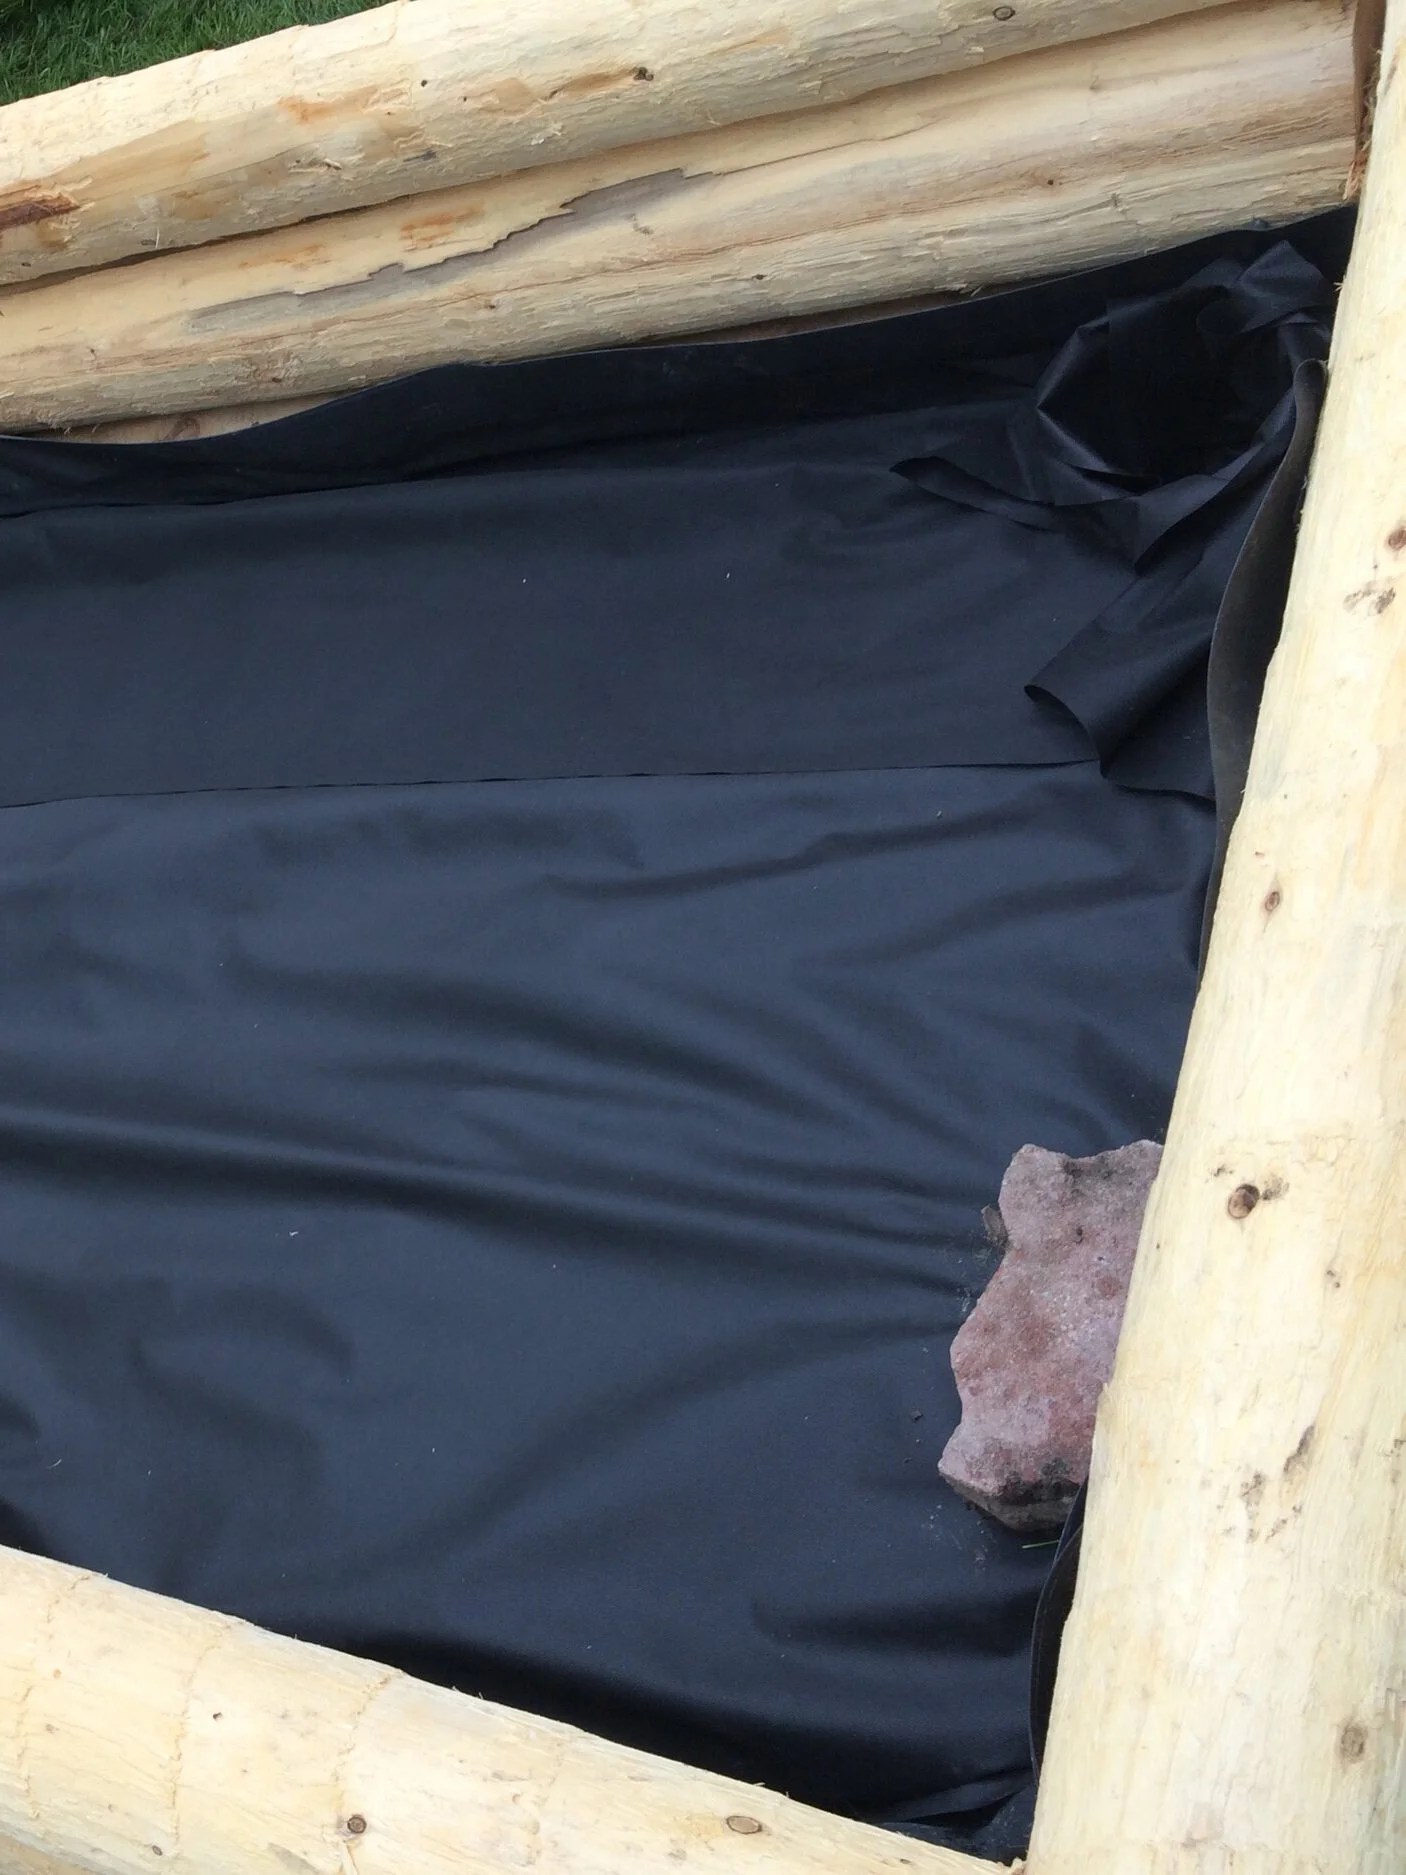
Cover with landscape fabric to keep soil out of the reservoir area. Note the depressing in the top-right corner: While in theory water wicks up the gravel, I also created this soil-filled wick that dips into the reservoir. Not necessary, so I wouldn't do it again.
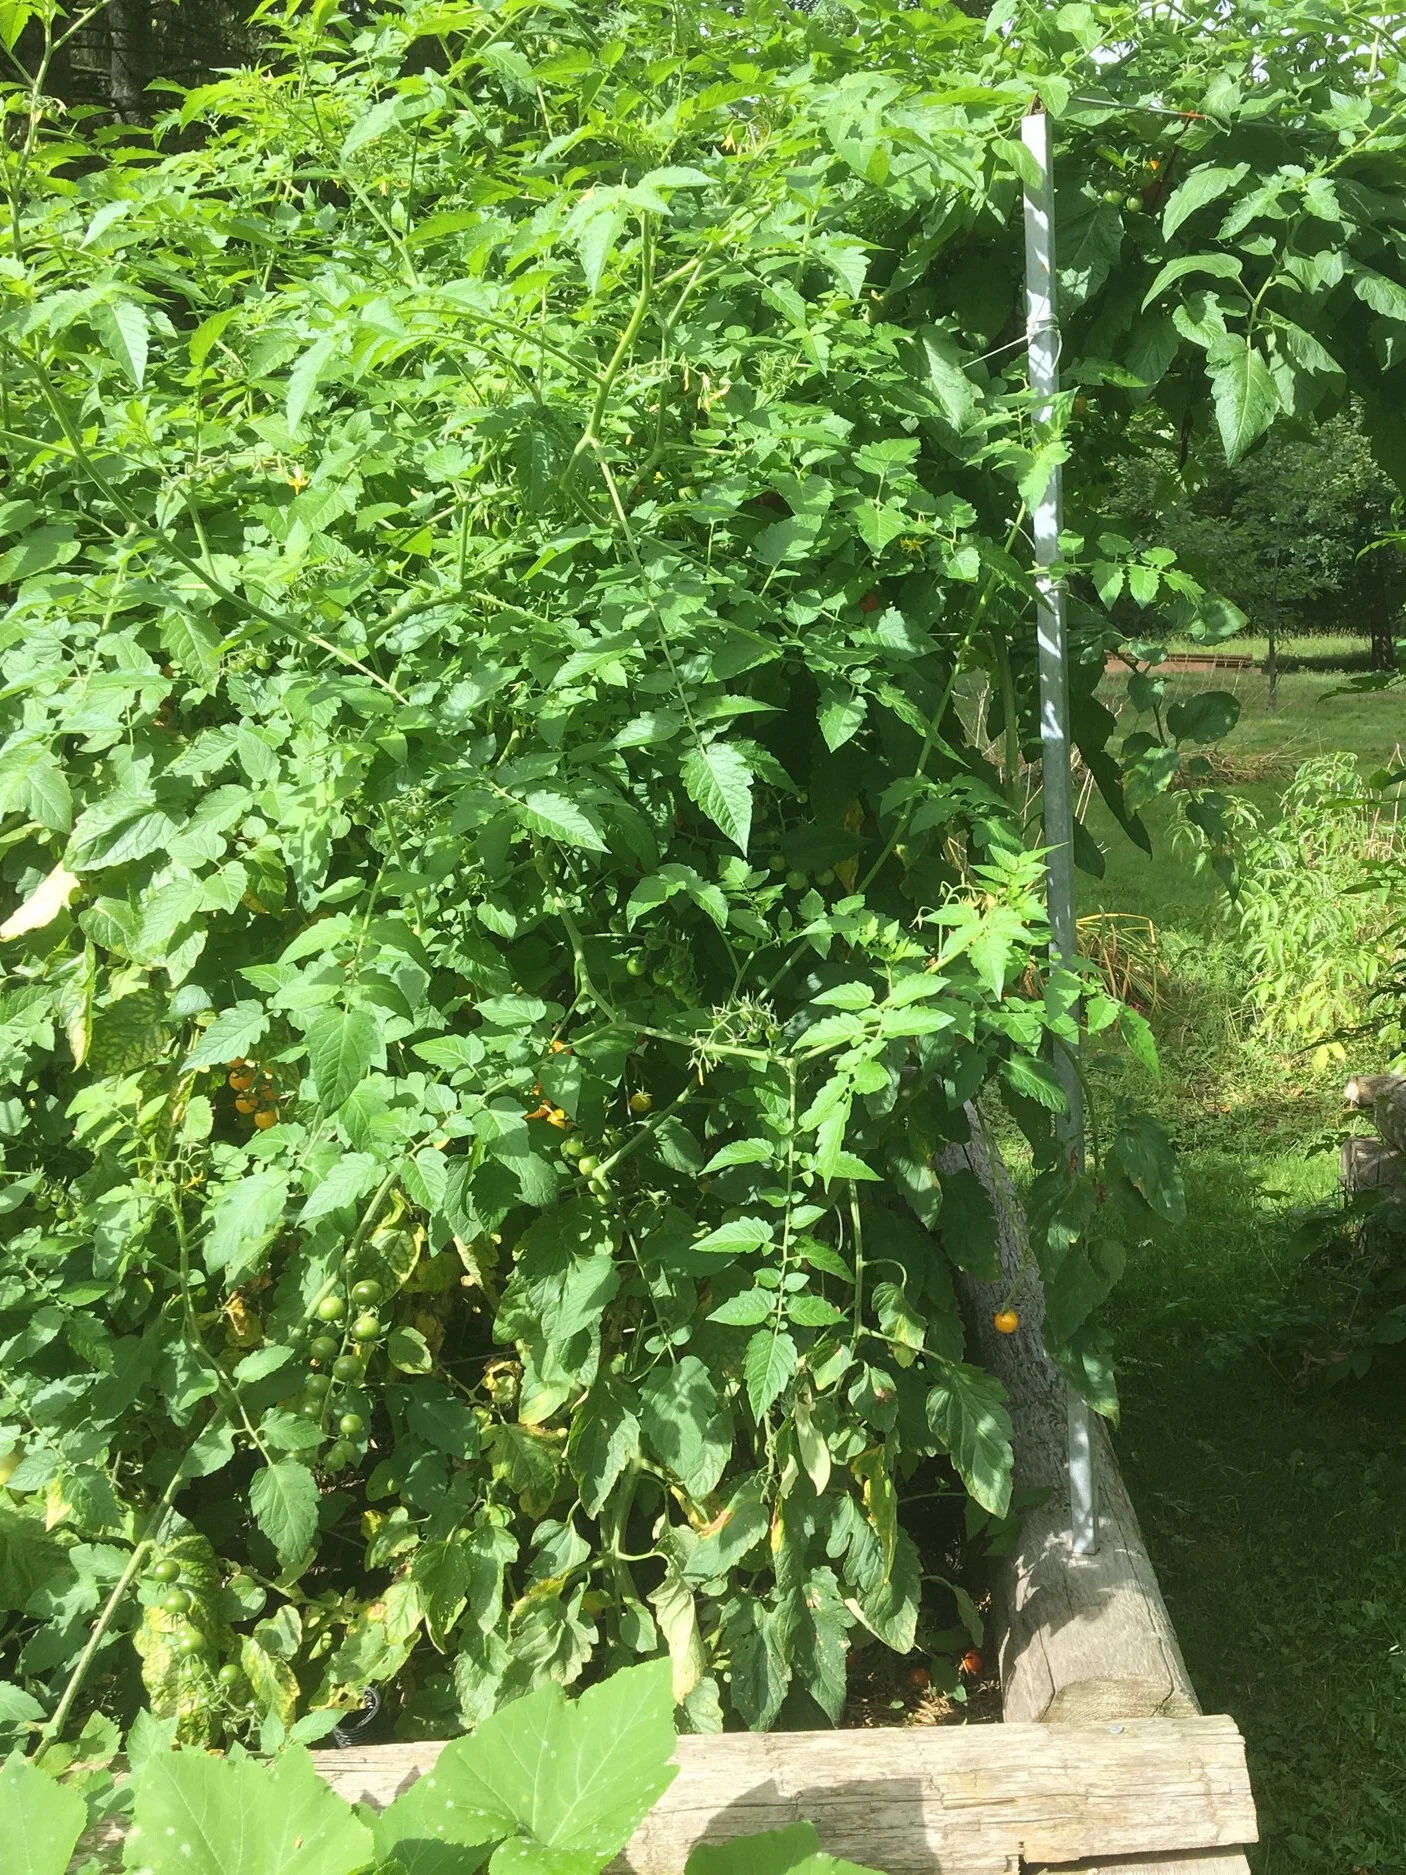
Soil depth: 30-40 cm (12-16") of soil works well. If there is too much soil, the water will not wick all the way to the top.
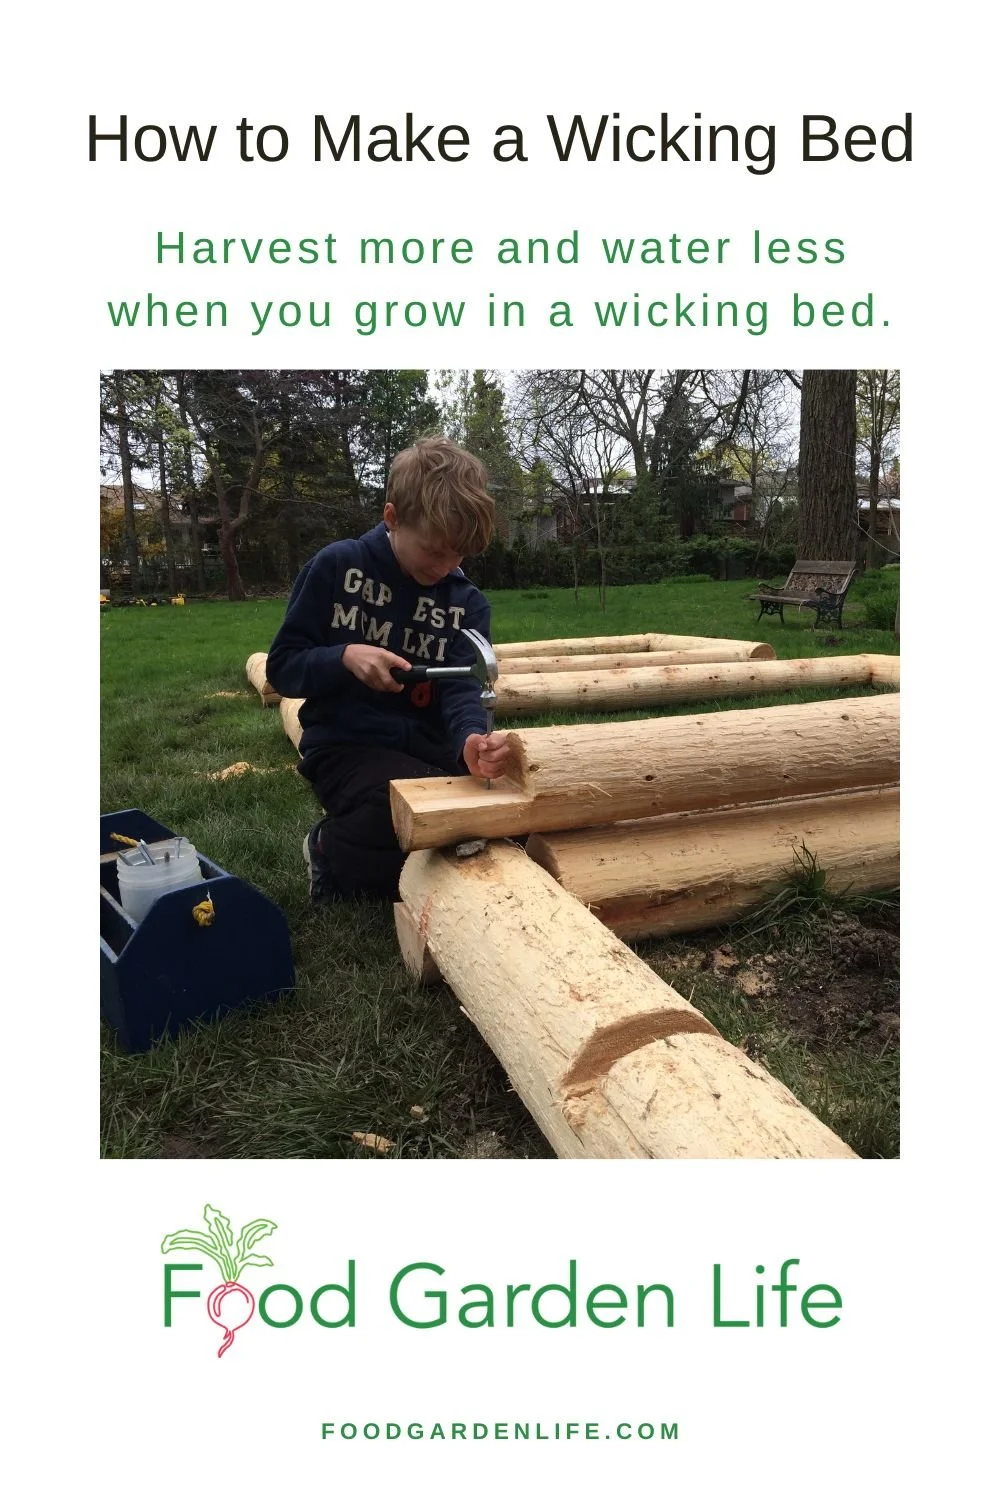
Pin this post about how to make a wicking bed.
Watering my Wicking Beds
I know that there is enough water in the reservoir when I see water coming out of the side of the bed. It's low-tech—but it works.
One More Reason for Wicking Beds
Soil contamination is another reason to consider growing in a wicking bed. Soil contamination can be a concern in areas where there is a history of industry, and also on former orchard lands where sprays with heavy metals might have been used. Or, like me, it could be from a nearby black walnut tree.
Find out more about soil contamination and what to do about it.
FAQ Wicking Beds
I’m already doing raised bed gardening. Can I retrofit my existing raised beds with this system of irrigation?
Yes, you can retrofit an existing raised garden bed to turn it into a wicking bed. But be prepared to first empty out the bed…so it means some digging!
I want my wicking bed to be a metre (3’) high. So it’s less bending for me while I’m gardening. Is that OK?
With wicking beds, less is more. Too much soil, and the water doesn’t wick all the way to the top of the soil. 30-40 cm (12-16”) soil depth is best for wicking.
If you want a taller raised bed, consider an elevated bed, on legs. (Like a sub-irrigated planter on stilts!) Then you can have the easy access you want, and the wicking won’t be compromised by excessive soil depth. And as a bonus, you won’t spend as much money on soil!
Here’s one other consideration: If you’re transplanting sizeable plants into a deep wicking bed, and don’t mind top watering for a bit until the roots reach a soil depth where there’s moisture from wicking, then maybe you don’t need to worry about soil depth.
Can it freeze in the winter? Does this work for raised bed gardening in Canada?
It’s fine for gardening in Canada and other places with cold climates. We use wicking beds in our urban garden here in Toronto.
Find This Helpful?
Enjoy not being bombarded by annoying ads?
Appreciate the absence of junky affiliate links for products you don’t need?
It’s because we’re reader supported.
If we’ve helped in your food-gardening journey, we’re glad of support. You can high-five us below. Any amount welcome!
Another Way to Add Growing Space in a Small Garden
Straw-bale gardening is a great way to grow on paved areas and areas with poor soil. And you also have a raised garden bed...so less bending required!
Find out more about straw-bale gardening.
More Ideas for Your Vegetable Garden
Find lots more articles about growing vegetables and edible plants in the Grow Vegetables area of this site.
Articles and Interviews
Courses: Edible Gardening
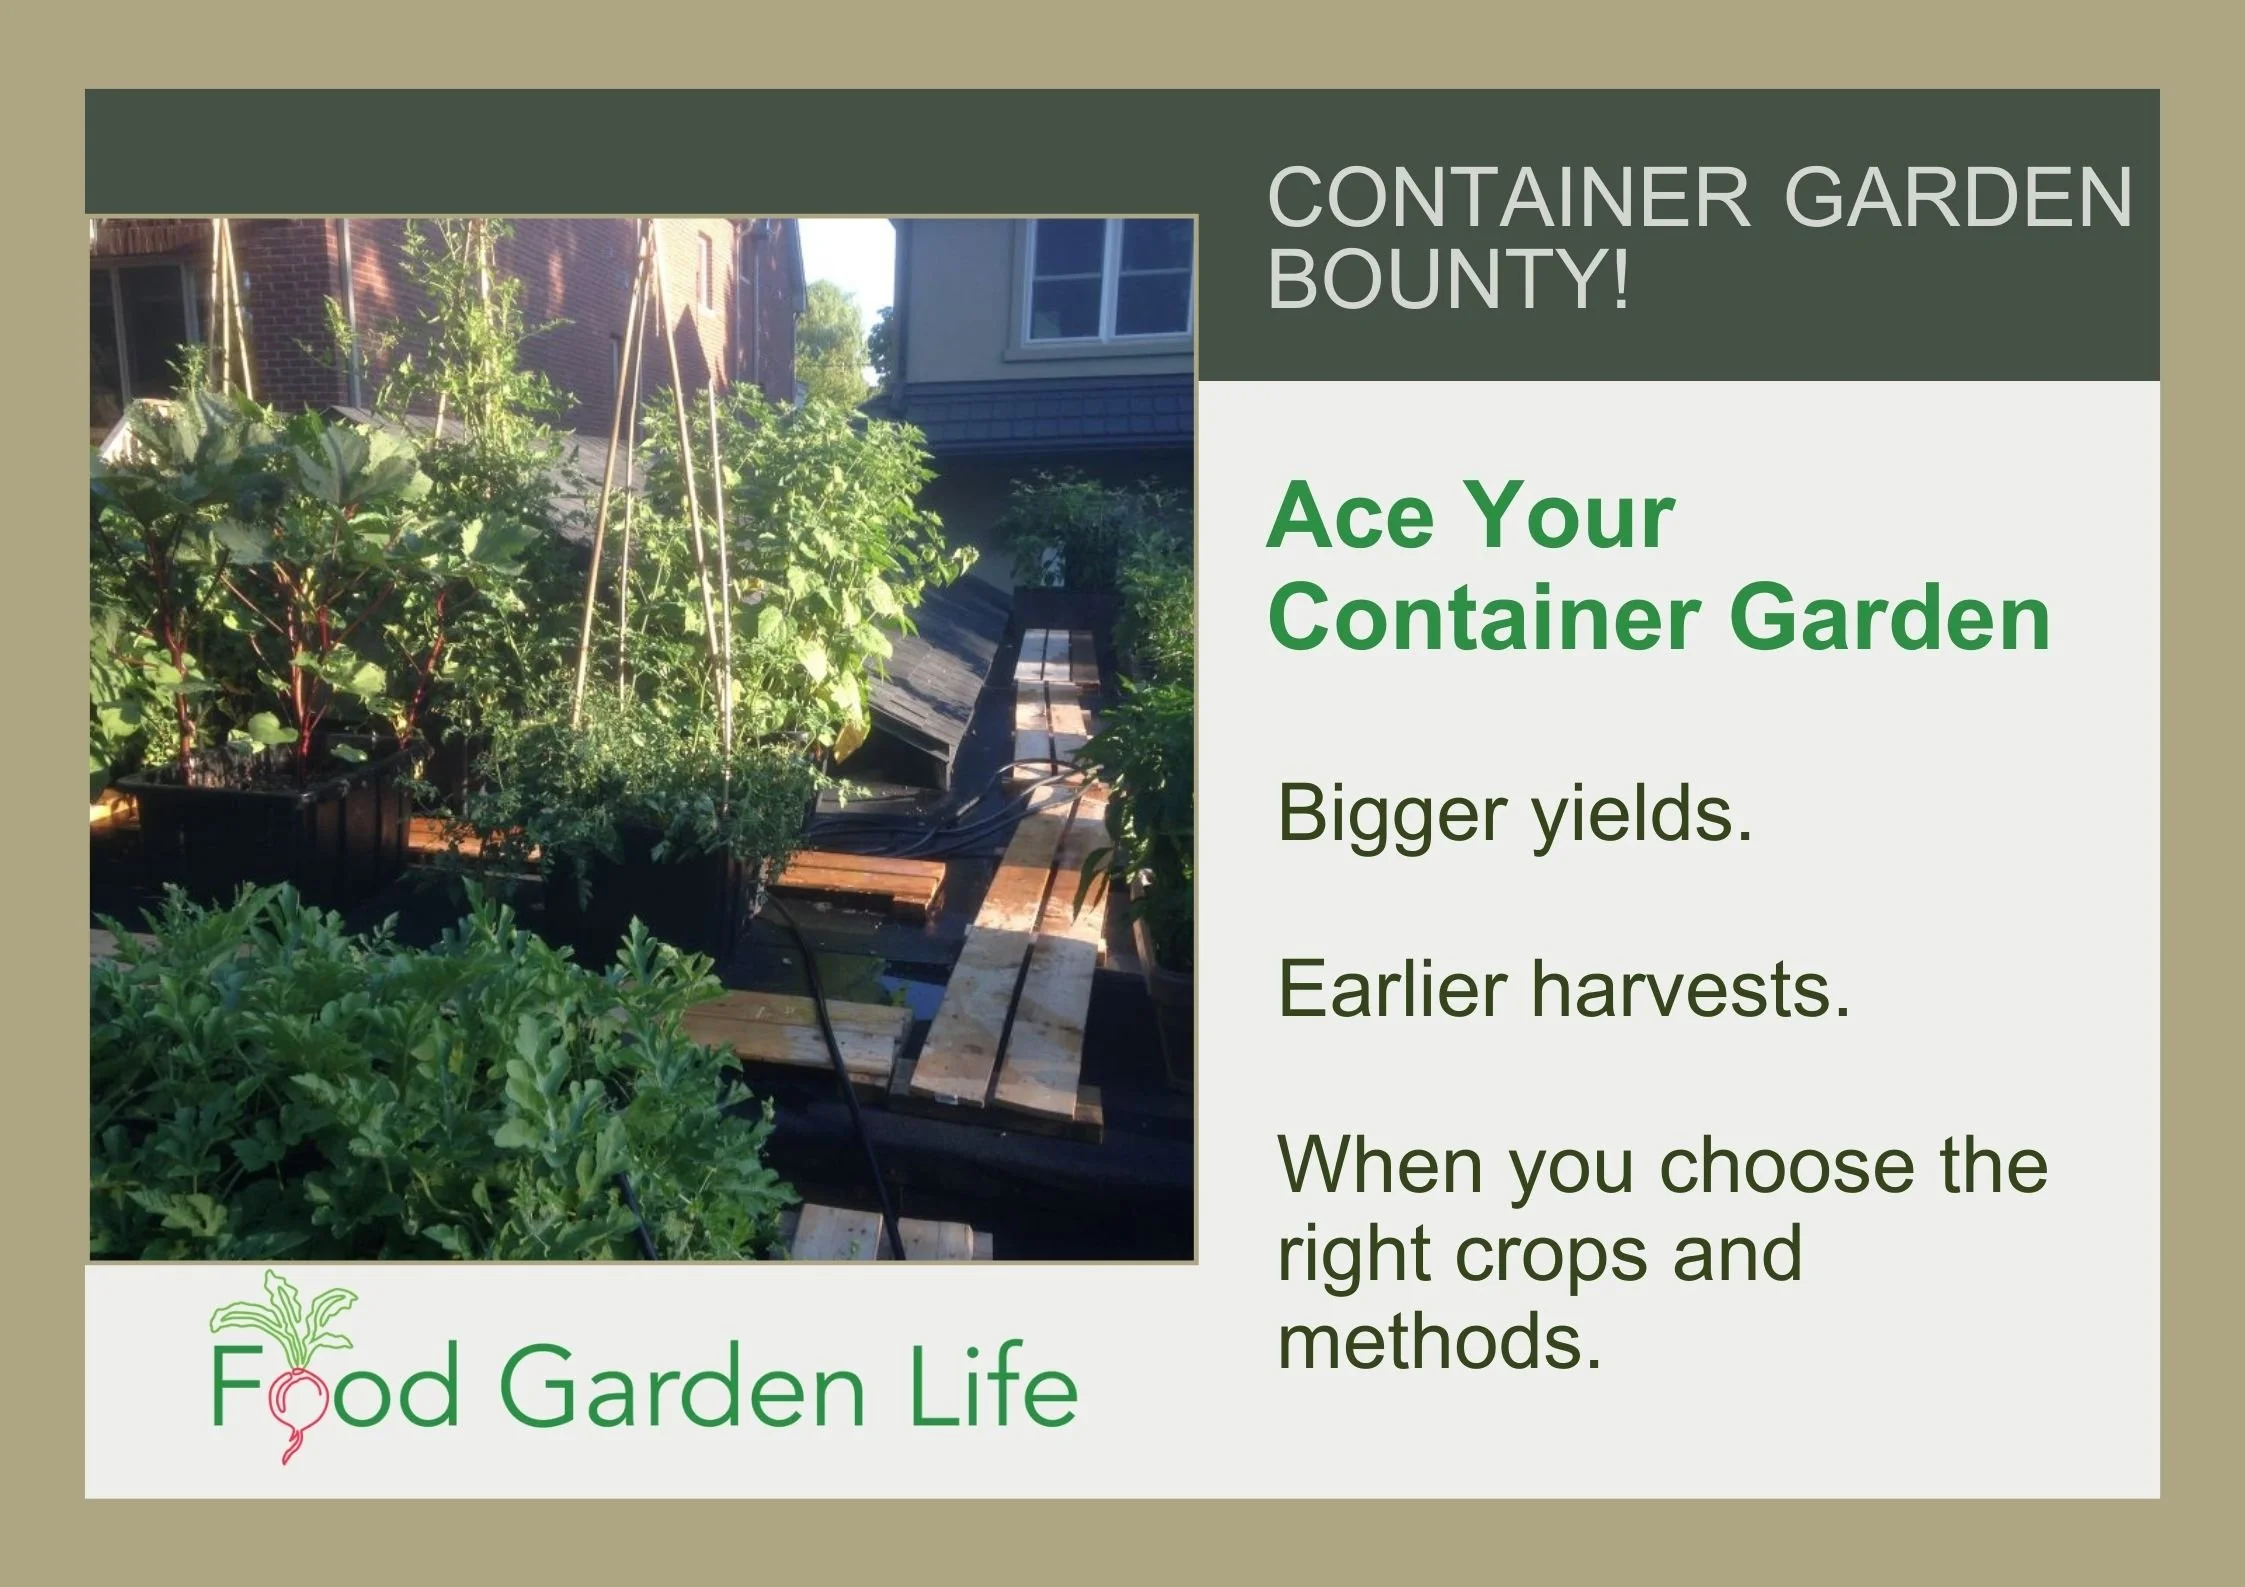
Find out about how to grow lots of vegetables in containers. Find out about potting mix, best types of containers, top crops, and how to care for your plants.
Want to create and edible garden or edible landscape but not sure where to start? Find out how to design a garden, choose plants, and create a functional, beautiful, edible landscape.
Guide to Fruits and Vegetables that Grow in Shade
Looking for fruits, vegetables, and herbs that grow well in a shady garden. This article has partial-sun crop ideas for you.
By Steven Biggs
Shade-Tolerant Vegetables and Fruits for the Edible Landscape and Food Garden
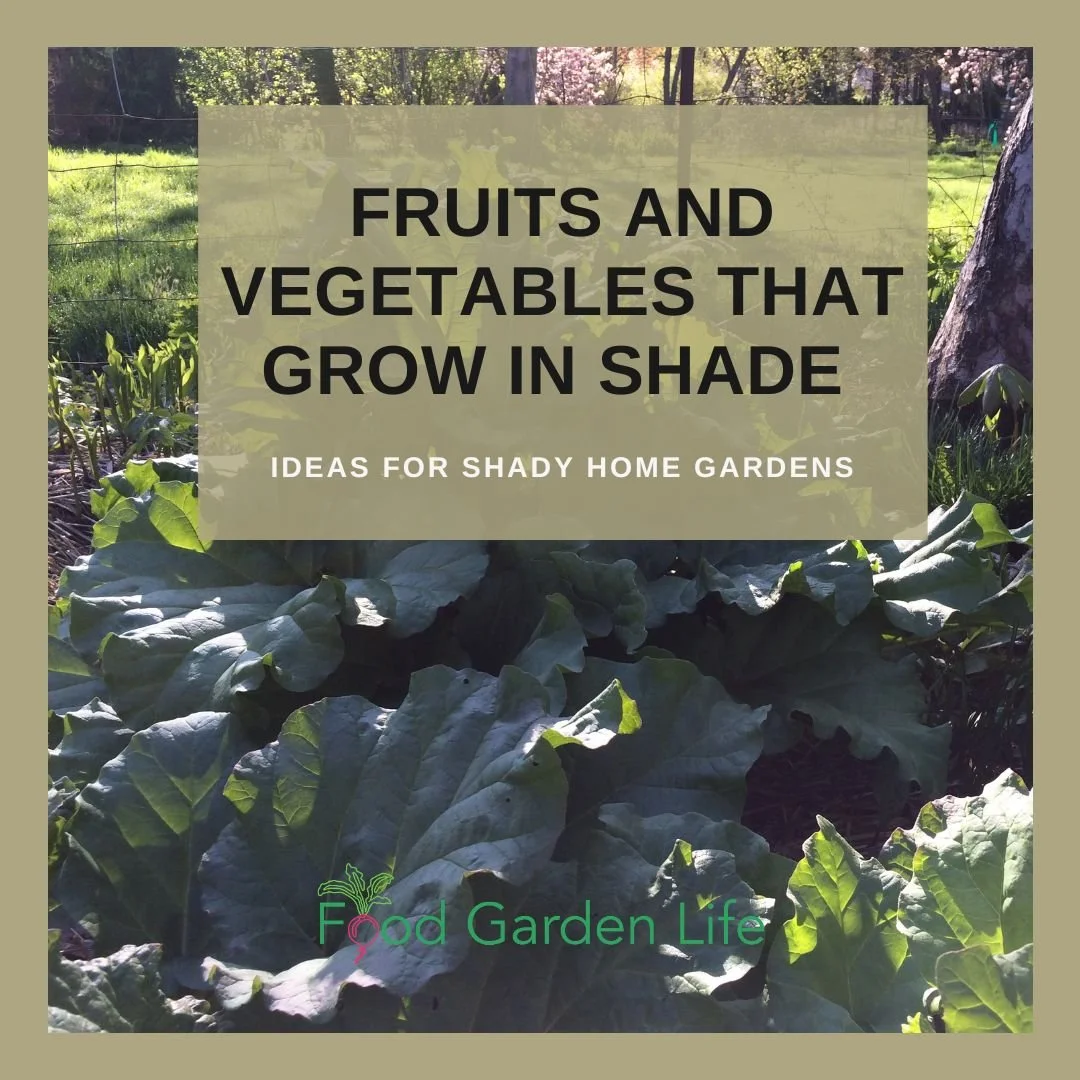
Don’t have full sun? Think your garden needs full sun? Find out about shade-garden vegetables, fruit, and herbs.
Not enough sunny growing space in your yard? Lots of partial sun? Light shade? You're not alone.
When I first landscaped my place, my neighbour Bob asked, "Steve, why is your patio so far from your house?"
"It's all about the vegetables,” I replied.
I reserved as much direct sunlight for my vegetables as possible. And used the shady spot for the patio."
There are lots of things around a home garden that cast shade: There’s the house, garage, fence, shed, trees, and hedges.
Not all fruits and vegetables grow well in shade. Lots of crops need "full sun" (6-8 hours of direct sunlight every day) to grow optimally.
But there are fruits, vegetables, and herbs that do nicely in a shady garden. Keep reading if you want to learn about vegetable plants that grow in shade, growing herbs in shade, shade-tolerant fruit, and how to plan your garden for shade.
Perfectionism Meets Shade Garden
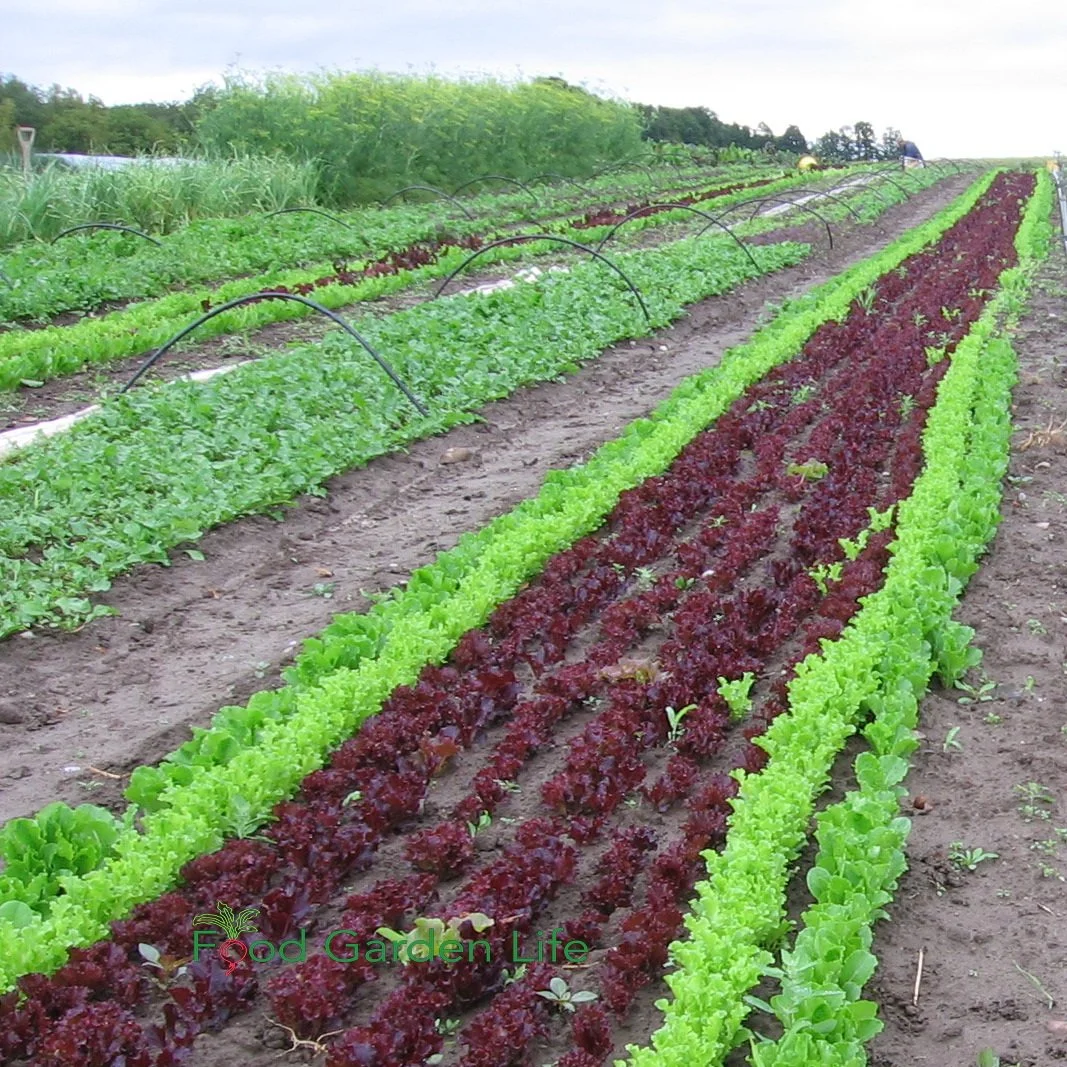
Don’t have a sunny field for growing vegetables? That’s fine, when planting a garden there are many shade-tolerant crops.
Before we get to shade-tolerant crops, let's start with the elephant in the room.
Perfectionism.
Many seed packets suggest full sun...and many yards don't have full sun. You might be contrasting your semi-shaded yard to bright, sunny fields of vegetables.
Your space doesn't compare...
So what?
So what if your plants don't look as good as what a commercial grower would grow! If you're a home gardener, you're growing edible plants for yourself, not to sell.
When I needed more growing space, I decided to reclaim the end of my driveway as a straw-bale garden. (Find out more about straw-bale gardens here.)
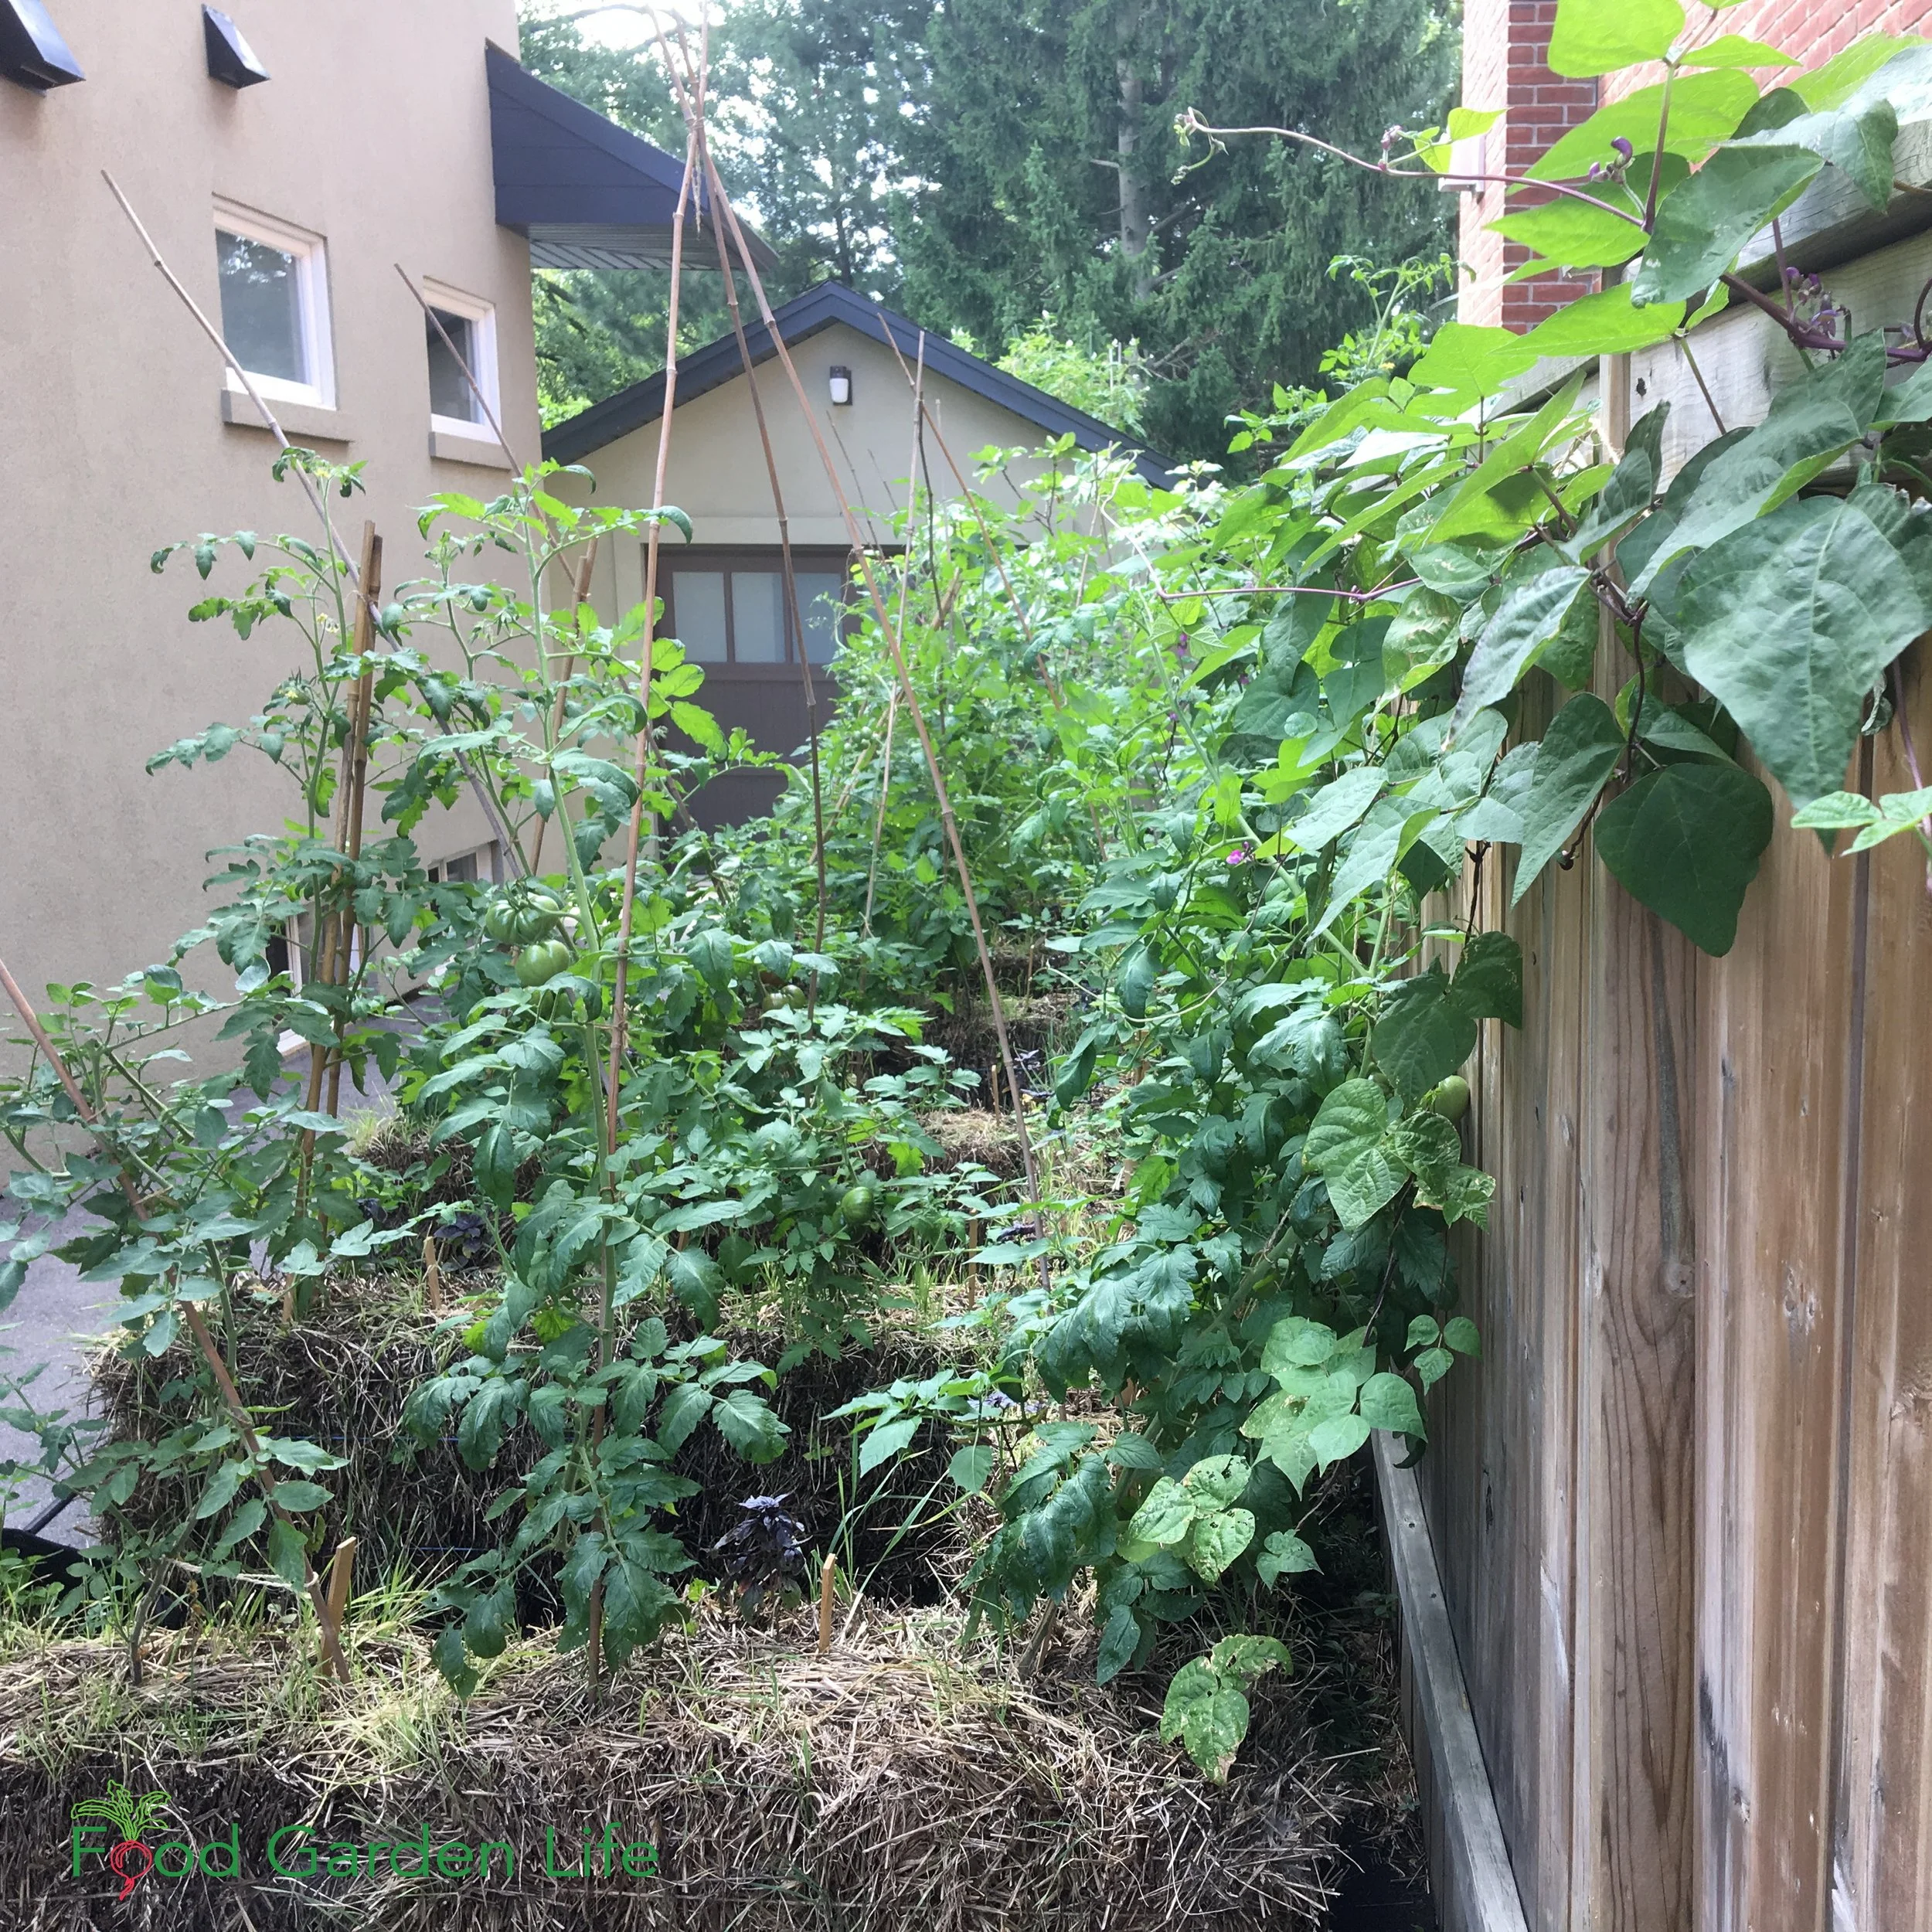
My driveway garden is in partial sun, nestled between two houses. You can still enjoy vegetable gardening if you have some shade.
The driveway is nestled between two houses. It gets less than six hours of sun exposure. But it’s better to have less-than-perfect tomato plants on that driveway and get a decent harvest than not to harvest any tomatoes from the driveway.
Five hours of sun isn't perfect. So what? The results are fine. It’s a successful garden. Even though I don’t have full sun.
A vegetable garden is a great cure for perfectionism. In home gardens we often have less-than-perfect conditions. So what!
A Word on Shade
Not all sun (and not all shade) is created equal. Here are things to consider as you look at the shady spots and sunny spots around a yard:
Dappled shade. Think of the shade under a locust tree, spotted with little flecks of light.
Heavy shade. This is where no light is gets through or is reflected, like next to buildings or under trees with dense canopies. (Norway maple...I'm talking about you!)
Afternoon shade. A.k.a. morning sun...and morning sun isn't as strong as afternoon sun.
Morning shade. Or afternoon sun.

Create Your Own Unique Edible Landscape
That fits for your yard, and your style!
Crops for Partial Shade
Grow Leafy Greens in Shade
Start with greens when gardening in partial shade.
The reason partial shade is fine for leafy greens is that we're not trying to grow a perfect crop: All we want is the leaves. We're not growing for flowers or fruit or seeds. We don’t care if the plant completes it’s life cycle.
(And with a bit of shade, leaves are often bigger and more tender!)
Many of the greens crops (e.g. arugula, lettuce, and spinach) have a short life cycle that's less that the length of the growing season. And that means that at some point they give up making tender leaves, and send up a flower stalk. (This is called "bolting.")
Bolting happens more quickly in hot, sunny locations. By growing leafy green crops in partial shade during intense summer heat, they'll bolt more slowly, and make tender leaves for longer time.
Here’s more about how to prevent lettuce from bolting.
Vegetable Plants that Grow in Shade
Here are a few greens that do very nicely in partial shade:
These lettuce plants will do well in this dappled light over the summer. It’s cooler than in direct sun.
Amaranth
Arugula
Beets (for the edible leaves…don’t expect as much from the roots as you would get in a sunny location)
Bok choy
Claytonia
Collards
Corn salad
Cress
Endive
Kale
Lettuce
Mizuna
Mustard greens
Spinach
Swiss chard
If you have a favourite green that's not on this list, try it. Leafy greens usually do very nicely in partial shade.
One more crop that I don't think of as a leafy vegetable (even though we eat the leaves) is green onions. With green onions, we're not trying to encourage bulb development...we're just trying to get tender leaves. So partial shade is fine.
Vine Crops as Shade-Garden Vegetables
Vine crops can grow up and into the sunlight.
If you have a partially shaded area where vining crops could grow up into a sunnier location, this can be a useful strategy.
Not only do they tolerate partial shade: You can train them up a trellis, arbour, hedge, or tree into sunnier conditions.
Cucumbers. They grow respectably well in partial shade. I've grown them in afternoon sun, up a trellis on the west side of a garage with very respectable results.
Squash. Like cucumber, they do fine in partial shade. I've grown them along a semi-shaded cedar hedge, and was delighted to find the hedge studded with squash at the end of the season.
Pole and runner beans. The year I grew runner beans up a tee-pee underneath my apple tree they grew right up into the tree above...and those scarlet flowers looked great amongst the green apples!
Vining Peas. Some pea varieties are bush-like, but if you want a vining crop to grow up into a sunnier space, look for vining peas. And with peas, you can also harvest and eat young shoot tips and tendrils.
All of these vine crops work well for vertical gardening. Find out how to make a vertical vegetable garden.
Grow a Container Vegetable Garden
And get an early harvest of crops that usually take too long!
Beyond Leafy Vegetables
I already told you about my 5-hour-a-day driveway tomatoes.
If you're experimenting with other sun-loving vegetables in partial shade, just expect them to have lanky growth and lower yield. And at a certain level of sunlight, you won't get enough to make it worth your while. Growing vegetables in shade might take some experimenting.
But if you don't try, you won't know.
Herbs that Grow in Shade
Lovage is a perennial herb that tolerates some shade.
There are many herbs that tolerate partial shade. Here are my favourites:
Chives
Cilantro
Dill
Lemon Balm
Lovage (this perennial herb lives in my semi-shaded perennial border)
Mint (see Full Shade, below)
Parsley
Fruit Crops for Partial Shade
When growing fruit in partial shade, take the same approach we do with veggies. Just adjust expectations accordingly.
Here are fruit crops that grow well in partial shade:
Choke cherry. Often found on the forest edge, where there's some shade. (Find out about 5 Types of Cherry Bushes for Edible Landscapes.)
Currants. My favourite. Here’s an article about how to grow currants.
Elderberry. Often found on the forest edge, where there's some shade.
Gooseberry. They take the same low-light conditions as currants.
Hardy Kiwi Vine.
Pawpaw. While young pawpaw trees benefit from shade, best fruit production is in full sun. But they fruit well in partial shade. No surprise as that's where you often find them in the wild.
Serviceberry. An understorey tree often found on the forest edge, where there's some shade. My favourite member of the serviceberry clan is the Saskatoon bush. Find out more about the Saskatoon bush.

Landscape with Fruit
That’s easy to grow in a home garden!
What About Heavy Shade?
This rhubarb plant is in partial shade, but I’ve seed decent rhubarb patches even in heavy shade.
If you have a space without any direct sunlight, reflected sunlight, or dappled sunlight, your crop options are more limited. This is what people call “full” shade or “deep” shade.
Here are ideas for you:
Mint and shade: Mint is an invasive plant that I normally only grow in containers. But in full shade, mint can be your friend. This is the one situation where I plant mint in the ground.
Rhubarb can do very nicely in heavy shade. My friend Chris had a lovely rhubarb plant that graced the edge of his shady pond...it looked quite tropical with the big leaves! Find out how to force rhubarb indoors over the winter.
Currants and gooseberries are a good fit underneath bigger trees. My neighbour Mr. Browne had a currant bush growing in the full shade of an apple tree...and that bush faithfully fruited year after year, albeit not as much as it would have in a sunnier spot.
FAQ Shade Tolerant Crops
Pin this post!
What is the best shade tolerant vegetable?
Parsley. Hands down. Because it's delicious, tolerates a wide range of conditions—and it’s very ornamental. I use it as a flower-border edging plant on the north side of the house. The curly-leaf types add great texture, and last well into the fall in cooler temperatures—until there's a hard freeze.
You might be saying, "But it's a herb." I've heard people argue it's a herb, others say it's a vegetable. In the quantities I use in my salads, I'm using it as a veg.
Can vegetables get too much sun?
Yes. Too much sun and too much heat cause many of the leafy greens to bolt quickly. They do better in shady areas in the heat of summer.
What is the difference between partial sun and partial shade?
If you read different sources, you'll come up with various definition.
To me, it's semantics. It just means less than full sun. I guess it depends whether you're the type of person who sees the glass as half full or half empty!
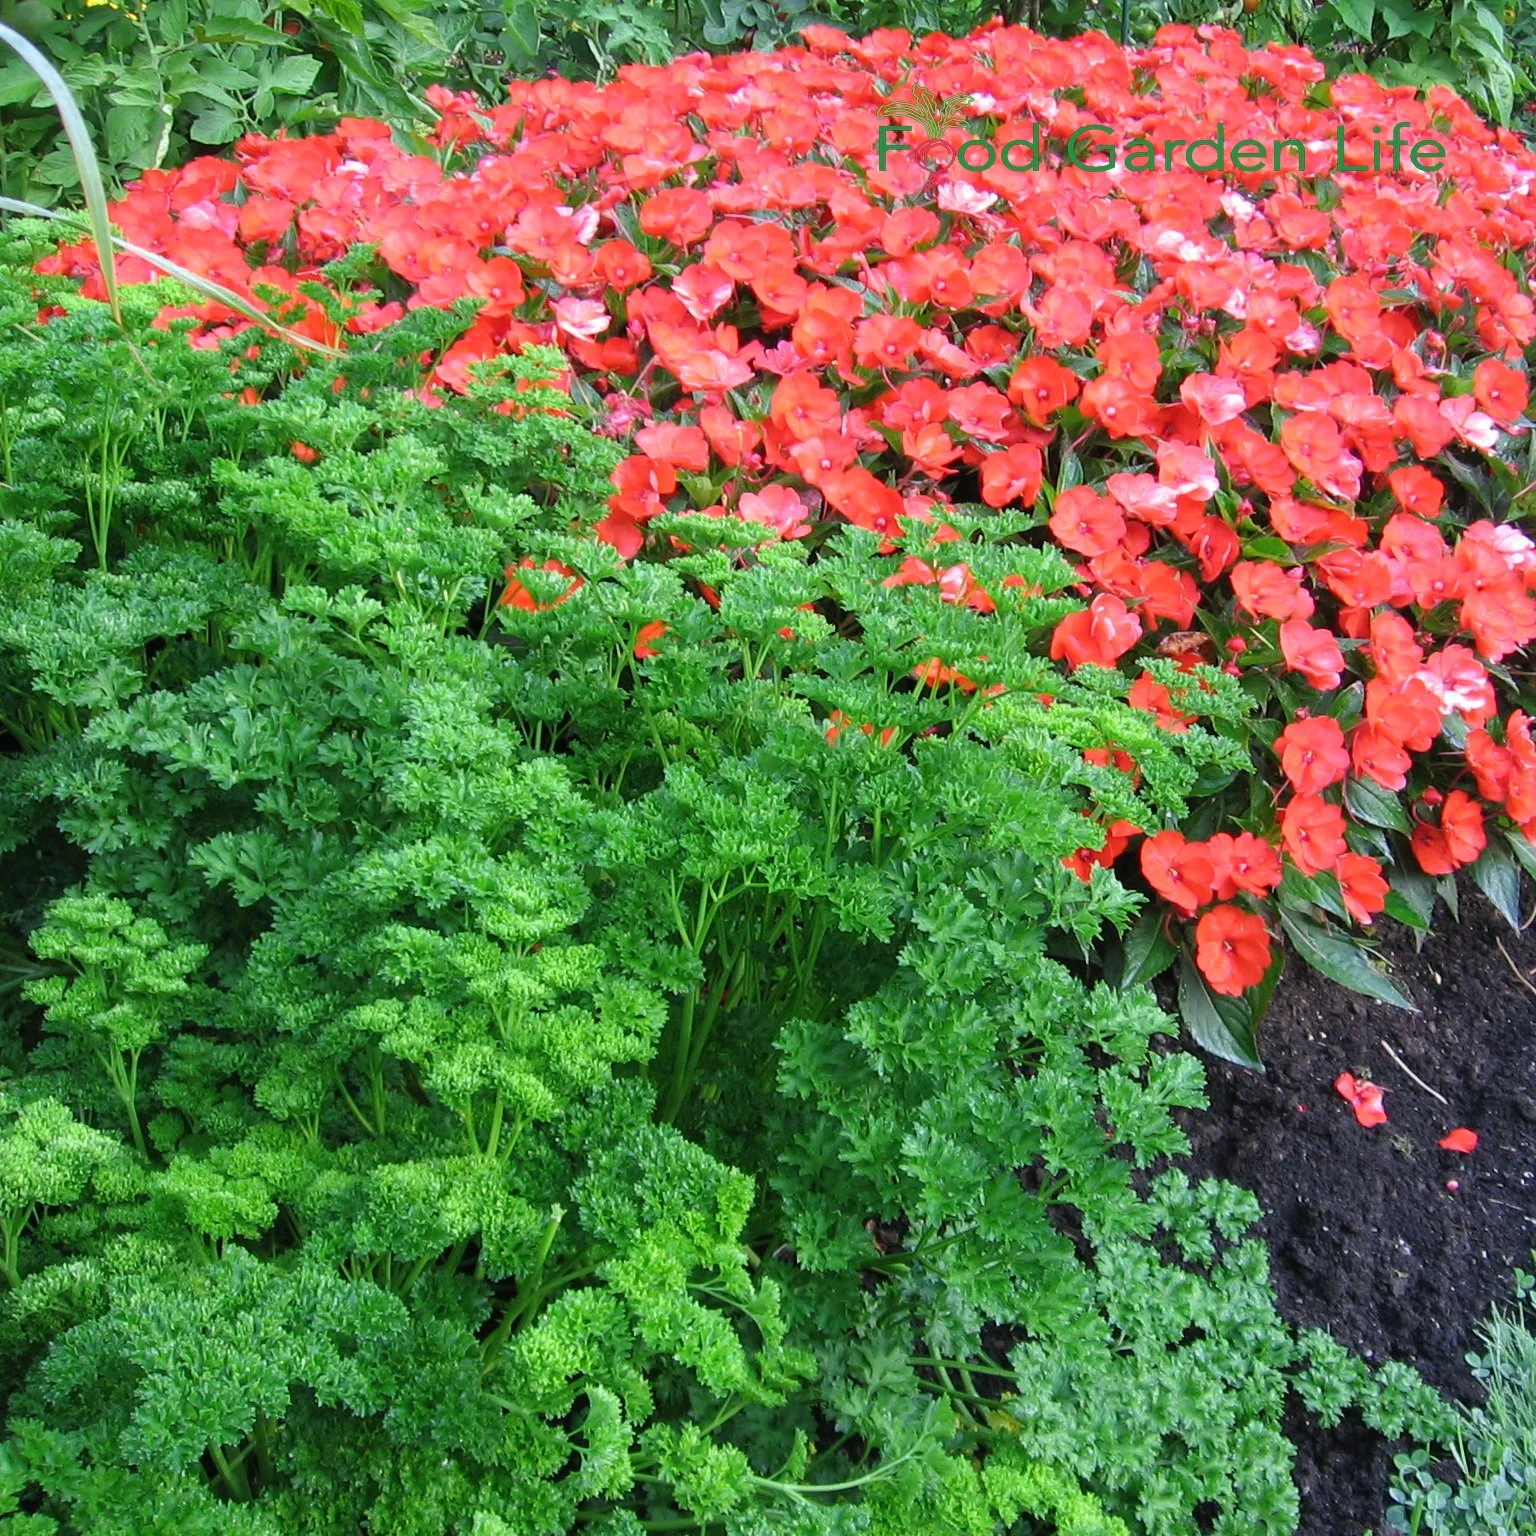
Parsley does very well in shady locations. And it’s a great plant for adding texture to a garden!
Find This Helpful?
Enjoy not being bombarded by annoying ads?
Appreciate the absence of junky affiliate links for products you don’t need?
It’s because we’re reader supported.
If we’ve helped in your food-gardening journey, we’re glad of support. You can high-five us below. Any amount welcome!
More Articles on Growing Crops
Articles about Growing Vegetables
Find out how to stake and support tomato plants.
Courses
How to Support Tomato Plants: Tomato Stakes and More
Support those tomato plants! This guide tells you how to stake, trellis, train, and cage tomatoes so you can fit in more plants and get a great harvest.
By Steven Biggs
Tomato Stakes, Cages, Trellises
Tomato stakes,tomato cages, and more: Pick a method that suits your garden and your approach to gardening.
Joe uses tomato stakes.
I don't.
My neighbour Joe's backyard is all garden. Full-on backyard farm. He has row after row of tomatoes, neatly staked, pruned, and trained.
My garden is maxed out on tomatoes too. But my tomato patch looks entirely different from Joe's.
I have some tomatoes in cages. The tomato plants on my driveway (where I can't hammer in a stake) are supported by a trio of stakes in a teepee formation. In another area, I grow indeterminate tomatoes up twine.
Joe and I both grow in ways that suit our garden layout and approach to gardening.
This guide has information about tomato stakes, tomato cages, and other ways to provide support for your tomato plants.
To Stake or not to Stake

When tomatoes are staked or supported, the fruit isn't touching the soil.
When to Provide Support
The easiest way to grow a tomato plant is to let it sprawl on the ground. This is often how processing tomatoes are grown on a field scale.
There are reasons for home gardeners to support tomato plants:
When tomato plants are staked or supported, the fruit isn't touching the soil, so it's cleaner, and there's less chance of rot and insect damage
Upright plants take up less space…so if you stake tomatoes, you can fit more plants into your garden
An upright tomato plant has more air circulation around the leaves—and that reduces the chance of disease
In my garden we have a high-density approach to growing tomatoes because my daughter grows over 100 varieties in our urban yard. We grow them much more densely than many gardeners, but it works well because we support and prune the plants.
Choose a Type of Support to Suit the Plant Type
Decide if You Need to Provide Support
Whether or not you need to support the plants depends on the type of plant you're growing.
“Dwarf” tomato plants are quite compact and usually don't need any pruning or support. Great for container gardeners!
“Bush” tomatoes (also called determinate tomatoes) get to a certain height and then don't get any taller. The harvest window is shorter. Great if you want a concentrated harvest for sauce-making or processing. Stake or cage determinate tomato plants to increase planting density and to keep tomatoes off the ground.
Indeterminate tomatoes keep getting taller and taller all summer long. Great if you want an ongoing harvest. Prune and support indeterminate tomatoes to optimize production—and know that they can get very tall by the end of the summer.
Tomato Staking and Support Ideas
Tomato Stakes or Cages?
There are lots of ways you can stake and support tomato plants. Pick one that suits your garden and the amount of time you want to spend tending your tomato crop.
Here are ideas for supporting your tomato plants:

Staked tomato plants with wooden tomato stakes.
Tomato Stakes
Tie your tomato plant to a stake. A lot of gardeners keep one main stem, pinching off side shoots (called suckers). See ideas for support stakes below.
We tie the plants to the tomato stakes with a soft twine. Some gardeners prefer to use plant clips. My dad used strips of plastic garbage bags because they were soft and stretched.
Tomato Cages
Grow the tomato inside a supportive cage-like frame. Plants in cages can be wider—so having more than one main stem is common. See below for a tip on making your own heavy duty tomato cages.
Grow Tomato Vines up Twine
Visit a commercial tomato greenhouse and you're likely to see tomato vines growing up a piece of twine that is suspended from above.
We use a variation of this twine method in our garden, where we make tall A-frames with bamboo, and run a horizontal pole between them—six feet up in the air. Then we dangle pieces of twine from the horizontal pole, and train the stems up the twine. This way we can space our tomatoes very closely together so that we can fit more tomato varieties into the garden.
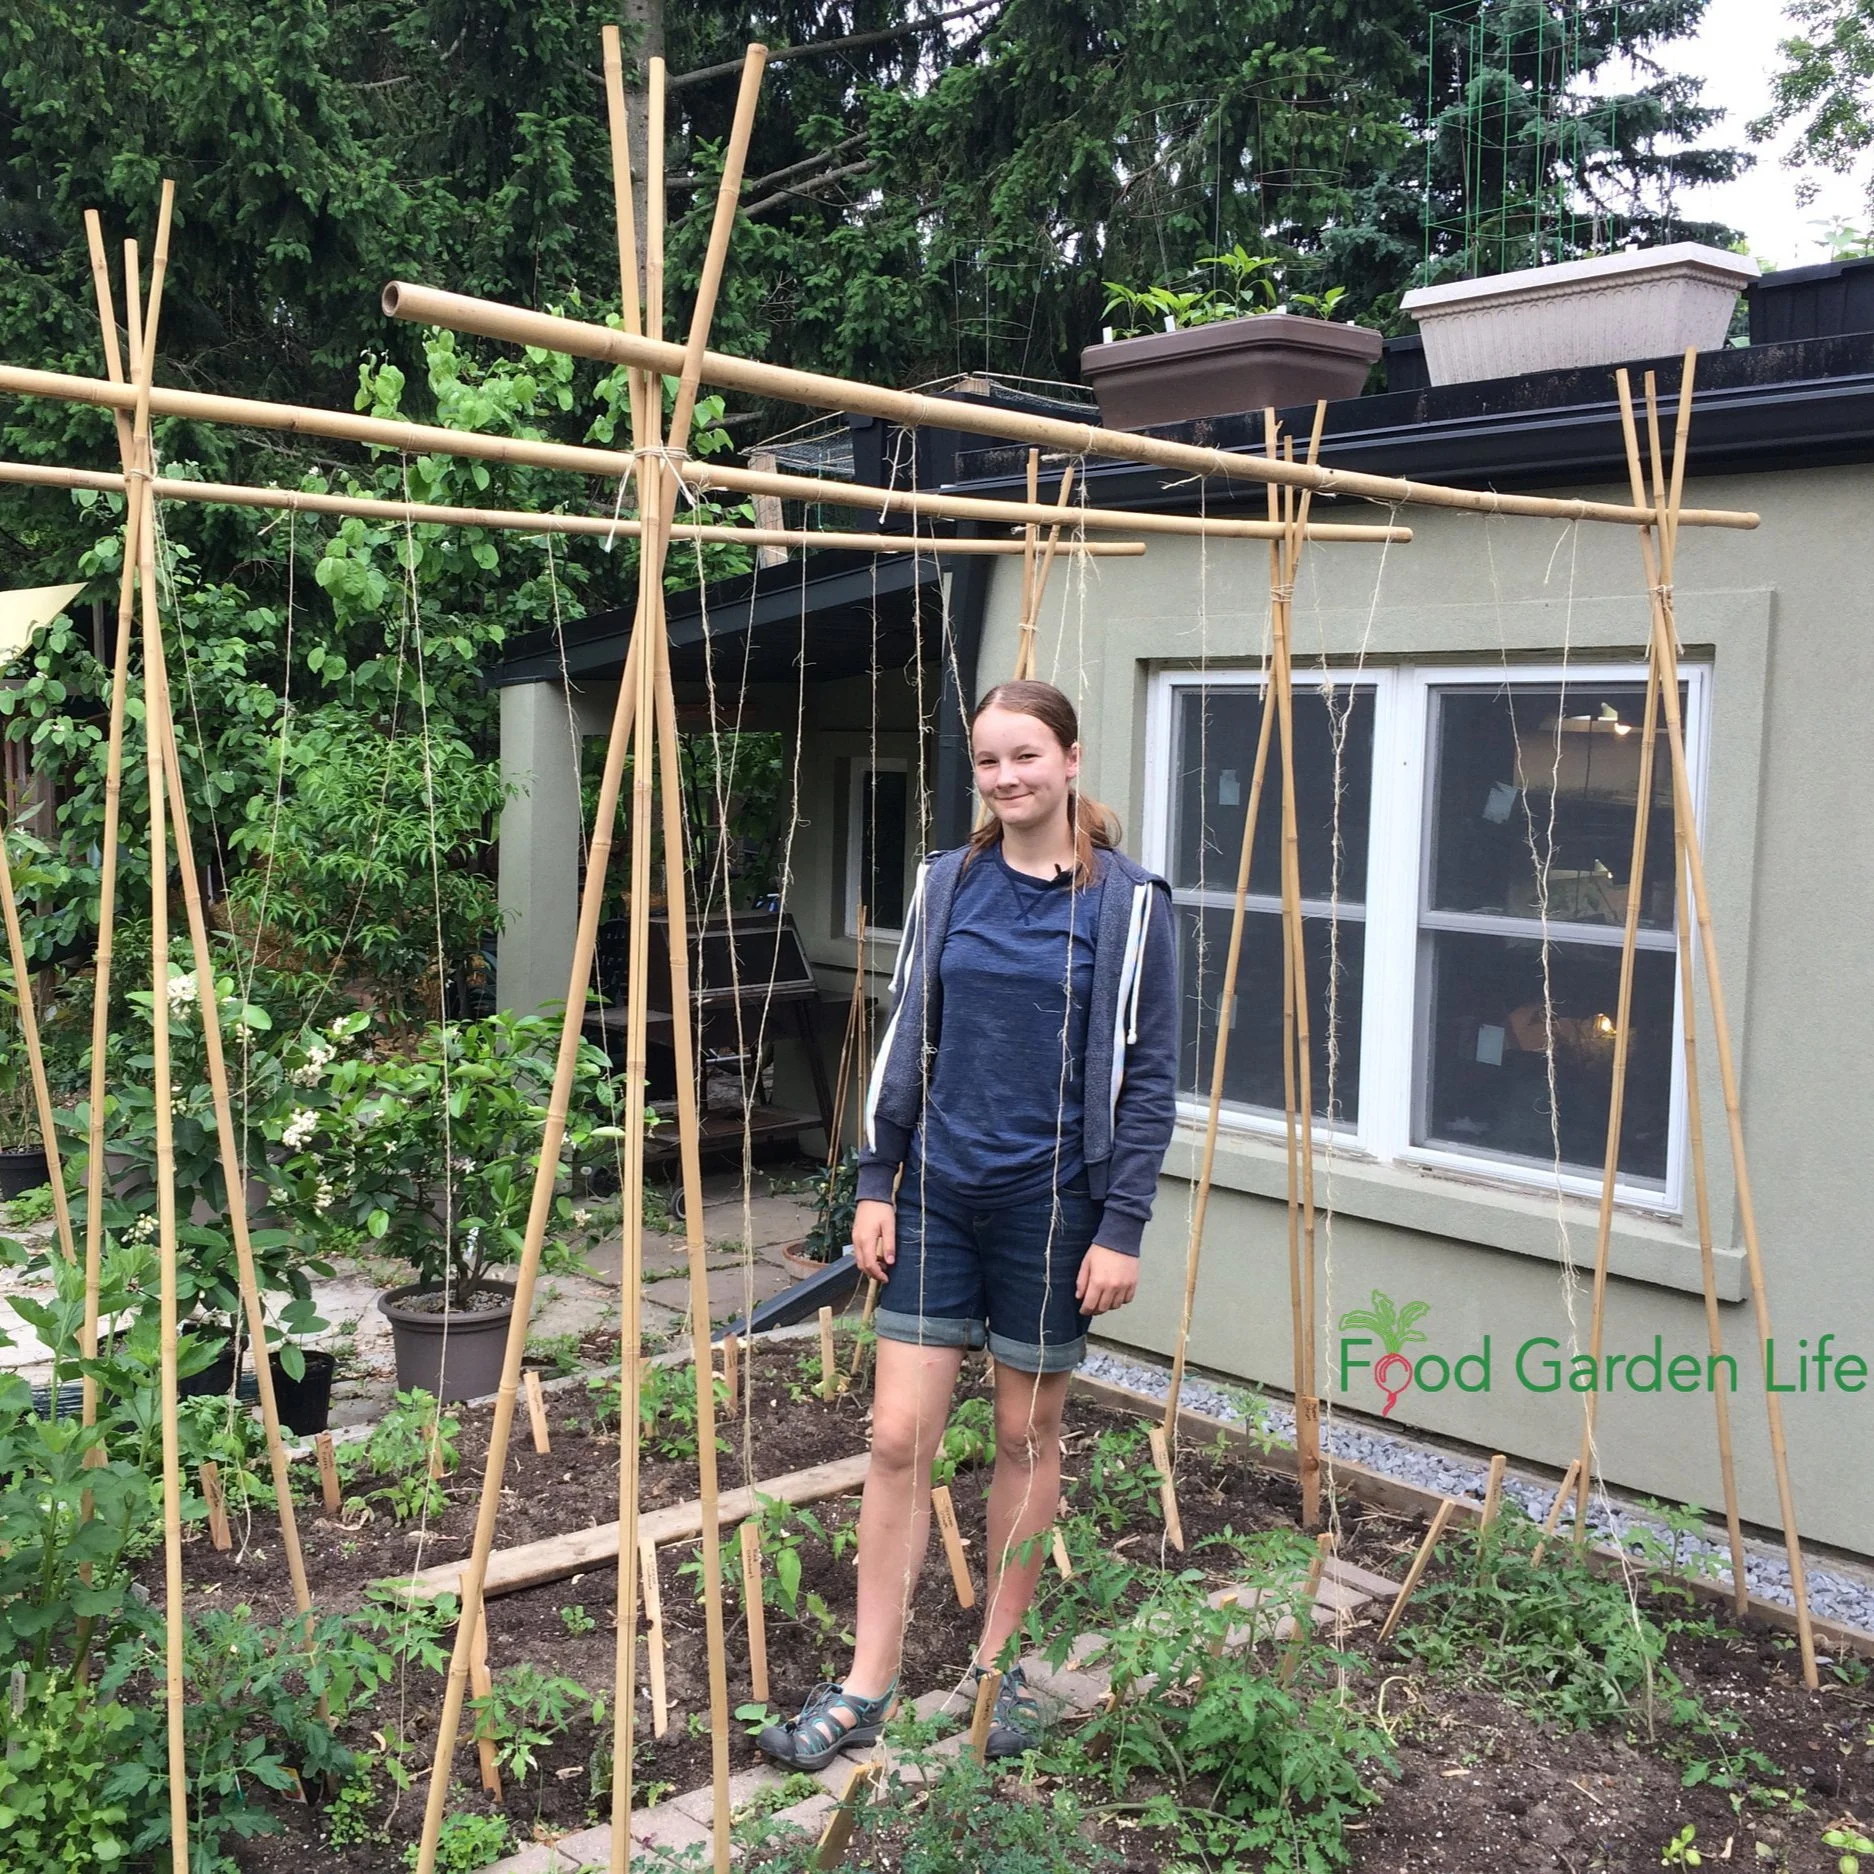
We make tall A-frames with bamboo, and run a horizontal pole between them.
Then we dangle pieces of twine from the horizontal pole, and train our tomato plants up the twine.
Florida Weave

The “Florida Weave,” where twine supported by two end stakes is woven around the tomato plants for support.
In this method of supporting tomato plants, we weave the tomato stems between horizontal rows of twine. Start by putting stakes at both ends of your tomato row. As plants get taller, keep adding rows of twine, and weave the stems between them.
Grow a Tomato Arch
If you have an archway in your garden, use it for tomato plants.
Indeterminate tomato varieties get taller, and taller, and taller. As they reach the top of the arch, you can train them down the other side.
Make Your Own Tomato Cages

Make a tomato arch with cattle panel wire.
A lot of the so-called tomato cages sold at garden centres are just too small to be useful. And if you find larger cages, they can cost you an arm and a leg.
We make our own tomato cages from the sheets of wire mesh used to reinforce concrete.
Cut the 4' x 8' sheet into two 4' x 4' sections (bolt cutters work well)
Then, bend the mesh into a cage
The bending takes effort as this is a strong material (I find that it works best if I place a board over the line I want to bend along, and then stand on the board as I bend the wire upwards)
These homemade tomato cages are long-lasting. Our oldest ones are over 15 years old and going strong.
If you're creative, you might come up with other materials to make your own tomato cages. I've seen old bundle buggies used!
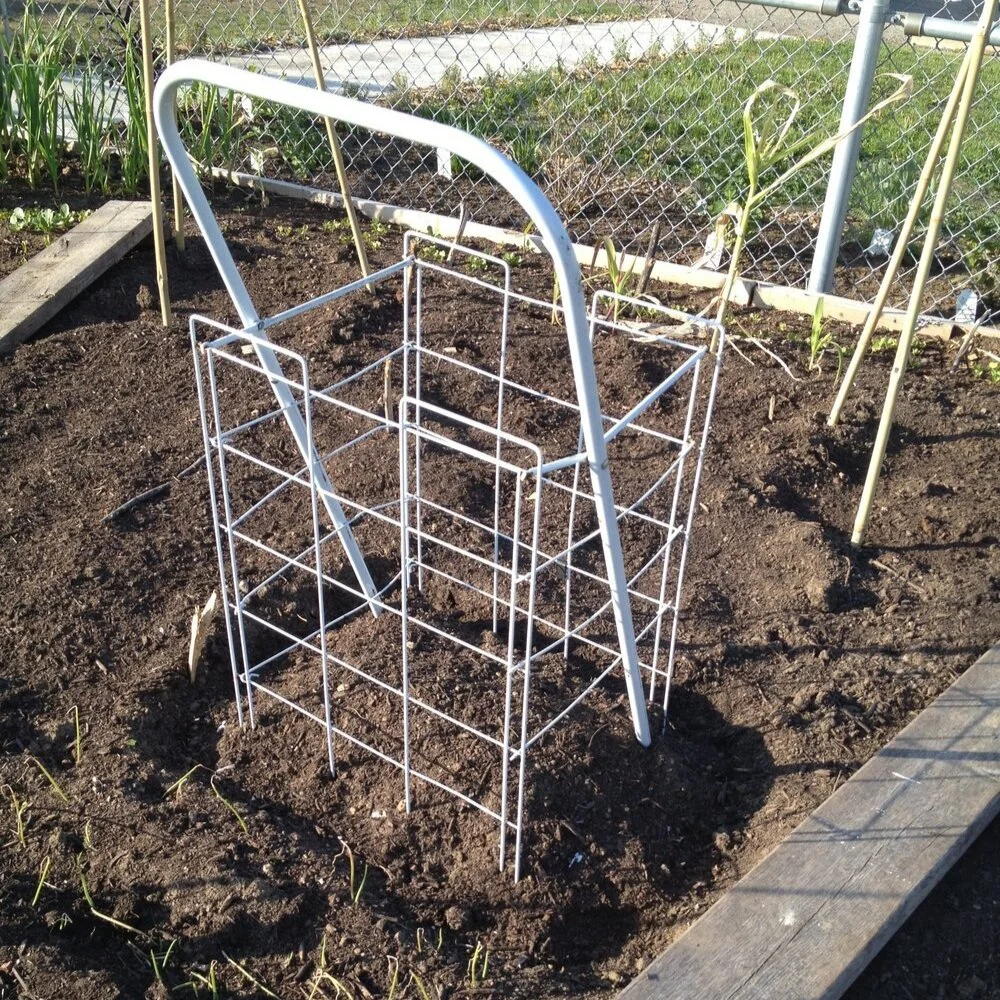
Be creative! A bundle buggy as a tomato cage.
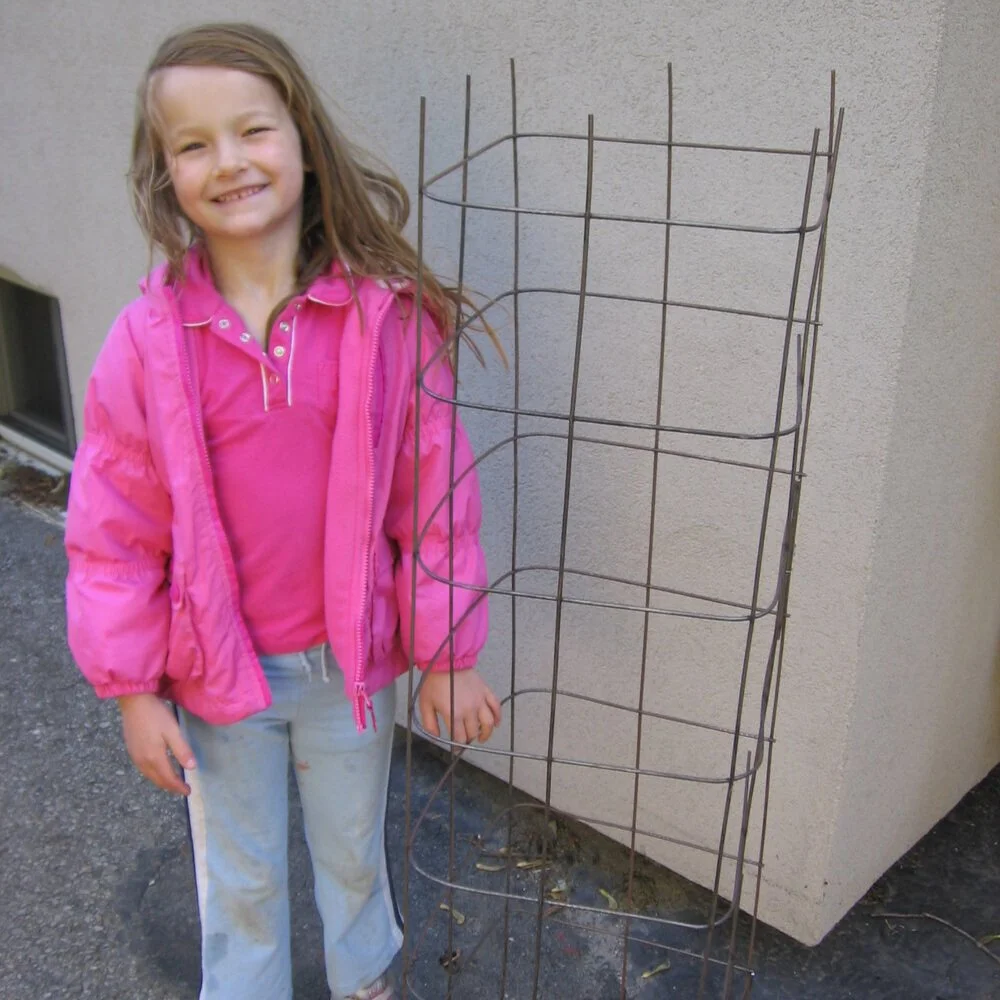
My daughter Emma and I made our own tomato cages by cutting and bending wire mesh.
Ideas for Tomato Stakes

Bamboo for tomato stakes. Make sure it's thick enough as thinner pieces might be too flimsy.
There are lots of other things you can use as tomato stakes. Here are ideas:
Iron rebar
Iron t-bars
Lumber (1x2 and 2x2 stakes are common, and if you buy pre-made 2x2 stakes they often come with a pointed tip)
Bamboo
Metal pipe
Bamboo and wood rot over time. But they widely available and relatively inexpensive.
My Favourite Tomato Stakes
I'm not a fan of the flimsy plastic-coated tomato stakes sold at garden centres. They're short-lived and look pretty ugly as the plastic ages and cracks.
My favourite tomato stake is iron rebar. Here's why:
It's long lasting
It's thin, making it easier to push into the ground by hand (iron t-bars last a long time too…but need hammering into the ground)
As it oxidizes, it becomes brown and blends into the surroundings
Ready to grow better tomatoes?
The Tomato Overload Masterclass covers varieties, seedlings, pruning, support, watering, and harvesting.
Best Twine to Use
If you opt to grow tomatoes up twine, keep in mind that by the end of the season, a tomato-laden plant weighs a lot. We've used natural-fibre twines such as just and sisal some years—but they aren't always up to the task for the whole season.
If you can find it, get a tomato twine. Such a thing exists; it's what's used in commercial tomato greenhouse operations.
How to Stake a Tomato Plant in a Straw-Bale Garden
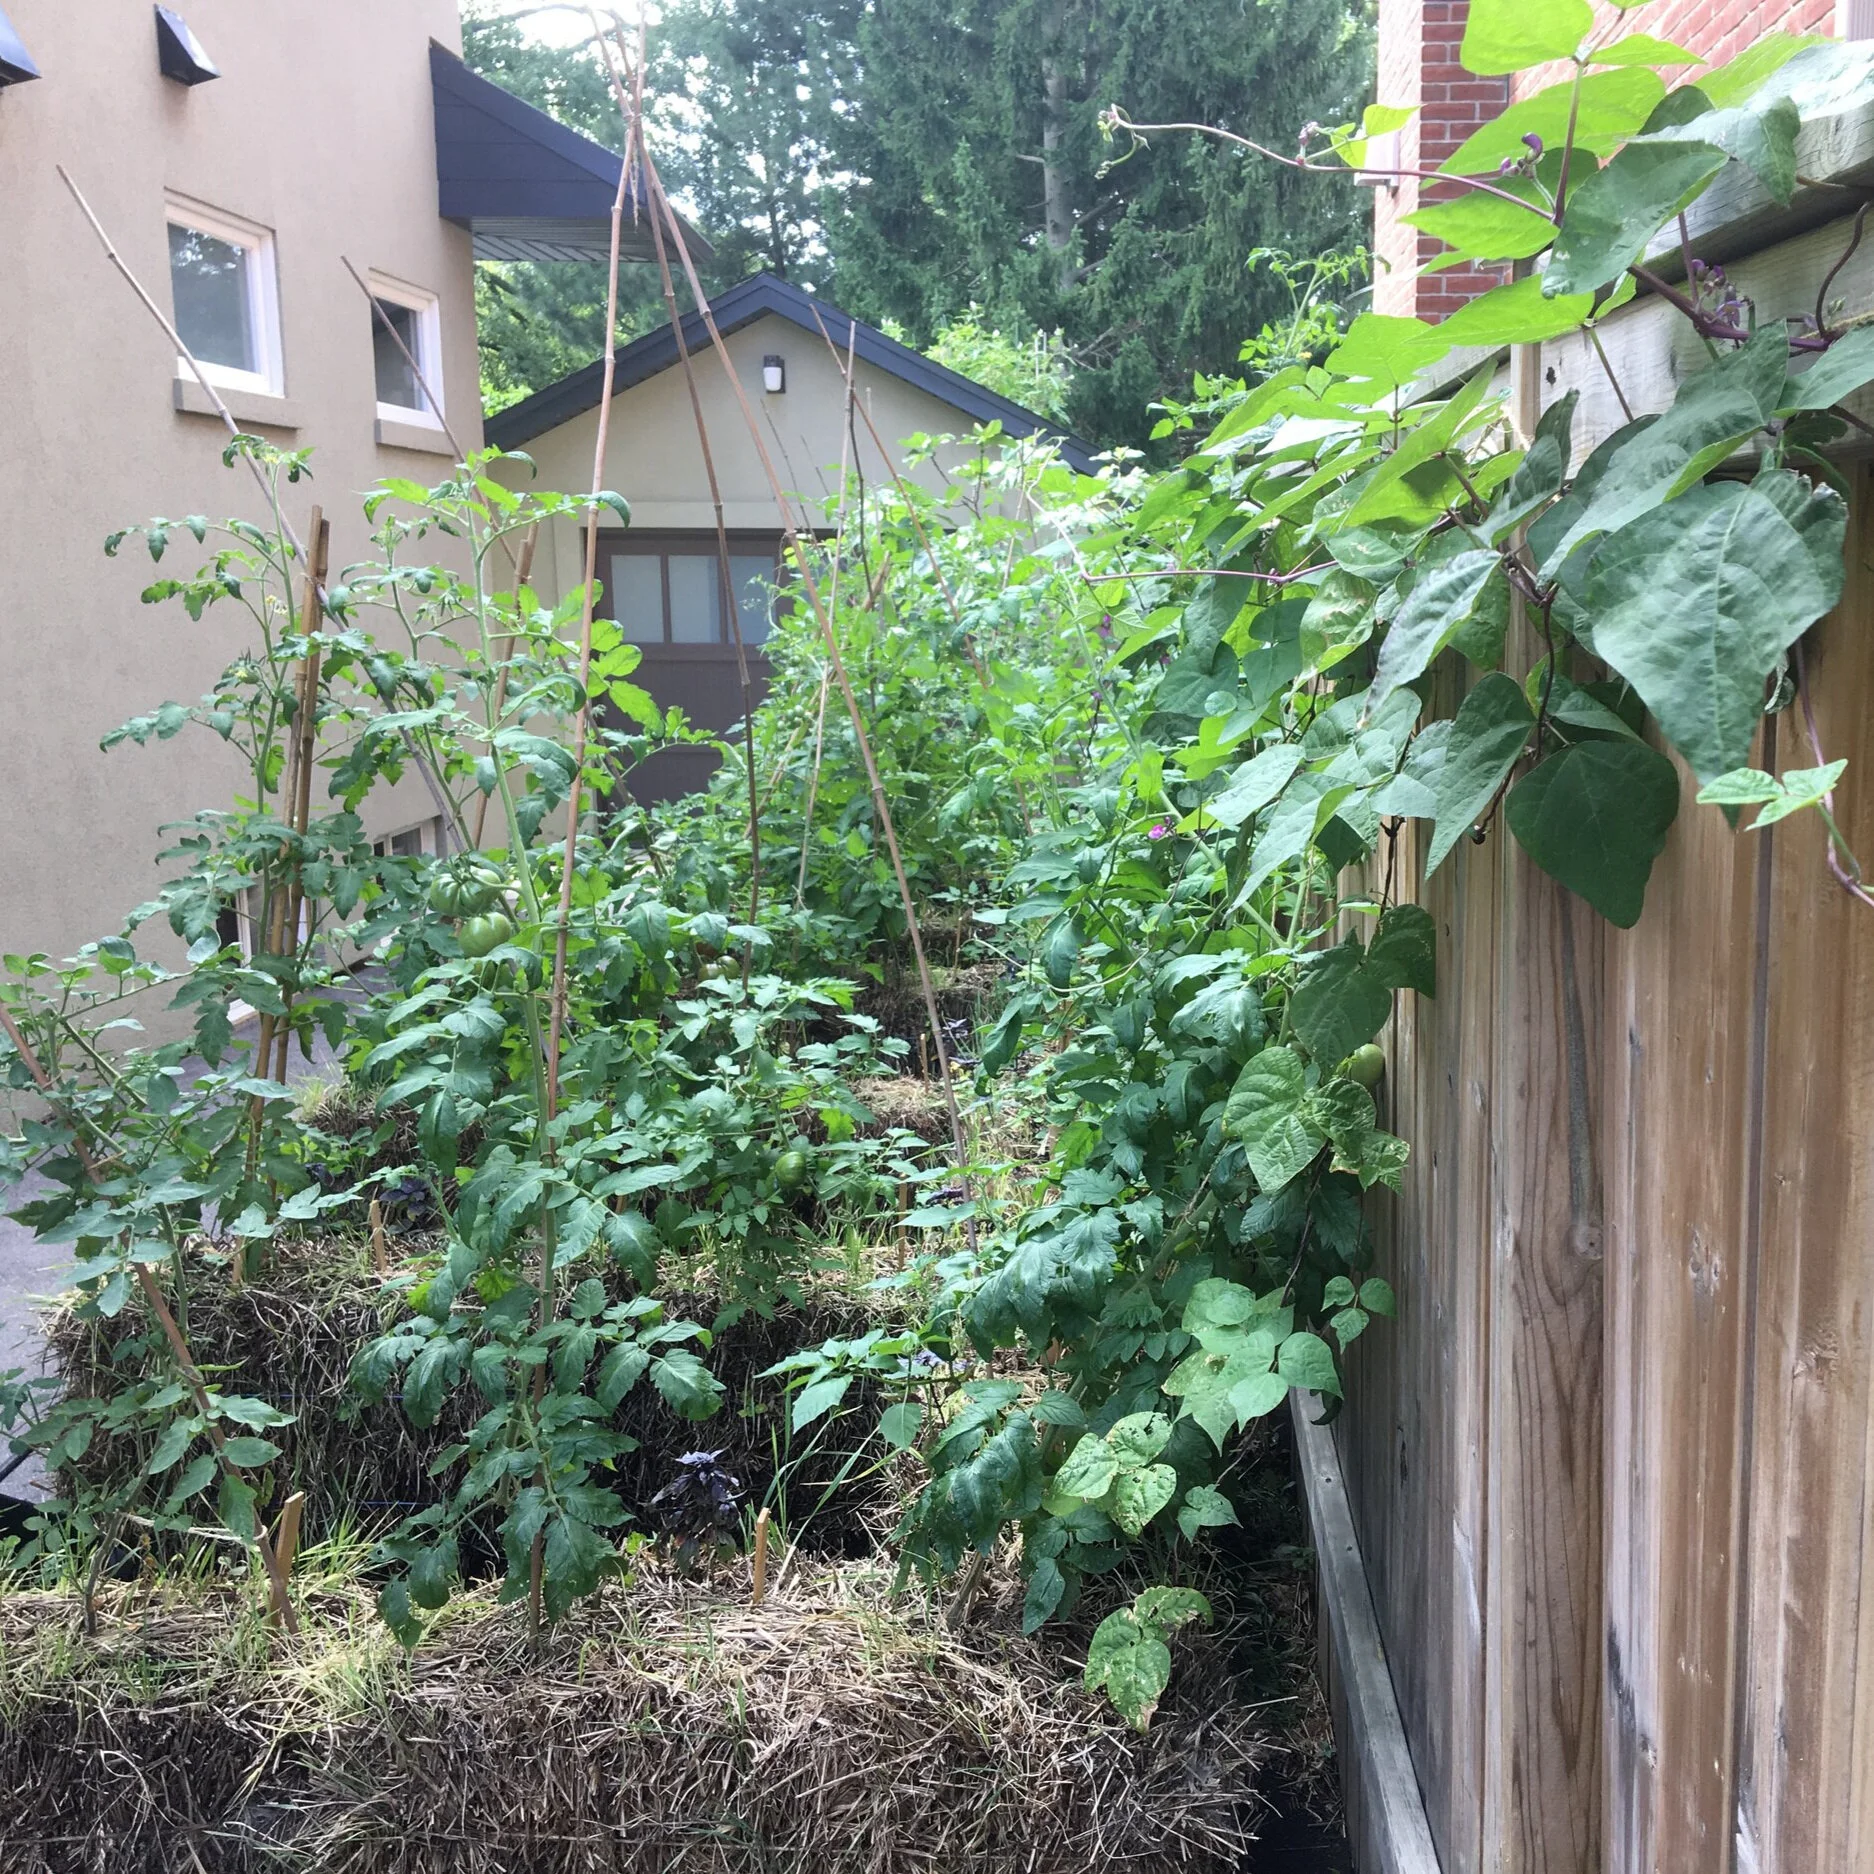
The tomatoes in this driveway straw-bale garden are supported with bamboo tripods.
If the concept of straw-bale gardening is new to you, read this article.
Straw bales break down as the summer progresses. That's what we want. But the result is that what seem like a firmly anchored support stakes in the spring will move (unless you drive the stake deep enough that it goes right through the bale and into the underlying soil.)
In our driveway straw-bale garden, we make tripods out of lumber or bamboo, tied together at the top. If the base is spaced out and balanced, they support the plants all summer.
How to Support a Tomato Plant in a Container
Determinate plants in containers need some sort of support, such as the tomato cage shown here.
If you're growing dwarf tomato plants, they likely won't need support.
But if you're growing determinate plants, you'll probably want to support them. I find that cages work well.
Note: When growing in containers, the shorter the better. That's because if the plants are too tall, there's a chance of the container tipping over in the wind.
Tomato Support FAQ
How often should I prune and train my tomato plants?
Ideally you don't want to let suckers get too big before pruning them out…it's a waste of energy that would be better spent growing tomatoes! In the summer when they're actively growing, check them once a week. (But don't sweat it if you miss a week.)
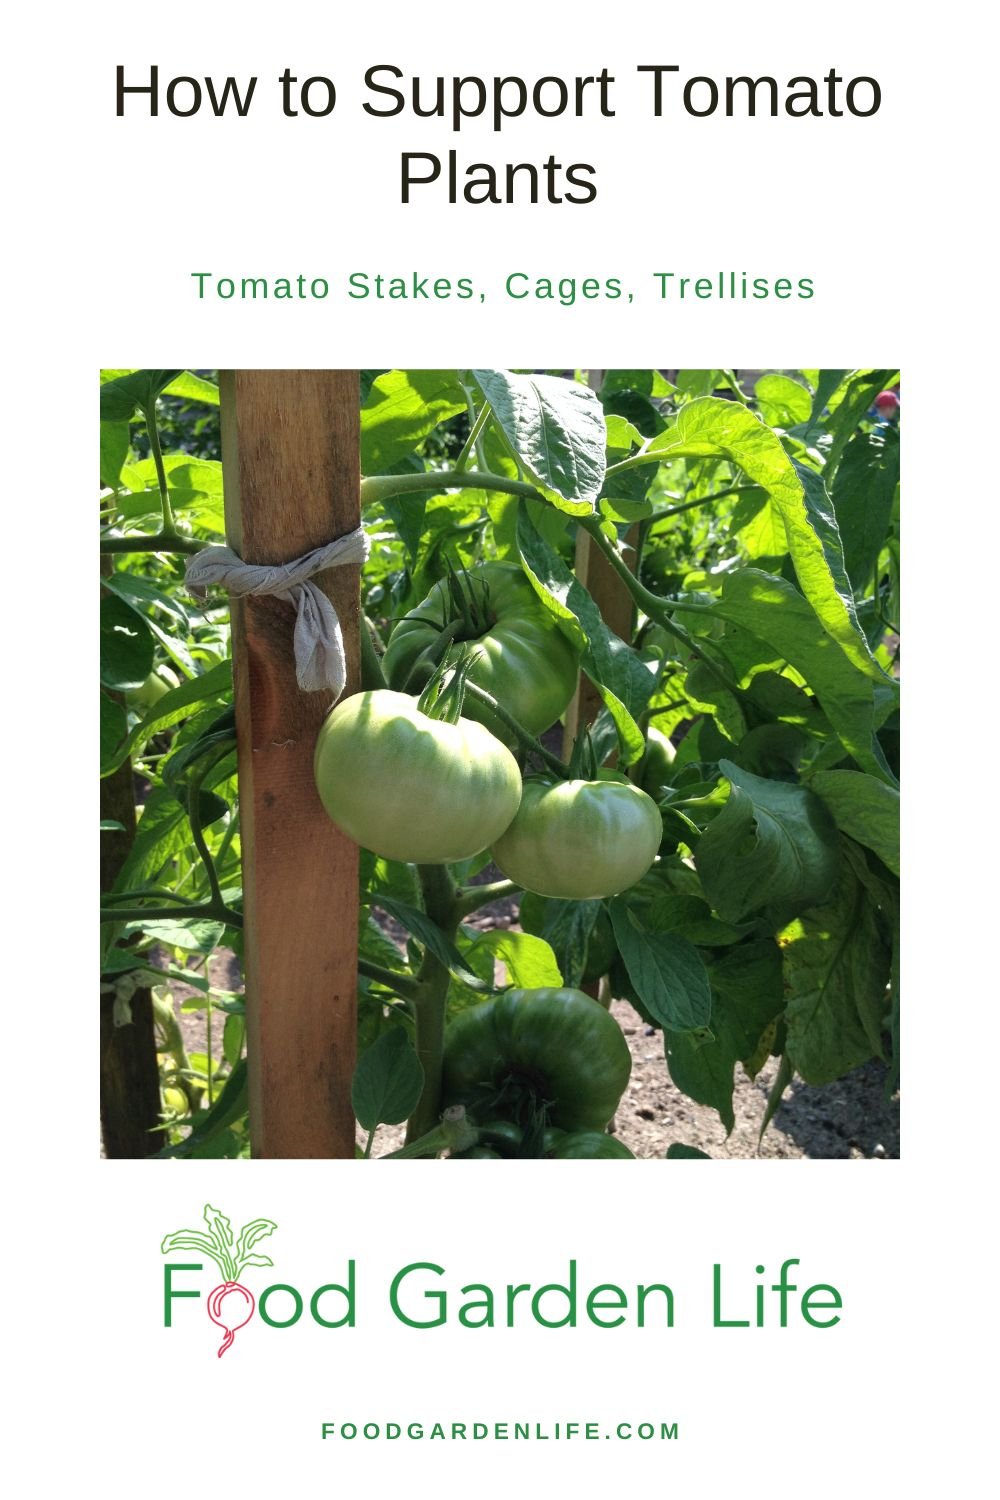
Pin this post about tomato stakes!
What should I do when the tomato plants gets taller than the tomato stakes?
Find a taller tomato stakes, or bend over the top of the plant and allow some stems to grow from down below.
Should I leave one stem or more than one stem?
It's up to you. But here's what I do: For tomatoes on twine, I leave only one stem. In a cage, I allow 3 or 4 to grow because the plant has more space.
What should I use to tie my plants to the tomato stakes?
I use a natural-fibre twine such as sisal or jute because at the end of the season I can compost it or let it fall to the soil where it decomposes.
Here are more ideas for tying plants to stakes:
Dad used to cut up black garbage bags into strips because it made a soft tie that didn't damage the tomato stem
My neighbour Sally used strips of old panty hose as tomato ties
You can buy purpose-made ties…but don't waste your money
Will the tomato cage tip over when the plant gets big?
Can do. I drive one stake into the ground and secure a corner of the cage to it. That prevents any tipping as the plants get bigger.
Find This Helpful?
Enjoy not being bombarded by annoying ads?
Appreciate the absence of junky affiliate links for products you don’t need?
It’s because we’re reader supported.
If we’ve helped in your food-gardening journey, we’re glad of support. You can high-five us below. Any amount welcome!
More on Tomatoes
Check Out These Tomato Guides
Hear Experts Share Tomato Tips
Course: Tomato Overload Masterclass
Want to up your game growing tomatoes?
This self-paced course helps you choose great varieties, grow great seedlings, give plants the care they need, and enjoy an abundant harvest.
More on Edible Gardening
7 Vegetable Garden Layout Ideas To Grow More Food In Less Space
Course: Edible Landscaping
Not Enough Garden Space? Try These Small Veg Garden Ideas
By Steven Biggs
Fit More Vegetable Plants in the Same Small Space

Ideas to help you harvest more from the same small space.
Want to harvest more fresh vegetables from your small-space garden? Sometimes it helps to forget what you’ve seen. And do things differently from what's done in a big garden or commercial farm.
Commercial growers often focus on uniformity, and on perfect, unblemished produce. They also need space for equipment or employees to work around the plants.
But in a small home edible garden, where there’s not a lot of growing space—and where we’re just growing our own food—our needs are different. We want a variety of crops. We want an ongoing harvest. And we want it to be simple enough to fit into our everyday routine.
If you're struggling to fit everything you want to grow in your vegetable garden, keep reading for ideas to make the most of your growing space.
Key Takeaways: Make the Most of a Small Vegetable Garden
Recommended plant or seed spacing sometimes uses more space than required in a small vegetable garden.
Vertical gardening helps to fit more plants in a small garden bed.
Companion planting is a simple way to boost the output of a small vegetable garden.
Farmers sometimes leave fields fallow, but there's no need for this in a home vegetable garden.
Many crops have more than one edible part, making crop choice a simple way to grow more of your own food in a small space.
Reconsider Plant Spacing in a Small Vegetable Garden
Do you grow vegetables with the spacing suggested on seed packets or plant labels?
I don't. I always sow carrots, lettuce, and beet seeds more densely than recommended. Then I thin them out as the plants start to grow.
And the thinning is not a waste. Because I eat the small plants that I've thinned out. Baby carrots, lettuce, and beets are a treat.
Recommended plant spacing usually gives plants a suitable amount a space to develop to their final size. But there's no reason you can't use some of the space to grow baby plants while the crop is small.
There are lots of other ways to save on spacing. I often plant a few onion sets on the sloped edges of my raised soil beds. They might not get quite the amount of space recommended...but I'm using space that might otherwise not be used.
My daughter is an avid tomato grower. Some years she's trying to fit 100 varieties into our yard. She does that by planting them close together, and then growing them up twine (see Vertical Gardening, below.)
Take Up a Smaller Footprint with Vertical Gardening
Use Vertical Space in Your Vegetable Garden
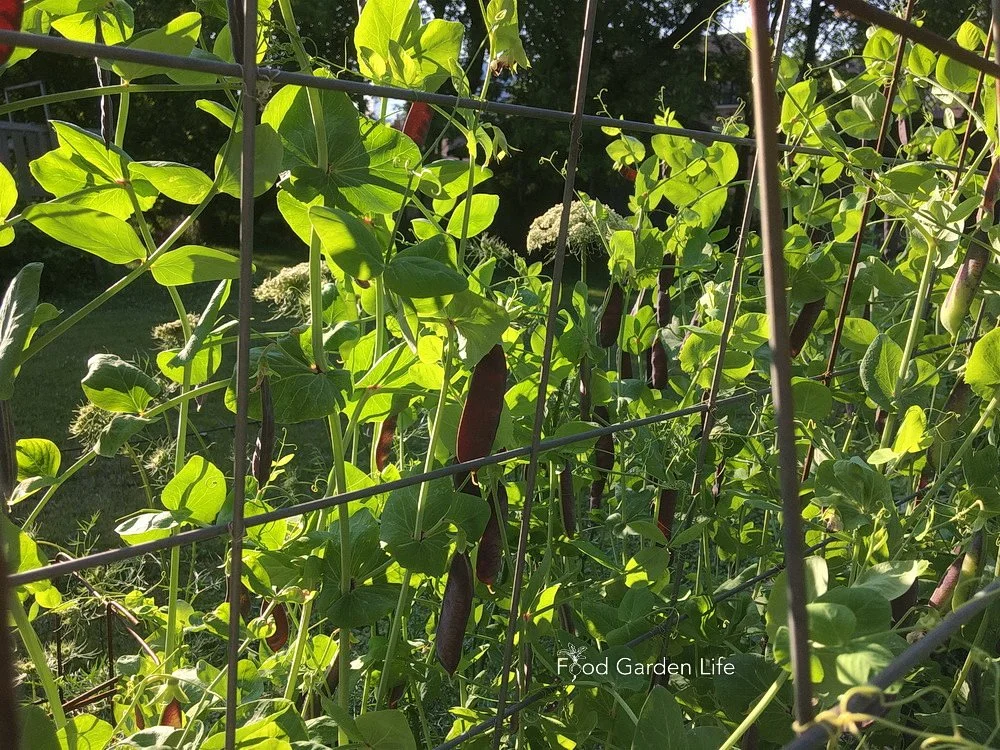
Growing vining peas up a trellis in a small garden.
When space is at a premium, don't let vining plants sprawl all over the garden bed. Grow them upwards, instead.
I’ve seen watermelons growing on A-frames, each melon supported by a sling! And there are other vining plants such as cantaloupe, indeterminate tomatoes, and cucumbers that you can grow vertically to maximize yield in a small space.
With the vining plants growing up your A-frame, you can now grow shade-tolerant vegetables such as leafy greens under the A-frame.
Here's another idea: My neighbour Joe has a 10-foot-high wall of pole beans around his vegetable garden…an edible wall! Bush beans are great, but if your growing space is at a premium, pole beans take up less of a footprint.
Choose Varieties Suited to a Small Space
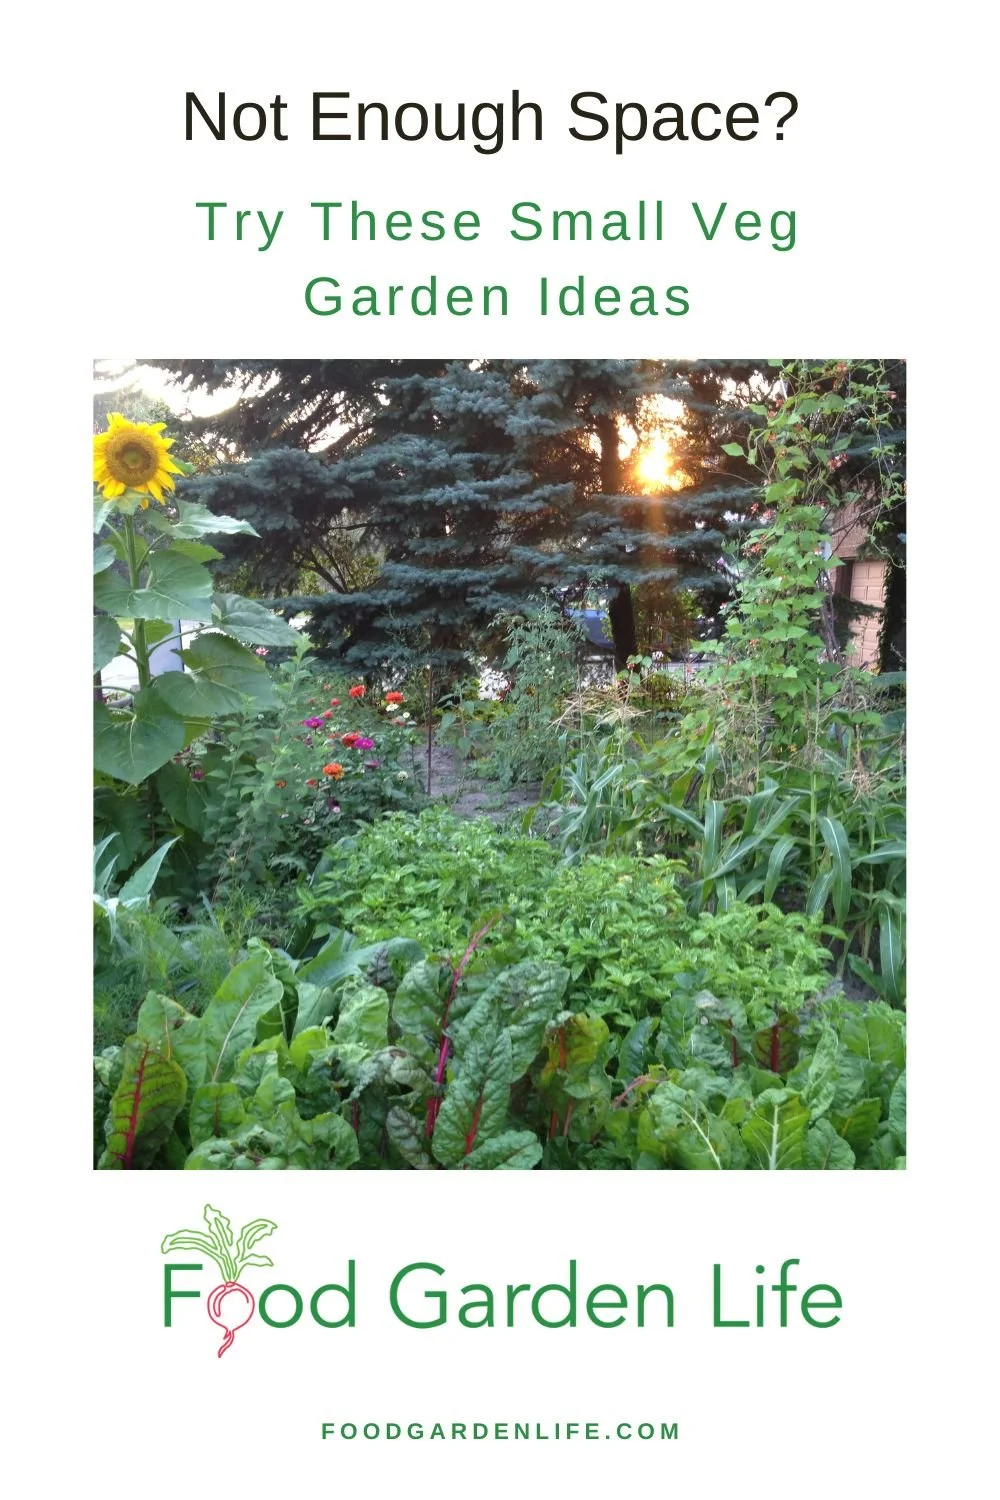
Pin this post!
When planning your vegetable garden, variety choice can help you grow vertically to maximize your available space.
Some plants, such as peas, beans, tomatoes, and squash, are available in both vining and bush forms. Fit more into a small space by choosing the vining varieties that you can grow vertically.
Bush beans are a great choice if you want a larger harvest all at once for a big feed or preserving...but the trade-off is that they use more space.
Small Space? Grow Vegetables on Fences and Walls
Make the most of your outdoor space by growing on walls. All you need is a trellis or twine.
An empty fence is a wasted opportunity. My neighbour and I share the squash that I grow along our fence. Great way to hide a chain-link fence!
(And don’t forget that the top of a fence can be dressed up with a window box. A fence-top container garden!)
Try Companion Planting
Companion planting just means growing different plants together for some sort of benefit.
Companion plants might attract pollinators, lure away pests, deter pests, or attract beneficial insects. Those beneficial insects can help with pollination, or they might parasitize or eat insect pests. There are lots of opportunities for companion planting in a vegetable garden.
Below are a couple of ways to use companions to fit more vegetables into your small garden.
Plant 2 Different Crops in the Same Spot—at the Same Time
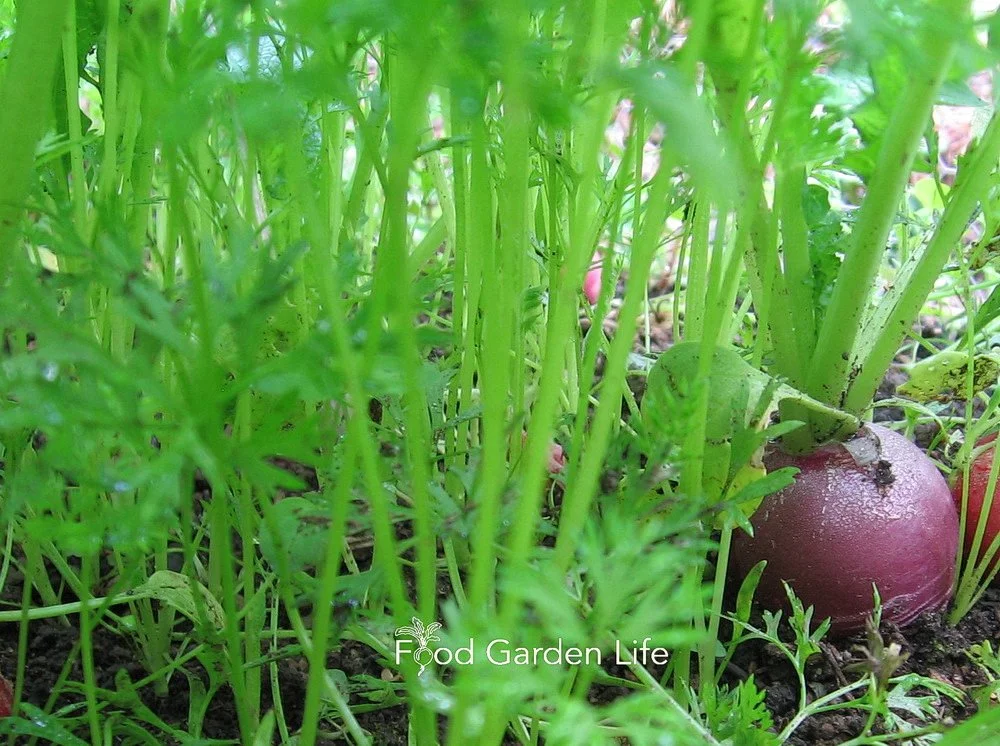
Growing radish and carrots together. The radishes are ready to harvest while the carrots are still quite small.
Waste less space by planting both fast- and slow-germinating seeds in the same space, at the same time.
My favourite example of this combination is pairing carrots and radishes. They are both root vegetables. And they are well-suited to being grown together in the same space because one grows quite quickly, one slowly.
Carrot seed is slow to germinate; radish seed is fast. And radish roots are ready to pluck from your garden way before your carrot roots are even getting chubby. That means you’ll be harvesting full-grown radishes just as your carrot seedlings need more space. As you pull out the radishes, you give the carrots more space to grow.
Wondering how one plant benefits the other in this scenario? Pulling out the radishes, which have taproots, also loosens the soil for your carrot seedlings!
Pair up Sun-Lovers and Shade-Lovers
When deciding which crops to plant together, think about sunlight.
If you have staked tomato plants, there can be a lot of unused, shady ground around them. (If it’s not yet shady, it will be, once the tomato plants get bigger.) Sprinkle seed for leafy vegetables at the base of your tomato plants. Lettuce lasts much longer when growing in some shade in the heat of summer.
Or, make an a-frame for growing climbing plants, and plant leafy greens in the shade below.
Use Your Garden Space as Long as Possible
Start as early as possible in the spring with cold-hardy crops. If your garden includes containers and raised bed, remember that the soil in containers and raised beds heats up more quickly than the ground, and that heat can speed along early spring sowings.
As your crops mature, plant new crops in the same space. Farms sometimes have “fallow” fields, unplanted fields, to control weeds or to conserve moisture. That’s fine for farms—but not for a small vegetable garden. Use your space continuously. You just need to recharge your soil nutrients, and you can do that by amending your garden soil with compost.
Don’t forget to grow cold-hardy crops in the fall to overwinter in cold frames and harvest all winter long. You can also plant cool-season crops in late summer and fall to harvest in early winter and further extend your harvest window.
Grow Vegetables That Produce a Lot in a Small Space

Radish seed pods are edible! A crunchy, peppery garnish.
Grow Plants with Multiple Edible Parts in a Small Garden
Growing plants with more than one edible part is a great way to get more from your growing space. Many plants have more than one edible part.
Growing beets? Eat the leaves, too, which are like chard. Garlic makes “scapes” that are edible and sought after by gourmet chefs! Radishes? Try the crunchy, peppery seed pods. One year, my daughter made pesto from young radish leaves…who knew?
In a Small Space, Plant Vegetables That Mature Quickly
Brussels sprouts? Leave them for farmers because they take up growing space ALL season and then you only harvest them once there's a fall frost.
As you think about vegetables to grow, consider kale, which you can be harvesting spring through fall, and even into the winter. Or cauliflower, which, after you harvest it, you can follow with another crop of something else.
Extend a Small Garden with Containers
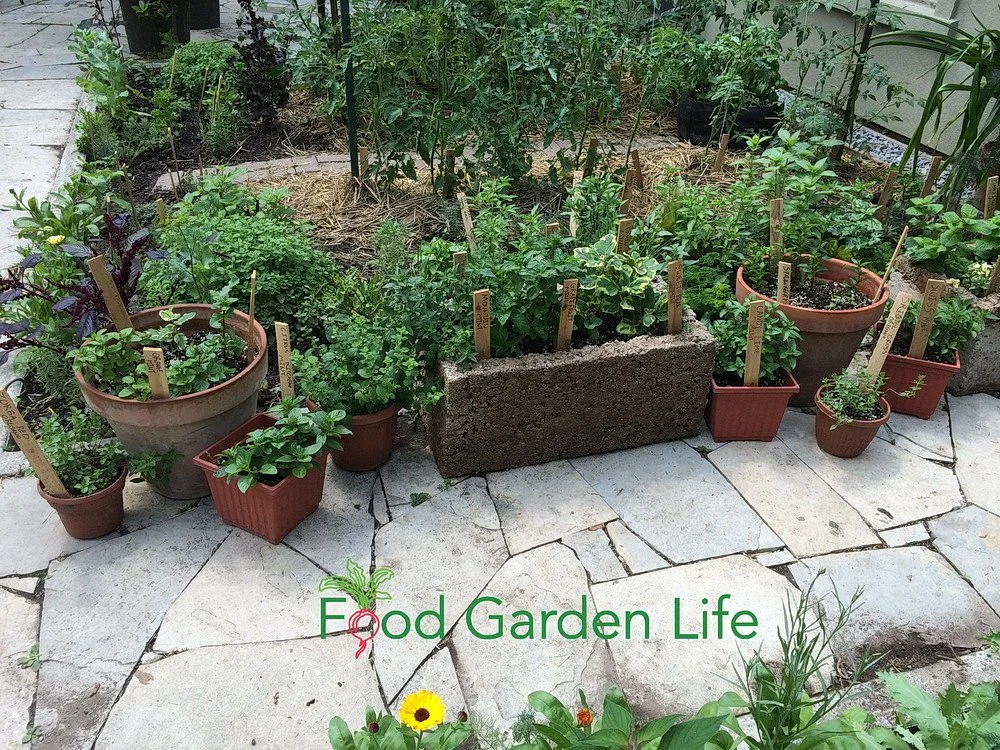
Using containers to make additional growing space beside this small garden.
Add Containers to Small-Space Gardens
Container gardening is a great way to extend a small vegetable garden, even if you don't have more in-ground growing-space.
Extend your small garden onto a patio, a deck, driveway or rooftop. Or even add window boxes.
For best results growing in containers, use a good potting mix. Here's more on potting soil.
And Finally...Forget Perfection in Your Small Garden
You probably don’t have the ideal conditions for some crops. Maybe your garden soil isn’t quite what you want…maybe you don’t have enough sun.
If you were a commercial market gardener, this could be a big deal.
But if you’re a home gardener, figure out how to make the best of what you have. For example, I grow tomatoes in a container garden on my driveway—in less than 6 hours of sunlight. I get A LOT of tomatoes from space that would otherwise go unused. Sure, it’s fewer tomatoes than if I had full sun on my driveway. But it’s more than I’d get if I didn’t grow there.
Gardening is a great cure for perfectionism. There’s real satisfaction in harvesting fresh produce from your own garden.
More on Vegetable Garden Planning
Find This Helpful?
Enjoy not being bombarded by annoying ads?
Appreciate the absence of junky affiliate links for products you don’t need?
It’s because we’re reader supported.
If we’ve helped in your food-gardening journey, we’re glad of support. You can high-five us below. Any amount welcome!
Course: Edible Garden Makeover
Want to make an edible garden you love to be in?
If you've been thinking about growing more of your own food, but are holding back because you have information overload...
Or if you just don't know where to start.
Edible Garden Makeover gives you the ideas, knowledge, and confidence to make a unique edible landscape for your yard and your needs.

Eat Your Own Fresh Tomatoes in March! Grow Storage Tomatoes
By Steven Biggs
Long Keeper Tomatoes Last all Winter
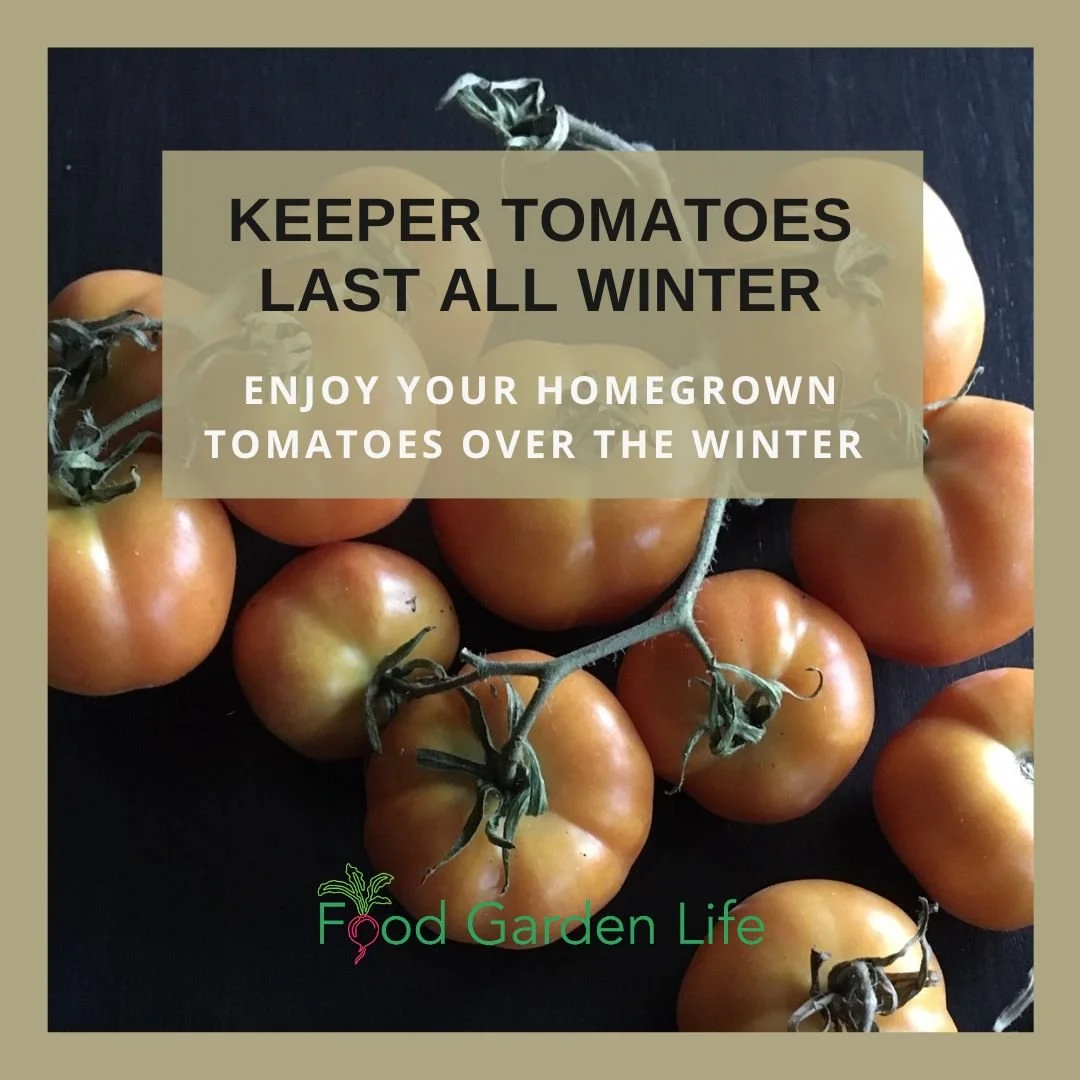
With the right tomato variety, you’ll still be eating your own fresh tomatoes in early spring. It’s often March by the time I use up my fresh tomatoes.
That’s right. March.
Yet I picked the tomatoes the previous October, just before the first fall frost.
Tomatoes that store well are called long-keeper tomatoes, keeper tomatoes, storage tomatoes, or winter tomatoes.
These storage tomatoes are a simple way to add fresh, homegrown veg to the winter menu. Perfect for home gardeners.
If you’re interested in growing long keeper tomatoes, keep reading to find out how you can enjoy your own homegrown tomatoes over the winter.
What’s a Long Keeper Tomato?
Let’s be clear: Long keeper tomatoes are NOT like a thin-skinned, juicy tomato.
They’re thick-skinned. It’s because of that thick skin that they last a long time without spoiling.
Storage Tomato…Not a Thin-Skinned Slicer
I once gave long keeper tomato plants to my neighbours Joe and Gina. They were avid veg gardeners. Loved tomatoes. I thought they’d love the idea of having their own storage tomatoes all winter long.
But they hated my keeper tomatoes…
That’s because they loved juicy tomatoes for sandwiches and meaty tomatoes for sauces. Keeper tomatoes are for storage—they’re not summer sandwich material.
Expecting a keeper tomato to be like a beefsteak tomato is like expecting a pickup truck to drive like sports car. Ain’t going to happen. The purpose of each is quite different.
When to Sow Long Keeper Tomato Seeds
Because I harvest my keeper tomatoes at the very end of the season, there is no point to starting them too early. (My first fall frost is usually late October—so that means I’m only harvesting the keeper tomatoes in October.)
I start my summer-eating tomato varieties 6-10 weeks before the average last frost date, so that I can enjoy fresh tomatoes as soon as possible.
But I only start the keeper tomato varieties a couple of weeks before the last spring frost. Then I transplant them into the garden when the plants are big enough.
Want to grow your own storage tomatoes from seed? Get tips to grow great tomato seedlings at home.
How to Grow Storage Tomatoes
In the garden, grow storage tomatoes as you would other tomato varieties. The main difference is that there’s less of a rush to get them going early.
Here’s a guide to staking tomato plants.
How to Store Long Keeper Tomatoes
If you have only a few storage tomatoes, put them in a bowl on the counter; they last well and look nice. But for longer-term storage, a slightly cooler temperature is better. That way, they’ll last longer. I store long keeper tomatoes in a cool basement room, spread out on a tray.
Hurray! No processing, no freezing.
Here’s another way to store keeper tomatoes: Leave the tomatoes on the plant, and then harvest the whole plant. Then, hang the plant upside down, somewhere cool. The tomatoes continue to ripen on the plant.
Wondering about how to ripen all the other green tomatoes left in your garden in the fall? Here’s an article that tells you how.
How to Use Keeper Tomatoes
Keeper, or “winter,” tomatoes are perfect for chopping up to use in salads and in cooking.
My favourite way to use them is in bruschetta.
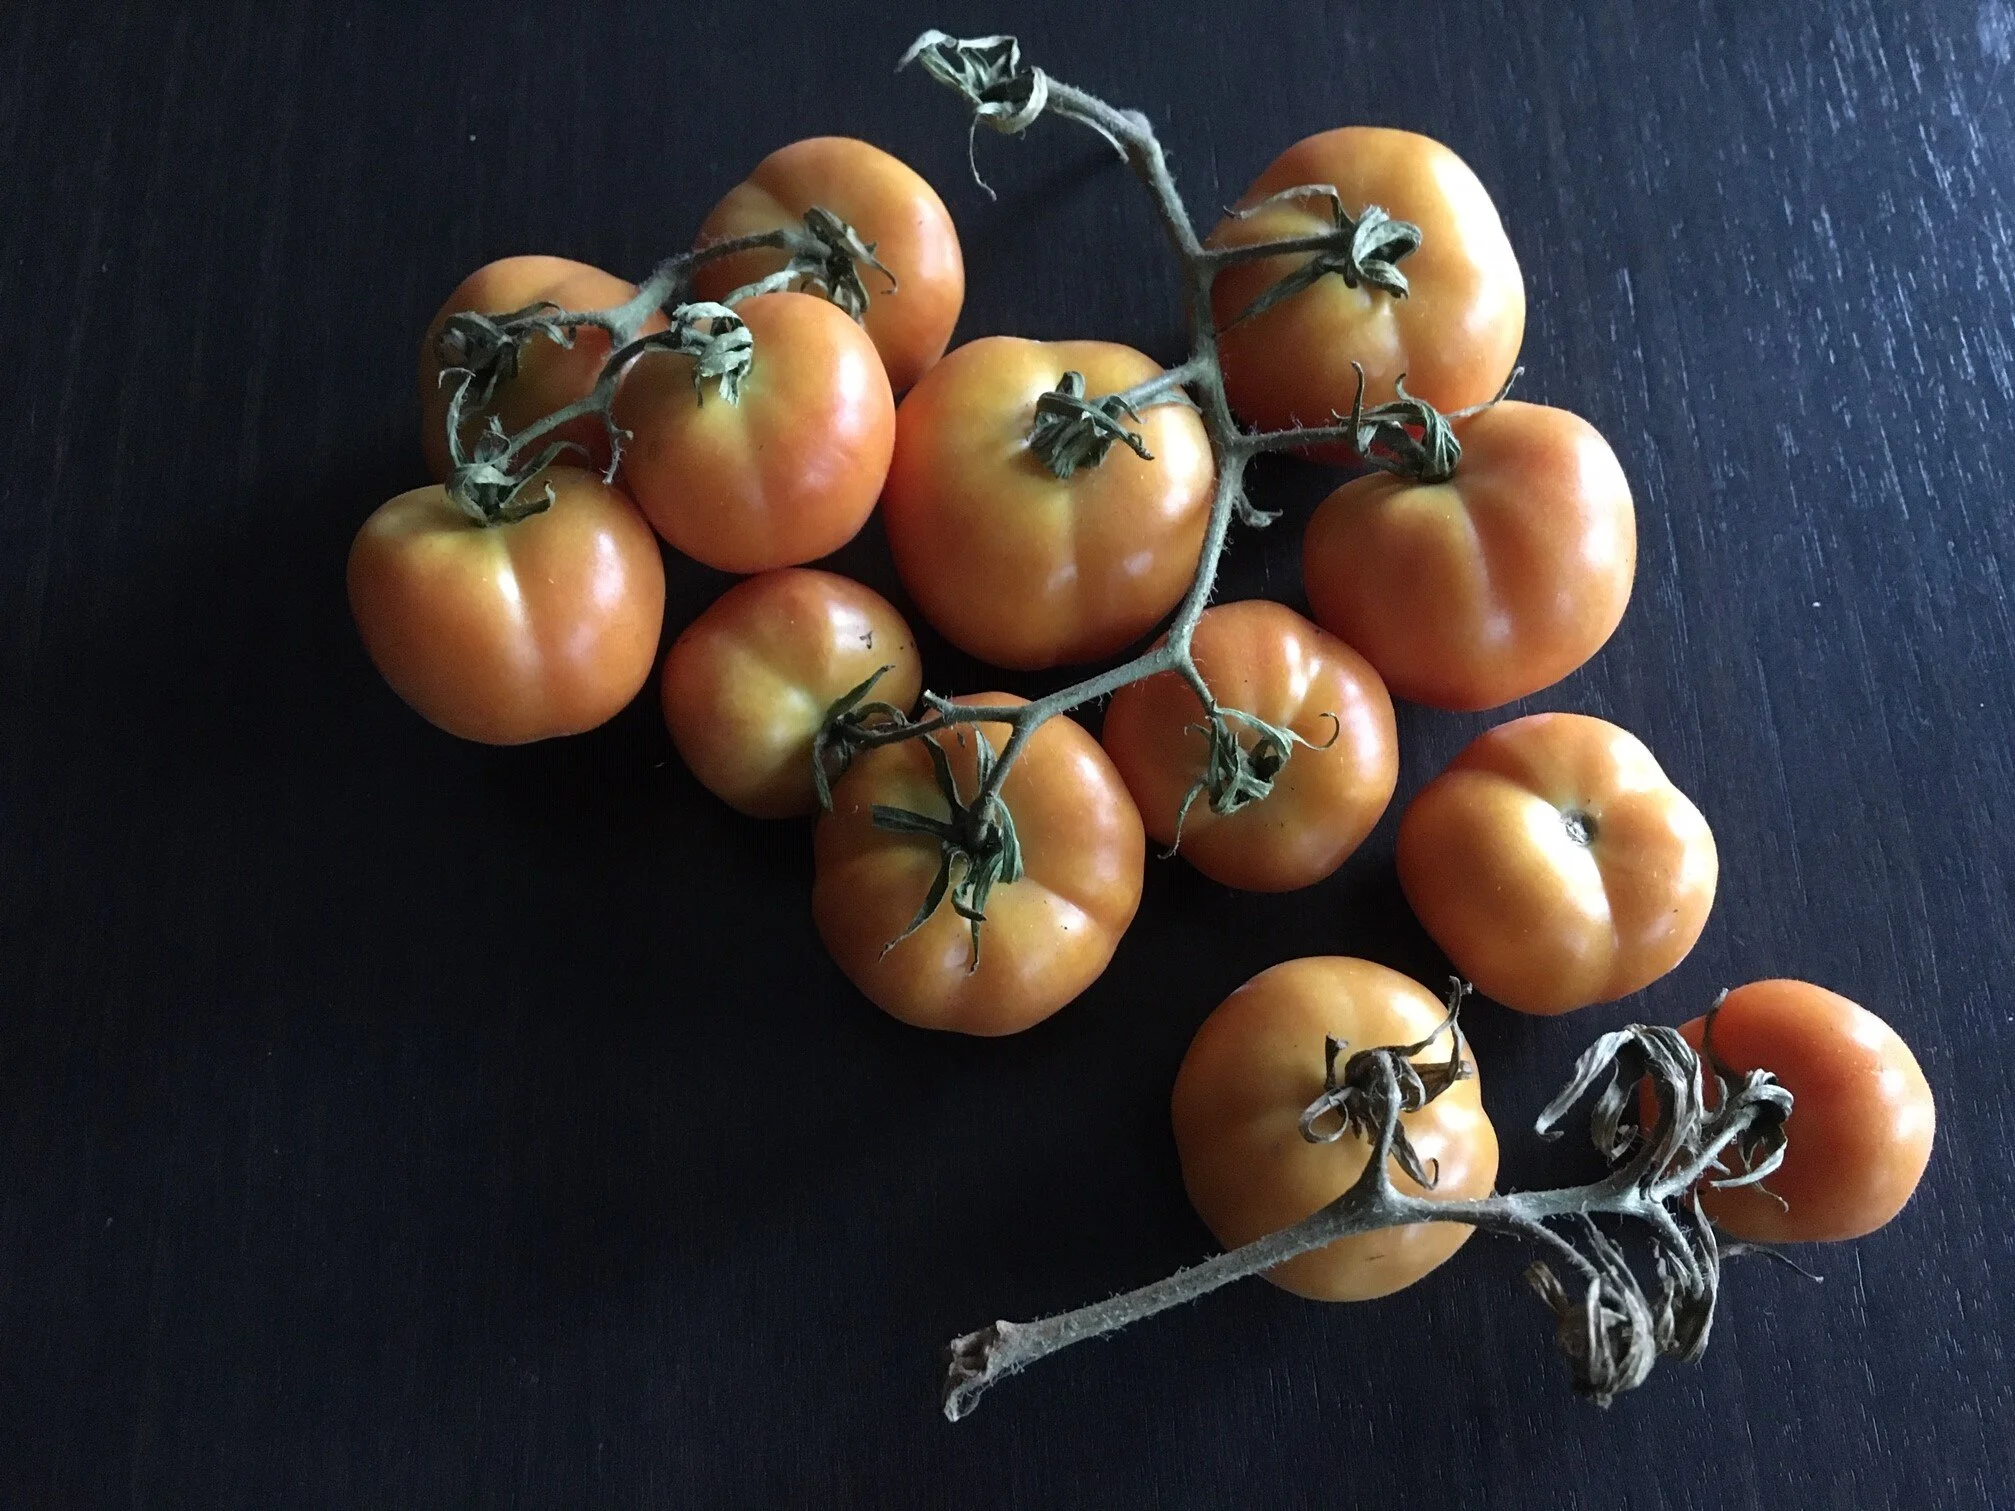
Tomatoes in March. Grow a “keeper” or “winter” tomato.
Long Keeper Tomato Varieties
My first long keeper tomato variety came from my Dad’s friend Dino. Dino simply called it a “winter tomato.” So I just call it Dino’s Winter Tomato.
When it’s ripe, the skin has an orange colour; and when you cut into it, the flesh has a light red colour.
There are many keeper varieties around. Here are some to try:
‘Long Keeper’ is an old variety that’s widely available.
Prairie Garden Seeds sells a keeper tomato called ‘Clare’s Tomato’.
‘Green Bee’ is a firm-when-ripe tomato that grills well—and it’s also an excellent storage tomato.
Looking for a beautiful keeper tomato? Then try ‘Evil Olive’. It’s a great storage tomato. (Don’t be put off by the name, it’s lovely!)
‘Fakel’ is an old processing variety with a thick skin. It’s a medium-sized red tomato that’s good for fresh eating and storage. So if you want something that’s good sliced but also stores well, a good option. (Determinate plant, so good if you’re doing container gardening.)
‘Piennolo del Vesuvio’ is an Italian heirloom from the area around Mount Vesuvius. It forms clusters with cherry-tomato-sized fruit having a pointy tip. The clusters are traditionally picked and hung indoors to slowly ripen through the winter.
More on Tomatoes
Find This Helpful?
Enjoy not being bombarded by annoying ads?
Appreciate the absence of junky affiliate links for products you don’t need?
It’s because we’re reader supported.
If we’ve helped in your food-gardening journey, we’re glad of support. You can high-five us below. Any amount welcome!
Course: Tomato Overload Masterclass
Want to up your game growing tomatoes?
This self-paced course helps you choose great varieties, grow great seedlings, give plants the care they need, and enjoy an abundant harvest.
Guide to Direct Sowing Seeds (Why and When to Skip the Transplants!)
Find out how and what to direct seed in your vegetable garden.
by Steven Biggs
Why Direct Sow Seeds?
Ever had transplants that put on the brakes after you move them to the garden?
It’s disappointing.
But a big transplant isn’t always better than a wee seed.
Sometimes, it’s better to plant seeds straight into the garden.
This is called direct sowing, also called direct seeding or direct planting.
This post tells you how to direct sow, best crops for direct sowing—and simple ways to sow seeds in a home garden.
What is Does Direct Sow Mean?
Direct sowing is when we sow seeds—plant seeds—directly in the garden.
This is instead of starting seeds indoors and then move them to the garden later—known as growing “transplants.”
Why Direct Sow Vegetable Seeds?
There are many reasons to direct-sow vegetables.
Here are a few reasons:

Pin this post!
Easier (there's no need to care for seedlings indoors)
Less expensive (no need for potting soil or containers)
Less environmental footprint (yeah, your coir-based and peat-based potting soils have an environmental footprint)
Saves indoor seed-starting space for crops that really need to be started indoors
No need to “harden off” young seedlings before planting them in the garden
Some crops don’t transplant well…and don’t bounce back well from transplanting
When to Direct Sow Seeds
It’s tempting to start direct sowing as soon as the soil thaws in the spring. But it’s often best to wait a bit. Moisture and temperature are two things to consider as you decide when to direct sow your seeds.
Moisture
If the soil is really wet, it can be difficult to get it ready for direct seeding.
The soil might stick to your tools, or might be clumpy and hard to spread around.
Another reason not to work in your garden when the soil is still very wet is that it’s easy to compact the soil—which messes up drainage and makes conditions less suited to your crops.
Temperature
The ideal temperature varies by crop. But in general, when things are still really cold and wet, there’s more chance your seeds will rot before they start to grow. Soil in raised beds warms up more quickly.
In this guide to when to start seeds indoors I also give talk about when to direct seed some crops.
Direct Sowing isn’t Always the Best Choice
Direct seeding isn’t the best choice for all crops, or in all situations. Here are a few things to consider:
In areas with a short growing season, crops that take a long time to mature are usually grown from transplants.
Slugs and other bugs can devastate small, direct-sown seedlings as they emerge…whereas a larger transplant might get through some insect damage.
During hot summer weather, seed germination can be spotty (see below for a summer seed-sowing hack). So crops that we direct sow in the spring are sometimes started indoors and then transplanted during hot summer weather.
In low-lying area, the garden soil might be too wet to direct sow seeds in the spring.
Here’s one more: You’re new to gardening and won’t know the difference between emerging direct-seeded crops and the weed seedlings!
How to Direct Sow Seeds
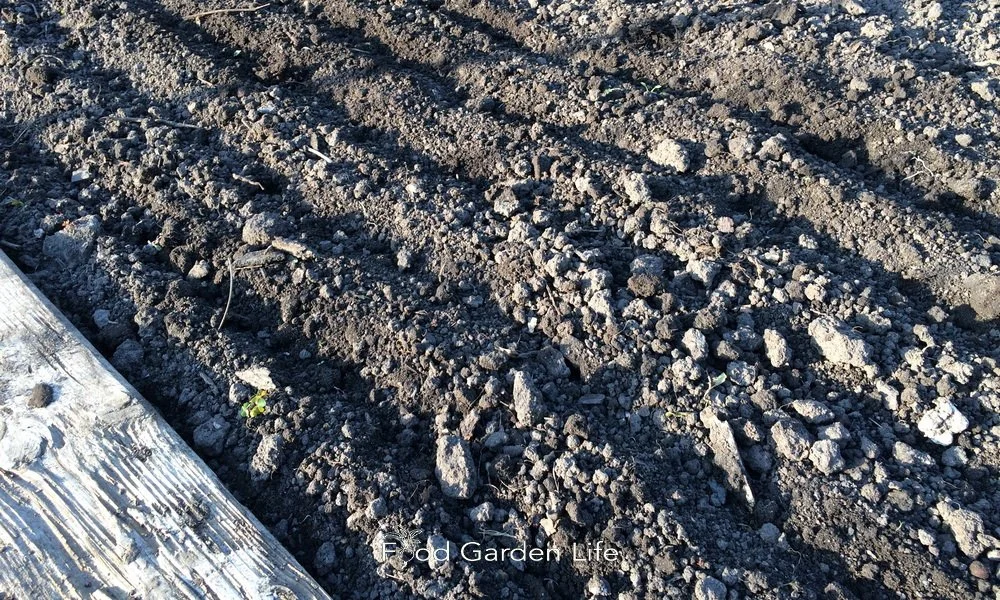
Before sowing seeds, prepare the soil.
Start by preparing the soil ahead of time. When sowing seeds, we want to break up any crust on top of the soil surface, and break up bigger chunks of soil. That way, germinating seeds don’t hit roadblocks.
(Yes, there’s a whole body of work out there on no-dig techniques—and there is a time and place for this…but if you want the best results when direct sowing, prepare the soil.)
Planting Depth
Use the size of the seed as a guide to planting depth. Seed packets usually recommend a depth too.
Plant the seed about twice as deep as it is wide. Too shallow is better than too deep.
But don't feel as if you need to measure and be precise.
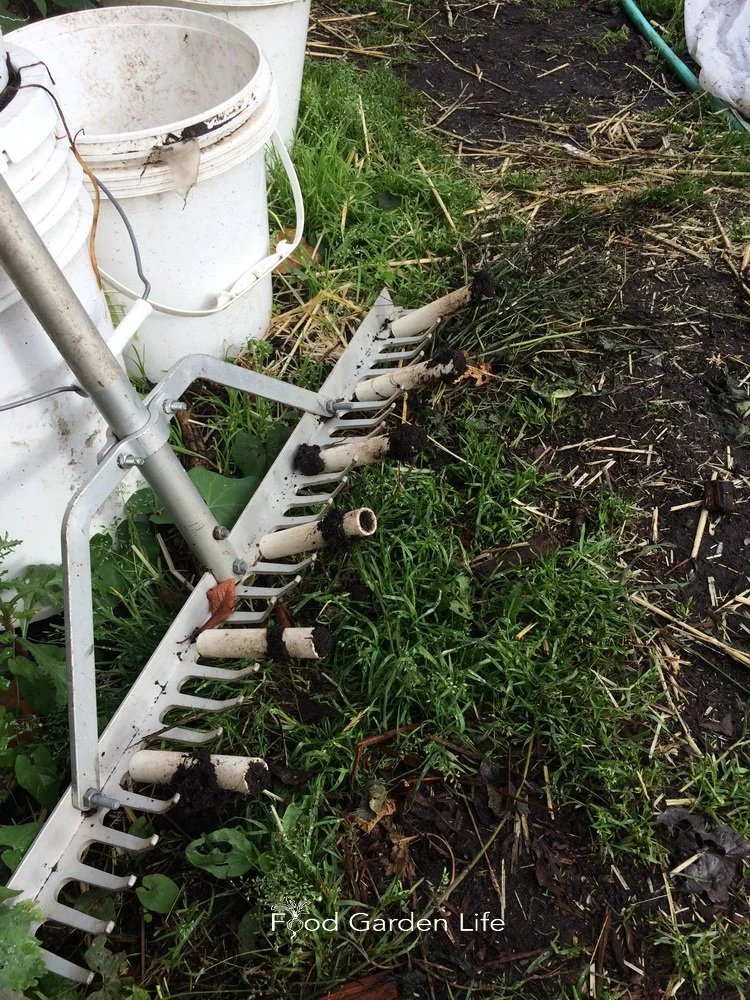
If you’re planting seeds into trenches, you can make well-spaced trenches using a garden rake that has pieces of pipe on it.
Like most things in gardening (and life), direct sowing isn't an exact science.
Trench for Sowing Seeds
If you direct-sow seeds in rows, make a trench with your trowel or the corner of a hoe.
Then, place your vegetable seeds into the trench, and cover with soil.
OR, make your trenches by fitting pieces of pipe onto a garden rake! (See the photo.)
Poke Seeds in the Soil (Planting Seeds Simplified!)
This is low-tech and might be laughable to a commercial grower—but in a home-garden setting, can be a simple approach to direct sow seeds!
I drop large seeds into place, and then just poke them into the soil. Then I scuff the soil to fill the holes.
Poking works well for larger seeds that you can easily see:
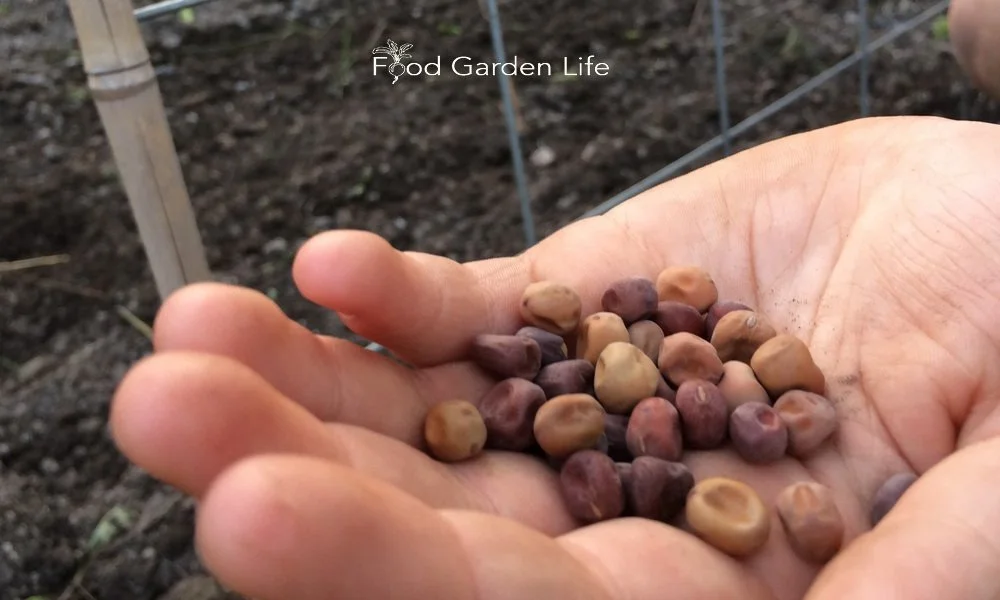
Poking large seeds into the soil is a simple way of planting seeds.
Peas
Beans
Beets
Swiss chard
Squash
Zucchini
If you’re planting a whole block with seeds, as I like to do with beets and Swiss chard, you can do what I call the “scatter-and-poke” method. Scatter seeds to approximately the spacing you want—and then poke them into the soil. Scuff soil to fill in holes.
(Gardening is a great cure for perfectionism, and the scatter-and-poke approach dispenses with all notions of perfection in a garden!)
Broadcast and Cover
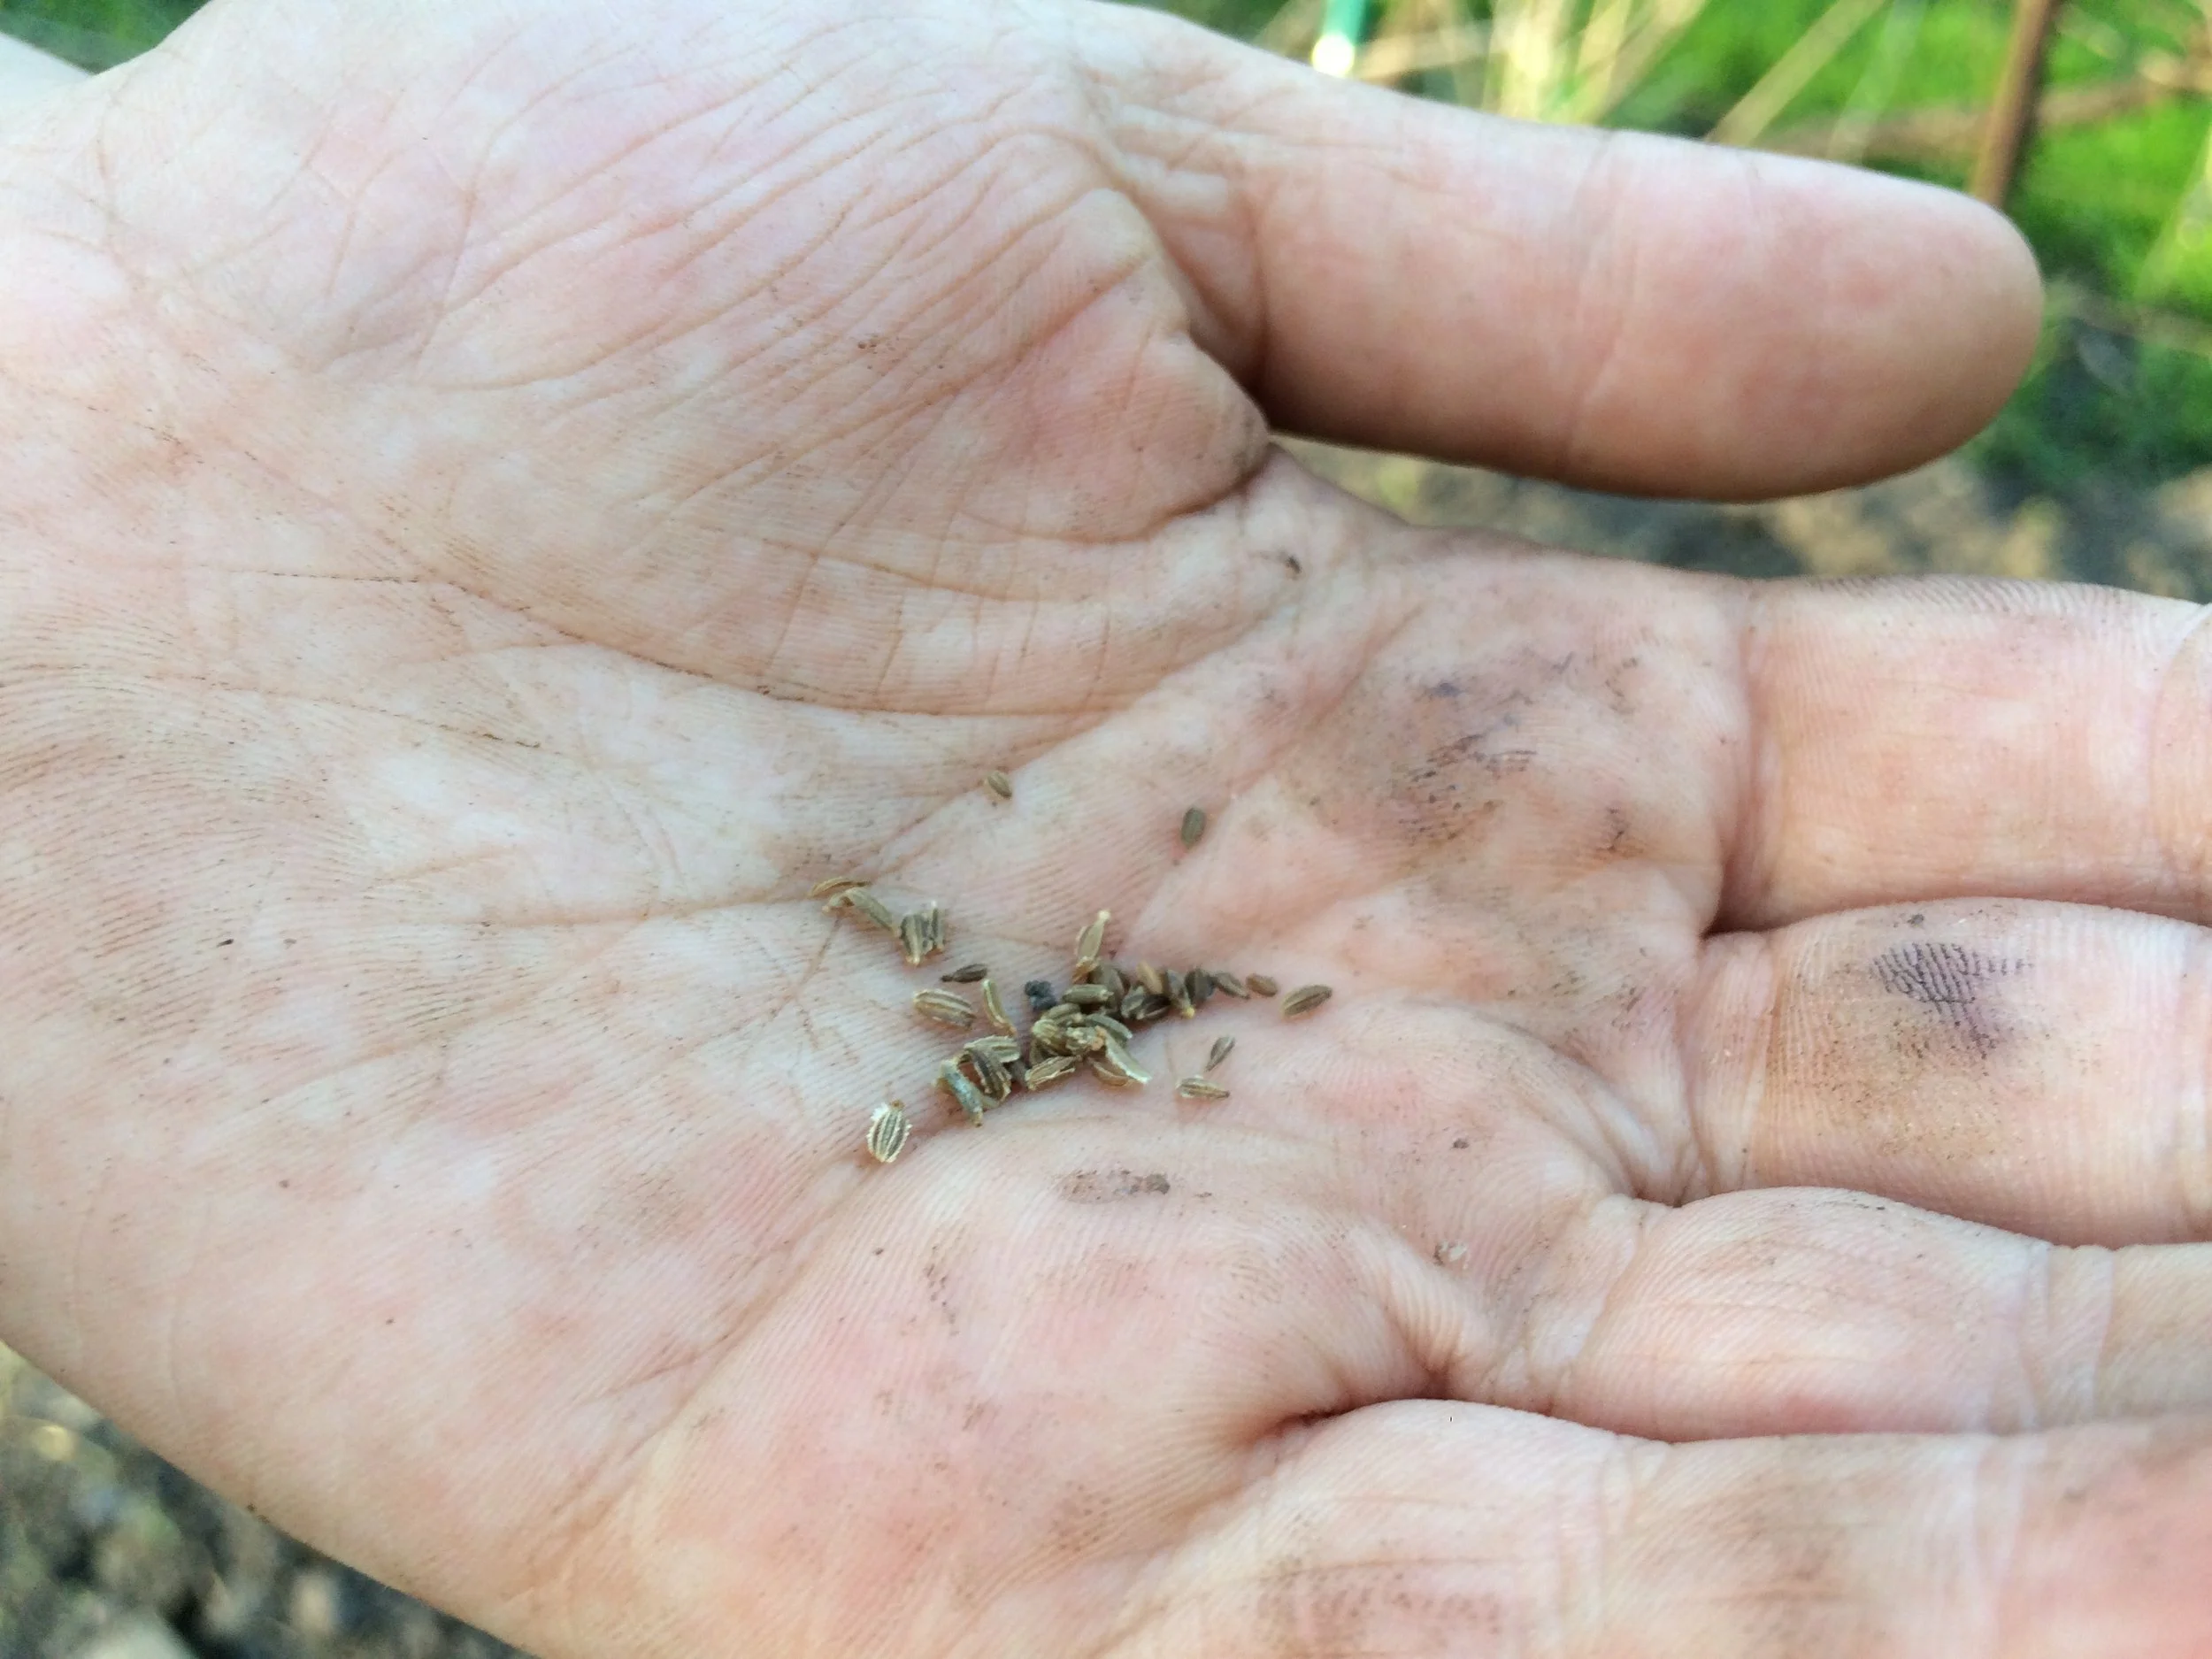
You can sprinkle small seeds such as these carrot seeds by hand, and then cover with soil.
If you’re filling a block or wide row with small seeds (e.g. carrot or lettuce), sprinkle by hand, and then cover with soil.
You might wonder, “Where do I get the soil I’m covering the seed with?” Rake aside some garden soil before you sprinkle your seed in place—and replace it over top of the seed afterwards.
Broadcast and Rake!
I’m always interested in methods that make my life simpler. And raking aside soil before I broadcast seed is a bother.
So I simply broadcast the seed, and then use an up-and-down motion with a hand rake to work some of those seeds into the soil.
Note: There will be some seeds that aren’t at an ideal depth. That’s OK. I’m a home gardener—not a commercial grower. I just seed more heavily to compensate.
Direct Sowing Hacks
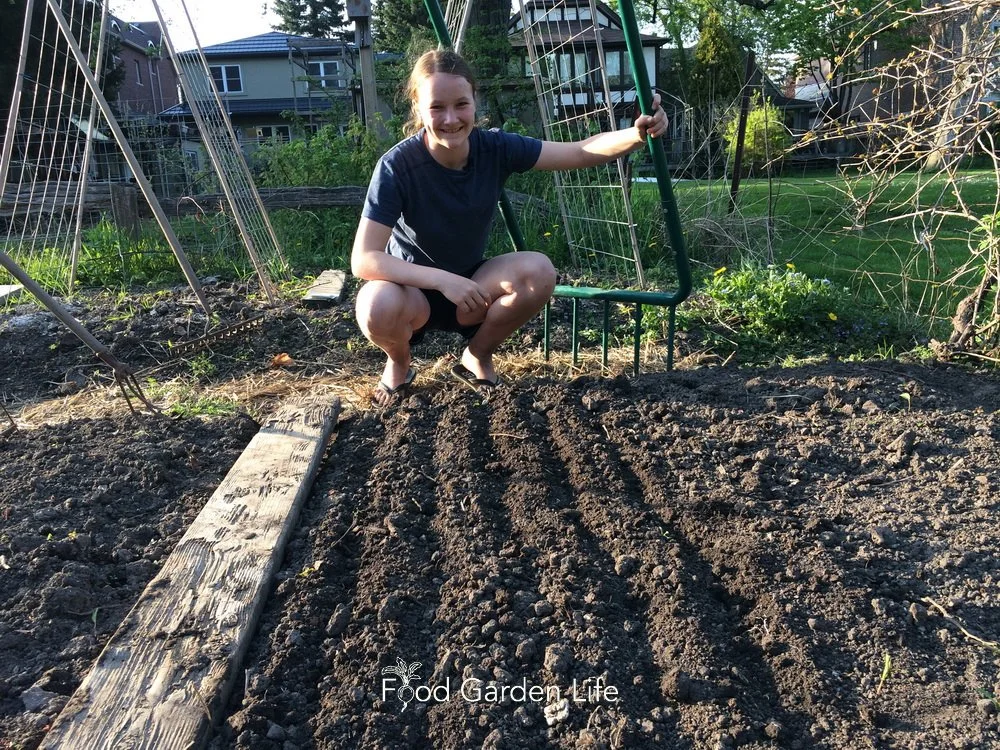
Using a broadfork to make straight rows.
Folded paper. Forget the seed-dispensing gizmos for small seed. Fold a sheet of paper in half. Pour seed onto the folded sheet. Now, use a pencil or a nail to dispense individual seeds off the end of this folded sheet. Low tech, yes—but works well.
Broadfork. When my daughter, Emma, wanted side-by-side trial rows of a number of crops, she used the broadfork to make a tidy set of trenches. (The broadfork is normally used to loosen soil…but this works nicely!)
Seed tape. Seeds embedded in a strip of biodegradable paper. Yeah, a bit gimmicky. I don’t use this. But if you’re gardening with kids, or you have shaky hands and can’t easily dispense seed, it can be useful.

Using boards to keep the soil moist for direct seeding in the summer.
Pelleted seed. Small seeds bulked out with a clay coating. Like seed tape, you pay more per seed. But again, could be useful if you’re direct seeding with kids, or you’re having trouble coping with smaller seeds.
Boards. Yup, low-tech boards over summer-sown small seeds can be a life saver. In summer heat, soil can quickly form a crust that seedling have difficulty breaching. But a board over the soil during the germination window keeps the soil underneath moist. No crust.
Web trays. As soon as squirrels see freshly turned soil in my garden, they’re eager to disinter seeds. It’s infuriating. Who would have thought there’s a higher purpose for those horrid plastic webbed trays that the horticulture industry so loves! Inverted web trays over top of your directly sown seeds keep digging varmints at bay.
Direct Seeding by Crop
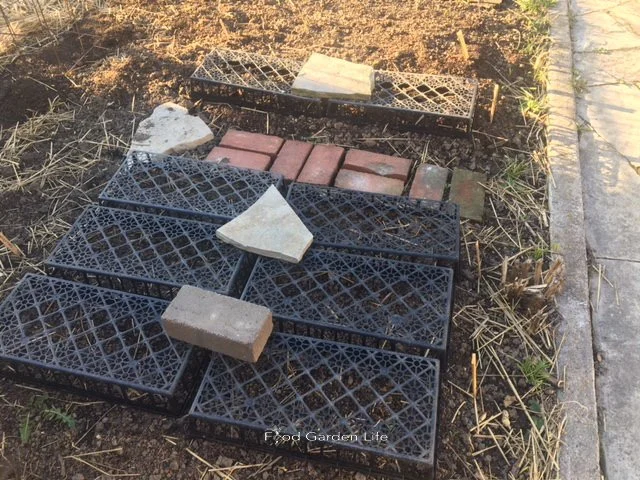
Take that, squirrels!
Leafy Greens. I grow transplants of leafy green crops such as lettuce, spinach, and Swiss chard. I also direct-sow seeds into the garden.
Why both ways?
So I have a succession of harvests.
(It is also insurance. If weather or pests cause less successful results one way, I have a backup!)
Root Crops. I direct sow all my carrots, parsnips, and beets. These crops can all be direct-sown in the garden early. And they don’t respond well to root disturbance.
“Fruit” Veg. For those fruits that we insist on calling veg—tomatoes, peppers, and eggplant—I grow everything by transplants because I’m in a cold climate and I extend the harvest window with transplants.
Vine Crops. The vine crops in the squash and cucumber clans don’t respond well to root disturbance. So direct sowing is always a good strategy.
(But, like the leafy greens, I hedge my bets and both direct sow and start a few transplants.)
Top Direct Seeding Tip
If conditions get really dry just as your seeds are starting to grow, tender young leaves and roots can dry out quickly…and it’s game over.
Keep the soil well watered!
FAQ Direct Sowing
What vegetables can be direct sown?
Direct sow root crops such as beet, carrot, parsnip, radish, and turnip.
Direct sow leafy greens including chard, kale, lettuce, mizuna, and spinach.
Direct seed legumes such as beans and peas.
Do I need to thin direct-seeded crops?
That depends on how much seed you use. In commercial production, growers often use precision-seeding devices so that the seeds are perfectly spaced. So no need to thin. But that’s approach isn’t always practical in a home-garden setting where we’re dealing with smaller, irregularly shaped spaces.
My approach is to direct sow with lots of seed, and then thin out extra plants while the plants are still small. So, as I thin out young spinach plants, I have baby salad greens for supper!
Find This Helpful?
Enjoy not being bombarded by annoying ads?
Appreciate the absence of junky affiliate links for products you don’t need?
It’s because we’re reader supported.
If we’ve helped in your food-gardening journey, we’re glad of support. You can high-five us below. Any amount welcome!
Courses
Here’s a course that guides you through creating an edible garden you love. It’s my ode to edible gardening. You’ll find out how to think outside the box and create a special space. Get the information you need about a wide range of edible plants.
Driveway Makeover! 5 Ideas for Growing a Container Garden for Vegetables
A container vegetable garden is a good way to fit lots of vegetable crops into a small space. Find out how to get started.
by Steven Biggs
My Driveway Container Vegetable Garden
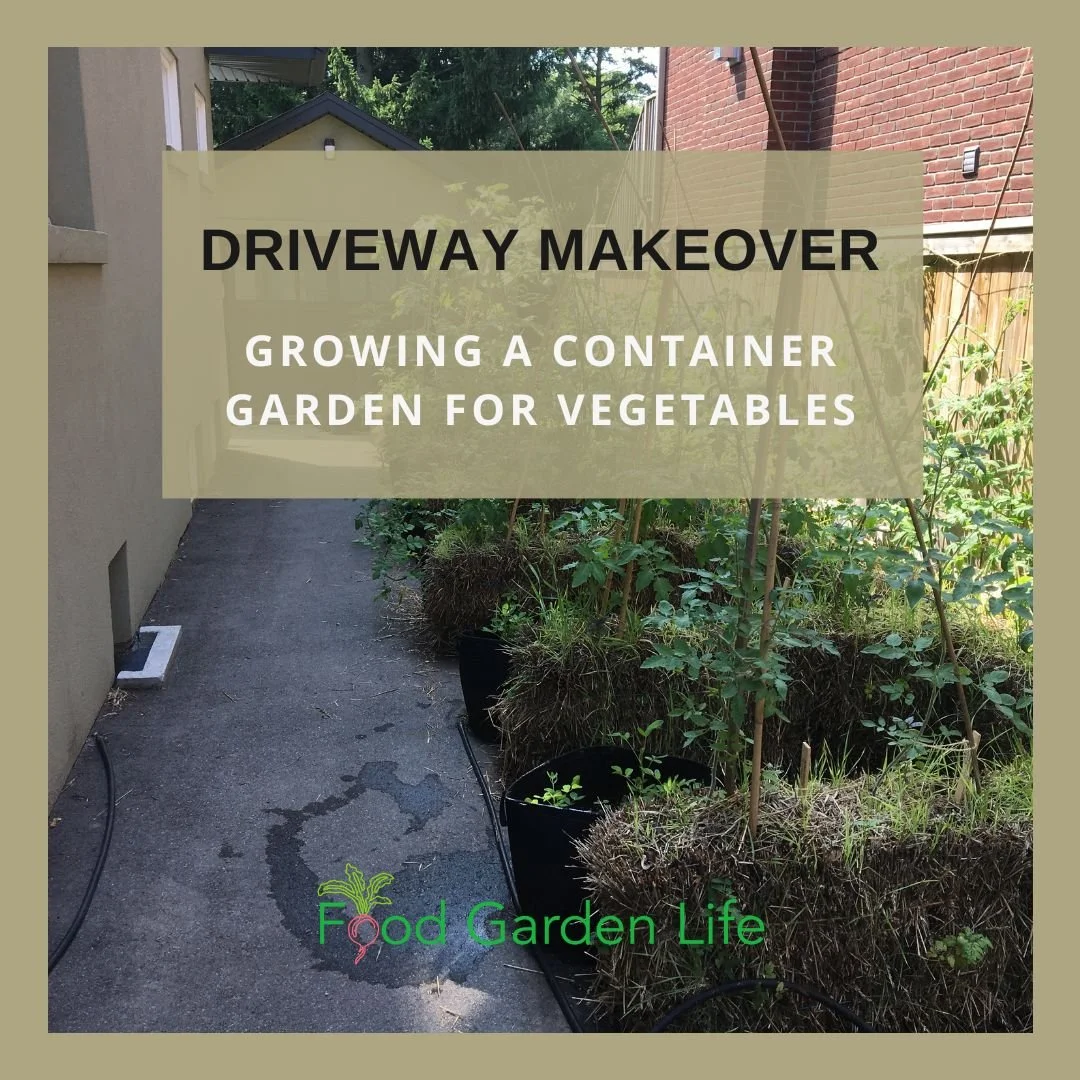
Not enough space to grow everything you want? Be creative! A container garden is a great way to fit more vegetables into your yard.
Here’s our driveway container garden. The driveway container garden is a quick, temporary space-making solution so we can grow extra tomato, pepper, potato, summer squash, and chard plants.
In this vegetable container garden, we use straw bales, fabric pots, nursery pots, bushel baskets, and vertical gardening techniques to make the most of the space.
Do you have an underused space that you can use for growing food? Many yards do. It could be a driveway, patio, or even the hard-packed space alongside a hedge. In this post, I look at how to add growing space to your yard.
Ideas for Your Vegetable Container Garden
Container gardening is part science, and part creativity. There are lots of ways to approach it. Here are five ideas we’ve used to make the most of our driveway for growing vegetables.
1. Strawbale Gardens: Grow Vegetables in Containers that are Biodegradeable
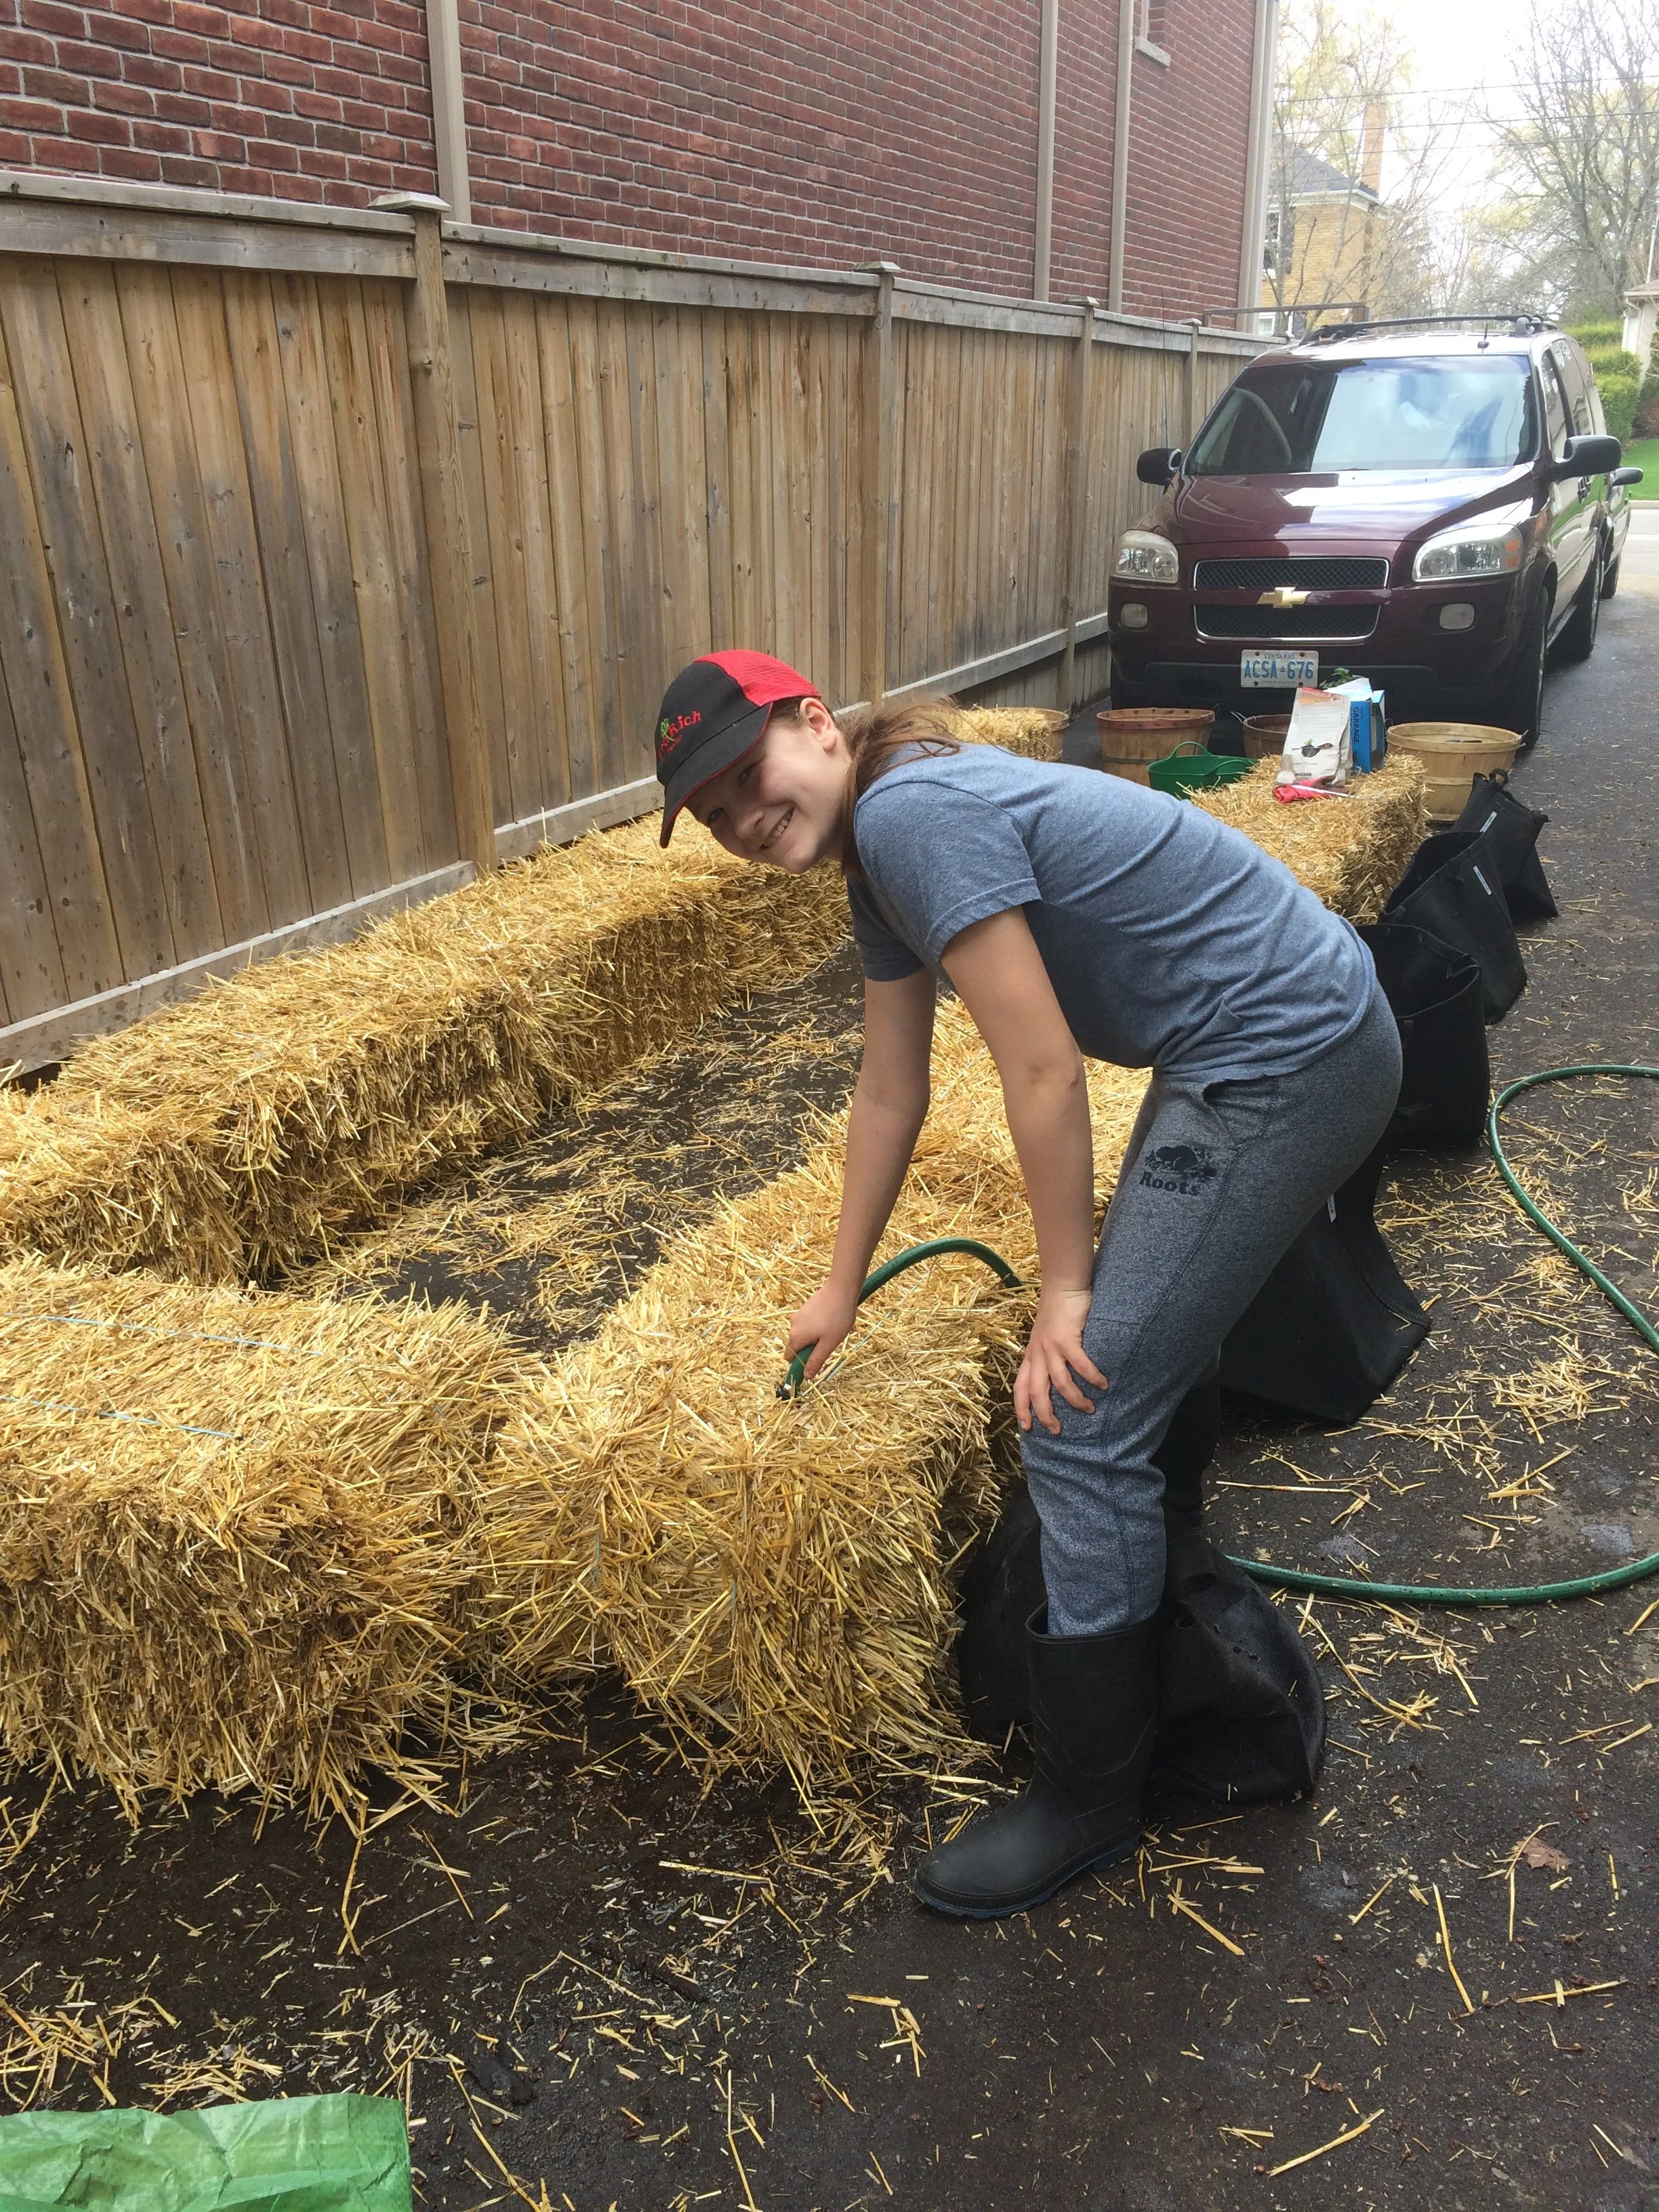
Wetting the straw bales to start the “conditioning” process.
A lot of visitors take a second look at my straw-bale garden and wonder where I put the potting soil. There is no potting soil: The straw bale is both the container and the growing medium. No potting mix required!
The decomposing straw gives plant roots needed air while retaining moisture…like a big sponge.
By the end of the season, when we pull apart a bale, the inside is dark and crumbly. It’s already partially composted and perfect to use as mulch on our gardens. Then, we start again with new bales the following year.
We plant the top of each straw bale with tomato plants and leafy greens. Then we put bush beans on the sides of the bales. (Just poke the bean seeds into the bale!)
Important: If you’re starting with new, fresh, dry bales, the first step is to get microbial activity underway by watering them and feeding them. This step is called “conditioning.”
I’m a big fan of straw-bale gardening. If you plant to do it for the first time, make sure to condition the bales properly. Find out more about straw-bale gardening and how to condition the bales.
2. Bushel Baskets: Growing Vegetables in Repurposed Containers
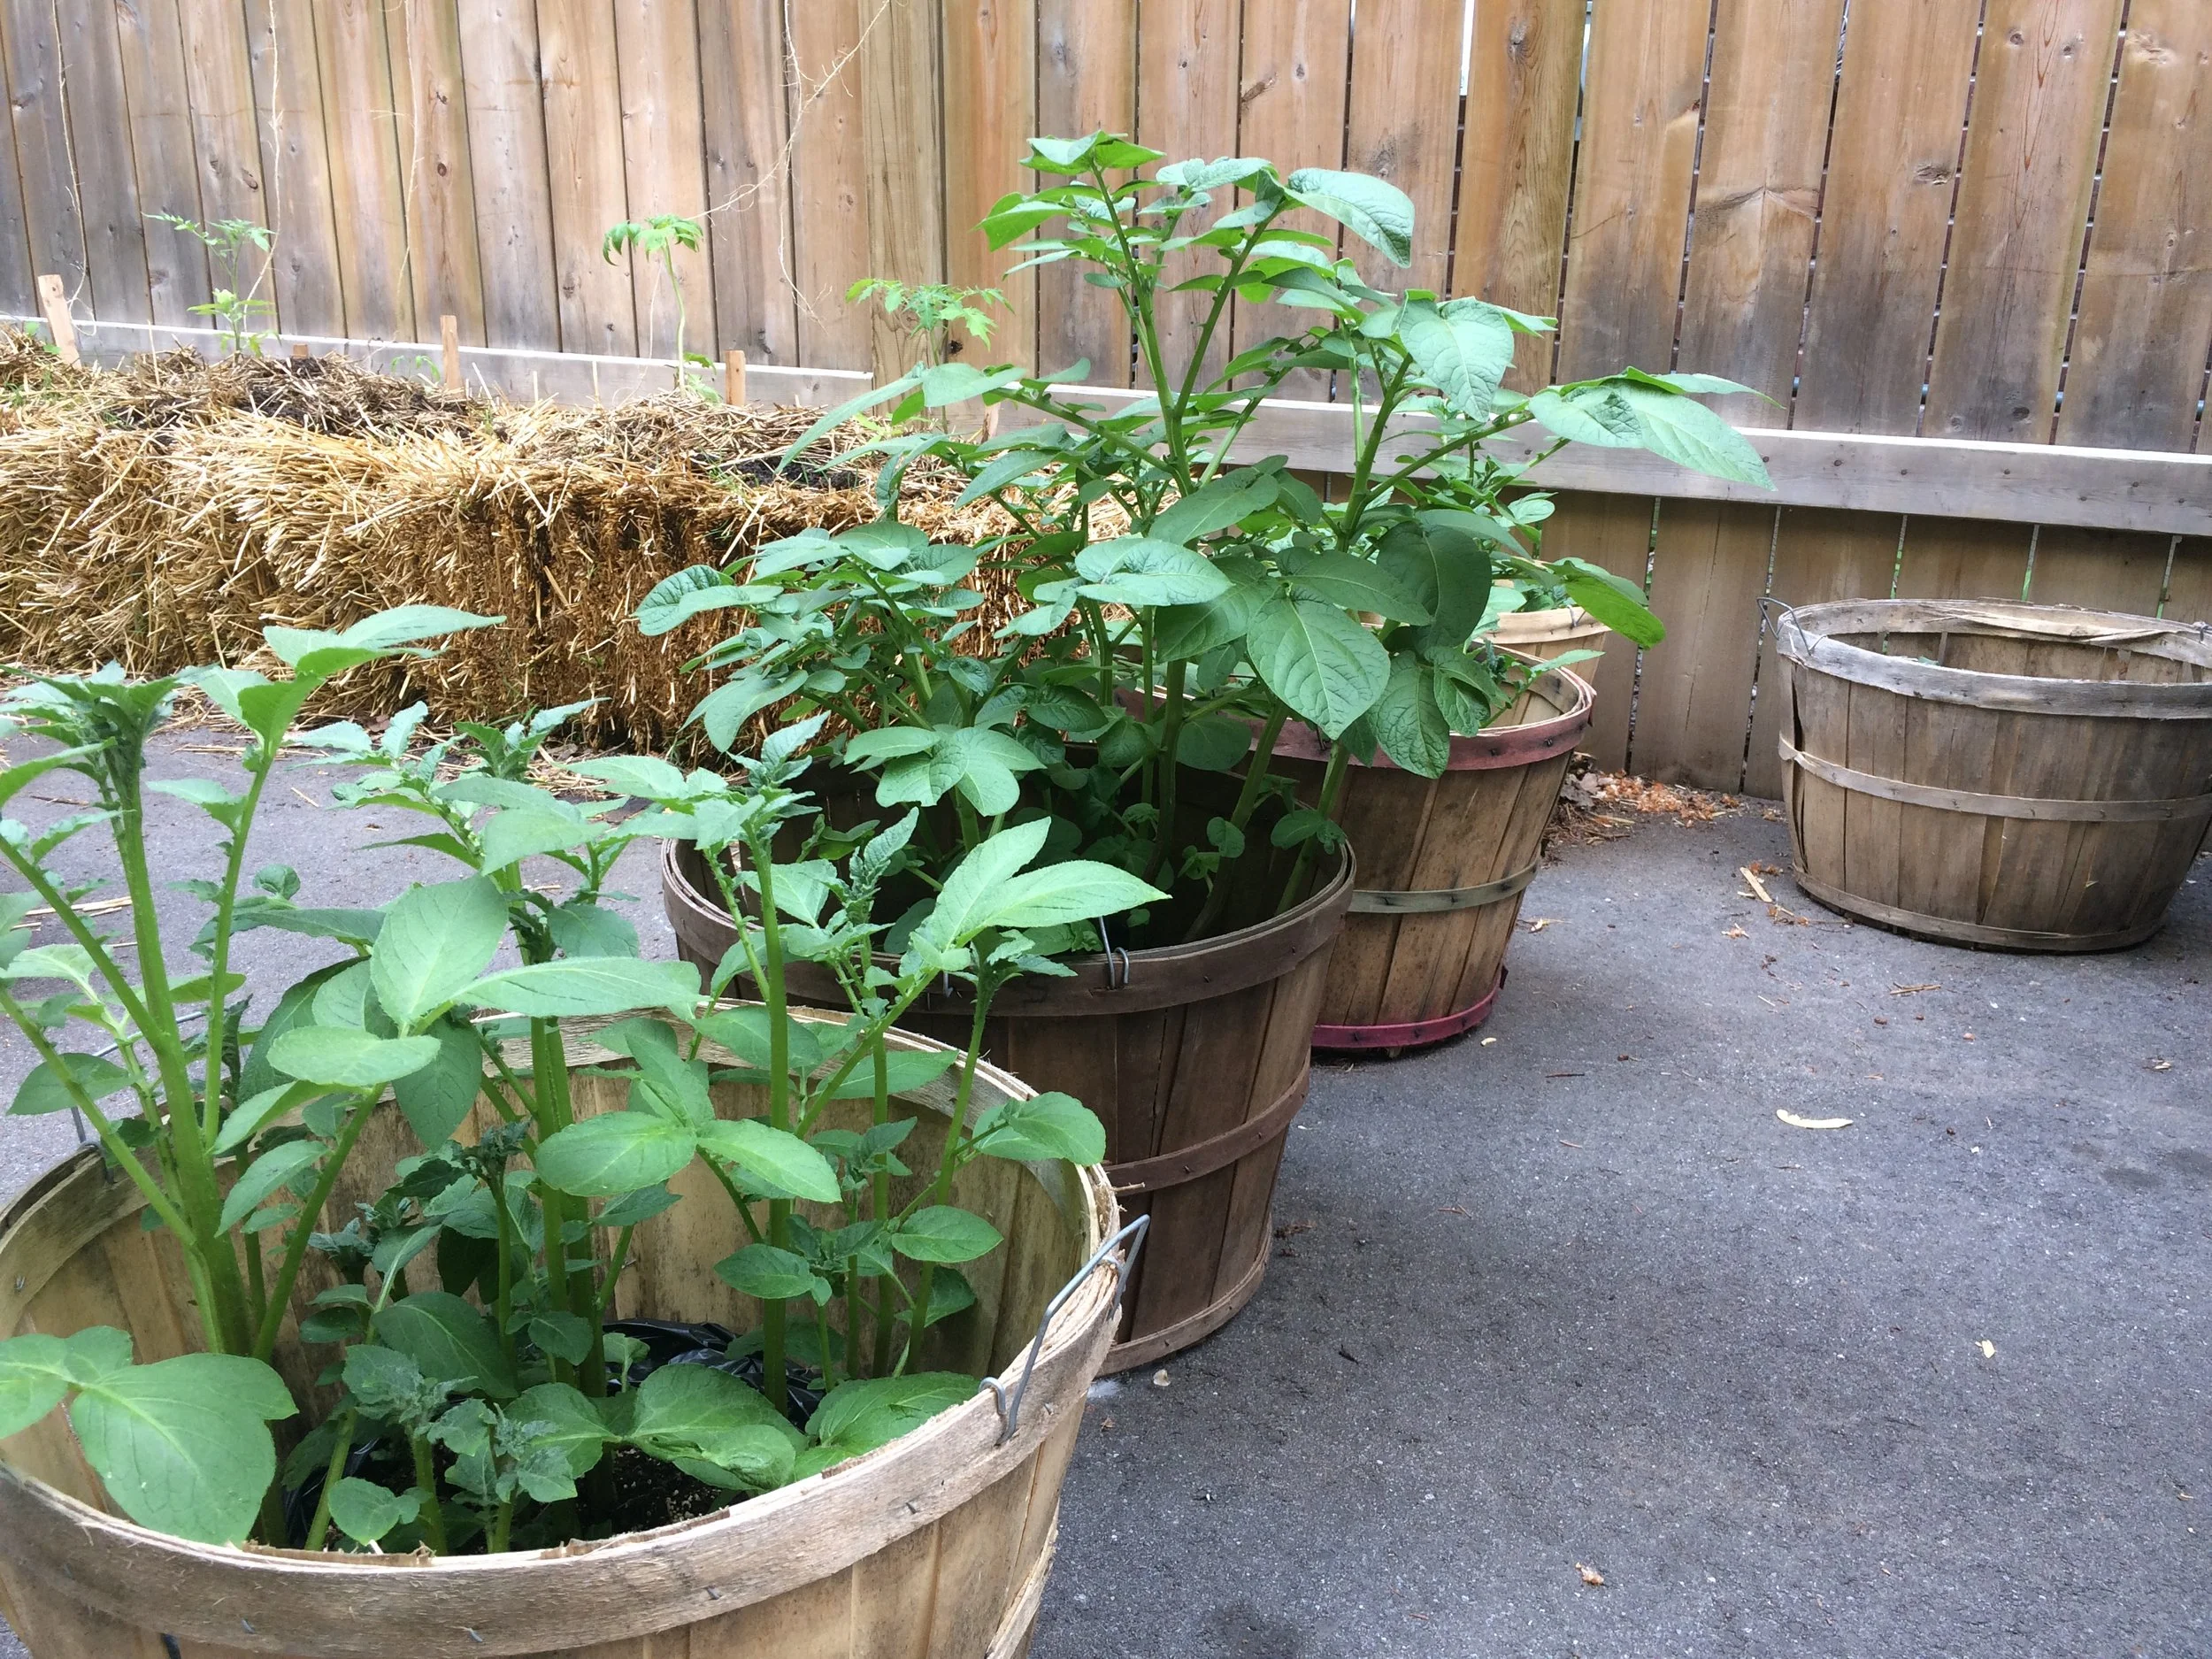
Container vegetable gardening with repurposed stuff! Potatoes growing in lined bushel baskets.
We often have extra bushel baskets from our fall cider-making. So we use them for growing potatoes. (We can’t grow potatoes in our back yard because our neighbour’s black walnut tree gives off a compound that kills them. Here’s more on black-walnut toxicity.)
We line the bushel baskets with plastic bags so that the potting soil stays moist longer and so the bushel baskets won’t decompose as quickly. (Important note: We poke drainage holes in the bottom of the bags!)
There are lots of repurposed items that work well as containers. Here are a few ideas:
Milk crates. I’ve used these in previous gardens. Just cover the openings on the side and bottom with newspaper or cardboard, so the soil doesn’t escape.
Old wheelbarrow. A friend uses an old wheelbarrow as a driveway planter.
Wash basins. I have neighbours who use metal wash basins as vegetable garden planters. (Make sure to drill drainage holes in the bottom.)
3. Fabric Pots: Garden in Pots that are Moveable

Fabric pots are moveable, and a great way to start container gardening.
These pots are widely available. What we like about them is that they have handles so we can move them aside if we need to move anything large along the driveway.
I’ve seen impressive rooftop container gardens created with fabric pots. While some gardeners use drip irrigation to keep the soil consistently moist, a more simple approach is to put a saucer underneath; as the potting mix begins to dry, water in the saucer wicks upwards.
4. Fence: Grow Vegetable Plants on Surrounding Features
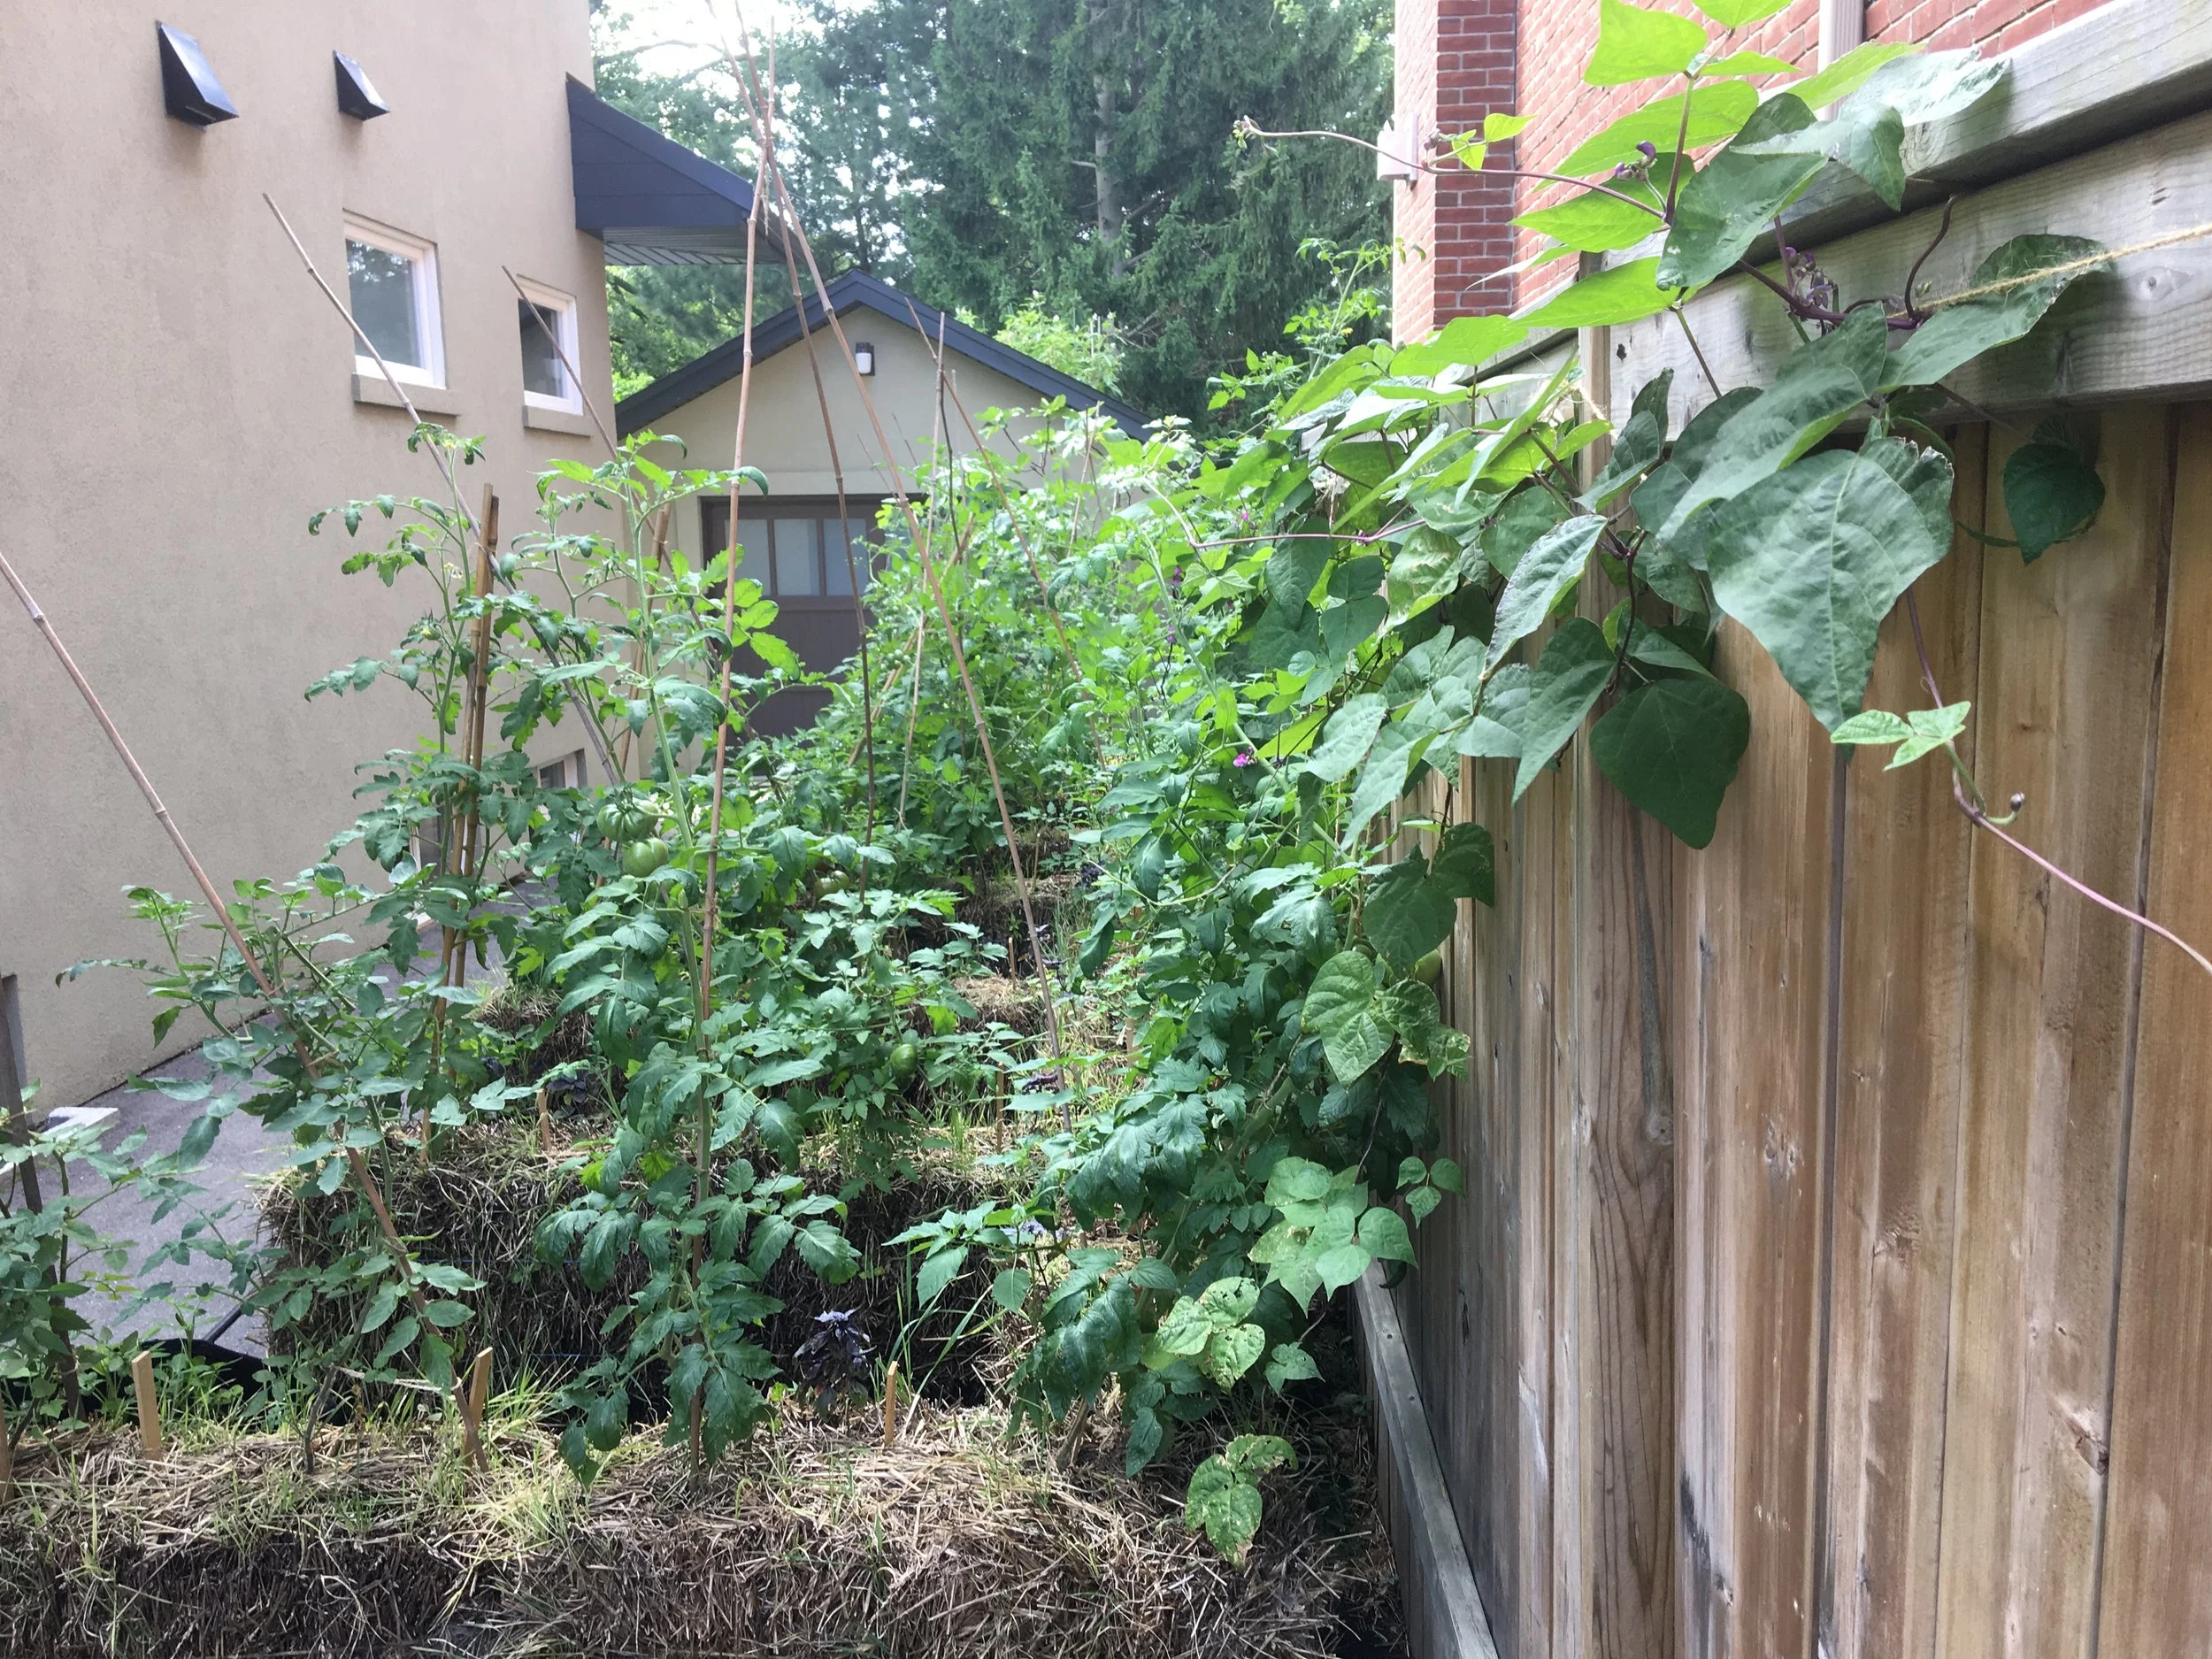
We train tomato plants up the twine that is dangling from the top of the fence.
Sometimes it’s possible to squeeze more crops into a space by growing some of them upwards—a concept that’s often referred to as “vertical gardening.” In the case of our driveway, there’s a wonky board fence that I like to hide with a wall of tomato and squash!
We plant tomatoes next to the fence, and then train them up twine suspended along the fence. We also grow squash vines along the fence—well past where the garden is.
Idea: I’ve also grown squash along hedges and up trees. Because the vines roam around, there are lots of vertical-gardening possibilities.
Here’s more about vertical gardening.
5. Nursery Pots: Figs Growing in Containers
Next to my garage is my potted fig “orchard.” It’s a collection of potted fig plants growing in nursery pots. These fig trees spend the winter in my garage.
Nursery pots are an inexpensive way to start container gardening. Talk with garden centres and arborists—you can often get them for free or very inexpensively.
If you’re interested in growing figs in a cold climate, here’s more about how to do it.
Grow a Container Vegetable Garden
And get an early harvest of crops that usually take too long!
Plan Your Container Vegetable Garden
Choose the Location
If you’re thinking about a container vegetable garden but don’t know where to start, choose your location first.
Then, once you’ve decided on a location, you’ll know how much sunlight you’re dealing with. Remember that full-sun crops such as tomatoes can do respectably well in partial sun. (This is not something a commercial market gardener would do…but if you’re a home gardener, conditions often aren’t perfect.)
Something else to think about is access to water. Is there a tap or hose nearby?
Choosing Container Plants
When it comes to choosing container gardening crops, a good starting point is things you like to eat.
Then, think about crops that do well in containers. Most vegetables grow well if a container is big enough, but some crops are more practical than others.
For example:
Pole beans are great if they're next to something they can grow on, but, otherwise, bush beans are more practical because you don't need to make a trellis.
Parsnips and Brussels sprouts take the whole summer and fall to mature. Instead, look for crops that mature more quickly, like carrots and carrots.
Here’s a list of best vegetables to grow in pots.
If the location is shady, here’s a list of crops that grow in shade.
Need Inspiration?
Here’s our chat with a gardener who grows a whole garden full of hot peppers in containers.
Consider Containers with Reservoirs
A key to success—and common reason for failure—with container vegetable gardening is watering. When the soil in containers regularly dries out, your vegetable plants put on the brakes. Growth stalls. Or, even worse, your plants skip straight to flowering before they're big enough.
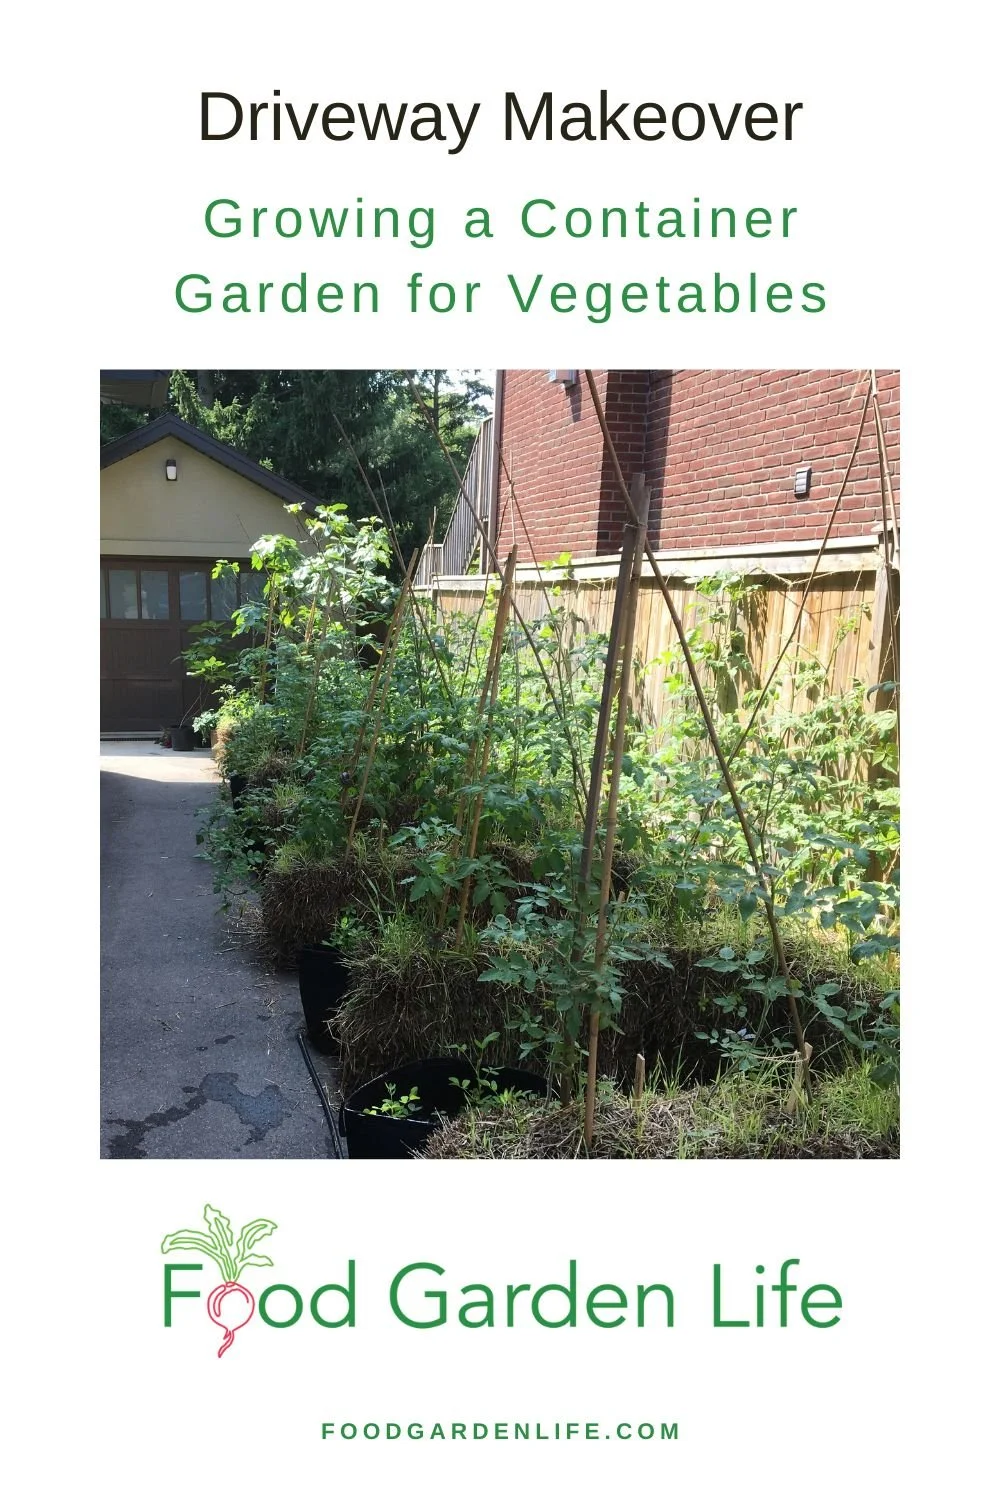
Pin this post!
(When you’re looking for bargain plants at a big-box store and see what looks like a bonsai cauliflower plant that’s only six inches tall, chances are that the plant got parched too often…and that stress made it flower before its time.)
If the potting soil is consistently moist, your crop will be miles ahead. It makes a big difference.
You can keep the potting mix consistently moist with what’s called “sub-irrigated” pots. This is just a fancy way of saying a container with a reservoir. As the potting mix begins to dry, water from the reservoir wicks upwards, keeping the soil continuously moist.
This sort of container is widely available—but you can easily make your own.
Find out more about sub-irrigated (a.k.a. self-watering) pots.
More Container Ideas
If space is tight, small containers might be your only option. I've made herb container gardens by dotting potted plants on a staircase.
Don't forget window boxes. Although they're shallow, they work well for shallow-rooted crops such as leafy greens.
Hanging baskets are a great way to fit more vegetable plants into your container garden.
Find This Helpful?
Enjoy not being bombarded by annoying ads?
Appreciate the absence of junky affiliate links for products you don’t need?
It’s because we’re reader supported.
If we’ve helped in your food-gardening journey, we’re glad of support. You can high-five us below. Any amount welcome!
Best Juglone-Tolerant Plants for Food Gardens Near Black Walnut Trees
By Steven Biggs
Growing Food Crops Near Black Walnut Trees
I bought my current home in the late winter when there were no leaves on the trees. So I didn't notice that the massive black walnut tree next door. Yikes! It's created a lot of gardening hurdles.
Black walnuts are known for their beautiful wood. Prized in fine woodworking. But there's a sinister side too...they have the odious reputation as trees that poison nearby plants.
A commercial grower or a gardener in a rural area might react with a chainsaw. Not an option for most home gardeners. Especially in the city where trees have the same rights as taxpayers.
But I've figured out how to grow a thriving vegetable garden, edible landscape, and fruit crops all around that black walnut tree. If you want to grow food crops alongside these beautiful but challenging trees, keep reading: This post tells you what you need to know to successfully grow food plants—even if your yard is overshadowed by a black walnut tree.
Primer: Black Waltnut Toxicity
Black walnut (Juglans nigra) trees give off something called juglone, which can affect the growth of nearby plants. Not a bad thing from the walnut's perspective...because there's less competition.
Juglone is in all parts of the black walnut tree, including the roots, leaves, and the nuts.
Not all plants are affected by juglone.
As juglone builds up in the soil under and around the tree, it affects nearby susceptible plants.
If you like the technical lingo: When a plant makes something that inhibits the growth of other plants, it's called "allelopathy."
Tips for Gardening Near Black Walnut Trees
Sources of Black Walnut Toxicity
Let's take a look at how juglone gets from the tree into your soil. If there's a walnut tree, you'll have more juglone than you want. But you can do some things to reduce black walnut toxicity in your garden.
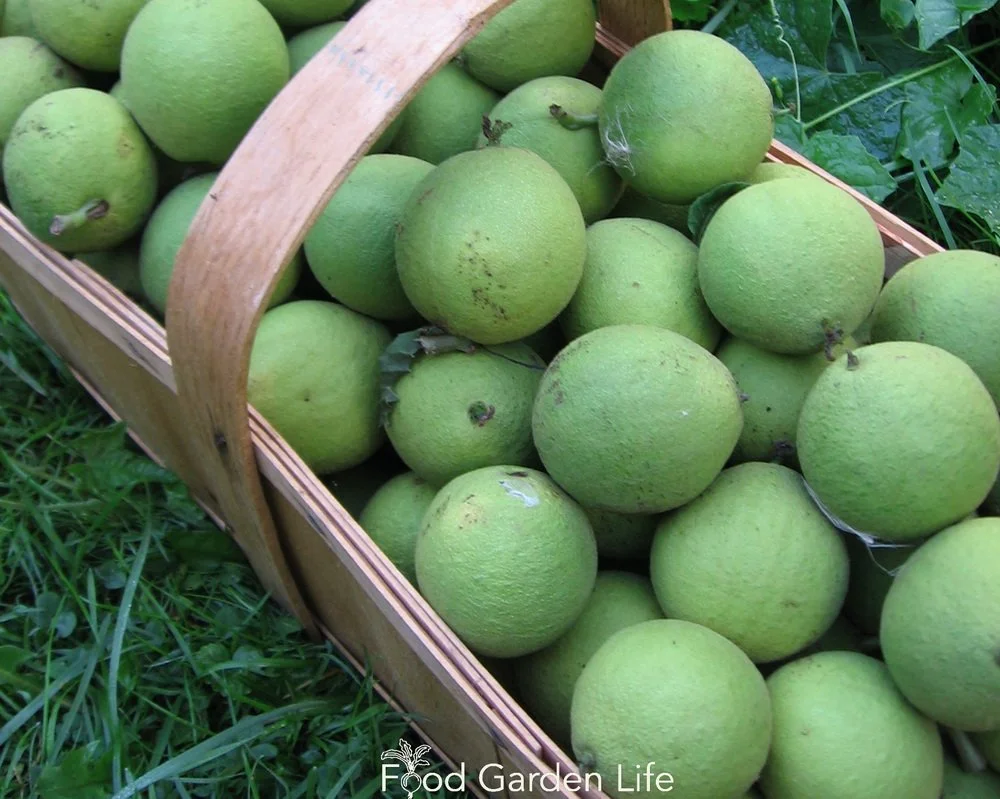
Black walnut hulls also contain juglone.
Roots. Walnut tree roots release juglone into the soil. Remember the black walnut roots if you're thinking of raised-bed gardening, because tree roots can (and do!) grow up into raised beds. You need a raised bed that the roots can't get into. (See below, Raised Beds.)
Leaves. I don't bother removing walnut leaves from my vegetable garden beds near the black walnut tree. Those beds are already loaded with juglone. But I do remove fallen walnut leaves from my raised beds, where the soil is not contaminated with juglone. I don't compost black walnut leaves with leaves from other parts of my yard. No point making killer compost. (Composting breaks down juglone, but in a home garden we don't have perfect composting conditions, so you won't know how long until your compost is juglone-free.)
Nuts. Black walnut hulls also contain juglone. Again, I removed them from the raised beds where the soil isn't full of juglone. If I'm not fast, the squirrels help with cleanup! Bothered by squirrels? Here are 50 ways to foil squirrels in your food garden.
Wood. If you're getting a load of wood chips from an arborist, make sure there isn't chipped black walnut in there!
Other trees in the same family as black walnut (the Juglandaceae family) give off juglone too. These include butternut, pecan, English walnut, heartnut, and hickory. But black walnut gives off the most, hence its reputation and the term "black walnut toxicity."
How Big is the Walnut "Kill Zone"
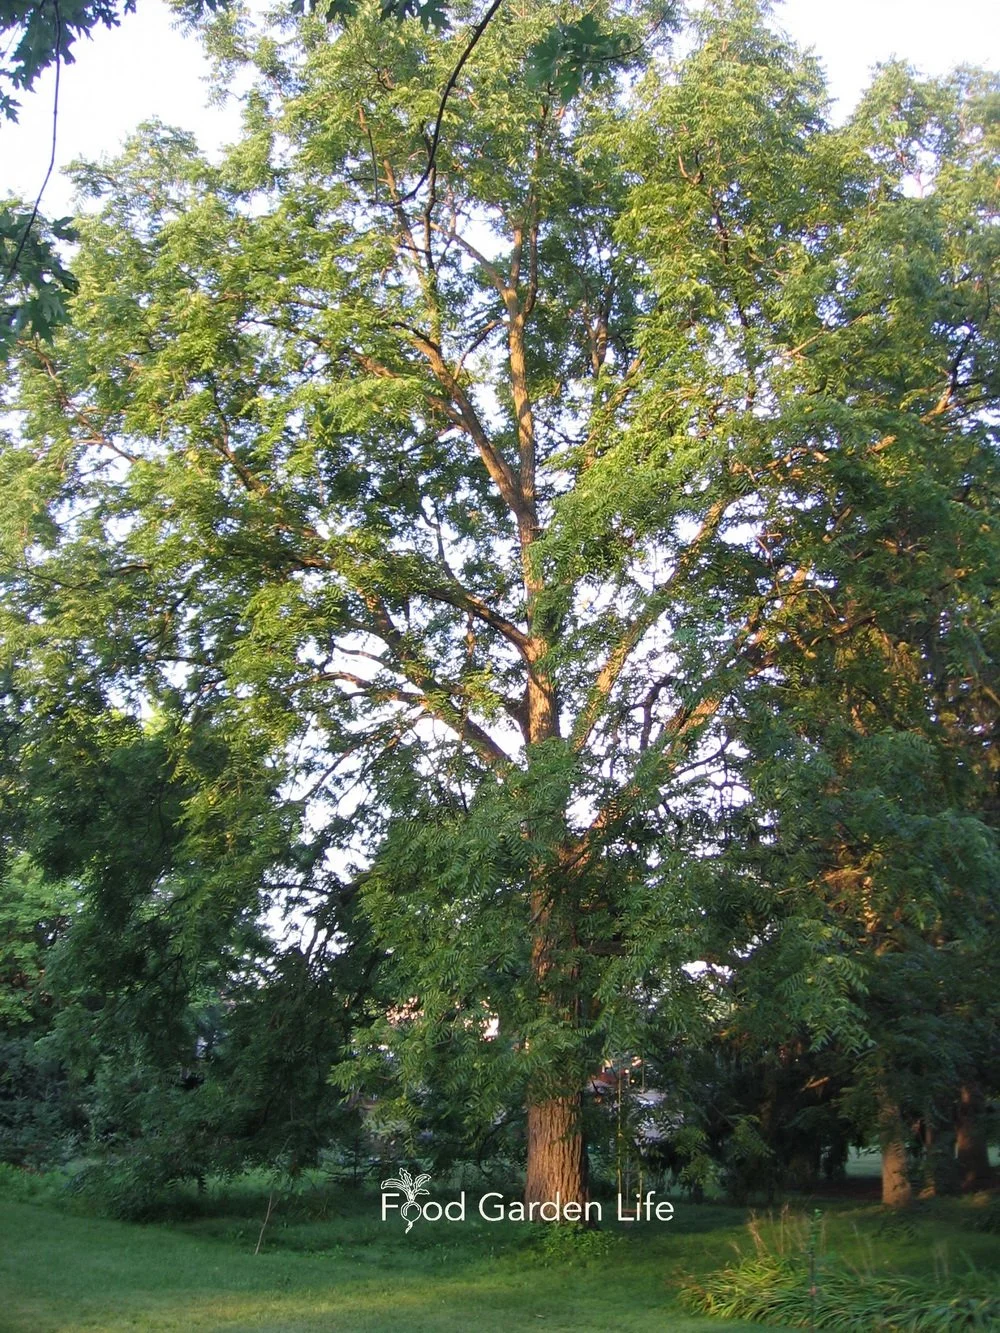
The bigger the tree, the bigger the zone where you’ll get black walnut toxicity. My neighbour’s tree is big…and so is the kill zone.
I remember hiking in a nearby ravine with a semi-wooded, scrubby area. The scrub was dotted with young black walnut trees. And underneath these young trees there was mostly grass. Like a doughnut under each tree. Far less competition. I call that the "kill zone."
The size of this kill zone in your yard depends on how big the tree is and how well drained the soil is. Soil drainage, soil type, and microbes are involved in breaking down juglone. That just means that determining the size of the kill zone is not an exact science.
When I first started gardening near my neighbour's big black walnut tree, I figured that if I planted beyond the "drip line" (which is what's under the tree canopy) it might be OK.
It wasn't.
The young espaliered apple trees I'd worked hard to shape? Toast. Even though they were 15 metres away. The effects of juglone can extend well beyond the drip line of big trees. For a big tree, I'd use 15 metres as a starting point. The farther the better.
Symptoms of Juglone Toxicity
Juglone can cause yellowing leaves, partial or total wilting, stunted growth, and, possibly, death of susceptible plants.
The symptoms might look like drought stress at first. That's what I saw the first time it affected our tomato crop: Wilting even when there was ample soil moisture. But by then, it's too late. Game over. No matter how much you water.
Walnut-Wise Food Gardening
3 Steps to Create a Thriving Vegetable Garden or Edible Landscape Near a Black Walnut Tree
Consider the kill zone. Once you've mapped out the likely kill zone, you can start planning where to put your juglone-sensitive plants, and where to put your juglone-tolerant plant species. Play it safe, and assume the kill zone is bigger rather than smaller.
Choose wisely. There are oodles of plants that are tolerant to juglone. Use the lists below to help you choose what to grow—and what not to grow.
Keep crops out of affected soil. Use containers and raised bed to grow juglone-sensitive plants close to a black walnut tree. But you have to do it right. (But see Raised Beds, below, so that you do it right.)
Underneath my neighbour's black walnut tree I have a small pawpaw patch (these are shade-tolerant native plants with a really tasty fruit, worthwhile working into your walnut-wise garden.) There's also small fruit such as bush cherries, chokeberry, and autumn olive closer to the edge of the dripline, where there's more sunlight. Then, further out, where there's a bit more sun, I have raised beds for juglone-sensitive plants. And finally, still within the kill zone, I have a really big veg patch, filled with crops that aren't affected by juglone.
Container Veg Gardening Course
As well as helping with your walnut problem, a container garden is a great way to harvest more from a small space. If you want to take container gardening to the next level, check out the course below on vegetable container gardening.
Raised Beds and Containers to Solve Black Walnut Toxicity
A raised bed allows you to grow juglone-sensitive crops in the kill zone. But you have to set it up properly...or it won't help for long. Tree roots grow up into raised beds.
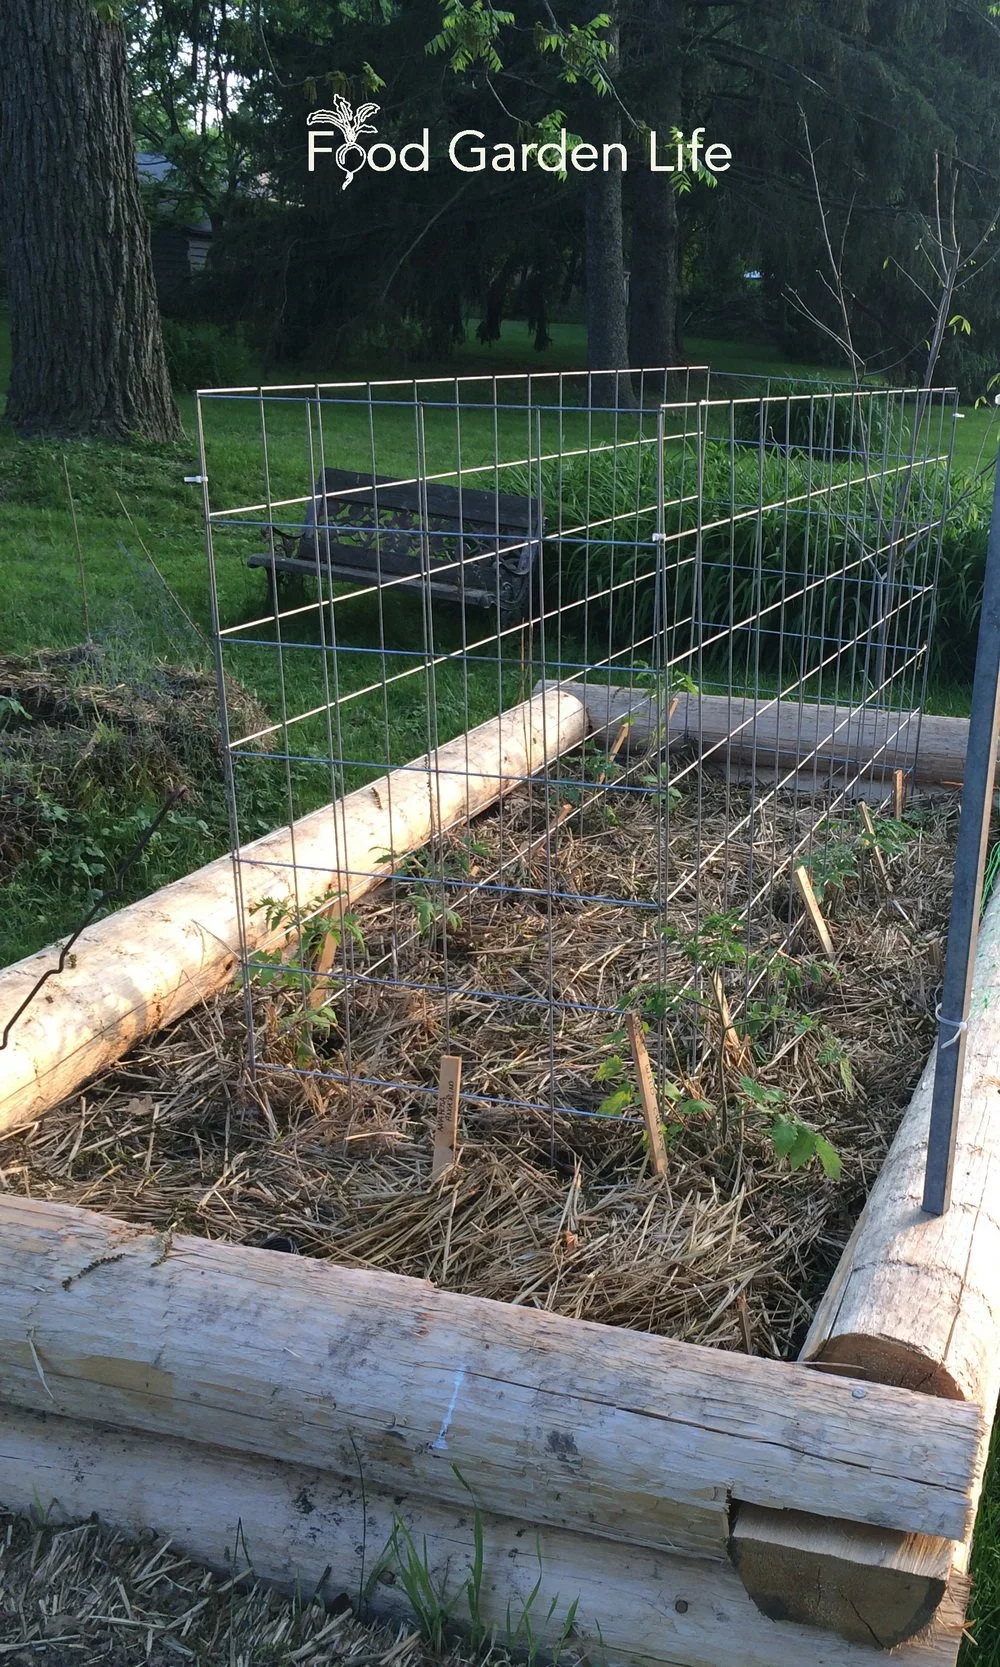
This is a wicking bed, very close to a black walnut tree (see the tree trunk in the back corner of the photo.) A wicking bed is one way to grow juglone-sensitive plants near a black walnut tree.
Failure 1. My first attempt at growing tomatoes in the ground near the tree failed. To be expected. So I reasoned that if I made a simple wooden raised bed, lined the bottom with landscape fabric, and added uncontaminated soil, it would solve the problem. At first, it seemed to work. But by mid summer, the tomatoes wilted badly. The reason? The roll of fabric wasn't as wide as the bed. And even though I overlapped the fabric so that the "new" soil above was separated from the contaminated soil below, tomato roots could find their way into the soil below...and walnut roots could grow up into the raised bed.
Failure 2. Another year I tried strawbale gardening. I reasoned that I could grow tomato plants in bales, near the walnut tree, if I put down a layer of plastic mulch under that bale to keep the tomato roots out of the soil below. This might have worked...except I used a biodegradeable plastic mulch, and part way through the season those tomato roots made the journey to juglone hell. Game over. (But strawbale gardening is an excellent technique. Find out how to use strawbales to create awesome food gardens.)
Success! I realized that tree roots quickly grow where they're not wanted...and the same goes for tomato roots. So I needed a bed that isolated the tomato roots. The answer was something called a "wicking bed." In short, it's a bed that has a thick liner at the bottom, creating a reservoir. They're usually used in dry areas, as a way to conserve water...but they fit the bill perfectly. Here's more information about using wicking beds.
On a smaller scale than a raised bed such as a wicking bed, container gardening is another way to grow sensitive plants near a black walnut tree. I'm a big fan of sub-irrigated planters (a.k.a. SIPS), which, like wicking beds, cut back on how often you need to water. Here's more about SIPS.
Plant Lists for Walnut-Wise Food Gardens
Here are edible plant lists you can use to plan your walnut-wise garden. These are from my experience and from published sources such as extension agencies and universities. Sometimes recommendations by published sources differ, so consider this a guide—not cast in stone.
Juglone-Sensitive Plants
Sensitive Plants - Fruit Trees and Shrubs
Apple
Crabapple
Blackberry
Blueberry
Sensitive Plants - Vegetables
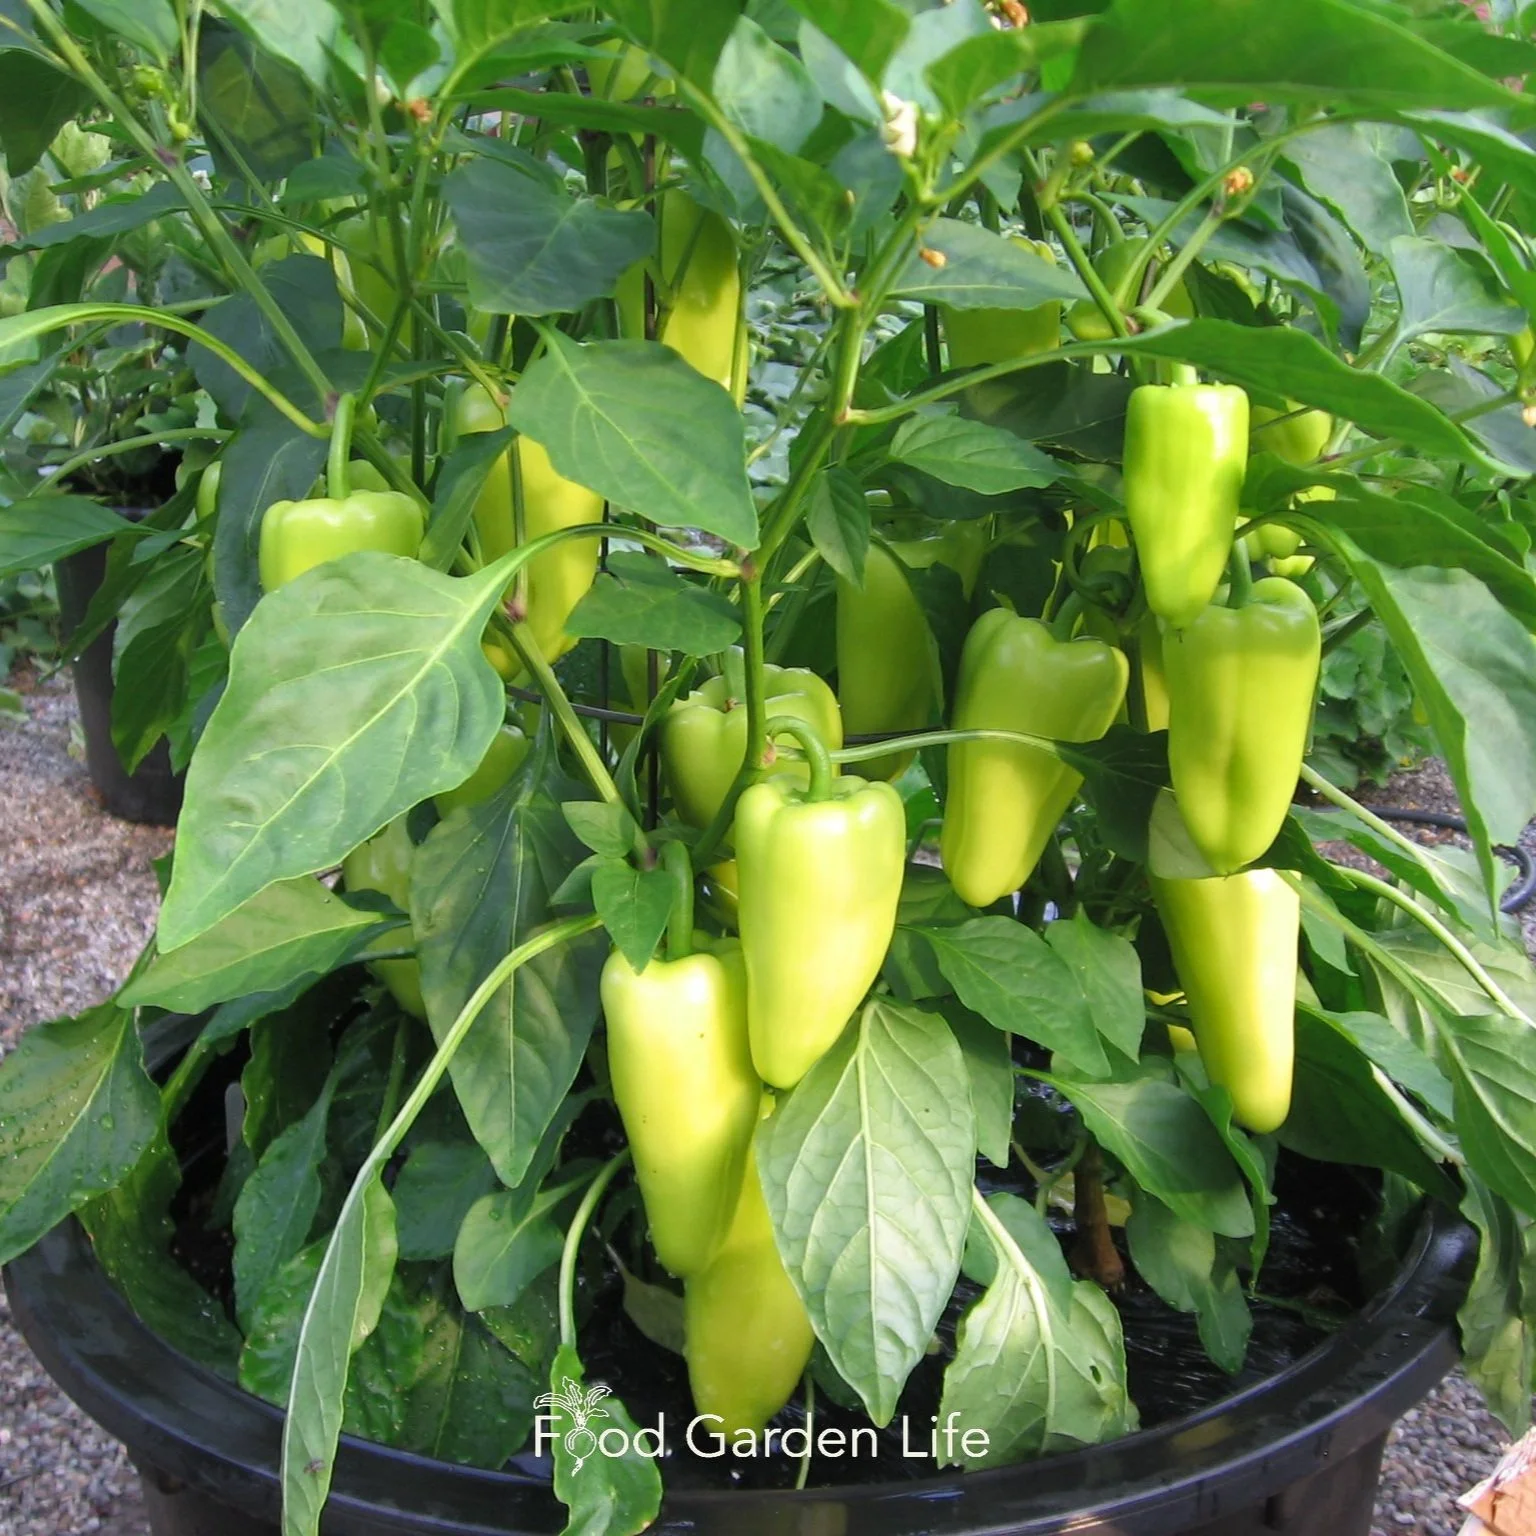
Peppers and other plants in the nightshade family are sensitive to juglone.
Wondering what vegetables are sensitive to juglone? Plants in the nightshade family (Solanaceae) practically wilt at the mention of juglone. This family includes lots of the must-grow veg crops such as tomatoes, peppers, potatoes—but also some less common ones such as cape gooseberry and ground cherry.
Asparagus
Cabbage and family
Eggplant
Pepper
Potato
Rhubarb
Tomato
Plants Tolerant to Juglone
Wondering what grows well near a black walnut tree? Many plants grow just fine under or near a walnut tree. So if you're wondering how far should a garden be from a black walnut tree, you can garden quite close to the tree if you choose juglone-tolerant plants and take into account the shade. Here are key edible plants to get you started.
Juglone-Tolerant Plants - Fruit Trees and Shrubs
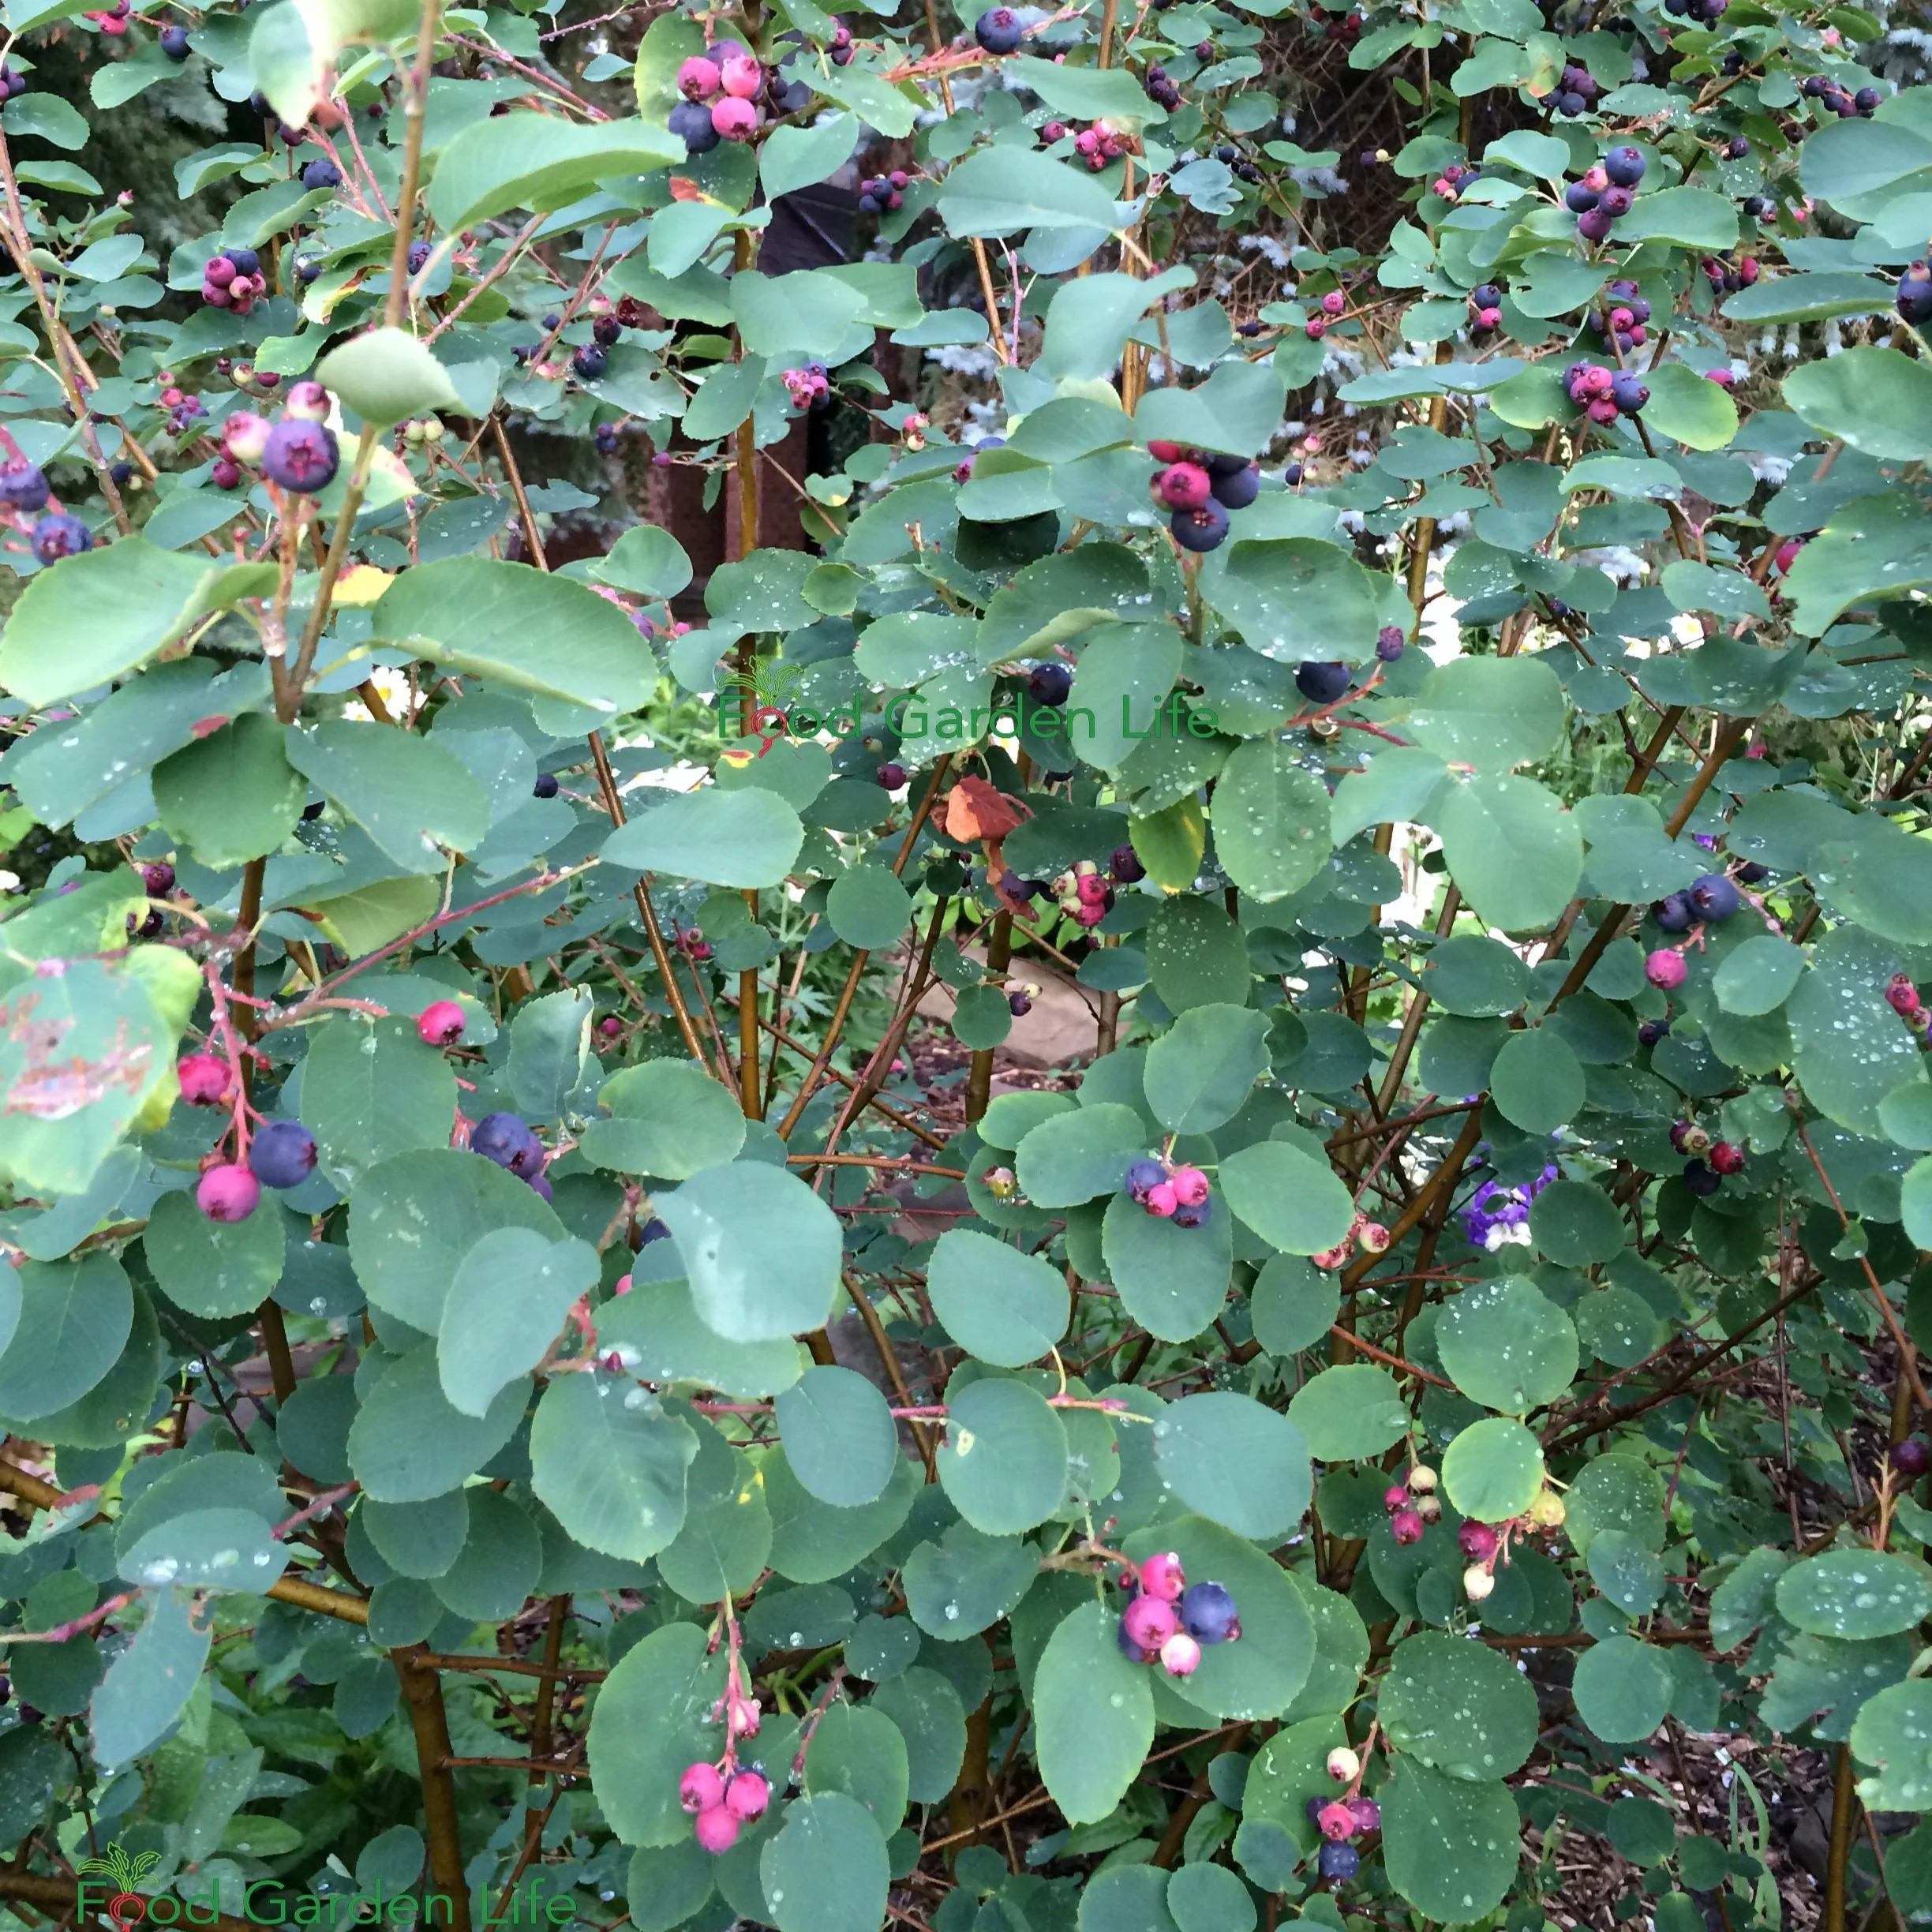
Saskatoon is an example of a fruit bush that is not juglone-sensitive.
Wondering what fruit trees are juglone tolerant? You have a lot of choice!
Autumn Olive (loved by foragers, though disliked by some because it can be an invasive here in Southern Ontario)
Cherry, Peach, Plum, Nectarine (fruit trees and bushes in the Prunus clan, what people often call stone fruit)
Chokeberry
Elderberry
Figs
Grape
Hazelnut
Pawpaw
Black raspberry
Serviceberry (including saskatoon, a.k.a. juneberry)
Here are 5 types of bush cherries you can grow.
Find out how to grow saskatoons.
Juglone-Tolerant Vegetable Crops and Herb Crops
Wondering what vegetables and herbs will tolerate juglone? There are many vegetables that tolerate juglone, so you have quite a few options.

Here’s a corner of the veg patch I have near the black walnut tree, where I grow carrots, beets, parsley, basil, squash, and corn very close to a large black walnut tree.
Basil
Bean
Beet
Carrot
Chive
Corn
Cucumber
Dill
Edamame (which is soybeans while they're still green)
Garlic
Leek
Melon
Onion
Parsley
Parsnip
Pea
Squash
Swiss chard
Other Walnut-Tolerant Edible Plants
Bee Balm (edible petals)
Dandelion (sure some people think of this as a weed, but great for early greens in the spring!)
Daylily (edible flower buds, here's more on edible flowers)
Grains such as wheat, millet, and sorgum
Hawthorn
Hosta (edible leaf spears in the spring!)
Jerusalem artichoke
Mint
Nasturtium
Pin cherry and choke cherry
Redbud tree (edible flower buds)
Rose (edible petals, rosehips)
Staghorn sumac
Looking for edible flower ideas? Check out this list of edible flowers for home gardens.
Landscape with Fruit Course
It the above list of juglone-tolerant fruit has you thinking of planting fruit near your black walnut tree, here’s a course all about how to grow fruit in home gardens.
How to Use Black Walnuts - Yes, You Can Eat Them!
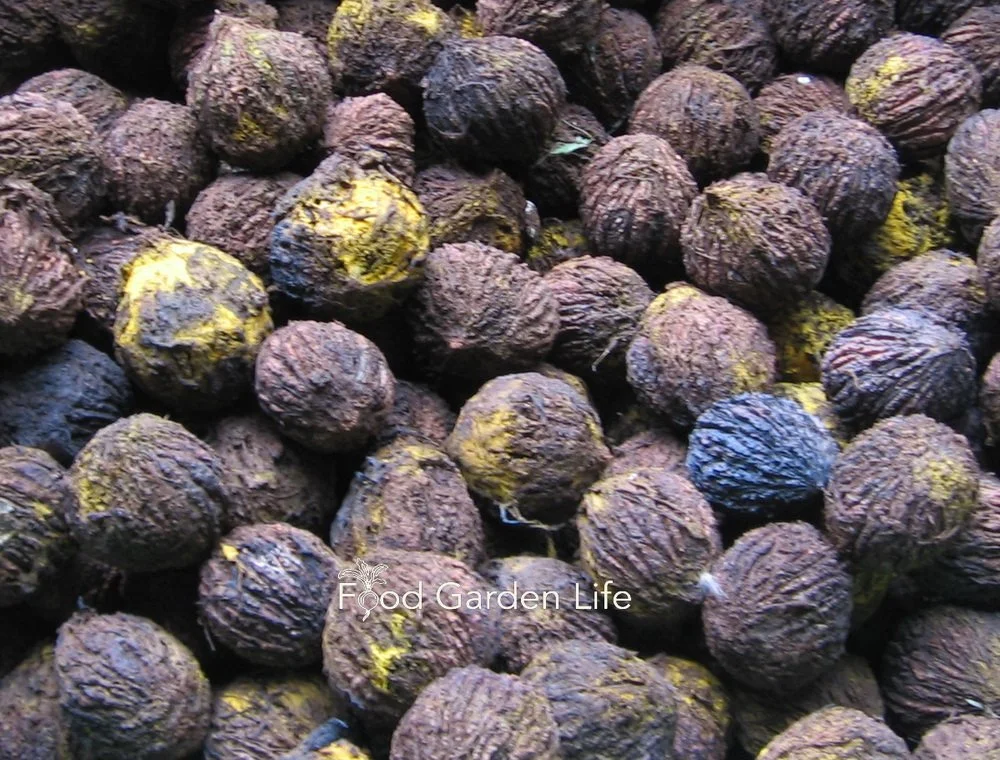
Black walnuts with husks removed.
While you're not likely to find black walnuts for sale, they are quite edible. Like other nuts, remove the hull and then air dry the nuts.
Note: The husk stain. I learned the hard way one year when my hands were a few shades darker for a week after hulling black walnuts. Someone later told me that a good way to get off the hulls is to pile the nuts until the hulls soften, and then send in kids dressed in old clothes and rubber boots to jump on the pile. I haven't tried it myself, but sounds as if it would work!
The challenge with black walnuts is cracking the shell. They're much more difficult to open than an English walnut. There is a vice-like device for cracking them open. I use a hammer. Or, I've heard of people driving over the nuts!
Key Takeaways
Pin this post!
Black walnut trees give off a chemical called juglone, which affects some plants. This is sometimes called black walnut toxicity.
This doesn't mean that you can't garden hear a black walnut tree—but that you need to choose tolerant plants and use raised beds or containers.
The size of the affected area around a tree depends on its age, the soil type, and soil moisture.
FAQ
Can I just cut down my black walnut tree to solve the problem?
Sorry...that would still leave lots of roots all through the soil, and, therefore, lots of juglone. Because it can take a few years for all the roots to decay, it's not a quick fix. In short, juglone can persist for a few years after a black walnut tree is removed.
How far should a garden be from a black walnut tree?
For a mature tree, the kill zone extends beyond the tree canopy and can be more than 15 metres from the trunk.
Find This Helpful?
Enjoy not being bombarded by annoying ads?
Appreciate the absence of junky affiliate links for products you don’t need?
It’s because we’re reader supported.
If we’ve helped in your food-gardening journey, we’re glad of support. You can high-five us below. Any amount welcome!
Food Gardening Articles
Food Gardening Courses
Find out how to grow more great food at home with our online courses. We have both live and self-paced courses.

Hi, We’re Steve and Emma!
We help people grow food on balconies, in backyards, and beyond—whether it’s edible landscaping, a vegetable garden, container gardens, or a home orchard.
Courses


Free Food- Garden Guide
Books

Covering everything from lemon varieties, to location and watering, to pruning and shaping, to overwintering, dealing with pests, and more—and including insights from fellow citrus enthusiasts—this book will give you the confidence you need to grow and harvest fresh lemons in cold climates.
Prefer an ebook? Find the Kindle edition on Amazon.

This book will help you apply creative “fig thinking” in your garden and harvest fresh figs even if you have a short summer or cold winters. With some fig thinking, you can harvest figs in areas where they don’t normally survive the winter! In this book, I share many of the questions I have been asked about growing figs in temperate climates, along with my responses.