
Cauliflower Steak with Yuzu Marinade
Here’s my recipe for a cauliflower steak with a yuzu marinade.
By Steven Biggs
Cauliflower Steak?

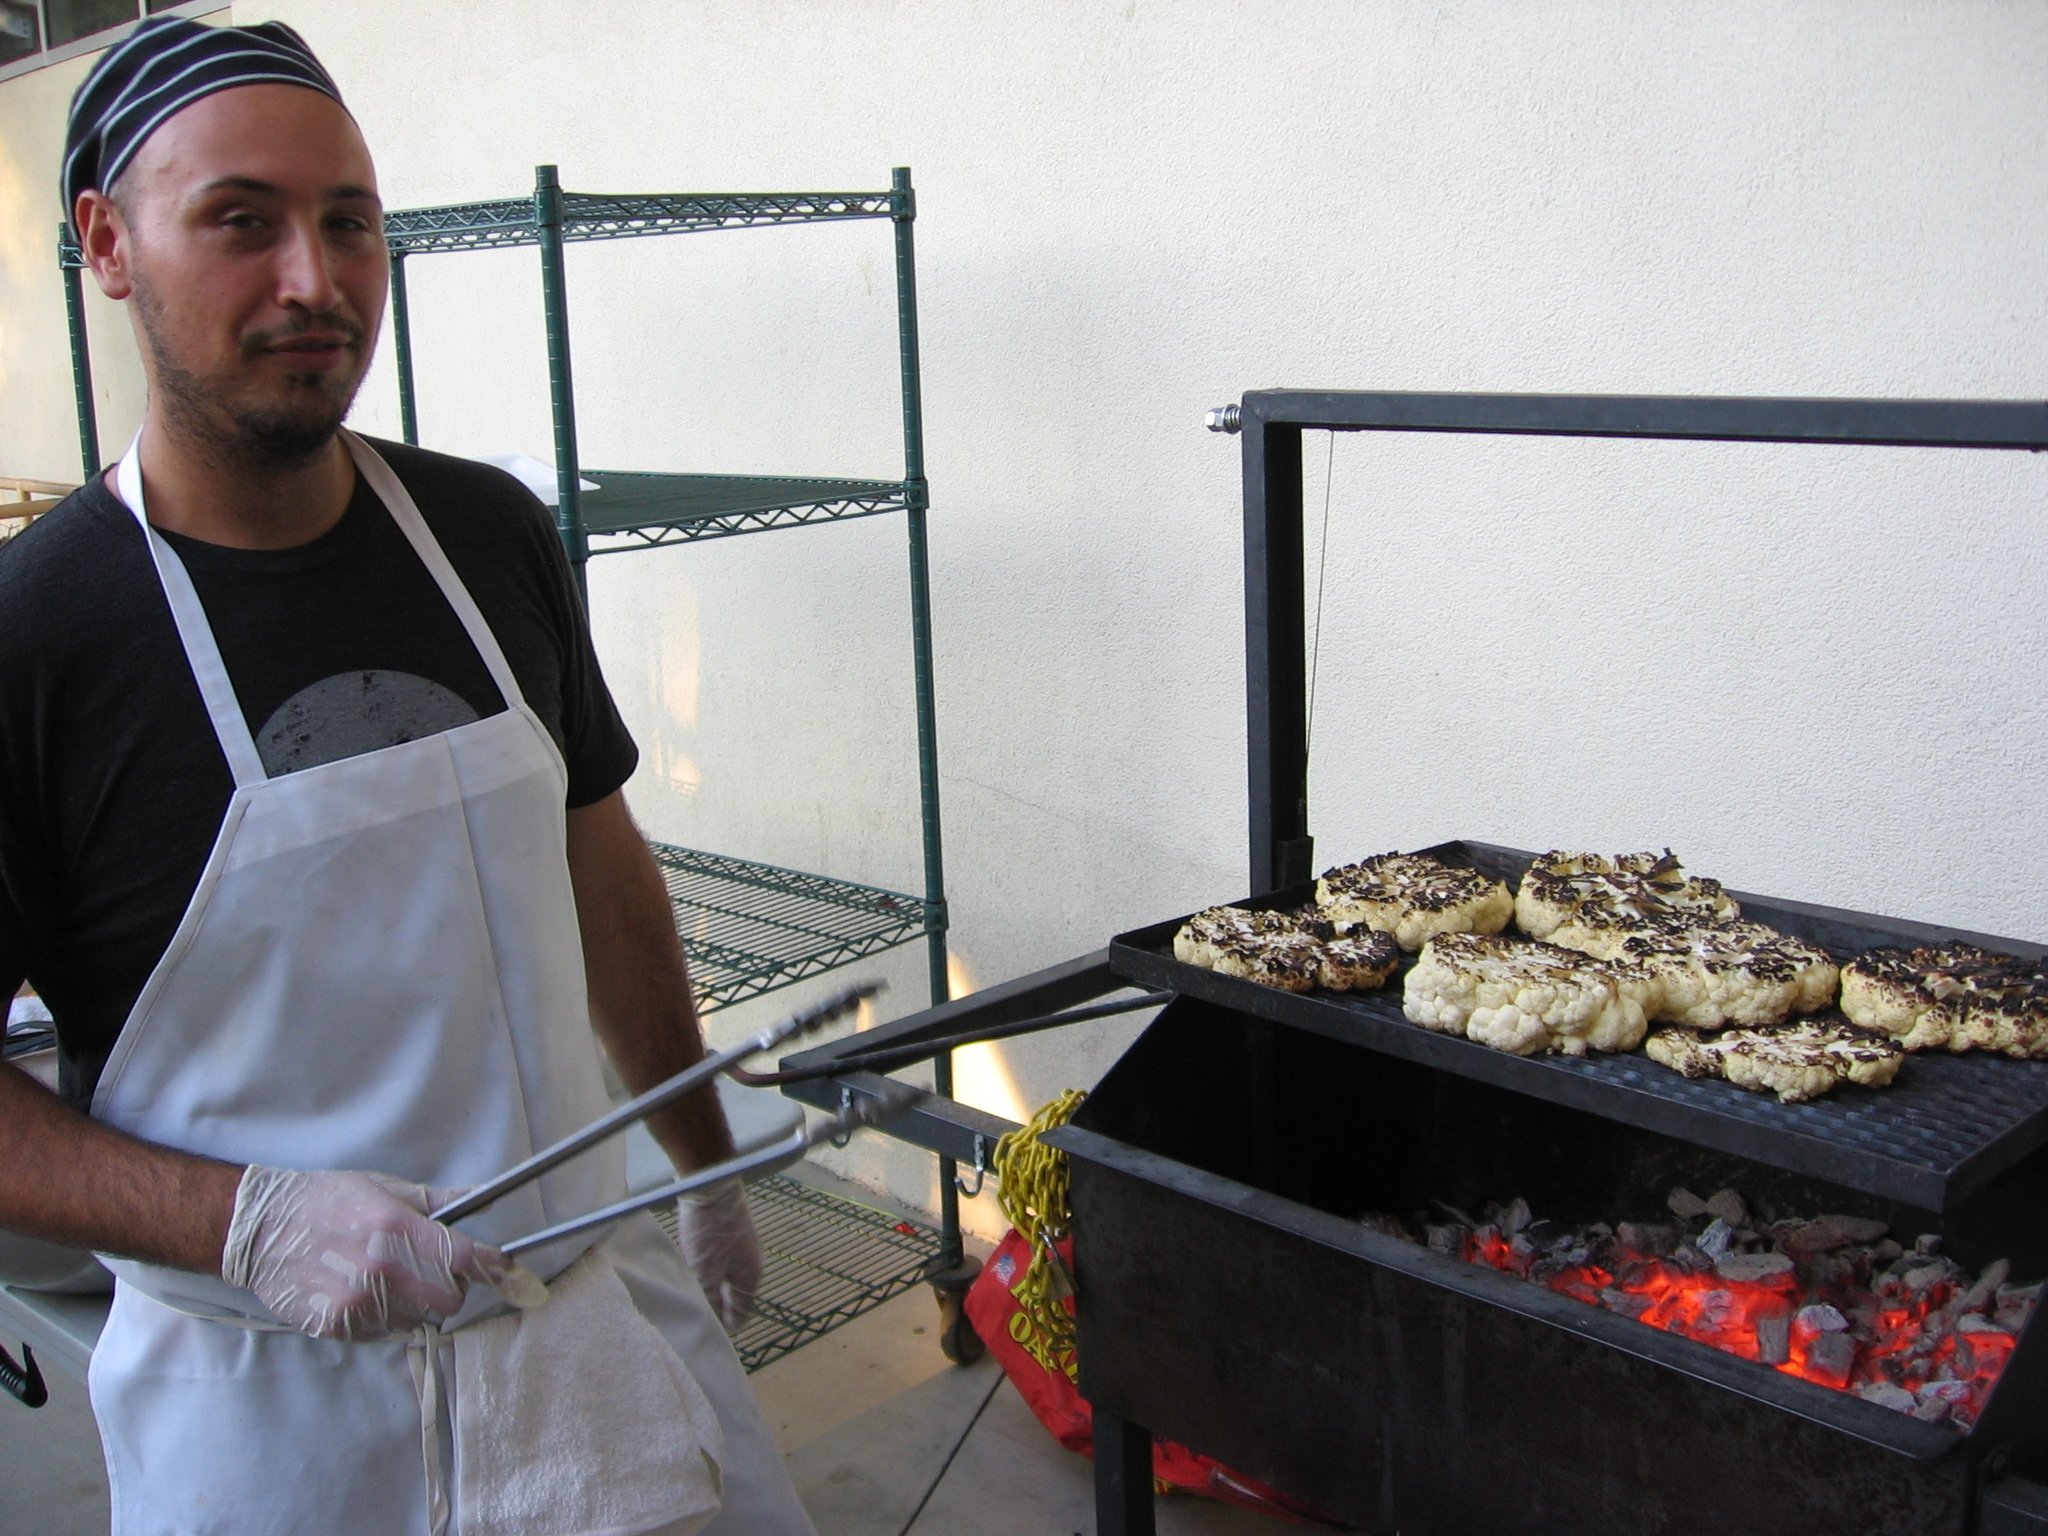
As the chef addressed our group of garden writers, he told us that he’d used a Korean-style marinade on the cauliflower steaks.
Cauliflower steaks? Yup. And not cauliflower crumbs glued together with insipid, sticky filler.
I walked over to the grill to have a peek. There were big, sizzling, round slabs of cauliflower, sliced so the central stem held everything together.
High-School Farm-to-Table Meal
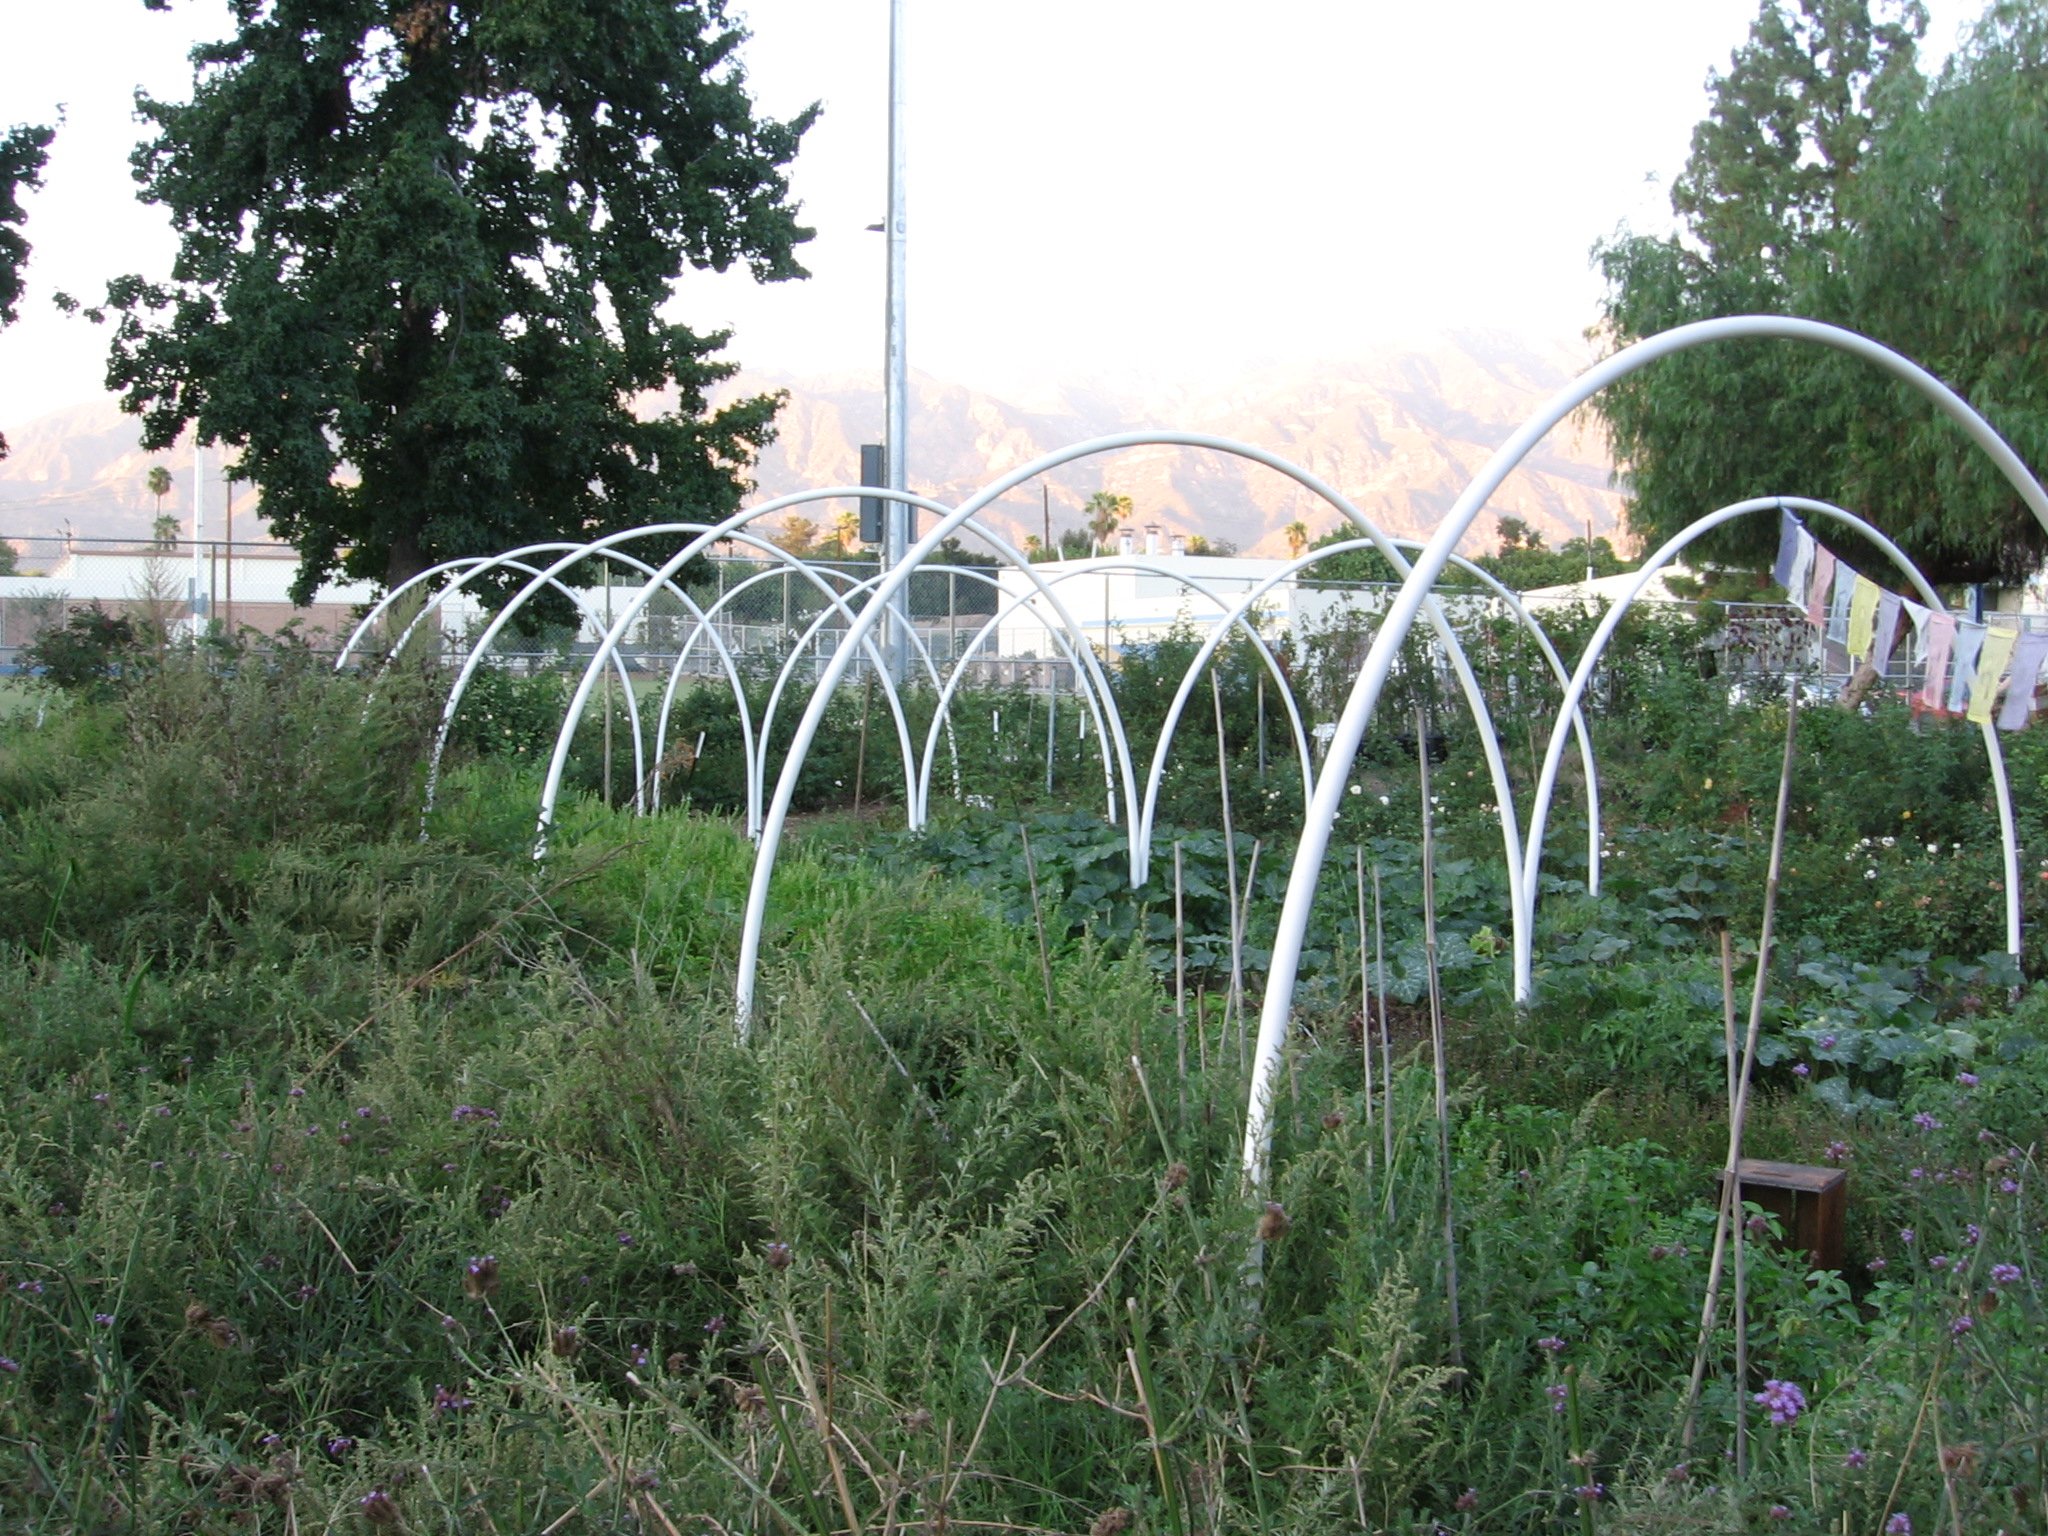
We were at Muir Ranch, an urban teaching farm and teen-jobs program on a 3-acre field behind John Muir High School in Pasadena, California.
They’d set up a long table beside the field to feed us. Students were ferrying around food.


Feeding a Diverse Crowd
That farm-to-table meal was in 2015, and I hadn’t had cauliflower steak since.

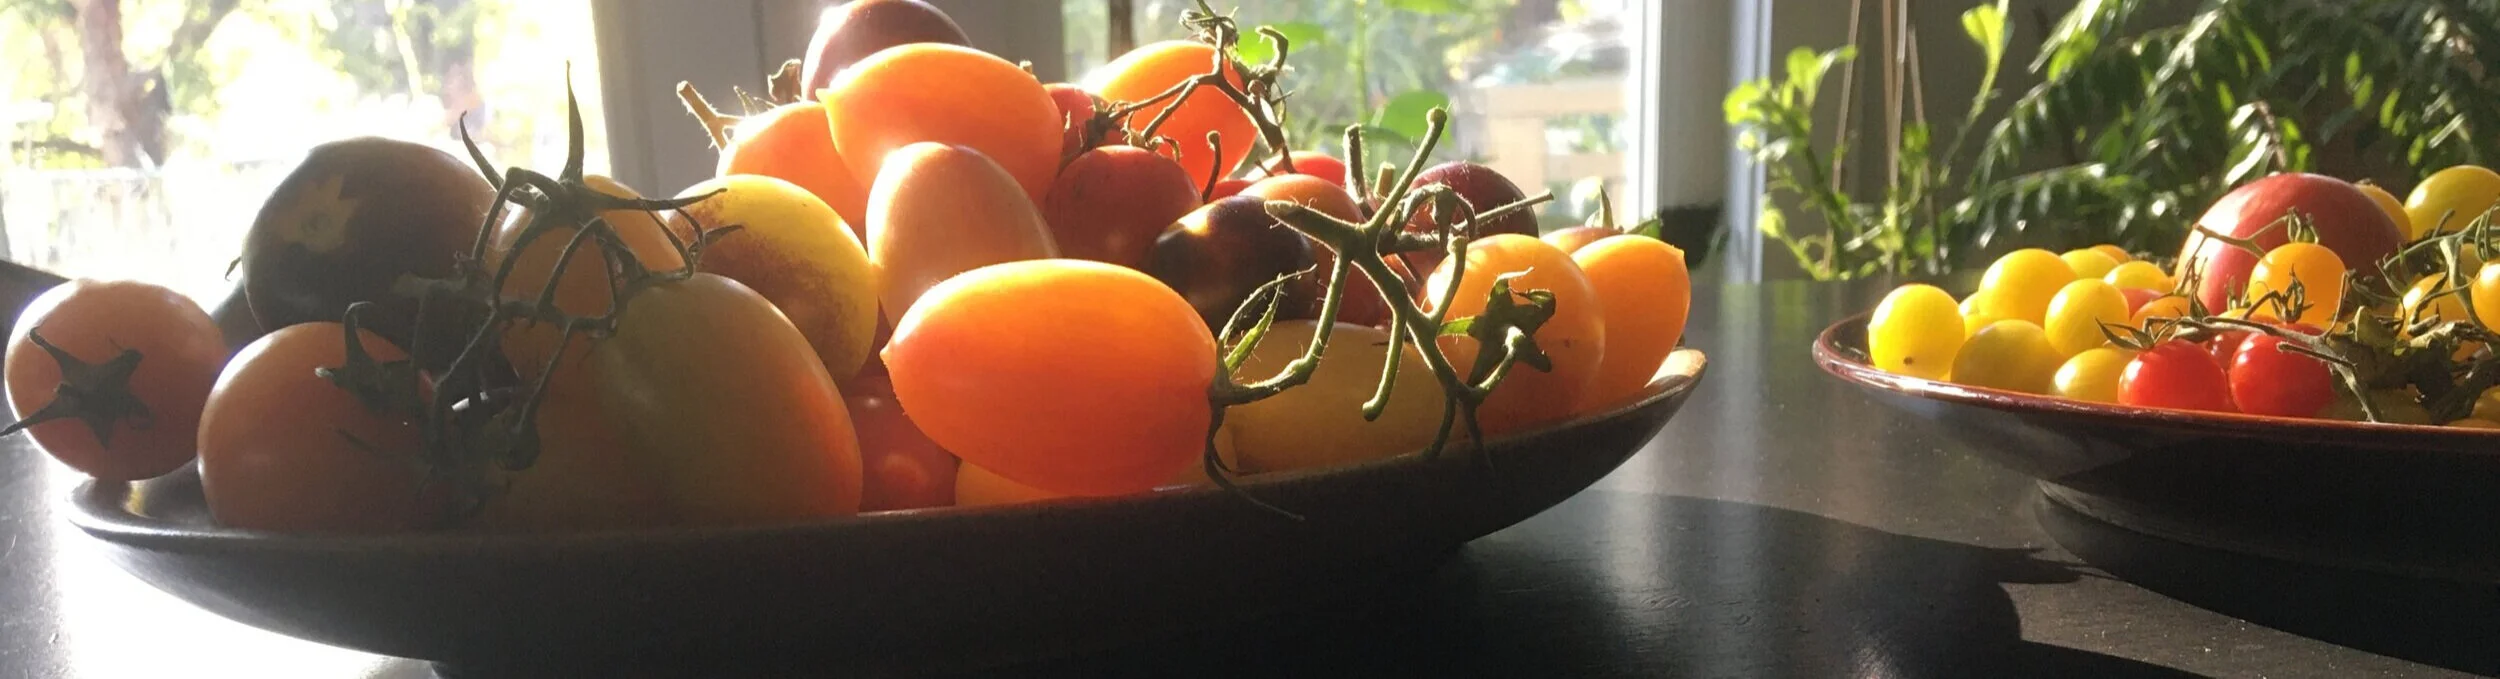
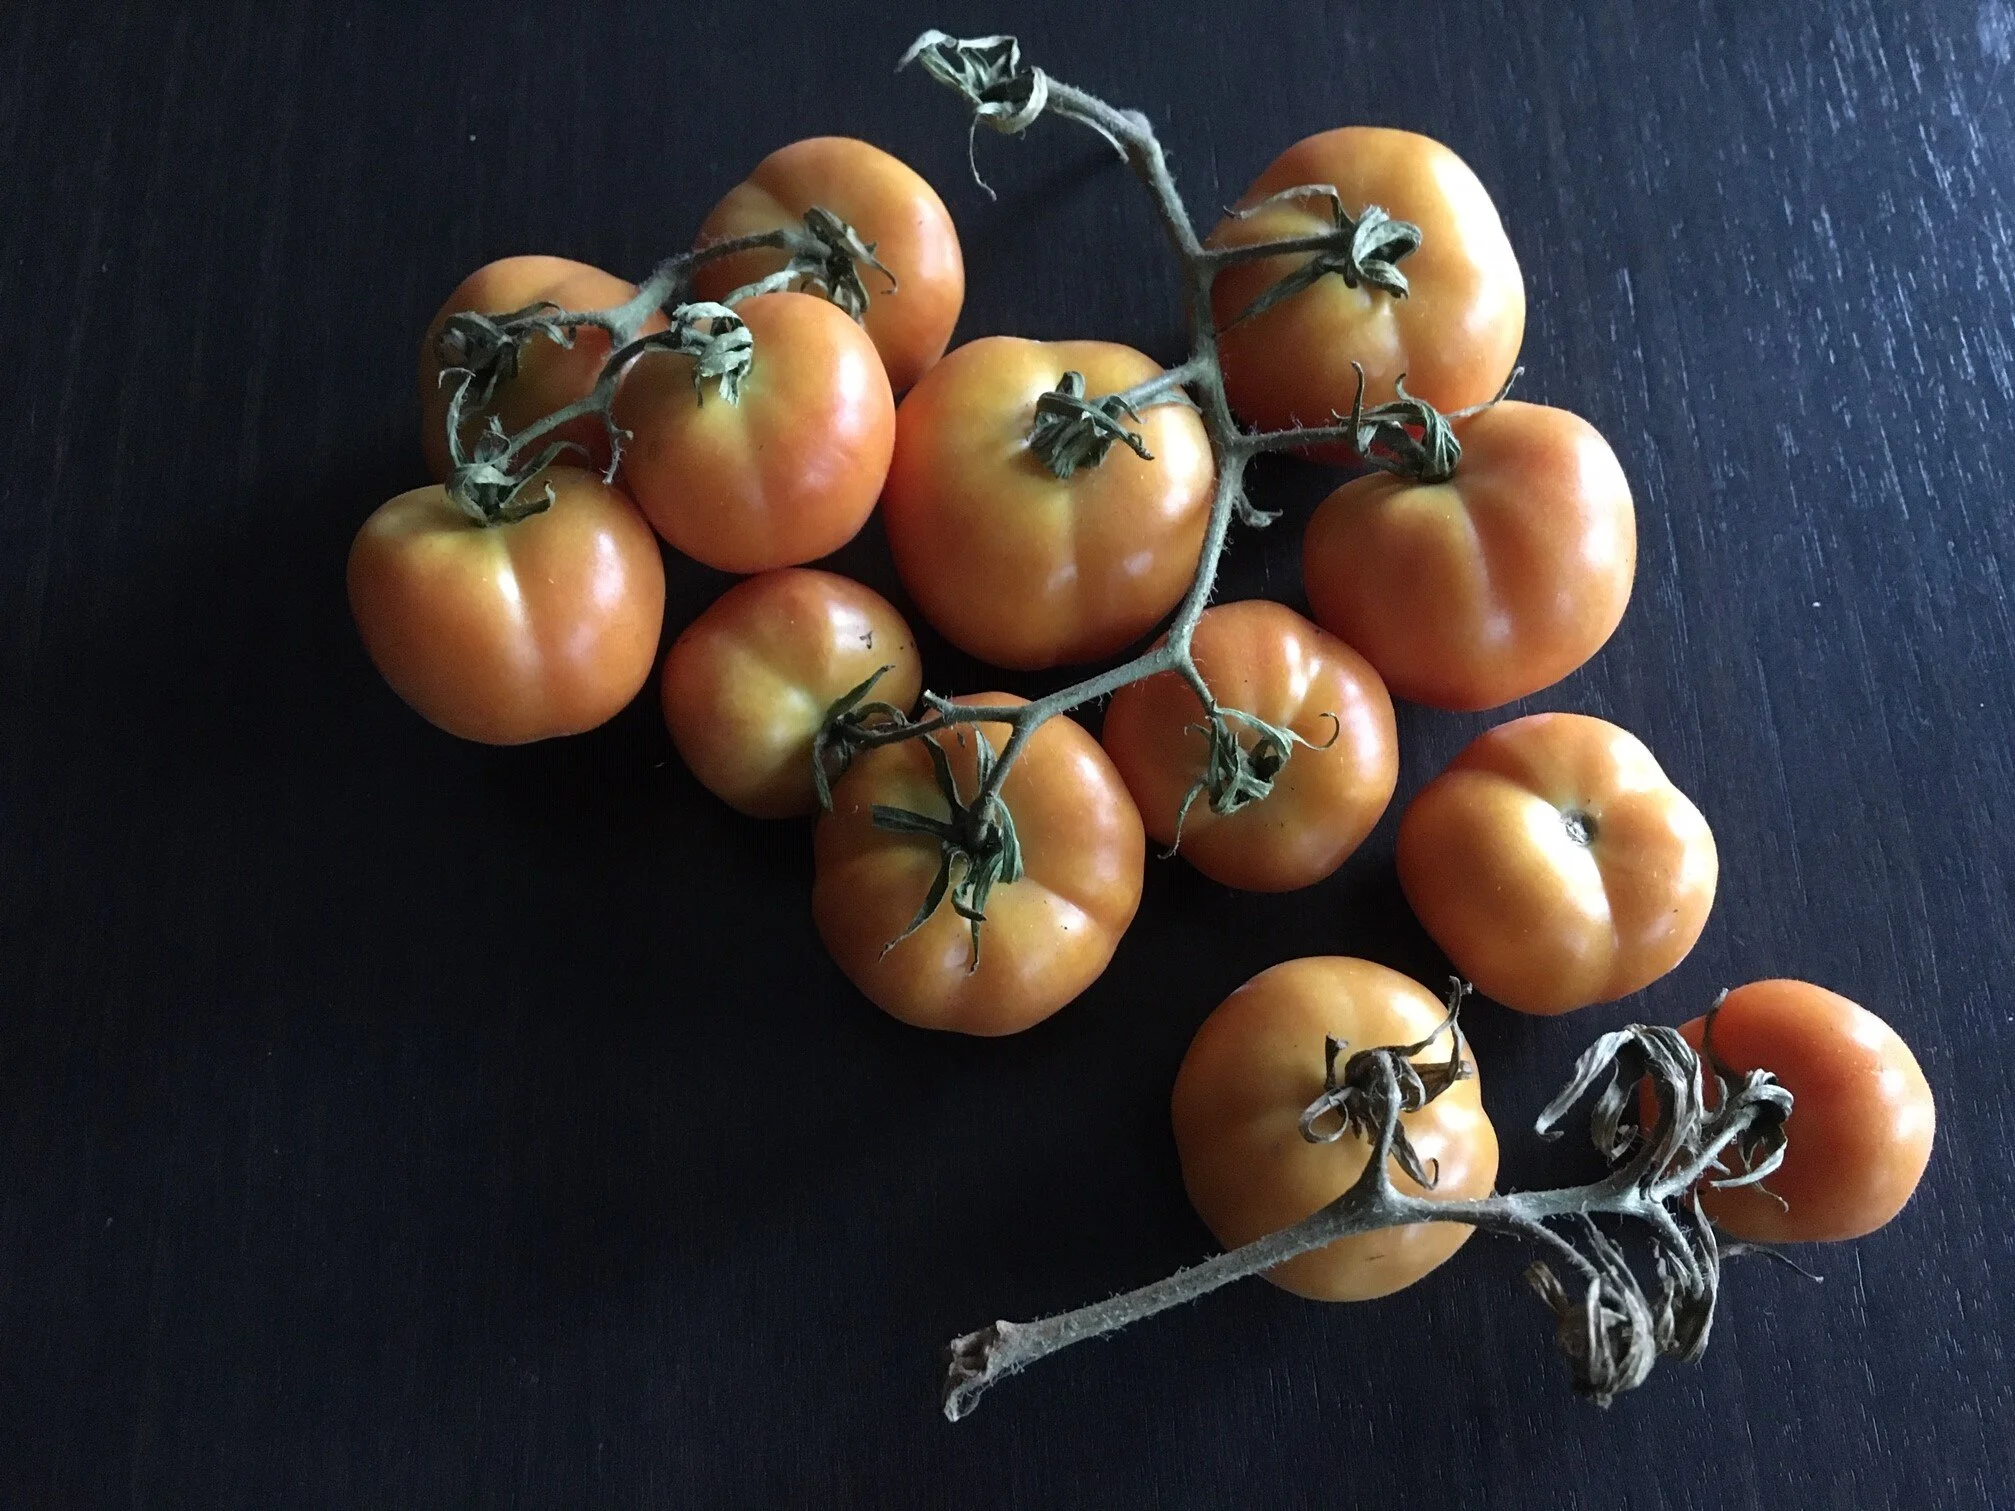
Cauliflower steak is a fun way to use locally-grown cauliflower when it’s in season. Here are some Ontario-grown beauties.
But recently I had an entertaining dilemma.
I was feeding a group of friends with diverse diets. I needed an entree that was:
Vegetarian
Low-carb
Gluten-free
Keto-friendly
Farewell soy sauce…see you, sugar…bye-bye bread crumbs!
So I went hunting for my photo of the cauliflower steaks, to see if I could remember how it was done.

I set out to recreate the cauliflower steaks I’d enjoyed at a very fun farm-to-table meal.
A Perfect Fall Meal
A cauliflower steak is a great dish for feeding friends on diverse diet regimes. (Unless you’re ardently anti-vegetable, like my late Uncle Bill.)
This is also a great recipe if you’re looking for new ways to serve up locally-grown produce. For long stretches of the year here in Southern Ontario, grocers stock puny shrink-wrapped cauliflower shipped in from across the continent.
But it’s November as I write this, and there are fantastic Ontario-grown cauliflower.
Large and snow-white.
Perfect for carving into steaks.
Add Yuzu
I had one other thought in mind as I planned dinner: Feed my guests some of the yuzu fruit I’ve grown.
If yuzu is new to you (excuse the rhyme!), it’s a citrus fruit, and the rind has a floral smell and taste.
For northern gardeners looking for a fun, exotic crop to grow in a pot, yuzu is a cold-tolerant citrus.
Grown in the ground, yuzu can go to about -10°C (14°F). In a pot it can’t get quite as cold…but I stow mine in a cold garage or greenhouse that I keep just above freezing for the winter. (Grow it just like you would a lemon tree in a cold climate.
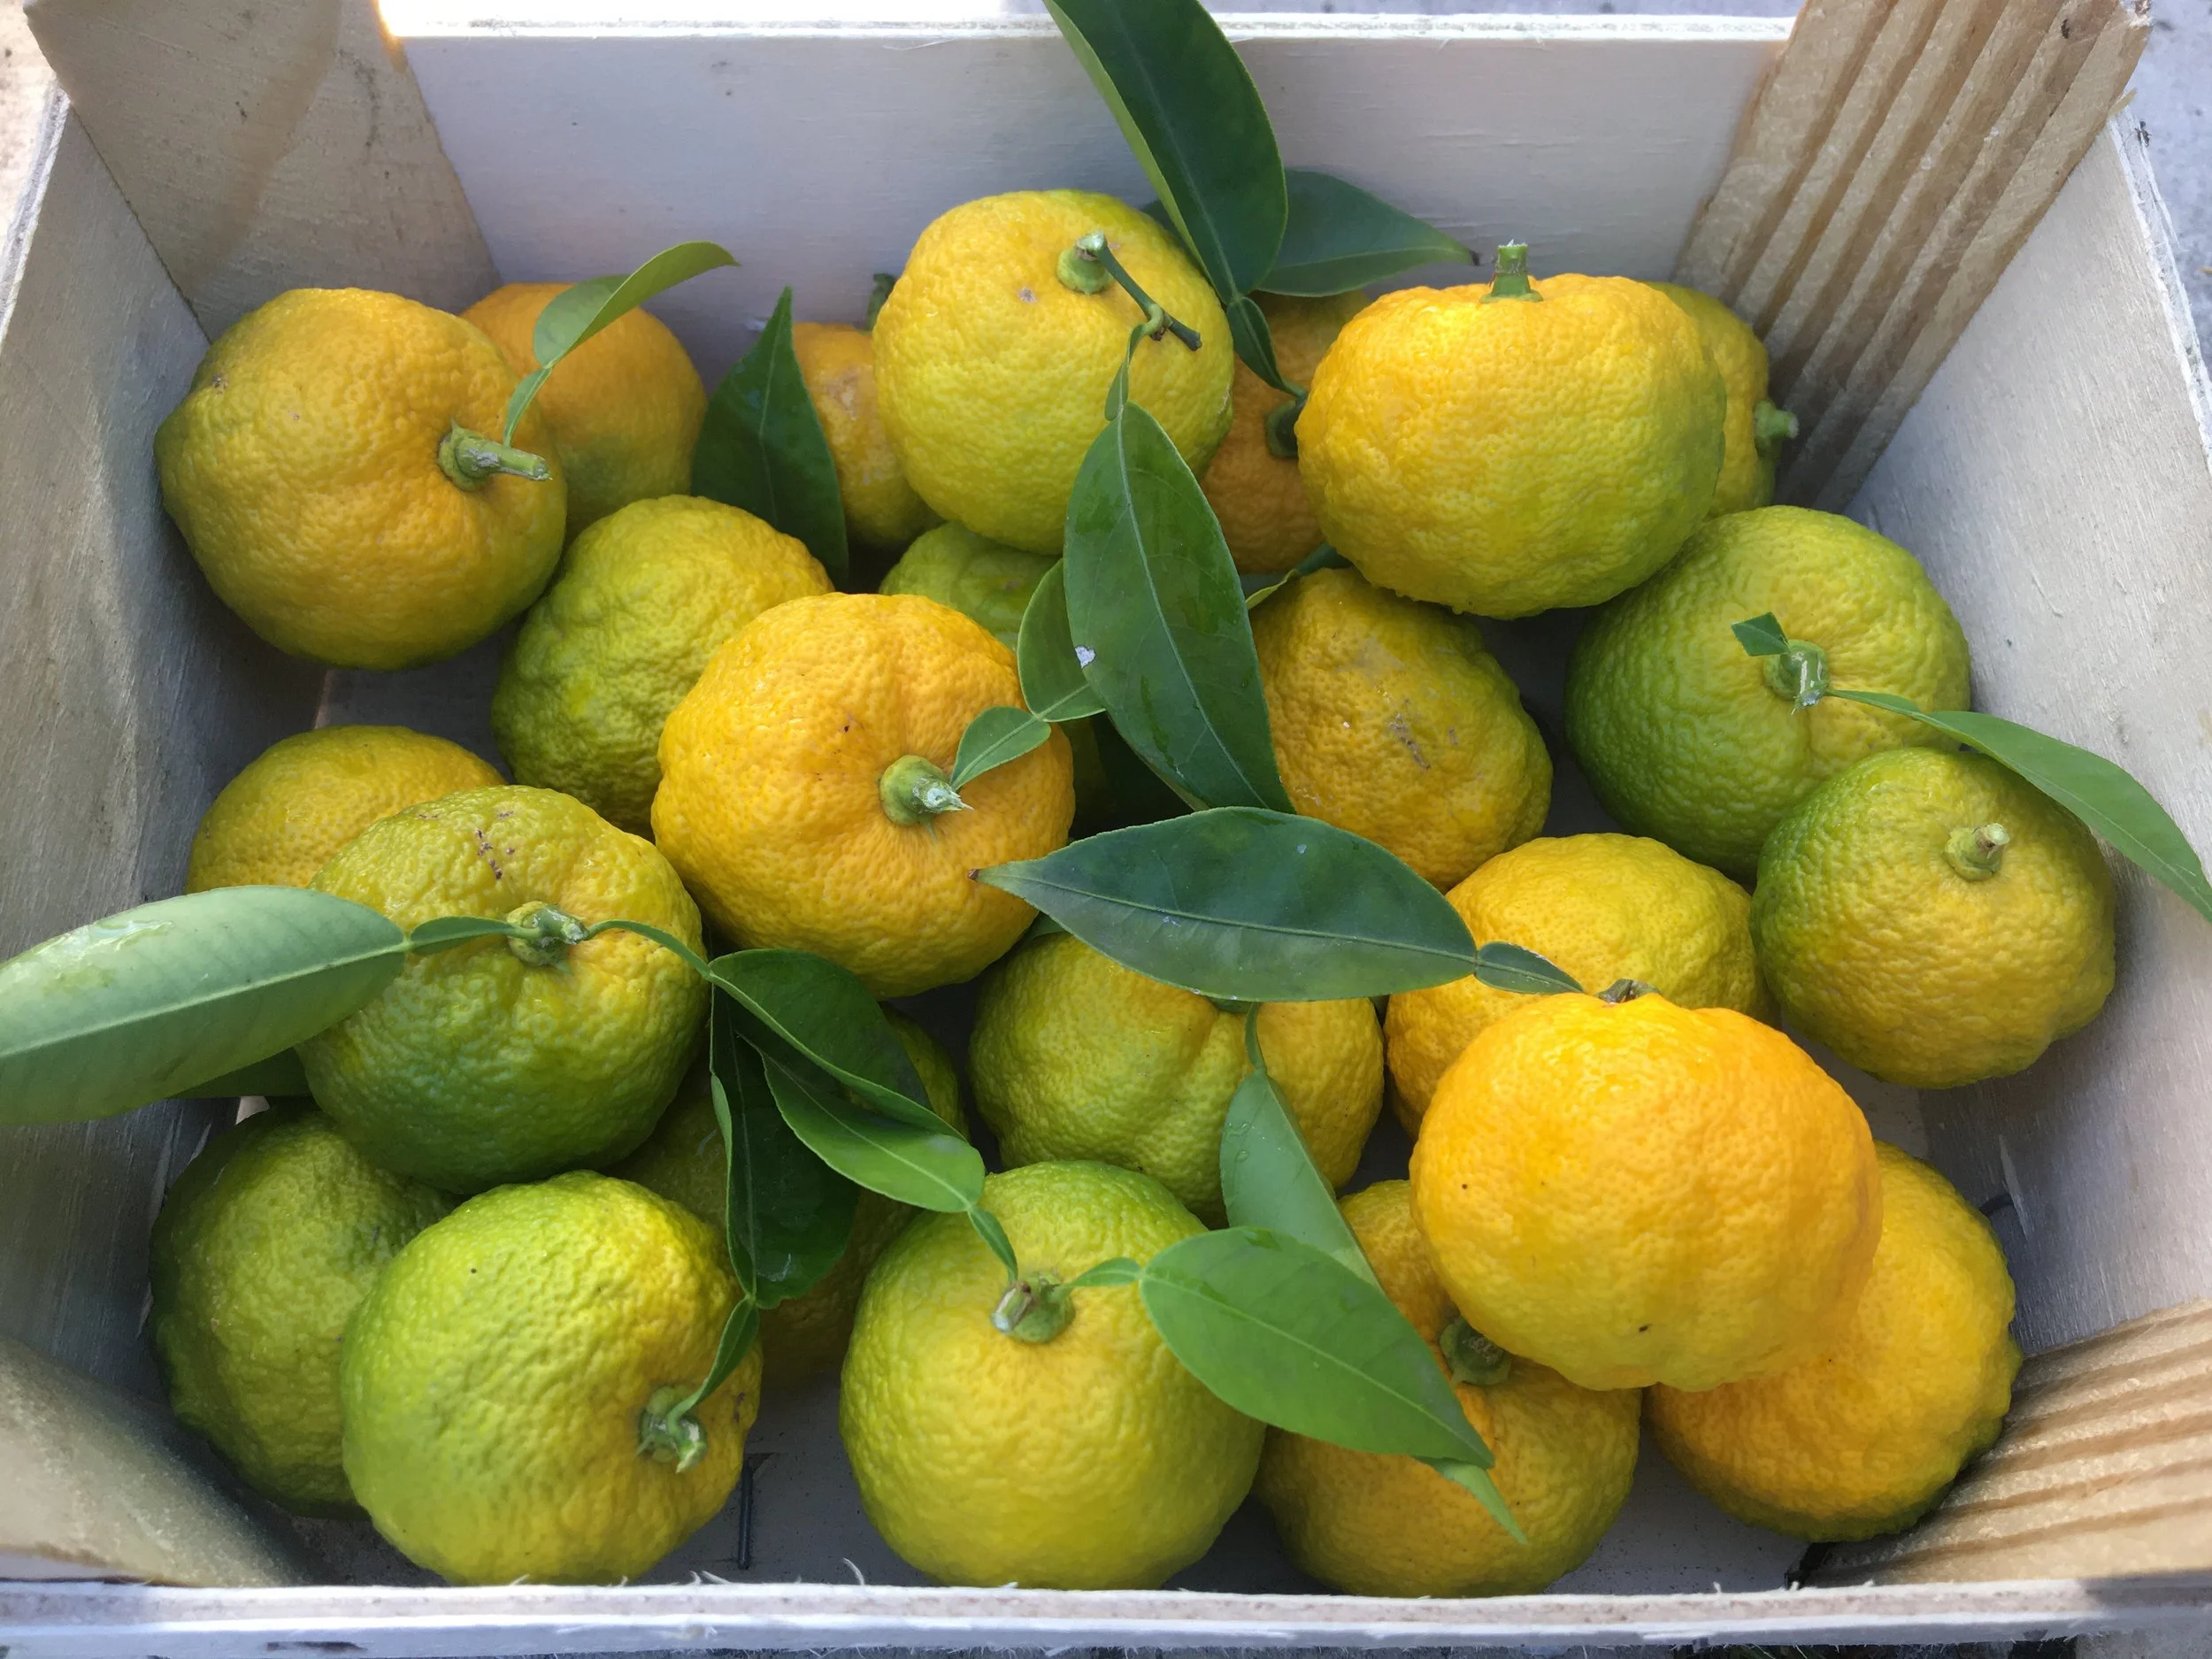
Some of my harvest of Toronto-grown yuzu fruit

The cauliflower steaks were a hit with my guests.
How to Make Cauliflower Steaks
The cauliflower steaks were a hit. If you like the sound of them, my recipe is below.
Carve Cauliflower into “Steaks”
I cut 2 steaks from each cauliflower head. Cut it from bottom to top, along the centre of the stem so that the outlying sections are held in place. After you’ve halved it, make a second cut to shave off the rounded side, leaving you with a flat steak.
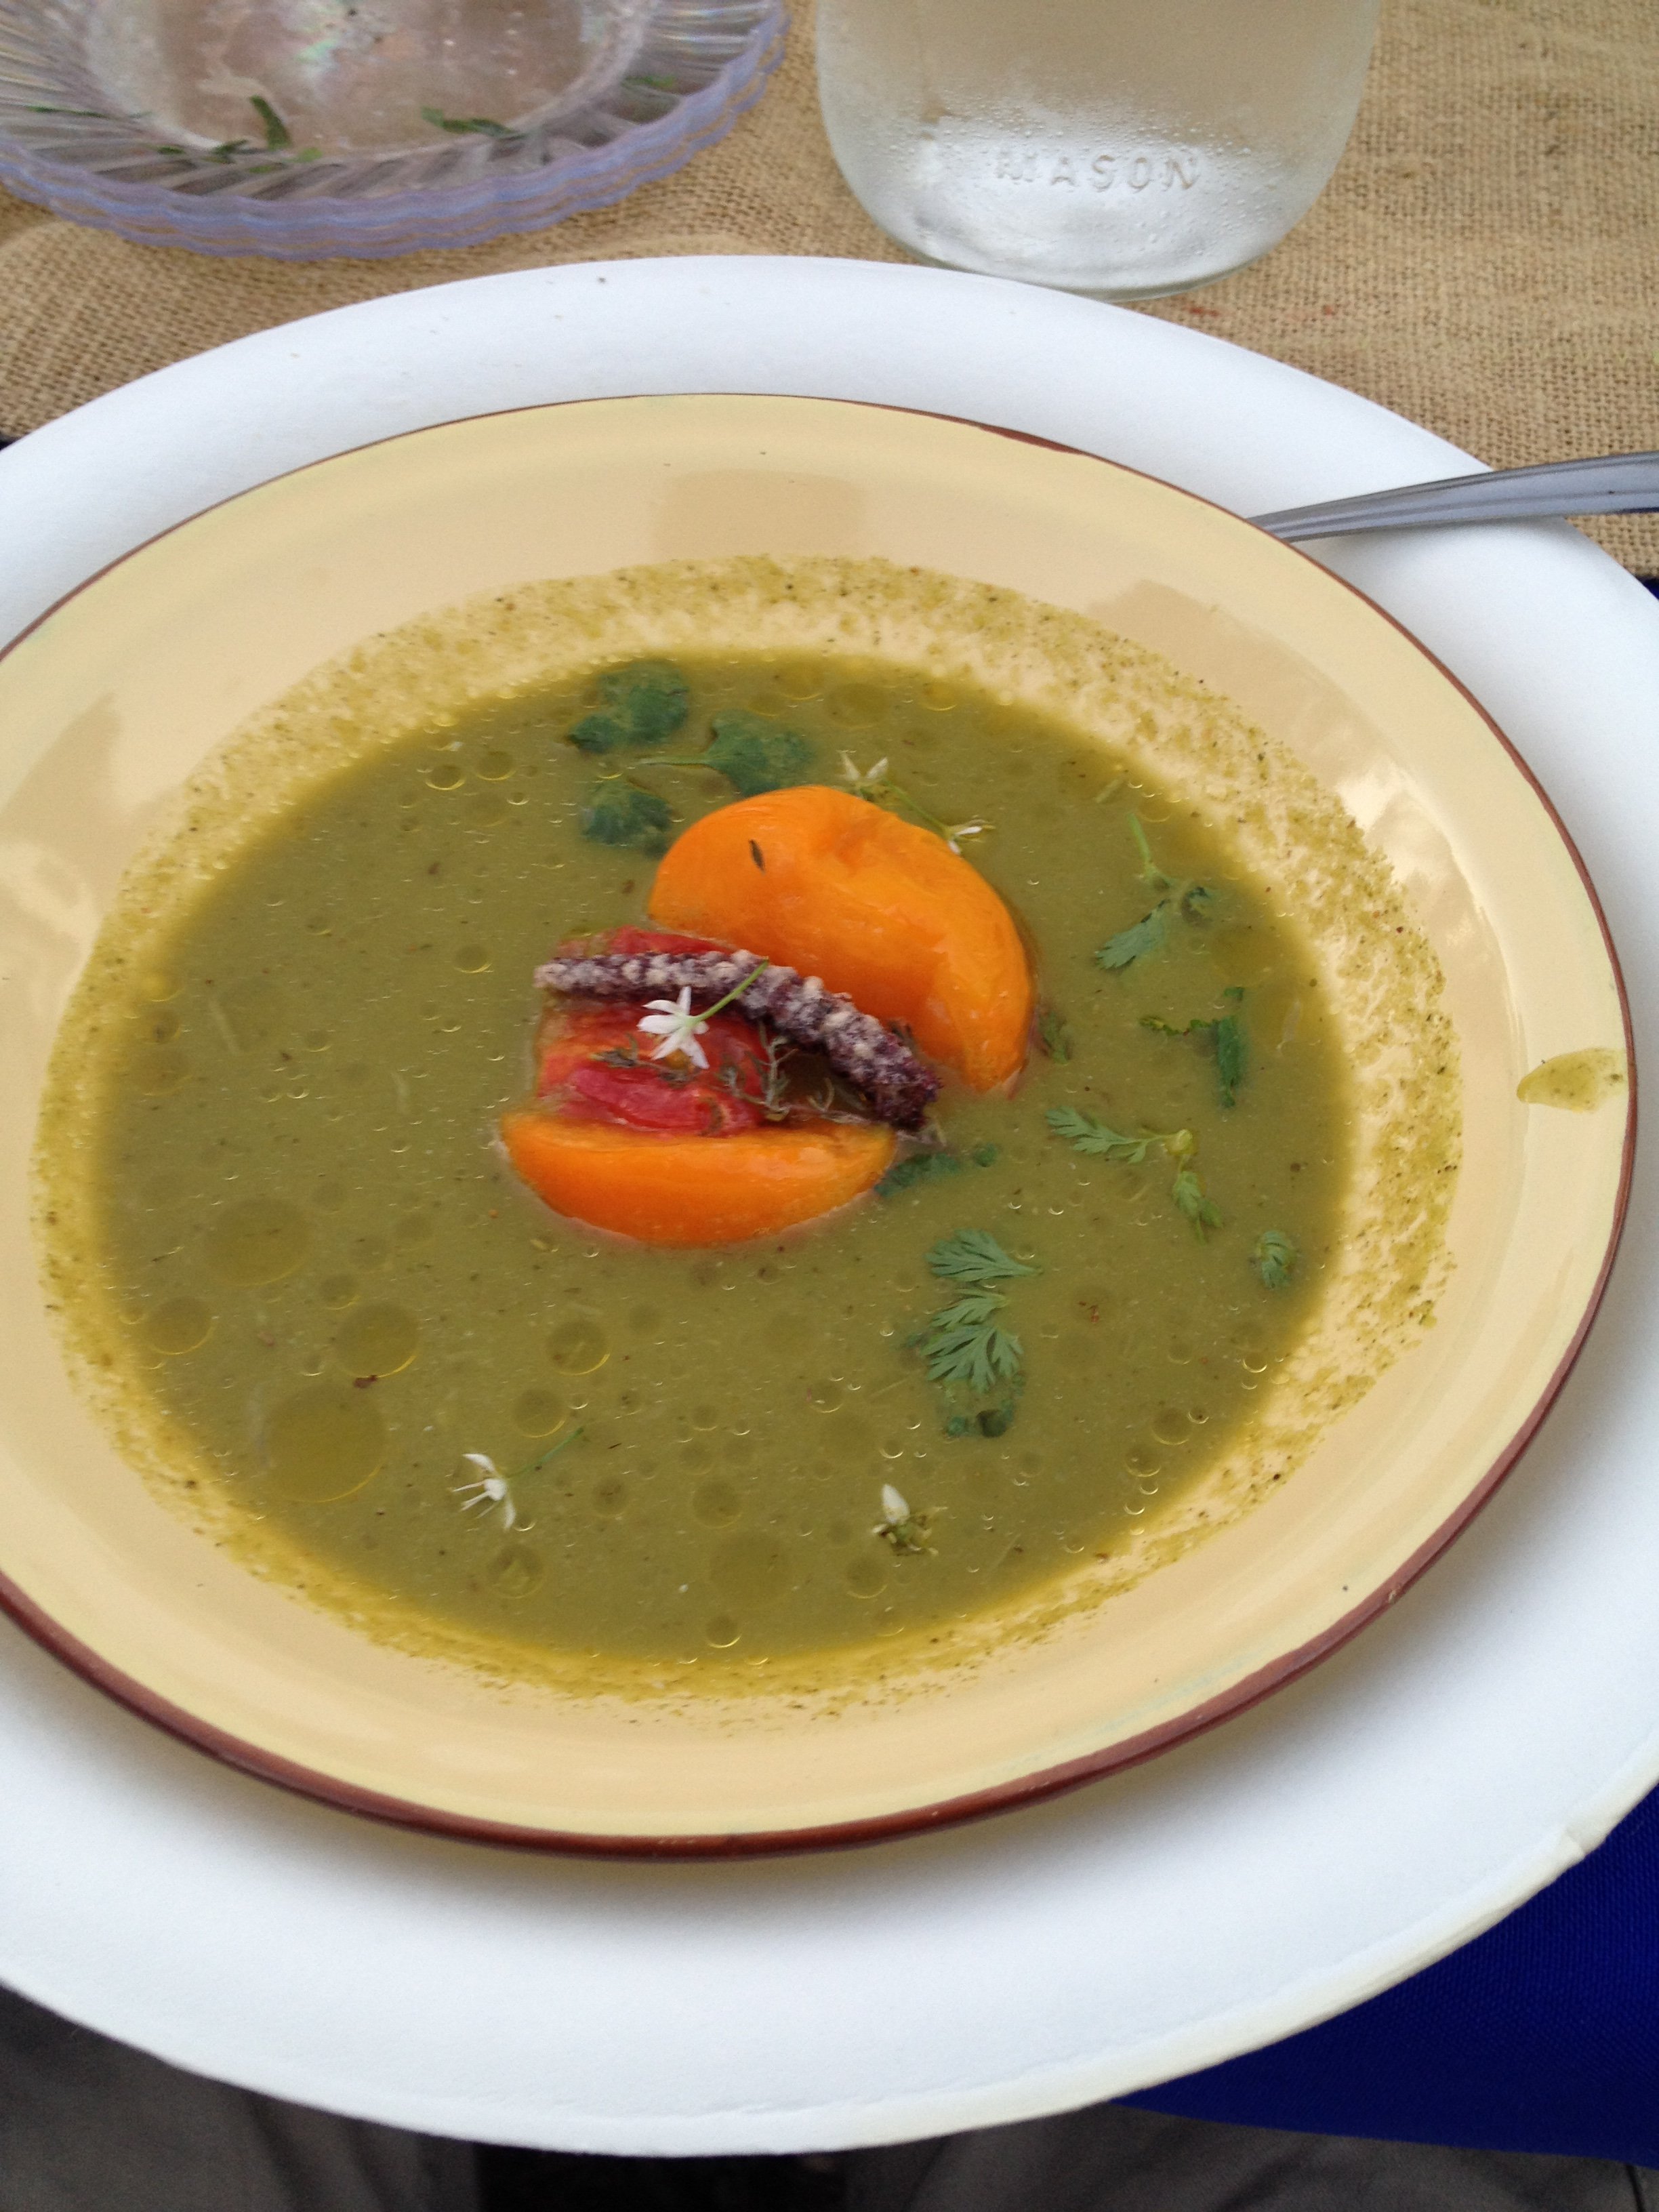
(The rounded part that you shaved off will include lots of small bits. I set them aside to make a cream of cauliflower soup later in the week.)
Make a Marinade
Because the chef who made those steaks at Muir Ranch mentioned a Korean marinade, I thought I’d combine ingredients for a Korean-inspired marinade, and then add in my yuzu fruit. I made a fairly big batch – enough for the 3 heads of cauliflower. You might not need this much if you’re doing just one head of cauliflower.

Cut cauliflower from bottom to top, along the centre of the stem so that the outlying sections are held in place.
4 large cloves of garlic (hardneck ‘Red Russian’ garlic from my garden)
Grated ginger root, about 2” of it (I use a microplane, but a fine grater is OK too)
5 tbsp. tamari sauce (soy works well too…but I used gluten-free tamari for my gluten-free guest)
3 tbsp. rice vinegar
6 tbsp. sesame oil
5 tbsp. of a brown-sugar like zero-calorie sugar replacement (OK, I’ll be honest here – just use brown sugar unless you’re on a special diet.)
1 tbsp. sambal oelek hot pepper sauce (I’ve seen a lot of Korean recipes calling for gochujang hot sauce…but we keep sambal oelek in our kitchen…and you can use whatever hot sauce suits your taste)
Zest and juice of 2 yuzu fruit (Substitute lemon juice and rind if you don’t have yuzu)
I spread the marinade on the cauliflower steaks a couple of hours ahead of cooking them. Put it on both sizes, and around the outer edge.
Grilling the Cauliflower Steak

I flipped the steaks part way through, and used a fork to test the softness.
I decided to go for high heat, with the lid of the BBQ down. That’s because I like cauliflower when slightly charred or browned, which gives it a slightly nutty flavour.
I flipped the steaks part way through, and used a fork to test the softness. I like cauliflower on the firm side.
Serving Cauliflower Steak
These were whopping big steaks…nearly as big as our dinner plates, and probably more cauliflower than even the most ardent health-food nut eats in a week.
So I sliced the steaks in half, down the middle, before putting them on a serving platter.
And one other thought: Put steak knives out with your table setting. The main rib can be hard to cut if your cauliflower is on the firm side.
Cauliflower Steak FAQ
What if I don’t have a sugar substitute?
Unless you’re on a special diet, just use brown sugar. That’s what I usually use in my Korean-style marinades.
Can I use purple cauliflower?
I’ve never tried that, but I think it’s an awesome idea. Try the yellow cauliflower too.
Can I cook cauliflower steak in the oven?
Why not? I love to dry-cook cauliflower in the oven at a high temperature so that it browns and develops a nutty flavour. Just do the same thing with a steak. Put it on a baking sheet, at a high temperature, around 425°F (220°C)
Find This Helpful?
Enjoy not being bombarded by annoying ads?
Appreciate the absence of junky affiliate links for products you don’t need?
It’s because we’re reader supported.
If we’ve helped in your food-gardening journey, we’re glad of support. You can high-five us below. Any amount welcome!
More Ideas
Here are more cooking ideas, and more information on growing your yuzu in a cold climate. Grow a potted yuzu tree the same way you would a lemon tree.
How to Make a Wicking Bed: A Raised Garden Bed that Keeps the Soil Moist
Harvest more and water less when you grow in a wicking bed. Find out how to make a wicking bed.
By Steven Biggs
Harvest More and Water Less with a Wicking Bed Garden
The potting mix in the wicking bed will wick moisture up to where plant roots can get it.
Wicking beds are a great way to maximize the use of space in a small garden. That's because this sort of raised bed keeps the soil continuously moist.
And that continuously moist soil is great for your crops.
With ample soil moisture, you can plant more densely. And with ample moisture, your crops produce more for you.
There's one other benefit of a wicking bed: You spend less time watering. Instead of frequently watering by hand or setting up a sprinkler, now you can fill up your wicking bed with water...occasionally.
Want to water less often? Want crops that thrive because they get consistent soil moisture? Keep reading to find out how to make this type of self-watering garden bed.
What's a Wicking Bed?
A Raised Garden Bed with Plumbing!
A wicking bed is simply raised bed with a water reservoir (a water storage area) at the bottom.
Water moves upwards (it "wicks") from the reservoir into the soil layer above. This "wicking" is the same ideas as what happens in an oil lantern as oil moves up the wick.
Wicking beds work the same way as sub-irrigated planters (a.k.a. SIPS or “self-watering” pots): Water wicks upwards into the soil above through capillary action. But while a sub-irrigated planter is often small enough to be picked up and moved, a wicking bed is a large, stationary raised bed.
Continuous Moisture Means Less Plant Stress
And Higher Yield
When there isn't enough moisture in the soil for plants, it's a stress.
And that stress affects yield.
Because the soil in a wicking bed remains moist, the plants don't have water stress. Without that stress, the increase in yield can be considerable.
(Of course, no one minds the time saved by having to water less frequently!)
Even in the heat of summer, when the plants are quite big, we water our wicking beds about once a week.

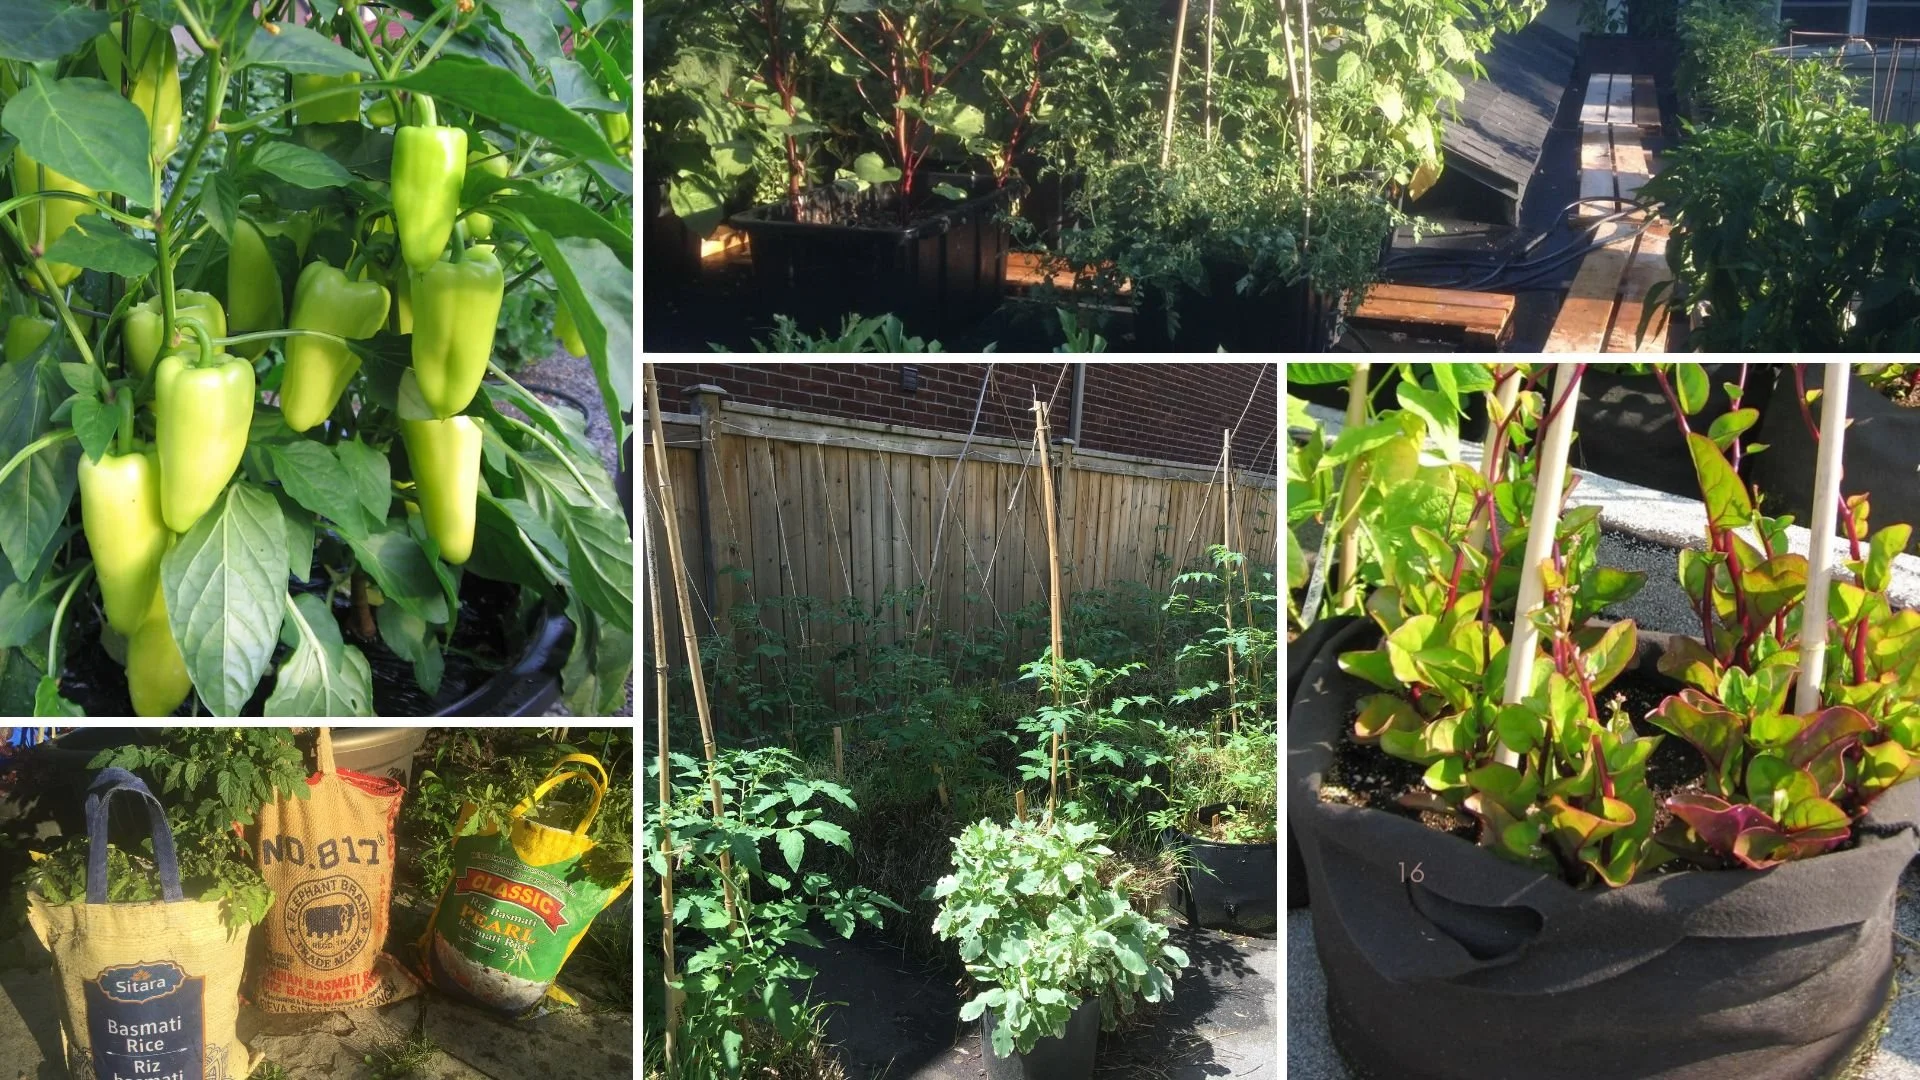
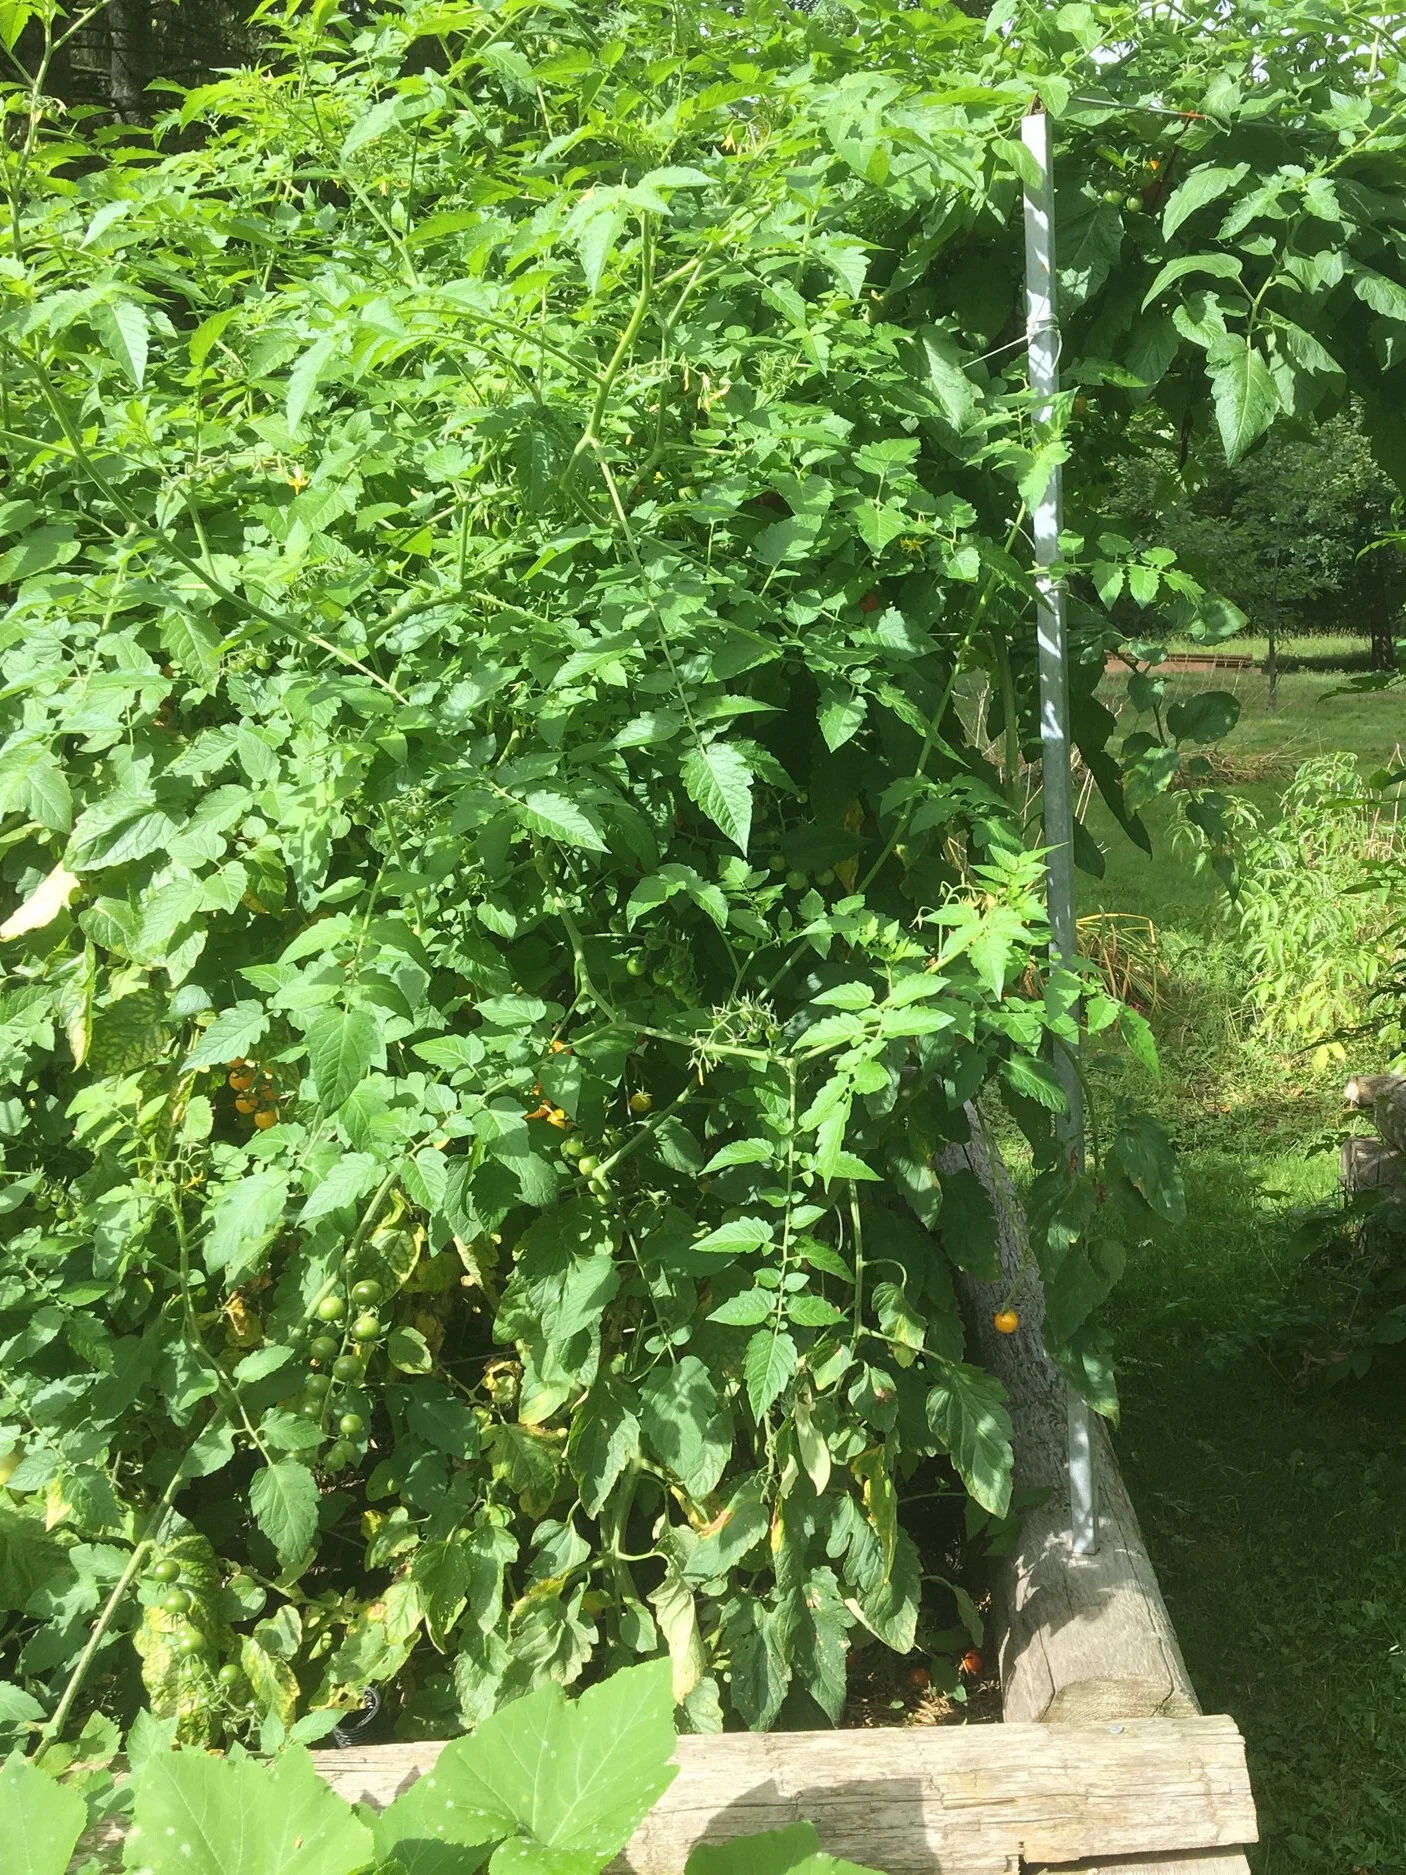
We turbo-charged our production by growing our vegetable plants in wicking beds.
Another Reason to Use a Wicking Bed
Edible Gardening near Black Walnut Trees
Our neighbour's large black walnut tree is beautiful. But walnut trees give off a compound called “juglone.”
And juglone affects the growth of many plants…including tomatoes.
We tried growing tomatoes in the backyard many times…and they always died.
We solved the problem by growing tomato plants in wicking beds. That's because the tomato plant roots never get into the juglone-contaminated soil below.
Find out about juglone-tolerant plants for gardening near black walnut trees.
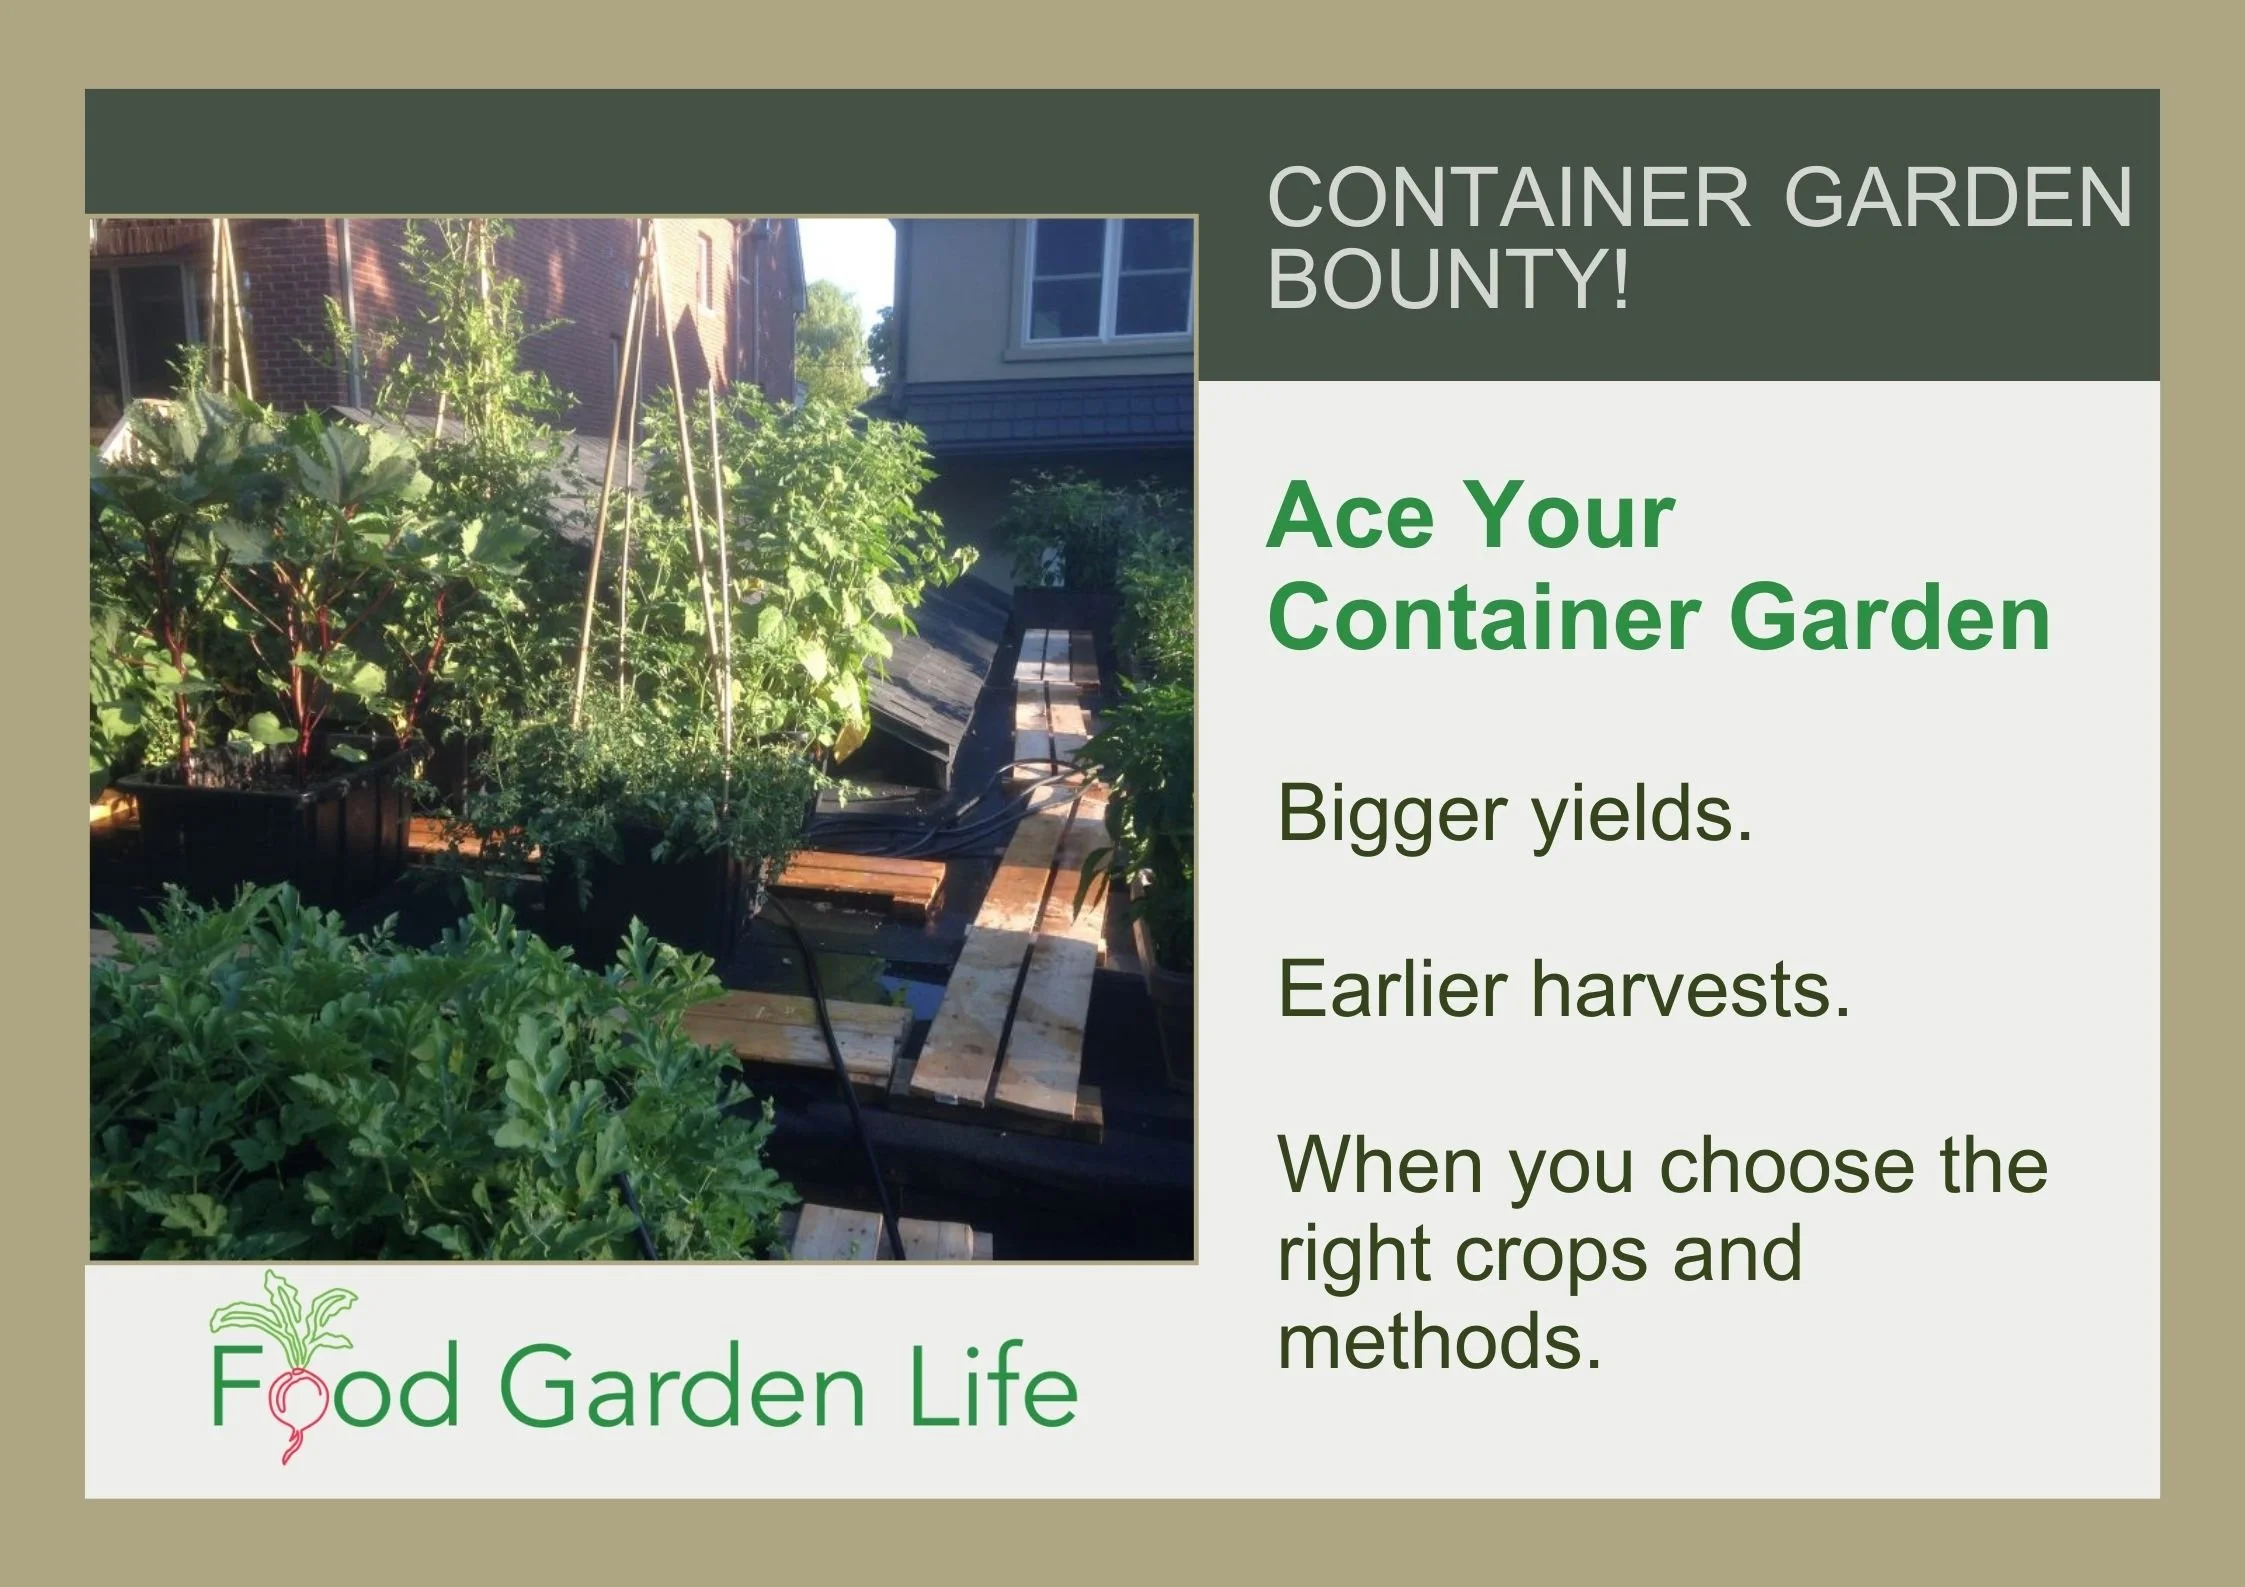
Want to Ace Your Container Garden?
Find out about top crops, how to choose the right soil, feeding your plants, and what to look for as you're choosing containers. More on Vegetable Container Gardening Class.
Make Your Own Wicking Bed
Wicking Bed Design - Be Creative!
Be creative! You might want to make a wicking bed from salvaged material—or maybe you want a bed that ties in with the aesthetic in your landscape. (I think a red-brick wicking bed would look nice in my garden! One day…)
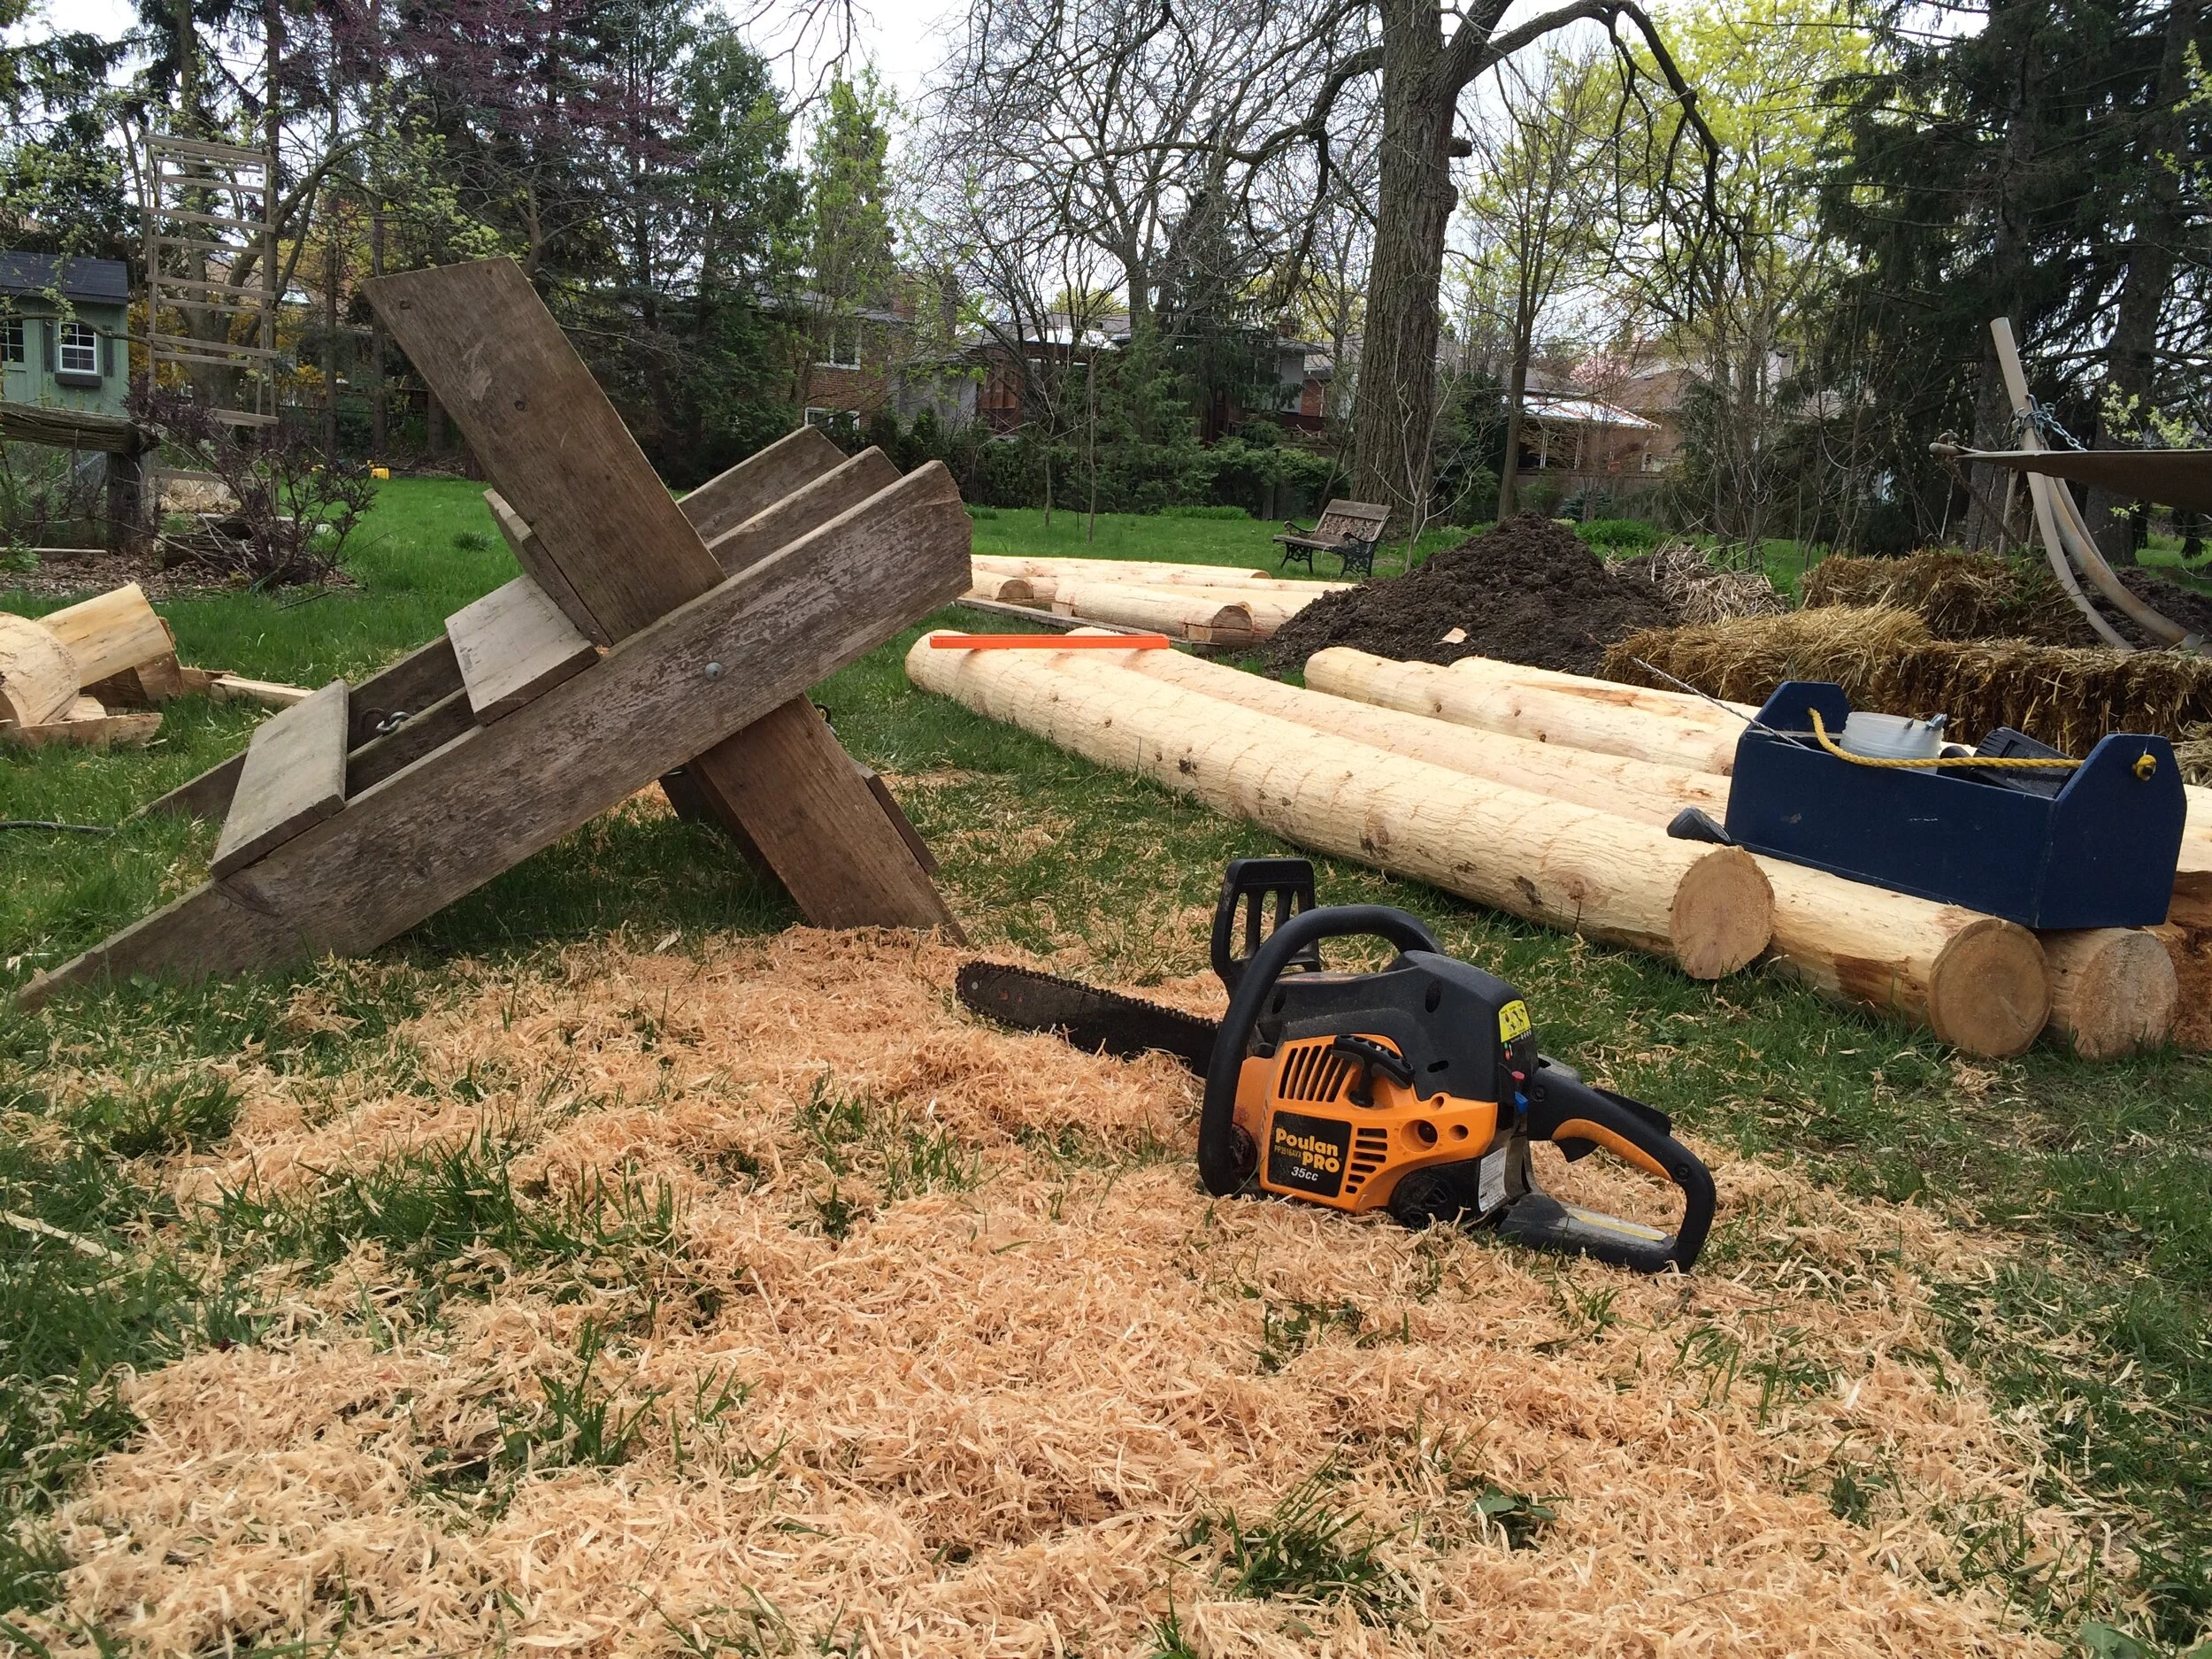
Later in this post you'll see photos of wicking beds that I made with my kids. I used cedar fence posts. But there are all sorts of materials you can use to make them.
Not sure what to build your wicking beds with? Here are thoughts to start with:

Be creative with the materials you choose for your wicking beds. We used cedar fence posts to make our wicking beds.
Find something that ties in with the aesthetic in your garden
Choose materials that are good value
See if you have materials on hand that you can reuse as you make your beds
Here's why I chose cedar fence posts:
They are long-lasting and not much more expensive than dimensional lumber
I didn't use treated lumber because it's not suitable for edible gardening
I didn't use dimensional lumber because raised beds made with dimensional lumber often sag outwards over time
I used pond liner to create the reservoir because I already had liner from a former pond
Wicking Bed Workings
The Raised Bed
There are many materials you can use to create the frame for your wicking bed.
I've seen wicking beds made from:
Large plastic bins
Intermediate bulk containers (IBCs)
Cinder blocks
New lumber
Recycled wood
The Reservoir
The bottom of your wicking bed must hold water. It's the water reservoir.
If you're making the wicking bed from a container that is closed at the bottom (for example, an intermediate bulk container), you won't need to line the bottom of the bed to create the water reservoir. (Instead, you'll drill a hole at the top of the reservoir level for excess water to drain away.)
If you make a wicking bed from wood or stone, it won't be sealed at the bottom. So you'll need to create a reservoir at the bottom to hold water. Do this by lining the bottom of the bed with some sort of liner. Choose a material that is durable enough so you won't need to take apart your wicking bed to repair a puncture. Pond liner is very durable, and widely available.
The Plumbing
A wicking bed has a "fill tube" that extends up above the soil layer. You might also see this called the "inlet pipe."
Down below, the fill tube reaches into the reservoir area. This tube is how you add water to the reservoir. Simply put your hose into the tube and leave the hose running until the reservoir is full.
Ideas for what to use to make a fill tube:
Dishwasher drain hose (that's what I used, as it's big enough that I can put the hose into it when filling the wicking bed)
PVC pipe (sometimes called a PVC inlet pipe)
Downspout
You also need to have some way for excess water to escape once the reservoir is full. So that your plants don't have wet feet after heavy rain or if you fill it for too long!
In other words, once the reservoir is full, any additional water drains from the bed.
Ideas for an overflow:
In the case of my own wicking beds, the liner only extends up to the height of the reservoir level, so and excess water drains out behind the liner and through the cedar posts...no fancy fittings or overflow tube required
For IBCs and rigid beds, drill holes at the desired overflow level
Some gardeners also install an overflow pipe or overflow tube through the hole...looks a bit more tidy
The Wick
The water moves upward from the reservoir into the soil mix through capillary action. In other words, it wicks.
But for it to wick properly, it has to be able to move up and along something. Luckily, gravel works well. So gravel is often used to fill the reservoir area.
This might sound strange to you, filling an area intended for water with gravel. But there can be lots of open space between particles in some types of gravel...and that space is perfect for holding water.
The type of gravel available to you depends where you live. Some people use pea gravel. Around here, it's easy to get what's called 3/4" "clear" gravel which has only large rocks. That's what you want. Make sure the gravel doesn't also include fine particles too, because fine particles fill up the space that we want for the water.
A layer of landscape fabric over top of the gravel prevents soil from filling up the spaces in the gravel.
The Soil
Don't cheap out on soil. It's critical.
The soil must have good wicking action. Capillary action.
And to have that, it should have lots of air spaces within it.
So don't use straight top soil. It often packs down too much. A high quality potting mix or soil amended with lots of organic matter is better suited to making a wicking bed.
IMPORTANT POINT ON SOIL: The water will only wick upwards so far. That means if the soil is too deep, water won't wick all the way to the zone where your plant roots are. Aim for a soil depth of 30-40 cm (12-16").
Other Options
There are many ways to make a wicking bed, so if you research the topic don't be surprised when you find all sorts of variations.
Plumbing! If you're a do-it-yourselfer, you might be interested in hooking up a water supply and shut-off! I've seen videos where people demonstrate this sort of set-up, using the same sort of plumbing supplies used for toilets. When the water level gets low, this sort of system automatically refills the reservoir.
Weeping tile. A perforated pipe or drain tile in the bottom area along with the gravel permits water to quickly move through the reservoir. It also means you don't need as much gravel. You’ll see weeping tile in the pictures of my wicking beds, below.
Materials List for My Wicking Bed
Here's what I used to make wicking beds.
Cedar fence posts.
Pond liner. The pond liner holds water in the bottom of the bed. Once the sides of the pond liner are folded upwards and fixed into place, it creates a shallow water storage area at the bottom of the bed—about as high as the weeping tile.
Weeping tile.
3/4” gravel. Use “clear” gravel, which means that it does not have smaller pieces of gravel that will fill up the spaces in between. That way the space is available to hold water.
Dishwasher drain tube. To create a fill tube, sometimes called an inlet pipe.
Landscape fabric. Its purpose is to keep the soil from filling up the weeping tile and the spaces between gravel.
Soil. I used a mix of high quality potting mix blended with compost.
Steps for Making a Wicking Bed
Cut posts to length and notch the ends.
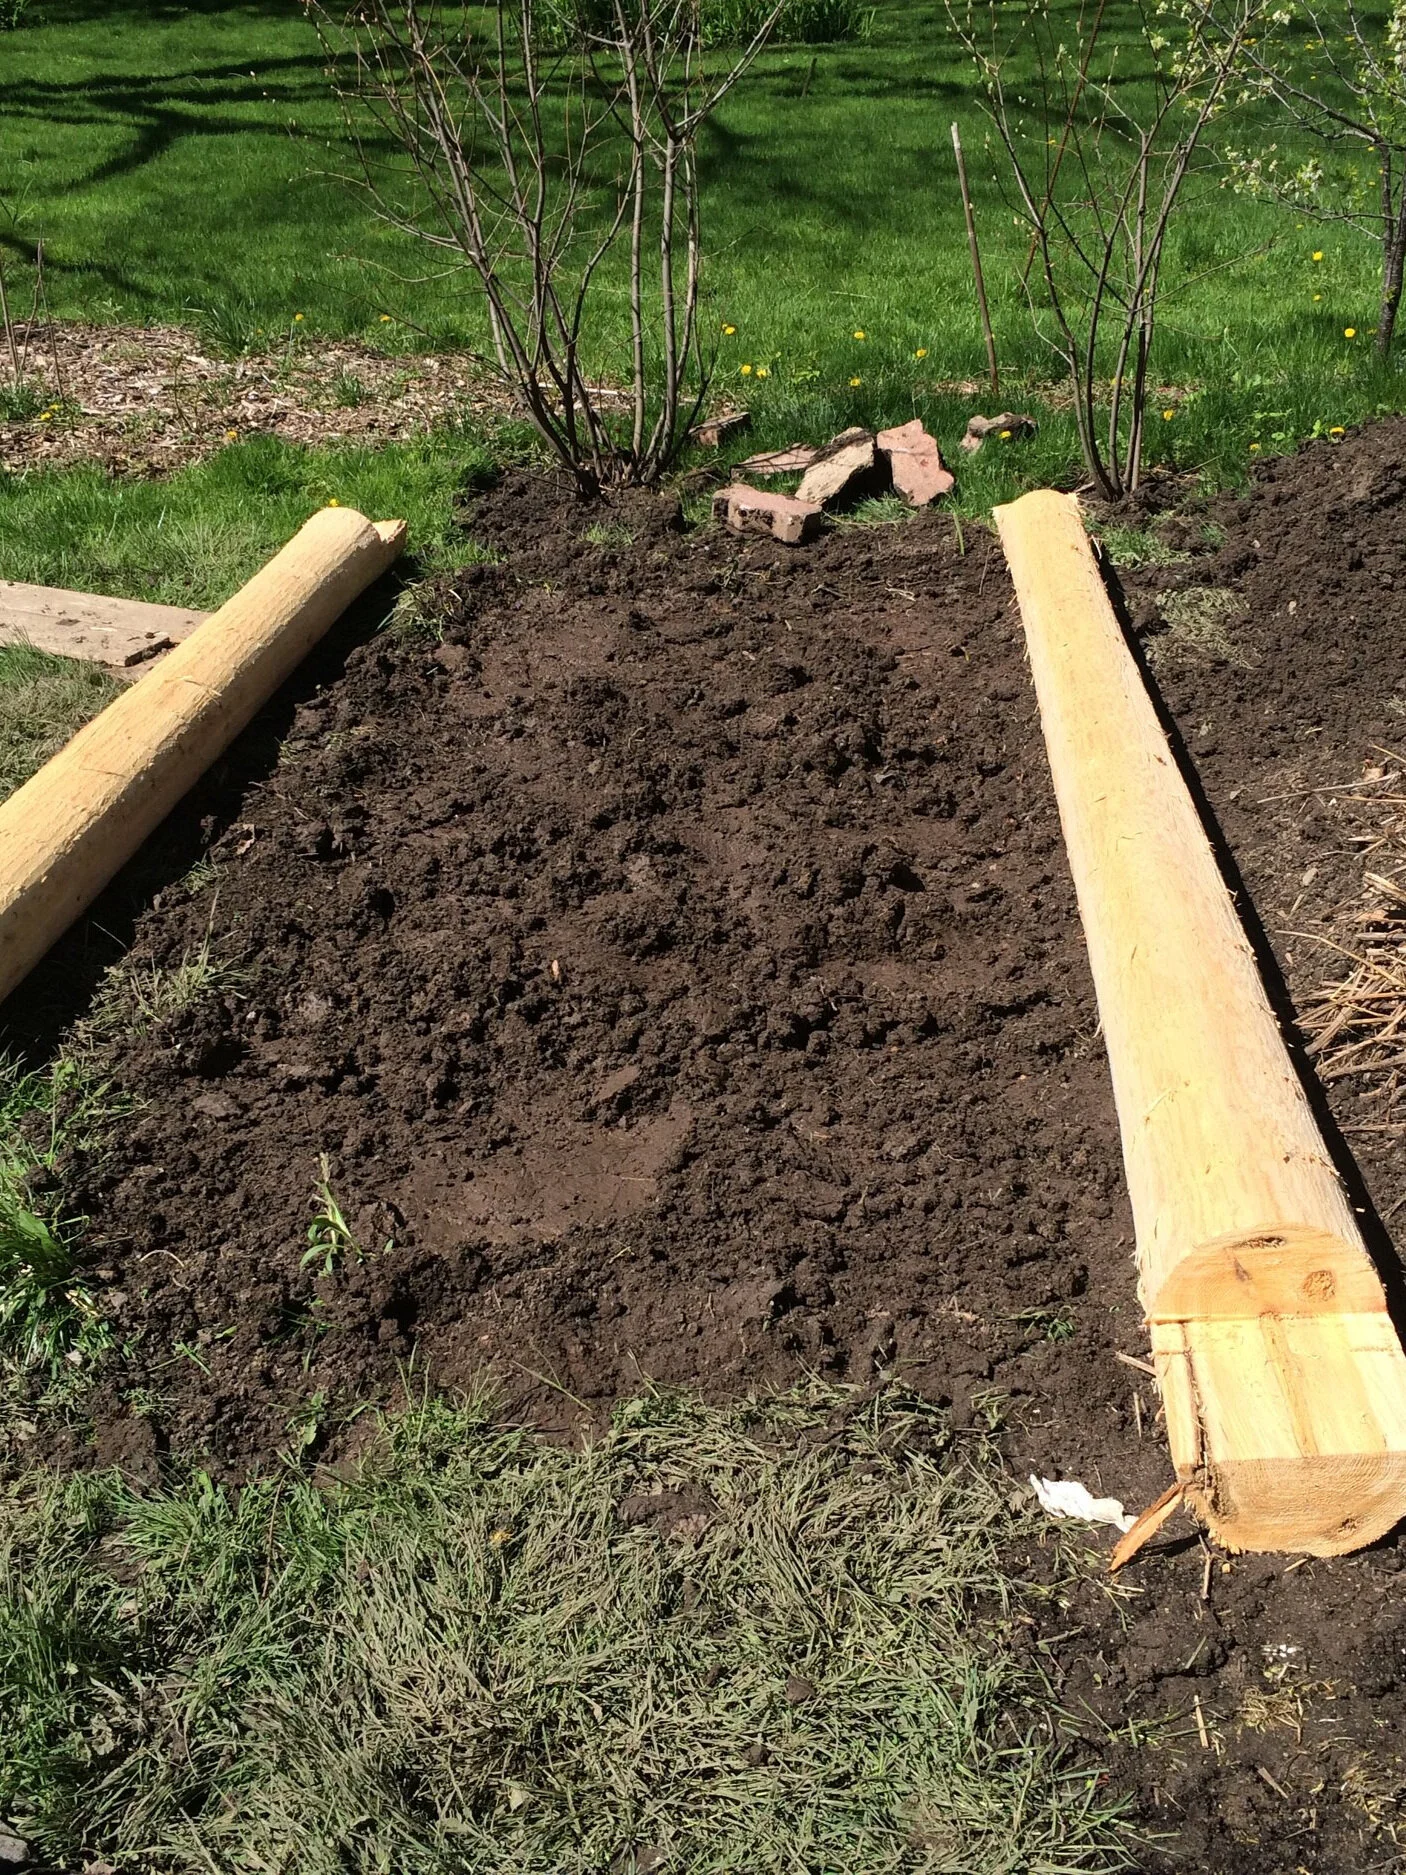
Place notched posts directly on the ground. Level the ground first.
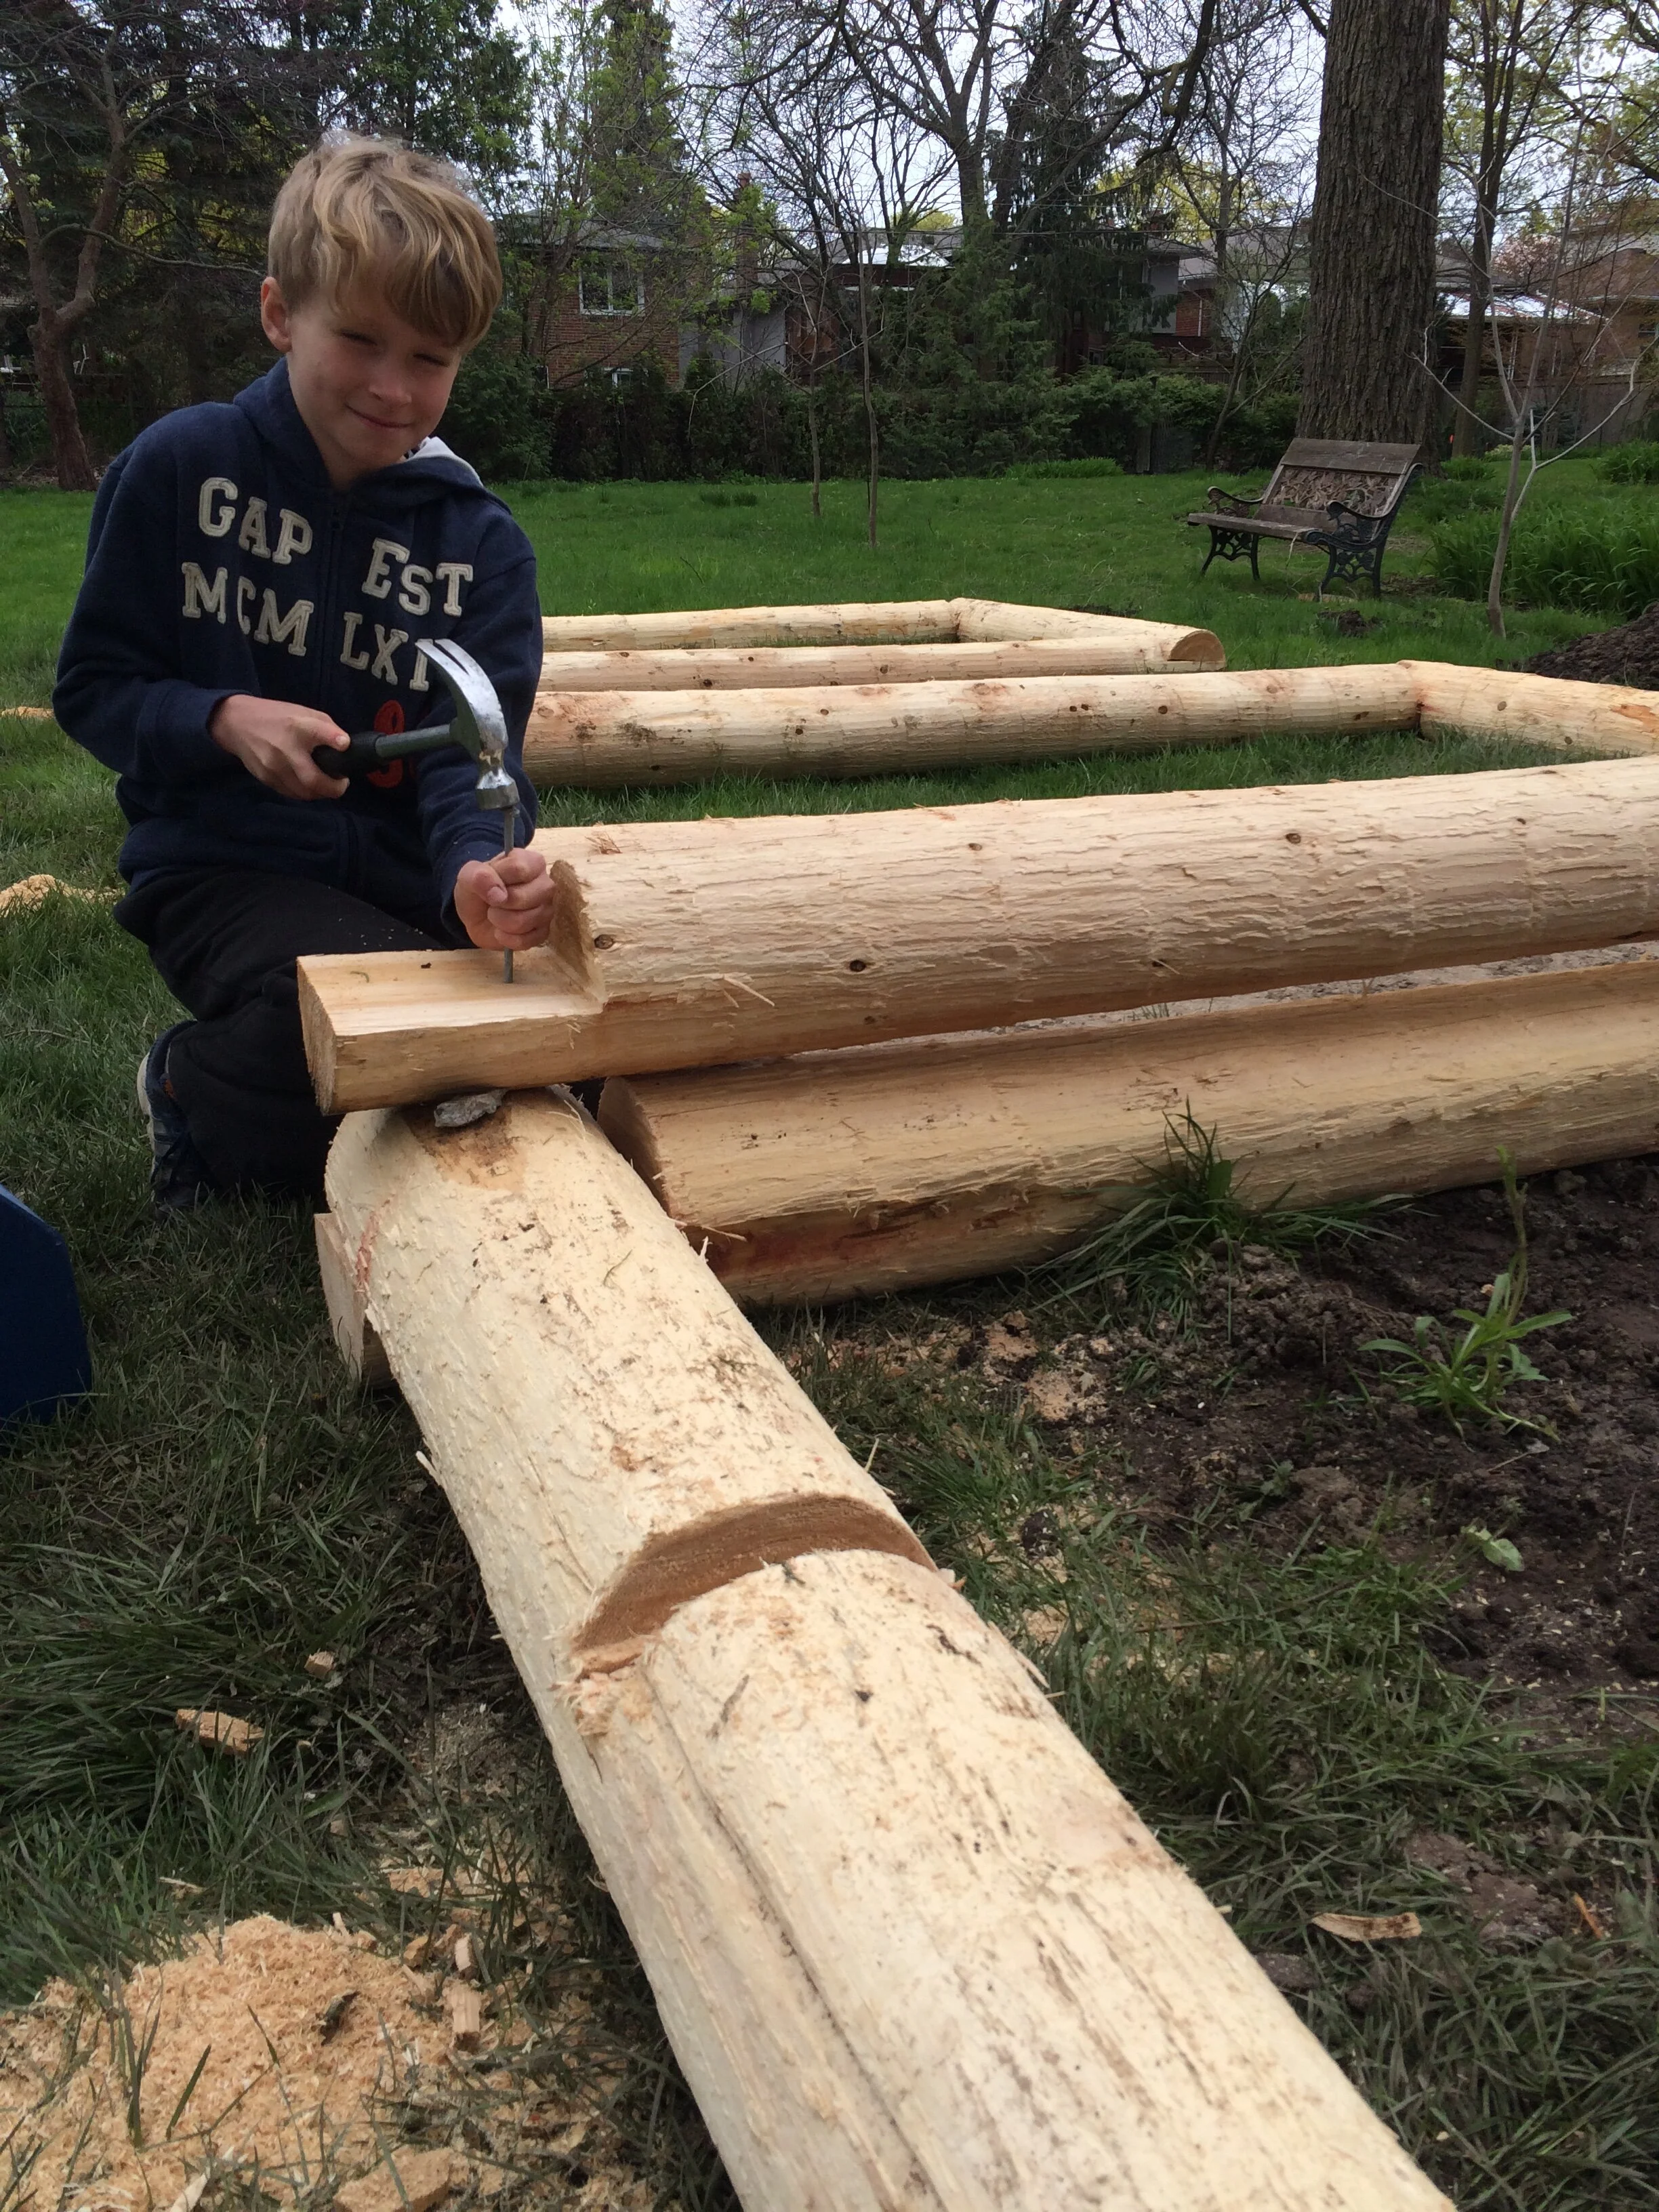
Nail spikes into the corners of the posts to keep them in place.
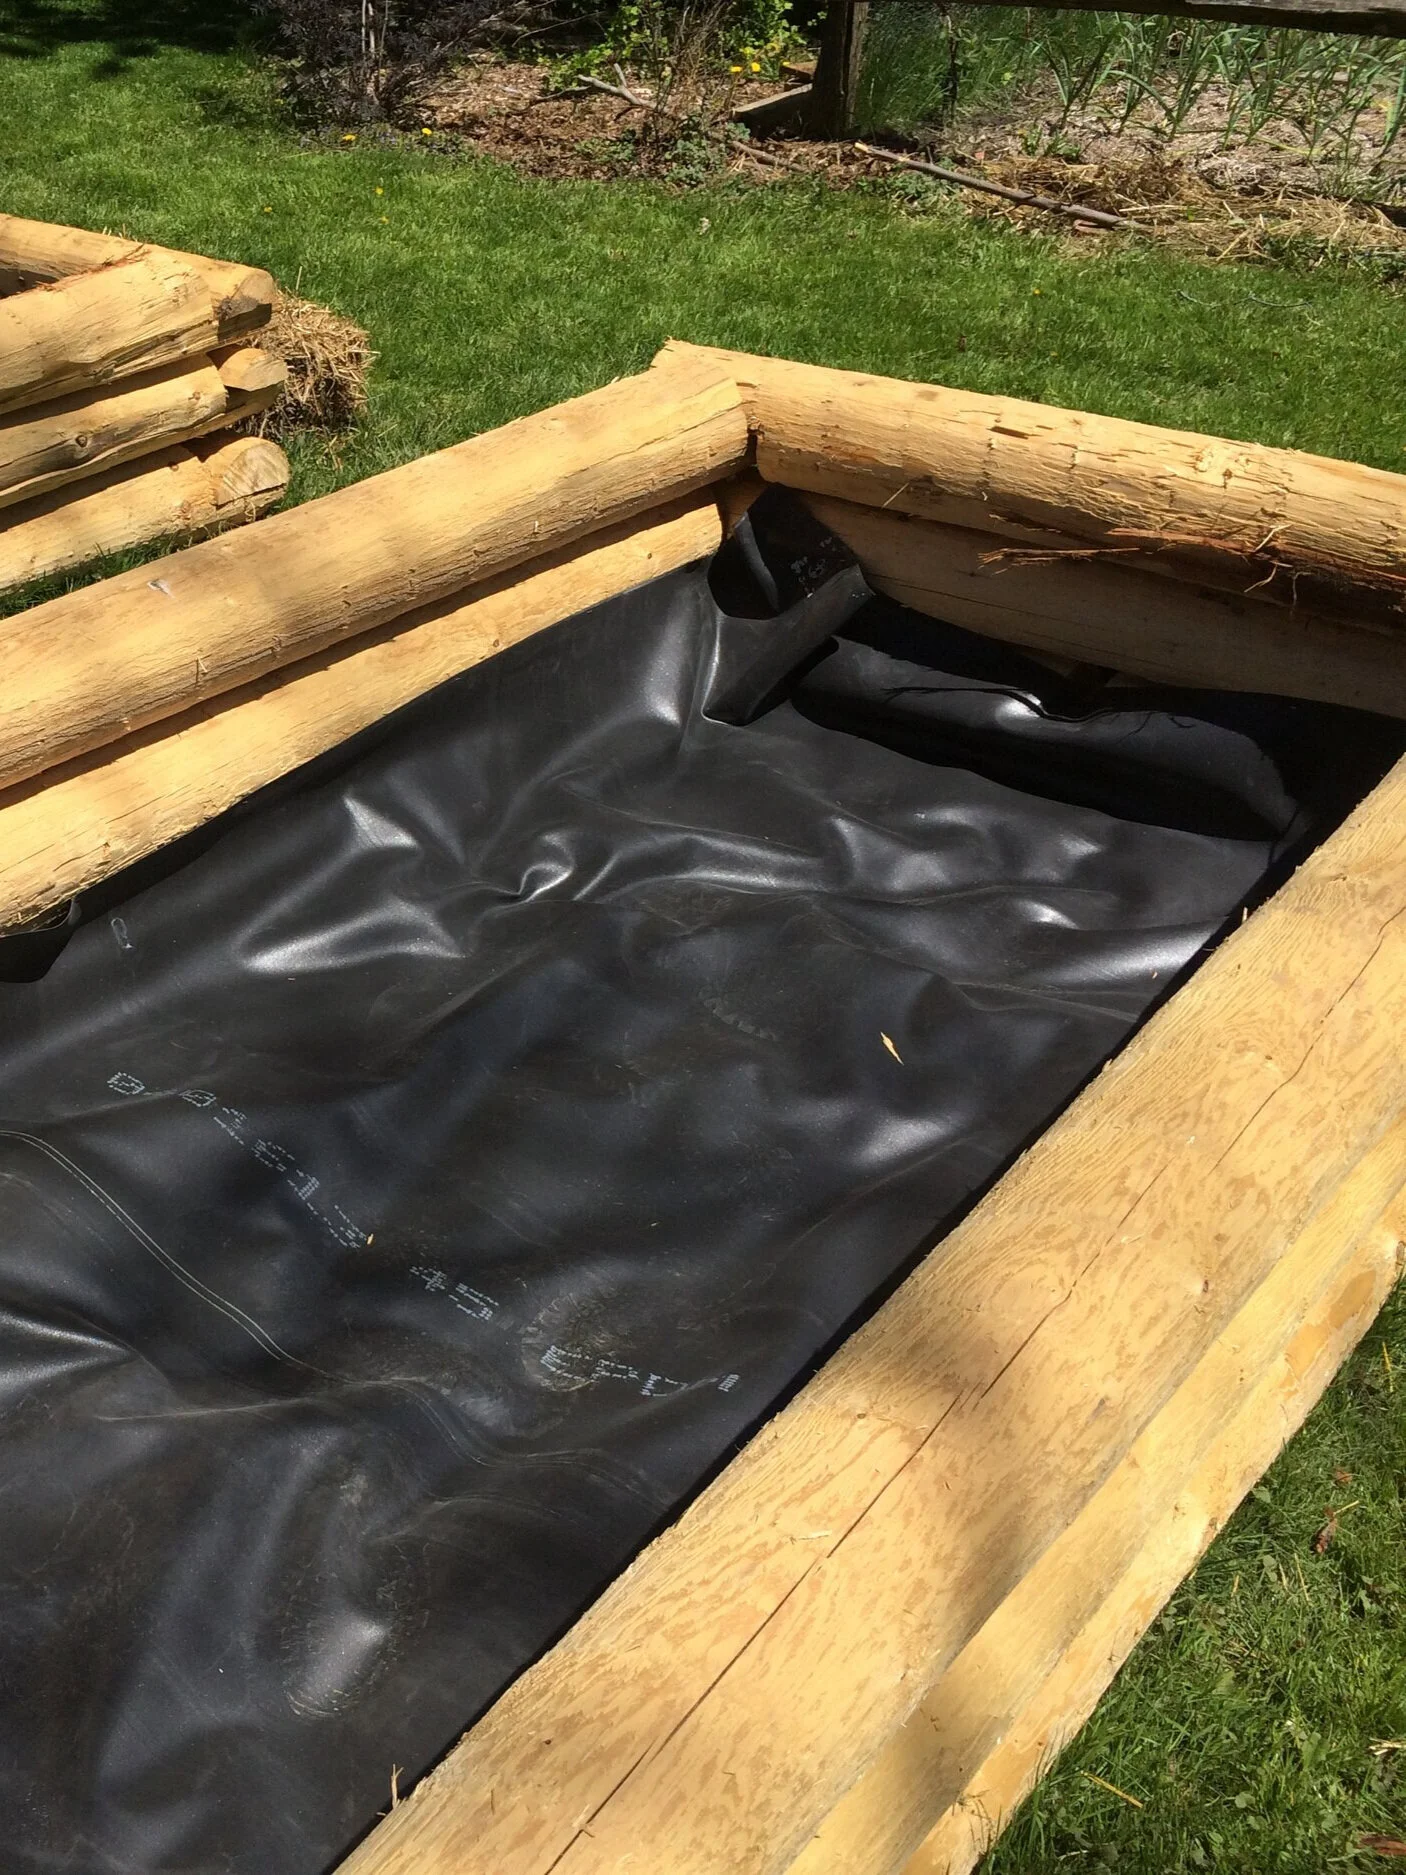
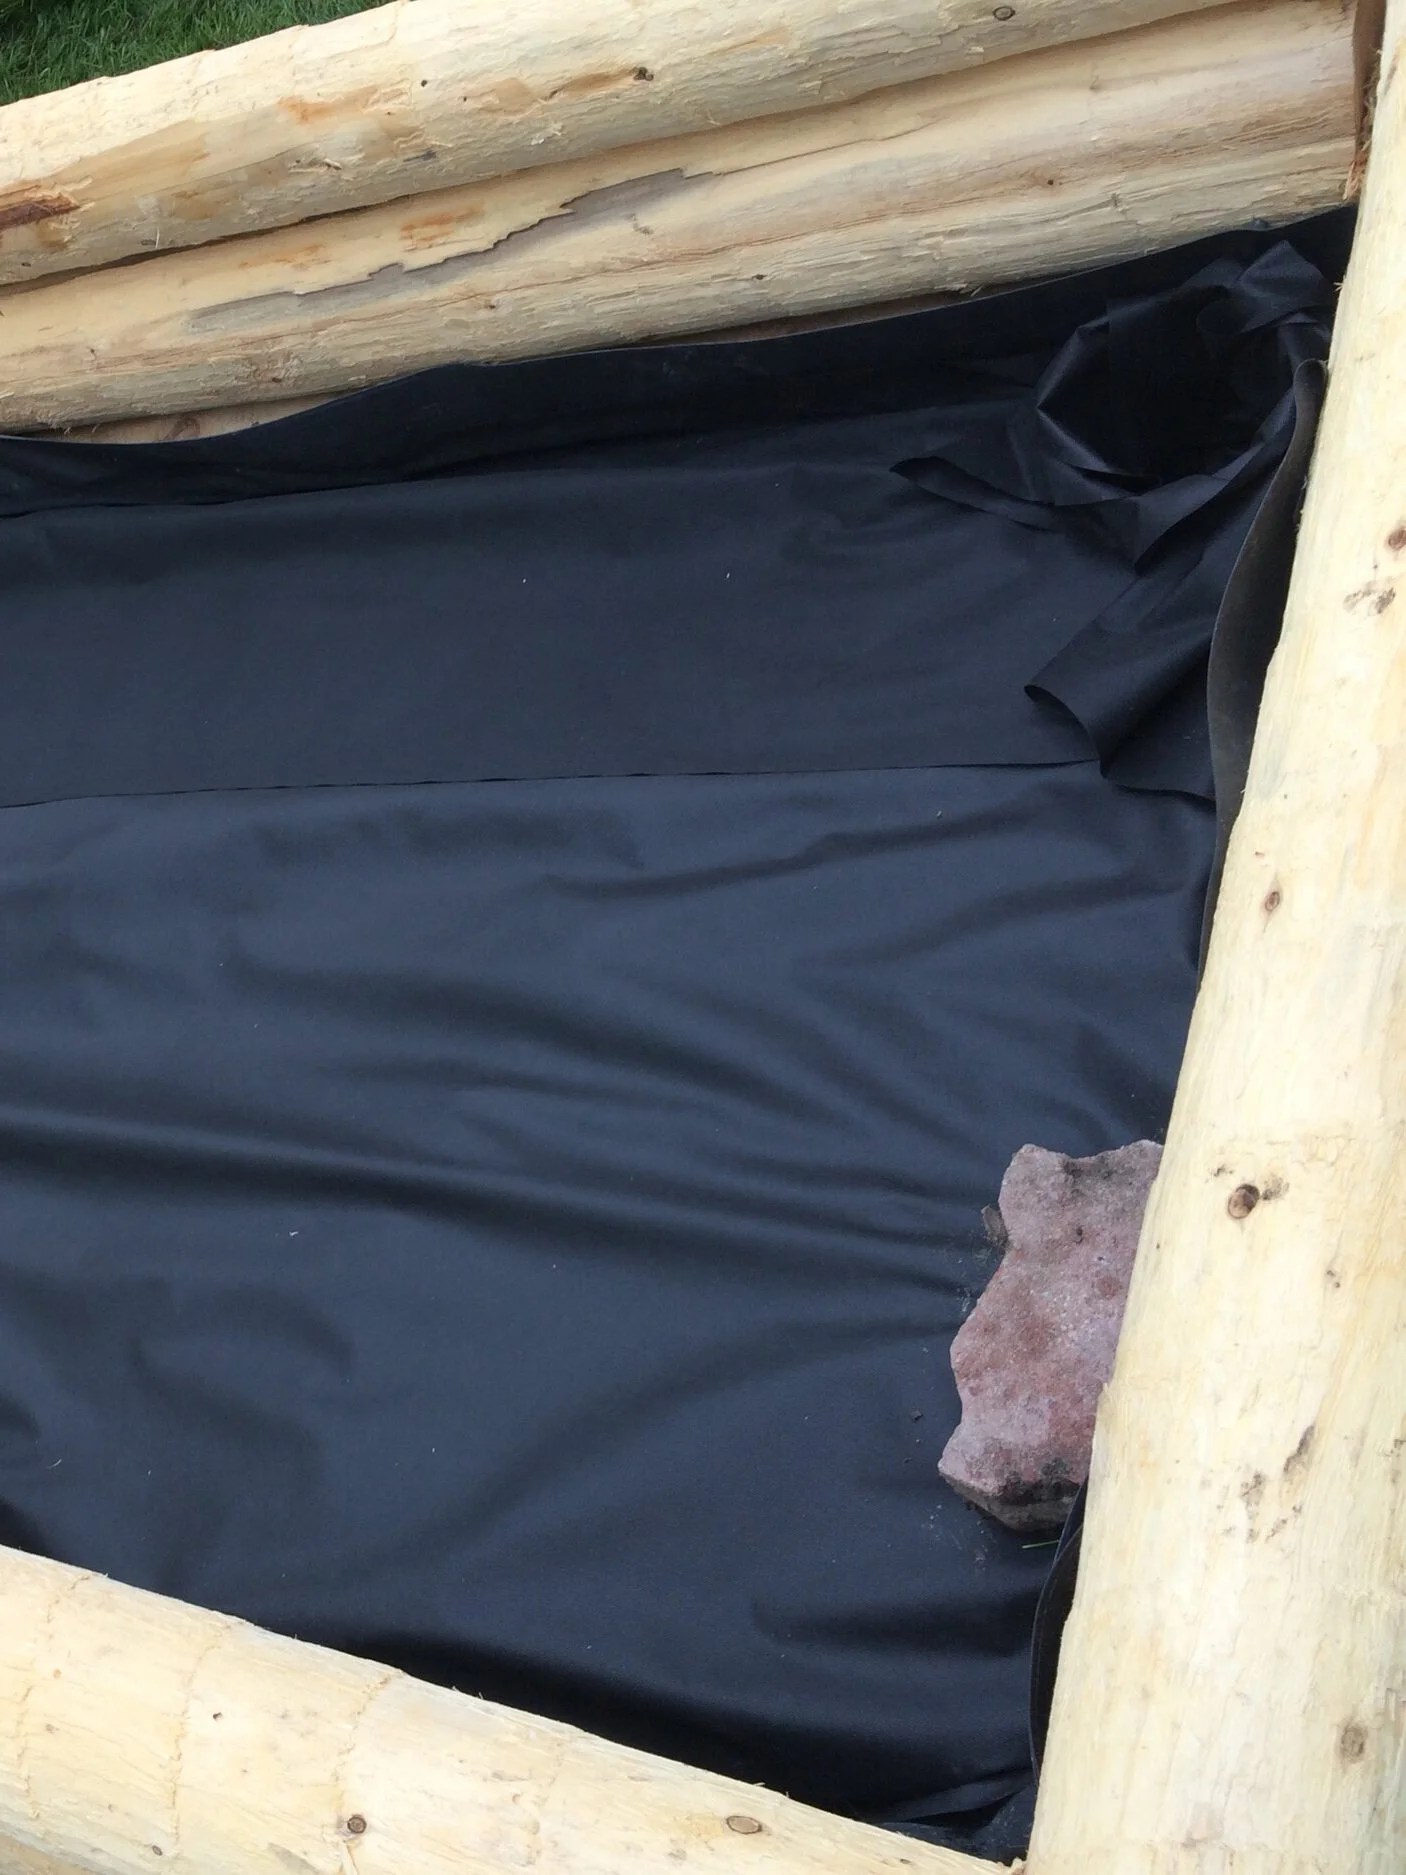
Install liner at the bottom by placing it on the ground, and up about 8-10 inches at the side. Secure temporarily with staples, to keep it in place until the gravel pins it into place.
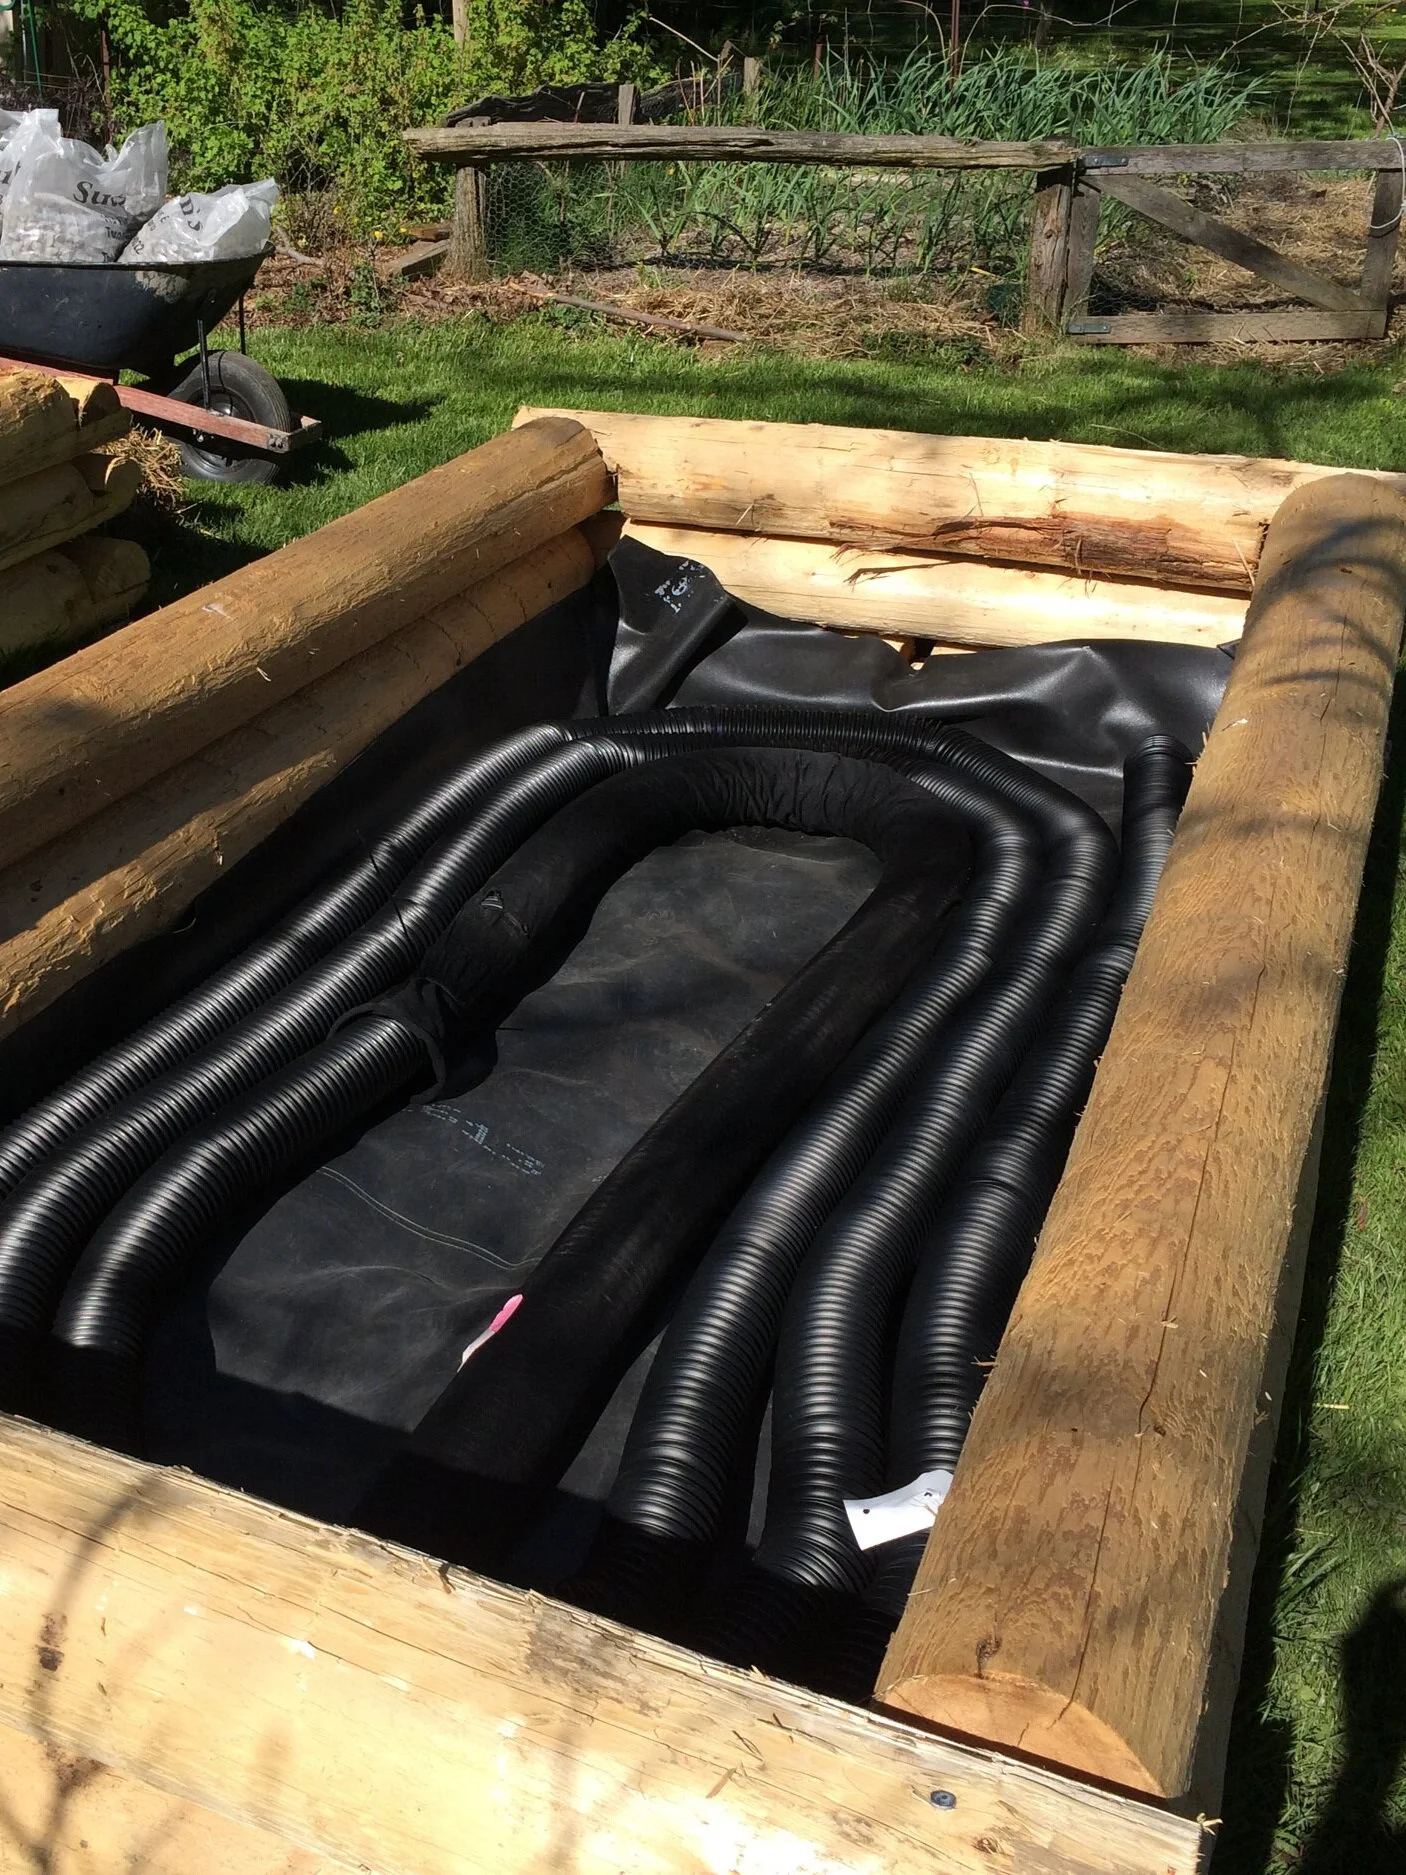
Place coils of weeping tile in the bottom. The tile permits water to quickly move through the reservoir, and it also holds up the soil above.
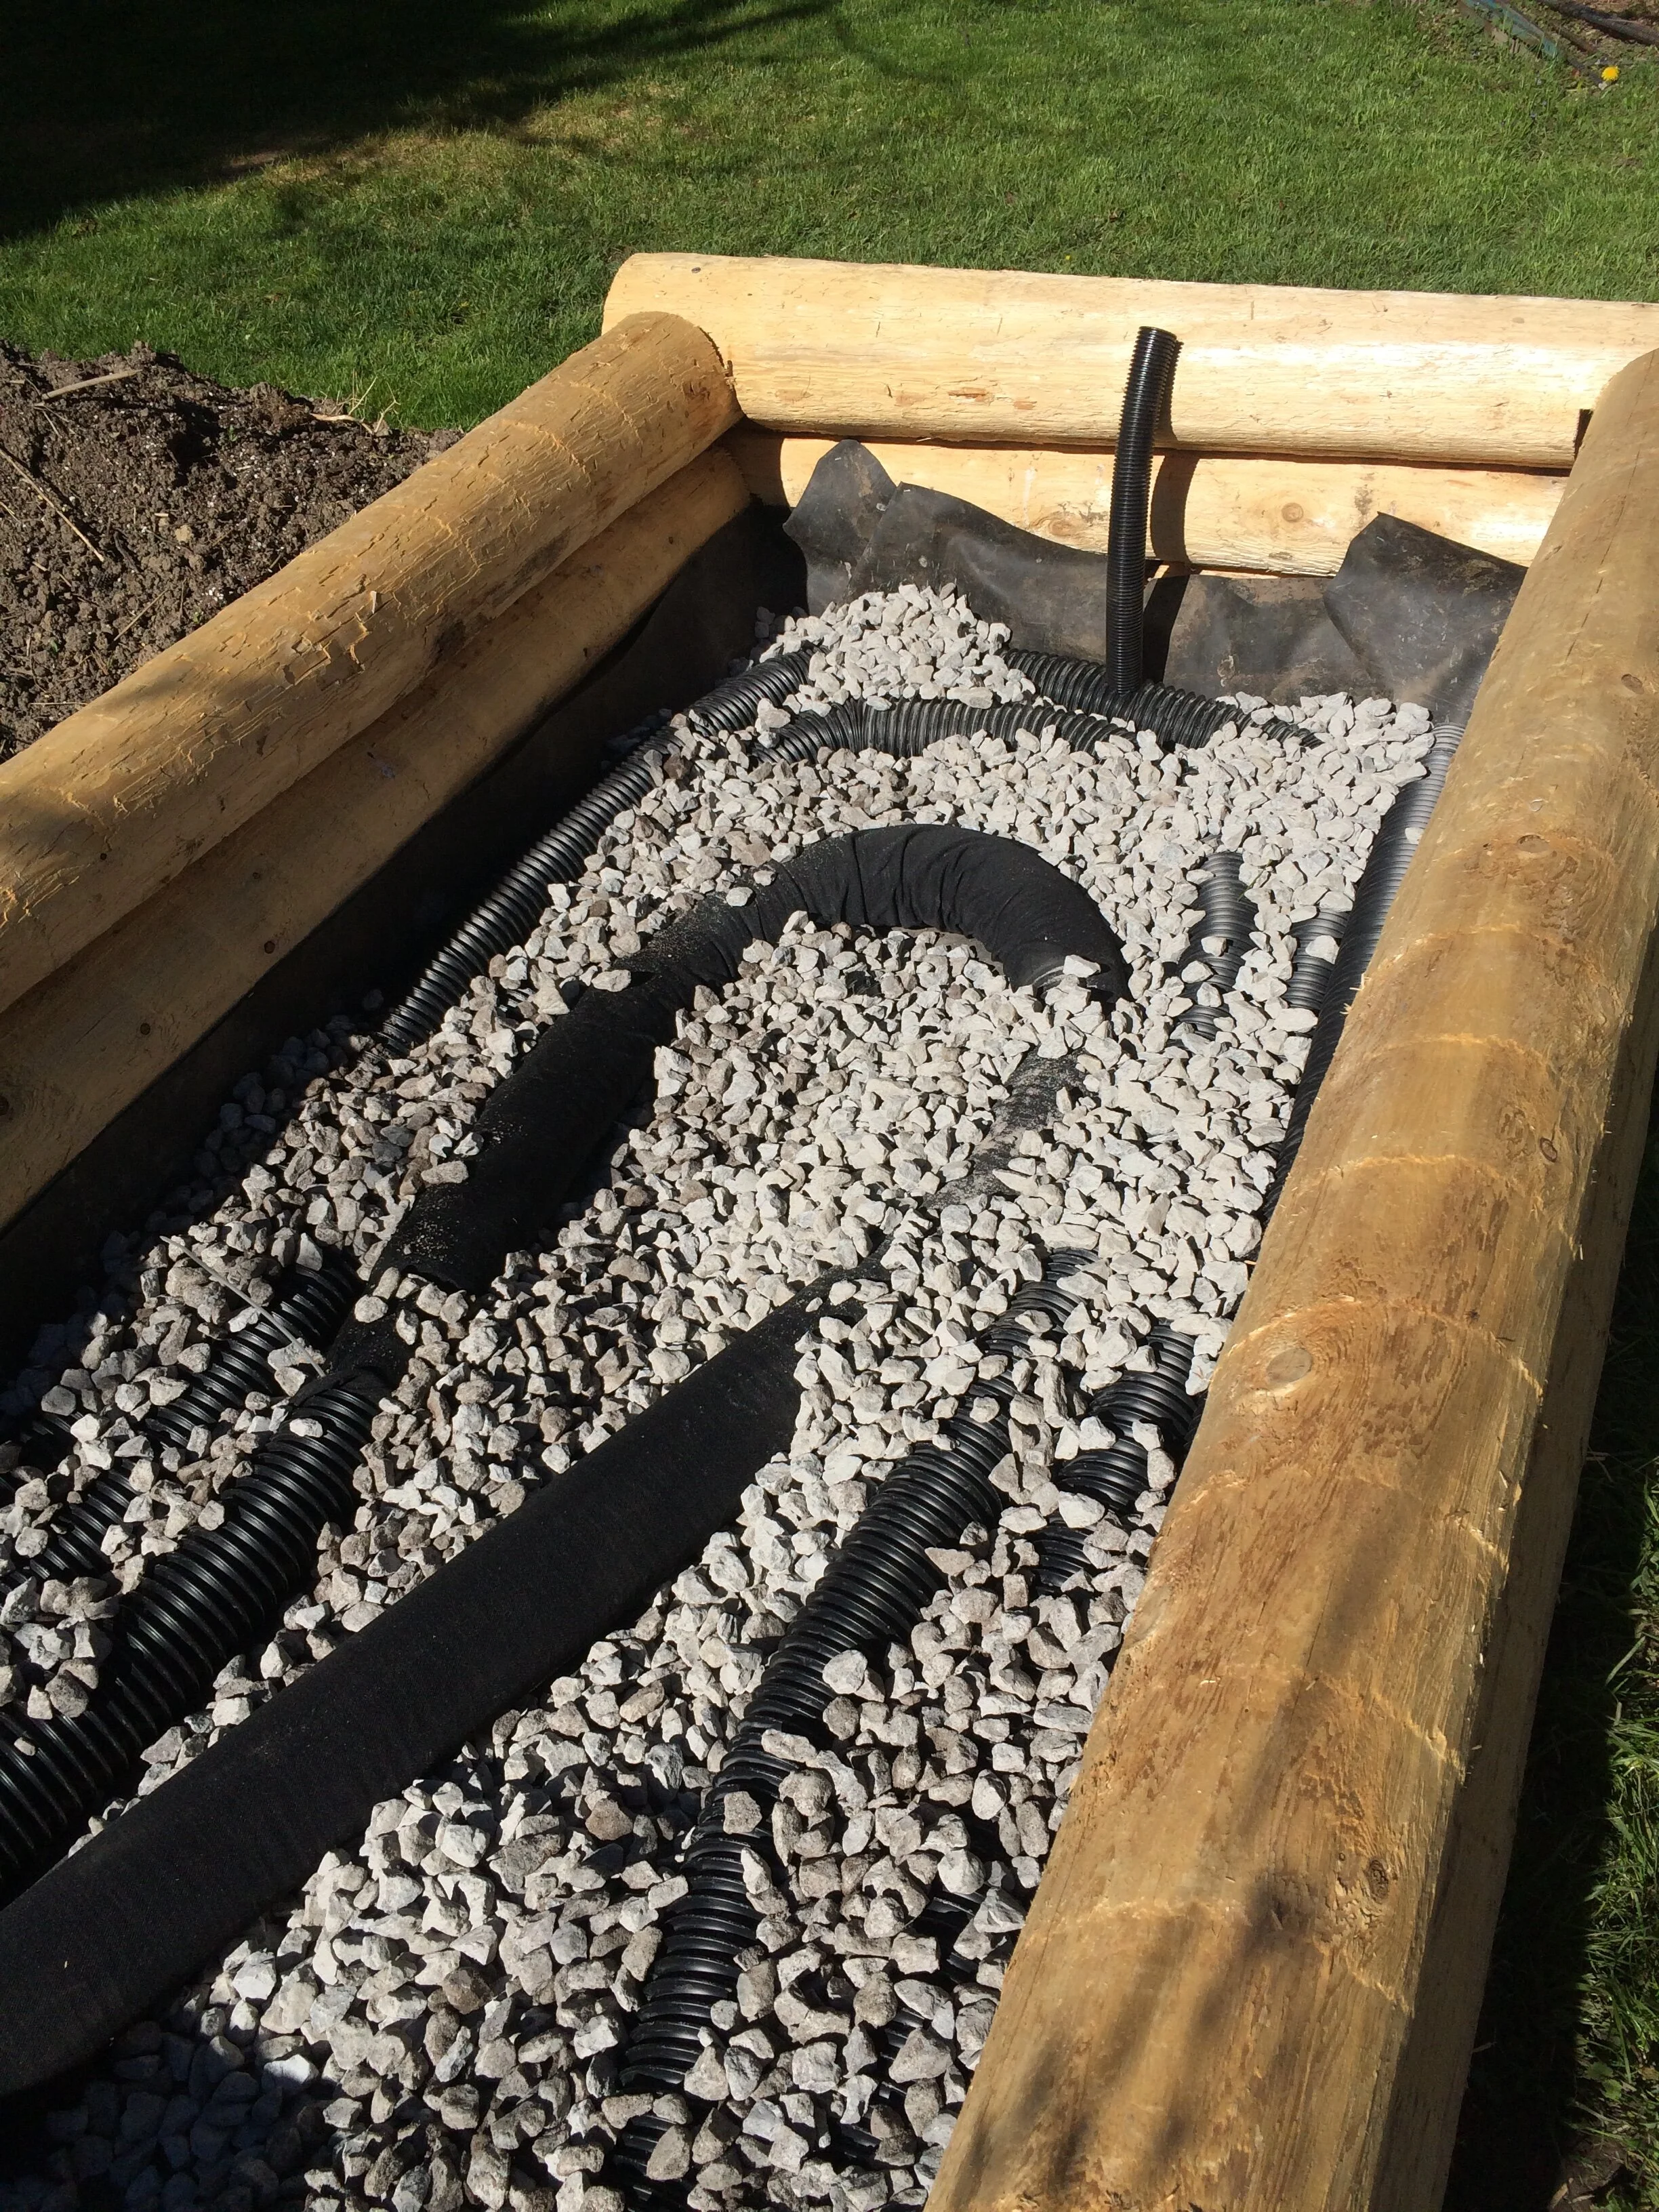
Add gravel. It supports the weight of the soil above, while the spaces between the pieces of gravel fill with water. Water moves upwards through the gravel by capillary action.
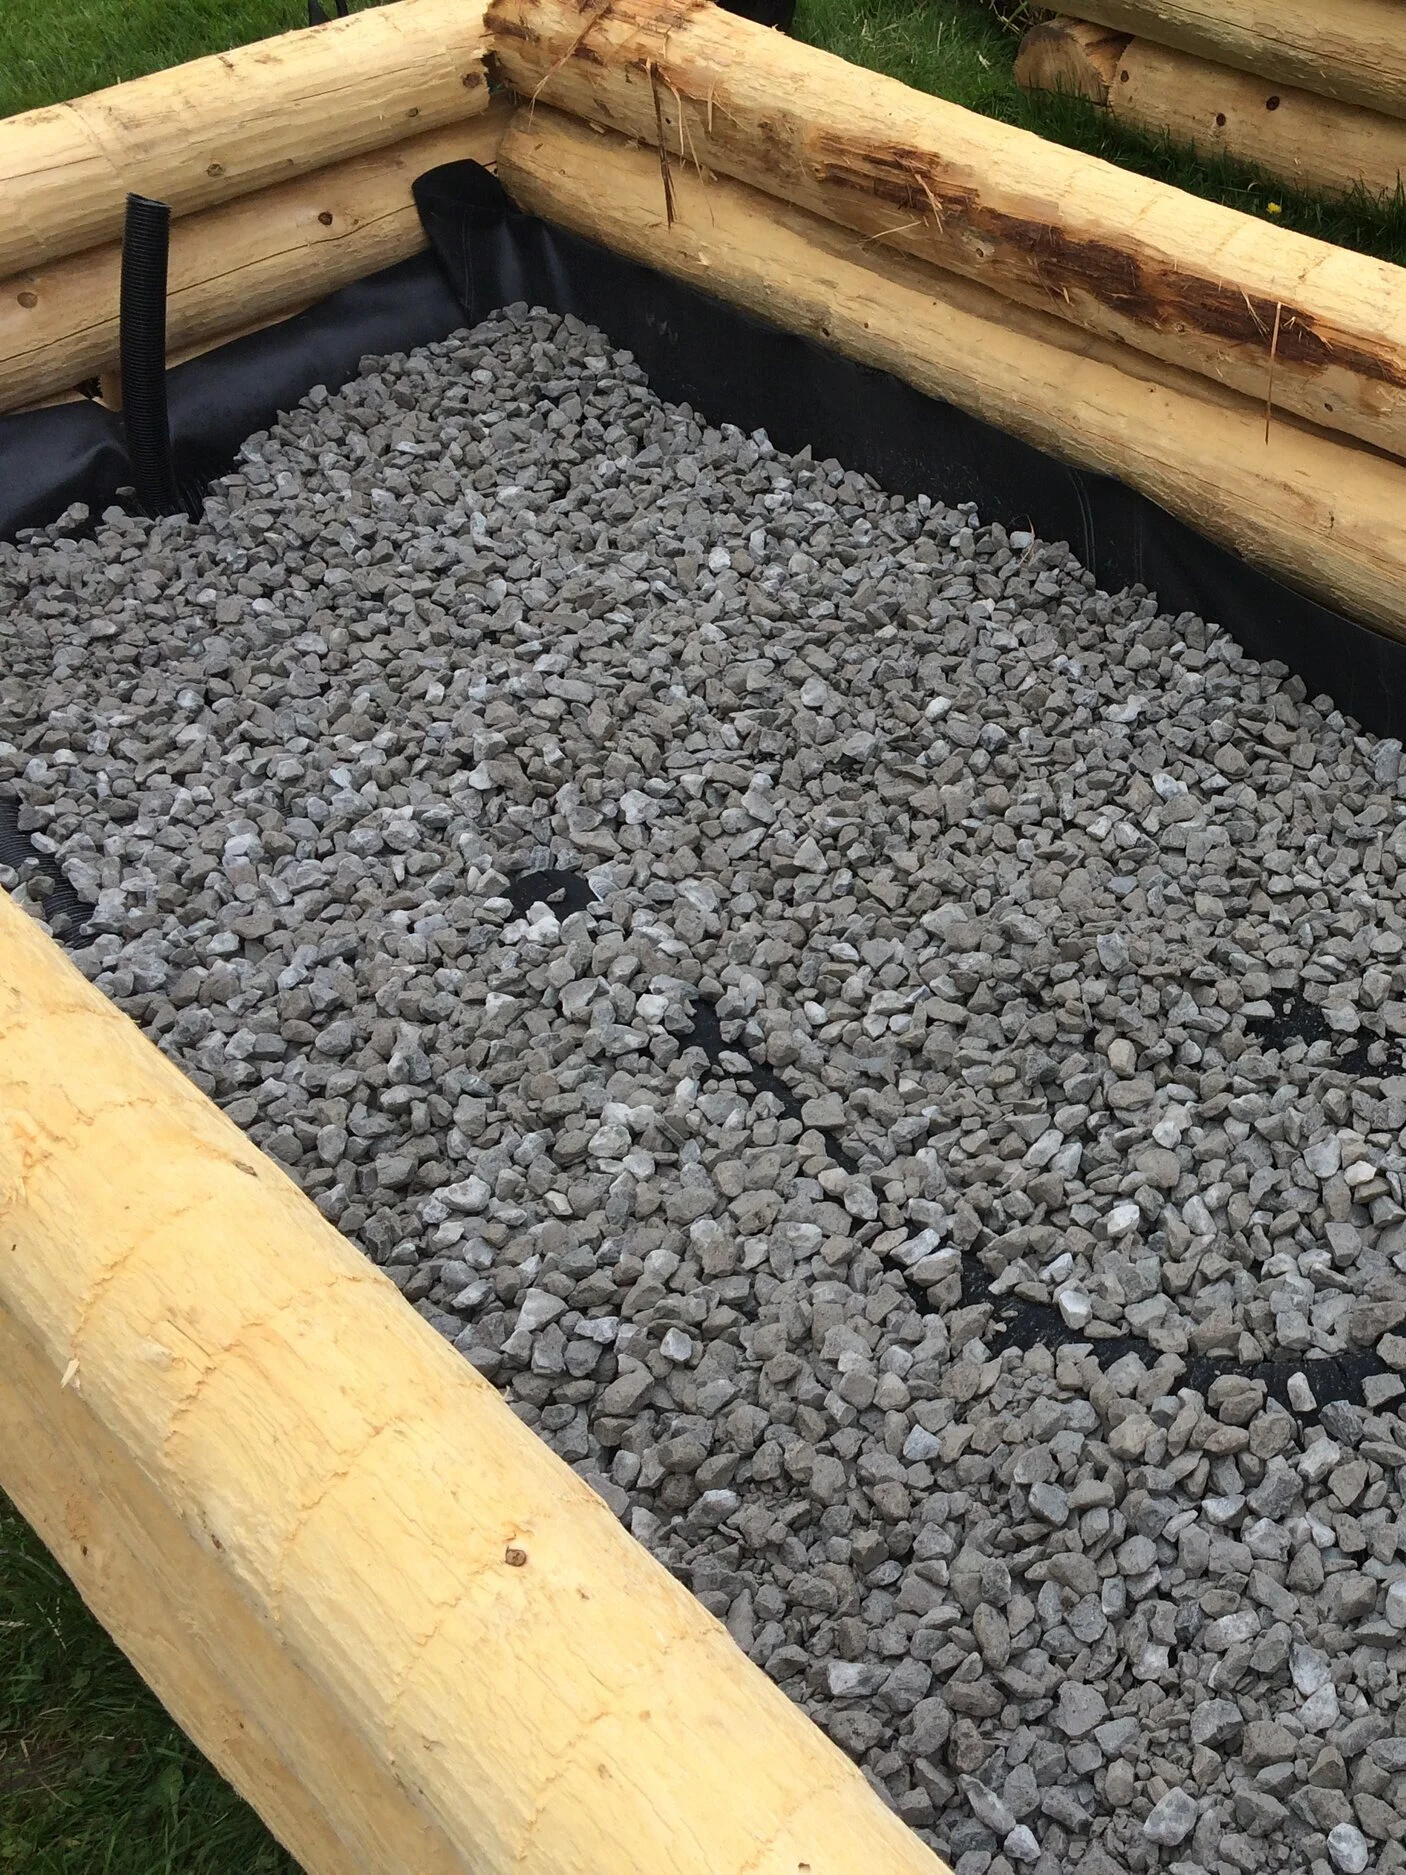
Note the fill tube at the far end, a piece of drain hose installed into the weeping tile. This permits filling of the reservoir with a hose after soil has been added.
Cover with landscape fabric to keep soil out of the reservoir area. Note the depressing in the top-right corner: While in theory water wicks up the gravel, I also created this soil-filled wick that dips into the reservoir. Not necessary, so I wouldn't do it again.
Soil depth: 30-40 cm (12-16") of soil works well. If there is too much soil, the water will not wick all the way to the top.
Pin this post about how to make a wicking bed.
Watering my Wicking Beds
I know that there is enough water in the reservoir when I see water coming out of the side of the bed. It's low-tech—but it works.
One More Reason for Wicking Beds
Soil contamination is another reason to consider growing in a wicking bed. Soil contamination can be a concern in areas where there is a history of industry, and also on former orchard lands where sprays with heavy metals might have been used. Or, like me, it could be from a nearby black walnut tree.
Find out more about soil contamination and what to do about it.
FAQ Wicking Beds
I’m already doing raised bed gardening. Can I retrofit my existing raised beds with this system of irrigation?
Yes, you can retrofit an existing raised garden bed to turn it into a wicking bed. But be prepared to first empty out the bed…so it means some digging!
I want my wicking bed to be a metre (3’) high. So it’s less bending for me while I’m gardening. Is that OK?
With wicking beds, less is more. Too much soil, and the water doesn’t wick all the way to the top of the soil. 30-40 cm (12-16”) soil depth is best for wicking.
If you want a taller raised bed, consider an elevated bed, on legs. (Like a sub-irrigated planter on stilts!) Then you can have the easy access you want, and the wicking won’t be compromised by excessive soil depth. And as a bonus, you won’t spend as much money on soil!
Here’s one other consideration: If you’re transplanting sizeable plants into a deep wicking bed, and don’t mind top watering for a bit until the roots reach a soil depth where there’s moisture from wicking, then maybe you don’t need to worry about soil depth.
Can it freeze in the winter? Does this work for raised bed gardening in Canada?
It’s fine for gardening in Canada and other places with cold climates. We use wicking beds in our urban garden here in Toronto.
Find This Helpful?
Enjoy not being bombarded by annoying ads?
Appreciate the absence of junky affiliate links for products you don’t need?
It’s because we’re reader supported.
If we’ve helped in your food-gardening journey, we’re glad of support. You can high-five us below. Any amount welcome!
Another Way to Add Growing Space in a Small Garden
Straw-bale gardening is a great way to grow on paved areas and areas with poor soil. And you also have a raised garden bed...so less bending required!
Find out more about straw-bale gardening.
More Ideas for Your Vegetable Garden
Find lots more articles about growing vegetables and edible plants in the Grow Vegetables area of this site.
Articles and Interviews
Courses: Edible Gardening
Find out about how to grow lots of vegetables in containers. Find out about potting mix, best types of containers, top crops, and how to care for your plants.

Want to create and edible garden or edible landscape but not sure where to start? Find out how to design a garden, choose plants, and create a functional, beautiful, edible landscape.
Create a Magical Dragon-Themed Garden for Children
By Steven Biggs
Kids Think of the Best Children’s Gardening Activities!

Endless opportunities to shape gardening activities to what interests your child. When it's fun, they'll be spending time in the garden!
A dragon-themed garden never occurred to me.
It was Finn's idea.
Finn and him mom came to my daughter Emma's talk about gardening activities for children.
She told the kids they didn't have to garden like grown ups. Because grown ups want things to look nice, she said. Kids just want it to be fun.
She told the kids in the audience to think of ways to make their garden space fun. Really fun. One way to do that, she explained, is to pick something you like, and then use it to make a theme garden.
Grow a tickling garden with plants that are good for tickling...great for the whole family
Grow a garden that's your favourite colour (she talked about a kid she met who grew a purple garden!)
Or grow a giant's garden with giant sunflowers and mammoth pumpkins
If you're looking for ideas to get kids involved in their own garden or growing their own food, keep reading for some super fun ideas!
Dragon Garden Sparks Finn's Imagination
After Emma talked about using their garden space to make a theme garden, Emma told the kids about some of her own favourite plants that summer.
And one of her favourite plants was a bean with unusual markings called ‘Dragon Tongue.'
The next morning, Finn's mom sent us a note. He loved the ‘Dragon Tongue' bean. He loved dragons. So he decided he'd grow a dragon-themed garden.
How's that for a creative children's garden!
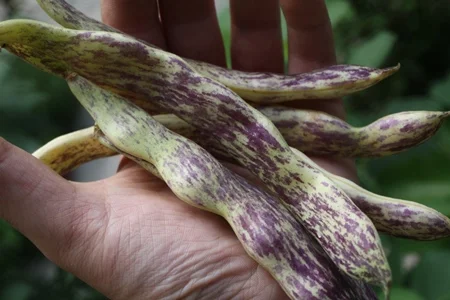
Dragon Tongue beans for a dragon-themed garden. (Photo by Emma Biggs)
Dragon Plant Guide
Veggies and Flowers with "Dragon" in the Name
Emma and I loved Finn's idea for his own garden. His dragon-themed garden.
So we scoured seed websites and seed catalogues for dragon-themed plants. Here's what we came up with:
Dragon's Egg cucumber
Purple Dragon carrot
Red Dragon arugula
Dragon's Fire arugula
Tongue of Fire bean
Snapdragon…and there are so many sizes and colours
Dragon's Toe pepper
Green Dragon cucumber
Thai Dragon hot pepper
Blue Dragon dracocephalum
Flower Dragon watermelon
Black Dragon coleus
Dragon's Claw millet
Taking the Dragon-Garden Idea Further - More Fun!
Dragon-Like Vegetables and Flowers
Then we thought about how we'd describe a dragon. We came up with ideas like spiny, toothy, winged, and pointy.
That helped us find even more plant ideas for the dragon-themed children's garden:

Litchi tomato for it's spiny skin! Perfect snack for a dragon.
Toothy. (An agave looks pretty toothy to my imagination. Or, if you want to stretch things, dandelion comes from French—dent-de-lion—which means "lion's tooth.” I even found a daylily called ‘Snaggle Tooth.')
Long and pointy for the tail. (Corn? …I'll let the kids brainstorm this one.)
Leathery or spiny for dragon-like skin. (I'm picturing citrus rind here; and Litchi Tomato would be perfect!)
Serpent-like shape. (I think snake gourds might work!)
Wings (How about a winged bean, angel wing begonia…or maybe something with winged seeds such as maple?)
I'm sure there are lots more plants with a dragon connection. E-mail us if you have any to add to the list!
How to Build a Dragon Garden
Turn an Outdoor Space into a Kid's Garden
If you think a dragon-themed garden is a fun way to keep your kids occupied this summer, here are steps you can go through with them. Older kids might be able to do much of this on their own. Little ones might need you to guide them through the process.
Choose a garden space. It could be a corner of your garden, or maybe you want to help them create a new garden.
Get the space ready. Digging can be a fun part of the process, so include the kids right from the beginning.
Decide what you'll grow. For first-time gardeners, starting with a handful of plants is more doable.
Get seeds or plants. Buy or trade seeds and plants. (Here's a guide to seed companies.)
Start your seeds indoors in the spring. (Here's a guide to growing plants from seed.)
Transplant seedlings outdoors into the garden when there's no more risk of frost. You can help guide the plant spacing, but remember it's more fun for kids when they help plant the garden.
Care for your dragon-themed garden over the summer. Water the plants and remove any weeds that grow.
Take pictures to show friends!
Another Themed Garden for Kids
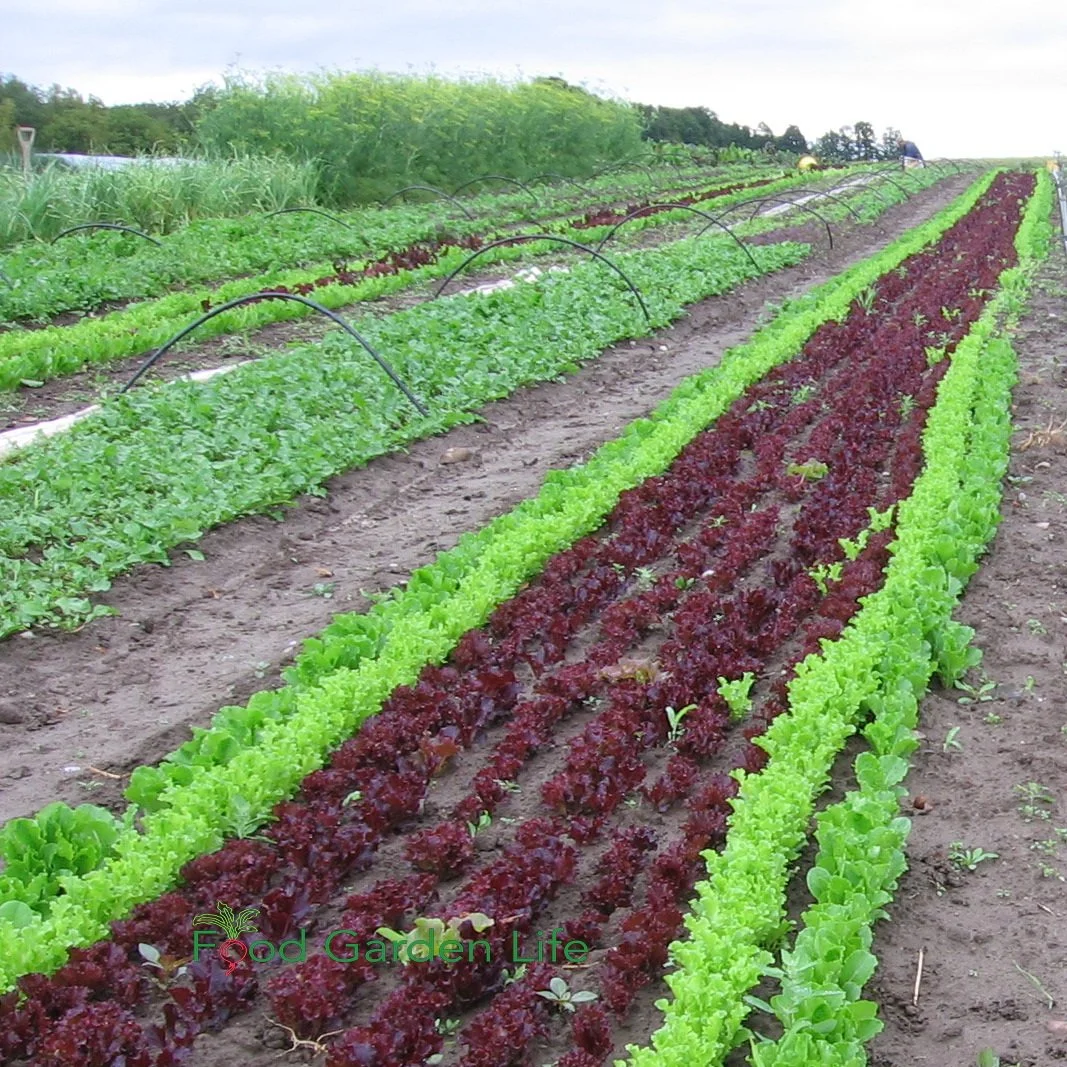
Check out the picture below of the harvest from Emma's rainbow-themed garden. It's full of veggies with as many colours as possible.
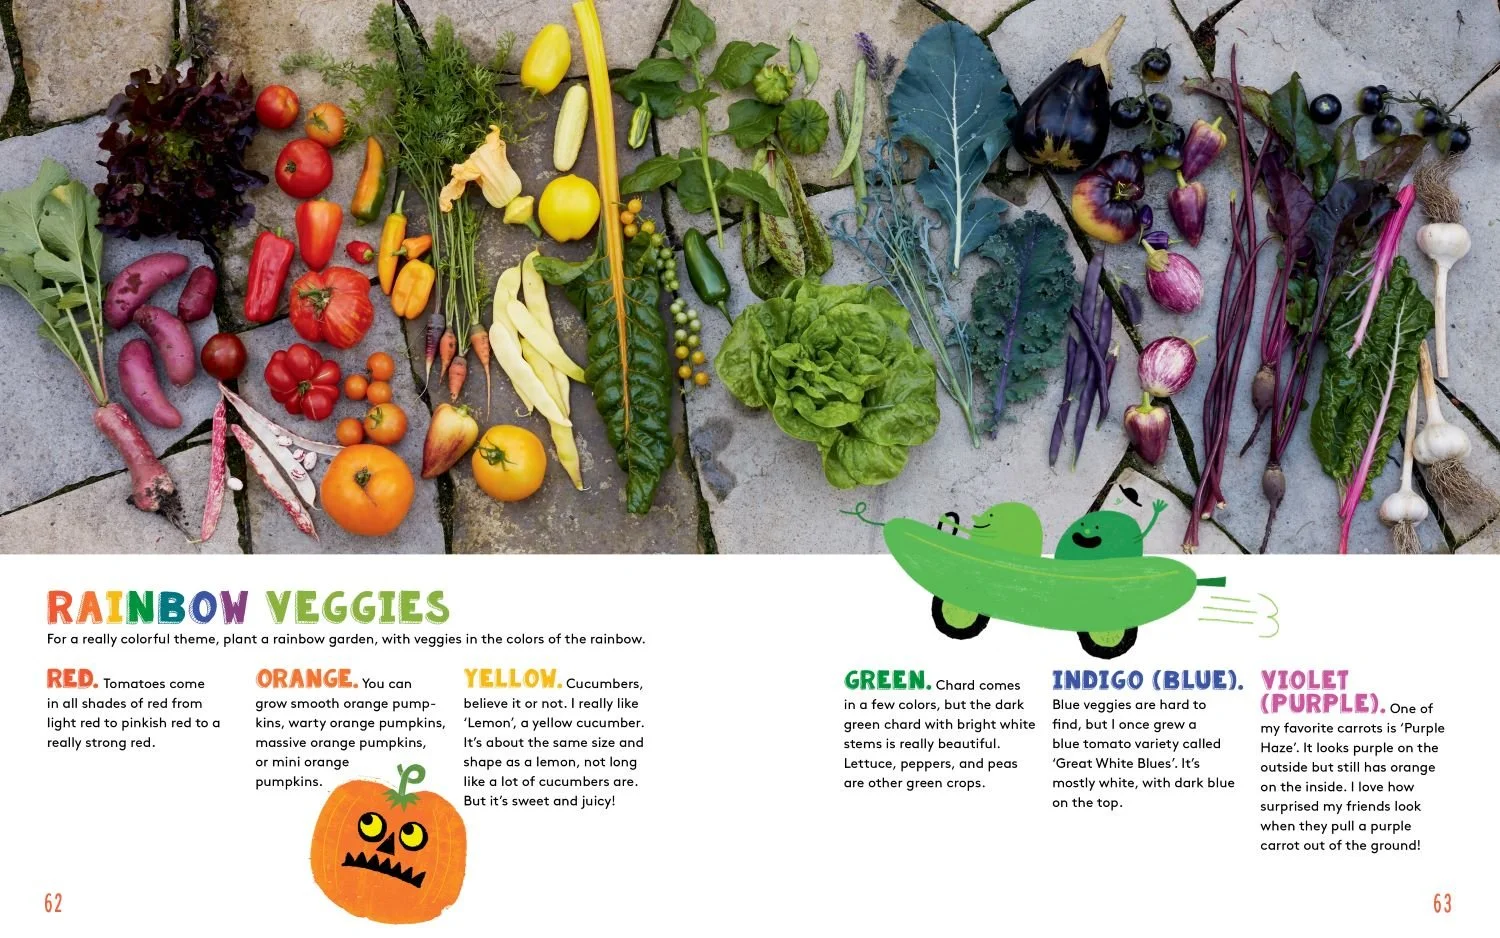
A Rainbow-themed garden, from the book Gardening with Emma. If you're looking for ideas for gardening activities, you'll love the book.
More Theme Garden Ideas
Pizza garden. Vegetables and herbs used to make a pizza!
Salsa garden. Herbs and veggies to make homemade salsa.
Bug's garden. For kids who love bugs, set up an outdoor space where they can have their own nature scavenger hunts for bugs! Include logs and rocks that kids can lift up to hunt for bugs, and flowers for flying insects.
Hummingbird garden. For children who are interested in birds, select flowers that attract hummingbirds.
Mud kitchen. Not so much a garden as an outdoor space for kids to use soil, seeds, flowers...whatever you're willing to part with, to enjoy the sensory aspects things related to gardening. Great way to get them in the fresh air, and for little kids, a fun way to work on gross motor skills. (We had lots of mud stew prepared in our garden over the years.)
Gardening Benefits for Children
Gardening can be a fun way of spending time together with kids. It can be terribly boring, too, if it's too adult-centric.
So think of ways to make it fun for kids. A little bit of ownership and responsibility can go a long way.
Besides growing plants in a garden, there are also lots of gardening activities to get kids outdoors in the fresh air. For example, instead of raking leaves onto a compost heap, rake them into a pile to jump on. Then rake them into the shape of imaginary buildings. Make a few buildings!
Find This Helpful?
Enjoy not being bombarded by annoying ads?
Appreciate the absence of junky affiliate links for products you don’t need?
It’s because we’re reader supported.
If we’ve helped in your food-gardening journey, we’re glad of support. You can high-five us below. Any amount welcome!
More Kids Gardening Ideas
Kids Gardening Articles and Interviews
Looking for more kids gardening ideas?
Click the button below to head over to the children's gardening area for more gardening activities for kids.
Kids Gardening Book
Want a fun book to inspire the kids in your life to explore the garden?
My daughter, Emma, wrote Gardening with Emma. It's full of super fun gardening activities for kids.
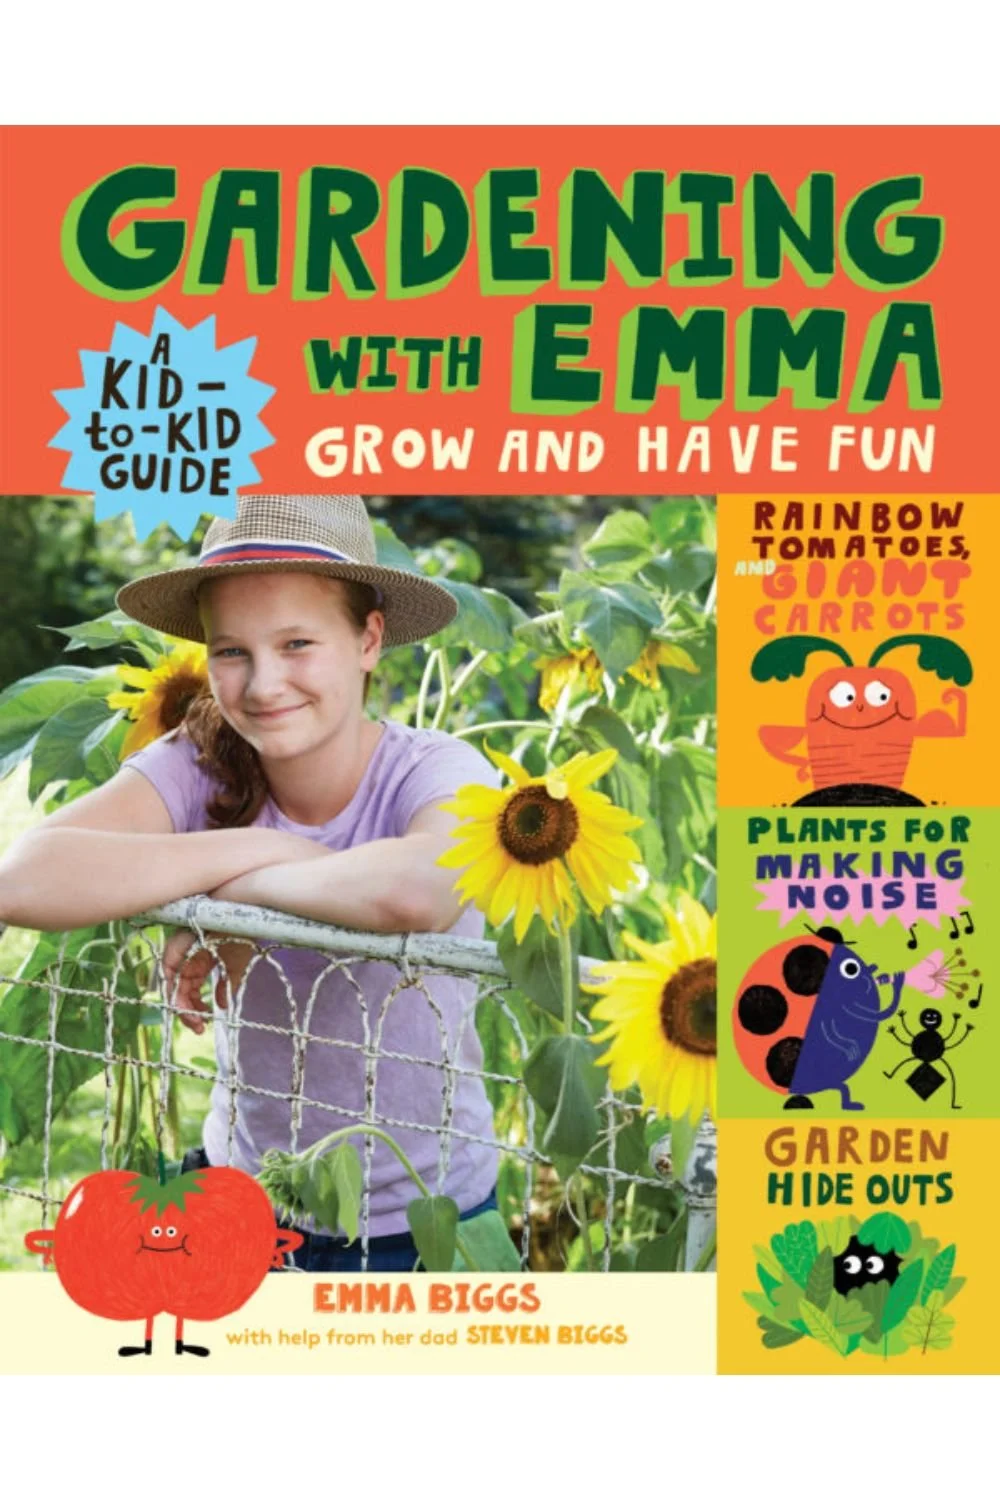
Written for kids by a kid, this guide helps kids see the fun side of gardening, whether it’s growing giant vegetables, making a bug vacuum, or making a sound-themed garden.
Emma shares lots of inspiring ideas for young gardeners about how to grow healthy food, raise cool plants, and have fun outdoors.
Copies from the Food Garden Life shop are signed by Emma!
Guide to Fruits and Vegetables that Grow in Shade
Looking for fruits, vegetables, and herbs that grow well in a shady garden. This article has partial-sun crop ideas for you.
By Steven Biggs
Shade-Tolerant Vegetables and Fruits for the Edible Landscape and Food Garden

Don’t have full sun? Think your garden needs full sun? Find out about shade-garden vegetables, fruit, and herbs.
Not enough sunny growing space in your yard? Lots of partial sun? Light shade? You're not alone.
When I first landscaped my place, my neighbour Bob asked, "Steve, why is your patio so far from your house?"
"It's all about the vegetables,” I replied.
I reserved as much direct sunlight for my vegetables as possible. And used the shady spot for the patio."
There are lots of things around a home garden that cast shade: There’s the house, garage, fence, shed, trees, and hedges.
Not all fruits and vegetables grow well in shade. Lots of crops need "full sun" (6-8 hours of direct sunlight every day) to grow optimally.
But there are fruits, vegetables, and herbs that do nicely in a shady garden. Keep reading if you want to learn about vegetable plants that grow in shade, growing herbs in shade, shade-tolerant fruit, and how to plan your garden for shade.
Perfectionism Meets Shade Garden
Don’t have a sunny field for growing vegetables? That’s fine, when planting a garden there are many shade-tolerant crops.
Before we get to shade-tolerant crops, let's start with the elephant in the room.
Perfectionism.
Many seed packets suggest full sun...and many yards don't have full sun. You might be contrasting your semi-shaded yard to bright, sunny fields of vegetables.
Your space doesn't compare...
So what?
So what if your plants don't look as good as what a commercial grower would grow! If you're a home gardener, you're growing edible plants for yourself, not to sell.
When I needed more growing space, I decided to reclaim the end of my driveway as a straw-bale garden. (Find out more about straw-bale gardens here.)
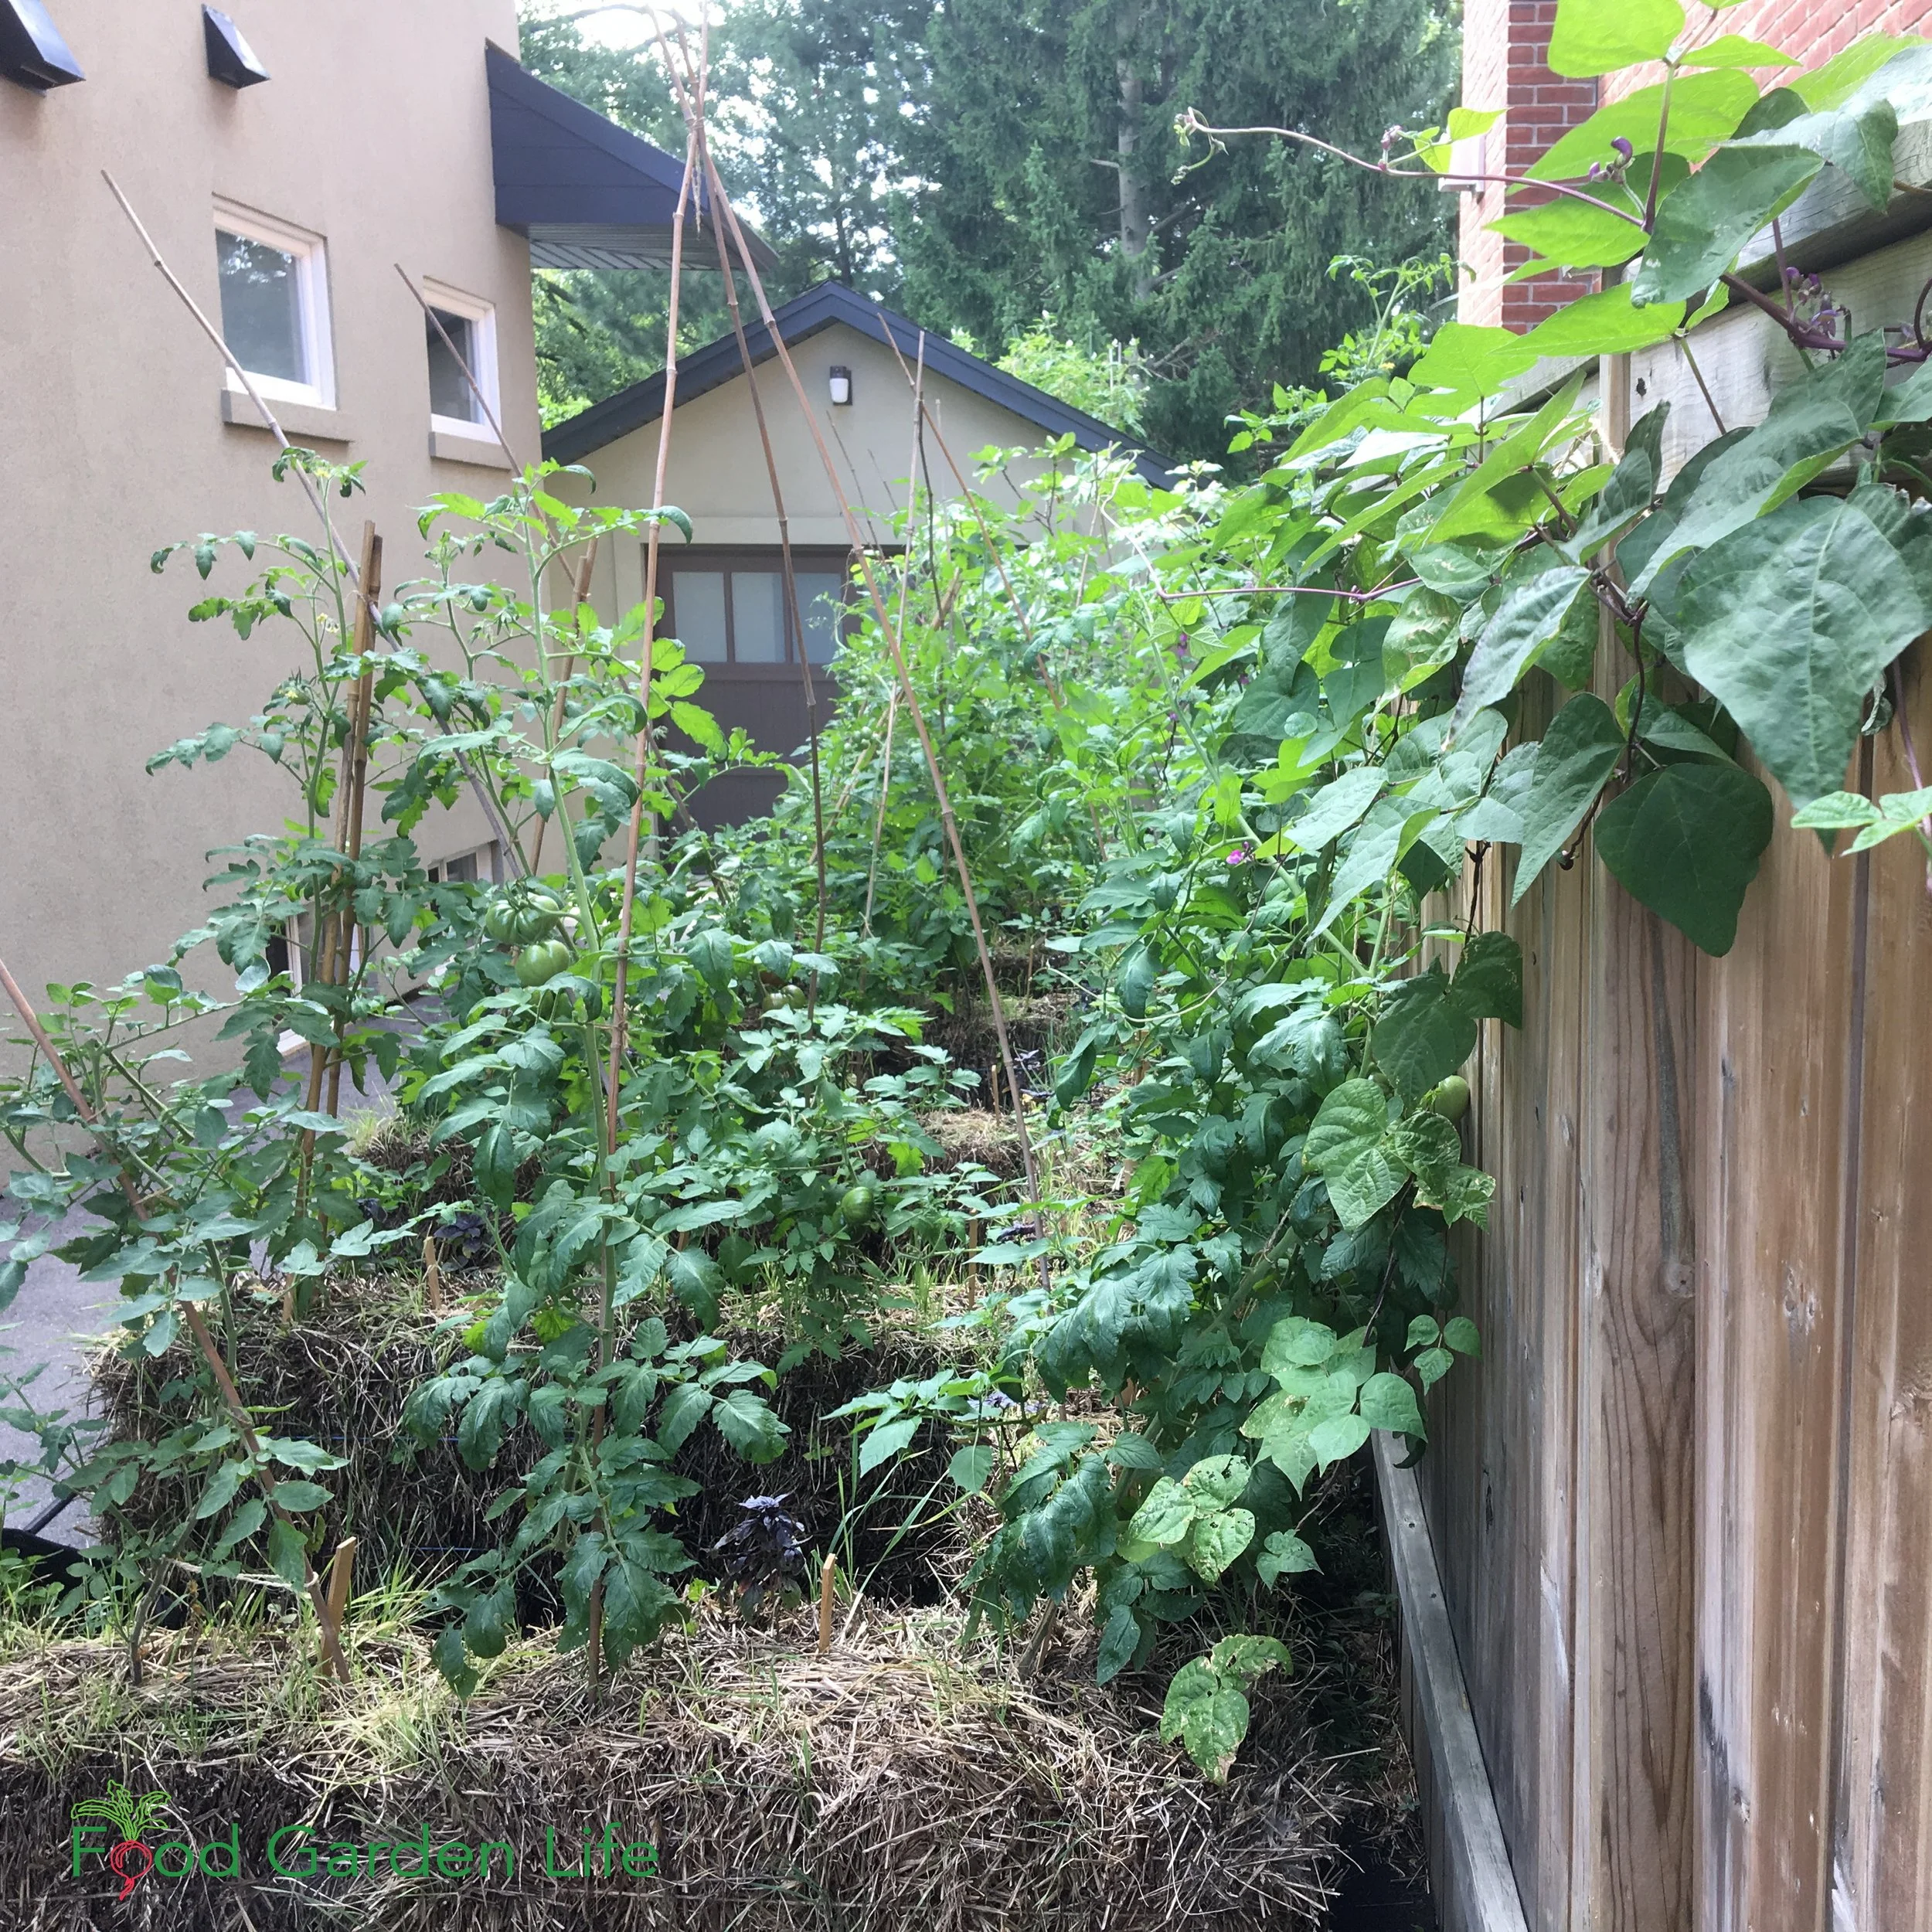
My driveway garden is in partial sun, nestled between two houses. You can still enjoy vegetable gardening if you have some shade.
The driveway is nestled between two houses. It gets less than six hours of sun exposure. But it’s better to have less-than-perfect tomato plants on that driveway and get a decent harvest than not to harvest any tomatoes from the driveway.
Five hours of sun isn't perfect. So what? The results are fine. It’s a successful garden. Even though I don’t have full sun.
A vegetable garden is a great cure for perfectionism. In home gardens we often have less-than-perfect conditions. So what!
A Word on Shade
Not all sun (and not all shade) is created equal. Here are things to consider as you look at the shady spots and sunny spots around a yard:
Dappled shade. Think of the shade under a locust tree, spotted with little flecks of light.
Heavy shade. This is where no light is gets through or is reflected, like next to buildings or under trees with dense canopies. (Norway maple...I'm talking about you!)
Afternoon shade. A.k.a. morning sun...and morning sun isn't as strong as afternoon sun.
Morning shade. Or afternoon sun.
Create Your Own Unique Edible Landscape
That fits for your yard, and your style!
Crops for Partial Shade
Grow Leafy Greens in Shade
Start with greens when gardening in partial shade.
The reason partial shade is fine for leafy greens is that we're not trying to grow a perfect crop: All we want is the leaves. We're not growing for flowers or fruit or seeds. We don’t care if the plant completes it’s life cycle.
(And with a bit of shade, leaves are often bigger and more tender!)
Many of the greens crops (e.g. arugula, lettuce, and spinach) have a short life cycle that's less that the length of the growing season. And that means that at some point they give up making tender leaves, and send up a flower stalk. (This is called "bolting.")
Bolting happens more quickly in hot, sunny locations. By growing leafy green crops in partial shade during intense summer heat, they'll bolt more slowly, and make tender leaves for longer time.
Here’s more about how to prevent lettuce from bolting.
Vegetable Plants that Grow in Shade
Here are a few greens that do very nicely in partial shade:
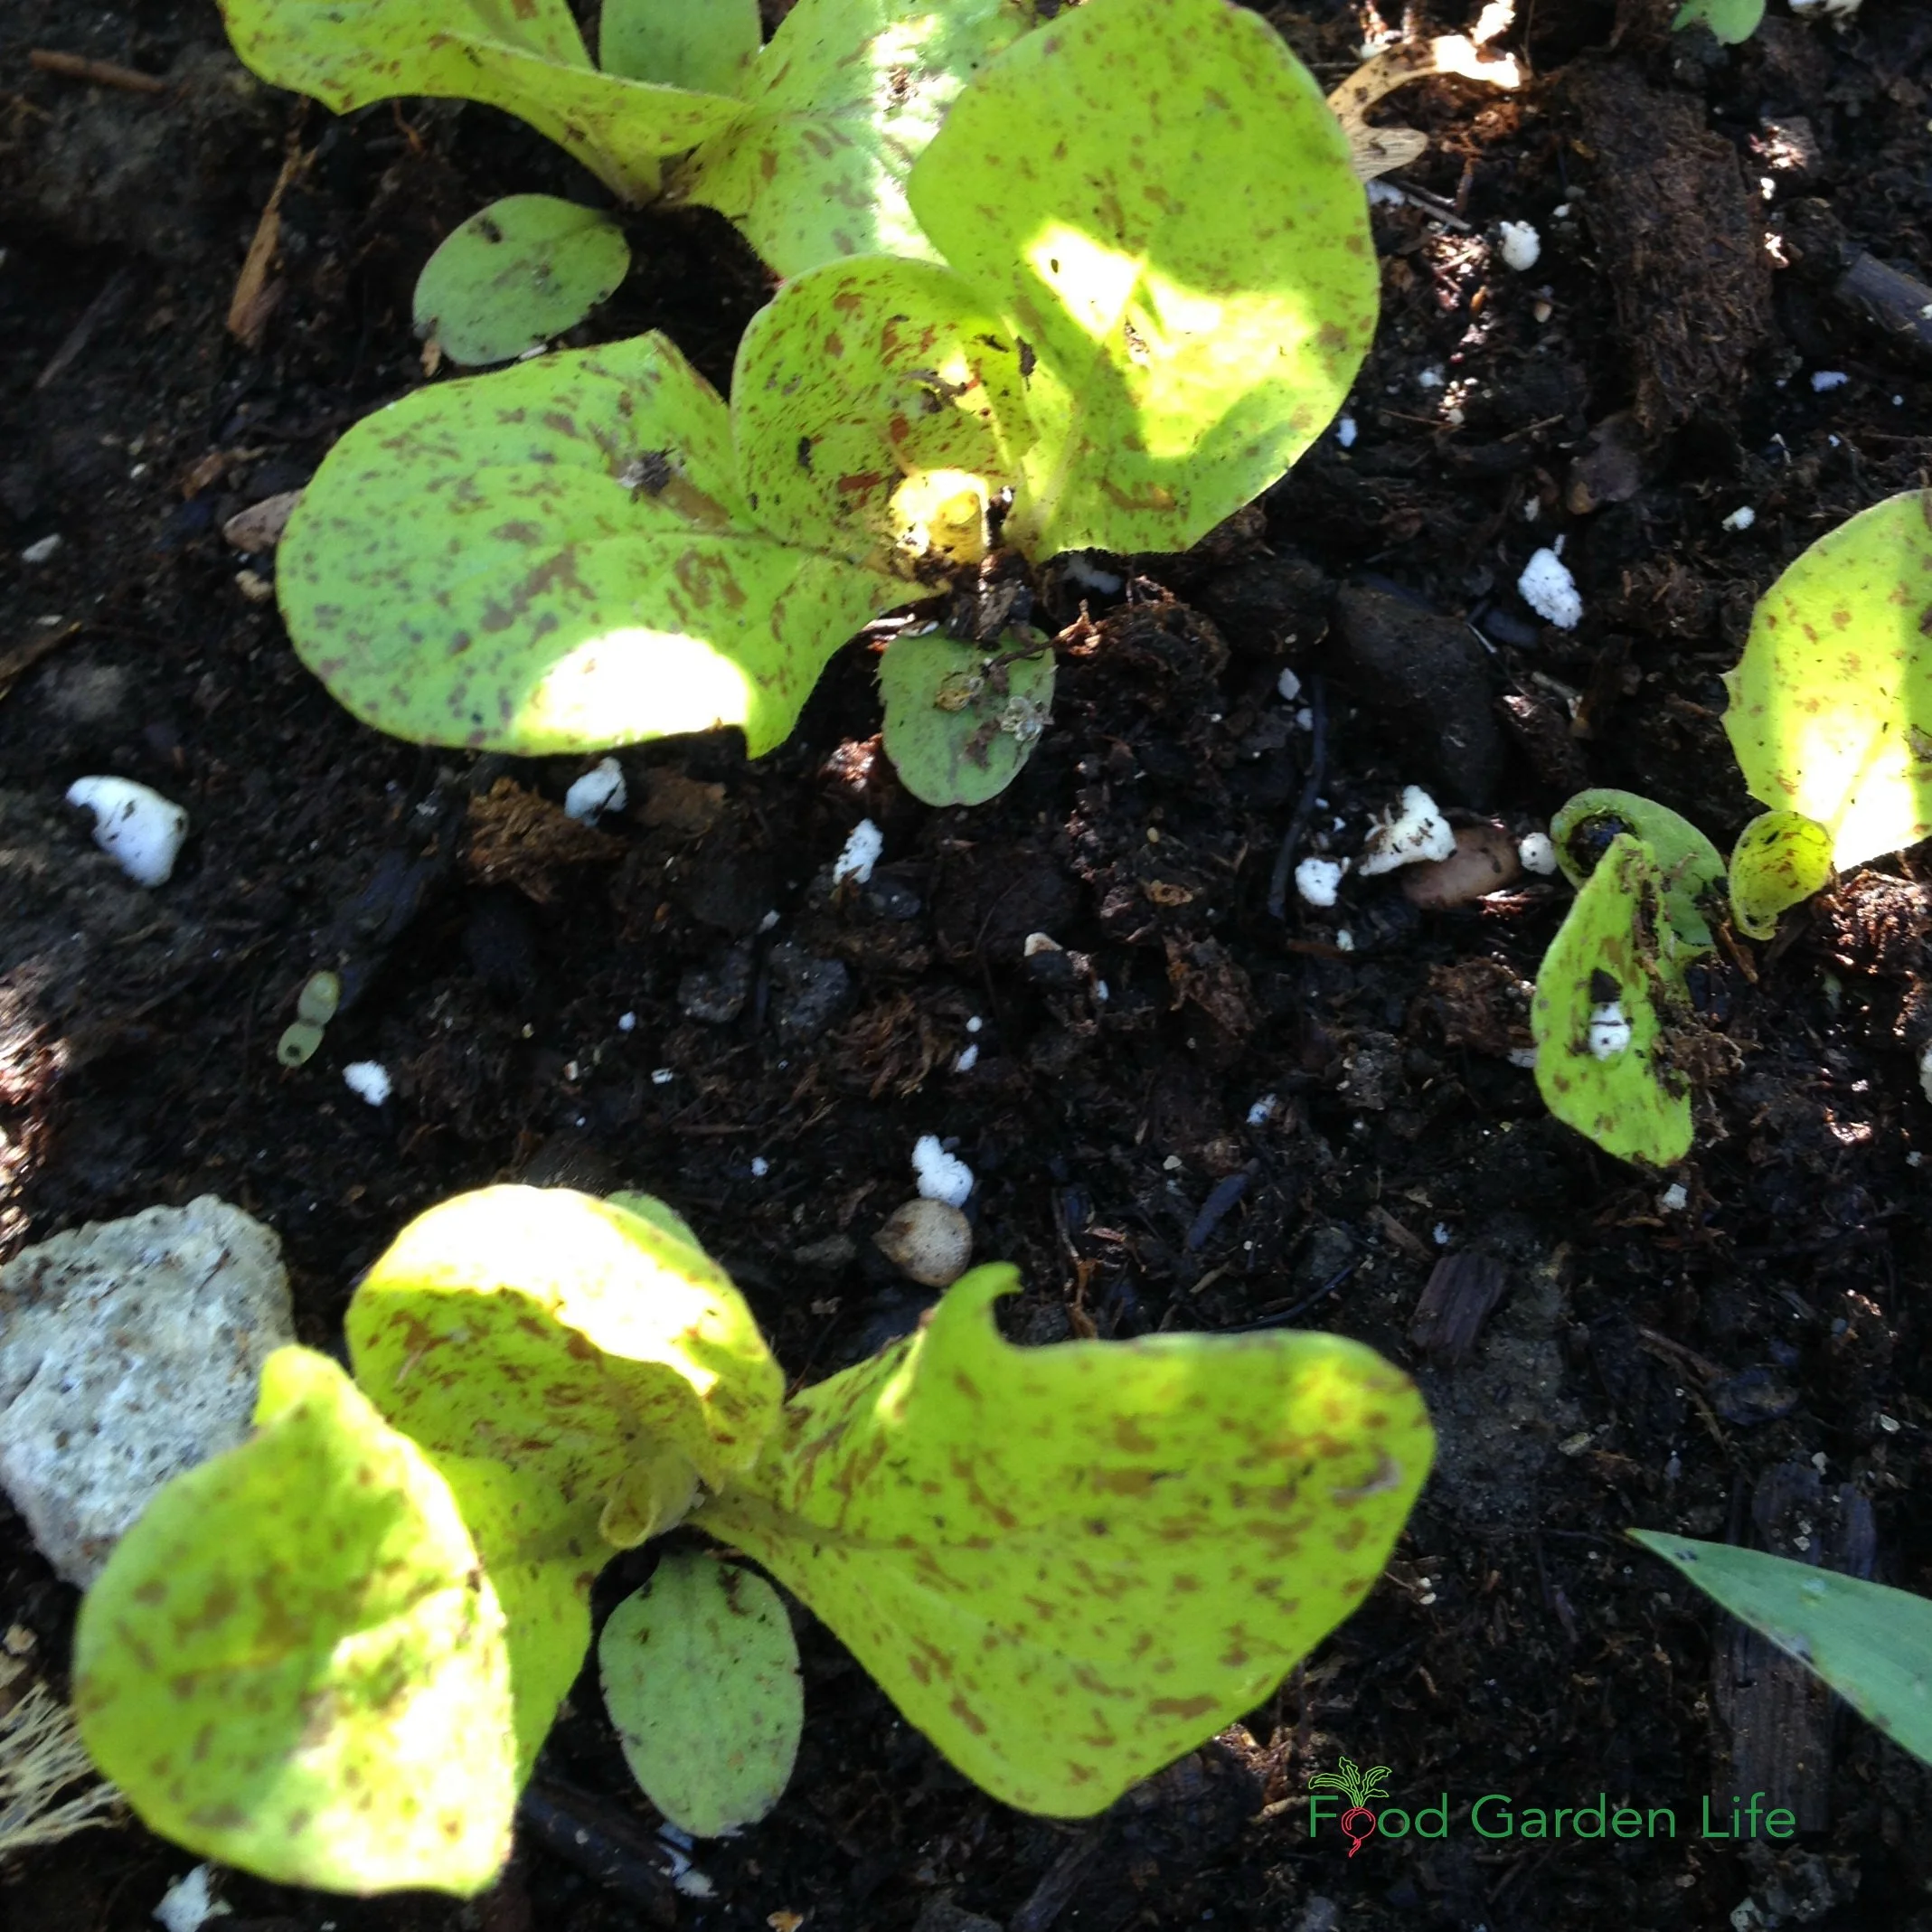
These lettuce plants will do well in this dappled light over the summer. It’s cooler than in direct sun.
Amaranth
Arugula
Beets (for the edible leaves…don’t expect as much from the roots as you would get in a sunny location)
Bok choy
Claytonia
Collards
Corn salad
Cress
Endive
Kale
Lettuce
Mizuna
Mustard greens
Spinach
Swiss chard
If you have a favourite green that's not on this list, try it. Leafy greens usually do very nicely in partial shade.
One more crop that I don't think of as a leafy vegetable (even though we eat the leaves) is green onions. With green onions, we're not trying to encourage bulb development...we're just trying to get tender leaves. So partial shade is fine.
Vine Crops as Shade-Garden Vegetables
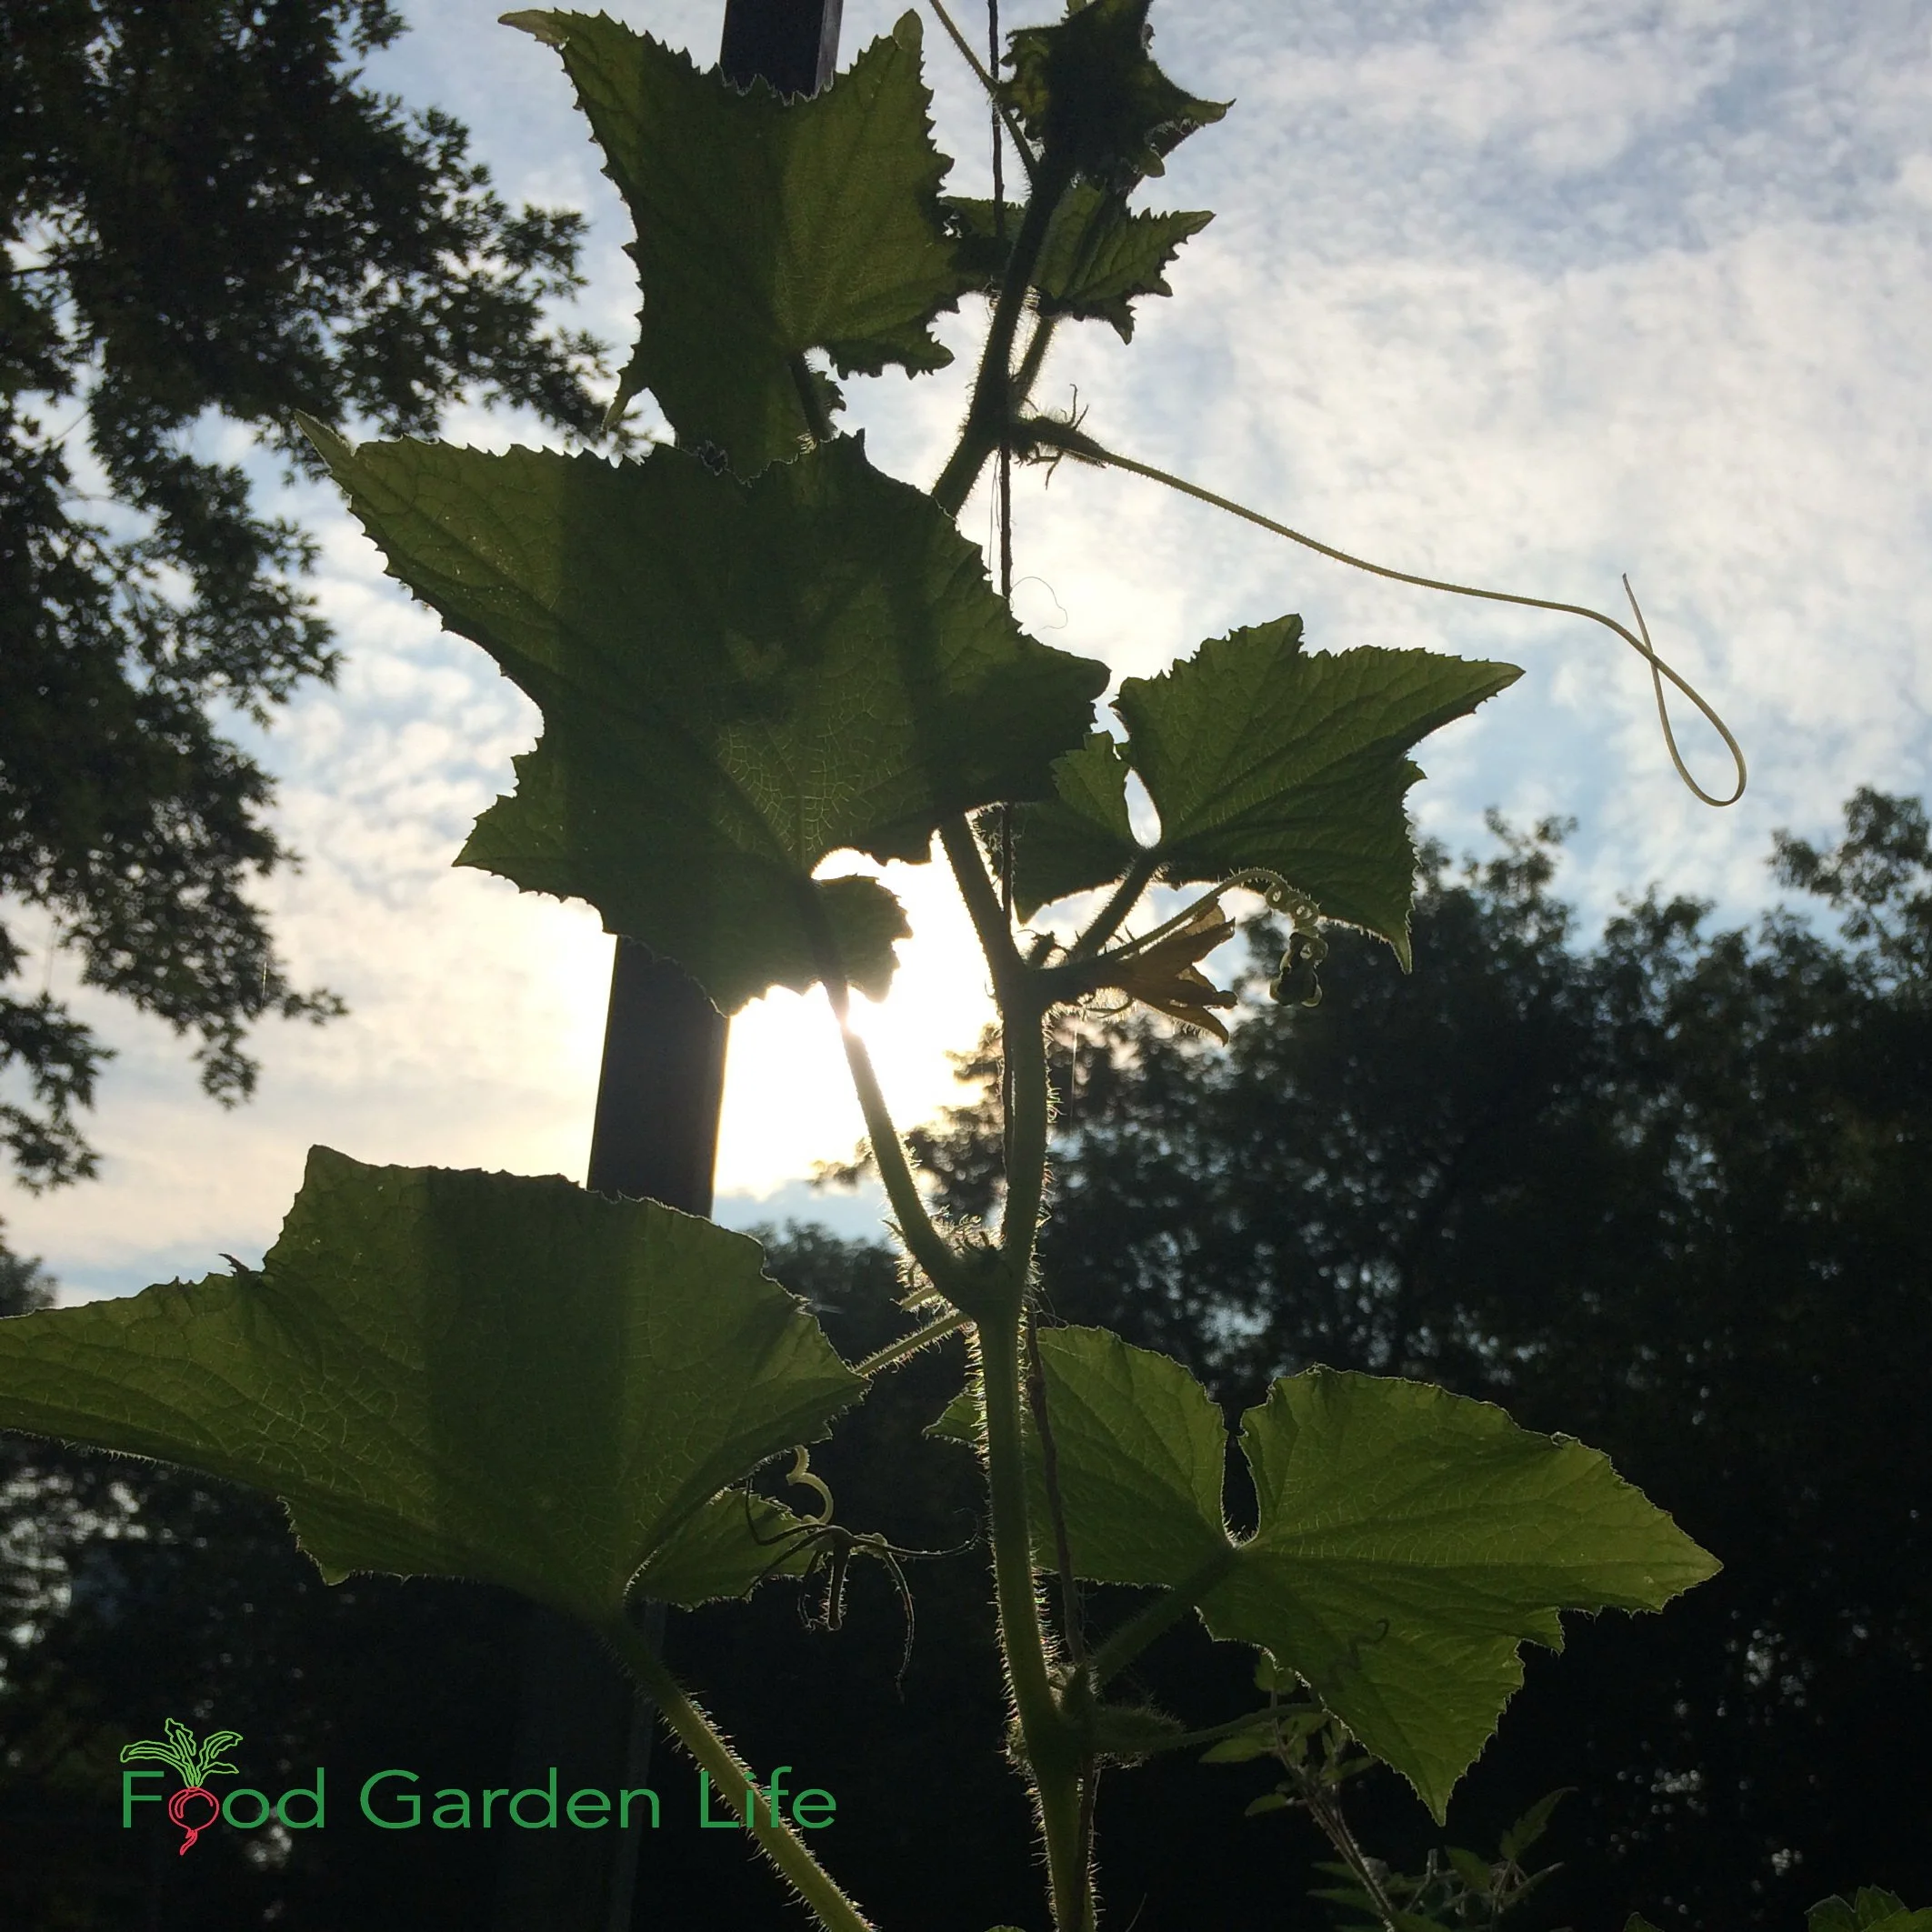
Vine crops can grow up and into the sunlight.
If you have a partially shaded area where vining crops could grow up into a sunnier location, this can be a useful strategy.
Not only do they tolerate partial shade: You can train them up a trellis, arbour, hedge, or tree into sunnier conditions.
Cucumbers. They grow respectably well in partial shade. I've grown them in afternoon sun, up a trellis on the west side of a garage with very respectable results.
Squash. Like cucumber, they do fine in partial shade. I've grown them along a semi-shaded cedar hedge, and was delighted to find the hedge studded with squash at the end of the season.
Pole and runner beans. The year I grew runner beans up a tee-pee underneath my apple tree they grew right up into the tree above...and those scarlet flowers looked great amongst the green apples!
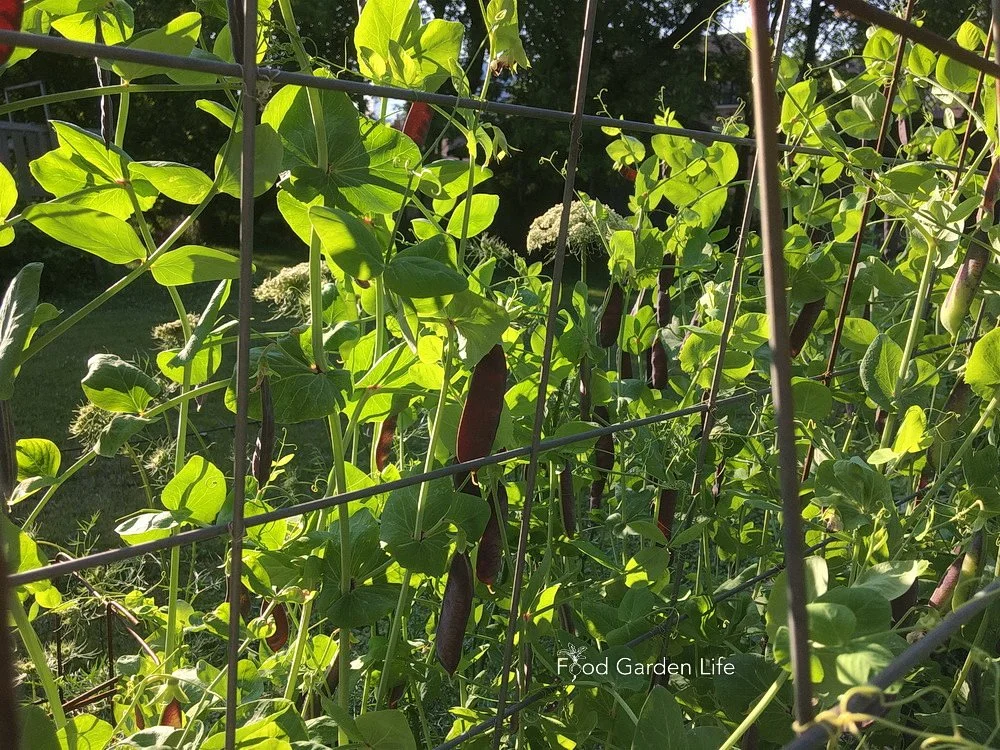
Vining Peas. Some pea varieties are bush-like, but if you want a vining crop to grow up into a sunnier space, look for vining peas. And with peas, you can also harvest and eat young shoot tips and tendrils.
All of these vine crops work well for vertical gardening. Find out how to make a vertical vegetable garden.
Grow a Container Vegetable Garden
And get an early harvest of crops that usually take too long!
Beyond Leafy Vegetables
I already told you about my 5-hour-a-day driveway tomatoes.
If you're experimenting with other sun-loving vegetables in partial shade, just expect them to have lanky growth and lower yield. And at a certain level of sunlight, you won't get enough to make it worth your while. Growing vegetables in shade might take some experimenting.
But if you don't try, you won't know.
Herbs that Grow in Shade
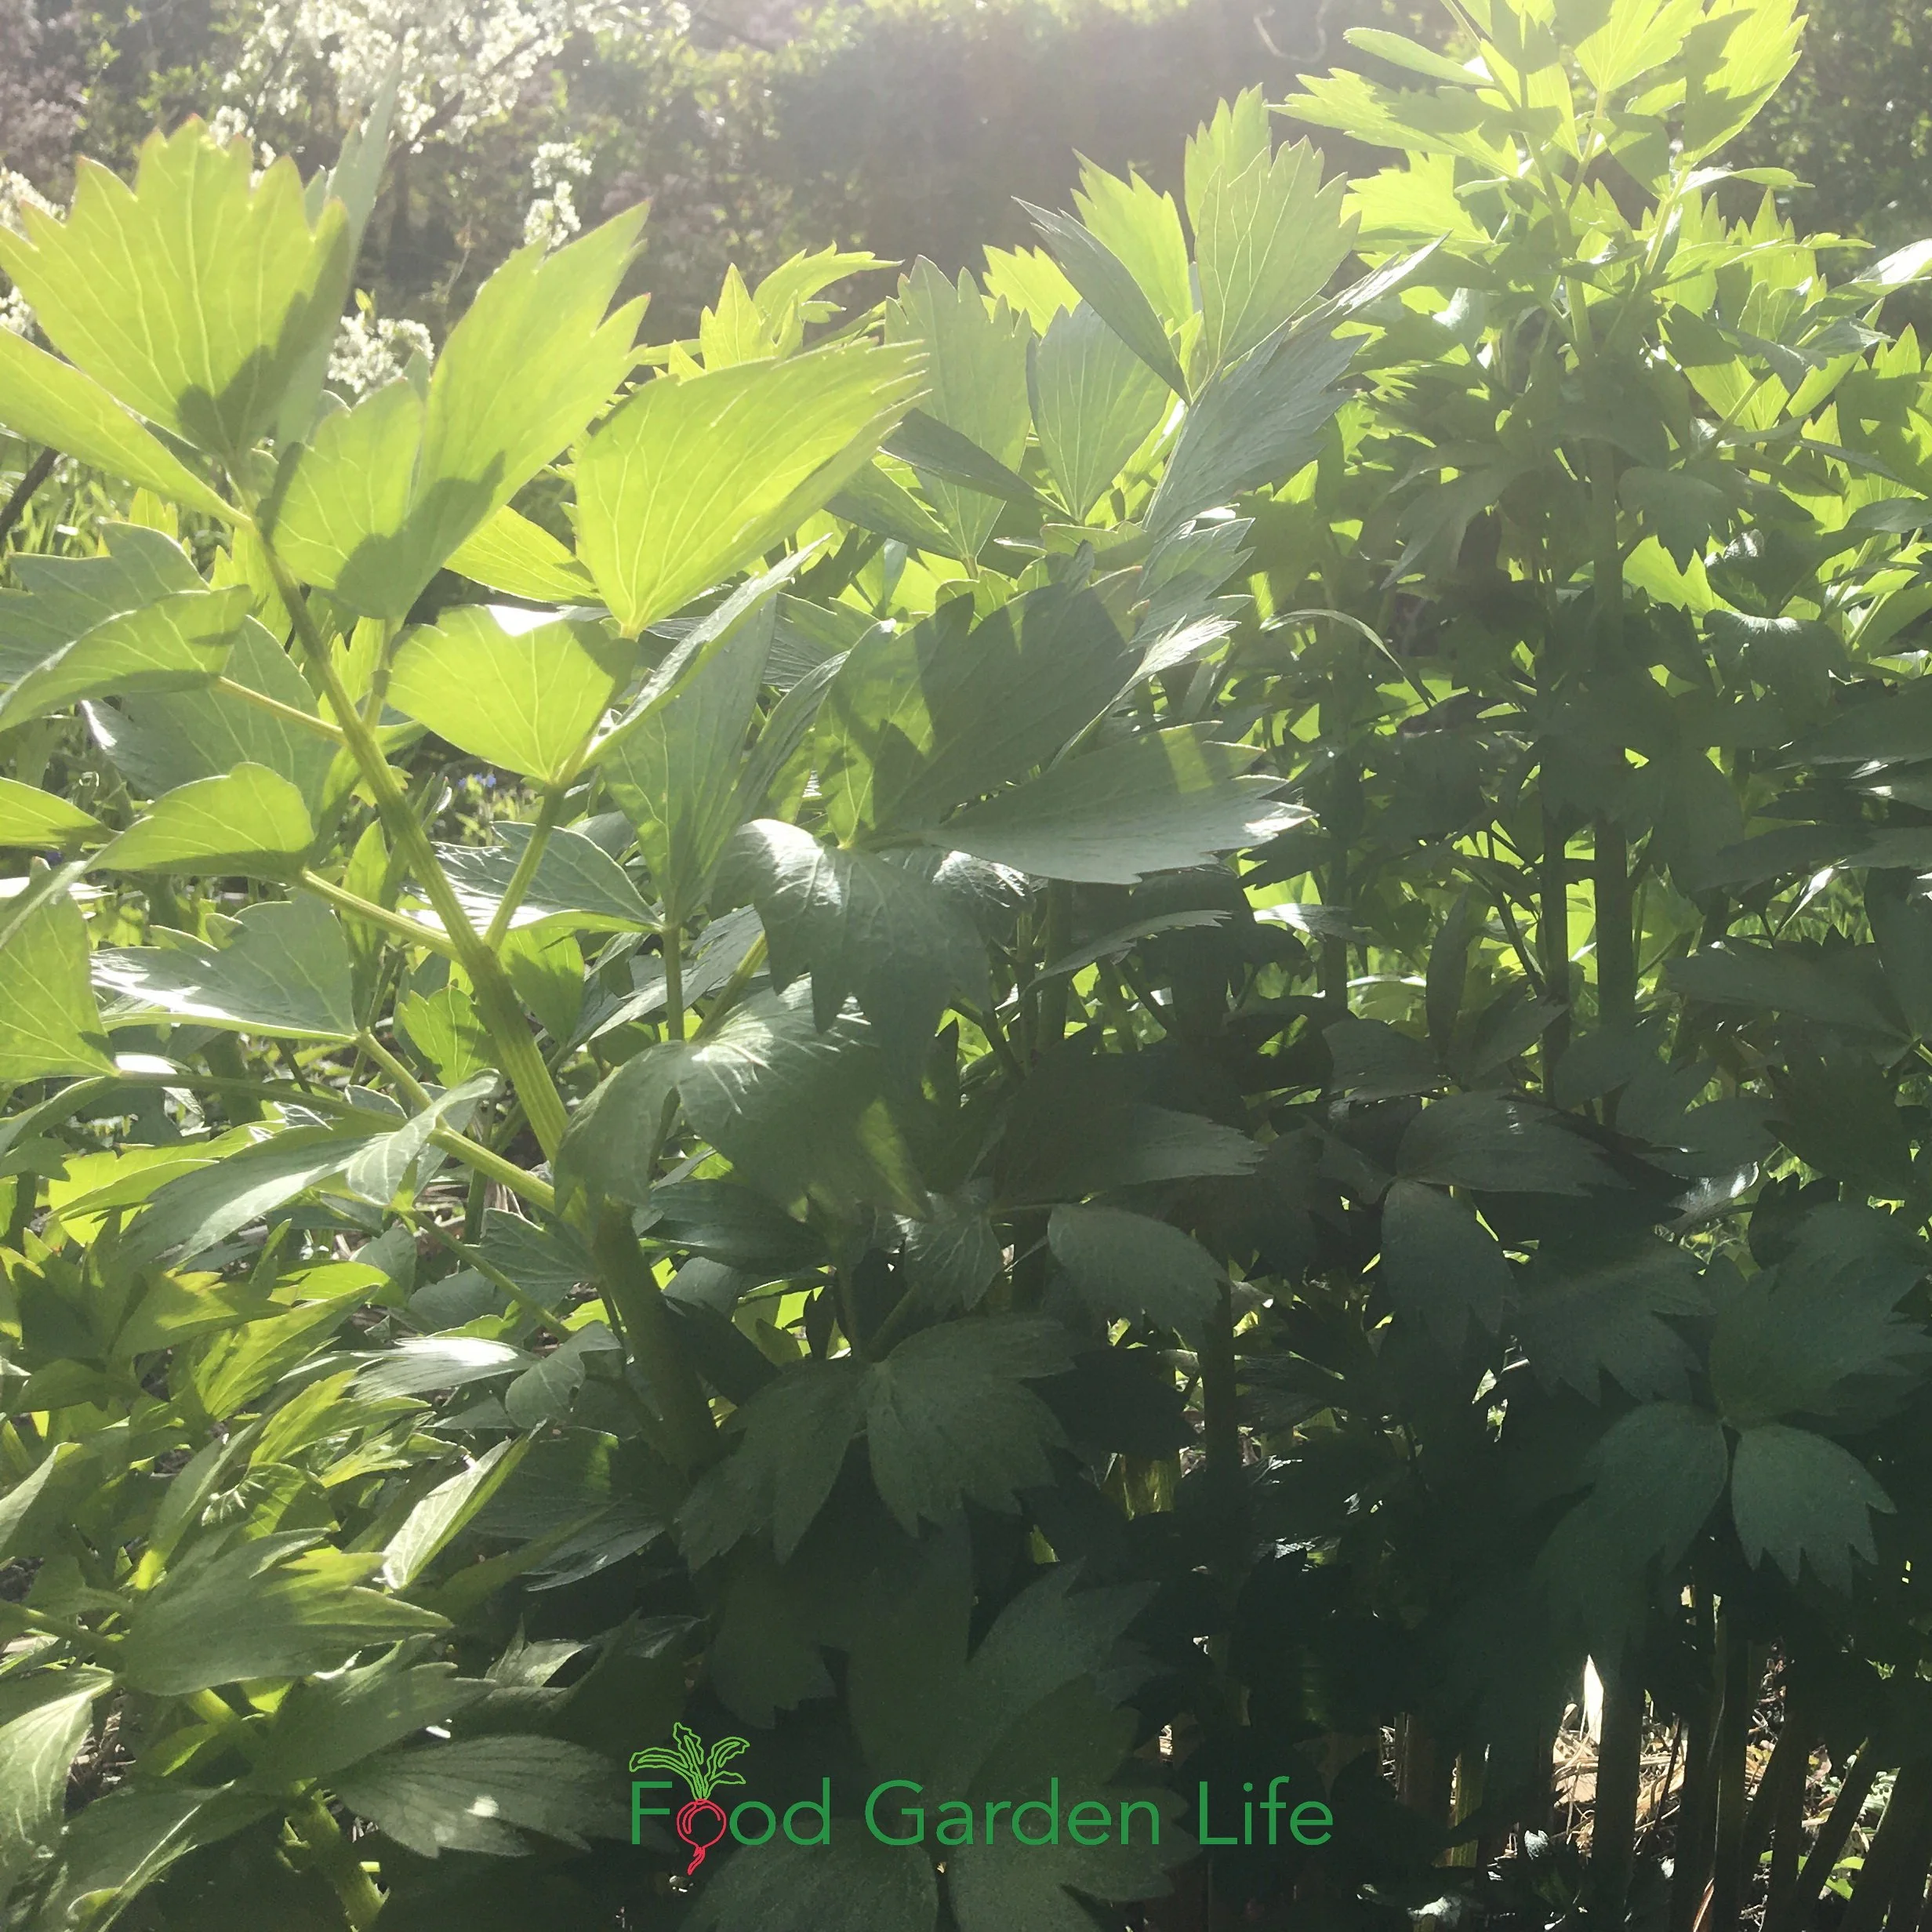
Lovage is a perennial herb that tolerates some shade.
There are many herbs that tolerate partial shade. Here are my favourites:
Chives
Cilantro
Dill
Lemon Balm
Lovage (this perennial herb lives in my semi-shaded perennial border)
Mint (see Full Shade, below)
Parsley
Fruit Crops for Partial Shade
When growing fruit in partial shade, take the same approach we do with veggies. Just adjust expectations accordingly.
Here are fruit crops that grow well in partial shade:
Choke cherry. Often found on the forest edge, where there's some shade. (Find out about 5 Types of Cherry Bushes for Edible Landscapes.)
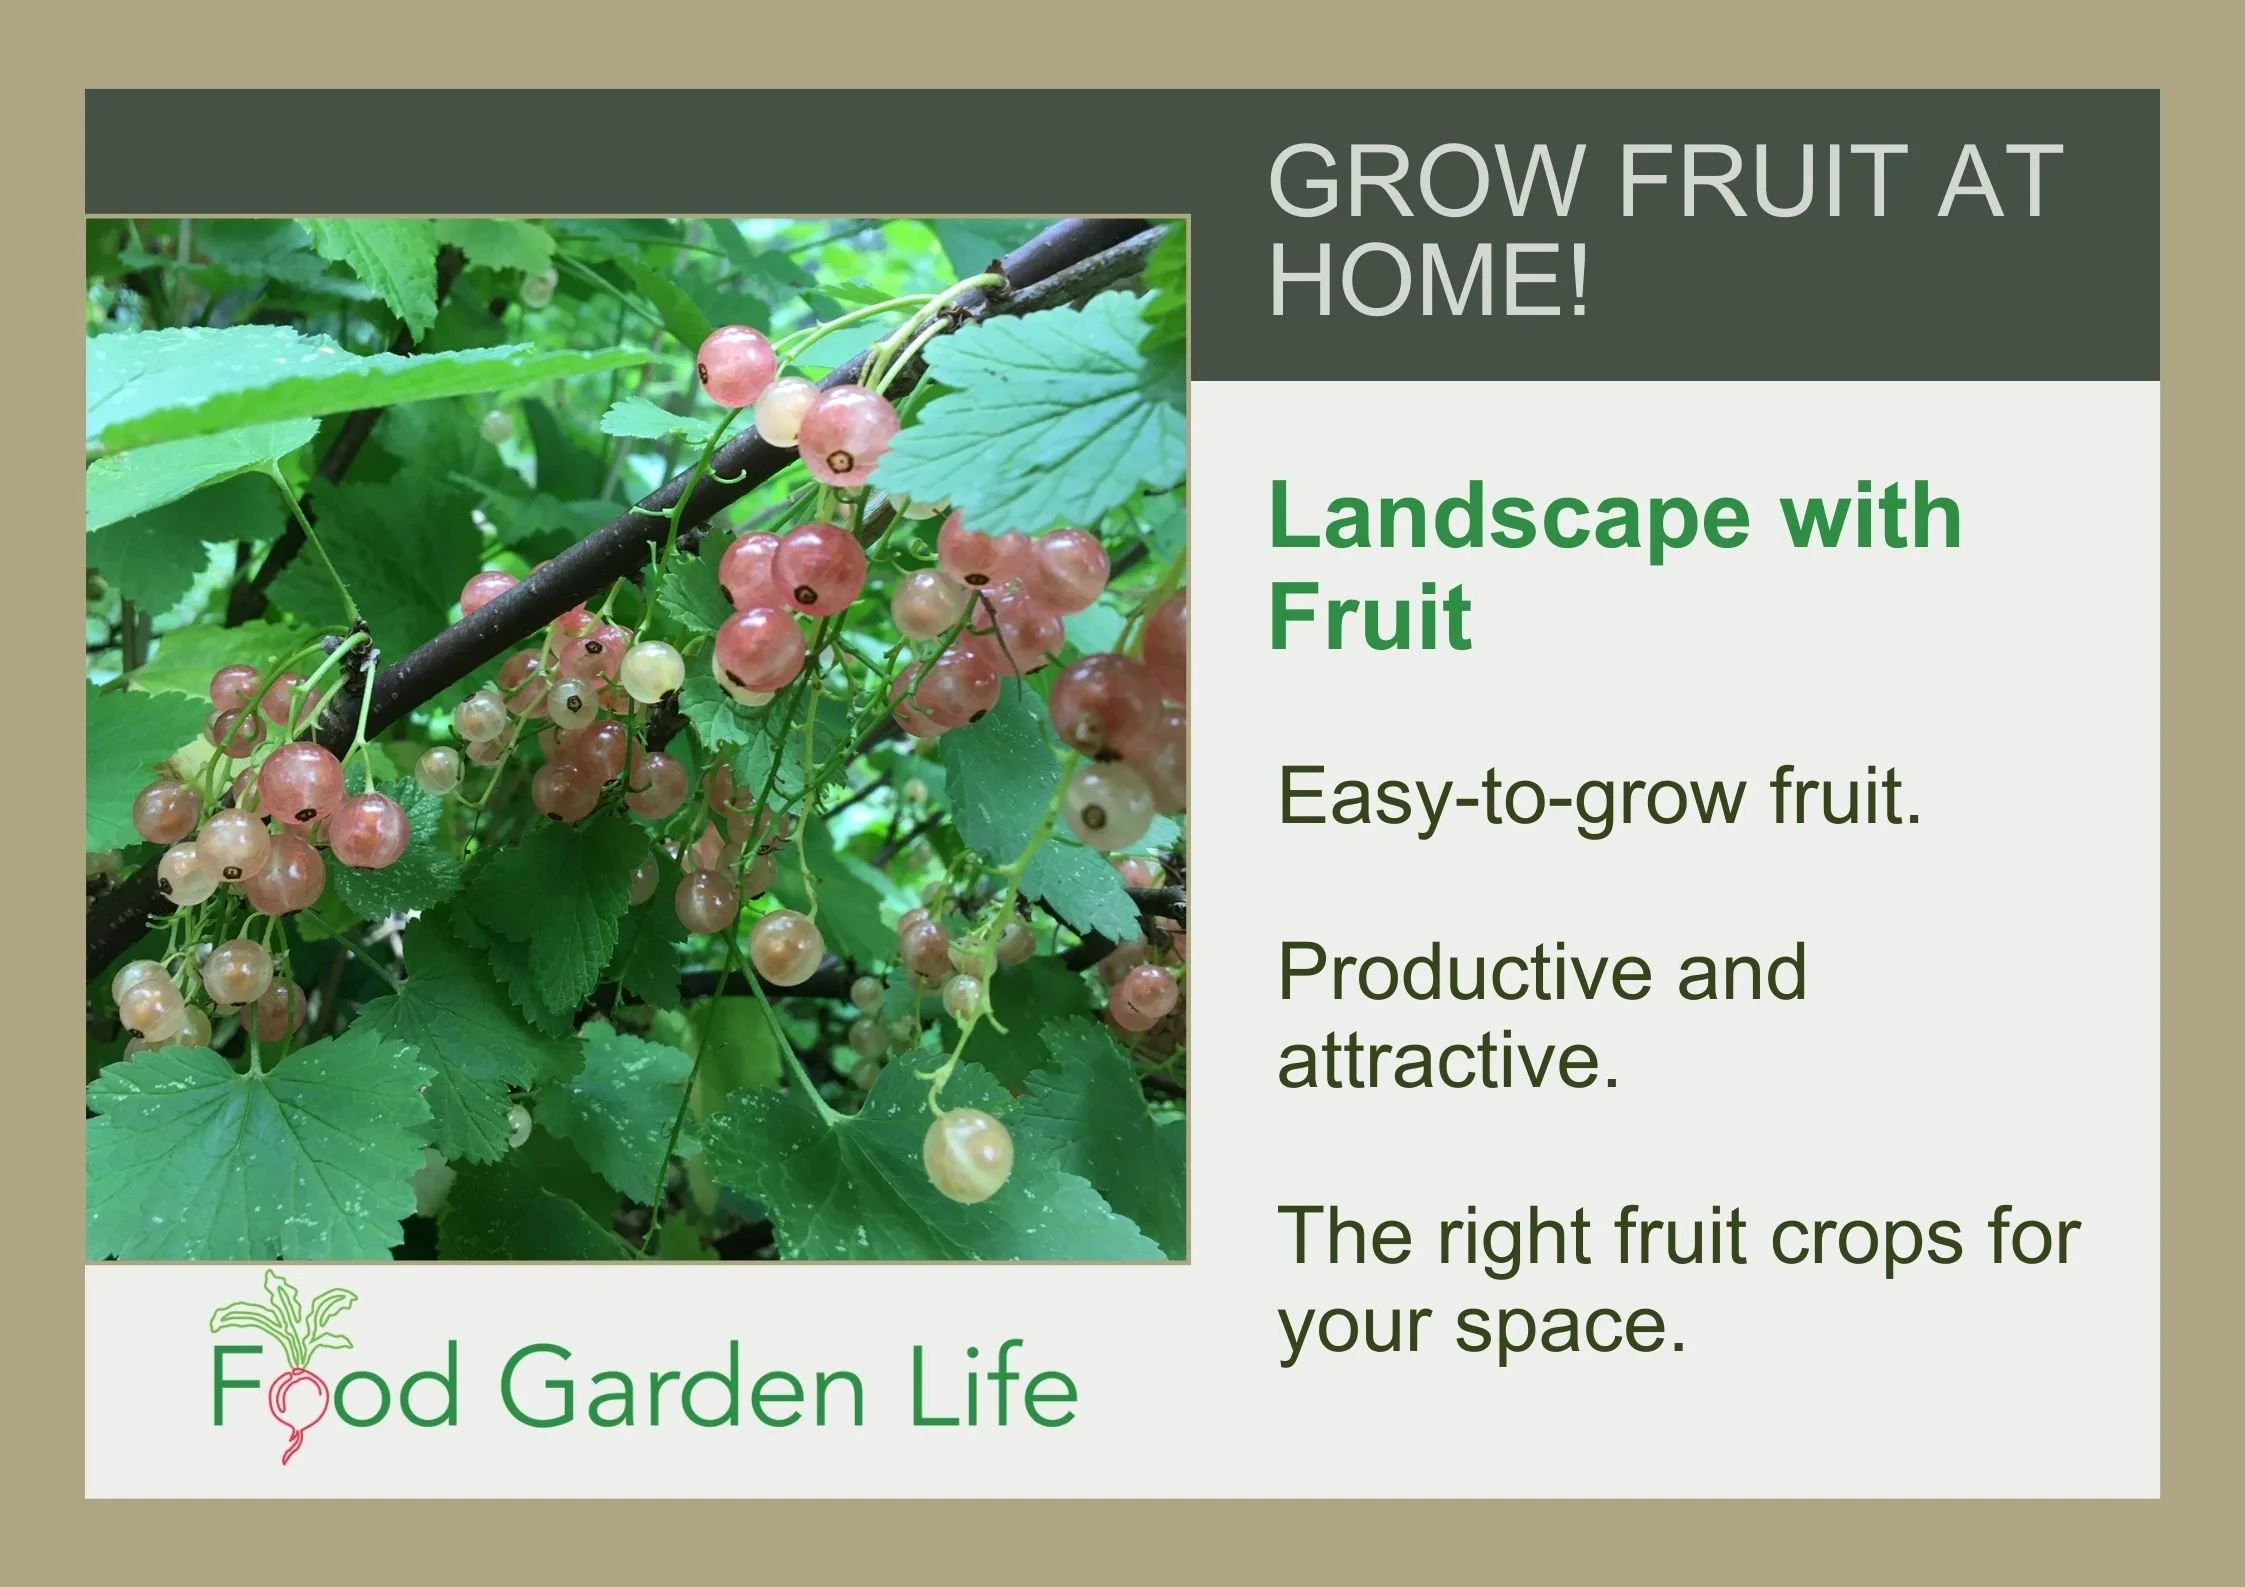
Currants. My favourite. Here’s an article about how to grow currants.
Elderberry. Often found on the forest edge, where there's some shade.
Gooseberry. They take the same low-light conditions as currants.
Hardy Kiwi Vine.
Pawpaw. While young pawpaw trees benefit from shade, best fruit production is in full sun. But they fruit well in partial shade. No surprise as that's where you often find them in the wild.
Serviceberry. An understorey tree often found on the forest edge, where there's some shade. My favourite member of the serviceberry clan is the Saskatoon bush. Find out more about the Saskatoon bush.

Landscape with Fruit
That’s easy to grow in a home garden!
What About Heavy Shade?
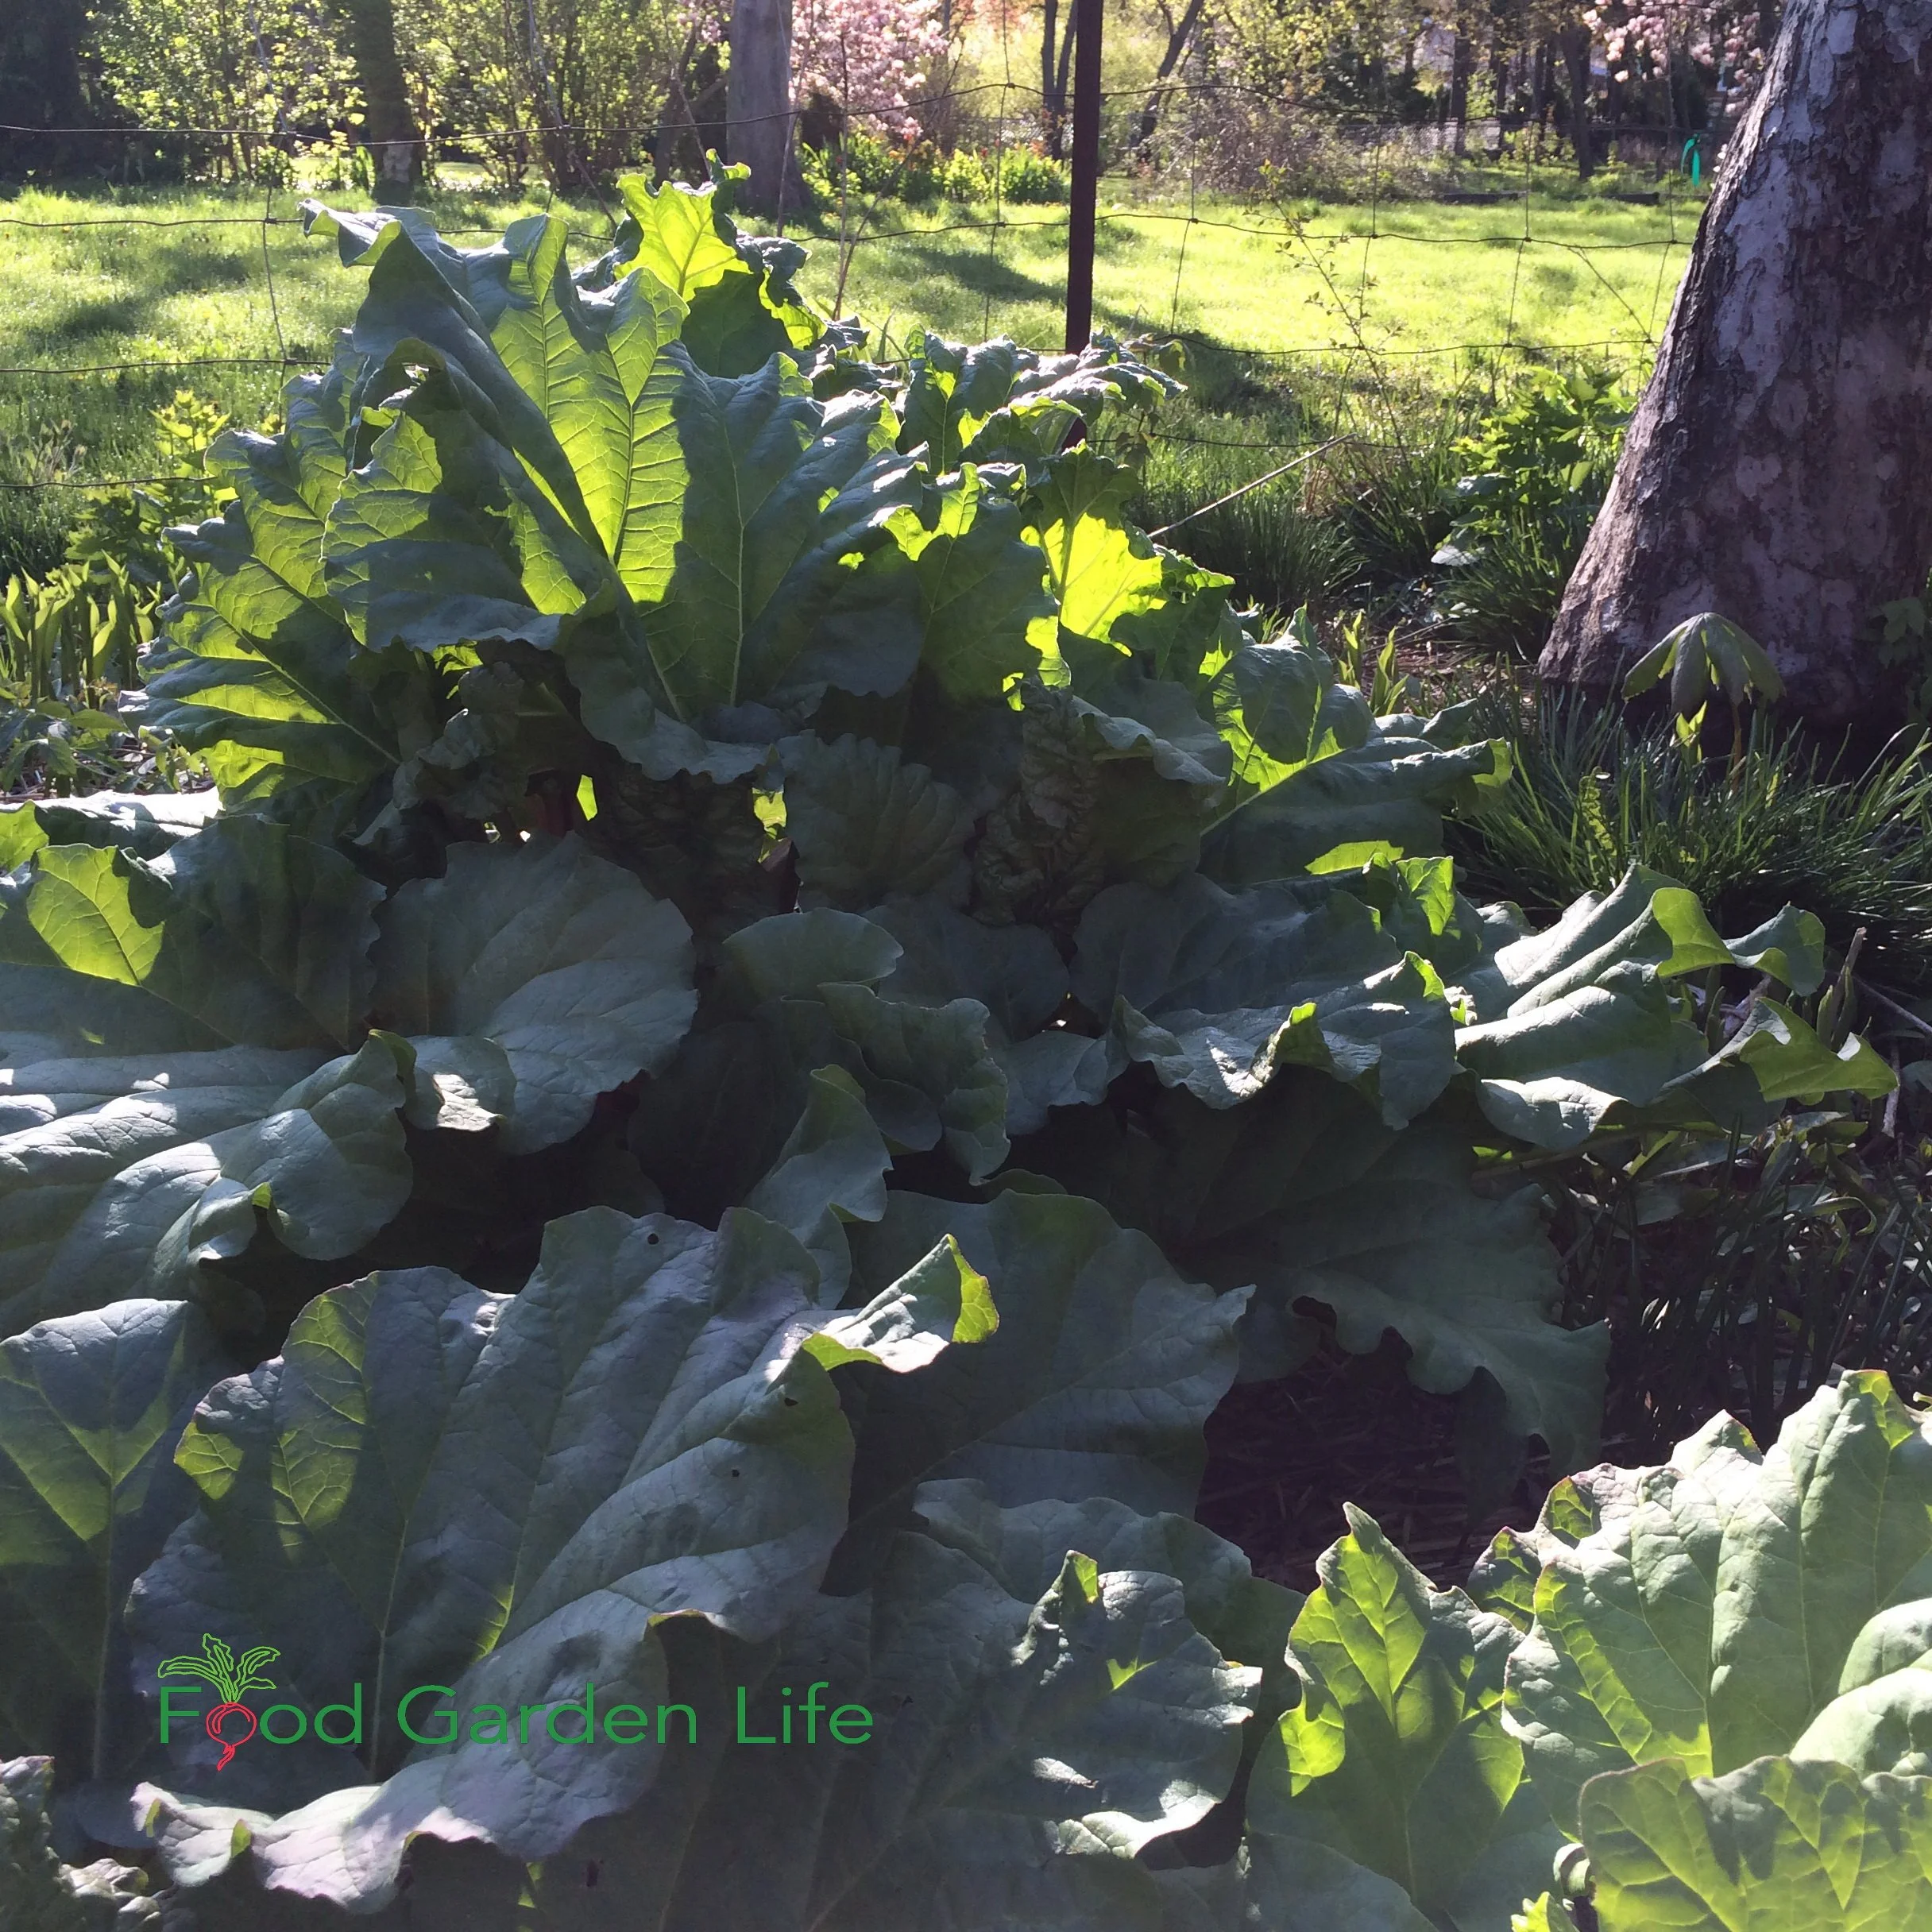
This rhubarb plant is in partial shade, but I’ve seed decent rhubarb patches even in heavy shade.
If you have a space without any direct sunlight, reflected sunlight, or dappled sunlight, your crop options are more limited. This is what people call “full” shade or “deep” shade.
Here are ideas for you:
Mint and shade: Mint is an invasive plant that I normally only grow in containers. But in full shade, mint can be your friend. This is the one situation where I plant mint in the ground.
Rhubarb can do very nicely in heavy shade. My friend Chris had a lovely rhubarb plant that graced the edge of his shady pond...it looked quite tropical with the big leaves! Find out how to force rhubarb indoors over the winter.
Currants and gooseberries are a good fit underneath bigger trees. My neighbour Mr. Browne had a currant bush growing in the full shade of an apple tree...and that bush faithfully fruited year after year, albeit not as much as it would have in a sunnier spot.
FAQ Shade Tolerant Crops

Pin this post!
What is the best shade tolerant vegetable?
Parsley. Hands down. Because it's delicious, tolerates a wide range of conditions—and it’s very ornamental. I use it as a flower-border edging plant on the north side of the house. The curly-leaf types add great texture, and last well into the fall in cooler temperatures—until there's a hard freeze.
You might be saying, "But it's a herb." I've heard people argue it's a herb, others say it's a vegetable. In the quantities I use in my salads, I'm using it as a veg.
Can vegetables get too much sun?
Yes. Too much sun and too much heat cause many of the leafy greens to bolt quickly. They do better in shady areas in the heat of summer.
What is the difference between partial sun and partial shade?
If you read different sources, you'll come up with various definition.
To me, it's semantics. It just means less than full sun. I guess it depends whether you're the type of person who sees the glass as half full or half empty!
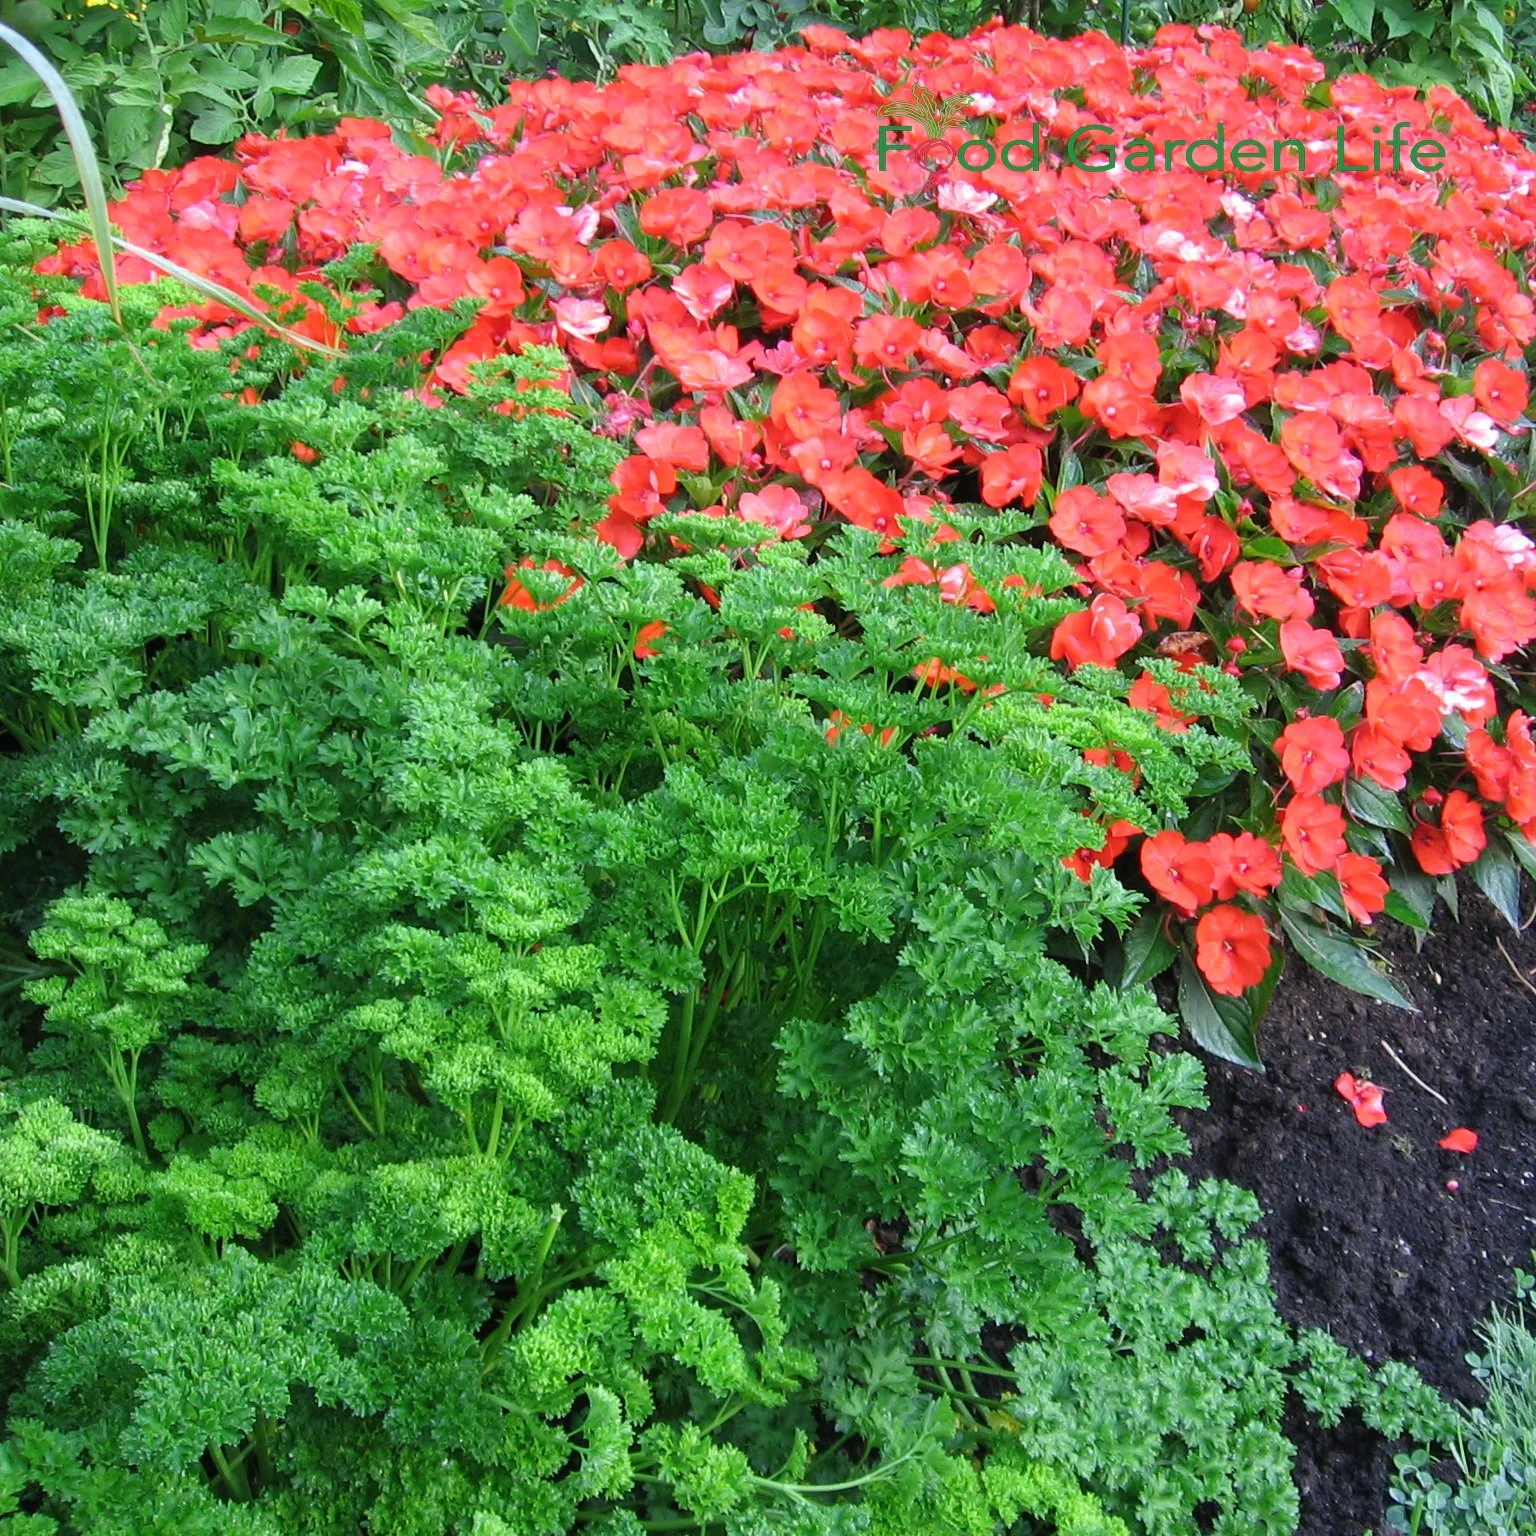
Parsley does very well in shady locations. And it’s a great plant for adding texture to a garden!
Find This Helpful?
Enjoy not being bombarded by annoying ads?
Appreciate the absence of junky affiliate links for products you don’t need?
It’s because we’re reader supported.
If we’ve helped in your food-gardening journey, we’re glad of support. You can high-five us below. Any amount welcome!
More Articles on Growing Crops
Articles about Growing Vegetables
Find out how to stake and support tomato plants.
Courses
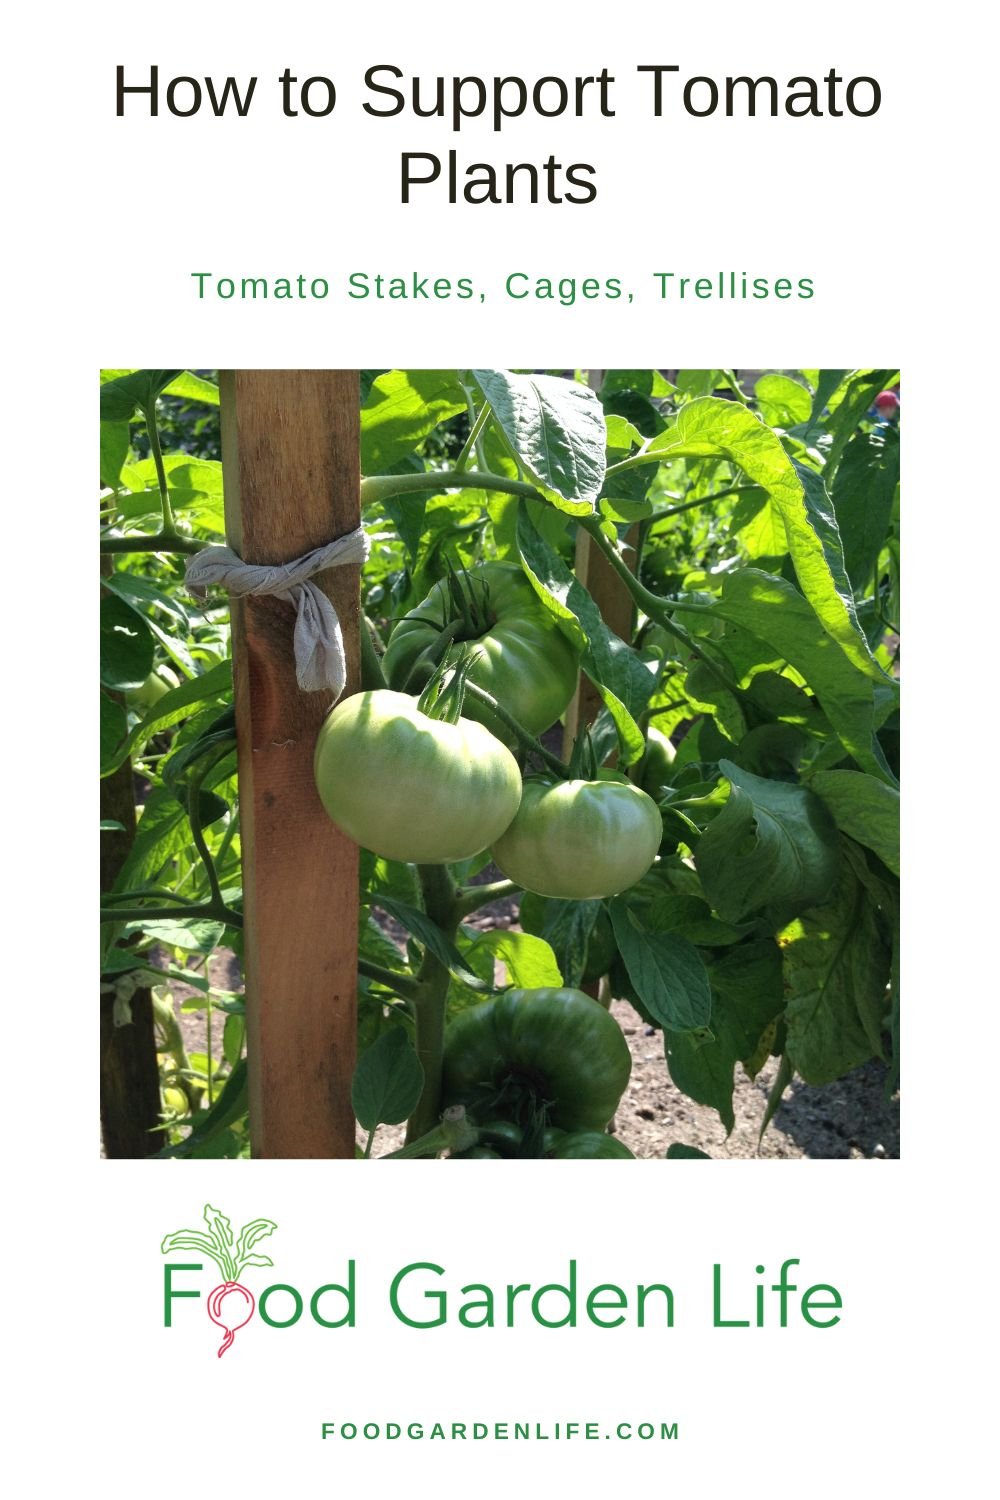
How to Support Tomato Plants: Tomato Stakes and More
Support those tomato plants! This guide tells you how to stake, trellis, train, and cage tomatoes so you can fit in more plants and get a great harvest.
By Steven Biggs
Tomato Stakes, Cages, Trellises
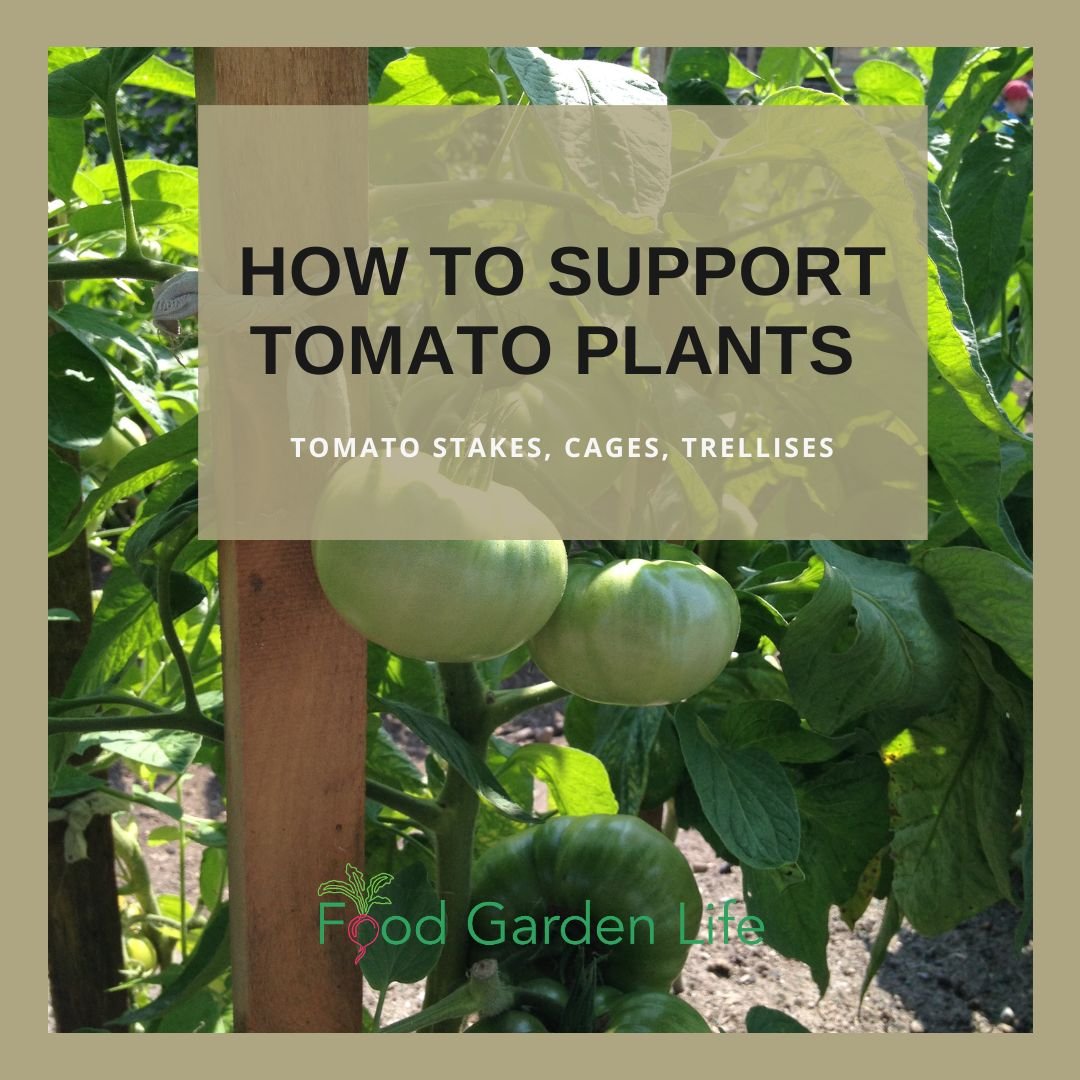
Tomato stakes,tomato cages, and more: Pick a method that suits your garden and your approach to gardening.
Joe uses tomato stakes.
I don't.
My neighbour Joe's backyard is all garden. Full-on backyard farm. He has row after row of tomatoes, neatly staked, pruned, and trained.
My garden is maxed out on tomatoes too. But my tomato patch looks entirely different from Joe's.
I have some tomatoes in cages. The tomato plants on my driveway (where I can't hammer in a stake) are supported by a trio of stakes in a teepee formation. In another area, I grow indeterminate tomatoes up twine.
Joe and I both grow in ways that suit our garden layout and approach to gardening.
This guide has information about tomato stakes, tomato cages, and other ways to provide support for your tomato plants.
To Stake or not to Stake

When tomatoes are staked or supported, the fruit isn't touching the soil.
When to Provide Support
The easiest way to grow a tomato plant is to let it sprawl on the ground. This is often how processing tomatoes are grown on a field scale.
There are reasons for home gardeners to support tomato plants:
When tomato plants are staked or supported, the fruit isn't touching the soil, so it's cleaner, and there's less chance of rot and insect damage
Upright plants take up less space…so if you stake tomatoes, you can fit more plants into your garden
An upright tomato plant has more air circulation around the leaves—and that reduces the chance of disease
In my garden we have a high-density approach to growing tomatoes because my daughter grows over 100 varieties in our urban yard. We grow them much more densely than many gardeners, but it works well because we support and prune the plants.
Choose a Type of Support to Suit the Plant Type
Decide if You Need to Provide Support
Whether or not you need to support the plants depends on the type of plant you're growing.
“Dwarf” tomato plants are quite compact and usually don't need any pruning or support. Great for container gardeners!
“Bush” tomatoes (also called determinate tomatoes) get to a certain height and then don't get any taller. The harvest window is shorter. Great if you want a concentrated harvest for sauce-making or processing. Stake or cage determinate tomato plants to increase planting density and to keep tomatoes off the ground.
Indeterminate tomatoes keep getting taller and taller all summer long. Great if you want an ongoing harvest. Prune and support indeterminate tomatoes to optimize production—and know that they can get very tall by the end of the summer.
Tomato Staking and Support Ideas
Tomato Stakes or Cages?
There are lots of ways you can stake and support tomato plants. Pick one that suits your garden and the amount of time you want to spend tending your tomato crop.
Here are ideas for supporting your tomato plants:

Staked tomato plants with wooden tomato stakes.
Tomato Stakes
Tie your tomato plant to a stake. A lot of gardeners keep one main stem, pinching off side shoots (called suckers). See ideas for support stakes below.
We tie the plants to the tomato stakes with a soft twine. Some gardeners prefer to use plant clips. My dad used strips of plastic garbage bags because they were soft and stretched.
Tomato Cages
Grow the tomato inside a supportive cage-like frame. Plants in cages can be wider—so having more than one main stem is common. See below for a tip on making your own heavy duty tomato cages.
Grow Tomato Vines up Twine
Visit a commercial tomato greenhouse and you're likely to see tomato vines growing up a piece of twine that is suspended from above.
We use a variation of this twine method in our garden, where we make tall A-frames with bamboo, and run a horizontal pole between them—six feet up in the air. Then we dangle pieces of twine from the horizontal pole, and train the stems up the twine. This way we can space our tomatoes very closely together so that we can fit more tomato varieties into the garden.
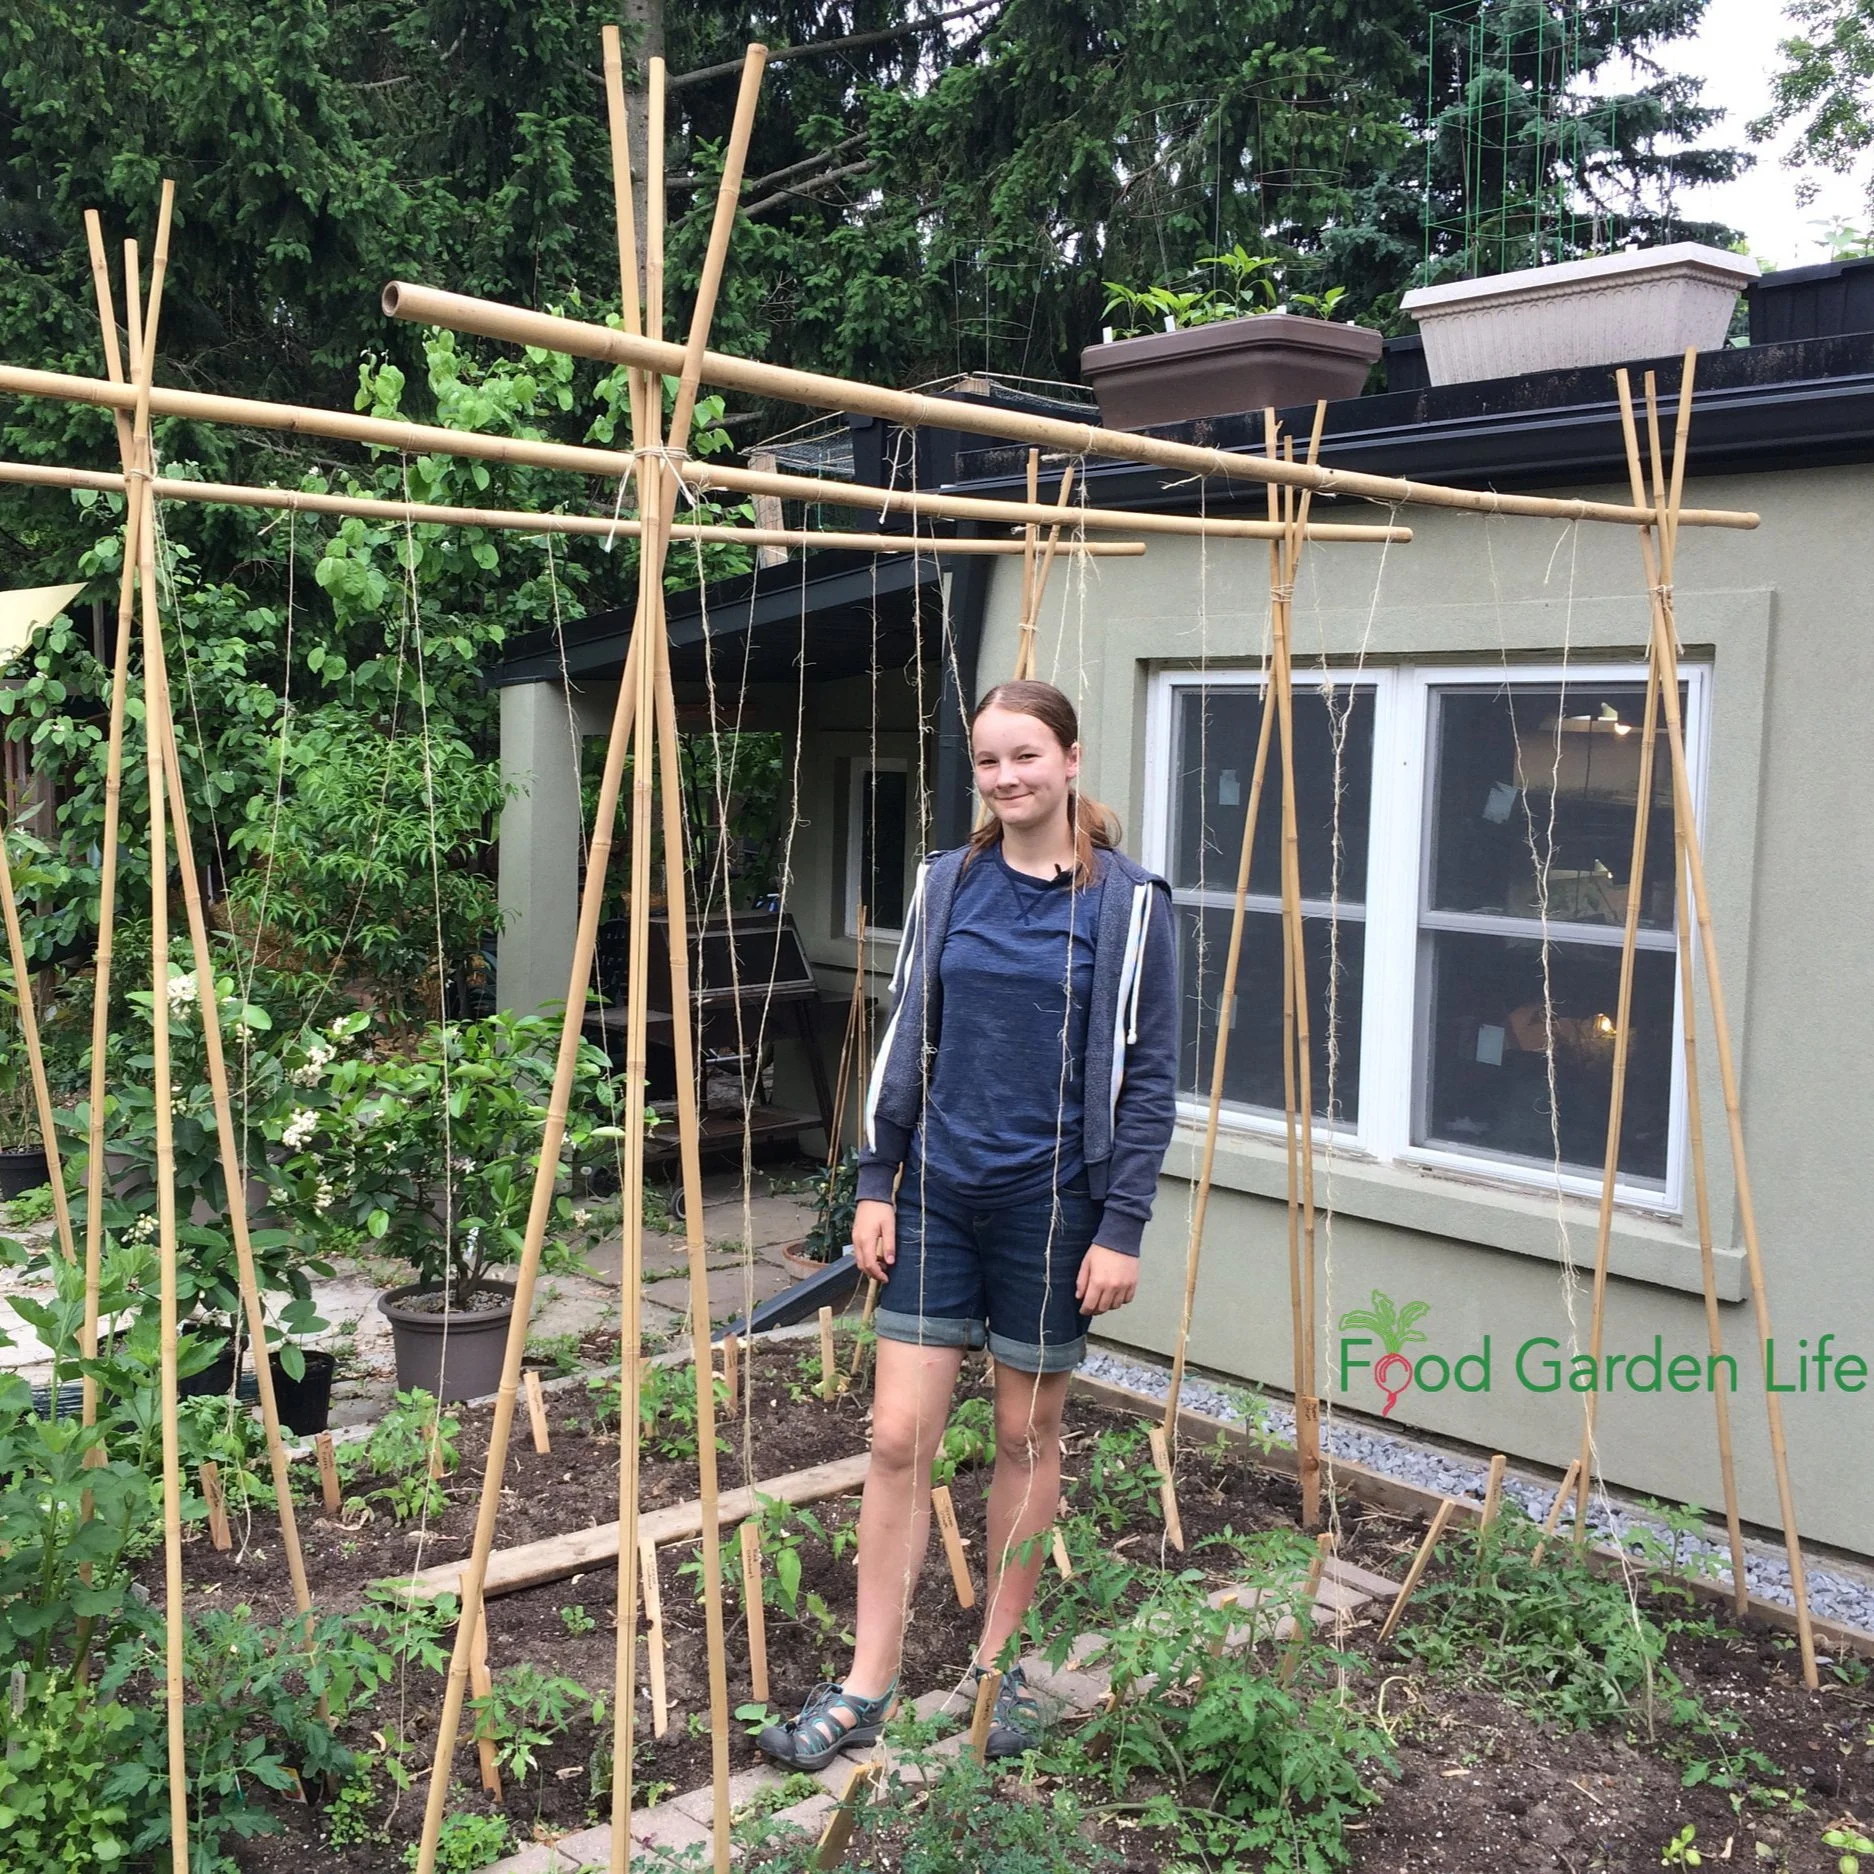
We make tall A-frames with bamboo, and run a horizontal pole between them.
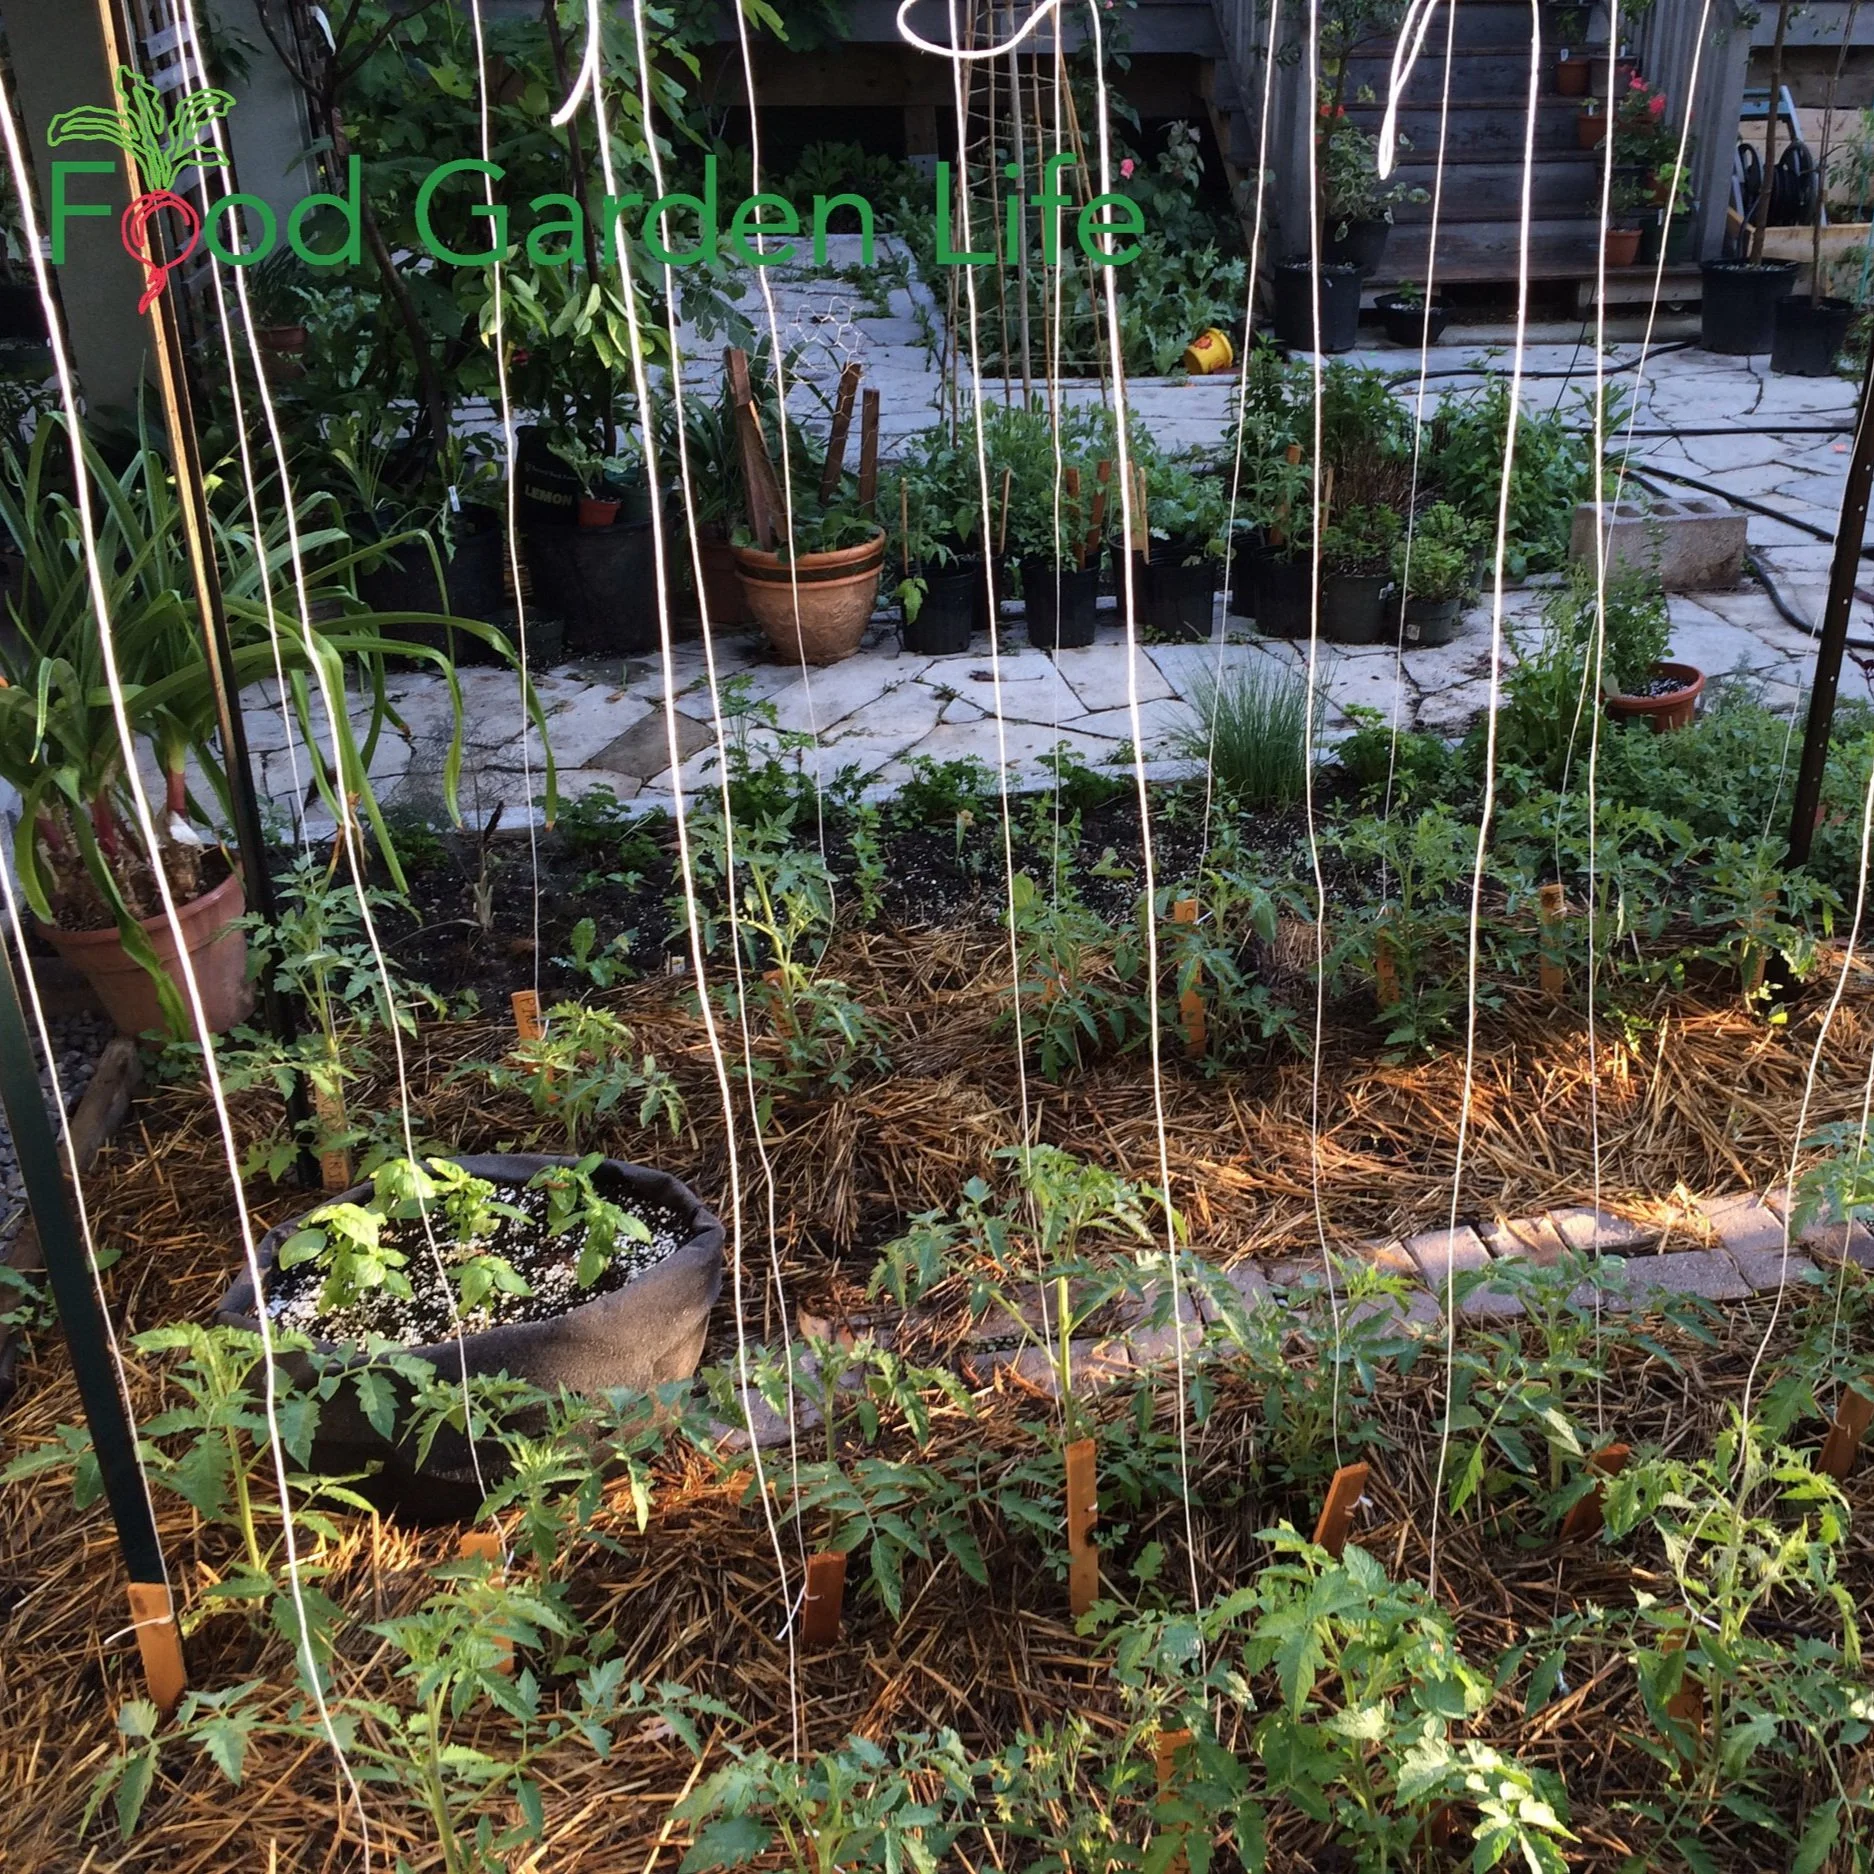
Then we dangle pieces of twine from the horizontal pole, and train our tomato plants up the twine.
Florida Weave

The “Florida Weave,” where twine supported by two end stakes is woven around the tomato plants for support.
In this method of supporting tomato plants, we weave the tomato stems between horizontal rows of twine. Start by putting stakes at both ends of your tomato row. As plants get taller, keep adding rows of twine, and weave the stems between them.
Grow a Tomato Arch
If you have an archway in your garden, use it for tomato plants.
Indeterminate tomato varieties get taller, and taller, and taller. As they reach the top of the arch, you can train them down the other side.
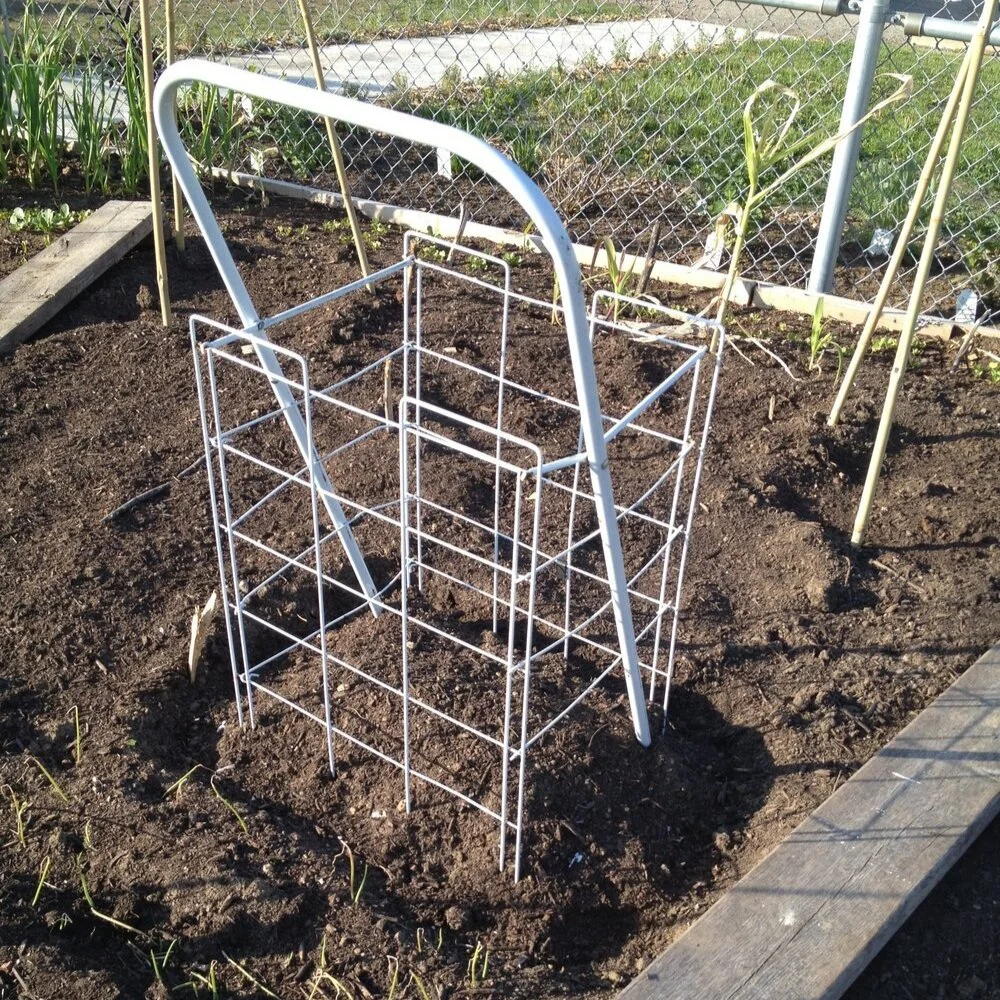
Make Your Own Tomato Cages

Make a tomato arch with cattle panel wire.
A lot of the so-called tomato cages sold at garden centres are just too small to be useful. And if you find larger cages, they can cost you an arm and a leg.
We make our own tomato cages from the sheets of wire mesh used to reinforce concrete.
Cut the 4' x 8' sheet into two 4' x 4' sections (bolt cutters work well)
Then, bend the mesh into a cage
The bending takes effort as this is a strong material (I find that it works best if I place a board over the line I want to bend along, and then stand on the board as I bend the wire upwards)
These homemade tomato cages are long-lasting. Our oldest ones are over 15 years old and going strong.
If you're creative, you might come up with other materials to make your own tomato cages. I've seen old bundle buggies used!
Be creative! A bundle buggy as a tomato cage.
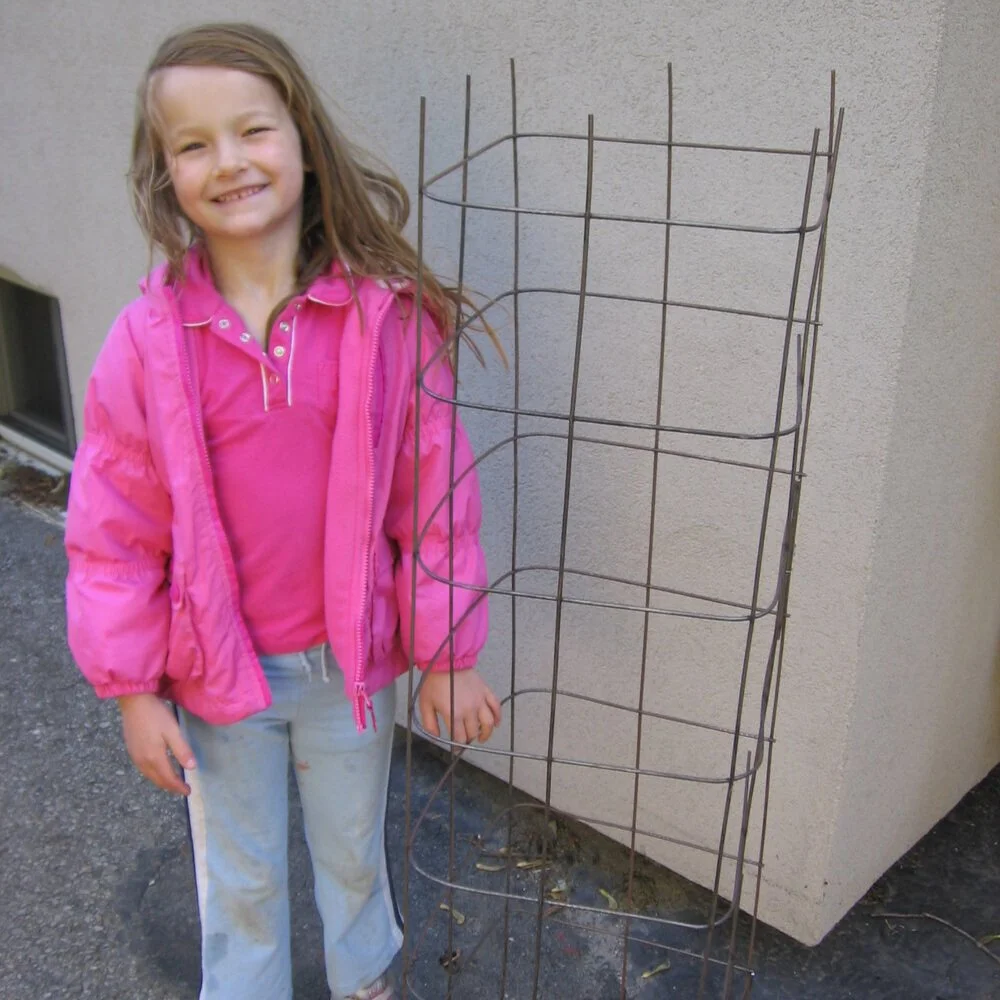
My daughter Emma and I made our own tomato cages by cutting and bending wire mesh.
Ideas for Tomato Stakes

Bamboo for tomato stakes. Make sure it's thick enough as thinner pieces might be too flimsy.
There are lots of other things you can use as tomato stakes. Here are ideas:
Iron rebar
Iron t-bars
Lumber (1x2 and 2x2 stakes are common, and if you buy pre-made 2x2 stakes they often come with a pointed tip)
Bamboo
Metal pipe
Bamboo and wood rot over time. But they widely available and relatively inexpensive.
My Favourite Tomato Stakes
I'm not a fan of the flimsy plastic-coated tomato stakes sold at garden centres. They're short-lived and look pretty ugly as the plastic ages and cracks.
My favourite tomato stake is iron rebar. Here's why:
It's long lasting
It's thin, making it easier to push into the ground by hand (iron t-bars last a long time too…but need hammering into the ground)
As it oxidizes, it becomes brown and blends into the surroundings
Create Your Own Unique Edible Landscape
That fits for your yard, and your style!
Best Twine to Use
If you opt to grow tomatoes up twine, keep in mind that by the end of the season, a tomato-laden plant weighs a lot. We've used natural-fibre twines such as just and sisal some years—but they aren't always up to the task for the whole season.
If you can find it, get a tomato twine. Such a thing exists; it's what's used in commercial tomato greenhouse operations.
How to Stake a Tomato Plant in a Straw-Bale Garden
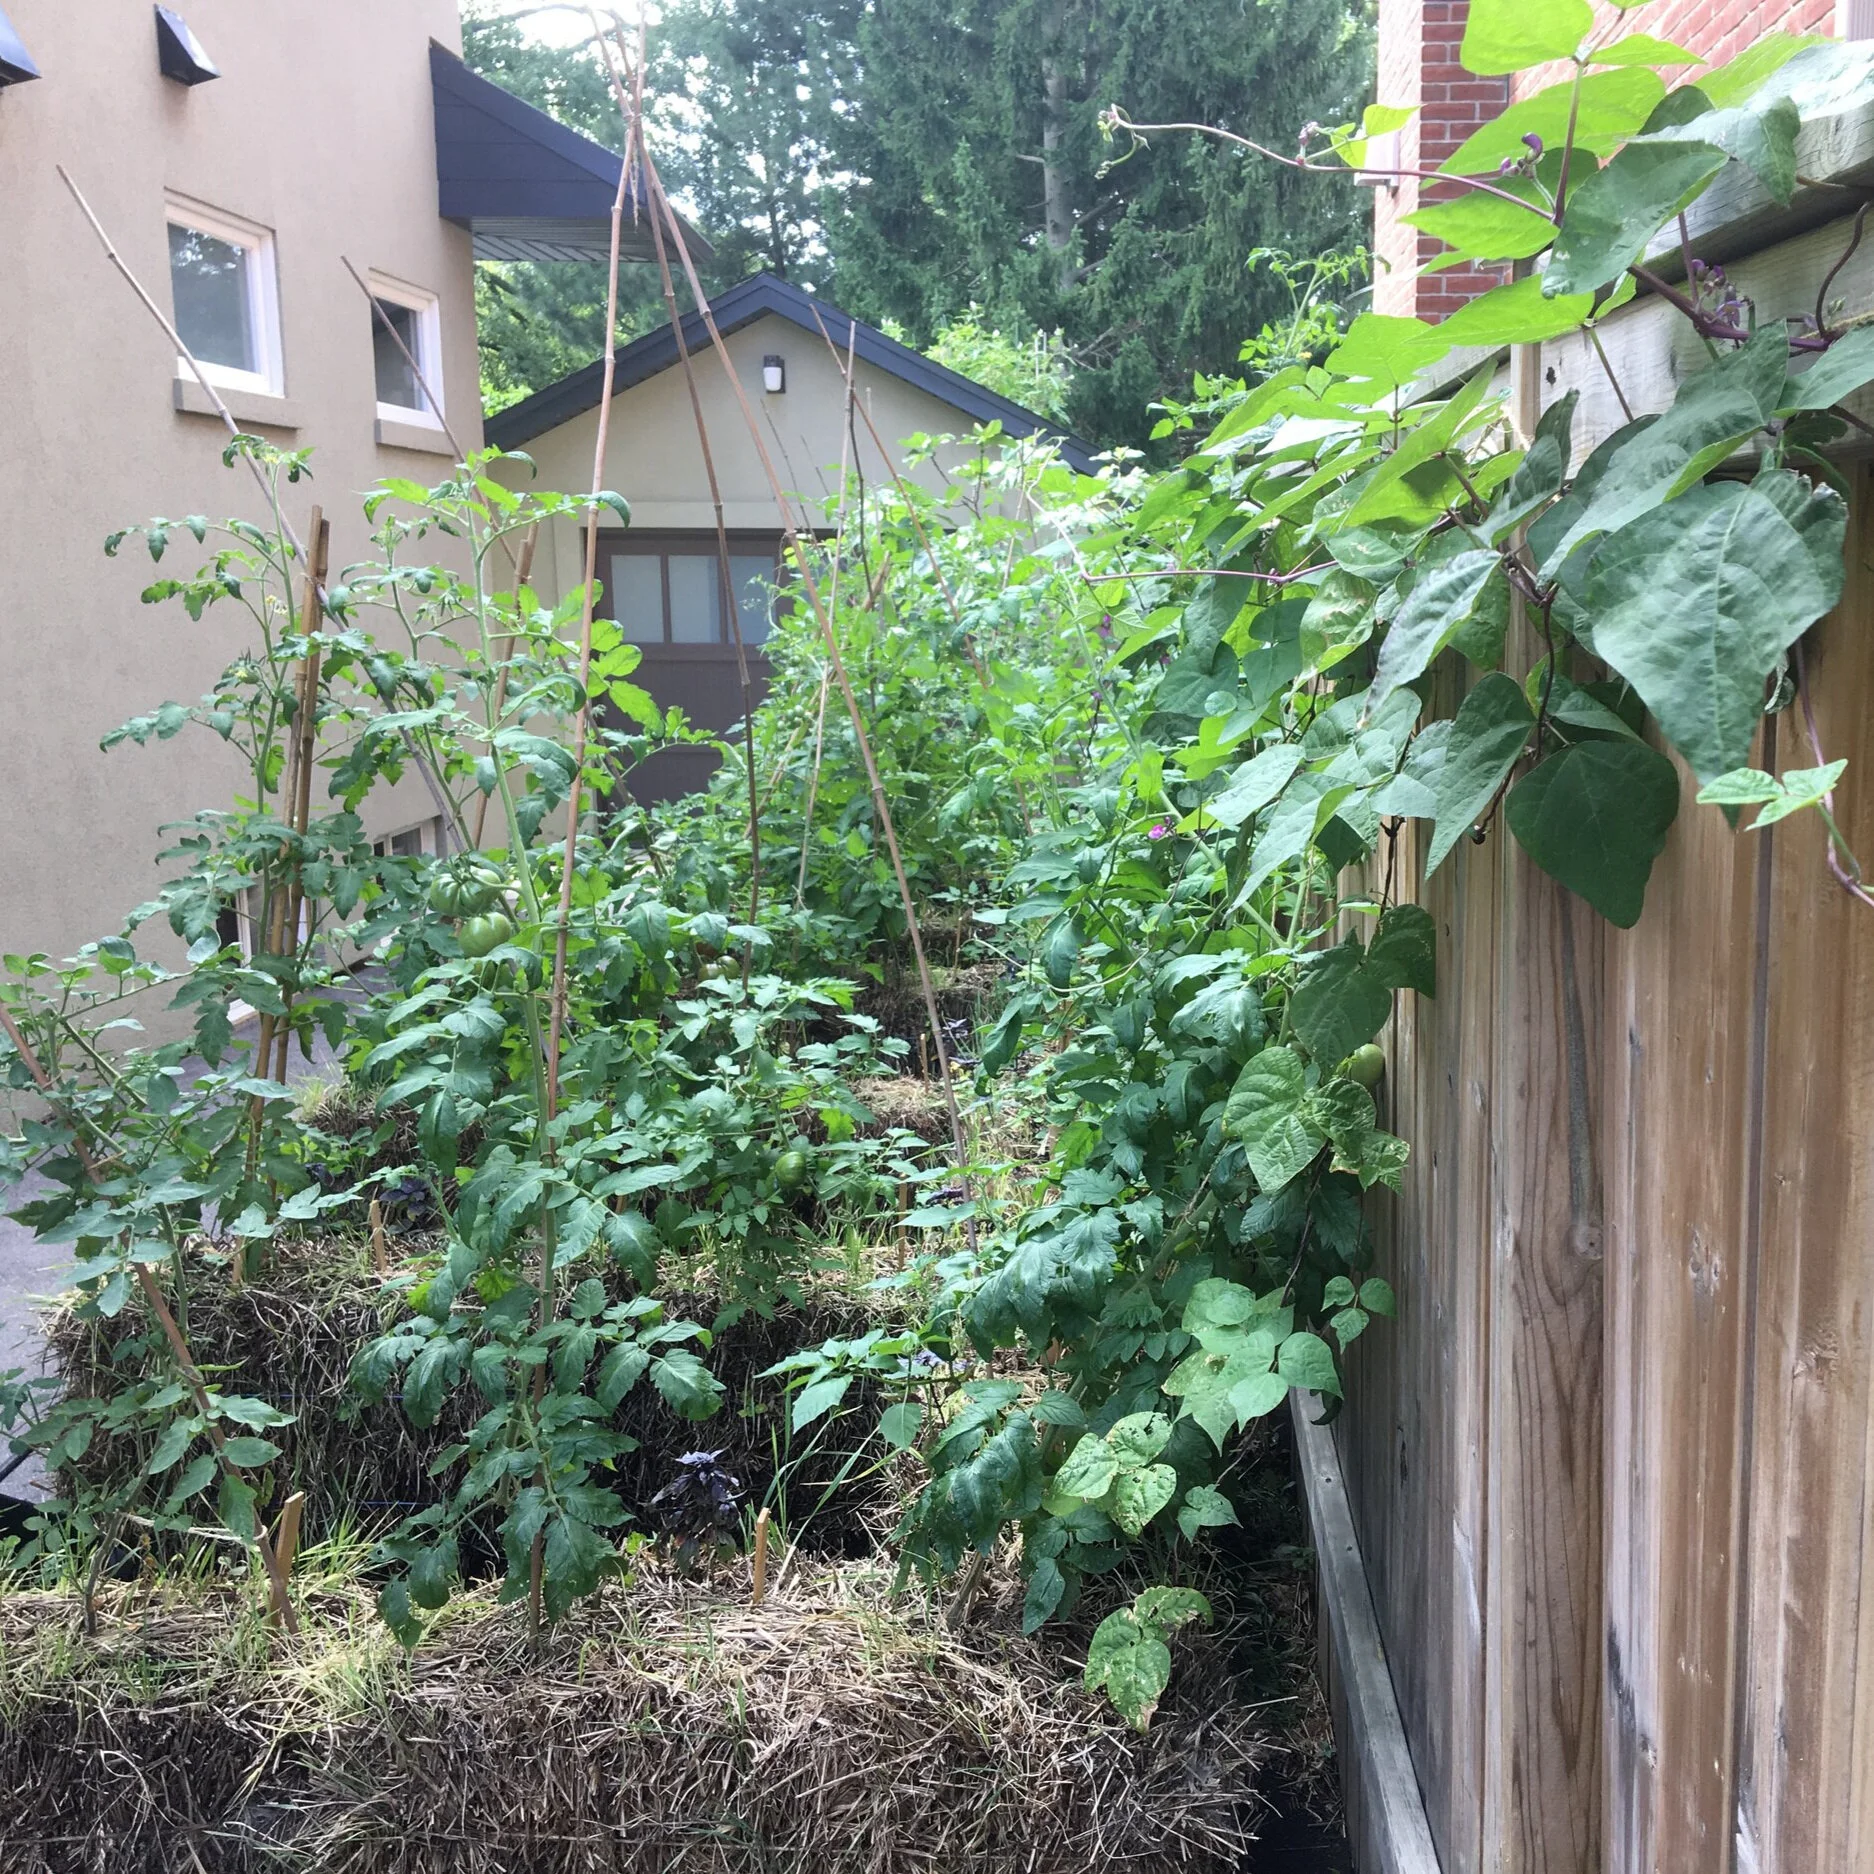
The tomatoes in this driveway straw-bale garden are supported with bamboo tripods.
If the concept of straw-bale gardening is new to you, read this article.
Straw bales break down as the summer progresses. That's what we want. But the result is that what seem like a firmly anchored support stakes in the spring will move (unless you drive the stake deep enough that it goes right through the bale and into the underlying soil.)
In our driveway straw-bale garden, we make tripods out of lumber or bamboo, tied together at the top. If the base is spaced out and balanced, they support the plants all summer.
How to Support a Tomato Plant in a Container
Determinate plants in containers need some sort of support, such as the tomato cage shown here.
If you're growing dwarf tomato plants, they likely won't need support.
But if you're growing determinate plants, you'll probably want to support them. I find that cages work well.
Note: When growing in containers, the shorter the better. That's because if the plants are too tall, there's a chance of the container tipping over in the wind.
Tomato Support FAQ
How often should I prune and train my tomato plants?
Ideally you don't want to let suckers get too big before pruning them out…it's a waste of energy that would be better spent growing tomatoes! In the summer when they're actively growing, check them once a week. (But don't sweat it if you miss a week.)
Pin this post about tomato stakes!
What should I do when the tomato plants gets taller than the tomato stakes?
Find a taller tomato stakes, or bend over the top of the plant and allow some stems to grow from down below.
Should I leave one stem or more than one stem?
It's up to you. But here's what I do: For tomatoes on twine, I leave only one stem. In a cage, I allow 3 or 4 to grow because the plant has more space.
What should I use to tie my plants to the tomato stakes?
I use a natural-fibre twine such as sisal or jute because at the end of the season I can compost it or let it fall to the soil where it decomposes.
Here are more ideas for tying plants to stakes:
Dad used to cut up black garbage bags into strips because it made a soft tie that didn't damage the tomato stem
My neighbour Sally used strips of old panty hose as tomato ties
You can buy purpose-made ties…but don't waste your money
Will the tomato cage tip over when the plant gets big?
Can do. I drive one stake into the ground and secure a corner of the cage to it. That prevents any tipping as the plants get bigger.
Find This Helpful?
Enjoy not being bombarded by annoying ads?
Appreciate the absence of junky affiliate links for products you don’t need?
It’s because we’re reader supported.
If we’ve helped in your food-gardening journey, we’re glad of support. You can high-five us below. Any amount welcome!
More on Tomatoes
Check Out These Tomato Guides
Hear Experts Share Tomato Tips
Course: Tomato Overload Masterclass
Want to up your game growing tomatoes?
This self-paced course helps you choose great varieties, grow great seedlings, give plants the care they need, and enjoy an abundant harvest.

More on Edible Gardening
7 Vegetable Garden Layout Ideas To Grow More Food In Less Space
Course: Edible Landscaping
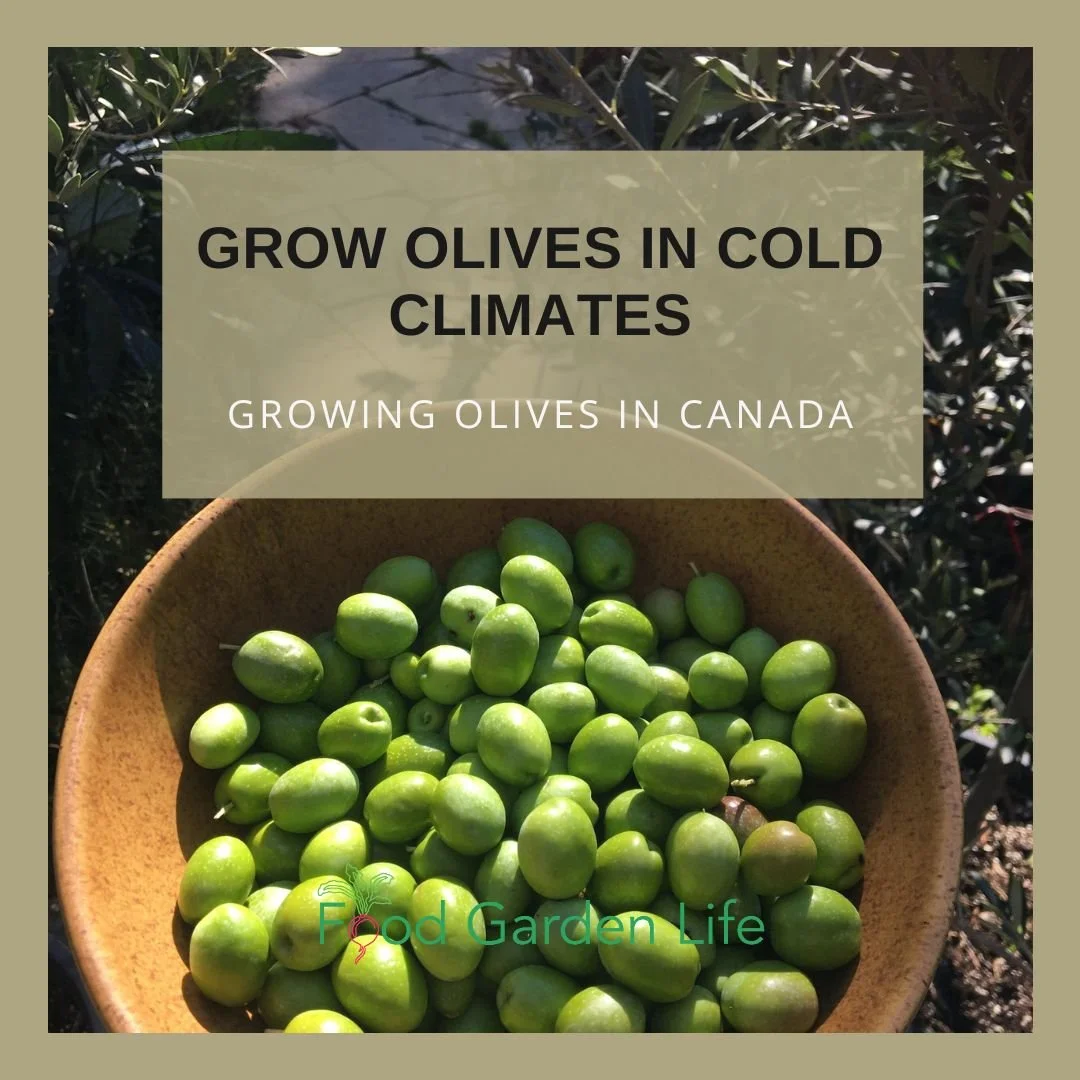
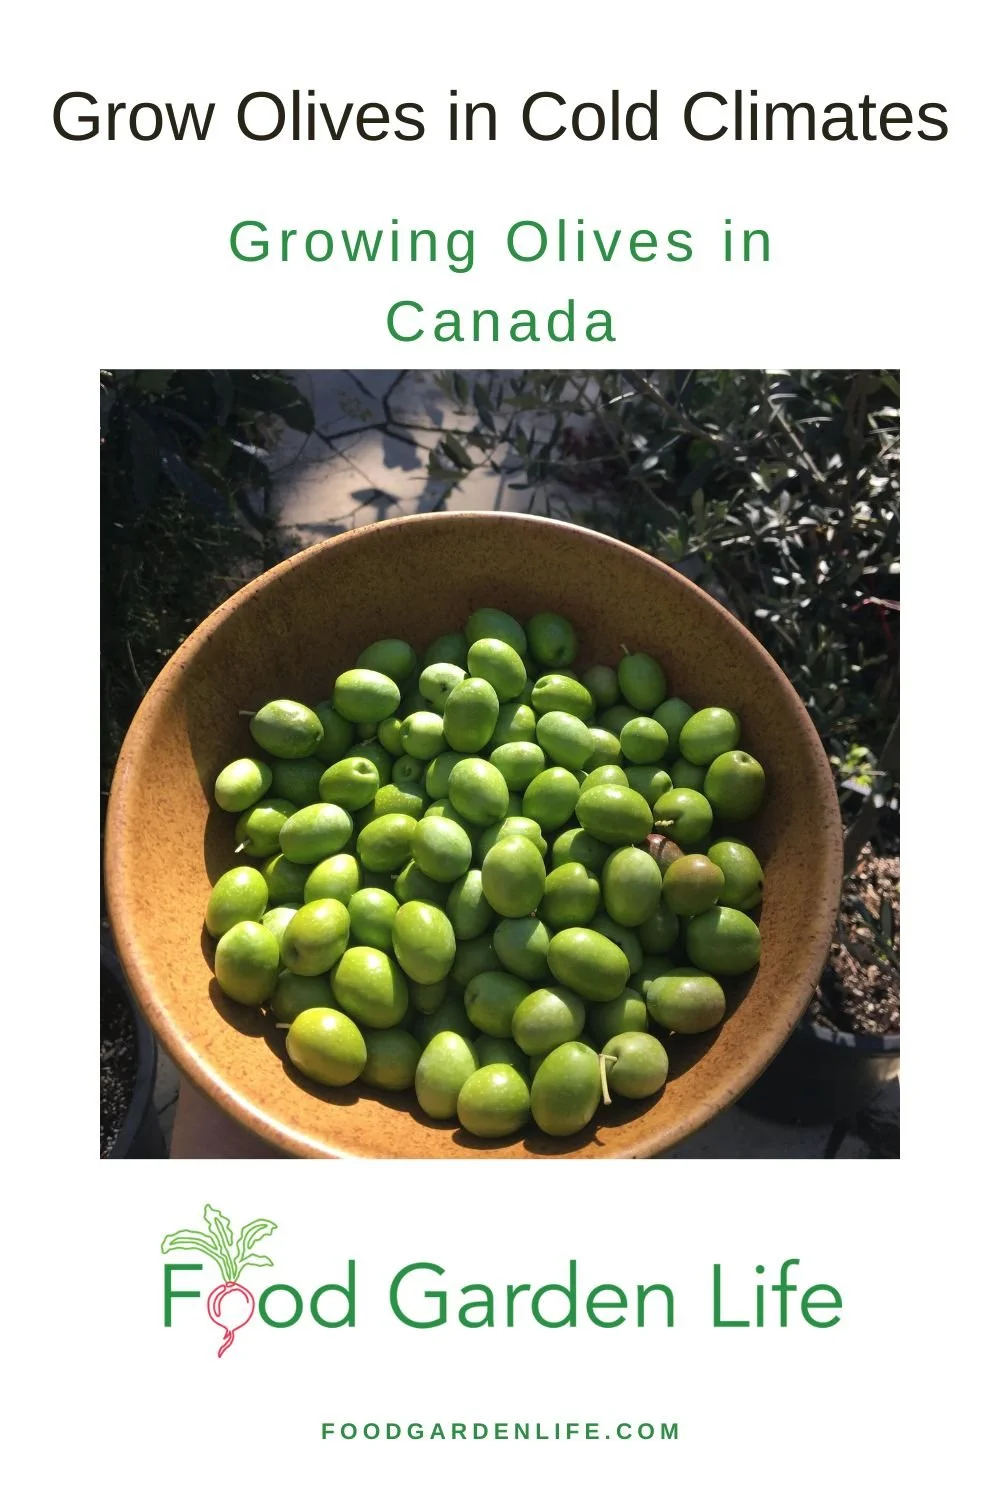
Think You Can't Grow an Olive Tree in a Cold Climate? These Canadians Grow Olive Trees
Want to grow olives but live in a cold climate? This article tells you how you can grow and harvest your own olives.
By Steven Biggs
Be Creative and You Can Grow this Mediterranean Staple
An olive tree won't survive winter temperatures in most parts of Canada…but there are creative ways to grow one.
As Bob Duncan points to the olive trees on the south and west walls of his house he tells me, “Don't waste the walls on rose bushes!”
Duncan is near Victoria, British Columbia. And amongst the olive branches against his south and west walls I see a heavy crop of olive fruit.
While olive trees (Olea europaea) don't survive winter temperatures in most parts of Canada, in the balmier parts of British Columbia they do.
“The trees are absolutely fine at -10°C,” says Duncan, owner of Fruit Trees and More nursery.“
Last year, that one was thick with olives. Thousands of them,” he says, pointing to a 10-year-old olive tree.
It's not surprising that olive trees do well here, says Duncan. He explains that they are planted extensively in Mediterranean countries, where winters are similarly cooler than summers.
Growing Olive Trees in Southern B.C.
Planting an Olive Tree Where There's Protection
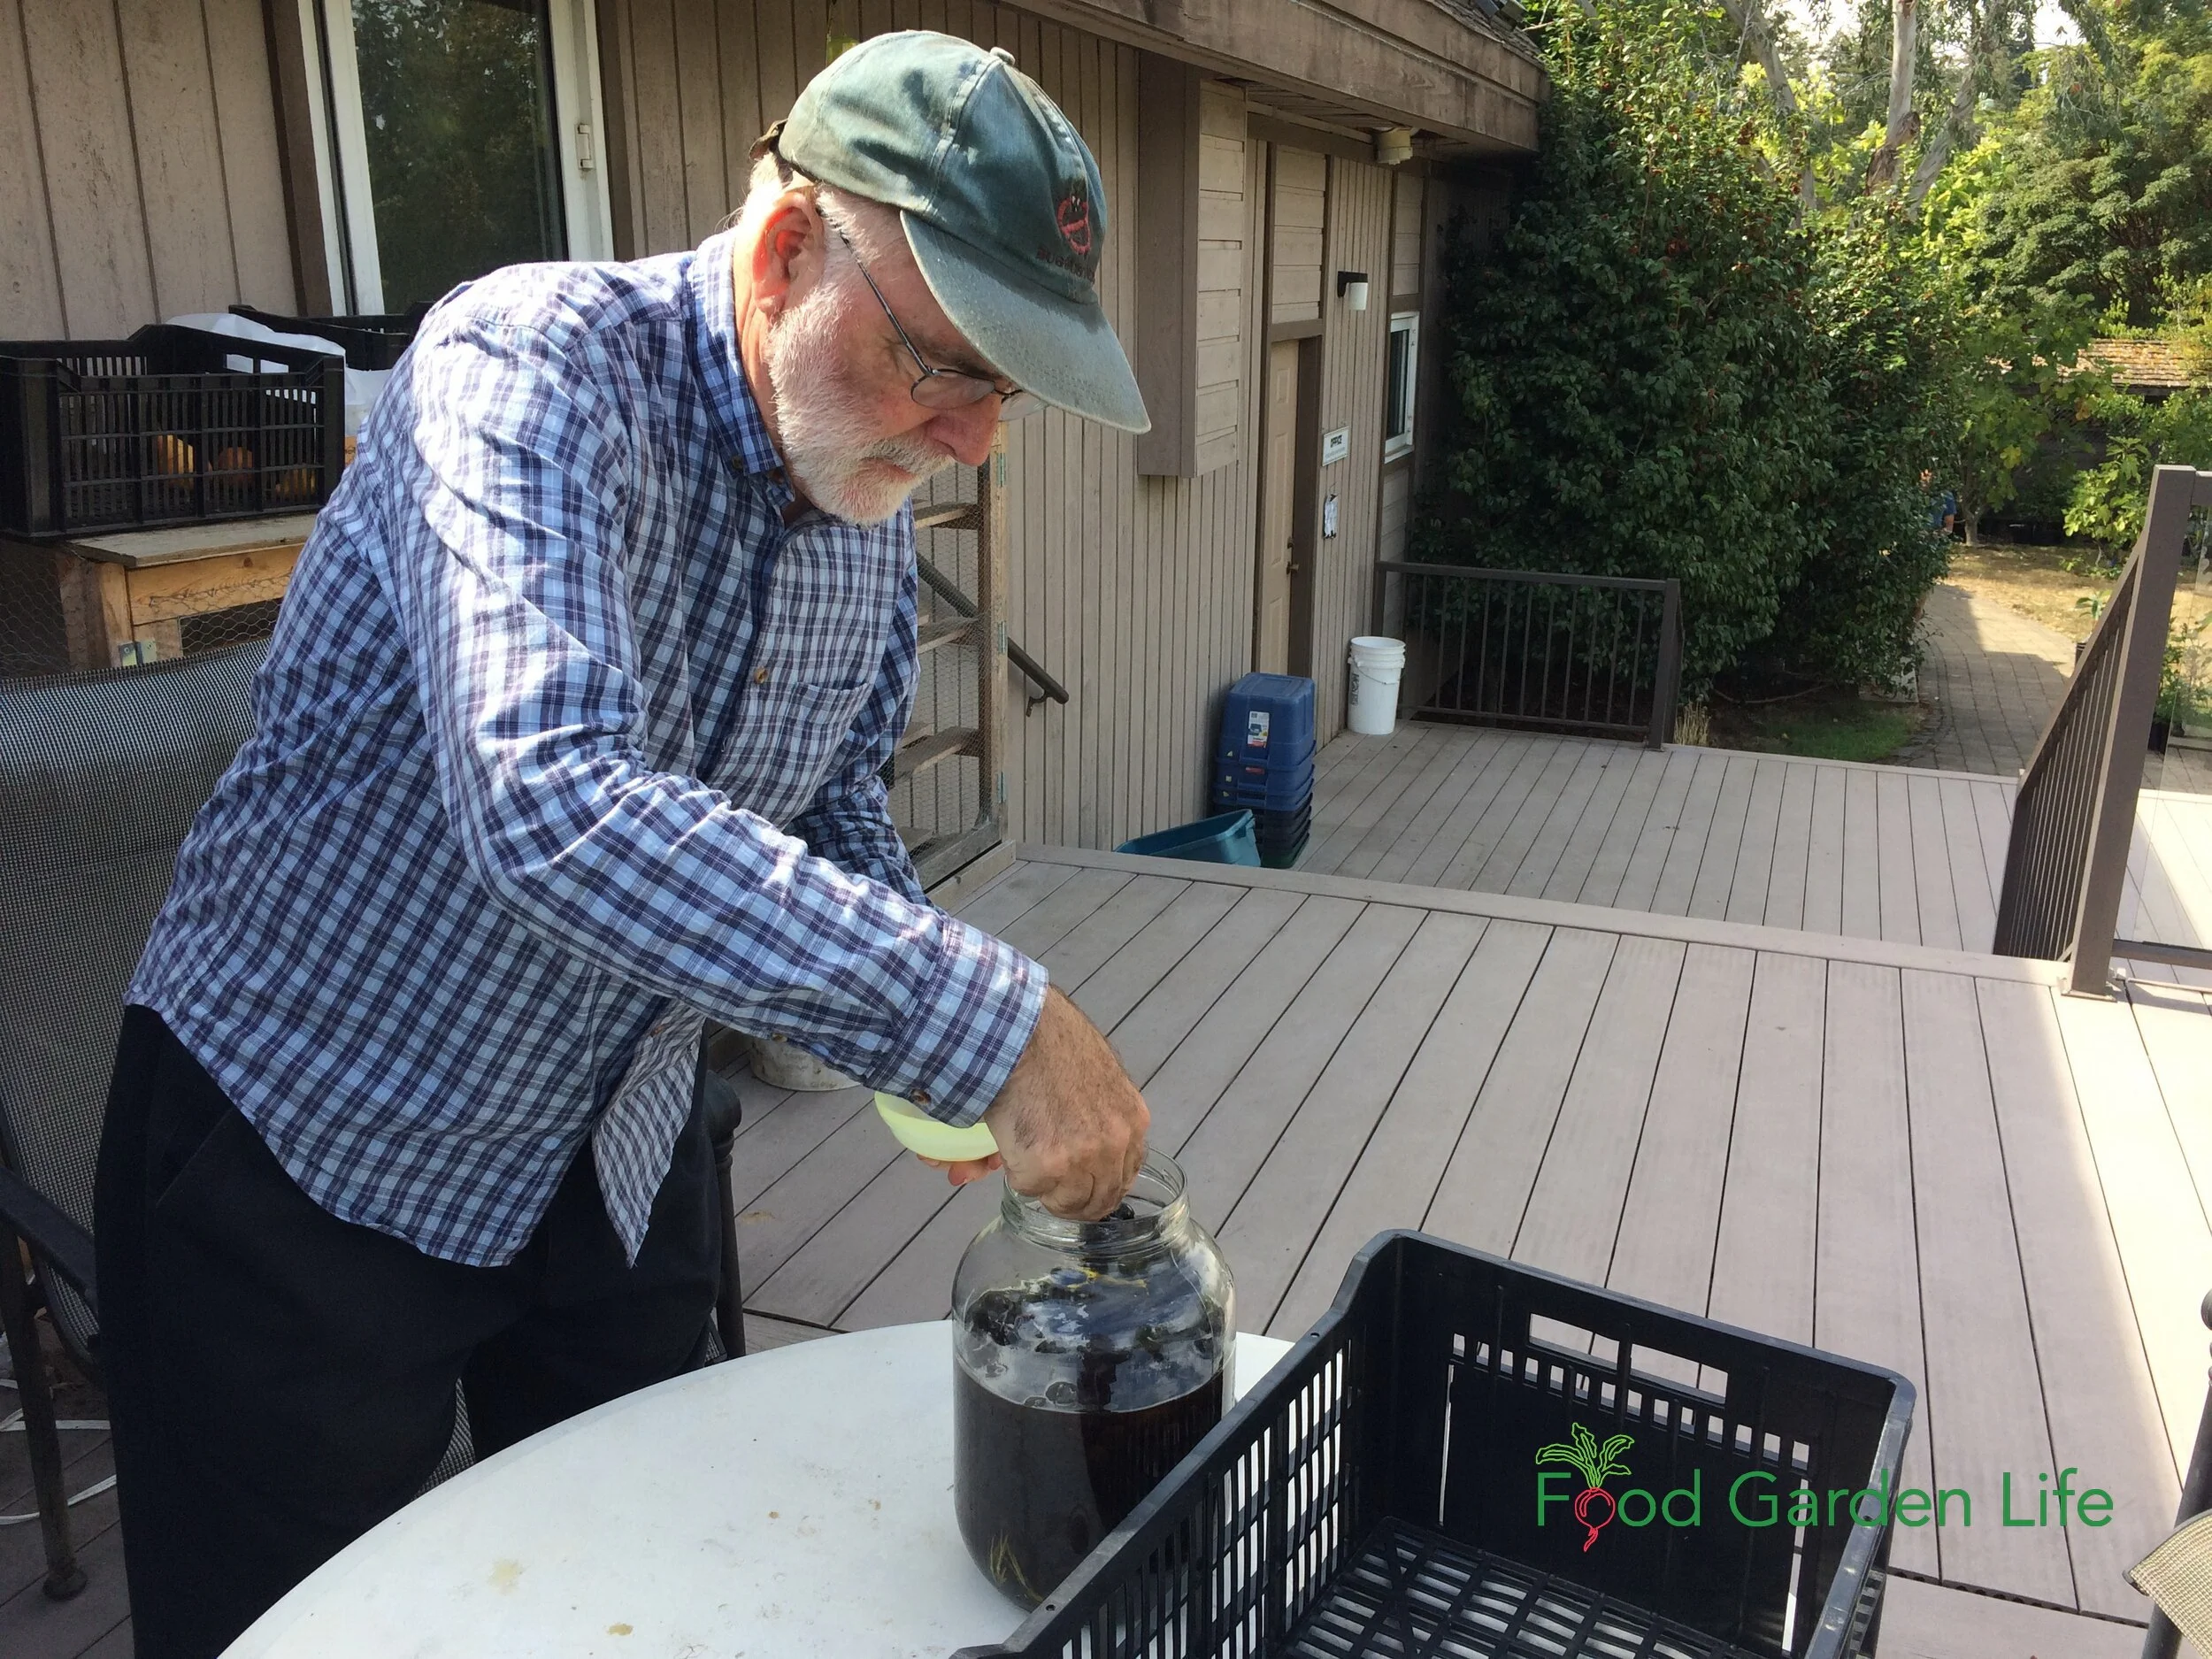
Bob Duncan, serving me home-grown table olives. This olive variety is from Italy.
Duncan grows olive trees flat against his house on a series of horizontal wires. If temperatures drop below -10°C (14°F), he drapes the outward-facing side of the olive trees with a floating row cover (a breathable, lightweight, cloth-like material).
He also has another trick to protect the olive trees during cold spells: Old-fashioned incandescent Christmas lights. When temperatures get low enough, he turns on the lights, which emit just enough heat to keep the temperature in a safe zone.
Olive Trees Elsewhere in B.C.
Conditions Similar to the Mediterranean
Michael Pierce grows olive trees in the ground, out in the open, at his home on Saturna Island, B.C. His nursery, Saturna Olive Consortium, specializes in olive trees.
He says that while the climate on some of the southern Gulf Islands and around Victoria makes it possible to grow an in-ground olive tree, it's borderline.
“They grow more slowly because the growing season is shorter and the conditions are cooler,” he explains.
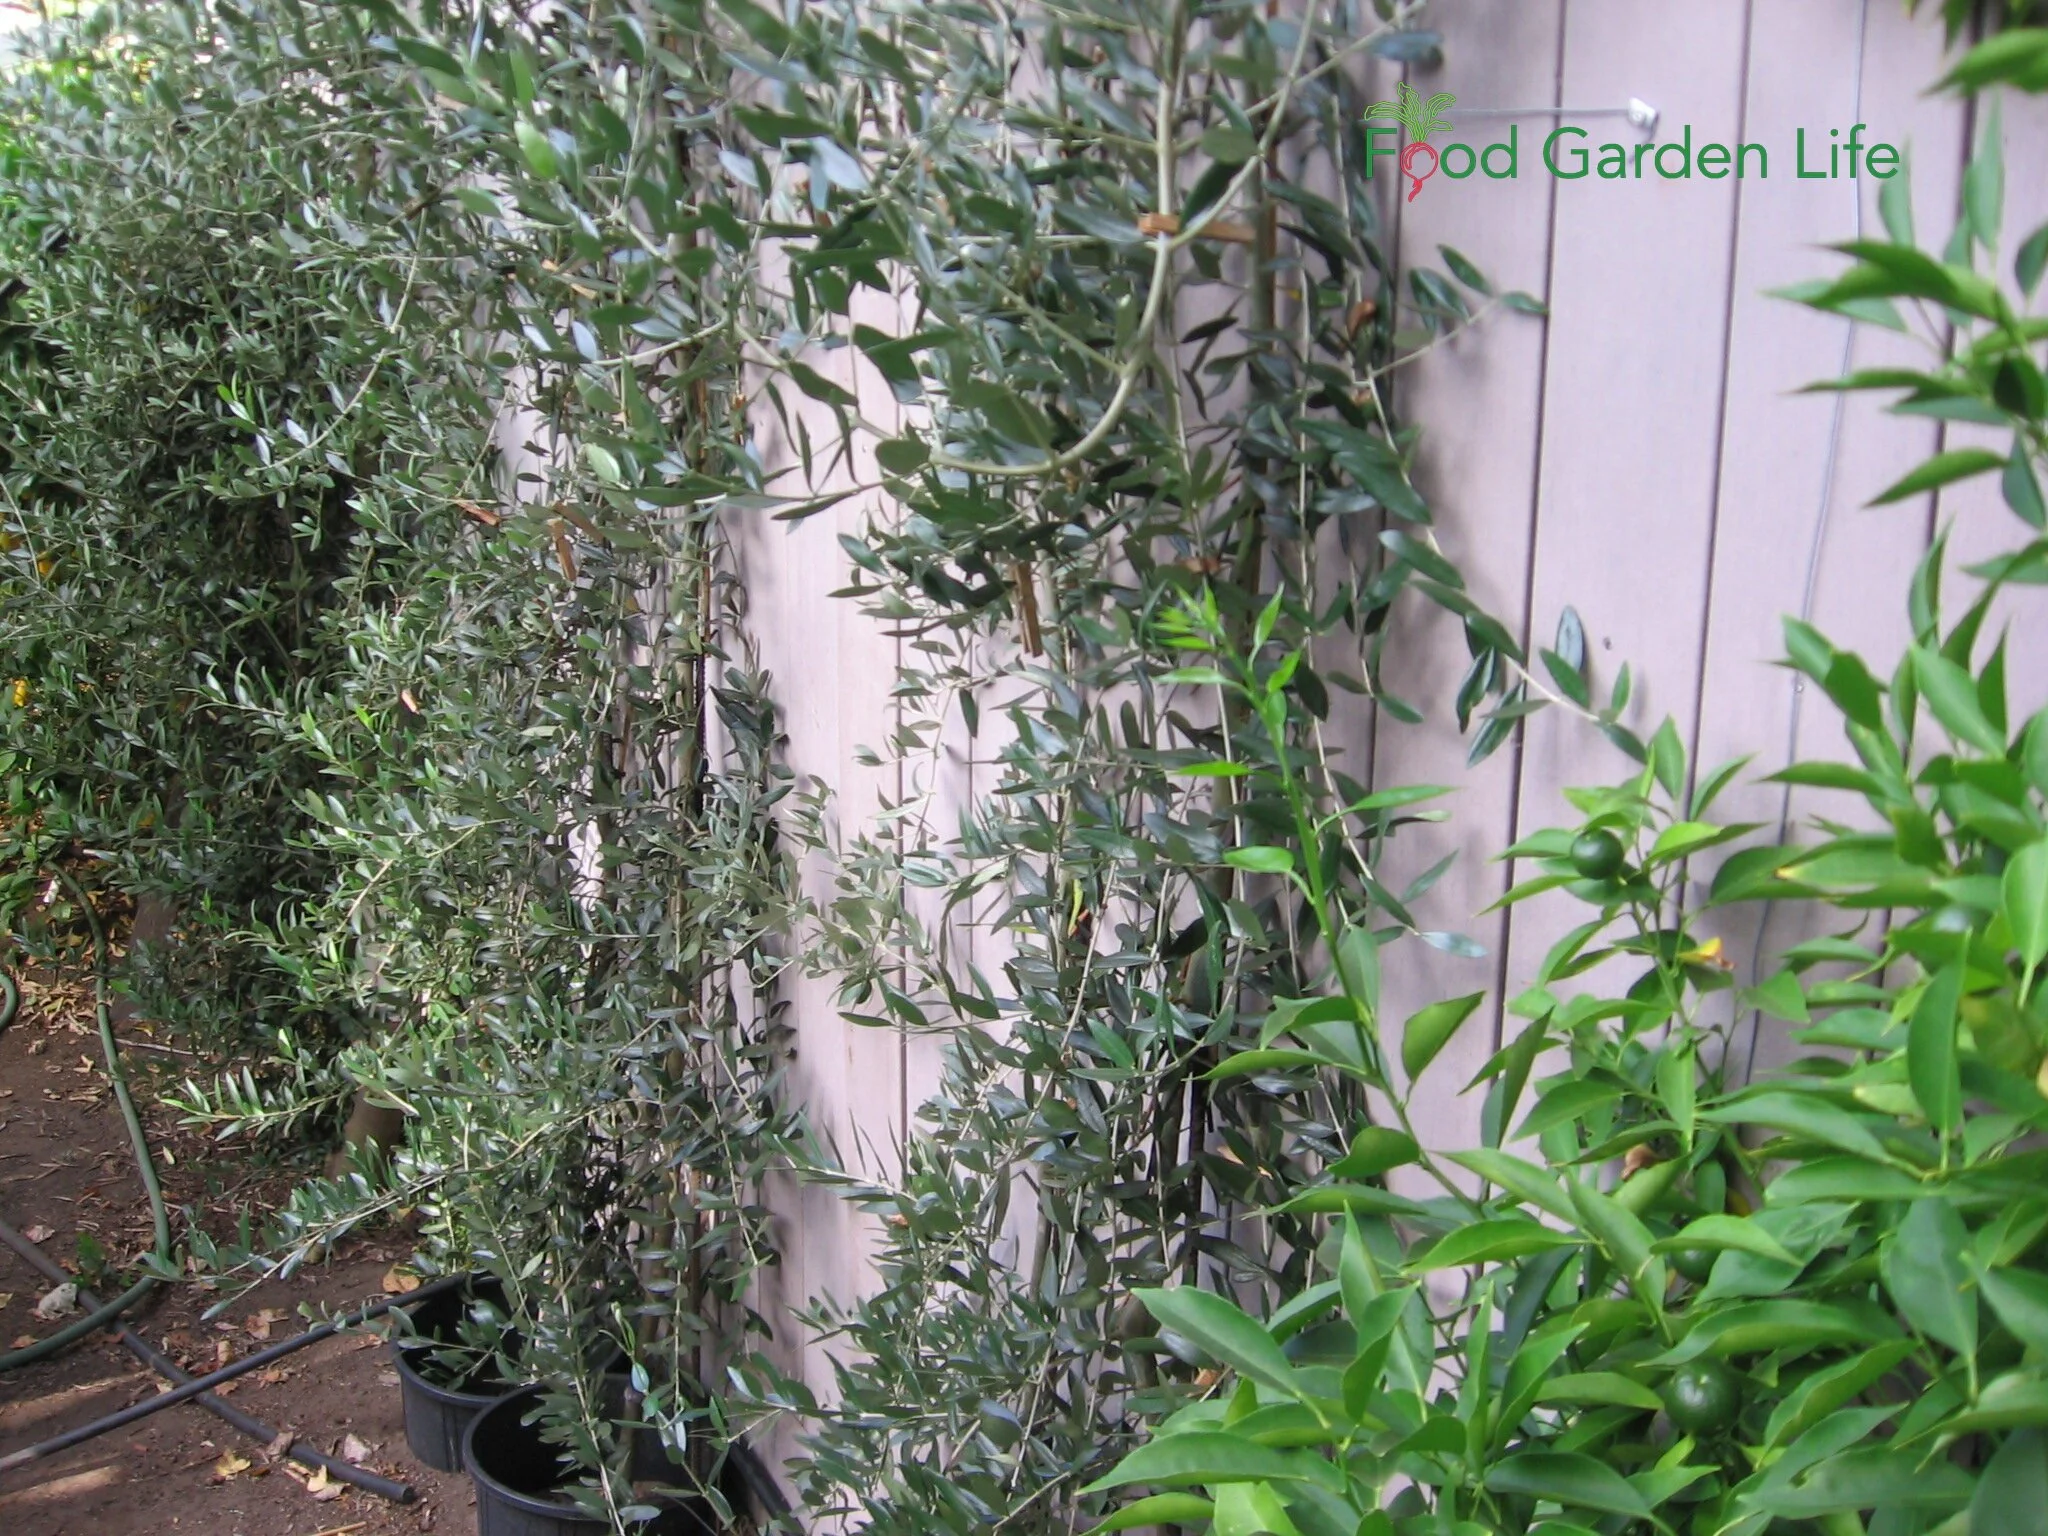
Duncan tells local gardeners not to waste the south- and west-facing walls on their property on roses…save them for an olive tree!
Growing an Olive Tree in Colder Canadian Climates
Grow Your Olive Tree in a Container
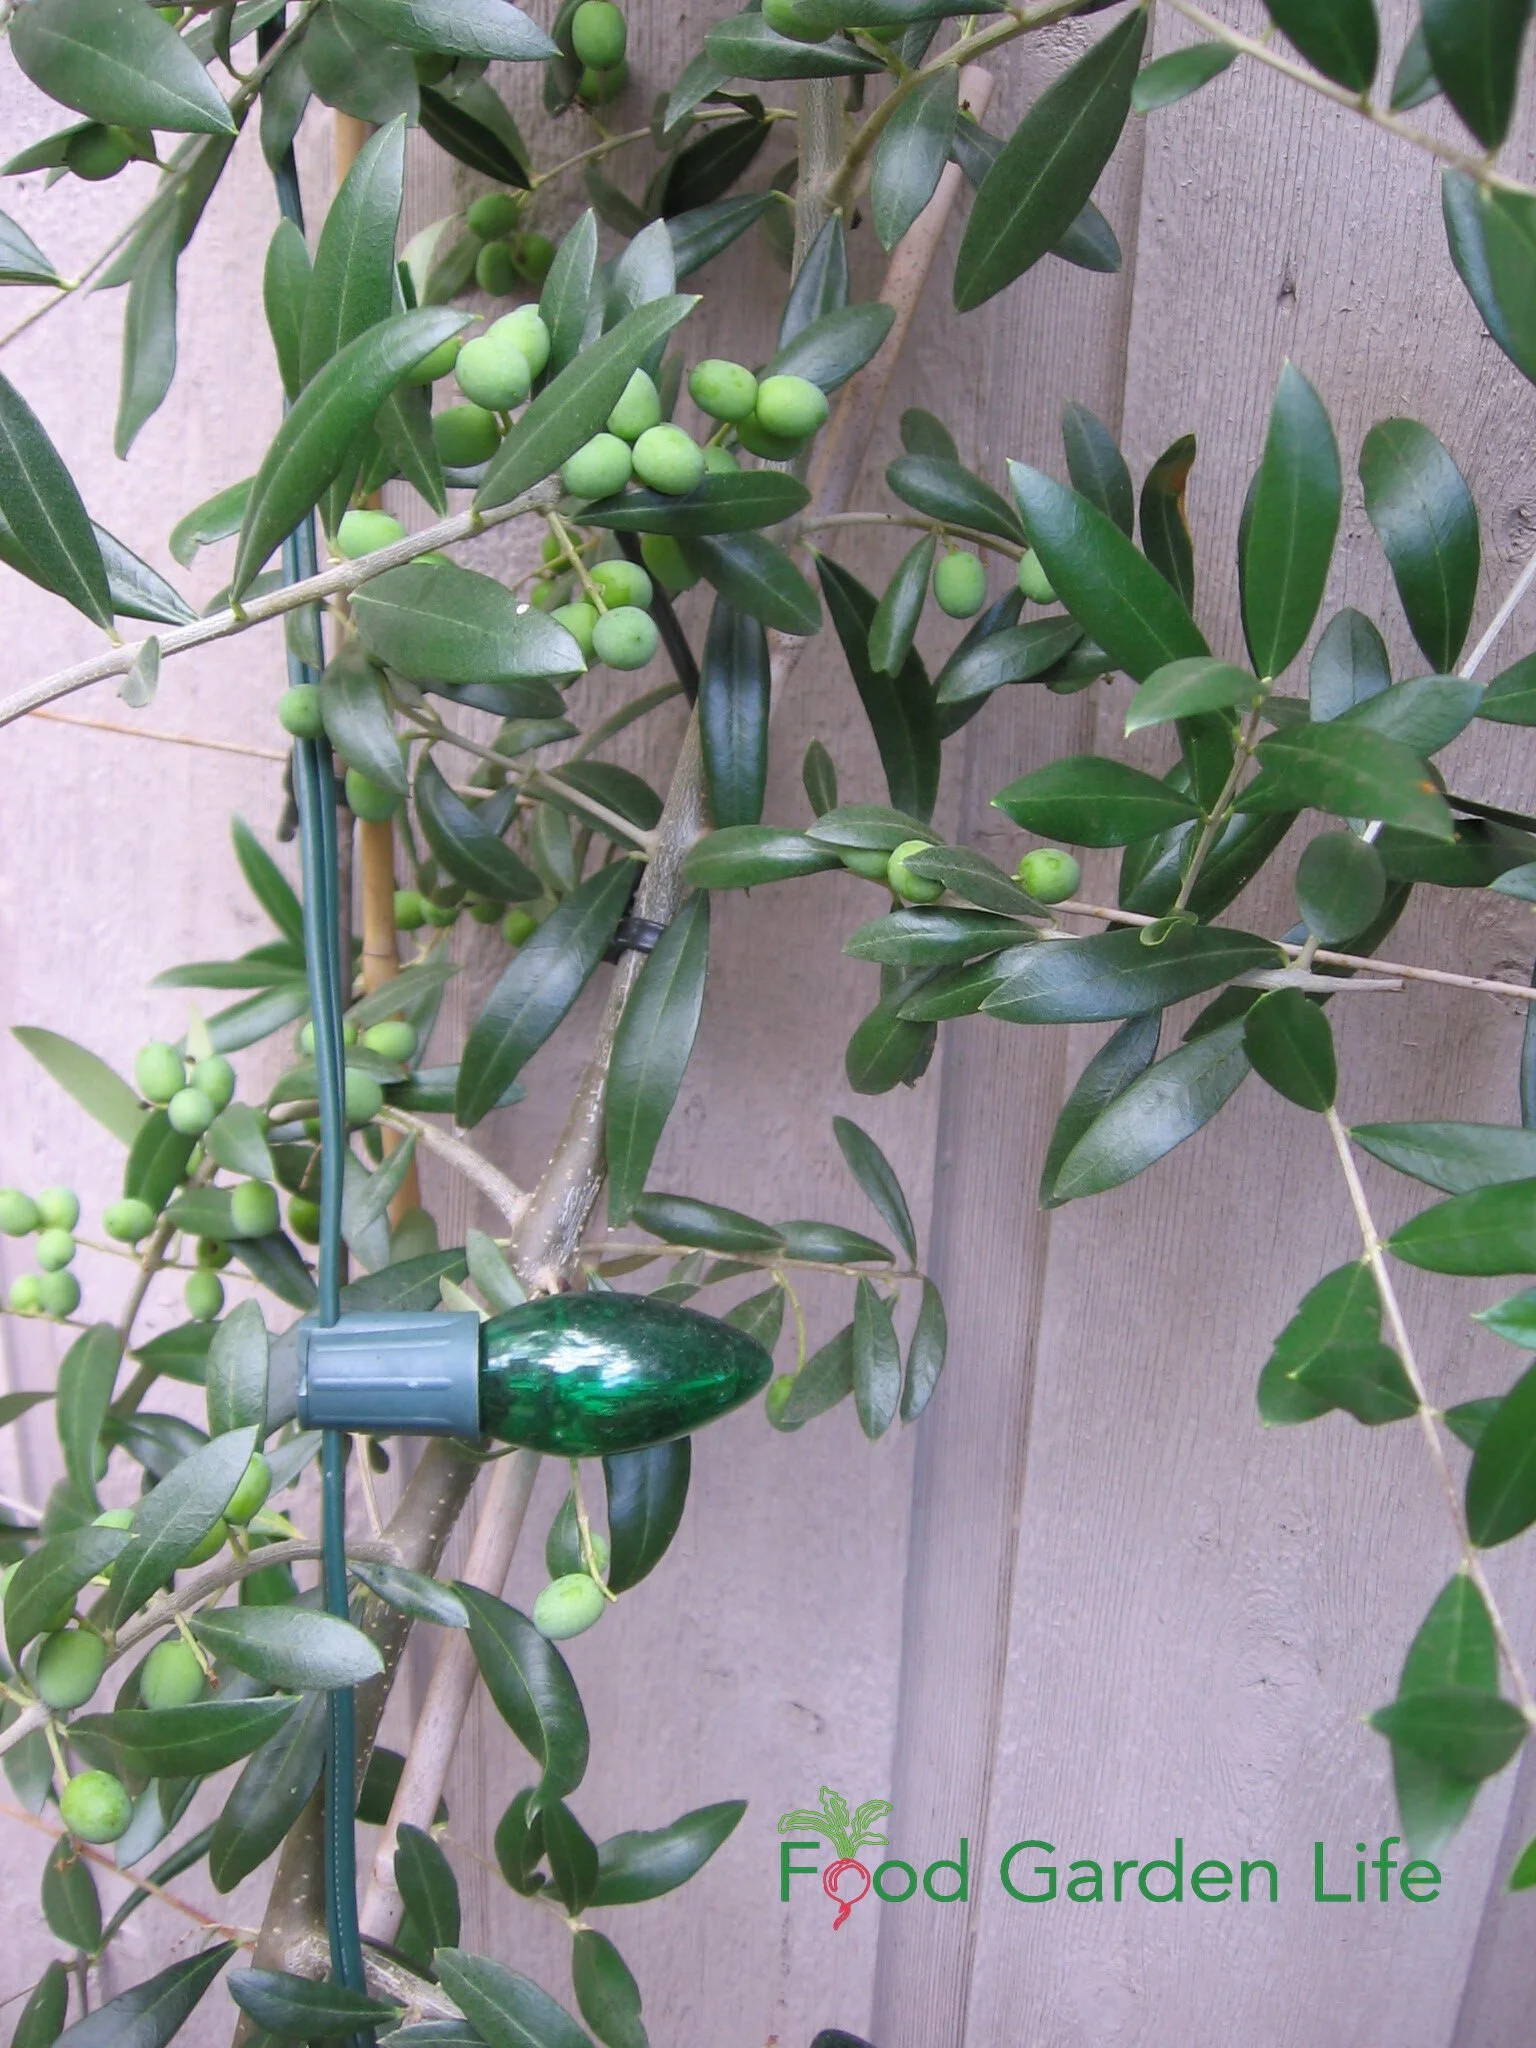
If temperatures drop low enough, Bob Duncan turns on the incandescent Christmas lights on his olive plants as a source of heat.
My own potted olive trees in Toronto survive winter in a cool sunroom or an insulated garage. They’ve even spent the season in our dining room, though that’s not ideal.
A friend overwinters her olive tree by the south window in the house.
Find out more about how to grow an olive tree in a pot.
While an olive tree can make an attractive indoor plant, Duncan and Pierce both point out that without a cool spell, the flowering cycle of the olive tree can be disrupted. So if you overwinter it at room temperature, you might not get flowers. No flowers means no olive fruit.
Don Moffat, who works as an ornamental gardener in Toronto, has helped clients overwinter olive trees. A smaller olive tree, he says, can be buried in the ground to protect it from the cold.
Duncan notes that while an in-ground olive tree easily withstands -10°C (14°F), a potted olive tree should be exposed to no more than a light freeze. “The roots are not as tough as the upstairs,” he says.
Getting an Olive Tree to Flower and Fruit in Canada
An Olive Tree in a Container Needs a Cold Spell!
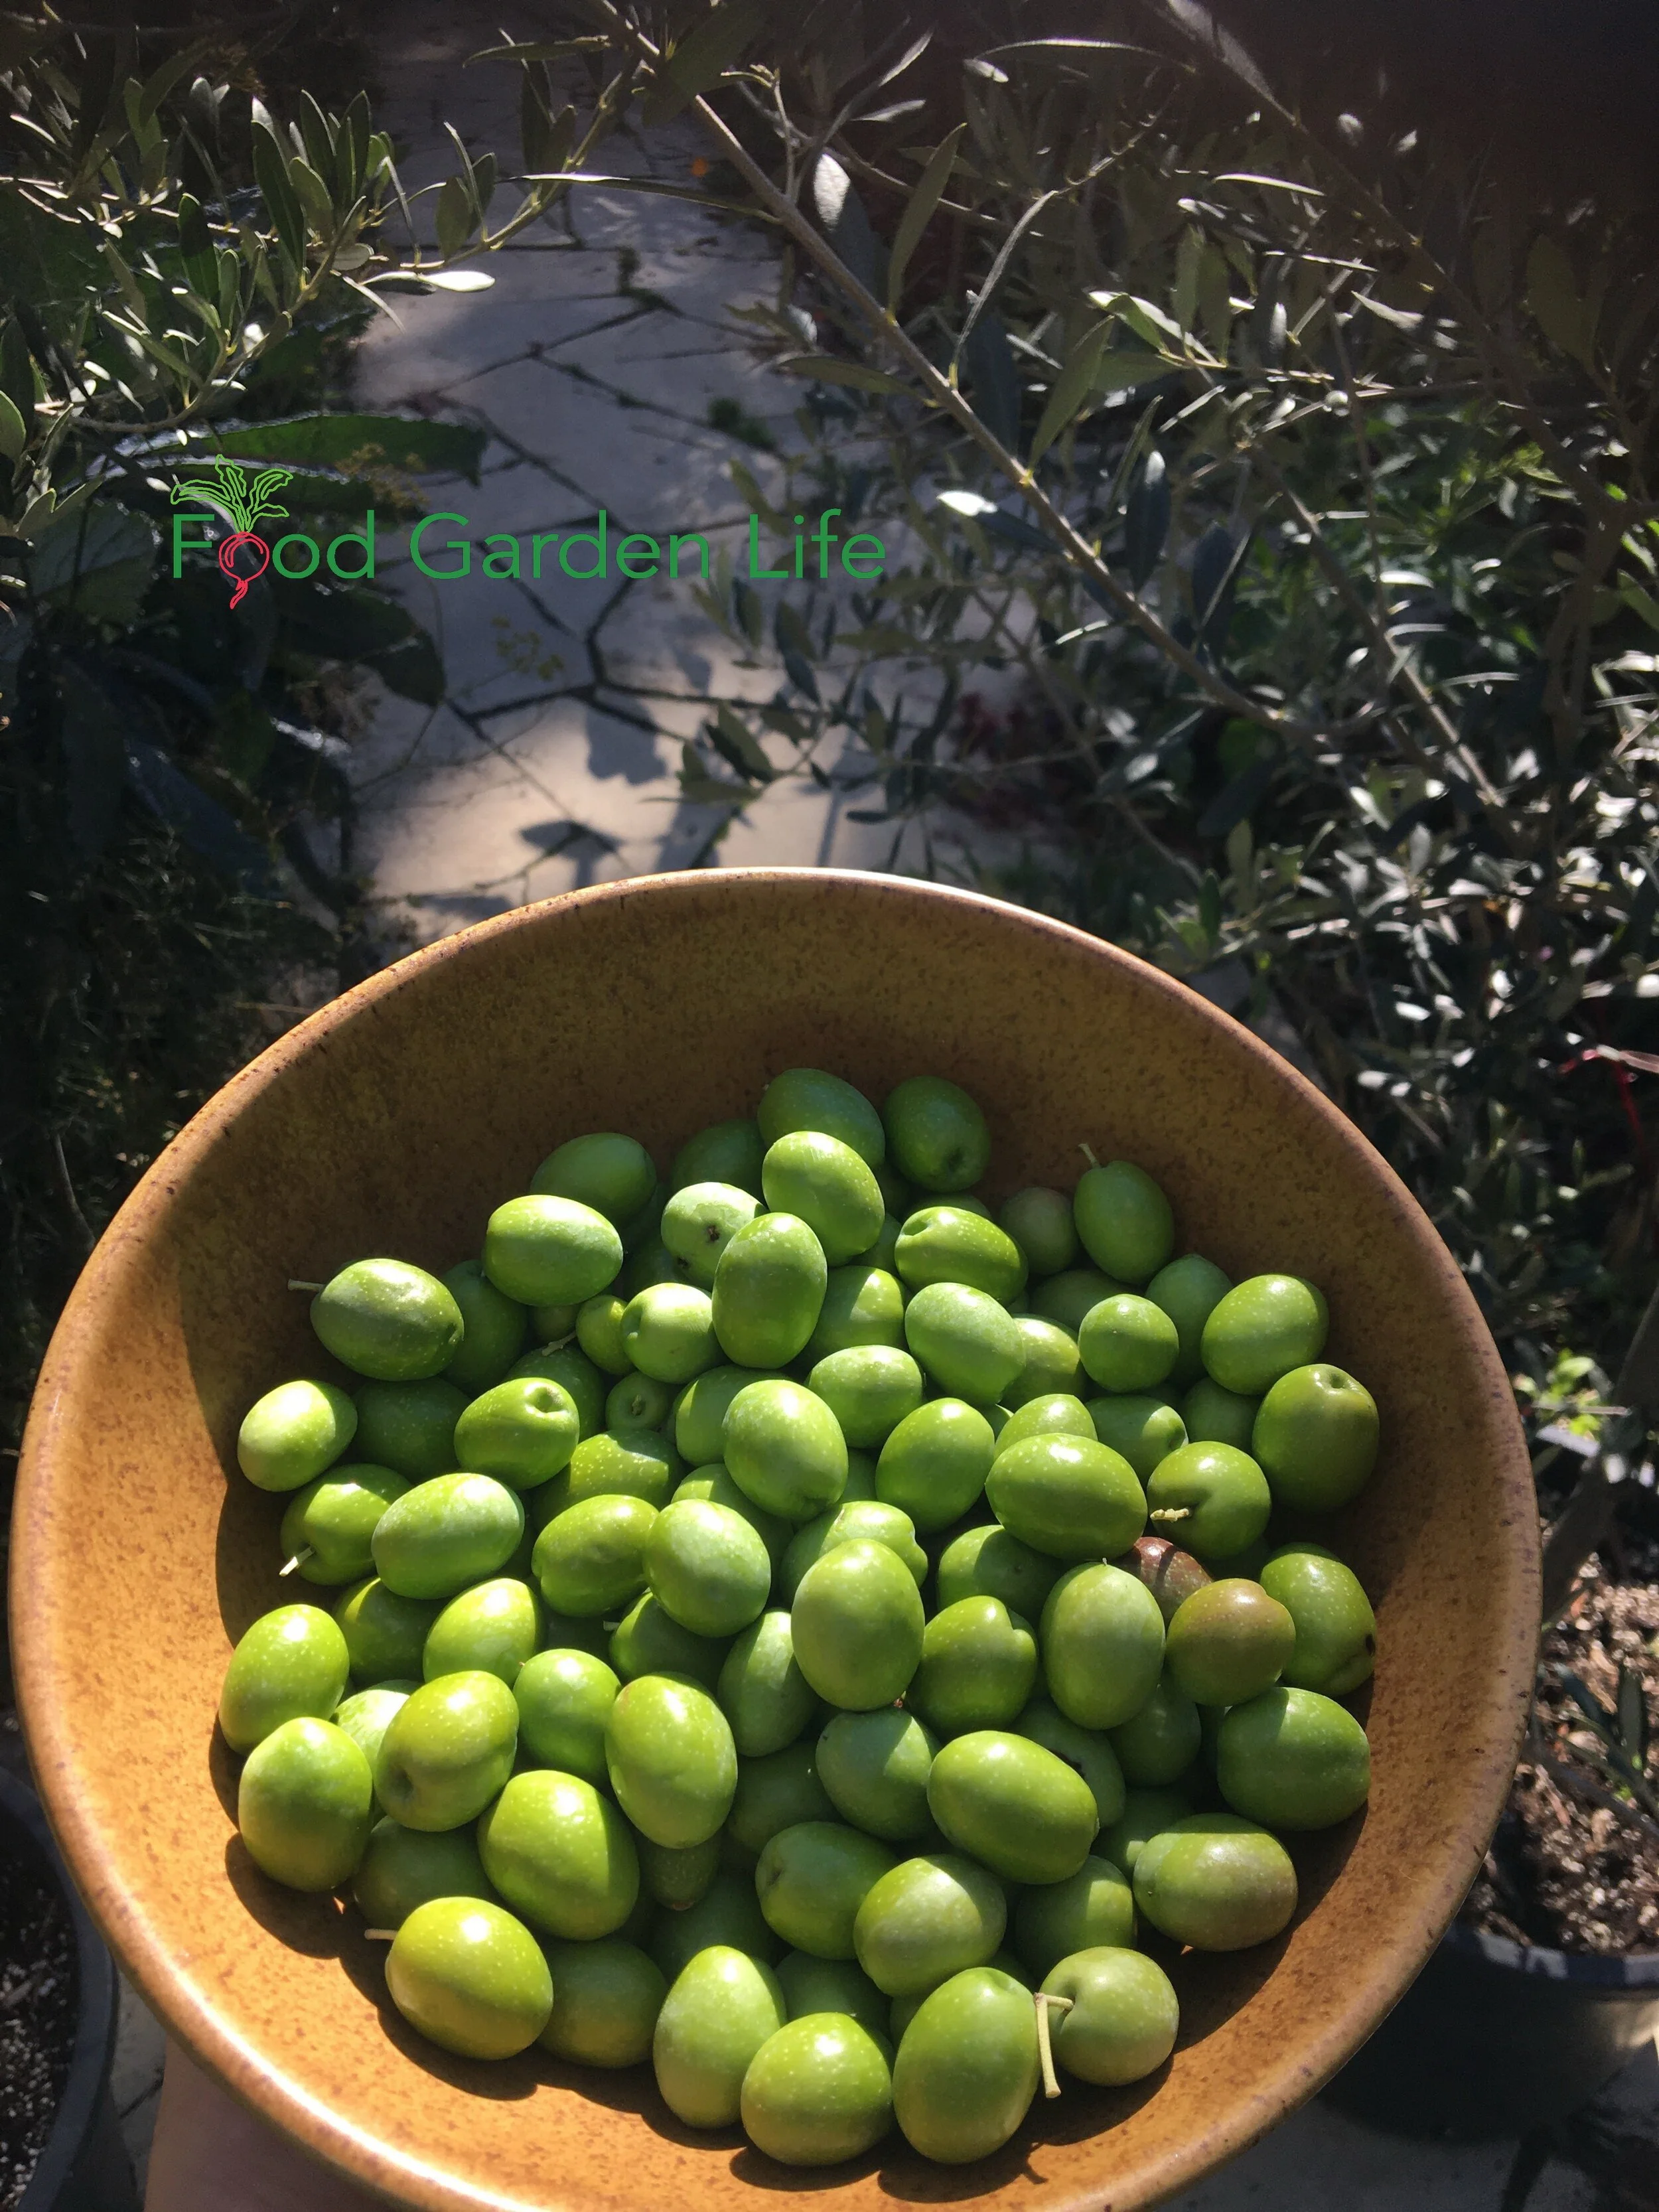
My Toronto olive harvest! I harvest them as green olives.
My original two olive trees—clones from the same plant—looked great but didn't give me olives for years. Duncan told me that they likely needed a cold spell. So I tweaked my overwintering technique to give them cold, bright conditions over the winter in a minimally heated greenhouse. They only get partial sun over the winter; that's fine.
Duncan also explained that because my plants are both the same variety, and because an olive tree is not always self-fertile, I should get another variety so they can cross-pollinate.
While Duncan has seen plants in isolation produce some olives, “It's better to have two varieties,” he says.
So I got a third olive tree—another variety. And between having two varieties, and providing a cold, bright spell over winter, my olives began to flower and set fruit.
Olive Tree Pollination
Want to Help Your Olive Tree?
“There is pollen everywhere,” says Duncan, as he talks about when the trees bloom.
Olive trees are wind-pollinated. But he helps to pollinate his olive trees, using a feather duster, or a vacuum set on reverse to blow.
I don't use a feather duster or vacuum for my potted olive trees. But I do keep the pots fairly close together when the trees bloom.
Olive Harvest

Even if you live somewhere too cold for olive trees to survive the winter, you can enjoy the exotic touch of an olive tree in your garden. This book gives you what you need to know to grow an olive tree in a pot. (And get olives!) Buy at Amazon.ca and Amazon.com.
Pierce usually harvests olives in November. Harvest time depends on the growing season, the variety, and stage of ripeness.
Olives can be picked before the fruit is ripe, while still green. That where green olives come from.
But green olives eventually ripen to another colour, and they can also be picked as they start to change colour, or when fully coloured.
Maintaining an Olive Tree
An olive tree will do best in full sun. When grown in a pot, make sure there are drainage holes. Use a well-draining potting soil and feed with a balanced fertilizer in spring and summer. Keep your potted olive tree well watered, but you don't want the soil to be constantly wet: Duncan advises that they be kept on the “dry side of moist.”
Only have partial sun? Conditions are rarely perfect in a home garden. Worth a try. And if your olive tree is growing in a container, you can move it around to give it as much sunlight as possible.
A young olive tree might need support until its stem thickens. Pruning is usually done in the spring. Prune to obtain the desired size and shape, removing crossing branches. Olives grow into small trees. Duncan's reach up to the eaves of his house.
But the gardener decides when the olive tree has reached its final size. My own olive trees are in 14” pots; I prune the plants to six feet in height so they are easily carried through a doorway.
An olive tree grown from cuttings (as are most commercially available plants) is “physiologically” mature and will fruit while still small. Pierce says, “I've seen a little, twelve-inch olive tree start to flower and get fruit.”
Pin this post about How to Grow an Olive Tree!
Olive Tree Varieties
Choose an Olive Tree for Hardiness and the Type of Olives
There are many olive varieties, and some are more tolerant of cold than others, says Duncan. Pierce finds the cultivars Frantoio and Leccino have good cold hardiness. These varieties are both from Italy.
But for gardeners growing olives in pots and providing a protected spot for the winter, this cold hardiness is not as important as it is for people growing an olive tree in the ground in southern BC.
My original two olive trees are an unnamed variety with olives that are large, plump, and green when I pick them here in Toronto in October. My third olive tree, which came home in the suitcase from Bob Duncan's nursery, is a Frantoio, and it's smaller fruits are just starting to colour up as I pick from my olive trees before stowing them away for the winter.
There are some varieties grown mainly as table olives. Other are for the olive oil. Some are for both olive oil and fruit.
More on Growing an Olive Tree in Cold Climates
Find out how to grow an olive tree in a pot.
Find This Helpful?
Enjoy not being bombarded by annoying ads?
Appreciate the absence of junky affiliate links for products you don’t need?
It’s because we’re reader supported.
If we’ve helped in your food-gardening journey, we’re glad of support. You can high-five us below. Any amount welcome!
Here’s More Exotic Fruit You Can Grow
If you get a kick out of growing things where they don’t normally survive, find out about how to harvest figs and lemons in cold climates:
Not Enough Garden Space? Try These Small Veg Garden Ideas
By Steven Biggs
Fit More Vegetable Plants in the Same Small Space

Ideas to help you harvest more from the same small space.
Want to harvest more fresh vegetables from your small-space garden? Sometimes it helps to forget what you’ve seen. And do things differently from what's done in a big garden or commercial farm.
Commercial growers often focus on uniformity, and on perfect, unblemished produce. They also need space for equipment or employees to work around the plants.
But in a small home edible garden, where there’s not a lot of growing space—and where we’re just growing our own food—our needs are different. We want a variety of crops. We want an ongoing harvest. And we want it to be simple enough to fit into our everyday routine.
If you're struggling to fit everything you want to grow in your vegetable garden, keep reading for ideas to make the most of your growing space.
Key Takeaways: Make the Most of a Small Vegetable Garden
Recommended plant or seed spacing sometimes uses more space than required in a small vegetable garden.
Vertical gardening helps to fit more plants in a small garden bed.
Companion planting is a simple way to boost the output of a small vegetable garden.
Farmers sometimes leave fields fallow, but there's no need for this in a home vegetable garden.
Many crops have more than one edible part, making crop choice a simple way to grow more of your own food in a small space.
Reconsider Plant Spacing in a Small Vegetable Garden
Do you grow vegetables with the spacing suggested on seed packets or plant labels?
I don't. I always sow carrots, lettuce, and beet seeds more densely than recommended. Then I thin them out as the plants start to grow.
And the thinning is not a waste. Because I eat the small plants that I've thinned out. Baby carrots, lettuce, and beets are a treat.
Recommended plant spacing usually gives plants a suitable amount a space to develop to their final size. But there's no reason you can't use some of the space to grow baby plants while the crop is small.
There are lots of other ways to save on spacing. I often plant a few onion sets on the sloped edges of my raised soil beds. They might not get quite the amount of space recommended...but I'm using space that might otherwise not be used.
My daughter is an avid tomato grower. Some years she's trying to fit 100 varieties into our yard. She does that by planting them close together, and then growing them up twine (see Vertical Gardening, below.)
Take Up a Smaller Footprint with Vertical Gardening
Use Vertical Space in Your Vegetable Garden
Growing vining peas up a trellis in a small garden.
When space is at a premium, don't let vining plants sprawl all over the garden bed. Grow them upwards, instead.
I’ve seen watermelons growing on A-frames, each melon supported by a sling! And there are other vining plants such as cantaloupe, indeterminate tomatoes, and cucumbers that you can grow vertically to maximize yield in a small space.
With the vining plants growing up your A-frame, you can now grow shade-tolerant vegetables such as leafy greens under the A-frame.
Here's another idea: My neighbour Joe has a 10-foot-high wall of pole beans around his vegetable garden…an edible wall! Bush beans are great, but if your growing space is at a premium, pole beans take up less of a footprint.
Choose Varieties Suited to a Small Space

Pin this post!
When planning your vegetable garden, variety choice can help you grow vertically to maximize your available space.
Some plants, such as peas, beans, tomatoes, and squash, are available in both vining and bush forms. Fit more into a small space by choosing the vining varieties that you can grow vertically.
Bush beans are a great choice if you want a larger harvest all at once for a big feed or preserving...but the trade-off is that they use more space.
Small Space? Grow Vegetables on Fences and Walls
Make the most of your outdoor space by growing on walls. All you need is a trellis or twine.
An empty fence is a wasted opportunity. My neighbour and I share the squash that I grow along our fence. Great way to hide a chain-link fence!
(And don’t forget that the top of a fence can be dressed up with a window box. A fence-top container garden!)
Try Companion Planting
Companion planting just means growing different plants together for some sort of benefit.
Companion plants might attract pollinators, lure away pests, deter pests, or attract beneficial insects. Those beneficial insects can help with pollination, or they might parasitize or eat insect pests. There are lots of opportunities for companion planting in a vegetable garden.
Below are a couple of ways to use companions to fit more vegetables into your small garden.
Plant 2 Different Crops in the Same Spot—at the Same Time
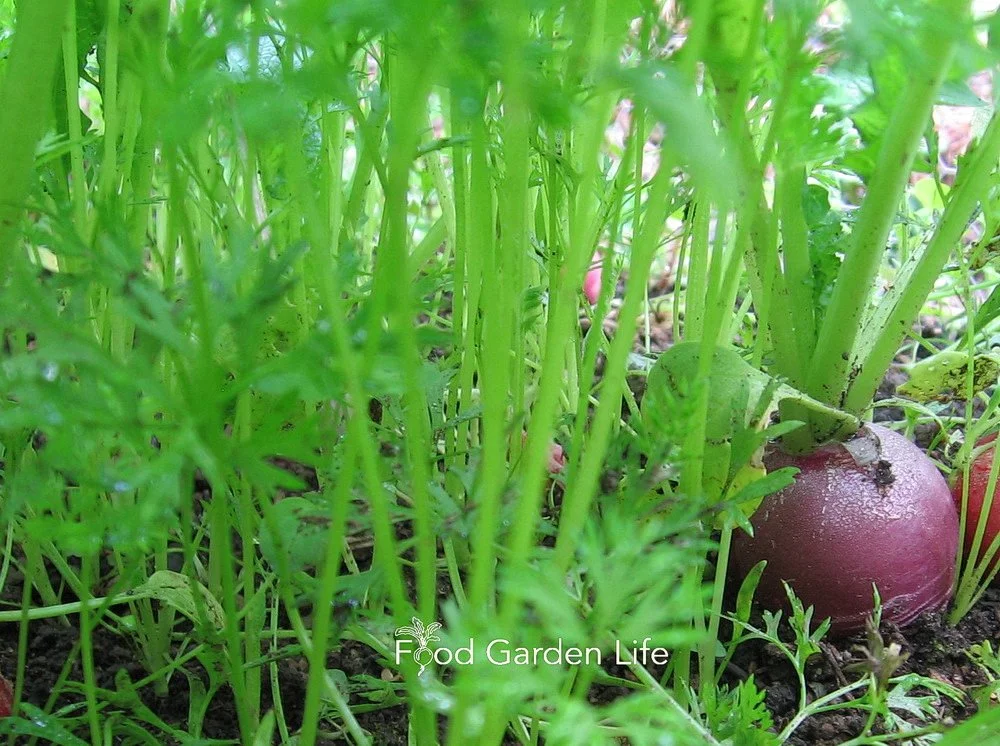
Growing radish and carrots together. The radishes are ready to harvest while the carrots are still quite small.
Waste less space by planting both fast- and slow-germinating seeds in the same space, at the same time.
My favourite example of this combination is pairing carrots and radishes. They are both root vegetables. And they are well-suited to being grown together in the same space because one grows quite quickly, one slowly.
Carrot seed is slow to germinate; radish seed is fast. And radish roots are ready to pluck from your garden way before your carrot roots are even getting chubby. That means you’ll be harvesting full-grown radishes just as your carrot seedlings need more space. As you pull out the radishes, you give the carrots more space to grow.
Wondering how one plant benefits the other in this scenario? Pulling out the radishes, which have taproots, also loosens the soil for your carrot seedlings!
Pair up Sun-Lovers and Shade-Lovers
When deciding which crops to plant together, think about sunlight.
If you have staked tomato plants, there can be a lot of unused, shady ground around them. (If it’s not yet shady, it will be, once the tomato plants get bigger.) Sprinkle seed for leafy vegetables at the base of your tomato plants. Lettuce lasts much longer when growing in some shade in the heat of summer.
Or, make an a-frame for growing climbing plants, and plant leafy greens in the shade below.
Use Your Garden Space as Long as Possible
Start as early as possible in the spring with cold-hardy crops. If your garden includes containers and raised bed, remember that the soil in containers and raised beds heats up more quickly than the ground, and that heat can speed along early spring sowings.
As your crops mature, plant new crops in the same space. Farms sometimes have “fallow” fields, unplanted fields, to control weeds or to conserve moisture. That’s fine for farms—but not for a small vegetable garden. Use your space continuously. You just need to recharge your soil nutrients, and you can do that by amending your garden soil with compost.
Don’t forget to grow cold-hardy crops in the fall to overwinter in cold frames and harvest all winter long. You can also plant cool-season crops in late summer and fall to harvest in early winter and further extend your harvest window.
Grow Vegetables That Produce a Lot in a Small Space

Radish seed pods are edible! A crunchy, peppery garnish.
Grow Plants with Multiple Edible Parts in a Small Garden
Growing plants with more than one edible part is a great way to get more from your growing space. Many plants have more than one edible part.
Growing beets? Eat the leaves, too, which are like chard. Garlic makes “scapes” that are edible and sought after by gourmet chefs! Radishes? Try the crunchy, peppery seed pods. One year, my daughter made pesto from young radish leaves…who knew?
In a Small Space, Plant Vegetables That Mature Quickly
Brussels sprouts? Leave them for farmers because they take up growing space ALL season and then you only harvest them once there's a fall frost.
As you think about vegetables to grow, consider kale, which you can be harvesting spring through fall, and even into the winter. Or cauliflower, which, after you harvest it, you can follow with another crop of something else.
Extend a Small Garden with Containers
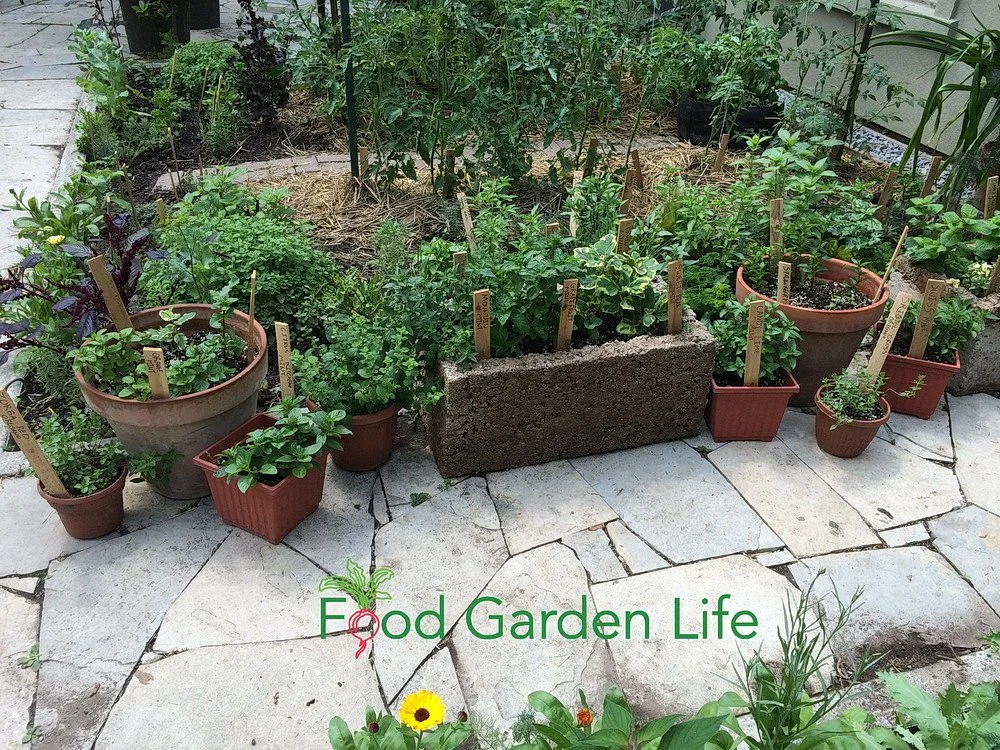
Using containers to make additional growing space beside this small garden.
Add Containers to Small-Space Gardens
Container gardening is a great way to extend a small vegetable garden, even if you don't have more in-ground growing-space.
Extend your small garden onto a patio, a deck, driveway or rooftop. Or even add window boxes.
For best results growing in containers, use a good potting mix. Here's more on potting soil.
And Finally...Forget Perfection in Your Small Garden
You probably don’t have the ideal conditions for some crops. Maybe your garden soil isn’t quite what you want…maybe you don’t have enough sun.
If you were a commercial market gardener, this could be a big deal.
But if you’re a home gardener, figure out how to make the best of what you have. For example, I grow tomatoes in a container garden on my driveway—in less than 6 hours of sunlight. I get A LOT of tomatoes from space that would otherwise go unused. Sure, it’s fewer tomatoes than if I had full sun on my driveway. But it’s more than I’d get if I didn’t grow there.
Gardening is a great cure for perfectionism. There’s real satisfaction in harvesting fresh produce from your own garden.
More on Vegetable Garden Planning
Find This Helpful?
Enjoy not being bombarded by annoying ads?
Appreciate the absence of junky affiliate links for products you don’t need?
It’s because we’re reader supported.
If we’ve helped in your food-gardening journey, we’re glad of support. You can high-five us below. Any amount welcome!
Course: Edible Garden Makeover
Want to make an edible garden you love to be in?
If you've been thinking about growing more of your own food, but are holding back because you have information overload...
Or if you just don't know where to start.
Edible Garden Makeover gives you the ideas, knowledge, and confidence to make a unique edible landscape for your yard and your needs.

Eat Your Own Fresh Tomatoes in March! Grow Storage Tomatoes
By Steven Biggs
Long Keeper Tomatoes Last all Winter
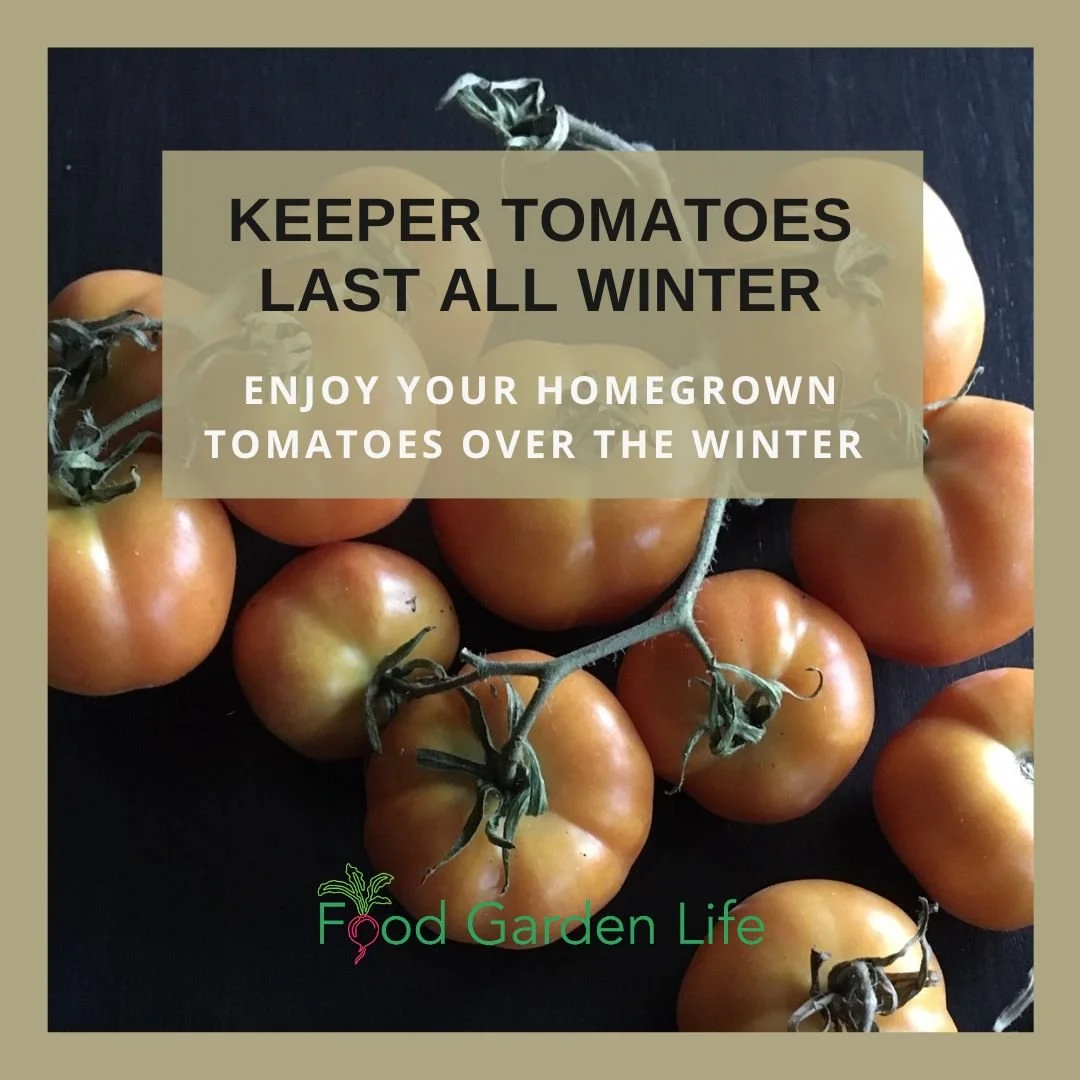
With the right tomato variety, you’ll still be eating your own fresh tomatoes in early spring. It’s often March by the time I use up my fresh tomatoes.
That’s right. March.
Yet I picked the tomatoes the previous October, just before the first fall frost.
Tomatoes that store well are called long-keeper tomatoes, keeper tomatoes, storage tomatoes, or winter tomatoes.
These storage tomatoes are a simple way to add fresh, homegrown veg to the winter menu. Perfect for home gardeners.
If you’re interested in growing long keeper tomatoes, keep reading to find out how you can enjoy your own homegrown tomatoes over the winter.
What’s a Long Keeper Tomato?
Let’s be clear: Long keeper tomatoes are NOT like a thin-skinned, juicy tomato.
They’re thick-skinned. It’s because of that thick skin that they last a long time without spoiling.
Storage Tomato…Not a Thin-Skinned Slicer
I once gave long keeper tomato plants to my neighbours Joe and Gina. They were avid veg gardeners. Loved tomatoes. I thought they’d love the idea of having their own storage tomatoes all winter long.
But they hated my keeper tomatoes…
That’s because they loved juicy tomatoes for sandwiches and meaty tomatoes for sauces. Keeper tomatoes are for storage—they’re not summer sandwich material.
Expecting a keeper tomato to be like a beefsteak tomato is like expecting a pickup truck to drive like sports car. Ain’t going to happen. The purpose of each is quite different.
When to Sow Long Keeper Tomato Seeds
Because I harvest my keeper tomatoes at the very end of the season, there is no point to starting them too early. (My first fall frost is usually late October—so that means I’m only harvesting the keeper tomatoes in October.)
I start my summer-eating tomato varieties 6-10 weeks before the average last frost date, so that I can enjoy fresh tomatoes as soon as possible.
But I only start the keeper tomato varieties a couple of weeks before the last spring frost. Then I transplant them into the garden when the plants are big enough.
Want to grow your own storage tomatoes from seed? Get tips to grow great tomato seedlings at home.
How to Grow Storage Tomatoes
In the garden, grow storage tomatoes as you would other tomato varieties. The main difference is that there’s less of a rush to get them going early.
Here’s a guide to staking tomato plants.
How to Store Long Keeper Tomatoes
If you have only a few storage tomatoes, put them in a bowl on the counter; they last well and look nice. But for longer-term storage, a slightly cooler temperature is better. That way, they’ll last longer. I store long keeper tomatoes in a cool basement room, spread out on a tray.
Hurray! No processing, no freezing.
Here’s another way to store keeper tomatoes: Leave the tomatoes on the plant, and then harvest the whole plant. Then, hang the plant upside down, somewhere cool. The tomatoes continue to ripen on the plant.
Wondering about how to ripen all the other green tomatoes left in your garden in the fall? Here’s an article that tells you how.
How to Use Keeper Tomatoes
Keeper, or “winter,” tomatoes are perfect for chopping up to use in salads and in cooking.
My favourite way to use them is in bruschetta.
Tomatoes in March. Grow a “keeper” or “winter” tomato.
Long Keeper Tomato Varieties
My first long keeper tomato variety came from my Dad’s friend Dino. Dino simply called it a “winter tomato.” So I just call it Dino’s Winter Tomato.
When it’s ripe, the skin has an orange colour; and when you cut into it, the flesh has a light red colour.
There are many keeper varieties around. Here are some to try:
‘Long Keeper’ is an old variety that’s widely available.
Prairie Garden Seeds sells a keeper tomato called ‘Clare’s Tomato’.
‘Green Bee’ is a firm-when-ripe tomato that grills well—and it’s also an excellent storage tomato.
Looking for a beautiful keeper tomato? Then try ‘Evil Olive’. It’s a great storage tomato. (Don’t be put off by the name, it’s lovely!)
‘Fakel’ is an old processing variety with a thick skin. It’s a medium-sized red tomato that’s good for fresh eating and storage. So if you want something that’s good sliced but also stores well, a good option. (Determinate plant, so good if you’re doing container gardening.)
‘Piennolo del Vesuvio’ is an Italian heirloom from the area around Mount Vesuvius. It forms clusters with cherry-tomato-sized fruit having a pointy tip. The clusters are traditionally picked and hung indoors to slowly ripen through the winter.
More on Tomatoes
Find This Helpful?
Enjoy not being bombarded by annoying ads?
Appreciate the absence of junky affiliate links for products you don’t need?
It’s because we’re reader supported.
If we’ve helped in your food-gardening journey, we’re glad of support. You can high-five us below. Any amount welcome!
Course: Tomato Overload Masterclass
Want to up your game growing tomatoes?
This self-paced course helps you choose great varieties, grow great seedlings, give plants the care they need, and enjoy an abundant harvest.
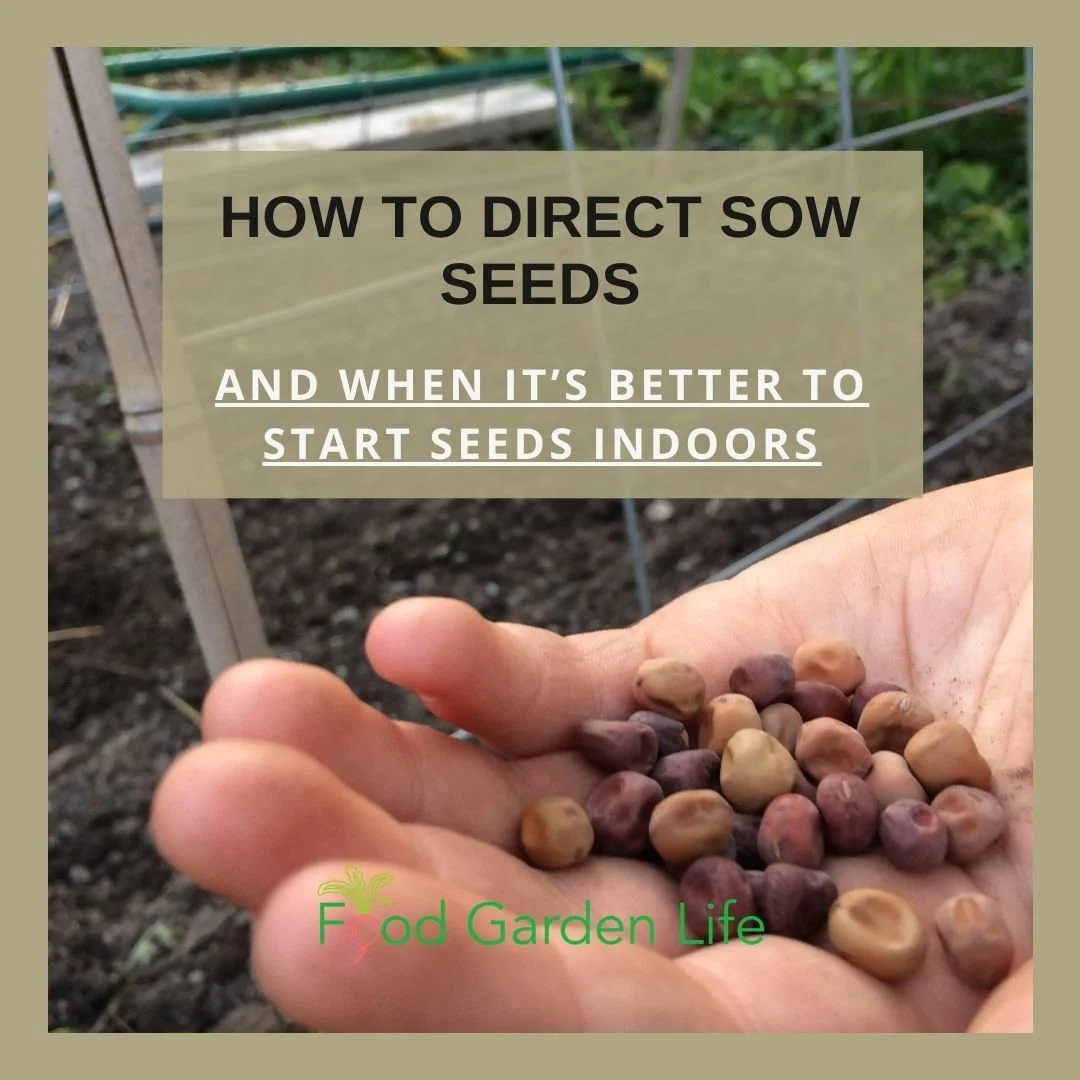
Guide to Direct Sowing Seeds (Why and When to Skip the Transplants!)
Find out how and what to direct seed in your vegetable garden.
by Steven Biggs
Why Direct Sow Seeds?
Ever had transplants that put on the brakes after you move them to the garden?
It’s disappointing.
But a big transplant isn’t always better than a wee seed.
Sometimes, it’s better to plant seeds straight into the garden.
This is called direct sowing, also called direct seeding or direct planting.
This post tells you how to direct sow, best crops for direct sowing—and simple ways to sow seeds in a home garden.
What is Does Direct Sow Mean?
Direct sowing is when we sow seeds—plant seeds—directly in the garden.
This is instead of starting seeds indoors and then move them to the garden later—known as growing “transplants.”
Why Direct Sow Vegetable Seeds?
There are many reasons to direct-sow vegetables.
Here are a few reasons:

Pin this post!
Easier (there's no need to care for seedlings indoors)
Less expensive (no need for potting soil or containers)
Less environmental footprint (yeah, your coir-based and peat-based potting soils have an environmental footprint)
Saves indoor seed-starting space for crops that really need to be started indoors
No need to “harden off” young seedlings before planting them in the garden
Some crops don’t transplant well…and don’t bounce back well from transplanting
When to Direct Sow Seeds
It’s tempting to start direct sowing as soon as the soil thaws in the spring. But it’s often best to wait a bit. Moisture and temperature are two things to consider as you decide when to direct sow your seeds.
Moisture
If the soil is really wet, it can be difficult to get it ready for direct seeding.
The soil might stick to your tools, or might be clumpy and hard to spread around.
Another reason not to work in your garden when the soil is still very wet is that it’s easy to compact the soil—which messes up drainage and makes conditions less suited to your crops.
Temperature
The ideal temperature varies by crop. But in general, when things are still really cold and wet, there’s more chance your seeds will rot before they start to grow. Soil in raised beds warms up more quickly.
In this guide to when to start seeds indoors I also give talk about when to direct seed some crops.
Direct Sowing isn’t Always the Best Choice
Direct seeding isn’t the best choice for all crops, or in all situations. Here are a few things to consider:
In areas with a short growing season, crops that take a long time to mature are usually grown from transplants.
Slugs and other bugs can devastate small, direct-sown seedlings as they emerge…whereas a larger transplant might get through some insect damage.
During hot summer weather, seed germination can be spotty (see below for a summer seed-sowing hack). So crops that we direct sow in the spring are sometimes started indoors and then transplanted during hot summer weather.
In low-lying area, the garden soil might be too wet to direct sow seeds in the spring.
Here’s one more: You’re new to gardening and won’t know the difference between emerging direct-seeded crops and the weed seedlings!
How to Direct Sow Seeds
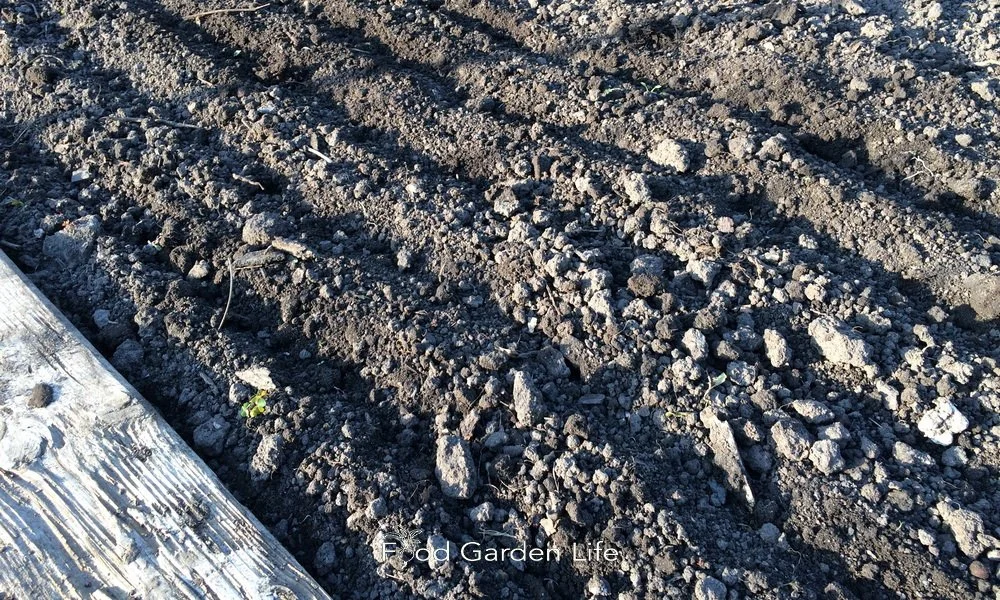
Before sowing seeds, prepare the soil.
Start by preparing the soil ahead of time. When sowing seeds, we want to break up any crust on top of the soil surface, and break up bigger chunks of soil. That way, germinating seeds don’t hit roadblocks.
(Yes, there’s a whole body of work out there on no-dig techniques—and there is a time and place for this…but if you want the best results when direct sowing, prepare the soil.)
Planting Depth
Use the size of the seed as a guide to planting depth. Seed packets usually recommend a depth too.
Plant the seed about twice as deep as it is wide. Too shallow is better than too deep.
But don't feel as if you need to measure and be precise.
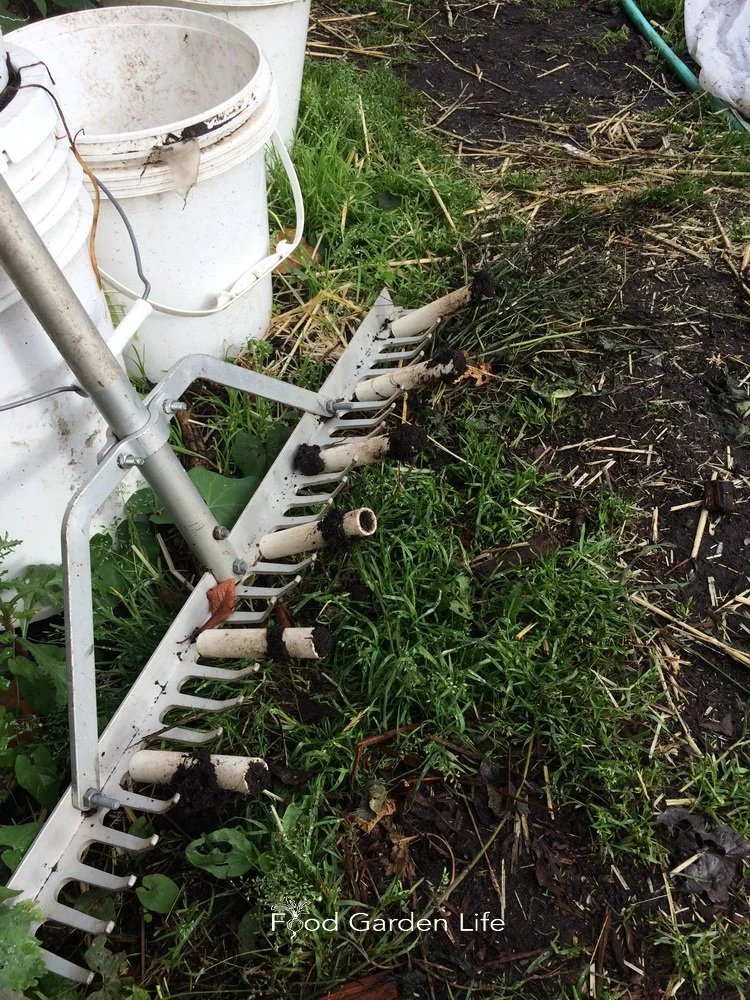
If you’re planting seeds into trenches, you can make well-spaced trenches using a garden rake that has pieces of pipe on it.
Like most things in gardening (and life), direct sowing isn't an exact science.
Trench for Sowing Seeds
If you direct-sow seeds in rows, make a trench with your trowel or the corner of a hoe.
Then, place your vegetable seeds into the trench, and cover with soil.
OR, make your trenches by fitting pieces of pipe onto a garden rake! (See the photo.)
Poke Seeds in the Soil (Planting Seeds Simplified!)
This is low-tech and might be laughable to a commercial grower—but in a home-garden setting, can be a simple approach to direct sow seeds!
I drop large seeds into place, and then just poke them into the soil. Then I scuff the soil to fill the holes.
Poking works well for larger seeds that you can easily see:
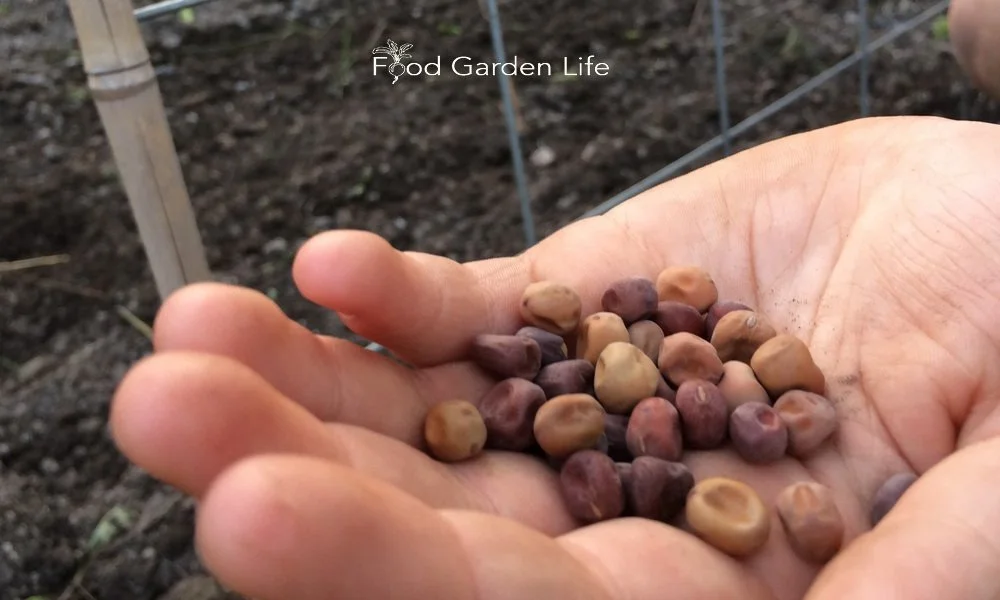
Poking large seeds into the soil is a simple way of planting seeds.
Peas
Beans
Beets
Swiss chard
Squash
Zucchini
If you’re planting a whole block with seeds, as I like to do with beets and Swiss chard, you can do what I call the “scatter-and-poke” method. Scatter seeds to approximately the spacing you want—and then poke them into the soil. Scuff soil to fill in holes.
(Gardening is a great cure for perfectionism, and the scatter-and-poke approach dispenses with all notions of perfection in a garden!)
Broadcast and Cover
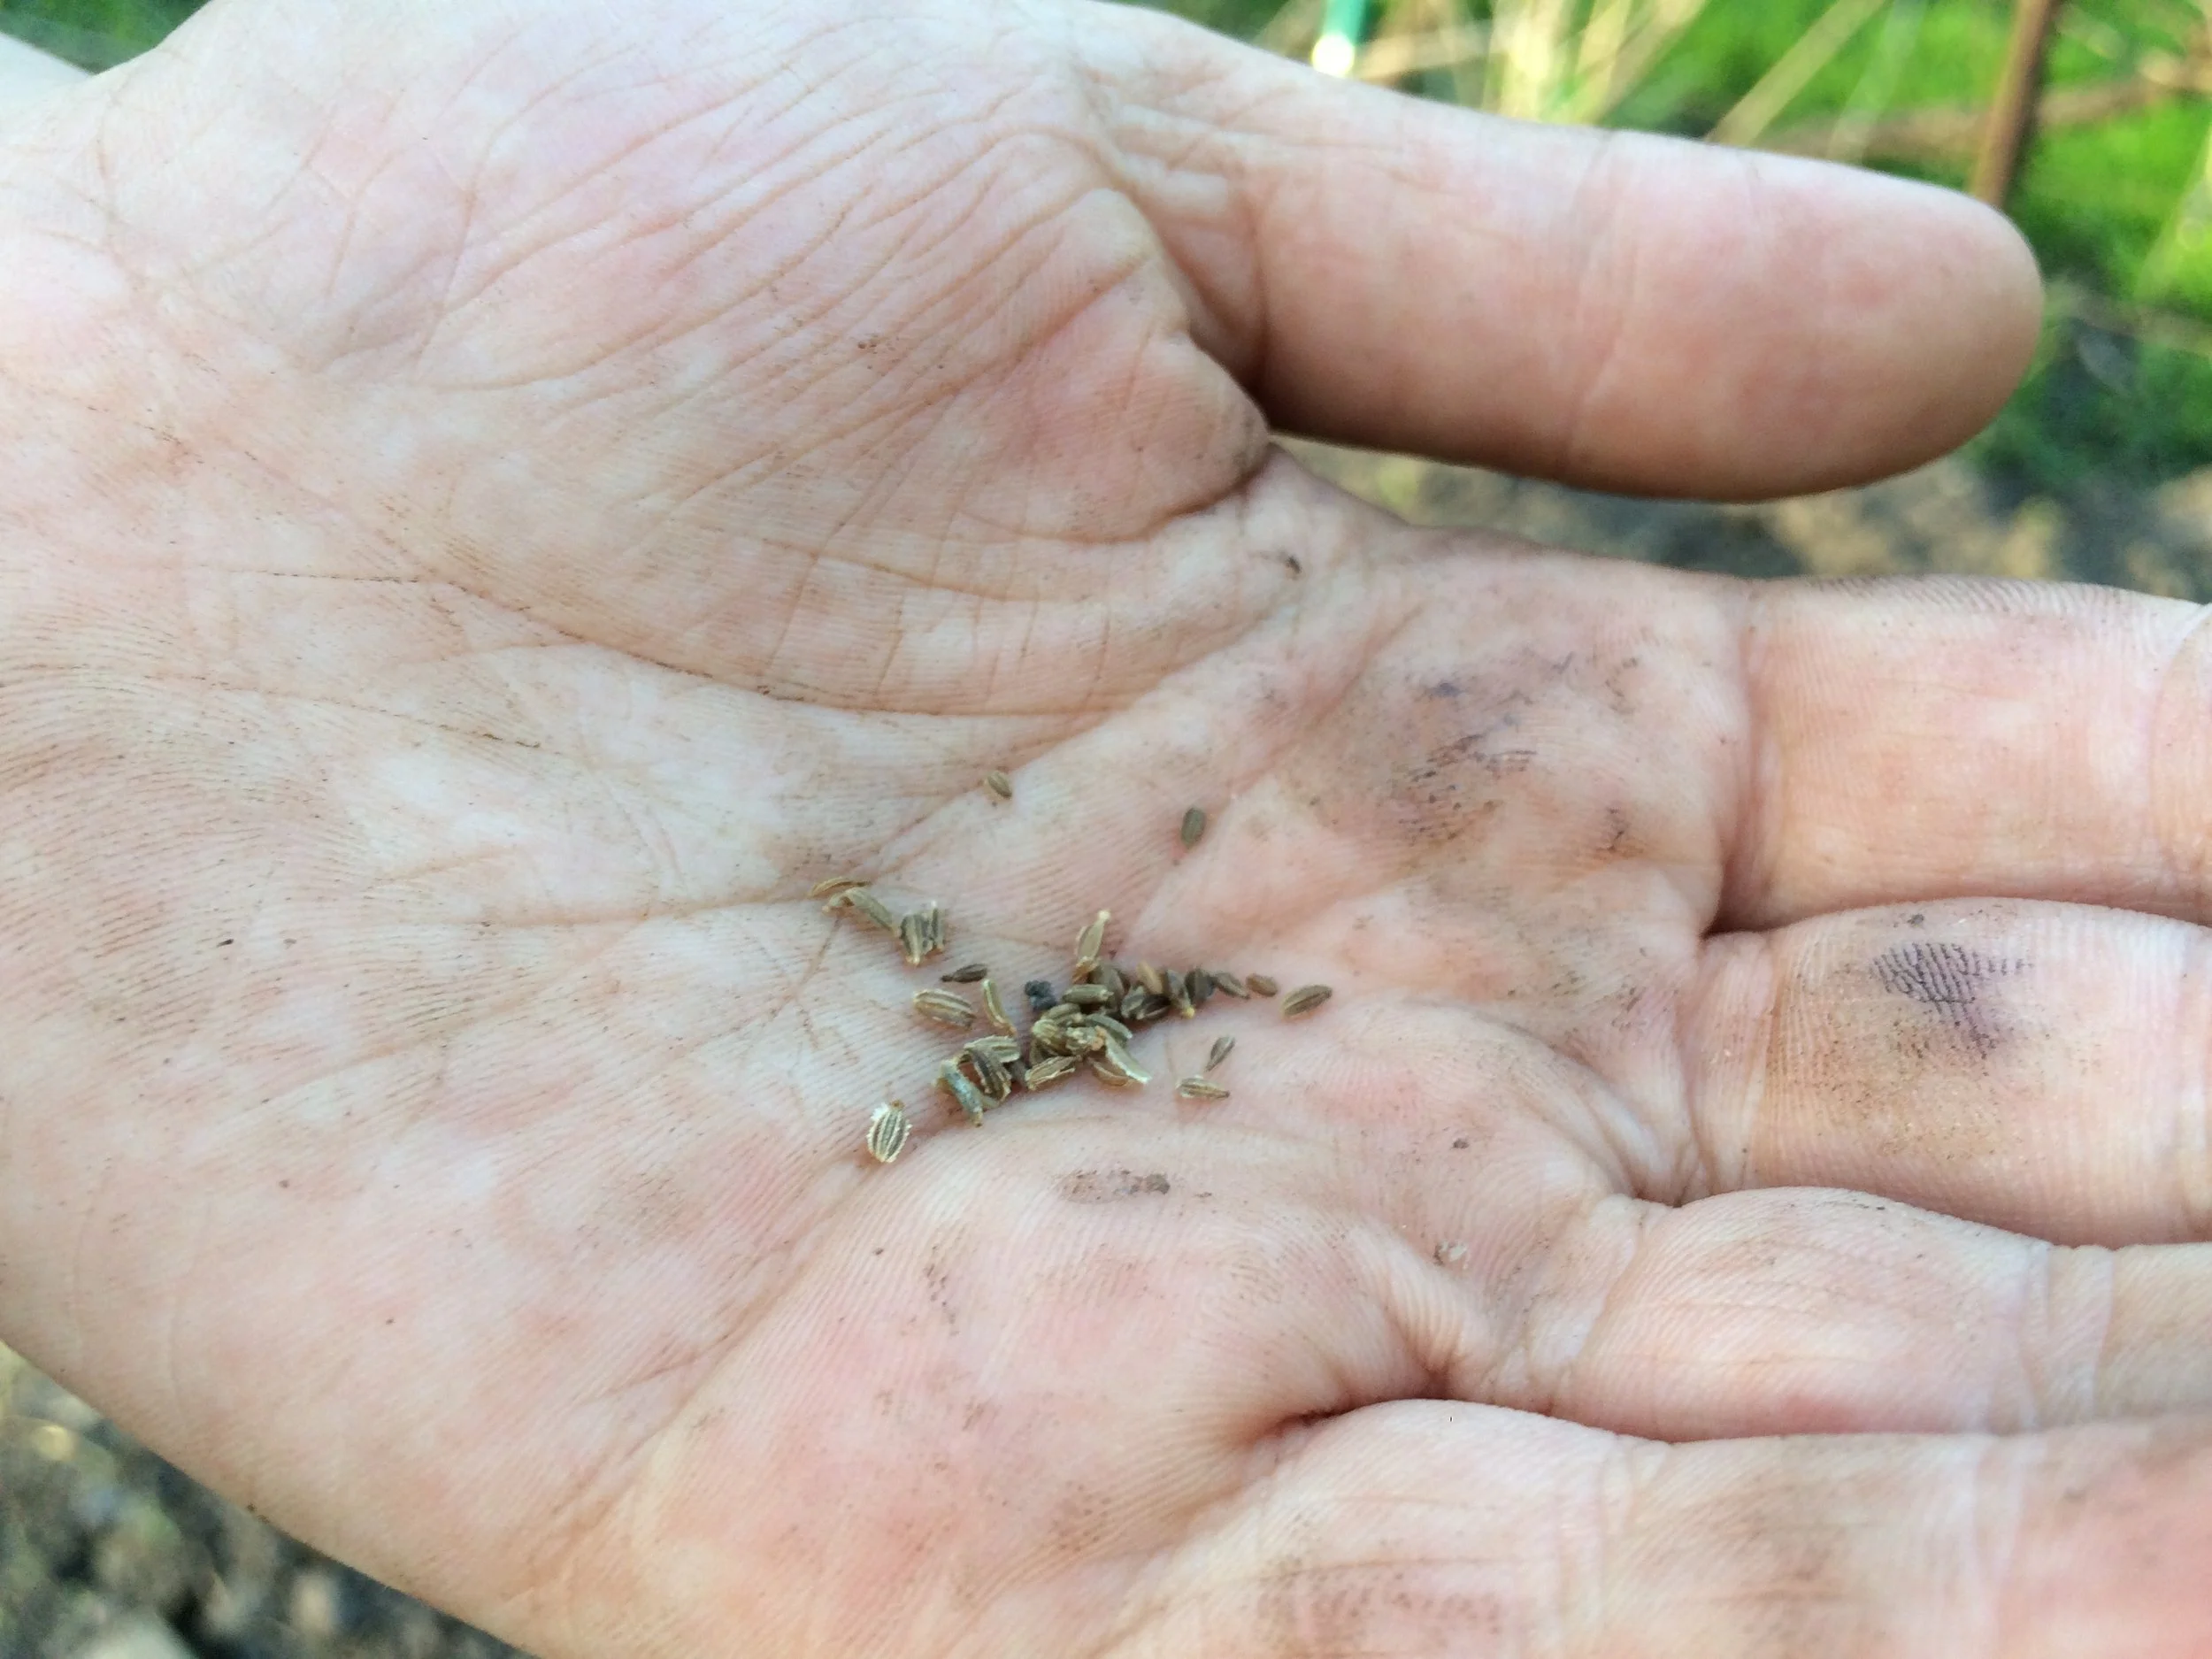
You can sprinkle small seeds such as these carrot seeds by hand, and then cover with soil.
If you’re filling a block or wide row with small seeds (e.g. carrot or lettuce), sprinkle by hand, and then cover with soil.
You might wonder, “Where do I get the soil I’m covering the seed with?” Rake aside some garden soil before you sprinkle your seed in place—and replace it over top of the seed afterwards.
Broadcast and Rake!
I’m always interested in methods that make my life simpler. And raking aside soil before I broadcast seed is a bother.
So I simply broadcast the seed, and then use an up-and-down motion with a hand rake to work some of those seeds into the soil.
Note: There will be some seeds that aren’t at an ideal depth. That’s OK. I’m a home gardener—not a commercial grower. I just seed more heavily to compensate.
Direct Sowing Hacks
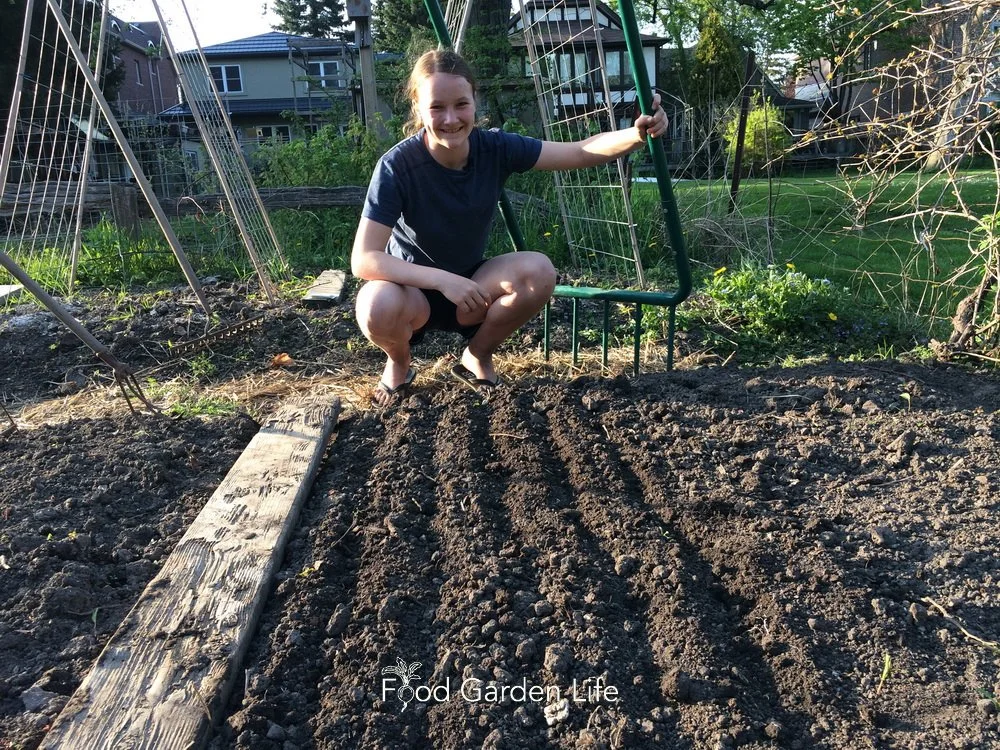
Using a broadfork to make straight rows.
Folded paper. Forget the seed-dispensing gizmos for small seed. Fold a sheet of paper in half. Pour seed onto the folded sheet. Now, use a pencil or a nail to dispense individual seeds off the end of this folded sheet. Low tech, yes—but works well.
Broadfork. When my daughter, Emma, wanted side-by-side trial rows of a number of crops, she used the broadfork to make a tidy set of trenches. (The broadfork is normally used to loosen soil…but this works nicely!)
Seed tape. Seeds embedded in a strip of biodegradable paper. Yeah, a bit gimmicky. I don’t use this. But if you’re gardening with kids, or you have shaky hands and can’t easily dispense seed, it can be useful.

Using boards to keep the soil moist for direct seeding in the summer.
Pelleted seed. Small seeds bulked out with a clay coating. Like seed tape, you pay more per seed. But again, could be useful if you’re direct seeding with kids, or you’re having trouble coping with smaller seeds.
Boards. Yup, low-tech boards over summer-sown small seeds can be a life saver. In summer heat, soil can quickly form a crust that seedling have difficulty breaching. But a board over the soil during the germination window keeps the soil underneath moist. No crust.
Web trays. As soon as squirrels see freshly turned soil in my garden, they’re eager to disinter seeds. It’s infuriating. Who would have thought there’s a higher purpose for those horrid plastic webbed trays that the horticulture industry so loves! Inverted web trays over top of your directly sown seeds keep digging varmints at bay.
Direct Seeding by Crop
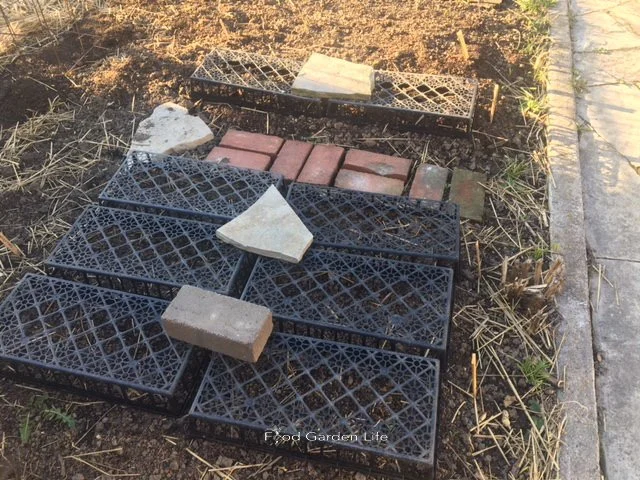
Take that, squirrels!
Leafy Greens. I grow transplants of leafy green crops such as lettuce, spinach, and Swiss chard. I also direct-sow seeds into the garden.
Why both ways?
So I have a succession of harvests.
(It is also insurance. If weather or pests cause less successful results one way, I have a backup!)
Root Crops. I direct sow all my carrots, parsnips, and beets. These crops can all be direct-sown in the garden early. And they don’t respond well to root disturbance.
“Fruit” Veg. For those fruits that we insist on calling veg—tomatoes, peppers, and eggplant—I grow everything by transplants because I’m in a cold climate and I extend the harvest window with transplants.
Vine Crops. The vine crops in the squash and cucumber clans don’t respond well to root disturbance. So direct sowing is always a good strategy.
(But, like the leafy greens, I hedge my bets and both direct sow and start a few transplants.)
Top Direct Seeding Tip
If conditions get really dry just as your seeds are starting to grow, tender young leaves and roots can dry out quickly…and it’s game over.
Keep the soil well watered!
FAQ Direct Sowing
What vegetables can be direct sown?
Direct sow root crops such as beet, carrot, parsnip, radish, and turnip.
Direct sow leafy greens including chard, kale, lettuce, mizuna, and spinach.
Direct seed legumes such as beans and peas.
Do I need to thin direct-seeded crops?
That depends on how much seed you use. In commercial production, growers often use precision-seeding devices so that the seeds are perfectly spaced. So no need to thin. But that’s approach isn’t always practical in a home-garden setting where we’re dealing with smaller, irregularly shaped spaces.
My approach is to direct sow with lots of seed, and then thin out extra plants while the plants are still small. So, as I thin out young spinach plants, I have baby salad greens for supper!
Find This Helpful?
Enjoy not being bombarded by annoying ads?
Appreciate the absence of junky affiliate links for products you don’t need?
It’s because we’re reader supported.
If we’ve helped in your food-gardening journey, we’re glad of support. You can high-five us below. Any amount welcome!
Courses
Here’s a course that guides you through creating an edible garden you love. It’s my ode to edible gardening. You’ll find out how to think outside the box and create a special space. Get the information you need about a wide range of edible plants.
Driveway Makeover! 5 Ideas for Growing a Container Garden for Vegetables
A container vegetable garden is a good way to fit lots of vegetable crops into a small space. Find out how to get started.
by Steven Biggs
My Driveway Container Vegetable Garden
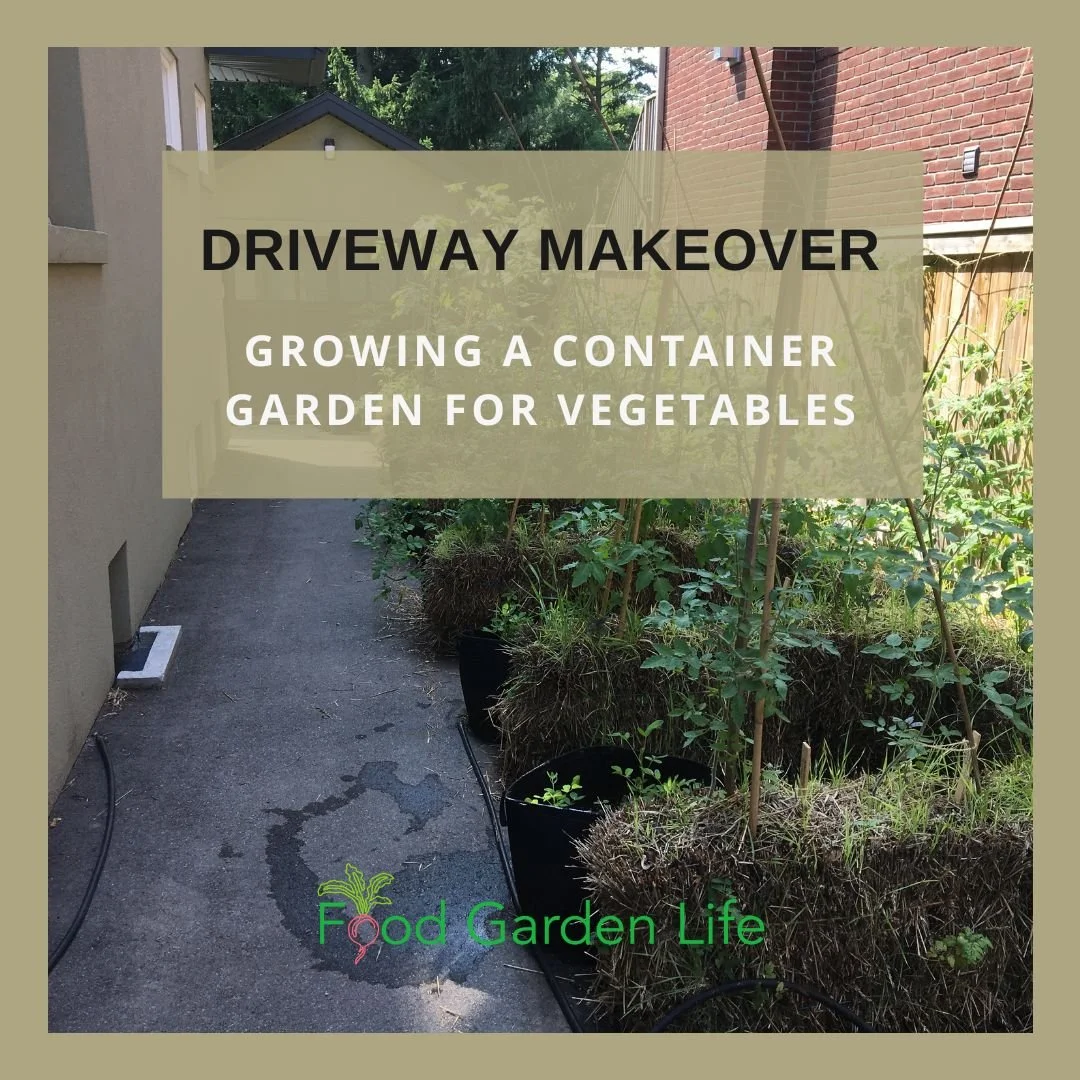
Not enough space to grow everything you want? Be creative! A container garden is a great way to fit more vegetables into your yard.
Here’s our driveway container garden. The driveway container garden is a quick, temporary space-making solution so we can grow extra tomato, pepper, potato, summer squash, and chard plants.
In this vegetable container garden, we use straw bales, fabric pots, nursery pots, bushel baskets, and vertical gardening techniques to make the most of the space.
Do you have an underused space that you can use for growing food? Many yards do. It could be a driveway, patio, or even the hard-packed space alongside a hedge. In this post, I look at how to add growing space to your yard.
Ideas for Your Vegetable Container Garden
Container gardening is part science, and part creativity. There are lots of ways to approach it. Here are five ideas we’ve used to make the most of our driveway for growing vegetables.
1. Strawbale Gardens: Grow Vegetables in Containers that are Biodegradeable
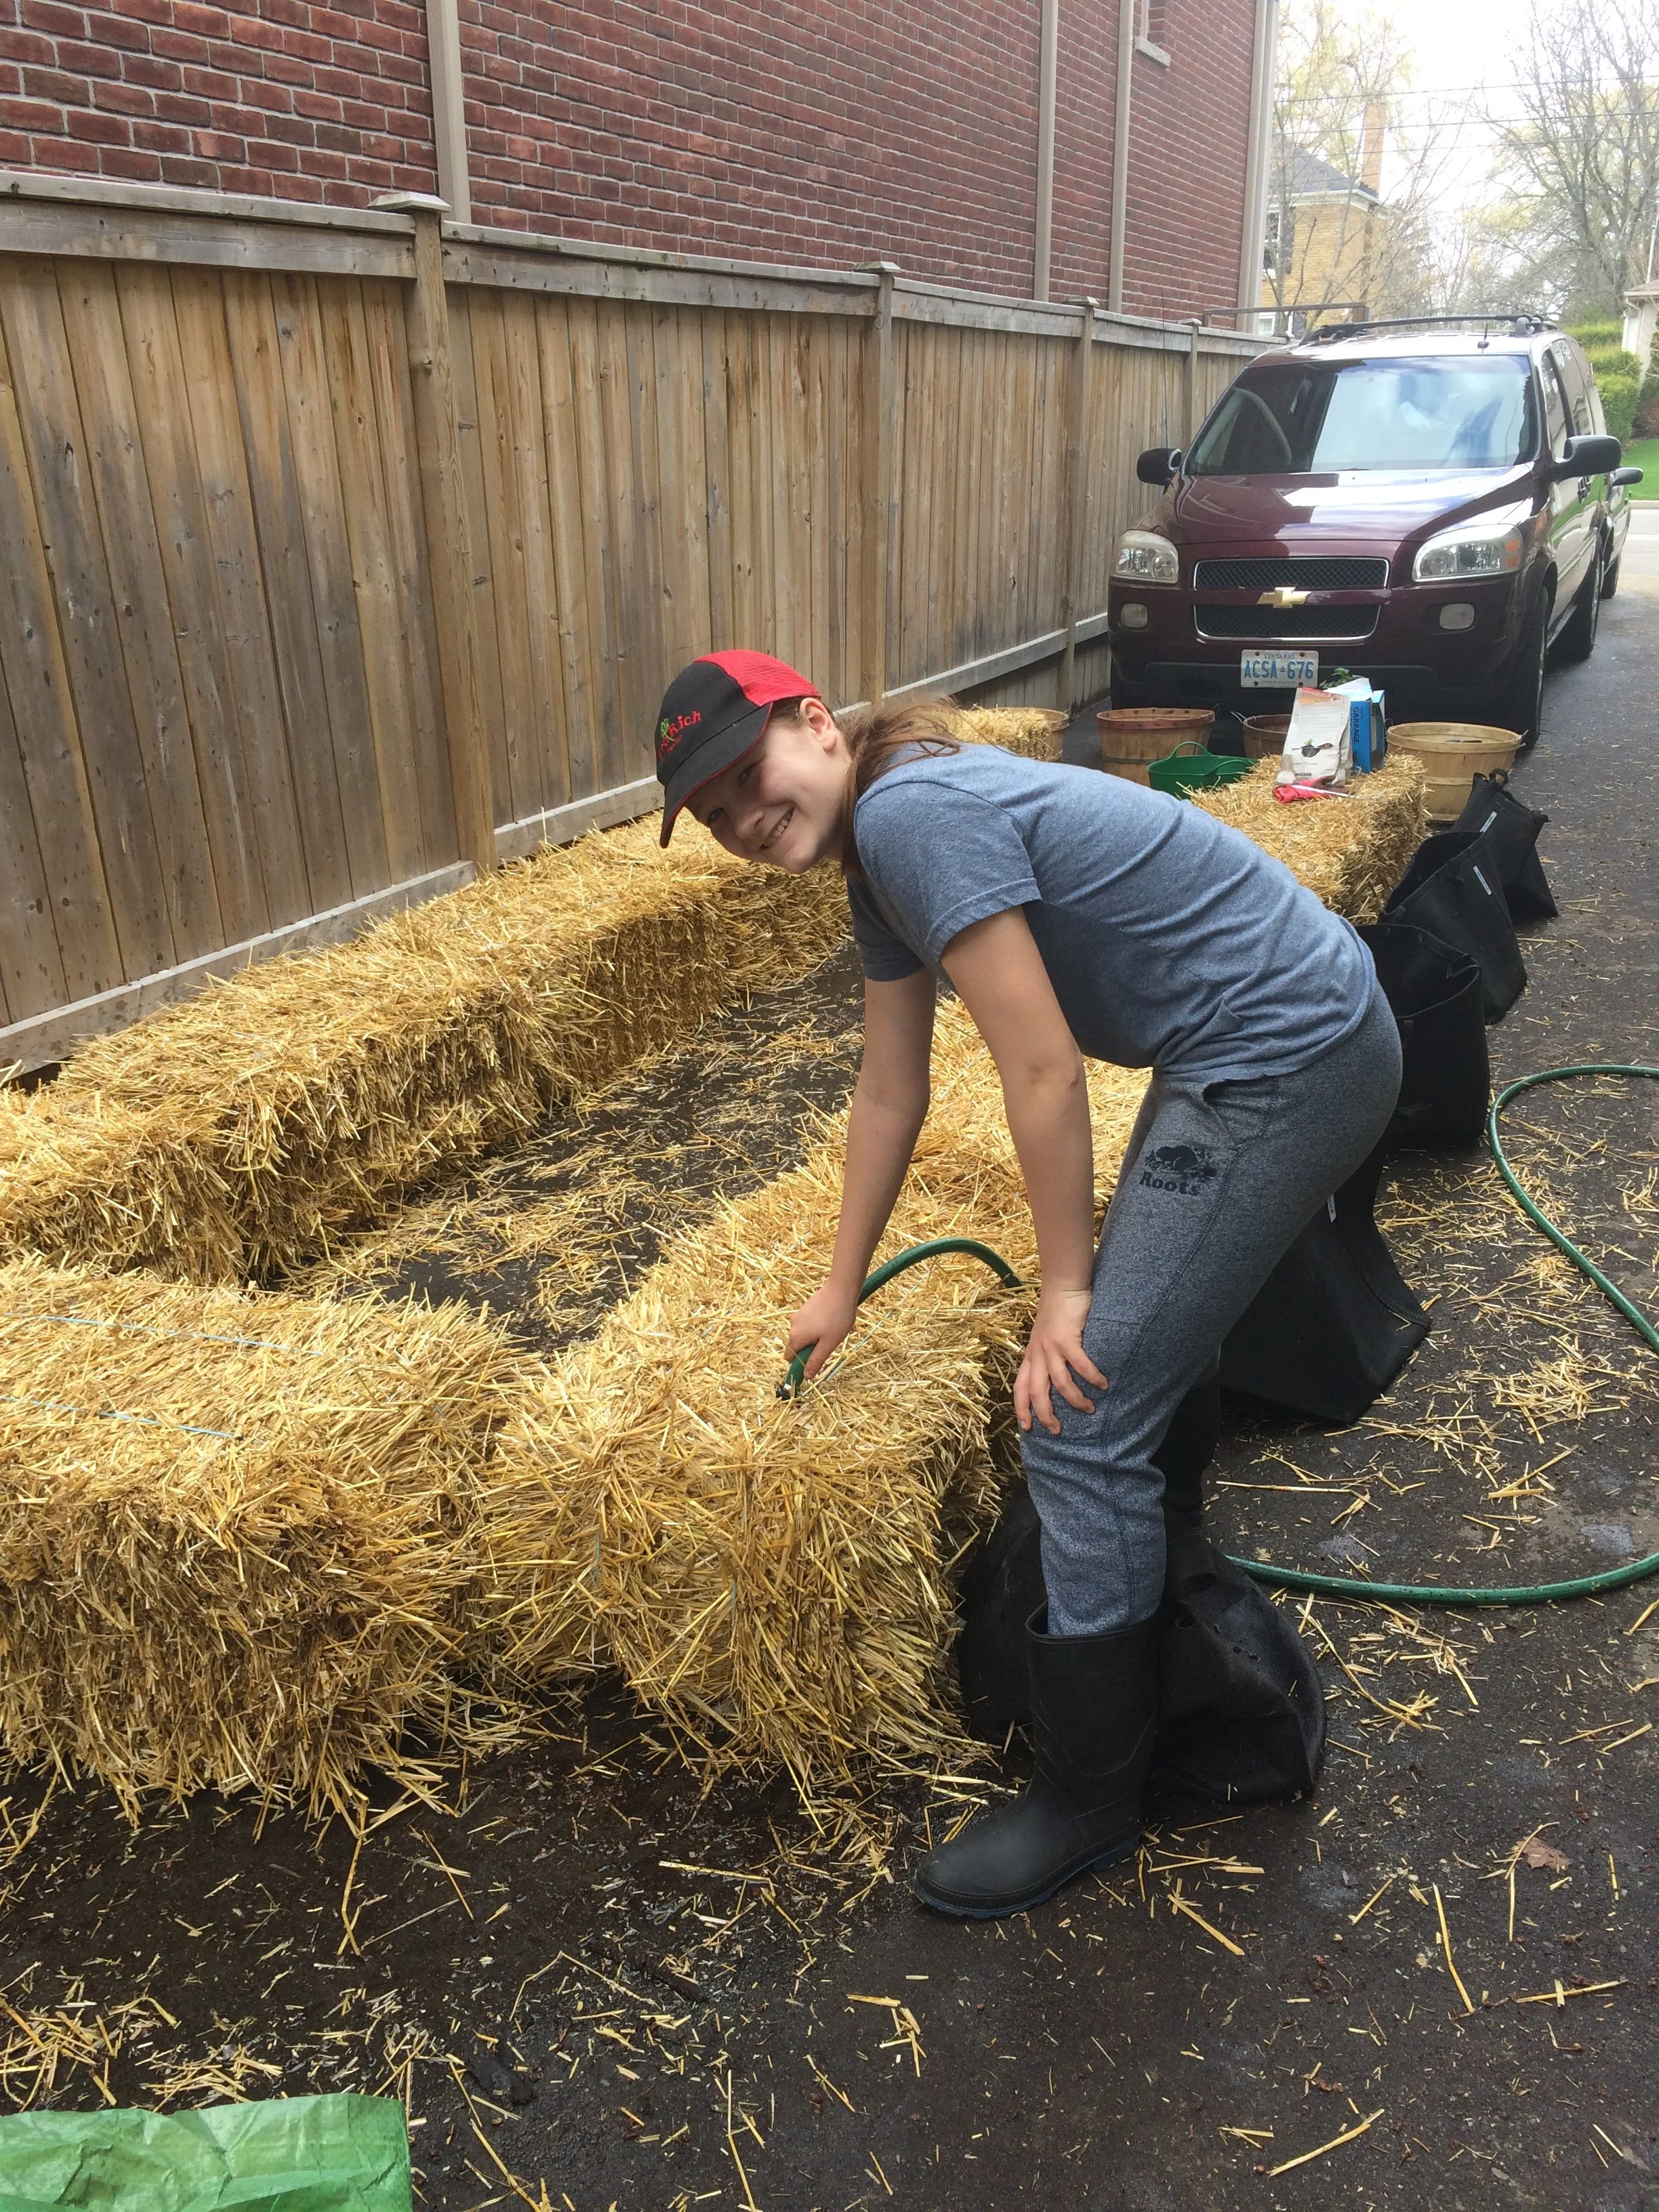
Wetting the straw bales to start the “conditioning” process.
A lot of visitors take a second look at my straw-bale garden and wonder where I put the potting soil. There is no potting soil: The straw bale is both the container and the growing medium. No potting mix required!
The decomposing straw gives plant roots needed air while retaining moisture…like a big sponge.
By the end of the season, when we pull apart a bale, the inside is dark and crumbly. It’s already partially composted and perfect to use as mulch on our gardens. Then, we start again with new bales the following year.
We plant the top of each straw bale with tomato plants and leafy greens. Then we put bush beans on the sides of the bales. (Just poke the bean seeds into the bale!)
Important: If you’re starting with new, fresh, dry bales, the first step is to get microbial activity underway by watering them and feeding them. This step is called “conditioning.”
I’m a big fan of straw-bale gardening. If you plant to do it for the first time, make sure to condition the bales properly. Find out more about straw-bale gardening and how to condition the bales.
2. Bushel Baskets: Growing Vegetables in Repurposed Containers
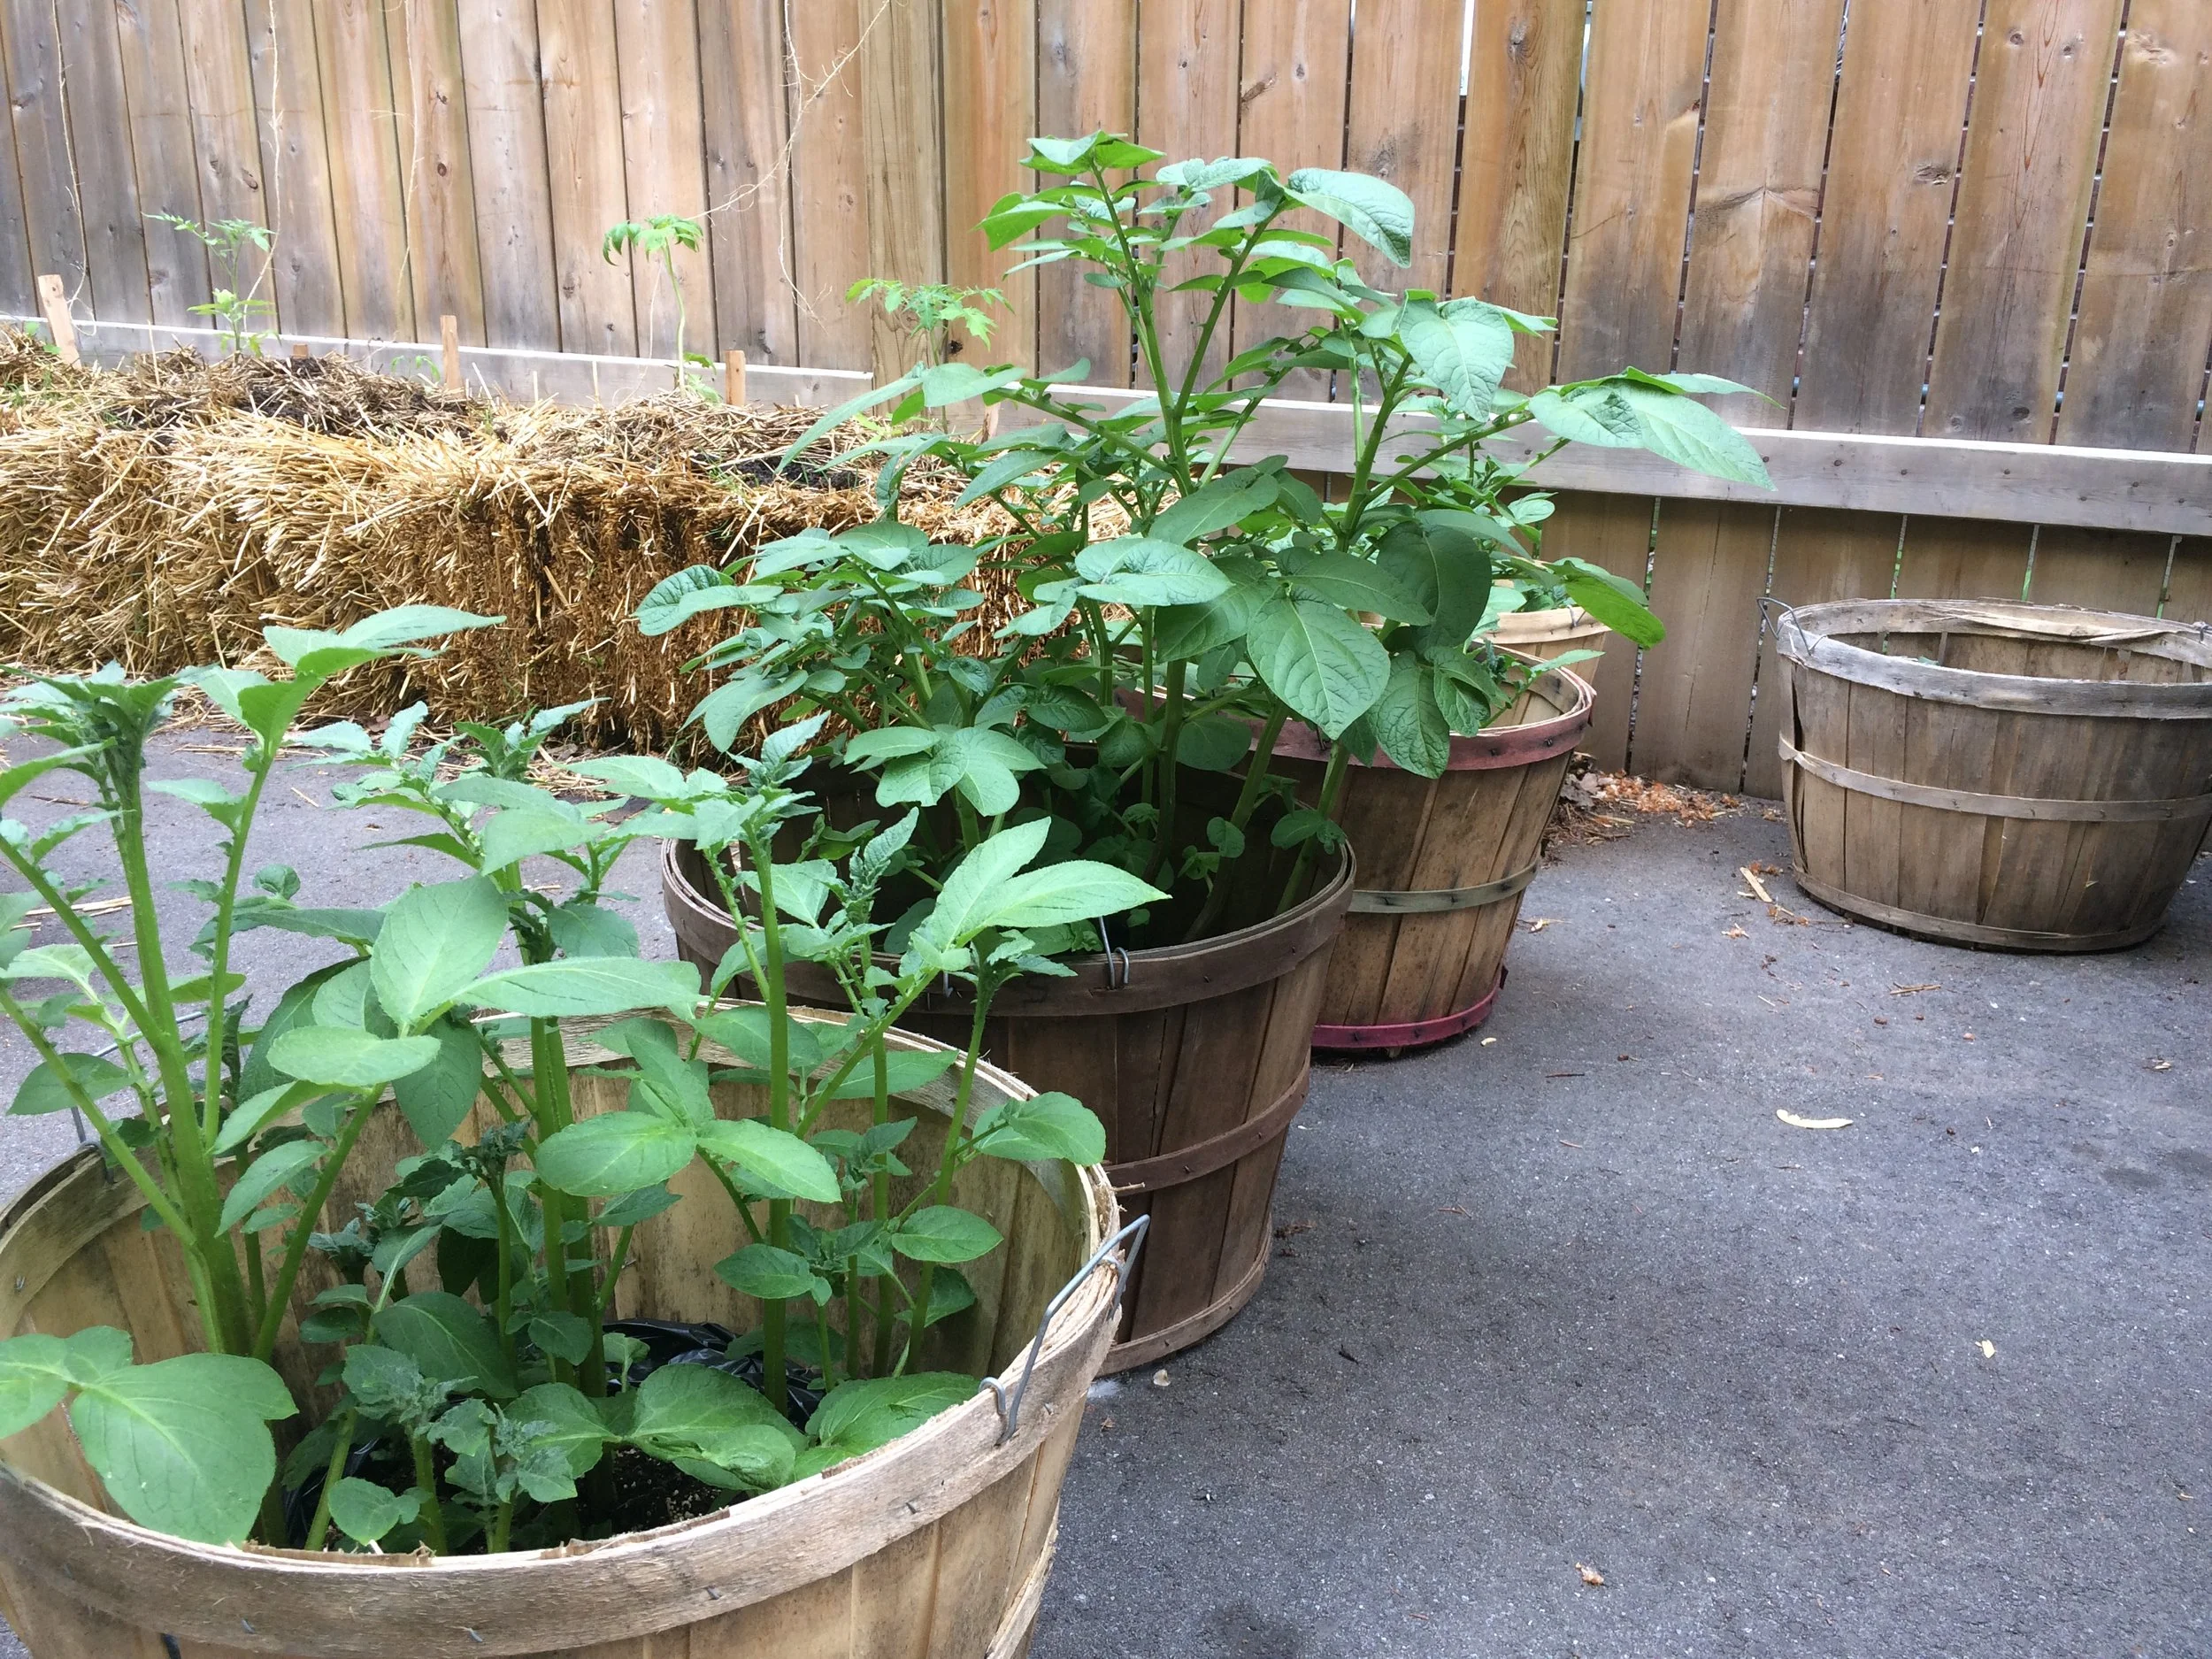
Container vegetable gardening with repurposed stuff! Potatoes growing in lined bushel baskets.
We often have extra bushel baskets from our fall cider-making. So we use them for growing potatoes. (We can’t grow potatoes in our back yard because our neighbour’s black walnut tree gives off a compound that kills them. Here’s more on black-walnut toxicity.)
We line the bushel baskets with plastic bags so that the potting soil stays moist longer and so the bushel baskets won’t decompose as quickly. (Important note: We poke drainage holes in the bottom of the bags!)
There are lots of repurposed items that work well as containers. Here are a few ideas:
Milk crates. I’ve used these in previous gardens. Just cover the openings on the side and bottom with newspaper or cardboard, so the soil doesn’t escape.
Old wheelbarrow. A friend uses an old wheelbarrow as a driveway planter.
Wash basins. I have neighbours who use metal wash basins as vegetable garden planters. (Make sure to drill drainage holes in the bottom.)
3. Fabric Pots: Garden in Pots that are Moveable

Fabric pots are moveable, and a great way to start container gardening.
These pots are widely available. What we like about them is that they have handles so we can move them aside if we need to move anything large along the driveway.
I’ve seen impressive rooftop container gardens created with fabric pots. While some gardeners use drip irrigation to keep the soil consistently moist, a more simple approach is to put a saucer underneath; as the potting mix begins to dry, water in the saucer wicks upwards.
4. Fence: Grow Vegetable Plants on Surrounding Features
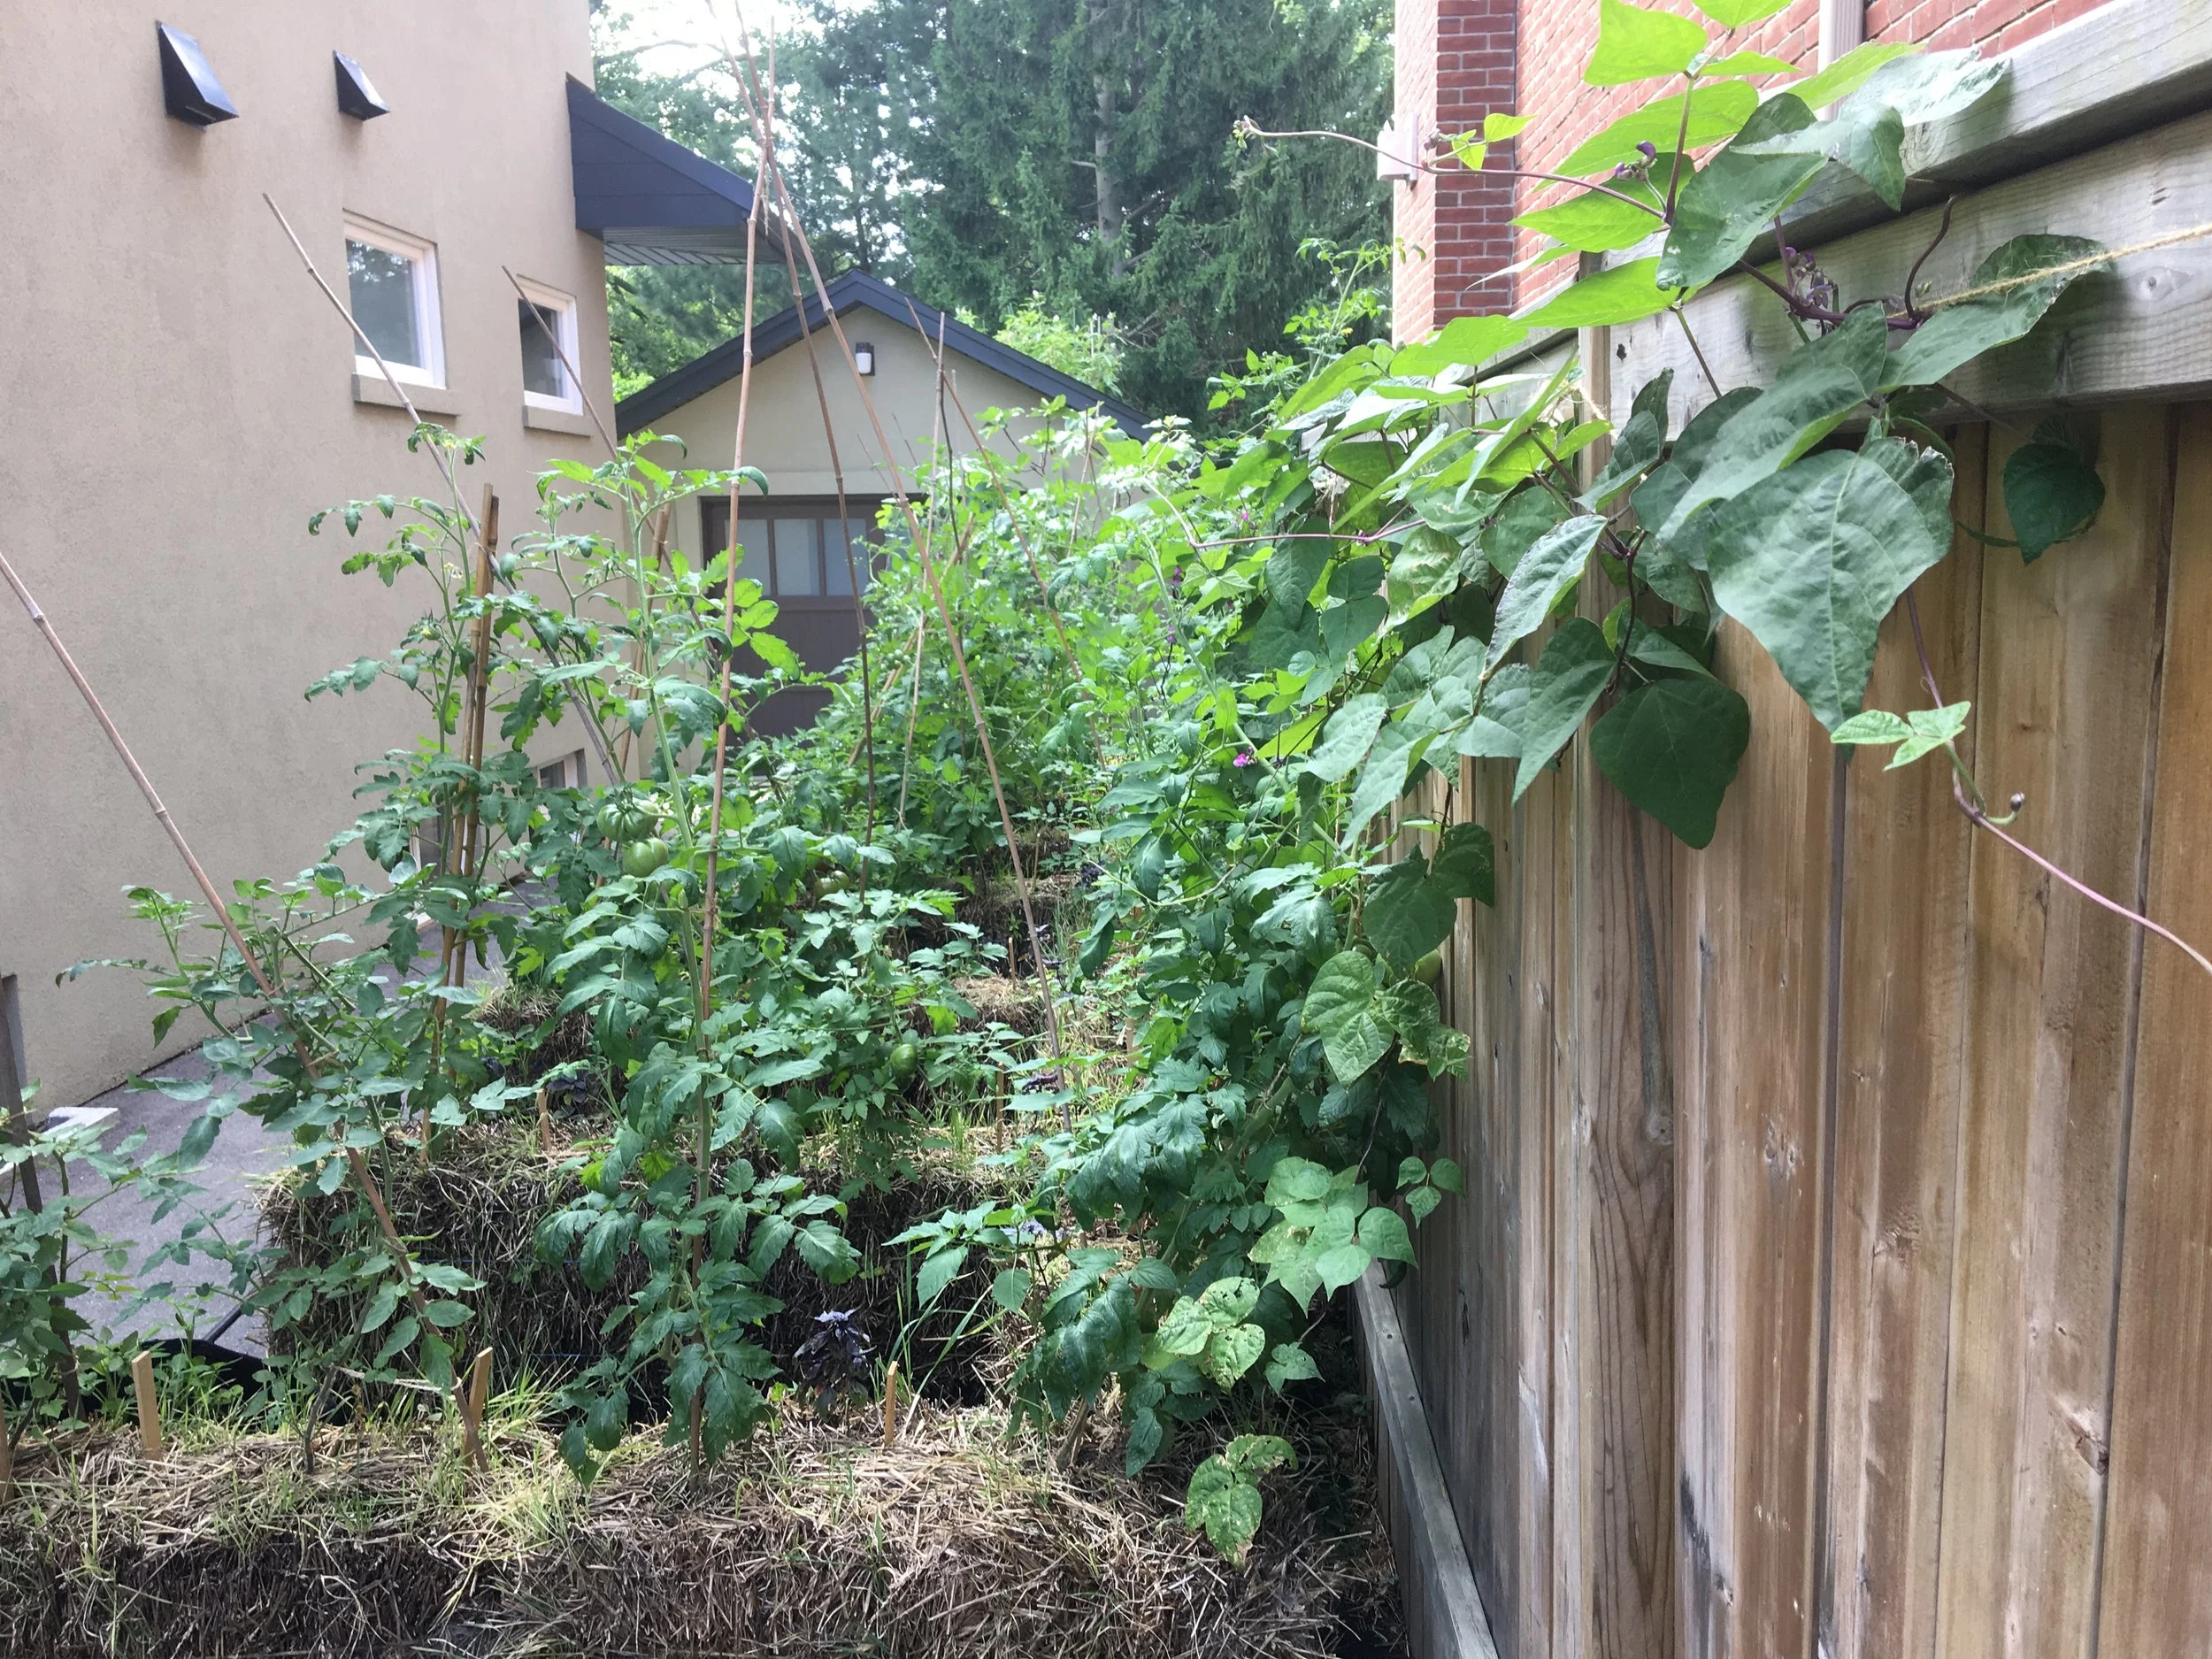
We train tomato plants up the twine that is dangling from the top of the fence.
Sometimes it’s possible to squeeze more crops into a space by growing some of them upwards—a concept that’s often referred to as “vertical gardening.” In the case of our driveway, there’s a wonky board fence that I like to hide with a wall of tomato and squash!
We plant tomatoes next to the fence, and then train them up twine suspended along the fence. We also grow squash vines along the fence—well past where the garden is.
Idea: I’ve also grown squash along hedges and up trees. Because the vines roam around, there are lots of vertical-gardening possibilities.
Here’s more about vertical gardening.
5. Nursery Pots: Figs Growing in Containers
Next to my garage is my potted fig “orchard.” It’s a collection of potted fig plants growing in nursery pots. These fig trees spend the winter in my garage.
Nursery pots are an inexpensive way to start container gardening. Talk with garden centres and arborists—you can often get them for free or very inexpensively.
If you’re interested in growing figs in a cold climate, here’s more about how to do it.
Grow a Container Vegetable Garden
And get an early harvest of crops that usually take too long!
Plan Your Container Vegetable Garden
Choose the Location
If you’re thinking about a container vegetable garden but don’t know where to start, choose your location first.
Then, once you’ve decided on a location, you’ll know how much sunlight you’re dealing with. Remember that full-sun crops such as tomatoes can do respectably well in partial sun. (This is not something a commercial market gardener would do…but if you’re a home gardener, conditions often aren’t perfect.)
Something else to think about is access to water. Is there a tap or hose nearby?
Choosing Container Plants
When it comes to choosing container gardening crops, a good starting point is things you like to eat.
Then, think about crops that do well in containers. Most vegetables grow well if a container is big enough, but some crops are more practical than others.
For example:
Pole beans are great if they're next to something they can grow on, but, otherwise, bush beans are more practical because you don't need to make a trellis.
Parsnips and Brussels sprouts take the whole summer and fall to mature. Instead, look for crops that mature more quickly, like carrots and carrots.
Here’s a list of best vegetables to grow in pots.
If the location is shady, here’s a list of crops that grow in shade.
Need Inspiration?
Here’s our chat with a gardener who grows a whole garden full of hot peppers in containers.
Consider Containers with Reservoirs
A key to success—and common reason for failure—with container vegetable gardening is watering. When the soil in containers regularly dries out, your vegetable plants put on the brakes. Growth stalls. Or, even worse, your plants skip straight to flowering before they're big enough.
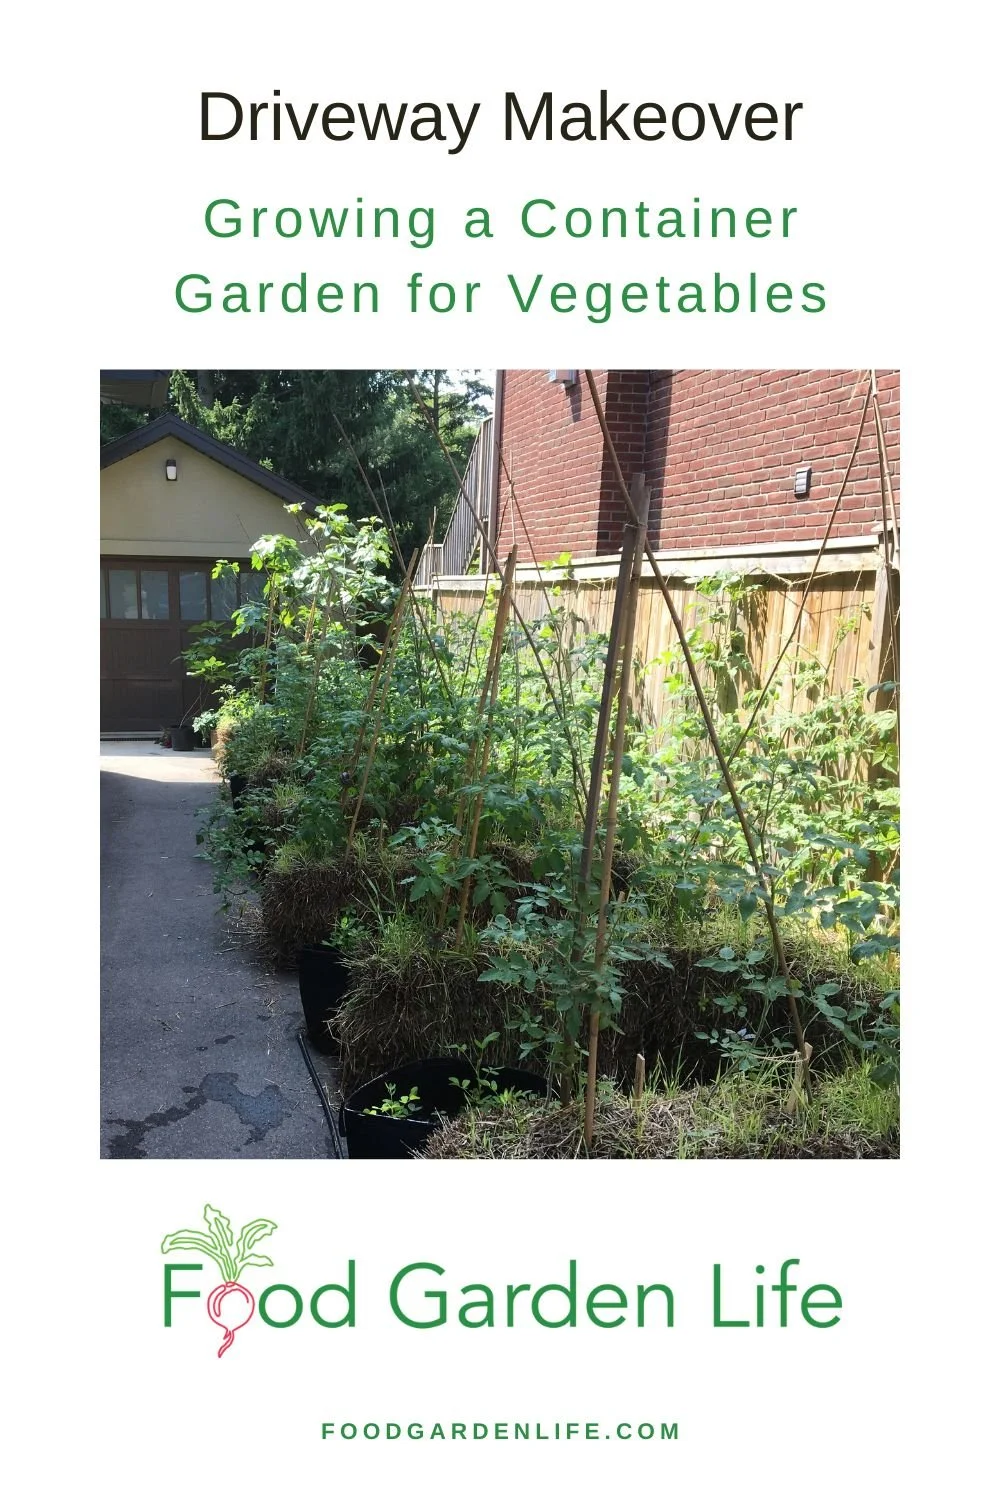
Pin this post!
(When you’re looking for bargain plants at a big-box store and see what looks like a bonsai cauliflower plant that’s only six inches tall, chances are that the plant got parched too often…and that stress made it flower before its time.)
If the potting soil is consistently moist, your crop will be miles ahead. It makes a big difference.
You can keep the potting mix consistently moist with what’s called “sub-irrigated” pots. This is just a fancy way of saying a container with a reservoir. As the potting mix begins to dry, water from the reservoir wicks upwards, keeping the soil continuously moist.
This sort of container is widely available—but you can easily make your own.
Find out more about sub-irrigated (a.k.a. self-watering) pots.
More Container Ideas
If space is tight, small containers might be your only option. I've made herb container gardens by dotting potted plants on a staircase.
Don't forget window boxes. Although they're shallow, they work well for shallow-rooted crops such as leafy greens.
Hanging baskets are a great way to fit more vegetable plants into your container garden.
Find This Helpful?
Enjoy not being bombarded by annoying ads?
Appreciate the absence of junky affiliate links for products you don’t need?
It’s because we’re reader supported.
If we’ve helped in your food-gardening journey, we’re glad of support. You can high-five us below. Any amount welcome!
Best Juglone-Tolerant Plants for Food Gardens Near Black Walnut Trees
By Steven Biggs
Growing Food Crops Near Black Walnut Trees
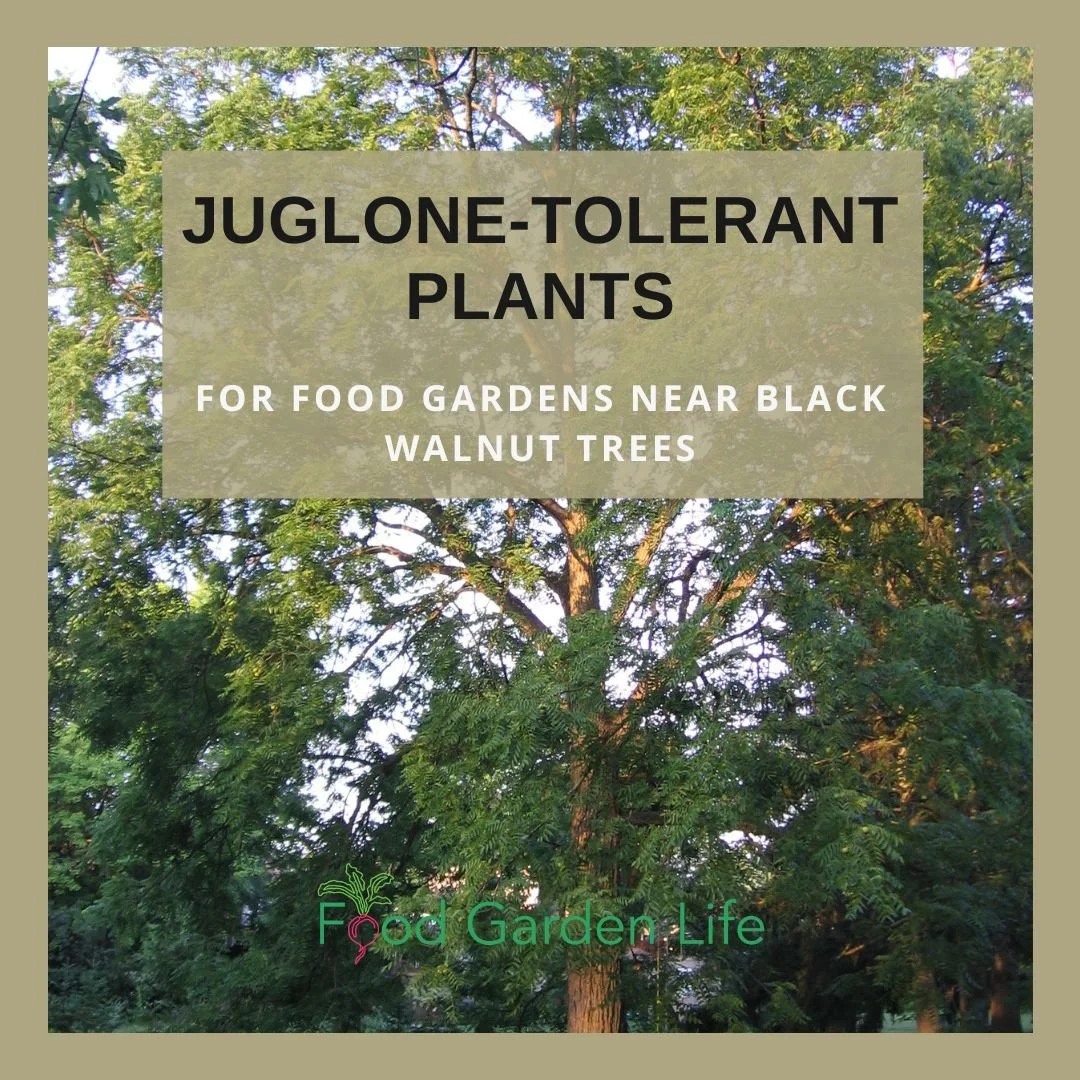
I bought my current home in the late winter when there were no leaves on the trees. So I didn't notice that the massive black walnut tree next door. Yikes! It's created a lot of gardening hurdles.
Black walnuts are known for their beautiful wood. Prized in fine woodworking. But there's a sinister side too...they have the odious reputation as trees that poison nearby plants.
A commercial grower or a gardener in a rural area might react with a chainsaw. Not an option for most home gardeners. Especially in the city where trees have the same rights as taxpayers.
But I've figured out how to grow a thriving vegetable garden, edible landscape, and fruit crops all around that black walnut tree. If you want to grow food crops alongside these beautiful but challenging trees, keep reading: This post tells you what you need to know to successfully grow food plants—even if your yard is overshadowed by a black walnut tree.
Primer: Black Waltnut Toxicity
Black walnut (Juglans nigra) trees give off something called juglone, which can affect the growth of nearby plants. Not a bad thing from the walnut's perspective...because there's less competition.
Juglone is in all parts of the black walnut tree, including the roots, leaves, and the nuts.
Not all plants are affected by juglone.
As juglone builds up in the soil under and around the tree, it affects nearby susceptible plants.
If you like the technical lingo: When a plant makes something that inhibits the growth of other plants, it's called "allelopathy."
Tips for Gardening Near Black Walnut Trees
Sources of Black Walnut Toxicity
Let's take a look at how juglone gets from the tree into your soil. If there's a walnut tree, you'll have more juglone than you want. But you can do some things to reduce black walnut toxicity in your garden.
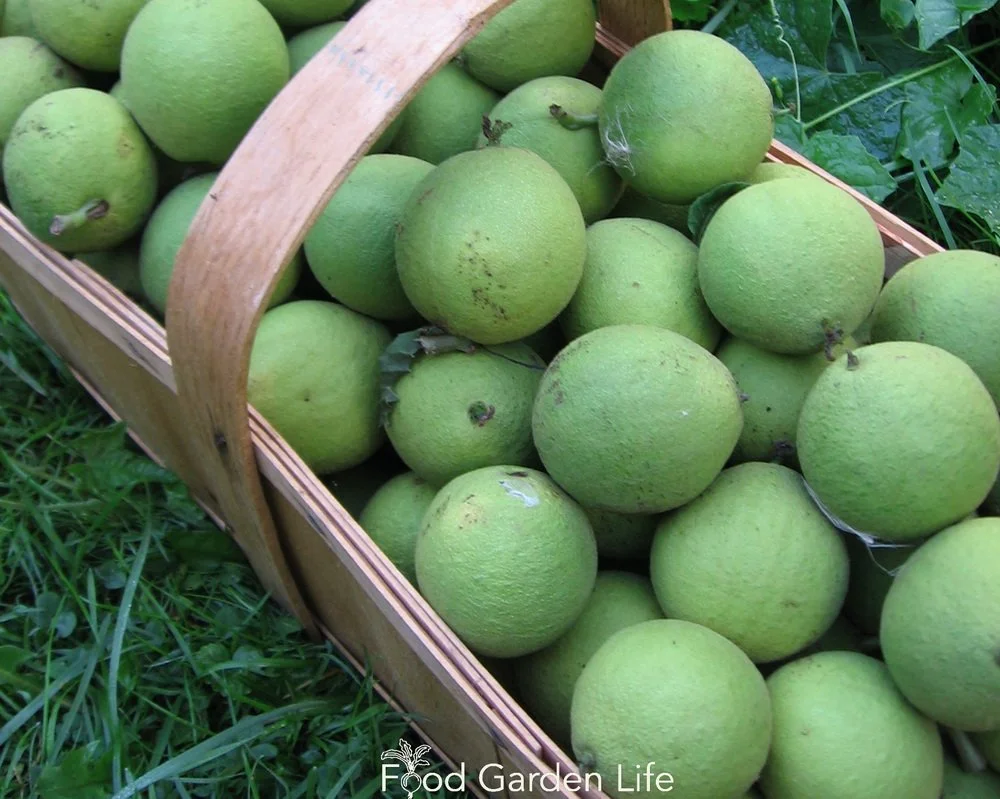
Black walnut hulls also contain juglone.
Roots. Walnut tree roots release juglone into the soil. Remember the black walnut roots if you're thinking of raised-bed gardening, because tree roots can (and do!) grow up into raised beds. You need a raised bed that the roots can't get into. (See below, Raised Beds.)
Leaves. I don't bother removing walnut leaves from my vegetable garden beds near the black walnut tree. Those beds are already loaded with juglone. But I do remove fallen walnut leaves from my raised beds, where the soil is not contaminated with juglone. I don't compost black walnut leaves with leaves from other parts of my yard. No point making killer compost. (Composting breaks down juglone, but in a home garden we don't have perfect composting conditions, so you won't know how long until your compost is juglone-free.)
Nuts. Black walnut hulls also contain juglone. Again, I removed them from the raised beds where the soil isn't full of juglone. If I'm not fast, the squirrels help with cleanup! Bothered by squirrels? Here are 50 ways to foil squirrels in your food garden.
Wood. If you're getting a load of wood chips from an arborist, make sure there isn't chipped black walnut in there!
Other trees in the same family as black walnut (the Juglandaceae family) give off juglone too. These include butternut, pecan, English walnut, heartnut, and hickory. But black walnut gives off the most, hence its reputation and the term "black walnut toxicity."
How Big is the Walnut "Kill Zone"
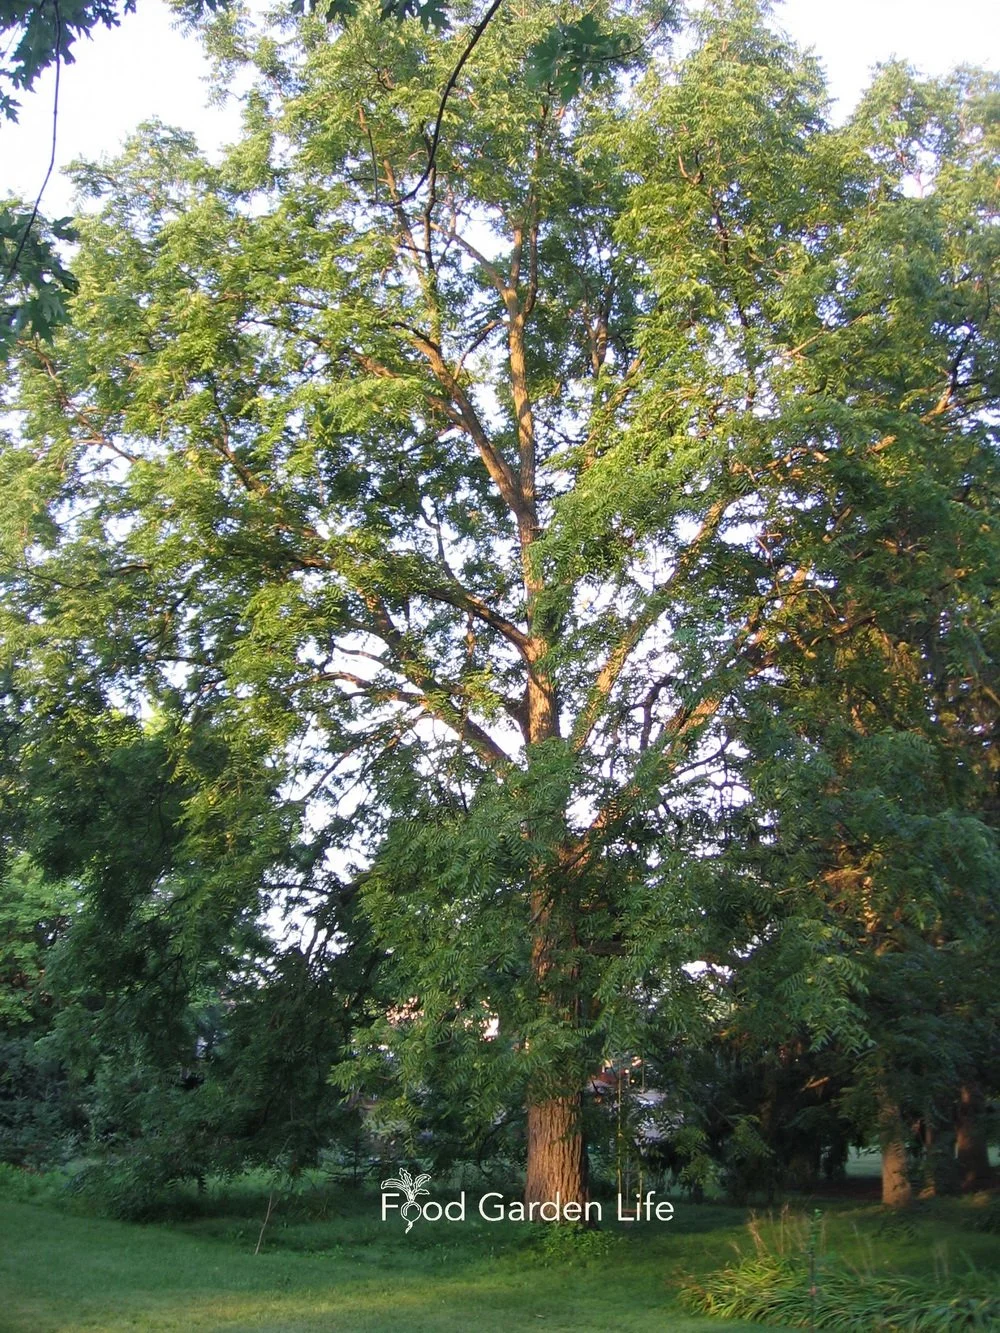
The bigger the tree, the bigger the zone where you’ll get black walnut toxicity. My neighbour’s tree is big…and so is the kill zone.
I remember hiking in a nearby ravine with a semi-wooded, scrubby area. The scrub was dotted with young black walnut trees. And underneath these young trees there was mostly grass. Like a doughnut under each tree. Far less competition. I call that the "kill zone."
The size of this kill zone in your yard depends on how big the tree is and how well drained the soil is. Soil drainage, soil type, and microbes are involved in breaking down juglone. That just means that determining the size of the kill zone is not an exact science.
When I first started gardening near my neighbour's big black walnut tree, I figured that if I planted beyond the "drip line" (which is what's under the tree canopy) it might be OK.
It wasn't.
The young espaliered apple trees I'd worked hard to shape? Toast. Even though they were 15 metres away. The effects of juglone can extend well beyond the drip line of big trees. For a big tree, I'd use 15 metres as a starting point. The farther the better.
Symptoms of Juglone Toxicity
Juglone can cause yellowing leaves, partial or total wilting, stunted growth, and, possibly, death of susceptible plants.
The symptoms might look like drought stress at first. That's what I saw the first time it affected our tomato crop: Wilting even when there was ample soil moisture. But by then, it's too late. Game over. No matter how much you water.
Walnut-Wise Food Gardening
3 Steps to Create a Thriving Vegetable Garden or Edible Landscape Near a Black Walnut Tree
Consider the kill zone. Once you've mapped out the likely kill zone, you can start planning where to put your juglone-sensitive plants, and where to put your juglone-tolerant plant species. Play it safe, and assume the kill zone is bigger rather than smaller.
Choose wisely. There are oodles of plants that are tolerant to juglone. Use the lists below to help you choose what to grow—and what not to grow.
Keep crops out of affected soil. Use containers and raised bed to grow juglone-sensitive plants close to a black walnut tree. But you have to do it right. (But see Raised Beds, below, so that you do it right.)
Underneath my neighbour's black walnut tree I have a small pawpaw patch (these are shade-tolerant native plants with a really tasty fruit, worthwhile working into your walnut-wise garden.) There's also small fruit such as bush cherries, chokeberry, and autumn olive closer to the edge of the dripline, where there's more sunlight. Then, further out, where there's a bit more sun, I have raised beds for juglone-sensitive plants. And finally, still within the kill zone, I have a really big veg patch, filled with crops that aren't affected by juglone.
Container Veg Gardening Course
As well as helping with your walnut problem, a container garden is a great way to harvest more from a small space. If you want to take container gardening to the next level, check out the course below on vegetable container gardening.

Raised Beds and Containers to Solve Black Walnut Toxicity
A raised bed allows you to grow juglone-sensitive crops in the kill zone. But you have to set it up properly...or it won't help for long. Tree roots grow up into raised beds.
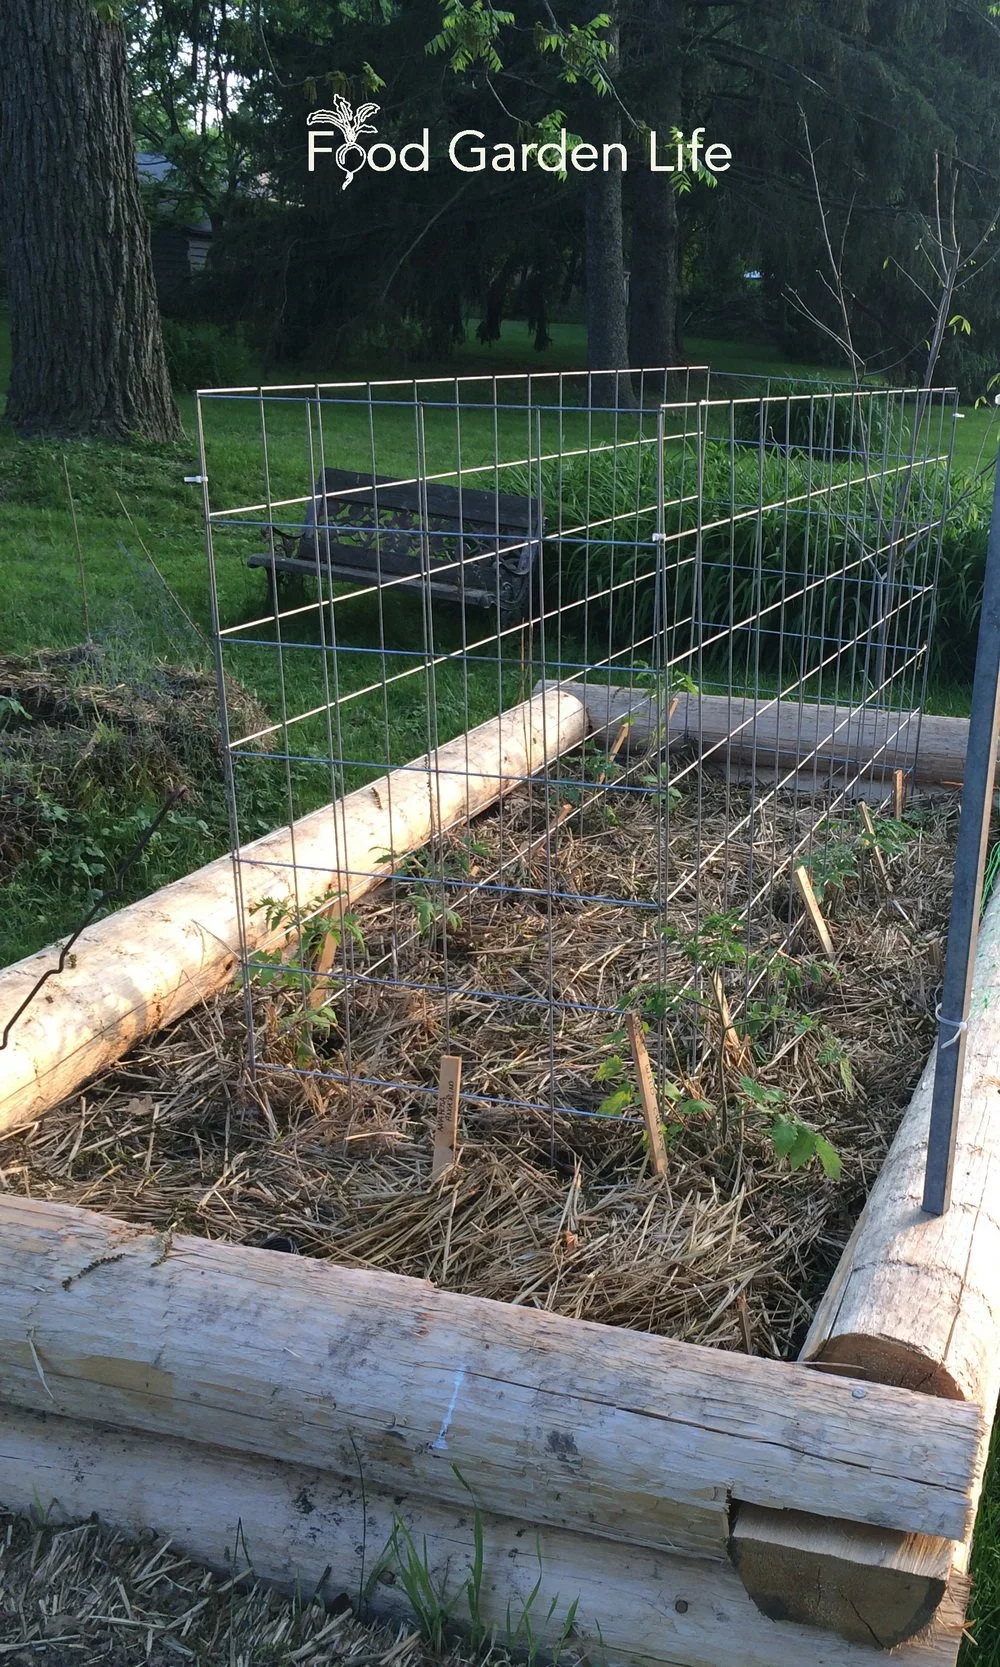
This is a wicking bed, very close to a black walnut tree (see the tree trunk in the back corner of the photo.) A wicking bed is one way to grow juglone-sensitive plants near a black walnut tree.
Failure 1. My first attempt at growing tomatoes in the ground near the tree failed. To be expected. So I reasoned that if I made a simple wooden raised bed, lined the bottom with landscape fabric, and added uncontaminated soil, it would solve the problem. At first, it seemed to work. But by mid summer, the tomatoes wilted badly. The reason? The roll of fabric wasn't as wide as the bed. And even though I overlapped the fabric so that the "new" soil above was separated from the contaminated soil below, tomato roots could find their way into the soil below...and walnut roots could grow up into the raised bed.
Failure 2. Another year I tried strawbale gardening. I reasoned that I could grow tomato plants in bales, near the walnut tree, if I put down a layer of plastic mulch under that bale to keep the tomato roots out of the soil below. This might have worked...except I used a biodegradeable plastic mulch, and part way through the season those tomato roots made the journey to juglone hell. Game over. (But strawbale gardening is an excellent technique. Find out how to use strawbales to create awesome food gardens.)
Success! I realized that tree roots quickly grow where they're not wanted...and the same goes for tomato roots. So I needed a bed that isolated the tomato roots. The answer was something called a "wicking bed." In short, it's a bed that has a thick liner at the bottom, creating a reservoir. They're usually used in dry areas, as a way to conserve water...but they fit the bill perfectly. Here's more information about using wicking beds.
On a smaller scale than a raised bed such as a wicking bed, container gardening is another way to grow sensitive plants near a black walnut tree. I'm a big fan of sub-irrigated planters (a.k.a. SIPS), which, like wicking beds, cut back on how often you need to water. Here's more about SIPS.
Plant Lists for Walnut-Wise Food Gardens
Here are edible plant lists you can use to plan your walnut-wise garden. These are from my experience and from published sources such as extension agencies and universities. Sometimes recommendations by published sources differ, so consider this a guide—not cast in stone.
Juglone-Sensitive Plants
Sensitive Plants - Fruit Trees and Shrubs
Apple
Crabapple
Blackberry
Blueberry
Sensitive Plants - Vegetables
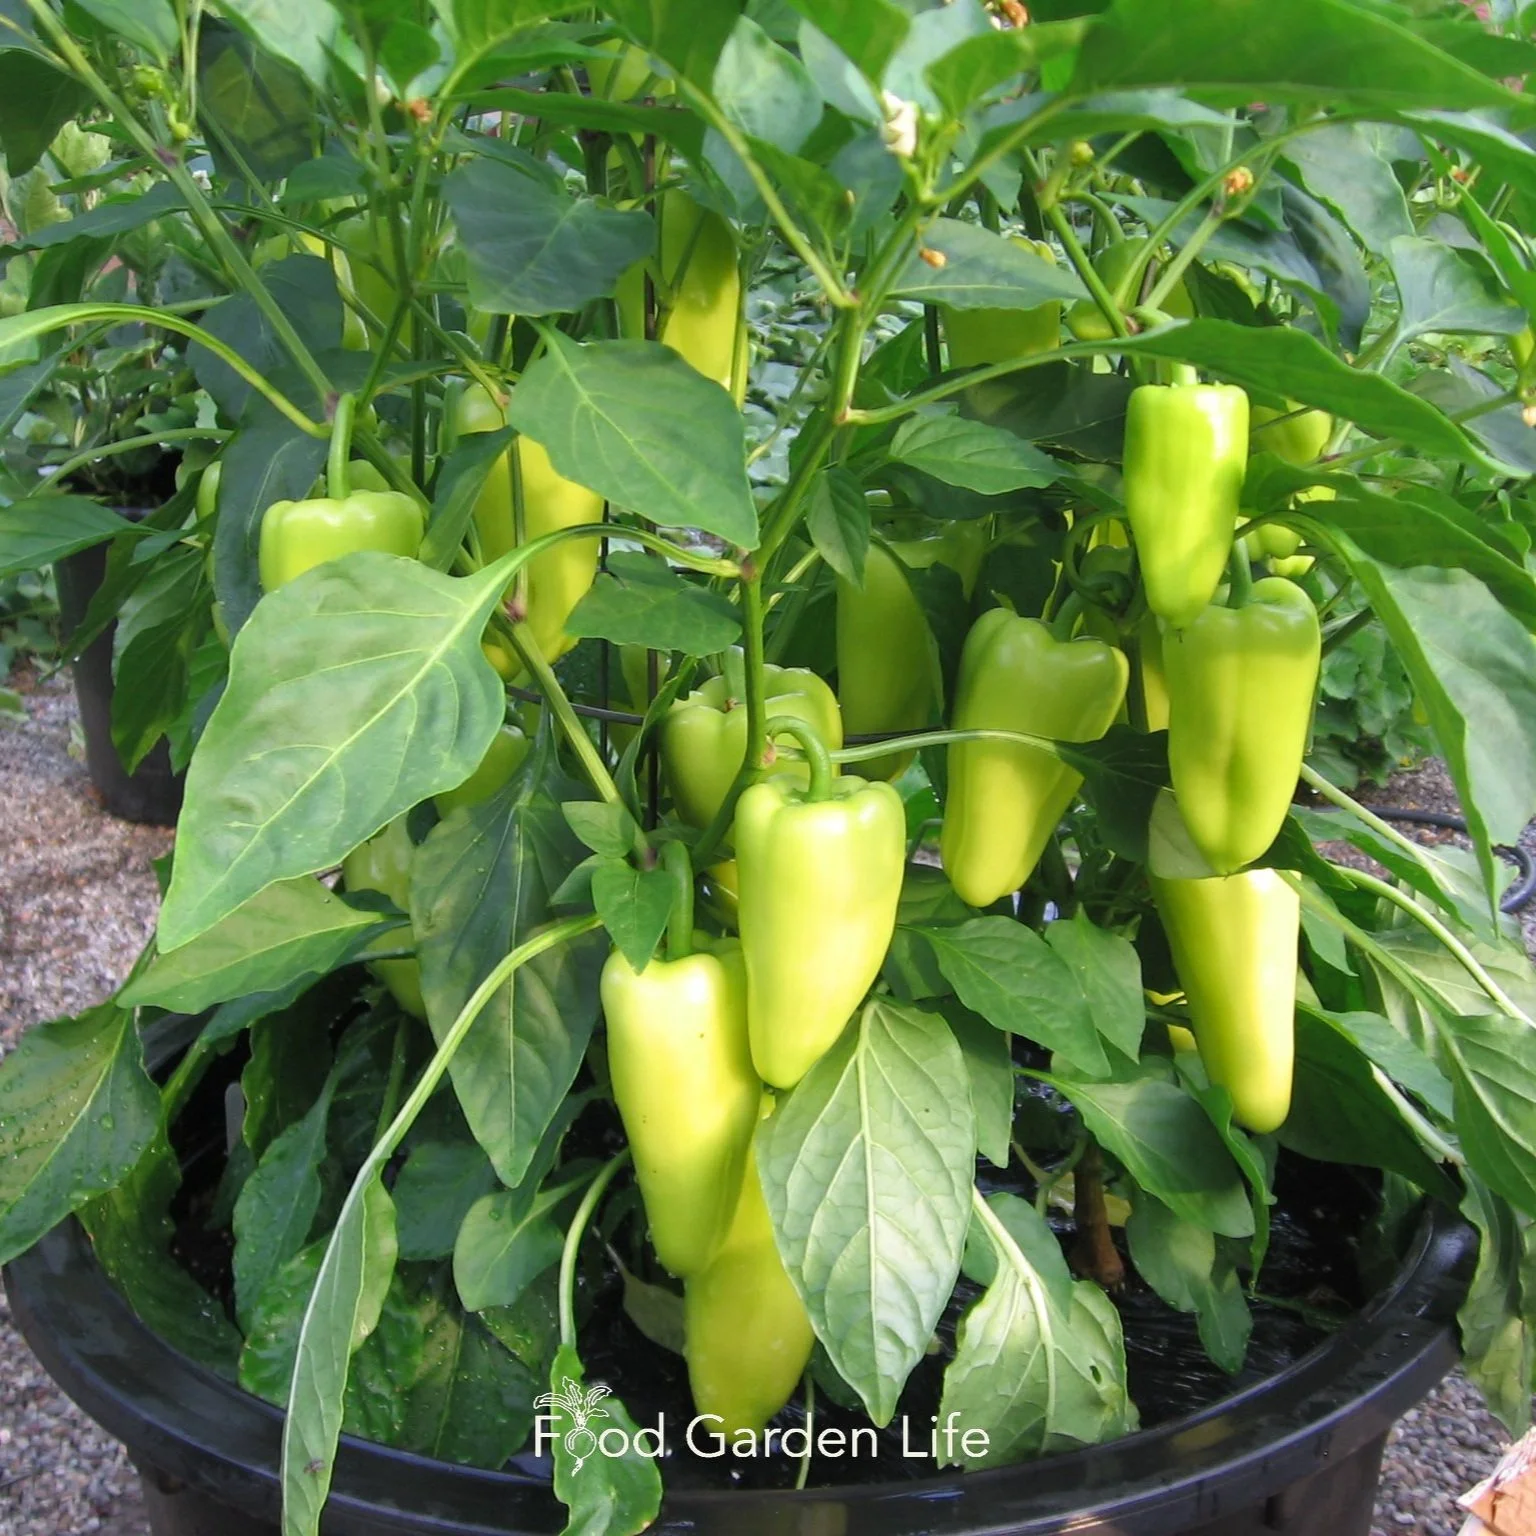
Peppers and other plants in the nightshade family are sensitive to juglone.
Wondering what vegetables are sensitive to juglone? Plants in the nightshade family (Solanaceae) practically wilt at the mention of juglone. This family includes lots of the must-grow veg crops such as tomatoes, peppers, potatoes—but also some less common ones such as cape gooseberry and ground cherry.
Asparagus
Cabbage and family
Eggplant
Pepper
Potato
Rhubarb
Tomato
Plants Tolerant to Juglone
Wondering what grows well near a black walnut tree? Many plants grow just fine under or near a walnut tree. So if you're wondering how far should a garden be from a black walnut tree, you can garden quite close to the tree if you choose juglone-tolerant plants and take into account the shade. Here are key edible plants to get you started.
Juglone-Tolerant Plants - Fruit Trees and Shrubs
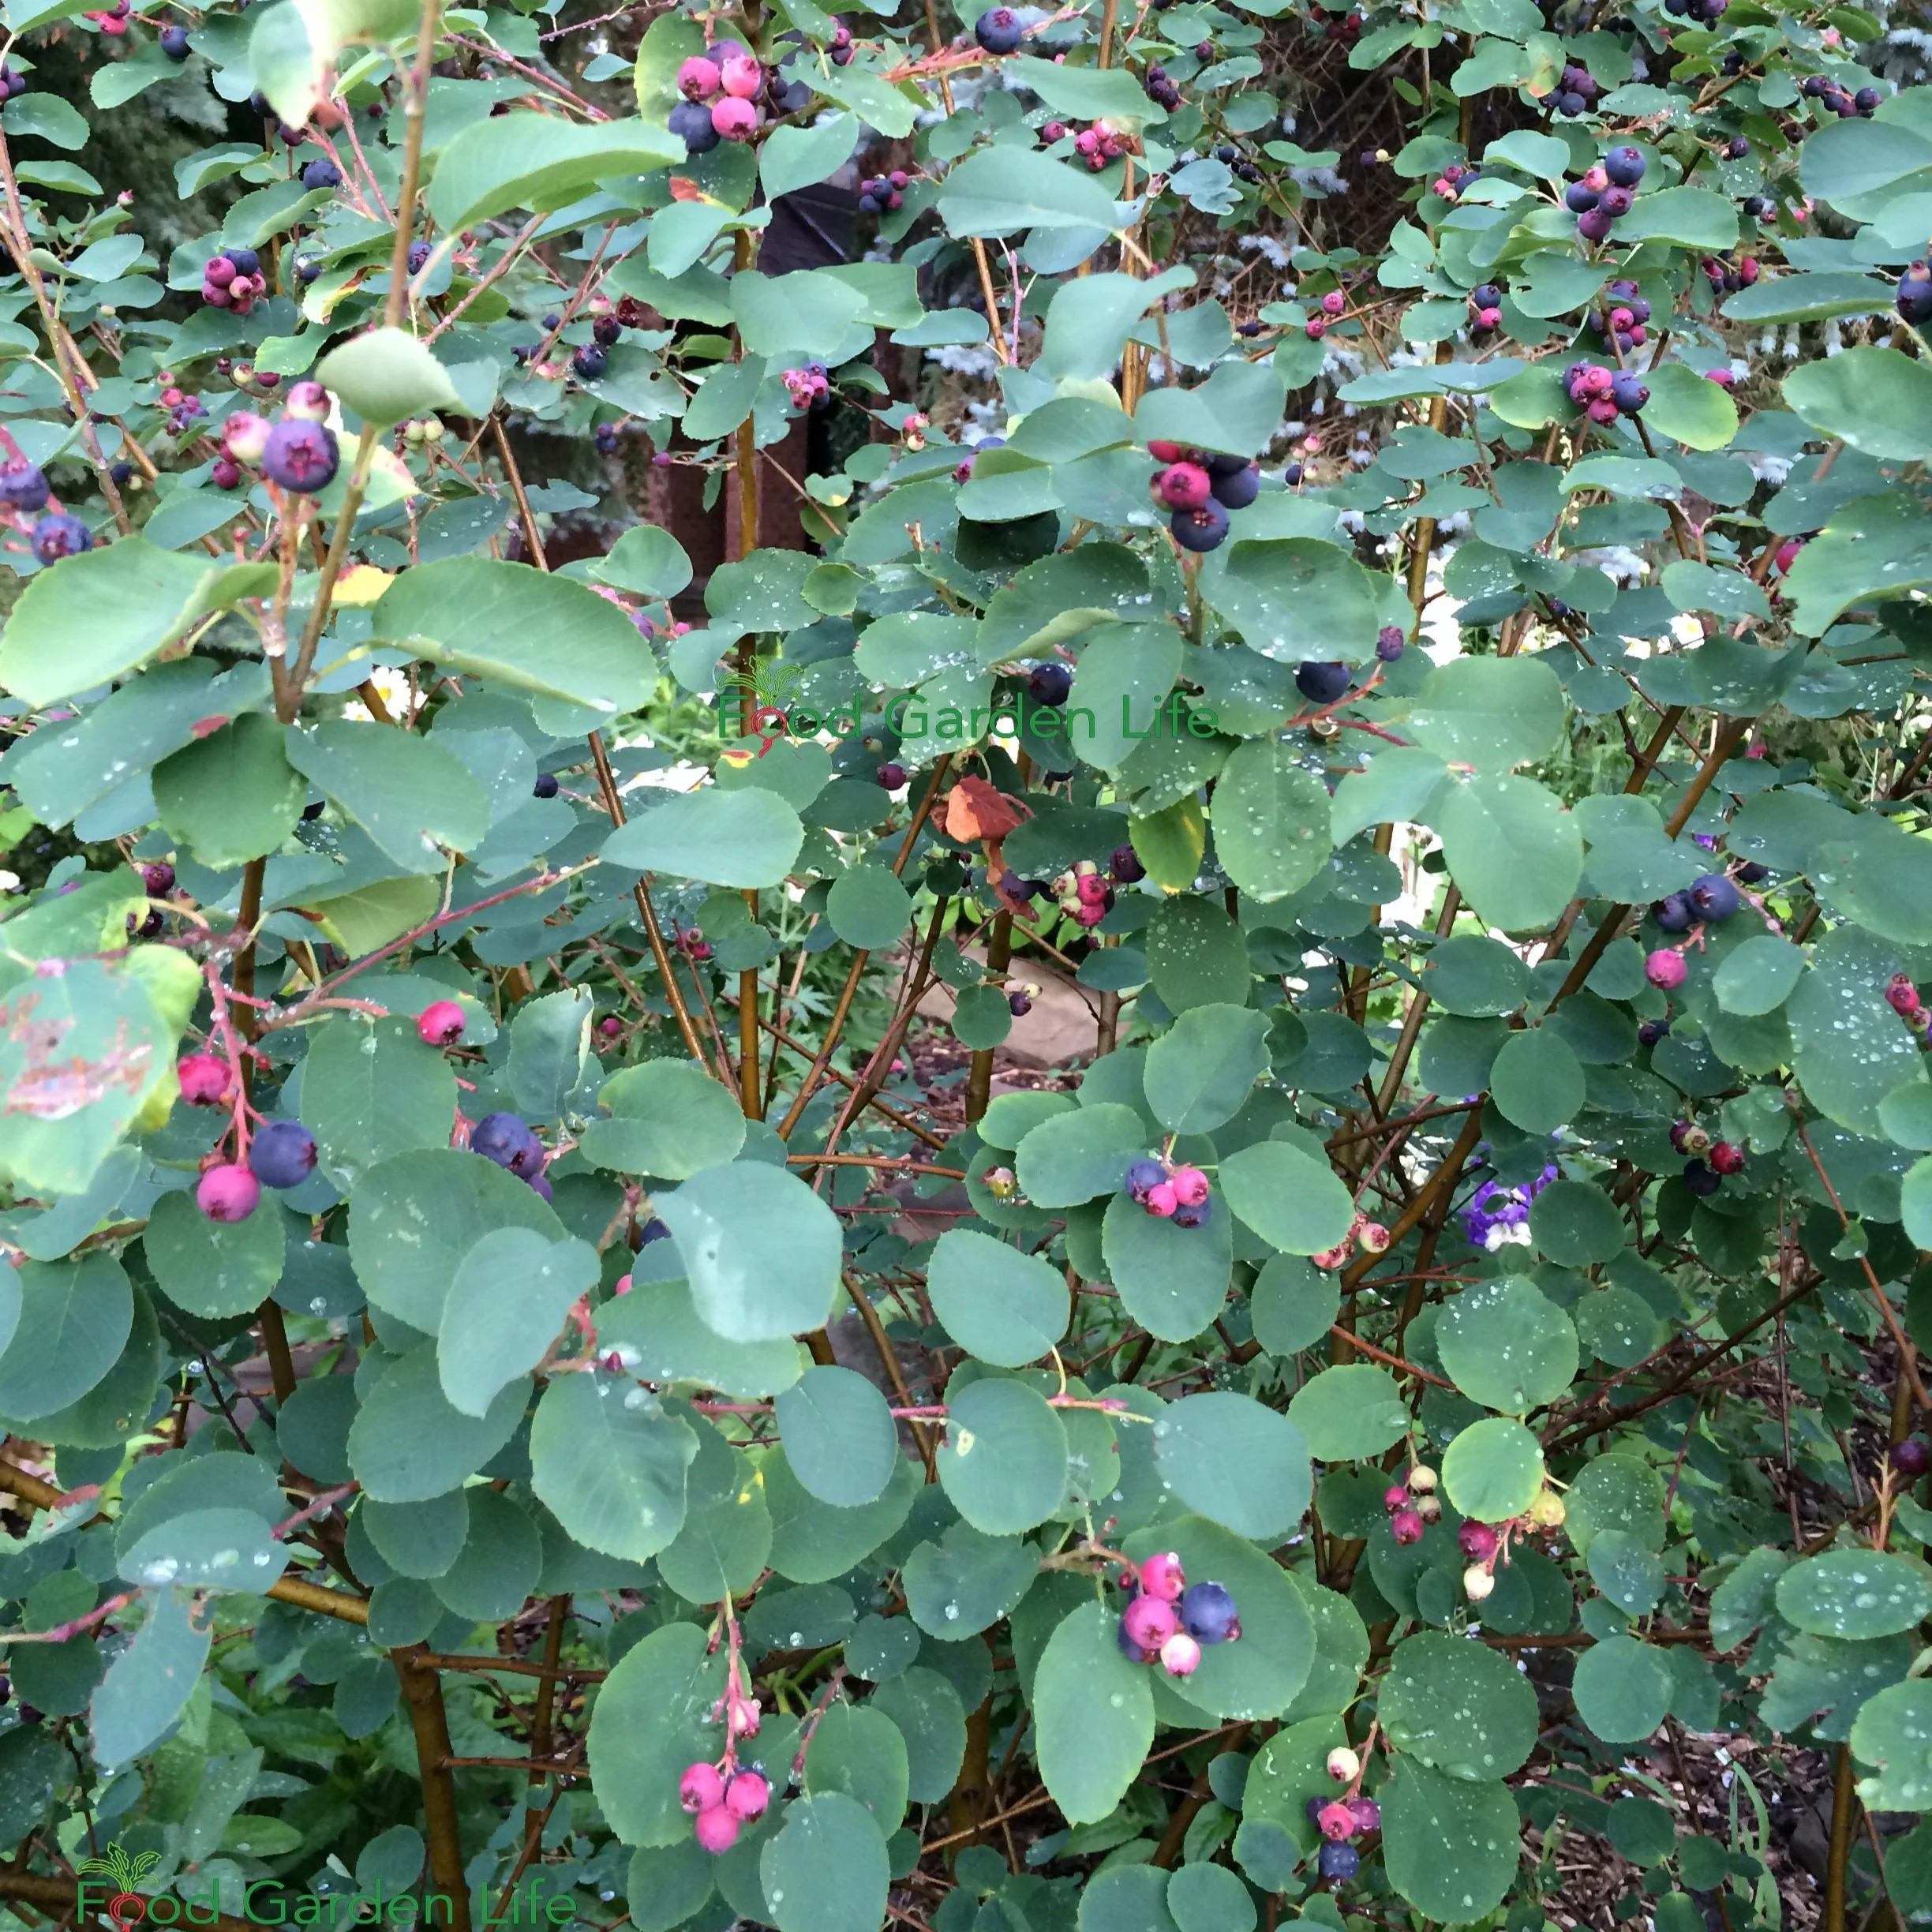
Saskatoon is an example of a fruit bush that is not juglone-sensitive.
Wondering what fruit trees are juglone tolerant? You have a lot of choice!
Autumn Olive (loved by foragers, though disliked by some because it can be an invasive here in Southern Ontario)
Cherry, Peach, Plum, Nectarine (fruit trees and bushes in the Prunus clan, what people often call stone fruit)
Chokeberry
Elderberry
Figs
Grape
Hazelnut
Pawpaw
Black raspberry
Serviceberry (including saskatoon, a.k.a. juneberry)
Here are 5 types of bush cherries you can grow.
Find out how to grow saskatoons.
Juglone-Tolerant Vegetable Crops and Herb Crops
Wondering what vegetables and herbs will tolerate juglone? There are many vegetables that tolerate juglone, so you have quite a few options.

Here’s a corner of the veg patch I have near the black walnut tree, where I grow carrots, beets, parsley, basil, squash, and corn very close to a large black walnut tree.
Basil
Bean
Beet
Carrot
Chive
Corn
Cucumber
Dill
Edamame (which is soybeans while they're still green)
Garlic
Leek
Melon
Onion
Parsley
Parsnip
Pea
Squash
Swiss chard
Other Walnut-Tolerant Edible Plants
Bee Balm (edible petals)
Dandelion (sure some people think of this as a weed, but great for early greens in the spring!)
Daylily (edible flower buds, here's more on edible flowers)
Grains such as wheat, millet, and sorgum
Hawthorn
Hosta (edible leaf spears in the spring!)
Jerusalem artichoke
Mint
Nasturtium
Pin cherry and choke cherry
Redbud tree (edible flower buds)
Rose (edible petals, rosehips)
Staghorn sumac
Looking for edible flower ideas? Check out this list of edible flowers for home gardens.
Landscape with Fruit Course
It the above list of juglone-tolerant fruit has you thinking of planting fruit near your black walnut tree, here’s a course all about how to grow fruit in home gardens.
How to Use Black Walnuts - Yes, You Can Eat Them!
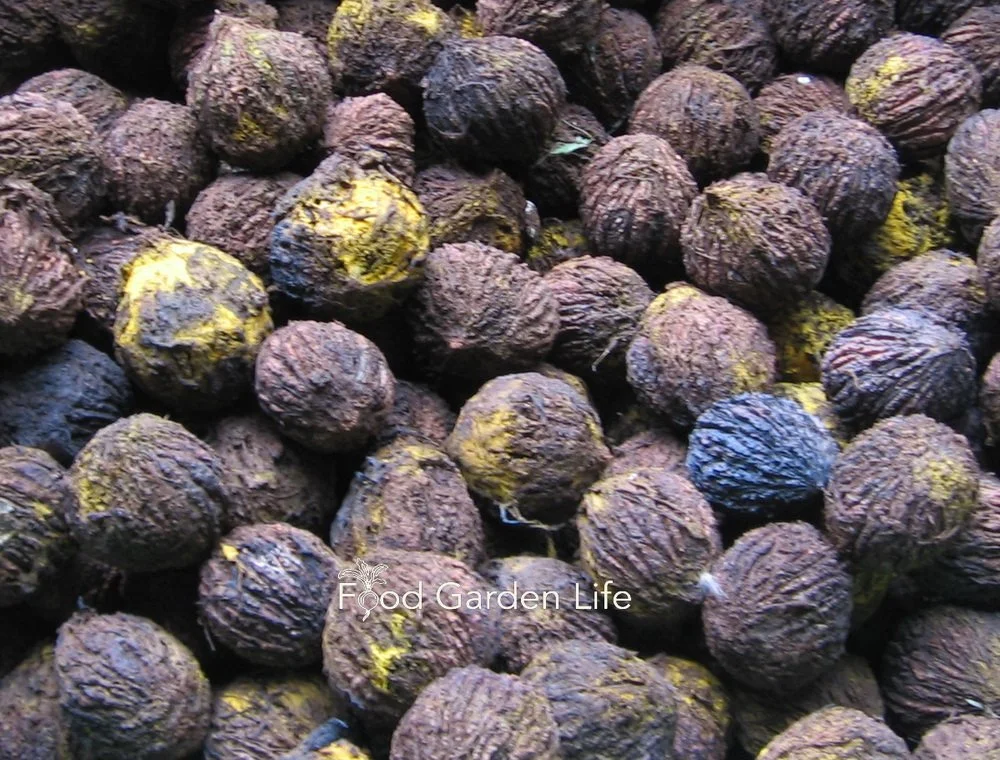
Black walnuts with husks removed.
While you're not likely to find black walnuts for sale, they are quite edible. Like other nuts, remove the hull and then air dry the nuts.
Note: The husk stain. I learned the hard way one year when my hands were a few shades darker for a week after hulling black walnuts. Someone later told me that a good way to get off the hulls is to pile the nuts until the hulls soften, and then send in kids dressed in old clothes and rubber boots to jump on the pile. I haven't tried it myself, but sounds as if it would work!
The challenge with black walnuts is cracking the shell. They're much more difficult to open than an English walnut. There is a vice-like device for cracking them open. I use a hammer. Or, I've heard of people driving over the nuts!
Key Takeaways
Pin this post!
Black walnut trees give off a chemical called juglone, which affects some plants. This is sometimes called black walnut toxicity.
This doesn't mean that you can't garden hear a black walnut tree—but that you need to choose tolerant plants and use raised beds or containers.
The size of the affected area around a tree depends on its age, the soil type, and soil moisture.
FAQ
Can I just cut down my black walnut tree to solve the problem?
Sorry...that would still leave lots of roots all through the soil, and, therefore, lots of juglone. Because it can take a few years for all the roots to decay, it's not a quick fix. In short, juglone can persist for a few years after a black walnut tree is removed.
How far should a garden be from a black walnut tree?
For a mature tree, the kill zone extends beyond the tree canopy and can be more than 15 metres from the trunk.
Find This Helpful?
Enjoy not being bombarded by annoying ads?
Appreciate the absence of junky affiliate links for products you don’t need?
It’s because we’re reader supported.
If we’ve helped in your food-gardening journey, we’re glad of support. You can high-five us below. Any amount welcome!
Food Gardening Articles
Food Gardening Courses
Find out how to grow more great food at home with our online courses. We have both live and self-paced courses.
Potting Soils: Choose the Right Potting Soil
A good potting soil helps your container vegetable garden thrive!
By Steven Biggs
Choose the Best Potting Mix
Ever had potted plants that just seem to stall?
It could be the soil.
Good potting soil can be the difference between potted crops that grow like gangbusters...and those that don't seem to do anything.
This guide covers key soil ingredients, types of soil mixes, and tips to help you choose good soil. If you're a home gardener who wants to keep things simple but use the best soil mix, keep reading.
Key Takeaways
Potting soil is a soil blend made for the growing conditions in containers.
Despite the name, it often contains no garden soil.
Common potting soil ingredients include peat moss, compost, coir, perlite, and vermiculite.
There are specialty potting soils for specific plants and purposes.
You can buy ready-made potting soil or blend your own.
Understanding Potting Soil
Potting Mix vs. Potting Soil
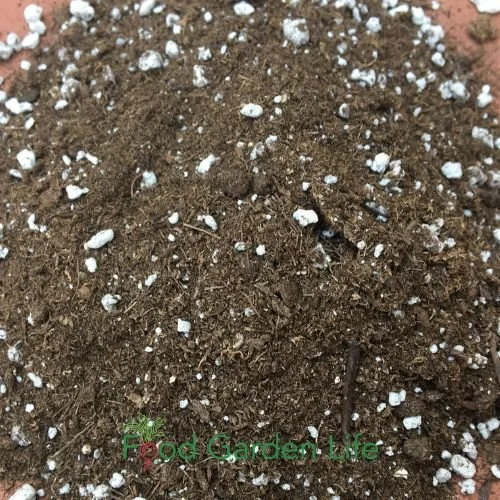
Potting mix is made for the growing conditions in containers. Many have no soil. This mix has peat moss and perlite.
You might come across a few different names used for potting soil, including potting mix, growing medium (if you're reading technical sources), potting medium, soilless medium, and soilless mix. In British English, you'll also find term "compost" used for potting soil.
In a Nutshell
Potting soil is a soil mix made for plants in containers. Because the roots of plants in containers can't spread out to find water, moisture retention is important.
But even though we need the soil to hold moisture, we also need lots of little air pockets. That's called "aeration." Those little air pockets helps excess water move through the soil, while also leaving space for the soil to hold on to some of the water, until the plant roots can absorb it.
Some potting soil mixes—though not all—contain food for the plants. It could be in the form of a separate fertilizing product. But it might also come from one of the soil ingredients.
In short, a good potting mix retains moisture...yet drains well. It doesn't pack down with repeated watering.
Potting Soil vs. Garden Soil
Soil from the garden is rarely ideal for potted plants. That's because it often packs down with the frequent watering.
Garden soil can also contain weed seeds and diseases.
Key Ingredients in Potting Soil
Ask 10 gardeners for soil-mix recipes and you might come away with 10 different recipes. Like most things in life, there's more than one way to go about it.
But there are some ingredients that are frequently used to make commercial potting mixes. We'll look at some of them below.
Organic Ingredients
By "organic" we just mean something that was once living. Organic ingredients include peat moss, coir, compost, and composted bark chips.
Maybe before we even jump into these organic ingredients, let's not ignore the elephant in the room. There's an environmental footprint to potting soils. Peat moss is extracted from peat bogs, where carbon has been sequestered long-term. When we use peat moss for gardening, that carbon is quickly released back into the environment. Coir is touted an environmentally preferable substitute, though it's from a crop planted where there were once rain forests...and then it's shipped a long ways for a northern gardener like me.
If this environmental footprint is on your mind, here are some thoughts:
Don't waste potting soil—and certainly don't use it like a garden-soil amendment
Use your potting soil for more than a year where appropriate
Consider potting-soil ingredients such as home-made compost and composted forestry waste
Peat Moss
Peat moss is widely used because it holds water really well—like a sponge. Yet it still drains well. Lots of air pockets, yet still moisture that plant roots can take up.
When peat moss gets very dry, it repels water. (It becomes "hydrophobic" if you like the technical jargon.) So if you're mixing your own soil, moisten the peat moss beforehand. (Commercially prepared soil mixes often have an ingredient called a "wetting agent" that makes the peat less hydrophobic.)
Because peat moss is acidic, ground limestone is often added to peat-based potting soils. This helps to balance the pH. (And that's important because if the soil is too acidic, plants might not be able to take up the nutrients they need.)
Coir
Coconut coir is commonly used as an alternative to peat moss. We're talking about the fibre from coconut husks. As well as being used in place of peat moss, some gardeners blend coir with peat moss.
Coir-based soil mixes are sold in bags, as are peat-based soil mixes. But you can also find compressed bricks of coir. They're completely dry and very lightweight. These bricks are soaked in water before making a potting mix.
Compost
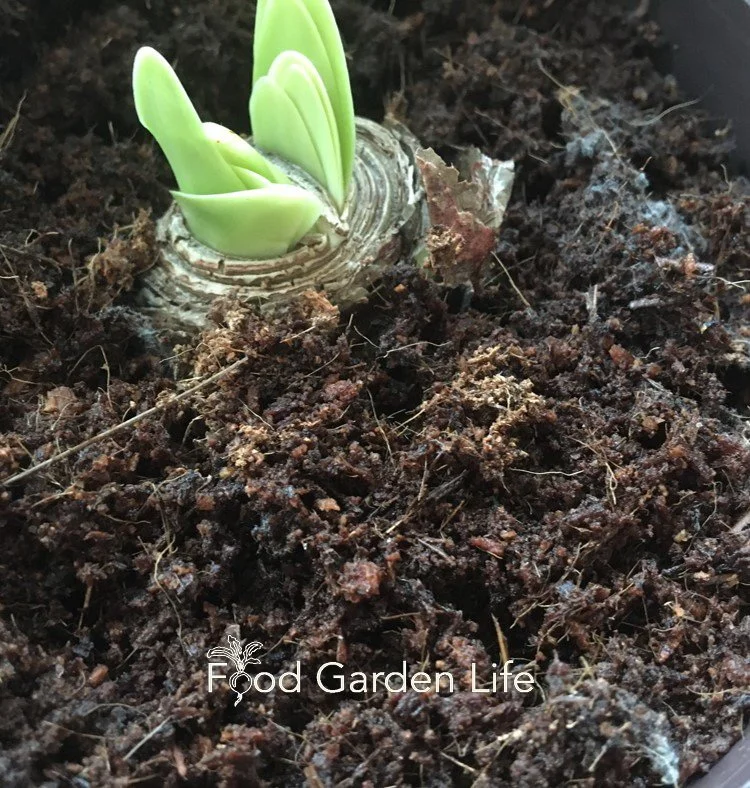
Here’s a close up of a potted bulb growing in a soilless coir mix. You can see the long fibres.
The nutrient content of a compost depends on what it's made from. For example, composted animal manures or composted seafood waste contain higher nutrient levels that something such as composted leaves (a.k.a. leaf mould.)
If you’re aiming to make your own peat-free soil mixes, leaf mould (composted leaves) is a traditional ingredient. Leaf mould breaks down more quickly than coir and peat.
Composted Bark Chips
Composted bark chips are sometimes added to soil mixes for larger plants. The bark bulks out the soil mix, while holding moisture.
Worm Castings
Worm castings—worm poo—add nutrients and microbial activity to a soil mix.
Inorganic Ingredients
With inorganic ingredient, we're mainly talking about "aggregates," things that add structure to the potting soil. These include perlite, vermiculite, sand, and grit. Light-weight materials such as perlite and vermiculite are common in commercially prepared soilless potting mixes.
Perlite
This popcorn-like, light, fluffy material is heat-expanded volcanic glass. It adds air pockets to the potting soil.
Vermiculite
Vermiculite is heat-expanded mica. It's like a sponge, able to hold water and nutrients. Because it’s so good at holding moisture, the soil is less likely to shrink when dry.
Sand
Common in home-made soil mixes to improve drainage and to add weight. Not so common in commercial mixes because it adds weight...and that makes shipping more expensive.
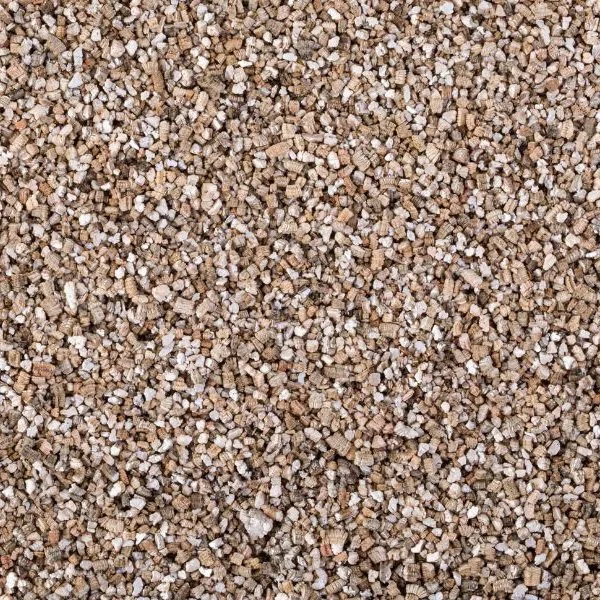
Vermiculite helps to retain moisture.
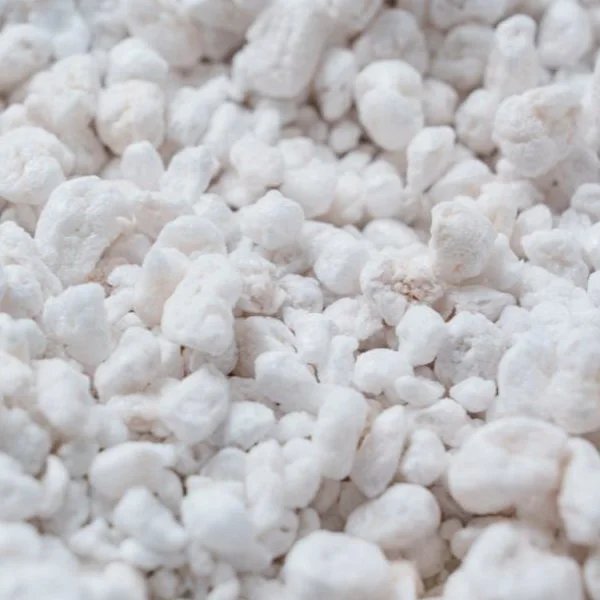
Perlite adds lots of air pockets to a mix.
Types of Potting Soils
Potting soil can be blended for specific types of plants (e.g. cactus), for certain plant needs (e.g. acid-loving plants, or "high porosity" for plants that don't like wet roots), and for specific uses, such as seed-starting.
Here are common types of ready-to-go potting soils:
All-Purpose Potting Mix

This high-porosity potting mix is made from peat and perlite.
As the name suggests, this sort of mix is intended for a wide range of uses and plants. Many commercial all-purpose blends (I've seen the name "general-purpose" used too) contain peat moss or coir, compost, vermiculite, and perlite.
High-Porosity Mixes
High porosity is just another way of saying it drains well.
This sort of mix is for plants that don't do well when the roots remain wet for too long. For example, if you're growing a potted lemon tree, good drainage is very important because the roots can quickly rot if the soil stays wet for too long.
(An interesting aside: I asked at my local garden centre why they're now stocking this sort of mix, which I only used to see in commercial horticulture. I was amused to learn that home cannabis growers favour it!)
"Organic" Potting Mix
It's worth mentioning that some companies market "organic" soils. These will contain the organic portion we talk about above (peat, coir, compost, etc.) meaning something that was once living.
But in this case, the word "organic" has an additional meaning: It means that the mix meets the standards of an organic certification organization. And that usually means that there's no wetting agents (something that makes the peat moss easier to wet) and that if there are fertilizers in the potting mix, they're approved by the certifying agency.
Seed-Starting Mix
The main difference with seed-starting mixes is that the texture is finer. Smaller vermiculite. No coarse bits in the peat moss. Perhaps no perlite. The idea is that a small, germinating seed isn't blocked by a hunk of something in your soil mix.
For what it's worth, I don't buy seedling mixes. They make sense for a commercial grower striving for a very high rate of success and uniformity. In my case, I always have ample seed for my smallish garden, so if the odd seed conks out because I'm using a general purpose mix and it's blocked by a big piece of perlite, it doesn't matter a bit.
Some people use an all-purpose mix, and simply screen out large bits, or break up the large bits while planting.
Homemade Potting Soil
What's the best potting soil? As I mention above, you're likely to find many different recipes for homemade potting mixes. The best mix depends on what you're growing, the growing conditions—and how you water! (I've met gardeners who know they're heavy handed with watering, so they blend especially well draining soilless potting mixes for their plants that don't tolerate wet roots.
If you don't need a lot of soil, you might find it easier just to use an off-the-shelf soil. But if you use quite a bit of soil, or if you have certain requirements, then making your own potting soil allows you to customize the ingredients and match them to the needs of your plants.
General-Purpose Soilless Mix Recipe
When it comes to general-purpose mixes, I keep my life simple, and just use an off-the-shelf product.
If you prefer to mix your own, here's a simple recipe you can start with:
2 parts peat moss (or peat moss substitute such as coir)
1 part vermiculite
1 part perlite
If you're using peat moss, add ground limestone so that the mix is less acidic. Add 30 ml of limestone for a 10 litre pail of soil.
One other tip: If the peat or coir is very dry, wet it first, before mixing with the other ingredients.
And one more tip: Using peat? Get "horticultural" or "blond" peat. Peat at the bottom of a peat bog has decomposed more, so it has shorter fibres. Because of the shorter fibres, it packs down more quickly. The peat that’s higher up in the bog has a lighter colour and longer fibres. It’s called “blond” peat. The blond peat is what you want because it gives a soil with more air pores, but at the same time, it holds water well.
It’s usually the dark peat that I see for sale at garden centres around here—because it’s less expensive and many people don't know the difference.
Container Veg Gardening Course
Soil-based Potting Mix
I use a soil-based potting mix for larger outdoor potted plants. Here's my mix for growing potted fig trees. It's good for all sorts of other potted plants too. With the garden-soil component, this mix holds more moisture. And the garden soil and sand both make it heavier, so that large plants are less likely to topple in the wind.
1 part garden loam
2 parts soilless potting mix (I prefer a commercial-grade of soilless potting mix, see my tips on soil-shopping, below)
1 part sand
Add 30 ml of limestone for a 10 litre pail of the mix
If you want to read more about potting soil for fig trees, here are my recommendations for potting soil for fig trees in pots.
Shopping for Potting Soil
It’s buyer beware when it comes to small, domestic-sized bags of potting mix. Some is great…some is terrible.
A simple approach that I recommend to all my students is to buy potting soil mixed for commercial producers. The quality is consistently good. Which makes sense, because commercial growers know good soil and won't settle for less.
Commercial potting mix is sold in "bales" that are 107 litres (3.8 cubic feet). And the soil within is dry and compressed. So it's a fair bit of soil, but I think it's worth it.
Summary
Good potting mix is a key to success with container gardening. There are many special-purpose mixes available. In many cases, a general purpose mix works quite well. If it's an option, buy a large, commercial-sized bag; the quality is more consistent. When mixing your own potting soil, remember that there are many recipes--and that what's the best for you depends on how you water and what you're growing.
If you’re interested in potting soil because you’re growing vegetables in containers, grab this container veggie guide.
Frequently Asked Questions
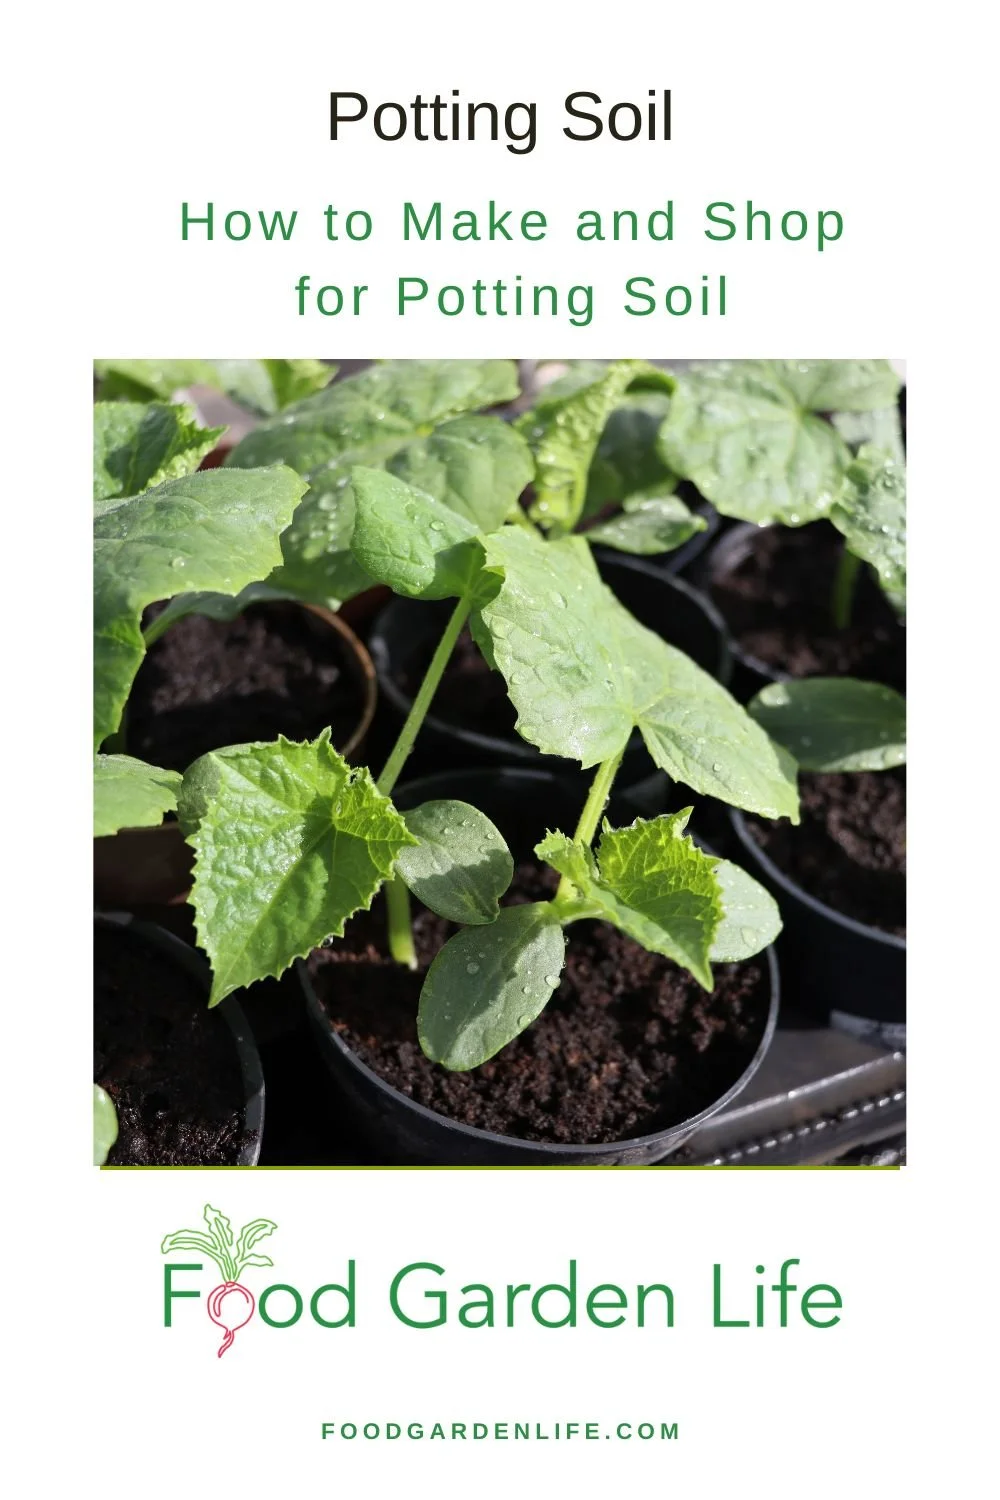
Pin this post!
What are the key ingredients in a good potting soil?
A potting soil has an organic component such as peat moss, coir, or compost. This is bulked out with an aggregate such as perlite, vermiculite, or sand.
Can I reuse old potting soil?
Absolutely. The structure of the soil breaks down over time as the organic part (sphagnum peat moss, coir, compost) breaks down. And when it does, the soil will pack down. But you can usually use soil for more than one year. Some gardeners reuse potting soil by refreshing old soil with new soil. (Don't reuse soil that had diseased plants in it, though.)
Does old soil go bad?
Old soil does not go bad. But when peat moss gets very dry, it can be difficult to rewet—it repels moisture. So when using old, very dry soil, allow time for moisture to spread around...and be prepared to get your hands dirty by mixing it.
What is the difference between potting soil and garden soil?
Potting soil is made for plants growing in containers. It drains well. Garden soil is more likely to pack down.
What is a good potting mix for lemon trees?
Root rot is a common problem with potted lemon trees because they don't tolerate wet soil. Look for a “high porosity” type mix. If you're mixing your own potting soil, make it well draining.
Here's a post that helps you know when to water your lemon tree.
What is the best potting soil for fig trees?
It depends on how you water, the size of your fig tree, and the type of container you're using.
Here's a whole article that explains potting soil for fig trees.
Do I need a special soil for wicking beds and sub-irrigated planters (SIPS)?
Use a soil that wicks moisture well. That's because with this type of container there's a reservoir at the base, and water wicks upwards.
If you're buying soil, you won't find "wicking" on the label. If in doubt, remember that the large, commercial bales of potting soil are usually a good bet.
Here's an article that explains sub-irrigated planters and talks about suitable soil.
What about sterile soil?
A heat treatment kills most organisms in the soil: Insects, weed seeds, and diseases.
In most cases, this is not necessary. Healthy soil is living, with microbial processes going on. But when it comes to starting seeds indoors, sterile soil can be beneficial because seedlings are more susceptible to damping off diseases than large plants.
I've heard of people wrapping moist potting soil in foil, and putting it in the oven at 200°F for 20 minutes. Never tried it myself...I know my family wouldn't approve of the smell. However, I have had students tell me they sterilize soil in the BBQ!
Peat-based soilless potting mix is acidic. While not sterile, it's less likely to have disease organisms than something like your home-made compost.
Find This Helpful?
Enjoy not being bombarded by annoying ads?
Appreciate the absence of junky affiliate links for products you don’t need?
It’s because we’re reader supported.
If we’ve helped in your food-gardening journey, we’re glad of support. You can high-five us below. Any amount welcome!
Interested in Adding Worm Castings to Your Soil?
Tune in to this interview to learn about how to use worm castings.
Articles
Growing veg in containers? Find out about vegetable container gardening.
Course on Container Gardening
Here is a self-paced masterclass to help you grow a great container vegetable garden.
Guide to Growing Saskatoon Berries: The Prairie Berry (a.k.a. Juneberry)
Guide to growing saskatoon berries. A Saskatoon bush is a great addition to a home garden…
By Steven Biggs

How to Grow a Saskatoon Bush
As an Ontarian, there was a fruit that I never ate growing up.
But I heard lots about it from Mom.
She grew up in Western Canada, and talked about the saskatoon berries that her parents grew. And when I finally saw a saskatoon bush, on a trip to her childhood home, I was surprised that the row of bushes was taller than me. I'd been expecting something puny, like the wild blueberry bushes we get in Ontario.
What is a Saskatoon Bush?
The saskatoon bush (Amelanchier alnifolia) is a native North American fruiting bush. It has a wide range: Wild saskatoon bushes are found in Alaska and Yukon, and in the harsh conditions of the prairie landscape.
It has a few aliases: South of the border you might hear it called juneberry (june berry), shadbush, and western serviceberry. And in the east, it's sometimes called serviceberry—like it's many kin in the Amelancheier clan. (There are many serviceberry species, some shrubby, some growing as small trees.)
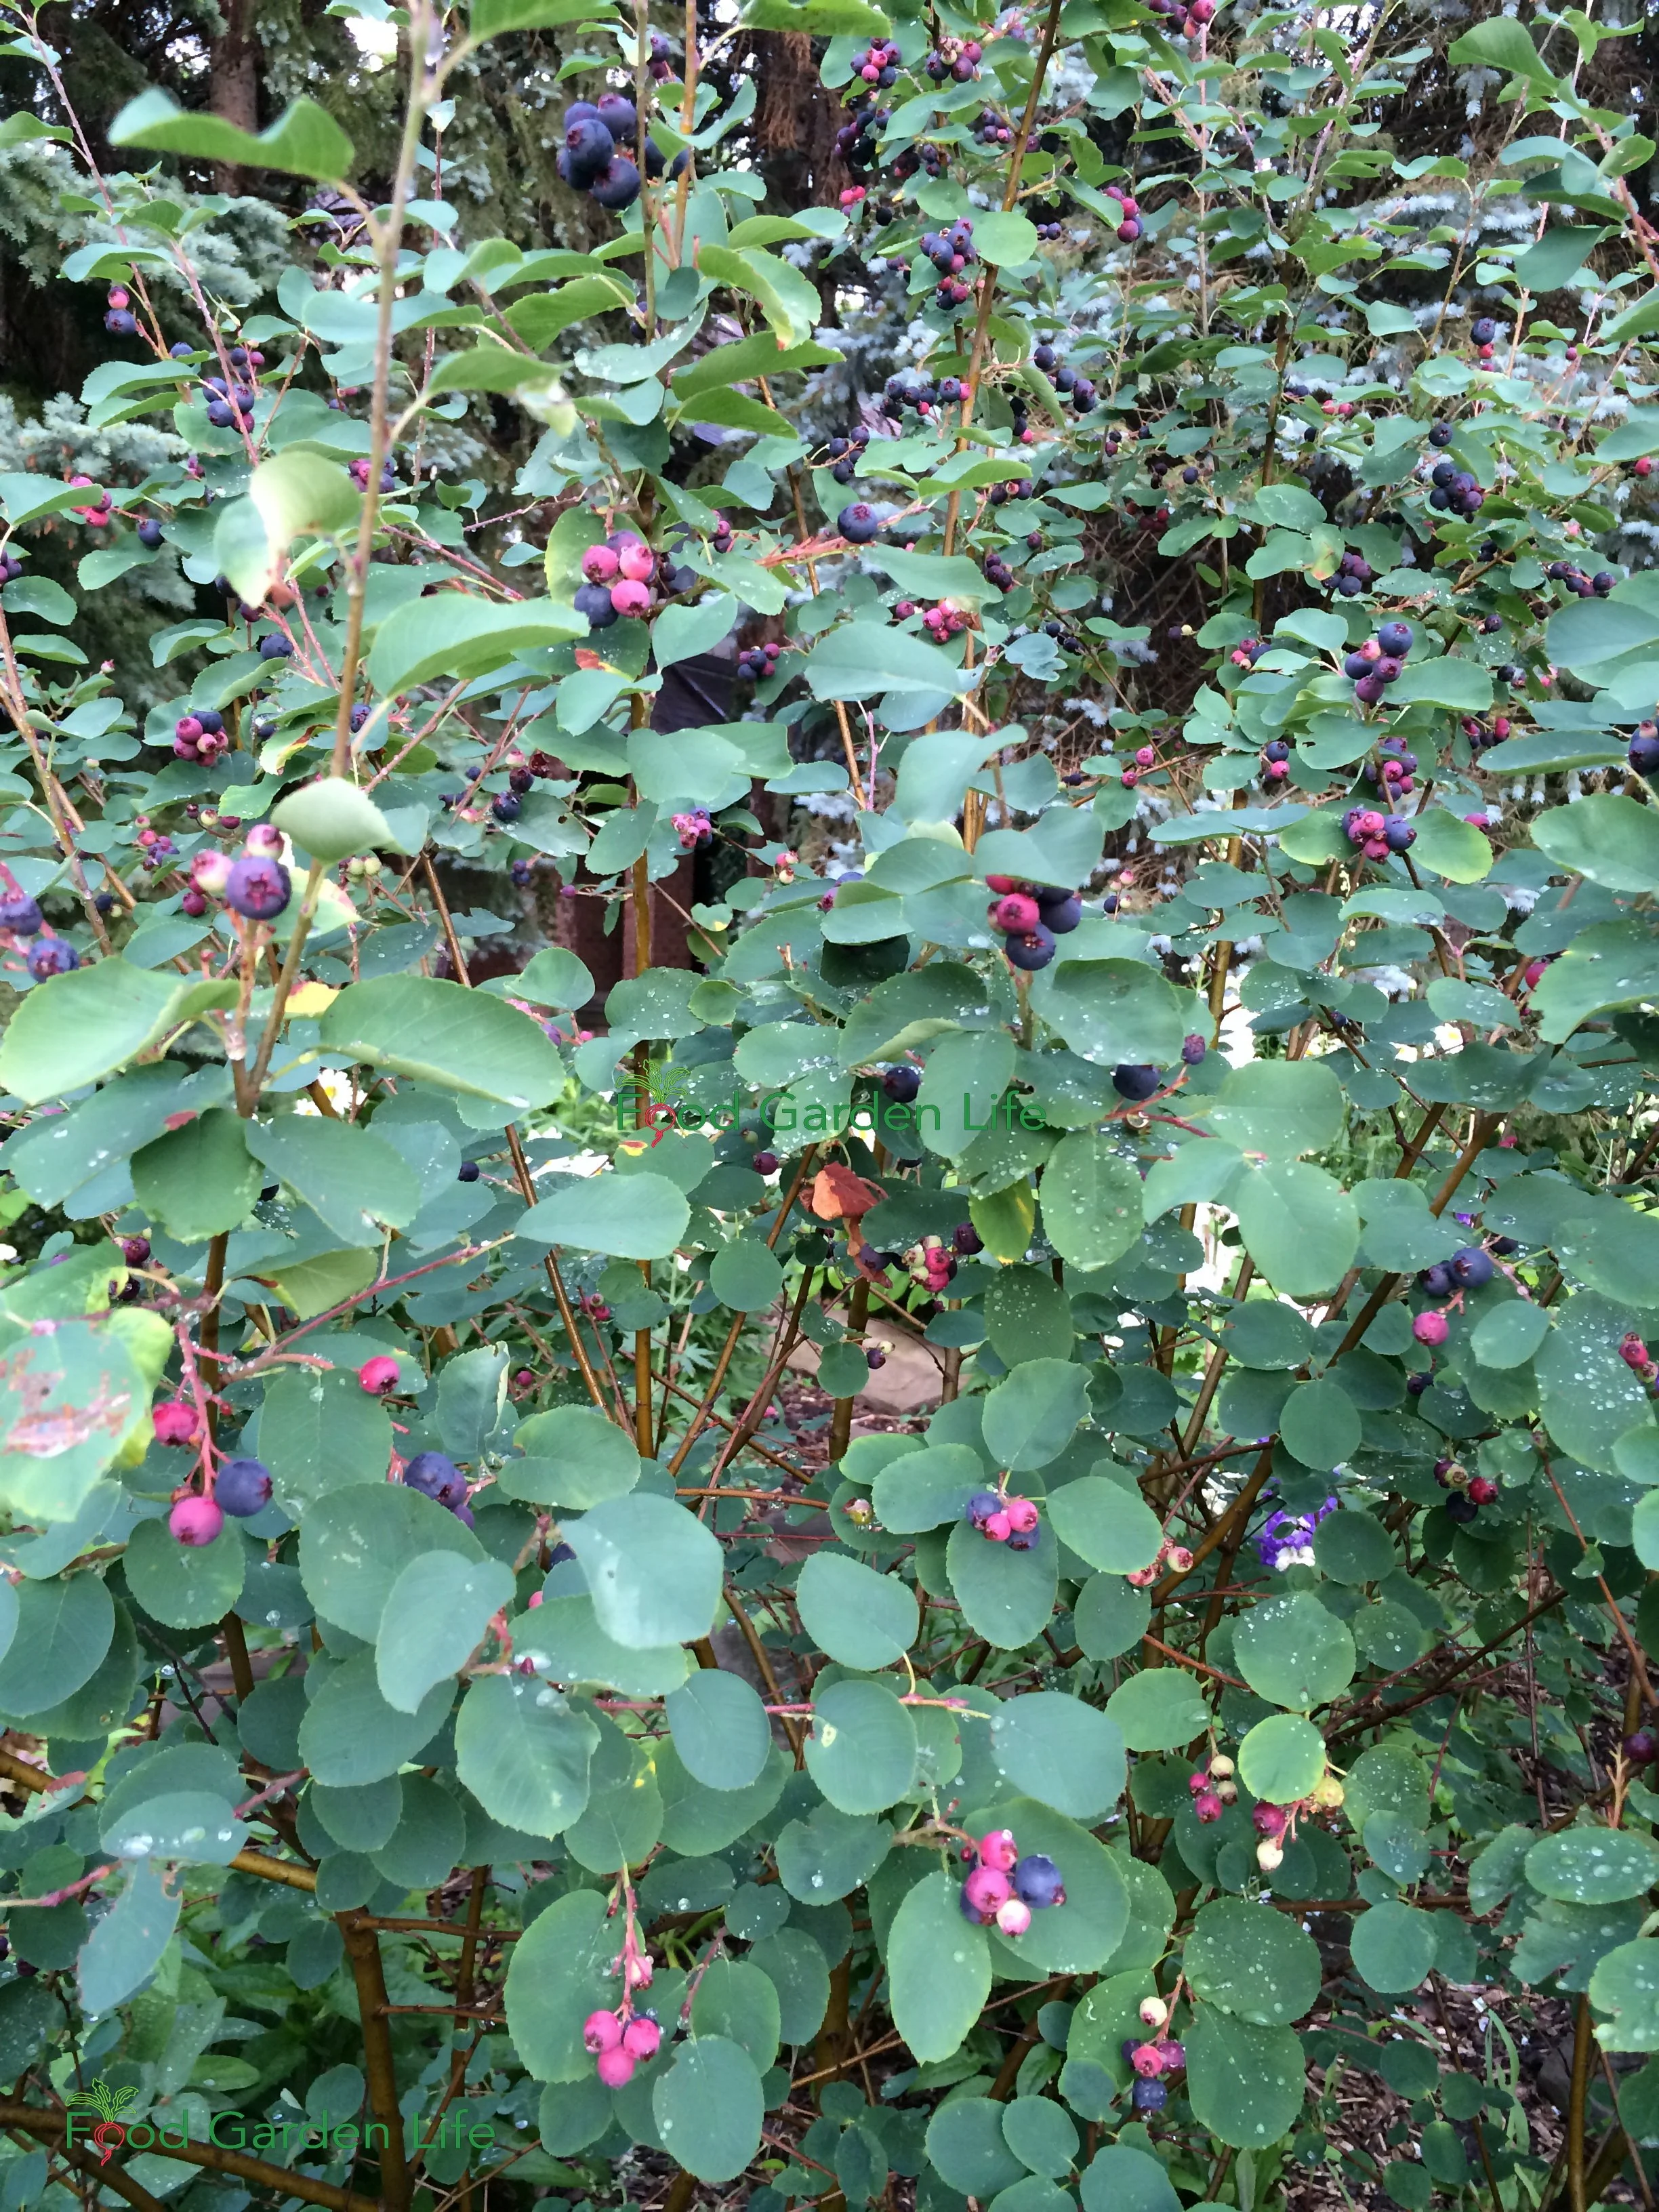
The saskatoon bush (Amelanchier alnifolia) is a native North American fruiting bush.
(If you’ve ever grabbed a handful of wild serviceberries or saskatoons and them spit them out because they’re pithy and dry, it’s time to try the domesticated version! The flavour and texture of the wild berries varies a lot, can comparing them to Saskatoon berries is like comparing a crabapple to a big, red, juicy apple from an orchard.)
Saskatoon Fruit
Ripe saskatoon berries look a bit like blueberries...but the similarities end there. They have a taste of their own, a bit nutty and slightly almond-like.
(In case you’re interested, they’re actually related to apples and mountain ash, so it’s no surprise they’re very different from blueberries.)
The saskatoon fruit turns from green to red as it ripens, with fully ripe fruit eventually turning deep purple—almost black.
Saskatoon Bush Size
Saskatoon bushes can grow to approximately 5 metres (16’) high when not pruned.
But in commercial production, they're often kept shorter, under 1.5 metres (5’) high.
An Ornamental Edible
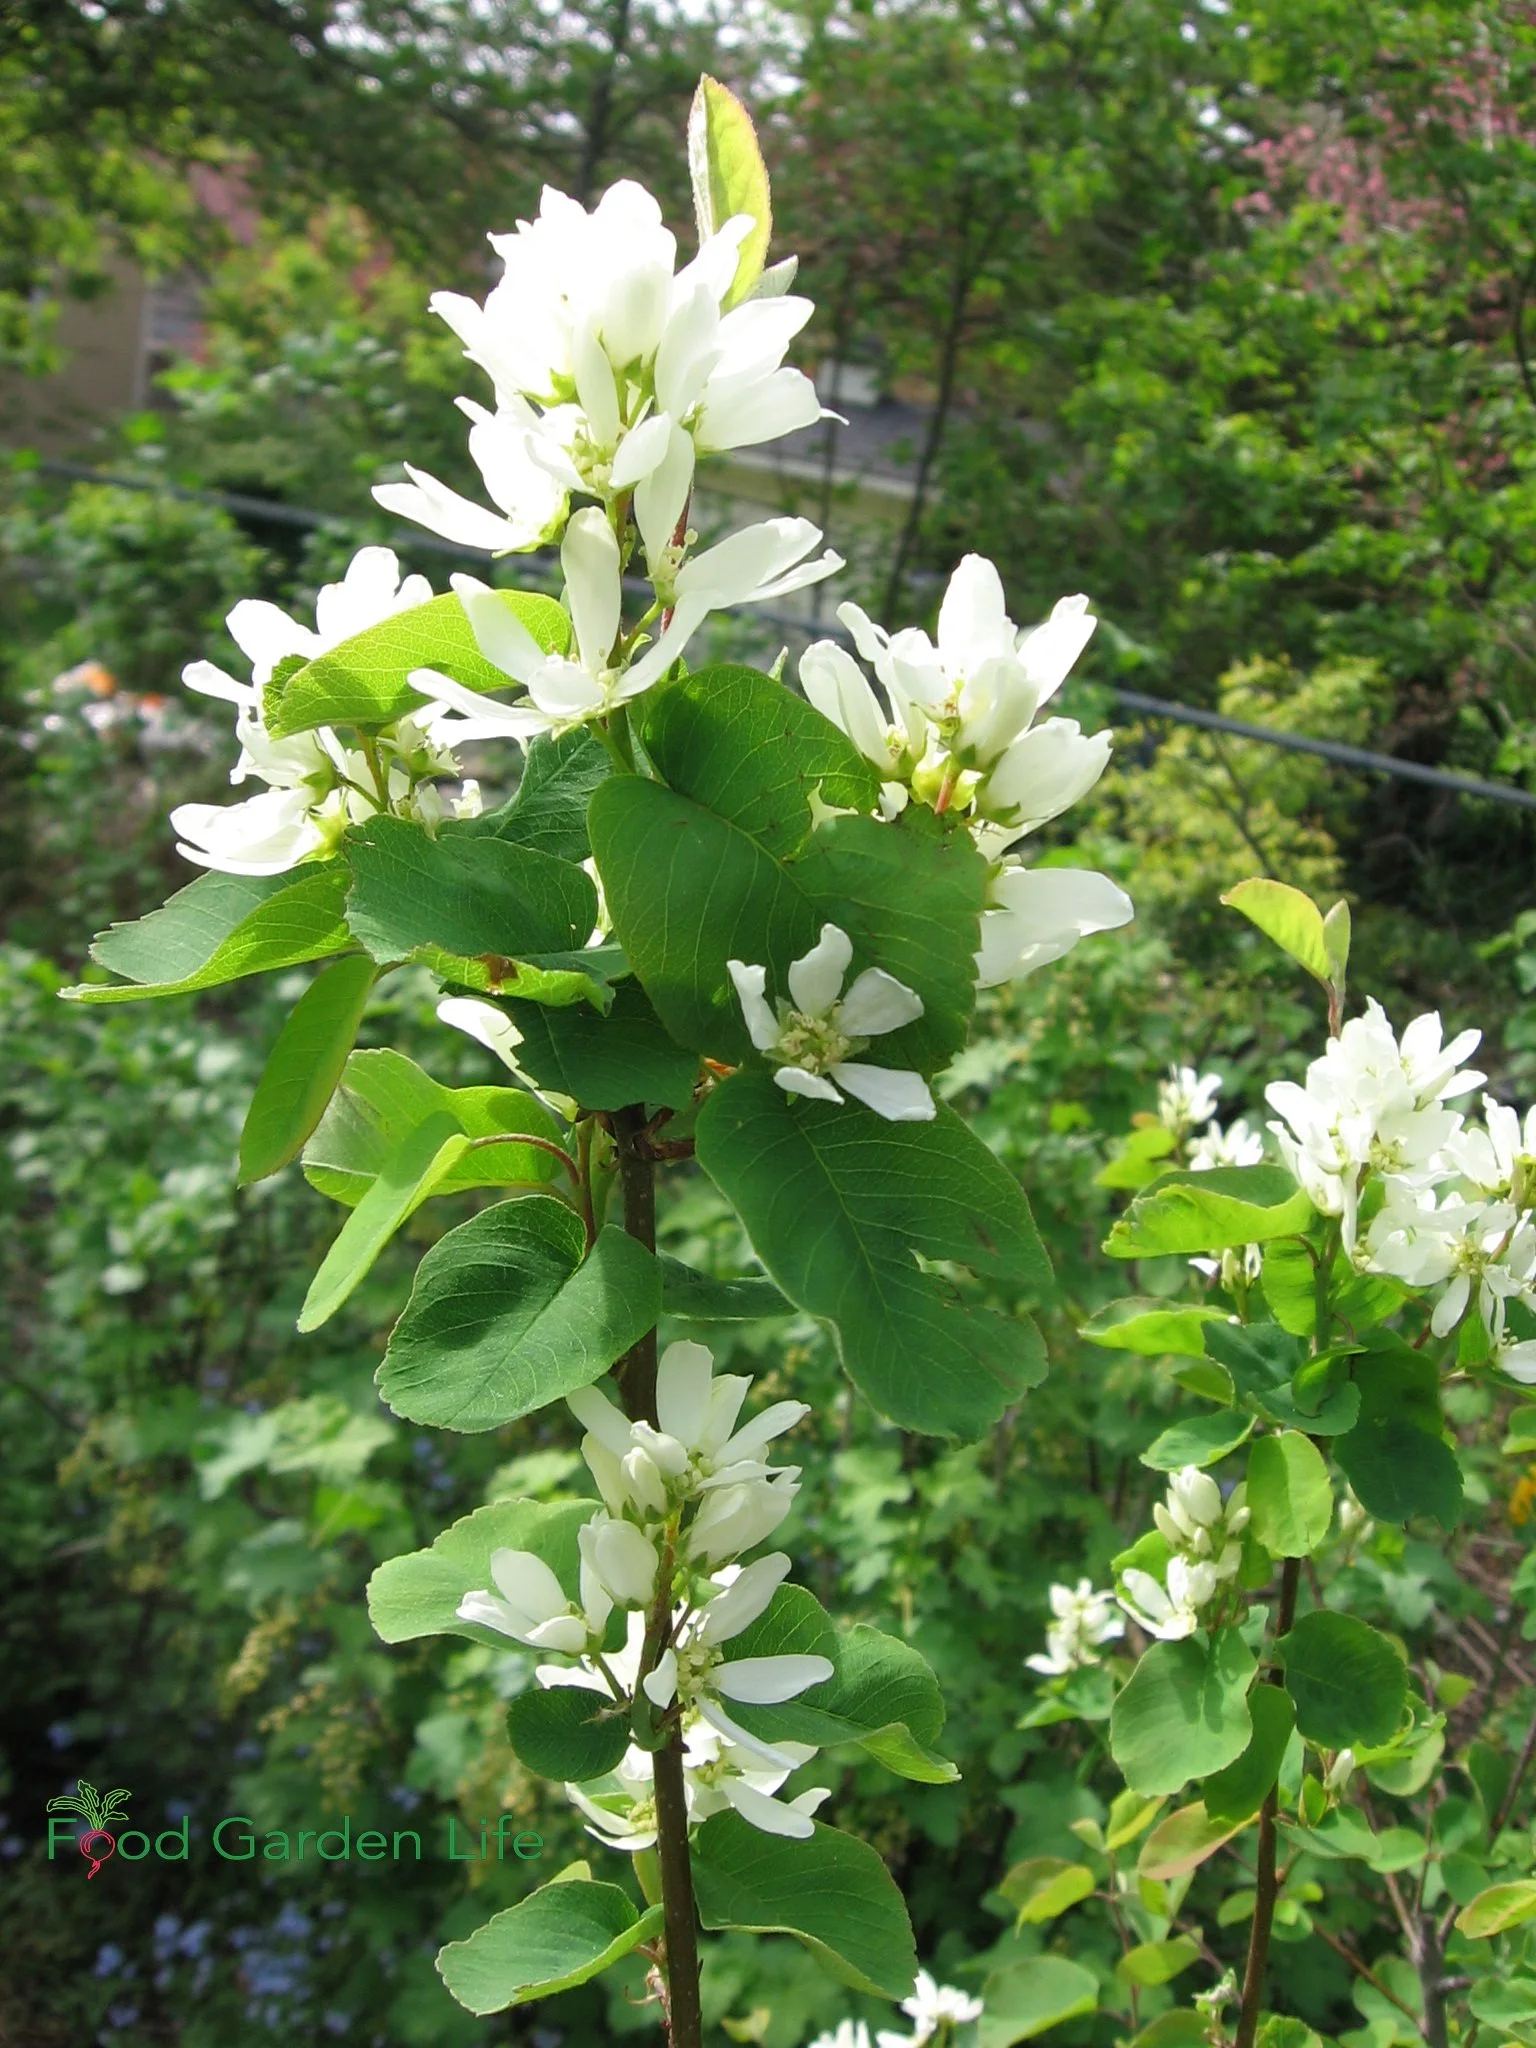
Along with the attractive fruit, saskatoon bushes have showy spring bloom, with clusters of upright flowers.
Saskatoon bushes are a great addition in an ornamental garden too. Along with the attractive fruit, the spring bloom, with its clusters of upright flowers, is very showy.
In the autumn, the leaves paint the garden with a showy orange colour.
Saskatoon Berries Cold Hardiness
It's as tough as nails! No surprise for a plant that’s native to the Great Plains, it takes harsh, dry conditions.
There are a few things that affect hardiness, but it takes temperatures as cold as -50°C (-58°F), and probably colder.
How to Plant a Saskatoon Berry Bush
Choose a Location
Select a location with a well-drained soil. Saskatoon bushes are tolerant of many soil types. So a clay soil with some soil moisture is fine, as long as the soil is not waterlogged.
Full sun is ideal for the best fruit production. It does respectably well in home gardens with partial shade, although the harvest is less than full-sun locations.
If you get late spring frosts, a sloped location where cold air can drain away is best. South-facing locations in cold areas are not ideal, as they warm up more quickly in early spring. That causes flowering while there's still more risk of frost.
Planting a Saskatoon Shrub
When planting most trees and shrubs it's good practice to keep the depth the same as it was before. Not deeper.
There are exceptions to every rule…and the Saskatoon is an exception.
You can plant your saskatoon bush at the same depth; that's fine. But you can also plant it a bit deeper.
Here’s why:
Saskatoon bushes have a habit of suckering—of sending up new shoots beyond the original bush. The bush gets wider over time, and you can end up with a little Saskatoon thicket!
But when planted a few inches deeper, they're less likely to sucker.
After you've planted, keep it well watered for the first year until it's established. Mulch the soil surface around the bush to control weeds and keep in soil moisture.
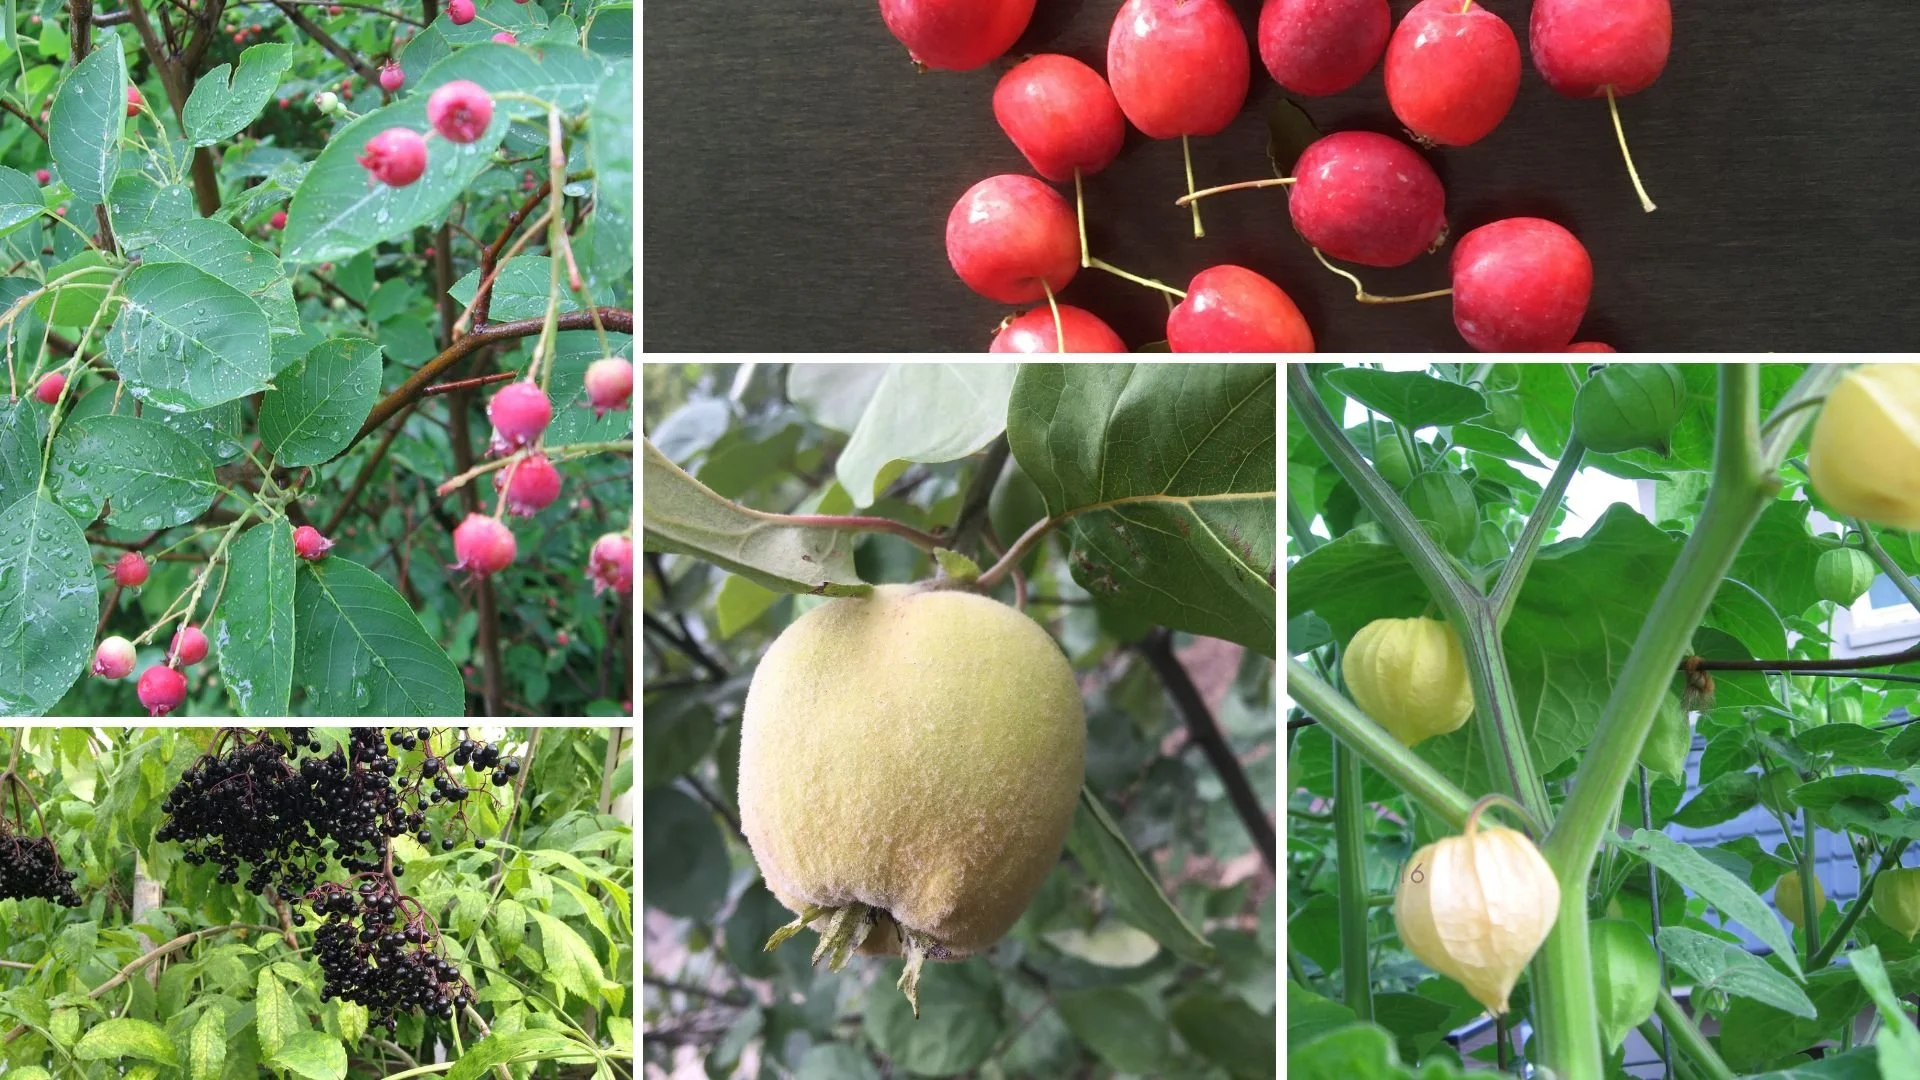
Landscape with Fruit
That’s easy to grow in a home garden!
Saskatoon Bushes in the Landscape
Saskatoon berries are very versatile in a home landscape.
Here are a few ideas:
Saskatoon Hedge. If it’s an edible hedge you’re after, look no further than the Saskatoon! It’s really ornamental too!
Saskatoons in a Food Forest. In forest gardens, Saskatoons can be grown as shrubs or small trees, and are tolerant of partial shade.
Saskatoon Berries in Containers. Because of their excellent tolerance of harsh conditions, Saskatoon berries are great candidates for container gardens.
I have an edible hedge in my garden that has a saskatoon bush, haskaps, and Nanking cherry.
Find out how to grow an edible hedge.
Check out these 5 types of cherry bushes to grow in an edible landscape.
Saskatoon Berry Care
Pruning Saskatoon Bushes
Regular pruning helps maintain vigour and encourages annual fruit production. (With saskatoon, like many fruit trees and bushes, plants often fruit more heavily every second year, something called biennial bearing.)
With pruning, we're helping the plant grow in a way that's beneficial to us. Importantly, we want to pick saskatoon berries without a ladder! (More fruit within reach means more for you, less for the birds!)
Here are a few more thoughts on pruning your saskatoon bush:
Prune out older, less fruitful wood
Remove diseased branches
The best fruit production is on wood from the previous season (older wood gives some fruit, though not as much)
Some saskatoon shrubs favour one main leading branch (leader) when unpruned. Prune back leaders for a well-branched bush form
Prune when dormant
Remember, prune your saskatoon shrub to control size and to create a multi-stemmed shrub.
With pruning, there are two main types of cut we make:
"Heading" cuts, where we cut a branch back only part way to the main branch they come from, encourage branching
"Thinning" cuts, where we cut right back to the main branch, are used to remove weak or unwanted growth
Feeding and Watering Saskatoon Bushes in a Home Landscape
If you have a well-fed soil that has been amended with lots of organic matter, you might not need to give any additional feed.
Sandy soils don't hold moisture or nutrients as well, so if you're on a sandy soil, be sure to amend the soil with lots of organic matter.
Mature service berry bushes are very hardy and won't require irrigation. While establishing newly planted bushes, water for the first year until well rooted.
When to Harvest Saskatoon Berries
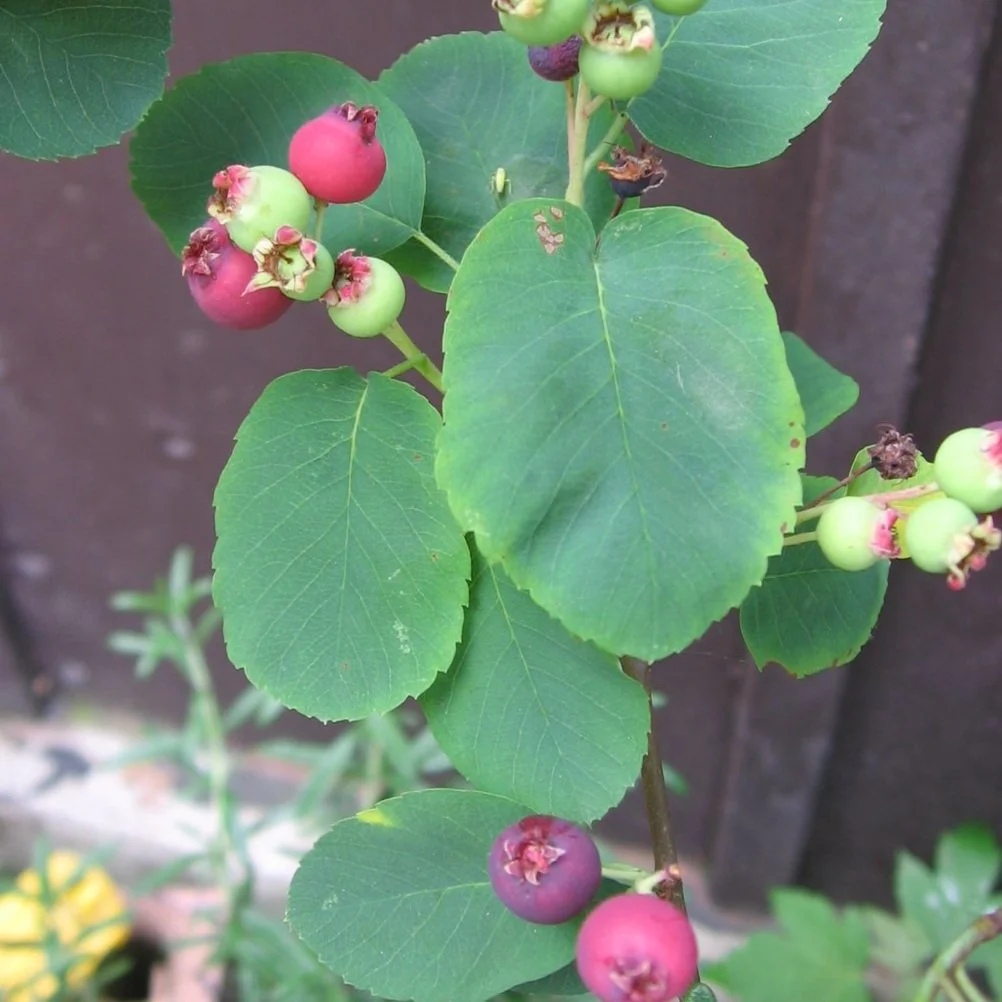
As saskatoon berries ripen, they first turn red or pink. Not all fruit ripen at the same time.
Saskatoons are self-fertile, meaning you get fruit even if you have only one bush. There's no need for a second bush.
Not all flowers open at the same time; and not all fruit ripen at the same time. Fruit on the outside and sunniest part of a bush often develop faster. So expect to pick more than once.
The fruit ripens six to eight weeks after flowering. If you're growing more than one variety, flowering and ripening times vary by variety.
As berries ripen, they first take on a red colour. Next, as they turn to dark purple, you can begin tasting them to figure out if they're close to optimal ripeness. On rip fruit, the flesh is usually pink or red.
How to Use Saskatoon Berries
Our favourite way to use serviceberries is for fresh eating. We graze some in the garden, mix with other fruits for fruit salad, or use them on cereal.
Fresh berries don’t last too long once picked because during picking the skin tears a bit as the stem detaches.

Saskatoon berries go from pink to blue, often to a purple-black colour. Taste some to determine if they’re fully ripe.
Here are a few other ways to use the fruit:
Jams and jellies
Pie
Muffins
Syrup
I've even heard of wine...though I haven't tried it!
And if you want some for using later, freeze them directly in freezer bags—or make some into dried berries.
A few saskatoon berries go nicely atop a crème brûlée! Find out how to make crème brûlée—gardener style!
Propagating a Saskatoon Bush
In the nursery trade, saskatoon bushes are often propagated by cuttings and tissue culture. Sometimes they are seed-grown, but there can be more variability with seed-grown plants.
For home gardeners, rooting saskatoon cuttings is a bit more tricky, as you need controlled conditions.
But its tendency to sucker makes it easy for home gardeners to propagate. The suckers it sends out are from underground stems (called stolons). They shoot up a little way away from the main plant. These can be removed from the parent plant using a spade.
Landscape with Fruit
That’s easy to grow in a home garden!
Saskatoon Berries Varieties
Because saskatoon berries are grown as a commercial crop, there are a number of cultivated varieties. You will probably find the best selection at a specialist nursery.
Here are things to look at as you compare saskatoon varieties:
Fruit size
Fruit colour (there are even white-fruited varieties...but they're usually grown as ornamentals)
Bush height and spread
Bloom time
Disease resistance
Pests and Diseases of Saskatoon Shrubs
In a home garden setting pests and diseases are infrequent.
Here are three to watch for:
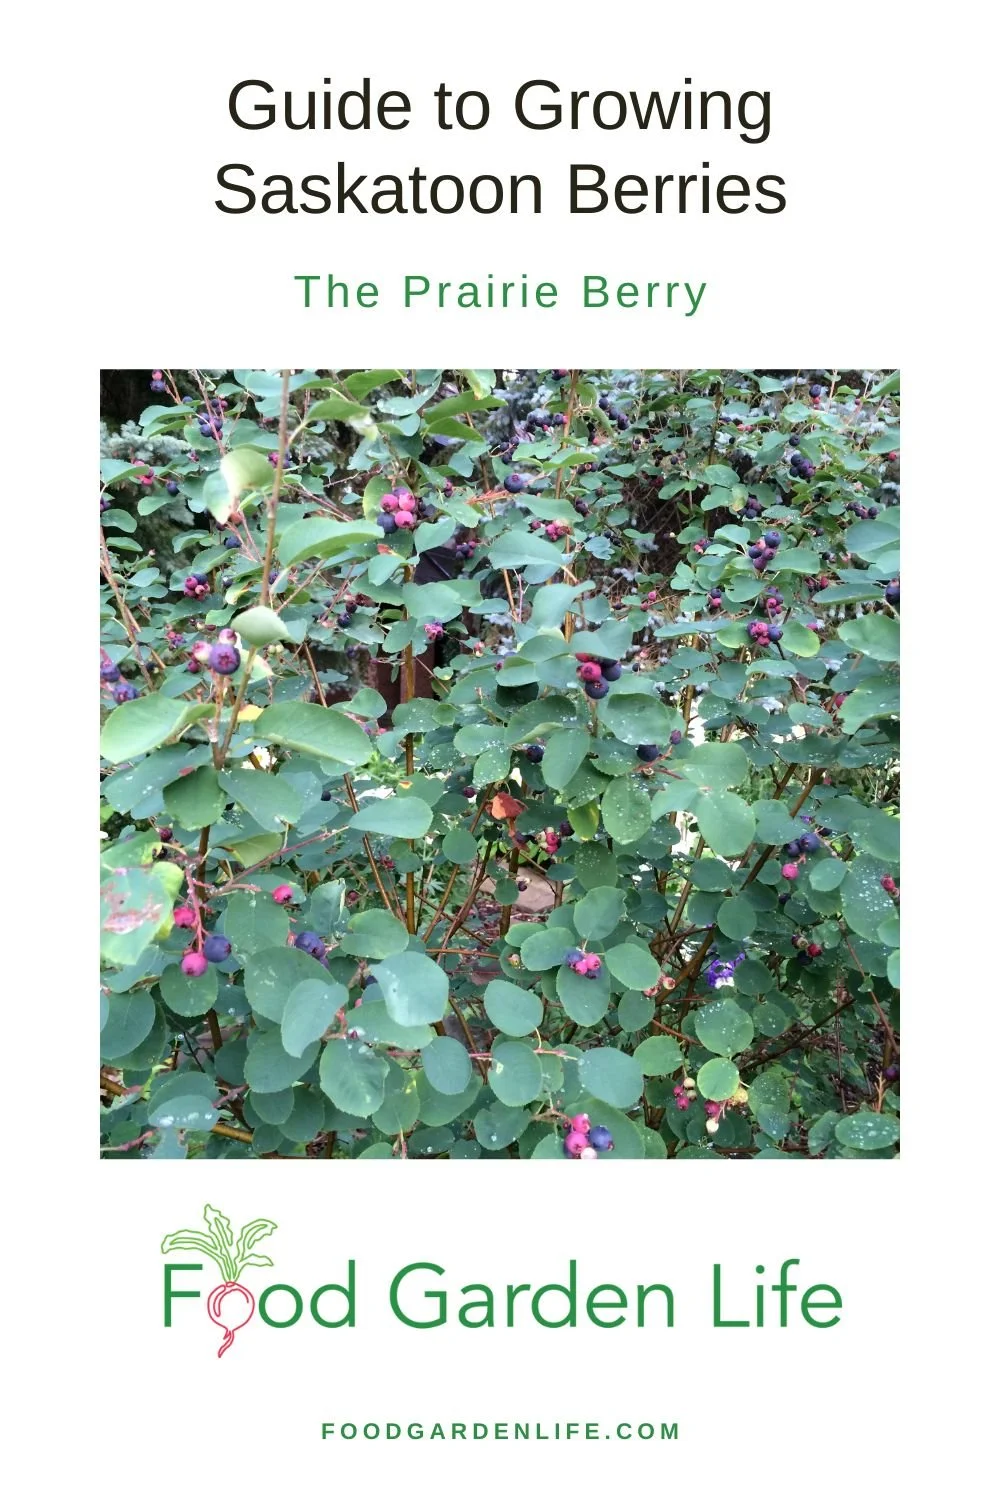
Rabbits. They enjoy snacking on young branches on new bushes over winter (use tree guards or chicken wire if this might be a problem)
Birds. Don't leave your harvest too late -- and consider netting if birds are likely to be a problem (or just grow more bushes so there's lots to share)
Saskatoon-juniper rust. This disease needs both the juniper and Saskatoon plants to finish its life cycle. It causes raised yellow areas on leaves and misshapen fruit. Cut out the woody galls on juniper that host the disease (you'll see yellow growths on them in spring). If it’s a problem, look for rust-resistant varieties (Arcadia, Broadmoor, Buffalo, Calgary Carpet)
Saskatoon Berry FAQ
What's the botanical name?
Amelanchier alnifolia (Although there are also a couple of cultivars that are hybrids with Amelanchier stolonifera)
How long will a saskatoon shrub live?
With pruning and good care, a saskatoon shrub fruits well for decades, by which point you'll have taken off suckers to make yourself even more plants!
Find This Helpful?
Enjoy not being bombarded by annoying ads?
Appreciate the absence of junky affiliate links for products you don’t need?
It’s because we’re reader supported.
If we’ve helped in your food-gardening journey, we’re glad of support. You can high-five us below. Any amount welcome!
Course on Home Fruit Growing
How to Grow Curry Leaves at Home
Spice Up Your Cold-Climate Garden with a Lush Curry Tree
Curry Leaf Plant for Edible Gardens
Grow your own curry leaf tree.
Beautiful Curry Leaf Tree
My kids make snide remarks about my curry leaf plant when I bring it into the dining room for the winter. I’ll explain why shortly.
But first, an introduction to an exotic plant with culinary appeal. A potted curry tree makes a nice addition to an edible garden in cooler climates. Grow it as a potted patio plant over the summer—then as a houseplant or conservatory plant through winter.
The curry leaf plant has aromatic leaves that are used in many South Asian dishes. In my kitchen, I use them in vegetable curries and chickpea curries.
Along with the glossy, pointy green leaves, it has clusters of white, star-shaped flowers. These flowers turn into shiny, black berries.
Don’t be put off by the word “tree” in the name. While I’ve seen curry trees taller than me, they’re easy to keep small when grown in a pot and pruned.
Where winters are cold, curry leaf trees need protection from frost. Here in Toronto, I grow it as a houseplant through the winter.
If you’re a Latin hound, you'll find it referred to by a couple of different names, depending on the source: Murraya koenigii or Bergera koenigii. The common names you’ll see are curry tree, curry leaf tree, curry leaf plant, and sweet neem. But don't confuse it with neem—that's a different plant. (It’s also different from the curry bush—which I mention below.)
My Kids and the Smelly Curry Tree

Curry leaf tree starting to flower.
Back to the snide comments from my kids: When you rub the leaves or brush against the plant, it smells. In my opinion—and theirs—it smells like tar. I've seen it described as a citrus-like scent, though that seems far-fetched to me. But it's a spicy aroma, for sure.
You might be wondering why grow something with such a smell. Don't worry. When you cook with them, fresh curry leaves add a complexity that’s anything but tar-like. It all changes when you cook with them.
As for my kids complaints, the solution is simple. Don’t put your potted curry plant in a high-traffic area where people will brush against it!
Curry Powder, Curry Leaves, and Curry Plant
Don’t be confused by the name: The flavour of curry leaves is different from that of curry powder. Although you might use both when cooking a curry.
(The run-of-the-mill curry powder around here is usually a combination of coriander, cumin, chilies, fenugreek, and turmeric—though curry spice blends differ by region, and my local South African store has various curry powders that are quite different.)
Then there’s the curry plant—a.k.a. curry bush—which is totally different. Curry plant (Helichrysum italicum) is a shorter, grey-leaved tender perennial that owes its name to the strong sweet curry smell of its leaves. Curry plant has small yellow flowers that contrast nicely with the leaves. Nice plant—but not what we’re talking about here.
How to Grow a Curry Leaf Plant
Location for a Potted Curry Tree Outdoors

Potted Curry leaf plant outside on the patio for the summer.
A potted curry tree makes a good potted patio plant over the summer. Grow it in full or partial sun.
Protect from frost. If you're in a cold climate like me, move the tree indoors for winter.
This is an evergreen plant, meaning that it keeps its leaves year-round. That is, if it’s warm enough. If you leave it out in the fall as temperatures cool, you might find some of the leaves yellowing. With the cool conditions, the plant is getting ready to take a break.
Winter in Cooler Climates
Over the winter, curry leaf plant makes an excellent houseplant.
Give it your sunniest window, preferably a south-facing window with full sun.
If you left it out in cool fall weather and leaves started to turn yellow and drop before you moved it indoors, it might take a little break. It might drop some more leaves while the days are short. This is nothing to worry about. Growth resumes and the plant grows new leaves as days get longer and it’s in a warm location.

Keep Your Lemon Tree Through the Winter
And enjoy fresh homegrown lemons!
Curry Tree Care
Feeding
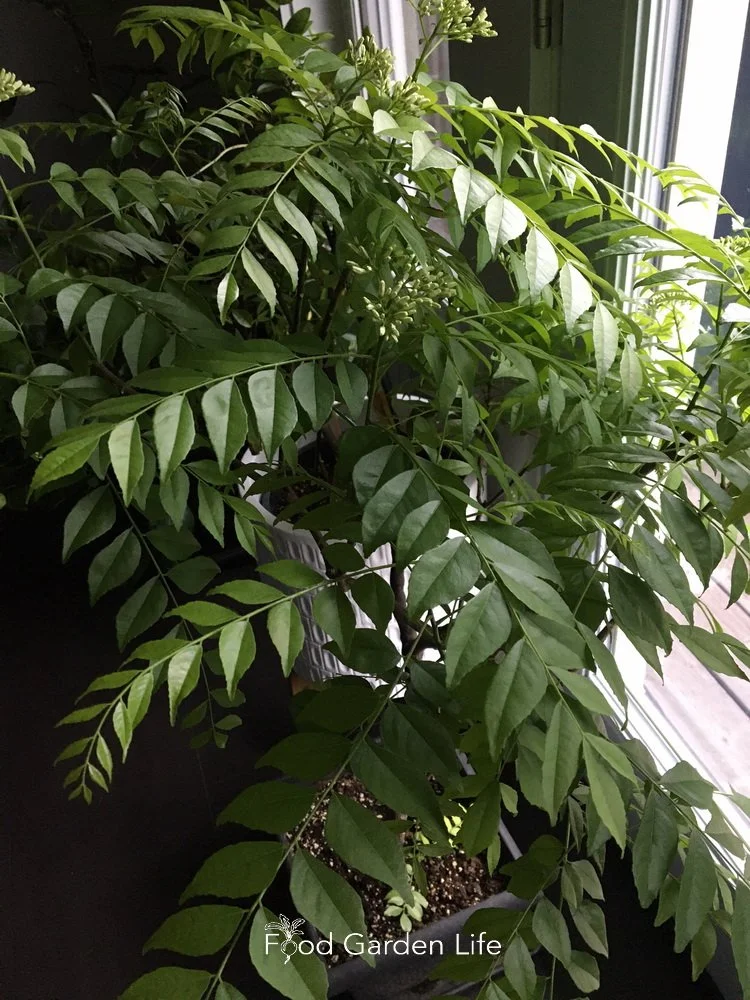
Growing a potted curry leaf tree as a potted plant indoors for the winter.
Feed your curry leaf plant when it’s growing.
If growth stalls in cool weather, stop feeding until it starts again.
There’s no need for any special fertilizer for curry leaf plants. I use general-purpose feeds.
If feeding potted patio plants seems like a never-ending task, here’s what I do:
In the spring, as I move potted plants outdoors, I give them a half dose of a slow-release feed that lasts for the entire summer. (There are granular products that can be spread over the top of the soil—easy to apply.)
I occasionally supplement with a low rate of a liquid feed—”spoon feeding” as I think the plants need it.
(Why, you might ask, a half dose of slow-release feed? Because I often use manures when I blend my own potting soils, and they contain some nutrients.)
Watering a Curry Leaf Plant
Water regularly while the curry leaf plant is actively growing.
The goal is to keep the soil moist, but not constantly wet:
Water enough so that water comes out of the bottom of the pot.
Then water again as the top inch or two of soil looks dry.
If in doubt, stick your finger in the soil to see how moist it feels.
If growth slows during the winter, water less often. The plant will use less water as growth slows. And if the soil stays too wet for too long, there's more chance of root rot.
Here's my guide to watering potted citrus trees. The same ideas apply to watering your curry tree.
Repotting
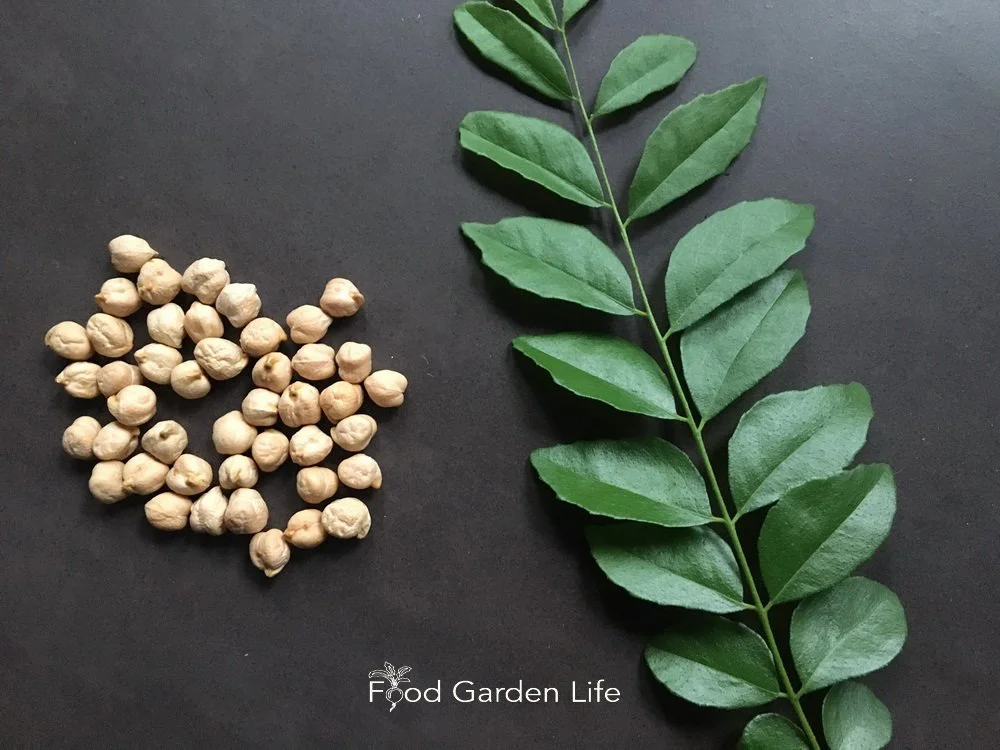
I love to use fresh curry leaves in vegetable curries and chickpea curries.
Repot in the spring when the plant starts to make new growth.
As your curry plant grows bigger, repot it into a slightly larger pot every year or two, until it reaches a size that suits you. You'll know it's time to repot when the roots fill the soil and begin to coil around.
Once it reaches the size you want to keep it at, repot every couple of years back into the same pot. You only give it a larger container if you want a larger plant. Remove up to one third of the soil, and then put it back into the same pot, with some fresh potting soil.
An off-the-shelf soilless potting medium is fine. No need for anything special. It should be a well draining soil.
But if you’re growing it into a tall tree, you might want a heavier soil mix to prevent it from tipping over in the wind. In that case, a loam-based potting soil is a good option.
When it comes to choosing a pot, make sure there are drainage holes. Good drainage is important. Otherwise, you're setting yourself up for root rot. If you tend to have a heavy hand at watering, unglazed terracotta pots breathe—so the soil dries out more quickly—and that helps counteract your heavy hand!

Covering everything from lemon varieties, to location and watering, to pruning and shaping, to overwintering, dealing with pests, and more—and including insights from fellow citrus enthusiasts—this book will give you the confidence you need to grow and harvest fresh lemons in cold climates.
Pruning a Curry Leaf Plant
Curry trees get leggy if not pruned. My neighbours have an unwieldy seven-foot-high giant. They can get even bigger and more gangly than that given the opportunity.
I keep mine under four feet high with regular pruning. I prune it back before moving it into the house every winter, and give it a haircut as needed through the summer.
If starting with a young plant, pruning depends on the shape you want. You can grow it as a single-stemmed or multi-stemmed plant. If you want branching to start low down, for bushier growth, nip off the tip of the plant while it's still short to induce branching.
In summer, if there’s a long, lanky branch that you want to have side shoots, pinch out the tip to encourage branching.
Pests and Challenges
I find potted plants growing outdoors are far less likely to have pest problems than those grown indoors. That’s because outdoors, there are natural predators and parasites—and because heavy rain can wash away some pests. (Spider mites, I'm talking to you!)
But indoors, conditions can be ideal for pests…like an incubator.
Three common pests of potted curry leaf trees are:

This curry tree is outside on a warm winter day for an emergency spray to tread a spider mite infestation.
Scale
Spider mite
Mealybug
Here in Ontario, home gardeners are quite limited in the choice of pest control products. But we can get insecticidal soap and horticultural oil—and both of these are all that you need for curry leaf tree pests.
Before moving potted plants indoors for the winter, I spray three times, leaving a few days between each spray.
Soap and oil are good insecticides, but they don't kill eggs. The repeated spraying catches newly hatched critters.
If things go well, you won’t have pests indoors over the winter. But…sometimes it happens. On a couple of occasions I’ve paraded my potted plants outdoors on a mild winter day so I can spray for spider mites. (I’m talking about temperatures above 10°C.) Failing that, I know people who do mid-winter sprays in the shower!
Indoors, if there’s a way to keep the humidity higher, it makes conditions less ideal for spider mites.
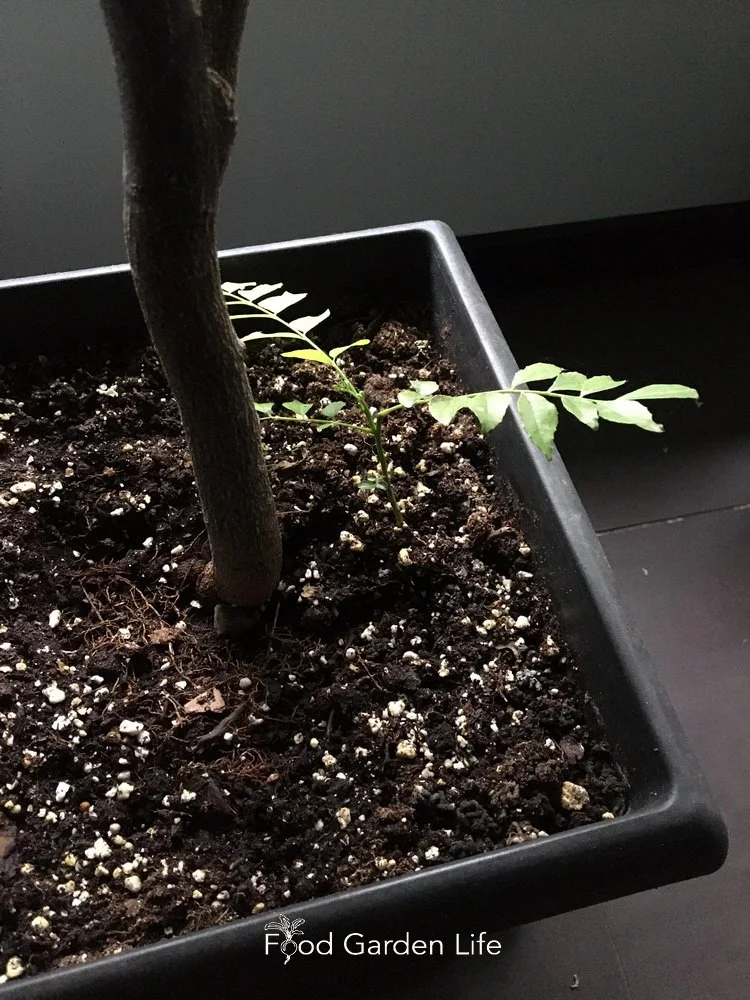
Curry leaf plant seedling growing at the base of a larger plant.
Propagation
Planting Curry Leaf Plant from Seeds
The easiest way to get started with a curry leaf tree is from someone who has a mature plant that’s dropped seeds into the pot. Then, young plants spring up on their own. That’s how I got started with curry leaf tree.
They are easy to grow from fresh seed—so if your plant makes seed, share with friends.
You can also propagate curry leaf tree by cuttings.
Where to Get a Curry Leaf Plant
If you have friends or neighbours with a curry tree, that’s a good place to start, because seeds that drop to the soil often grow at the base of the parent plant. Simply pot them up!
Check out our sources guides to find nurseries selling exotic plants such as curry tree, citrus trees, figs, and olive trees.
Harvest and Use
Pick fresh curry leaves as needed year-round.
I like fresh leaves the best. But curry leaves can also be frozen or dried for later use…although no need to do this if you have a plant growing in the kitchen. Then you’ll have a constant supply!

Pin this post!
Top Tips for Curry Leaf Tree
Pinch young plants to encourage branching if you want a multi-stemmed plants.
Spider mites love curry leaf trees…so keep your eyes open for them if overwintering in a centrally heated, dry space! (Grab a magnifier, and look on the undersides of the leaves.)
Curry Tree FAQ
Why are there two botanical names for curry tree?
It's common to find more than one botanical name used for a plant. Plant taxonomists continually regroup and rename plants. And because they don’t always agree with each other, home gardeners get to enjoy Latin-name overload.
Does it have medicinal properties?
Curry leaves are used in ayurvedic medicine. I’m not an expert on its medicinal properties, so I’ll say nothing more.
How do I make my curry leaf plant bushy?
If starting with a young plant, pinch out the tip early on to get it to branch out. If your curry leaf plant is already tall, you can prune it back quite drastically. It will bounce back.
Why is my curry leaf plant losing its leaves?
This is common when overwintering the plant in cool, indoor conditions. As days get longer and growth restarts with warm temperatures, you won't have to worry about leaf production.
Find This Helpful?
Enjoy not being bombarded by annoying ads?
Appreciate the absence of junky affiliate links for products you don’t need?
It’s because we’re reader supported.
If we’ve helped in your food-gardening journey, we’re glad of support. You can high-five us below. Any amount welcome!
More on Growing Exotic Edibles
Interview
Tune in to this episode of the Food Garden Life show to hear about growing guava, yacon, starfruit, cinnamon, curry leaf, and black pepper.
Articles
Find out about other exotic edible crops for cold-climate gardeners.
Courses on Growing Exotic Crops in Cold Climates
Here are self-paced masterclasses to help you grow figs and lemons:


Books on Exotic Crops
Covering everything from lemon varieties, to location and watering, to pruning and shaping, to overwintering, dealing with pests, and more—and including insights from fellow citrus enthusiasts—this book will give you the confidence you need to grow and harvest fresh lemons in cold climates.
Even if you live somewhere too cold for olive trees to survive the winter, you can enjoy the exotic touch of an olive tree in your garden. This book gives you what you need to know to grow an olive tree in a pot. (And get olives!)
In the USA? Here’s the link to the Mother Earth News store, where you can get a copy of this book.

This book will help you apply creative “fig thinking” in your garden and harvest fresh figs even if you have a short summer or cold winters. With some fig thinking, you can harvest figs in areas where they don’t normally survive the winter! In this book, I share many of the questions I have been asked about growing figs in temperate climates, along with my responses.

Hi, We’re Steve and Emma!
We help people grow food on balconies, in backyards, and beyond—whether it’s edible landscaping, a vegetable garden, container gardens, or a home orchard.
Courses


Free Food- Garden Guide
Books
Covering everything from lemon varieties, to location and watering, to pruning and shaping, to overwintering, dealing with pests, and more—and including insights from fellow citrus enthusiasts—this book will give you the confidence you need to grow and harvest fresh lemons in cold climates.

Didn’t think you can grow your own figs in a cold climate? Here’s all you need to know to grow exotic fresh figs, even if you live somewhere with cold winters. Find out about choosing the right location, watering, pruning—and how to conquer winter. You’ll also learn about varieties, dealing with pests, and get tips from cold-climate fig experts.
This book will help you apply creative “fig thinking” in your garden and harvest fresh figs even if you have a short summer or cold winters. With some fig thinking, you can harvest figs in areas where they don’t normally survive the winter! In this book, I share many of the questions I have been asked about growing figs in temperate climates, along with my responses.