
How to Make a Wicking Bed: A Raised Garden Bed that Keeps the Soil Moist
Harvest more and water less when you grow in a wicking bed. Find out how to make a wicking bed.
By Steven Biggs
Harvest More and Water Less with a Wicking Bed Garden
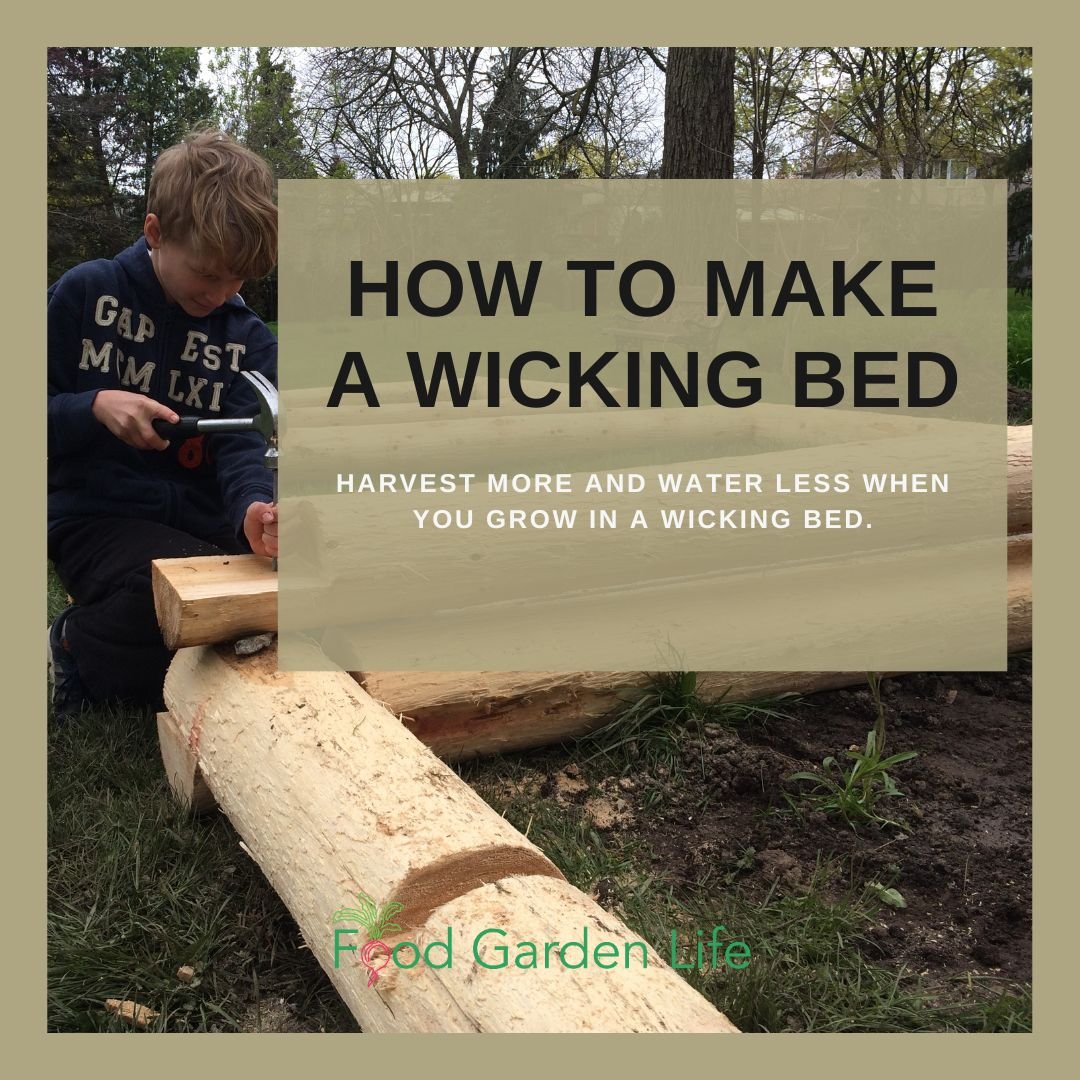
The potting mix in the wicking bed will wick moisture up to where plant roots can get it.
Wicking beds are a great way to maximize the use of space in a small garden. That's because this sort of raised bed keeps the soil continuously moist.
And that continuously moist soil is great for your crops.
With ample soil moisture, you can plant more densely. And with ample moisture, your crops produce more for you.
There's one other benefit of a wicking bed: You spend less time watering. Instead of frequently watering by hand or setting up a sprinkler, now you can fill up your wicking bed with water...occasionally.
Want to water less often? Want crops that thrive because they get consistent soil moisture? Keep reading to find out how to make this type of self-watering garden bed.
What's a Wicking Bed?
A Raised Garden Bed with Plumbing!
A wicking bed is simply raised bed with a water reservoir (a water storage area) at the bottom.
Water moves upwards (it "wicks") from the reservoir into the soil layer above. This "wicking" is the same ideas as what happens in an oil lantern as oil moves up the wick.
Wicking beds work the same way as sub-irrigated planters (a.k.a. SIPS or “self-watering” pots): Water wicks upwards into the soil above through capillary action. But while a sub-irrigated planter is often small enough to be picked up and moved, a wicking bed is a large, stationary raised bed.
Continuous Moisture Means Less Plant Stress
And Higher Yield
When there isn't enough moisture in the soil for plants, it's a stress.
And that stress affects yield.
Because the soil in a wicking bed remains moist, the plants don't have water stress. Without that stress, the increase in yield can be considerable.
(Of course, no one minds the time saved by having to water less frequently!)
Even in the heat of summer, when the plants are quite big, we water our wicking beds about once a week.
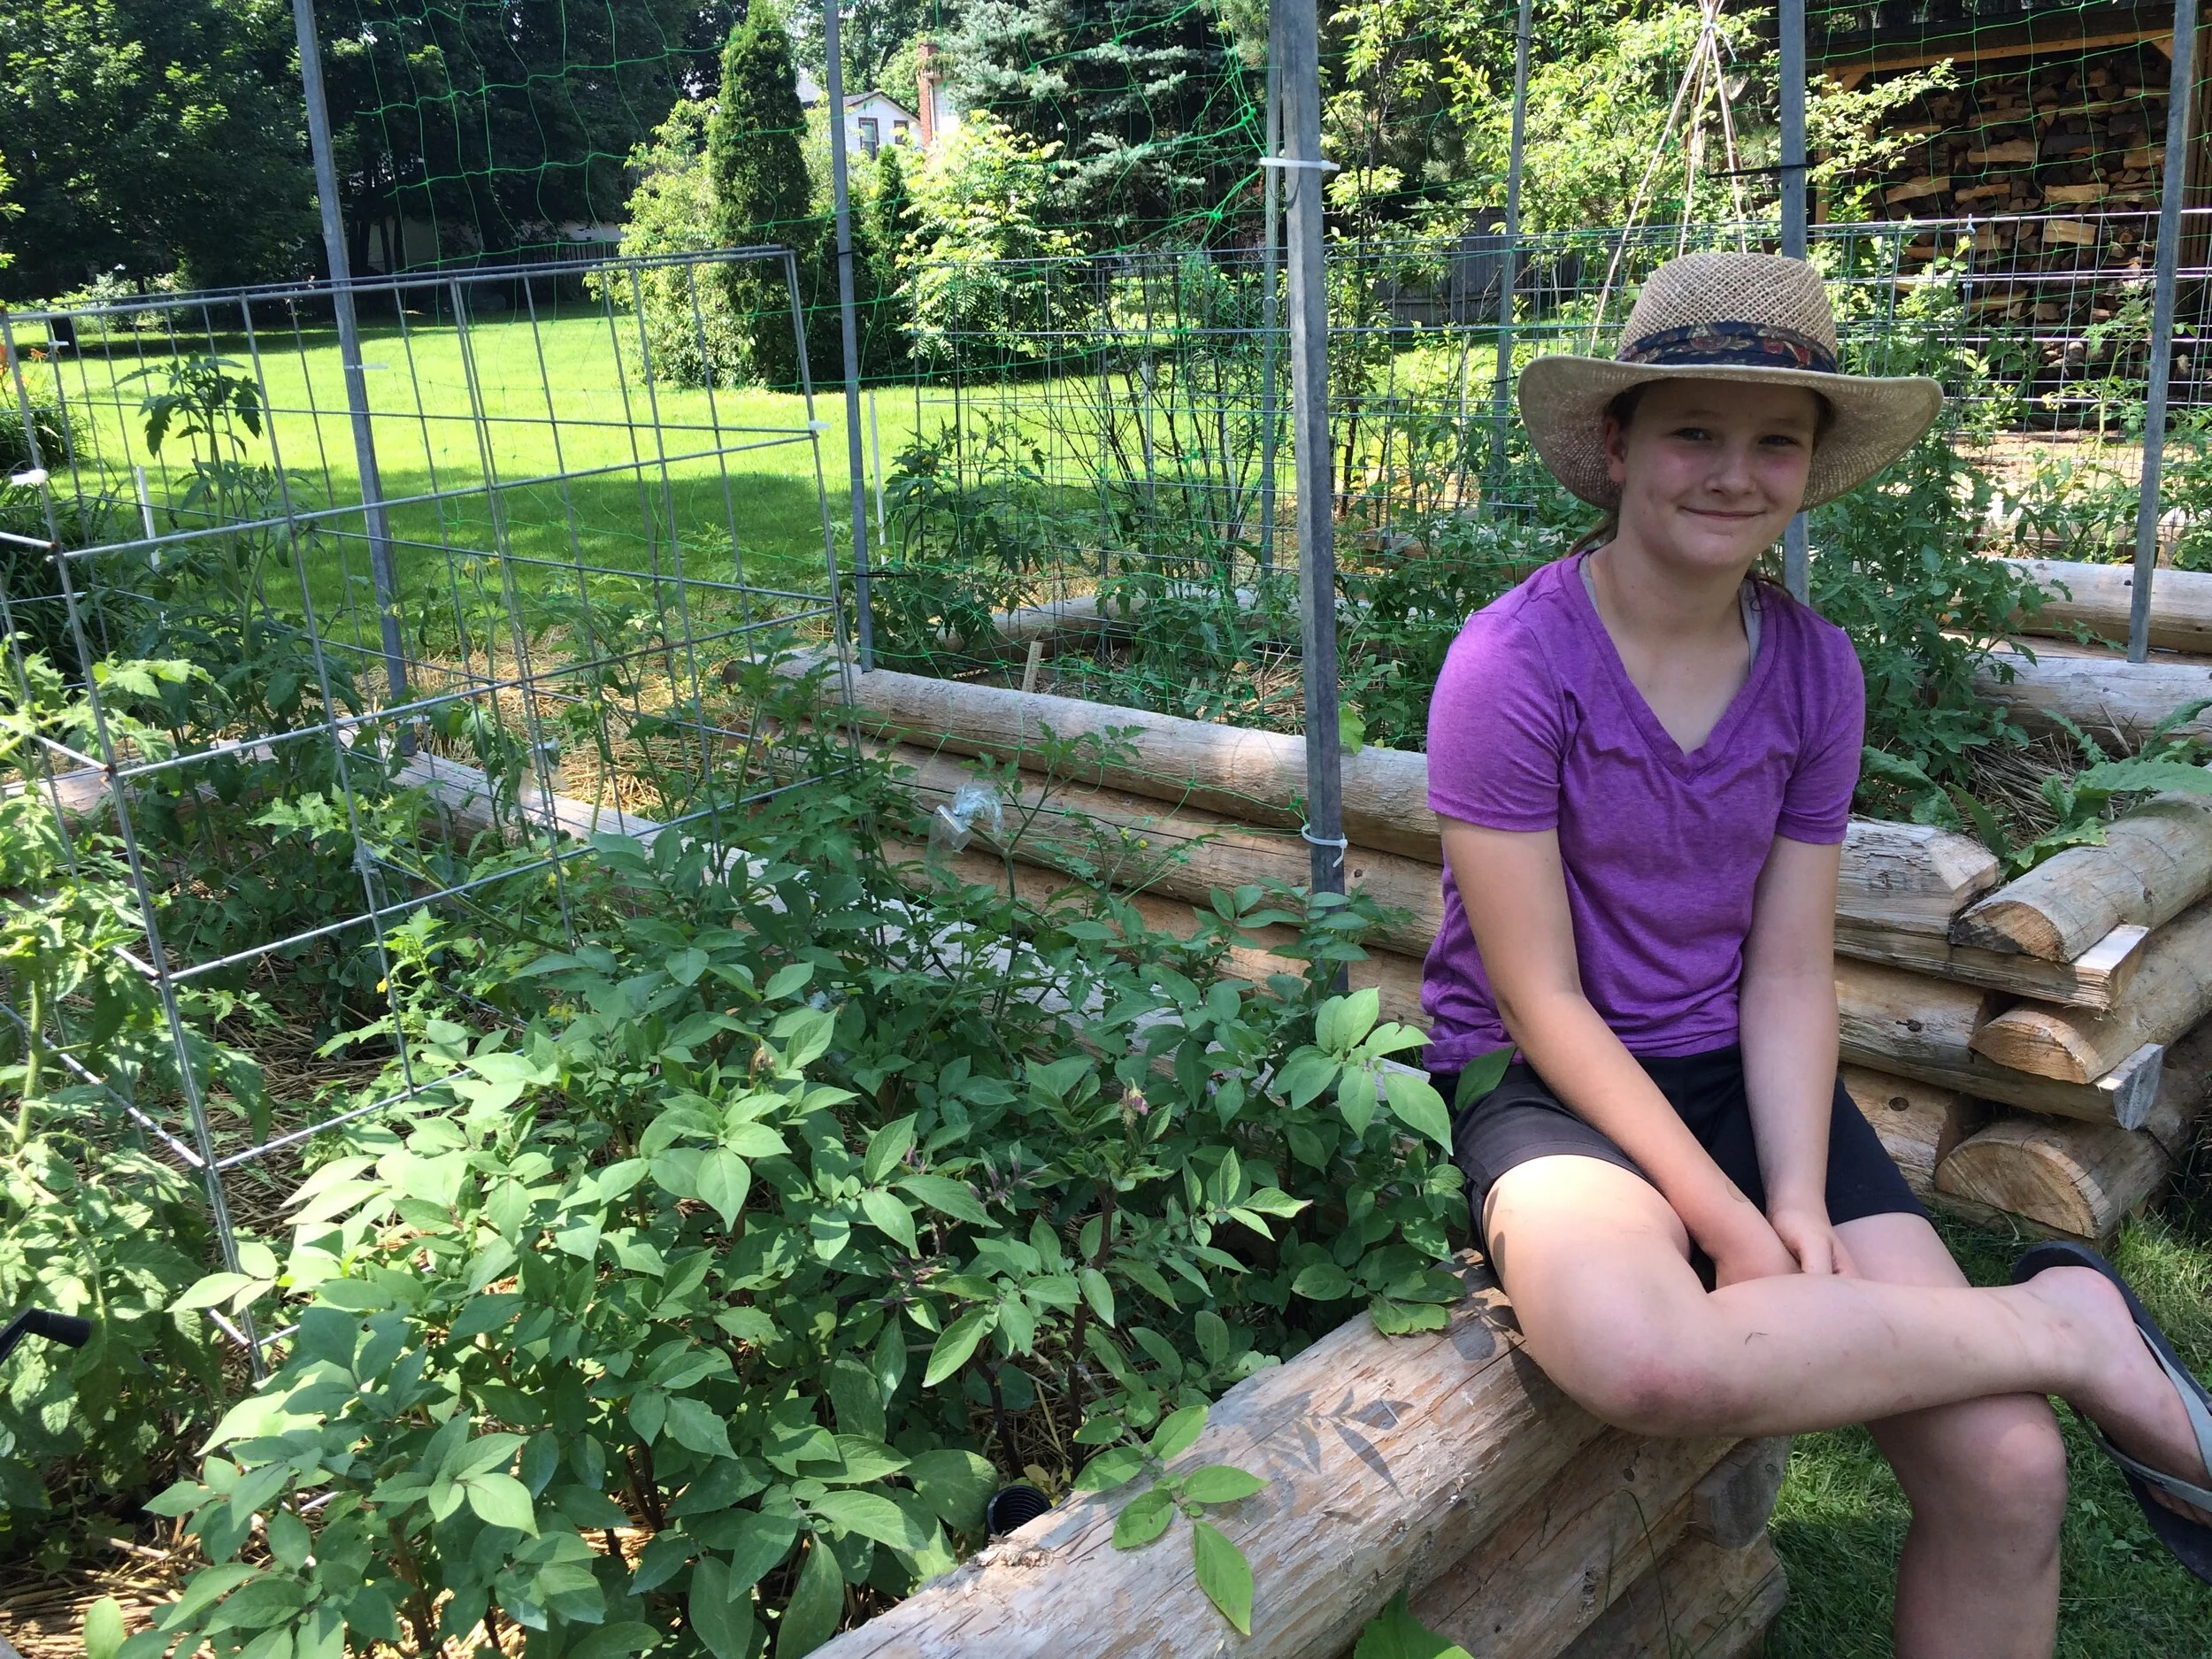
We turbo-charged our production by growing our vegetable plants in wicking beds.
Another Reason to Use a Wicking Bed
Edible Gardening near Black Walnut Trees
Our neighbour's large black walnut tree is beautiful. But walnut trees give off a compound called “juglone.”
And juglone affects the growth of many plants…including tomatoes.
We tried growing tomatoes in the backyard many times…and they always died.
We solved the problem by growing tomato plants in wicking beds. That's because the tomato plant roots never get into the juglone-contaminated soil below.
Find out about juglone-tolerant plants for gardening near black walnut trees.
Want to Ace Your Container Garden?
Find out about top crops, how to choose the right soil, feeding your plants, and what to look for as you're choosing containers. More on Vegetable Container Gardening Class.
Make Your Own Wicking Bed
Wicking Bed Design - Be Creative!
Be creative! You might want to make a wicking bed from salvaged material—or maybe you want a bed that ties in with the aesthetic in your landscape. (I think a red-brick wicking bed would look nice in my garden! One day…)
Later in this post you'll see photos of wicking beds that I made with my kids. I used cedar fence posts. But there are all sorts of materials you can use to make them.
Not sure what to build your wicking beds with? Here are thoughts to start with:
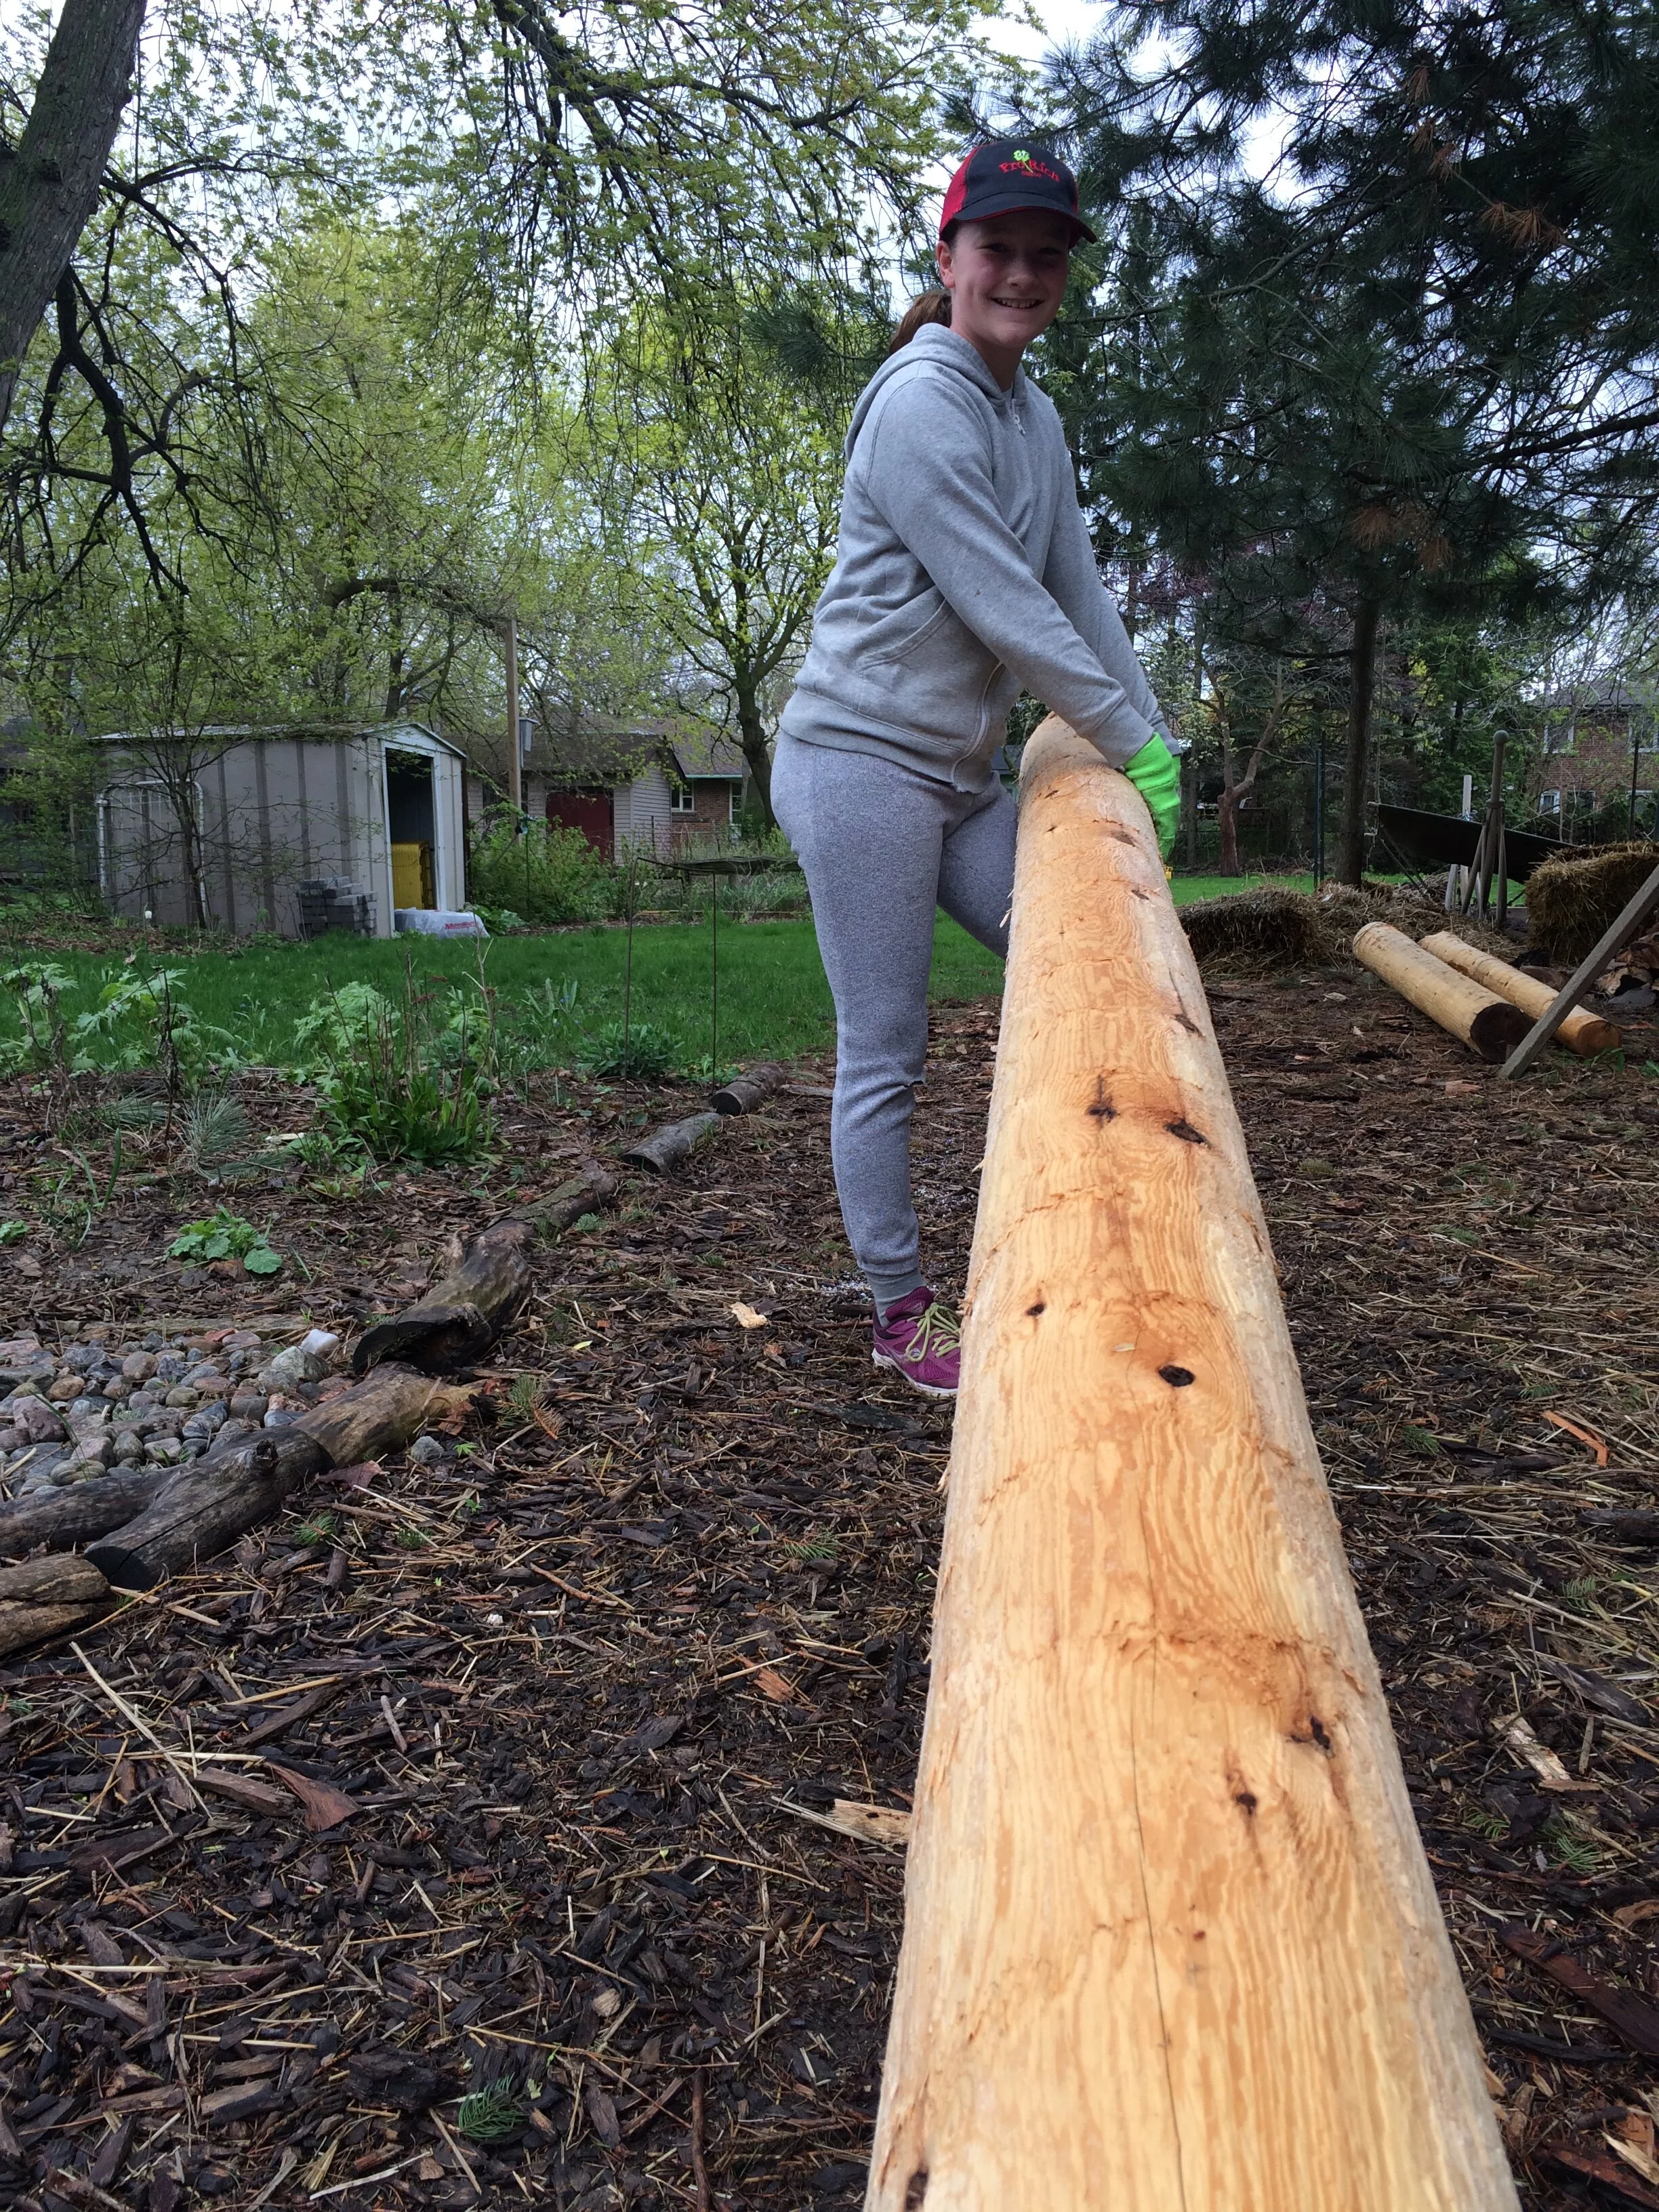
Be creative with the materials you choose for your wicking beds. We used cedar fence posts to make our wicking beds.
Find something that ties in with the aesthetic in your garden
Choose materials that are good value
See if you have materials on hand that you can reuse as you make your beds
Here's why I chose cedar fence posts:
They are long-lasting and not much more expensive than dimensional lumber
I didn't use treated lumber because it's not suitable for edible gardening
I didn't use dimensional lumber because raised beds made with dimensional lumber often sag outwards over time
I used pond liner to create the reservoir because I already had liner from a former pond
Wicking Bed Workings
The Raised Bed
There are many materials you can use to create the frame for your wicking bed.
I've seen wicking beds made from:
Large plastic bins
Intermediate bulk containers (IBCs)
Cinder blocks
New lumber
Recycled wood
The Reservoir
The bottom of your wicking bed must hold water. It's the water reservoir.
If you're making the wicking bed from a container that is closed at the bottom (for example, an intermediate bulk container), you won't need to line the bottom of the bed to create the water reservoir. (Instead, you'll drill a hole at the top of the reservoir level for excess water to drain away.)
If you make a wicking bed from wood or stone, it won't be sealed at the bottom. So you'll need to create a reservoir at the bottom to hold water. Do this by lining the bottom of the bed with some sort of liner. Choose a material that is durable enough so you won't need to take apart your wicking bed to repair a puncture. Pond liner is very durable, and widely available.
The Plumbing
A wicking bed has a "fill tube" that extends up above the soil layer. You might also see this called the "inlet pipe."
Down below, the fill tube reaches into the reservoir area. This tube is how you add water to the reservoir. Simply put your hose into the tube and leave the hose running until the reservoir is full.
Ideas for what to use to make a fill tube:
Dishwasher drain hose (that's what I used, as it's big enough that I can put the hose into it when filling the wicking bed)
PVC pipe (sometimes called a PVC inlet pipe)
Downspout
You also need to have some way for excess water to escape once the reservoir is full. So that your plants don't have wet feet after heavy rain or if you fill it for too long!
In other words, once the reservoir is full, any additional water drains from the bed.
Ideas for an overflow:
In the case of my own wicking beds, the liner only extends up to the height of the reservoir level, so and excess water drains out behind the liner and through the cedar posts...no fancy fittings or overflow tube required
For IBCs and rigid beds, drill holes at the desired overflow level
Some gardeners also install an overflow pipe or overflow tube through the hole...looks a bit more tidy
The Wick
The water moves upward from the reservoir into the soil mix through capillary action. In other words, it wicks.
But for it to wick properly, it has to be able to move up and along something. Luckily, gravel works well. So gravel is often used to fill the reservoir area.
This might sound strange to you, filling an area intended for water with gravel. But there can be lots of open space between particles in some types of gravel...and that space is perfect for holding water.
The type of gravel available to you depends where you live. Some people use pea gravel. Around here, it's easy to get what's called 3/4" "clear" gravel which has only large rocks. That's what you want. Make sure the gravel doesn't also include fine particles too, because fine particles fill up the space that we want for the water.
A layer of landscape fabric over top of the gravel prevents soil from filling up the spaces in the gravel.
The Soil
Don't cheap out on soil. It's critical.
The soil must have good wicking action. Capillary action.
And to have that, it should have lots of air spaces within it.
So don't use straight top soil. It often packs down too much. A high quality potting mix or soil amended with lots of organic matter is better suited to making a wicking bed.
IMPORTANT POINT ON SOIL: The water will only wick upwards so far. That means if the soil is too deep, water won't wick all the way to the zone where your plant roots are. Aim for a soil depth of 30-40 cm (12-16").
Other Options
There are many ways to make a wicking bed, so if you research the topic don't be surprised when you find all sorts of variations.
Plumbing! If you're a do-it-yourselfer, you might be interested in hooking up a water supply and shut-off! I've seen videos where people demonstrate this sort of set-up, using the same sort of plumbing supplies used for toilets. When the water level gets low, this sort of system automatically refills the reservoir.
Weeping tile. A perforated pipe or drain tile in the bottom area along with the gravel permits water to quickly move through the reservoir. It also means you don't need as much gravel. You’ll see weeping tile in the pictures of my wicking beds, below.
Materials List for My Wicking Bed
Here's what I used to make wicking beds.
Cedar fence posts.
Pond liner. The pond liner holds water in the bottom of the bed. Once the sides of the pond liner are folded upwards and fixed into place, it creates a shallow water storage area at the bottom of the bed—about as high as the weeping tile.
Weeping tile.
3/4” gravel. Use “clear” gravel, which means that it does not have smaller pieces of gravel that will fill up the spaces in between. That way the space is available to hold water.
Dishwasher drain tube. To create a fill tube, sometimes called an inlet pipe.
Landscape fabric. Its purpose is to keep the soil from filling up the weeping tile and the spaces between gravel.
Soil. I used a mix of high quality potting mix blended with compost.
Steps for Making a Wicking Bed
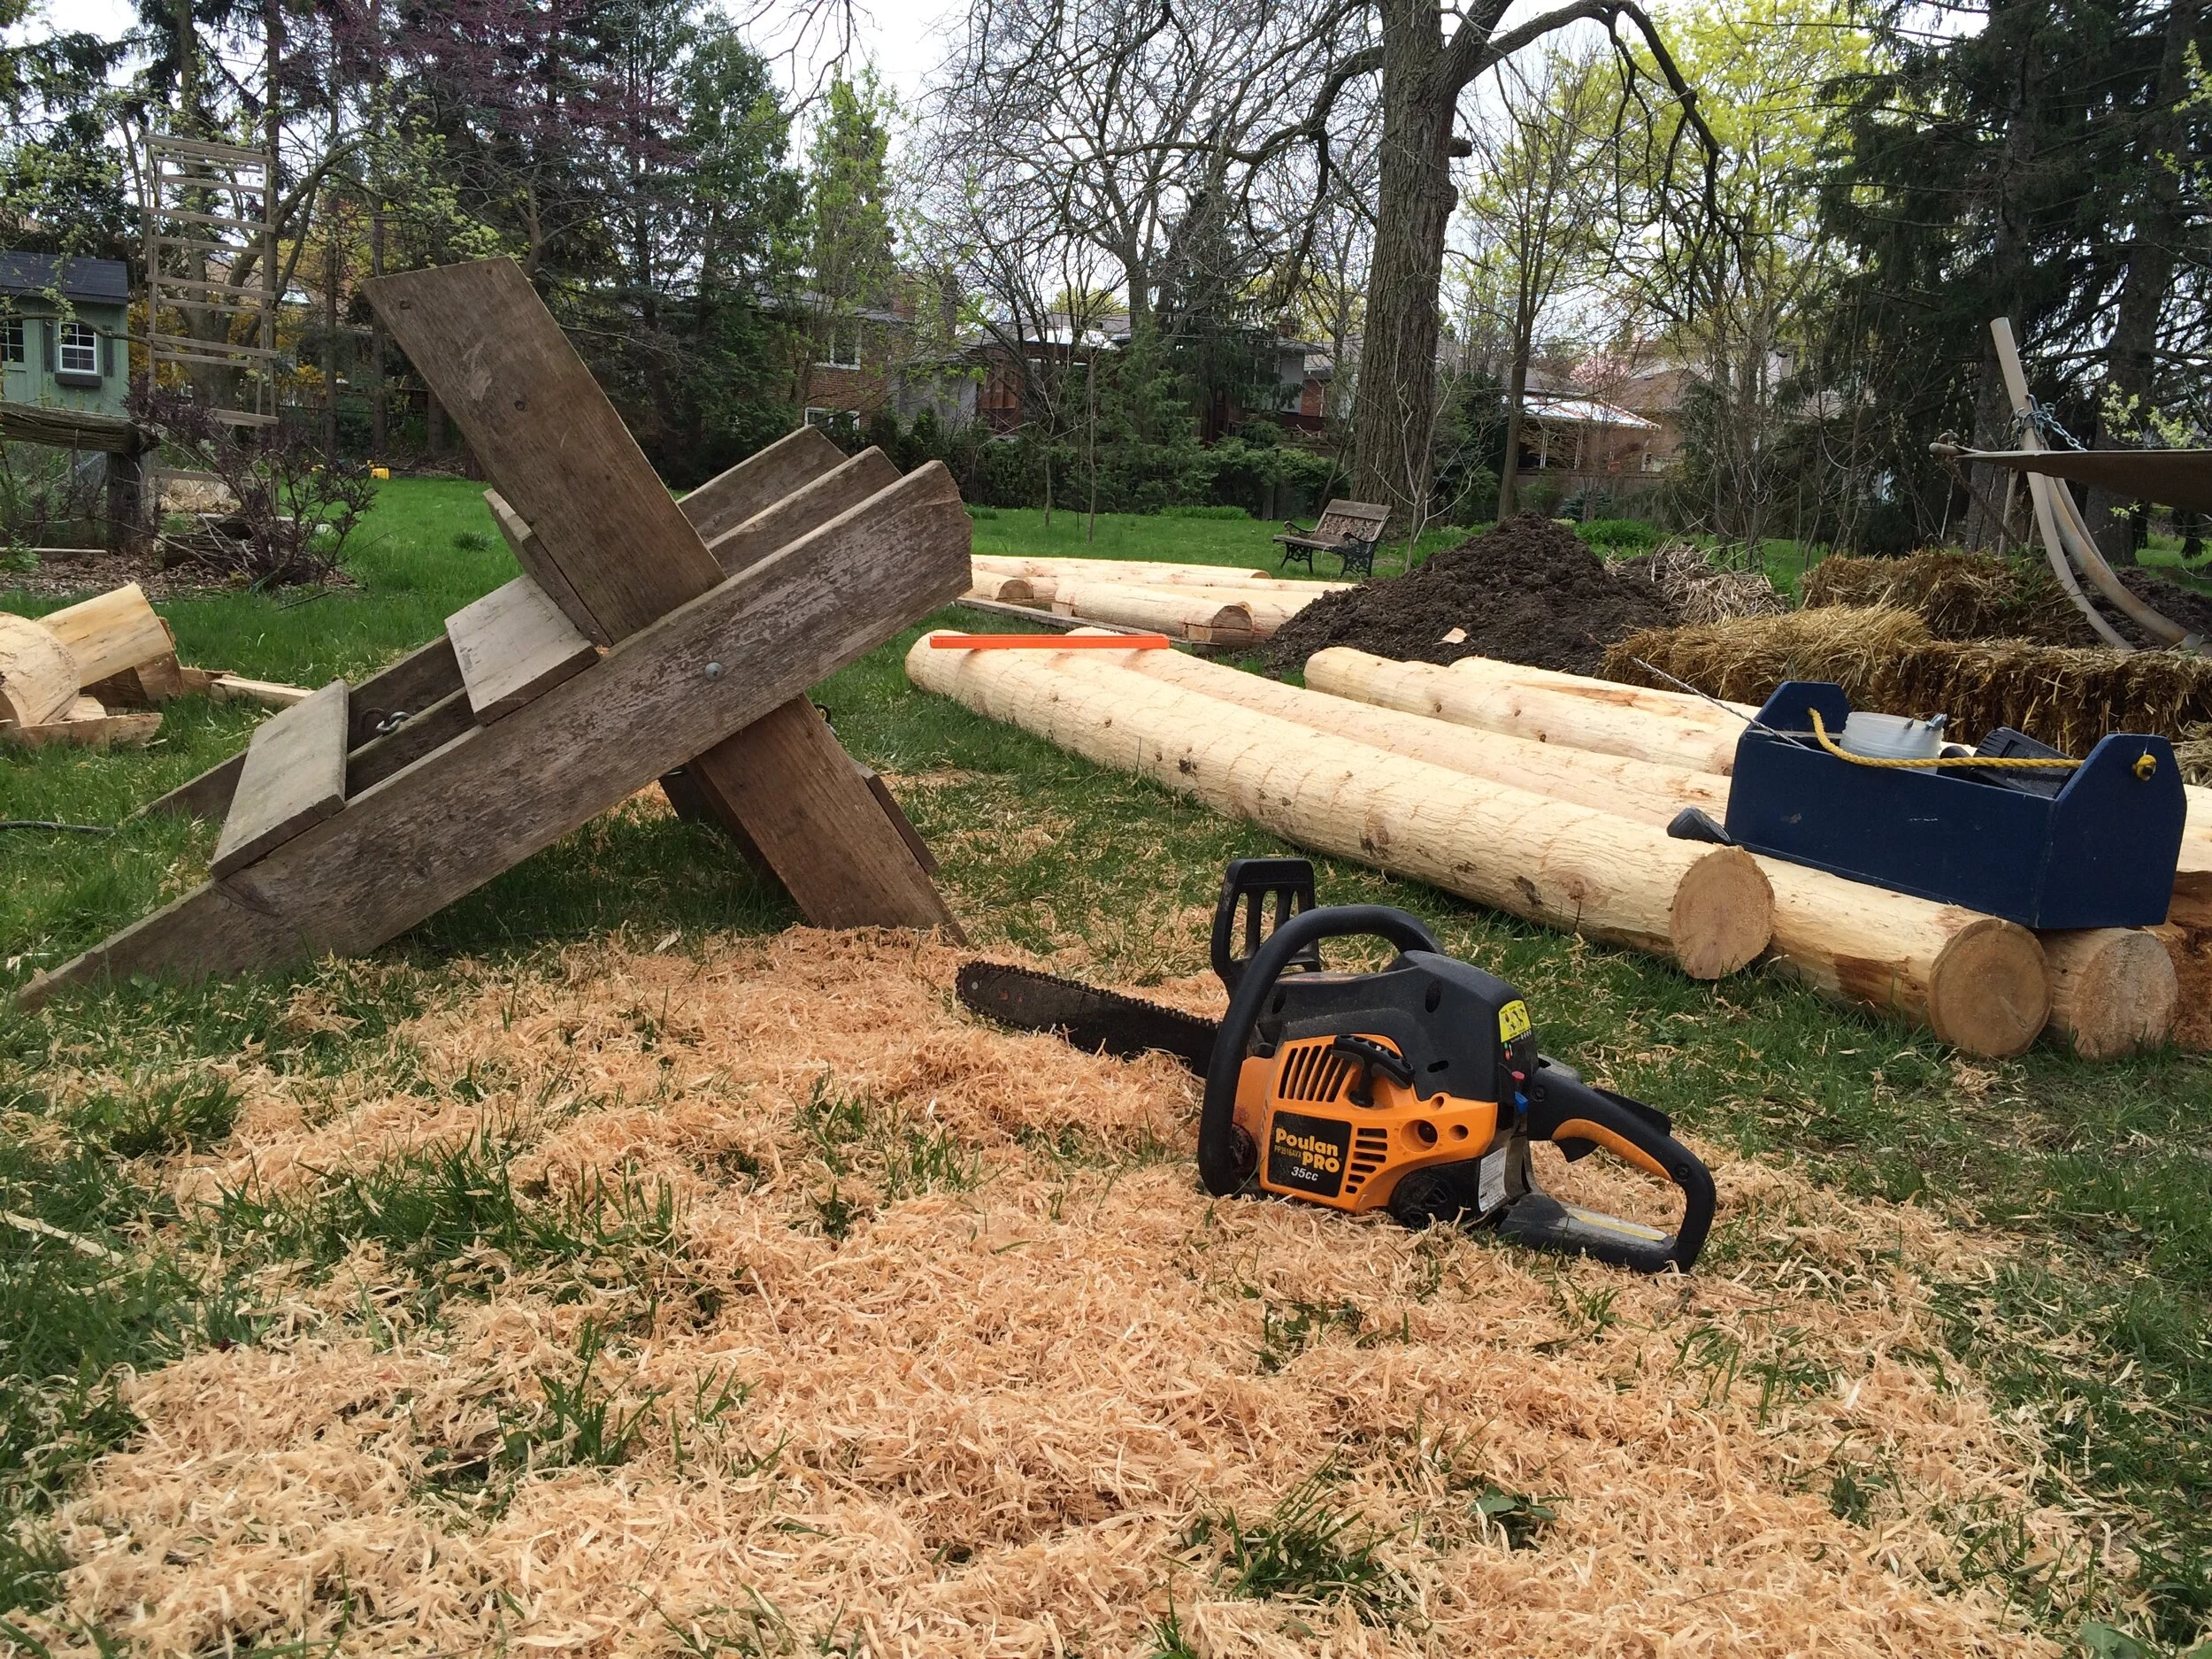
Cut posts to length and notch the ends.
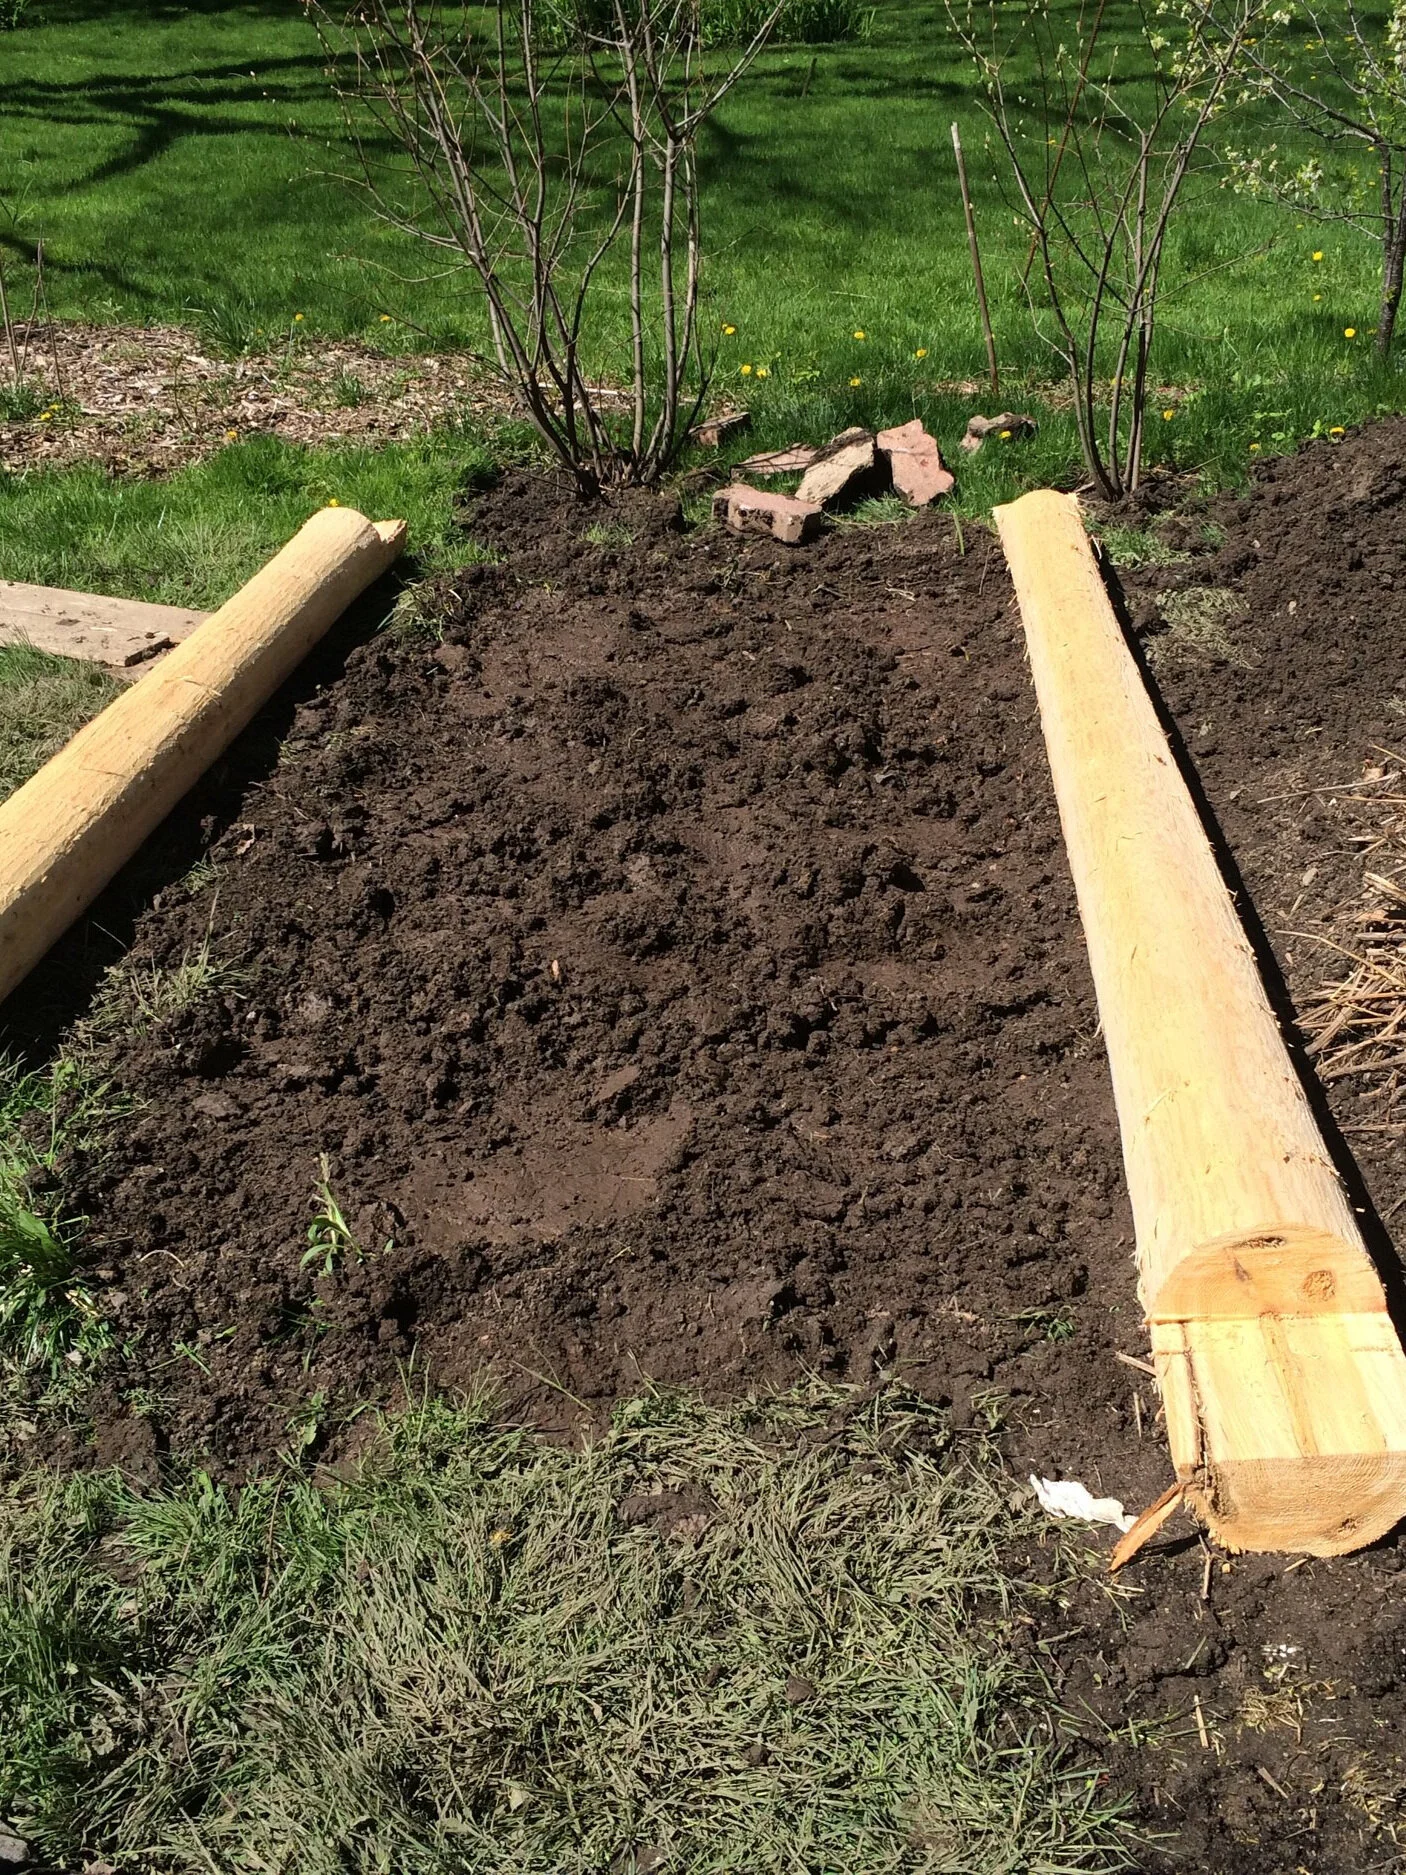
Place notched posts directly on the ground. Level the ground first.
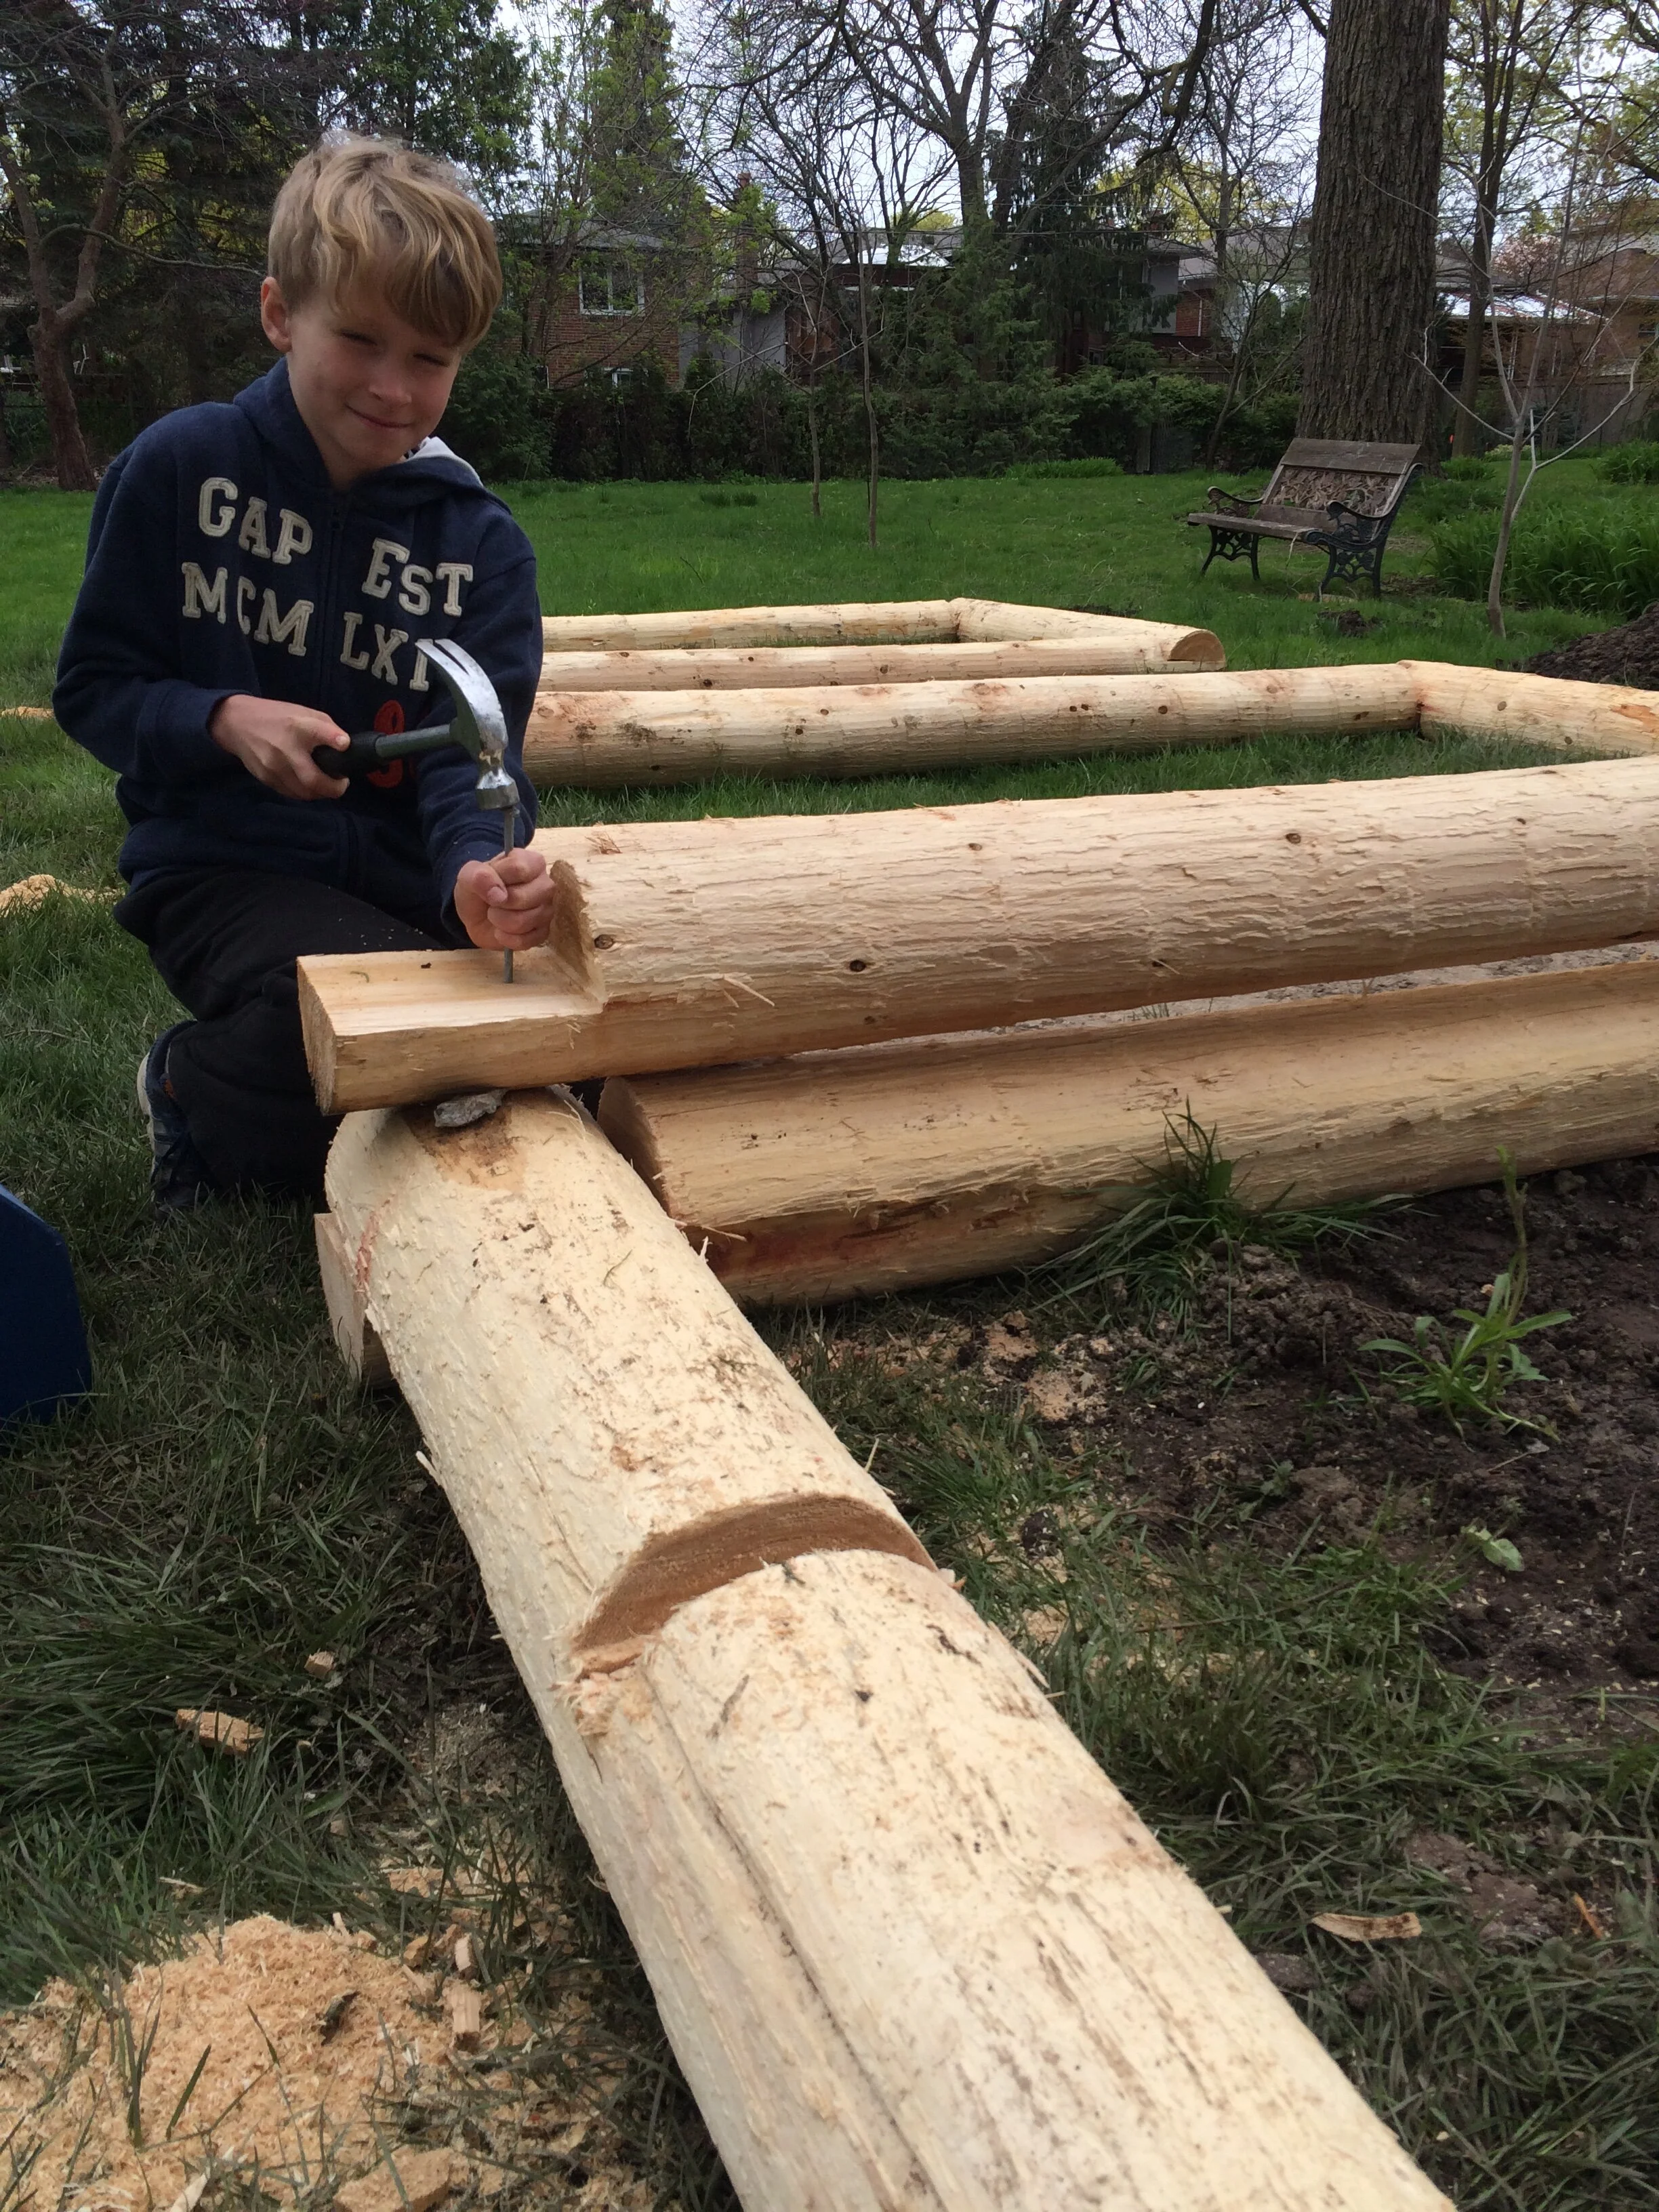
Nail spikes into the corners of the posts to keep them in place.
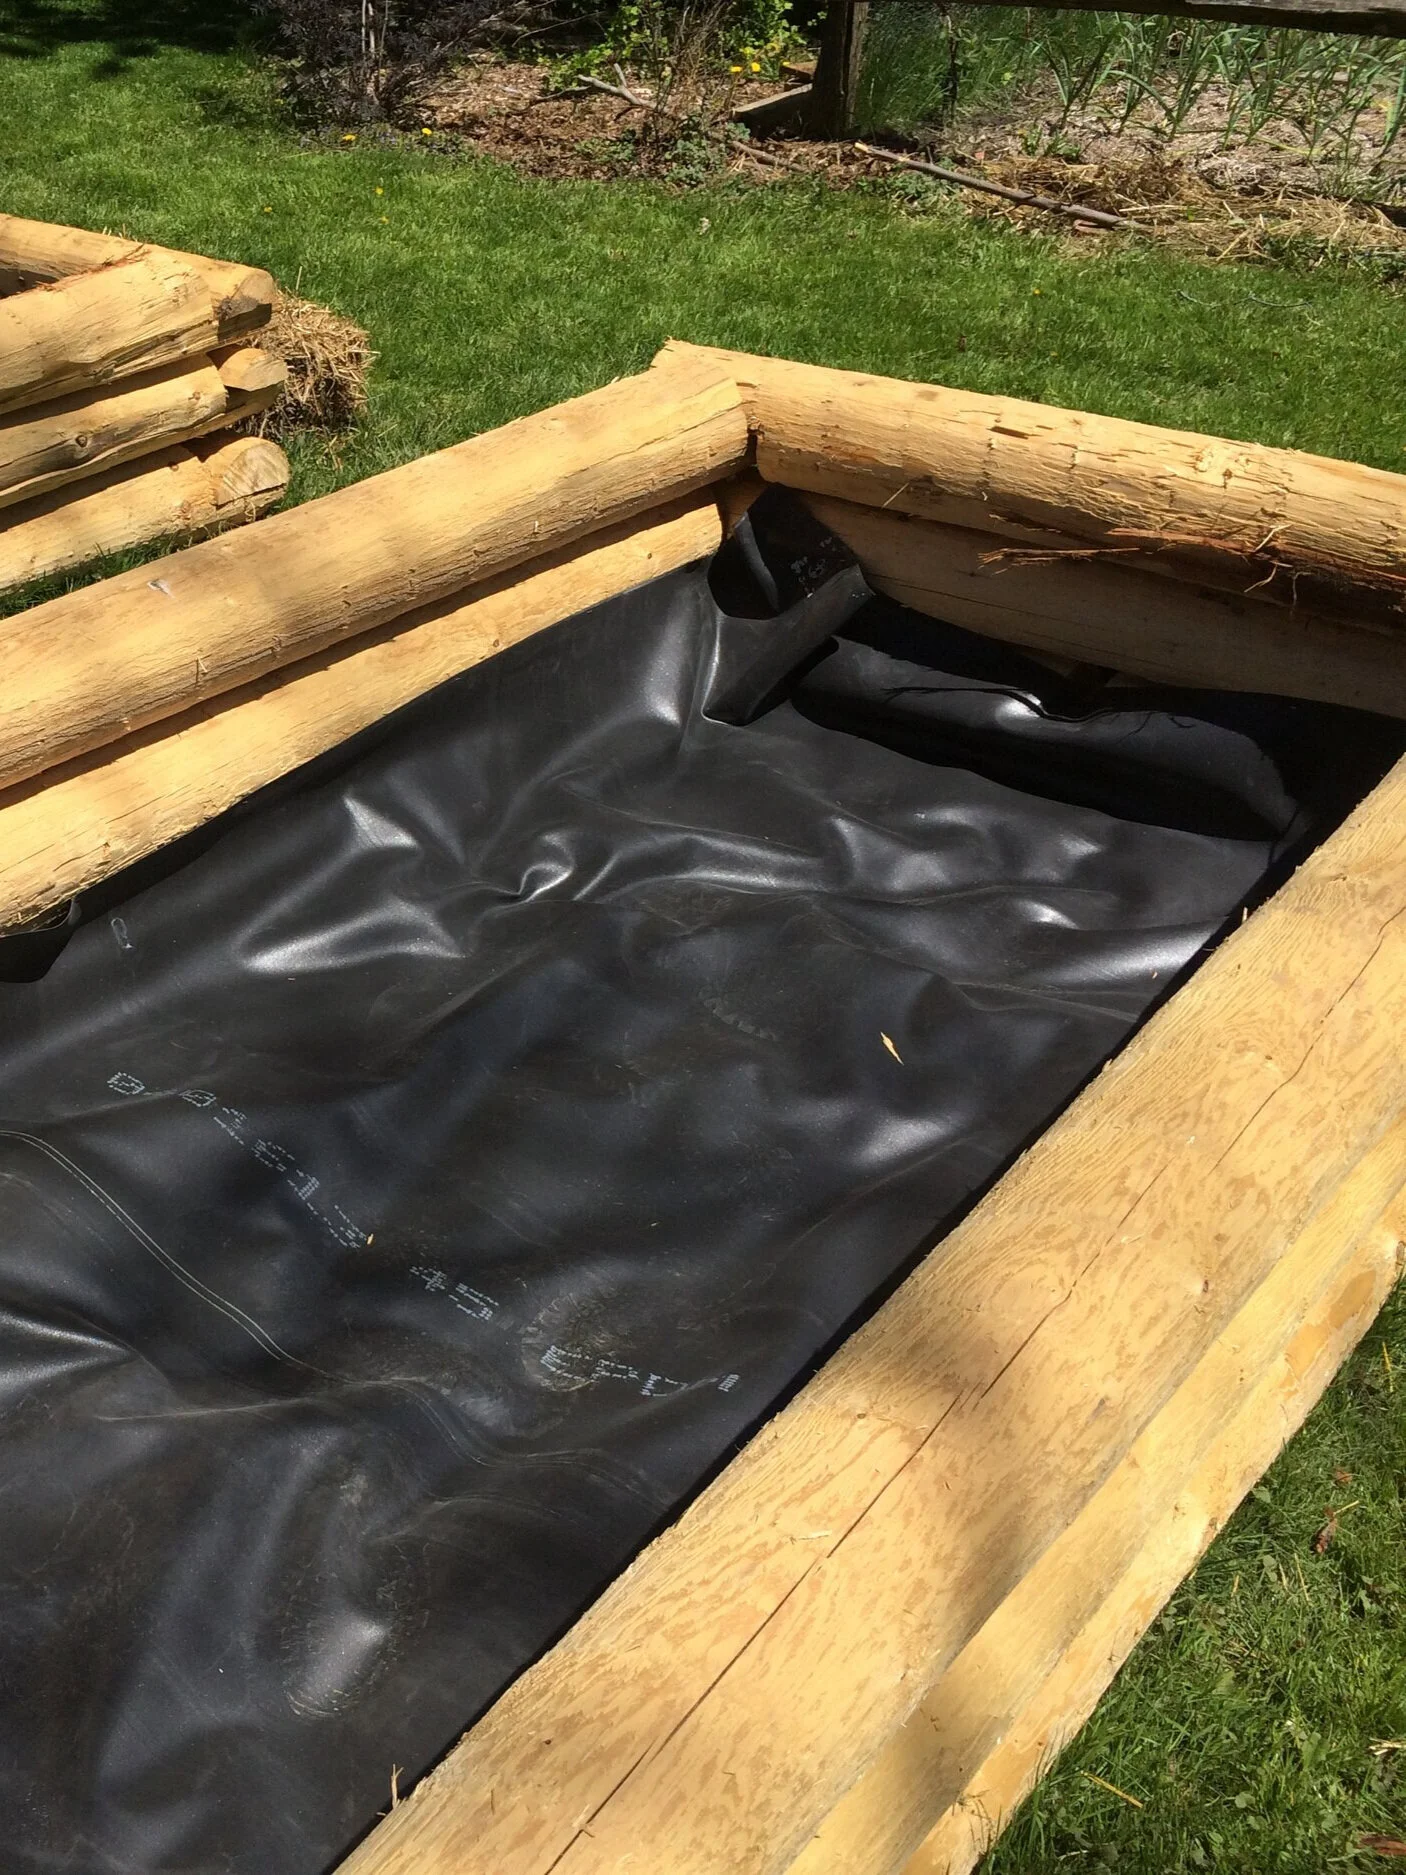
Install liner at the bottom by placing it on the ground, and up about 8-10 inches at the side. Secure temporarily with staples, to keep it in place until the gravel pins it into place.
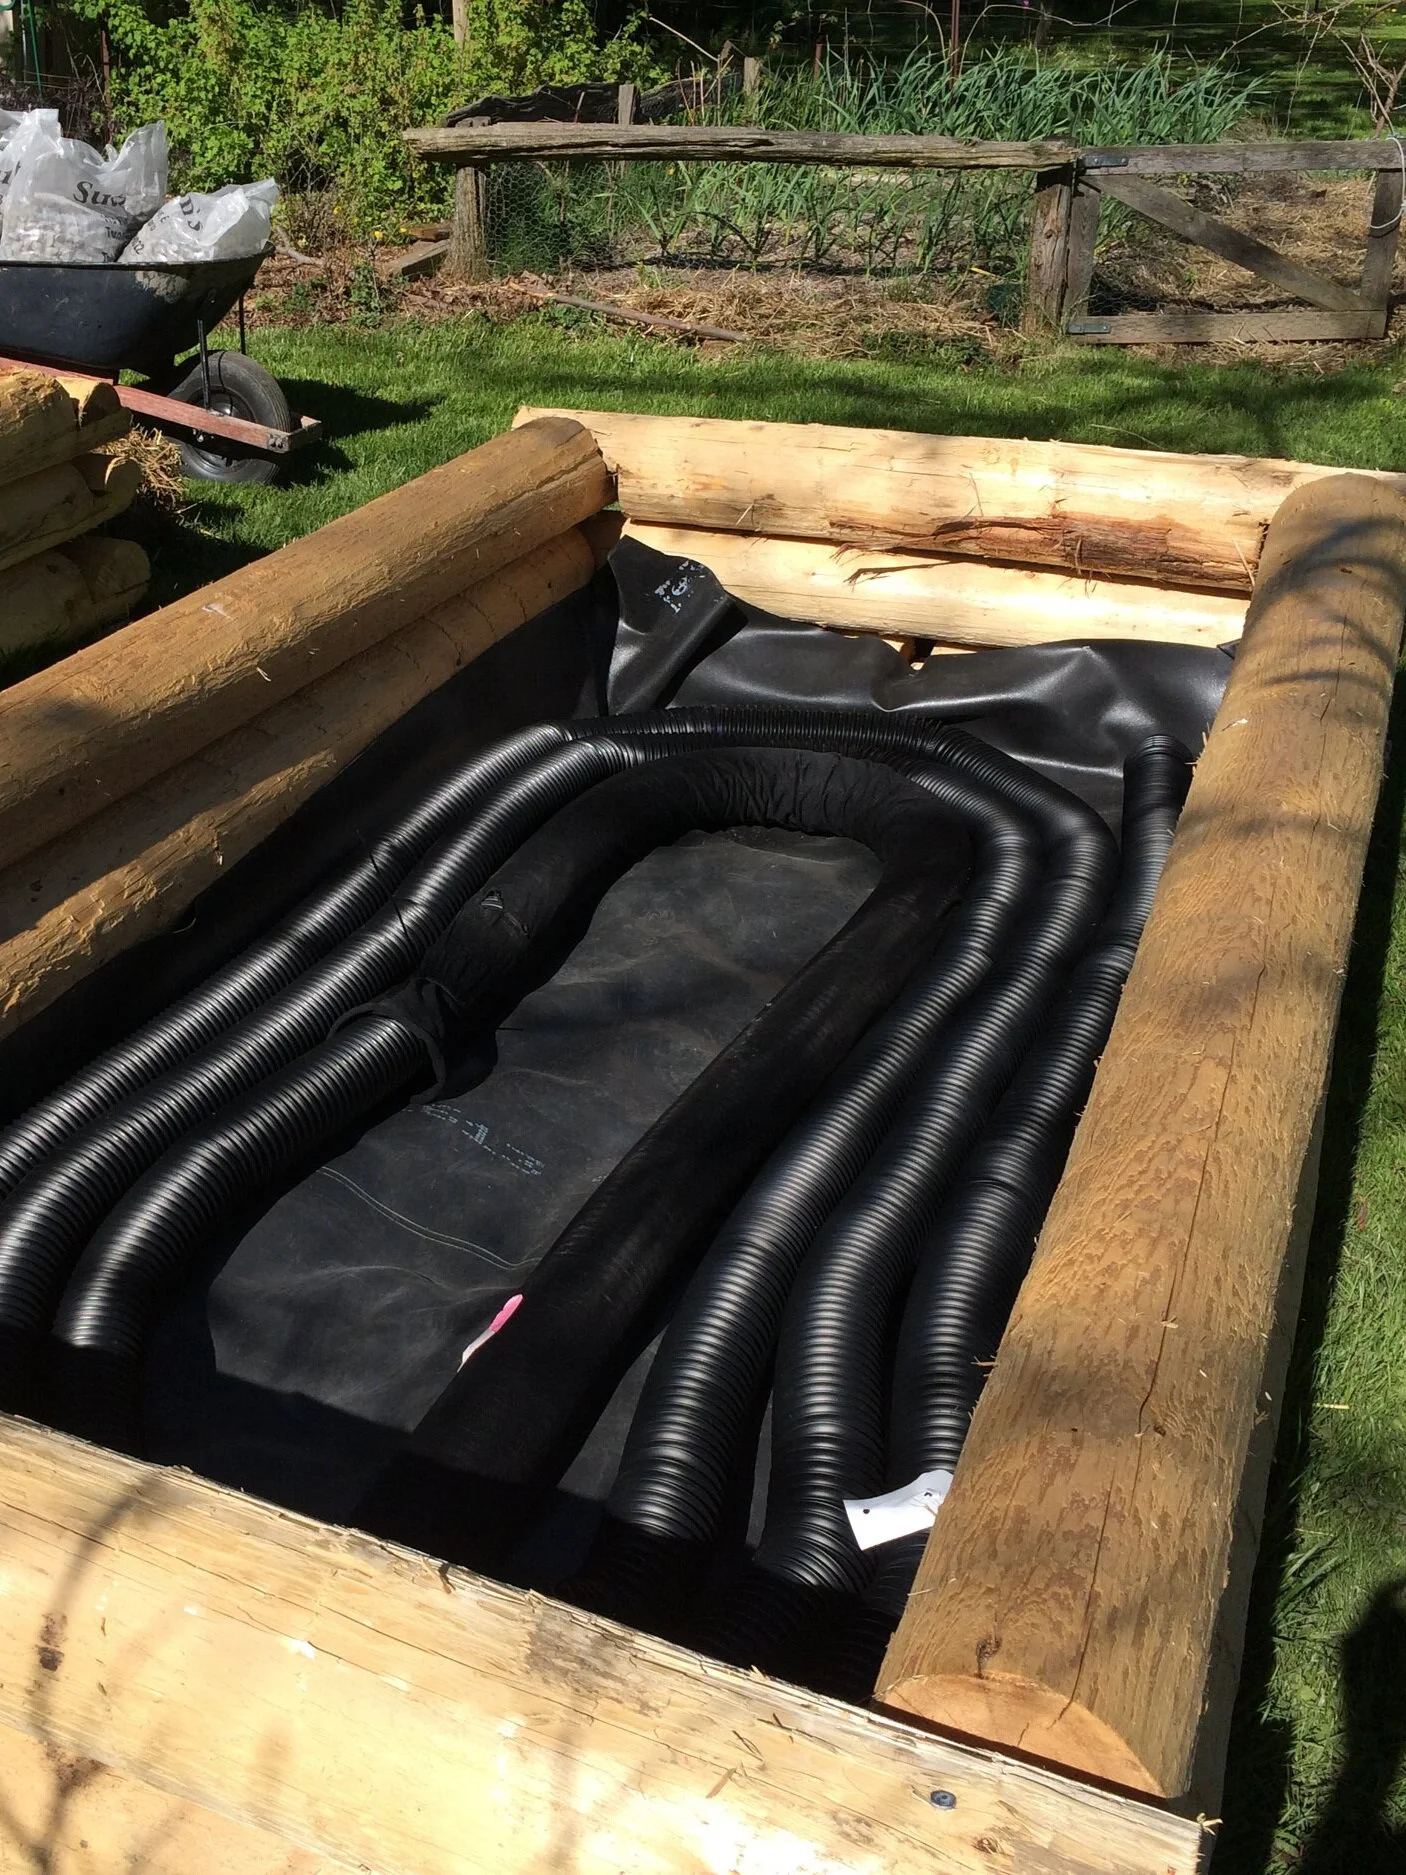
Place coils of weeping tile in the bottom. The tile permits water to quickly move through the reservoir, and it also holds up the soil above.
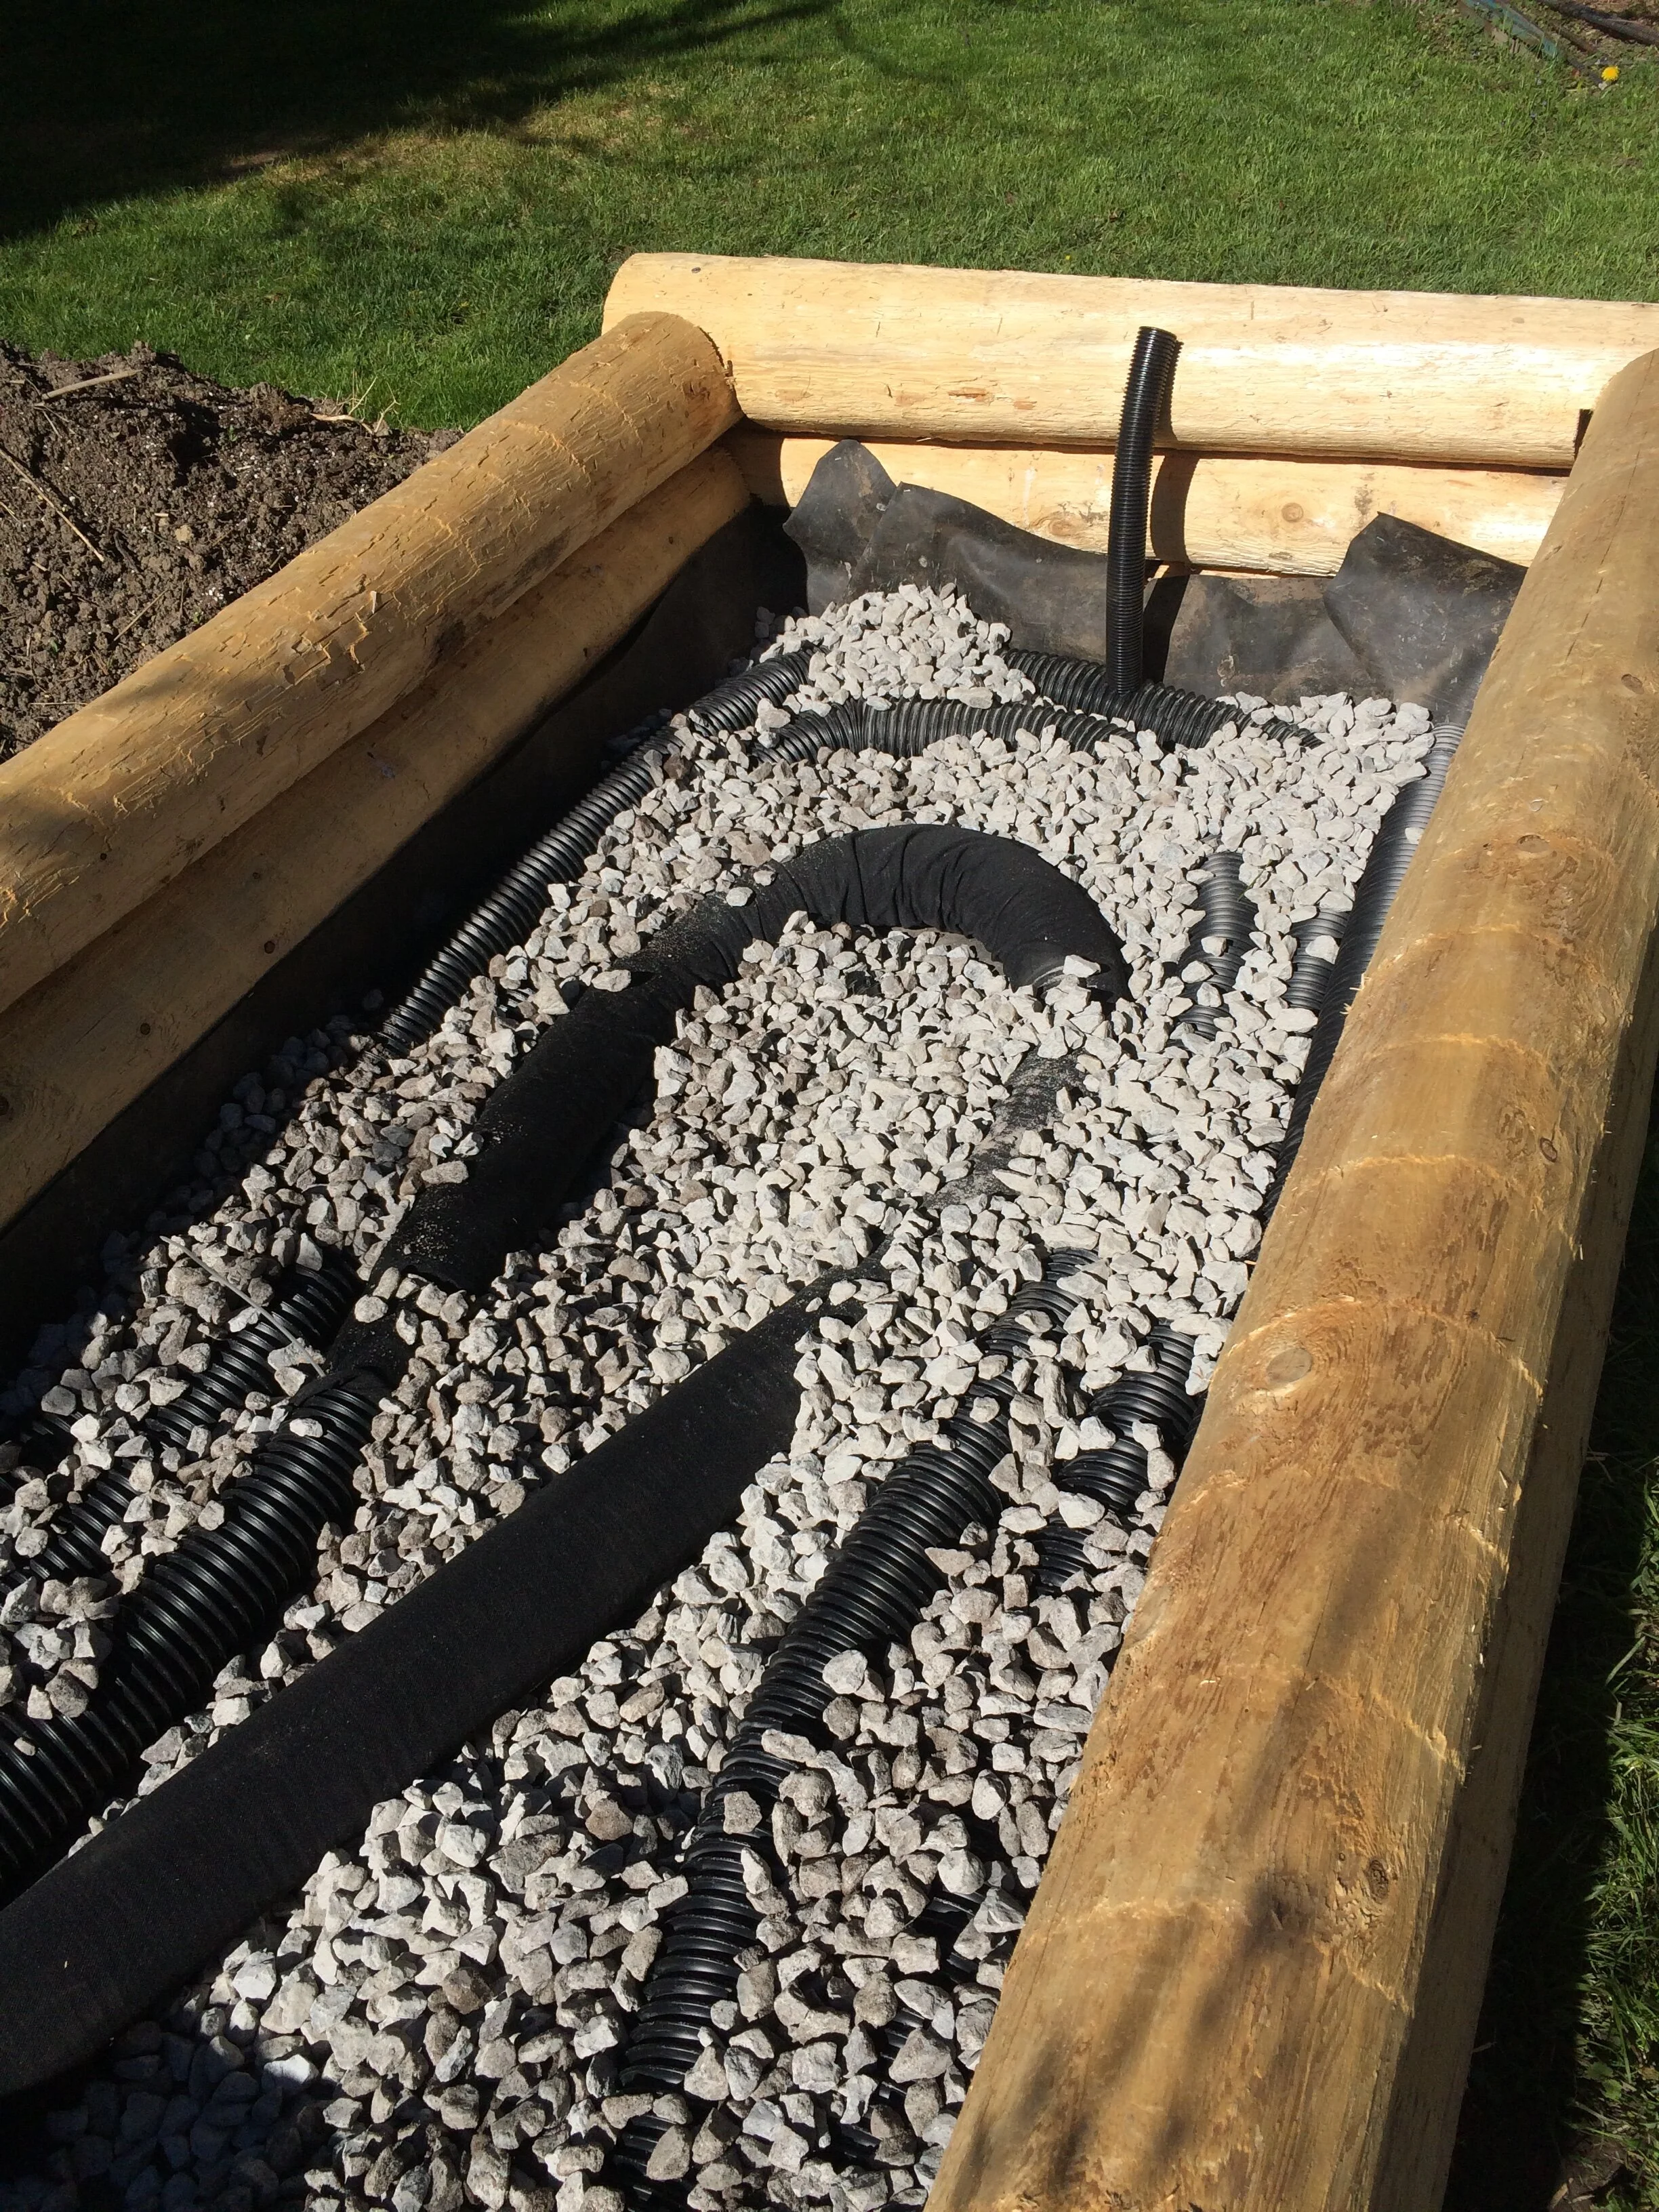
Add gravel. It supports the weight of the soil above, while the spaces between the pieces of gravel fill with water. Water moves upwards through the gravel by capillary action.
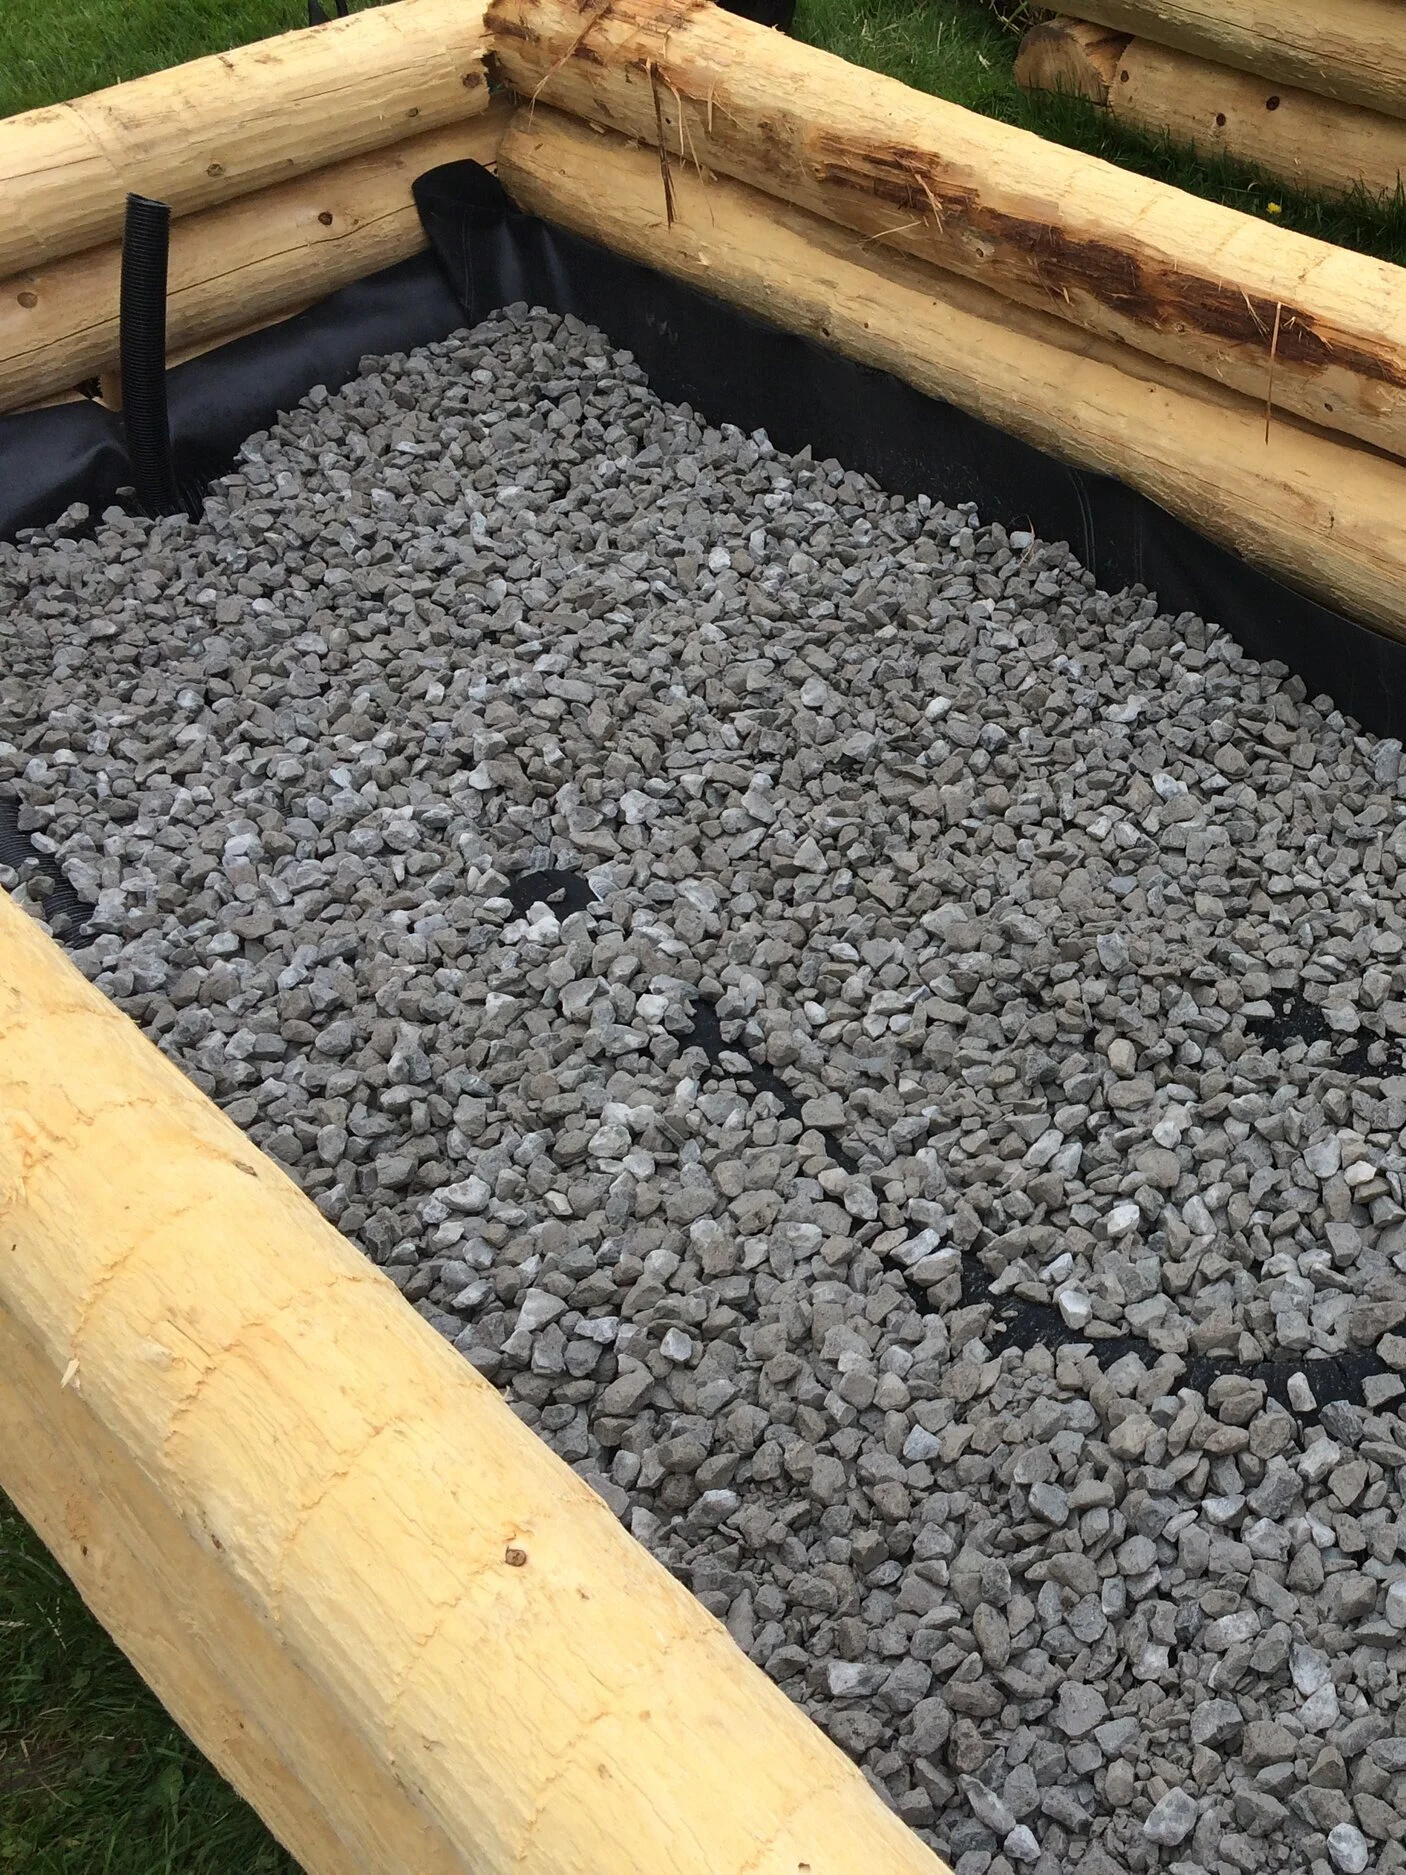
Note the fill tube at the far end, a piece of drain hose installed into the weeping tile. This permits filling of the reservoir with a hose after soil has been added.
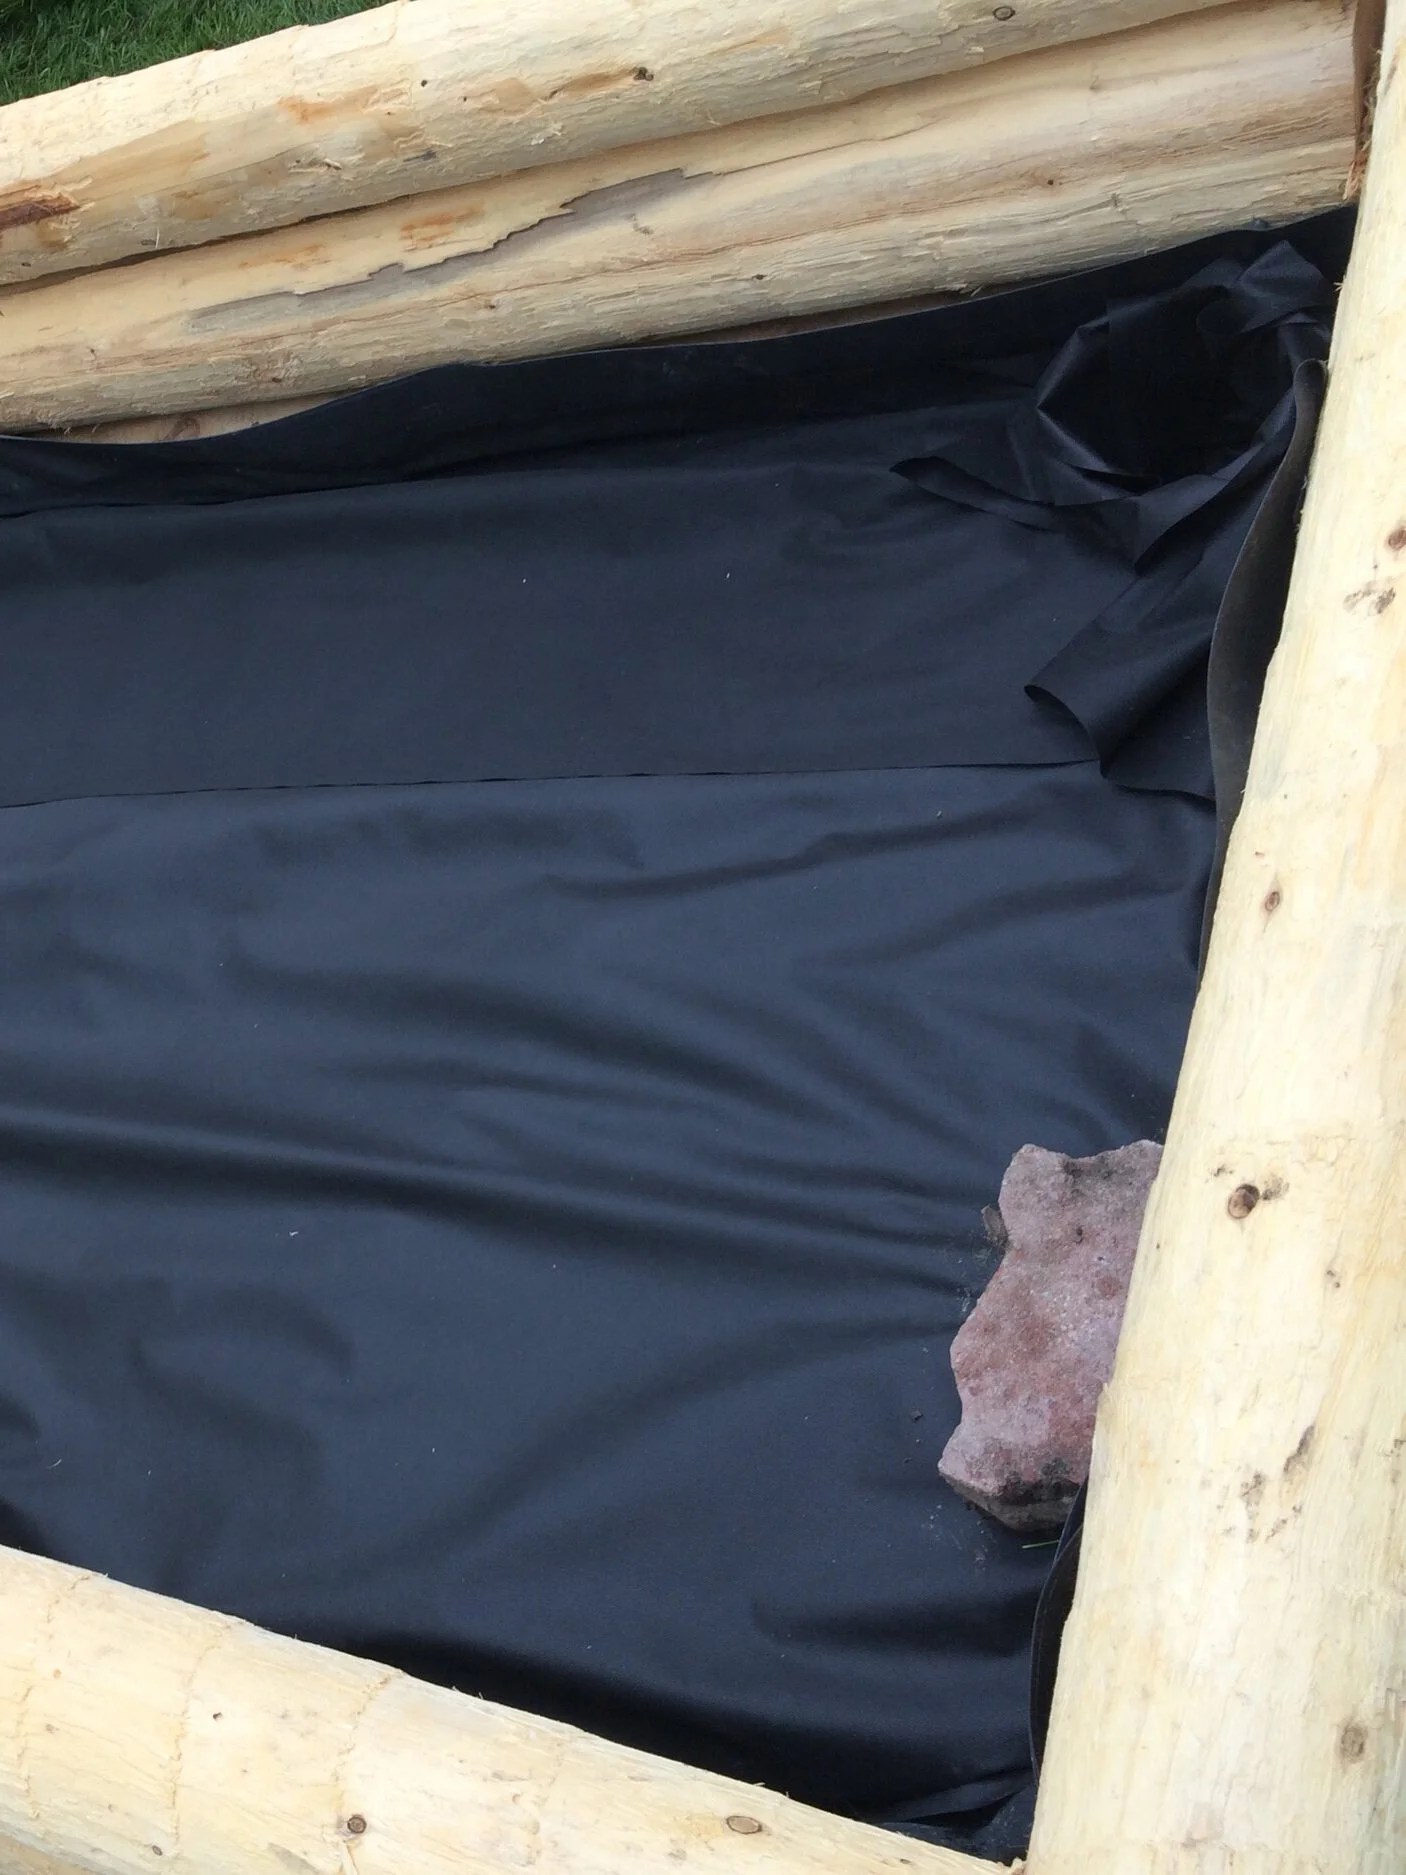
Cover with landscape fabric to keep soil out of the reservoir area. Note the depressing in the top-right corner: While in theory water wicks up the gravel, I also created this soil-filled wick that dips into the reservoir. Not necessary, so I wouldn't do it again.
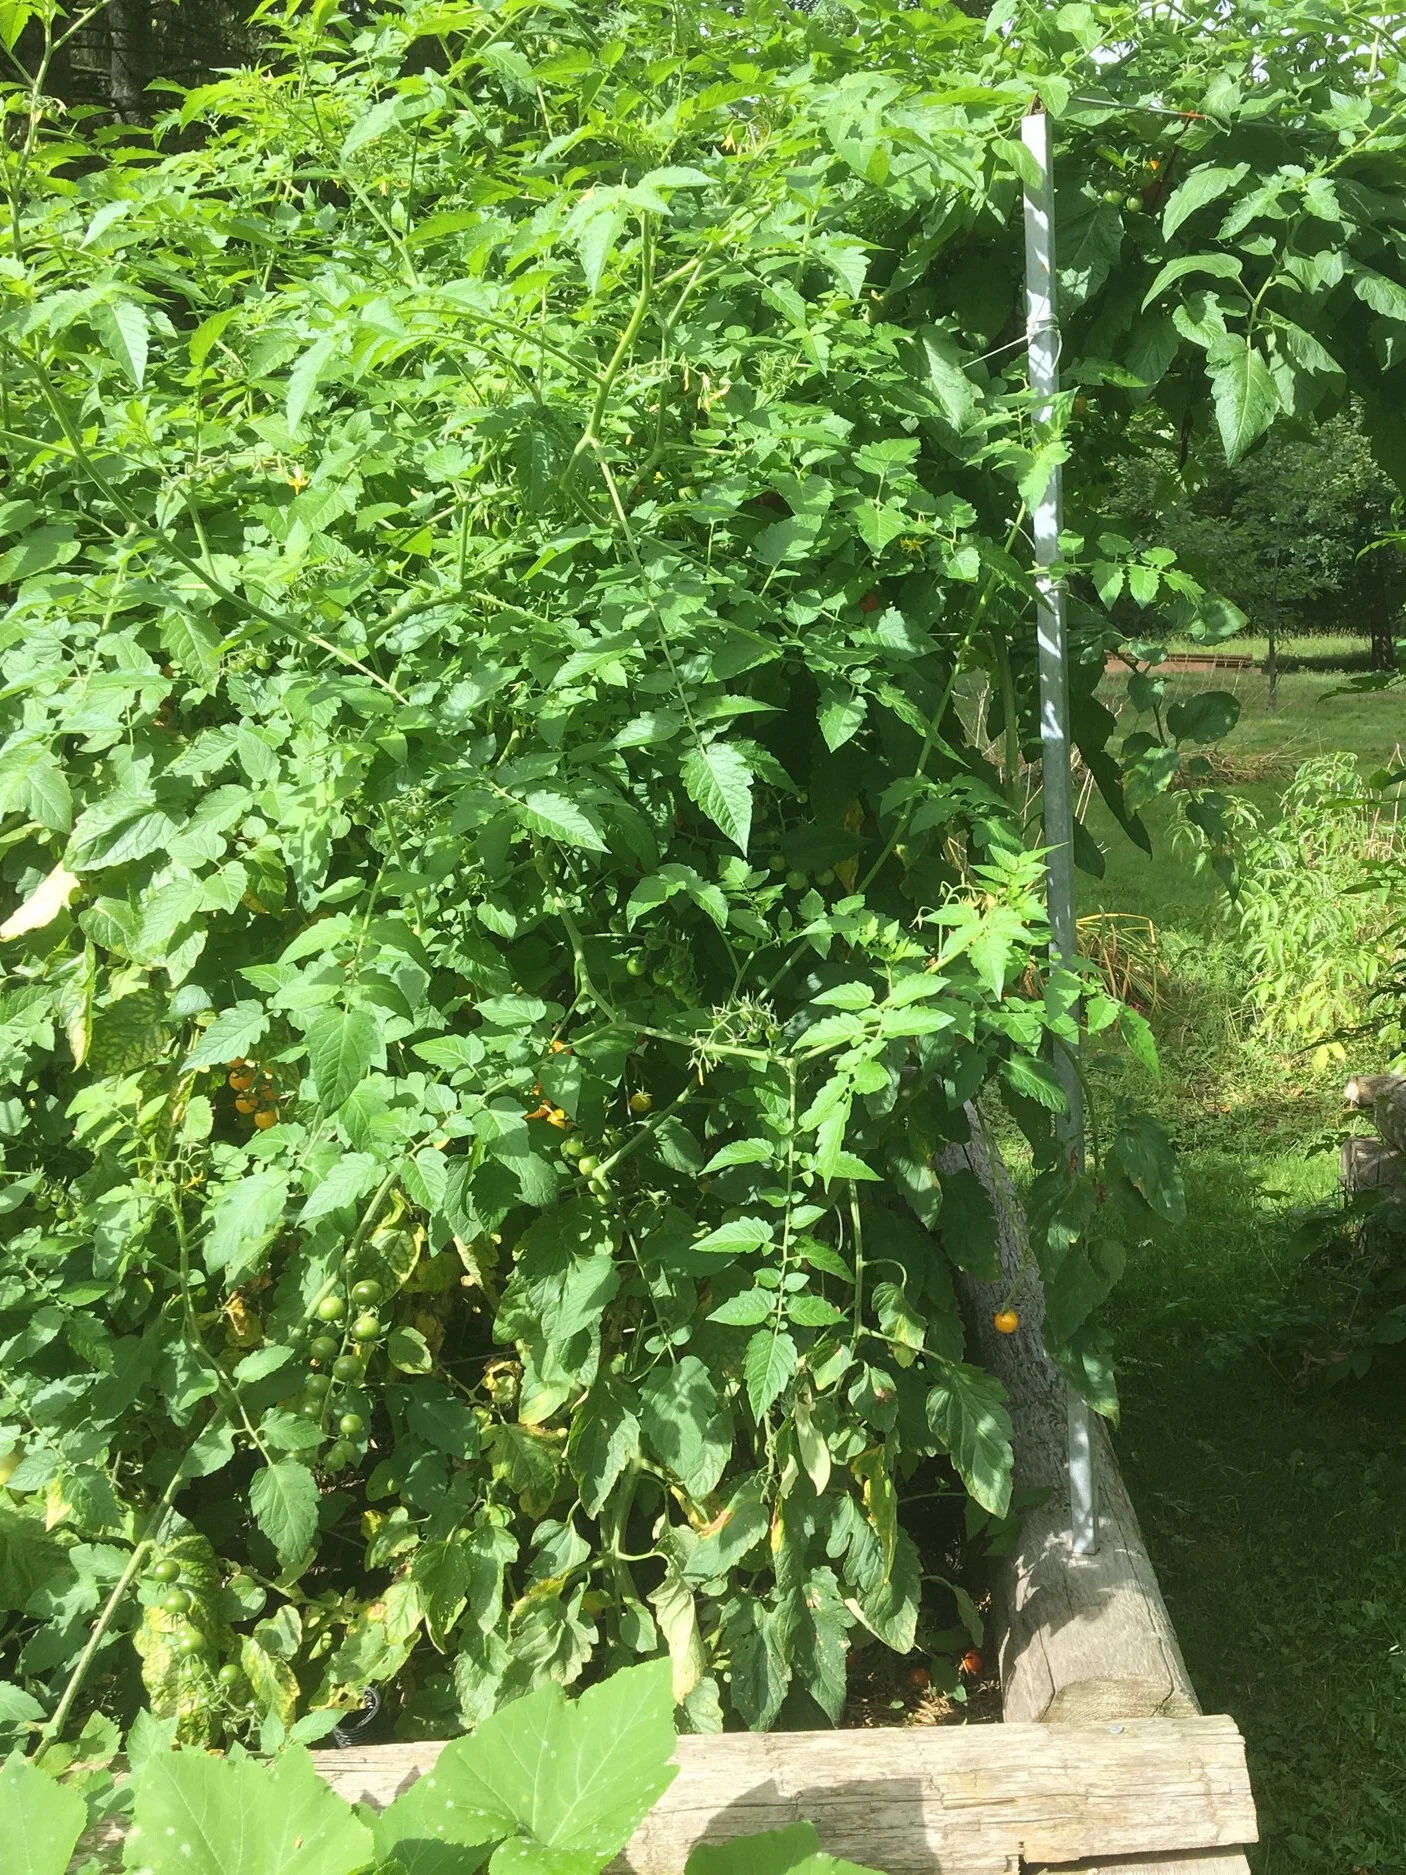
Soil depth: 30-40 cm (12-16") of soil works well. If there is too much soil, the water will not wick all the way to the top.
Pin this post about how to make a wicking bed.
Watering my Wicking Beds
I know that there is enough water in the reservoir when I see water coming out of the side of the bed. It's low-tech—but it works.
One More Reason for Wicking Beds
Soil contamination is another reason to consider growing in a wicking bed. Soil contamination can be a concern in areas where there is a history of industry, and also on former orchard lands where sprays with heavy metals might have been used. Or, like me, it could be from a nearby black walnut tree.
Find out more about soil contamination and what to do about it.
FAQ Wicking Beds
I’m already doing raised bed gardening. Can I retrofit my existing raised beds with this system of irrigation?
Yes, you can retrofit an existing raised garden bed to turn it into a wicking bed. But be prepared to first empty out the bed…so it means some digging!
I want my wicking bed to be a metre (3’) high. So it’s less bending for me while I’m gardening. Is that OK?
With wicking beds, less is more. Too much soil, and the water doesn’t wick all the way to the top of the soil. 30-40 cm (12-16”) soil depth is best for wicking.
If you want a taller raised bed, consider an elevated bed, on legs. (Like a sub-irrigated planter on stilts!) Then you can have the easy access you want, and the wicking won’t be compromised by excessive soil depth. And as a bonus, you won’t spend as much money on soil!
Here’s one other consideration: If you’re transplanting sizeable plants into a deep wicking bed, and don’t mind top watering for a bit until the roots reach a soil depth where there’s moisture from wicking, then maybe you don’t need to worry about soil depth.
Can it freeze in the winter? Does this work for raised bed gardening in Canada?
It’s fine for gardening in Canada and other places with cold climates. We use wicking beds in our urban garden here in Toronto.
Find This Helpful?
Enjoy not being bombarded by annoying ads?
Appreciate the absence of junky affiliate links for products you don’t need?
It’s because we’re reader supported.
If we’ve helped in your food-gardening journey, we’re glad of support. You can high-five us below. Any amount welcome!
Another Way to Add Growing Space in a Small Garden
Straw-bale gardening is a great way to grow on paved areas and areas with poor soil. And you also have a raised garden bed...so less bending required!
Find out more about straw-bale gardening.
More Ideas for Your Vegetable Garden
Find lots more articles about growing vegetables and edible plants in the Grow Vegetables area of this site.
Articles and Interviews
Courses: Edible Gardening
Find out about how to grow lots of vegetables in containers. Find out about potting mix, best types of containers, top crops, and how to care for your plants.
Want to create and edible garden or edible landscape but not sure where to start? Find out how to design a garden, choose plants, and create a functional, beautiful, edible landscape.
Not Enough Garden Space? Try These Small Veg Garden Ideas
By Steven Biggs
Fit More Vegetable Plants in the Same Small Space
Ideas to help you harvest more from the same small space.
Want to harvest more fresh vegetables from your small-space garden? Sometimes it helps to forget what you’ve seen. And do things differently from what's done in a big garden or commercial farm.
Commercial growers often focus on uniformity, and on perfect, unblemished produce. They also need space for equipment or employees to work around the plants.
But in a small home edible garden, where there’s not a lot of growing space—and where we’re just growing our own food—our needs are different. We want a variety of crops. We want an ongoing harvest. And we want it to be simple enough to fit into our everyday routine.
If you're struggling to fit everything you want to grow in your vegetable garden, keep reading for ideas to make the most of your growing space.
Key Takeaways: Make the Most of a Small Vegetable Garden
Recommended plant or seed spacing sometimes uses more space than required in a small vegetable garden.
Vertical gardening helps to fit more plants in a small garden bed.
Companion planting is a simple way to boost the output of a small vegetable garden.
Farmers sometimes leave fields fallow, but there's no need for this in a home vegetable garden.
Many crops have more than one edible part, making crop choice a simple way to grow more of your own food in a small space.
Reconsider Plant Spacing in a Small Vegetable Garden
Do you grow vegetables with the spacing suggested on seed packets or plant labels?
I don't. I always sow carrots, lettuce, and beet seeds more densely than recommended. Then I thin them out as the plants start to grow.
And the thinning is not a waste. Because I eat the small plants that I've thinned out. Baby carrots, lettuce, and beets are a treat.
Recommended plant spacing usually gives plants a suitable amount a space to develop to their final size. But there's no reason you can't use some of the space to grow baby plants while the crop is small.
There are lots of other ways to save on spacing. I often plant a few onion sets on the sloped edges of my raised soil beds. They might not get quite the amount of space recommended...but I'm using space that might otherwise not be used.
My daughter is an avid tomato grower. Some years she's trying to fit 100 varieties into our yard. She does that by planting them close together, and then growing them up twine (see Vertical Gardening, below.)
Take Up a Smaller Footprint with Vertical Gardening
Use Vertical Space in Your Vegetable Garden
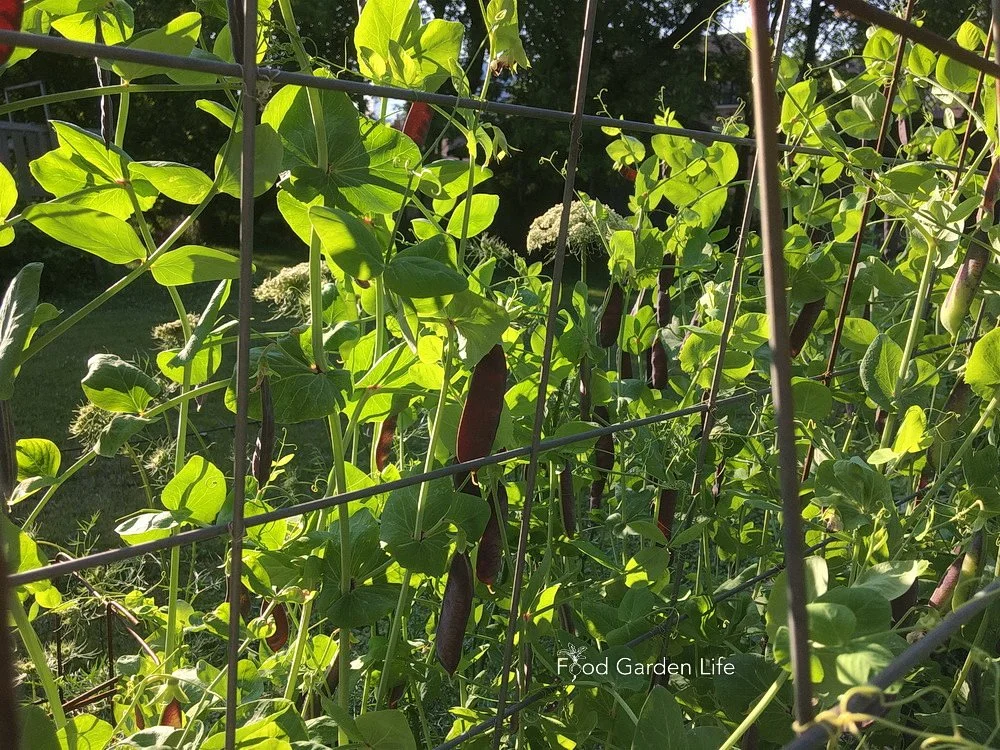
Growing vining peas up a trellis in a small garden.
When space is at a premium, don't let vining plants sprawl all over the garden bed. Grow them upwards, instead.
I’ve seen watermelons growing on A-frames, each melon supported by a sling! And there are other vining plants such as cantaloupe, indeterminate tomatoes, and cucumbers that you can grow vertically to maximize yield in a small space.
With the vining plants growing up your A-frame, you can now grow shade-tolerant vegetables such as leafy greens under the A-frame.
Here's another idea: My neighbour Joe has a 10-foot-high wall of pole beans around his vegetable garden…an edible wall! Bush beans are great, but if your growing space is at a premium, pole beans take up less of a footprint.
Choose Varieties Suited to a Small Space
Pin this post!
When planning your vegetable garden, variety choice can help you grow vertically to maximize your available space.
Some plants, such as peas, beans, tomatoes, and squash, are available in both vining and bush forms. Fit more into a small space by choosing the vining varieties that you can grow vertically.
Bush beans are a great choice if you want a larger harvest all at once for a big feed or preserving...but the trade-off is that they use more space.
Small Space? Grow Vegetables on Fences and Walls
Make the most of your outdoor space by growing on walls. All you need is a trellis or twine.
An empty fence is a wasted opportunity. My neighbour and I share the squash that I grow along our fence. Great way to hide a chain-link fence!
(And don’t forget that the top of a fence can be dressed up with a window box. A fence-top container garden!)
Try Companion Planting
Companion planting just means growing different plants together for some sort of benefit.
Companion plants might attract pollinators, lure away pests, deter pests, or attract beneficial insects. Those beneficial insects can help with pollination, or they might parasitize or eat insect pests. There are lots of opportunities for companion planting in a vegetable garden.
Below are a couple of ways to use companions to fit more vegetables into your small garden.
Plant 2 Different Crops in the Same Spot—at the Same Time
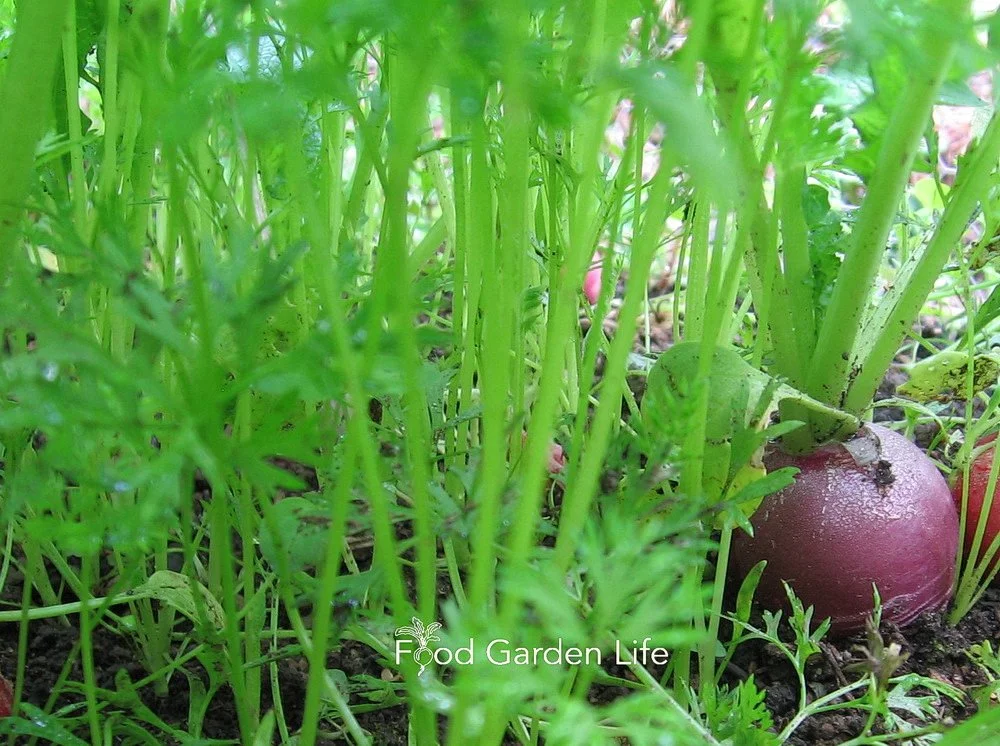
Growing radish and carrots together. The radishes are ready to harvest while the carrots are still quite small.
Waste less space by planting both fast- and slow-germinating seeds in the same space, at the same time.
My favourite example of this combination is pairing carrots and radishes. They are both root vegetables. And they are well-suited to being grown together in the same space because one grows quite quickly, one slowly.
Carrot seed is slow to germinate; radish seed is fast. And radish roots are ready to pluck from your garden way before your carrot roots are even getting chubby. That means you’ll be harvesting full-grown radishes just as your carrot seedlings need more space. As you pull out the radishes, you give the carrots more space to grow.
Wondering how one plant benefits the other in this scenario? Pulling out the radishes, which have taproots, also loosens the soil for your carrot seedlings!
Pair up Sun-Lovers and Shade-Lovers
When deciding which crops to plant together, think about sunlight.
If you have staked tomato plants, there can be a lot of unused, shady ground around them. (If it’s not yet shady, it will be, once the tomato plants get bigger.) Sprinkle seed for leafy vegetables at the base of your tomato plants. Lettuce lasts much longer when growing in some shade in the heat of summer.
Or, make an a-frame for growing climbing plants, and plant leafy greens in the shade below.
Use Your Garden Space as Long as Possible
Start as early as possible in the spring with cold-hardy crops. If your garden includes containers and raised bed, remember that the soil in containers and raised beds heats up more quickly than the ground, and that heat can speed along early spring sowings.
As your crops mature, plant new crops in the same space. Farms sometimes have “fallow” fields, unplanted fields, to control weeds or to conserve moisture. That’s fine for farms—but not for a small vegetable garden. Use your space continuously. You just need to recharge your soil nutrients, and you can do that by amending your garden soil with compost.
Don’t forget to grow cold-hardy crops in the fall to overwinter in cold frames and harvest all winter long. You can also plant cool-season crops in late summer and fall to harvest in early winter and further extend your harvest window.
Grow Vegetables That Produce a Lot in a Small Space
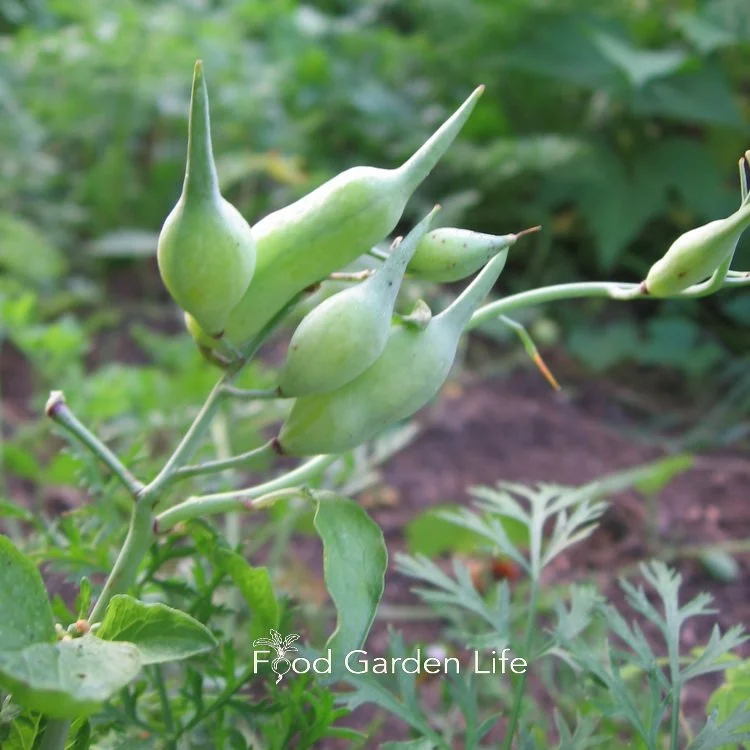
Radish seed pods are edible! A crunchy, peppery garnish.
Grow Plants with Multiple Edible Parts in a Small Garden
Growing plants with more than one edible part is a great way to get more from your growing space. Many plants have more than one edible part.
Growing beets? Eat the leaves, too, which are like chard. Garlic makes “scapes” that are edible and sought after by gourmet chefs! Radishes? Try the crunchy, peppery seed pods. One year, my daughter made pesto from young radish leaves…who knew?
In a Small Space, Plant Vegetables That Mature Quickly
Brussels sprouts? Leave them for farmers because they take up growing space ALL season and then you only harvest them once there's a fall frost.
As you think about vegetables to grow, consider kale, which you can be harvesting spring through fall, and even into the winter. Or cauliflower, which, after you harvest it, you can follow with another crop of something else.
Extend a Small Garden with Containers
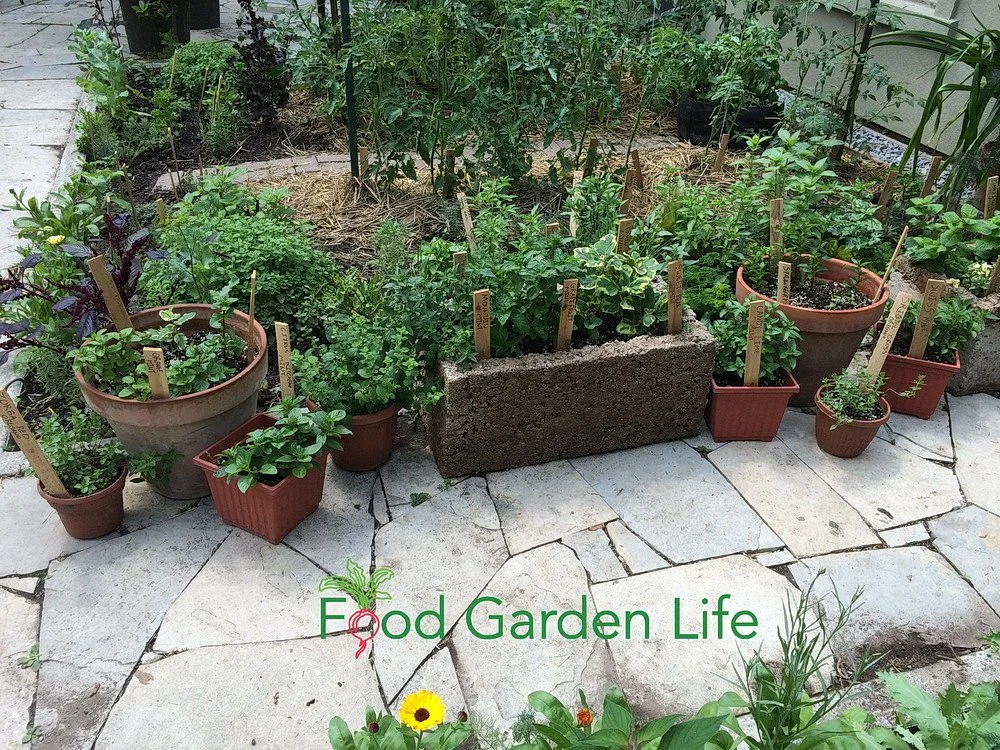
Using containers to make additional growing space beside this small garden.
Add Containers to Small-Space Gardens
Container gardening is a great way to extend a small vegetable garden, even if you don't have more in-ground growing-space.
Extend your small garden onto a patio, a deck, driveway or rooftop. Or even add window boxes.
For best results growing in containers, use a good potting mix. Here's more on potting soil.
And Finally...Forget Perfection in Your Small Garden
You probably don’t have the ideal conditions for some crops. Maybe your garden soil isn’t quite what you want…maybe you don’t have enough sun.
If you were a commercial market gardener, this could be a big deal.
But if you’re a home gardener, figure out how to make the best of what you have. For example, I grow tomatoes in a container garden on my driveway—in less than 6 hours of sunlight. I get A LOT of tomatoes from space that would otherwise go unused. Sure, it’s fewer tomatoes than if I had full sun on my driveway. But it’s more than I’d get if I didn’t grow there.
Making the best of the space and conditions you have is a big part of my approach to home food gardening.
Gardening is a great cure for perfectionism. There’s real satisfaction in harvesting fresh produce from your own garden.
More on Vegetable Garden Planning
Find This Helpful?
Enjoy not being bombarded by annoying ads?
Appreciate the absence of junky affiliate links for products you don’t need?
It’s because we’re reader supported.
If we’ve helped in your food-gardening journey, we’re glad of support. You can high-five us below. Any amount welcome!
Course: Edible Garden Makeover
Want to make an edible garden you love to be in?
If you've been thinking about growing more of your own food, but are holding back because you have information overload...
Or if you just don't know where to start.
Edible Garden Makeover gives you the ideas, knowledge, and confidence to make a unique edible landscape for your yard and your needs.
Driveway Makeover! 5 Ideas for Growing a Container Garden for Vegetables
A container vegetable garden is a good way to fit lots of vegetable crops into a small space. Find out how to get started.
by Steven Biggs
My Driveway Container Vegetable Garden
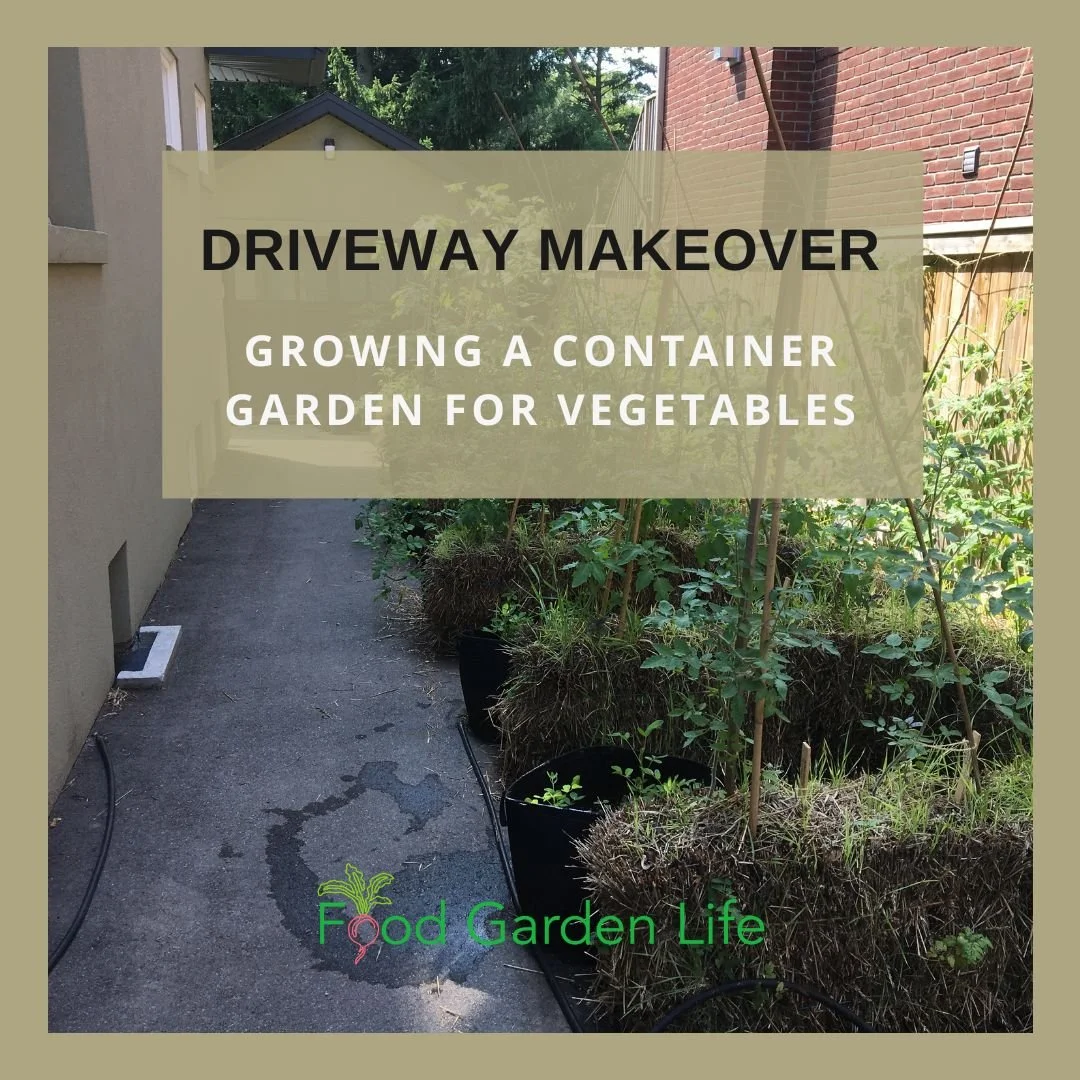
Not enough space to grow everything you want? Be creative! A container garden is a great way to fit more vegetables into your yard.
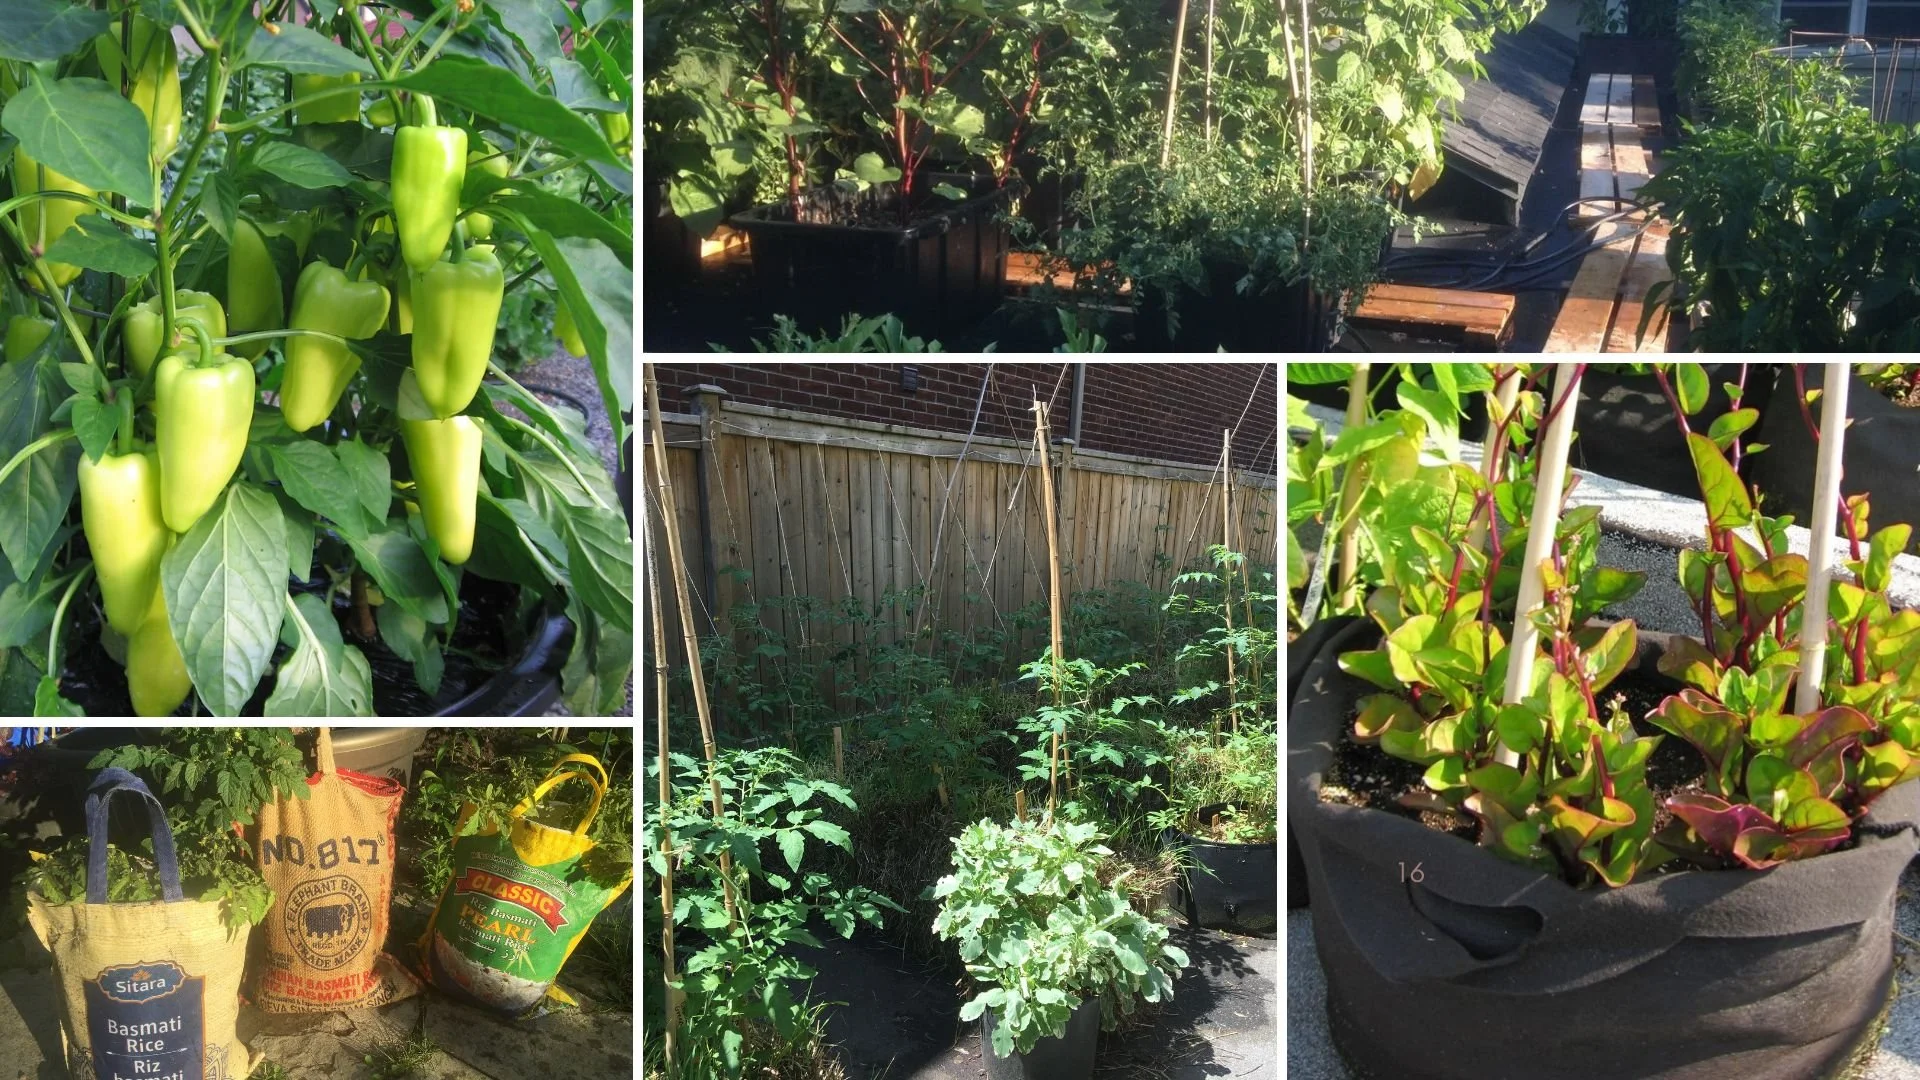
Here’s our driveway container garden. The driveway container garden is a quick, temporary space-making solution so we can grow extra tomato, pepper, potato, summer squash, and chard plants.
In this vegetable container garden, we use straw bales, fabric pots, nursery pots, bushel baskets, and vertical gardening techniques to make the most of the space.
Do you have an underused space that you can use for growing food? Many yards do. It could be a driveway, patio, or even the hard-packed space alongside a hedge. In this post, I look at how to add growing space to your yard.
Ideas for Your Vegetable Container Garden
Container gardening is part science, and part creativity. There are lots of ways to approach it. Here are five ideas we’ve used to make the most of our driveway for growing vegetables.
1. Strawbale Gardens: Grow Vegetables in Containers that are Biodegradeable
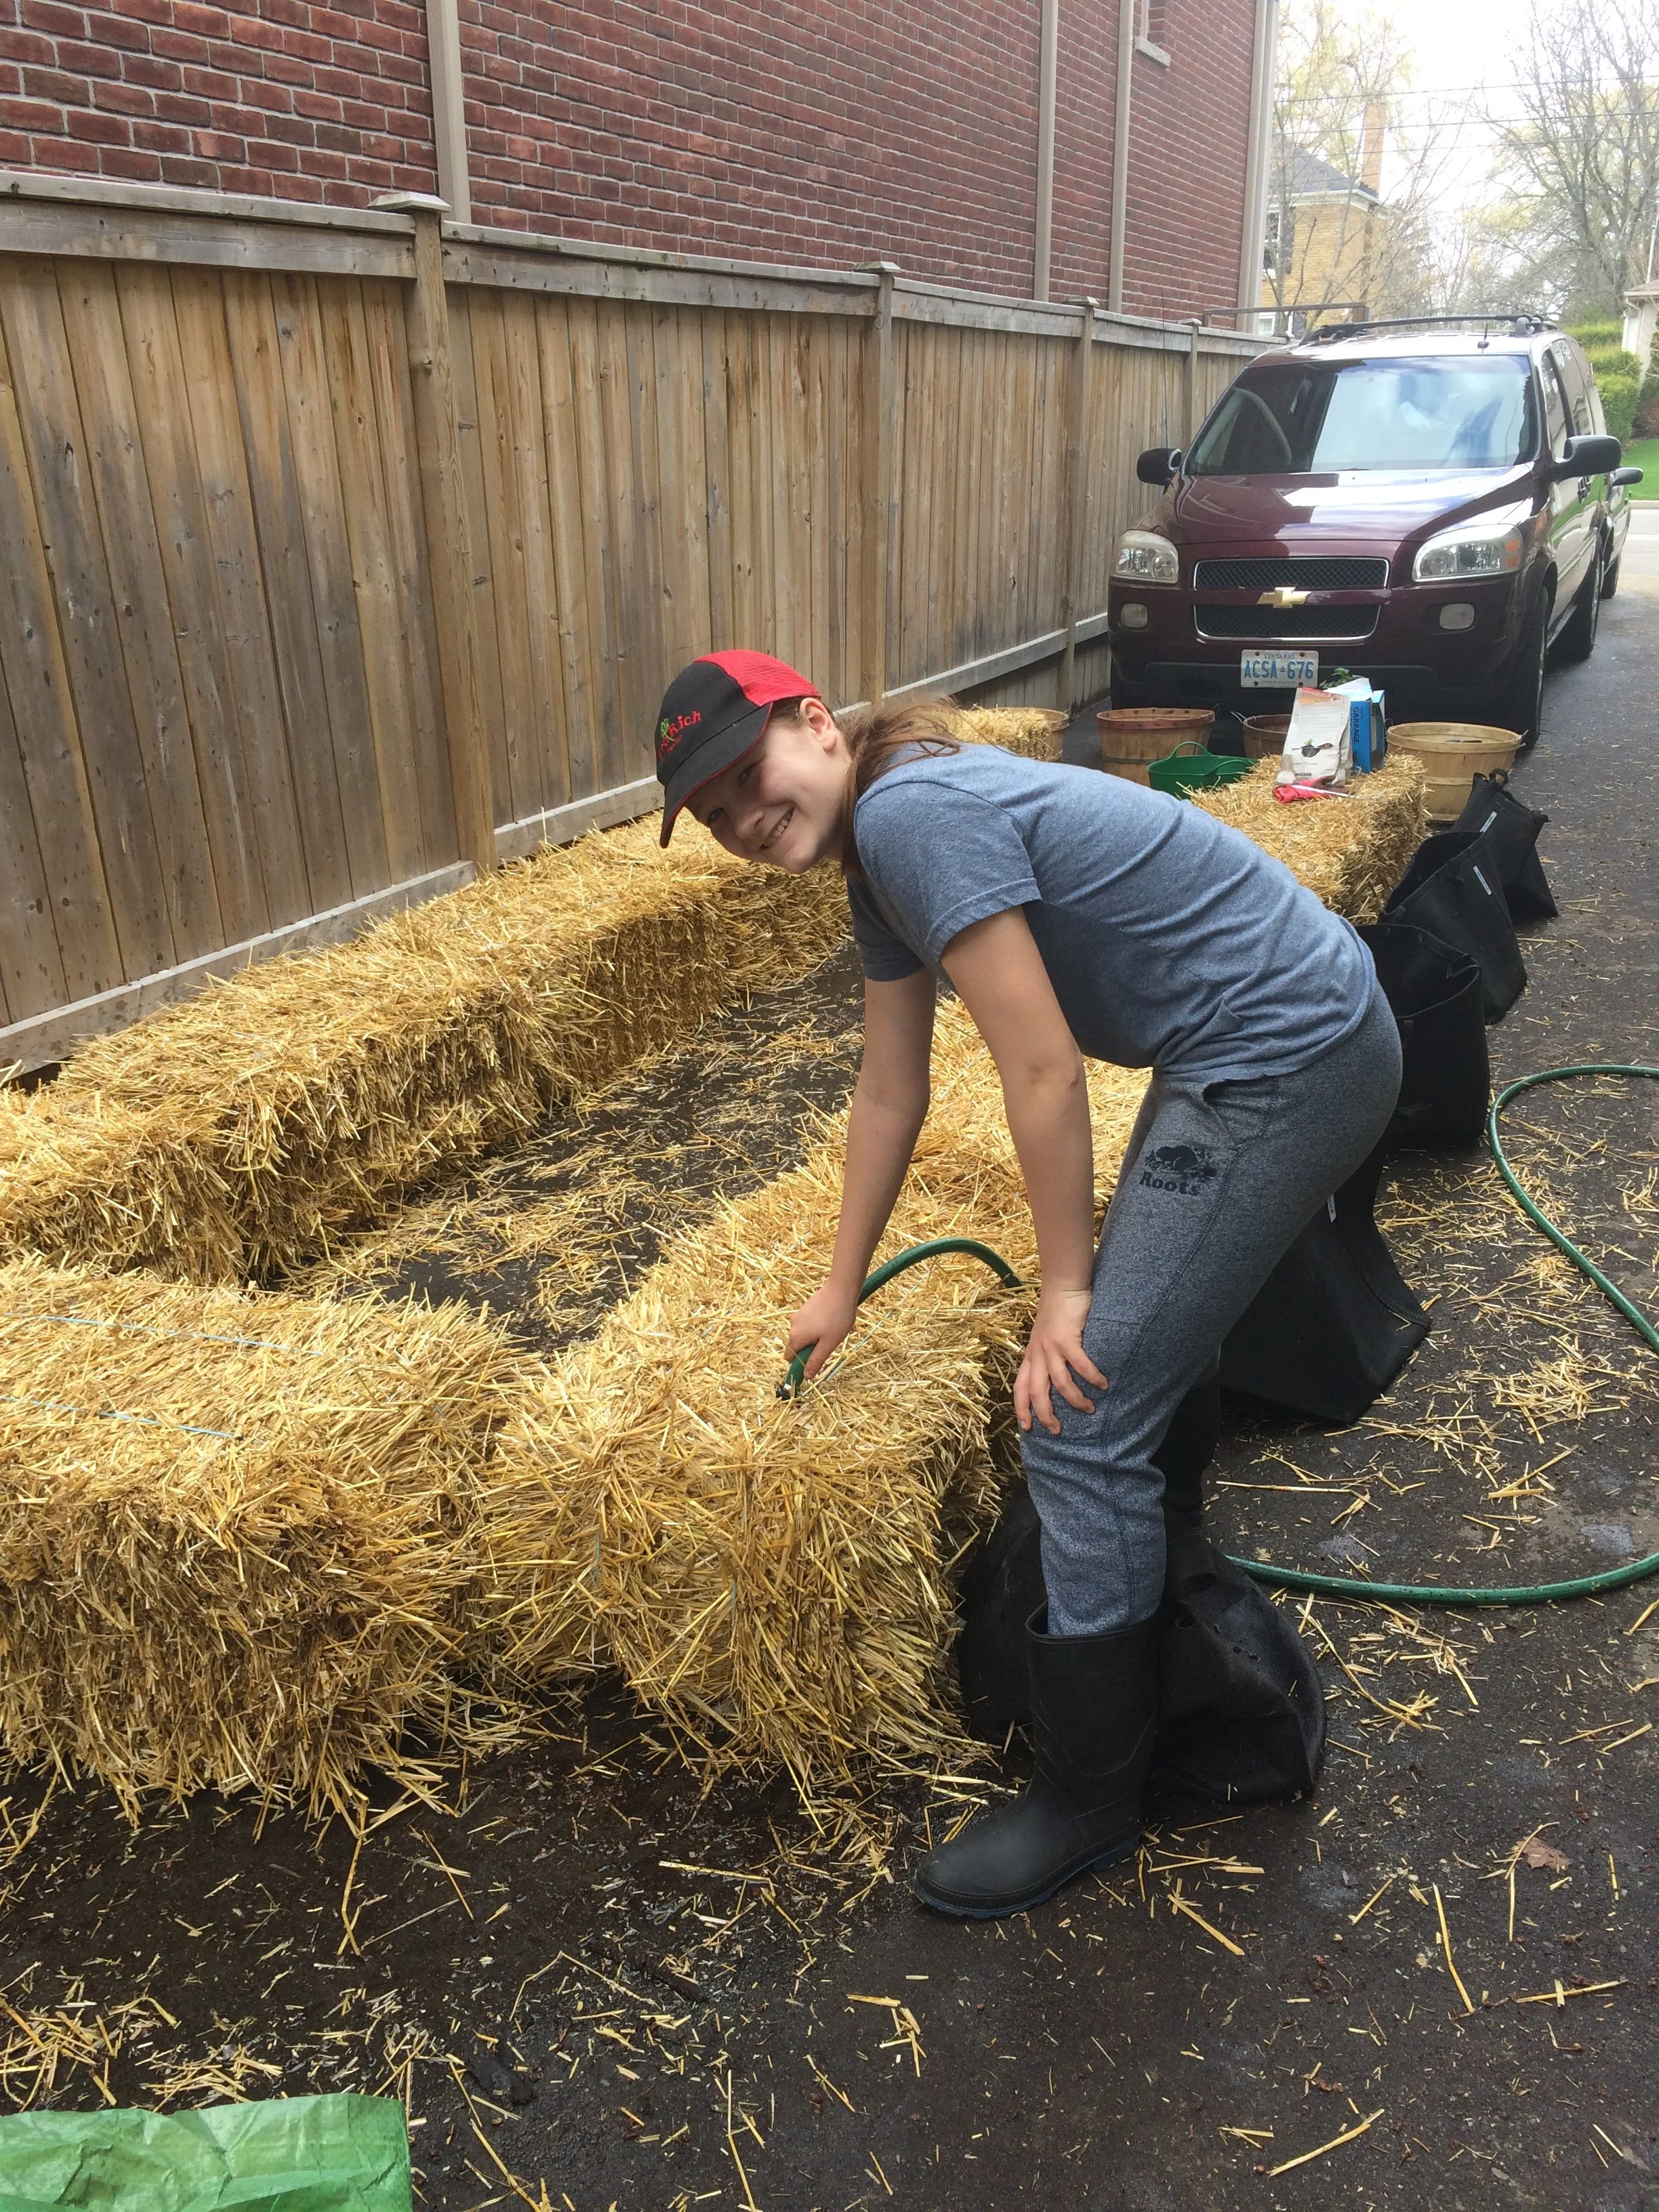
Wetting the straw bales to start the “conditioning” process.
A lot of visitors take a second look at my straw-bale garden and wonder where I put the potting soil. There is no potting soil: The straw bale is both the container and the growing medium. No potting mix required!
The decomposing straw gives plant roots needed air while retaining moisture…like a big sponge.
By the end of the season, when we pull apart a bale, the inside is dark and crumbly. It’s already partially composted and perfect to use as mulch on our gardens. Then, we start again with new bales the following year.
We plant the top of each straw bale with tomato plants and leafy greens. Then we put bush beans on the sides of the bales. (Just poke the bean seeds into the bale!)
Important: If you’re starting with new, fresh, dry bales, the first step is to get microbial activity underway by watering them and feeding them. This step is called “conditioning.”
I’m a big fan of straw-bale gardening. If you plant to do it for the first time, make sure to condition the bales properly. Find out more about straw-bale gardening and how to condition the bales.
2. Bushel Baskets: Growing Vegetables in Repurposed Containers
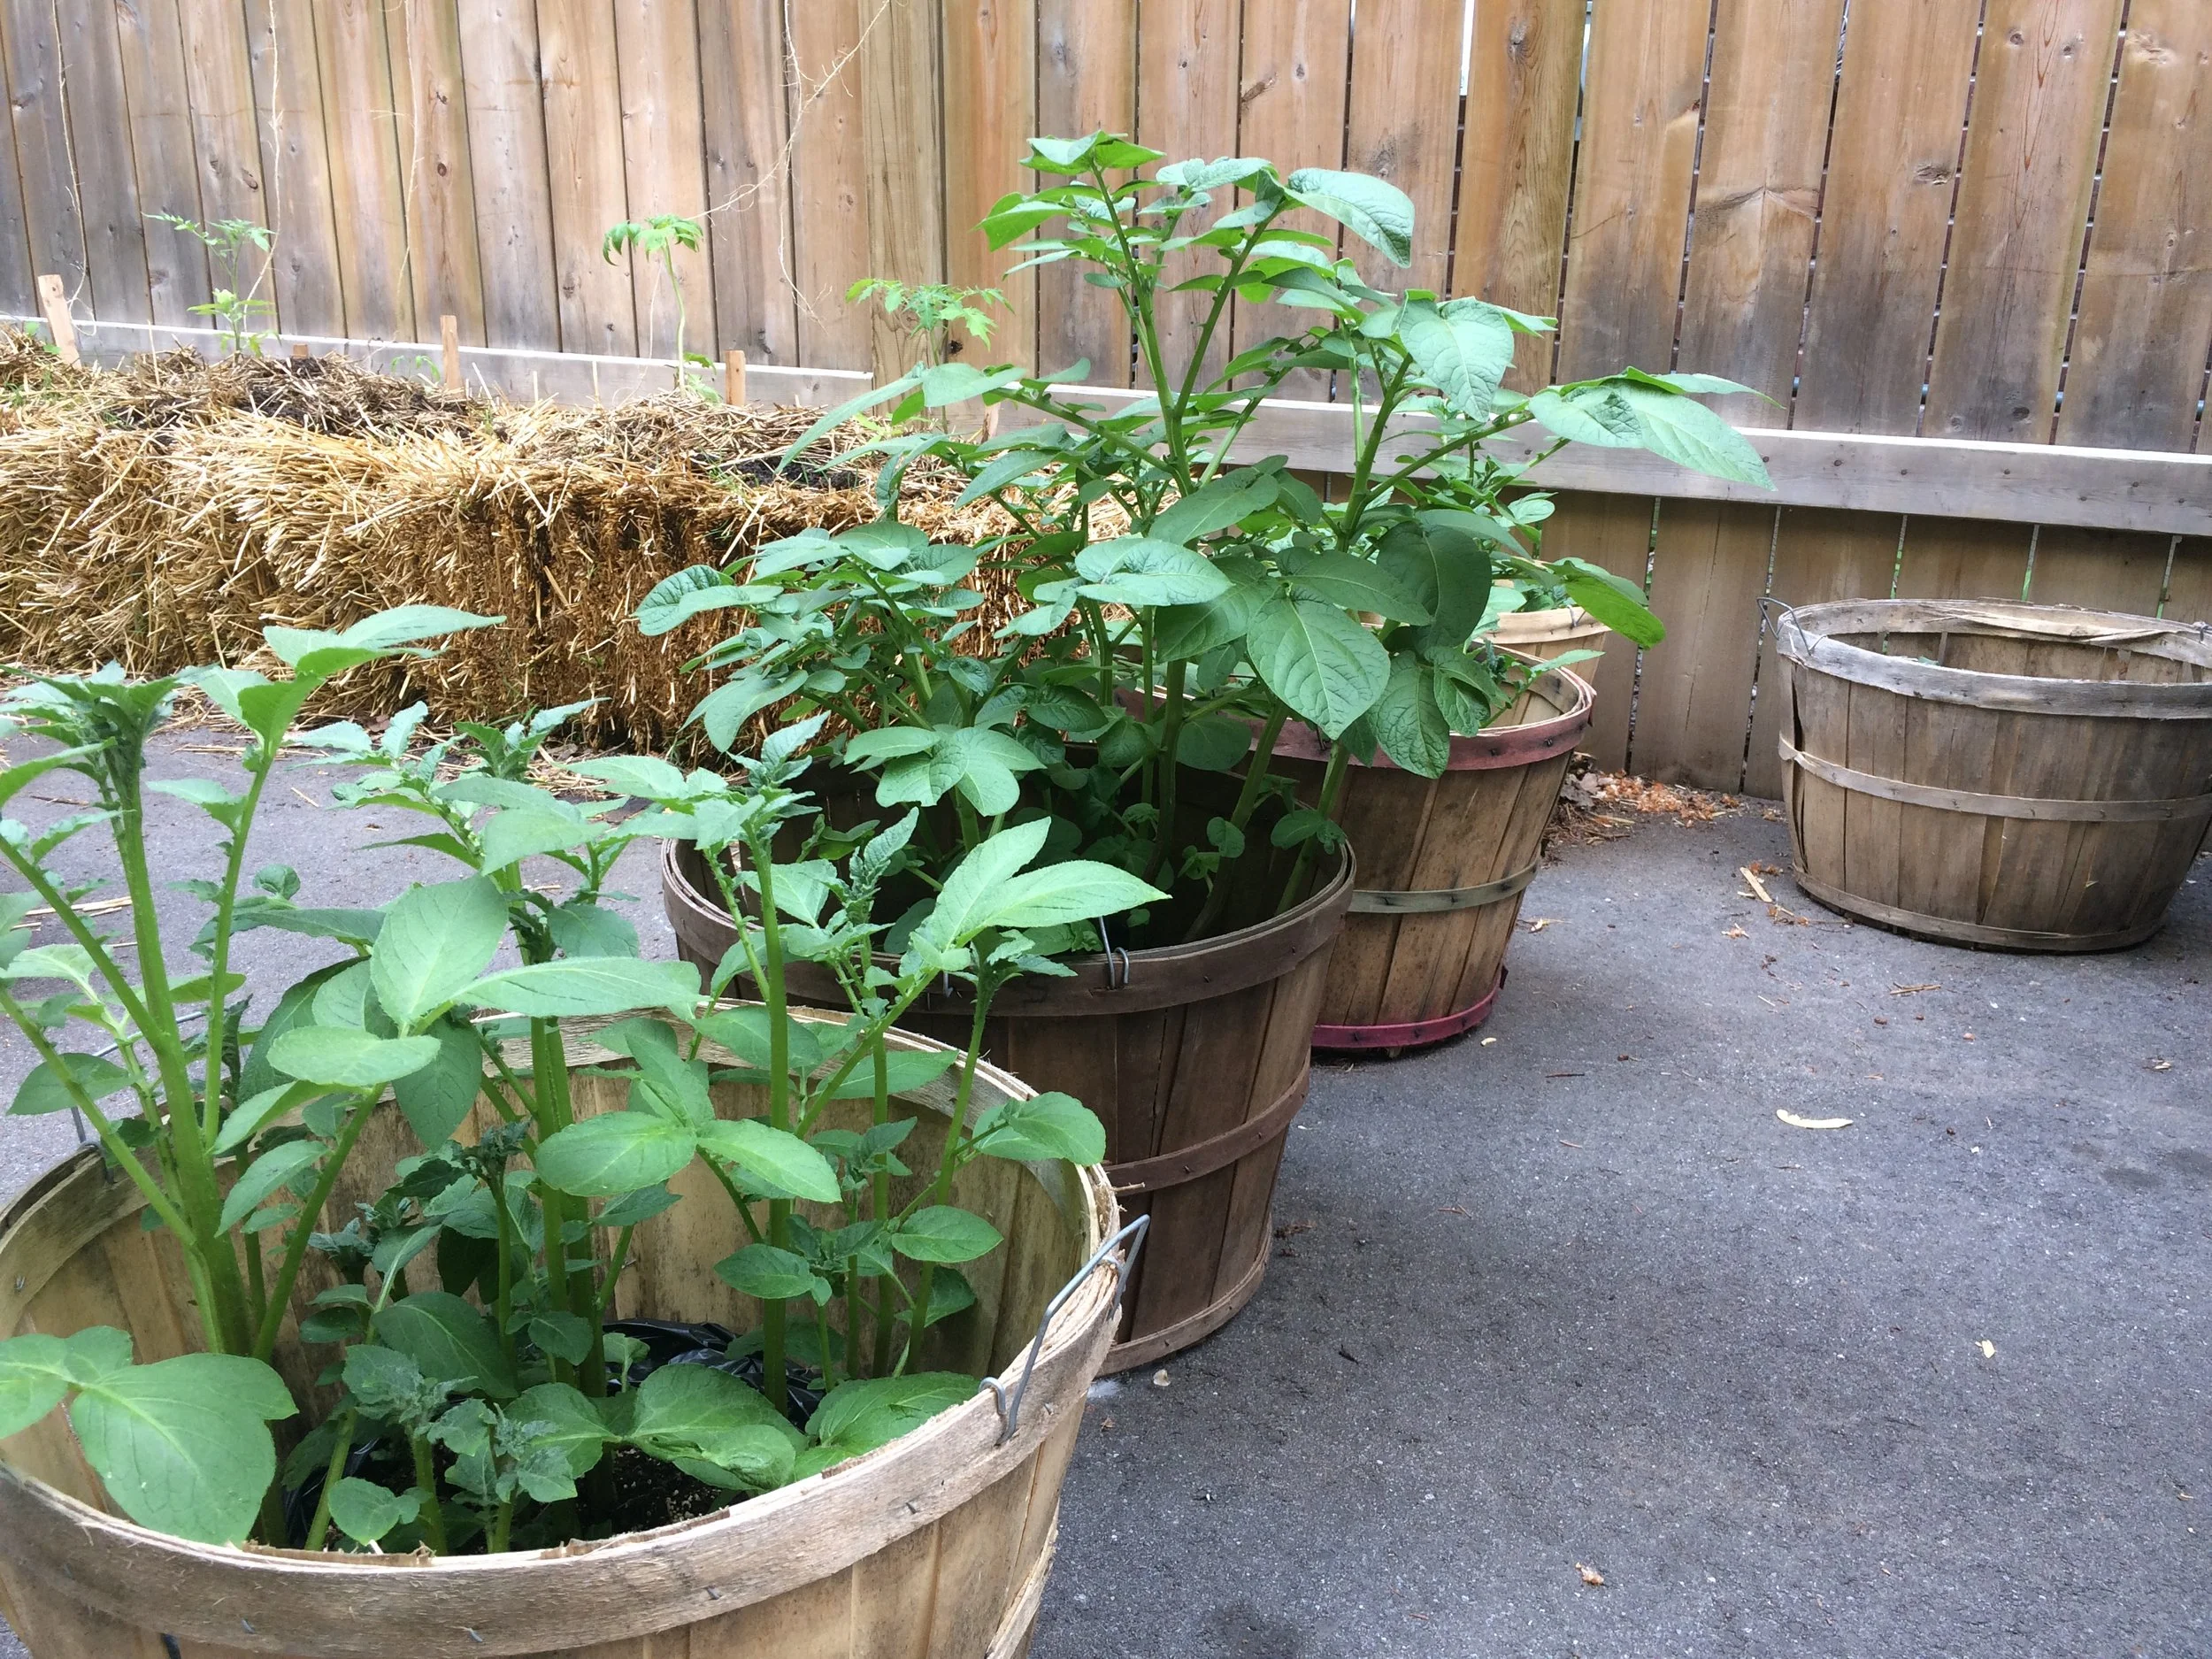
Container vegetable gardening with repurposed stuff! Potatoes growing in lined bushel baskets.
We often have extra bushel baskets from our fall cider-making. So we use them for growing potatoes. (We can’t grow potatoes in our back yard because our neighbour’s black walnut tree gives off a compound that kills them. Here’s more on black-walnut toxicity.)
We line the bushel baskets with plastic bags so that the potting soil stays moist longer and so the bushel baskets won’t decompose as quickly. (Important note: We poke drainage holes in the bottom of the bags!)
There are lots of repurposed items that work well as containers. Here are a few ideas:
Milk crates. I’ve used these in previous gardens. Just cover the openings on the side and bottom with newspaper or cardboard, so the soil doesn’t escape.
Old wheelbarrow. A friend uses an old wheelbarrow as a driveway planter.
Wash basins. I have neighbours who use metal wash basins as vegetable garden planters. (Make sure to drill drainage holes in the bottom.)
3. Fabric Pots: Garden in Pots that are Moveable

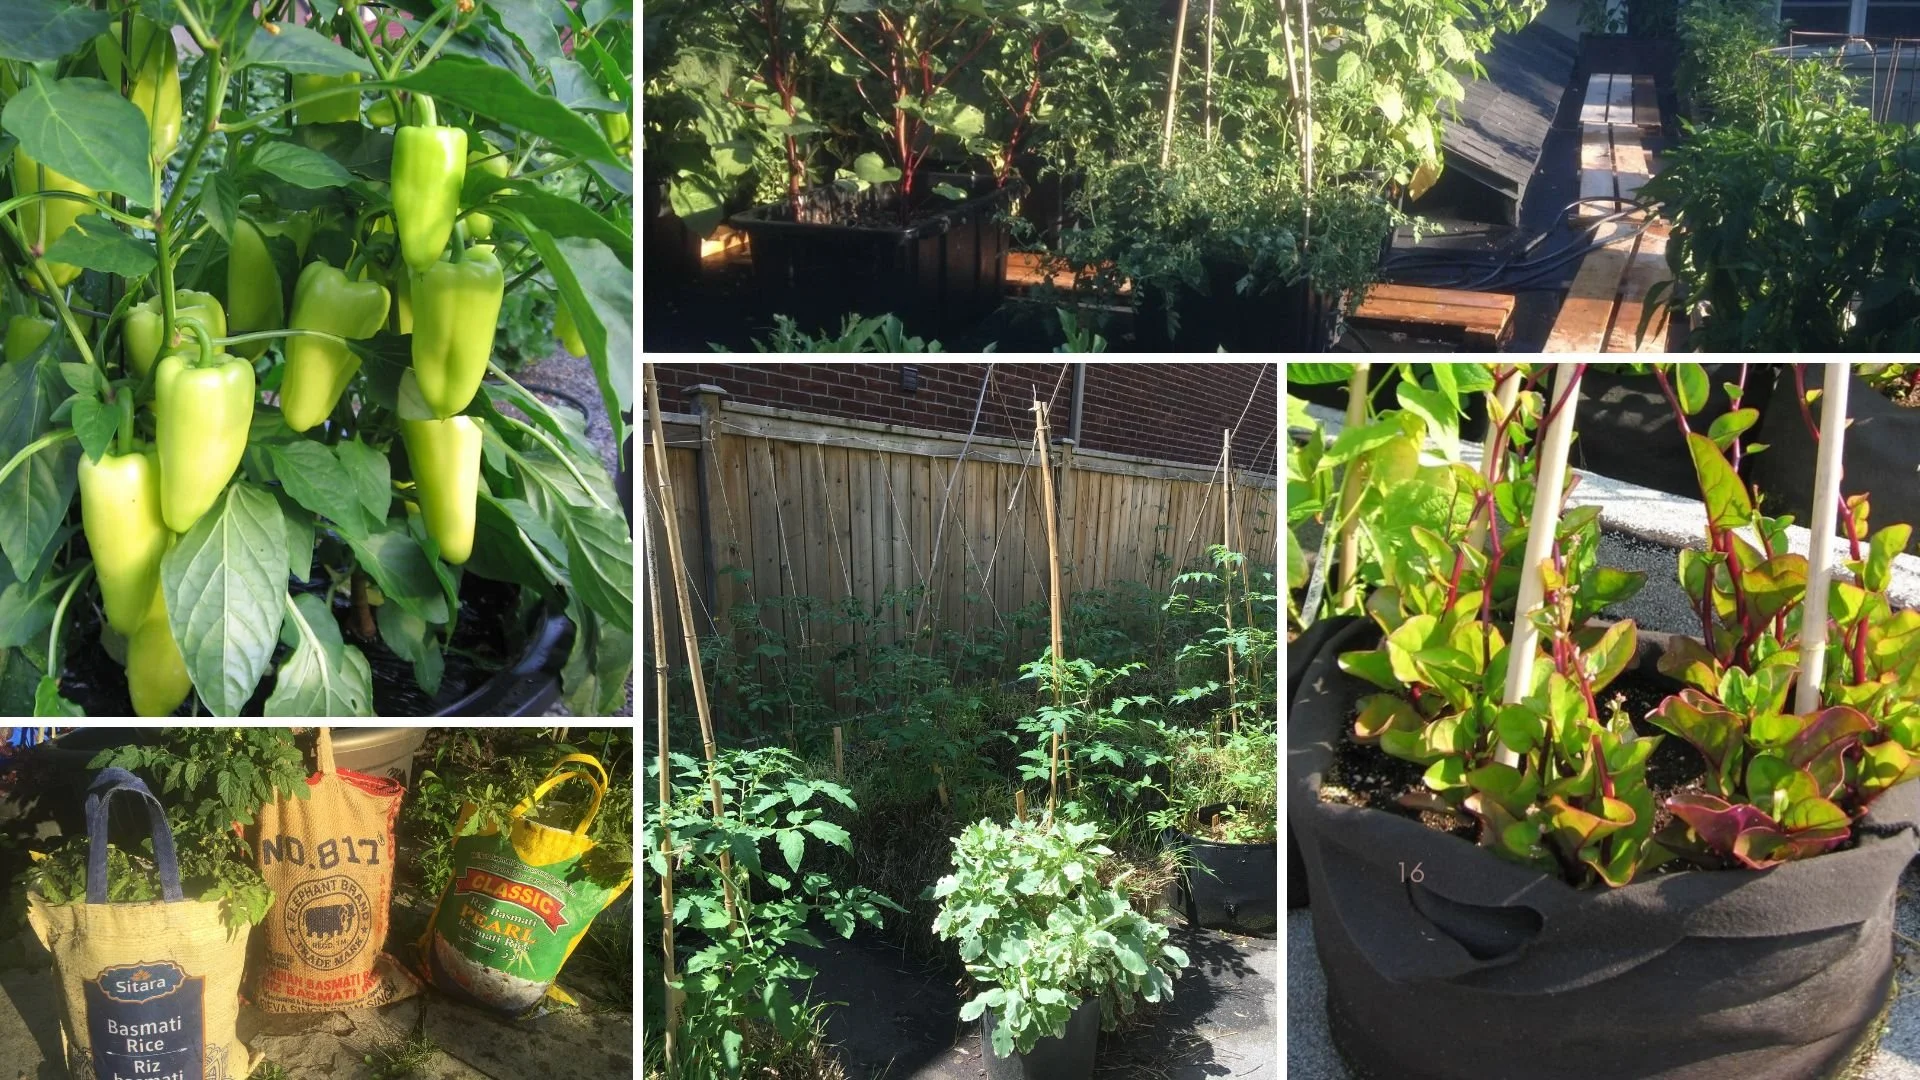
Fabric pots are moveable, and a great way to start container gardening.
These pots are widely available. What we like about them is that they have handles so we can move them aside if we need to move anything large along the driveway.
I’ve seen impressive rooftop container gardens created with fabric pots. While some gardeners use drip irrigation to keep the soil consistently moist, a more simple approach is to put a saucer underneath; as the potting mix begins to dry, water in the saucer wicks upwards.
4. Fence: Grow Vegetable Plants on Surrounding Features
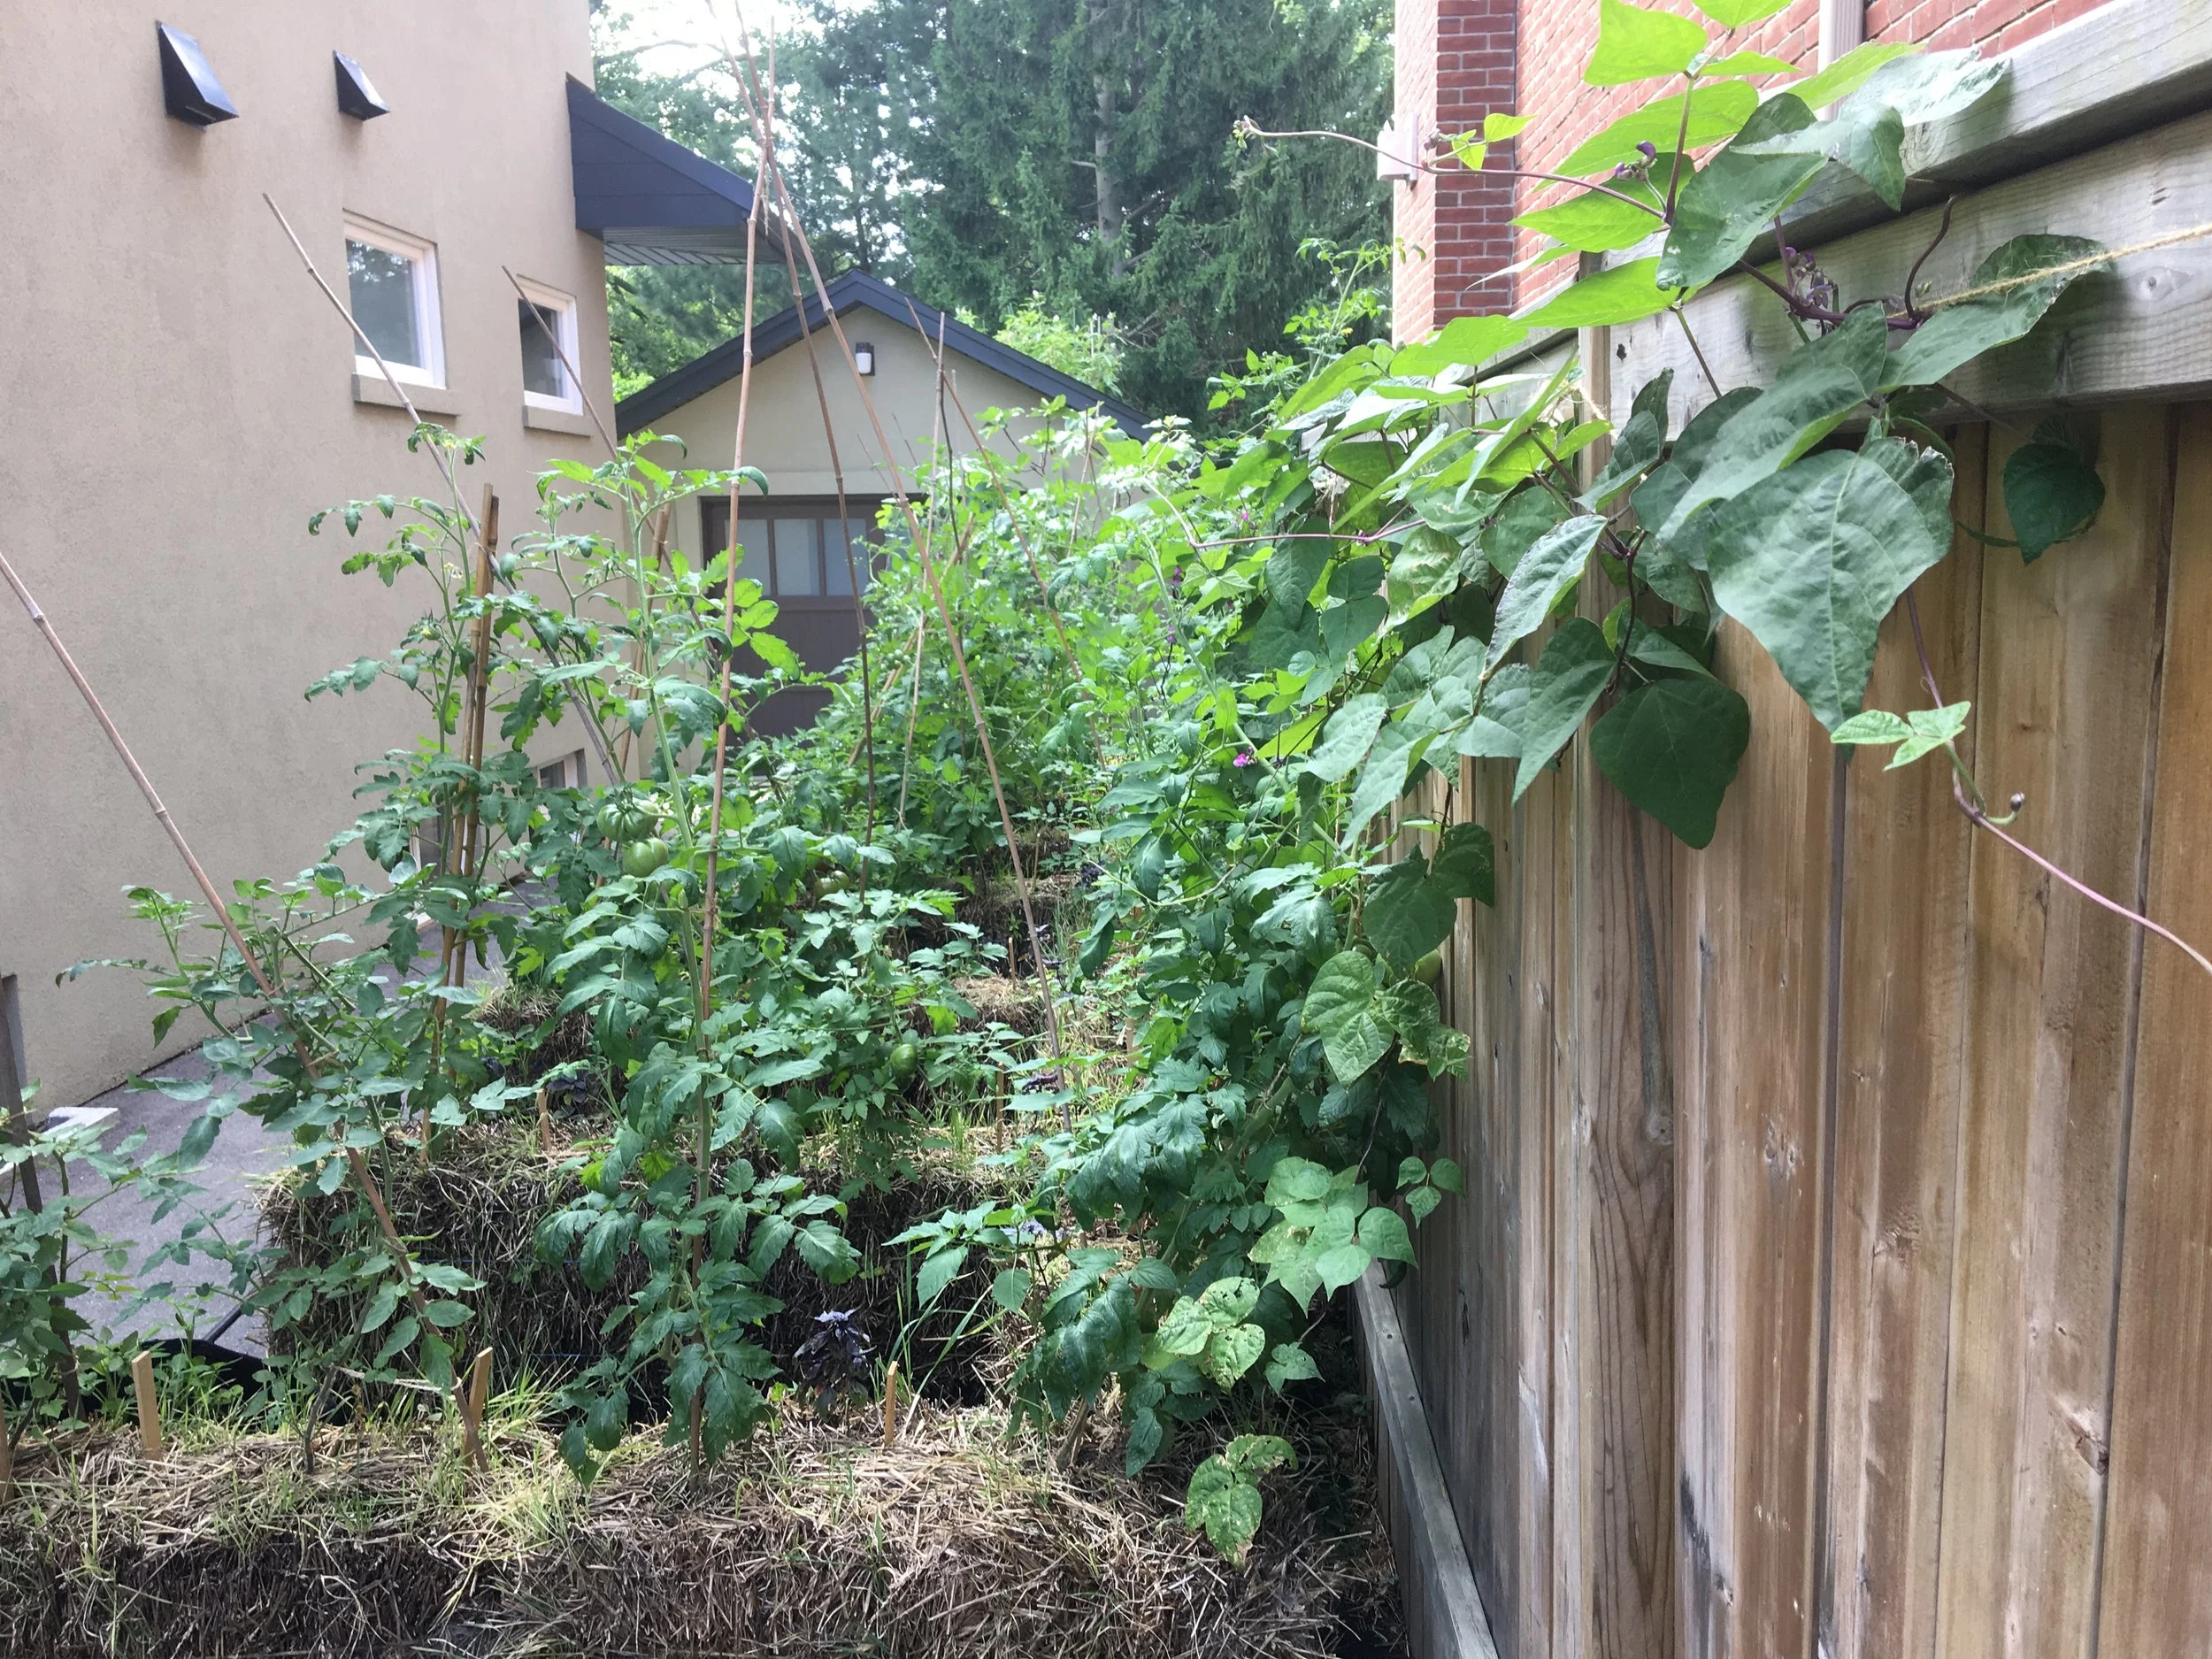
We train tomato plants up the twine that is dangling from the top of the fence.
Sometimes it’s possible to squeeze more crops into a space by growing some of them upwards—a concept that’s often referred to as “vertical gardening.” In the case of our driveway, there’s a wonky board fence that I like to hide with a wall of tomato and squash!
We plant tomatoes next to the fence, and then train them up twine suspended along the fence. We also grow squash vines along the fence—well past where the garden is.
Idea: I’ve also grown squash along hedges and up trees. Because the vines roam around, there are lots of vertical-gardening possibilities.
Here’s more about vertical gardening.
5. Nursery Pots: Figs Growing in Containers
Next to my garage is my potted fig “orchard.” It’s a collection of potted fig plants growing in nursery pots. These fig trees spend the winter in my garage.
Nursery pots are an inexpensive way to start container gardening. Talk with garden centres and arborists—you can often get them for free or very inexpensively.
If you’re interested in growing figs in a cold climate, here’s more about how to do it.
Grow a Container Vegetable Garden
And get an early harvest of crops that usually take too long!
Plan Your Container Vegetable Garden
Choose the Location
If you’re thinking about a container vegetable garden but don’t know where to start, choose your location first.
Then, once you’ve decided on a location, you’ll know how much sunlight you’re dealing with. Remember that full-sun crops such as tomatoes can do respectably well in partial sun. (This is not something a commercial market gardener would do…but if you’re a home gardener, conditions often aren’t perfect.)
Something else to think about is access to water. Is there a tap or hose nearby?
Choosing Container Plants
When it comes to choosing container gardening crops, a good starting point is things you like to eat.
Then, think about crops that do well in containers. Most vegetables grow well if a container is big enough, but some crops are more practical than others.
For example:
Pole beans are great if they're next to something they can grow on, but, otherwise, bush beans are more practical because you don't need to make a trellis.
Parsnips and Brussels sprouts take the whole summer and fall to mature. Instead, look for crops that mature more quickly, like carrots and carrots.
Here’s a list of best vegetables to grow in pots.
If the location is shady, here’s a list of crops that grow in shade.
Need Inspiration?
Here’s our chat with a gardener who grows a whole garden full of hot peppers in containers.
Consider Containers with Reservoirs
A key to success—and common reason for failure—with container vegetable gardening is watering. When the soil in containers regularly dries out, your vegetable plants put on the brakes. Growth stalls. Or, even worse, your plants skip straight to flowering before they're big enough.
Pin this post!
(When you’re looking for bargain plants at a big-box store and see what looks like a bonsai cauliflower plant that’s only six inches tall, chances are that the plant got parched too often…and that stress made it flower before its time.)
If the potting soil is consistently moist, your crop will be miles ahead. It makes a big difference.
You can keep the potting mix consistently moist with what’s called “sub-irrigated” pots. This is just a fancy way of saying a container with a reservoir. As the potting mix begins to dry, water from the reservoir wicks upwards, keeping the soil continuously moist.
This sort of container is widely available—but you can easily make your own.
Find out more about sub-irrigated (a.k.a. self-watering) pots.
More Container Ideas
If space is tight, small containers might be your only option. I've made herb container gardens by dotting potted plants on a staircase.
Don't forget window boxes. Although they're shallow, they work well for shallow-rooted crops such as leafy greens.
Hanging baskets are a great way to fit more vegetable plants into your container garden.
Find This Helpful?
Enjoy not being bombarded by annoying ads?
Appreciate the absence of junky affiliate links for products you don’t need?
It’s because we’re reader supported.
If we’ve helped in your food-gardening journey, we’re glad of support. You can high-five us below. Any amount welcome!
Best Vegetables to Grow in Pots (12 Great Container Vegetables)
Want vegetable container crops that will grow well? Here are 12 crops that thrive in container gardens.
By Steven Biggs
Container Gardens for Vegetables
I share my favourite vegetables to grow in pots.
I started growing vegetables in containers when I moved to my first apartment. I loved that apartment! It was in a low-rise yellow-brick building right on the water in suburban Montreal.
(I had the basement…not always a good choice in a waterfront location, but that’s another story.)
My landlord, Mr. Crevier, had ornamental garden beds in the yard. No vegetable plants. But when he decided to get rid of his boat, there was a weedy, hard-packed area where he’d parked his boat trailer. Knowing I worked in the horticulture industry, he asked if I’d like to make a garden there.
He didn’t have to ask twice.
The hard-packed soil was laced with gravel and debris. So I got nursery pots and soil from work, and had a vegetable container garden ready to plant within a couple of days.
Until that first container garden, I wasn’t a fan of container gardening. Seemed like a lot of work…second best to growing in the ground.
But my opinion changed.
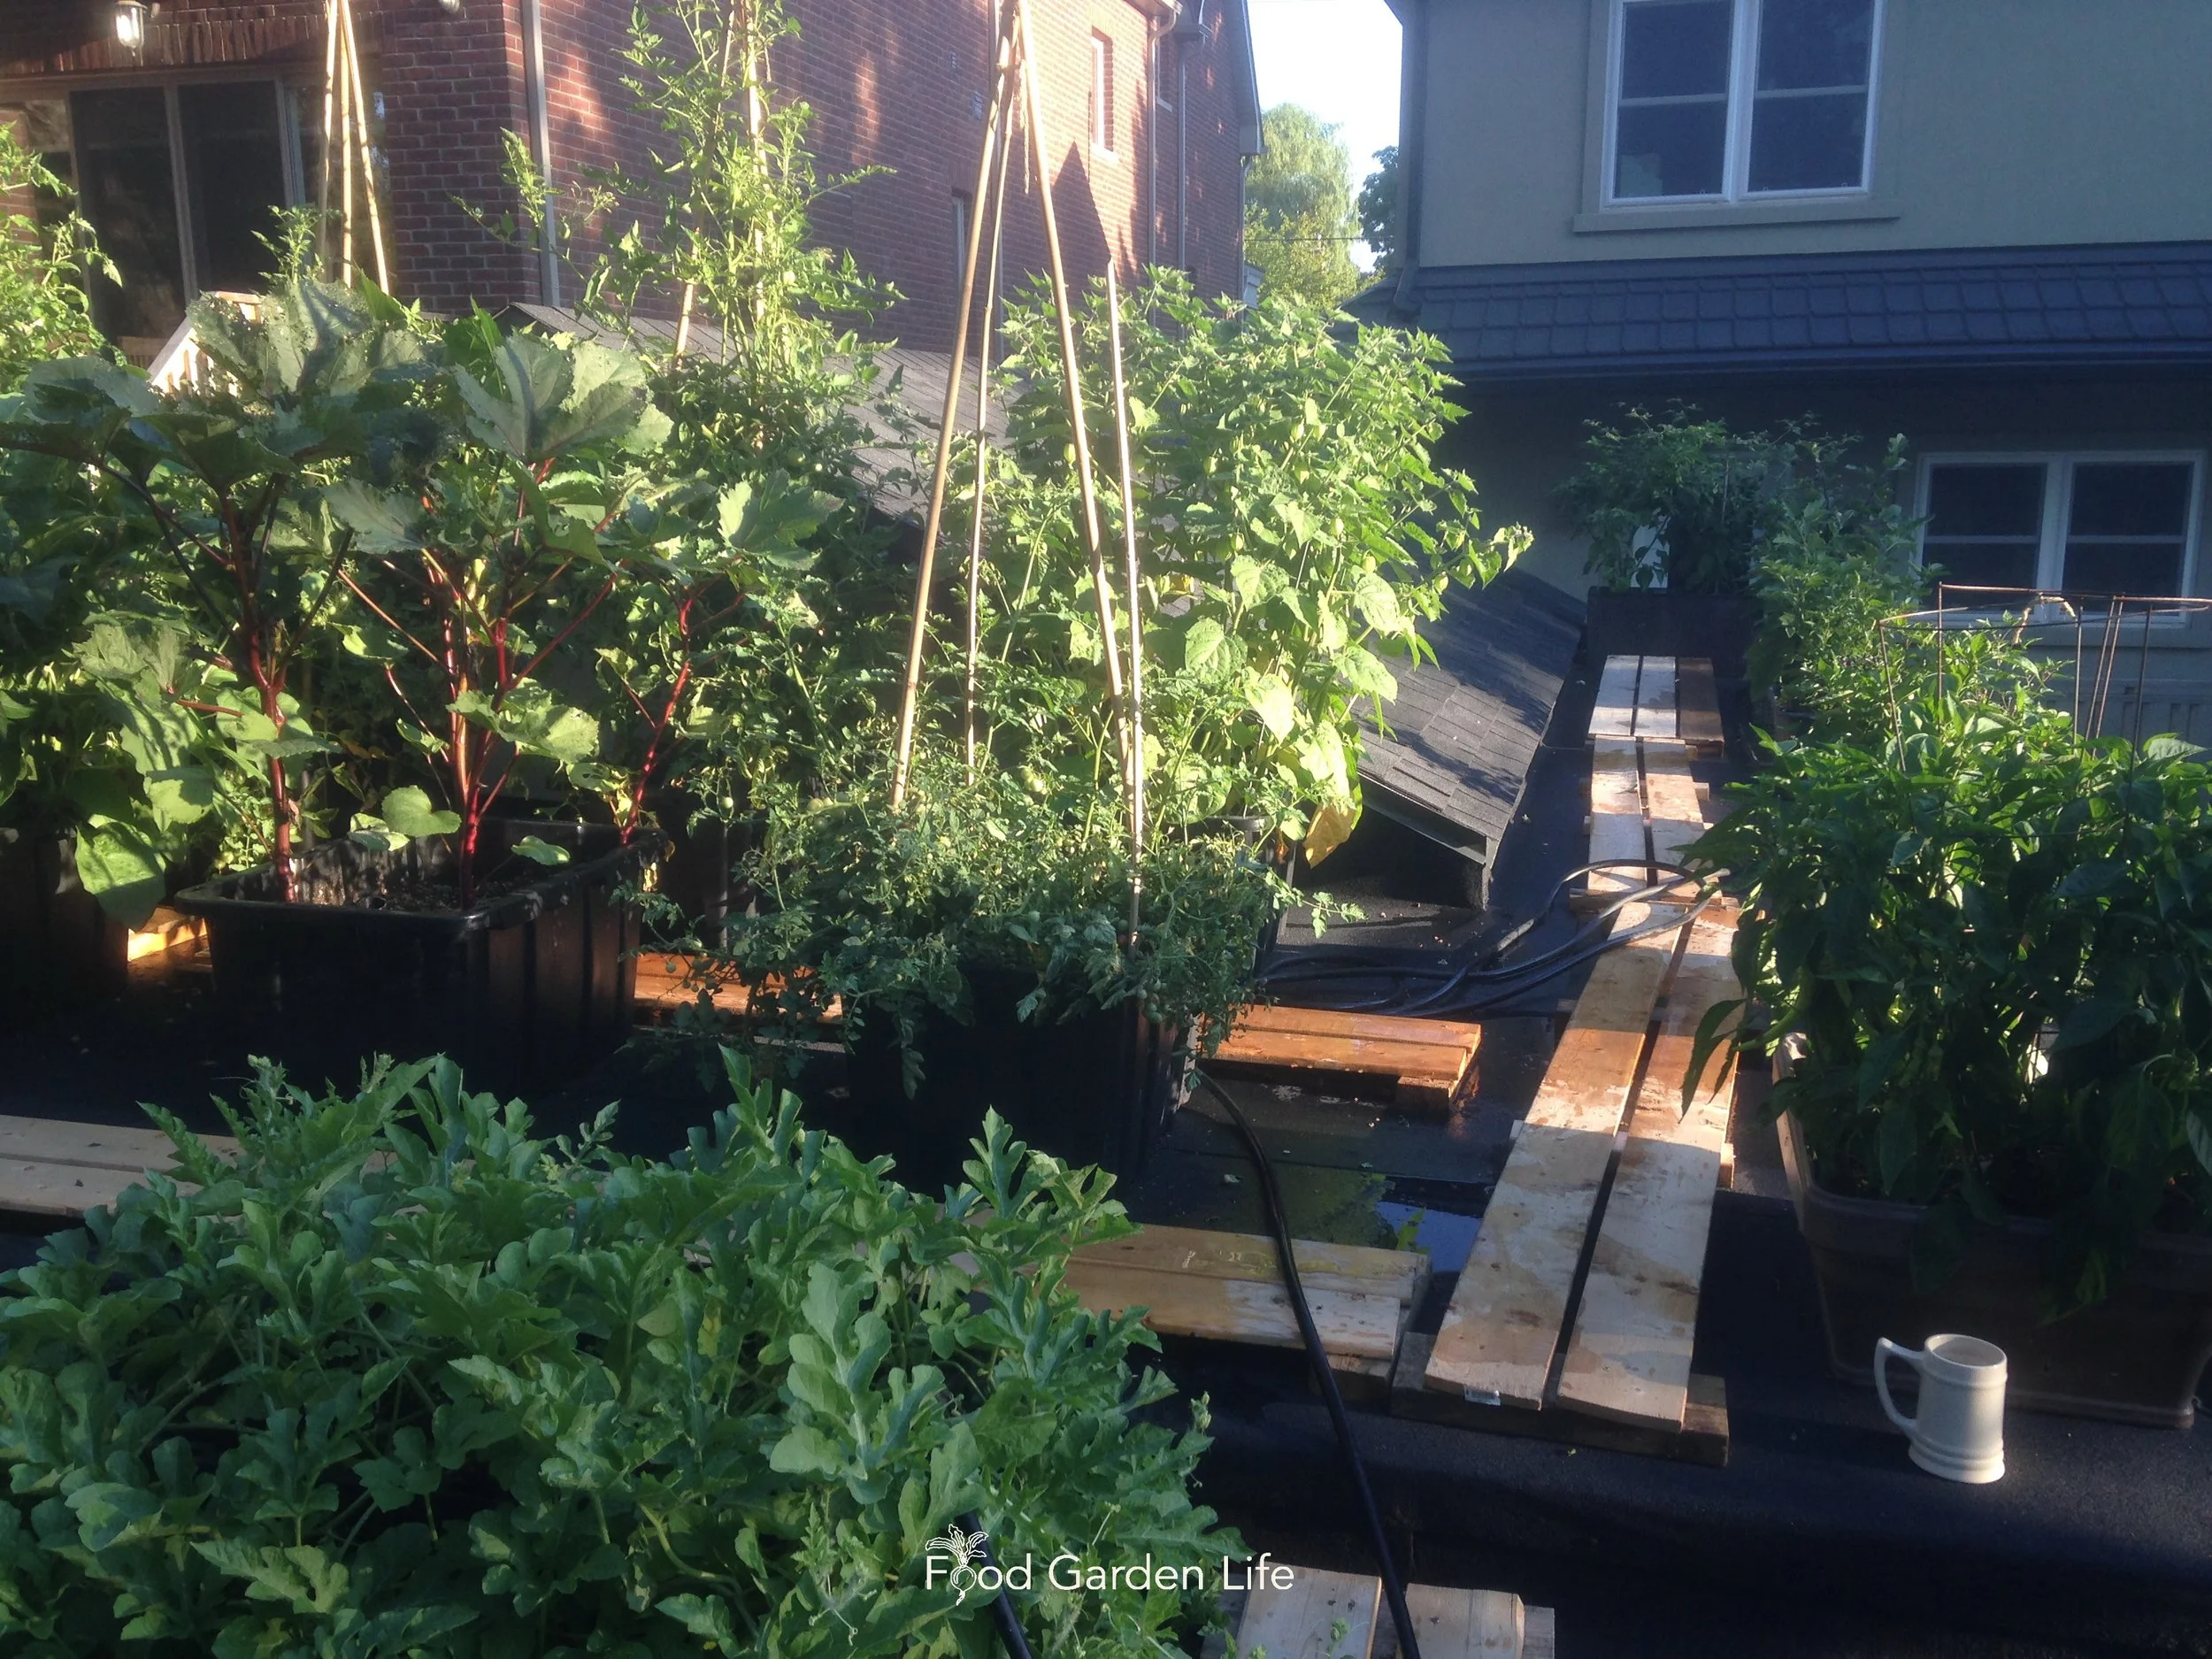
My rooftop vegetable garden! Growing vegetables in containers.
One of my container tomato plants birthed a 3-pound tomato. I had more lettuce than a bachelor could possibly eat. Buttered beans for supper every night…
Since that first container garden, I’ve made rooftop gardens, patio gardens, and driveway gardens full of planter vegetables…even when I have lots of space for veggies in my garden beds.
If you’re thinking of a container gardening, keep reading: This post covers key things to think about, and gives you a list of my top vegetables to grow in pots.
3 Benefits of Vegetable Container Gardening
Container Gardening Gives Vegetable Crops More Heat
The soil in containers warms up more quickly than garden beds—making it possible to grow vegetables earlier in the spring.
Then, during the summer, the soil in containers gets warmer than in-ground beds. Think of sun hitting the side of a container and warming it up. That makes containers a great place to successfully grow heat-loving crops in areas with cool climates or short summers.
Containers Help Squeeze More into a Small Space
It goes without saying that container gardening is a great way to garden in small spaces by using otherwise unused spaces where there’s paving, poor soil, or competing roots.
To squeeze even more vegetable container crops into limited yard space, think in layers:
Low containers
Containers filling space higher up
More containers up above—maybe hanging baskets
Containers to Overcome Soil Issues
Container gardening is also a good option in places with possible soil contamination.
Find out more about soil contamination.
Containers can be a good way to garden near a black walnut tree. Find about about walnut toxicity.
Even if the soil is OK, sometimes tree roots make gardening in the ground impractical. Containers to the rescue!
Grow a Container Vegetable Garden
And get an early harvest of crops that usually take too long!
My Top 12 Vegetable Container Plants
Here are my top vegetables to grow in pots. (In that first container vegetable garden in Montreal I had a lot of these—and they’re still my top choices.)
Beans
Bush, pole, and runner beans all do well as container vegetable crops. Pole and runner beans are a good option where there is a wall, trellis, or railing for support.
I grow both bush beans and pole beans in my driveway container garden. The pole beans hide an ugly fence, while the bush beans fill in space in front of tomato plants.
Recently I’ve been growing beans in my straw-bale gardens. Like container gardens, straw-bale gardens are great for small and paved spaces.
Find out more about straw-bale gardens.
Beet
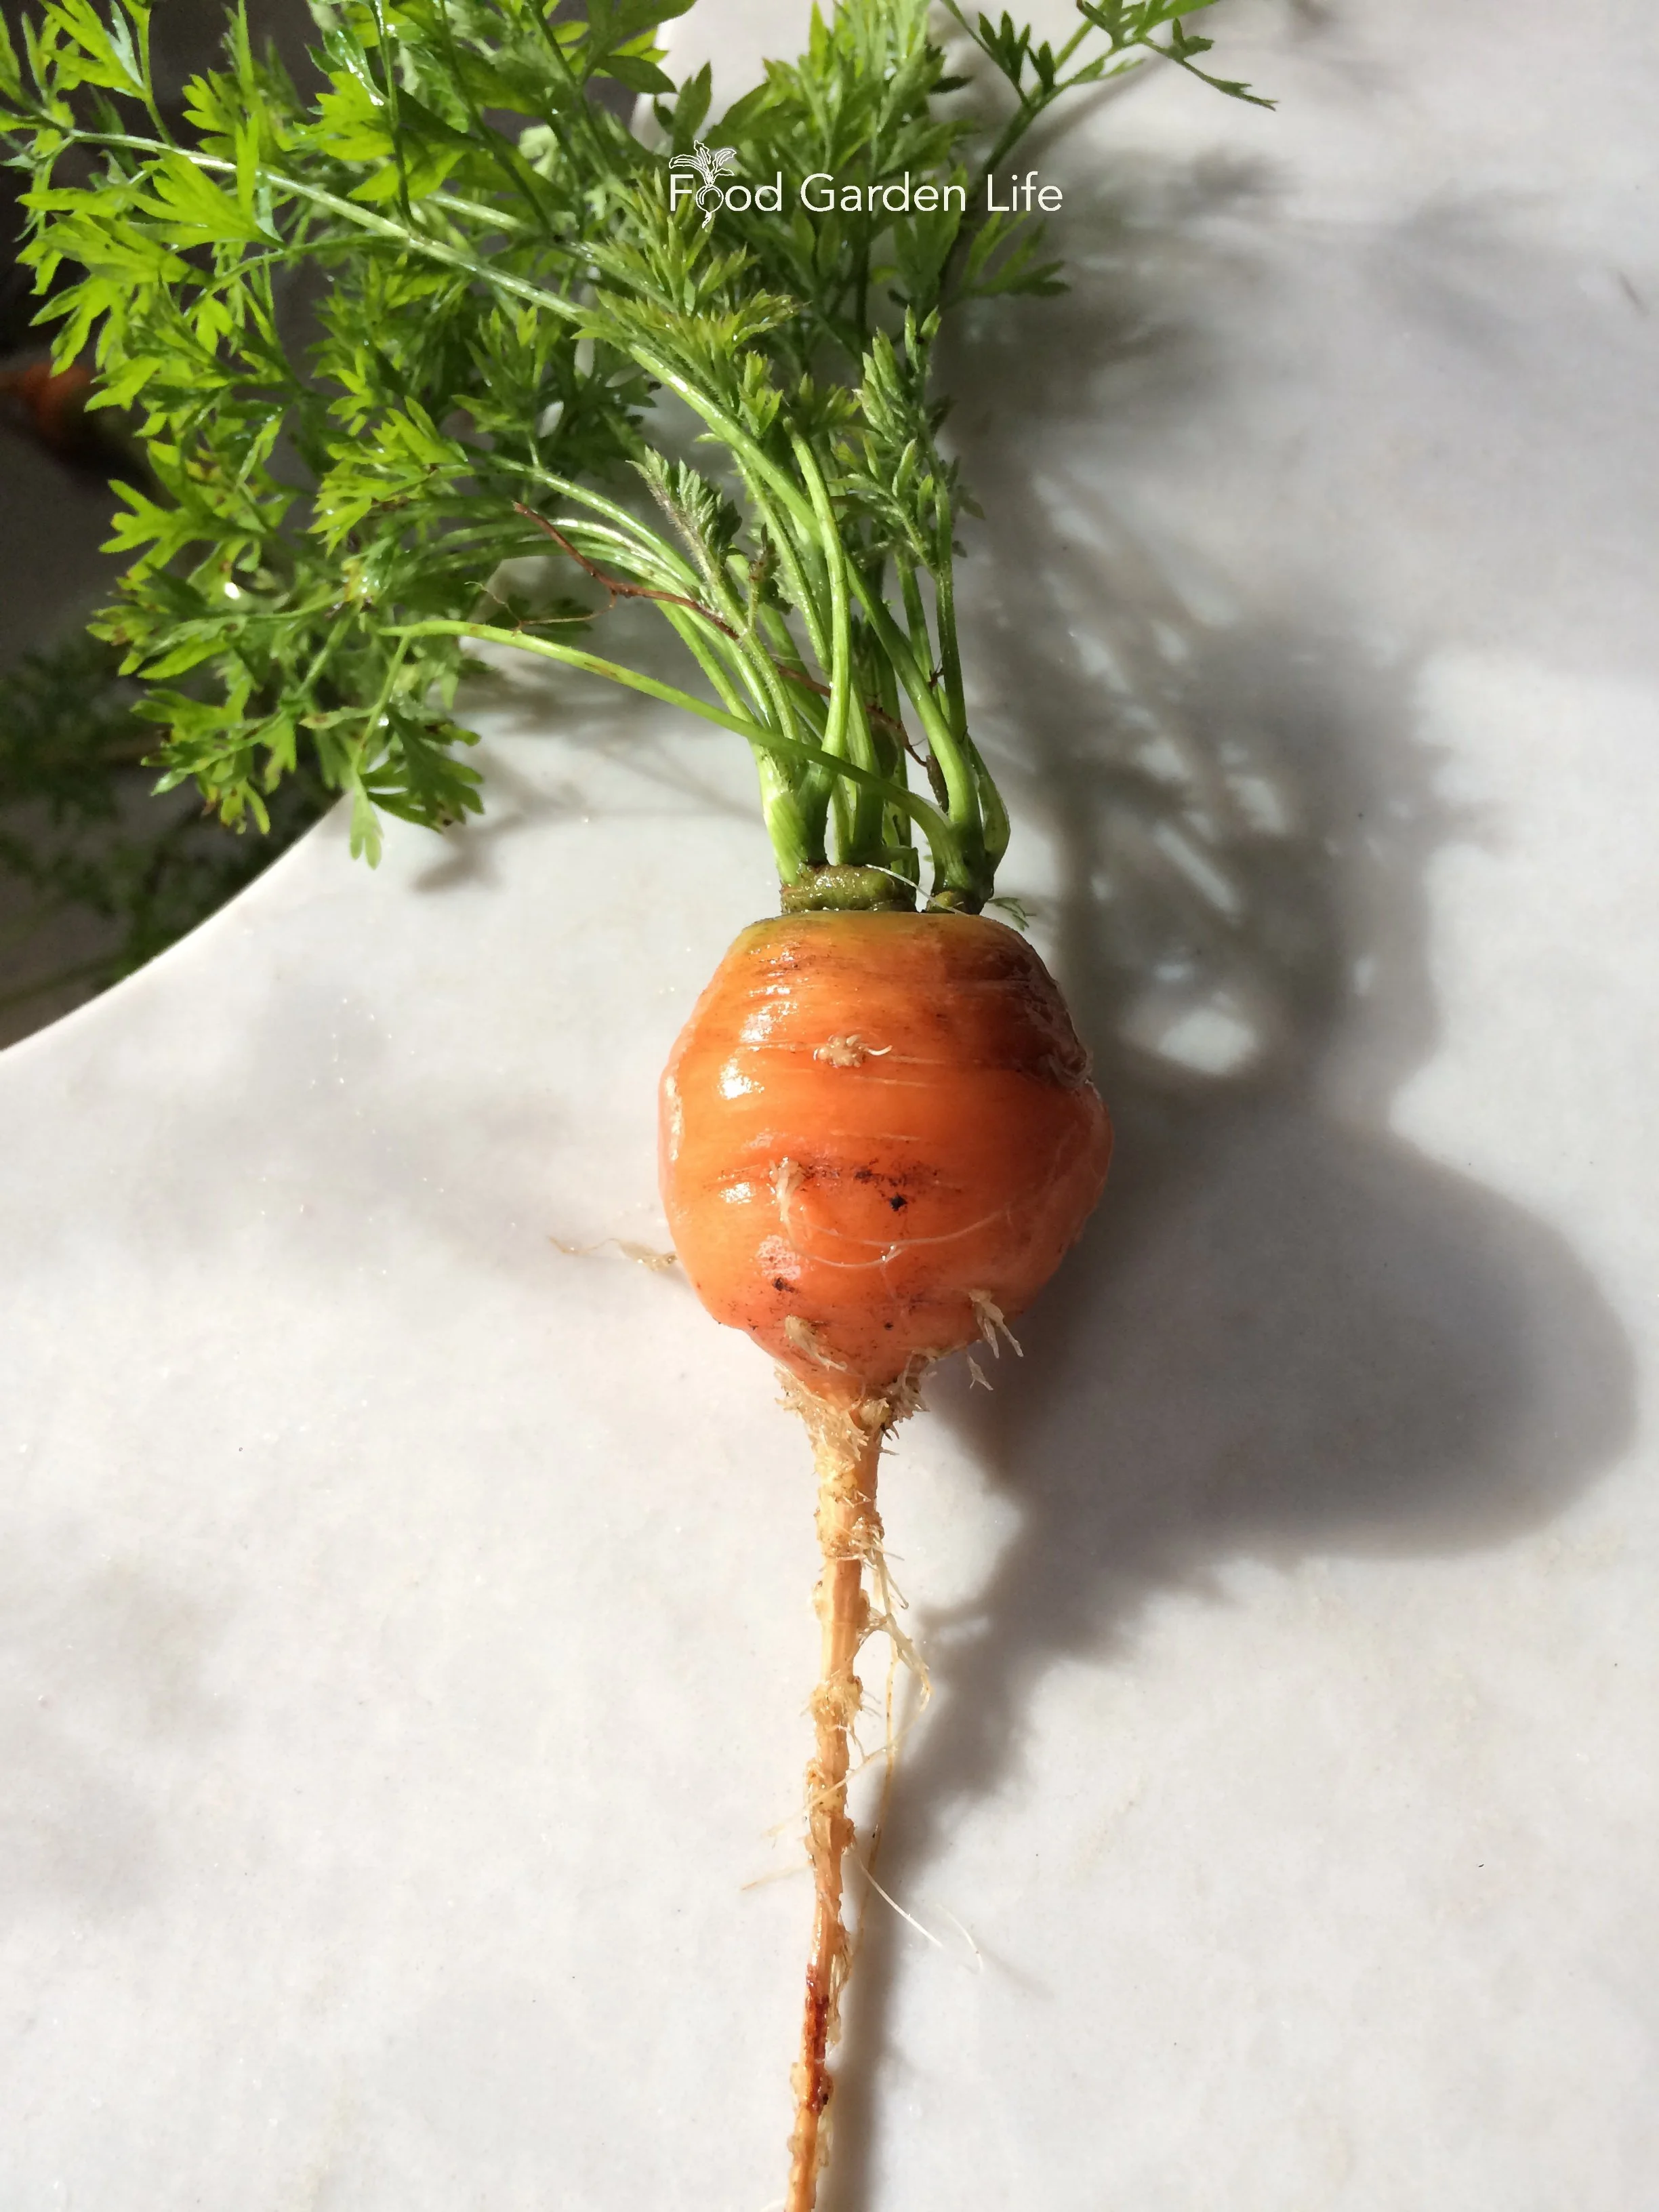
Paris Market carrot, a small carrot that’s well-suited to smaller containers.
Something that puts beets high on my list of is that there are two edible parts: the root, and the leaves.
Beet root is a great storage crop. Here are 25 storage crops you can grow at home.
‘Bulls Blood’ has red foliage prized as a colourful salad green.
Carrot
You can still grow carrots if you have small containers. For shallow containers, look for short varieties that have shallow roots, such as the little, round ‘Paris Market.’
As with beets, this is a crop with two edible parts: Leaves and roots are both edible.
Eggplant
Eggplant loves heat, making it a great choice for growing in containers. Pick the sunniest location you have.
Eggplant flowers are very attractive, making this one of those vegetable crops that’s very ornamental, too.
For novelty, look for red, white, or striped varieties.
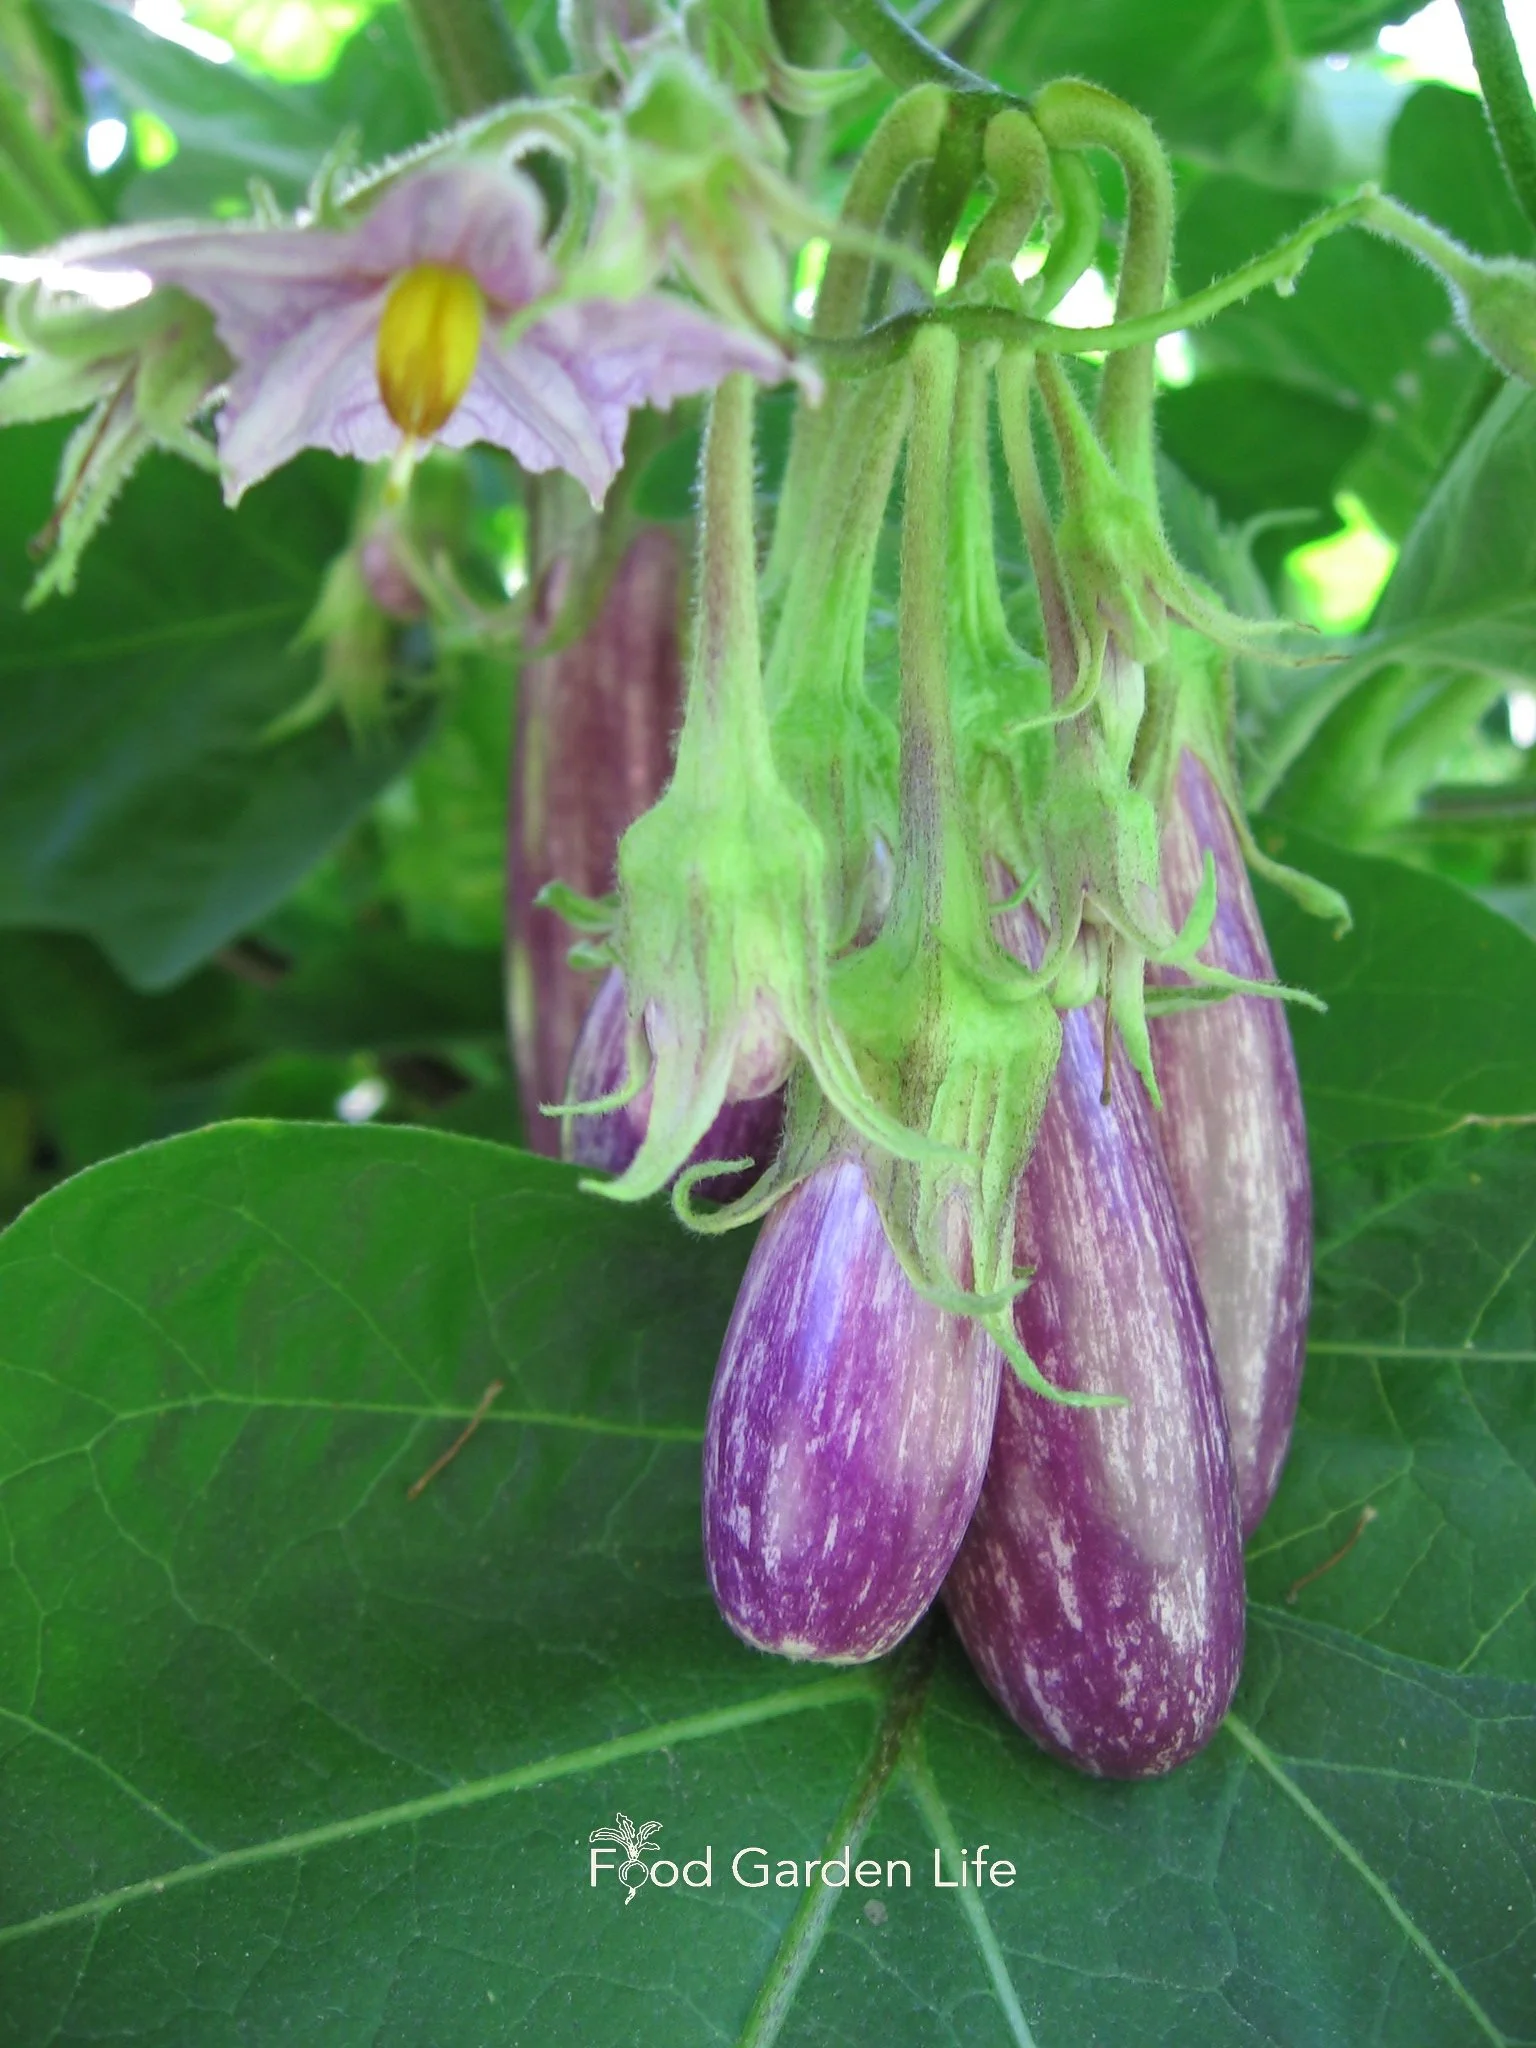
Potted plants that look beautiful! Try some eggplant.
Kale
Kale has excellent ornamental properties as it comes in many colours and has many leaf shapes and textures.
It holds up well through fall frosts and into winter, making it a must-have crop if you want a long harvest window.
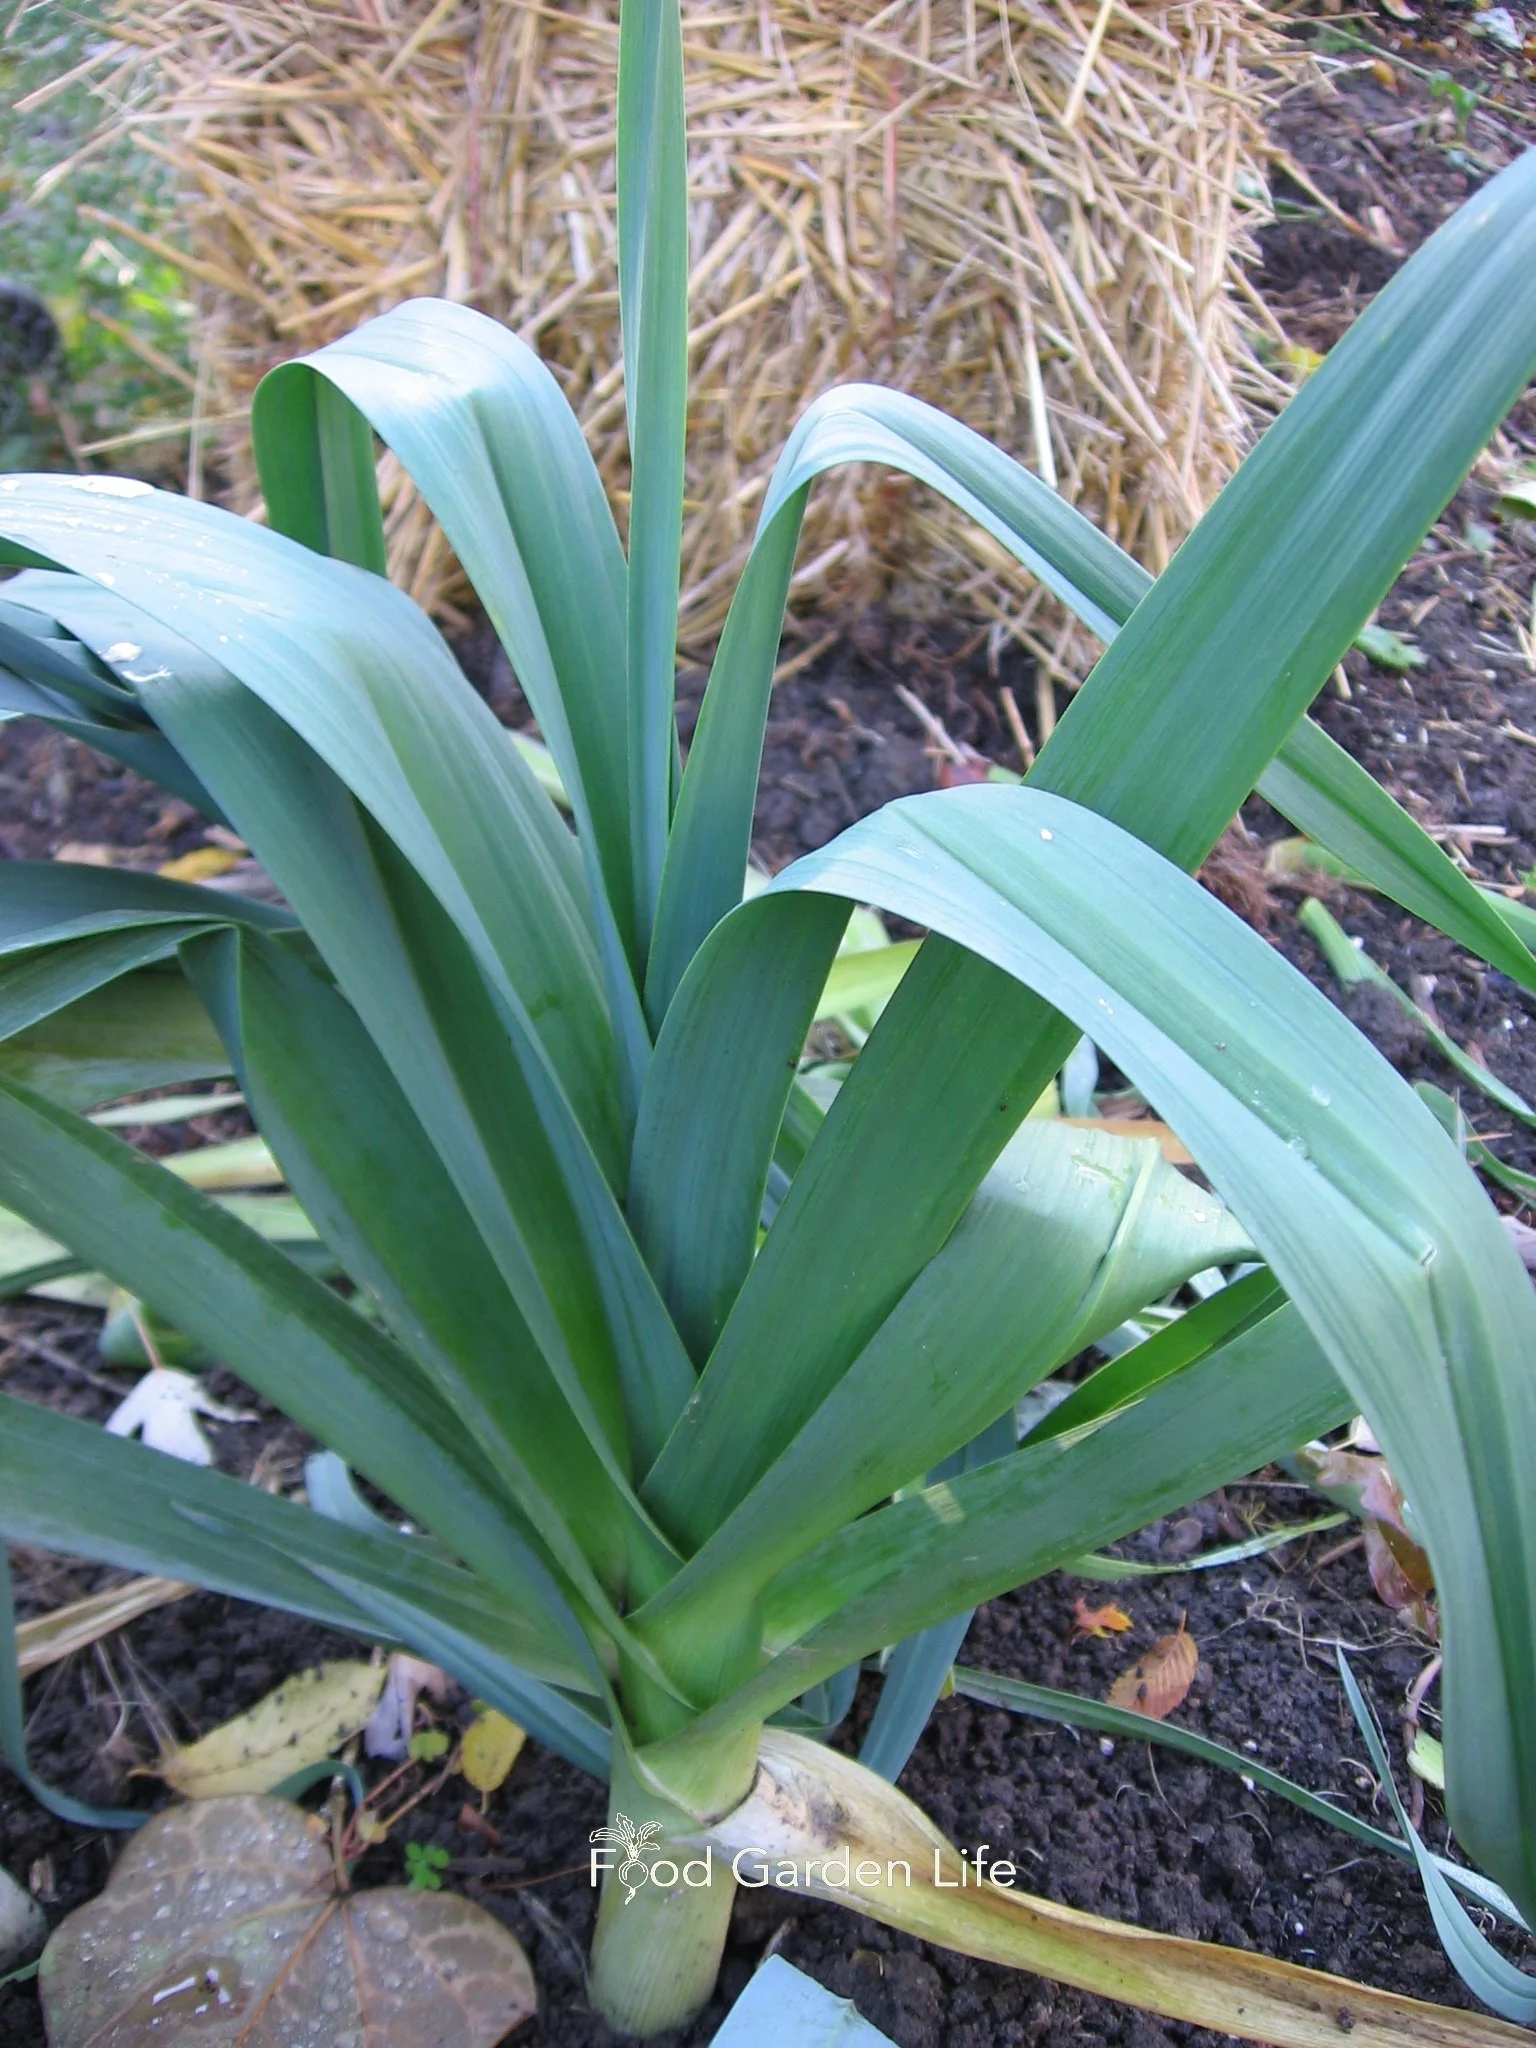
Leeks have a beautiful shape and a long harvest window.
Leek
So often overlooked, the leek is something to add to a container vegetable garden for two reasons:
It lasts right into the winter, making it perfect for gardeners wanting a long harvest window
It has a beautiful shape, and makes an excellent centrepiece in a decorative fall container.
(Makes a nice centrepiece in a fall planter, surrounded by colourful Swiss chard and filly parsley!)
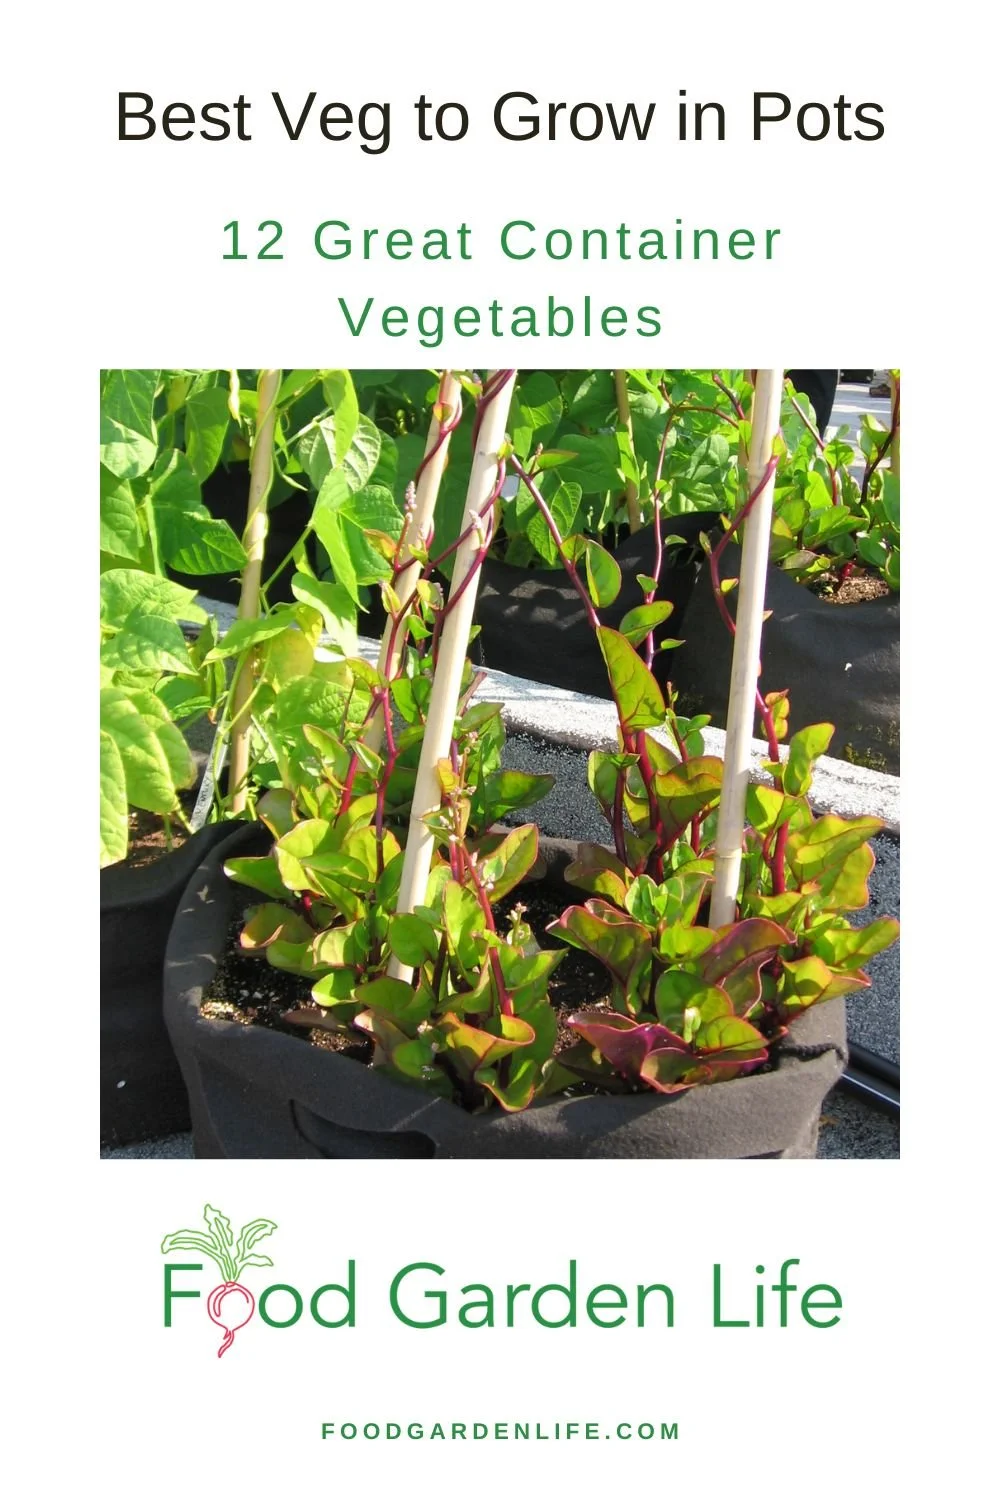
Malabar Spinach
A vining plant with edible stems and leaves that are a good addition to a stir fry. There’s a green variety, and also a red-leafed variety that’s very beautiful.
It’s a great crop for vertical gardening.
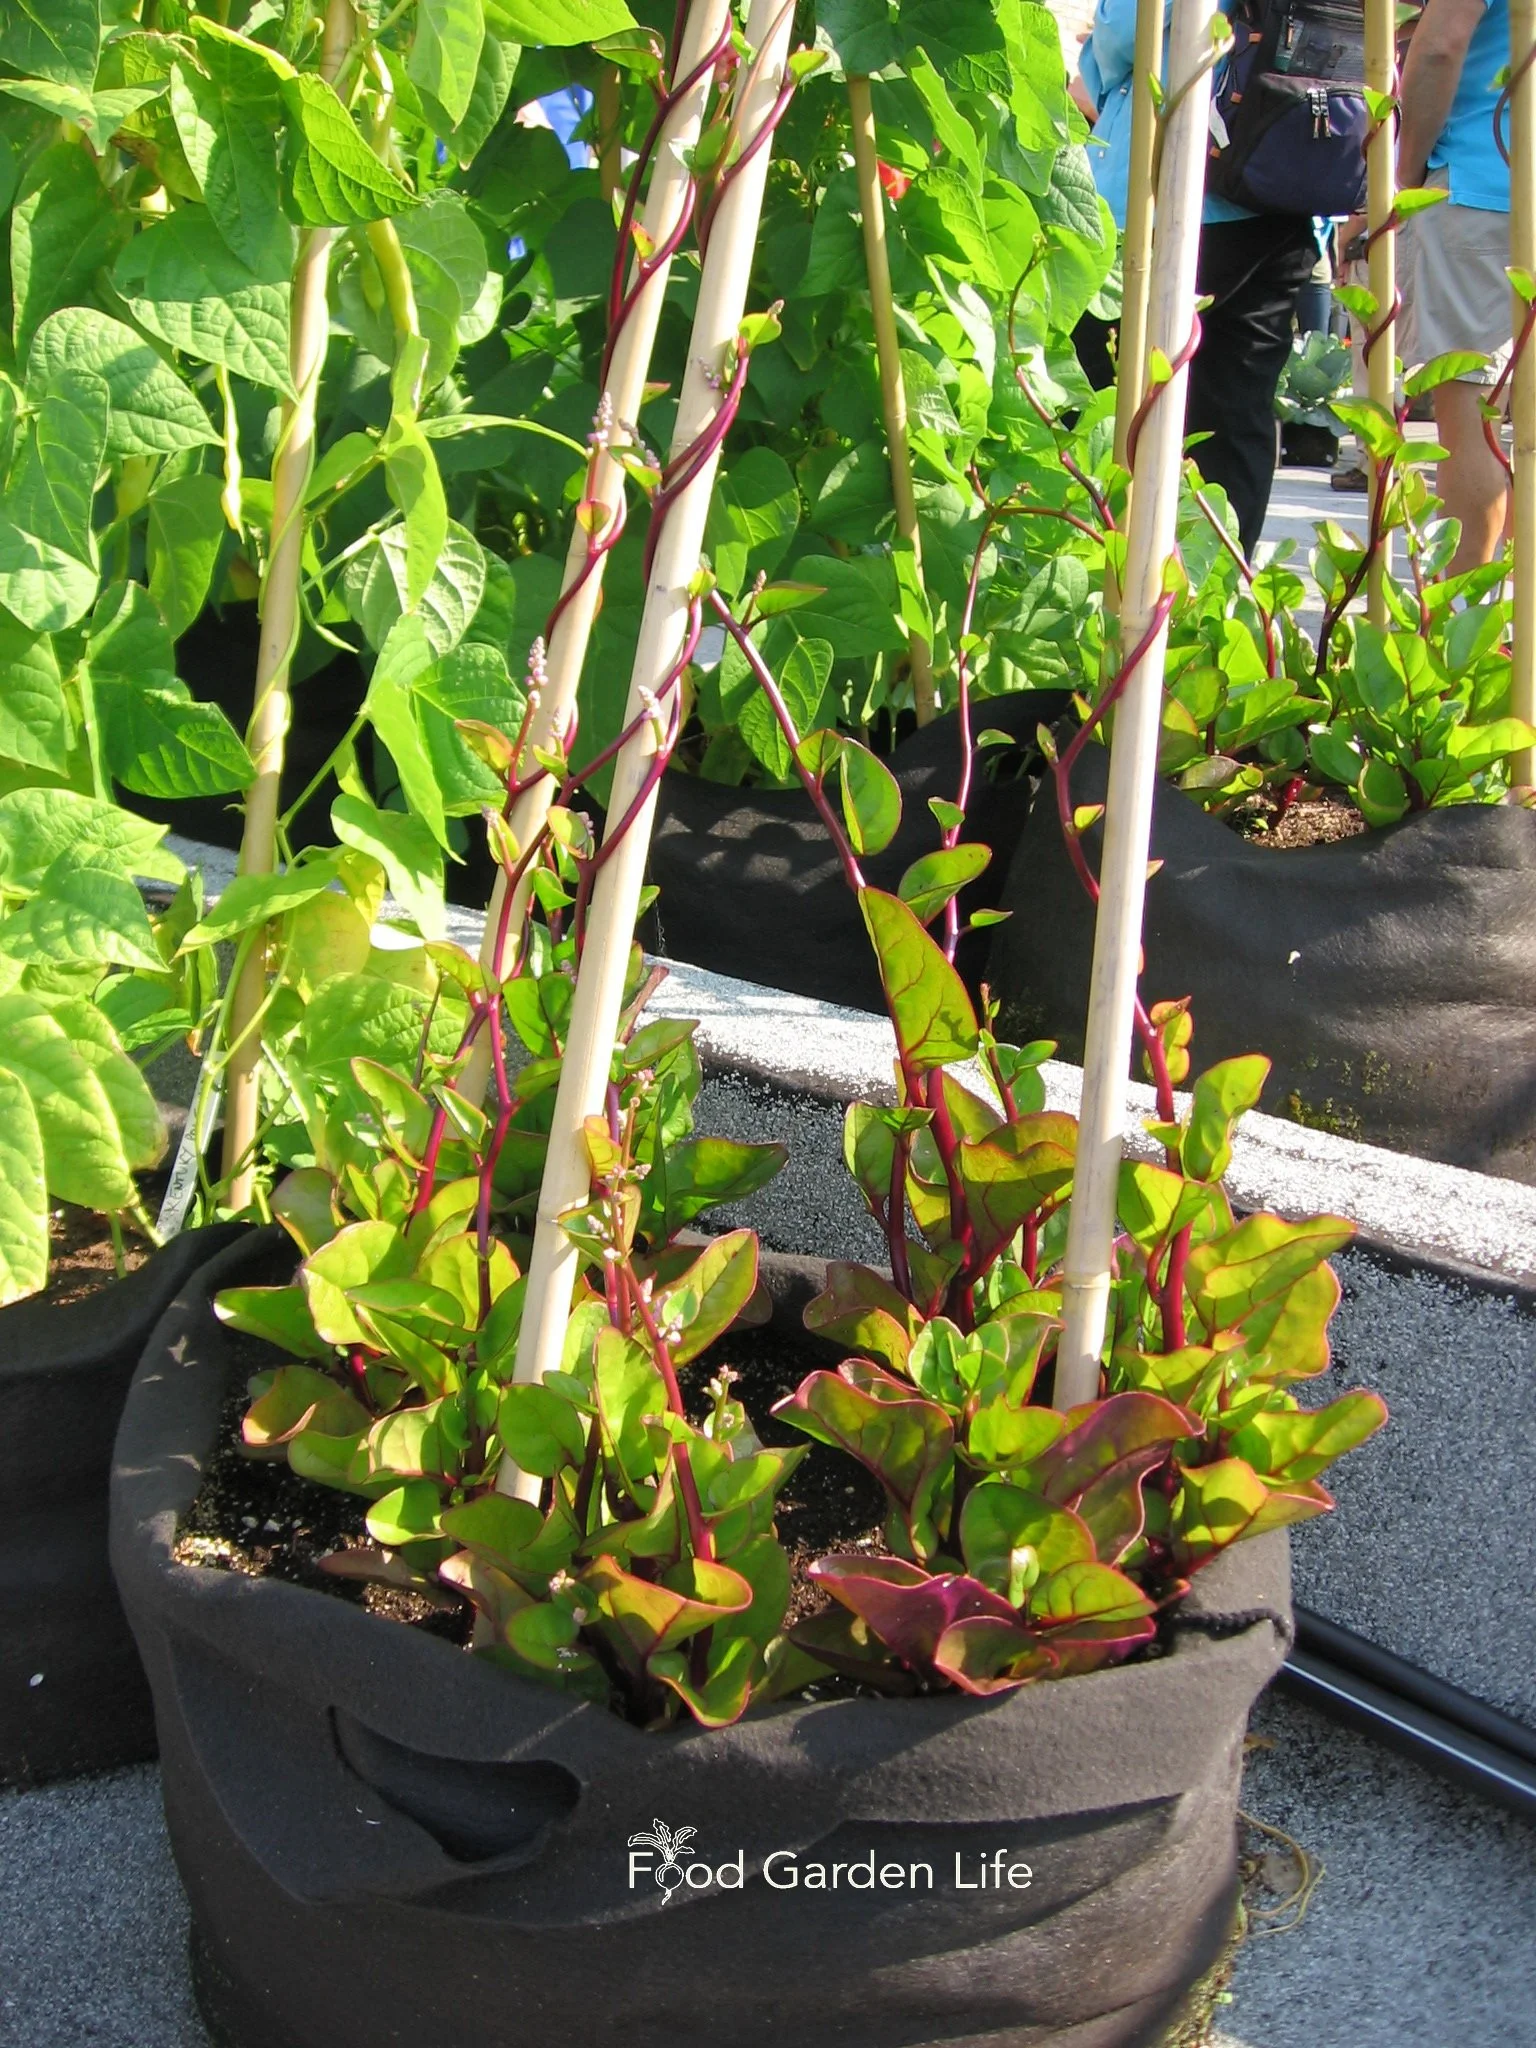
Malabar spinach is a great vegetable to grow in containers because it looks beautiful, produces a lot in a small space, and thrives in the heat.
Okra
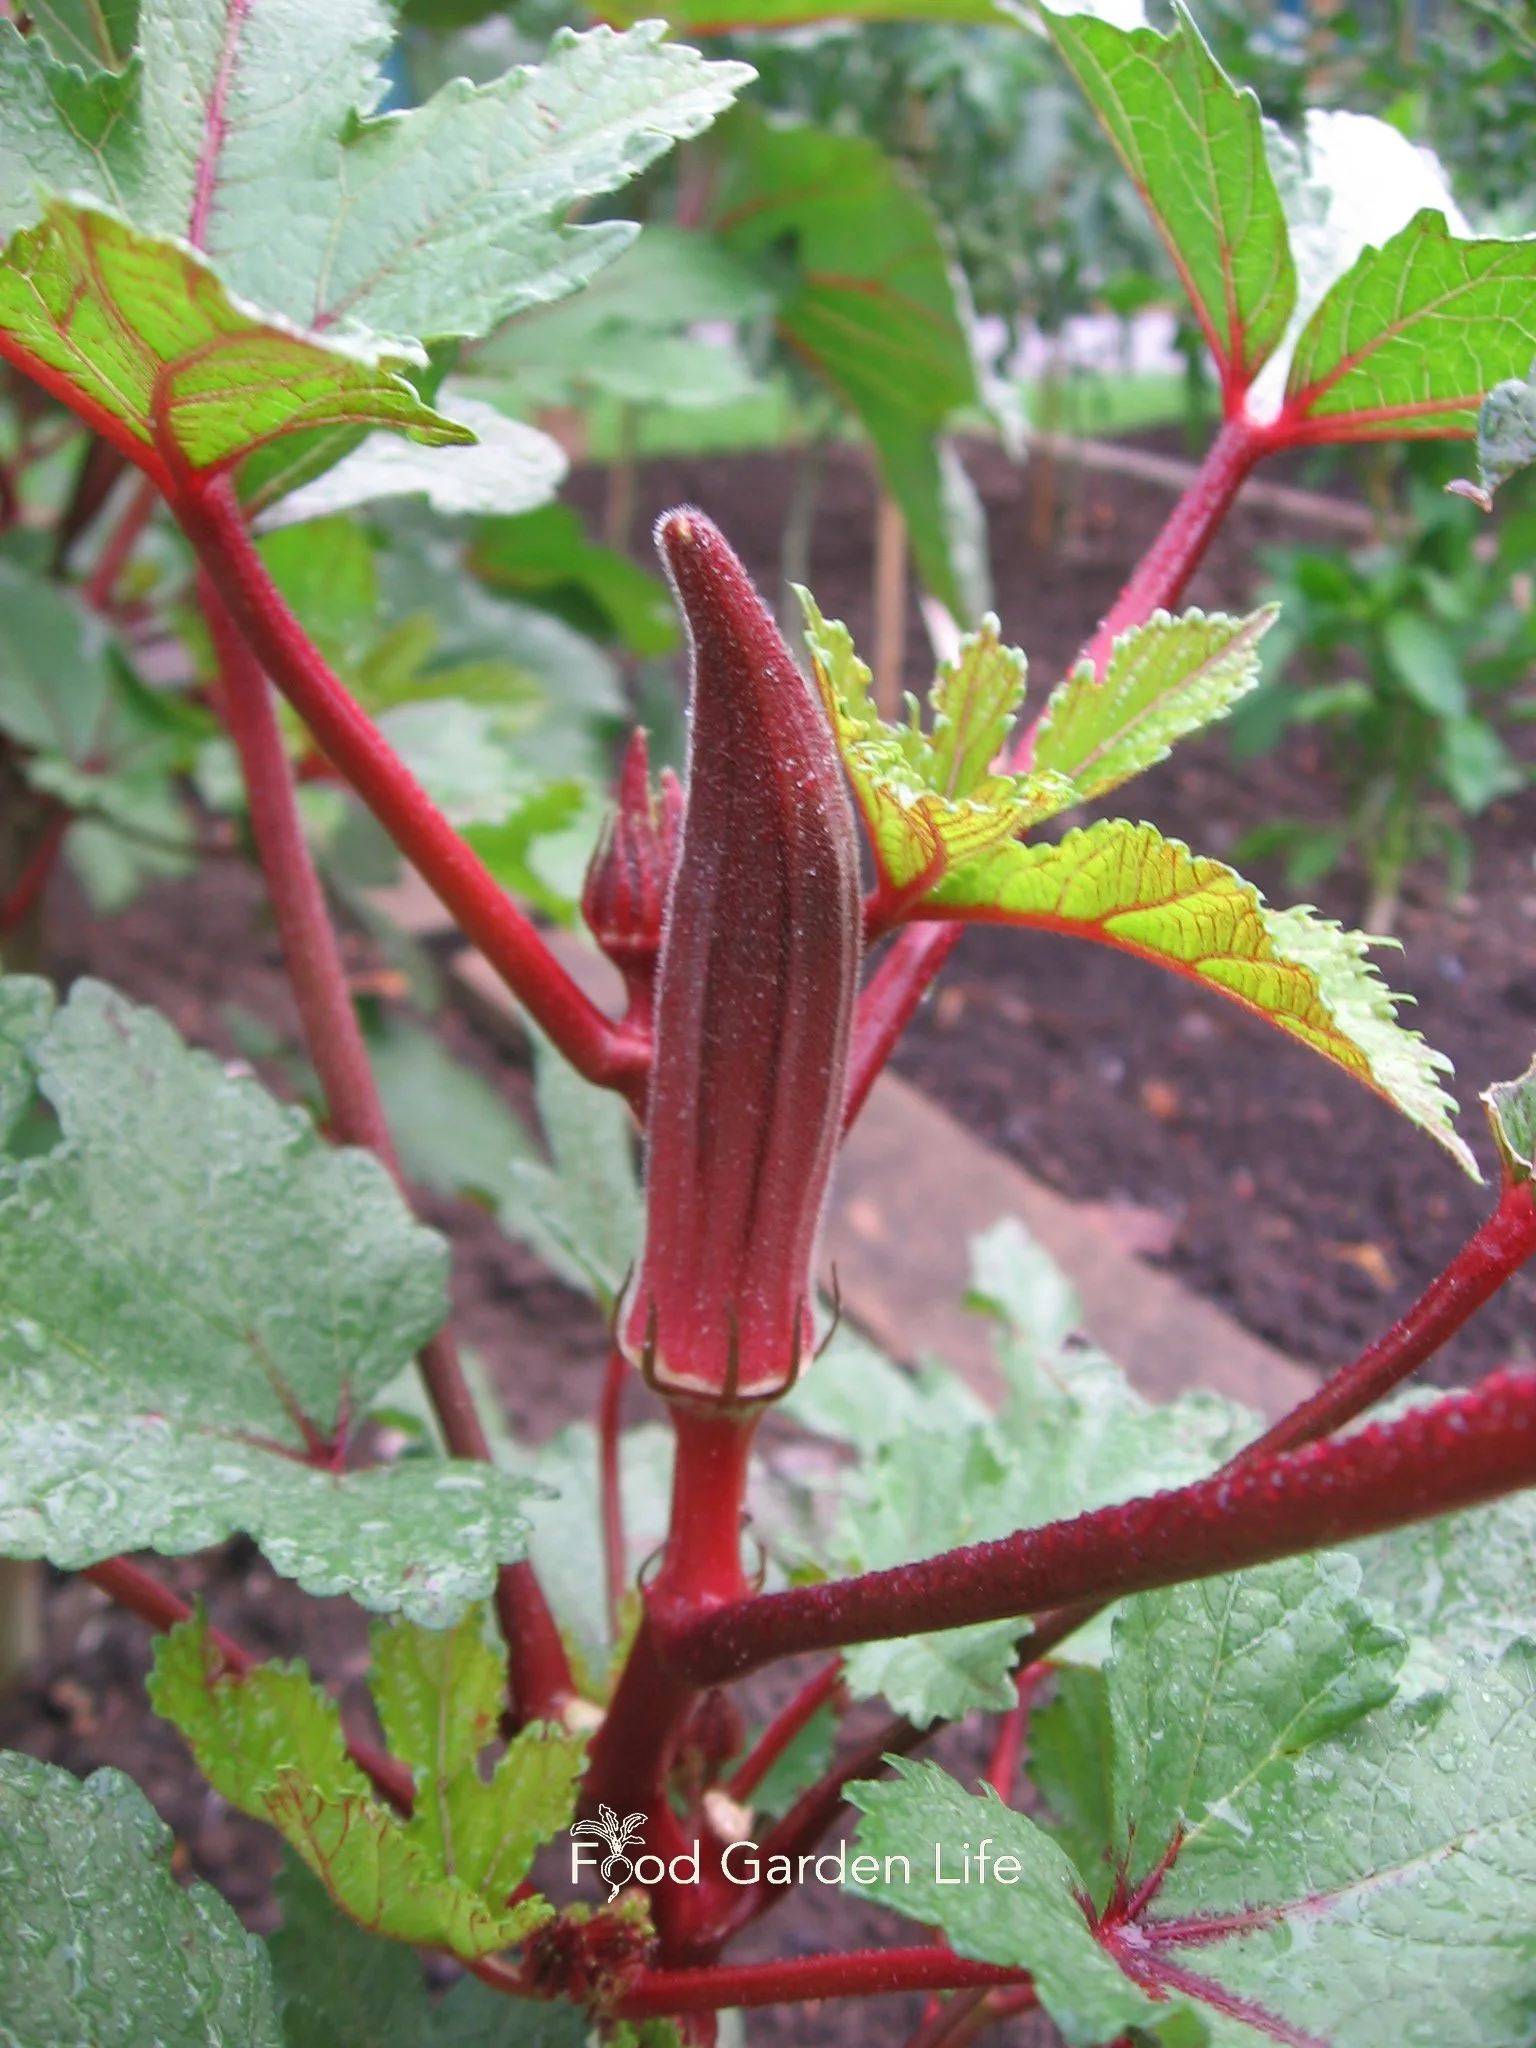
Red-podded okra.
Okra loves heat, making it a good choice for containers in sunny locations.
The red-podded varieties are beautiful, with red stems and red veins on the leaves. Nice ornamental value.
Here’s a chat with the Indiana Jones of okra.
Pepper
Peppers thrive in the heat, so are very well suited to growing in containers in sunny locations.
Both sweet peppers and hot peppers do well as container plants.
Many of the hot peppers have a compact form and look beautiful when the plants are covered with colourful peppers. (A favourite around here it Chinese 5 Colour Pepper, where the peppers go through 5 colours as they ripen—it’s beautiful.)
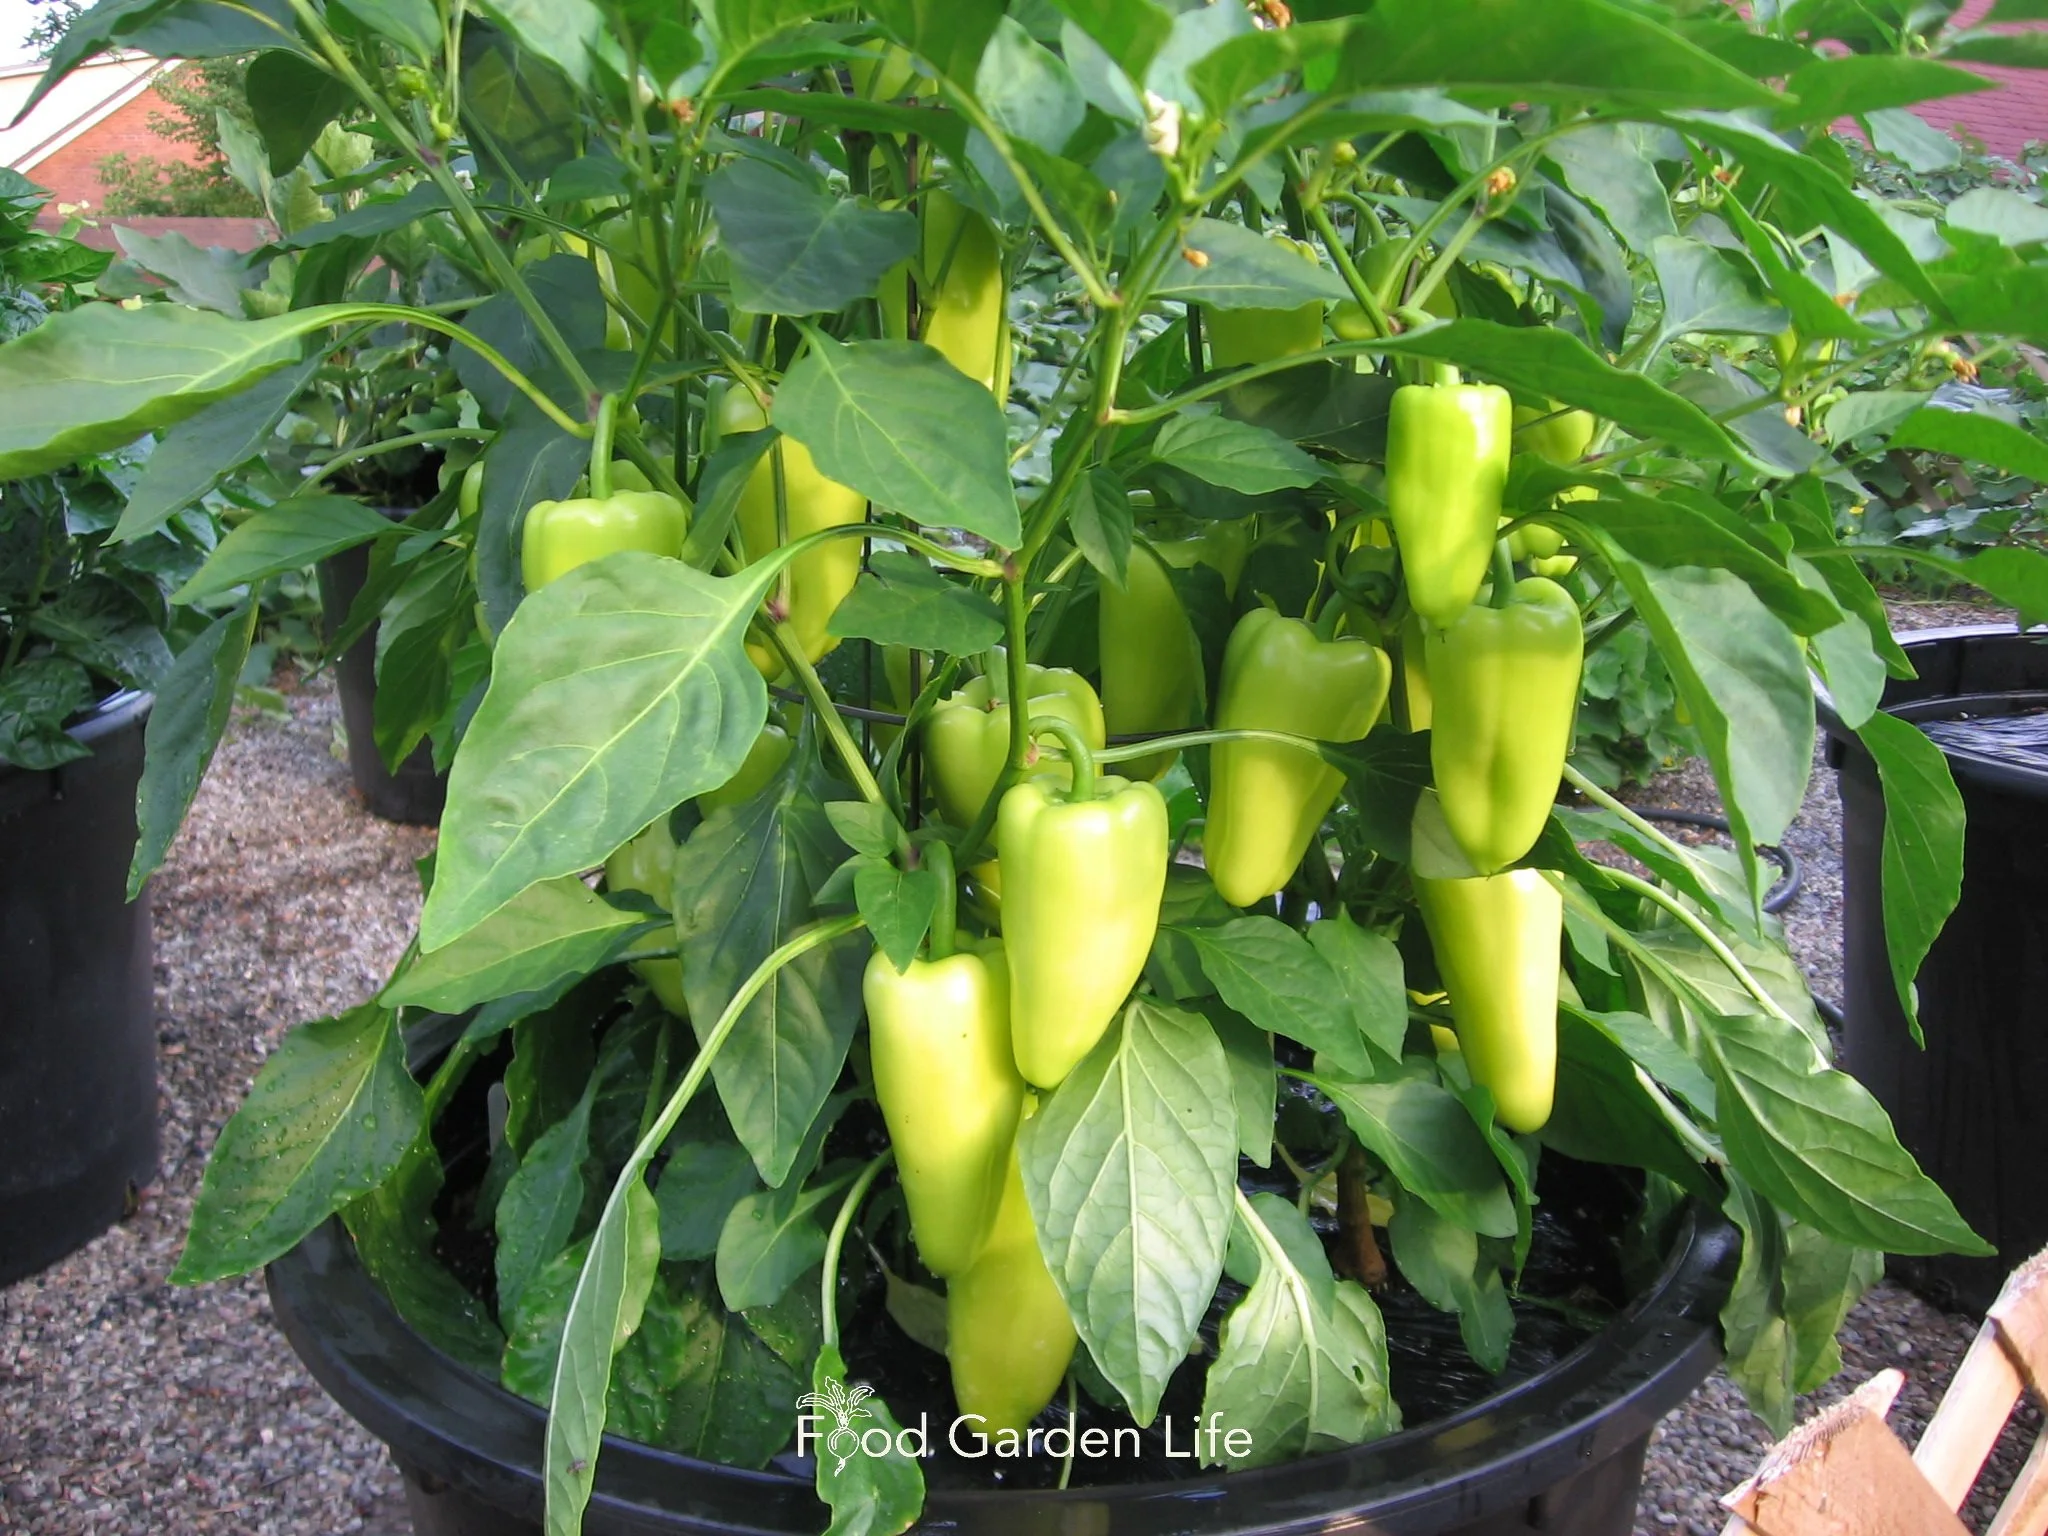
This container pepper plant is laden with peppers!
Potato
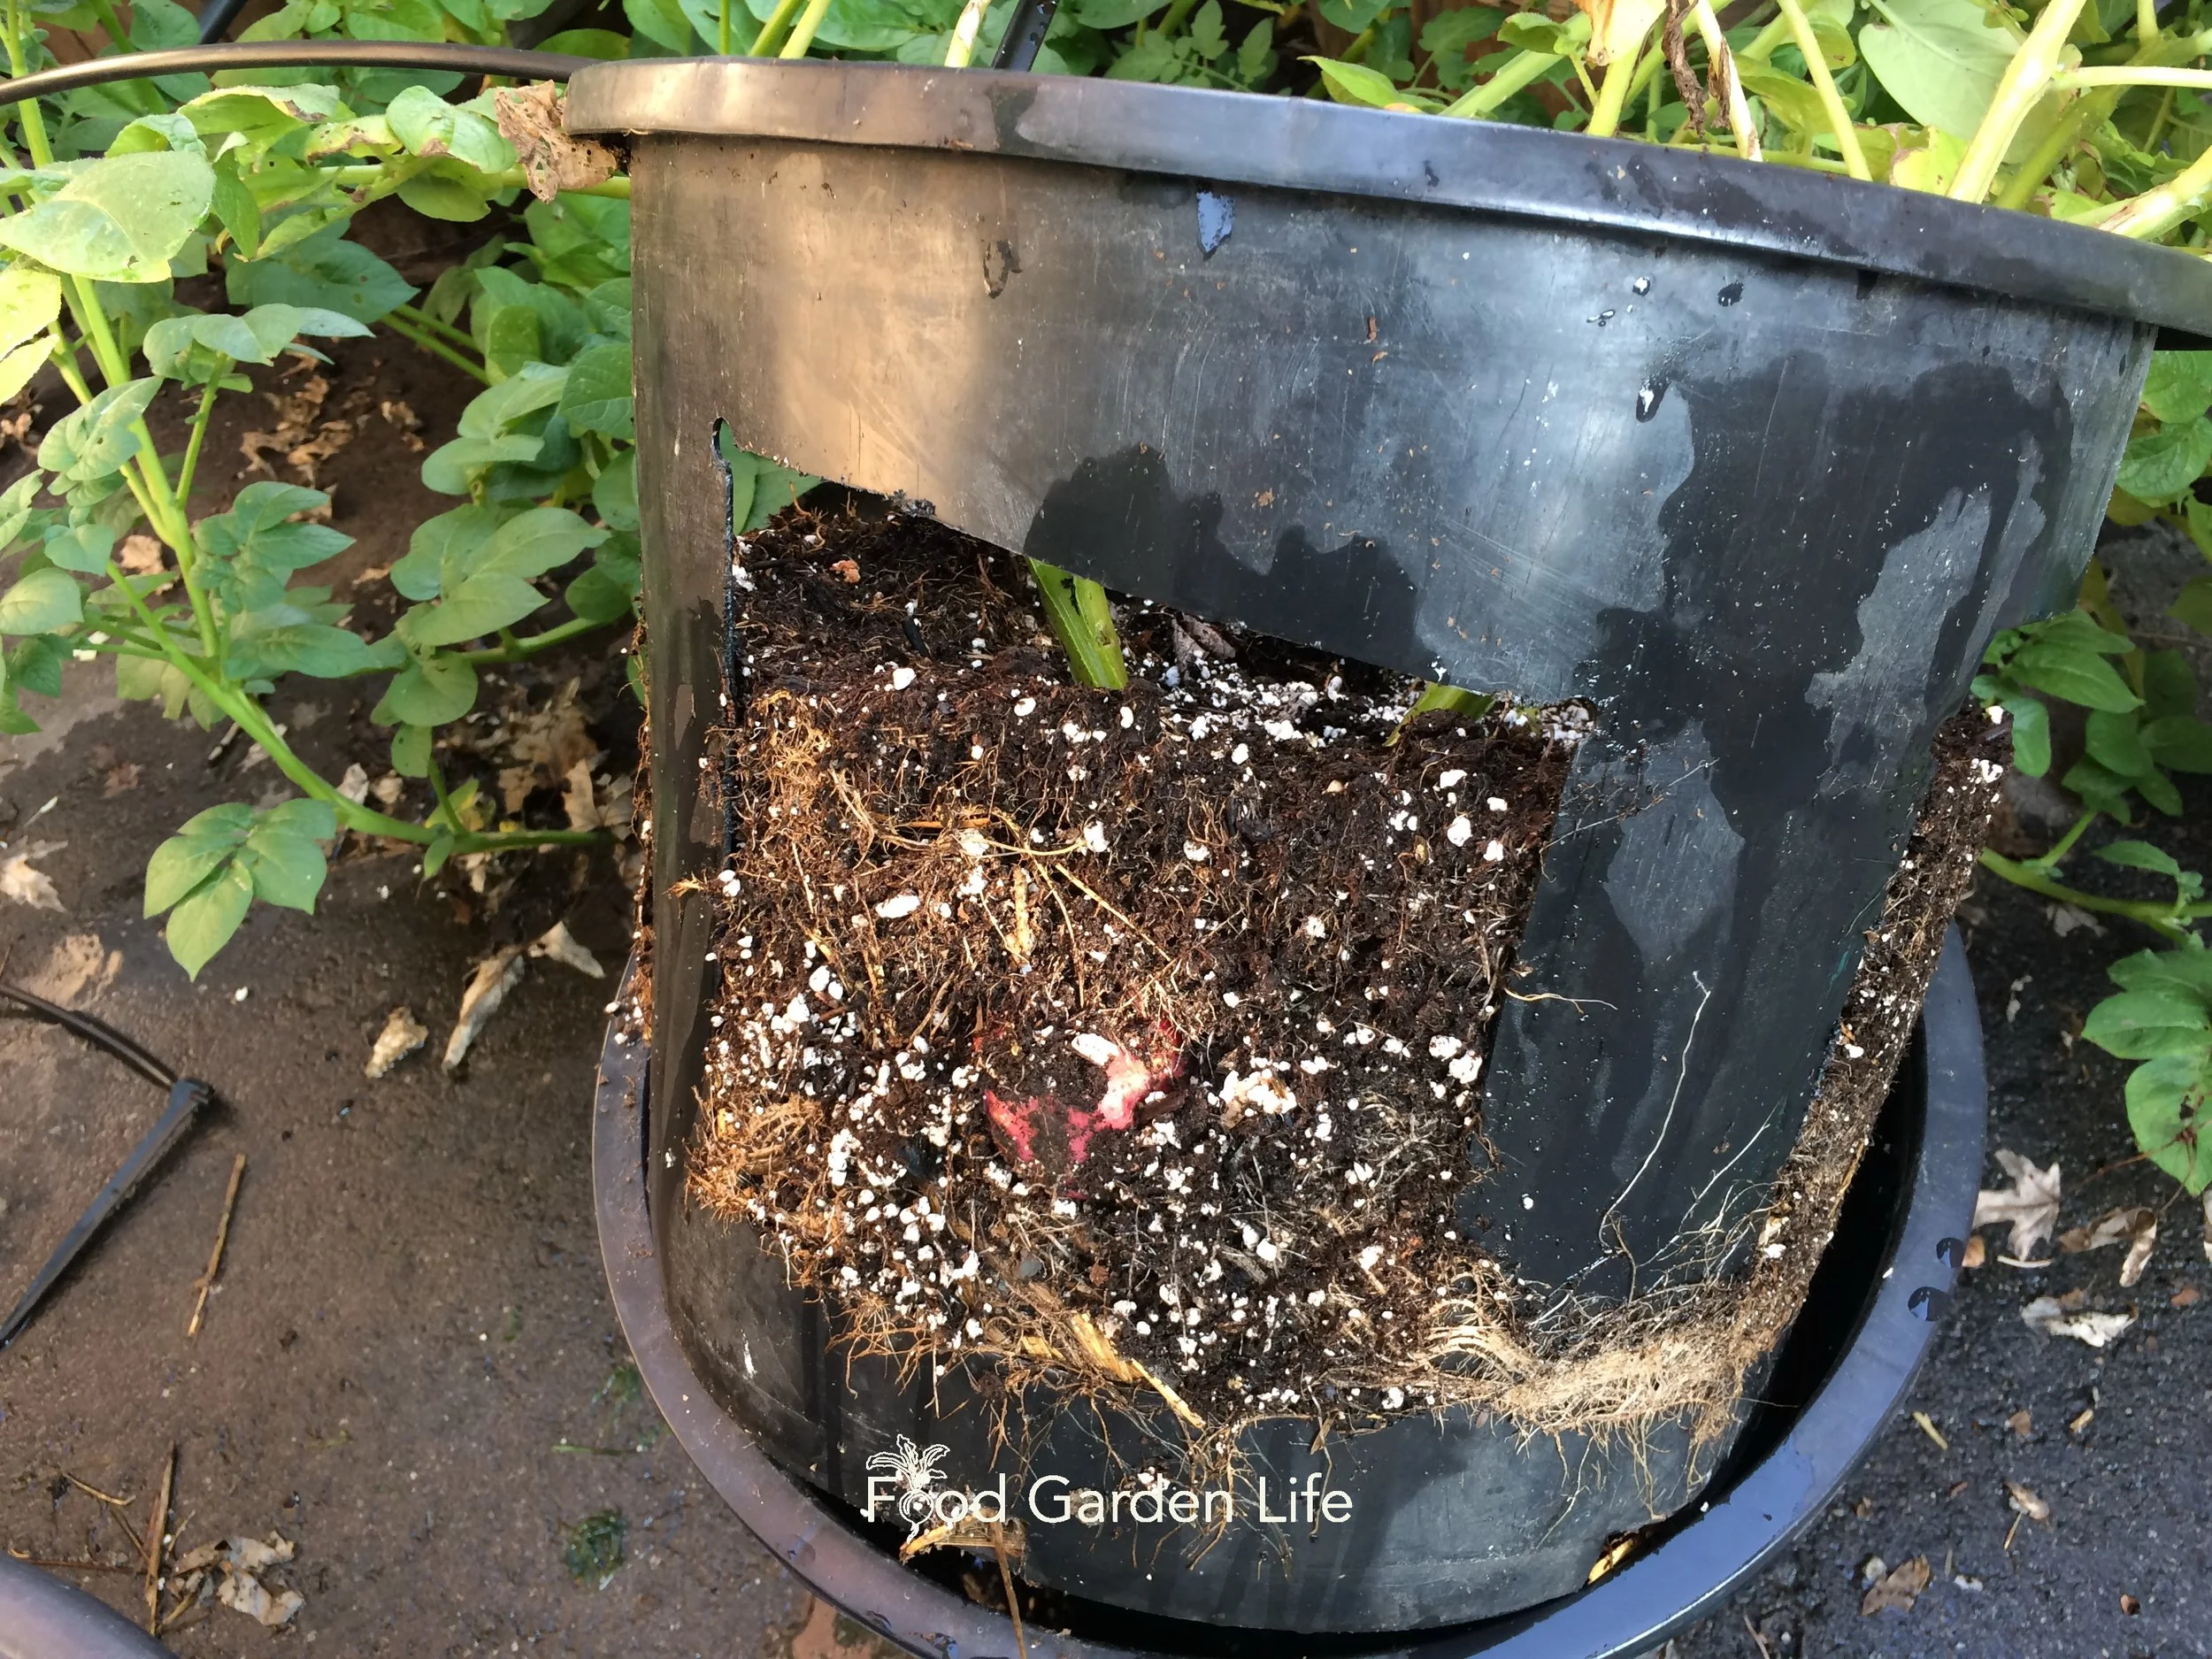
Check out this potato pot! I made it by cutting holes into a nursery pot, and then sliding the nursery pot into another one of the same size.
I love the special fingerling potato varieties that make great potato salads. Don’t waste precious container garden space on big clunky storage potatoes!
Tip: Potatoes form near the soil surface, and it’s important to keep them covered with soil so that they do not go green with exposure to sunlight. Start with just a small amount of soil at the bottom of the pot, then keep adding as the plant grows.
There are even planters with openings in the side for easy early harvest without digging up the whole plant—perfect when you only want a couple of potatoes at a time.
Swiss Chard
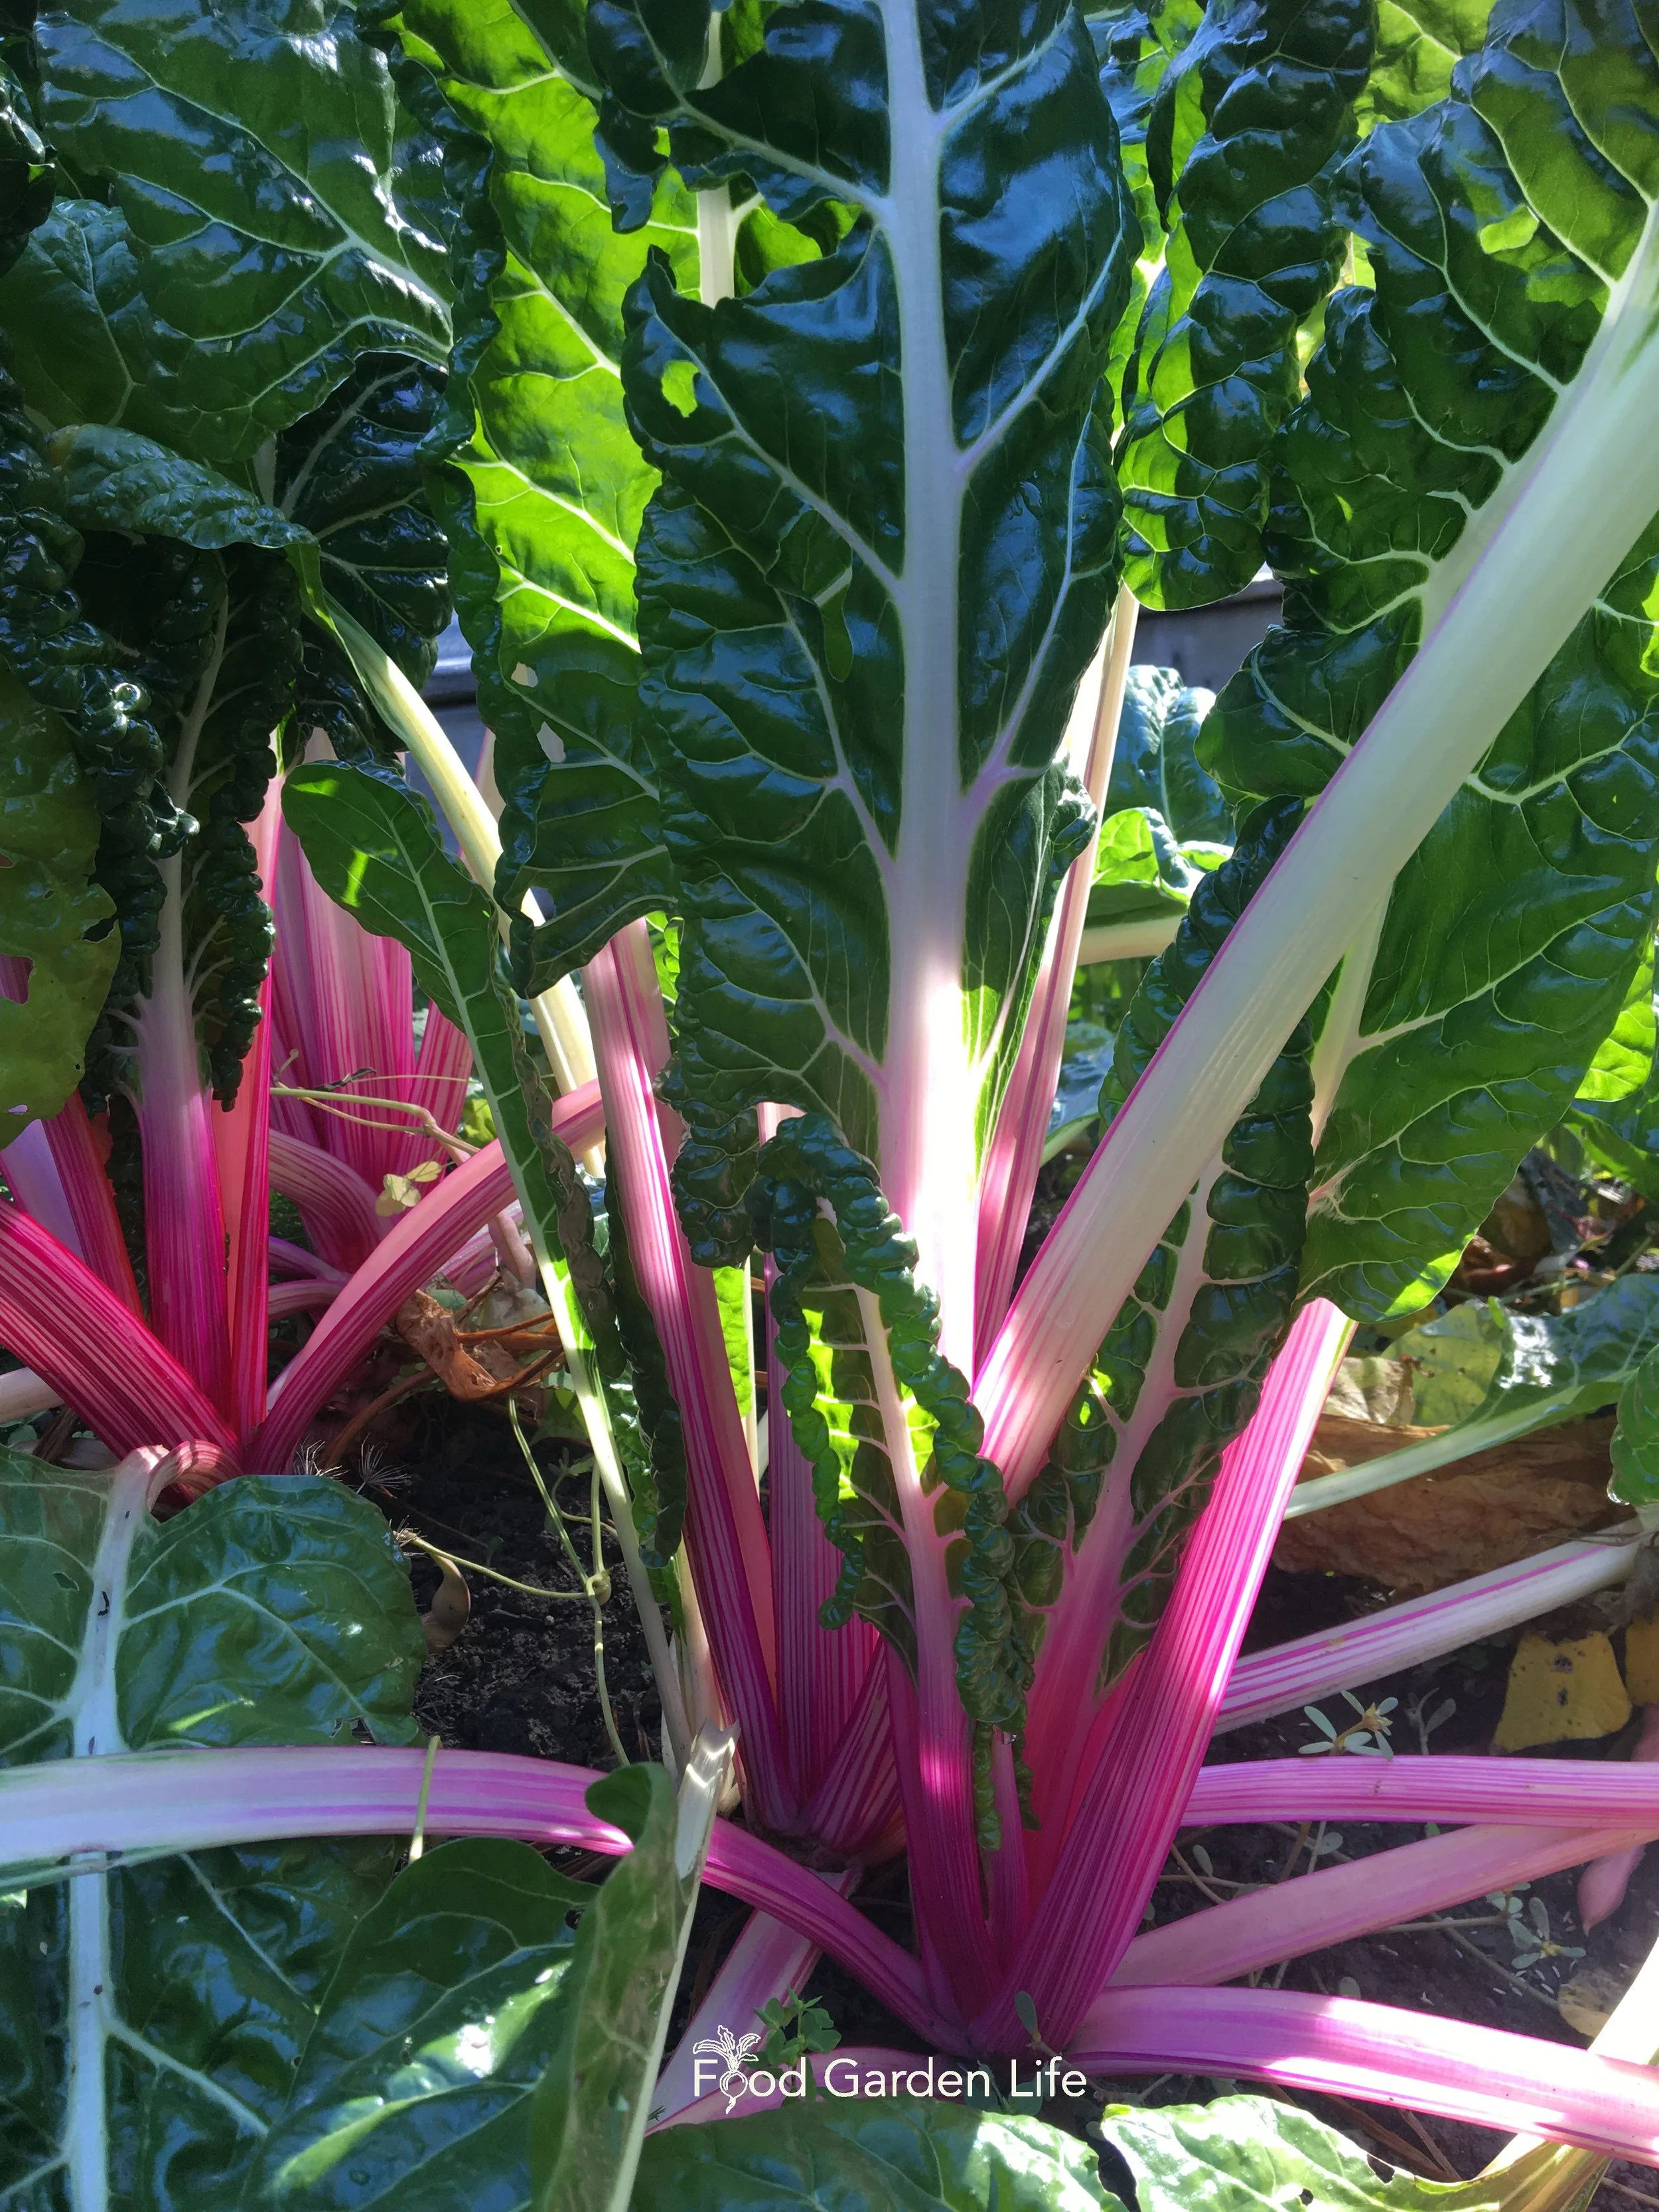
When it comes to salad greens, Swiss chard is easy to grow and long lasting.
I love Swiss chard because it keeps making leaves all summer long…while lettuce and spinach bolt at the first sniff of summer heat. This is the crop if you want leafy greens.
Chard has excellent ornamental properties as it comes in many colours. It holds up well through light fall frosts.
Chard is also a very ornamental vegetable and looks great in the fall.
Check out what chard looks like in the fall.
Tomato
For containers, look for “bush” or “determinate” tomatoes. Or the even more compact “dwarf” types.
I wish I remembered the variety that I grew in that first container garden in Montreal. It was a big, thin-skinned pinky-red coloured variety. But it wasn’t a bush type—which made it more work to stake.
‘House’ is a very compact variety that does well in containers, one that my daughter Emma often grows. Hear her chat with tomato expert Linda Crago about ‘House’ tomato and other fun tomato varieties.
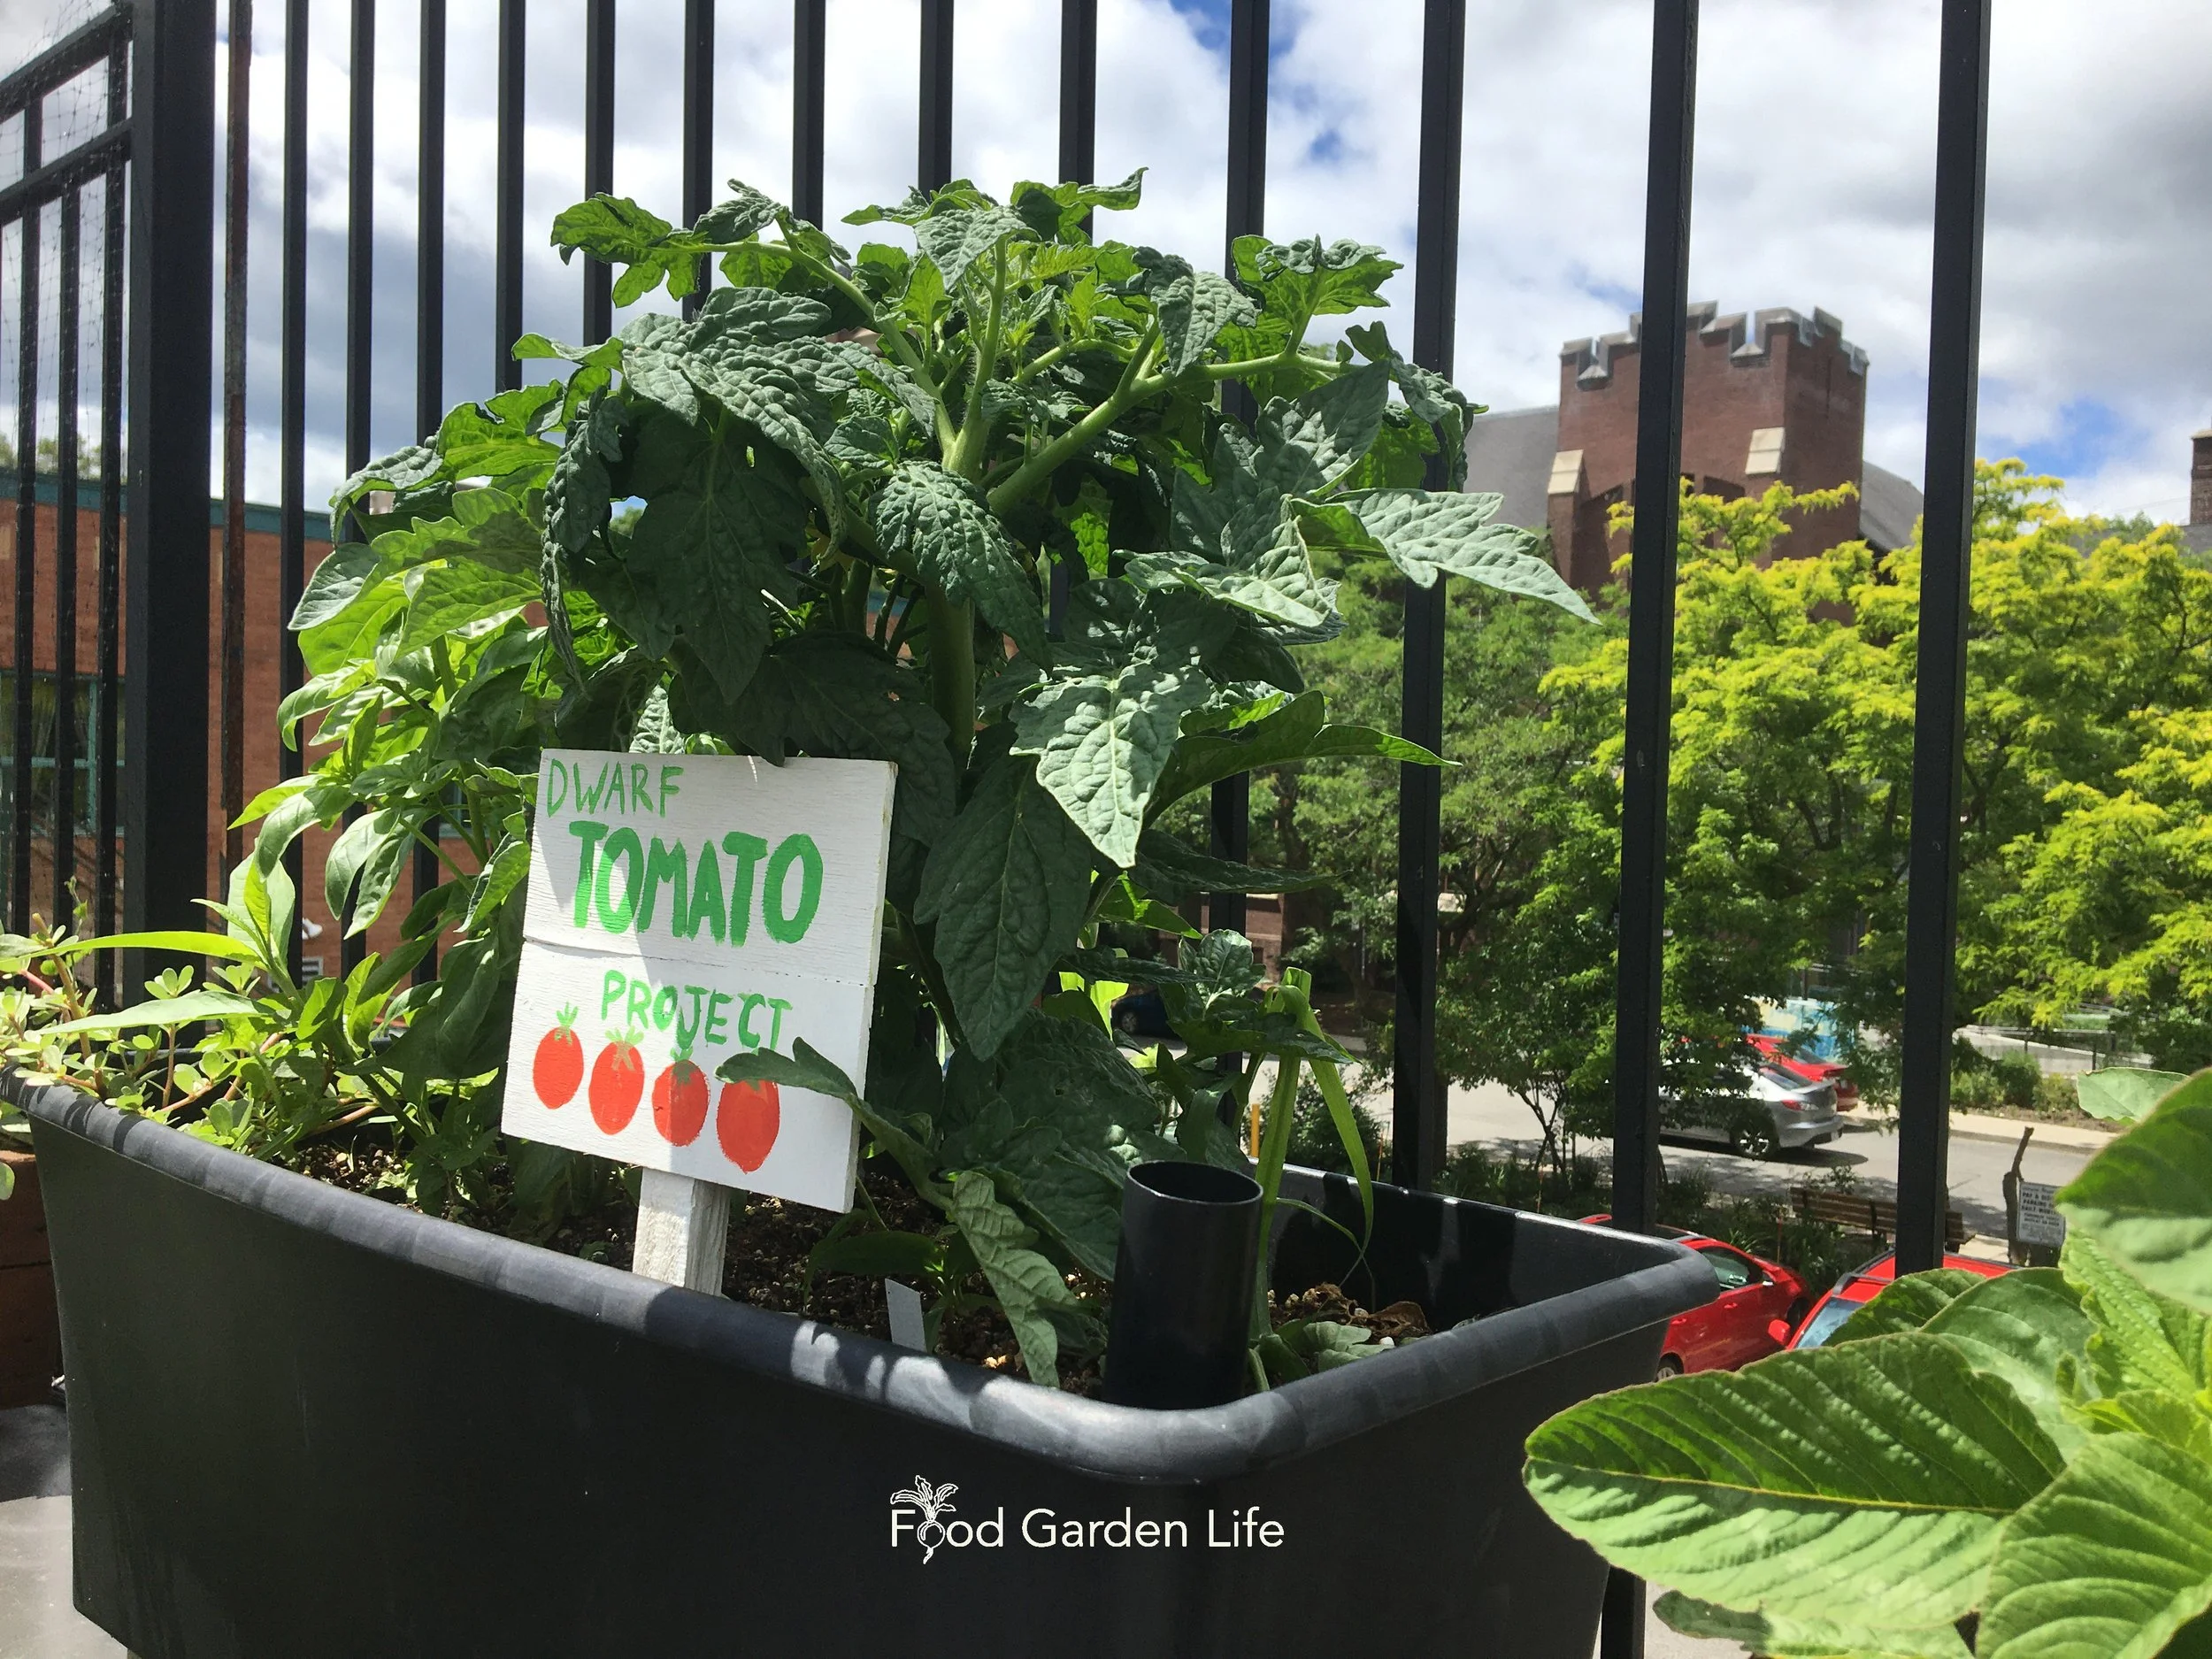
Dwarf tomatoes growing in a rooftop container. No need for staking or support!
Got Shade?
Is shade a challenge in your garden. Don’t worry, you still have lots of options. Find out vegetables that do well in the shade.
Find This Helpful?
Enjoy not being bombarded by annoying ads?
Appreciate the absence of junky affiliate links for products you don’t need?
It’s because we’re reader supported.
If we’ve helped in your food-gardening journey, we’re glad of support. You can high-five us below. Any amount welcome!
More Container Vegetable Gardening Ideas
Pin this post!
Planters with Reservoirs
“Sub-Irrigated planters” can reduce the amount of time you spend watering container gardens.
Find out about how sub-irrigated planters can cut your watering in half.
Straw-Bale Gardens
Think of straw bales as a temporary container garden. They’re quick to set up, and can give great results.
Find out more about straw-bale vegetable gardening.
Here’s a Fun Crop
Cardoon has amazing ornamental value—so it's a fun crop to consider, even if you won’t eat it.
Find out all about cardoon and how to grow and cook it.
More Articles on Vegetable Gardening
Courses: Growing Edibles
Guide: Vertical Vegetable Garden Ideas and Plants
Harvest more from the same space with these vertical-vegetable-garden ideas and vertical gardening crops.
By Steven Biggs
Vertical Gardens to Harvest More
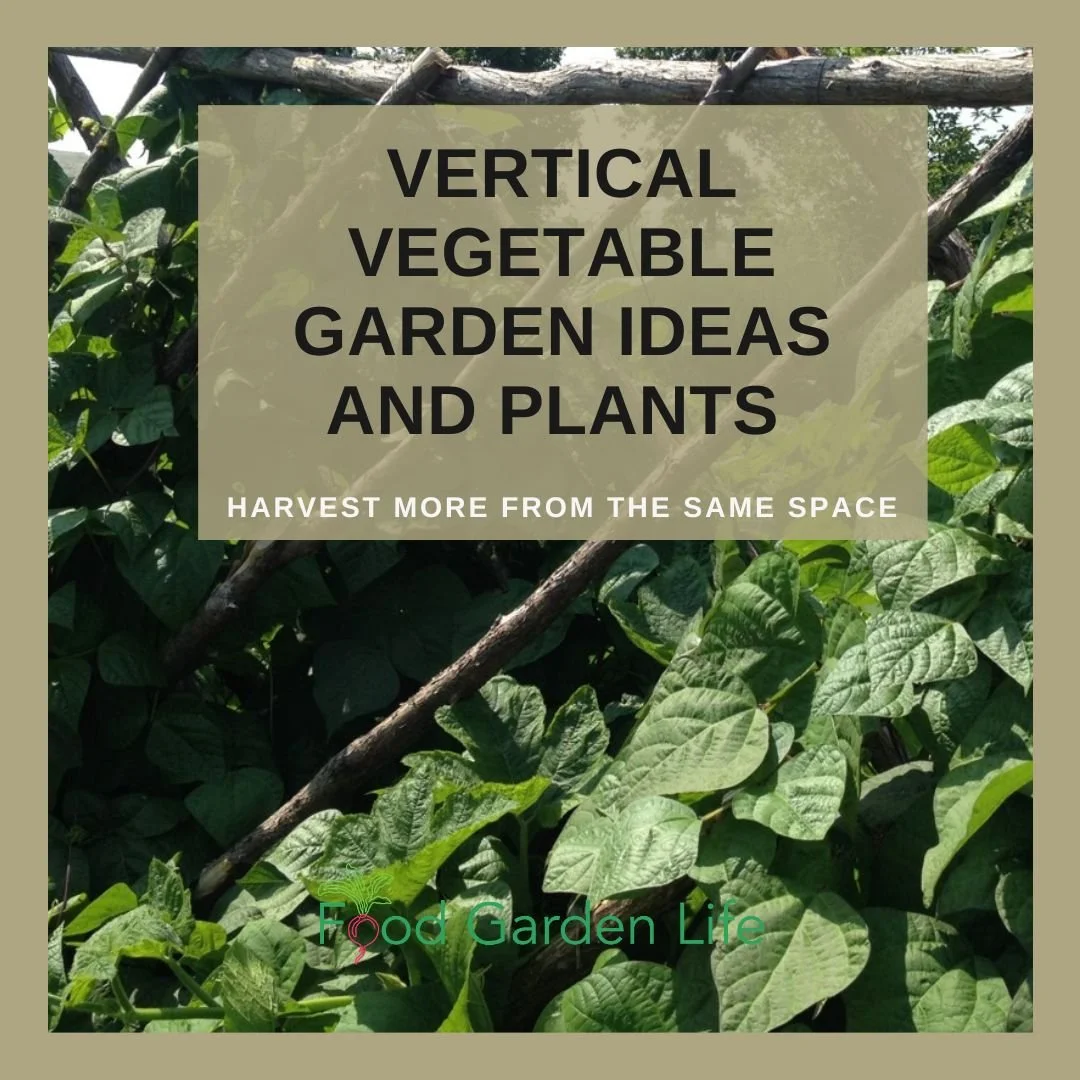
Vertical vegetable gardening squeezes more plants into a limited space by making use of space above the ground.
By growing sprawling plants upwards, there’s space on the ground to grow more plants.
Other Vertical Garden Benefits
Along with making it possible to grow more plants in the same space, a vertical vegetable garden has a couple of other benefits:
Vertical vegetable gardens for easy harvests. Less bending, because crops are raised
Vertical Gardens Help Provide Shade. Some crops do better in partial shade during the summer. Leafy vegetables grown on the ground space in the shade of a vertical vegetable garden are sheltered from the midday sun.
If you’re interested in creating more growing space to grow vegetables, keep reading. This article includes vertical garden crops, vertical vegetable garden ideas, and easy-to-work-with materials to make supports and trellises.
How to Add Vertical Crops to a Garden
Vertical Vegetable Garden Ideas
There are many ways to add vertical elements to a vegetable garden.
Look for ready-to-use products if you want to start small. It can be something as simple as a tomato cage to support a vining plant—or a window box for cascading herbs.
There are also lots of creative ways to make your own support structures so that you can grow vertically.
Add Tiers with Containers
Containers are a simple way to fit more plants into a garden. Having different tiers means that the canopies of different crops aren’t competing for space at the same level.
Another advantage of containers is that they make it possible to add a crop to an area where there is root competition from a neighbouring crop.
Fences to Support Vines

Squash growing on a fence as part of a vertical vegetable garden.
Fences can be a great opportunity to grow a vertical garden. If the space next to the fence is paved, consider growing in a container.
Tie tomato plants to a chain-link fence
Run twine along a board fence for cucumbers and other vining plants
Grow strawberries or herbs in planters fastened to the fence
Hanging Baskets and Hanging Planters
Vertical gardening doesn’t always mean training a plant upwards.
It can include plants dangling down. A hanging garden.
There are lots of crop options for hanging baskets. Here are ideas to get started:
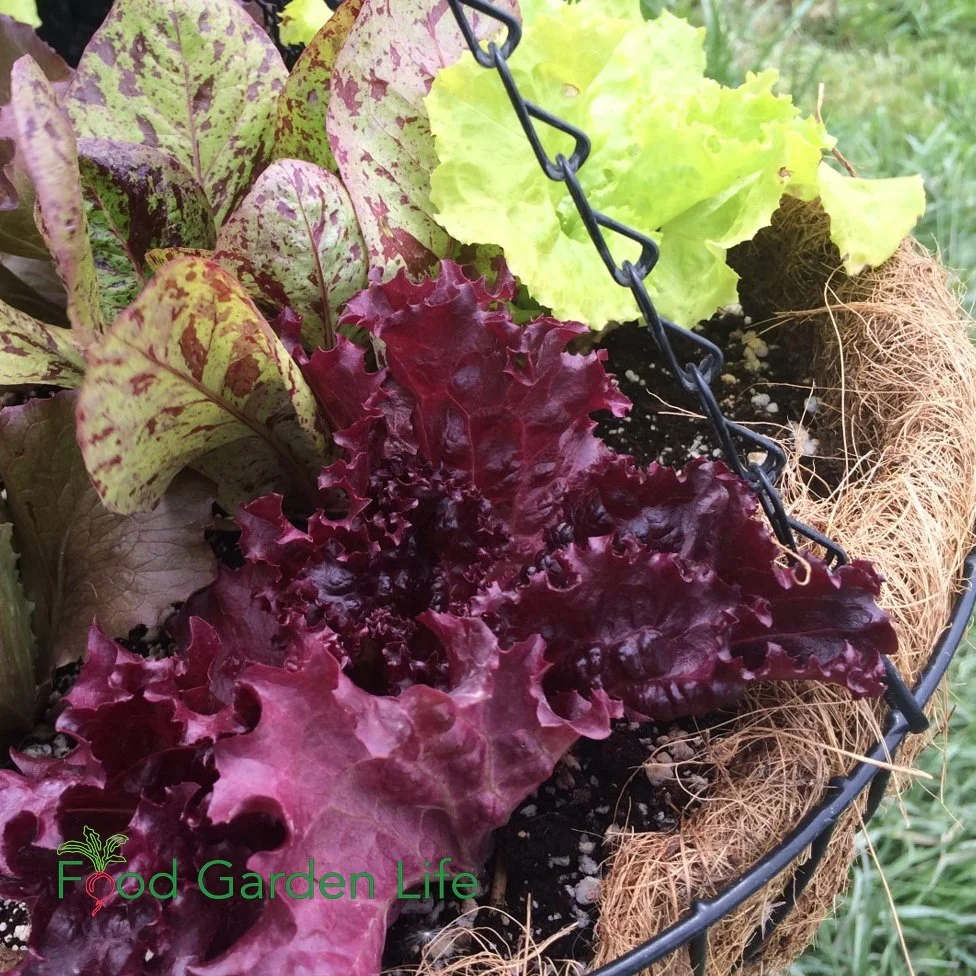
Add hanging baskets to vertical vegetable gardens.
Strawberries
Tomato plants
Herbs
Salad greens for hanging baskets in partial shade
Trailing nasturtiums (edible flowers!)
Stakes for a Vertical Vegetable Garden

Staked tomatoes leave space for some parsley plants at the ground level.
When staking a plant and growing it upwards you’re opening up space below for another crop. For many gardeners, the sight of staked tomatoes is familiar. Now picture those tomato plants with lettuce or parley underneath.
Some plants can wrap around or grab onto a stake. Other, such as tomatoes, must be tied to the stake.
Self-Supporting Structures for Vertical Gardens
There are many ways to make self-supporting structures for vertical growing.
Even if a vertical garden structure is self-supporting, it’s a good idea to secure it to the ground with a stake so that it doesn’t topple in strong wind.
Here are a few ideas to create vertical space:
Tee Pees
A-frames
A Row of angled, crossing poles jointed together with a pole laying across the top

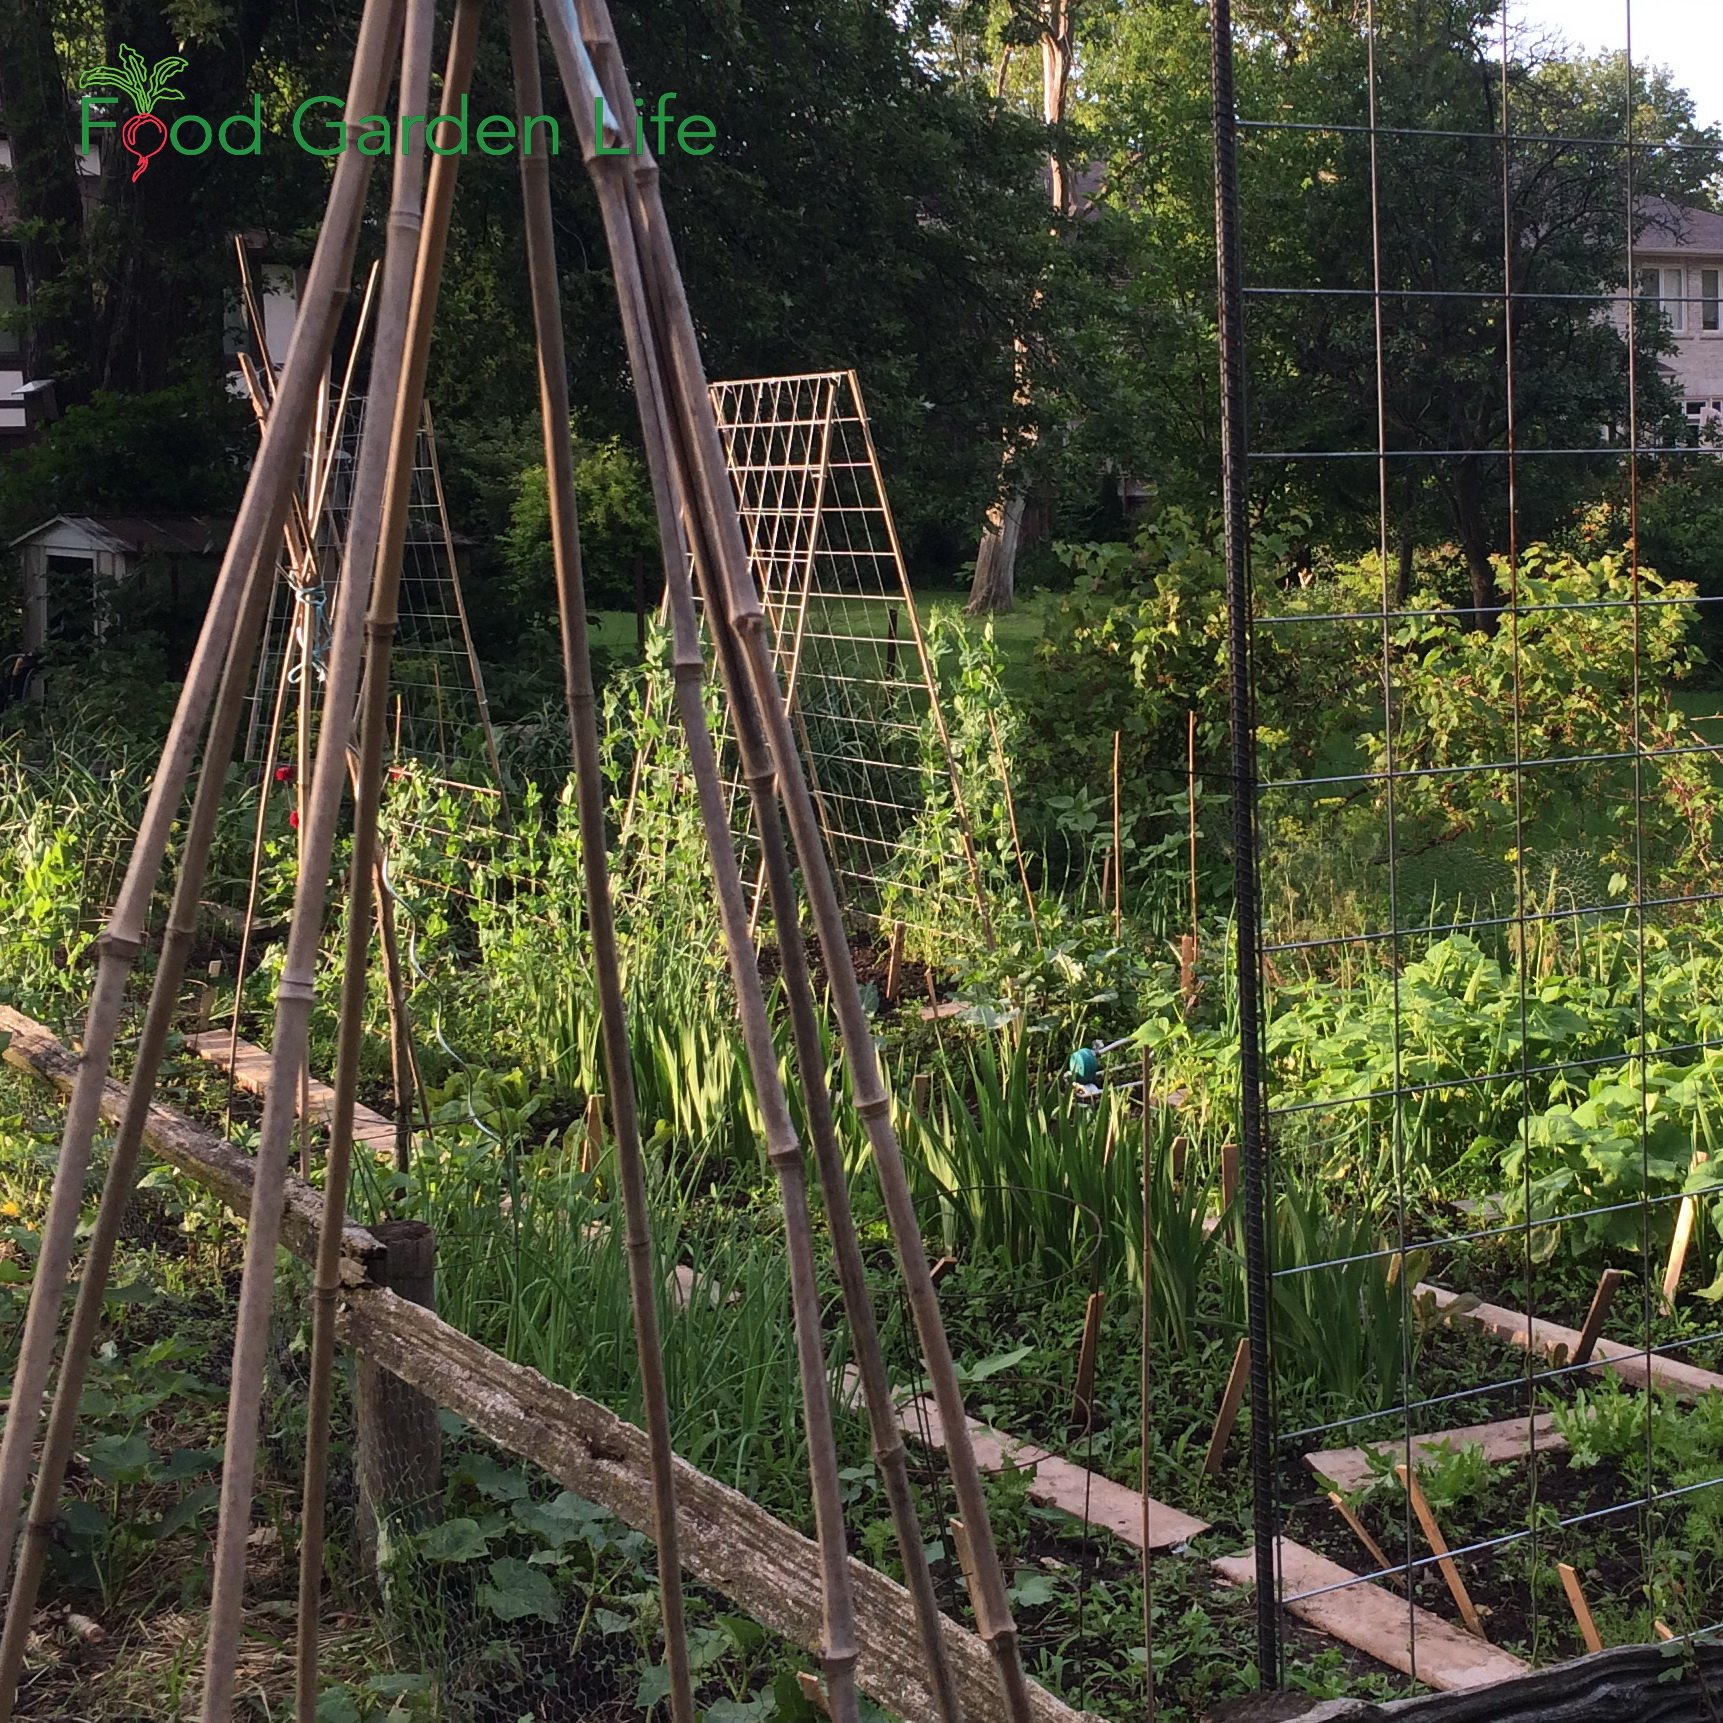
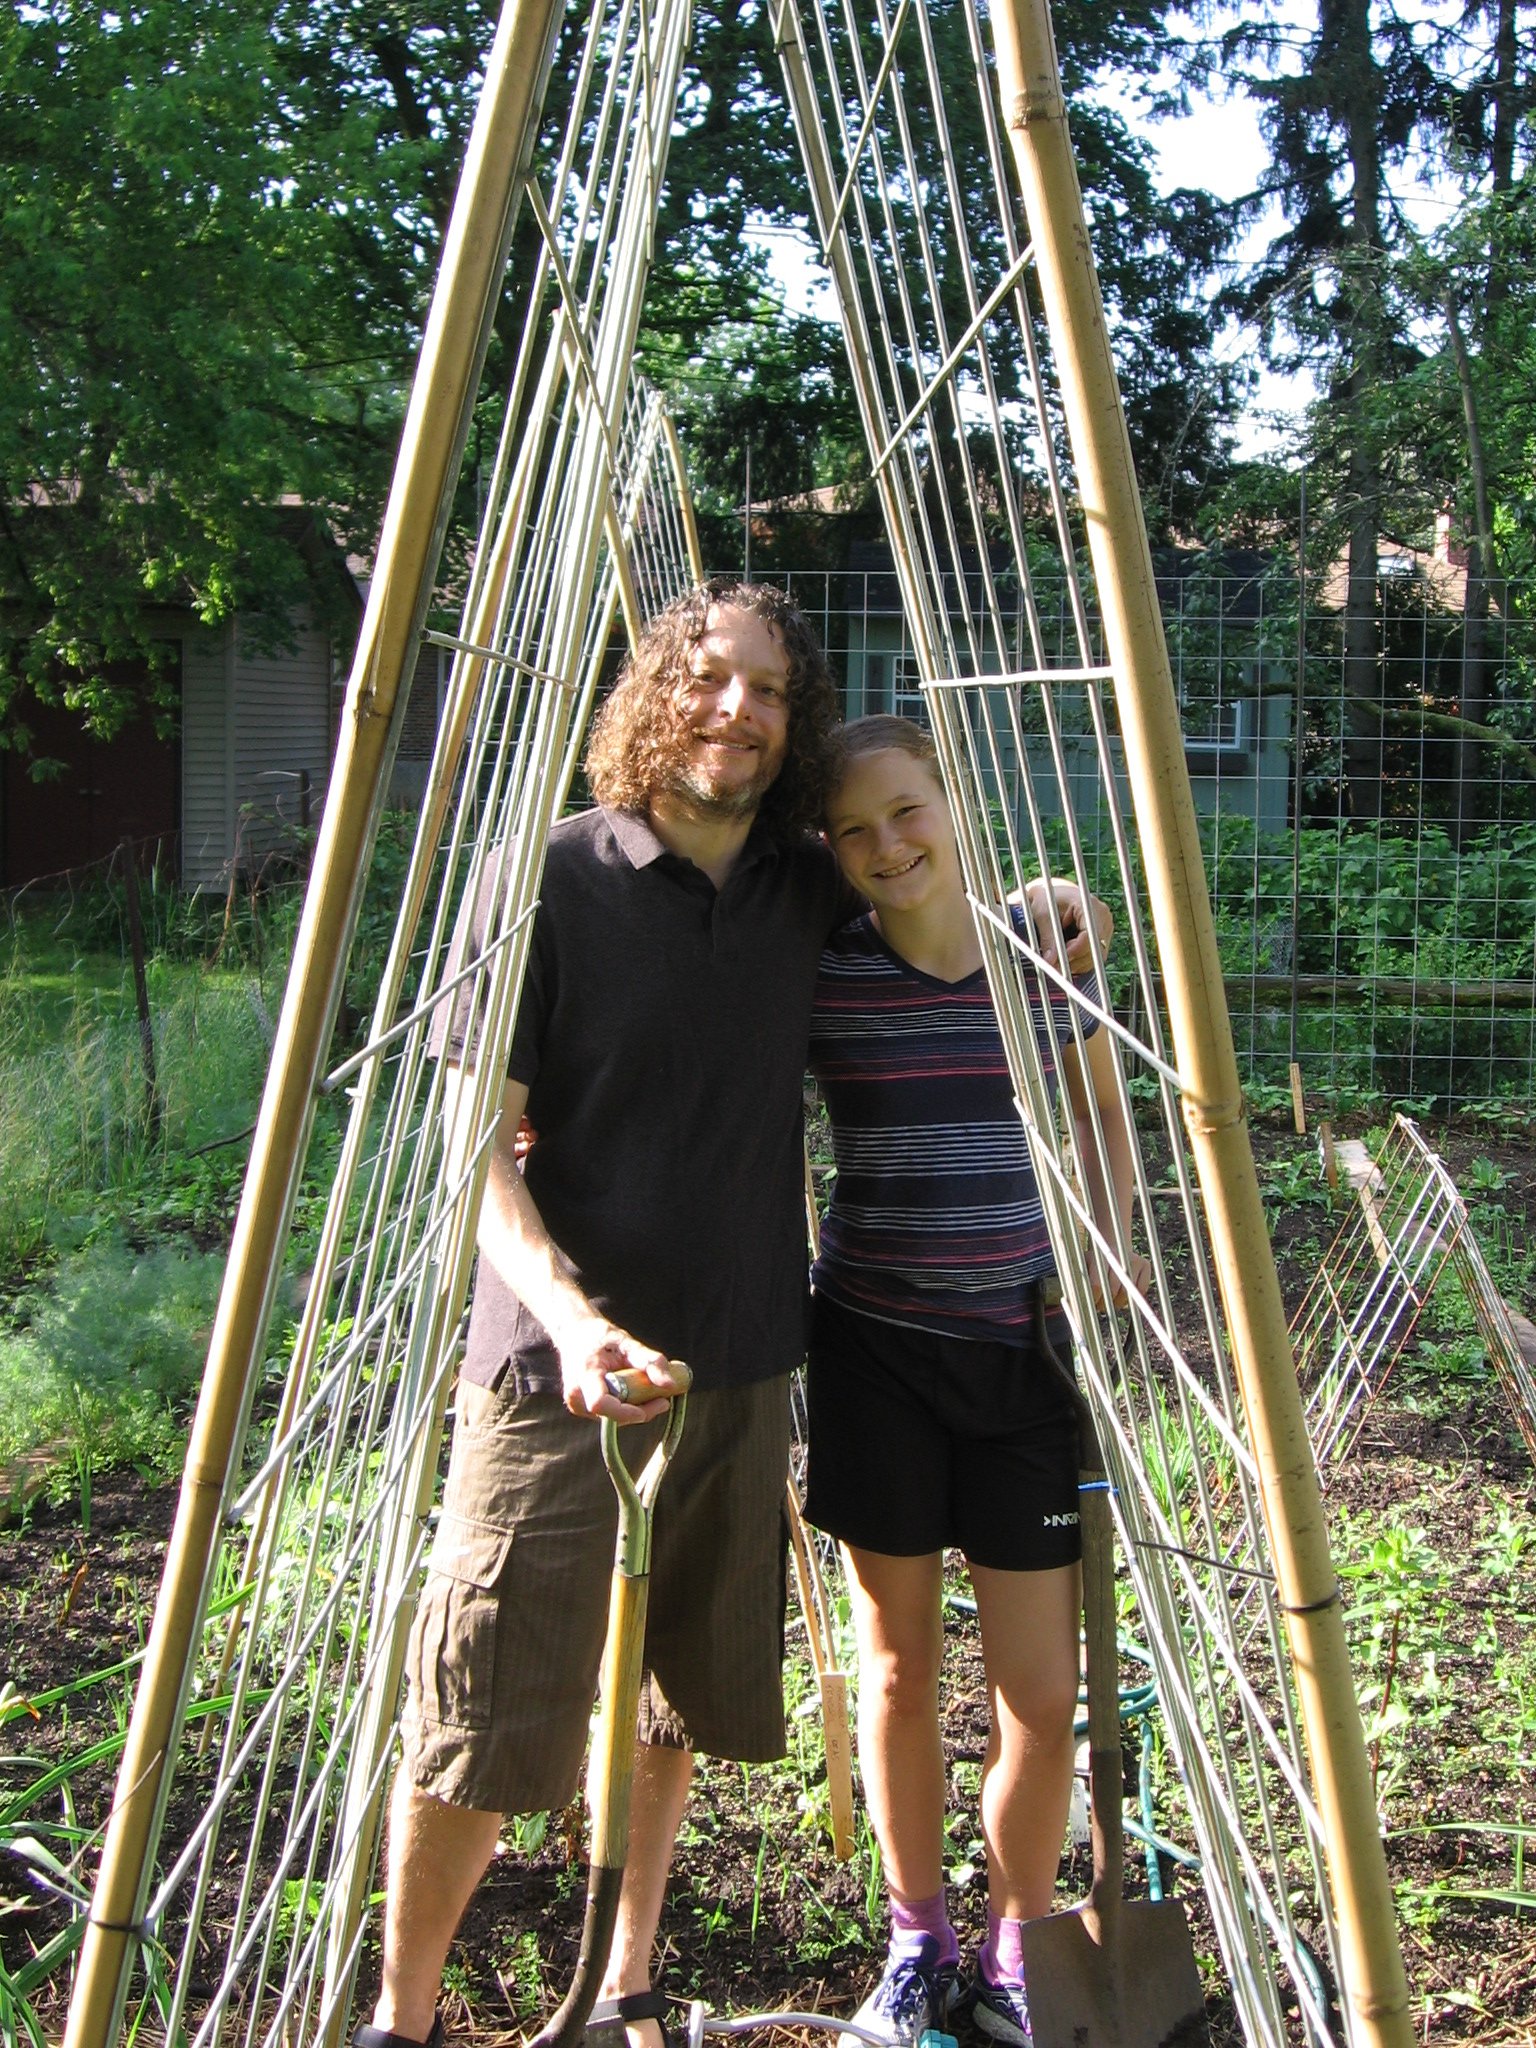
Grow food vertically using simple bamboo structures such as teepees and A-frames.
Or make more permanent structures for climbing vegetables using lumber:
Lattice-and-lumber A-frame
Wood frames from which twine can be suspended for vining crops
Wooden A-frames over which vining crops grow; and under which shade-tolerant leafy greens thrive during the summer
Or make ornamental landscape features the double as support for growing crops:
Arbours
Pergolas
Use Plants in the Landscape for Vertical Growing Space
Use plants within the landscape to support vining vertical crops:
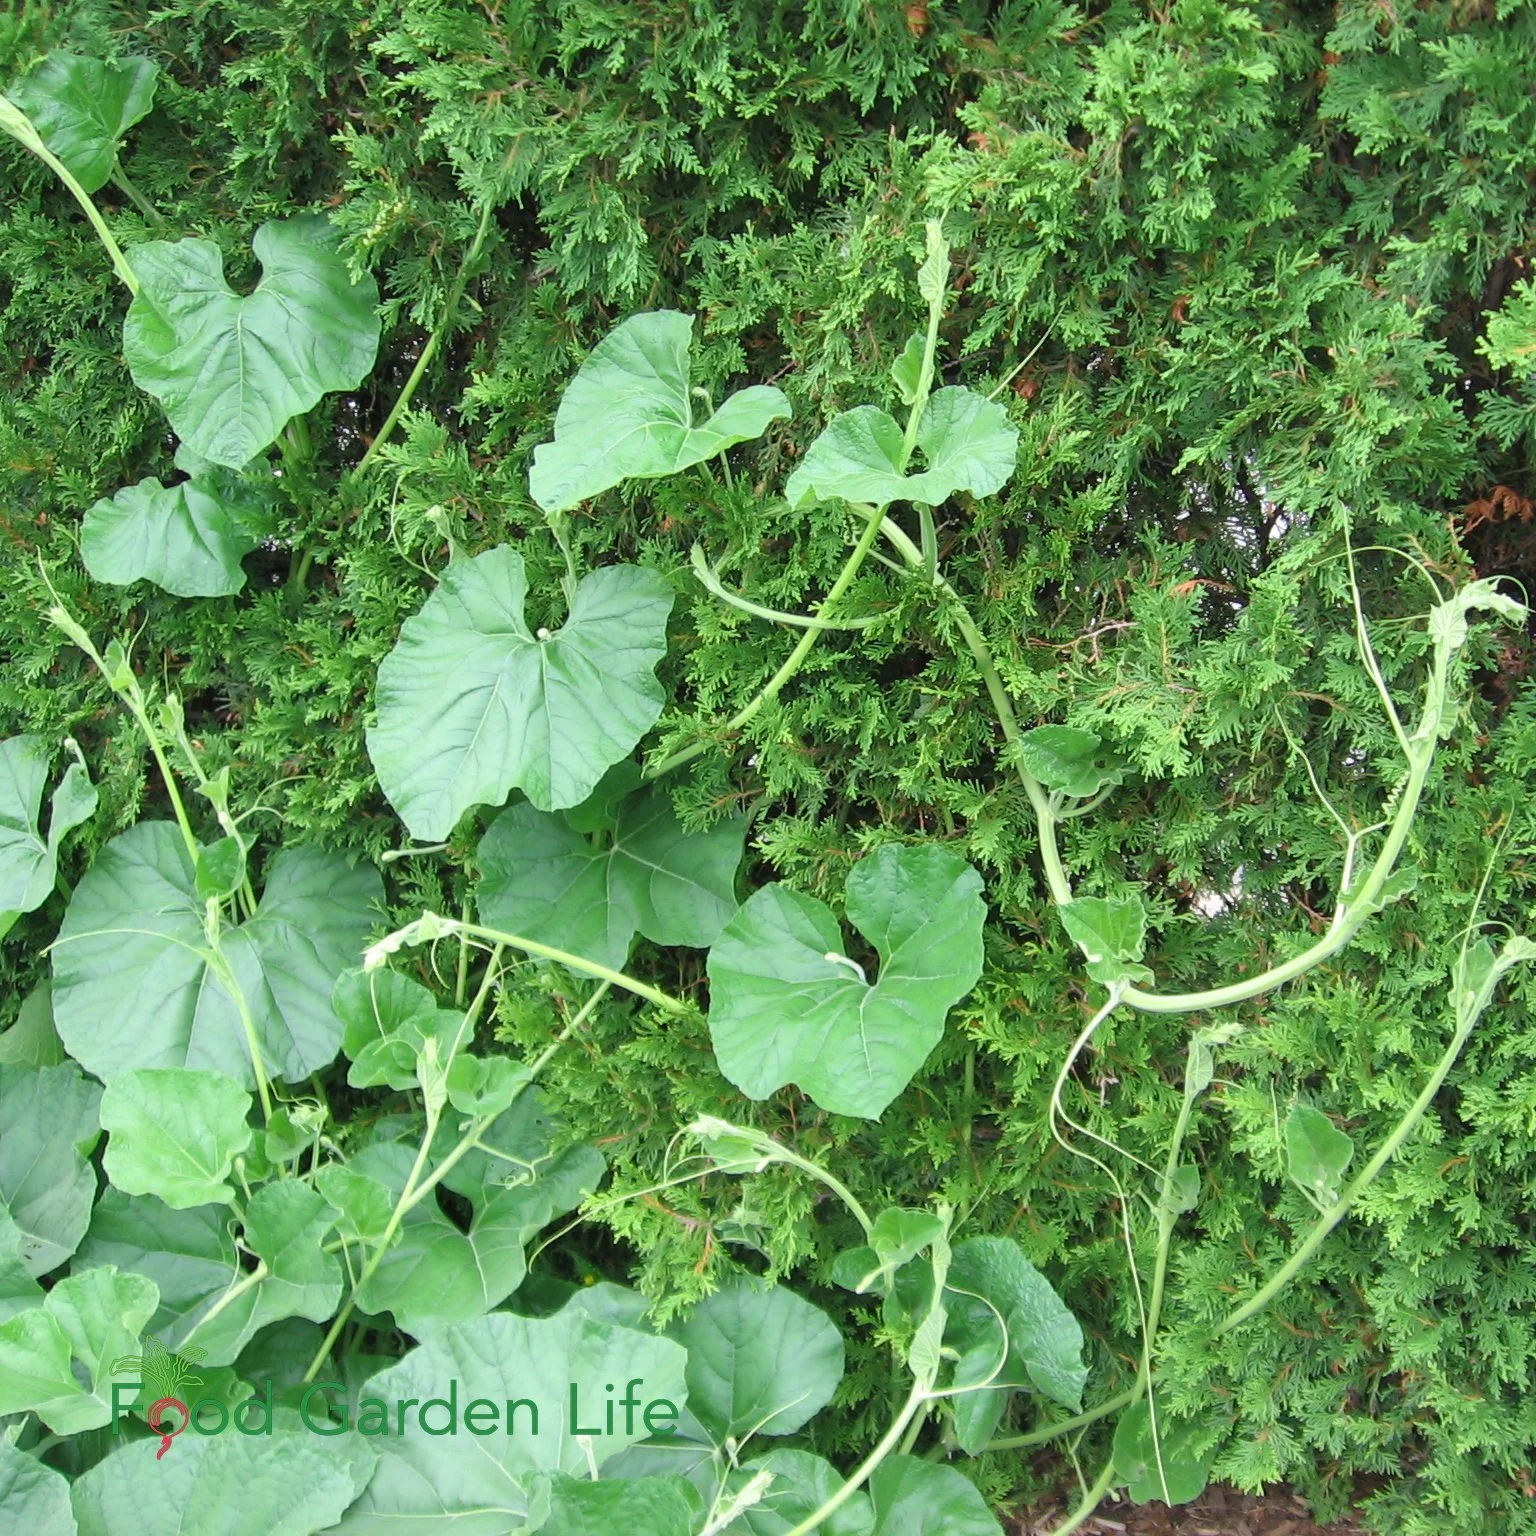
Save space by growing squash along a hedge!
Hedge (grow a squash vine along a hedge)
Tree (let runner beans grow into a small tree)
Sunflower or corn as a living trellis
Trellises for a Wall Garden
Trellises are a simple way to add more vertical growing space.
Turn an empty wall into a home for a vining crop
Add height to a fence with a trellis
Cover an unsightly utility pole and make it into a growing space
Vertical Garden Crops Ideas
Here are crops that are suited to growing vertically.
Achocha (a.k.a. Bolivian cucumber)

Achocha is a vining crop that’s easy to grow in a vertical vegetable garden.
If you’ve been frustrated by pests and diseases on more delicate vining crops such as cucumber, try achocha. It’s a survivor.
This vining crop has small pods that are eaten raw when small, and cooked when a bit bigger. (There’s a limit to how big they can get without being too woody, so aim to harvest them while small.)
Beans (pole beans and runner beans)
Both of these vining beans are a great addition to a vertical vegetable garden.
Grow them up trellises, garden structures, and tall fences.
Runner beans do better in cooler, maritime climates—and they tolerate partial shade.
Bitter melon
This vining crop has tendrils. Both fruit and young shoot tips are edible. Tolerates partial shade.
Burr Gherkin
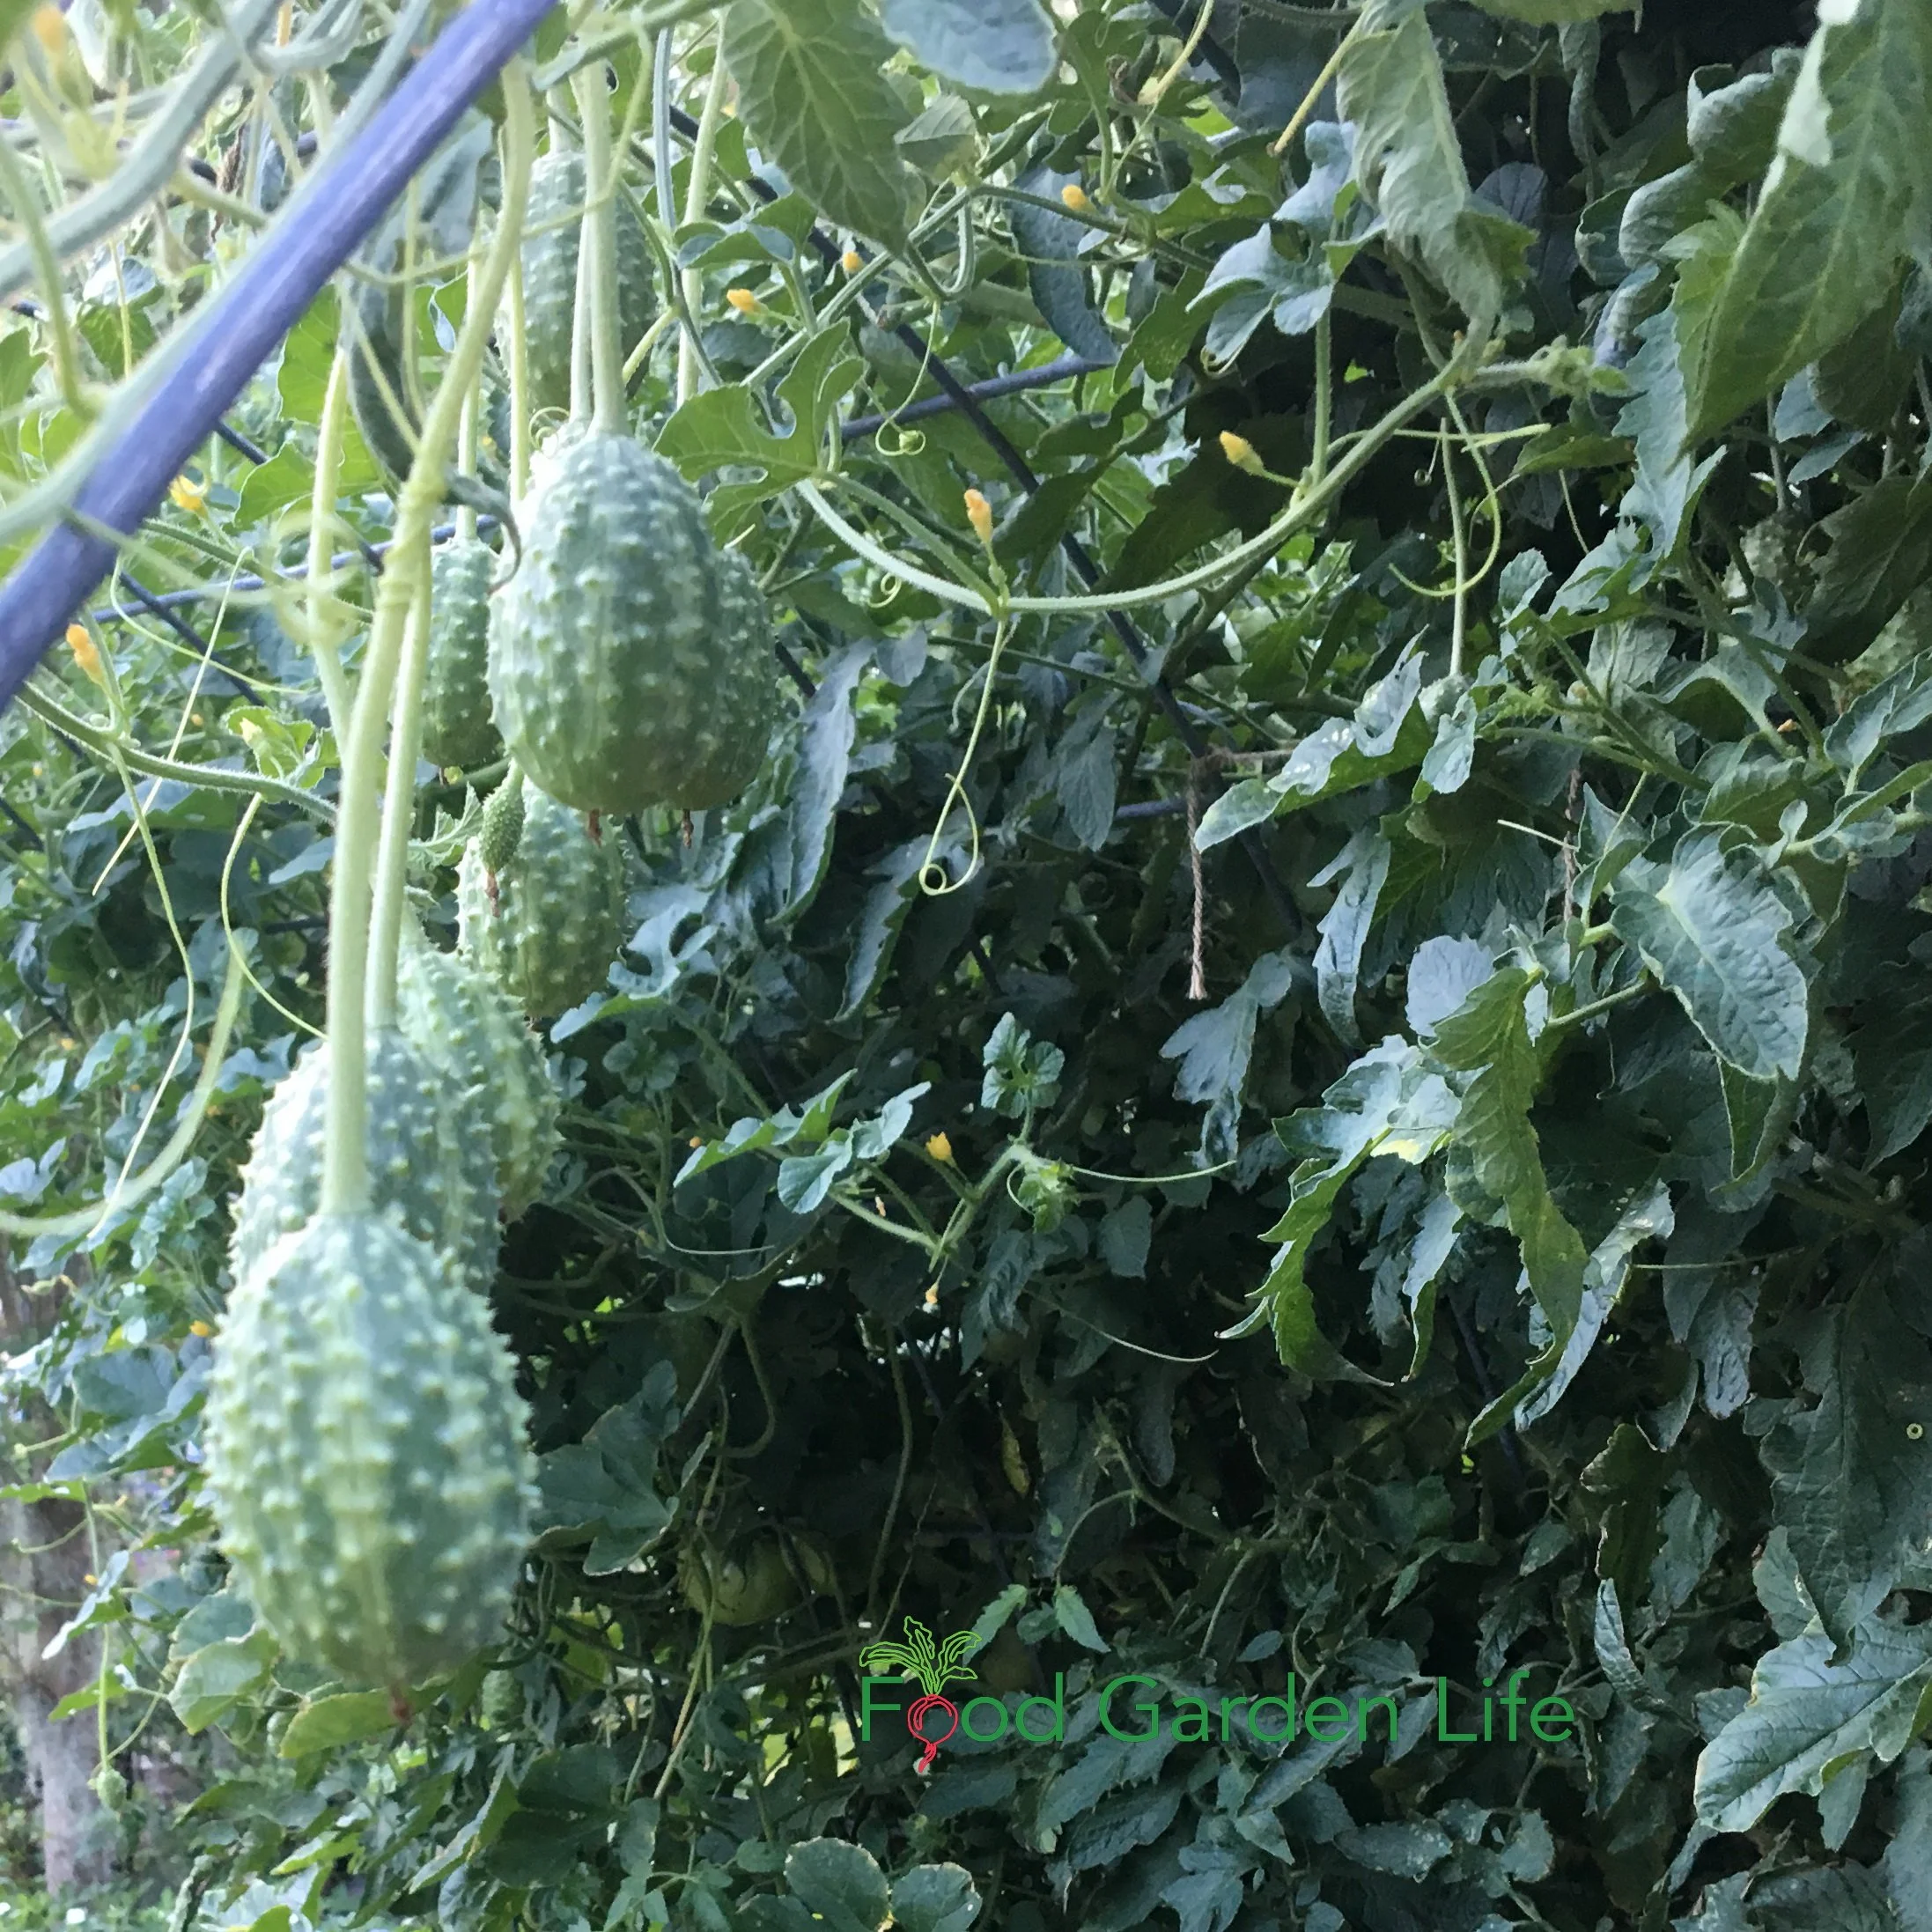
Burr gherkin is a vining crop that’s easy to grow in a vertical vegetable garden.
Spiky little cucumber relatives with a citrusy taste. Tasty fresh, and good for pickles too. Vines grow like cucumbers.
Cucamelon
(a.k.a. Mouse Melon, Mexican Sour Gherkin)
This cucumber relative has smaller leaves and fruit, but is a vigorous grow that easily climbs a trellis.
The small, thumbnail-sized fruit are cucumber-like, with a bit of citrus. Eat fresh, or make into pickles.
Cucumbers
Along with conventional cucumbers, look for Armenian cucumbers (not actually a cucumber…but a relative). Both make excellent vining crops.
Luffa
While many people think of using mature luffa fruit for the sponge-like scrubbies, the young luffa is edible—like a summer squash.
If you’re in a cold zone, know that this is a heat-loving crop that does best with a long growing season.
Create Your Own Unique Edible Landscape
That fits for your yard, and your style!
Malabar Spinach
(a.k.a Indian spinach, Ceylon spinach, vine spinach)
This vining plant is a spinach in name only. The leaves are thicker and waxier than true spinach. But it grows all summer—and grows well in heat of summer. The red-leaved varieties are quite ornamental.
Melons
Worried that you can’t grow melons and watermelons vertically because they’re too heavy? Don’t worry. Just make a sling to support the fruit.
Peas
If you've grown bush-types peas, you might not think of them as a vertical vegetable. For vertical gardening, get vining-type peas, which grow 6-8’ tall. ‘Tall Telephone’ is a well-known variety. (Remember, tendrils and shoot tips are edible too!)
Squash
Be sure to grow a vining squash variety, as many of the summer squash have a bush-like growth habit.
And…remember that you can eat more than just the squash fruit. Shoot tips are edible too.
Find out about eating squash tips and other lesser-known edible plant parts.
If you’re growing large winter squash, give extra support with a sling.
Tomatoes
Grow “indeterminate” tomatoes (a.k.a. vining tomatoes) for training upwards. They get taller and taller all summer long.
Most people think of growing tomatoes upwards…but some gardeners also let them dangle down. How about a curtain of tomato vines coming off a low-roofed shed or outbuilding?
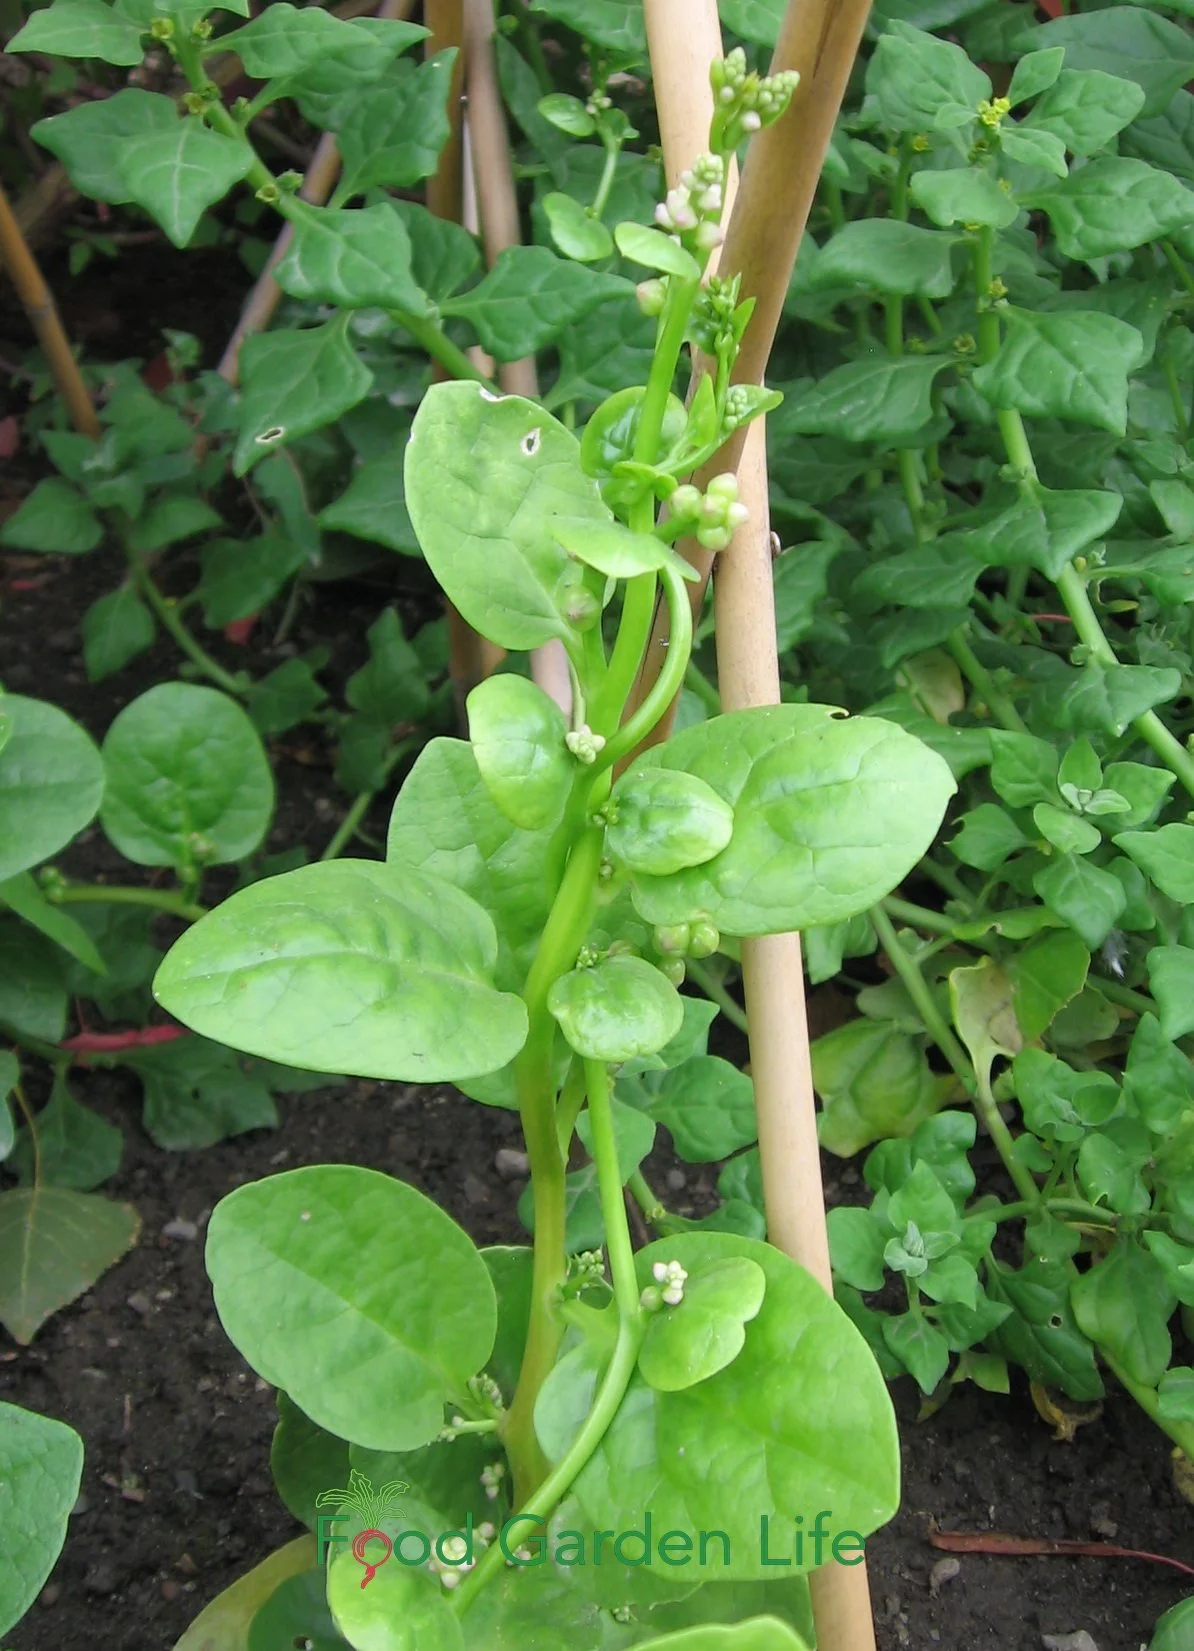
Malabar spinach.
Grow a Container Vegetable Garden
And get an early harvest of crops that usually take too long!
Materials for Making DIY Vertical Support Structures
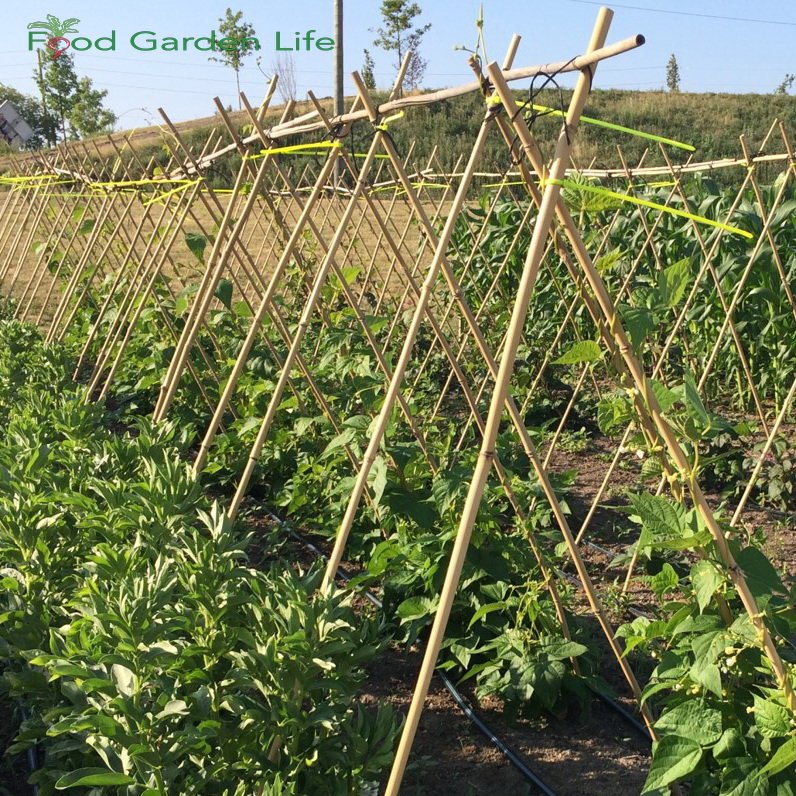
Bamboo Poles
Bamboo poles are an easy-to-use material that is widely available.
Use bamboo poles to stake individual plants, or to make trellises and A-frames.
When attaching poles together to create a trellis or support structure, use twine or zip ties. (Just don’t use the bright yellow zip ties like the ones in the photo below…clear ones are much less noticeable!)
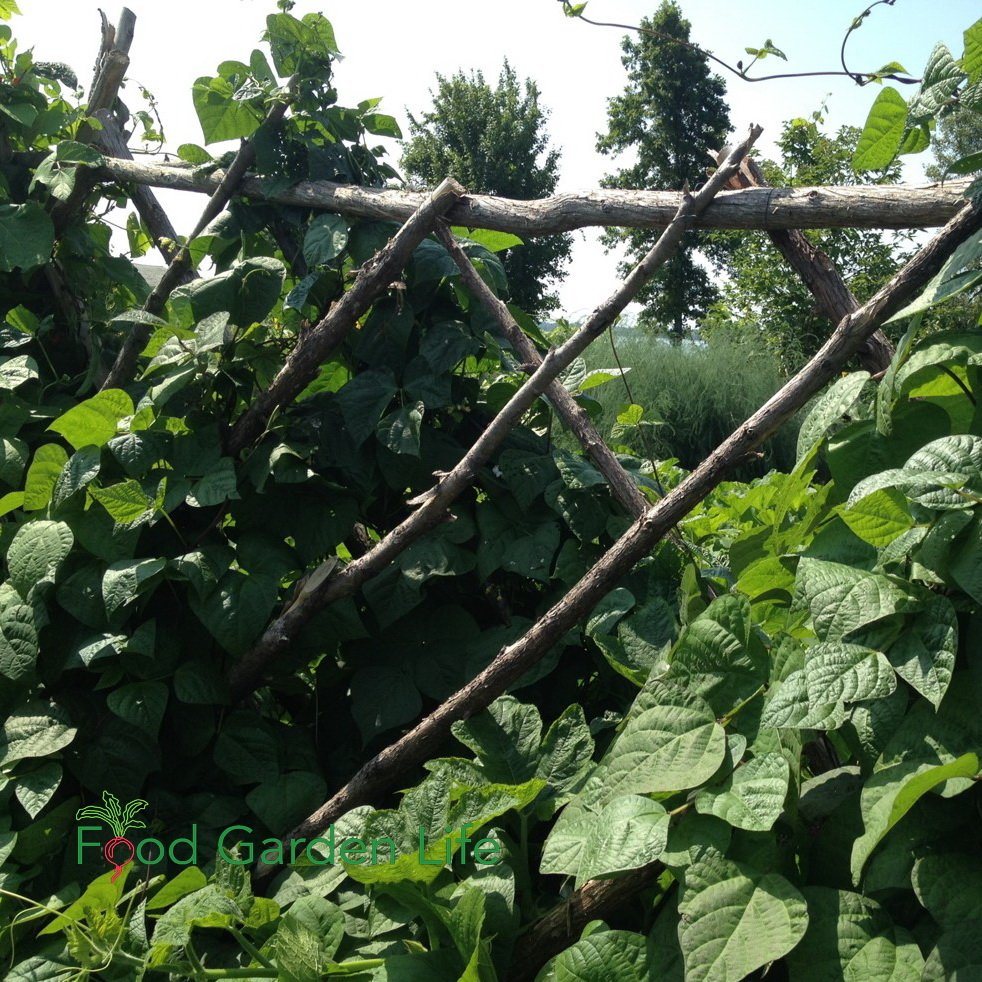
Branches
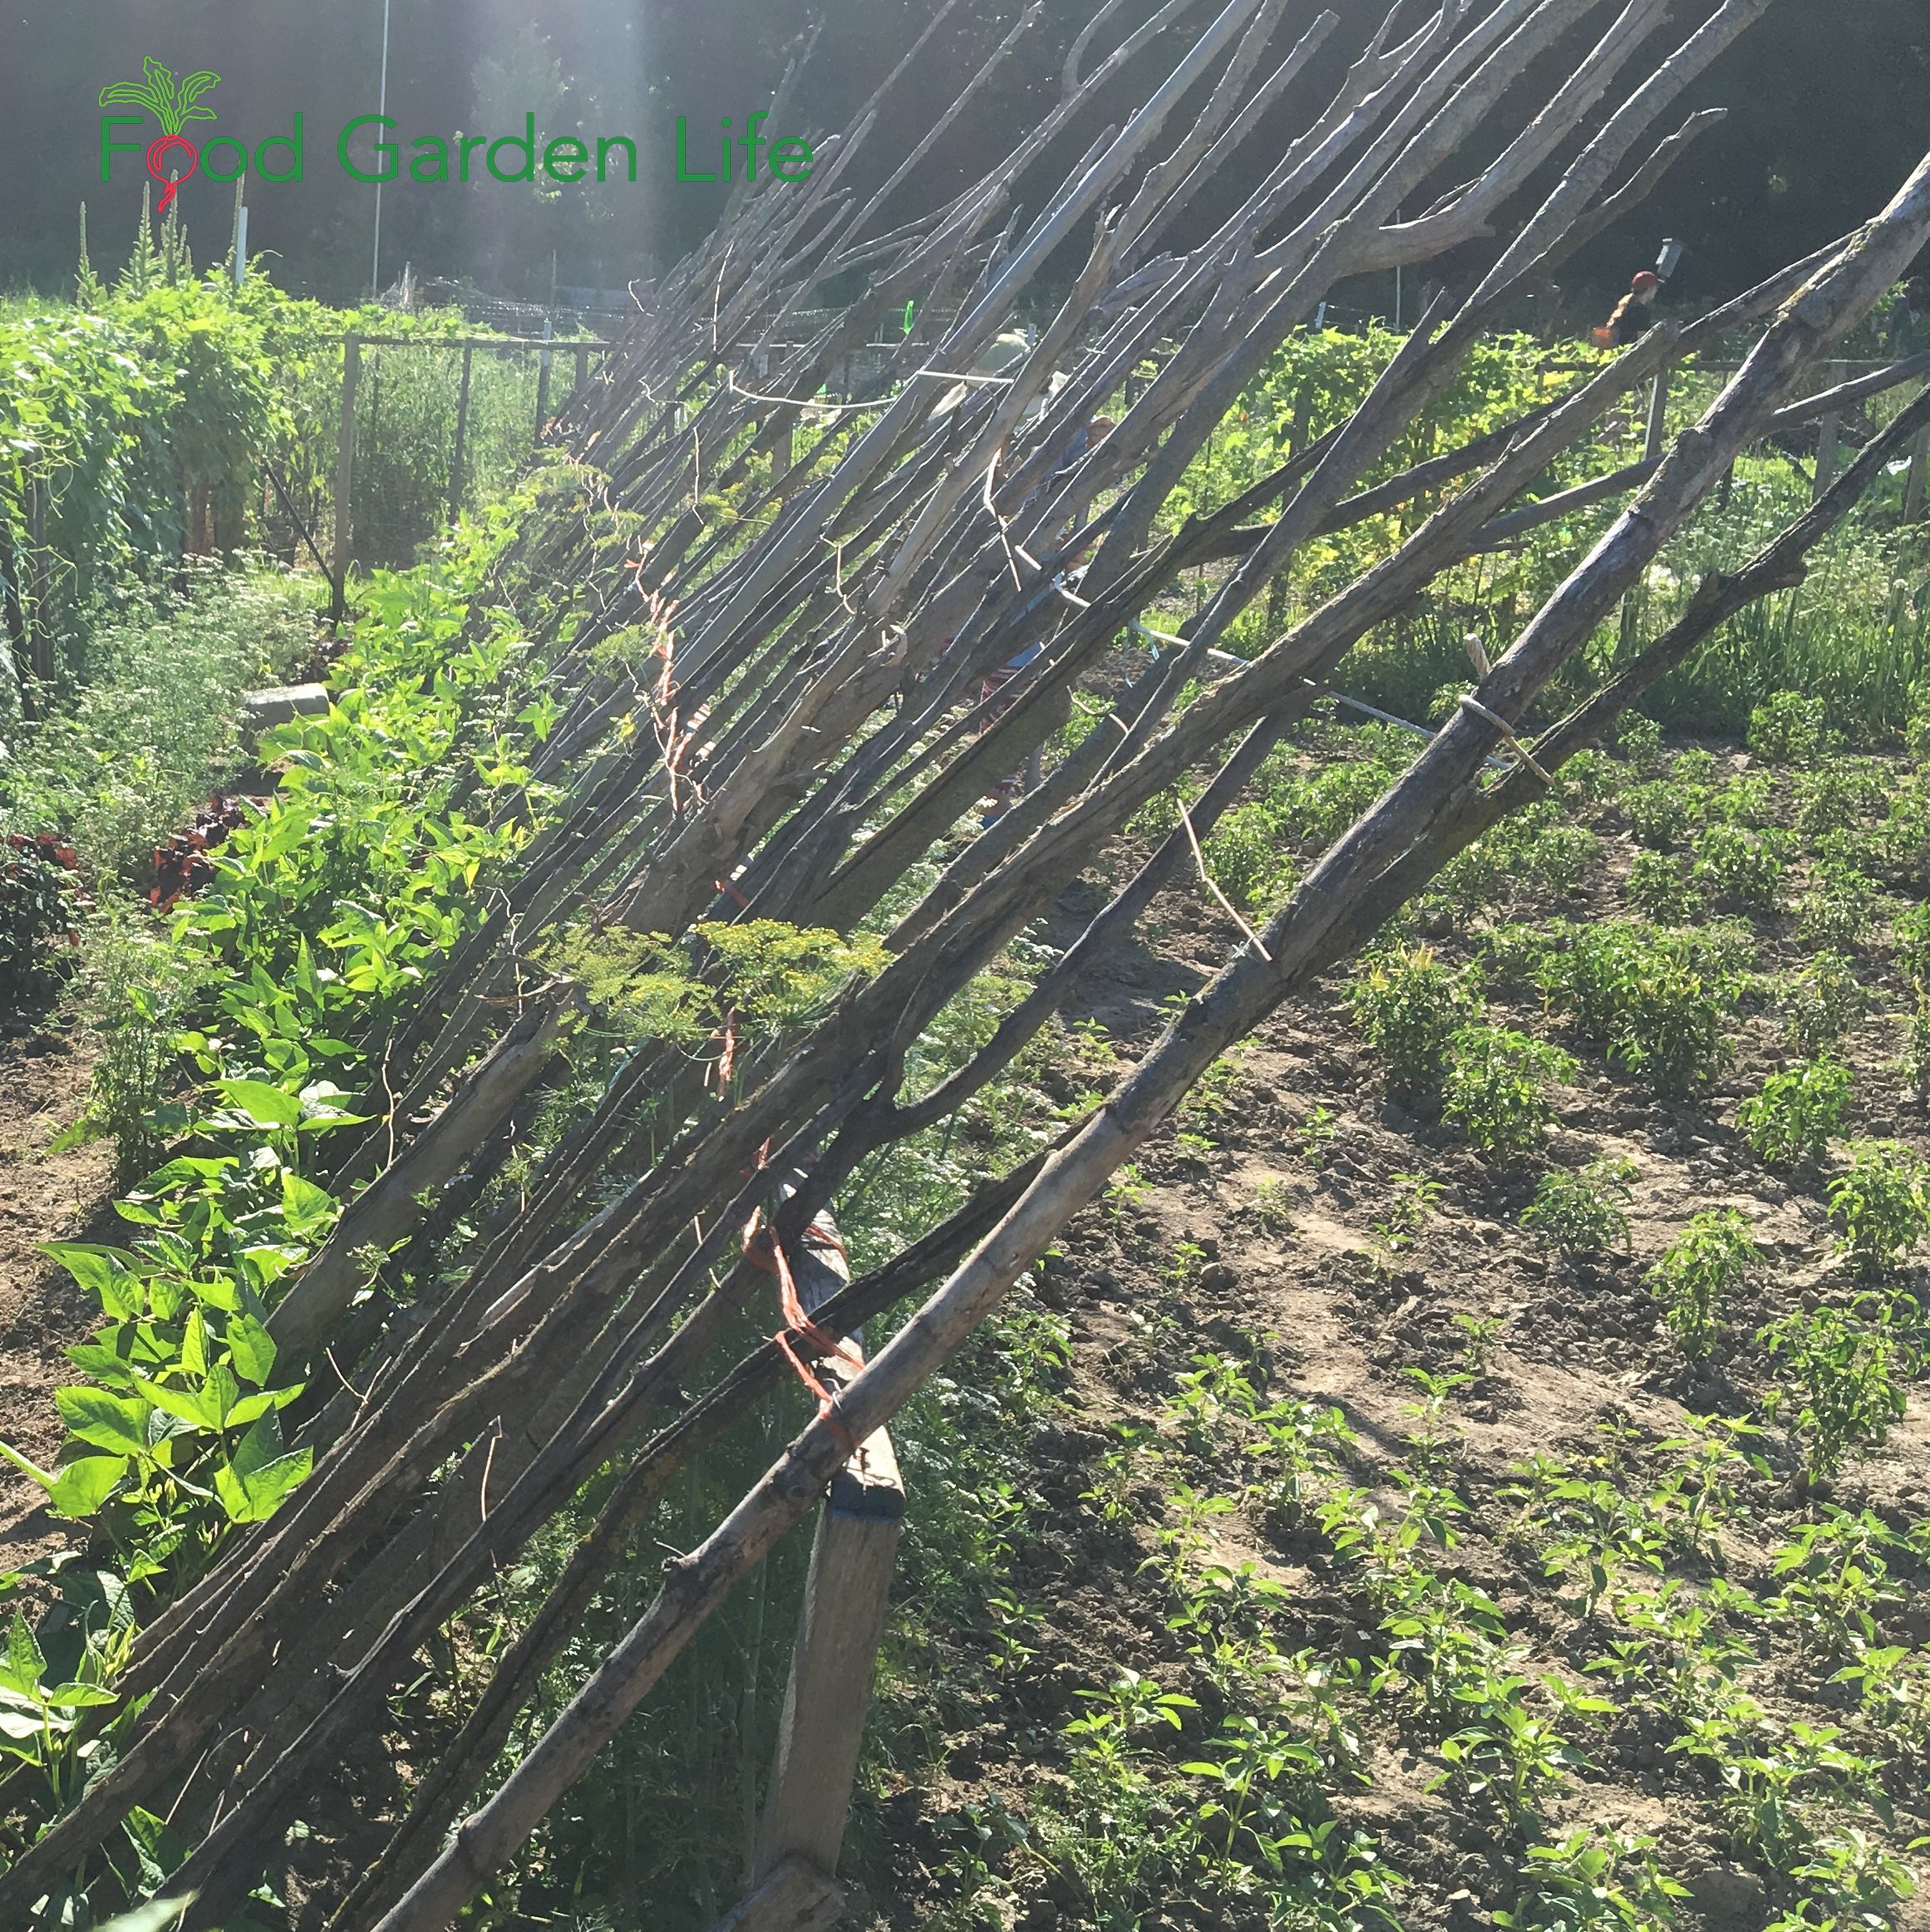
For a natural look—and for good economy—nothing beats branches.
Twine
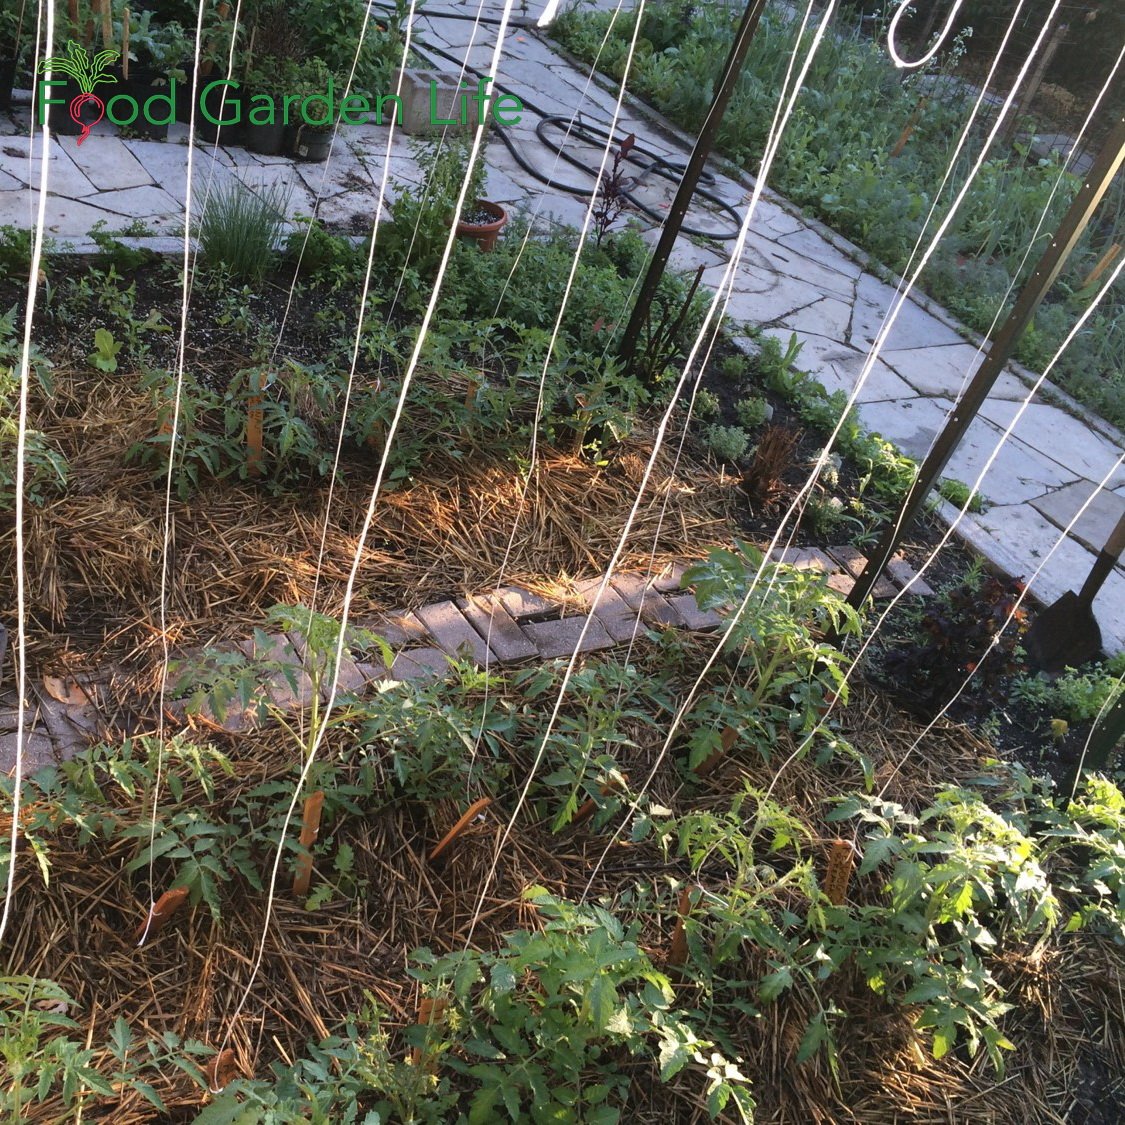
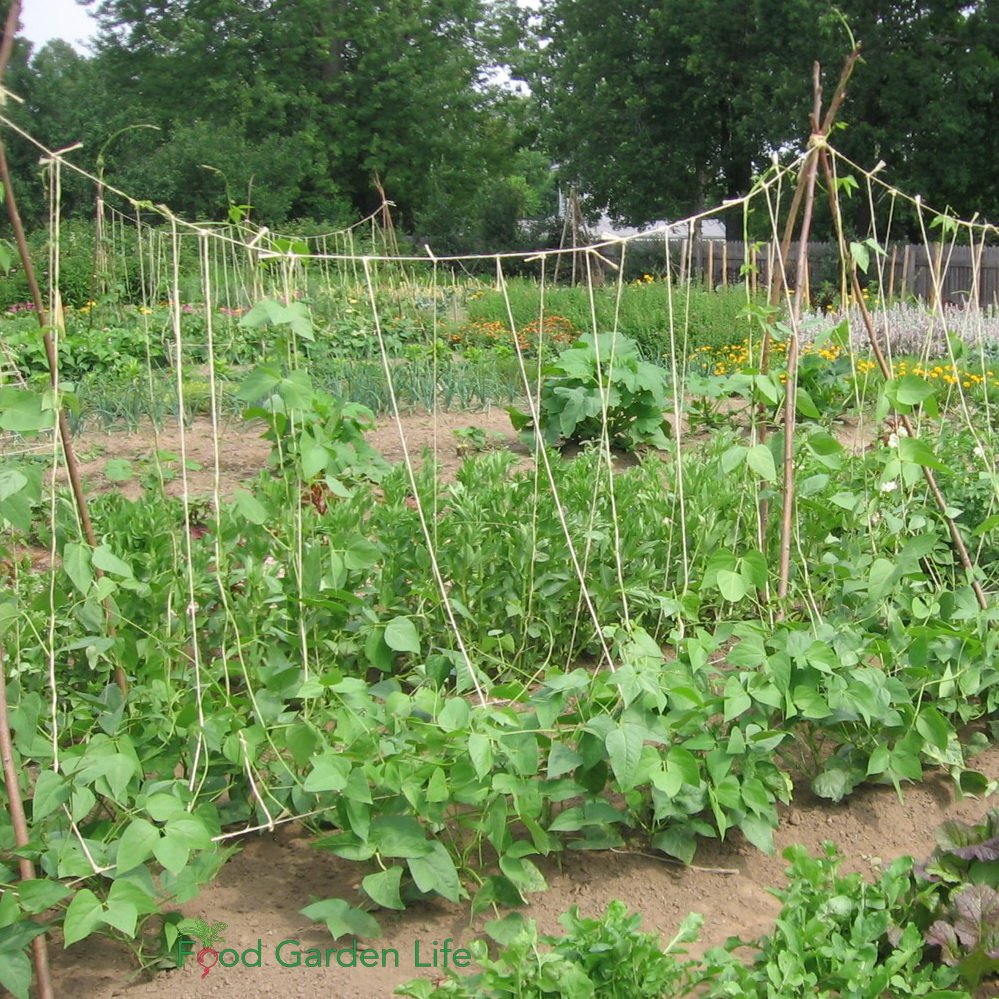
Natural-fibre twines such as jute and sisal readily break down when added to the compost pile or buried. They work well for tying plants and for making structures such as teepees.
If the twine will support a lot of weight (e.g. an 8’ high tomato-laden vine by the end of the season) consider something stronger. Either a thicker natural twine, or a synthetic twine.
Lumber
Like branches, lumber can often be scavenged for free.
The one caveat: Don’t use pressure-treated wood. It contains copper compounds.
Lattice
Looking to combine vertical growing with some privacy shields? Lattice could be a building material to consider.
A sheet of lattice usually bends when stood upright, so plan to frame it with wood so that it doesn’t bend.
Create Your Own Unique Edible Landscape
That fits for your yard, and your style!
Metal Stakes
Metal stakes last a long time!
T-bar stakes. Strong. Plan to use a post driver or a sledge hammer to drive them into the ground
Iron rebar. Thinner than T-bars, meaning that if the soil is moist, it can often be pushed into the ground.
PVC Pipe
Use PVC pipe to create supports for your vertical vegetable garden. It's readily available,
Looking for ways to connect horizontal poles to an upright T-bar? Stick a PVC plumbing tee-join on top of the T-bar – and now there are holes on either side into which to slip a horizontal pole.
Wire Mesh
There are a few types of wire mesh available; not all of them at garden centres. See what you can find at hardware and building-supply stores. And if you’re in a rural area, farm-supply stores often carry a good selection of wire.
To get you started as you think about using wire mesh…
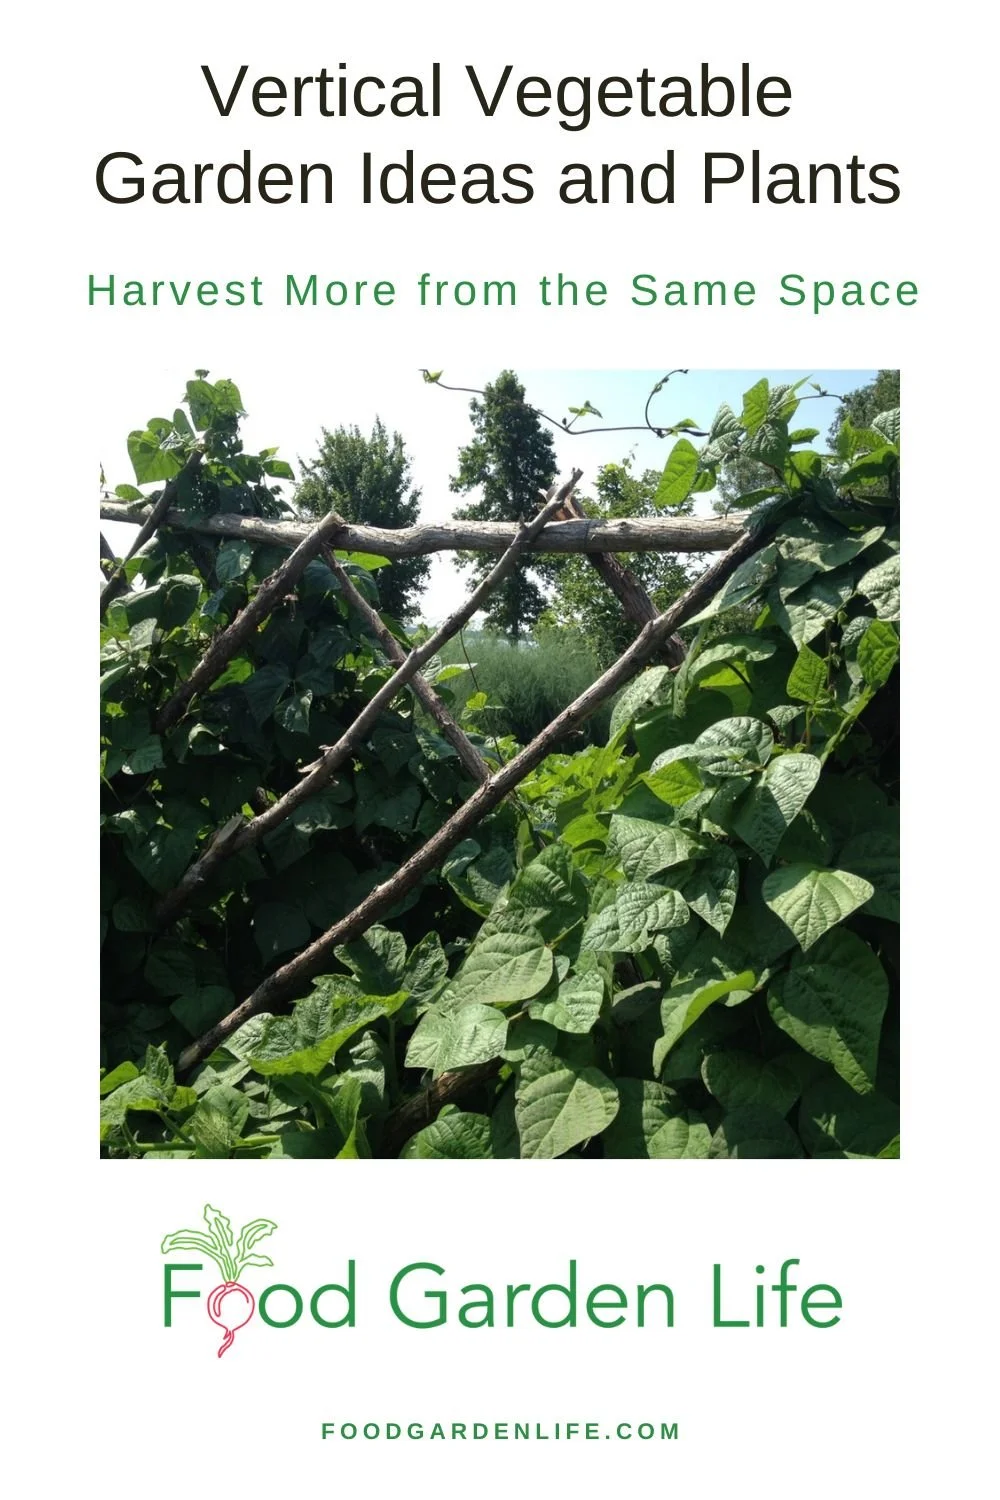
Pin this post!
Chicken wire. Easy to cut with tin snips.
Wire mesh to reinforce concrete. (A.k.a. remesh) Not galvanized like some other types of wire mesh, so it quickly takes on the patina of time and blends into the landscape. Tin snips won’t cut through this…plan for bolt cutter or a hack saw.
Hardware cloth. If you want closely spaced mesh that offers a visual shield, this can be an option. Cut with tin snips.
Cattle panels. Often galvanized. The spacing in the lower couple of courses of wire is often less than the other courses. More bendable than the mesh used for concrete—so if you’re looking to make an arch, a better choice.
Rolls of livestock fencing. Various gauges or wire and hole size available.
When buying mesh, think about this:
Do you want a galvanized product or not? Shiny obvious metal, or oxidized and less noticeable?
How will you transport it? Rolls can easily fit into the trunk of a car…but if you’re buying sheets of cattle panel or concrete mesh, you might need to put them on a roof rack (or track down a friend with a pickup truck!)
Find This Helpful?
Enjoy not being bombarded by annoying ads?
Appreciate the absence of junky affiliate links for products you don’t need?
It’s because we’re reader supported.
If we’ve helped in your food-gardening journey, we’re glad of support. You can high-five us below. Any amount welcome!
More Vegetable Gardening Information
Courses
Want to Water Less and Harvest More? Try Sub-Irrigated Planters
Find out how to make your own sub-irrigated planter (a.k.a. self-watering container).
By Steven Biggs
Wilted by Noon
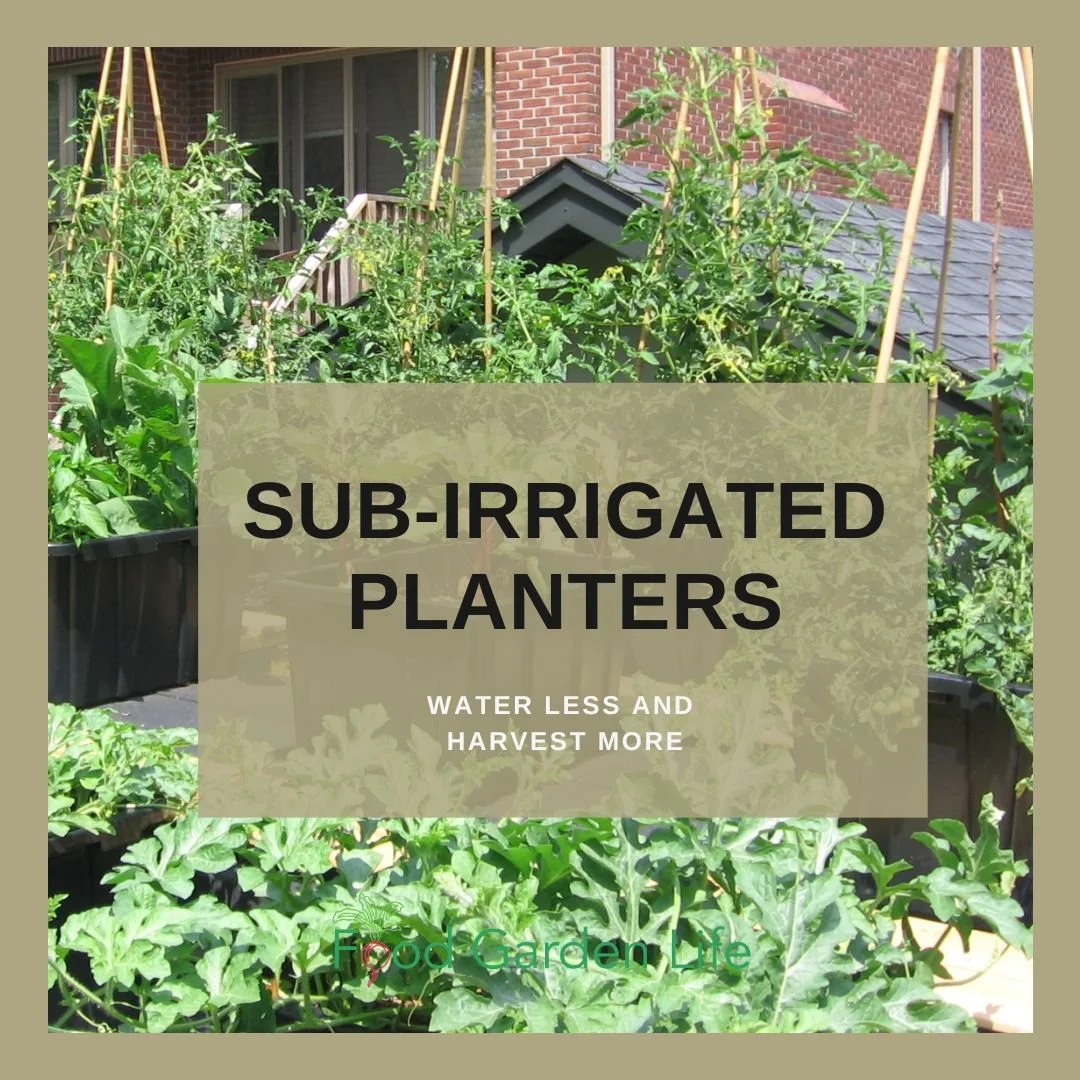
When I first started container gardening on my garage rooftop, I watered every morning. But in the heat of summer, my plants were parched and wilting by noon.
A sub-irrigated planter is an excellent way to solve the problem of parched plants. We want to prevent wilting, because it’s a sign of stress. Drying out is a stress for the crop.
And that stress can delay (or reduce!) your harvest.
Consistent soil moisture is best. Not sopping wet. Not dry.
And that’s where a sub-irrigated planter helps: It keeps the potting mix consistently moist, but not too wet.
This sort of planter is also known as a SIP, a self-watering container, or a self-watering planter.
Keep reading and I’ll explain how a self-watering system works and how you can make your own.
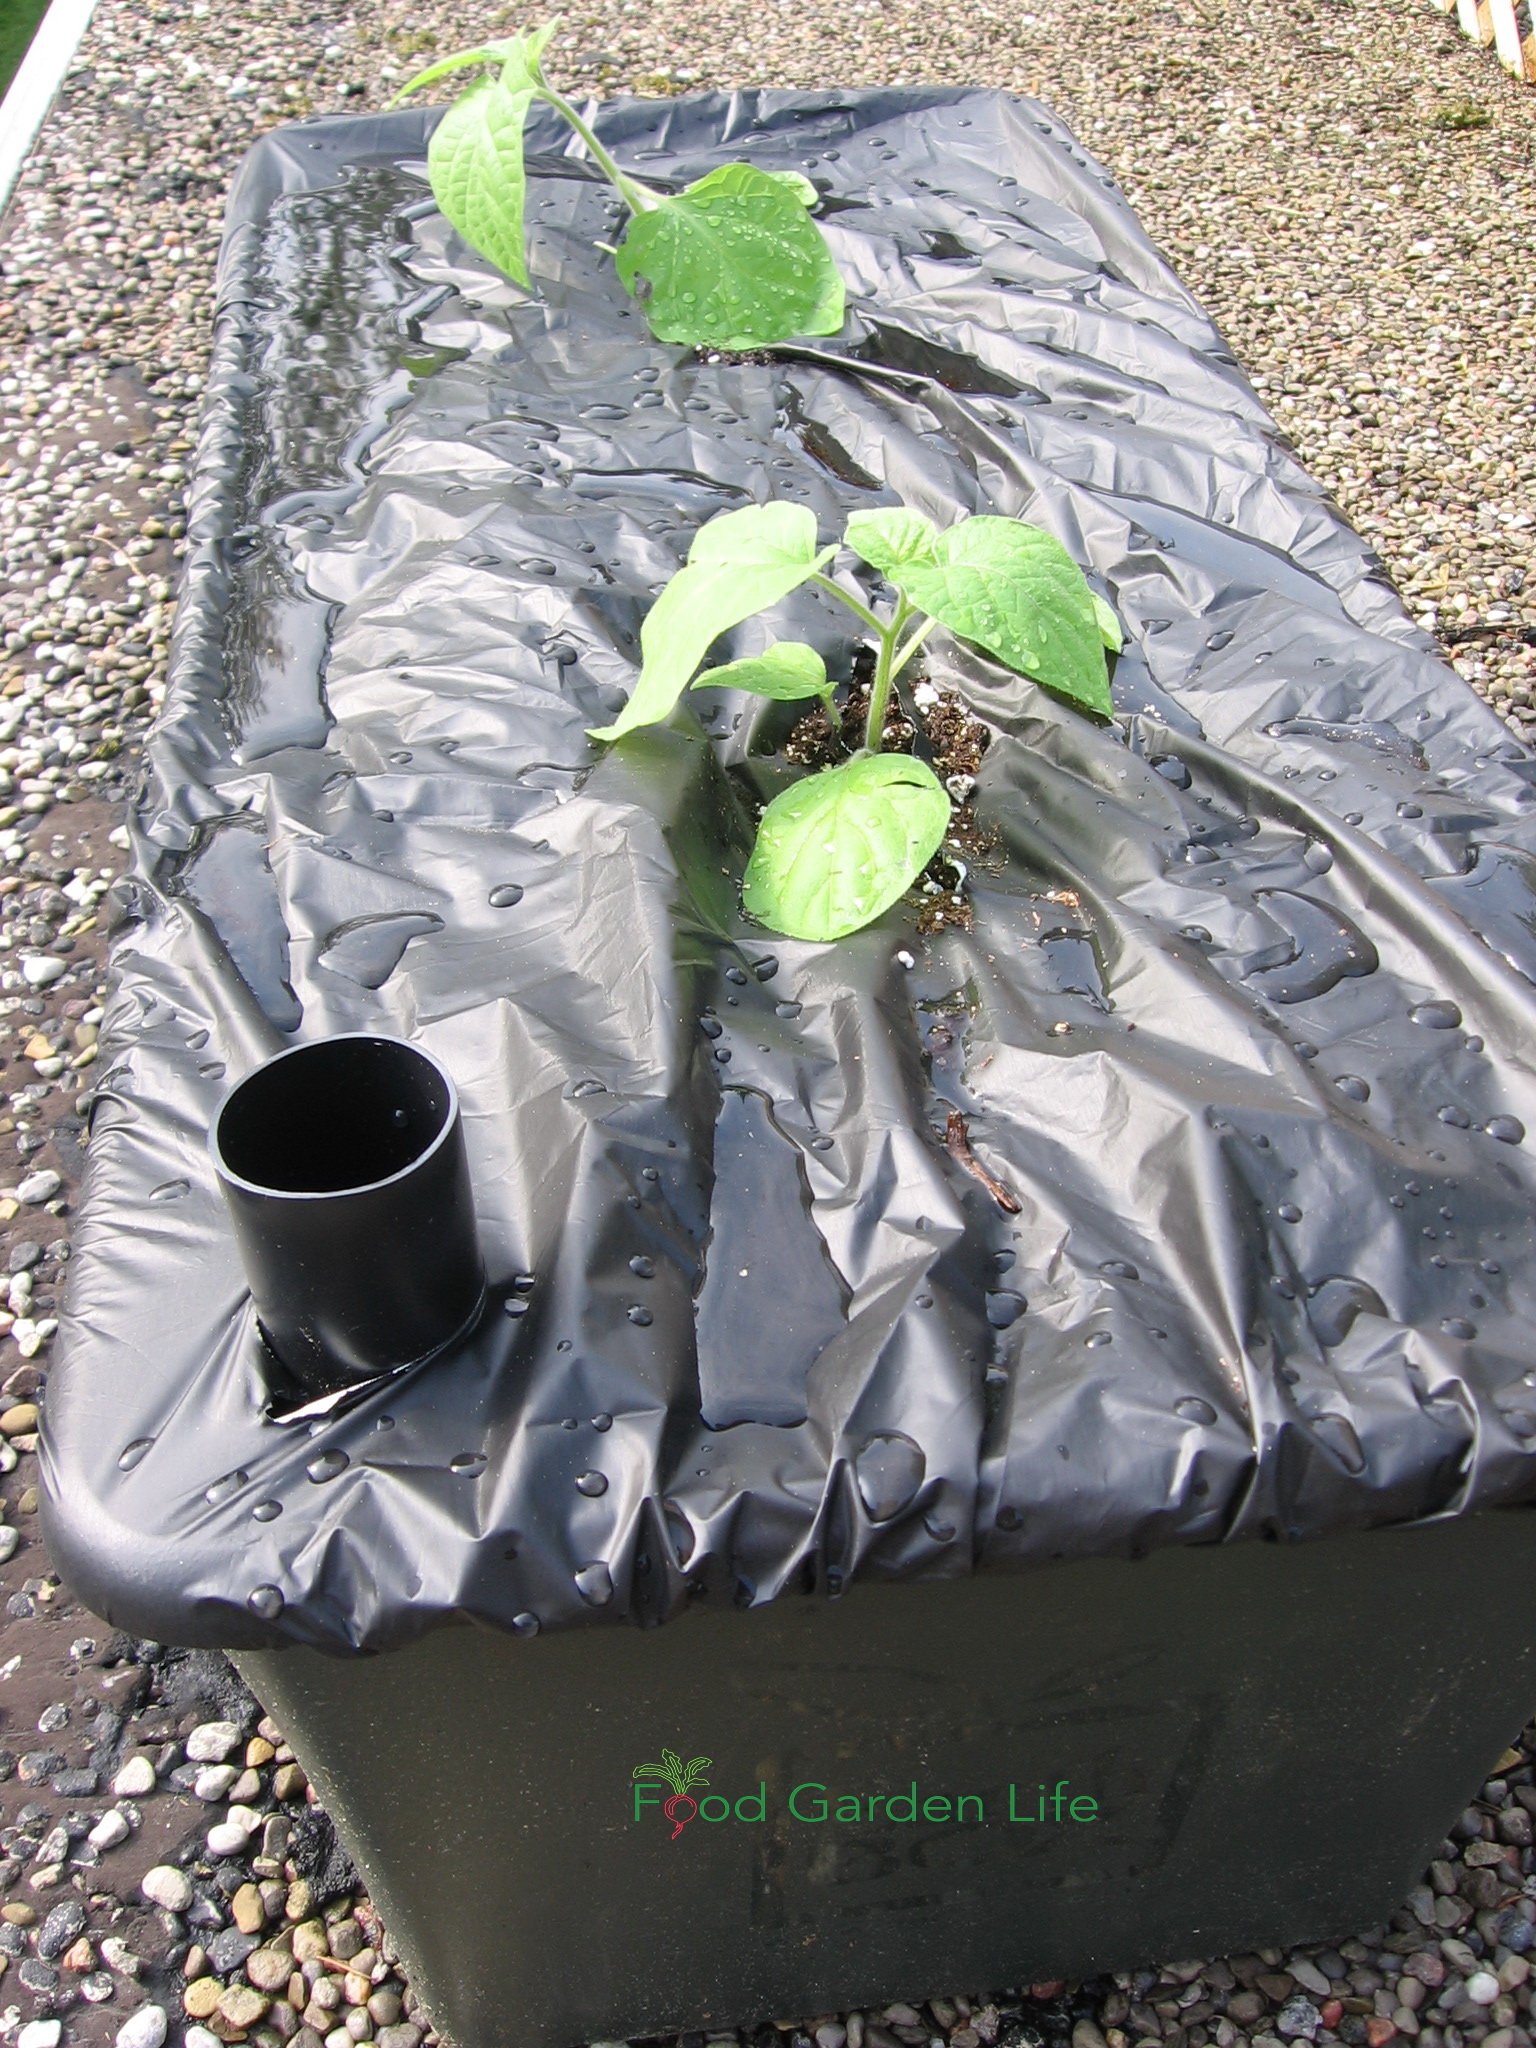
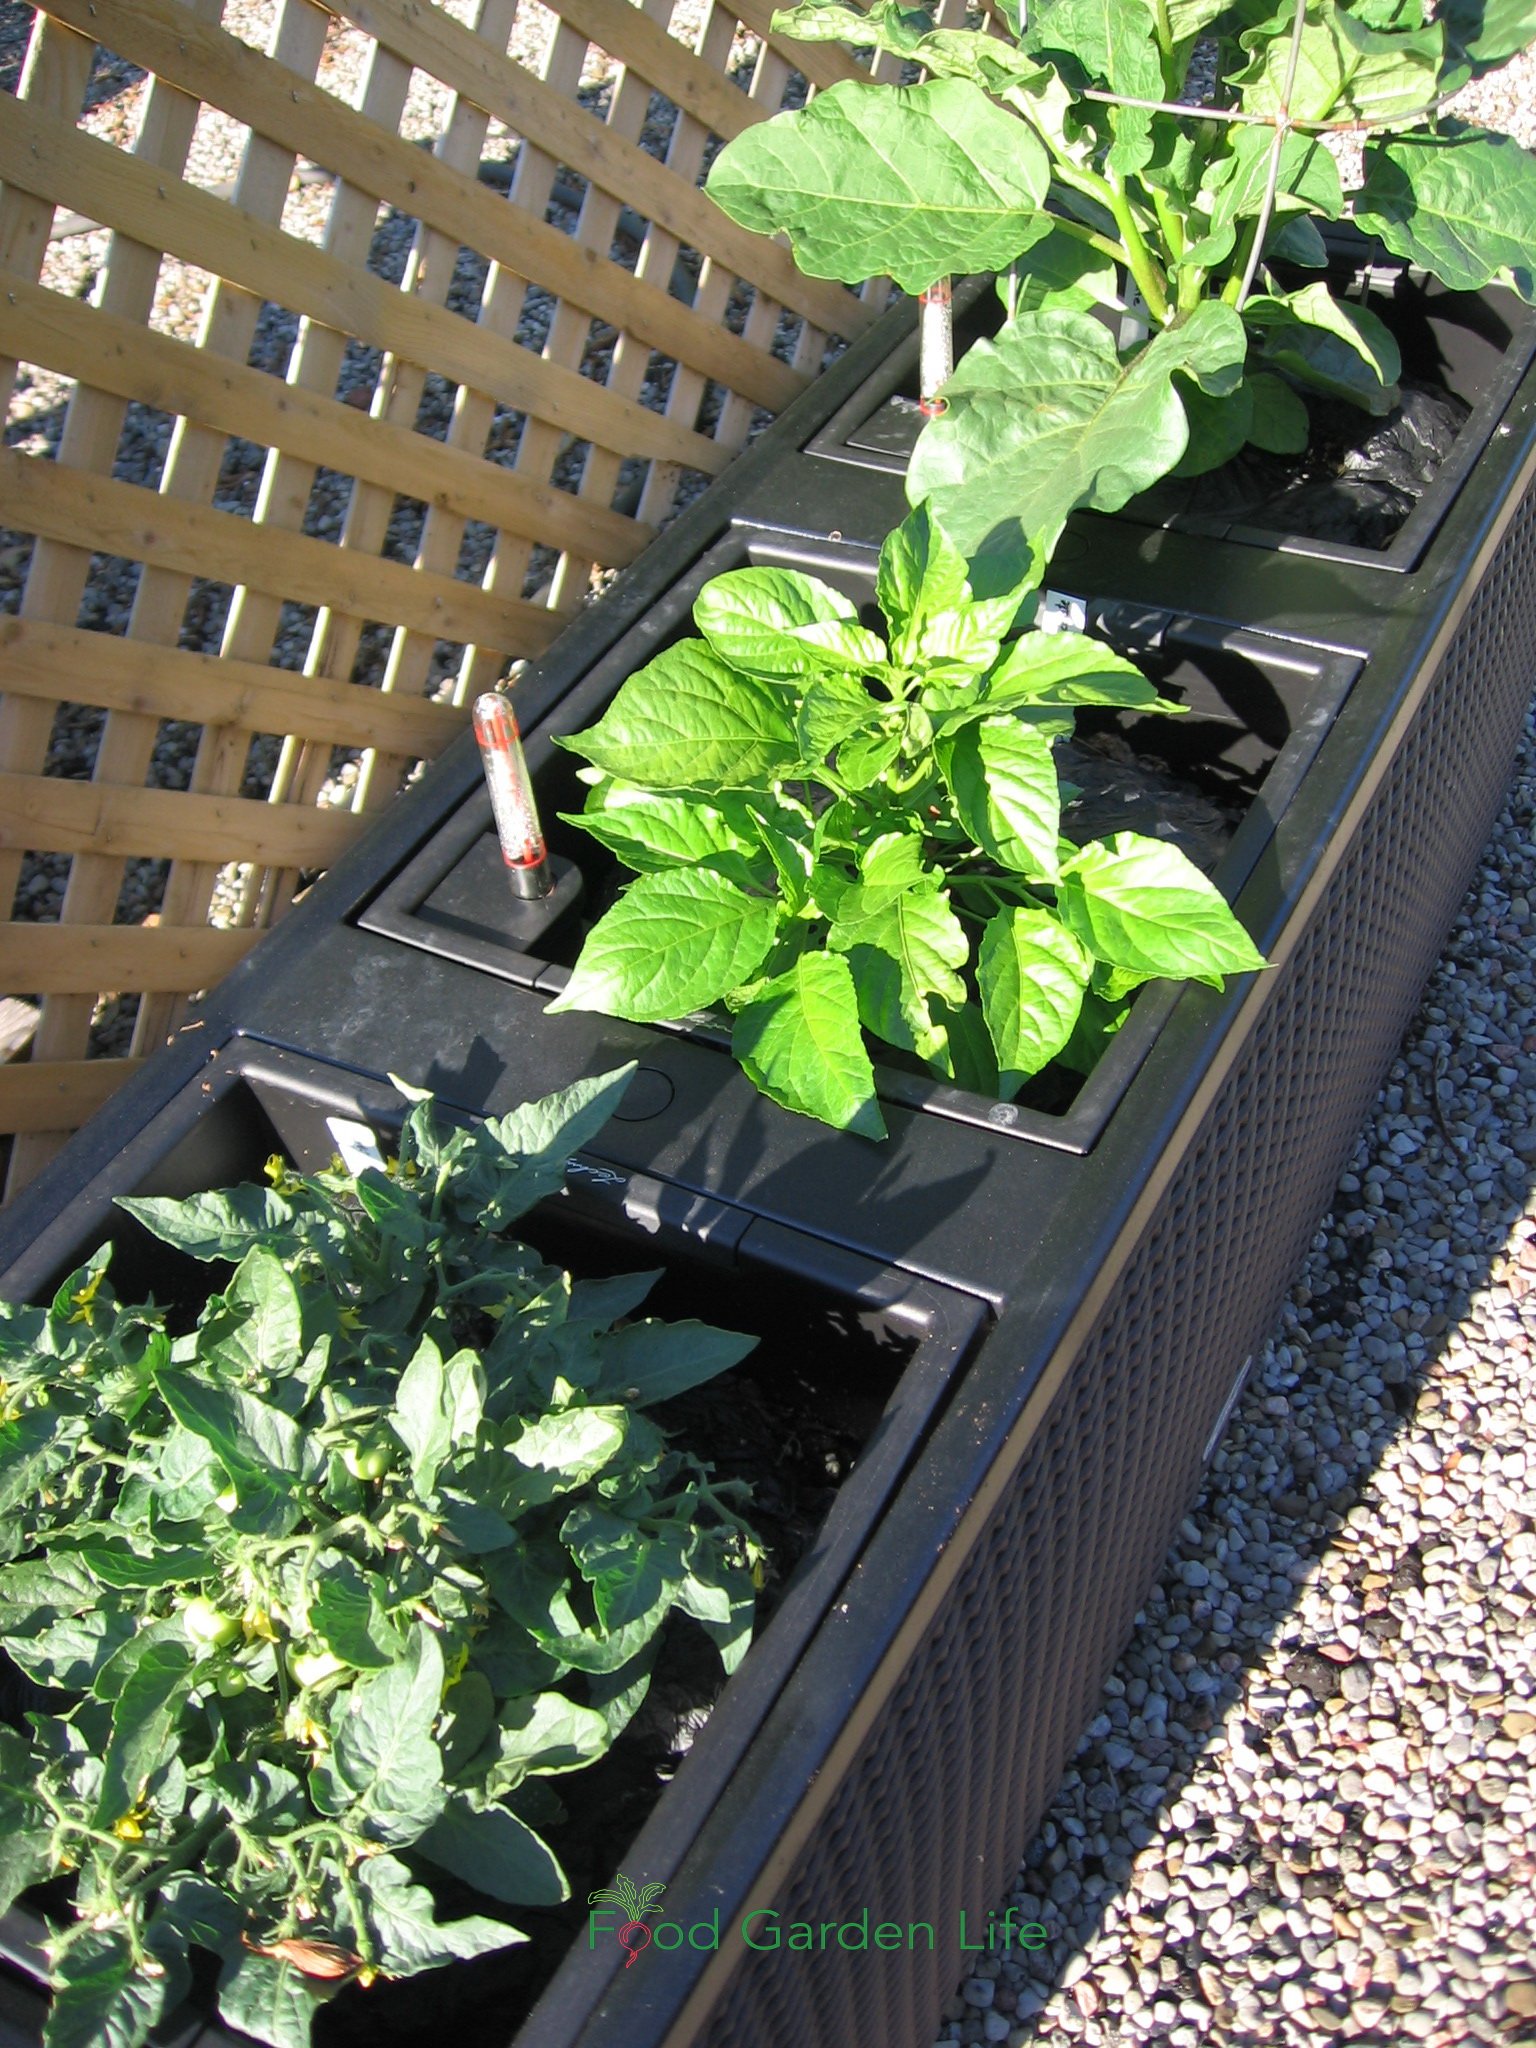
What are Sub-Irrigated Planters?
Sub-irrigation planters are simply planters with a water reservoir at the bottom. The reservoir is right under the soil.
Through capillary action, water wicks up through the potting mix, giving plant roots a consistent supply of moisture. Then, as the plants use water in the soil (creating a moisture gradient) more water wicks upwards from the reservoir.
There are many commercially produced sub-irrigated planters available. Some are fairly basic and resemble a normal container. Others have a gauge that shows the water level in the reservoir.
Self-Watering Planters vs. SIPS vs. Sub-Irrigation Planters
These are all different terms used to describe the same thing: Containers that have a water reservoir below, so that moisture can wick up into the soil.
By the way, they are not truly “self-watering.” The gardener must still fill the reservoir. (If you like do-it-yourself projects, you can automate this with irrigation, see below.)
Benefits of Sub-Irrigated Planters
Pin this post!
First, though, let’s look at the benefits of these self-watering containers.
Less waste:
There is less waste of water and fertilizer because it's a closed system, with less runoff
Higher yield because:
A continuously moist growing medium means the plant has no water stress (plant growth can slow, or flowers drop when the plant is under stress…)
When gardening in a container, the growing medium is warmer than soil in the garden, and that means that harvest begins earlier
Fewer weeds because:
The soil surface is not regularly moistened from overhead watering, giving dry surface conditions are not as good for weed seeds to germinate
The other reason that the soil surface is not as wet is that the farther you are from the reservoir, the less moist the soil (remember, it's going against gravity!)
Less disease because:
With no overhead watering, there's less splashing of disease organisms from the potting soil onto the leaves
And with tomatoes, SIPS usually solve blossom end rot (which actually is not a disease, but a physiological disorder that's caused by swings in soil moisture)
And the benefit of a SIP system that goes without saying: You spend less time spend watering!
Where to Grow in a Sub-Irrigated Planter
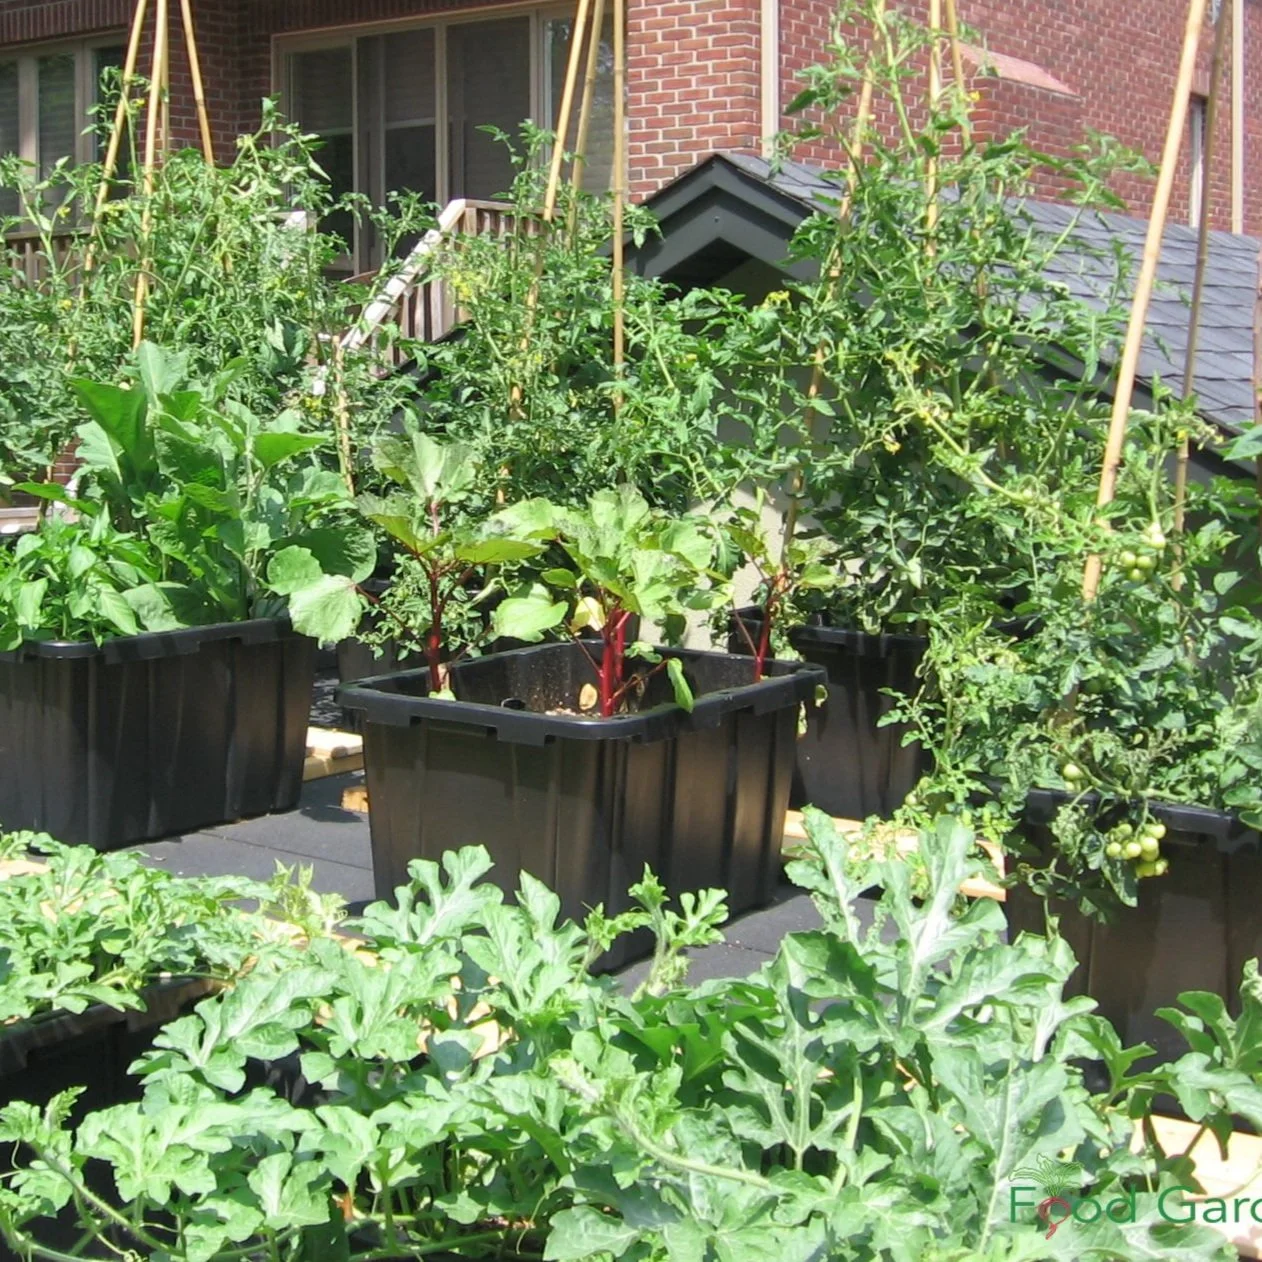
I made a garden on my garage rooftop using sub-irrigated (self-watering) planters.
As with any sort of container garden, a SIP makes it possible to grow on patios, decks, driveways.
You can also use them to grow over top of areas with tree roots or compacted soil.
If you’ve been eyeing up a space next to that water-hungry cedar hedge, this is your solution!
If you’re concerned about soil contamination, making a container garden is a simple solution.
Find out more about soil contamination.
What’s Inside a SIP
Here's what you'll usually find in a self-watering planter.
A water-tight area (the reservoir) at the base of the container (underneath the potting mix)
Something to hold the potting mix above the reservoir area: it could be a false bottom such as mesh, or hollow containers, or tubing
A way to add water to the reservoir (a fill-tube that extends above the soil surface)
A wick (the wick is usually the potting mix itself, but a fabric wick can be used too)
An overflow hole, so that if there's too much water, it can escape
How a Sub-Irrigation Planter Works
Think of how water moves up a sponge. Or put a piece of paper towel in water and watch the water move upwards.
The same thing happens in a self-watering planter.
The water that's stored in the reservoir moves up through the soil.
Create Your Own Unique Edible Landscape
That fits for your yard, and your style!
Plants That Thrive in Sub-Irrigated Planters
Annual vegetable and herb crops do well in sub-irrigation planters.
Avoid plants that are susceptible to root rot when overwatered. (For example, I grow potted lemon trees, and they hate “wet feet,” soil that says consistently wet. Read more about potted lemon trees.)
Potting Soil for Sub-Irrigated Planters
Choose a potting soil with good wicking properties. Do not use garden top soil or sand.
Sometimes this is easier said than done...because you won't find "wicking" on potting soil labels.
(A bargain isn't always a bargain when it comes to potting soil. If you see discounted bags at big-box retailers, be wary.)
The large compressed bales of potting mix made for commercial growers have a more consistently good quality. If in doubt, start with these.
If you're making your own peat-based potting mix, here’s an important point:
There are different qualities of peat. The darker peat from lower down in a bog is not as good at wicking as the lighter coloured, "blond" peat that comes from the top of a bog. Blond peat isn't always available at garden centres; you might need to go to an outlet that supplies commercial growers to find it.
Make Your Own Sub-Irrigated Planter
It's fairly simple to make your own self-watering planters.
Below is a series of pictures from a batch of planters I made for my garage rooftop garden.
The materials I used were inexpensive, and available at a hardware store:
Plastic storage bin
Weeping tile (4” bendable plastic drain used around the foundation of buildings…the term used for this seems to vary by region)
Dishwasher drain pipes
Landscape fabric
The tools needed to make these were:
Drill to make overflow hole
Saw or utility knife to cut the weeping tile and dishwasher drain pipe
Scissors to cut the landscape fabric
At the time I made these, I spent about $20 per planter, a fraction of what commercially available self-watering planters cost.
Making a Planter, Step by Step
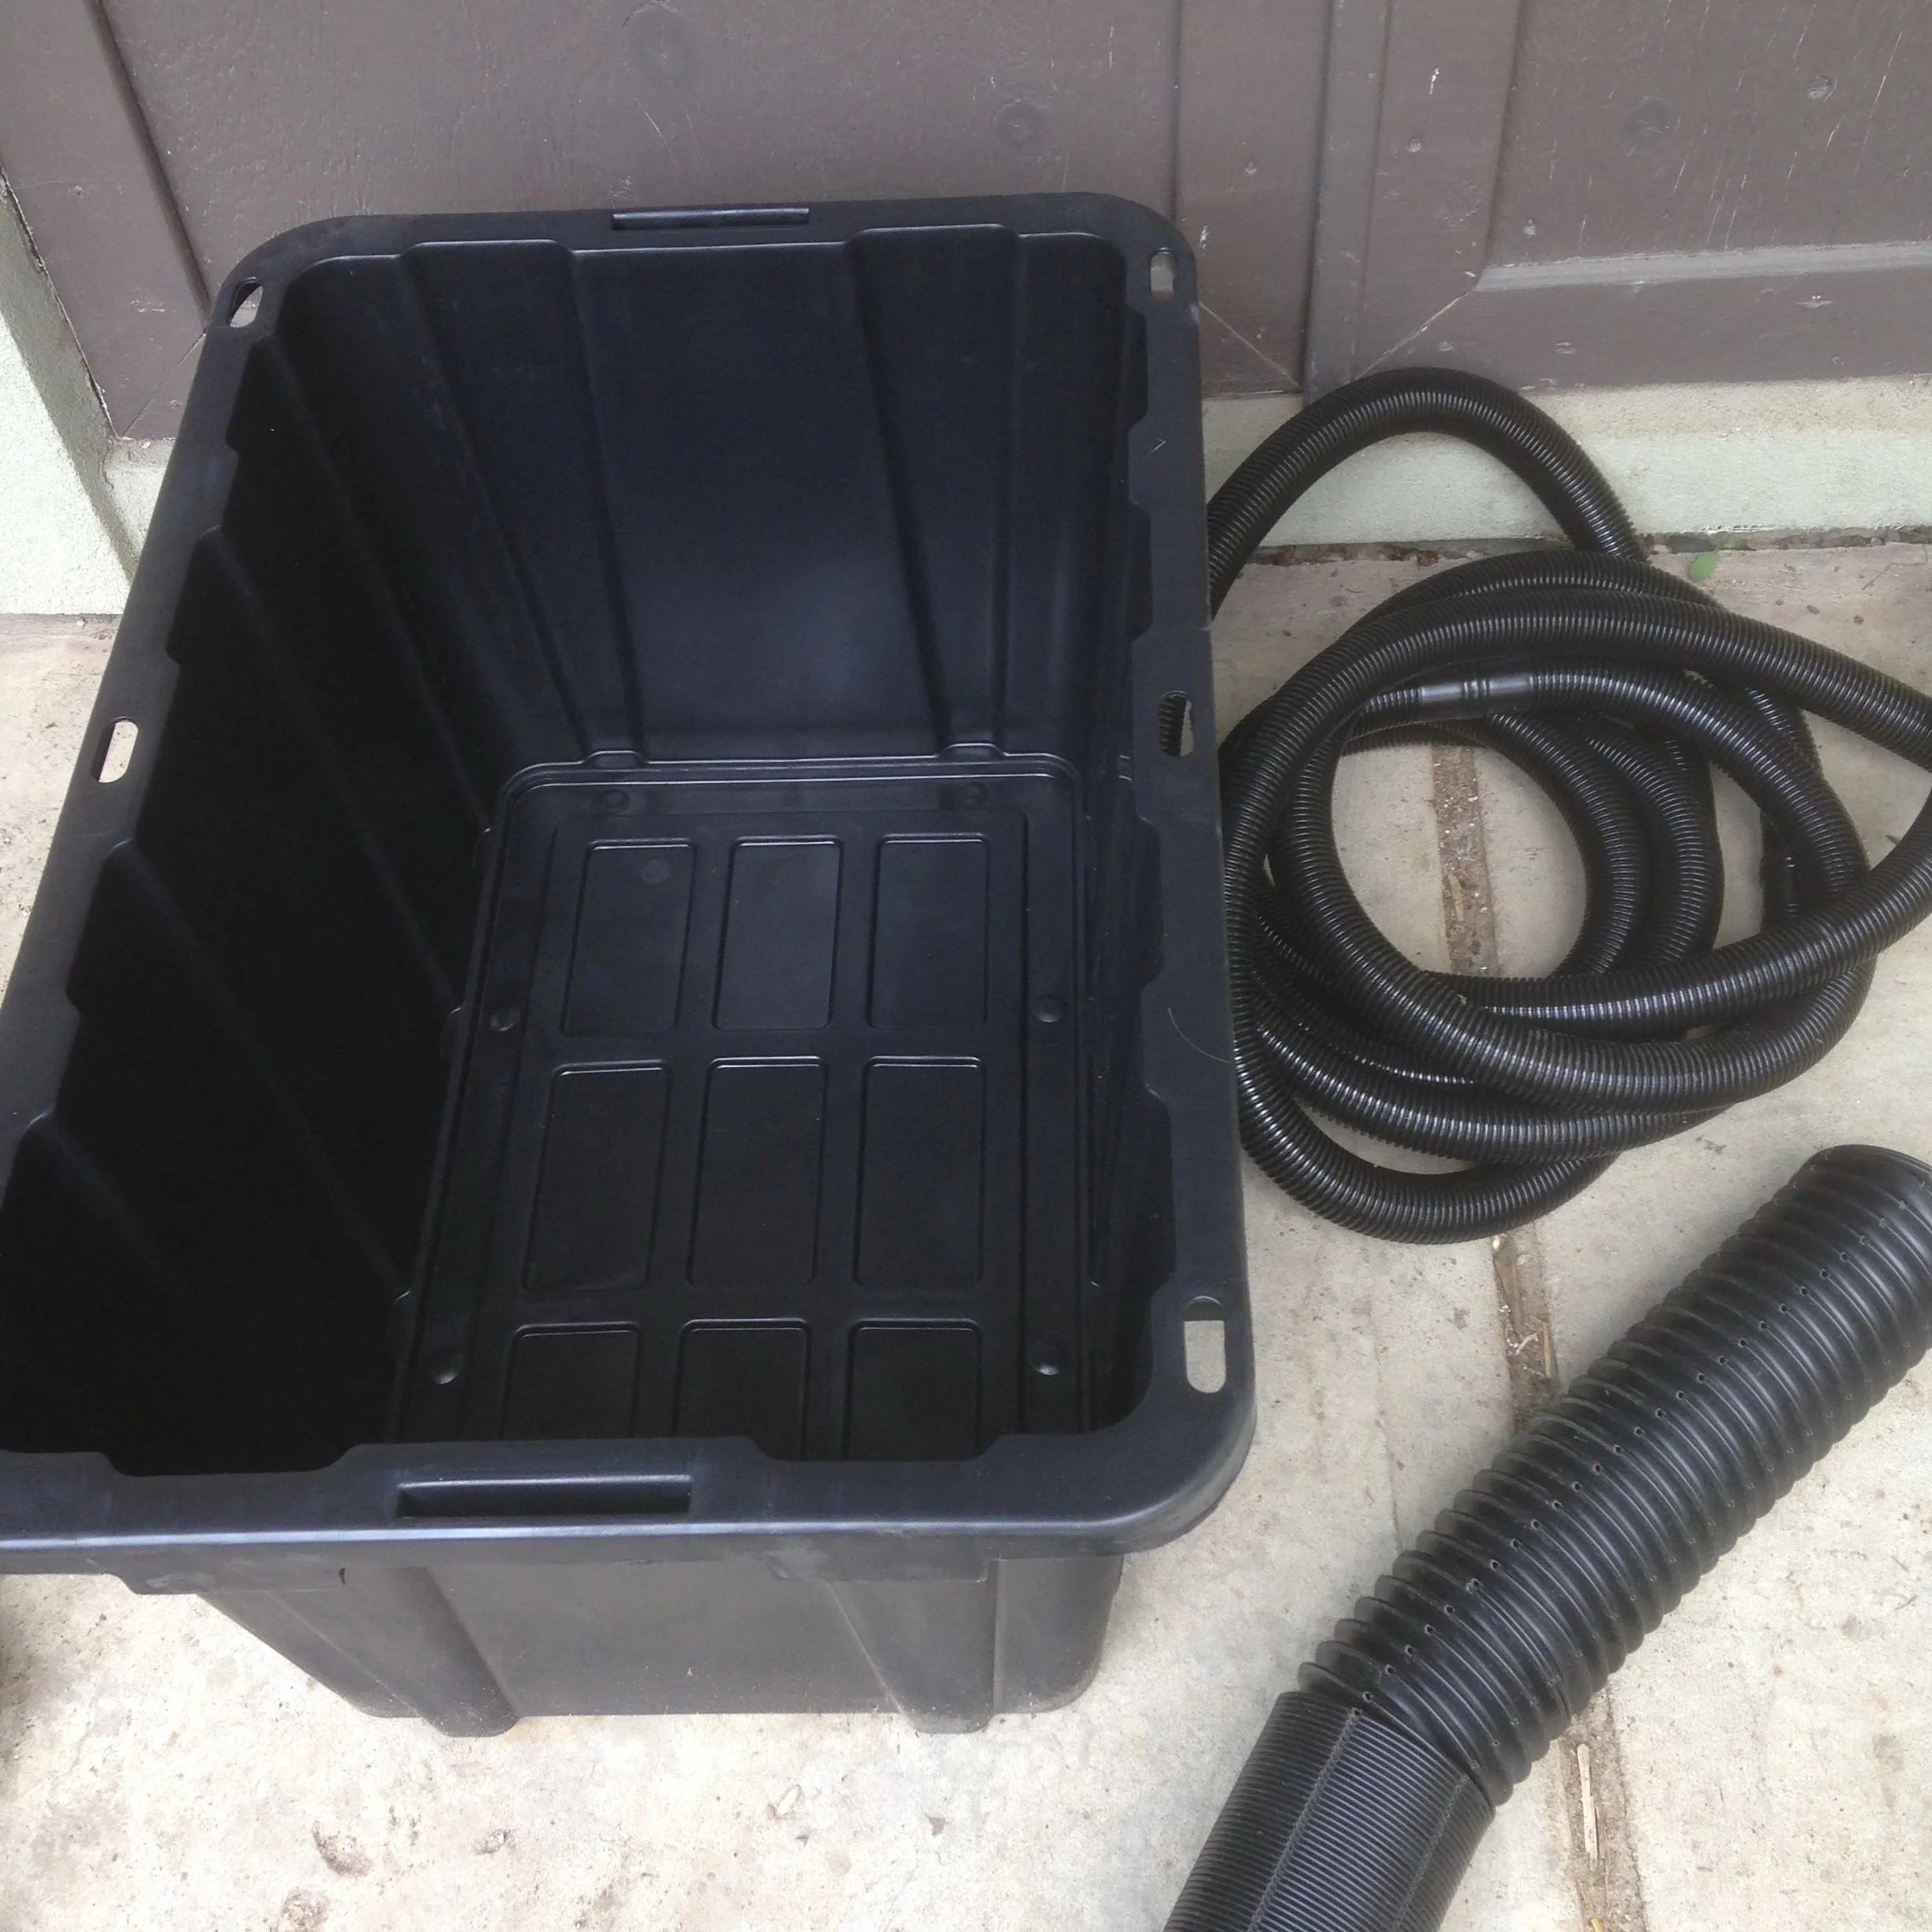
Supplies to Make a Sub-Irrigated Planter
Plastic storage bin
Weeping tile (4” bendable plastic drain used around the foundation of buildings…the term used for this seems to vary by region)
Dishwasher drain pipes
Landscape fabric (not shown)
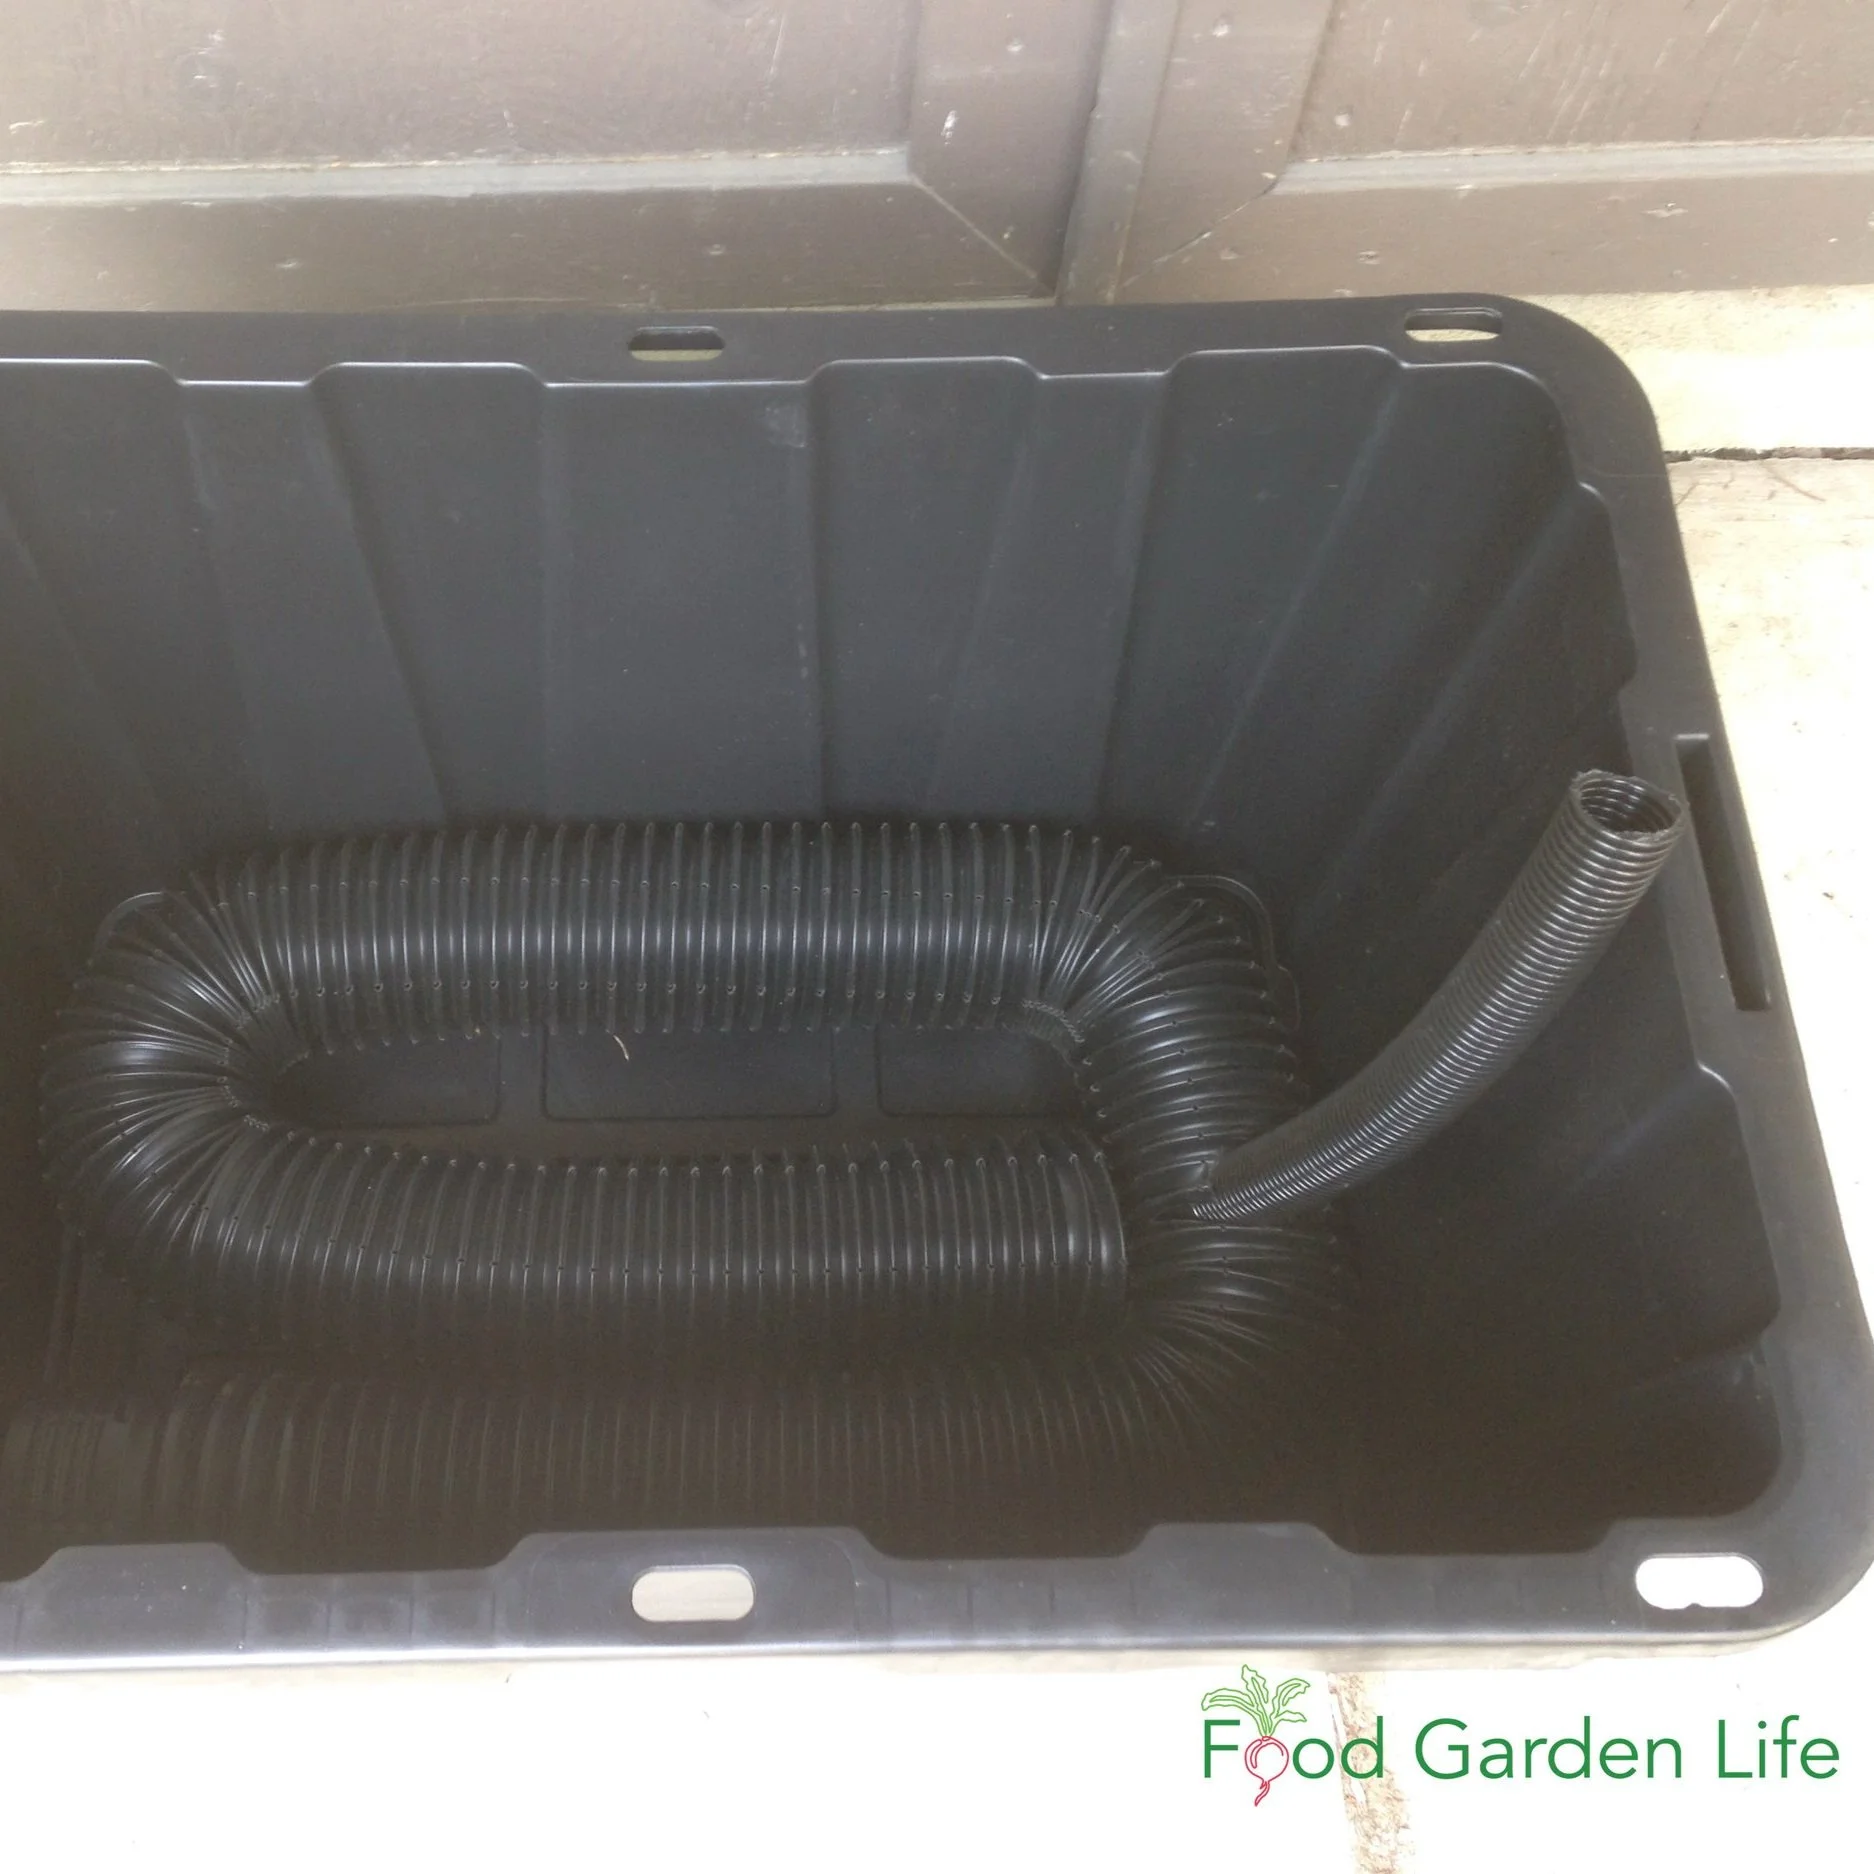
Weeping Tile with Fill Tube
Weeping tile coiled around the bottom of the bin.
A hole cut into the weeping tile with a utility knife allows a piece of dishwasher drain hose to be installed as a fill tube.
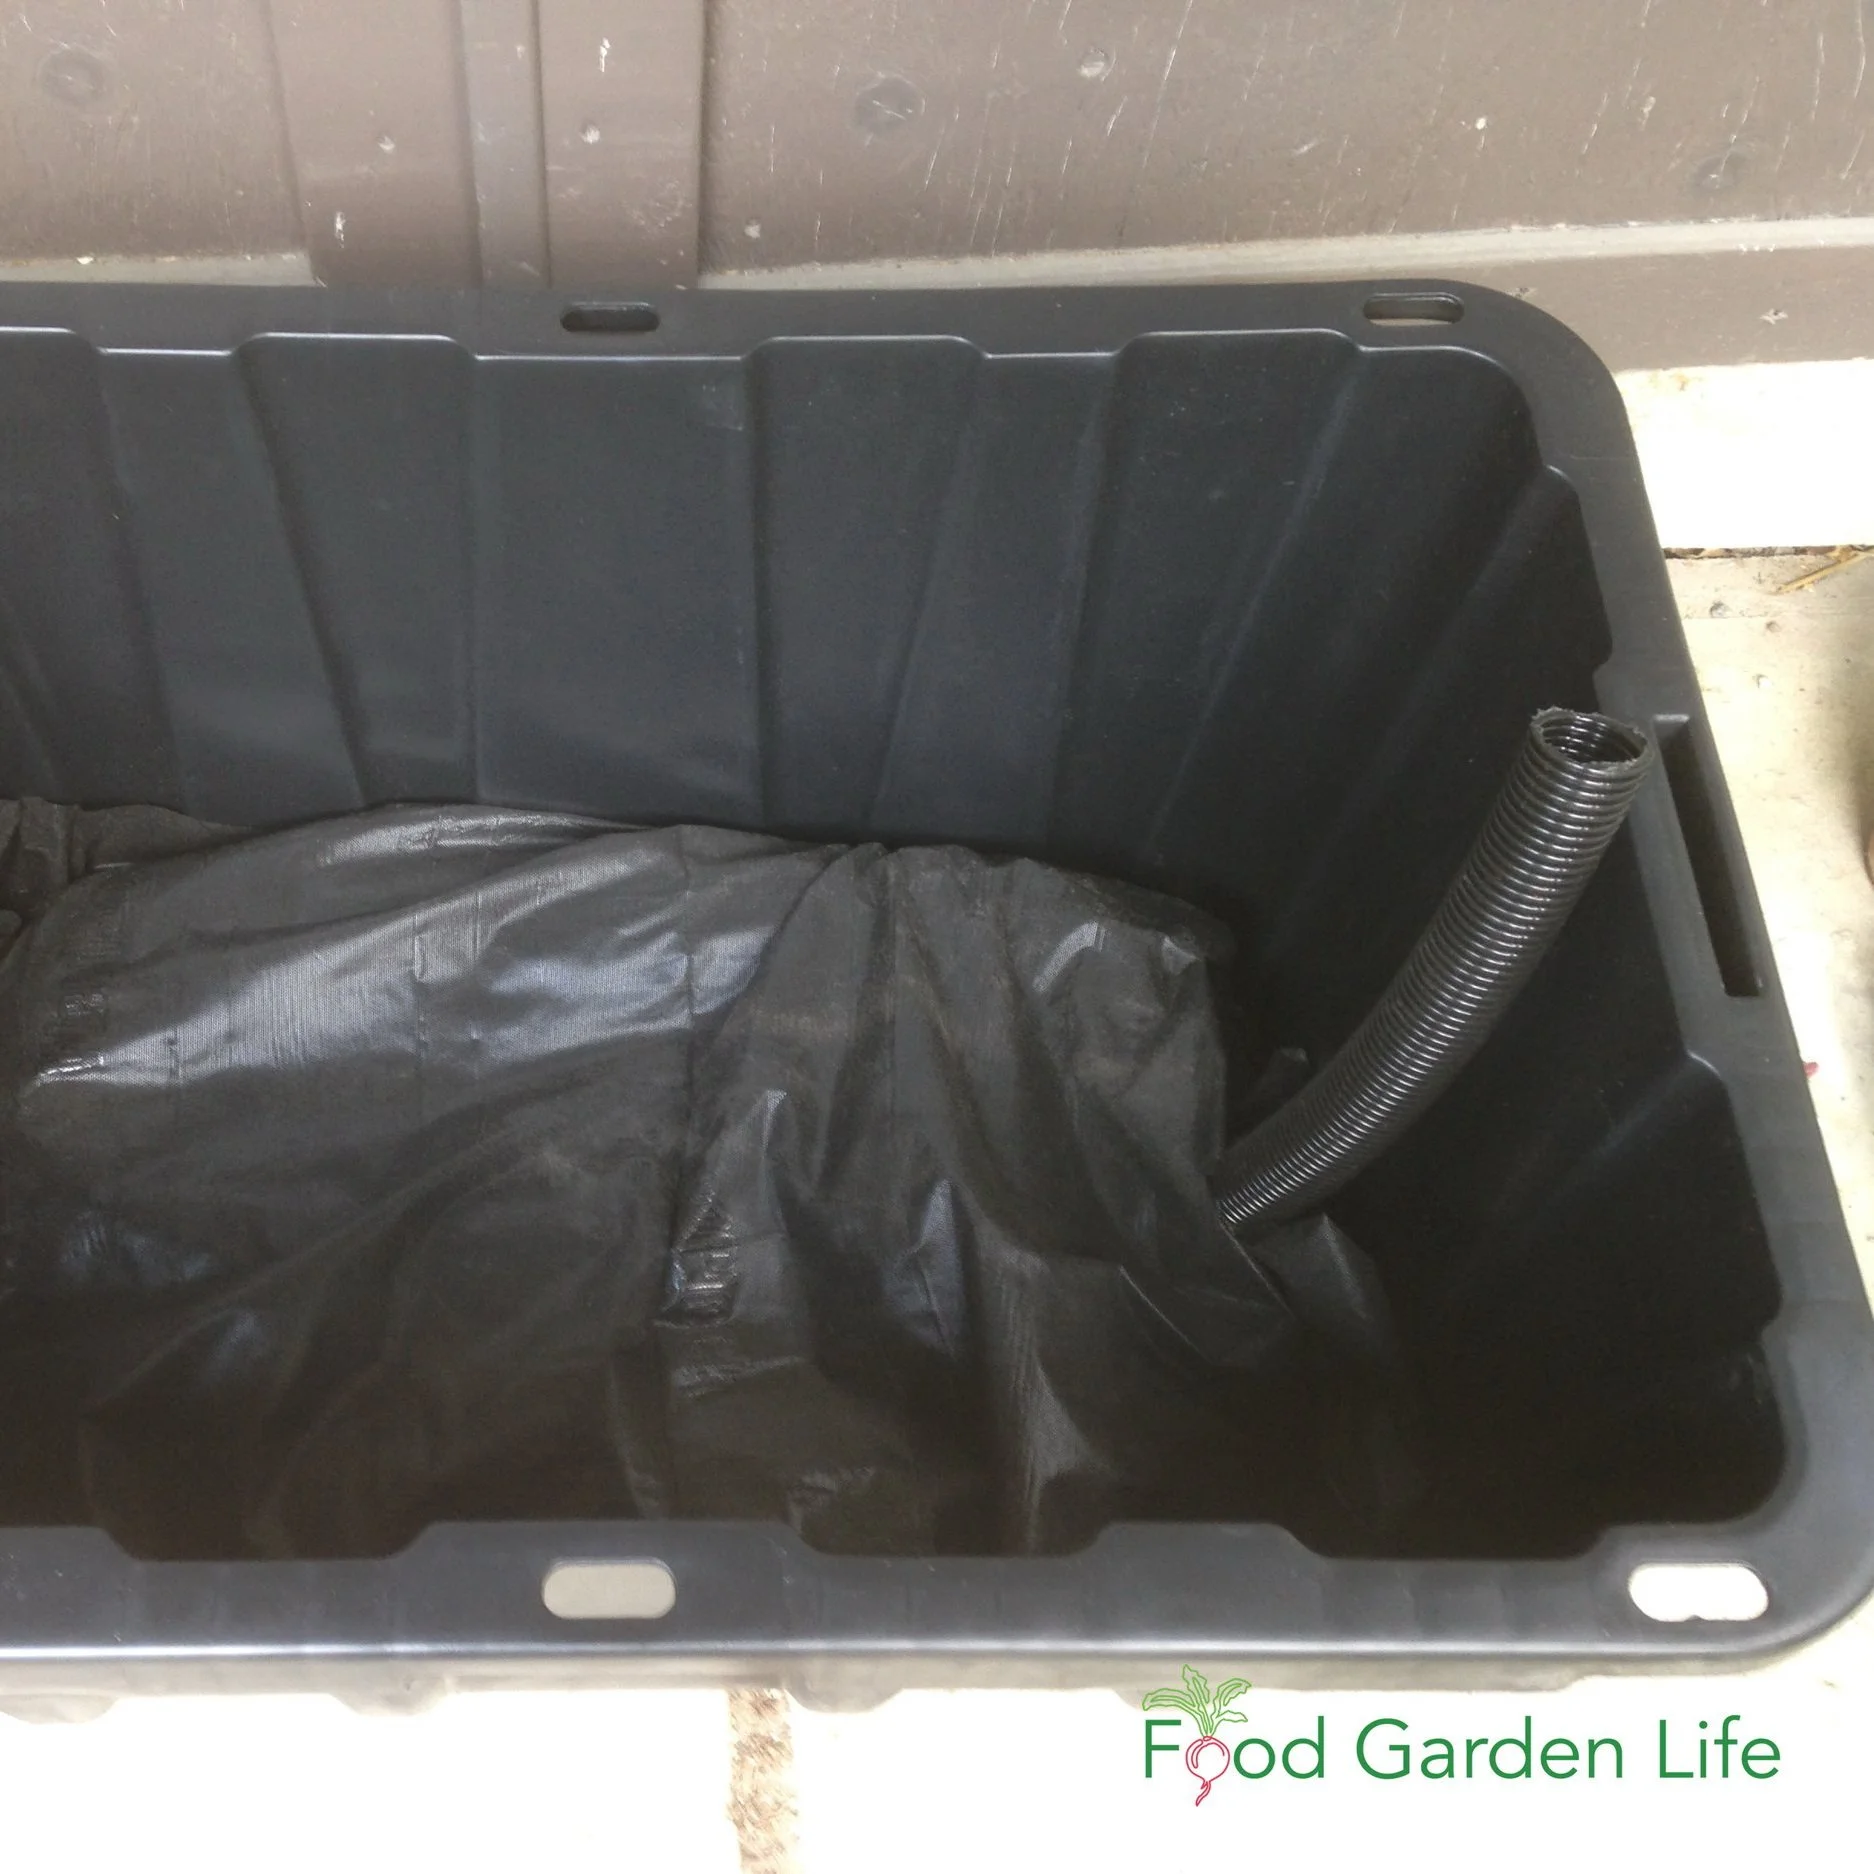
Landscape Fabric
The reservoir space created with the weeping tile is covered with landscape fabric so that potting soil doesn’t fill up the weeping tile.
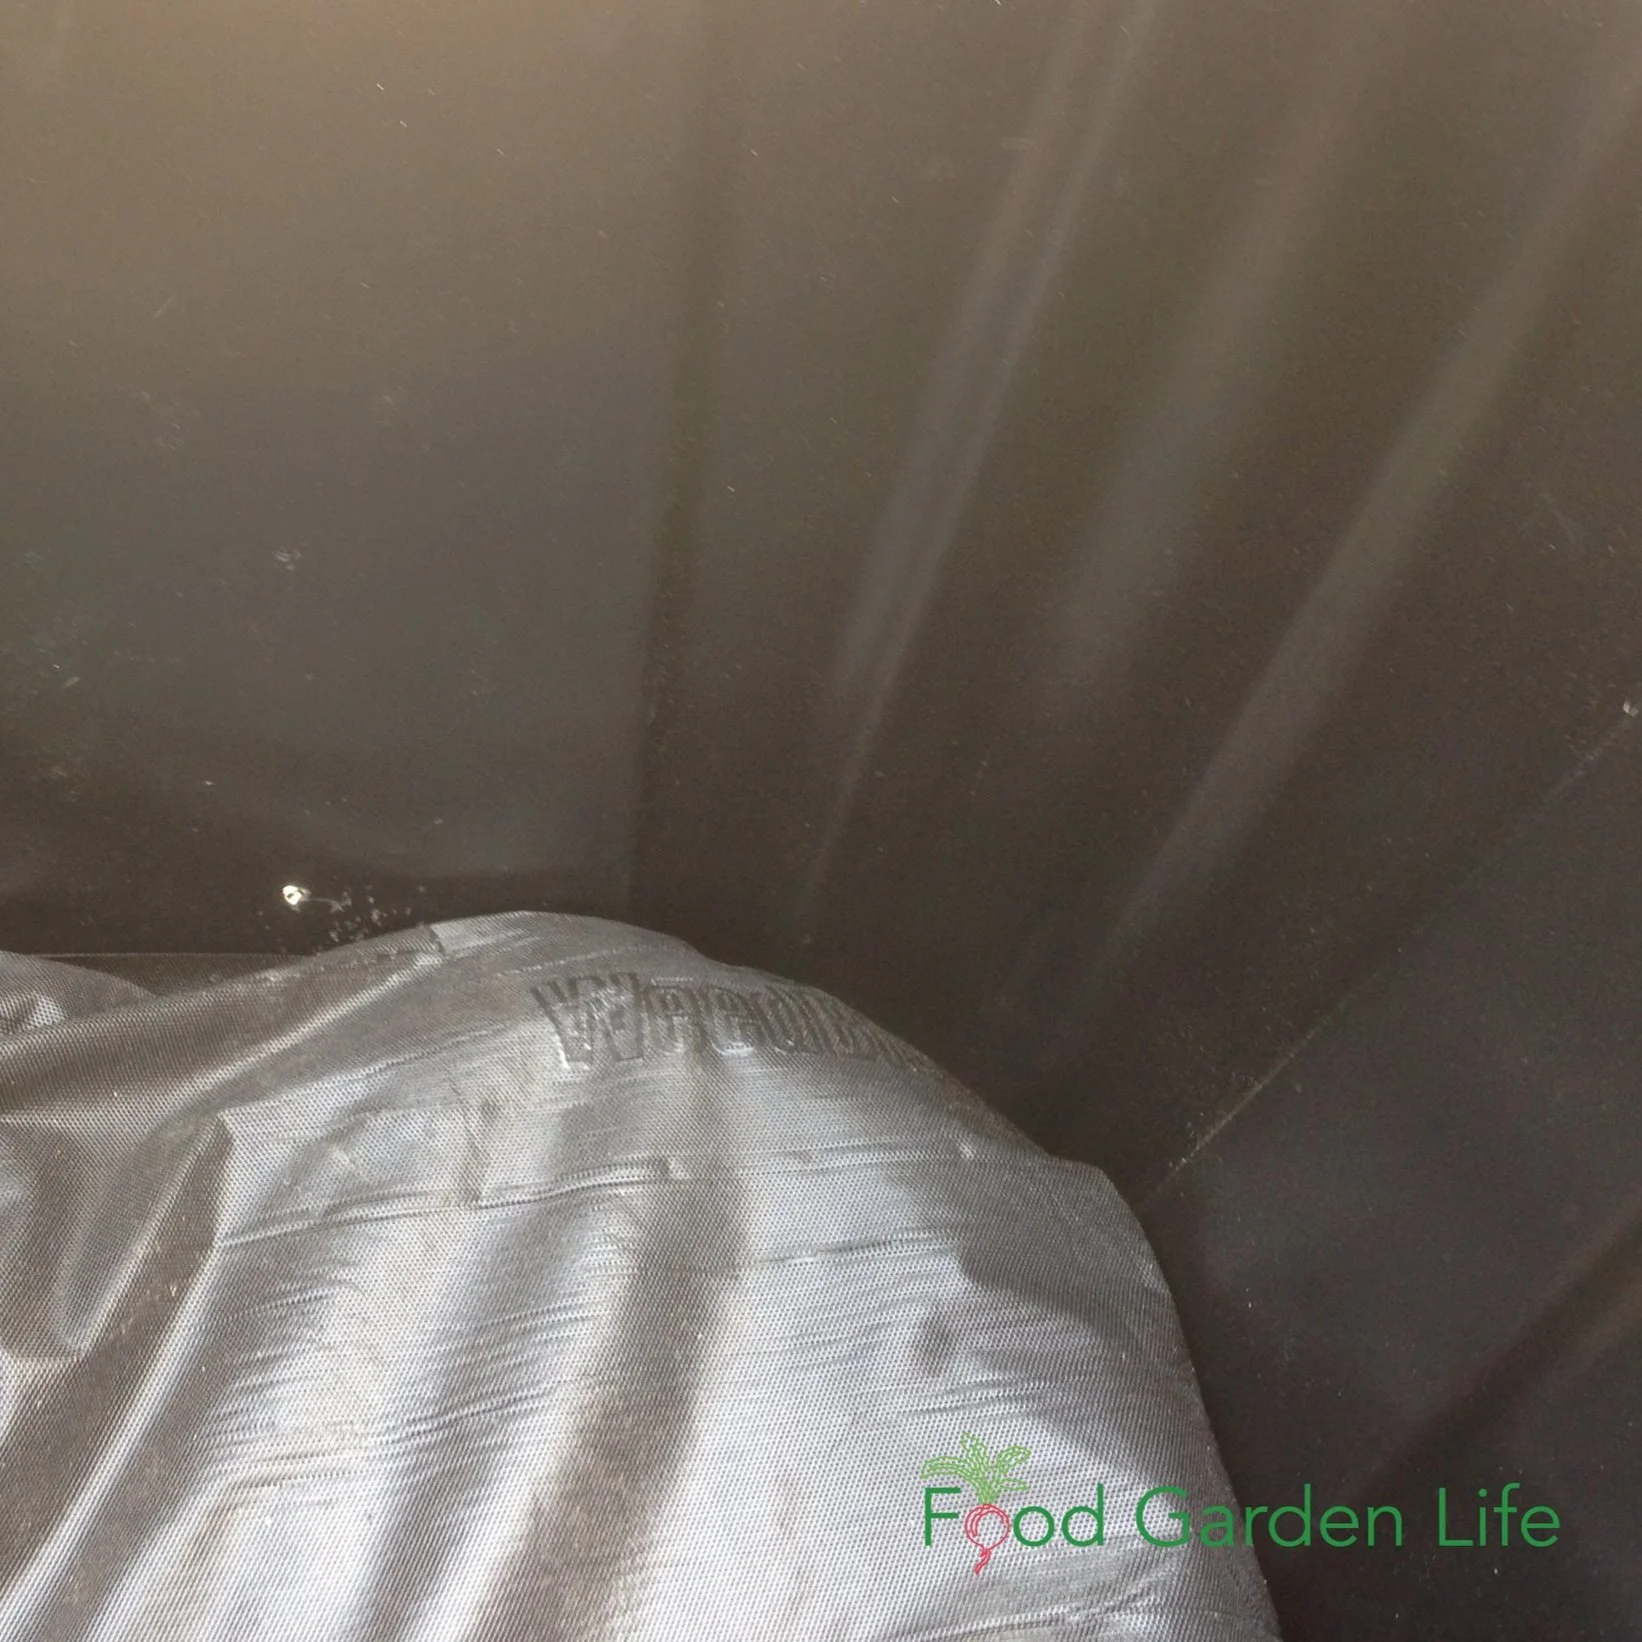
Don’t Forget This!
Drill a drainage hole near the top of the weeping tile.
The hole shown here was too small…and was blocked by a piece of perlite, so i had to drill a bigger hole.
Recycled Items to Make a Self-Watering Planter
I've also made self-watering systems using materials from the recycling bin, or things we already had on hand.
Here are examples of items you can use:
For the Water-Tight Reservoir

Retrofitting a large plastic pot to make a sub-irrigated planter. The reservoir is made from old flower pots, which are covered with wire mesh. The wick (not shown) is fabric. The mesh is covered with landscape fabric so that the potting soil does not fill up the reservoir.
A water-tight container such as a pail
Or, a liner to make a water-tight area in a container with holes (for example, pond liner or construction plastic)
To Hold the Soil Above the Reservoir Area
Drainage pipe
Downspout extenders
Downspouts
Weeping tile
Upside-down flower pots
Landscape fabric, or old t-shirts
For a Fill Tube
Water bottles
Dishwasher drain hose
Pop bottles (“soda” bottles if you’re in the US)
PVC pipe
Retrofit Containers into a Sub-Irrigated Planter
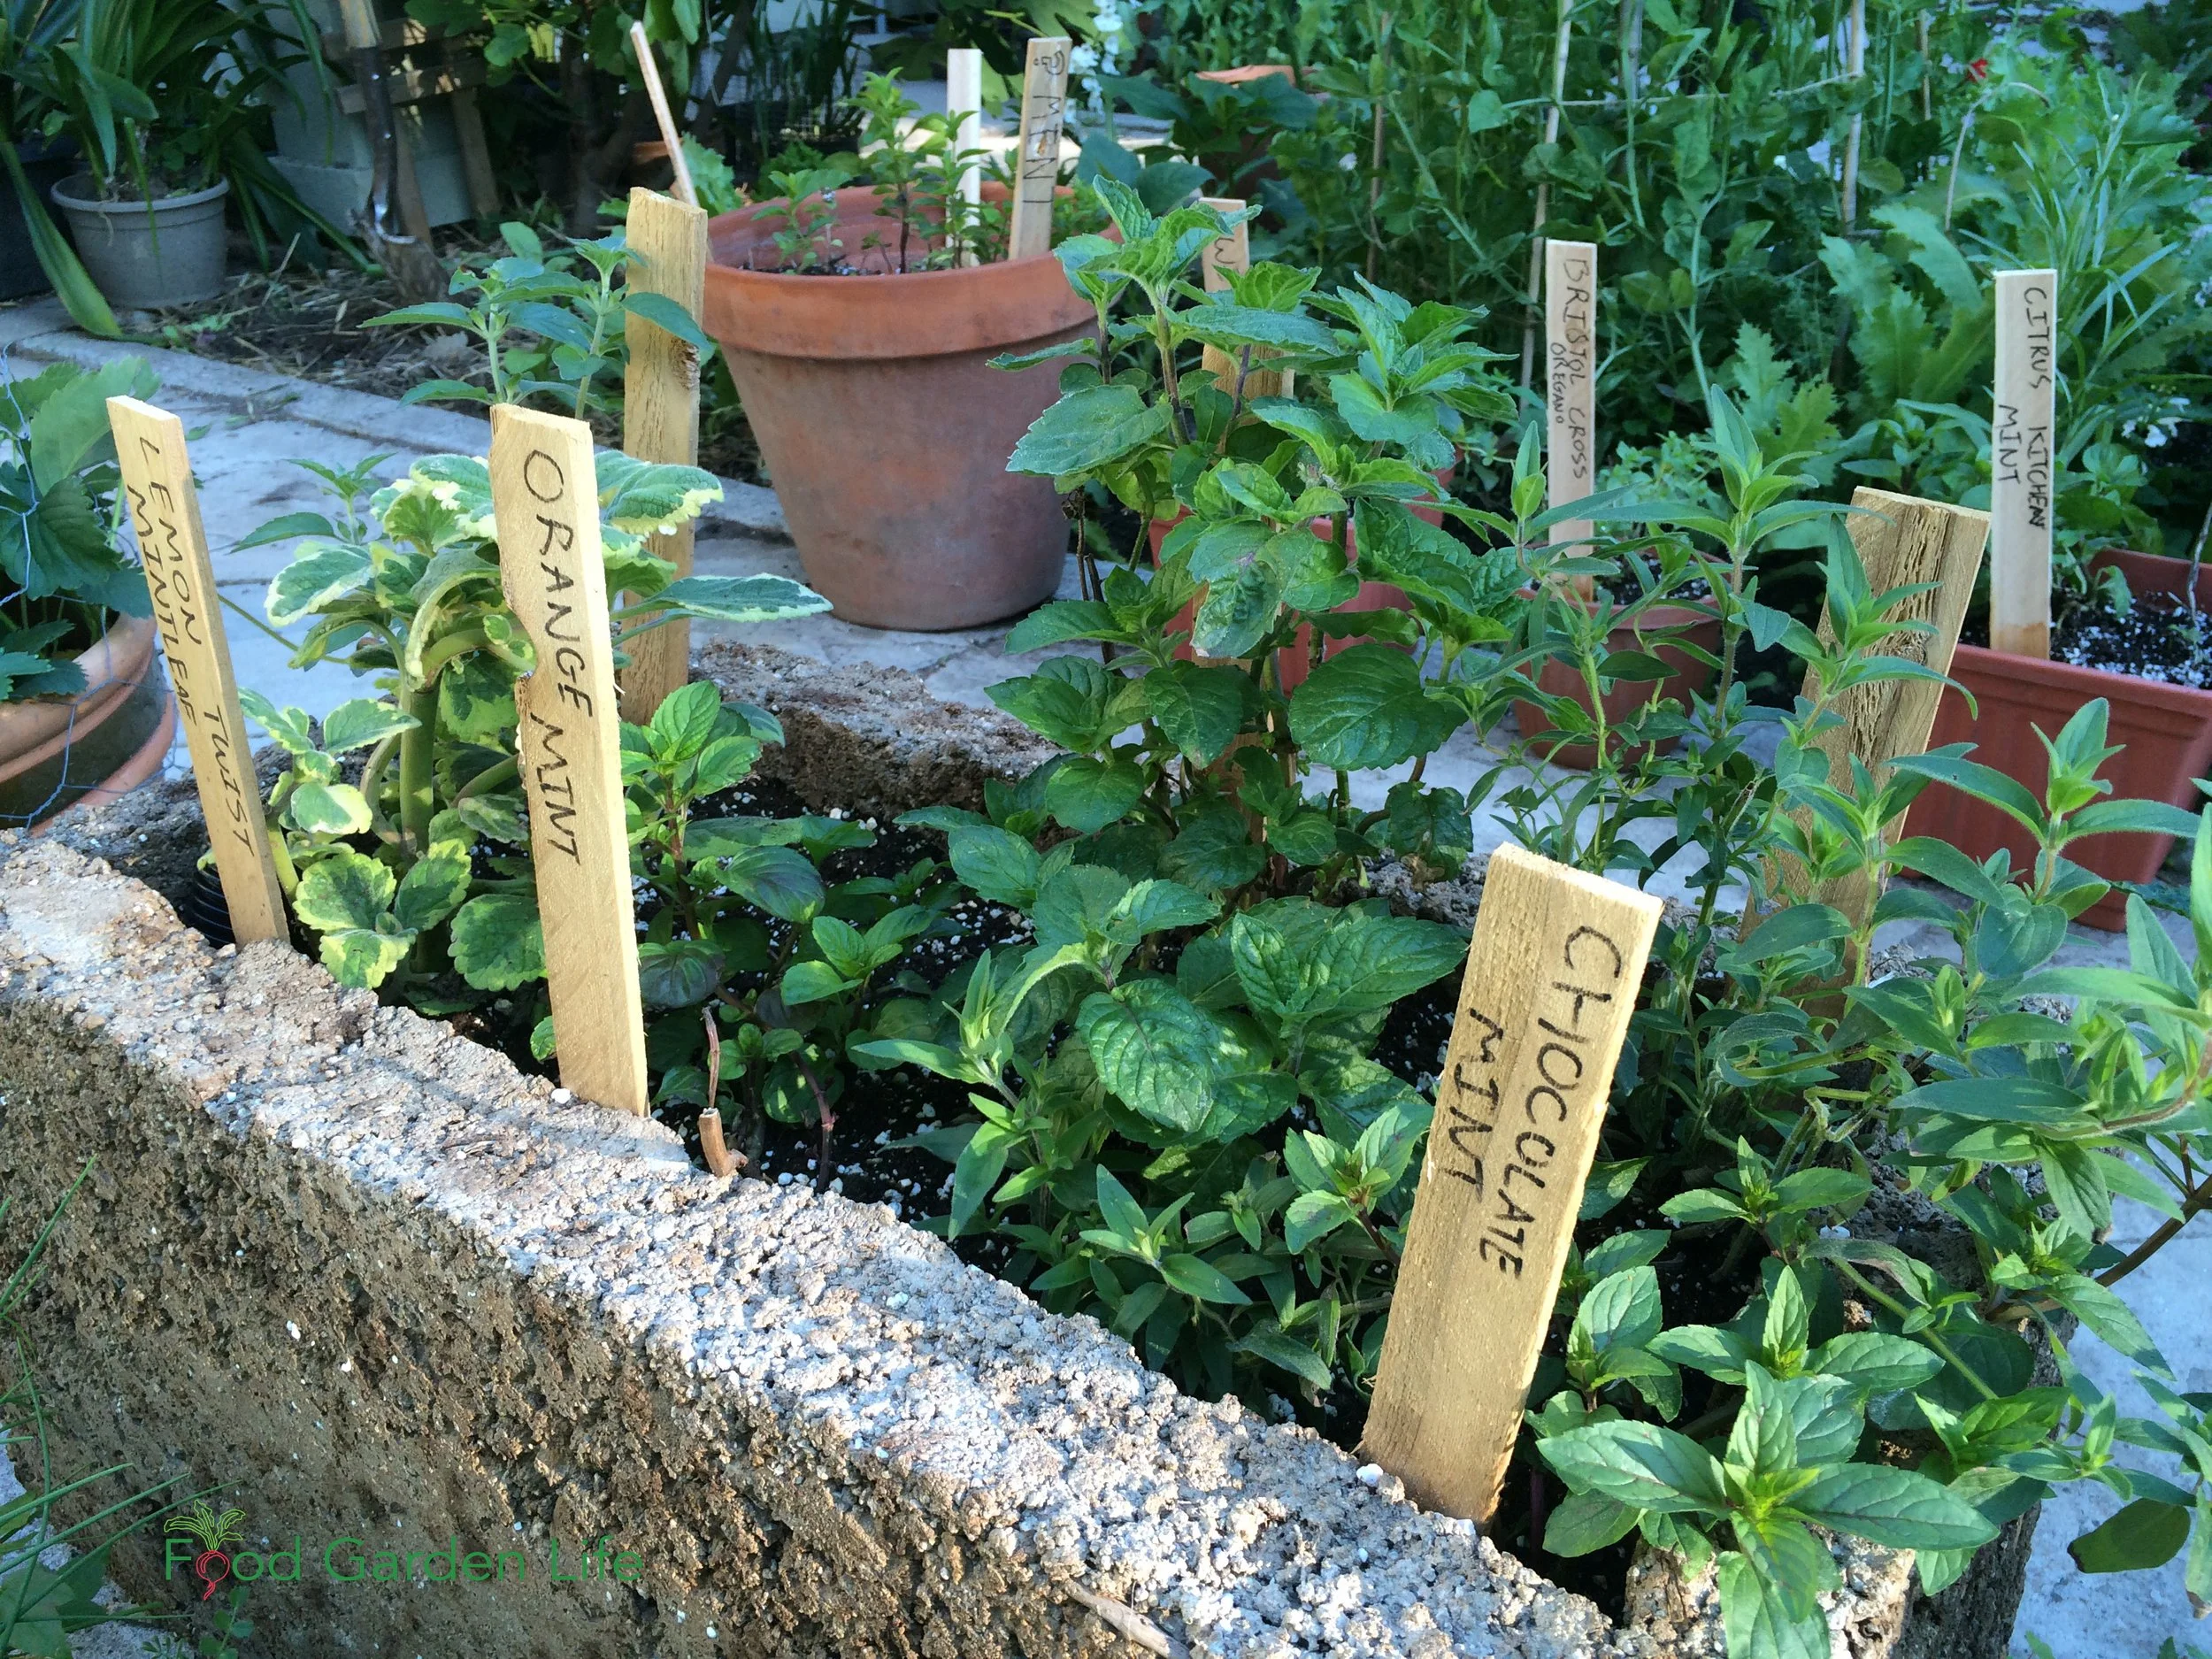
A hypertufa planter with sub-irrigation.
You can retrofit any traditional pot into a sub-irrigation system…even if they have holes in them.
Use a liner to make a water-tight reservoir area at the bottom, and then create an overflow hole.
Planter Maintenance
Potting mixes lose structure over time as the organic matter decomposes. Plan to refresh the potting mix periodically. How often you need to do this depends on the mix, and the conditions. Pay especial attention to the soil in the lower area that acts as a wick.
If you're using a fabric wick, check it annually to see its condition. Fabrics made from natural fibres break down fairly quickly.
Sub-Irrigated Planter FAQ
How deep should a sub-irrigated planter be?
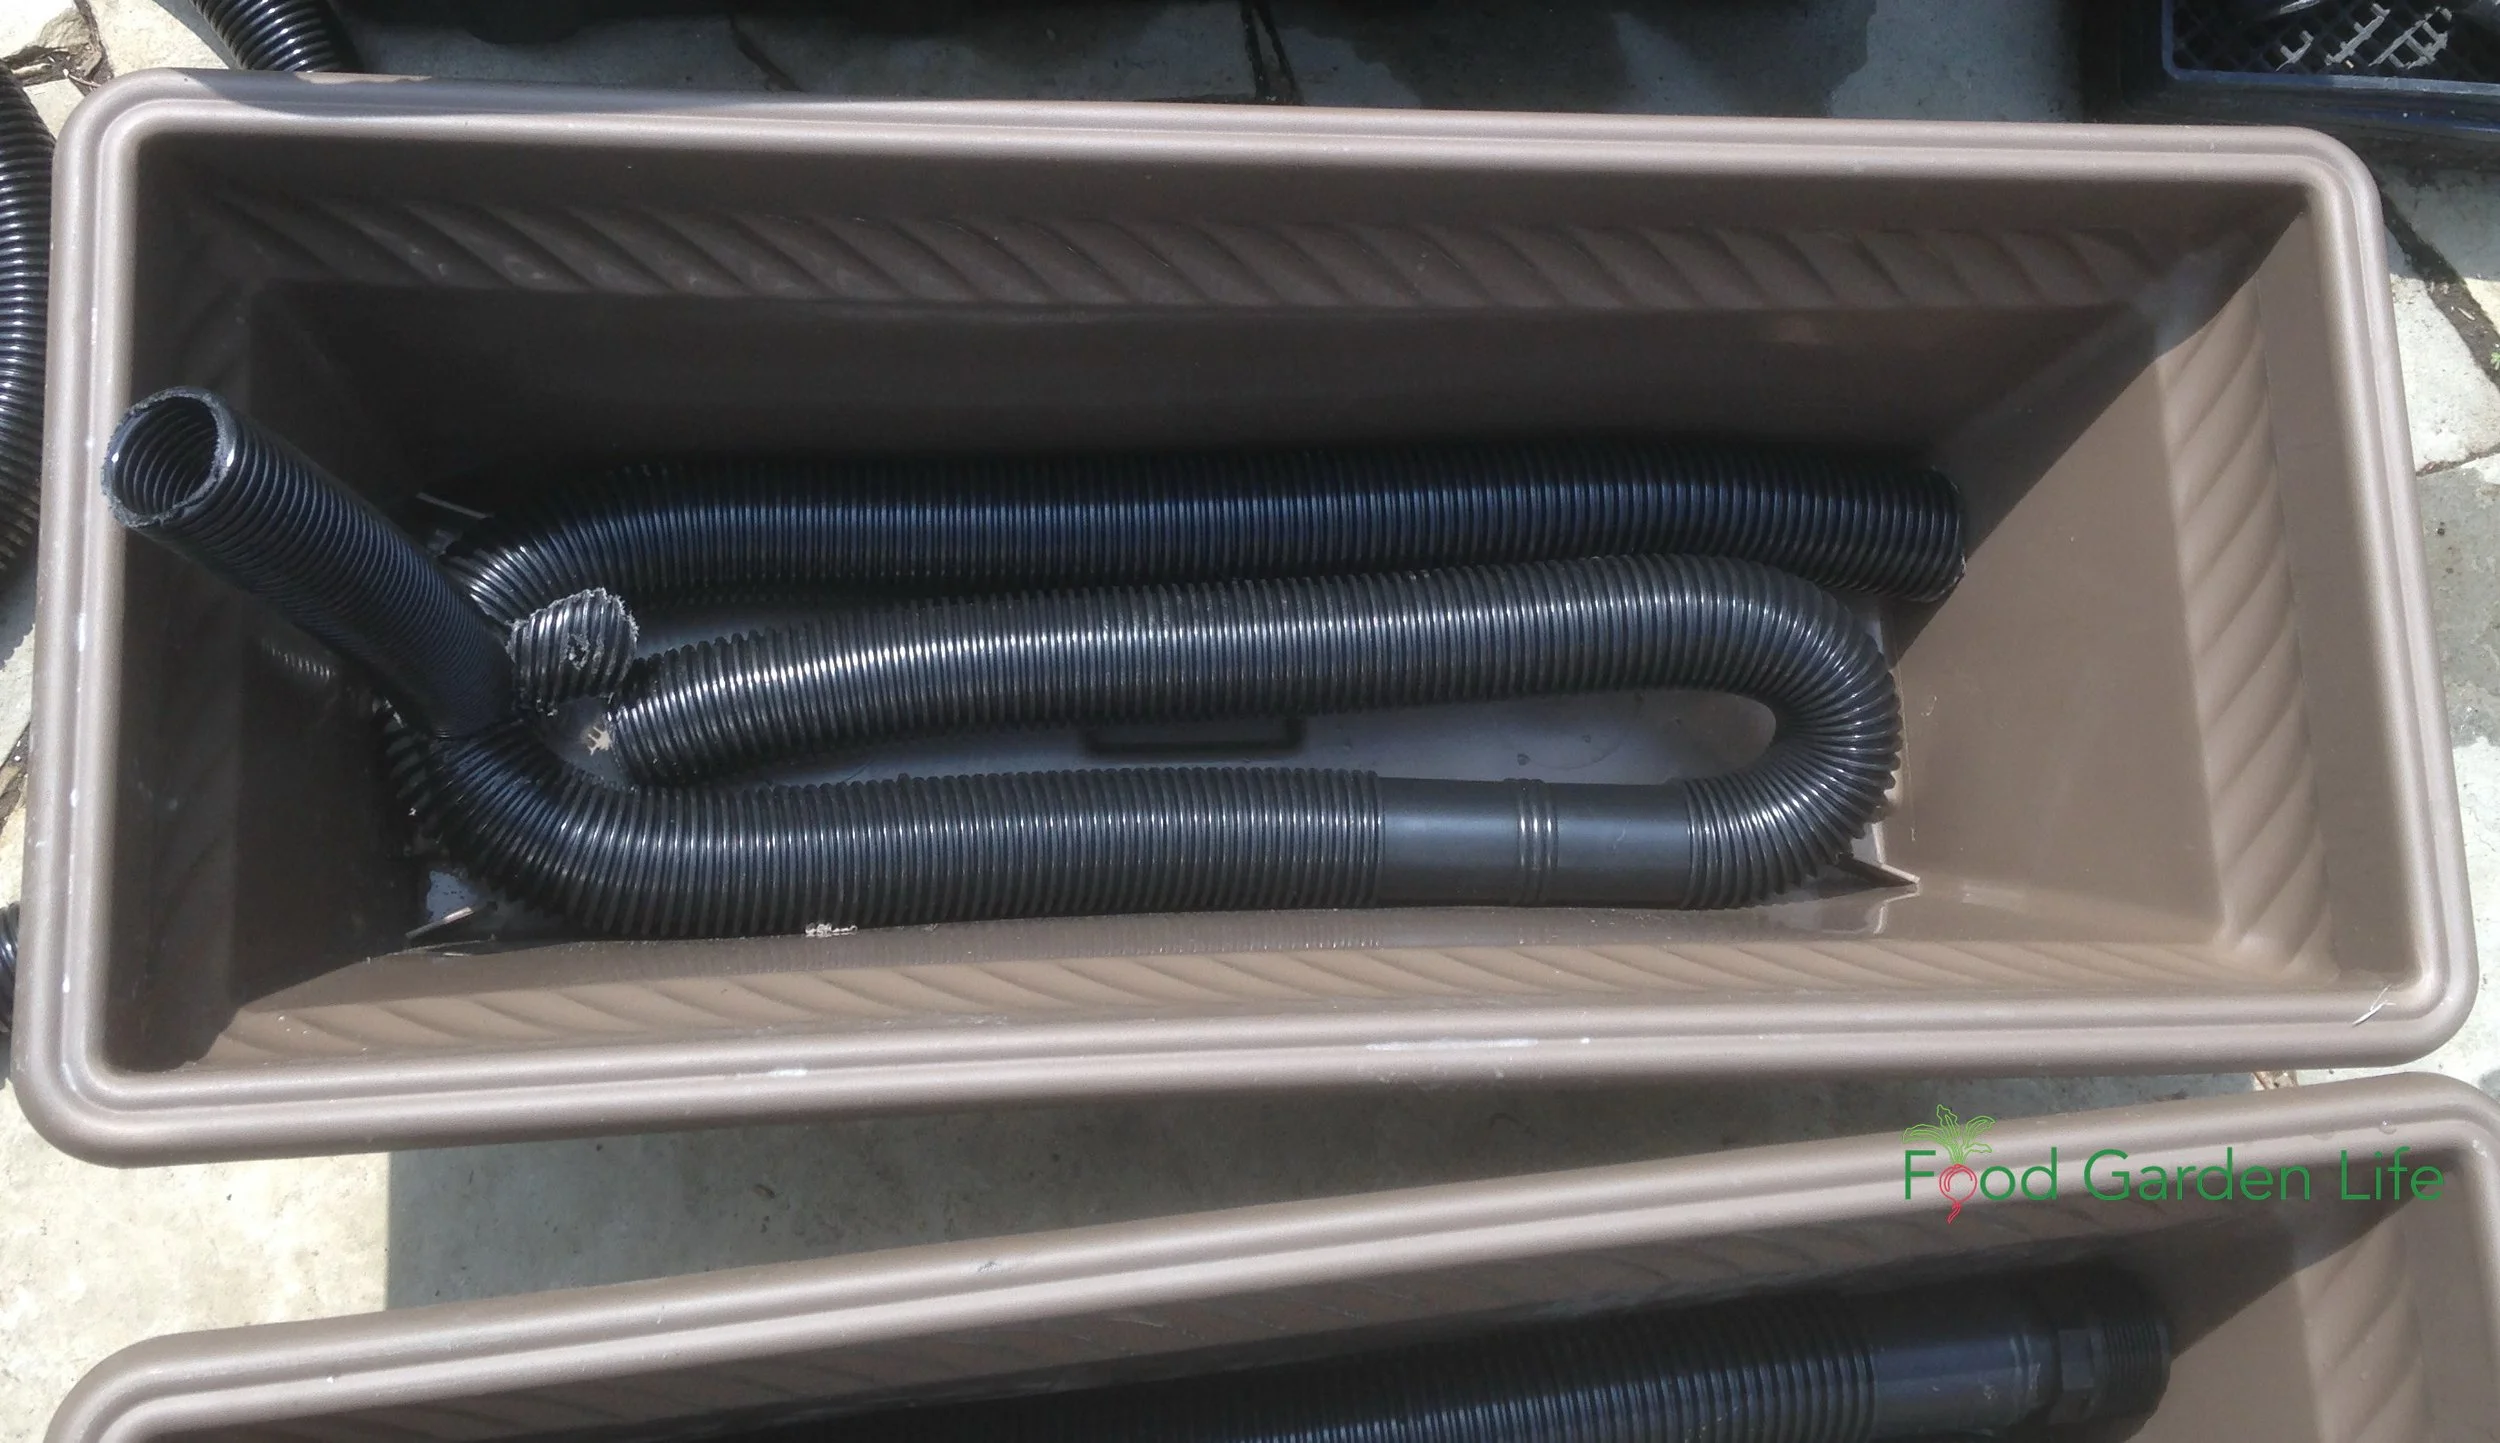
Making a sub-irrigated planter from a smaller, shallower planter. This is perfect for shallow-rooted crops such as leafy greens.
A soil depth of about 30cm (12") is usually lots. Remember, gravity is working against the wicking action...and when the soil is very deep the water doesn't wick all the way to the top.
The larger the plant you’re growing, the larger the volume of soil that you'll need. A smaller container with a 15 cm (6") soil depth can be fine for many smaller crops, such as leafy greens. If you're growing something that gets larger, for example bush-type tomatoes, a larger volume of soil is suitable. (That's why I used the storage bins in the example above. Along with determinate tomatoes, we use them for okra, peppers, and eggplant.)
Can I cover the soil on a self-watering planters?
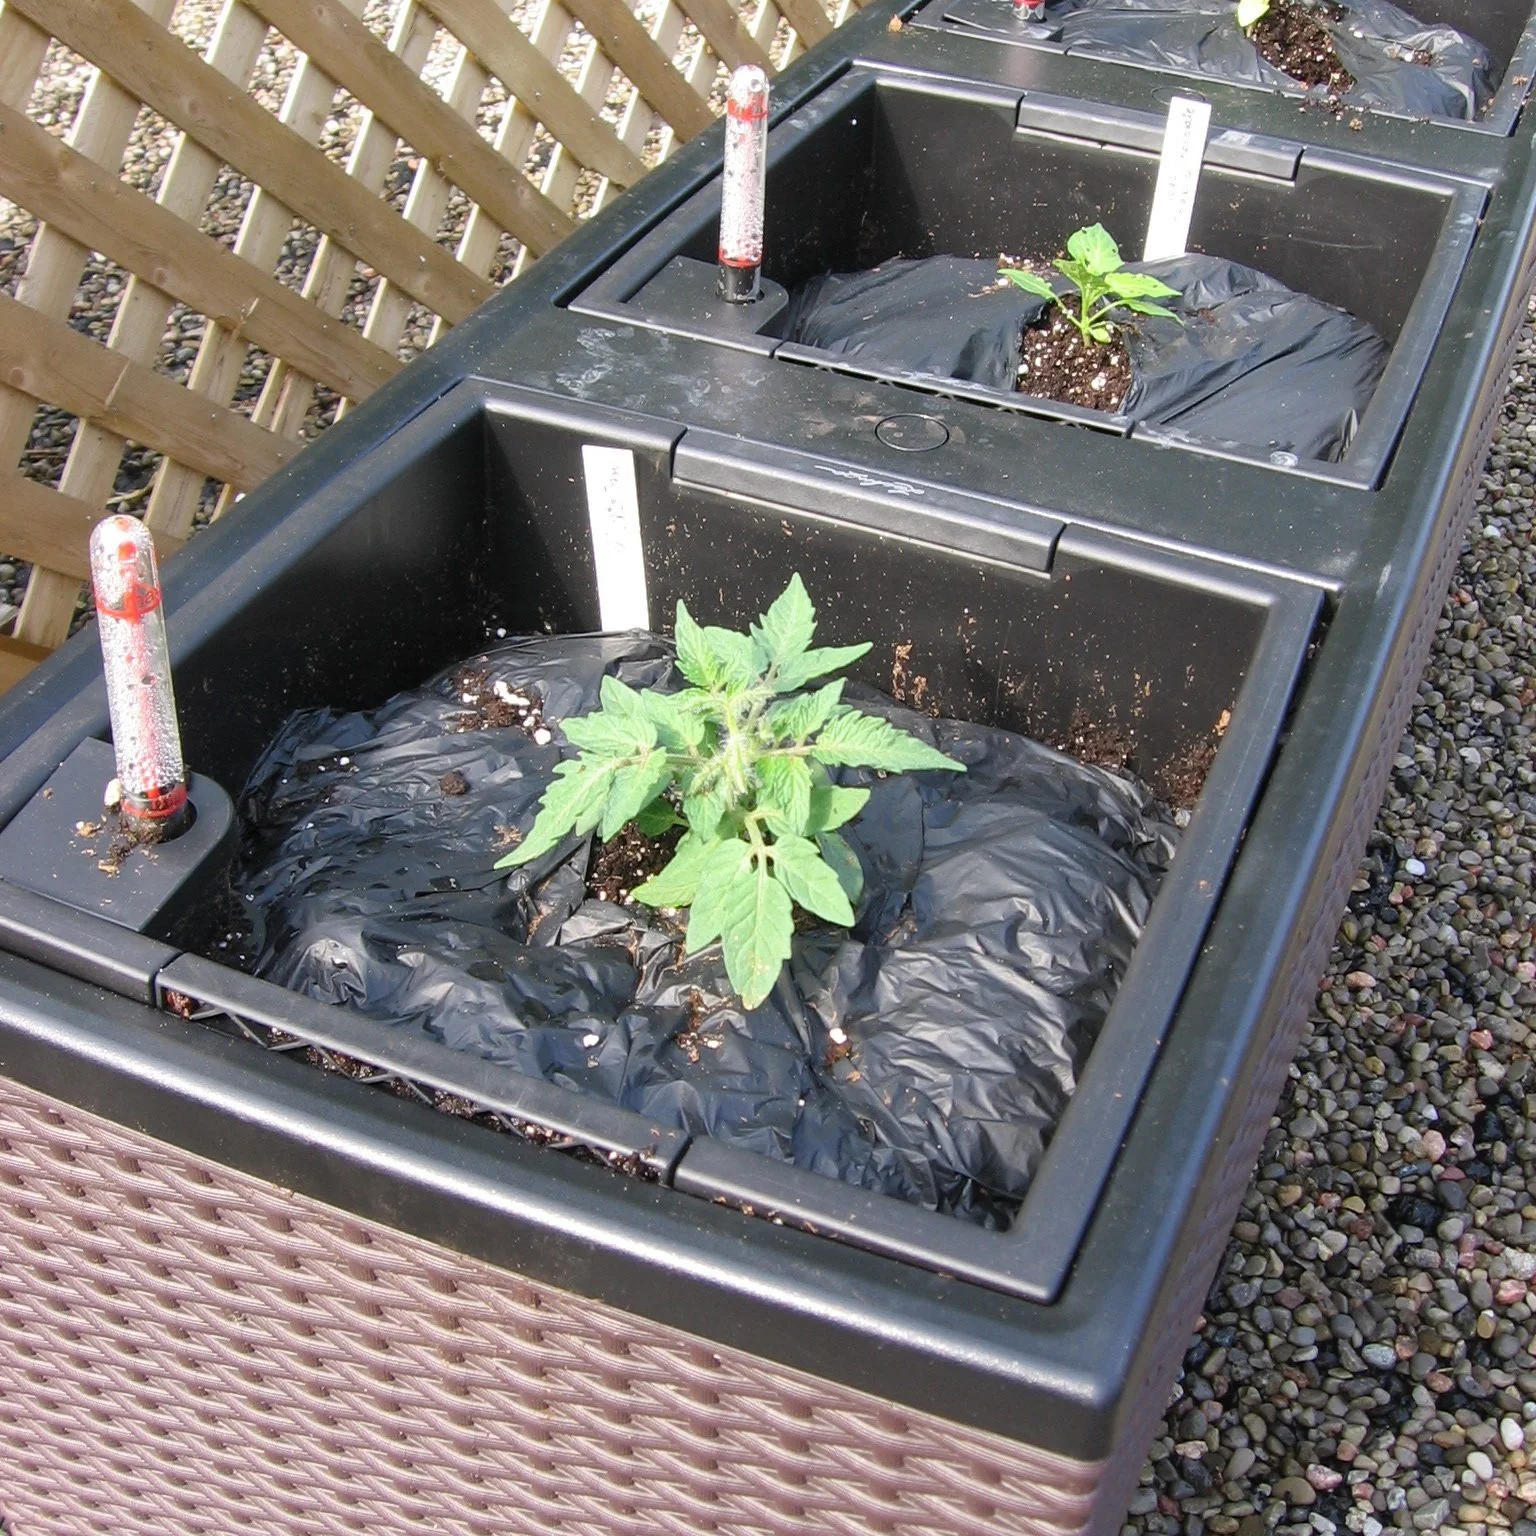
Plastic mulch over the soil holds in moisture and deters squirrels from digging up transplants in the spring.
Yes. A plastic mulch holds in moisture and stops weed seeds from germinating. There are biodegradable plastic mulches that last for a single growing season.
Lay the mulch over the potting mix, and then tuck it in tight at the sides. Once it's snug, you can cut and X in it with a sharp knife, and then plant into the X.
A springtime challenge for us is squirrels digging up newly transplanted seedlings from our planters. A simple solution is the plastic mulch, which seems to deter digging. (Soil is out of sight, and it’s out of their wee little squirrel minds.)
Or, if you don't like the look of the plastic, burlap works well too. (It's a natural fibre, so doesn't hold in as much moisture, but it deters digging and reduces growth of weed seeds.)
What about watering plants in a SIP from above?
This is fine. It will keep the soil surface moister, so there's more chance of weed seeds germinating. But there's nothing wrong with this...other than it can be much slower than filling using a fill tube.
Can I reuse the soil in my self-watering planter?
Over time, as the organic materials in soil break down, potting soil loses its structure. When is has less structure (fewer bigger particles and fewer air pores) it doesn’t wick as well.
So for best wicking, fresh potting mix work best.
But...replacing potting mix every year is both wasteful and expensive. I usually mix in some new soil mix every year, about 20 per cent.
What is an Earthbox?
It is a well-known brand of sub-irrigated planters.
Is a “global bucket” a sub-irrigated planter?
Yes. I suggest you search online to find out more about this easy-to-make pail-in-pail SIP planter that has a reservoir.
What is a wicking bed?

With a wicking bed, we're taking the same ideas we use in a sub-irrigated planter—just on a larger scale. Now we’re talking about a raised bed. A wicking bed has a water reservoir, fill tube, and overflow just like a SIP does.
If you’re researching wicking beds, you’ll see that the names SIP and wicking bed are often used interchangeably. For me, if it’s a moveable planter, it’s a SIP. If it’s a permanent bed, it’s a wicking bed. But don’t sweat the lingo—as long as you understand how it works inside.
Find out more about wicking beds.
Are there any things to watch for with SIPS?
Yes, salt build-up. Normally, excess salts that can accumulate near the soil surface wash away with watering, and then drain from the bottom of a container. But with a SIP, we’re not washing down salts with water, and any runoff is captured.
That means it's a good practice to flush out your SIPs in the spring. Water heavily from the top, enough to cause lots of water to drain through the overflow holes and carry away excess salts.
How can I automate watering in my self-watering planter?

An irrigation spaghetti tube goes into the fill tube on the SIP.
You can set it up with automatic irrigation that refills the reservoirs.
You want what’s called “spaghetti tubes,” small tubes that run from an irrigation line. One tube goes to each planter. (This sort of system is often used to irrigate container gardens, with “drip emitters” at the end of each spaghetti tube to regulate how much water comes out and onto the soil surface in the container.)
But when you’re setting up spaghetti tubes and drip emitters for a SIP garden, just put the tube and drip emitter right into your fill tube, so that when you turn on the irrigation, you’re replenishing the water in the reservoir—not wetting the soil surface. (That way, less water is lost to evaporation, and you’re not creating conditions suited to weed-seed germination.)
Experience will teach you how long to leave on the water supply to fill up the reservoir.
Find This Helpful?
Enjoy not being bombarded by annoying ads?
Appreciate the absence of junky affiliate links for products you don’t need?
It’s because we’re reader supported.
If we’ve helped in your food-gardening journey, we’re glad of support. You can high-five us below. Any amount welcome!
More on Growing Vegetables
Articles and Interviews
Course
Get great ideas for your edible garden in Edible Garden Makeover. Planning. Design. Crops. How-to.
Grow Vegetables in Straw Bales
Straw bale vegetable gardening is an easy way to create more growing space.
By Steven Biggs
Make More Growing Space with Straw Bale Gardens
I started straw bale gardening to solve a problem.
The problem? We needed more growing space for my daughter Emma’s 100-plus tomato varieties.
We have a big yard for the city. But there’s a black walnut tree that makes much of the yard unsuited to growing tomatoes.
(That’s because black walnuts give off a compound that kills the tomato plants…and a number of other plants too.)
With a long and ugly driveway that could fit a couple of school buses, Emma and I began to imagine a tomato plantation on the driveway.
In this post I’ll talk about how to use straw bales to make gardens on paved areas or over soil that’s not great for gardening.
Straw Bale Driveway Garden
Straw bales are an easy way to create a near-instant garden on paved surfaces and areas with poor soil. That’s because the straw bale is both the growing medium and the container.
Here’s how it works: As the straw bale decomposes, it creates an ideal growing medium that is well aerated and holds lots of moisture. It’s like a big sponge. It’s perfect for plant roots – better than many garden and container soils.
In short, you’re composting a bale of straw, and growing your vegetable plants in it at the same time.
Straw Bale Gardening: Top Tip

Our straw bale driveway garden
The most important thing to remember is that bales should be “conditioned” before you grow in them.
Conditioning means kick starting the microbial action. And you know when it’s working because as the microbes start to break down the straw, the temperature inside the bale goes up. We don’t plant in it yet…it might be too warm for our plants.
As the temperature comes down, your bale is ready to plant. Some people use a thermometer. I stick in my finger. It’s not an exact thing.
I allow 3-4 weeks for this conditioning process. It might be less if you’re somewhere warmer than me.
Since the bales in our driveway garden are for heat-loving tomato plants that we put out in late May, we start conditioning the bales late-April to make sure they’re ready for the planting date. I just work back four weeks from my planting date.
Straw Bale Garden Setup
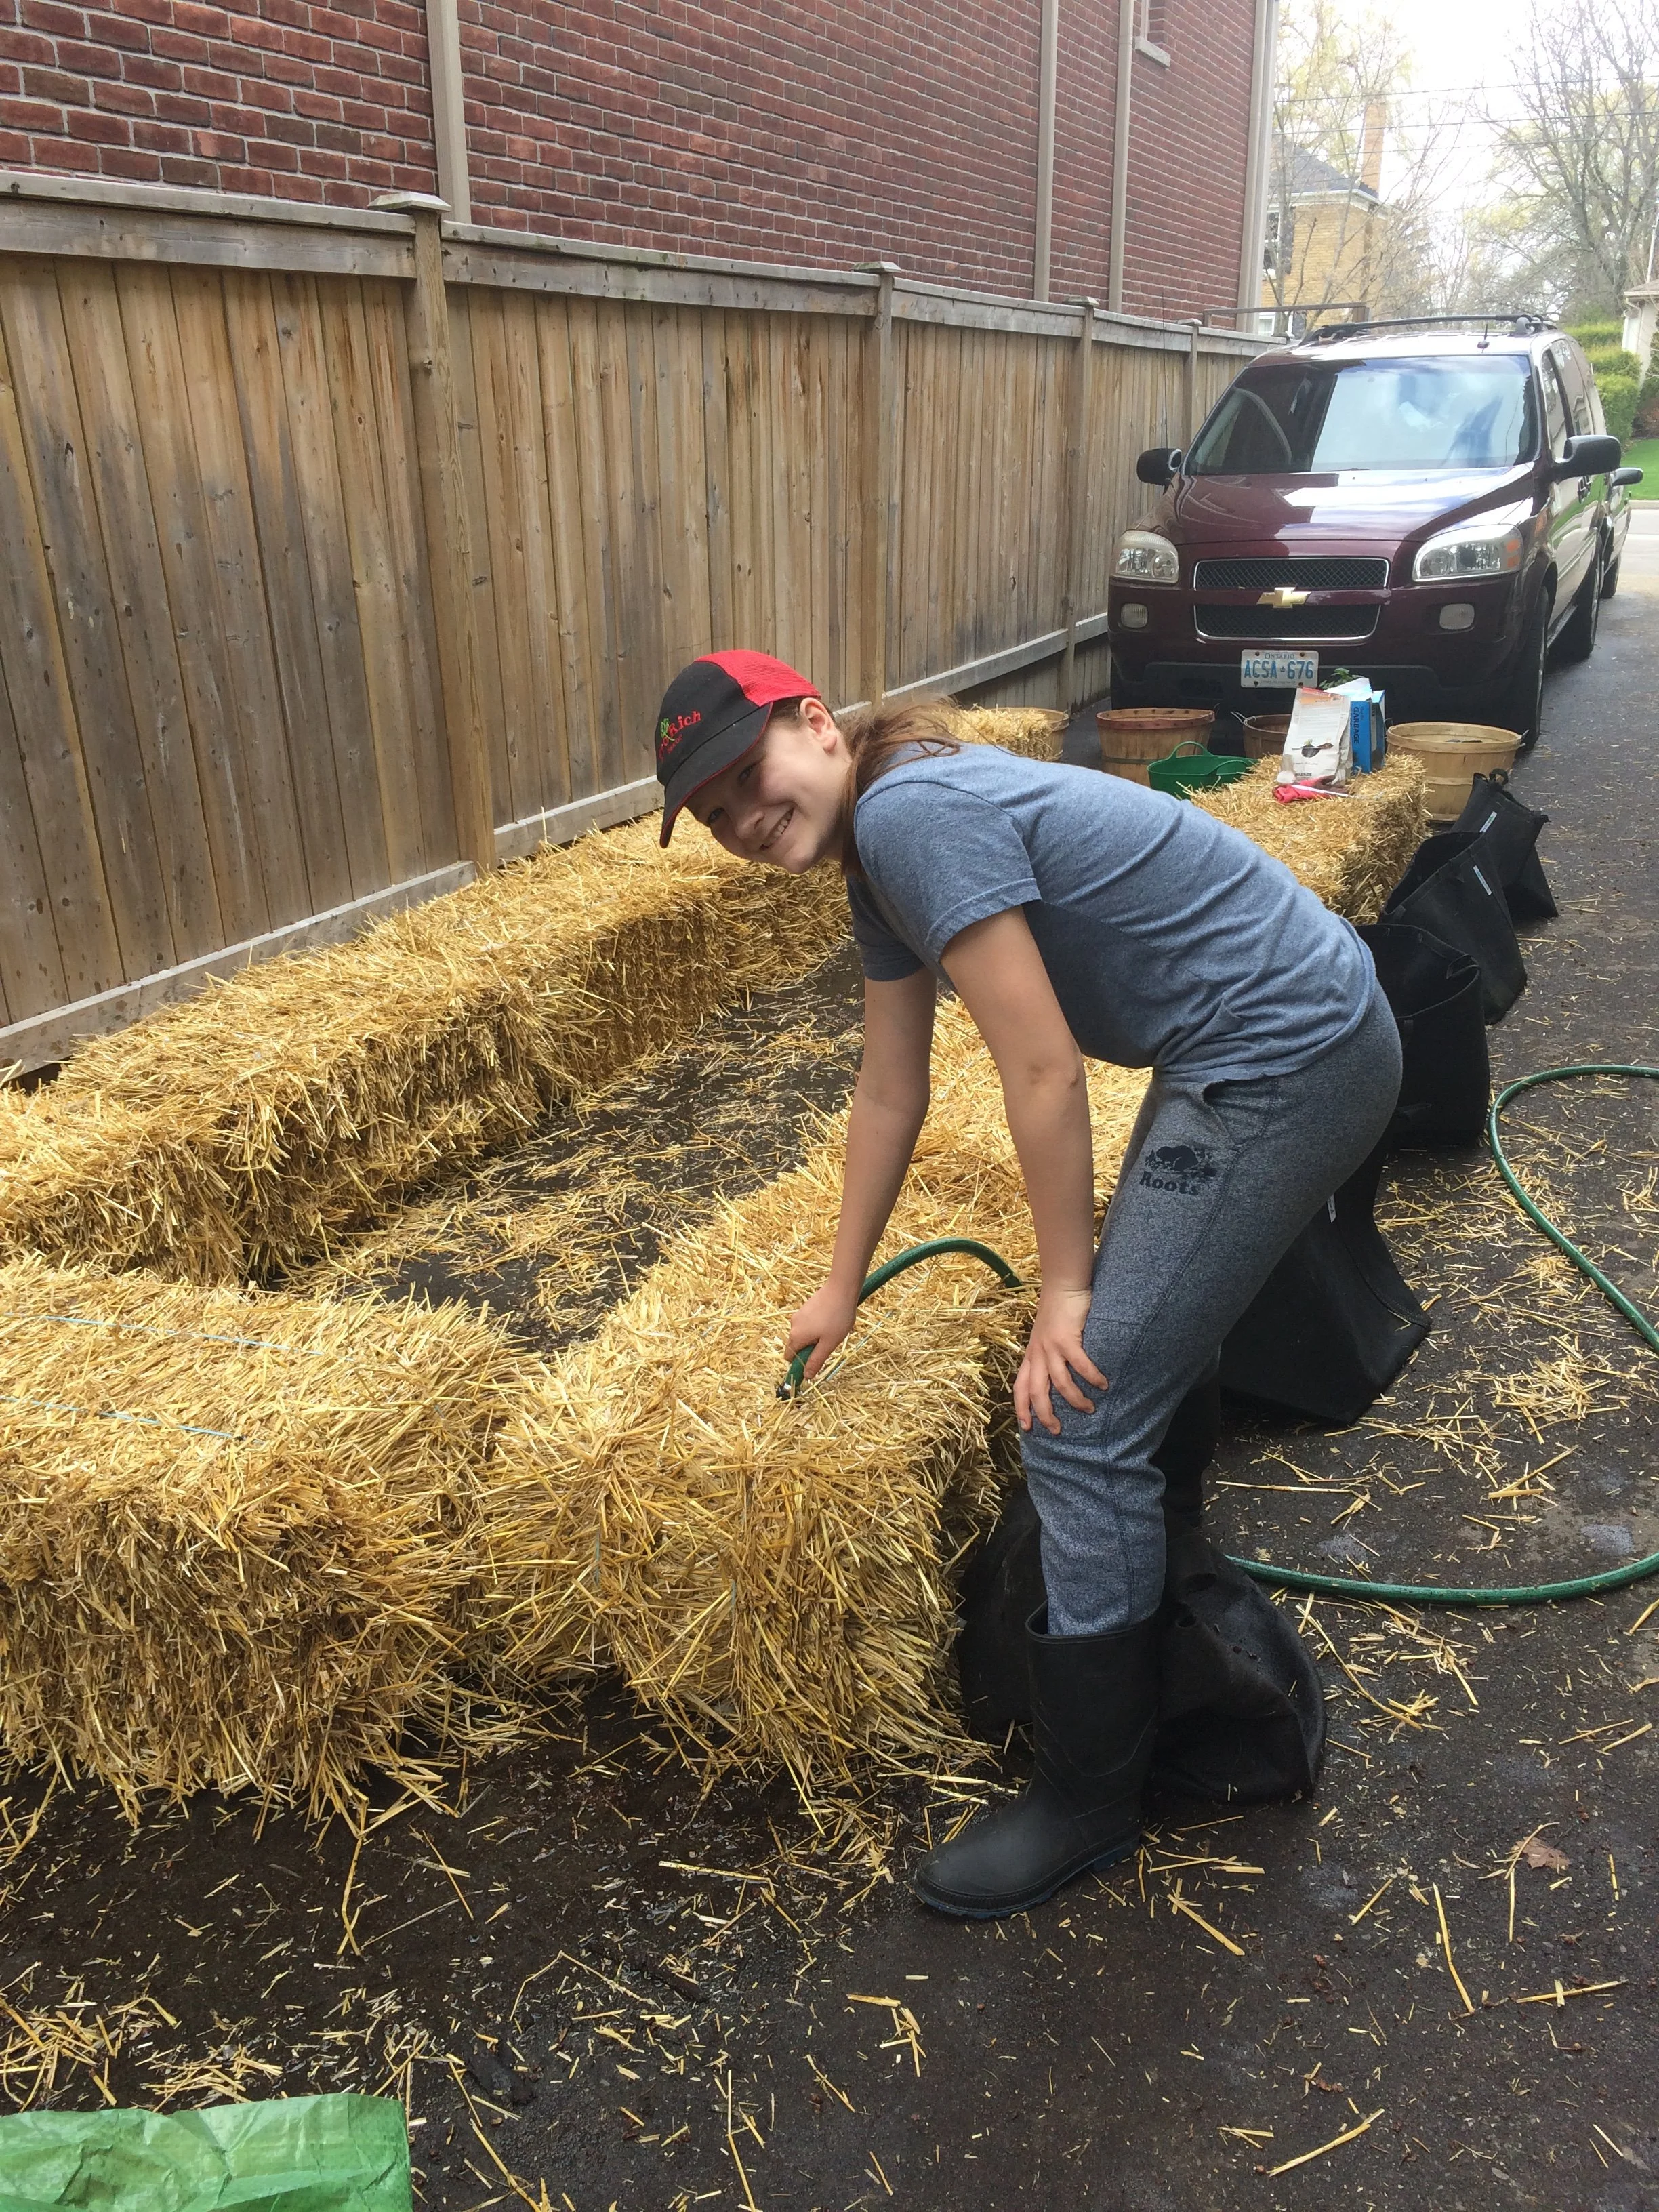
Emma conditioning the newly arrived straw bales.
Before your bales become heavy from watering them, it’s a good time to think about how you want to arrange them. There’s no right or wrong, it depends on your situation:
If you’re planning to use a long soaker hose, you might want them in a long line.
If you’re gardening with kids, arranging them in a square makes for a nice hidoute once the plants get bigger
If you’re watering with a hose, arrange the bales so you can easily move amongst the bales with the hose
How to Orient Straw Bales
Once you know how you want to arrange the bales, think about how you’re orienting them. You can place them so that the loops of twine are on the top and bottom – or the twine is at the sides. Both ways of orienting the bales are fine.
But here’s how I do it: When positioned so that the twine is at the sides, the straw within is mainly oriented vertically. Bales positioned this way absorb more water, so it’s less likely to run off of the side of the bale.
How to Condition Straw Bales
To condition the bales – which just means getting the microbes working – we need 2 things:
Water
Nitrogen
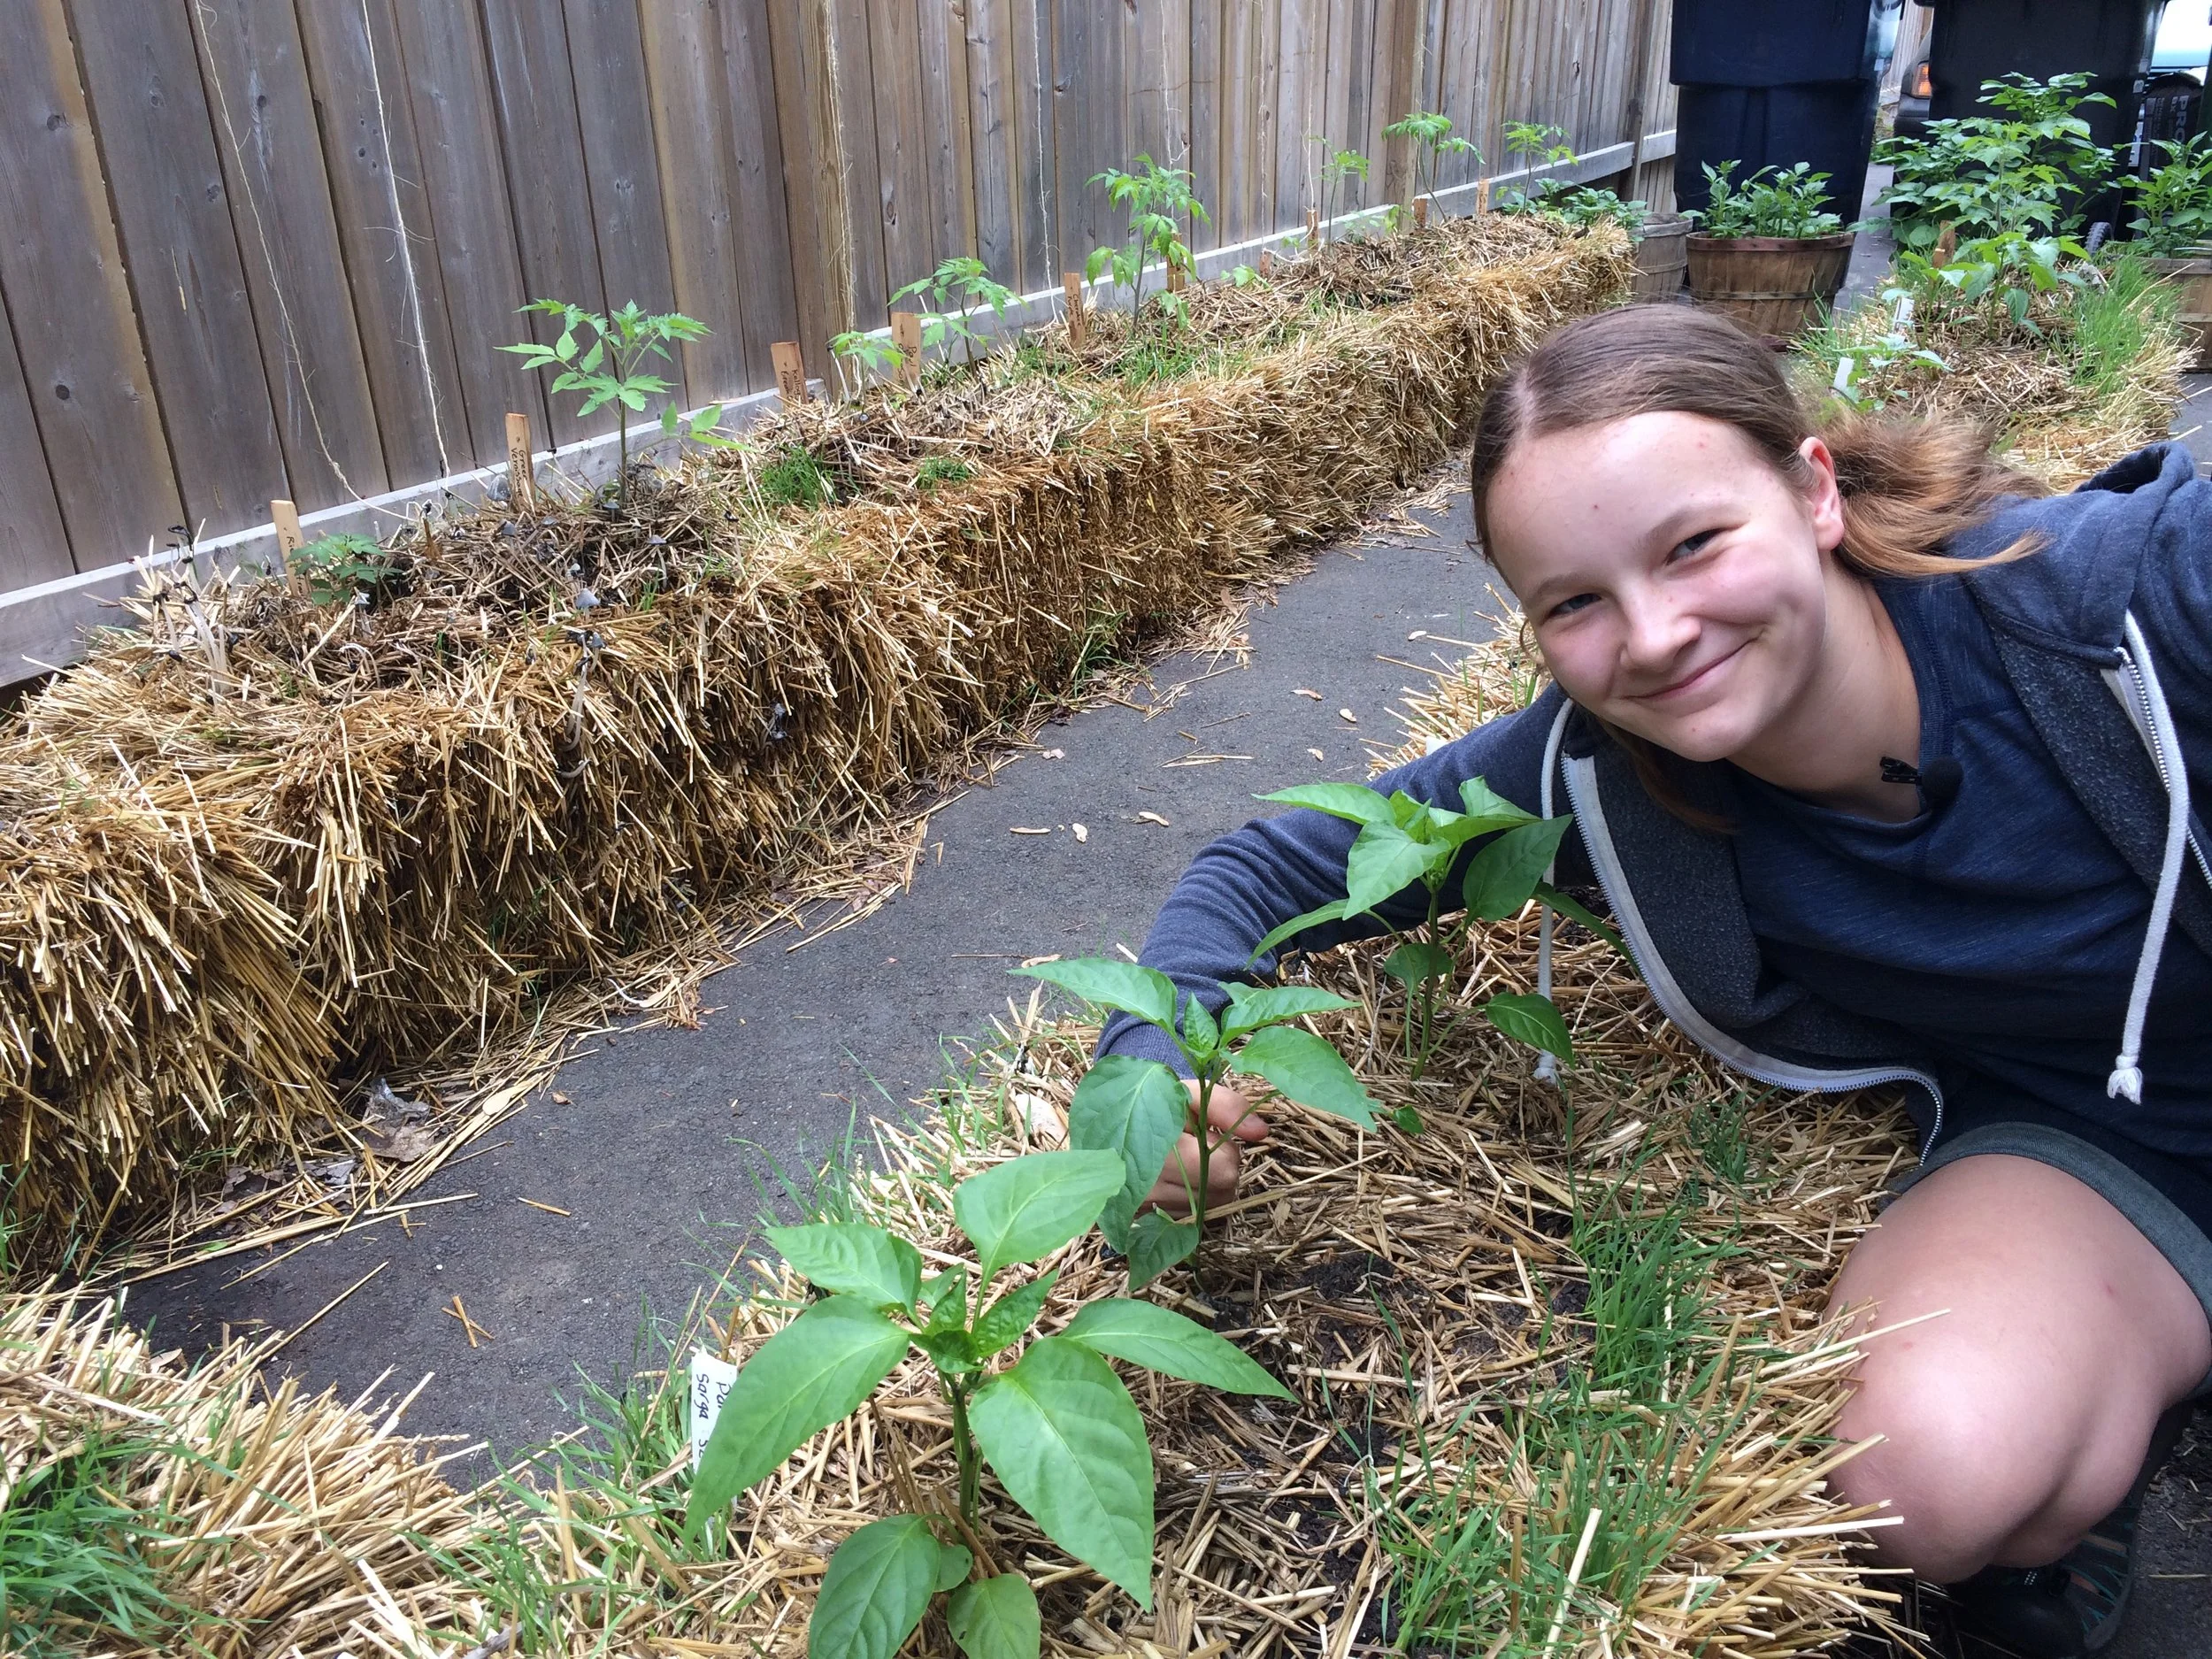
In this picture the bales are oriented with the twine at the top and bottom of the bales. We now prefer to have the twine at the side for easier water penetration.
Place a nitrogen source on top of the bales and water well. The goal is for the water to soak into the bale and move some of the nitrogen into the bale. Use a low pressure and volume so that water doesn’t flow over the sides of the bale (and take the nitrogen with it).
More on the nitrogen source: When you’re looking at the numbers in the fertilizer formulation, you want the first number, the nitrogen, to be higher than the others. For example, blood meal is 12-0-0. That’s what I usually use.
Other years I’ve also used a high-nitrogen organic fertilizer derived from guano, and a lawn fertilizer.
Here’s how I condition straw bales with blood meal:
I water well every day for the first week.
Starting on the first day, and again every other day, I put a 2 cups of blood meal on the bale BEFORE watering (so the water moves some of the blood meal into the bale).
I give 3 applications of blood meal.
As we get into week 2, the bale should be warming up nicely inside!
After 2 weeks, fertilize the bales with a balanced, all-purpose fertilizer.
During this conditioning process, the temperature can go up to about 50°C (120°F), and then it drops. You can plant in the straw bales once the temperature has dropped below about 26°C (80°F).
Grow a Container Vegetable Garden
And get an early harvest of crops that usually take too long!
Straw-bale Garden Plant Layout

Plant densely to make the best use of space in your straw bale garden.
Wondering about plant spacing in a straw-bale garden? Because a well-managed straw bale garden provides plants lots of moisture and an excellent growing medium, you can plant densely.
We aim for two or three tomato plants per bale. Around those tomatoes we sow bush beans and leafy greens.
Something else to think about with straw bales is that you can plant into the side of the bale too. We’ve grown dwarf tomato plants out the side of bales, while at the top are normal determinate and indeterminate varieties.
How to Support Plants in Straw Bale Gardens
Because there is a paved surface below, and because the bales decompose and start to collapse over the summer, regular staking is not an option.
Here’s what I do instead of staking:
Use 3-4 stakes positioned over the bale to create a self-supporting tee-pee.
Put the bales next to a fence and grow vining crops up the fence.
Looking for tomato-staking ideas? Find out how to stake and support tomato plants.
Straw Bale Garden Planting and Care
How to Plant in Straw Bales
When I show pictures of straw bale gardens to groups, I’m asked where the soil is. There doesn’t have to be soil, because the straw is the growing medium.
When transplanting, use a trowel to pry an opening into the bale. Then place the transplant into the opening, and close up the opening. Be sure to cover the transplant roots with straw so they remain moist.
With large seeds like beans, we just insert them right into the bale. Again, no soil necessary.
When direct seeding smaller seeds onto a straw bale, a thin layer of soil is helpful. We add about an inch of soil over the top of the bale if we’re seeding leafy greens. Use a potting soil or good garden soil that won’t cake with frequent watering.
Straw Bale Garden Fertilizer and Water
Once your bales are conditioned and planted, feed with a balanced, all-purpose feed and keep them well watered. Because the inside of the bale remains well aerated, excess water is not likely to harm the plants. But excess water will wash away nutrients.
If there are not many bales in your garden, hand watering might be fine.
For larger gardens, drip irrigation or a soaker hose works well. Position the soaker hose to sprays downwards, into the bale.
Grasses and Mushrooms on Straw Bales
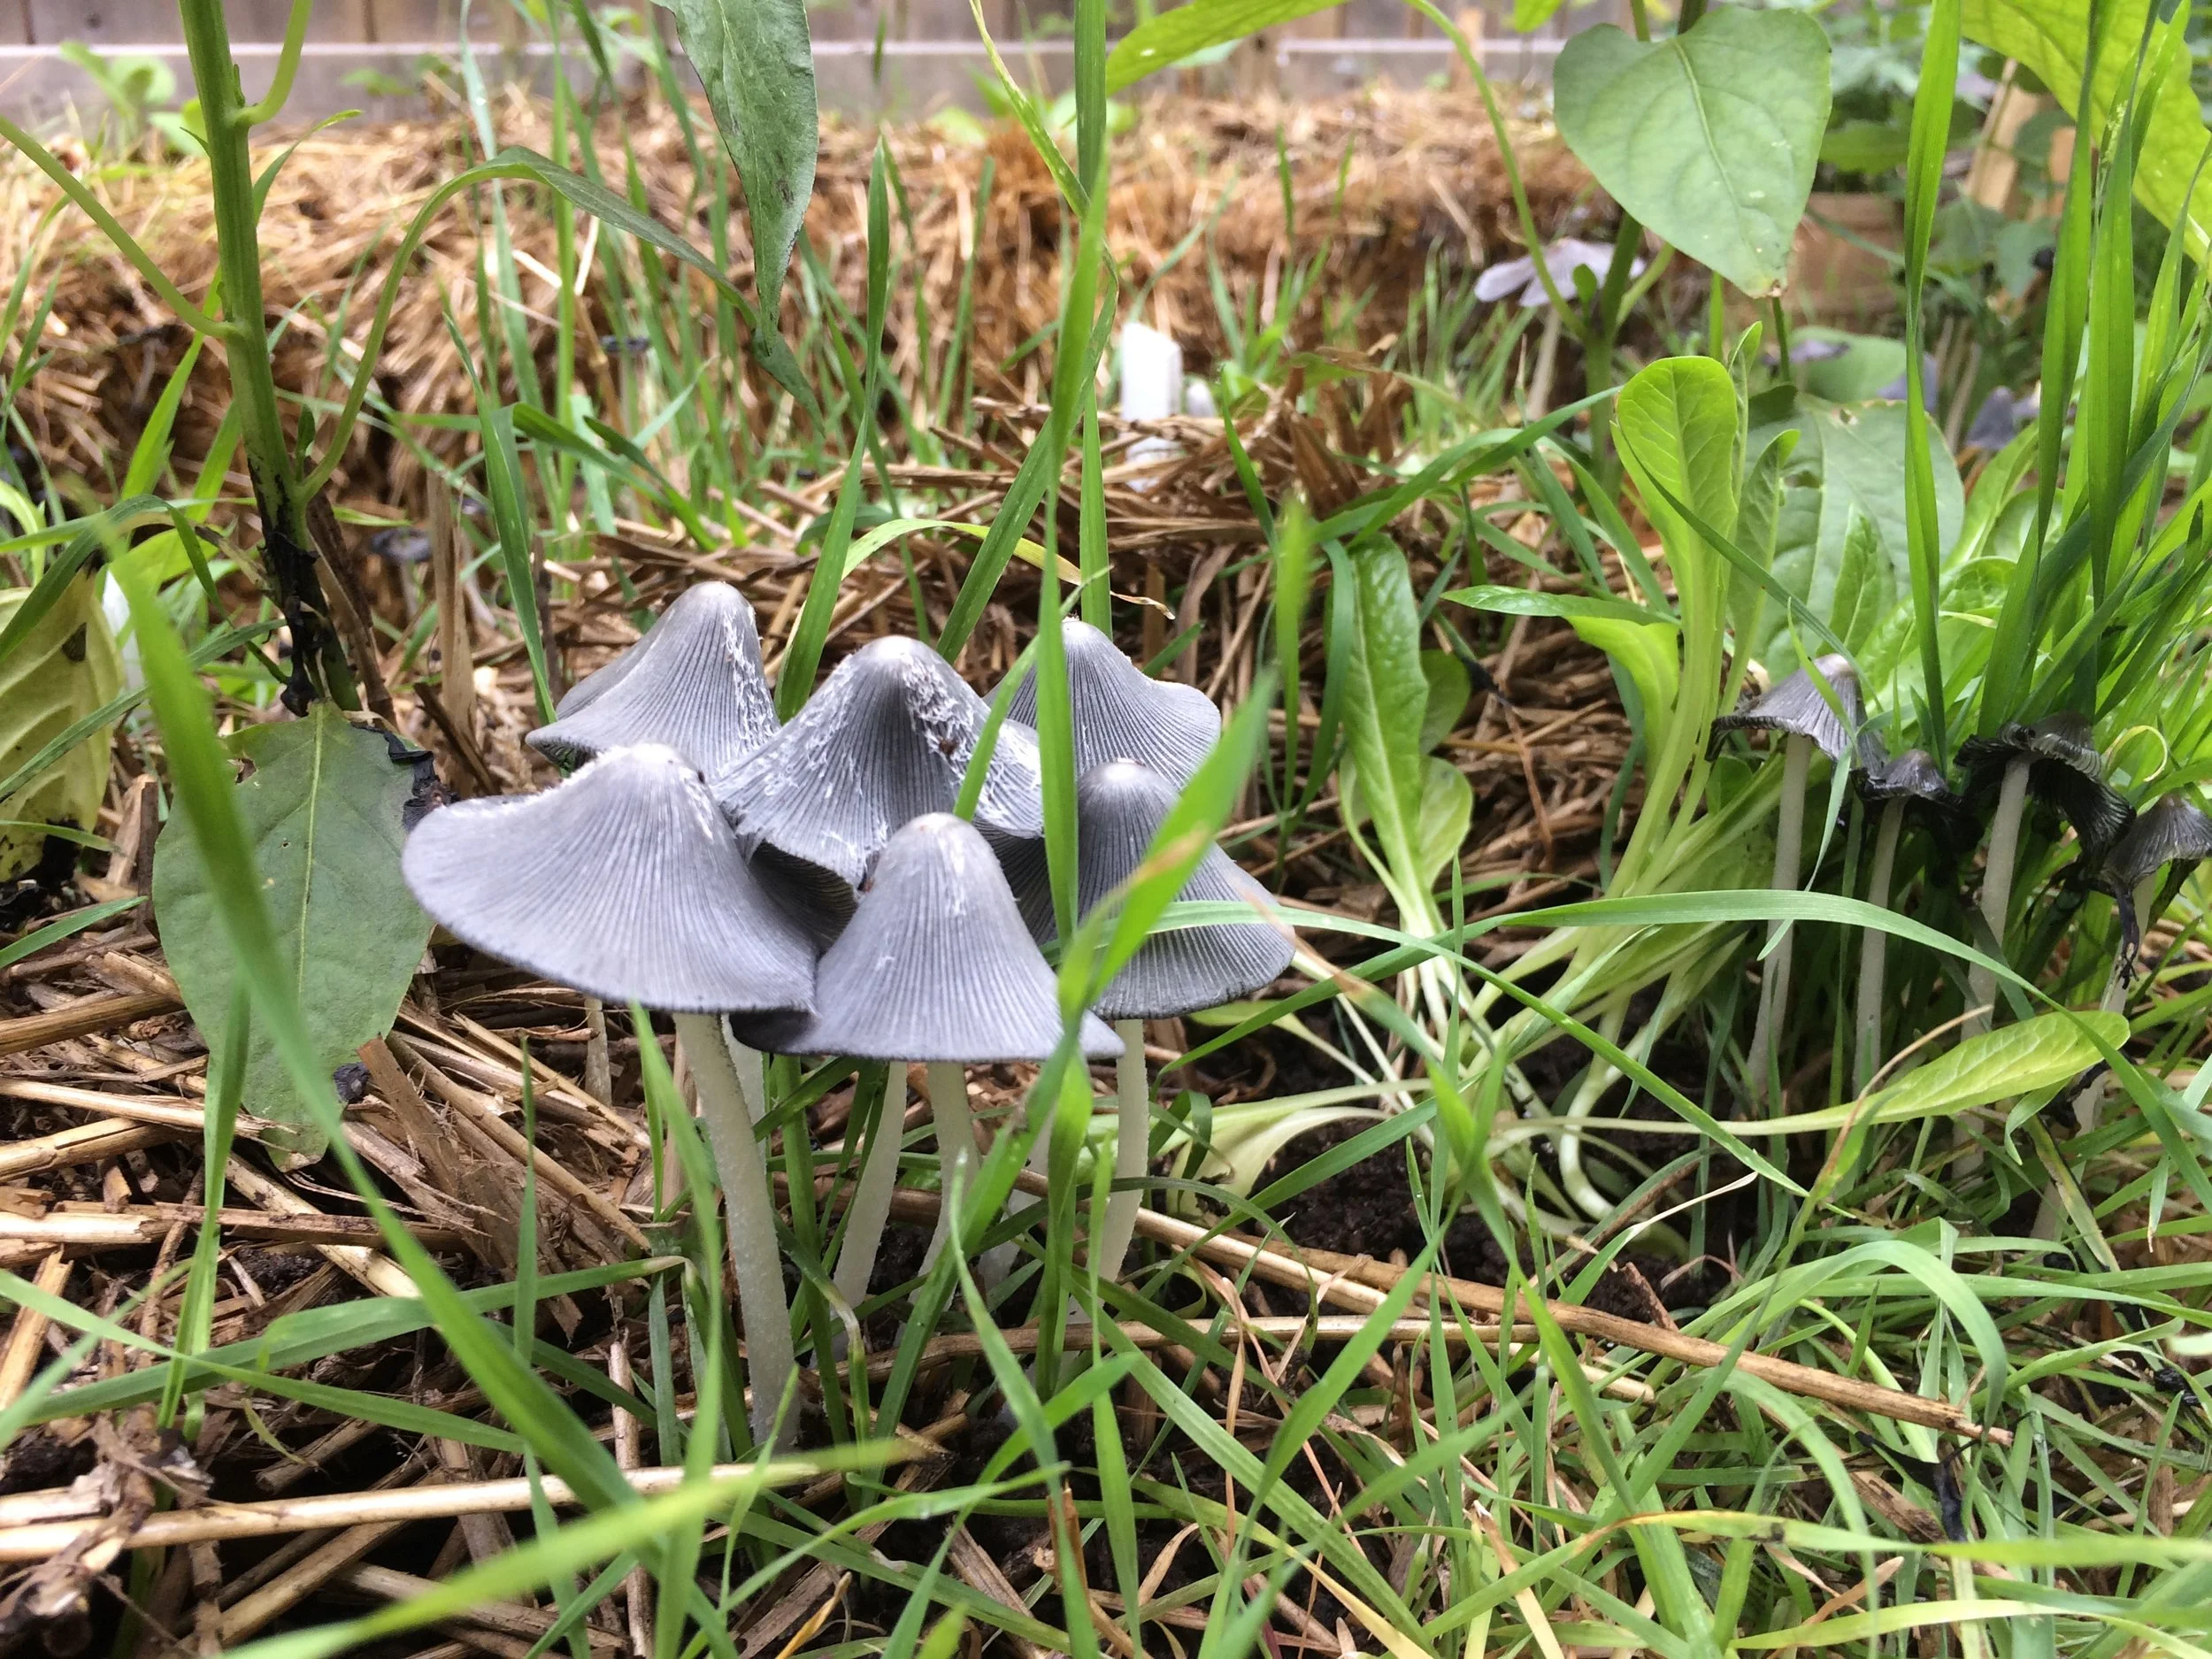
It’s normal to get mushrooms growing on straw bales. It means you’ve created good growing condtions.
Don’t be surprised to see little grass-like plants and mushrooms growing on the bales. These are good – it means you’ve created good growing conditions.
The grasses are any residual grain within the bale that germinates and grows. They won’t out-compete your crops. Just pull them off.
Straw Bale FAQ
What do you do with Straw Bales After Harvest?
After a year of growing I use the straw to mulch gardens, on pathways, and in my compost pile.
How Many Years do Straw Bales Last?
I’ve sometimes used bales a second year. How fast a bale decomposes varies with your weather conditions. Friends in warmer areas report that one year is the maximum for them.
What if the Twine Breaks?
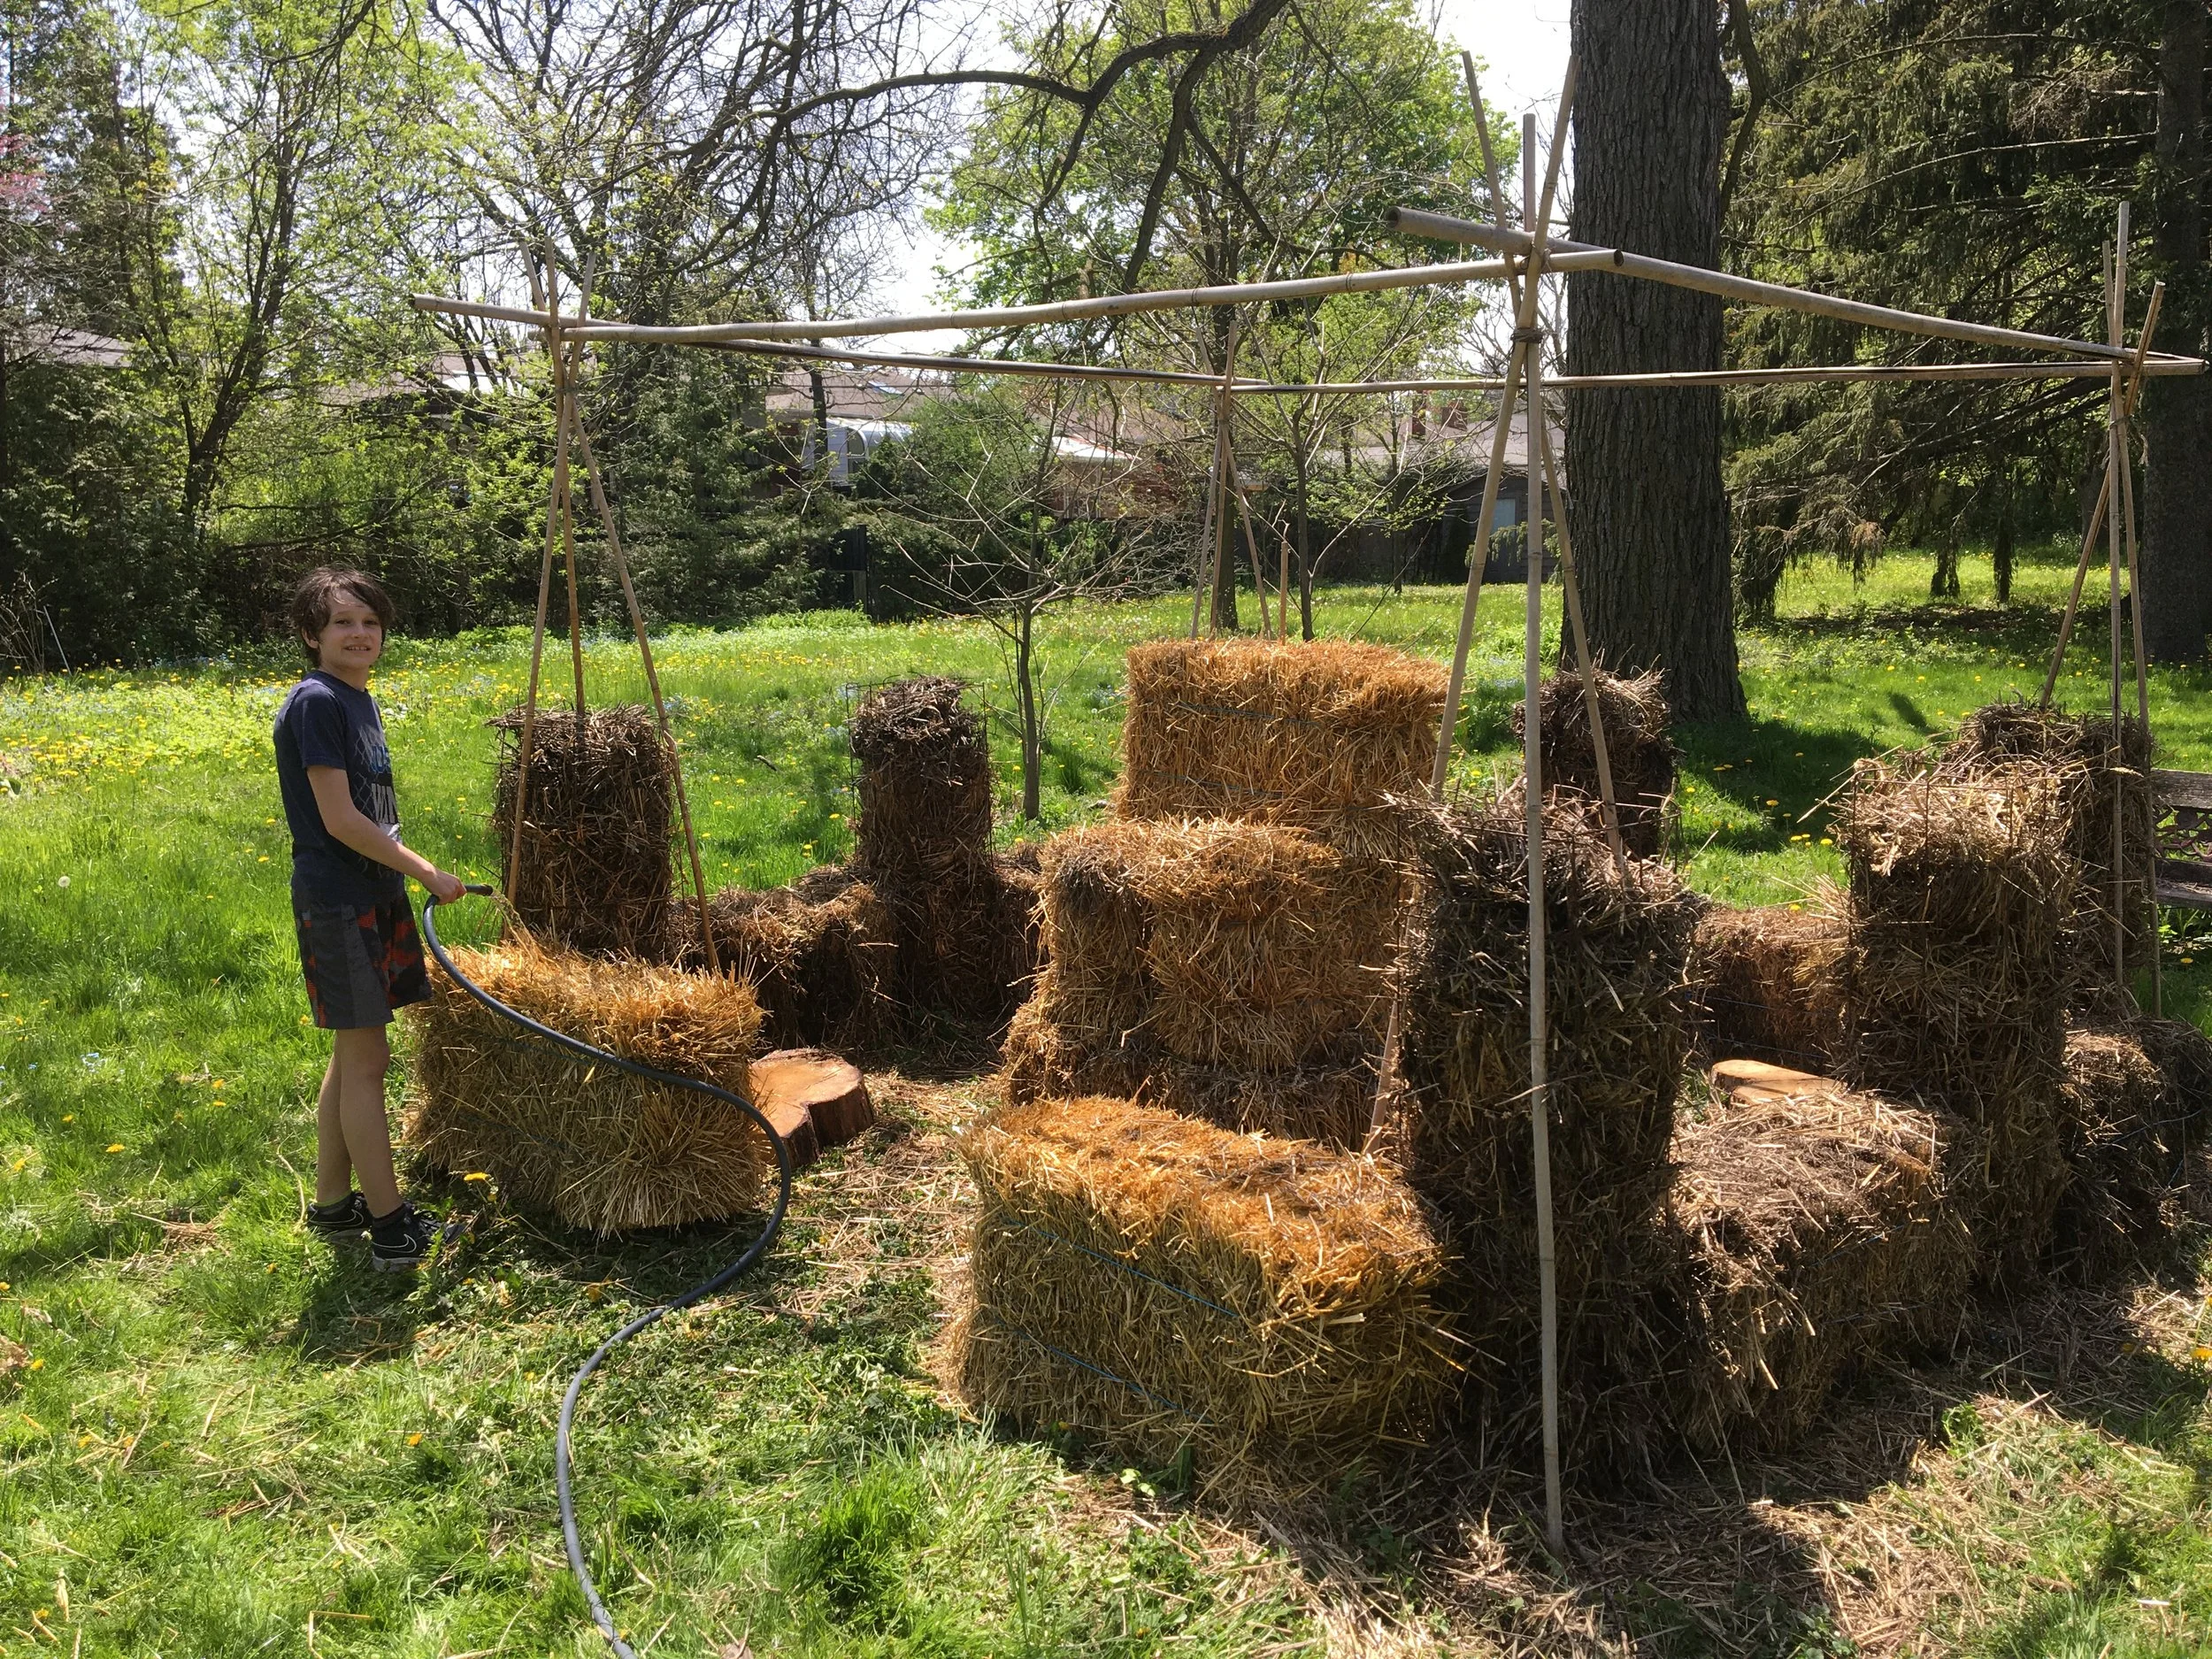
Broken bales? No problem. In this straw bale garden the tall sections are tomato cages filled with loose straw from broken bales.
If possible, tie it back together; or use a new, longer piece of twine to tie together the bale. If that doesn’t work, you can pack straw into a cage or pot instead.
As you carry the straw bales, try to do it in such a way that the twine does not slide off the side of the bale.
Do Straw Bales Leave Marks?
Yes. Straw bales can darken paved surfaces.
I don’t recommend using them on wood because it creates conditions that could speed up the decay of the wood.
One year I had them against a board fence, and it resulted in dark marks on the fence – so I now position the bales a couple of inches away from the fence.
What About Hay Bales?
Hay bales can also make an excellent growing medium, but there are a couple of reasons they’re not used as frequently as straw bales:
Hay often includes lots of grass seed – not something you want to introduce to your garden
Hay is often more expensive than straw
What are the Best Plants for the Straw-Bale Gardening method?
You can grow a wide range of vegetable crops in straw bales.
Heat-loving crops benefit from the warm root zone in the bales
Root crops develop very well in the well-aerated growing medium
Leafy greens grow well and can be planted underneath other crops such as tomatoes
Cascading plants such as nasturtiums (for edible flowers!) can drape down over the side of the bales
Where can I Buy Straw Bales?
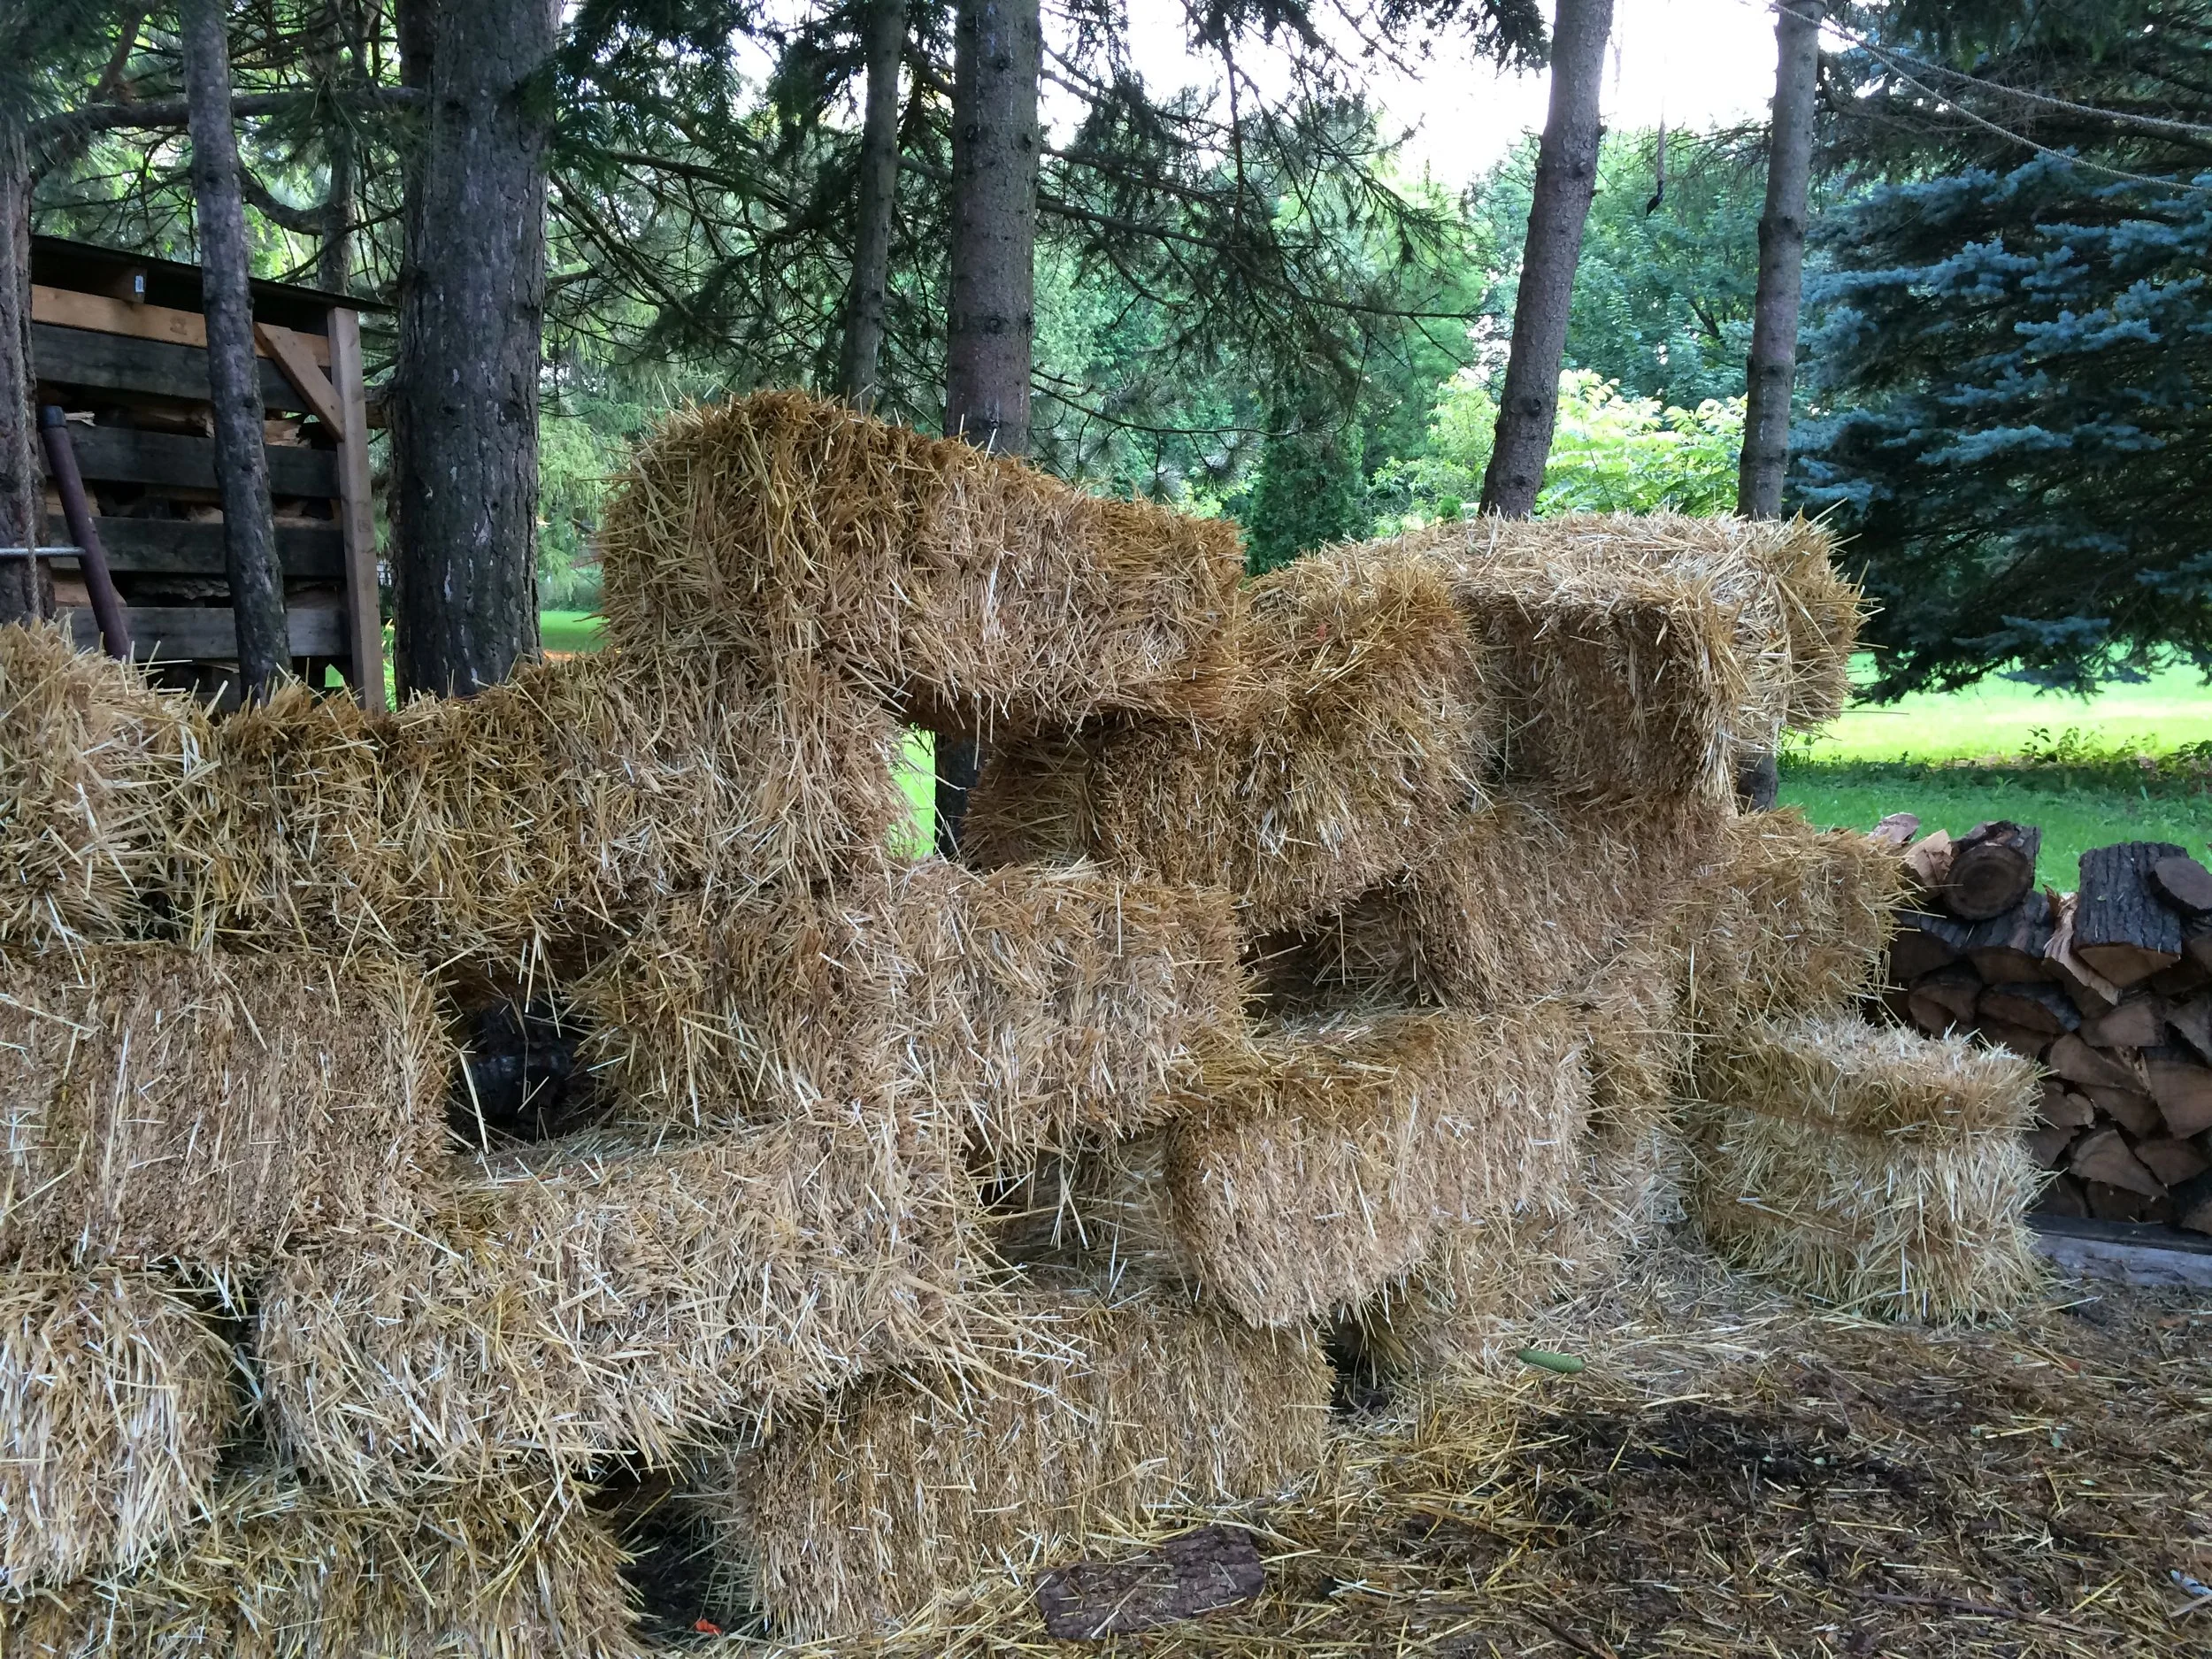
Straw bales are fun for kids.
I used to bring home loads of bales in my minivan. And my family hated all the prickly little bits of straw it left everywhere. So now I just get straw delivered.
To find a farmer, use an online classified advertising website.
And if you have kids: Get straw bales earlier than you need them – for your kids. Straw bales are like giant, biodegradable Lego blocks.
Don’t Straw Bales attract Rats?
The mention of straw has some people wondering whether straw bale gardens will be overrun with rats.
It’s a good question. Not in my experience.
The thing to remember with rats and mice is that they’re looking for food, shelter, and water.
A bale on a paved surface doesn’t give them burrowing room. Doesn’t give them water. Doesn’t give them much food.
What’s more likely to attract rats is bird baths, bird feeders, leaving out pet food, and improperly stored garbage. (On that note, gardening itself, and growing plants with seeds and fruit that are food for rodents, attracts rats.) Remember too, that they’re already abundant in many areas – just not out and about at times that we see them.
Find This Helpful?
Enjoy not being bombarded by annoying ads?
Appreciate the absence of junky affiliate links for products you don’t need?
It’s because we’re reader supported.
If we’ve helped in your food-gardening journey, we’re glad of support. You can high-five us below. Any amount welcome!
More Vegetable Garden Techniques

Hi, We’re Steve and Emma!
We help people grow food on balconies, in backyards, and beyond—whether it’s edible landscaping, a vegetable garden, container gardens, or a home orchard.
Courses

Free Food- Garden Guide
Books
Covering everything from lemon varieties, to location and watering, to pruning and shaping, to overwintering, dealing with pests, and more—and including insights from fellow citrus enthusiasts—this book will give you the confidence you need to grow and harvest fresh lemons in cold climates.
Orders may be shipped from Toronto or printed and shipped directly by our printing partner. Available destinations and shipping charges appear at checkout. All prices are in Canadian dollars.
Prefer an ebook? Find the Kindle edition on Amazon.