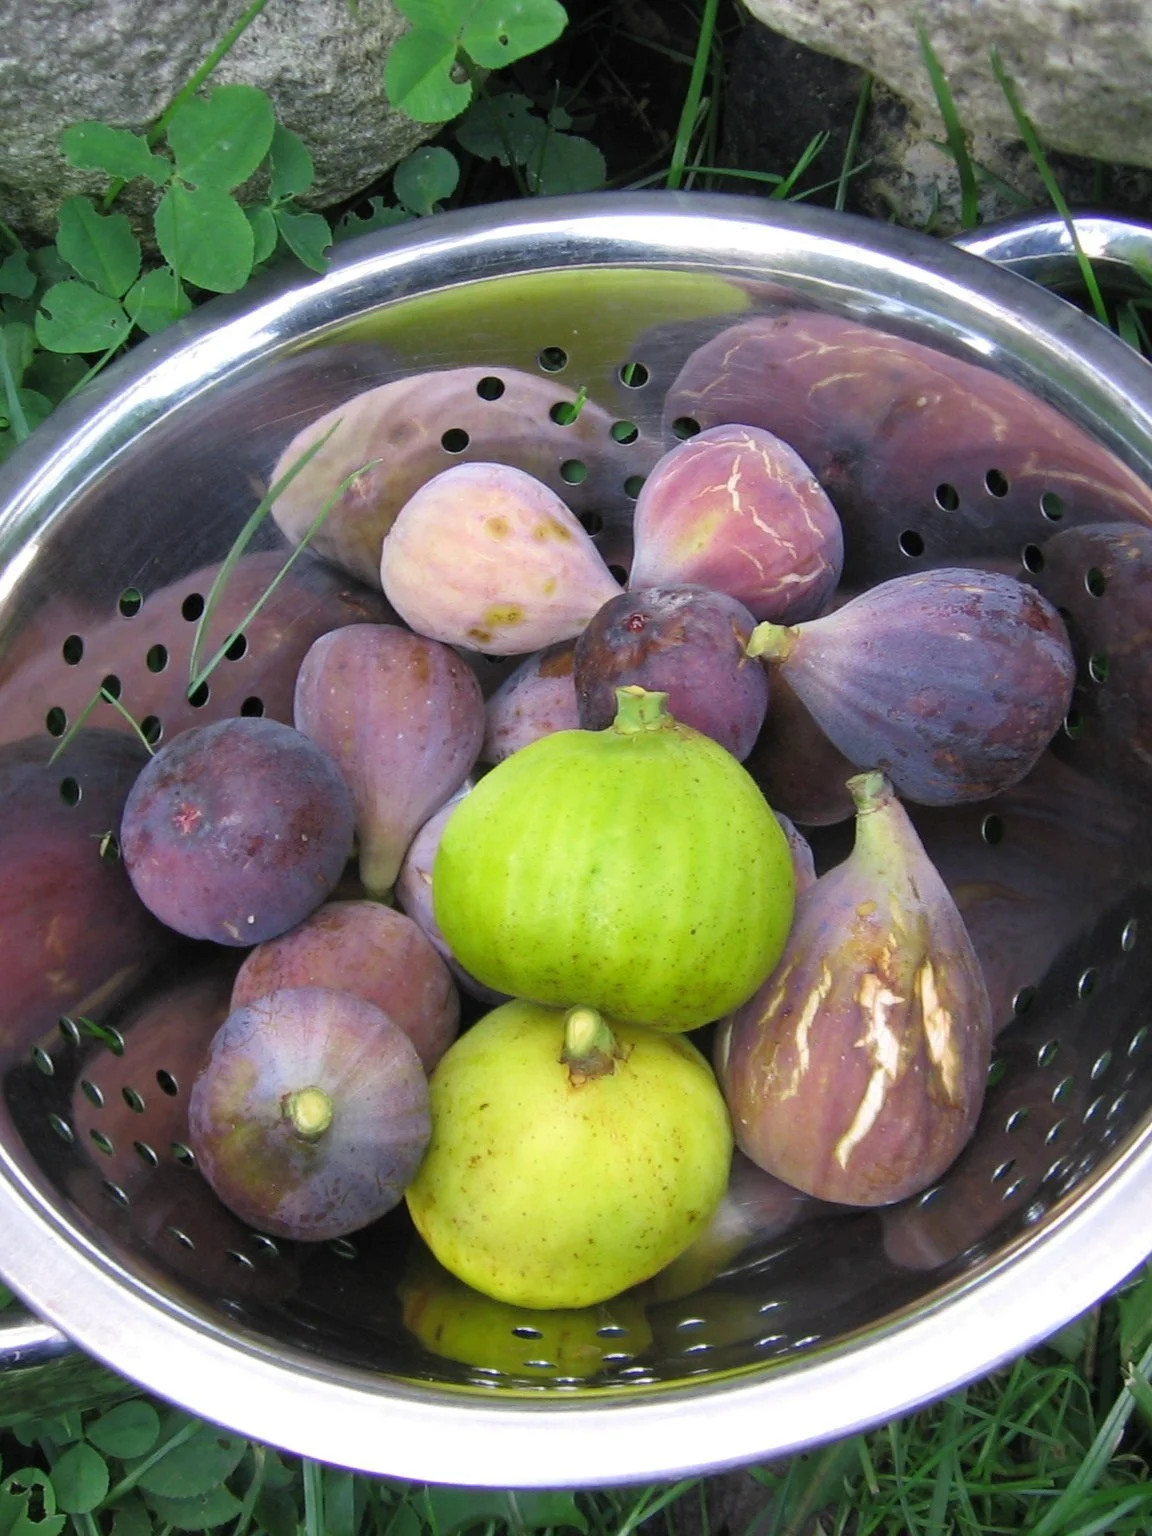
Best Soil for Fig Trees in Pots (What to Know + What to Avoid)
Find out about potting soils, potting soil ingredients, and potting soil recipes for fig trees. Choose the best soil for fig trees in pots!
by Steven Biggs
How to Choose a Soil for Fig Trees

Growing potted figs? Thinking of repotting fig trees?
There are lots of potting mixes to choose from.
When I worked at a fig nursery, we used a loam-based potting mix. (I explain below.)
Since then, many fig growers have told me about their fig potting soils.
They’re all different.
That’s the thing about soil…it’s a bit like tomato sauce recipes. Ask 10 people for a recipe, chances are you’ll get 10 different ones.
But that doesn’t mean anything goes.
The right potting mix recipe for your fig tree depends on your watering habits, how you feed, tree size, and the type of container.
This article looks at potting soils and potting soil ingredients so that you can choose one that’s a good fit for your fig tree.
(And you’ll also find out something I recommend you avoid.)
What a Soil Mixture Does
Soil is what the fig roots grow in; it’s like an anchor.
But it will also:
Retain moisture
Hold nutrients
Some soils also supply nutrients too
Good Potting Soil Has…
Good soil also has lots of air space.
That’s because roots need air too.
So we actually want a soil that holds moisture—but has air pockets.
About Commercially Prepared Soil
They're Soilless
In North America, most commercial potting soils don’t contain any “real” soil—sometimes called loam. Part of the reason for this is that soil is heavy…and weight is money.
So commercial “potting soils” are soilless—hence the alias “soilless mix.” In the UK, the name “compost” is sometimes used to describe potting mixes.
What's in Them
Commercial soils often contain a combination of the following:
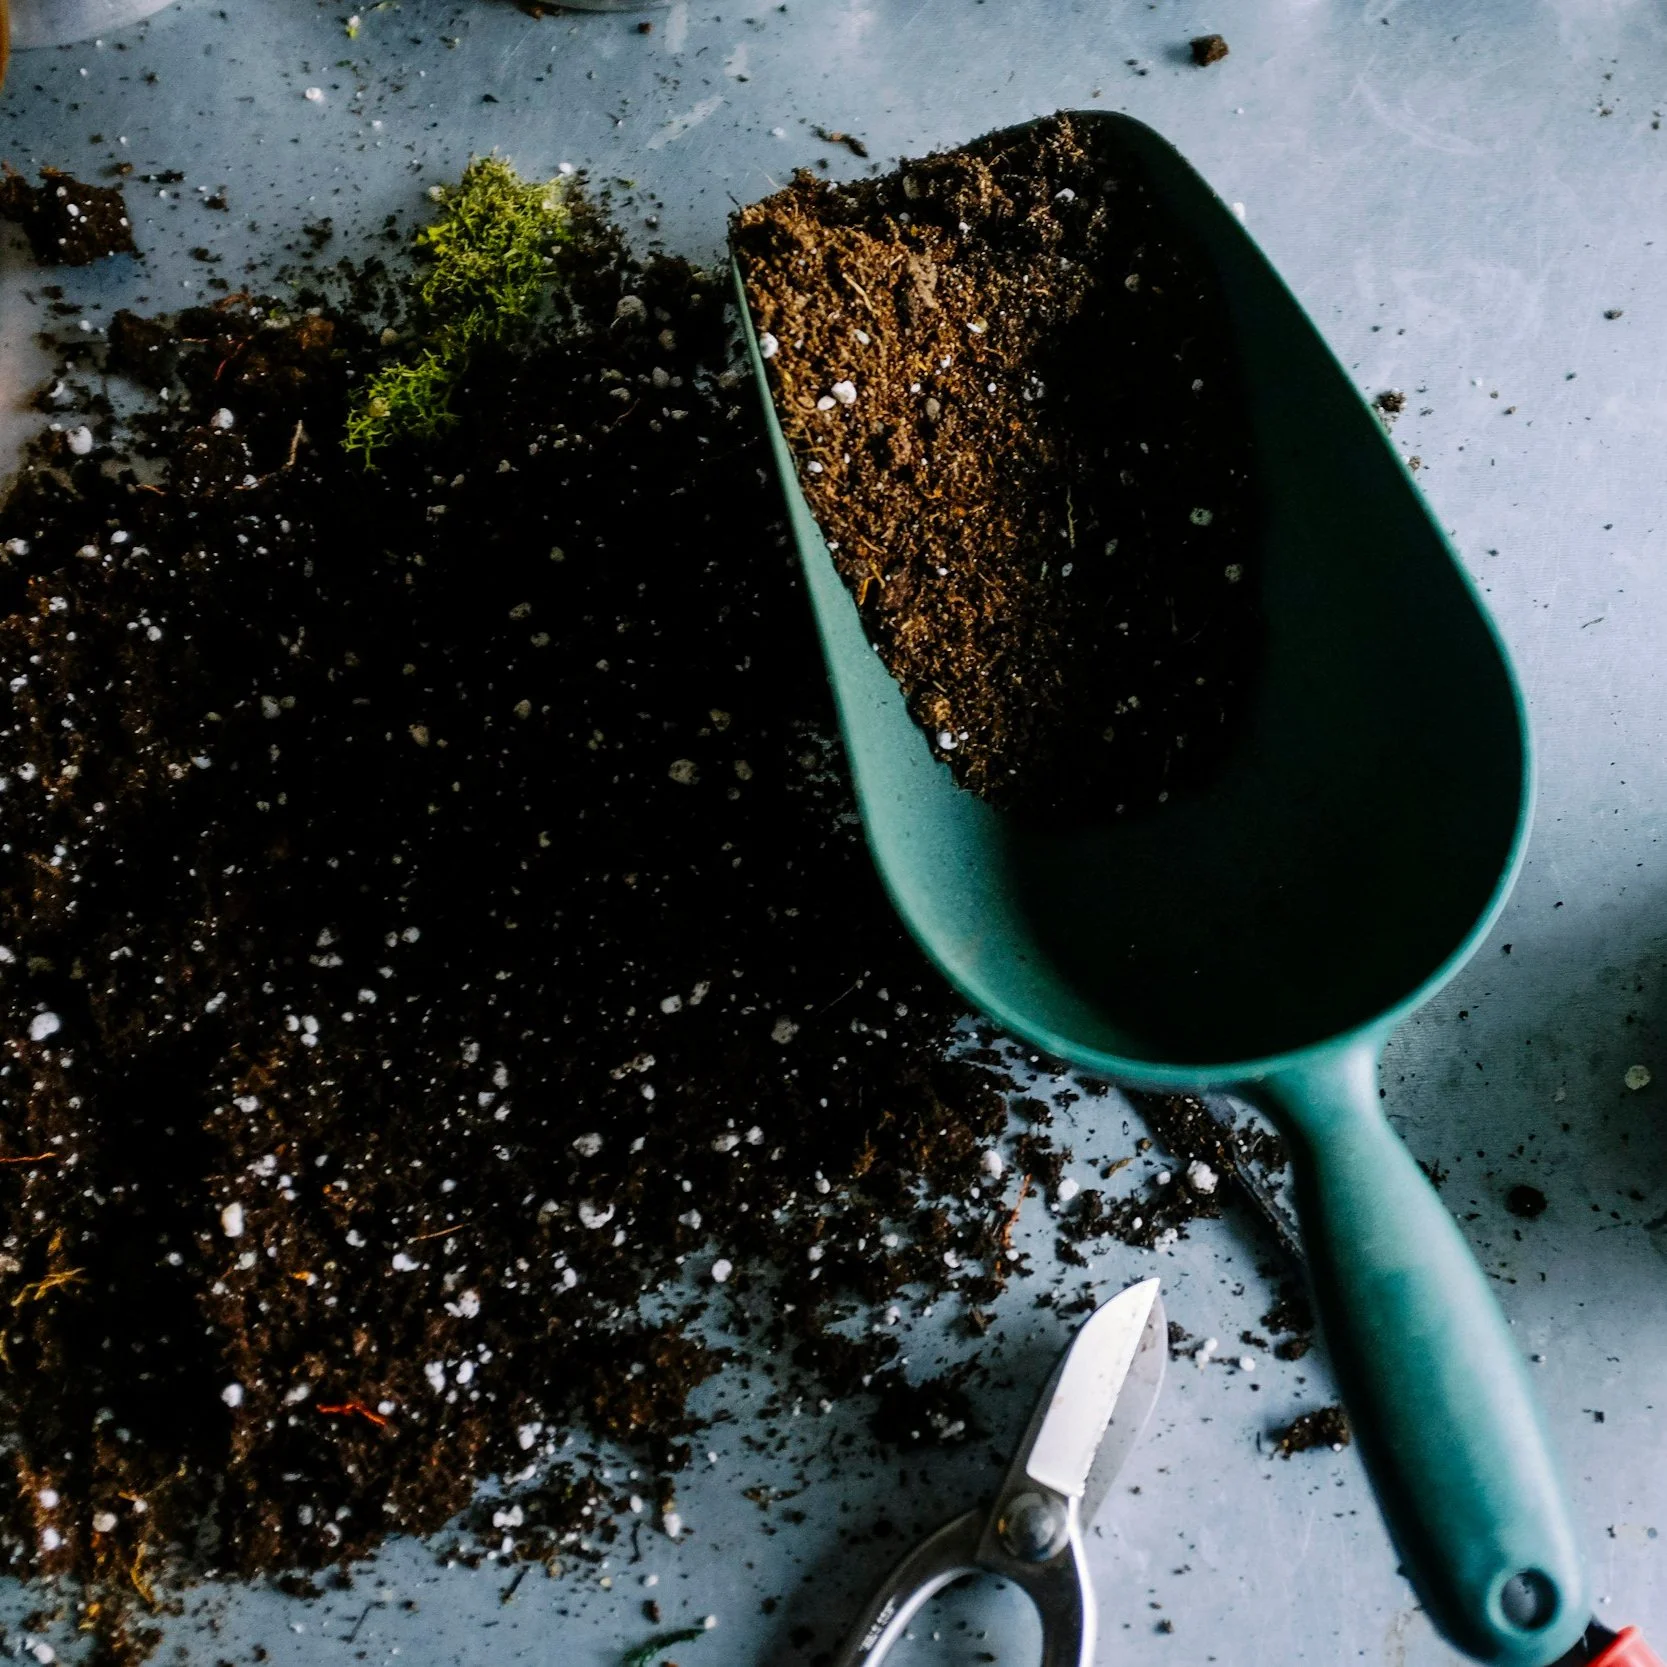
Commercial potting soil
Organic portion. This might be peat moss, coir (a.k.a coco coir), or some sort of composted forestry waste (e.g. composted sawdust).
Aggregate. There’s often a light-weight aggregate such as perlite or vermiculite.
Lime. Peat-based mixes are acidic, so lime is often added.
Fertilizer. Some soils have added fertilizer.
Other Ingredients
Here are other common ingredients in commercial potting mixes:
Bark chips. Bark chips are sometimes added to soils for larger plants because the hunks of bark hold moisture.
Compost. Could be composted municipal green waste, animal manures, forestry waste—or even composted peat. (When I don’t know what it is, I don’t buy it.)
More Ingredients
There are many more things that we can use when blending our own potting soils. Not all of them are commonly used in commercial soil mixes.
Here are a few ideas:
Composted seafood waste. This commercially prepared soil amendment is what’s left over at seafood processing plants, composted together with peat or forestry waste. (Here in Ontario, I find “shrimp compost,” while in Western Canada, I see a product called “Sea Soil.”) It’s added to potting soil to help feed the plant. (I chalk up one of my best container tomato harvests to a soil mix that included some shrimp compost.)
Composted animal manures. My fig mentor, Adriano, used composted manure in his soil. (And his preferred manure was rabbit manure.) Manure is added to help feed the plant.
Sand. Because of the weight, sand isn’t common in commercial mixes. But this aggregate is a traditional addition to potting soils. It’s added for weight and drainage.
Poultry grit. It’s just another type of aggregate. Bigger than sand. You’ll find this at farm-supply stores. Around here I find silica grit—which is a good choice because it’s inert. Added for weight and drainage. Note: Granite and silica grit are OK; but avoid grit made from clam or oyster shells—it might be too alkaline.
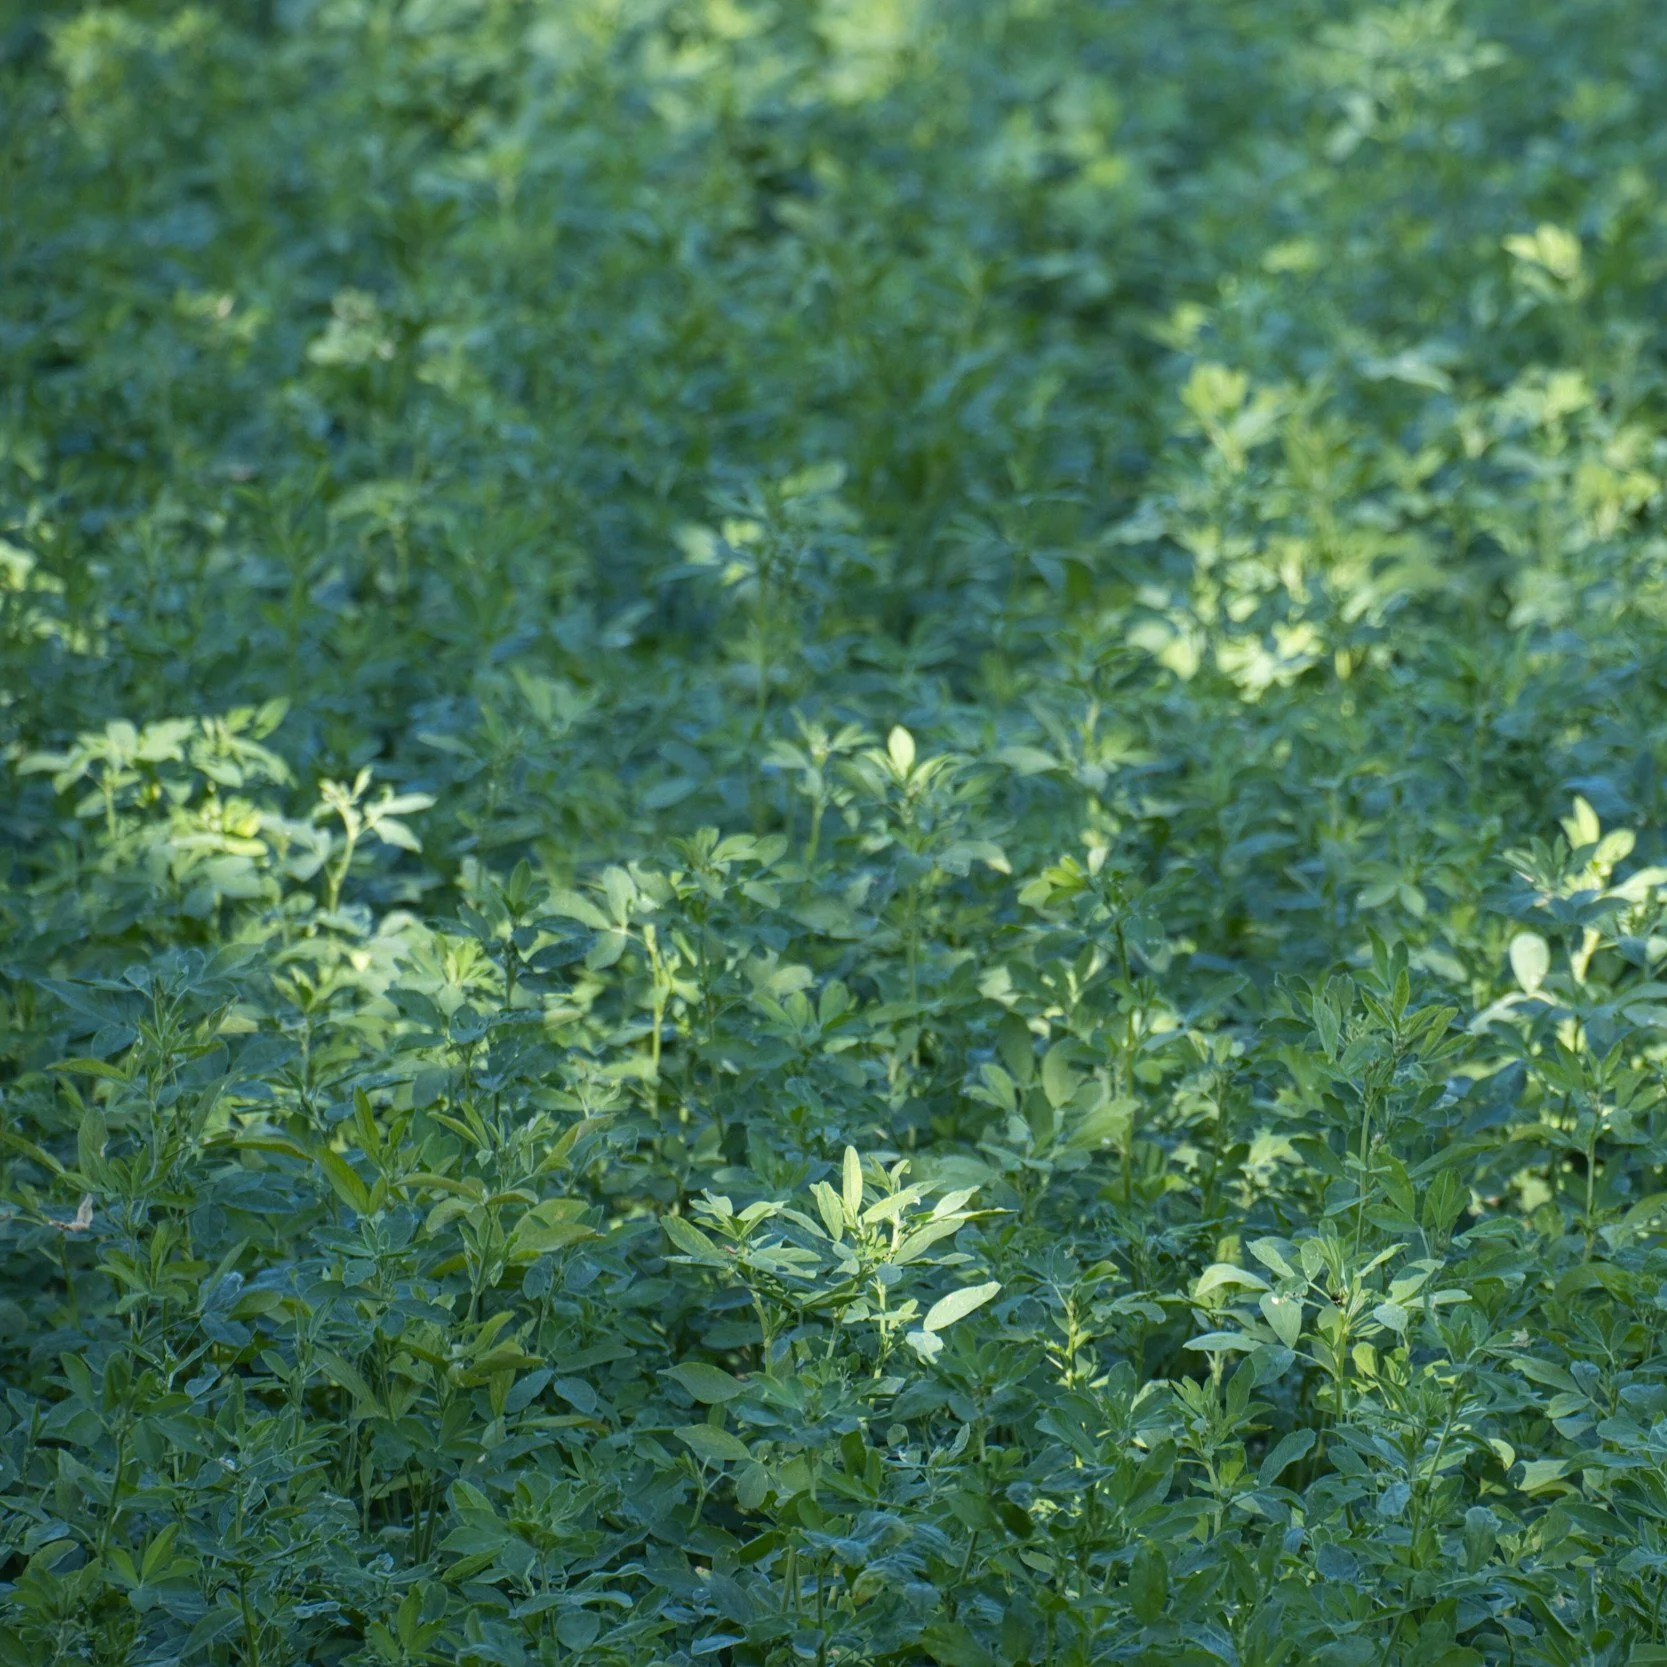
Alfalfa is a forage crop that also dried and ground into a meal that can be incorporated into your fig tree soil.
Baked clay cat litter. It drains well…yet holds moisture. (If you’re into bonsai, you’ve probably come across this already.) Added for weight and drainage.
Plant-based amendments: Alfalfa meal, soybean meal, cottonseed meal: These can be added to provide nutrients and to stimulate microbial activity. By the way, if you can’t get alfalfa meal, some people just add a handful or rabbit pellets (yes, they’re made with alfalfa) to a mix.
Worm compost. A.k.a. vermicompost. Fancy name for worm poo—or worm castings. Added for the nutrients and the microbial activity it adds to a soil.
Looking Beyond Peat Moss: Here’s an Idea
Hoping to use less peat moss? I am. By harvesting peat we harvest carbon that’s been stored long-term in a peat bog. But I’m not crazy about the common alternative—coir. Coir is coconut husk fibres…and the byproduct of a crop growing half way around the world on what was once rain forest. Seems like greenwashing to me.
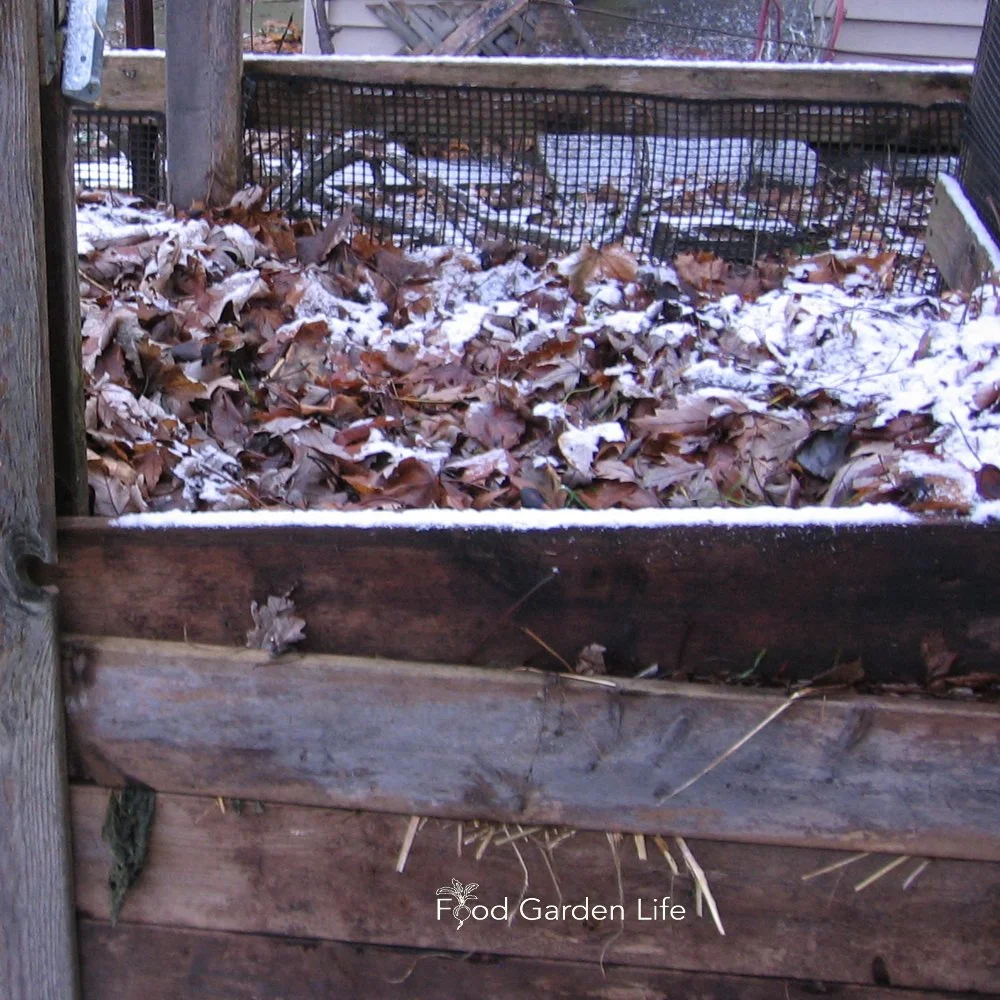
Composting leaves to make leaf mould, an excellent addition to soil for figs.
So I looked up soil recipes in old horticultural texts. Recipes from before peat-based soils became the standby in the horticulture industry.
Guess what? A common base is something many gardeners can make at home: Leaf mould. Which is just leaves, composted into a crumbly dark compost.
Keep in mind that leaf mould breaks down more quickly than coir or peat—so you adjust your fig tree repotting schedule accordingly.
(Something I’m experimenting with in veggie crops is using straw. I do strawbale gardening—but have also used straw as a growing medium. Haven’t tried straw or composted straw yet with figs…stay tuned.)
Find out more about straw-bale gardening.
More on Manure and Compost
Many commercial peat- and coir-based soils contain no nutrients.
Adding composted materials into a mix helps feed your fig plant. So your soil is part of your feeding regime. Remember that different manures bring different amounts of nutrients.
Don’t Do This
If you’re making your own fig tree potting mix using peat moss, there’s something important to know.
Not all peat moss is equal.
Some makes excellent soil; some not.
Here’s why:
Peat at the bottom of a peat bog is more highly decomposed, and has shorter fibres. It’s darker in colour. The peat that’s higher up in the bog has a lighter colour and longer fibres. It’s called “blond” peat. The blond peat gives a soil with more air pores, but at the same time, it holds water well.
The dark peat? It packs down.
Yet…it’s the dark peat that’s most often for sale at garden centres—because it’s less expensive, and is used as a garden soil amendment.
It’s like dollar-store phone chargers. Yeah, they kinda look like the higher quality ones…but you soon realize they suck. Same with dark peat for soils.
You might be wondering what to do if you can’t get blond peat? Get a high-quality commercial potting soil (they’re made with blond peat) and then tweak it to fit your recipe. See the next section, Top Tip, on buying high quality soil.
Get Your Fig Trees Through Winter—and Harvest Figs
Growing figs where winters are cold takes a bit of creative thinking.
In Fig Camp and the self-paced Fig Masterclass, I explain how to grow figs in pots or in the ground, extend the growing season, ripen more fruit, and protect your trees through winter.
Top Tip: Shopping for Soil
Ever seen “contractor-grade” products at the hardware store? Companies market the good stuff to contractors. Contractors know what’s poor quality.
Same in horticulture.
It’s buyer beware with small, homeowner-sized bags of soil. (Especially if you buy them from discount retailers!)
But the contractors in the world of horticulture—the commercial nursery and greenhouse growers—they know good soil.
And that’s why I buy soil packaged for commercial growers: The quality is consistently good.
Look for “bales” of commercial soil. It’s compressed, into 3.8 cubic foot bales (107 litres.)
Soil Choice and Plant Size
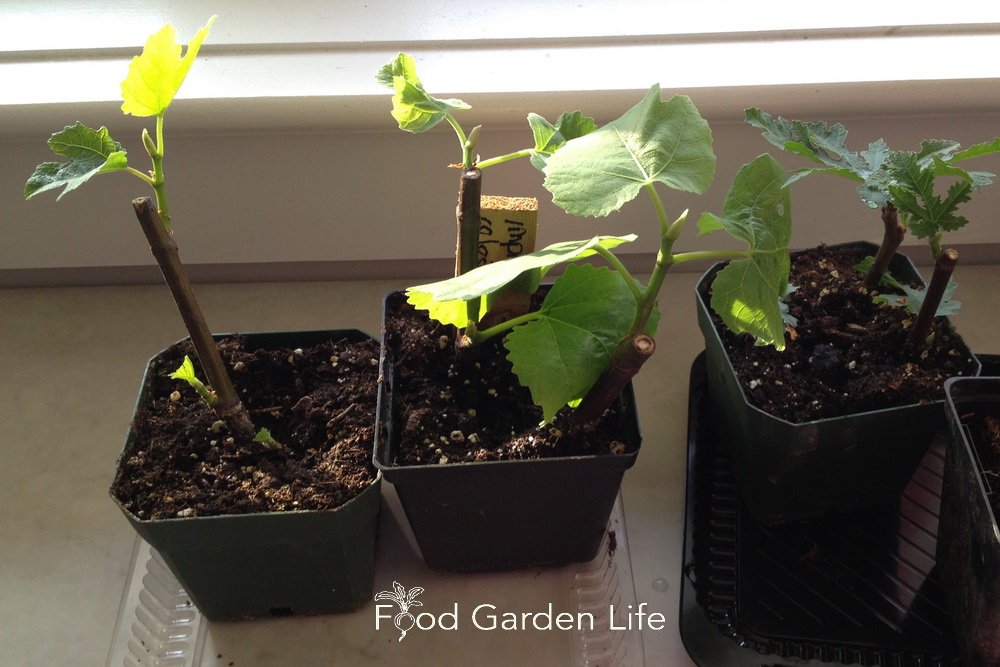
Young fig trees growing in simple potting soil.
I use different soils for my small and large fig plants. Here’s what I do:
Young Fig Trees. I use straight commercial soil for young fig trees and rooted cuttings. It’s quick and easy, and I repot frequently until the fig trees reach the size I want.
Mature Fig Trees. Once my fig trees are the size I want, I use a soil that holds more moisture, is heavy enough so they don’t tip over in the wind, and can buffer–meaning less chance of nutrients getting out of whack. (See soil recipe below.)
Should I Add Loam Soil?
First, let’s unpack the term “loam.” For soil scientists, it’s the soil with a desirable mix of sand, silt, and clay. With the right percentage of each, a soil can achieve “loam” status. It’s what most gardeners and farmers only wish they had…
For home gardeners, forget percentages: We’re just talking about a crumbly garden soil that doesn’t have so much clay that it’s sticky when it’s wet.
Loam—and for home gardeners, that means garden soil—has properties that make it useful in soil mixes:
Weight. Weight can be good! (Fig trees won’t tip in the wind!)
Insurance. Buffering effect (Meaning less chance of nutrient snafus)
Reservoir. Water holding (Clay holds water well!)
BUT we don’t use straight loam. Ever. It packs down too much in a pot. Great way to get root rot.
More on Loam
In case you’re wondering…commercial loam production entails stacking turf (think of sod) and letting it break down into a crumbly soil. The decomposed turf leaves and roots add organic matter to the soil.
Fig Tree Potting Soil Recipes
My Basic Fig Tree Potting Mix Recipe
Here’s what I use when I repot a mature fig tree in a larger pot. I want a long-term soil mix that retains more moisture, and is heavy enough so the fig tree doesn't tip in the wind.
1 part garden loam
2 parts soilless potting mix (a commercial-grade soilless potting mix)
1 part sand
1 tbsp. lime per gallon of mix
1 tbsp. bone meal per gallon of mix
John Innes Soil Mix

Pin this post!
Here’s the recipe for John Innes Soil mix. This is used more commonly in the UK—and it’s the blend we used when I worked at a fig tree nursery in the UK.
7 parts sterilized loam*
3 parts peat (or peat substitute)
2 parts coarse sand**
Plus fertilizer***
*I don’t sterilize loam…I don’t see a need for sterile except when it comes to seed-starting and cuttings. But if root-knot nematodes are an issue in your area, either sterilize or don’t use loam.
**Coarse sand: As compared to beach sand (or play sand) where the granules are rounded—but, instead, the sand particles are irregularly shaped and of varying sizes. In North America, you might look for “builders” sand.
***In old texts, you’ll see recommendations for a fertilizer mix that includes hoof, horn, and blood meals. There are other options now...use a slow-release feed for container plants.
Adriano’s Fig Tree Soil Mix
I mentioned that my fig mentor, Adriano, used rabbit manure in his preferred soil for fig trees.
Here’s Adriano’s Fig Tree Soil recipe:
1 part peat-based potting mix
1 part composted manure (rabbit when possible!)
1 part compost
Plus added perlite, dolomitic limestone, and vermiculite
Sterilizing Loam
As I mention above, I don’t sterilize loam. No need here.
But if you’re curious how a home gardener could sterilize soil for a fig tree soil mix, here’s how:
“The last soil sterilization method I shall discuss is surely a home method, for it involves the oven of your kitchen stove. Small quantities of soil put in the oven and held at 180°F for 30 minutes will be found to be ideal for starting seeds, not only because the disease organisms will have been destroyed, but because all weed seeds will have been killed too.”
Taken from: Greenhouse Gardening as a Hobby, James Underwood Crockett, 1961
I know my wife would leave me if I started cooking garden soil in the oven. Ain’t happening here in the Biggs household.
But here’s an idea: I’ve had students use the BBQ.
Not Sure Where to Begin with a Fig Tree Soil?
At this point we’ve looked at what makes a good soil, talked about a number of common ingredients, including what not to use. You have 3 fig tree soil recipes.
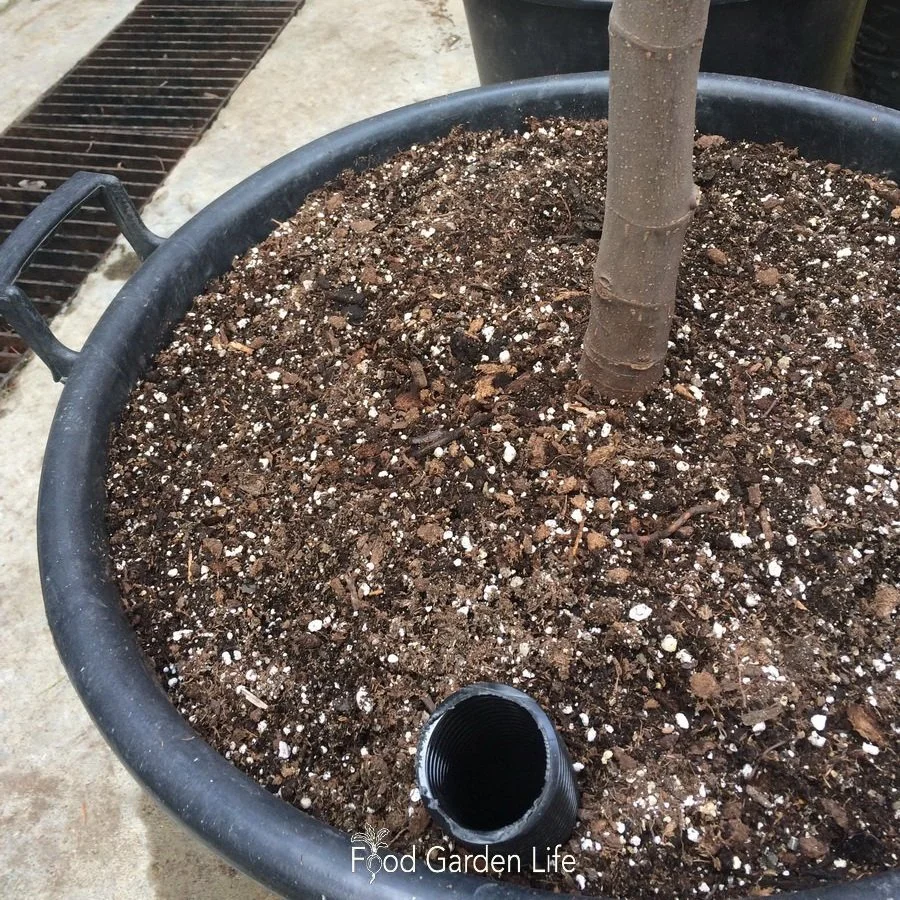
Fig tree growing in a sub-irrigated pot. A potting soil with good wicking properties is essential.
If you’re scratching your head wondering, “What should I do?” don’t be overwhelmed by options.
Start with one of the fig tree soil recipes I’ve given you.
Over time, experiment with different ingredients. Choose what works well with your fig trees, and what’s good value.
The art of making soil isn’t just for your fig trees—this is something you can use for all of your potted crops.
FAQ: Fig Tree Soil
What soil should I use for propagating fig trees?
I use a commercial peat-based mix.
There are other options too. Find out how to pre-root your fig cuttings.
Can I grow figs in a sub-irrigated pot? What soil should I use for fig trees in sub-irrigated pots?
It's important to have a soil with good wicking properties. Think of the blond peat moss I talk about above.
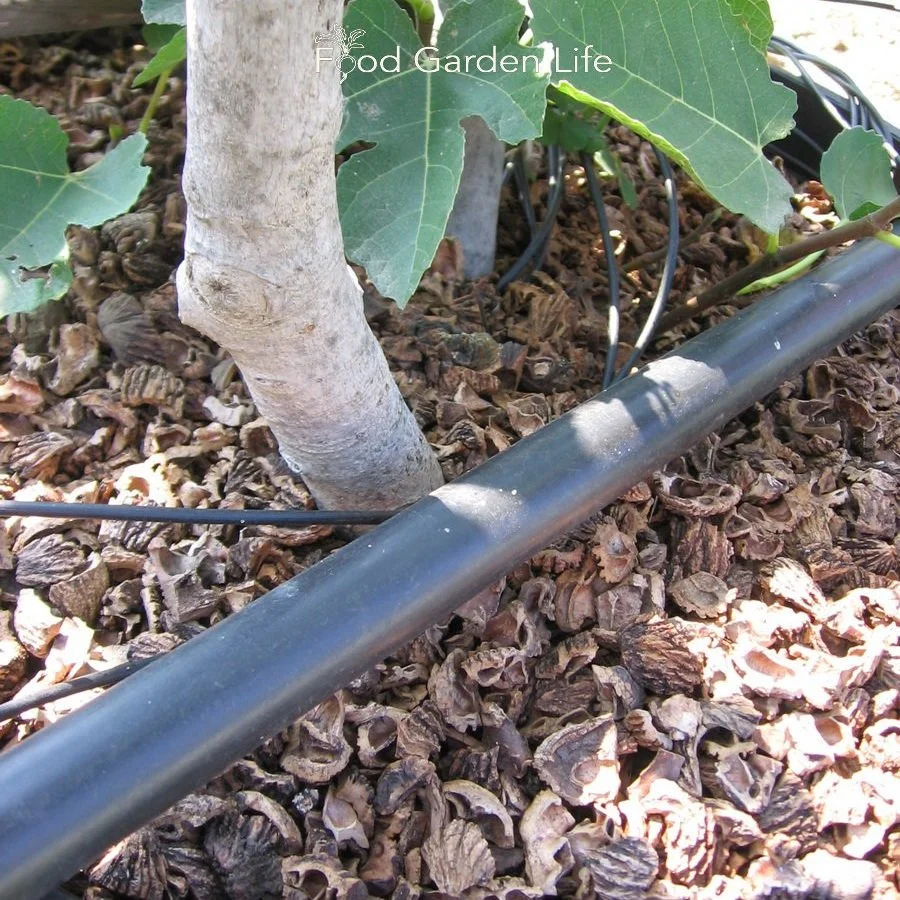
Mulch covering the potting soil, to reduce water loss to evaporation.
Find out more about how to make a sub-irrigated pot for your fig trees.
Can I add mulch to my potted fig trees?
Yes. A layer of mulch on top of the soil holds in soil moisture.
(The most interesting mulch I've seen was crushed walnut shells, at a nut nursery!)
My fig trees need frequent watering, what can I do?
You'll get the best growth when the soil is consistently moist. Add ingredients to retains moisture. And if that's not enough, consider a sub-irrigated pot.
Keep Growing Figs
Looking for more cold-climate fig-growing ideas? Visit the fig home page to browse articles about varieties, pruning, propagation, ripening, winter protection, and more.
Grow Figs Where You Think You Can’t
My revised and expanded fig book is a practical guide to growing figs in pots and cold climates—from choosing varieties and pruning to ripening fruit and conquering winter.
Find This Helpful?
Enjoy not being bombarded by annoying ads? Appreciate the absence of junky affiliate links for products you don’t need?
This site is reader supported. If it has helped you in your food-gardening journey, you can give us a high-five below. Any amount is welcome.
Cold-Climate Guide to How to Prune a Fig Tree
Growing figs in cold climates? This guide on how to prune a fig tree explains how to do it well.
By Steven Biggs
How to Prune a Fig Tree (and not Quit!)

I was really interested as one of the club members described how he clad his beloved fig tree in insulated panels every winter, making a temporary shed around it.
One of the pleasures of giving talks at garden clubs is that I get to meet lot of other plant lovers. And this guy was not only a plant lover—but a fig enthusiast too.
But then he told us that he “quit figs.”
He explained that the tree kept getting bigger…and he found it was too much work to protect it for the winter.
Please keep reading so that you don’t feel you have to quit figs. You can keep a fig tree quite compact. It’s just a matter of pruning.
Top Fig-Pruning Tip
In this article, I’ll talk about the idea of creating a permanent framework of branches on your fig plant. This framework will guide your pruning every year and make it simple. Think about your fig pruning this way, and it’s easy to prune well.
Overview of Fig Pruning
Things that Affect Fig Plant Pruning
First of all, there’s more than one approach to pruning a fig tree. There are a few things that affect how to do it, including the conditions in your garden, the variety, and the form you choose for your plant.
If that sounds overwhelming, just remember: Start by making a permanent framework of branches. After that, it’s easy.
Here are the first things to consider as we start to think about fig pruning:
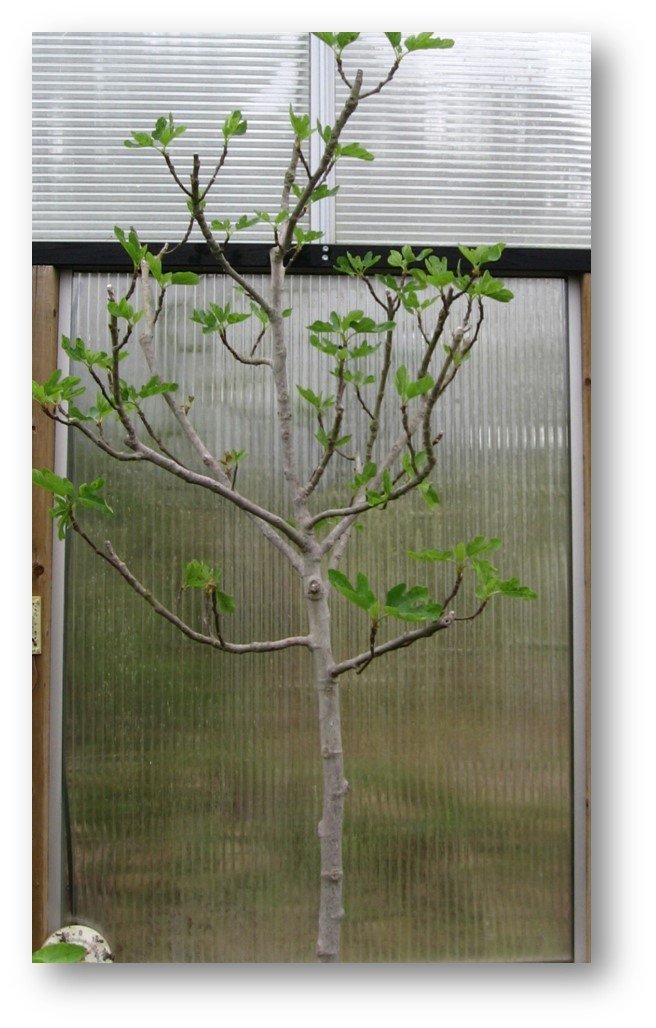
I love the look of trees, and find it’s easier to fit a number of narrow potted trees into a storage space over the winter.
Tree or bush: You can prune a fig tree into a tree or bush shape. There’s no right or wrong. I love the look of trees, and find it’s easier to fit a number of narrow potted trees into a storage space over the winter. But a bush is like having “fig insurance” because you have more branches in case there’s dieback over the winter.
Uniferous or biferous: This just refers to varieties that give either one or two crops. Uniferous varieties produce only the “main crop” figs later in the season; while biferous varieties produce a breba crop early in the summer, and then a main-crop fig later. We’ll dig into pruning for both of these types below, but just keep in mind that you can prune to optimize development and ripening of breba figs, main crop figs—or a bit of both.
Pot or in-ground: If you’re growing a potted fig, consider keeping your fig short enough that you can easily fit it through a door frame for winter storage. With an in-ground plant, height is still important, but there’s more wiggle room.
Here are a few more things to keep in mind as you get ready to prune your figs:
Unpruned figs get bushy, with lots of spindly branches that make small fruit…this is a plant that really benefits from pruning to optimize fruit production.
Breba figs form on branches from the previous year; main-crop figs on new wood…and we’ll relate this to pruning below.
If you chop back your plant too much, main-crop figs still form on the new branches…but it might be too late for ripening in short seasons (My neighbour Joe had an in-ground fig here in Toronto that he never protected. So it died to the ground every winter, and then regrew from the root…that dieback was like a very heavy pruning, except it was done by the cold weather. Those branches that grew did eventually form figs, but they never had time to ripen in our relatively short season because the figs formed too late.)

Remove branches that cross because fig plants have a tenancy to grow into a tangle of branches.
Remember, fig trees are quite forgiving. So if you make a mistake, don’t sweat it. Better to prune and make a mistake than not to prune at all.
Pruning Basics
A lot of pruning concepts that we use with other fruit trees work with fig trees too. So let’s review some of these pruning basics:
Remove branches that cross
Space out branches to allow light and air movement within the plant
Remove suckers
Cut back to a node or a branch (do not cut half way between nodes)
Fig Pruning Basics in 3 Words
Want three words to help you visualize good fig pruning?
Up
Out
Open
You’re pruning your tree to grow upwards, outwards, and have an open structure.
Types of Pruning Cuts
When we prune our figs, there a two types of cut we can make. The plant reacts differently to them—something we can use to our advantage.
Heading Cut. A heading cut is when you shorten a branch, but leave some of it. This type of cut encourages buds on the remaining bit of branch to grow. This is how you can get branches to grow where you want them.
Thinning Cut. This is when you entirely remove a branch, cutting it right back to what it came from. This is the type of cut to make when cleaning up a tangle of branches. It’s also what I use to form single-stem specimens. Energy is redirected to the remaining branch(es).
Whatever you do, don’t shear your fig plant like a hedge. If you do that, what you’re doing is a making a lot of heading cuts – and you’ll get willy-nilly sprouting of new branches and total tangled mess of branches.
Think of Pruning in 2 Stages
Start with your formative fig pruning. This is where you shape a young, single-stemmed plant (often called a whip) to give you a permanent framework of branches.
(Your permanent framework of branches has “scaffold” limbs—the main branches. And it has secondary limbs coming off of these.)
Once you’ve created this framework, then every year you’ll do some maintenance pruning.
Developing a Shape
a.k.a. Formative Fig Pruning
Let’s get back to the idea of creating a permanent framework. Below I give pointers on how to create a permanent framework for a fig bush, tree, step-over, or fan.

When we create a bush we prune to induce branching low to the ground. Then we prune to have a permanent framework of multiple branches with an open centre.
Prune to Create a Fig Bush
When we create a bush we prune to induce branching low to the ground. Then we prune to have a permanent framework of multiple branches with an open centre. We simply using heading cuts to create a well-spaced branching form.
If you’re starting from scratch, here’s how you can do it:
Year 1
Start with a single-stem young plant.
At the end of the first season, cut back to 3-4 nodes high (this is a “header” cut that induces branch formation low down).
Year 2
New branches grow from buds on the piece of stem you left the previous fall.
At the end of year 2, keep three or four branches, cutting each of those branches back to 3-4 nodes.
Year 3
The fig bush will now grow more branches from the nodes you left on the new wood the previous fall.
At the end of year 3, cut back new growth to 3 nodes and remove spindly branches. Now you’ve made yourself a nice permanent framework of branches for a bush!
Prune to Create a Fig Tree
Year 1
Start with a single-stem young plant (or rooted cutting).
Pinch off side shoots and suckers.
Stake the stem if it’s flimsy. Staking and tying also helps to develop a straight trunk.
At the end of the first season, make a header cut at the height where you want the tree to branch out. (If the tree didn’t yet get to that height, continue growing it upwards in year 2 – the amount of growth it makes will depend on growing conditions.)
Year 2
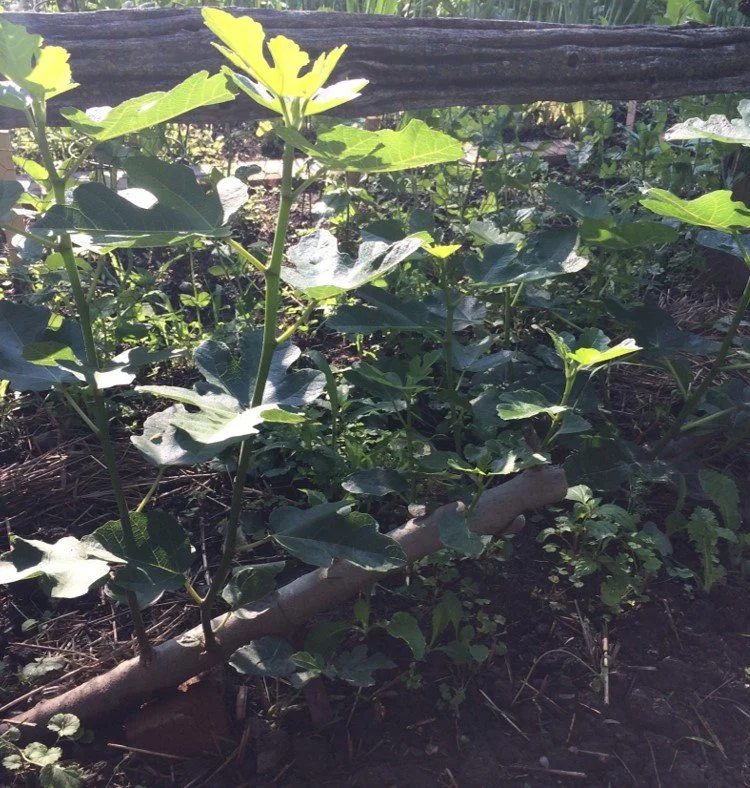
One way to make a step-over fig is to plant a single-stem fig tree on an angle so that the stem is horizontal.
New branches grow from the below where you headed the single stem.
At the end of year 2, keep three or four of the new branches, cutting each of those branches back to 3-4 nodes.
Year 3
The fig tree will now grow more branches from the nodes you left on the new wood the previous fall.
At the end of year 3, cut back new growth to 3 nodes and remove spindly branches. Now you’ve made yourself a nice permanent framework for a tree!
Get Your Fig Trees Through Winter—and Harvest Figs
Growing figs where winters are cold takes a bit of creative thinking.
In Fig Camp and the self-paced Fig Masterclass, I explain how to grow figs in pots or in the ground, extend the growing season, ripen more fruit, and protect your trees through winter.
Prune to Create a Step-Over Fig
A step-over tree is a low-growing tree grown horizontally so that you can truly just step over it. I’ve seen apple trees growing in the step-over form—and love the appearance.
There’s something else about the step-over form too…
I think the step-over concept is well suited to cold-climate fig growers as low-growing, horizontal braches are relatively easy to insulate over the winter. Depending on where you are, a blanket of straw bales or leaves could suffice.
(While you could simply rake leaves over a step-over fig, sometimes when they get wet and packed down they don’t insulate as well. The solution is to fill large plastic bags with leaves, making “leaf pillows” to insulate your step-over fig.)
Here are tips if you want to prune your fig into a step-over form (often called a cordon):
Make a header cut at a low height to encourage branches that you can train horizontally.
If you try to immediately train those branches horizontally, they probably won’t grow as quickly. So let them grow upwards initially (or at a 45°angle), and then, as they get longer, gently bend and tie them so they are horizontal.
At the end of the season, gently bend the stems to a horizontal position and pin them down.
Or, if you’re in a hurry and have a single-stemmed fig tree, plant it on an angle so that the stem is horizontal.
Or…if it’s a single-stem young tree that is still very flexible, gently bend it into place (gently and slowly…I’ve snapped off plants unintentionally by trying to bend them too aggressively!)
Here’s a more detailed article about how to grow a step-over fig, a.k.a. a low cordon.
Prune to Create a Fig Fan

Fig espalier in a greenhouse.

The idea behind a fan is that you have a fairly flat form that can go against a warm wall.
You can also prune a fig tree into a fan shape. I once saw one at a nearby garden centre and was all set to take it home with me…until I saw that it was priced at $500. I didn’t think I could explain that expenditure to my wife.
So I made my own instead.
The idea behind a fan is that you have a fairly flat form that can go against a warm wall. The wall captures and releases heat. It’s a common technique for other sorts of fruit trees in cold climates, offering protection from frost and additional heat for ripening. Ripening figs in cold climates is all about heat…
Year 1
Start with a single-stem young plant
At the end of the first season, make a header cut at a low height to encourage side branches that you can train out in a fan shape.
Year 2
Make a fan-shaped trellis that you can tie the branches to.
Thoughts on Fig Height
I’m a firm believer that cold-climate fig growers should keep plants short enough so that figs are within reach of humans – not up high in the realm of squirrels or birds.
A 20-foot-high fig tree sounds lovely, but it’s not practical in a cold climate. Pruning is your way of keeping your fig tree at a height that you can manage for picking AND overwintering. And if you do it right, you can make a very fruitful tree that suits your particular needs.
Maintenance Pruning for Fig Trees
Above we looked at how to make yourself a permanent framework of branches for your fig tree or bush. Now let’s look at what to do once you’ve grown your fig plant to its ultimate size. (Yes, you control the size!)
When to do Maintenance Pruning
We usually do this pruning while the tree is dormant. If I’m pruning potted figs that I store in my garage, I do this maintenance pruning when they’re dormant in the fall, before moving them indoors—so they take up less space. But for my in-ground figs growing outdoors (which I tip over and mulch for my growing conditions here in Toronto) I prune in the spring. I wait until the branches start to green up and buds swell, so that I can see if there is any winter die-back to trim off.
Prune Figs to Maximize Main-Crop Fig Production
Main-crop figs are the figs that grow on new wood from the current season.
Some varieties produce only main-crop figs. Other varieties (biferous varieties) give main-crop and breba figs. You might choose to prune a biferous fig top optimize main-crop figs (at the expense of breba figs) if you have other fig plants that give you breba figs.
Here’s an article about fig varieties for cold climates.
When pruning for main-crop figs, we are pruning to encourage new branches in the coming season.
While it’s Dormant
In the late winter or early spring, while the tree is still dormant, prune growth from the previous season to encourage new branches (remember, your main-crop figs grow on new wood.)
As we think about main-crop pruning, here’s something to keep in mind: Heavy pruning can delay ripening of main crop figs.
And in cold climates, where the length of our growing season is the limiting factor to ripe figs, that delayed ripening can be a challenge.
In warm areas a common practice is to prune back growth from the previous season to the permanent framework of branches—leaving just a short nub of each branch from which new branches can grow. This causes the plant to send out a lot of new branches, and on each of those are main-crop figs.
Here’s the challenge: This type of pruning can be too drastic in a cold climate—and few, if any, main-crop figs will ripen. It depends on the season, the variety, and how soon the plant started growing in the spring.
A safer way to prune for main-crop figs is to leave more of the growth from the previous season. Cut back branches part of the way—not all of the way—to the permanent framework. (Of course, over time this will give you a taller plant, but you can prune back a few branches to the permanent framework every year.)
While it’s Growing
There’s something else you can do for main-crop figs in cold climates: Pinching the tips in the summer.
Pinching might seem strange to fig growers in warmer areas, but in a cold climate such as Toronto, I know that I’ll only get 4-6 main crop figs to ripen on a given branch. Then cold weather arrives and we run out of time. So after a branch has 5-6 little figs growing on it, I pinch out the tip. This slows down shoot growth and formation of any additional figs, and directs more energy to those 5-6 little figs we’re hoping to ripen.
Prune to Maximize Breba Fig Production
Breba figs are the figs that grow on wood from the previous year. Because of this, the pruning approach above, for main-crop figs, won’t work. It removes growth from the previous year…so would not leave any branches with breba figs!
(Remember, breba figs grow on wood from the previous season.)
So when pruning for breba fig production, we want to keep growth from the previous season—it gives us figs.
Here’s what you do:
While it’s Dormant
Leave the year-old branches coming off the end of your permanent framework—it’s what gives you breba figs in the upcoming season
Prune off 2-year-old branches coming off the end of your permanent framework. These made breba figs the previous season…and if you leave them they’ll still make breba figs, but now those breba figs will be on the new growth, up high and out of reach. So cut these off, leaving about an inch of the branch remaining on your permanent framework from which new branches can form.
While it’s Growing
Here’s an additional step for breba-producing figs in cold areas where you’re protecting the plant over the winter. A shorter plant means less work protecting (wrapping or burying)…so let’s curb upward growth!
In spring and early summer, you’ll clearly see where the breba figs are, and, beyond that, the new growth that would eventually make main-crop figs. Pinch out the tip of that new growth to curtail the upwards growth of the plant.
Here’s more about winter protection for figs growing in cold climates.
Fig Pruning FAQ
I’m not starting with a young tree to grow into a nice framework. It’s already branched. What should I do?
There are probably some branches worth keeping. But if you’re new to pruning, mark branches before you start cutting. Put tape on the branches you want to remove before starting to prune. This will help you to visualize what the end result will look like.
Remember, with a heading cut you can make your fig grow branches where you want them.
What if I don’t prune one year?
If you miss a year, you certainly won’t hurt your fig tree. It will just get taller! Just be prepared to prune it back to your permanent framework the following year. And a heavier pruning might give you a bit less fruit production for a year—but it certainly won’t hurt the plant.
What if I have a mature bush that’s not well pruned?
Pick a four or five well-spaced branches to keep, and then tidy up the rest.
How small can I keep my fig tree?
Many new fig growers are reluctant to prune. It’s probably a combination of things: Pride at seeing the growth on the fig plants; and concern, too, that if they prune too much they might harm the plant. So please remember this: Like bonsai, the gardener determines the ultimate plant size. You’re the boss!
What can I do with the branches I pruned off of my fig plant?
This is the fun part! Root them.
I have an article about rooting fig cuttings here.
Another idea: If you like to make smoked food, fig wood gives a taste that’s very different from other fruit woods. Try it!
As well as using fig branches for a tasty smoke, you can cook with fig leaves. Find out how to use fig leaves in the kitchen.
What if I want to prune to get a mix of breba and main-crop figs?
You’ll take ideas from both of the pruning approaches above, so that you have a mix of branch tips from the previous season to give you breba figs, and you’re encouraging new branches that give you main crop figs. I’m working on that article next!
Keep Growing Figs
Looking for more cold-climate fig-growing ideas? Visit the fig home page to browse articles about varieties, pruning, propagation, ripening, winter protection, and more.
Grow Figs Where You Think You Can’t
My revised and expanded fig book is a practical guide to growing figs in pots and cold climates—from choosing varieties and pruning to ripening fruit and conquering winter.
Find This Helpful?
Enjoy not being bombarded by annoying ads? Appreciate the absence of junky affiliate links for products you don’t need?
This site is reader supported. If it has helped you in your food-gardening journey, you can give us a high-five below. Any amount is welcome.
Ripen More Figs in the Fall
Season length is a limiting factor to the fig harvest in cold climates. Here are thoughts on how to ripen more figs in the fall.
By Steven Biggs
Turn up the Heat for Your Figs

Dark coloured paving stones capture heat by day, and release it through the night.
Around here, we’re only a couple of months away from that first fall frost that puts an end to any hope of ripening more figs.
But if you turn up the heat, you can ripen more figs between then and now.
Remember Radiated Heat
How can you turn up the heat?
You can turn up the heat for your figs by remembering materials that capture and then slowly release heat.
I’m talking about things such as brick, tile, and concrete.
In late summer, as temperature swings between day and night become greater, using radiated heat in the garden is a technical-sounding, yet simple way to given fig plants more heat.
Remember: More heat for our fig plants means more ripe figs before the fall frost arrives!
Walls and Driveways
If you already have your fig near a paved driveway or brick wall, then it’s benefiting from thermal mass. At night, the driveway or brick slowly radiates heat that has been stored during the day, keeping the air temperature around your figs a bit warmer.
I was reminded of how much of a difference radiated heat can make a couple of weeks ago when I visited a friend who recently planted a fig hedge (which she intends to overwinter with an insulated A-frame).
As I stepped—barefoot—onto the patio surrounding the fig hedge, the dark stone singed my feet.
It was scorching hot.
When it rained a short while later, the stone dried within minutes because it was so darn hot!
That fig hedge has a really great “micro-climate.” They’re surrounded by that heat-capturing and heat-radiating stone. At night, those figs bathe in radiated heat.
Keep Growing Figs
Looking for more cold-climate fig-growing ideas? Visit the fig home page to browse articles about varieties, pruning, propagation, ripening, winter protection, and more.
Grow Figs Where You Think You Can’t
My revised and expanded fig book is a practical guide to growing figs in pots and cold climates—from choosing varieties and pruning to ripening fruit and conquering winter.
Find This Helpful?
Enjoy not being bombarded by annoying ads? Appreciate the absence of junky affiliate links for products you don’t need?
This site is reader supported. If it has helped you in your food-gardening journey, you can give us a high-five below. Any amount is welcome.
Sub-Irrigated Planters for Fig Trees: How SIPs Work
Make your own sub-irrigation planters (SIPS) so that your fig trees don’t need watering as often.
By Steven Biggs
Keep Potted Fig Trees Watered with a SIP
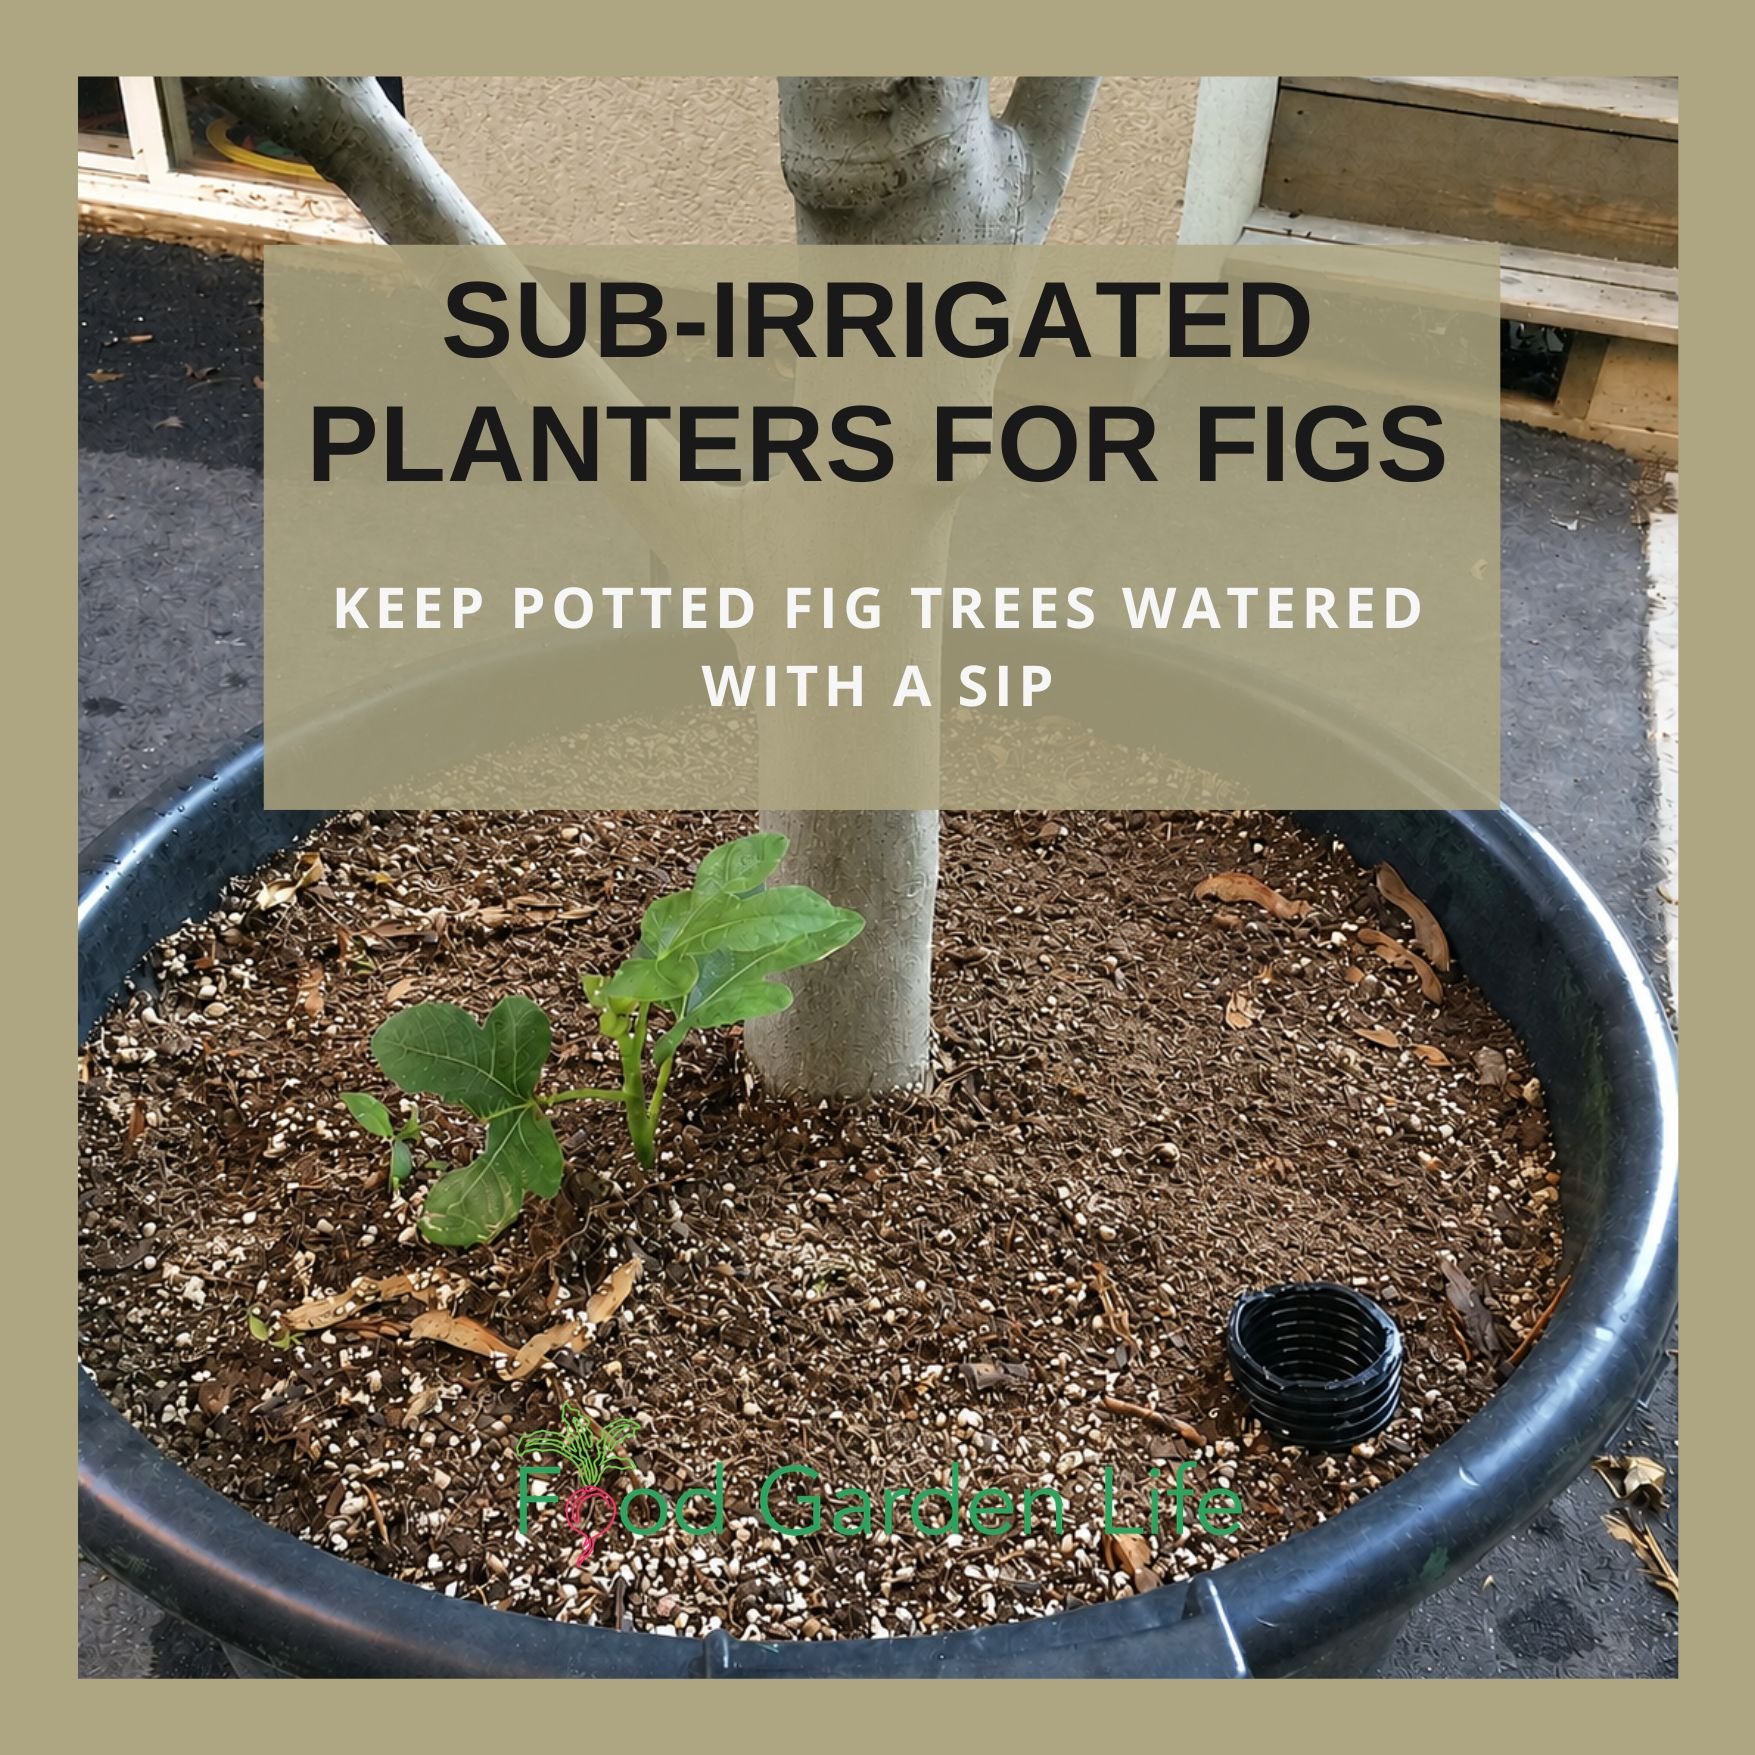
A homemade sub-irrigated planter provides a water reserve for a potted fig tree, helping to reduce moisture stress during hot weather.
Potted fig trees can guzzle a surprising amount of water in hot weather. If the potting mix repeatedly dries out, growth can slow and developing figs may shrivel or drop.
A sub-irrigated planter—or SIP—helps maintain more consistent soil moisture by storing water in a reservoir beneath the potting mix. Instead of relying on water applied from above, the mix draws water upwards as the plant uses it.
A SIP can be especially useful if you:
Grow figs in a hot, sunny location
Can’t water your containers every day
Have large plants that dry out more quickly than you can water them
Want to reduce water stress and premature fruit drop
Other ways to help potted figs stay moist include mulching the soil surface, using a larger container, and sinking the pot a few centimetres into the ground. But where frequent watering is a problem, a SIP provides a larger and more dependable reserve.
The good news is that a SIP for your fig tree is a straightforward do-it-yourself project.
How a Sub-Irrigated Planter Works
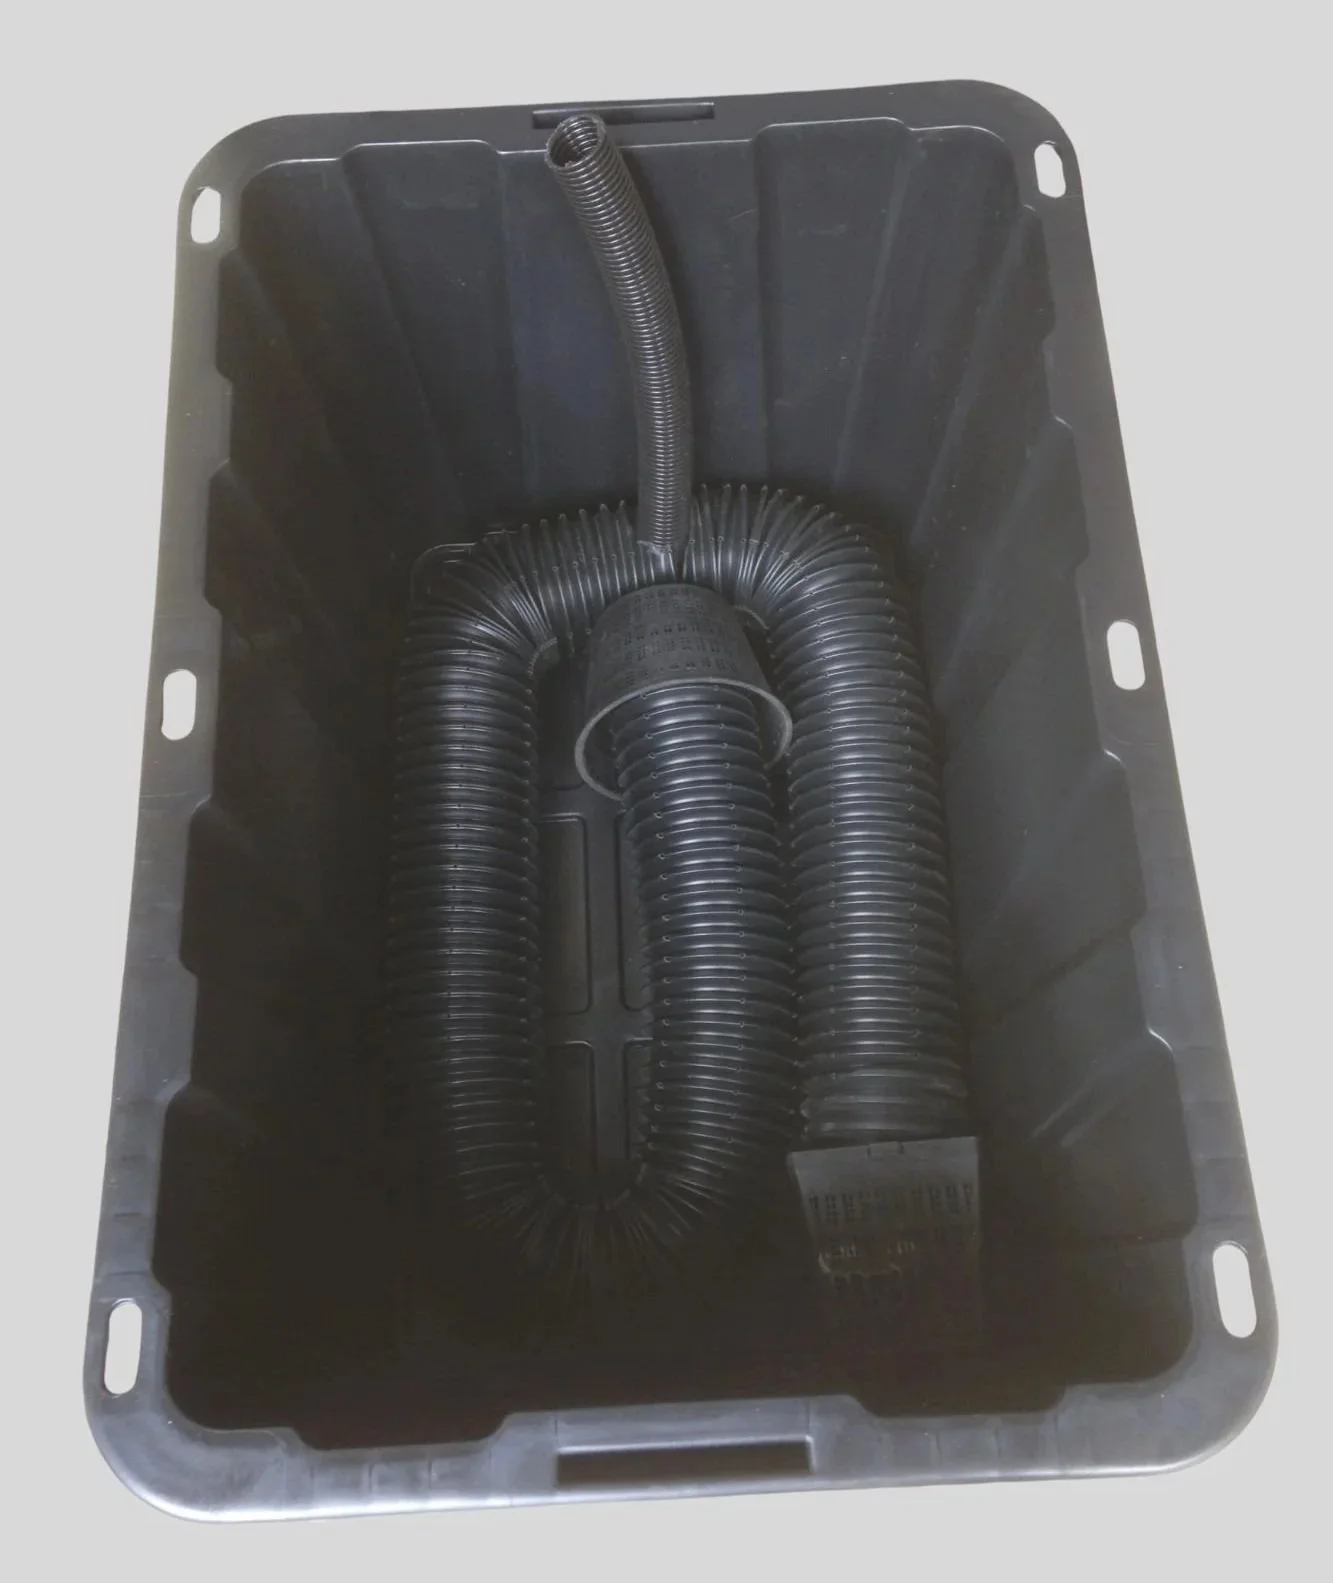
This homemade SIP is made from a storage tote, 10-cm (4-inch) weeping tile, and a dishwasher drain hose. An overflow hole in the side sits level with the top of the reservoir. Before adding soil, I drape landscape fabric over the plumbing so less soil moves into the tile area.
A sub-irrigated planter has a water reservoir beneath the potting mix. Water moves upwards from the reservoir through capillary action—the same way a sponge draws up water.
Three things make the system work:
A reservoir stores water beneath the soil
A wicking area allows part of the potting mix to contact the reservoir and draw up moisture
An overflow hole lets out excess water before the entire root zone becomes a swamp
A fill tube running from the top of the planter into the reservoir makes it easy to add water. Most of the root zone remains in the aerated potting mix above, although some roots eventually grow into the reservoir.
When first planting, water the potting mix thoroughly from above. This settles the mix and starts the wicking process. After that, you can simply refill the reservoir through the fill tube.
Parts of a Sub-Irrigated Planter
You can build a SIP in different ways, but a successful design needs the following components.
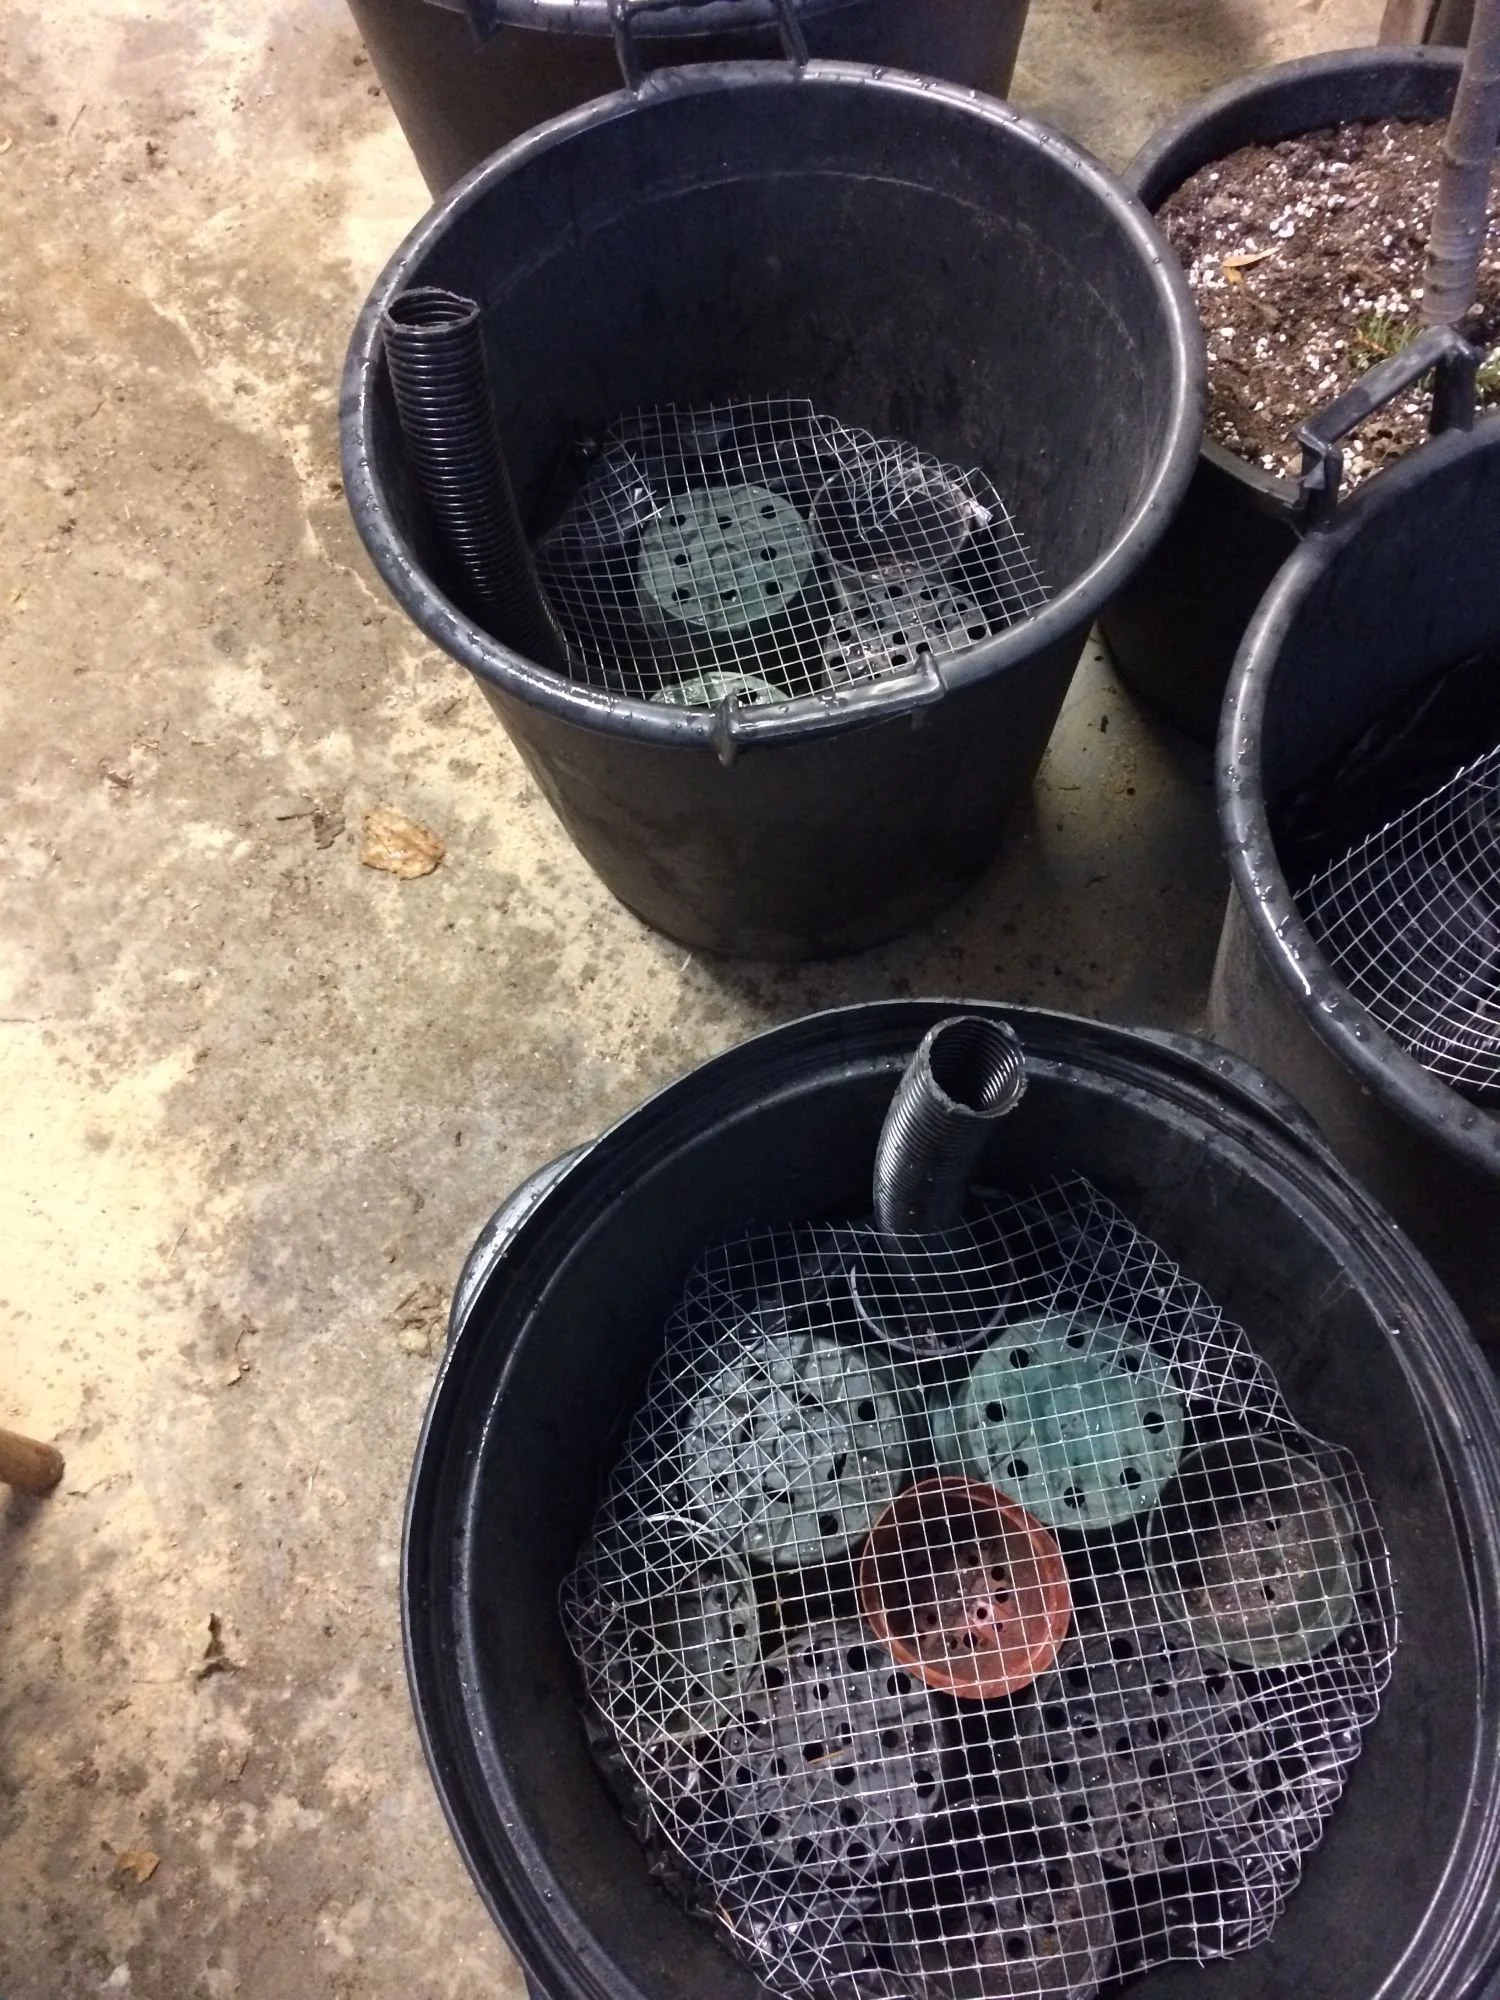
This nursery pot is lined to hold water. Inverted flowerpots support the soil above the reservoir, while mesh topped with landscape fabric will keep the potting mix in place.
Container
Start with a watertight container, or add a durable waterproof liner to a container that already has drainage holes.
Drill an overflow hole through the side of the container at the maximum water level. Position it level with the top of the reservoir. This hole is essential: it allows excess water to escape during heavy rain or if you overfill the reservoir.
Reservoir
The reservoir is the soil-free space at the bottom of the planter. It stores water while holding up the potting mix above.
You can create this space with materials such as:
Perforated drainage pipe
Inverted pots
Sturdy plastic containers
A purpose-made reservoir insert
Choose materials strong enough to support the weight of wet potting mix without collapsing.
Wicking Area
The potting mix needs a way to reach the water. Leave one or more openings where the mix extends down into the reservoir area. These pockets of mix act as wicks, drawing water upwards.
Don’t separate the entire reservoir from the potting mix with an impermeable barrier—the water must have a route upwards.
Note: An alternate approach to this wicking area is to use a fabric wick of some sort. I’ve never done this; it’s not necessary when using a soil mix with good wicking properties.
Fill Tube
Run a tube from the top of the planter into the reservoir. The opening should be wide enough to fill easily with a hose or watering can.
I’ve used dishwasher drain hose, old downspouts, and repurposed plastic tubing. Cut the lower end at an angle or add openings near the bottom so water can flow freely into the reservoir.
Fabric Layer
Place landscape fabric, burlap, or another permeable material over the reservoir supports to keep large amounts of potting mix from falling into the reservoir.
Remember: Leave a spot where the potting mix can dip down into the wicking area.
Potting Mix
Use a light potting mix that holds moisture while still providing air around the roots. A peat- or coir-based mix generally wicks more effectively than a coarse, bark-heavy mix.
Avoid garden soil. In a container, it can compact, drain poorly, and tends not to wick as well.
Learn more about choosing and mixing soil for fig trees in pots
How to Water a Fig Tree in a SIP
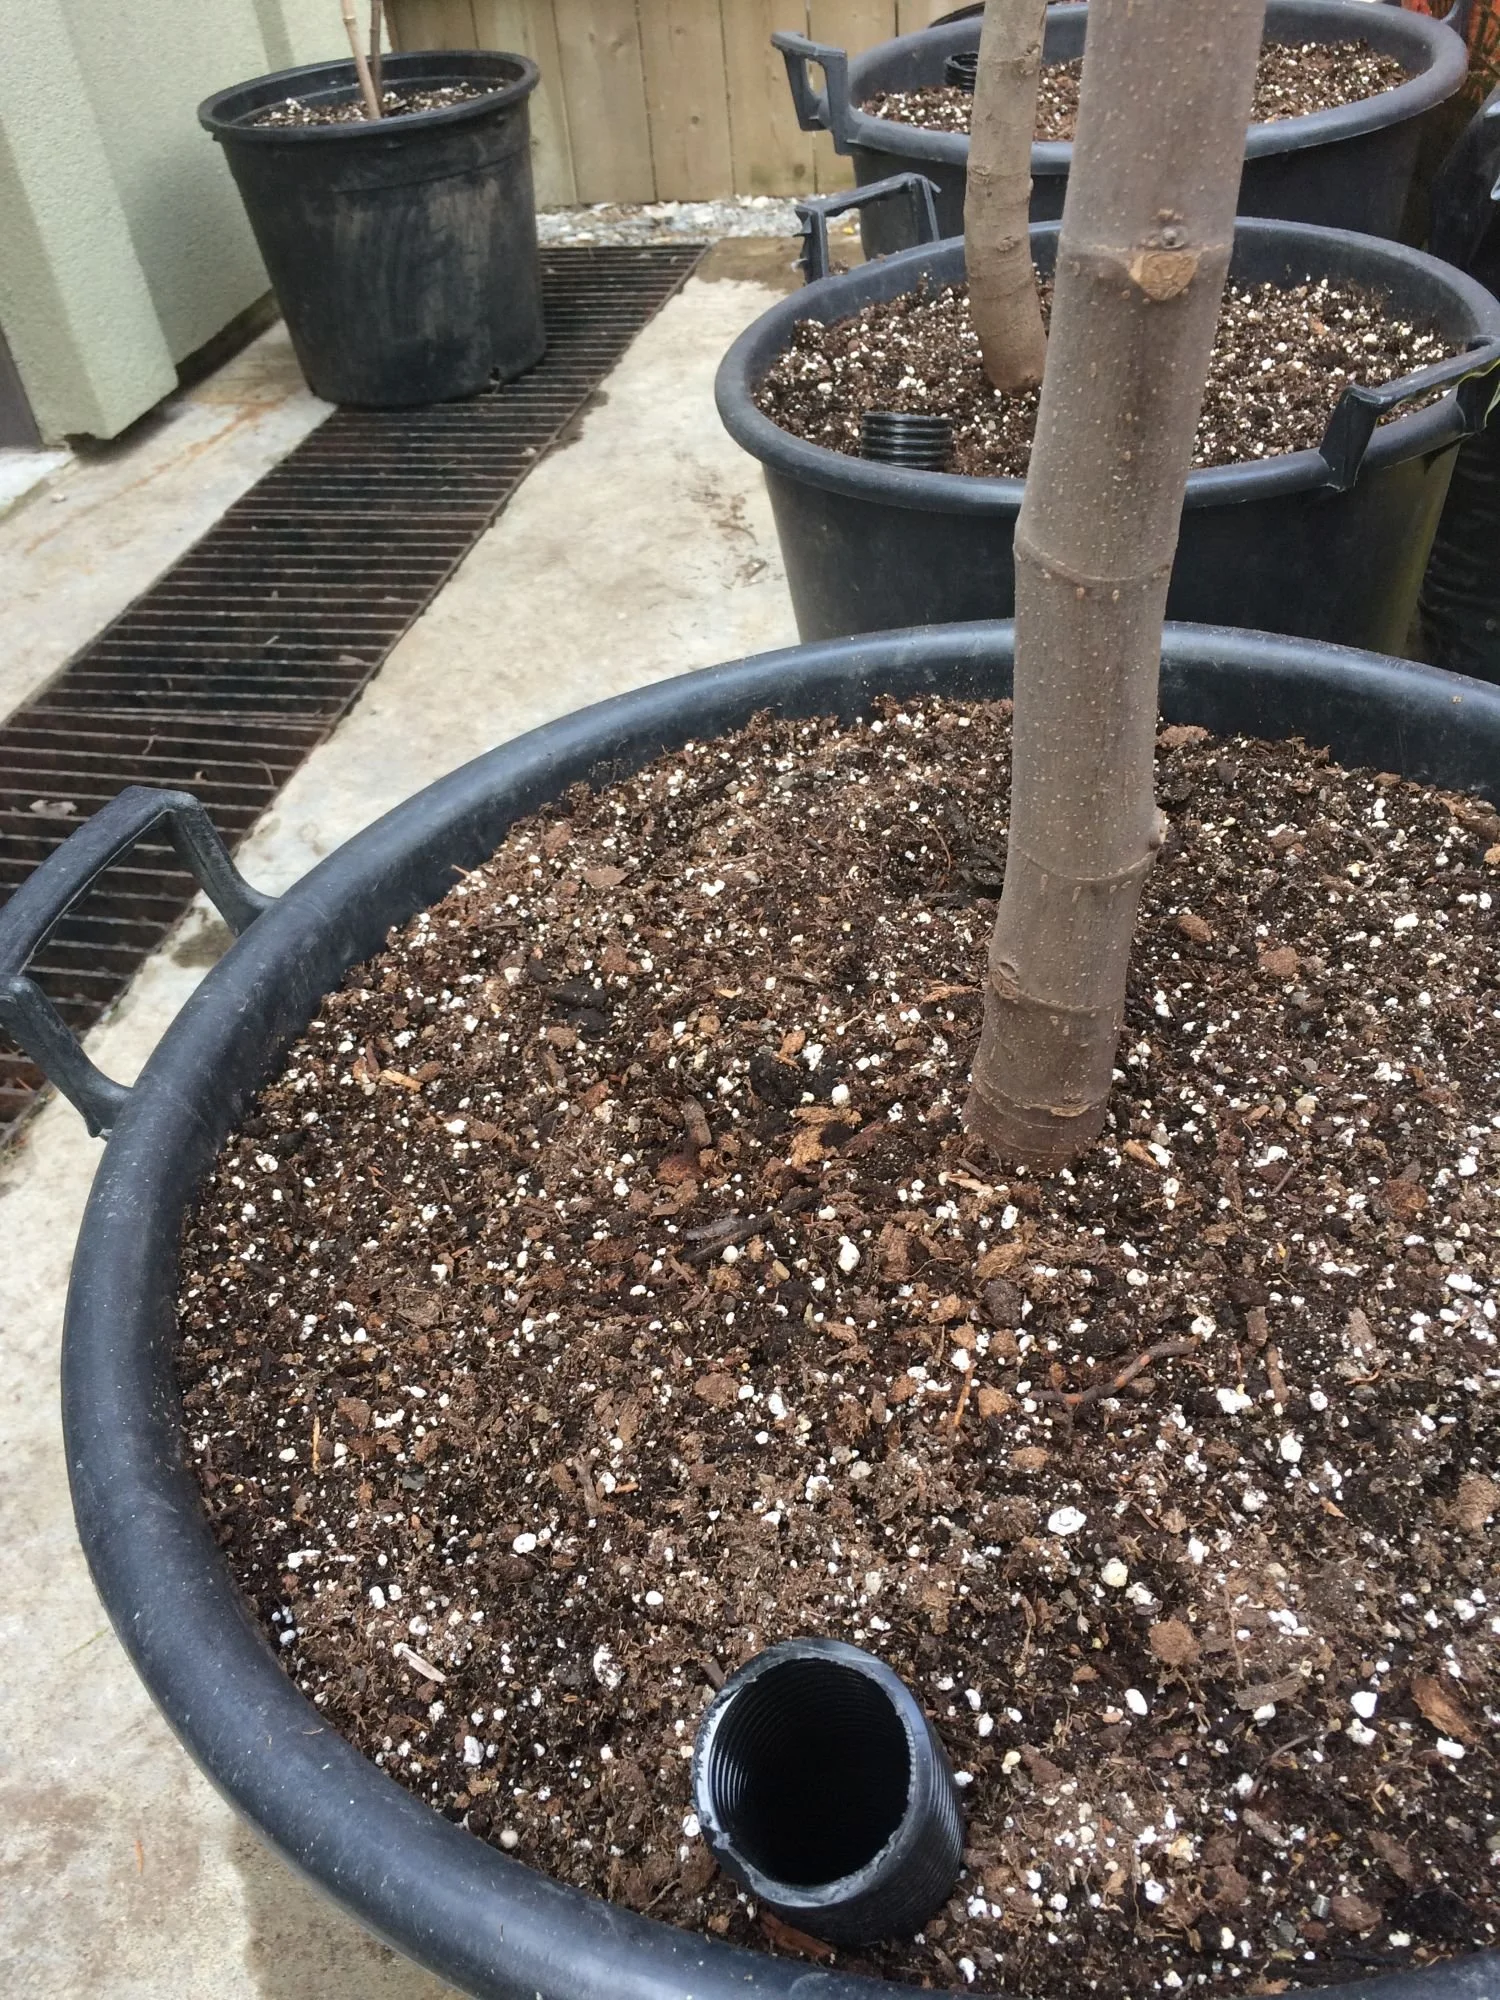
The fill tube carries water directly to the reservoir beneath the potting mix.
When you first plant the fig tree, water thoroughly from above. This settles the potting mix and helps establish the wicking action.
After that:
Add water through the fill tube until it begins to run from the overflow hole.
Allow the reservoir level to drop before filling it again.
Check more often during hot, windy weather and when the tree is carrying a heavy crop.
The weight of the container—not just the appearance of the soil surface—will help you judge the amount of water in the reservoir.
The surface can look dry even when the lower potting mix remains moist. That’s one of the advantages of a SIP: less water evaporates from the surface.
But don’t assume that a SIP makes overwatering impossible. If the overflow hole becomes blocked, the potting mix becomes waterlogged. I’ve had this happen when I created overflow holes that were too small…and they were blocked by large pieces of perlite. So if the soil moisture seems amiss, investigate.
Feeding Fig Trees in an SIP
Because water remains in the system, fertilizer salts can accumulate over time. So occasionally water thoroughly from above and allow the excess to drain through the overflow hole. This flushes accumulated salts from the potting mix.
Before Winter Storage
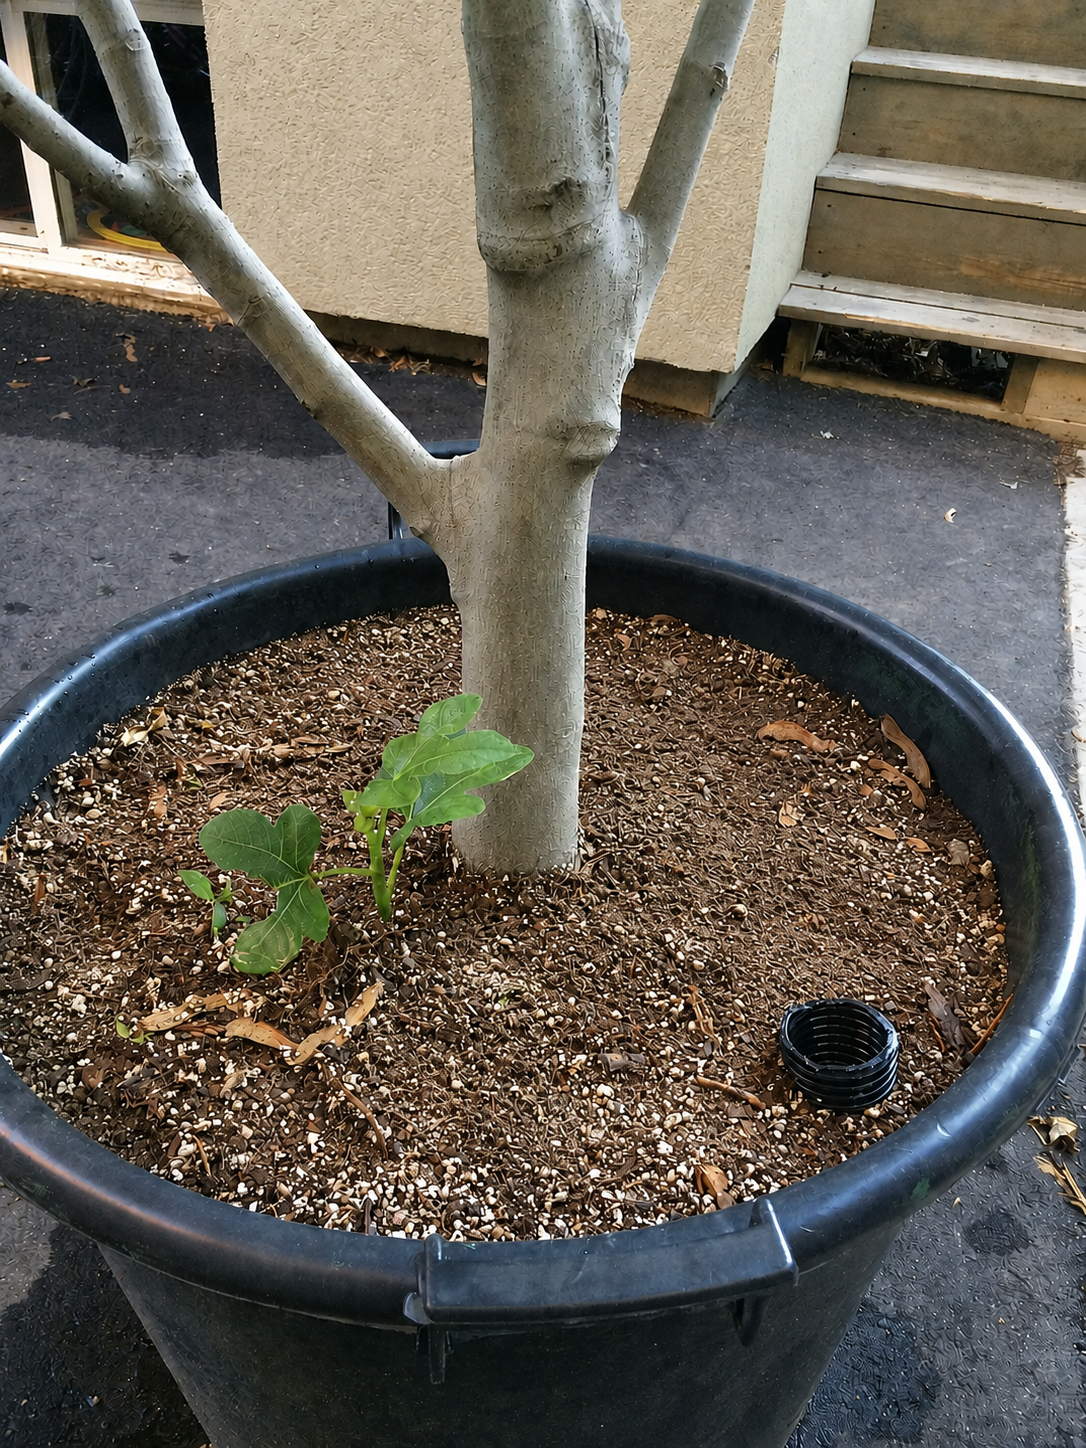
Emptying the reservoir makes a potted fig lighter and easier to move into winter storage.
Before moving a dormant potted fig into winter storage, allow the reservoir to empty. A water-filled reservoir adds considerable weight and isn’t needed while the dormant plant uses very little water.
If there’s still lots of water in the reservoir as you move the pots into winter storage, simply tip them to help more water come out of the overflow hole.
Use SIPs for Other Container Crops
SIPs aren’t just for fig trees. I’ve used them on my garage roof to grow vegetables, where heat and wind make ordinary containers dry out quickly.
The reservoir reduces how often I need to water and helps plants grow without repeatedly cycling between wet and dry conditions. SIPs work especially well for thirsty container crops such as tomatoes, cucumbers, eggplants, and squash.
Find out more about my rooftop SIPs in this article.
FAQ: Sub-Irrigated Planters for Fig Trees
Can fig-tree roots grow into the reservoir?
Yes. Roots grow into the reservoir as the container fills with roots. This isn’t a problem. Just make sure they don’t block the overflow hole.
Should I keep the reservoir full all the time?
You don’t have to. Refill it when needed, but you can allow the water level to drop between fillings. The frequency of refilling depends on the size of the planter, the weather, and the size of your fig tree.
Why is the potting mix dry on top?
A SIP supplies water from below, so the surface can look dry while the lower part of the root zone remains moist. Check the reservoir and the plant before assuming it needs water from above.
Can I convert an ordinary pot into an SIP?
Yes. Add a liner to hold water in the reservoir area. For the supports that hold up the soil, the recycling bin often has items you can use. Find a suitable material for a fill tube. Don’t forget an overflow hole.
Can I use garden soil in an SIP?
Garden soil is usually too heavy for container growing. Use a light potting mix that can wick moisture while retaining enough air for healthy root growth.
Will an SIP prevent fig drop?
It reduces fruit drop caused by drought stress, but figs can drop for other reasons, including cool temperatures, cold wind, or abrupt changes in growing conditions.
Can mosquitoes breed in the reservoir?
A well-built reservoir has little exposed water. Keep the fill-tube opening covered with a removable cap or fine mesh if mosquitoes are a concern.
Do I still need to water from above?
Yes, but only occasionally. Water from above when first planting, and then periodically afterwards to flush accumulated fertilizer salts out through the overflow hole.
Is a SIP Worth Making?
Pin this post!
If your potted fig dries out quickly or you can’t water every day, a SIP makes container growing much easier. It doesn’t mean you won’t have to water. But the reserve provides the steady moisture that vigorous, fruiting fig plants need.
Keep Growing Figs
Looking for more cold-climate fig-growing ideas? Visit the fig home page to browse articles about varieties, pruning, propagation, ripening, winter protection, and more.
Grow Figs Where You Think You Can’t
My revised and expanded fig book is a practical guide to growing figs in pots and cold climates—from choosing varieties and pruning to ripening fruit and conquering winter.
Find This Helpful?
Enjoy not being bombarded by annoying ads? Appreciate the absence of junky affiliate links for products you don’t need?
This site is reader supported. If it has helped you in your food-gardening journey, you can give us a high-five below. Any amount is welcome.

Hi, We’re Steve and Emma!
We help people grow food on balconies, in backyards, and beyond—whether it’s edible landscaping, a vegetable garden, container gardens, or a home orchard.
Fig Masterclass
This self-paced, virtual Fig Masterclass is hosted by Horticulturist and Cold-Climate Fig Expert Steven Biggs.