How to Grow Tomato Seeds Indoors
A complete guide to growing tomato seeds indoors. Tips, supplies—and what to avoid.
By Steven Biggs
Learning How to Plant Tomato Seeds
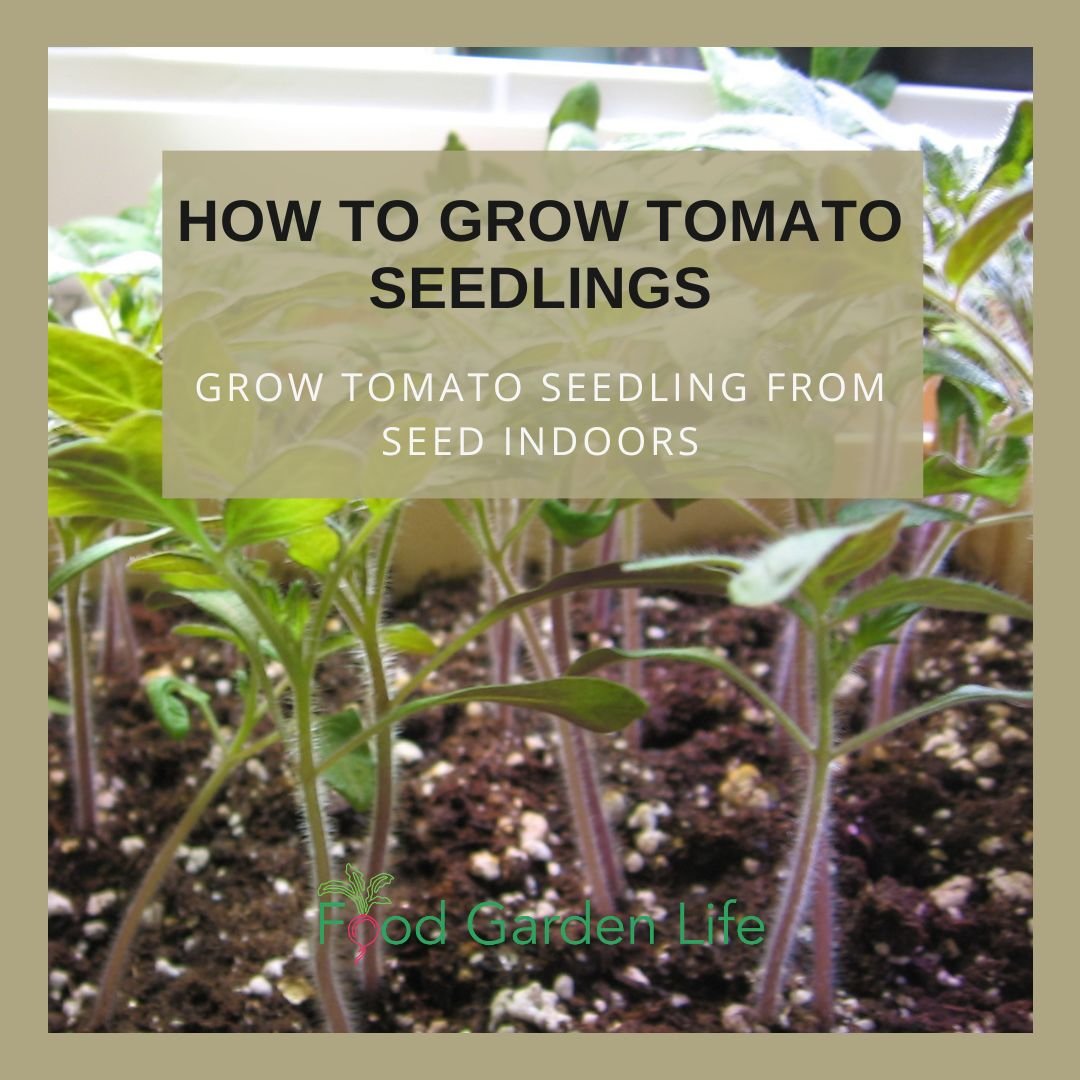
How to grow tomato plants from seed.
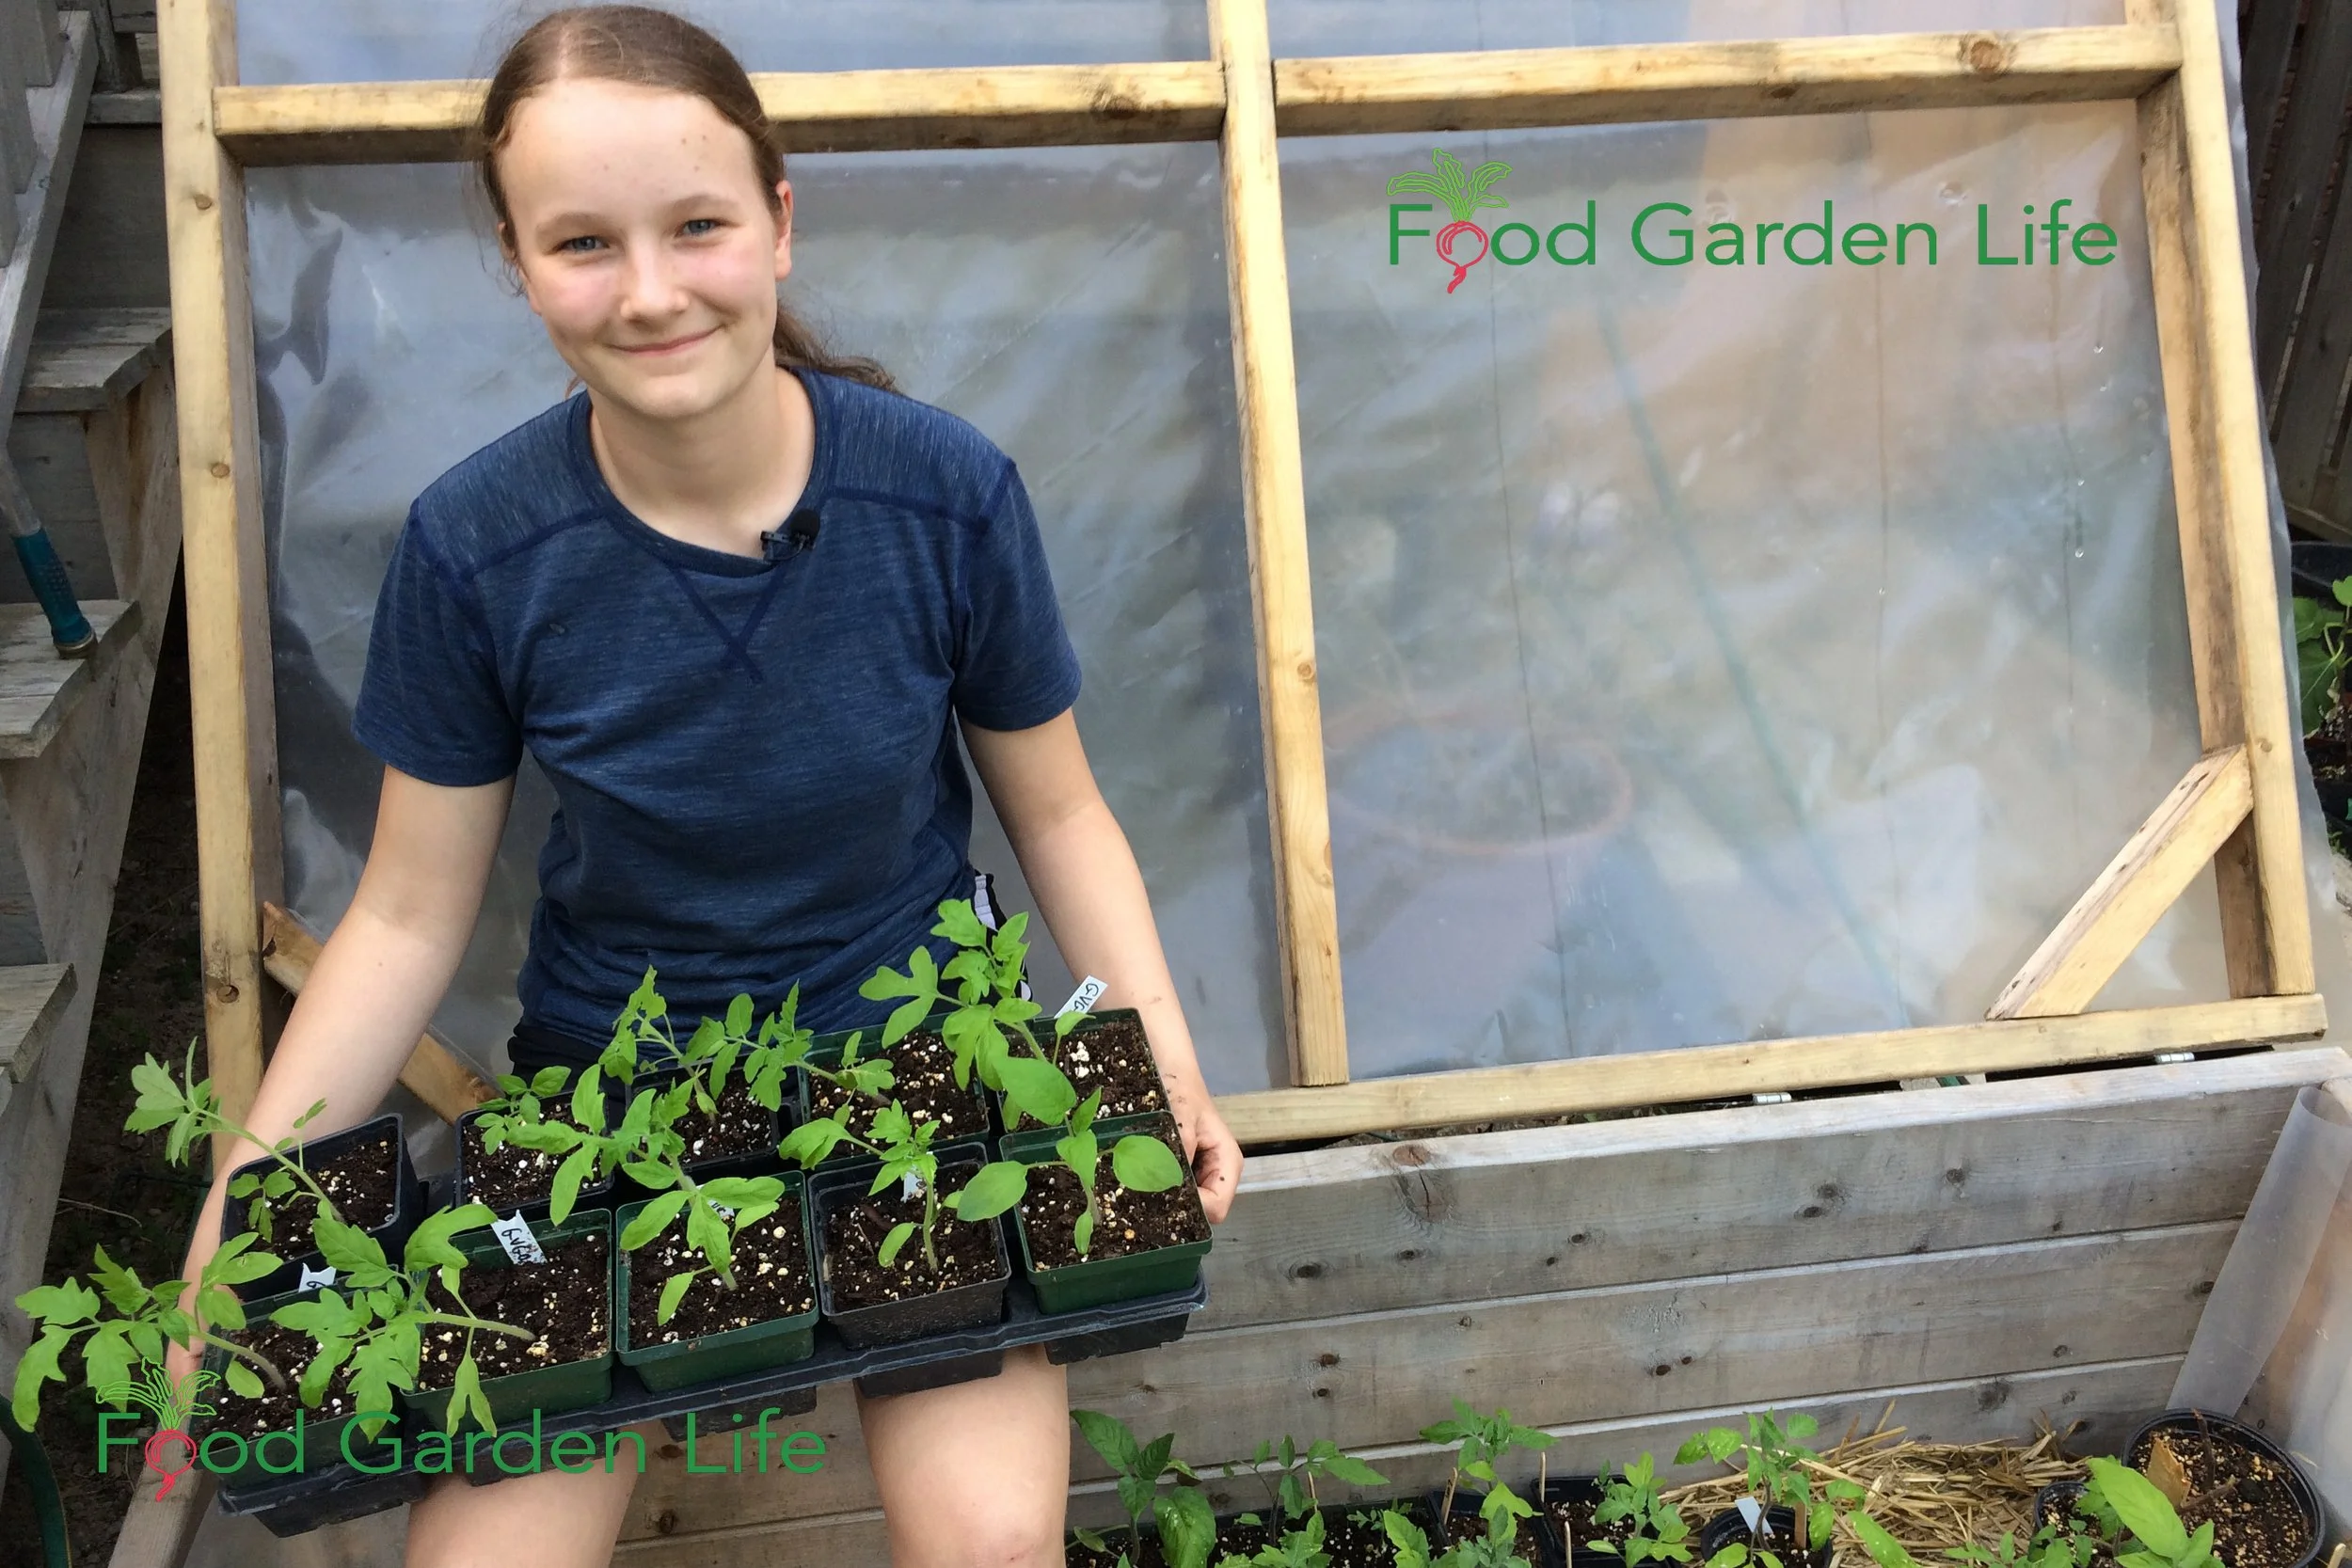
When I was 10 years old my grandfather helped me sow tomato seeds. My first yellow-fruited tomatoes.
I had the perfect teacher. Dido was a life-long gardener and retired market gardener.
He was visiting us from Calgary that spring. We didn’t have much in the way of seed-starting supplies at our place. So he just grabbed an unused wash basin. We put a couple of inches of potting soil in it, sprinkled seeds on top. And then a thin layer of soil.
I gave lots of yellow tomatoes to the neighbours that summer!
His no-fuss approach to gardening coloured mine. There are lots of great supplies, gadget, and tricks…if you want. But you can also make gardening—and growing tomato seeds—really simple. And in a home-garden setting, I think simple is good.
In this article I share ideas about how to grow tomato seeds in a way that suits your situation.
Choose a Tomato Variety

Find out how to grow tomato plants in a way that suits your situation.
Before planting, select a variety that gives you what you want.
Here are things I think about as I choose varieties:
Colour
Size
Taste
How long it takes to mature
Plant stature (determinate tomatoes, indeterminate tomatoes, dwarf tomatoes…there are even micro-dwarf tomatoes)
Disease Resistance
How I use the tomatoes (sauce, sandwiches, packed lunches)
Storage properties (there are storage—a.k.a. “keeper” tomatoes!)
Find out about “keeper” tomatoes.
Get tomato-choosing tips in this article by my tomato-crazy daughter, Emma.
Got problems with squirrels? Cherry tomatoes might be better than big beefsteak tomatoes because there are more tomatoes to go around. Here’s a guide with 50 ways to foil squirrels.
When to Start Tomato Seeds Indoors

Start tomato plants indoors to get a head start on the growing season. These tomato plants are growing in a wooden mandarin orange crate.
We grow tomato seeds indoors to get a head start on the growing season. That head start gives us an earlier harvest.
When it comes to timing, the date of the last spring frost is our guidepost. You’ll often see this date called the “last frost date” or “average last frost date.”
Find out the average last frost date for your area, and then count backwards 6 to 8 weeks.
For example:
The average last frost date around here is mid May. So working backwards 8 weeks, I know that I should be starting tomato seeds indoors around mid March.
This is not an exact science.
So don’t sweat the exact date.
Aim for approximately 6-8 weeks. But don’t start too early, because you could end up with leggy seedlings.
Create Your Own Unique Edible Landscape
That fits for your yard, and your style!
Supplies for Growing Tomato Seeds Indoors
The supplies you need when growing tomatoes from seed depends on your approach to gardening. As I mentioned above, you can keep it pretty simple.
Cell packs are a good option if you’re growing a lot of seedlings.
Here are basic supplies:
Potting soil
Pots or containers (ideas below)
Labels
Seeds
Optional goodies:
Heat mat
Fan
Dome or cover
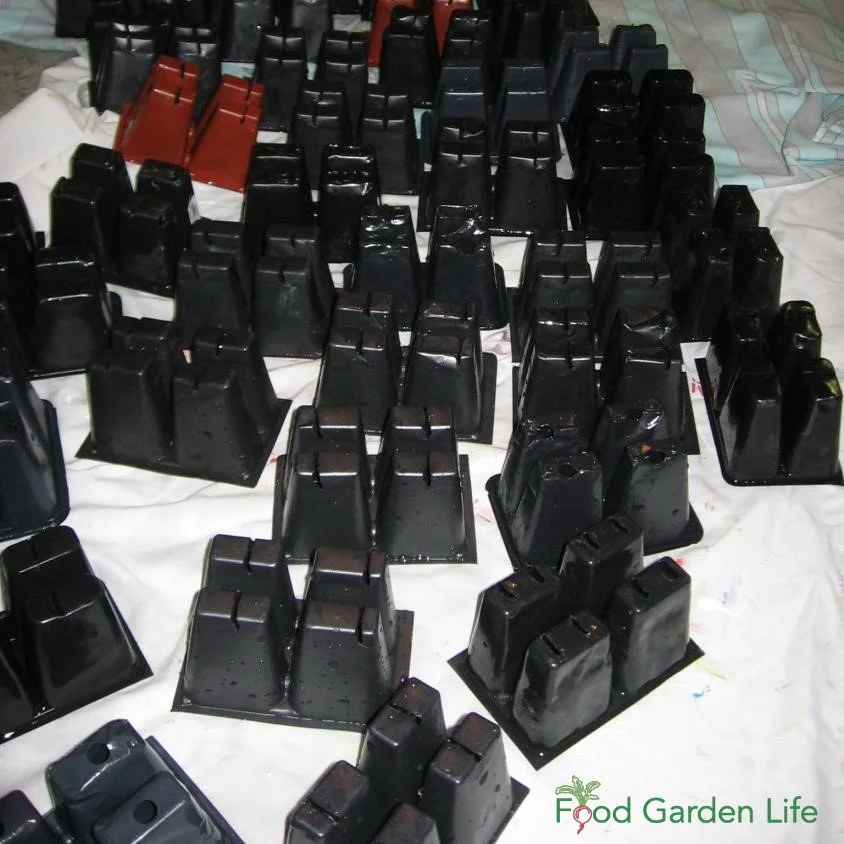
Containers for Starting Tomato Seeds
You can buy purpose-made containers for starting seeds. Or you might already have things you can reuse for seed-starting. (Horticulture creates a lot of plastic waste…and a bit of creativity with seed-starting containers is a great way to generate less waste.)
Here are ideas for seed-starting containers for tomatoes:
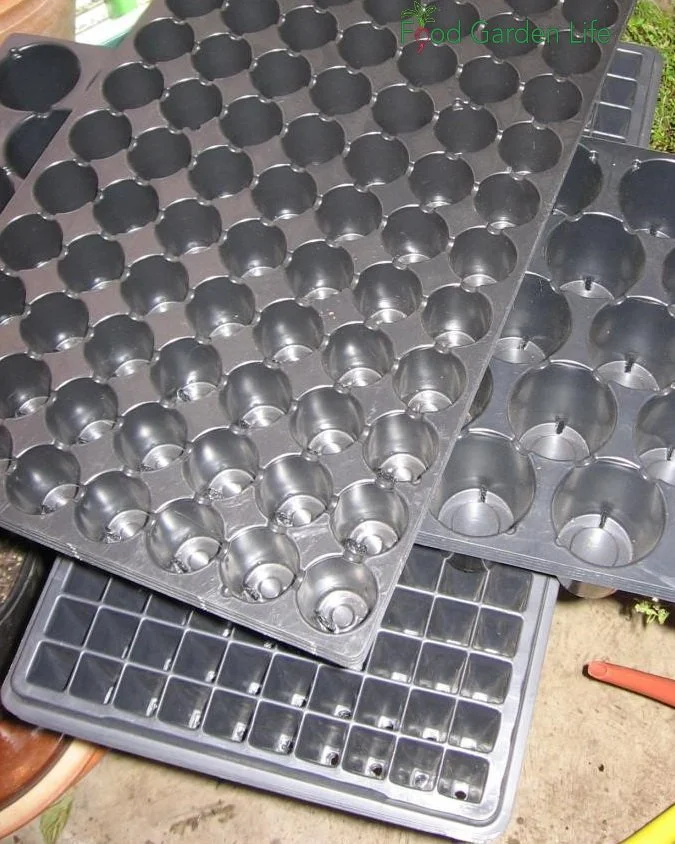
Plug trays are an option if you want to start lots of seeds.
Cell packs. These are the plastic containers with multiple holes, often used for bedding plants – a good option if you’re growing a lot of seedlings.
Plug trays. Plastic trays with a number of smaller holes, more commonly used in commercial greenhouses.
Pots.
Crates. I’ve used wooden mandarin orange crates.
Newspaper pots. Remember that paper pots wick moisture and dry quickly, so adjust your watering accordingly.
Egg cartons. Like egg shells, below, too small for growing tomato plants to the final transplanting size, but if it’s all you have, they’re OK for getting seeds started before transplanting into a bigger pot.
Egg shells? Don’t bother. There are lots of cutesy pictures online of seeds growing in egg shells. My suggestion is don’t bother, they’re impractical.
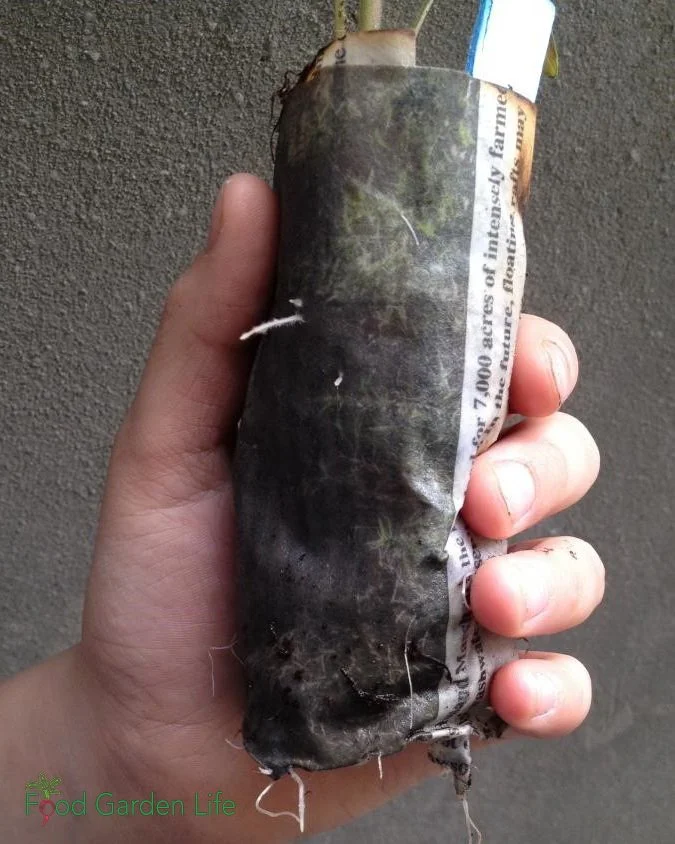
Newspaper pots are easy to make. They can be planted directly into the garden as the roots grow right through the newspaper.
If you’re using biodegradable, natural-fibre pots (peat pots are common, and I’ve even seen pots made from cow manure) a word of caution: Bury the entire pot when planting in the garden, or the whole thing is a wick, wicking water away from plant roots.
Soil for Starting Tomato Seeds
Top Tip: Don’t use garden soil.
That’s for two reasons: First, many garden soils have a structure that packs down, preventing little roots from growing. The other thing is that garden soil can harbour diseases that kill young tomato seedlings.
Use potting soil.
You might see potting soils specifically for seed-starting. These are made with ingredients that are more finely ground, so that there are no chunks of material blocking the way of little germinating seeds.
You don’t need the finely ground potting soils.
A general-purpose potting soil is fine. (A finely ground seed-starting mix is important for commercial growers who need uniform, optimal seed germination; but in a home garden we usually have more seeds than we need, so having the odd coarse chunk in the soil is no big deal).
If the soil is dry, moisten it before using it.
Light for Your Tomato Seedlings
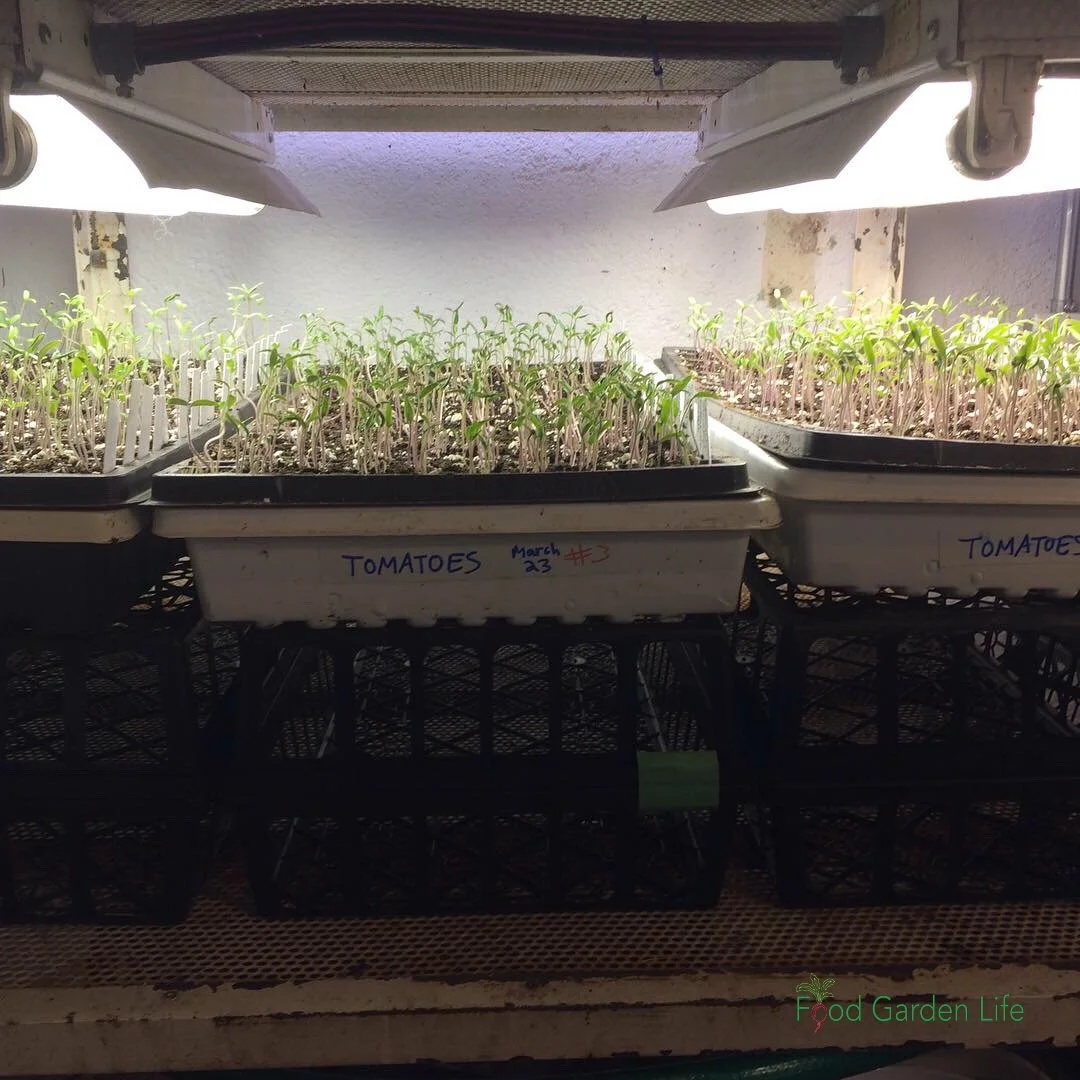
Grow lights for growing tomato seedlings. I use fluorescent lights. Note that the trays are propped up to be as close as possible to the lights.
Good light is important for growing compact plants. When there’s not enough light you end up with leggy plants that topple over.
There are lots of lighting options. The simplest and least expensive is to grow seedlings in a bright window (south facing is best.)
If you don’t have a bright window, you can start seeds under lights. There are many types of lights available.
Here’s the thing to know: Your tomato seedlings don’t need the same light as an indoor hydroponic vegetable crop.
You’re not trying to create perfect conditions to grow a plant right through to harvest. The lights just need to be good enough to give you healthy, fairly compact tomato transplants.
So save yourself some money and don’t go overboard on lighting.
My lighting for growing tomato seedlings is fluorescent shop lights. You don’t need full spectrum lights, nor do you need the strongest lights. Remember: You’re growing a young plant to transplant outdoors – where it will spend the rest of its life in sunlight.
Some grow light are adjustable, allowing you to move the lights close to the seedlings. Mine aren’t, so instead, I prop up trays of plants closer to the lights by putting something underneath them.
Use a timer so that you don’t have to remember to turn the grow lights on and off every day. I leave mine on for 16 hours a day.
Landscape with Fruit
That’s easy to grow in a home garden!
Planting Tomato Seeds
Fill your container with soil, leaving a bit of space at the top.
If you’re planting an individual seed, place it on top of the soil
If you’re planting a number of seeds in one container, space them out on top of the soil
Then place a thin layer of soil over the top. You don’t need to put much soil over the seed: Cover with a depth of soil similar to the seed width…up to about one-quarter inch. (Too deep and they might not grow.)
Then tamp very gently and water. What we’re trying to do by covering with soil and tamping is to make sure the seed is in contact with soil, which helps with uniform germination.
Wait a minute. Have you seen the recommendation to make a small hole, put a seed in the hole, and then cover with soil? There’s a gizmo called a dibbler that’s used to make holes. And some gardeners make holes, and even use a toothpick for precise seed placement. That’s fine too. There are many ways to plant tomatoes. My opinion is that this sort of precision is needed in a commercial operation…but I don’t need it for at the home-garden level.
Tomato Seeding Density
Not sure how many seeds to put in each container? Depending on how many tomato plants you’re growing and how much space you have, you can seed more or less densely:
Grow 2-3 seeds per pot, and then thin out extras as the tomato plants begin to grow.
Low Density
If you have lots of space and aren’t growing a lot, give each seed its own pot or section within a cell pack. One seed per pot takes up far more space initially. But if you want to keep things very simple, this is a good way to do it because it can cut out the step of transplanting later on.
Remember that a bigger pot dries out more slowly; water them accordingly so they aren’t waterlogged.
Tip: It’s rare to have every single seed germinate. To avoid having empty pots where seeds haven’t germinated, place 2-3 seeds per pot, and then thin out extras as the plants begin to grow.
High Density
If you want to start more seeds in less space, plant more than one seed in a container, and then separate and transplant them as they get bigger.
Labelling
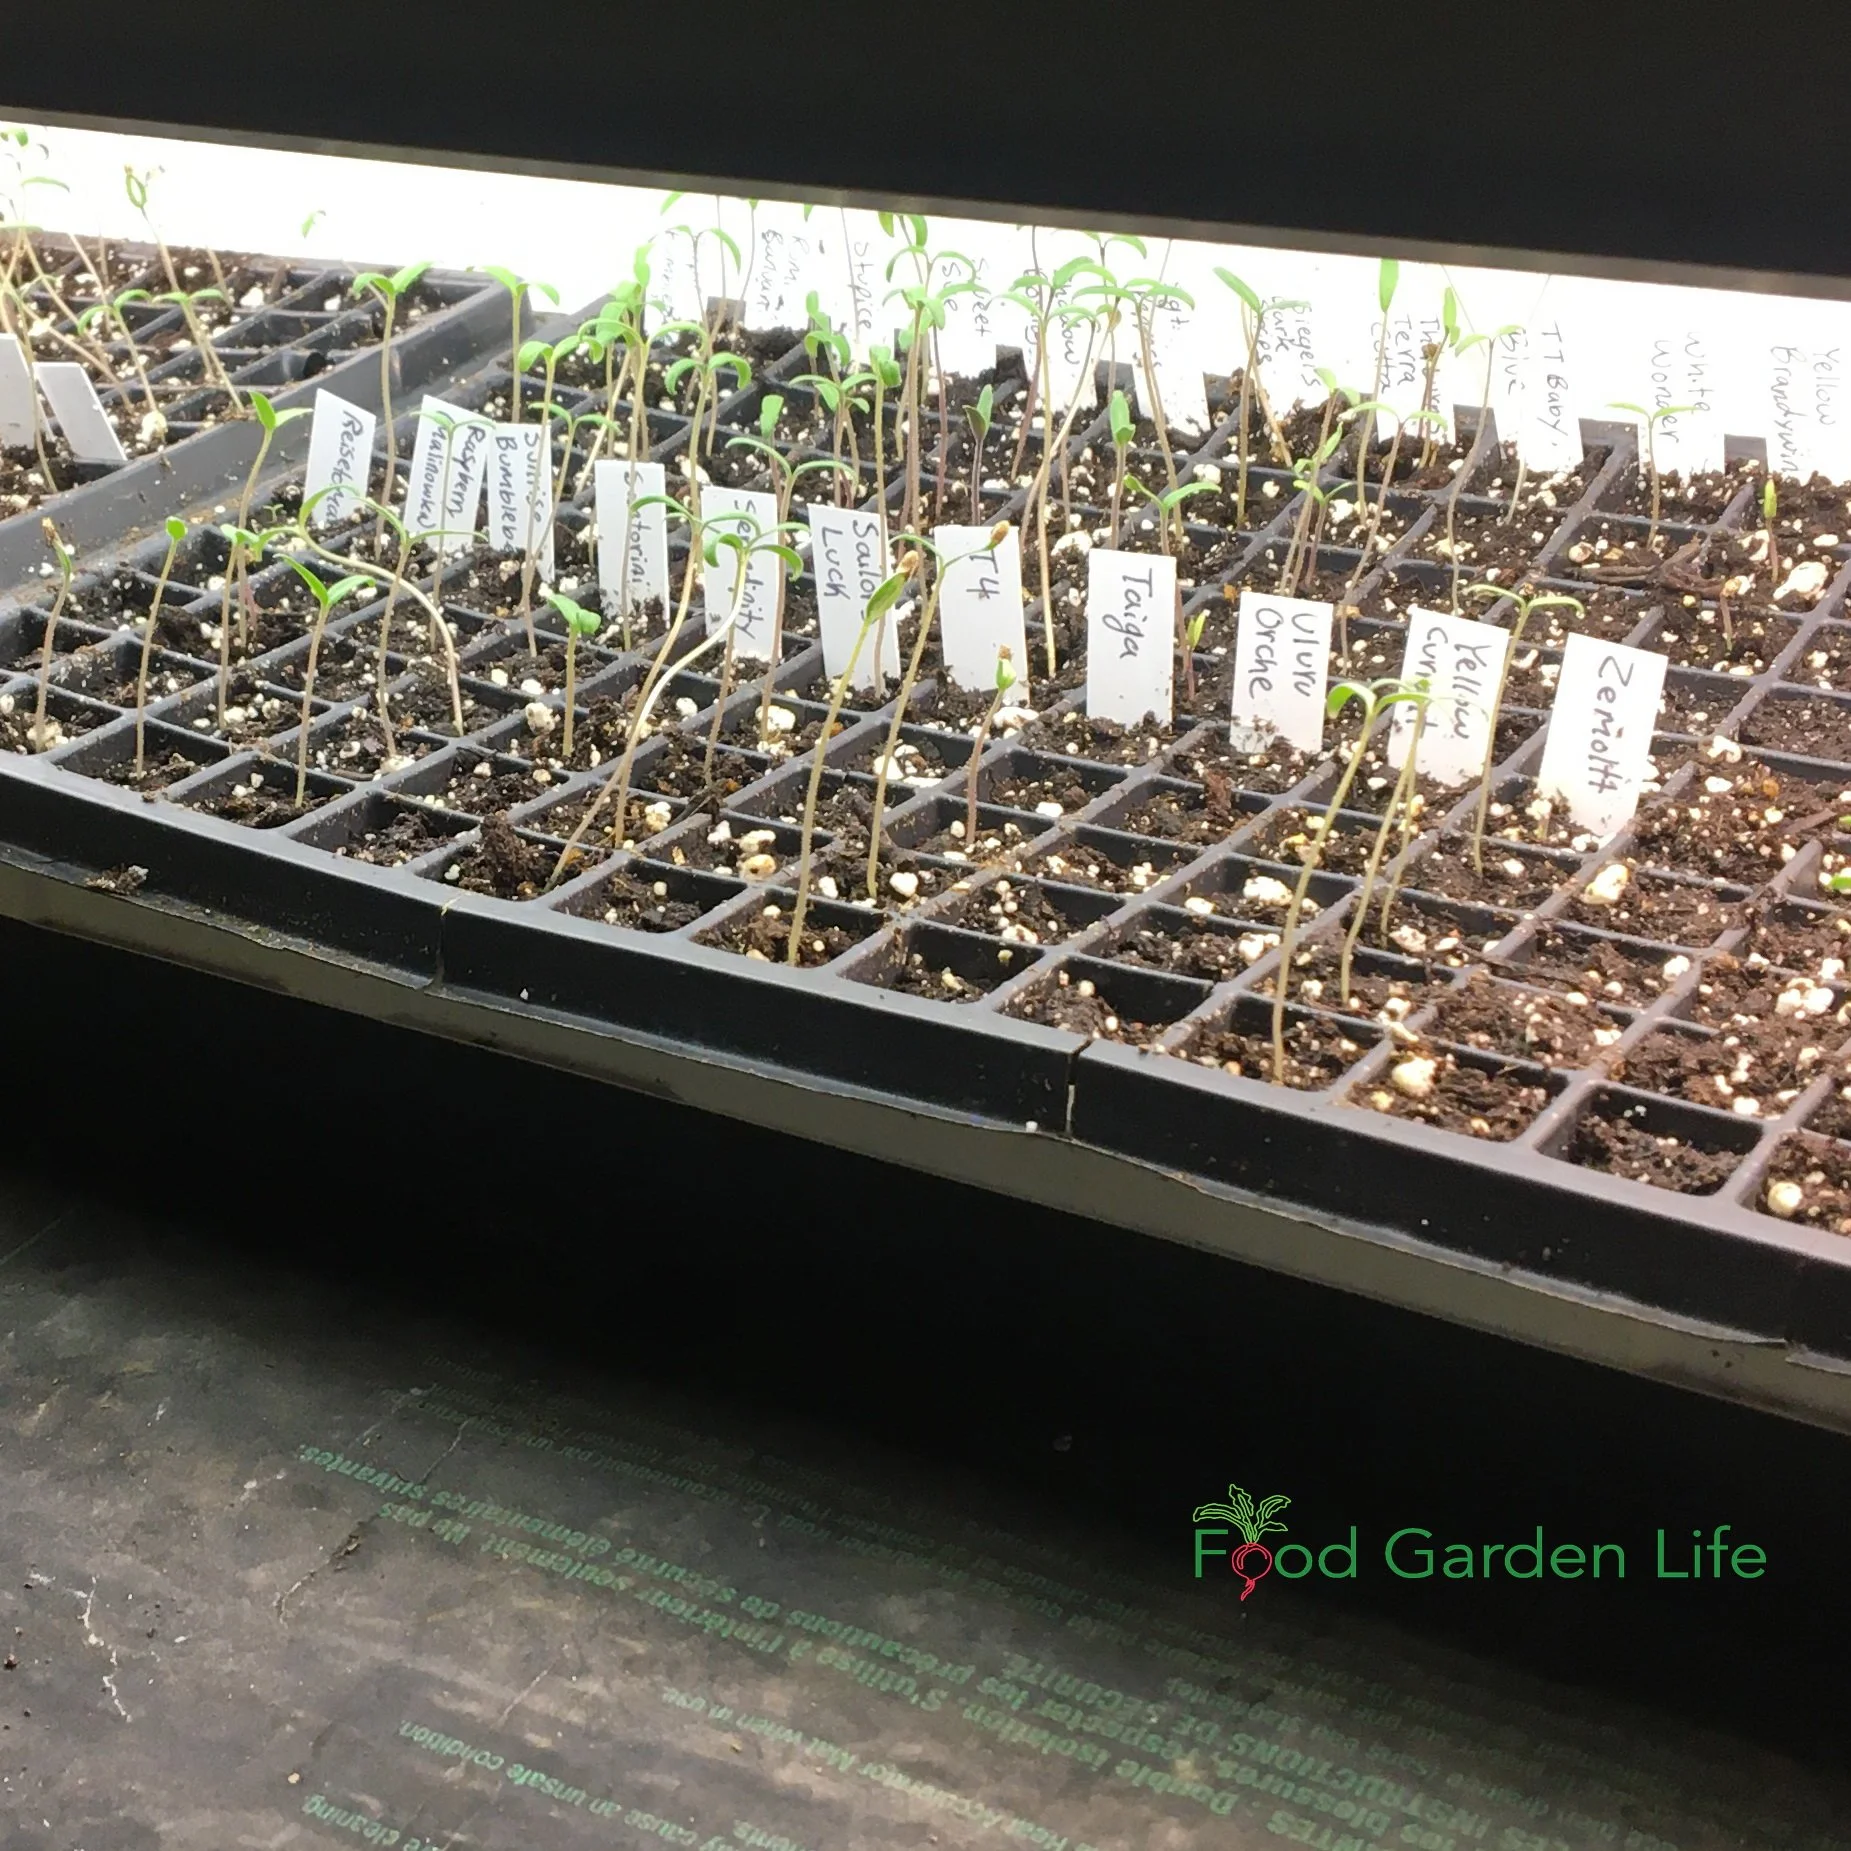
A tray of labelled tomato seedlings.
If you’re growing more than one variety, label them as you plant them. There are years I was sure I’d remember what was what…and I forgot.
You can use purpose-made plastic labels; or, if you want to use less plastic, wooden popsickle sticks or wooden tongue depressors work well (but don’t last all summer.)
If you’re using pots or cell packs, you can also just write the tomato variety name on masking tape, and then stick it on the container.
Hygiene
Damping off disease can wipe out a whole crop of seedlings quickly. It’s a fungal disease that moves around your growing area along with runoff from watering plants. It gets there in contaminated soil and on previously used equipment and pots.
The easiest way to avoid damping off is to use disease-free soil and clean supplies. If you make your own potting soil using compost, consider sterilizing it. Many commercial potting soils are made with peat and inert ingredients—and these tend to be disease free.
New pots and cell packs are likely disease free, but if you’re reusing pots and cell packs, sterilize them. First, scrub off any soil that’s caked on. Then dunk them in a solution of 10 parts water with 1 part bleach, and then let them air dry. (Note: This is a strong smelling solution, so I do this outdoors or in my garage.)
How Many Seeds to Grow
Planting extra tomato seeds is cheap insurance against plants lost to accidents.
I always grow extra plants.
Then I share leftovers with friends.
Conditions for Germinating Tomato Seed
Temperature

No heat mat? No problem. Find a warm spot to germinate tomato seeds. Pictured here: Germinating a flat of tomato seeds beside a heat duct near the basement ceiling — a warm location. (The wine is unrelated…I didn’t have a lot of space in that house!)
Room temperature is fine for germinating tomato seeds, but you can speed up seed germination if the temperature is warmer.
Here are ways to give your seeds warmer conditions:
Place them on a heated floor
Set them on top of a hot-water radiator
The fluorescent fixtures in my light tray give off heat, so if I put seed containers on the rack above
Some appliances give off heat – check to see if the top of your fridge is warm
Or get a heat mat (a water-resistant heating pad for plants)
Once a half to three quarters of the seeds are up, I remove the container from the heat.
Humidity
As a seed germinates, it needs moist surroundings until it grows roots and can take up water on its own. If it dries out at this vulnerable stage, it’s game over.
But the air in centrally heated homes over the winter is often quite dry.
You can keep the humidity higher right around the seeds by covering them.
I use the clear plastic domes designed to go over top of plant trays.
Or, cover a tray with a sheet of glass or plastic; or cover an individual pot with a plastic bag.
Another option is to use plastic cling wrap
Remove once the seeds emerge.
Light
Don’t worry about light for tomato seed germination. Some types of seed need light to germinate; not tomatoes.

The seedlings on the left are uncovered, to get air circulation. The seeds on the right are covered with a plastic cover to keep the humidity high during germination.
So in summary, as you’re getting your tomato seeds to germinate, think warm and humid. (In a previous house, I’d germinate my seeds atop a shelf in the basement, near the heat duct at ceiling level, where it was nice and warm.)
Conditions for Growing Tomato Seedlings
Once your tomato seedlings are up and growing, the best conditions are different from what we want when germinating seeds.
Light and Temperature
As seedlings begin to grow, we want bright light and cooler temperatures. That’s because with warmer temperatures, growth is lanky. With cooler temperatures (combined with bright light) the plants will be more compact and sturdy.
See if there’s a cooler spot near a sunny window. In my case, my grow lights are in the basement, in a room that is cooler than the rest of the house. It’s perfect for growing tomato seedlings.
Humidity and Air Circulation
High humidity while seed germinate is good.
But as the plants grow, we want lower humidity and some air circulation, which reduces the chance of fugal diseases. The moving air also gives stronger stems. (Some people use a fan to improve air circulation.)
So in summary, once the tomato plants are growing, you want cooler, brighter conditions than for germination.
Caring for Tomato Seedlings
Water
It’s easy to kill seedlings by overwatering them.
Keep the soil moist, but not sopping wet. Moist, but not waterlogged.
If in doubt about the amount of moisture in the soil, use your finger. (Whatever you do, don’t waste your money on a gadget that tells you soil moisture!)
Wondering about bottom watering? A lot of people “bottom water” seedlings. This just means sitting a container in water so that water wicks upwards. The reason is that a strong jet of water from a watering can can move around seeds and soil. So feel free to do the bottom watering if you like, although I find that watering gently, by putting my finger over the tip of the watering can to slow the flow of water, is enough to prevent making a potting soil sinkhole.
(If you forget to water and your seedlings flop over, there might still be hope. I remember the seedlings I grew with Dido: we came home one day and they were flopped right over…looked like they were doing yoga. He shrugged and watered them—and they sprang back up within an hour.)
Feeding Tomato Seedlings
Check your potting soil mix to see if it contains fertilizer. Some do. And if it contains fertilizer, you might not need to feed.
Otherwise, once your plants have a few leaves, you can begin to feed them. I use a water-soluble fertilizer.
Don’t overfeed. It can damage delicate seedling roots. (I feed at half of the rate recommended on the label.)
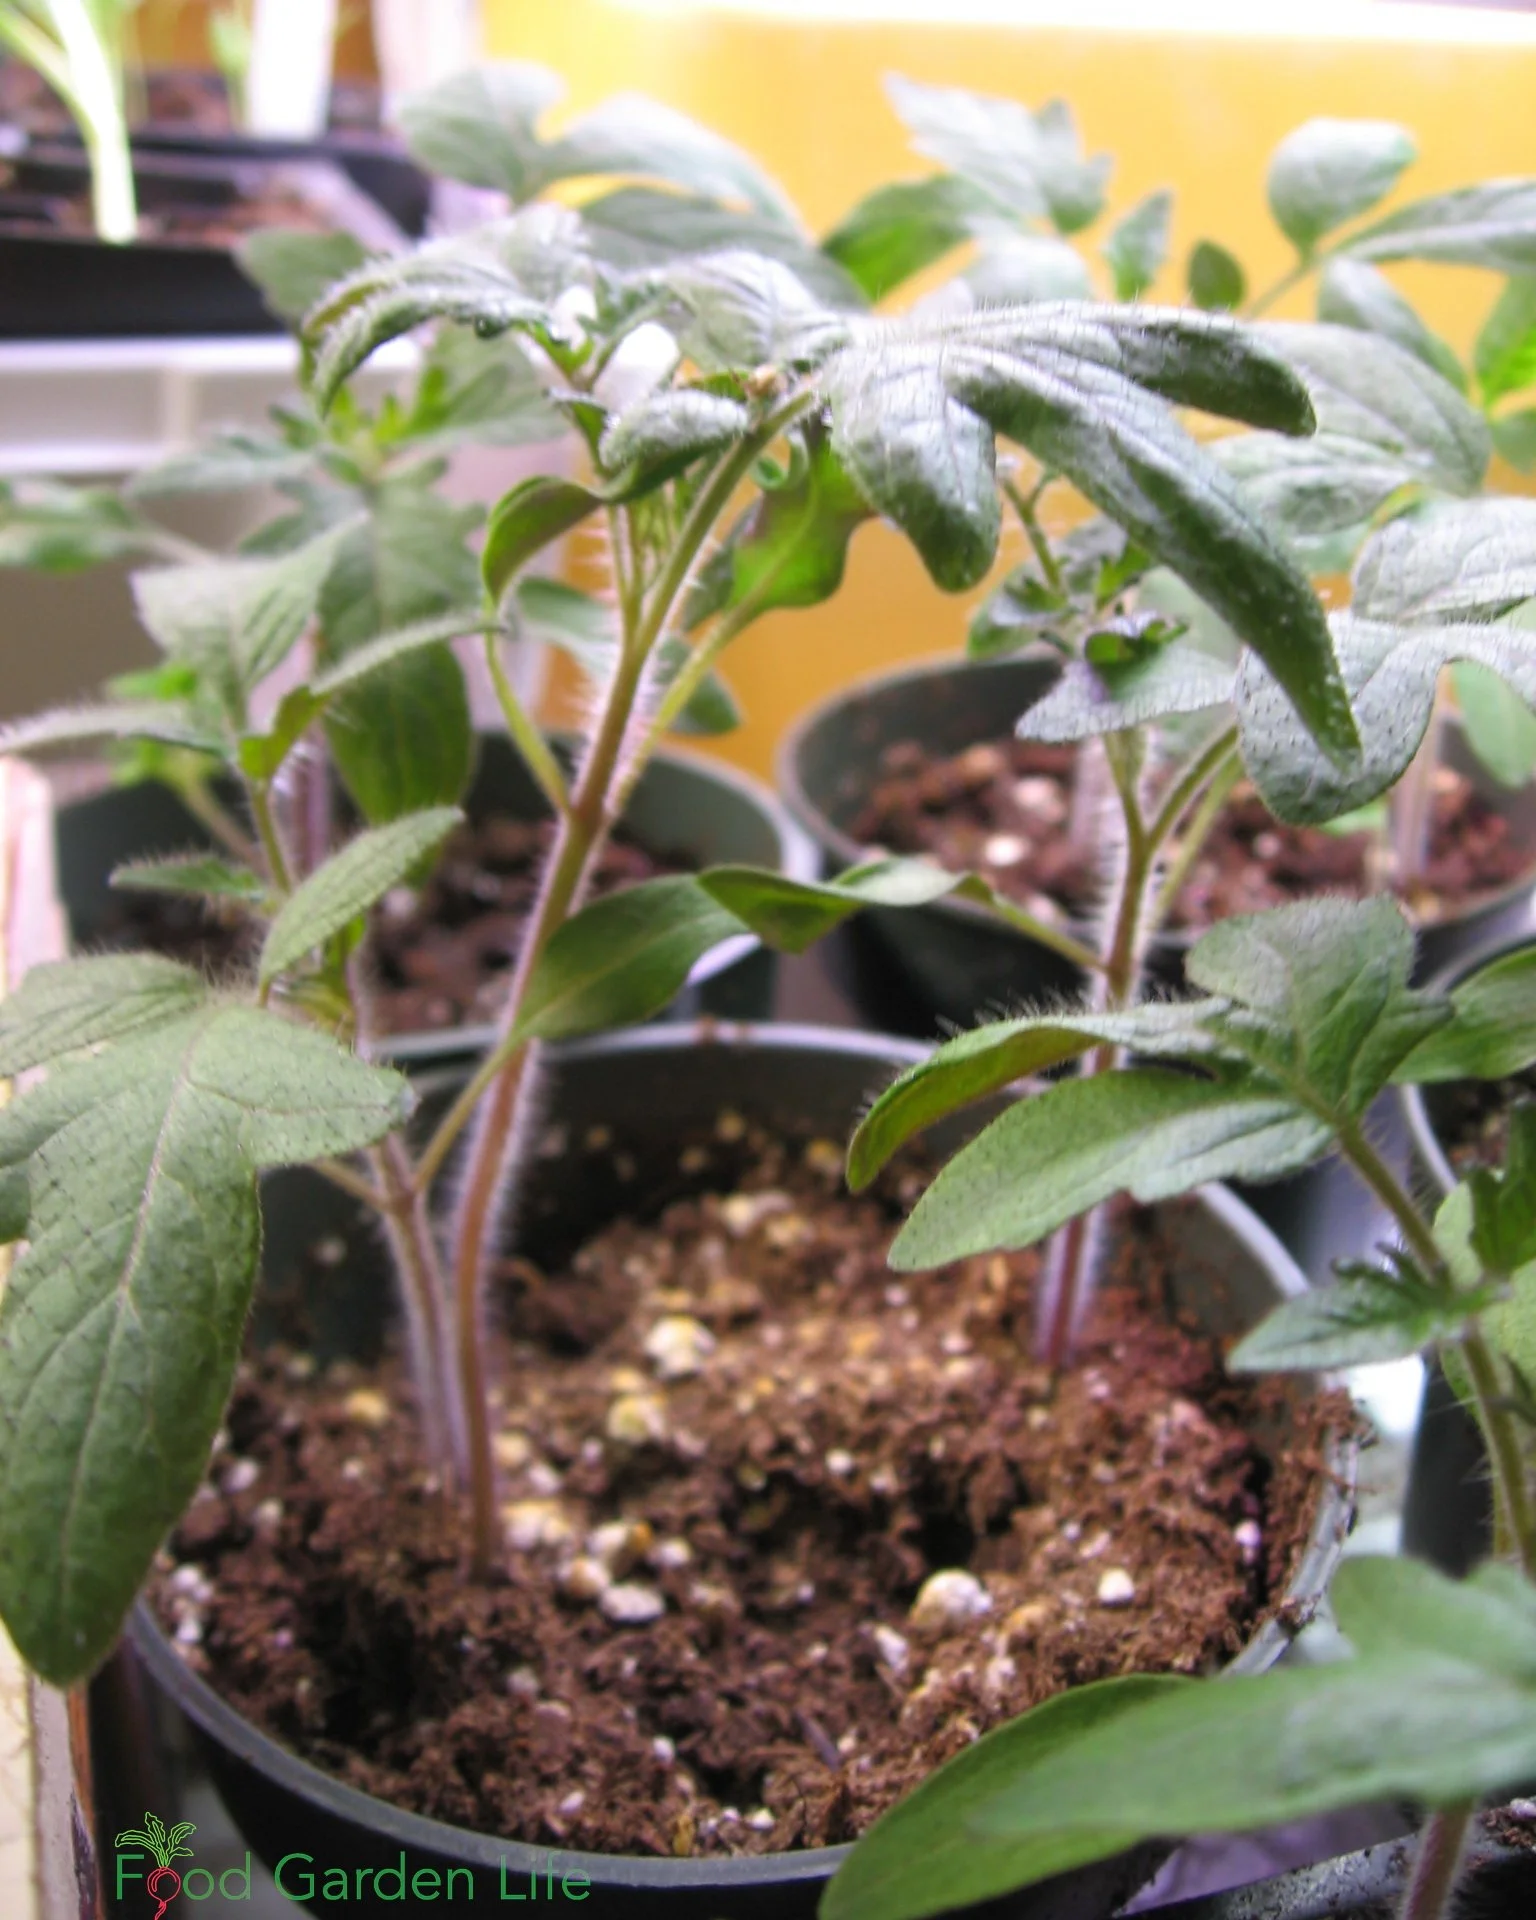
Transplant tomato seedlings after they get “true leaves,” the second set of leaves that comes after the “seed leaves.” These plants are beginning to grow true leaves.
Note: Don’t worry about feeding before the seedlings have a couple of sets of leaves. They’re still drawing from stored energy in the seed.
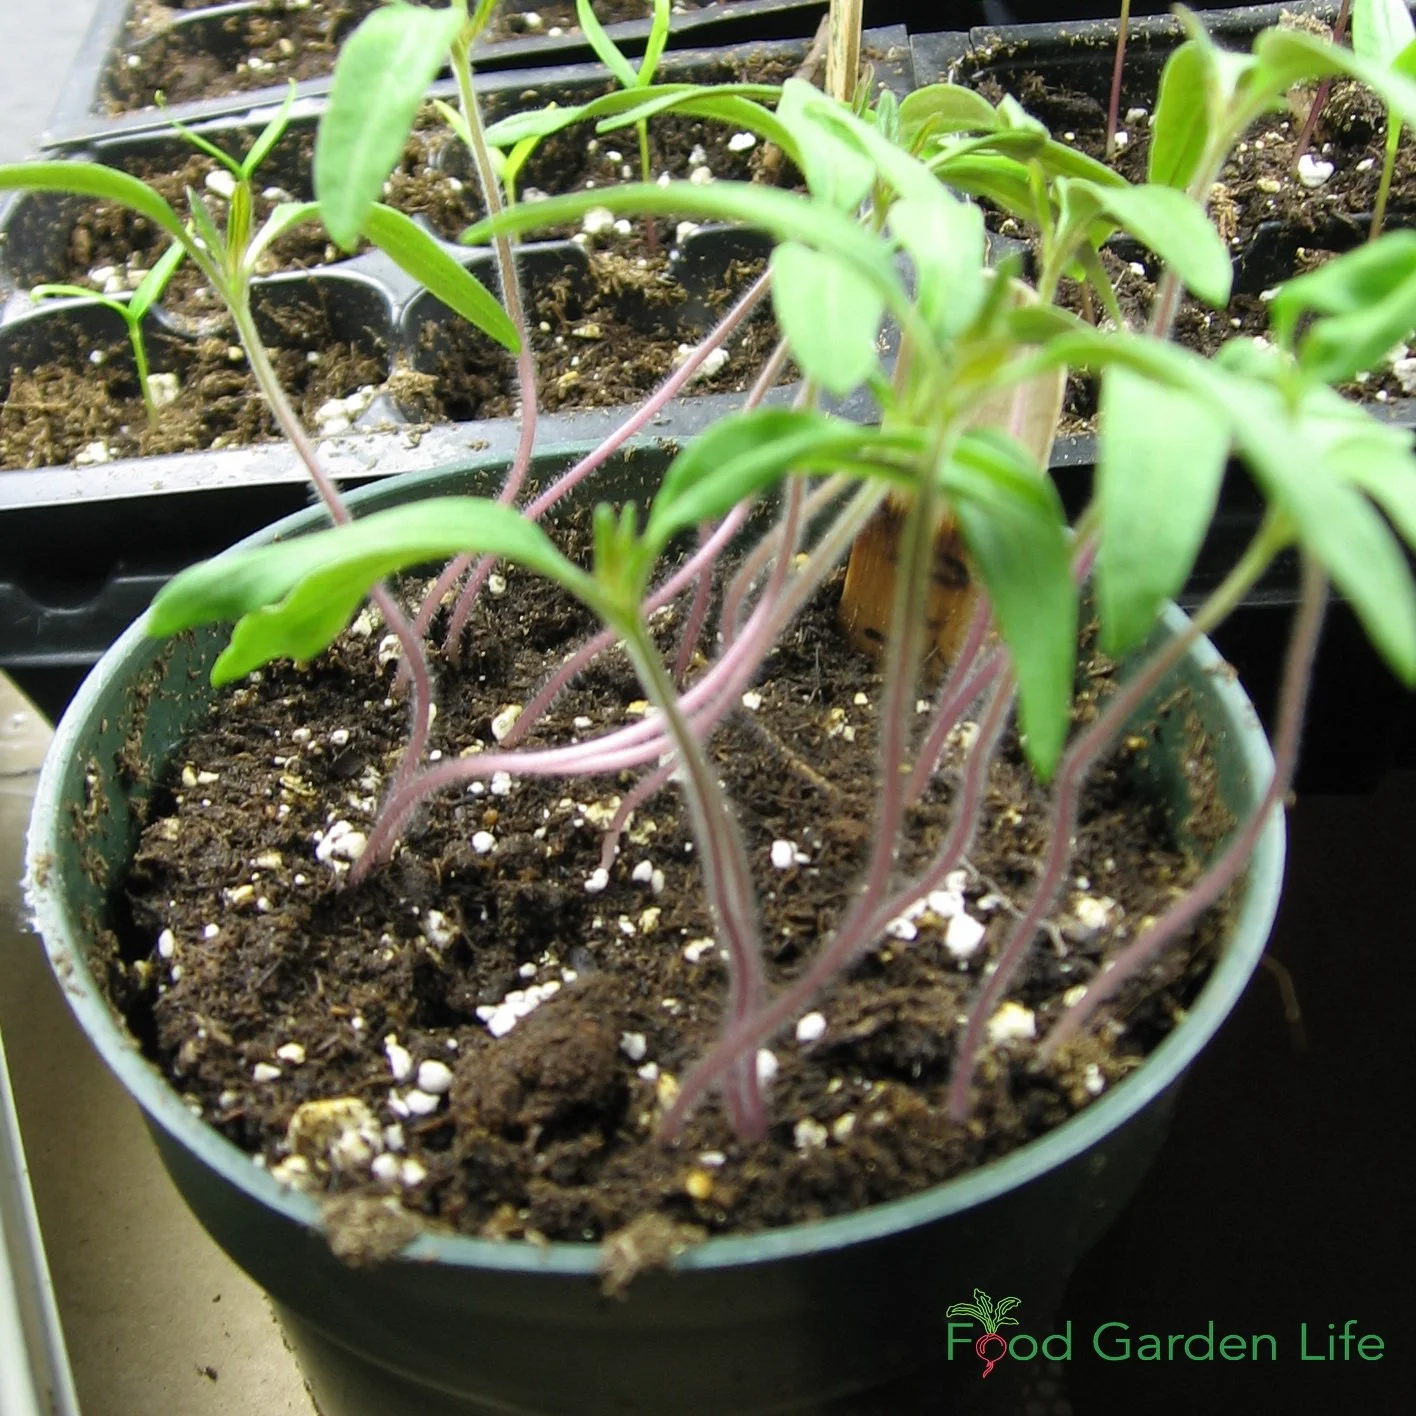
Thinning and Repotting
If you planted a few seeds together in a container, once they get big enough to handle, you can separate them and give them more space.
If you planted a few seeds together in a container, once they get big enough to handle, you can separate them and give them more space.
Transplant tomato seedlings after they get “true leaves.” The first leaves that appear are “seed leaves” so it’s the third and fourth leaves that are the true leaves. You’ll quickly see the difference.
I use a popsicle stick or pencil to tease apart soil and gently lift up a seedling and its roots. (There are purpose-made gadgets for this…not necessary.)
When picking up seedlings, hold them by the leaves. That’s because it’s very easy to crush the stem. (If you crush a leaf, it can grow a new leaf…if you crush the stem, it’s game over.)
Transplanting Tomato Plants in the Garden
Moving tomato seedlings outdoors to a cold frame in the spring so that they are hardened off for planting into the garden. If the light is bright, we cover the top of the cold frame with something to shade the plants below.
When it’s time to move your tomato seedlings to the garden, there’s one last thing to remember: Your seedlings have grown in the house, in moderate conditions. Once they’re outdoors, the light is brighter, the temperature swings, and there’s wind.
So we “harden off” seedlings, which simply means we get them used to outdoor conditions.
We do this by putting the plants outdoors, in the shade, for a few hours each day. Give them a longer stint in the sun each day, and keep doing this for at least a week.
Got lanky tomato plants? If you have lanky plants, with more stem than you want, you can bury a lot of that stem. That’s because tomato plants will send out new roots where you bury the stem. So just dig a deep hole, or make a trench and lay the plant on its side.
FAQ - How to Grow Tomato Seeds
Can I plant tomato seeds directly in the garden?
Yes, but your harvest will be weeks behind plants started indoors. (Tomato plants sometimes come up on their own in the garden where tomatoes fell to the ground the previous year…but the harvest is late.)
Should I soak my tomato seeds?
No, it’s not necessary.
Can I save my own seed?
Absolutely. It can be as simple as smearing some seeds on a paper towel, or you can clean them more through a fermentation process. In our household, I do the former, while my daughter does the latter.
Note: If you save seeds from hybrid tomato varieties, the seeds you end up with will be different from the parent plant. If you plan to save seeds, look for “open pollinated” varieties.
Is it too late if I start my tomato seeds only 4 weeks before the last frost?
No, but your harvest won’t be as early.
Can I start my tomato plants 10 weeks before the last frost?
Yes, but when they’re started indoors early, there’s more chance of ending up with lanky plants, unless you have very good growing conditions. If I had a greenhouse, I’d consider starting a few plants earlier—for an earlier harvest.
Where can I find the average last frost date for my area?
The easiest way is to do an online search. Some seed companies list dates, as do some master gardener groups and extension agencies.
Find This Helpful?
Enjoy not being bombarded by annoying ads?
Appreciate the absence of junky affiliate links for products you don’t need?
It’s because we’re reader supported.
If we’ve helped in your food-gardening journey, we’re glad of support. You can high-five us below. Any amount welcome!
More About Growing Tomatoes
Hear Tips from Tomato Experts
Course: Tomato Overload Masterclass
Want to up your game growing tomatoes?
This self-paced course helps you choose great varieties, grow great seedlings, give plants the care they need, and enjoy an abundant harvest.

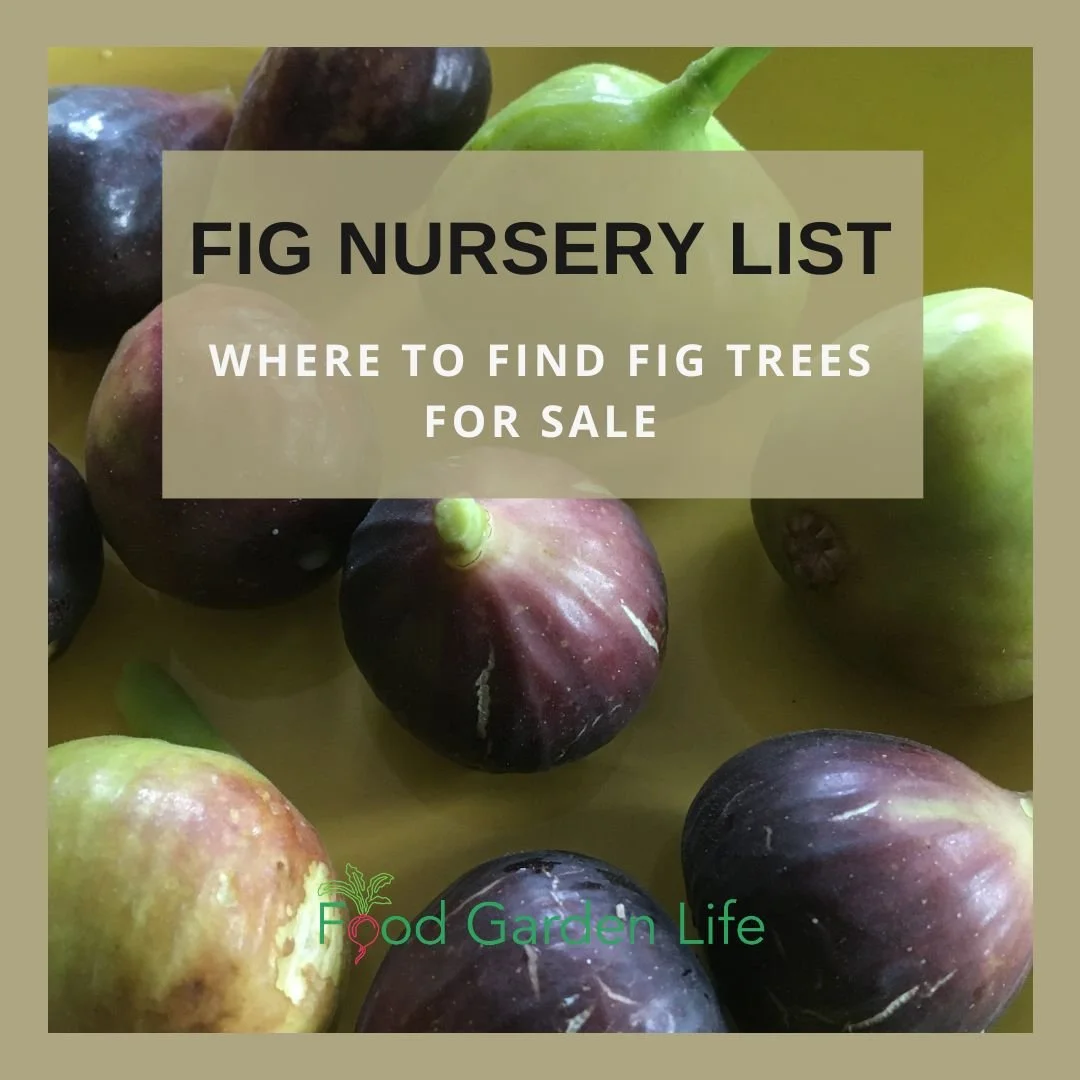
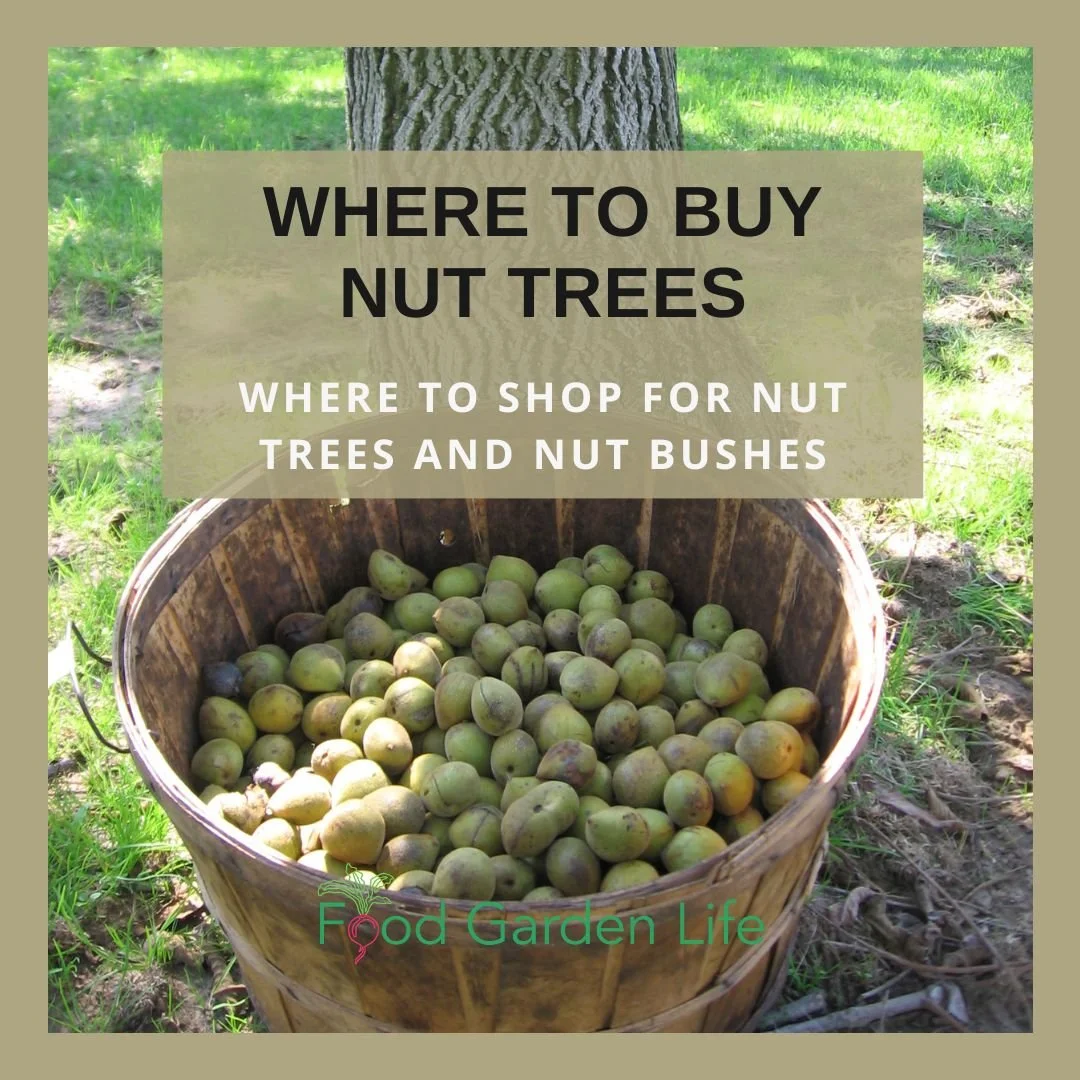
Shopping for Nut Trees? Find Out Where to Buy Nut Trees and Nut Bushes
Where to find nut trees and nut bushes for sale.
By Steven Biggs
Nut Tree Nursery List

I get a lot of messages from people looking for more edible plants for their home gardens and edible landscapes. So I hope this list of nurseries that sells nut trees and nut bushes helps you find the plant you’re looking for.
This list focuses on nurseries, garden centres, and specialty nut growers in Canada and the northern USA.
It’s a work in progress. If there’s a nursery you recommend, please e-mail me to let me know.
Before you browse nut tree nurseries, get started with Nut Tree Shopping Tips, below.
Tips When Plant Shopping
Here are tips to keep in mind as you get ready to order trees and shrubs.
Delivery vs. Pick-Up
It’s expensive to ship trees and shrubs! They’re big. And if there’s soil—they’re heavy too.
Delivery costs depend on the distance, the size of the plant, and whether it’s in a pot with soil, or is “bare root.”
(Bare root means it’s dormant, and there’s no soil.)
If picking up your fruit plants is an option, you can usually save quite a bit of money.
Ordering and Shipping Fruit Trees and shrubs
Shipping usually begins in spring, when there’s no further risk to the plants from cold temperatures.
The first to ship are “bare root” plants—dormant shrubs and trees with no soil. (Roots are wrapped in something damp to prevent them from drying out.)
Cross-Border Shipments
Some sellers don’t ship out of country. That’s because it usually involves “phytosanitary” inspections and paperwork.
Or, there might be restrictions on shipping some types of fruit to some regions (to avoid the spread of pests or diseases.)
If you find an out-of-country vendor who ships to your country, ask about the cost of phytosanitary certificates—as well as the delay that inspections can cause for your shipment.
When You Receive Your Order
Bare-root Plants. Keep them somewhere cool and dark until you’re ready to plant them, so that they remain dormant. Plant as soon as possible. Make sure the roots stay moist.
Potted Plants. There’s less of a rush planting potted plants than there is with bare-root plants. Keep plants well-watered until they’re planted.
Landscape with Fruit
That’s easy to grow in a home garden!
Canadaian Nurseries Selling Nut Tree
Looking for Canadian nurseries selling nut trees? Here’s a list of Canadian retailers of nut trees. Remember: Not all nurseries grow their own plants. So if you want Canadian-grown plants, ask the nursery if their stock is produced in Canada.
Exotic Fruit Nursery
Pin this post!
Lunenburg, Nova Scotia
Hardy fruit, exotic fruit, and nuts.
Hardy Fruit Tree Nursery
Rawdon, Quebec
Cold-hardy nut trees, nut bushes, and a wide mix of fruiting plants.
Grimo Nut Nursery
We get Ontario grown pecans here! They sell a wide range of nut trees and nut bushes, along with some minor fruit.
Founder Ernie Grimo joined us on The Food Garden Life Show to talk about cold-adapted nut trees. Tune in here.
Nutcracker Nursery
Maskinongé, Quebec
As the name suggests, nut trees is a specialty. I’ve ordered plums and damsons here and was pleased with the quality of the plants.
Pépeinière Ancestrale
St-Julien, Quebec
Good mix of nut trees and nut bushes. This is where I got my first cherry-plum bushes. Fruit and nut trees.
Prairie Hardy Nursery
Two Hills, Alberta

Recommended by my horticultural colleague in Alberta Donna Balzer.
Rhora's Nut Farm and Nursery
Wainfleet, Ontario
Specializing in nut trees and minor fruit.
Silvercreek Nursery
Wellesley, Ontario
Nuts and fruit. Some of my apple trees are from Silvercreek—and I took a fantastic grafting workshop there.
Whiffletree Farm and Nursery
Elora, Ontario
Nut trees, nut bushes, fruit trees and bushes, and orchard supplies.
Willow Creek Permaculture
Dutton, Ontario
Fruit and nut trees.
USA Nut Tree Nurseries
One Green World
Portland, Oregon
Nut trees and bushes, fruit, subtropical fruits, fruiting ground covers. We chatted with Sam Hubert from One Green World on the podcast to find out all about hardy citrus. They carry lots of other fruit trees, fruit bushes, and berries too.
Raintree Nursery
Morton, Washington
A diverse collections of edible plants including nut trees and nut bushes.
Find This Helpful?
Enjoy not being bombarded by annoying ads?
Appreciate the absence of junky affiliate links for products you don’t need?
It’s because we’re reader supported.
If we’ve helped in your food-gardening journey, we’re glad of support. You can high-five us below. Any amount welcome!
Find Out How to Grow Nut Trees
More Sources for Plants


Find Exotic Edible Plants for Your Garden
Find out where to buy a lemon tree.
By Steven Biggs
Looking for Exotic Edibles for Your Home Garden?

I get a lot of messages from people who are eager to grow a new exotic edible crop…but are not sure where to find it. I hope this list of plants suppliers helps you find what you’re looking for.
This list focuses on nurseries, garden centres, and other plant suppliers in Canada and the northern USA.
It’s a work in progress. If you know a supplier that should be on this list, e-mail me to let me know.
Get started with some shopping tips, below.
Tips When Shopping for Exotic Edible Plants
Here are tips to keep in mind as you get ready to shop for plants.
Delivery vs. Pick-Up
Large potted plants are expensive to ship! Delivery costs depend on the distance and the size of the plant.
If pick-up is an option, you might save money.
Mail-order sellers usually only ship spring through fall, when the temperature is warm enough.
Seasonal Exotic Plant Availability

Some of these plant sellers are nurseries that propagate their own plants and have plants year-round.
Others are garden centres that carry less common plants seasonally.
For example, here in Southern Ontario, I often start to see California-grown potted citrus trees in garden centres in the spring. Then, selection usually declines through the season, and once they’re sold out, that’s it until the following year.
Cross-Border Shipments
Some nurseries and garden centres don’t ship plants out of country. That’s because sending plants across the border involves a lot of paperwork.
If you find an out-of-country vendor who does ship to your area, ask about any additional cost for inspections and paperwork. And check about the delay that inspections can cause for your order.
Canada Exotic Edibles

Looking for Canadian nurseries that sell exotic plants? Here’s a list of Canadian retailers of exotic plants. Remember: Not all nurseries grow their own plants. So if you want plants produced in Canada, ask the retailer.
Angelo’s Garden Centre
Vaughan, Ontario
This is a garden centre near me, in the Toronto area, that seasonally carries citrus trees, olive trees, and fig trees. (I got my first olive tree here!) Hear owner Carlo Amendolia tell the story of their 19-foot-high fig tree.
Brugmansia Quebec
St-Valérien de Milton, Québec
A good selection of citrus trees, figs, and, as the name suggests, Brugmansia—a.k.a. angel’s trumpet.
Exotic Fruit Nursery
Lunenburg, Nova Scotia
Citrus trees, hardy fruit trees, exotic fruit, and nut trees.
Fiesta Gardens
Toronto, Ontario
We’re big fans of Fiesta Gardens, here in Toronto. This independent garden centre brings in some really cool plant material every year—and there are usually lemon trees and other citrus too.
Flora Exotica
Montreal, Quebec
Exotic plants and seeds. Lots of unusual fruit.
Fruit Trees and More
North Saanich, British Columbia
This nursery and demonstration orchard specializes in plants for Mediterranean climates. Owner Bob Duncan was the inspiration for my book Grow Lemons Where You Think You Can’t. He grow citrus tree espaliers in his demonstration orchard, and has a big Meyer lemon espalier on his house.
Nutcracker Nursery
Maskinongé, Quebec
Nice selection of citrus trees and figs. As the name suggests, they specialize in nuts. Also other fruit (I’ve ordered plums and damsons here and was pleased with the quality of the plants.)
Phoenix Perennials
Richmond, British Columbia

An excellent mail-order nursery with unusual plants. (This is where I tracked down a grafted tomato-potato plant for my daughter!) They have a good selection of citrus trees.
Richters Herbs
Goodwood, Ontario
Both seeds and plants. Greenhouses open to the public, and it’s a fun place to browse. We came home with 19 types of mint after one visit. Lots of figs too.
Sage Garden Greenhouses
Winnipeg, Manitoba
Co-owner Dave Hanson has joined me to teach about exotic edibles and Mediterranean plants. He is a wealth of knowledge.
Tropic of Canada
Rodney, Ontario
Citrus, figs, and a fun mix of exotics.
Valleyview Gardens
Markham, Ontario
This Toronto-area garden centre has tropical plants year-round. When I couldn’t find a yuzu citrus tree, this is where I found one.
USA Exotic Edibles
Edible Landscaping
Afton, Virginia
Citrus, fruit trees, fruit bushes, berries, and exotics.
Four Winds Growers
Winters, California
Specializes in semi-dwarf citrus trees.
Logee’s
Danielson, Connecticut
As well as citrus, they have figs and other exotic fruit—and a ton of ornamentals. Their ponderosa lemon is over 100 years old!
McKenzie Farm
Scranton, South Carolina
Owner Stan McKenzie is passionate about cold-hardy citrus. Hear Stan tell us all about cold-hardy citrus on The Food Garden Life Show.
One Green World
Portland, Oregon
A delicious mix of citrus trees, olives, figs, and lots of sub-tropical fruit.
Sam Hubert from One Green World joined us on the Food Garden Life show with top cold-hardy citrus picks. Find out Sam’s favourite cold-hardy citrus.
Well-Sweep Herb Farm
Port Murray, New Jersey
Lots of herbs, and a good selection of citrus.
Find This Helpful?
Enjoy not being bombarded by annoying ads?
Appreciate the absence of junky affiliate links for products you don’t need?
It’s because we’re reader supported.
If we’ve helped in your food-gardening journey, we’re glad of support. You can high-five us below. Any amount welcome!
Find Out How to Grow Exotic Edibles
More Sources for Plants


Nursery List: Fruiting Shrubs, Unusual Fruit, Berry Bushes, and Hardy Fruit Trees
Where to find fruit trees for sale.
By Steven Biggs
Buying Fruit Trees, Fruiting Shrubs, and Berry Bushes

I get a lot of messages from people wondering where to buy fruiting plants. So I hope this list helps you find a nursery with the fruit trees you’re looking for.
This list focuses on nurseries, garden centres, and fruit-growing specialists in Canada and the northern USA.
It’s a work in progress. If there’s a nursery you recommend, please e-mail me to let me know.
Before you browse nurseries, get started with Tips When Shopping, below.
Tips When Plant Shopping
Here are tips to keep in mind as you get ready to order trees and shrubs.
Delivery vs. Pick-Up
It’s expensive to ship trees and shrubs! They’re big. And if there’s soil—they’re heavy too.
Delivery costs depend on the distance, the size of the plant, and whether it’s in a pot with soil, or is “bare root.”
(Bare root means it’s dormant, and there’s no soil.)
If picking up your fruit plants is an option, you can usually save quite a bit of money.
Ordering and Shipping Fruit Trees and shrubs
Shipping usually begins in spring, when there’s no further risk to the plants from cold temperatures.
The first to ship are “bare root” plants—dormant shrubs and trees with no soil. (Roots are wrapped in something damp to prevent them from drying out.)
Cross-Border Shipments
Some sellers don’t ship out of country. That’s because it usually involves “phytosanitary” inspections and paperwork.
Or, there might be restrictions on shipping some types of fruit to some regions (to avoid the spread of pests or diseases.)
If you find an out-of-country vendor who ships to your country, ask about the cost of phytosanitary certificates—as well as the delay that inspections can cause for your shipment.
When You Receive Your Order
Bare-root Plants. Keep them somewhere cool and dark until you’re ready to plant them, so that they remain dormant. Plant as soon as possible. Make sure the roots stay moist.
Potted Plants. There’s less of a rush planting potted plants than there is with bare-root plants. Keep plants well-watered until they’re planted.
Landscape with Fruit
That’s easy to grow in a home garden!
Canadian Nurseries
Looking for a Canadian retailer of fruit trees? Or berry bushes and berry plants? Here’s a list of specialized Canadian nurseries. Remember: Not all nurseries grow their own plant material; some are resellers. If you’re looking for a Canadian product—plants grown in Canada—ask the retailer where the plants are grown.
Bambooplants.ca
Ontario
Great selection of minor and unusual fruit plants.
Boughen Nurseries
Nipawin, Saskatchewan
Boughen sells fruit trees and berries for cold climates. This is where I found my favourite culinary crabapple, ‘Dolgo.’ They also have Nanking cherry, which, despite being easy to grow, can be difficult to find in many parts of Canada.
Corn Hill Nursery
King’s Country, New Brunswick
Owner Bob Osborne is a CBC radio columnist, and the author of the book Hardy Apples: Growing Apples in Cold Climates.
Hear Bob tell us about hardy apples on The Food Garden Life Show.
DNA Gardens
Elnora, Alberta
Specializing in hardy fruit trees.
Exotic Fruit Nursery
Lunenburg, Nova Scotia
Hardy fruit, exotic fruit, and nuts.
Fruit Trees and More
North Saanich, British Columbia
A nursery and experimental orchard. Well worth a visit if you’re in the area—but they do mail-order too. Lots of less common fruit such as medlar and Asian pear. (And olives, citrus, and figs!)
Grimo Nut Nursery
Niagara-on-the-Lake, Ontario
A specialty nut nursery that also has uncommon fruit such as American persimmon and a number of mulberries.
Linda Grimo shares tips on how they prune mulberries in this guide to growing mulberries.
Hardy Fruit Tree Nursery
Rawdon, Quebec
Some good articles about growing fruit trees on the website. Grafting onto full-sized rootstock.
Nutcracker Nursery
Maskinongé, Quebec
I’ve ordered plums and damsons here and was pleased with the quality of the plants.
Pépeinière Ancestrale
St-Julien, Quebec
This is where I got my first cherry-plum bushes! Fruit trees and nut trees.
Prairie Hardy Nursery
Two Hills, Alberta
Recommended to me by my horticultural colleague in Alberta Donna Balzer.
Production Lareault inc.
Lavaltrie, Quebec
Berries and small fruit. (Also asparagus, rhubarb, and kiwi.)
Rhora's Nut Farm and Nursery
Wainfleet, Ontario
Specializing in nut trees, with some minor fruit too.
Riverbend Orchards
Portage la Prairie, Manitoba
Cold-hardy fruit bushes, including haskaps, currants, and cherries.
Silvercreek Nursery
Wellesley, Ontario
Some of my apple trees are from Silvercreek—and I took a fantastic grafting workshop there.
T&T Seeds
Headingley, Manitoba
Seeds, accessories, and fruit plants by mail order. Also a garden centre if you’re in the area.
TreeMobile
Toronto, Ontario
A not-for-profit organization supplying fruit trees and supplies to gardeners.
Hear our chat with TreeMobile founder Virginie Gysel.
Whiffletree Farm and Nursery
Elora, Ontario
Trees, small fruit, and orchard supplies.
Willow Creek Permaculture
Dutton, Ontario
Fruit and nut trees.
USA Nurseries

Pin this post!
Edible Landscaping
Afton, Virginia
Fruit trees, fruit bushes, berries, and exotics like citrus.
Honeyberry USA
Bagley, Minnesta
Cold-hardy fruit bushes including honeyberry, a.k.a. haskap.
Off the Beaten Path
Lancaster, Pennsylvania
Lots of figs, as well as other unusual fruit.
Hear the owner, Bill Lauris, talk about figs in this podcast episode.
One Green World
Portland, Oregon
We chatted with Sam Hubert from One Green World on the podcast to find out all about hardy citrus. They carry lots of other fruit trees, fruit bushes, and berries too.
Raintree Nursery
Morton, Washington
A diverse collections of edible plants including nut trees and nut bushes.
Trade Winds Fruit
Seeds for rare and unusual fruit.
More Sources for Plants
Here’s a Fig Nursery List to help you find fig trees for sale.
Find This Helpful?
Enjoy not being bombarded by annoying ads?
Appreciate the absence of junky affiliate links for products you don’t need?
It’s because we’re reader supported.
If we’ve helped in your food-gardening journey, we’re glad of support. You can high-five us below. Any amount welcome!
Find Out How to Grow Fruit
Head to the Growing Fruit Home Page for articles, interviews, and guides on how to grow fruit.
More Sources for Plants


Potting Soils: Choose the Right Potting Soil
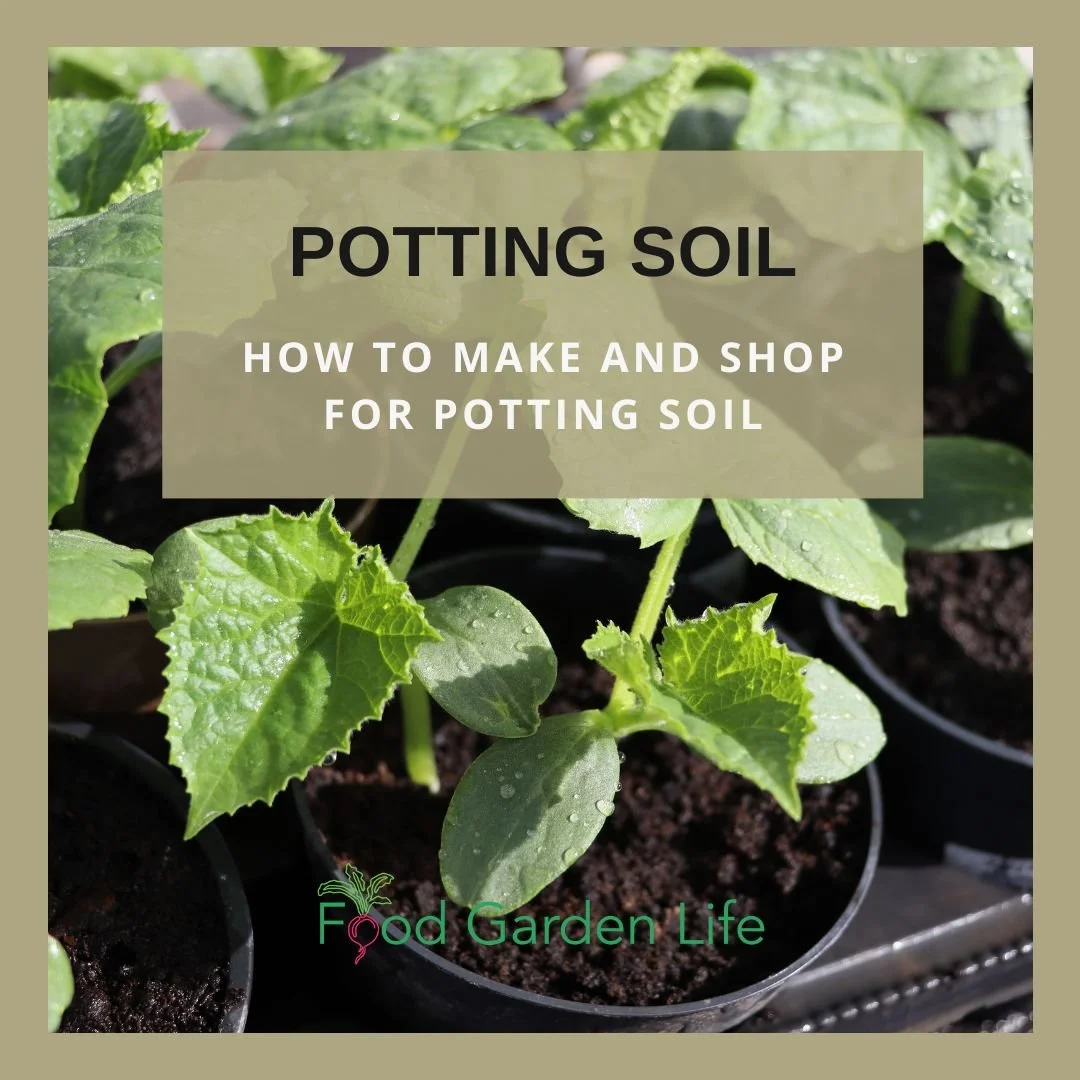
A good potting soil helps your container vegetable garden thrive!
By Steven Biggs
Choose the Best Potting Mix
Ever had potted plants that just seem to stall?
It could be the soil.
Good potting soil can be the difference between potted crops that grow like gangbusters...and those that don't seem to do anything.
This guide covers key soil ingredients, types of soil mixes, and tips to help you choose good soil. If you're a home gardener who wants to keep things simple but use the best soil mix, keep reading.
Key Takeaways
Potting soil is a soil blend made for the growing conditions in containers.
Despite the name, it often contains no garden soil.
Common potting soil ingredients include peat moss, compost, coir, perlite, and vermiculite.
There are specialty potting soils for specific plants and purposes.
You can buy ready-made potting soil or blend your own.
Understanding Potting Soil
Potting Mix vs. Potting Soil
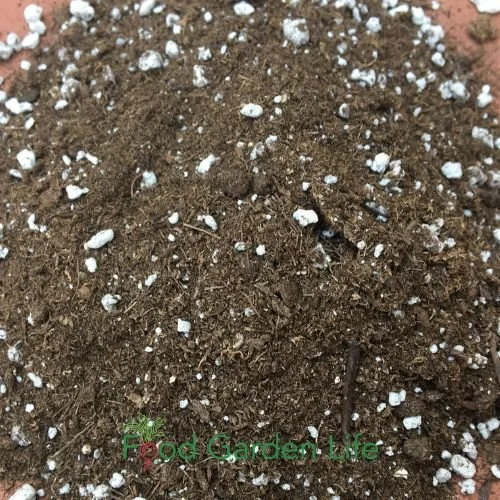
Potting mix is made for the growing conditions in containers. Many have no soil. This mix has peat moss and perlite.
You might come across a few different names used for potting soil, including potting mix, growing medium (if you're reading technical sources), potting medium, soilless medium, and soilless mix. In British English, you'll also find term "compost" used for potting soil.
In a Nutshell
Potting soil is a soil mix made for plants in containers. Because the roots of plants in containers can't spread out to find water, moisture retention is important.
But even though we need the soil to hold moisture, we also need lots of little air pockets. That's called "aeration." Those little air pockets helps excess water move through the soil, while also leaving space for the soil to hold on to some of the water, until the plant roots can absorb it.
Some potting soil mixes—though not all—contain food for the plants. It could be in the form of a separate fertilizing product. But it might also come from one of the soil ingredients.
In short, a good potting mix retains moisture...yet drains well. It doesn't pack down with repeated watering.
Potting Soil vs. Garden Soil
Soil from the garden is rarely ideal for potted plants. That's because it often packs down with the frequent watering.
Garden soil can also contain weed seeds and diseases.
Key Ingredients in Potting Soil
Ask 10 gardeners for soil-mix recipes and you might come away with 10 different recipes. Like most things in life, there's more than one way to go about it.
But there are some ingredients that are frequently used to make commercial potting mixes. We'll look at some of them below.
Organic Ingredients
By "organic" we just mean something that was once living. Organic ingredients include peat moss, coir, compost, and composted bark chips.
Maybe before we even jump into these organic ingredients, let's not ignore the elephant in the room. There's an environmental footprint to potting soils. Peat moss is extracted from peat bogs, where carbon has been sequestered long-term. When we use peat moss for gardening, that carbon is quickly released back into the environment. Coir is touted an environmentally preferable substitute, though it's from a crop planted where there were once rain forests...and then it's shipped a long ways for a northern gardener like me.
If this environmental footprint is on your mind, here are some thoughts:
Don't waste potting soil—and certainly don't use it like a garden-soil amendment
Use your potting soil for more than a year where appropriate
Consider potting-soil ingredients such as home-made compost and composted forestry waste
Peat Moss
Peat moss is widely used because it holds water really well—like a sponge. Yet it still drains well. Lots of air pockets, yet still moisture that plant roots can take up.
When peat moss gets very dry, it repels water. (It becomes "hydrophobic" if you like the technical jargon.) So if you're mixing your own soil, moisten the peat moss beforehand. (Commercially prepared soil mixes often have an ingredient called a "wetting agent" that makes the peat less hydrophobic.)
Because peat moss is acidic, ground limestone is often added to peat-based potting soils. This helps to balance the pH. (And that's important because if the soil is too acidic, plants might not be able to take up the nutrients they need.)
Coir
Coconut coir is commonly used as an alternative to peat moss. We're talking about the fibre from coconut husks. As well as being used in place of peat moss, some gardeners blend coir with peat moss.
Coir-based soil mixes are sold in bags, as are peat-based soil mixes. But you can also find compressed bricks of coir. They're completely dry and very lightweight. These bricks are soaked in water before making a potting mix.
Compost
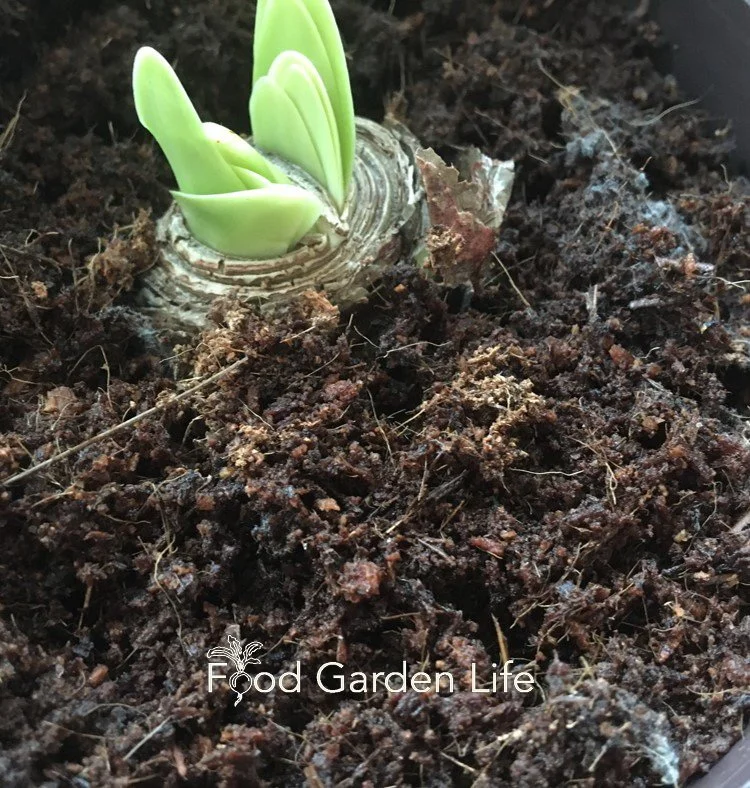
Here’s a close up of a potted bulb growing in a soilless coir mix. You can see the long fibres.
The nutrient content of a compost depends on what it's made from. For example, composted animal manures or composted seafood waste contain higher nutrient levels that something such as composted leaves (a.k.a. leaf mould.)
If you’re aiming to make your own peat-free soil mixes, leaf mould (composted leaves) is a traditional ingredient. Leaf mould breaks down more quickly than coir and peat.
Composted Bark Chips
Composted bark chips are sometimes added to soil mixes for larger plants. The bark bulks out the soil mix, while holding moisture.
Worm Castings
Worm castings—worm poo—add nutrients and microbial activity to a soil mix.
Inorganic Ingredients
With inorganic ingredient, we're mainly talking about "aggregates," things that add structure to the potting soil. These include perlite, vermiculite, sand, and grit. Light-weight materials such as perlite and vermiculite are common in commercially prepared soilless potting mixes.
Perlite
This popcorn-like, light, fluffy material is heat-expanded volcanic glass. It adds air pockets to the potting soil.
Vermiculite
Vermiculite is heat-expanded mica. It's like a sponge, able to hold water and nutrients. Because it’s so good at holding moisture, the soil is less likely to shrink when dry.
Sand
Common in home-made soil mixes to improve drainage and to add weight. Not so common in commercial mixes because it adds weight...and that makes shipping more expensive.
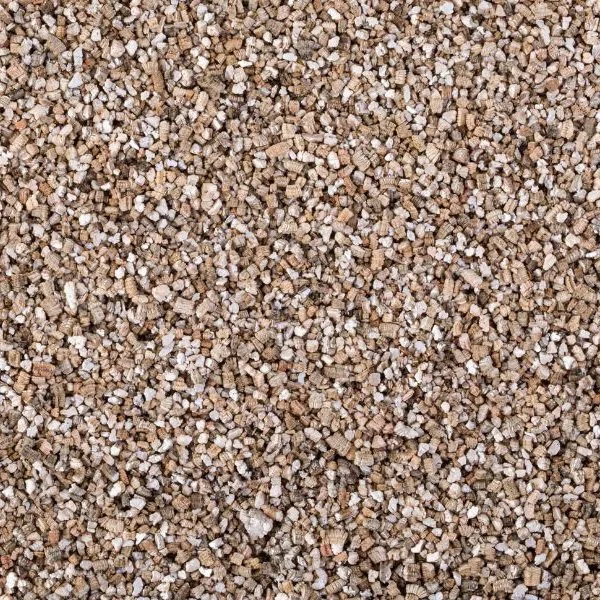
Vermiculite helps to retain moisture.
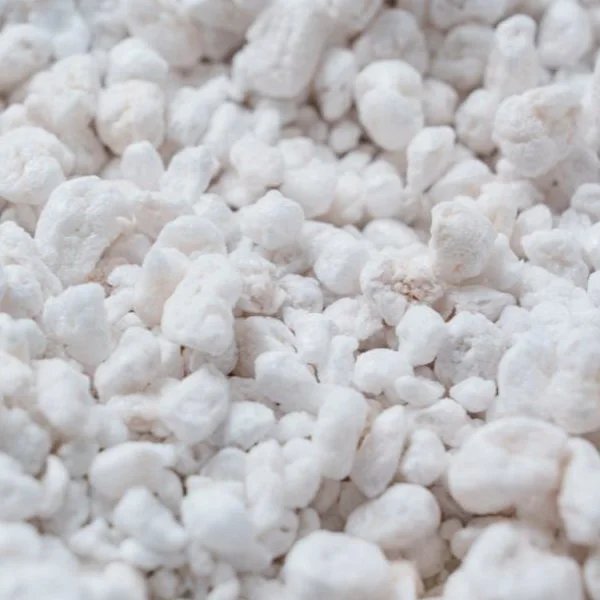
Perlite adds lots of air pockets to a mix.
Types of Potting Soils
Potting soil can be blended for specific types of plants (e.g. cactus), for certain plant needs (e.g. acid-loving plants, or "high porosity" for plants that don't like wet roots), and for specific uses, such as seed-starting.
Here are common types of ready-to-go potting soils:
All-Purpose Potting Mix

This high-porosity potting mix is made from peat and perlite.
As the name suggests, this sort of mix is intended for a wide range of uses and plants. Many commercial all-purpose blends (I've seen the name "general-purpose" used too) contain peat moss or coir, compost, vermiculite, and perlite.
High-Porosity Mixes
High porosity is just another way of saying it drains well.
This sort of mix is for plants that don't do well when the roots remain wet for too long. For example, if you're growing a potted lemon tree, good drainage is very important because the roots can quickly rot if the soil stays wet for too long.
(An interesting aside: I asked at my local garden centre why they're now stocking this sort of mix, which I only used to see in commercial horticulture. I was amused to learn that home cannabis growers favour it!)
"Organic" Potting Mix
It's worth mentioning that some companies market "organic" soils. These will contain the organic portion we talk about above (peat, coir, compost, etc.) meaning something that was once living.
But in this case, the word "organic" has an additional meaning: It means that the mix meets the standards of an organic certification organization. And that usually means that there's no wetting agents (something that makes the peat moss easier to wet) and that if there are fertilizers in the potting mix, they're approved by the certifying agency.
Seed-Starting Mix
The main difference with seed-starting mixes is that the texture is finer. Smaller vermiculite. No coarse bits in the peat moss. Perhaps no perlite. The idea is that a small, germinating seed isn't blocked by a hunk of something in your soil mix.
For what it's worth, I don't buy seedling mixes. They make sense for a commercial grower striving for a very high rate of success and uniformity. In my case, I always have ample seed for my smallish garden, so if the odd seed conks out because I'm using a general purpose mix and it's blocked by a big piece of perlite, it doesn't matter a bit.
Some people use an all-purpose mix, and simply screen out large bits, or break up the large bits while planting.
Homemade Potting Soil
What's the best potting soil? As I mention above, you're likely to find many different recipes for homemade potting mixes. The best mix depends on what you're growing, the growing conditions—and how you water! (I've met gardeners who know they're heavy handed with watering, so they blend especially well draining soilless potting mixes for their plants that don't tolerate wet roots.
If you don't need a lot of soil, you might find it easier just to use an off-the-shelf soil. But if you use quite a bit of soil, or if you have certain requirements, then making your own potting soil allows you to customize the ingredients and match them to the needs of your plants.
General-Purpose Soilless Mix Recipe
When it comes to general-purpose mixes, I keep my life simple, and just use an off-the-shelf product.
If you prefer to mix your own, here's a simple recipe you can start with:
2 parts peat moss (or peat moss substitute such as coir)
1 part vermiculite
1 part perlite
If you're using peat moss, add ground limestone so that the mix is less acidic. Add 30 ml of limestone for a 10 litre pail of soil.
One other tip: If the peat or coir is very dry, wet it first, before mixing with the other ingredients.
And one more tip: Using peat? Get "horticultural" or "blond" peat. Peat at the bottom of a peat bog has decomposed more, so it has shorter fibres. Because of the shorter fibres, it packs down more quickly. The peat that’s higher up in the bog has a lighter colour and longer fibres. It’s called “blond” peat. The blond peat is what you want because it gives a soil with more air pores, but at the same time, it holds water well.
It’s usually the dark peat that I see for sale at garden centres around here—because it’s less expensive and many people don't know the difference.
Container Veg Gardening Course

Soil-based Potting Mix
I use a soil-based potting mix for larger outdoor potted plants. Here's my mix for growing potted fig trees. It's good for all sorts of other potted plants too. With the garden-soil component, this mix holds more moisture. And the garden soil and sand both make it heavier, so that large plants are less likely to topple in the wind.
1 part garden loam
2 parts soilless potting mix (I prefer a commercial-grade of soilless potting mix, see my tips on soil-shopping, below)
1 part sand
Add 30 ml of limestone for a 10 litre pail of the mix
If you want to read more about potting soil for fig trees, here are my recommendations for potting soil for fig trees in pots.
Shopping for Potting Soil
It’s buyer beware when it comes to small, domestic-sized bags of potting mix. Some is great…some is terrible.
A simple approach that I recommend to all my students is to buy potting soil mixed for commercial producers. The quality is consistently good. Which makes sense, because commercial growers know good soil and won't settle for less.
Commercial potting mix is sold in "bales" that are 107 litres (3.8 cubic feet). And the soil within is dry and compressed. So it's a fair bit of soil, but I think it's worth it.
Summary
Good potting mix is a key to success with container gardening. There are many special-purpose mixes available. In many cases, a general purpose mix works quite well. If it's an option, buy a large, commercial-sized bag; the quality is more consistent. When mixing your own potting soil, remember that there are many recipes--and that what's the best for you depends on how you water and what you're growing.
If you’re interested in potting soil because you’re growing vegetables in containers, grab this container veggie guide.
Frequently Asked Questions
Pin this post!
What are the key ingredients in a good potting soil?
A potting soil has an organic component such as peat moss, coir, or compost. This is bulked out with an aggregate such as perlite, vermiculite, or sand.
Can I reuse old potting soil?
Absolutely. The structure of the soil breaks down over time as the organic part (sphagnum peat moss, coir, compost) breaks down. And when it does, the soil will pack down. But you can usually use soil for more than one year. Some gardeners reuse potting soil by refreshing old soil with new soil. (Don't reuse soil that had diseased plants in it, though.)
Does old soil go bad?
Old soil does not go bad. But when peat moss gets very dry, it can be difficult to rewet—it repels moisture. So when using old, very dry soil, allow time for moisture to spread around...and be prepared to get your hands dirty by mixing it.
What is the difference between potting soil and garden soil?
Potting soil is made for plants growing in containers. It drains well. Garden soil is more likely to pack down.
What is a good potting mix for lemon trees?
Root rot is a common problem with potted lemon trees because they don't tolerate wet soil. Look for a “high porosity” type mix. If you're mixing your own potting soil, make it well draining.
Here's a post that helps you know when to water your lemon tree.
What is the best potting soil for fig trees?
It depends on how you water, the size of your fig tree, and the type of container you're using.
Here's a whole article that explains potting soil for fig trees.
Do I need a special soil for wicking beds and sub-irrigated planters (SIPS)?
Use a soil that wicks moisture well. That's because with this type of container there's a reservoir at the base, and water wicks upwards.
If you're buying soil, you won't find "wicking" on the label. If in doubt, remember that the large, commercial bales of potting soil are usually a good bet.
Here's an article that explains sub-irrigated planters and talks about suitable soil.
What about sterile soil?
A heat treatment kills most organisms in the soil: Insects, weed seeds, and diseases.
In most cases, this is not necessary. Healthy soil is living, with microbial processes going on. But when it comes to starting seeds indoors, sterile soil can be beneficial because seedlings are more susceptible to damping off diseases than large plants.
I've heard of people wrapping moist potting soil in foil, and putting it in the oven at 200°F for 20 minutes. Never tried it myself...I know my family wouldn't approve of the smell. However, I have had students tell me they sterilize soil in the BBQ!
Peat-based soilless potting mix is acidic. While not sterile, it's less likely to have disease organisms than something like your home-made compost.
Find This Helpful?
Enjoy not being bombarded by annoying ads?
Appreciate the absence of junky affiliate links for products you don’t need?
It’s because we’re reader supported.
If we’ve helped in your food-gardening journey, we’re glad of support. You can high-five us below. Any amount welcome!
Interested in Adding Worm Castings to Your Soil?
Tune in to this interview to learn about how to use worm castings.
Articles
Growing veg in containers? Find out about vegetable container gardening.
Course on Container Gardening
Here is a self-paced masterclass to help you grow a great container vegetable garden.
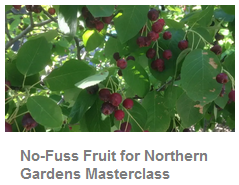
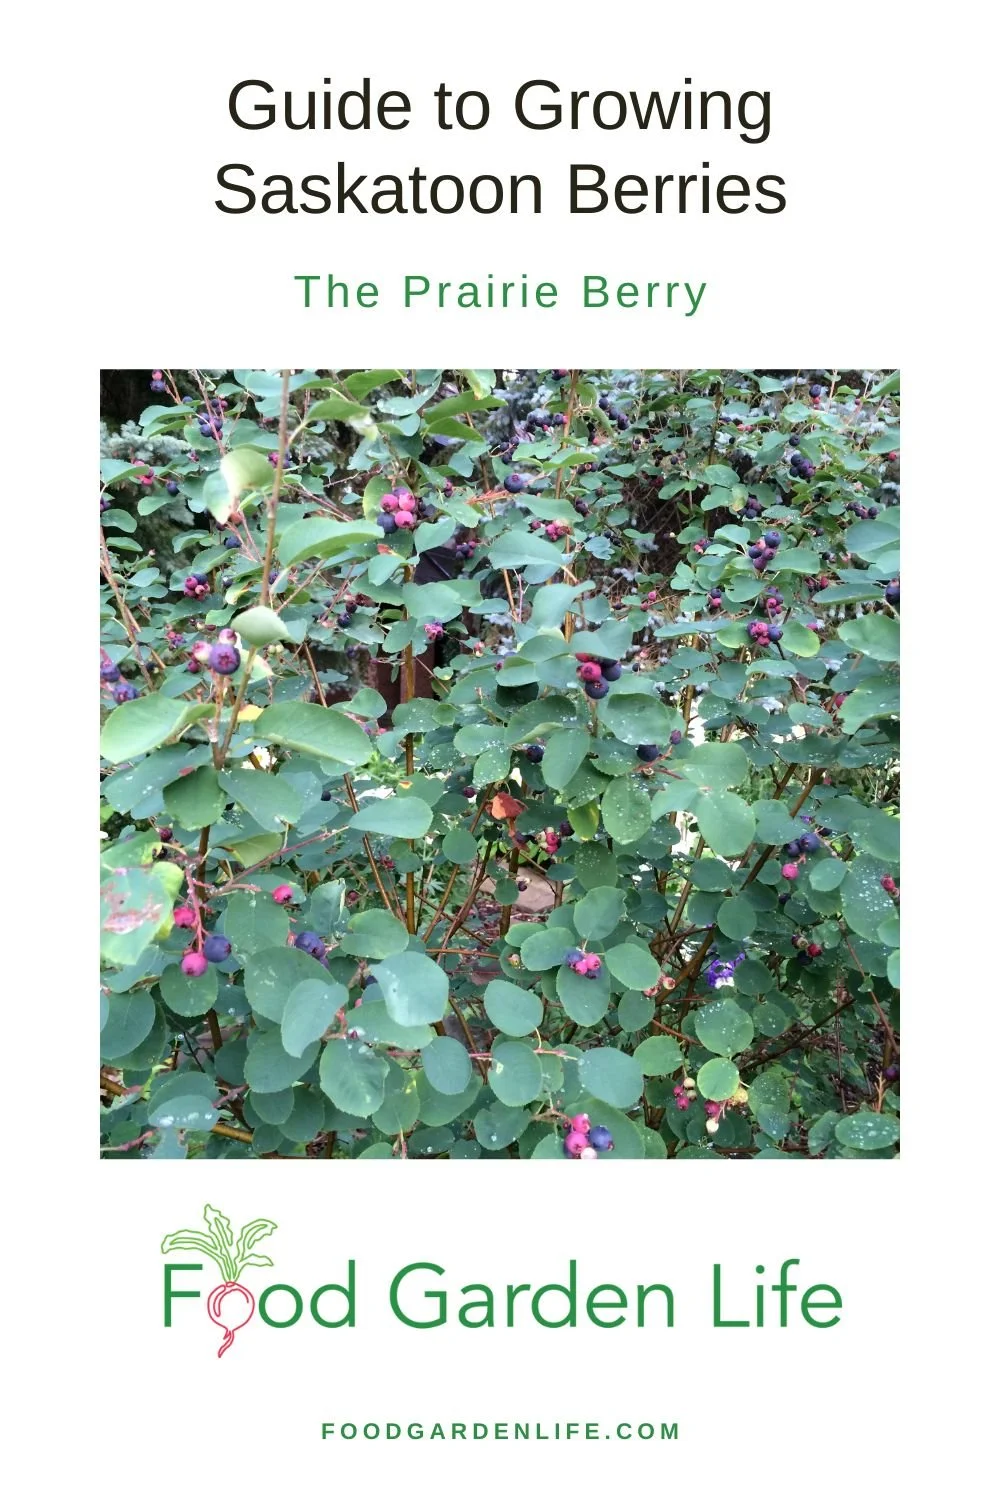
Guide to Growing Saskatoon Berries: The Prairie Berry (a.k.a. Juneberry)
Guide to growing saskatoon berries. A Saskatoon bush is a great addition to a home garden…
By Steven Biggs

How to Grow a Saskatoon Bush
As an Ontarian, there was a fruit that I never ate growing up.
But I heard lots about it from Mom.
She grew up in Western Canada, and talked about the saskatoon berries that her parents grew. And when I finally saw a saskatoon bush, on a trip to her childhood home, I was surprised that the row of bushes was taller than me. I'd been expecting something puny, like the wild blueberry bushes we get in Ontario.
What is a Saskatoon Bush?
The saskatoon bush (Amelanchier alnifolia) is a native North American fruiting bush. It has a wide range: Wild saskatoon bushes are found in Alaska and Yukon, and in the harsh conditions of the prairie landscape.
It has a few aliases: South of the border you might hear it called juneberry (june berry), shadbush, and western serviceberry. And in the east, it's sometimes called serviceberry—like it's many kin in the Amelancheier clan. (There are many serviceberry species, some shrubby, some growing as small trees.)
The saskatoon bush (Amelanchier alnifolia) is a native North American fruiting bush.
(If you’ve ever grabbed a handful of wild serviceberries or saskatoons and them spit them out because they’re pithy and dry, it’s time to try the domesticated version! The flavour and texture of the wild berries varies a lot, can comparing them to Saskatoon berries is like comparing a crabapple to a big, red, juicy apple from an orchard.)
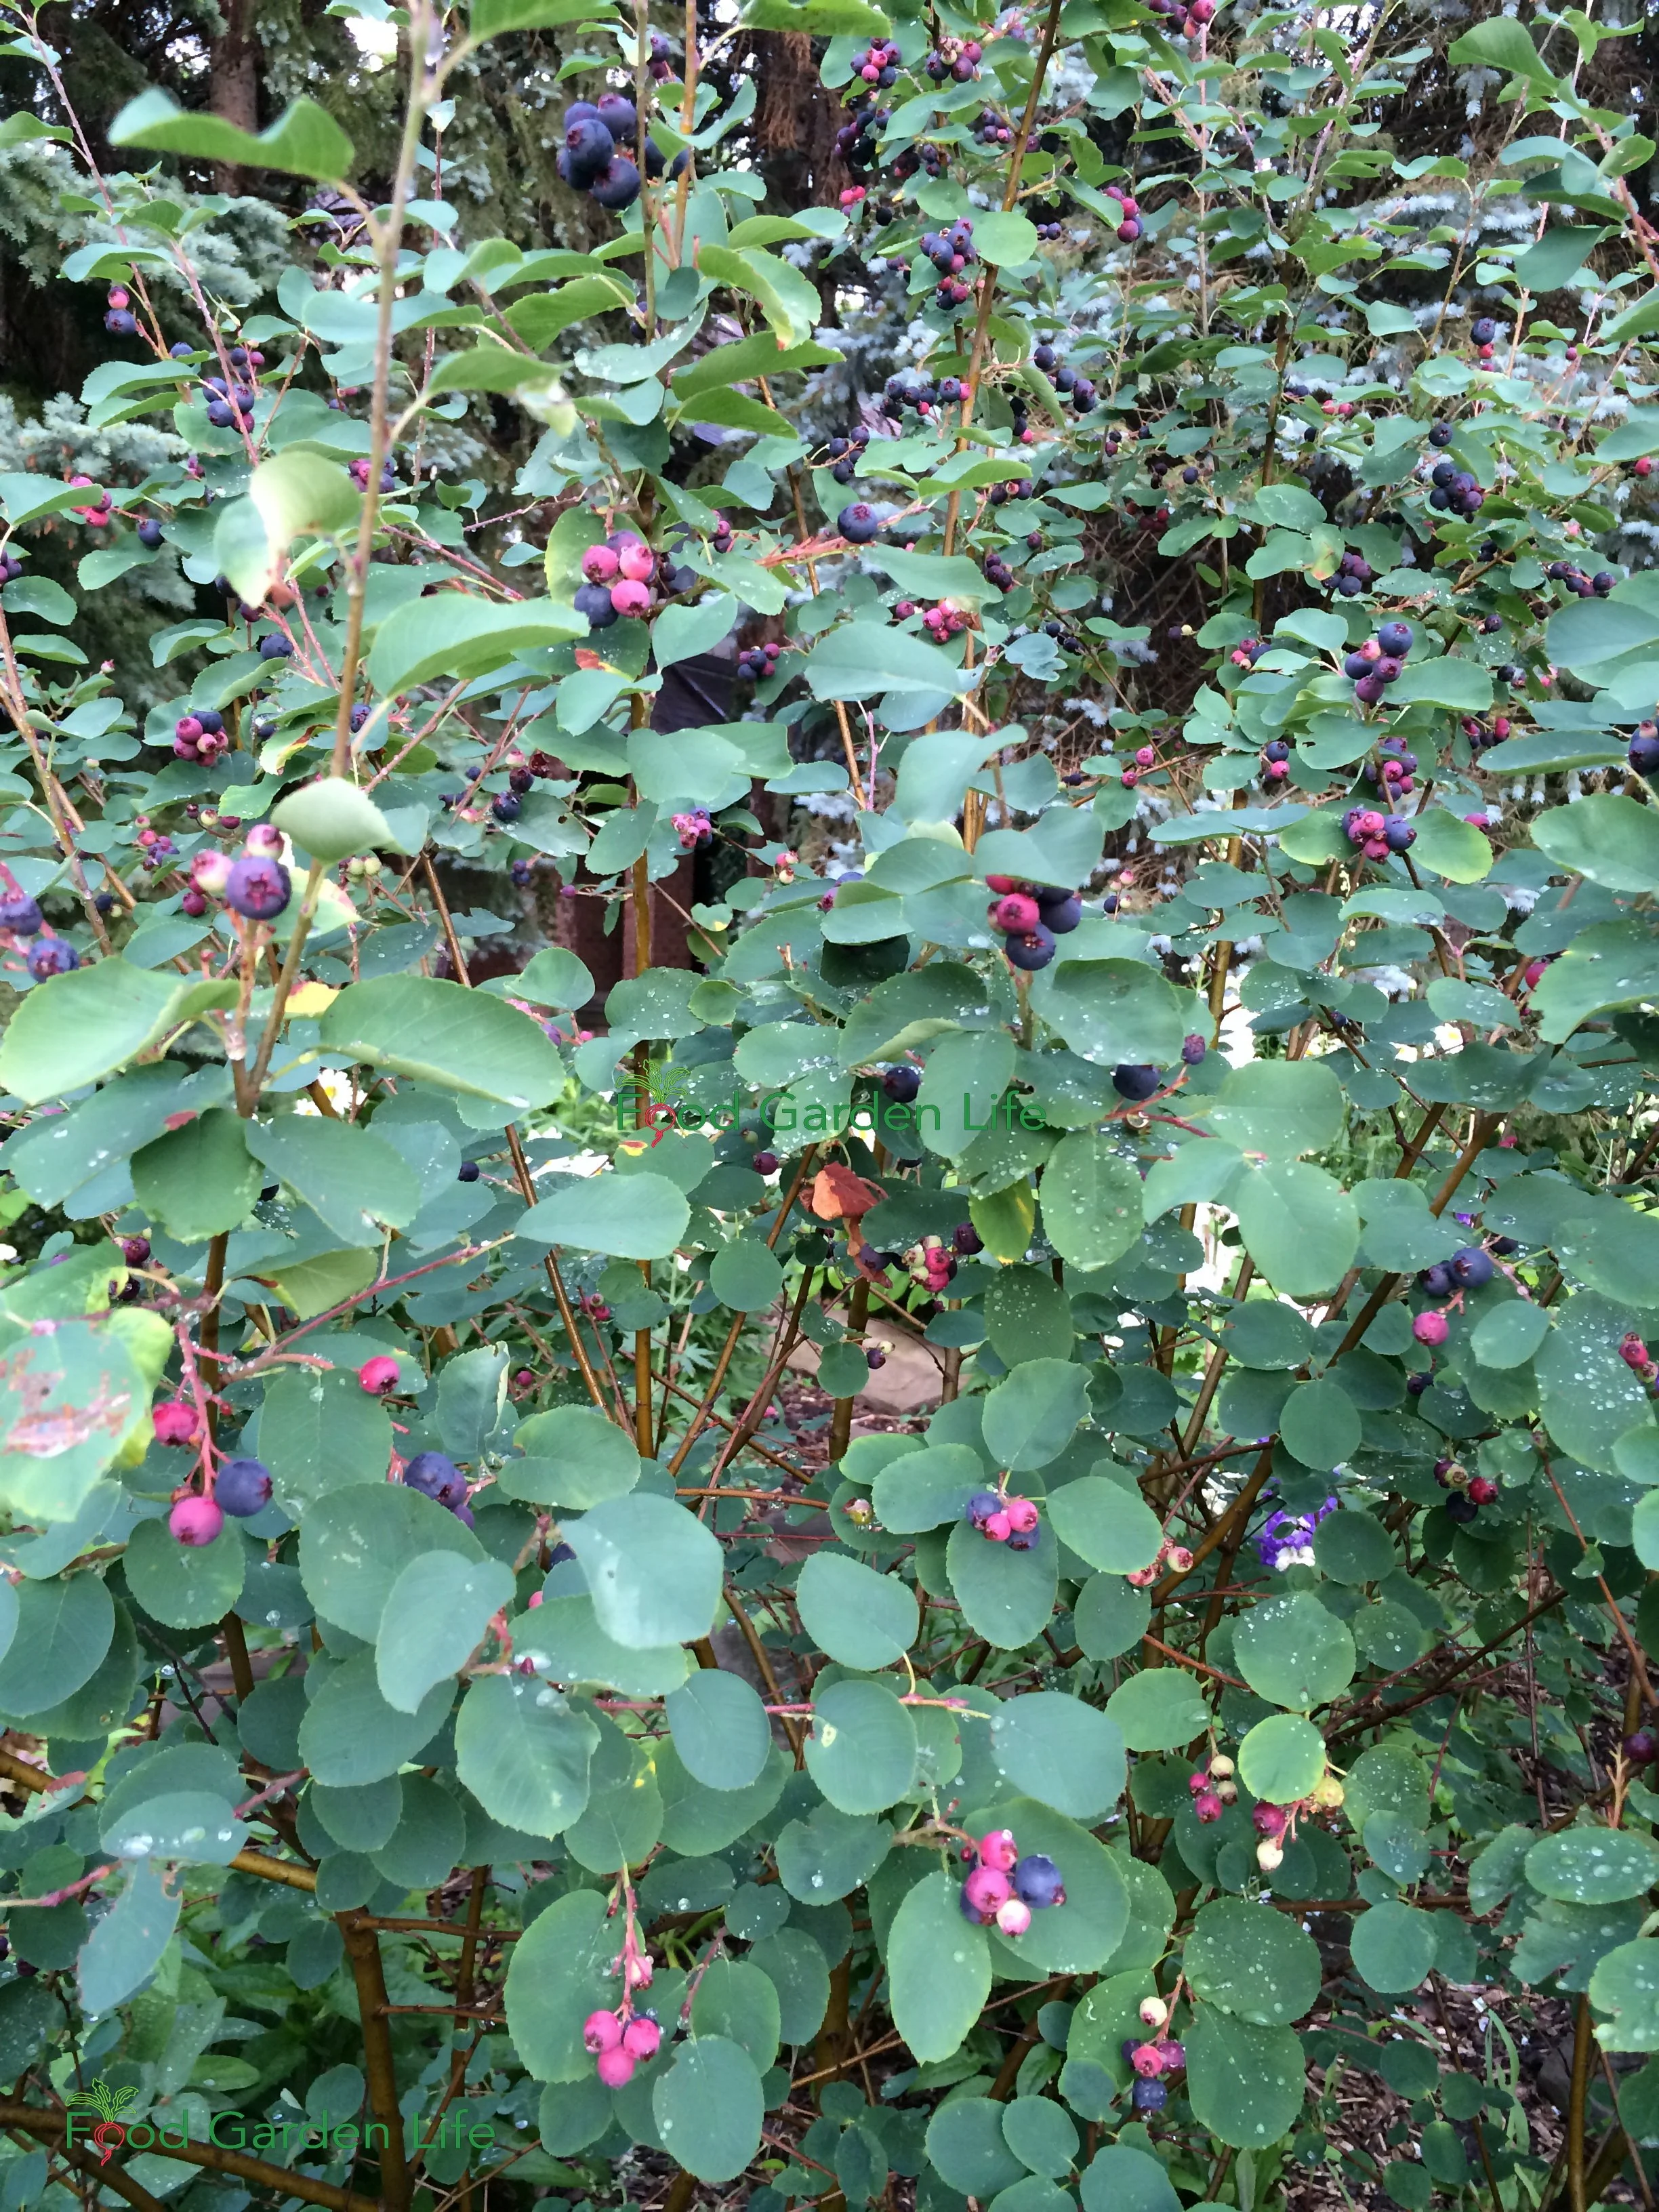
Saskatoon Fruit
Ripe saskatoon berries look a bit like blueberries...but the similarities end there. They have a taste of their own, a bit nutty and slightly almond-like.
(In case you’re interested, they’re actually related to apples and mountain ash, so it’s no surprise they’re very different from blueberries.)
The saskatoon fruit turns from green to red as it ripens, with fully ripe fruit eventually turning deep purple—almost black.
Saskatoon Bush Size
Saskatoon bushes can grow to approximately 5 metres (16’) high when not pruned.
But in commercial production, they're often kept shorter, under 1.5 metres (5’) high.
An Ornamental Edible
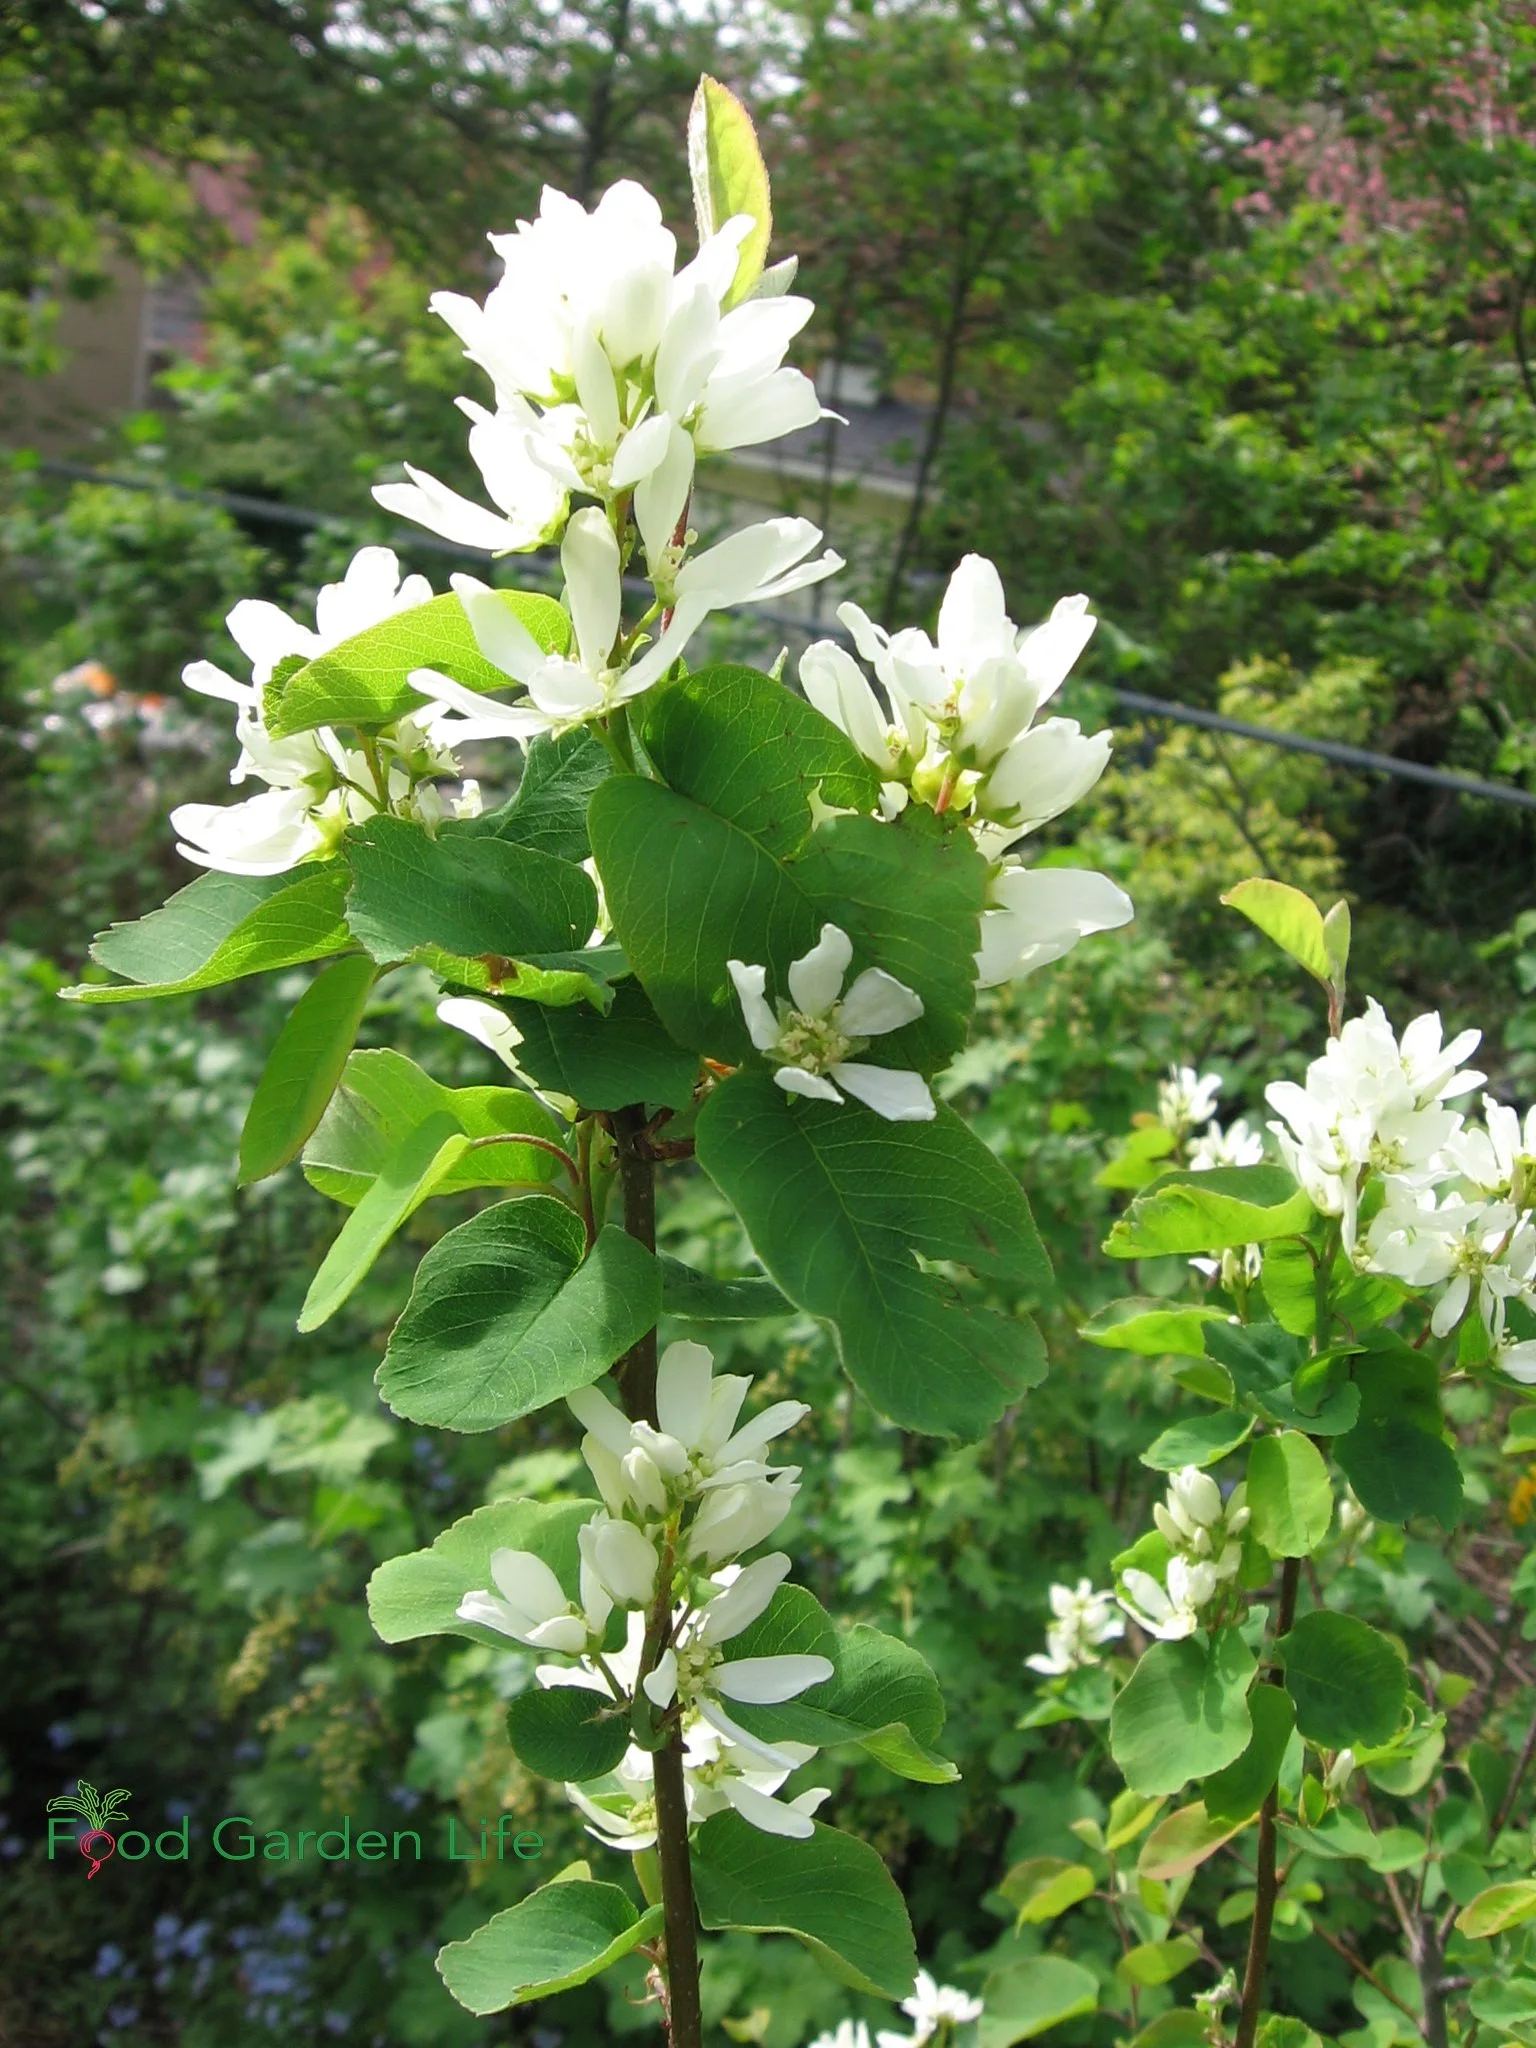
Along with the attractive fruit, saskatoon bushes have showy spring bloom, with clusters of upright flowers.
Saskatoon bushes are a great addition in an ornamental garden too. Along with the attractive fruit, the spring bloom, with its clusters of upright flowers, is very showy.
In the autumn, the leaves paint the garden with a showy orange colour.
Saskatoon Berries Cold Hardiness
It's as tough as nails! No surprise for a plant that’s native to the Great Plains, it takes harsh, dry conditions.
There are a few things that affect hardiness, but it takes temperatures as cold as -50°C (-58°F), and probably colder.
How to Plant a Saskatoon Berry Bush
Choose a Location
Select a location with a well-drained soil. Saskatoon bushes are tolerant of many soil types. So a clay soil with some soil moisture is fine, as long as the soil is not waterlogged.
Full sun is ideal for the best fruit production. It does respectably well in home gardens with partial shade, although the harvest is less than full-sun locations.
If you get late spring frosts, a sloped location where cold air can drain away is best. South-facing locations in cold areas are not ideal, as they warm up more quickly in early spring. That causes flowering while there's still more risk of frost.
Planting a Saskatoon Shrub
When planting most trees and shrubs it's good practice to keep the depth the same as it was before. Not deeper.
There are exceptions to every rule…and the Saskatoon is an exception.
You can plant your saskatoon bush at the same depth; that's fine. But you can also plant it a bit deeper.
Here’s why:
Saskatoon bushes have a habit of suckering—of sending up new shoots beyond the original bush. The bush gets wider over time, and you can end up with a little Saskatoon thicket!
But when planted a few inches deeper, they're less likely to sucker.
After you've planted, keep it well watered for the first year until it's established. Mulch the soil surface around the bush to control weeds and keep in soil moisture.
Landscape with Fruit
That’s easy to grow in a home garden!
Saskatoon Bushes in the Landscape
Saskatoon berries are very versatile in a home landscape.
Here are a few ideas:
Saskatoon Hedge. If it’s an edible hedge you’re after, look no further than the Saskatoon! It’s really ornamental too!
Saskatoons in a Food Forest. In forest gardens, Saskatoons can be grown as shrubs or small trees, and are tolerant of partial shade.
Saskatoon Berries in Containers. Because of their excellent tolerance of harsh conditions, Saskatoon berries are great candidates for container gardens.
I have an edible hedge in my garden that has a saskatoon bush, haskaps, and Nanking cherry.
Find out how to grow an edible hedge.
Check out these 5 types of cherry bushes to grow in an edible landscape.
Saskatoon Berry Care
Pruning Saskatoon Bushes
Regular pruning helps maintain vigour and encourages annual fruit production. (With saskatoon, like many fruit trees and bushes, plants often fruit more heavily every second year, something called biennial bearing.)
With pruning, we're helping the plant grow in a way that's beneficial to us. Importantly, we want to pick saskatoon berries without a ladder! (More fruit within reach means more for you, less for the birds!)
Here are a few more thoughts on pruning your saskatoon bush:
Prune out older, less fruitful wood
Remove diseased branches
The best fruit production is on wood from the previous season (older wood gives some fruit, though not as much)
Some saskatoon shrubs favour one main leading branch (leader) when unpruned. Prune back leaders for a well-branched bush form
Prune when dormant
Remember, prune your saskatoon shrub to control size and to create a multi-stemmed shrub.
With pruning, there are two main types of cut we make:
"Heading" cuts, where we cut a branch back only part way to the main branch they come from, encourage branching
"Thinning" cuts, where we cut right back to the main branch, are used to remove weak or unwanted growth
Feeding and Watering Saskatoon Bushes in a Home Landscape
If you have a well-fed soil that has been amended with lots of organic matter, you might not need to give any additional feed.
Sandy soils don't hold moisture or nutrients as well, so if you're on a sandy soil, be sure to amend the soil with lots of organic matter.
Mature service berry bushes are very hardy and won't require irrigation. While establishing newly planted bushes, water for the first year until well rooted.
When to Harvest Saskatoon Berries
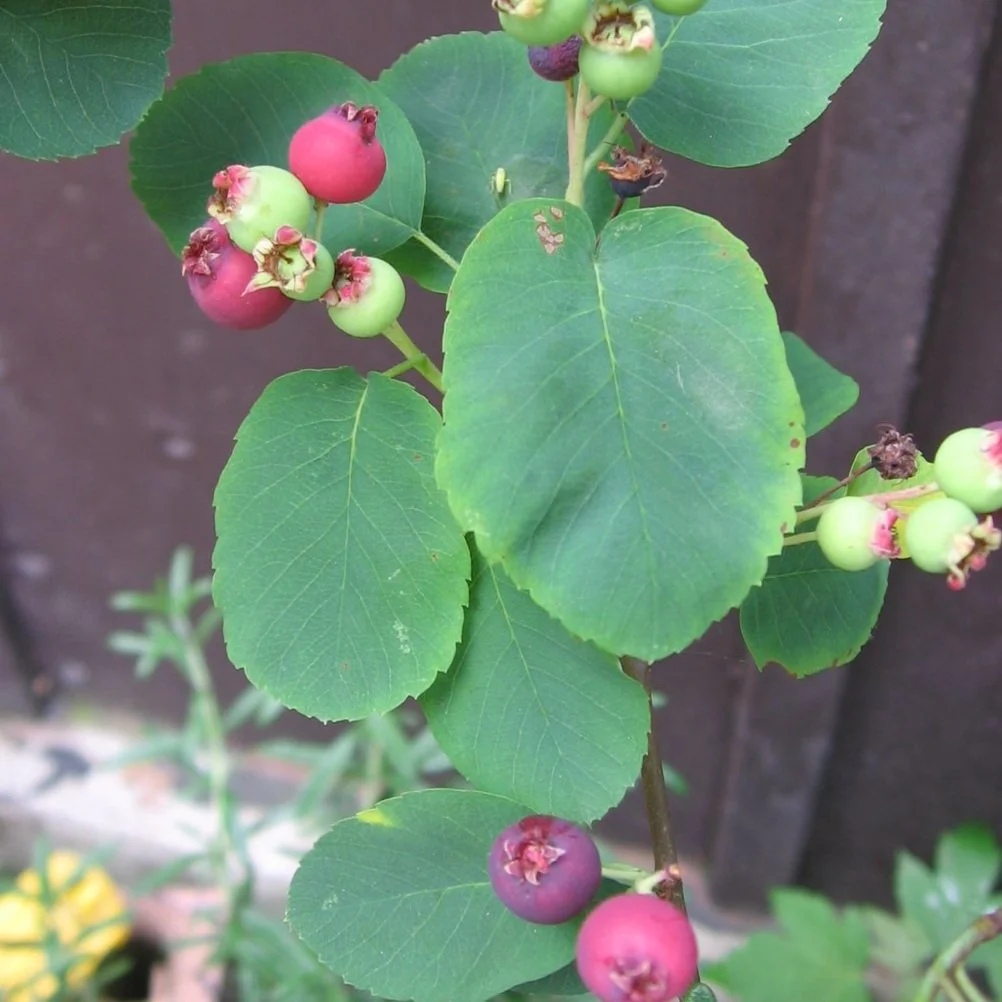
As saskatoon berries ripen, they first turn red or pink. Not all fruit ripen at the same time.
Saskatoons are self-fertile, meaning you get fruit even if you have only one bush. There's no need for a second bush.
Not all flowers open at the same time; and not all fruit ripen at the same time. Fruit on the outside and sunniest part of a bush often develop faster. So expect to pick more than once.
The fruit ripens six to eight weeks after flowering. If you're growing more than one variety, flowering and ripening times vary by variety.
As berries ripen, they first take on a red colour. Next, as they turn to dark purple, you can begin tasting them to figure out if they're close to optimal ripeness. On rip fruit, the flesh is usually pink or red.
How to Use Saskatoon Berries
Our favourite way to use serviceberries is for fresh eating. We graze some in the garden, mix with other fruits for fruit salad, or use them on cereal.
Fresh berries don’t last too long once picked because during picking the skin tears a bit as the stem detaches.

Saskatoon berries go from pink to blue, often to a purple-black colour. Taste some to determine if they’re fully ripe.
Here are a few other ways to use the fruit:
Jams and jellies
Pie
Muffins
Syrup
I've even heard of wine...though I haven't tried it!
And if you want some for using later, freeze them directly in freezer bags—or make some into dried berries.
A few saskatoon berries go nicely atop a crème brûlée! Find out how to make crème brûlée—gardener style!
Propagating a Saskatoon Bush
In the nursery trade, saskatoon bushes are often propagated by cuttings and tissue culture. Sometimes they are seed-grown, but there can be more variability with seed-grown plants.
For home gardeners, rooting saskatoon cuttings is a bit more tricky, as you need controlled conditions.
But its tendency to sucker makes it easy for home gardeners to propagate. The suckers it sends out are from underground stems (called stolons). They shoot up a little way away from the main plant. These can be removed from the parent plant using a spade.
Landscape with Fruit
That’s easy to grow in a home garden!
Saskatoon Berries Varieties
Because saskatoon berries are grown as a commercial crop, there are a number of cultivated varieties. You will probably find the best selection at a specialist nursery.
Here are things to look at as you compare saskatoon varieties:
Fruit size
Fruit colour (there are even white-fruited varieties...but they're usually grown as ornamentals)
Bush height and spread
Bloom time
Disease resistance
Pests and Diseases of Saskatoon Shrubs
In a home garden setting pests and diseases are infrequent.
Here are three to watch for:
Rabbits. They enjoy snacking on young branches on new bushes over winter (use tree guards or chicken wire if this might be a problem)
Birds. Don't leave your harvest too late -- and consider netting if birds are likely to be a problem (or just grow more bushes so there's lots to share)
Saskatoon-juniper rust. This disease needs both the juniper and Saskatoon plants to finish its life cycle. It causes raised yellow areas on leaves and misshapen fruit. Cut out the woody galls on juniper that host the disease (you'll see yellow growths on them in spring). If it’s a problem, look for rust-resistant varieties (Arcadia, Broadmoor, Buffalo, Calgary Carpet)
Saskatoon Berry FAQ
What's the botanical name?
Amelanchier alnifolia (Although there are also a couple of cultivars that are hybrids with Amelanchier stolonifera)
How long will a saskatoon shrub live?
With pruning and good care, a saskatoon shrub fruits well for decades, by which point you'll have taken off suckers to make yourself even more plants!
Find This Helpful?
Enjoy not being bombarded by annoying ads?
Appreciate the absence of junky affiliate links for products you don’t need?
It’s because we’re reader supported.
If we’ve helped in your food-gardening journey, we’re glad of support. You can high-five us below. Any amount welcome!
Course on Home Fruit Growing
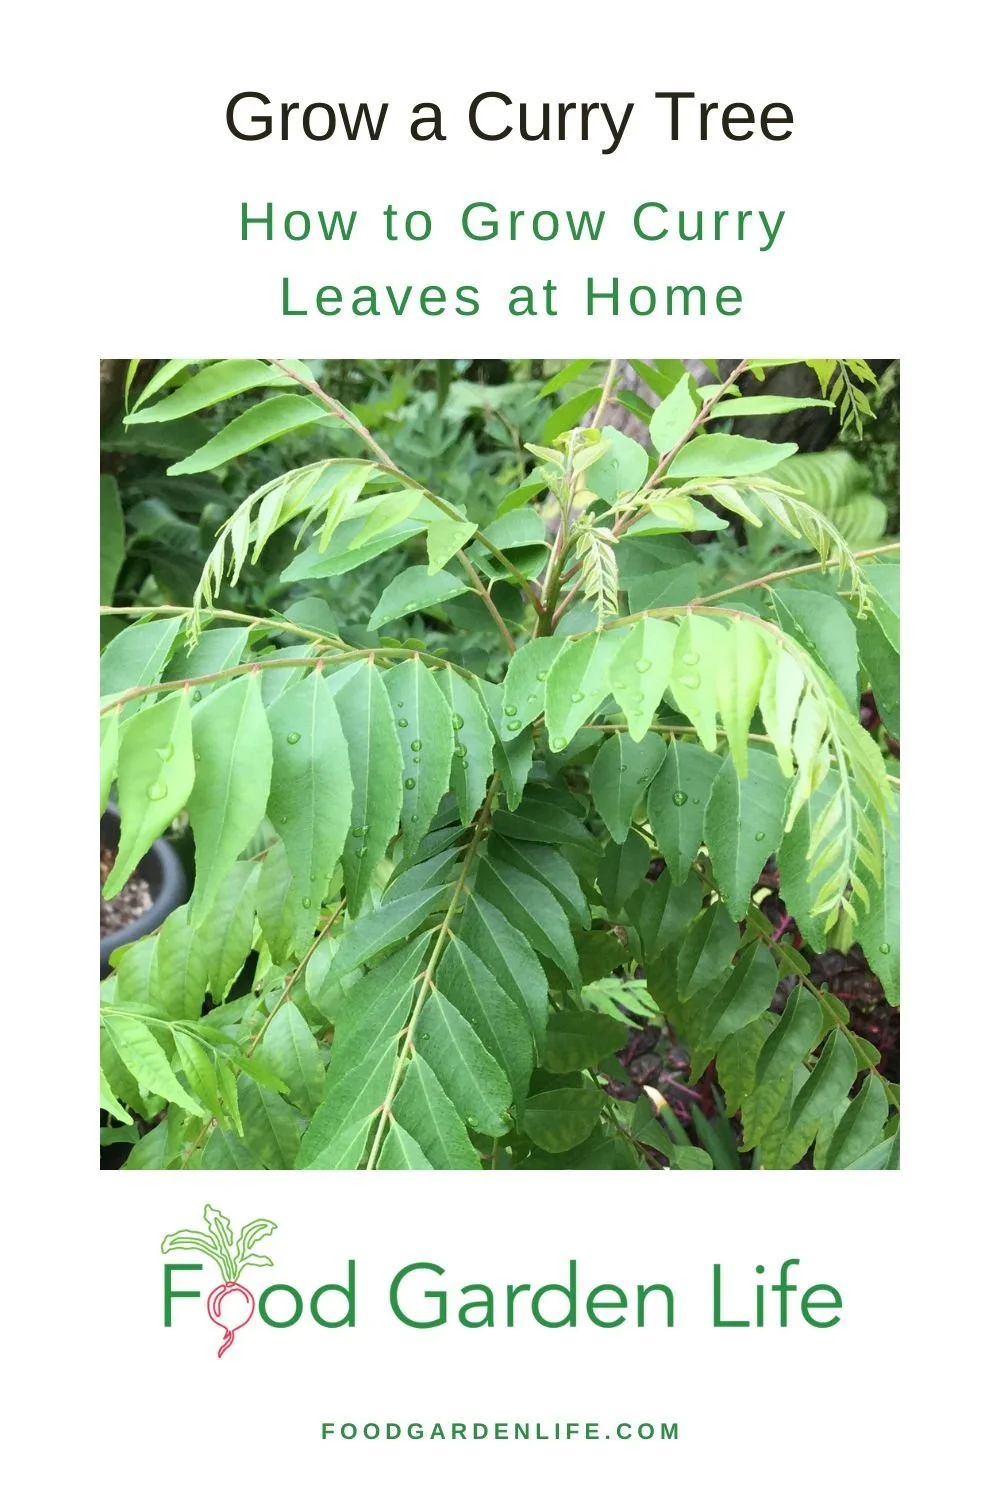
How to Grow Curry Leaves at Home
Spice Up Your Cold-Climate Garden with a Lush Curry Tree
Curry Leaf Plant for Edible Gardens
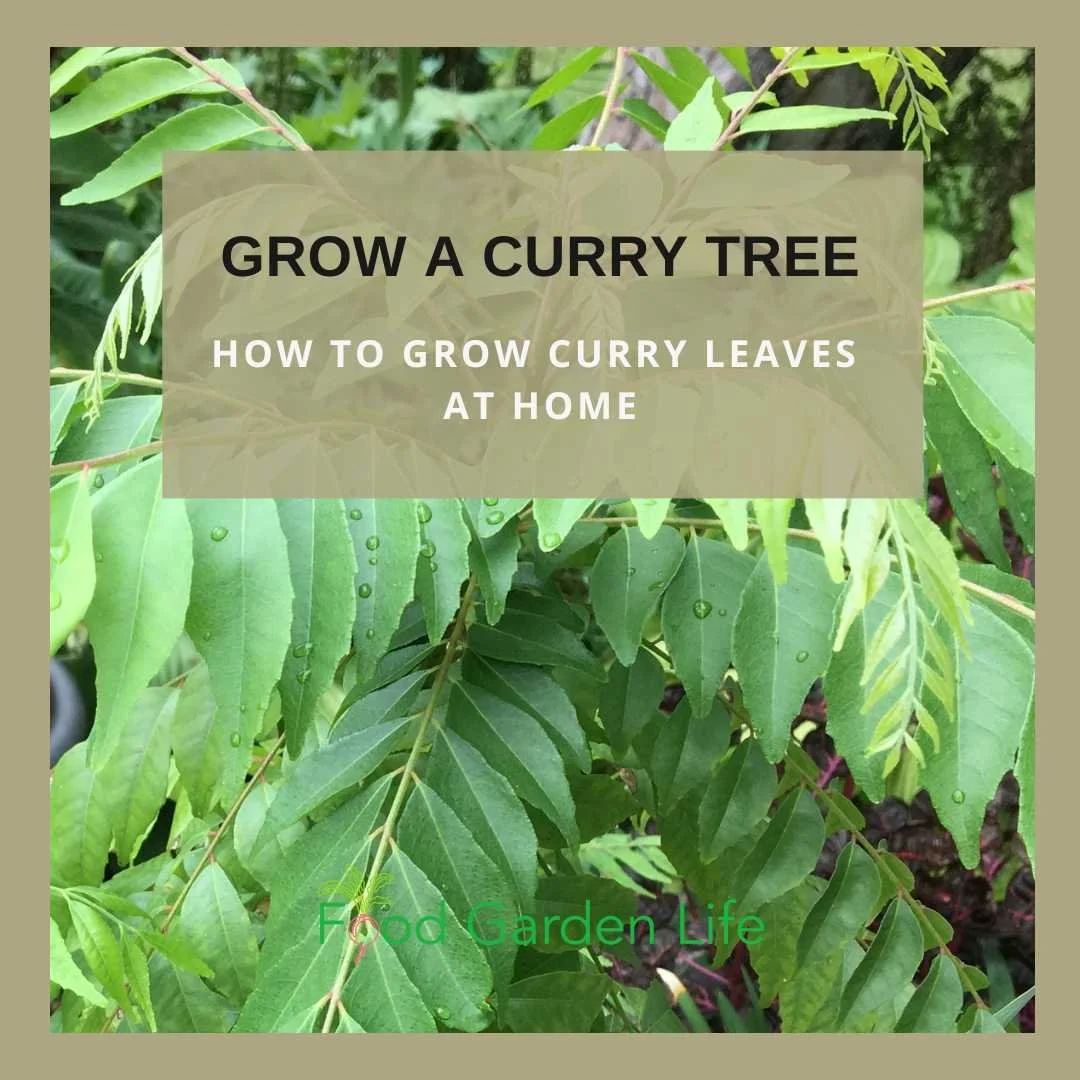
Grow your own curry leaf tree.
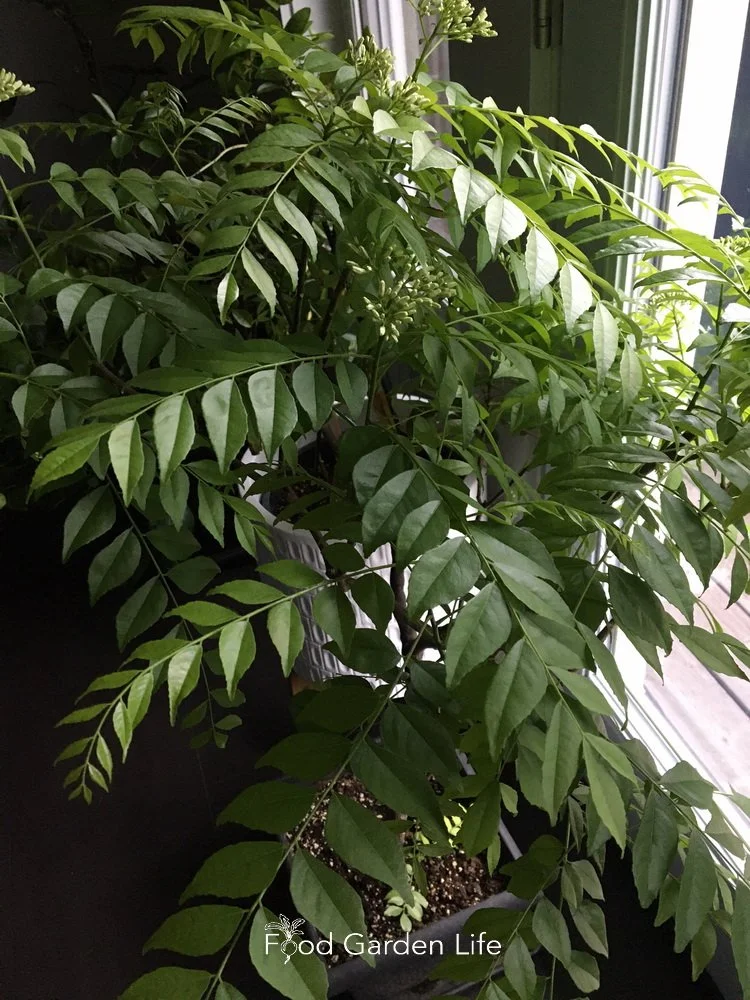
Beautiful Curry Leaf Tree
My kids make snide remarks about my curry leaf plant when I bring it into the dining room for the winter. I’ll explain why shortly.
But first, an introduction to an exotic plant with culinary appeal. A potted curry tree makes a nice addition to an edible garden in cooler climates. Grow it as a potted patio plant over the summer—then as a houseplant or conservatory plant through winter.
The curry leaf plant has aromatic leaves that are used in many South Asian dishes. In my kitchen, I use them in vegetable curries and chickpea curries.
Along with the glossy, pointy green leaves, it has clusters of white, star-shaped flowers. These flowers turn into shiny, black berries.
Don’t be put off by the word “tree” in the name. While I’ve seen curry trees taller than me, they’re easy to keep small when grown in a pot and pruned.
Where winters are cold, curry leaf trees need protection from frost. Here in Toronto, I grow it as a houseplant through the winter.
If you’re a Latin hound, you'll find it referred to by a couple of different names, depending on the source: Murraya koenigii or Bergera koenigii. The common names you’ll see are curry tree, curry leaf tree, curry leaf plant, and sweet neem. But don't confuse it with neem—that's a different plant. (It’s also different from the curry bush—which I mention below.)
My Kids and the Smelly Curry Tree

Curry leaf tree starting to flower.
Back to the snide comments from my kids: When you rub the leaves or brush against the plant, it smells. In my opinion—and theirs—it smells like tar. I've seen it described as a citrus-like scent, though that seems far-fetched to me. But it's a spicy aroma, for sure.
You might be wondering why grow something with such a smell. Don't worry. When you cook with them, fresh curry leaves add a complexity that’s anything but tar-like. It all changes when you cook with them.
As for my kids complaints, the solution is simple. Don’t put your potted curry plant in a high-traffic area where people will brush against it!
Curry Powder, Curry Leaves, and Curry Plant
Don’t be confused by the name: The flavour of curry leaves is different from that of curry powder. Although you might use both when cooking a curry.
(The run-of-the-mill curry powder around here is usually a combination of coriander, cumin, chilies, fenugreek, and turmeric—though curry spice blends differ by region, and my local South African store has various curry powders that are quite different.)
Then there’s the curry plant—a.k.a. curry bush—which is totally different. Curry plant (Helichrysum italicum) is a shorter, grey-leaved tender perennial that owes its name to the strong sweet curry smell of its leaves. Curry plant has small yellow flowers that contrast nicely with the leaves. Nice plant—but not what we’re talking about here.
How to Grow a Curry Leaf Plant
Location for a Potted Curry Tree Outdoors

Potted Curry leaf plant outside on the patio for the summer.
A potted curry tree makes a good potted patio plant over the summer. Grow it in full or partial sun.
Protect from frost. If you're in a cold climate like me, move the tree indoors for winter.
This is an evergreen plant, meaning that it keeps its leaves year-round. That is, if it’s warm enough. If you leave it out in the fall as temperatures cool, you might find some of the leaves yellowing. With the cool conditions, the plant is getting ready to take a break.
Winter in Cooler Climates
Over the winter, curry leaf plant makes an excellent houseplant.
Give it your sunniest window, preferably a south-facing window with full sun.
If you left it out in cool fall weather and leaves started to turn yellow and drop before you moved it indoors, it might take a little break. It might drop some more leaves while the days are short. This is nothing to worry about. Growth resumes and the plant grows new leaves as days get longer and it’s in a warm location.
Keep Your Lemon Tree Through the Winter
And enjoy fresh homegrown lemons!
Curry Tree Care
Feeding
Growing a potted curry leaf tree as a potted plant indoors for the winter.
Feed your curry leaf plant when it’s growing.
If growth stalls in cool weather, stop feeding until it starts again.
There’s no need for any special fertilizer for curry leaf plants. I use general-purpose feeds.
If feeding potted patio plants seems like a never-ending task, here’s what I do:
In the spring, as I move potted plants outdoors, I give them a half dose of a slow-release feed that lasts for the entire summer. (There are granular products that can be spread over the top of the soil—easy to apply.)
I occasionally supplement with a low rate of a liquid feed—”spoon feeding” as I think the plants need it.
(Why, you might ask, a half dose of slow-release feed? Because I often use manures when I blend my own potting soils, and they contain some nutrients.)
Watering a Curry Leaf Plant
Water regularly while the curry leaf plant is actively growing.
The goal is to keep the soil moist, but not constantly wet:
Water enough so that water comes out of the bottom of the pot.
Then water again as the top inch or two of soil looks dry.
If in doubt, stick your finger in the soil to see how moist it feels.
If growth slows during the winter, water less often. The plant will use less water as growth slows. And if the soil stays too wet for too long, there's more chance of root rot.
Here's my guide to watering potted citrus trees. The same ideas apply to watering your curry tree.
Repotting
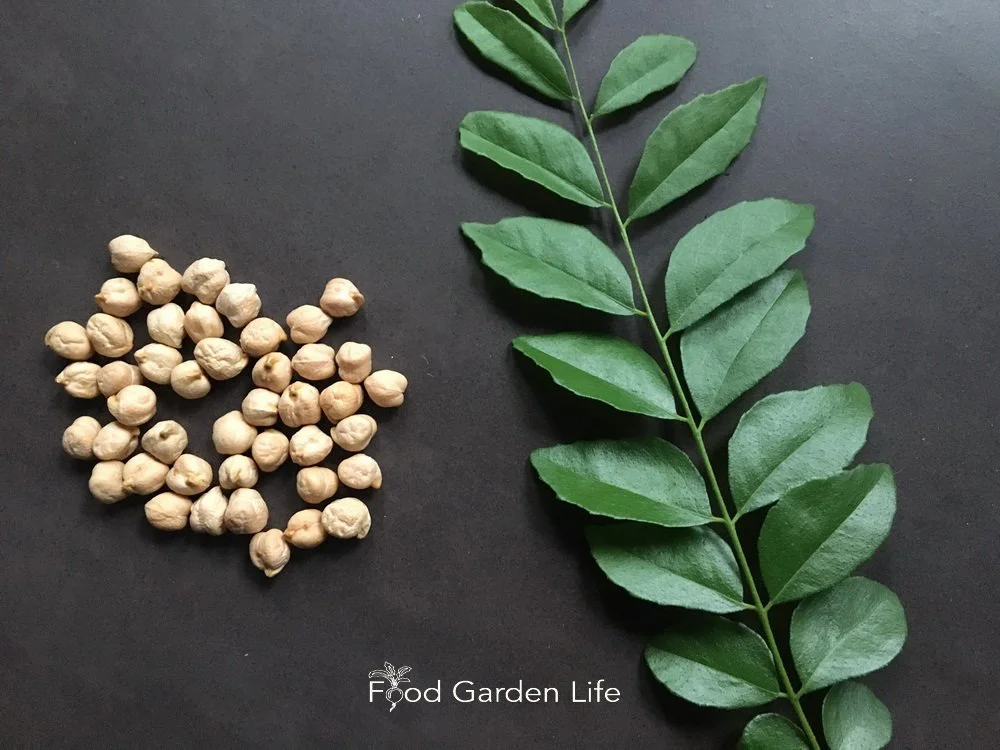
I love to use fresh curry leaves in vegetable curries and chickpea curries.
Repot in the spring when the plant starts to make new growth.
As your curry plant grows bigger, repot it into a slightly larger pot every year or two, until it reaches a size that suits you. You'll know it's time to repot when the roots fill the soil and begin to coil around.
Once it reaches the size you want to keep it at, repot every couple of years back into the same pot. You only give it a larger container if you want a larger plant. Remove up to one third of the soil, and then put it back into the same pot, with some fresh potting soil.
An off-the-shelf soilless potting medium is fine. No need for anything special. It should be a well draining soil.
But if you’re growing it into a tall tree, you might want a heavier soil mix to prevent it from tipping over in the wind. In that case, a loam-based potting soil is a good option.
When it comes to choosing a pot, make sure there are drainage holes. Good drainage is important. Otherwise, you're setting yourself up for root rot. If you tend to have a heavy hand at watering, unglazed terracotta pots breathe—so the soil dries out more quickly—and that helps counteract your heavy hand!
Pruning a Curry Leaf Plant
Curry trees get leggy if not pruned. My neighbours have an unwieldy seven-foot-high giant. They can get even bigger and more gangly than that given the opportunity.
I keep mine under four feet high with regular pruning. I prune it back before moving it into the house every winter, and give it a haircut as needed through the summer.
If starting with a young plant, pruning depends on the shape you want. You can grow it as a single-stemmed or multi-stemmed plant. If you want branching to start low down, for bushier growth, nip off the tip of the plant while it's still short to induce branching.
In summer, if there’s a long, lanky branch that you want to have side shoots, pinch out the tip to encourage branching.
Pests and Challenges
I find potted plants growing outdoors are far less likely to have pest problems than those grown indoors. That’s because outdoors, there are natural predators and parasites—and because heavy rain can wash away some pests. (Spider mites, I'm talking to you!)
But indoors, conditions can be ideal for pests…like an incubator.
Three common pests of potted curry leaf trees are:

This curry tree is outside on a warm winter day for an emergency spray to tread a spider mite infestation.
Scale
Spider mite
Mealybug
Here in Ontario, home gardeners are quite limited in the choice of pest control products. But we can get insecticidal soap and horticultural oil—and both of these are all that you need for curry leaf tree pests.
Before moving potted plants indoors for the winter, I spray three times, leaving a few days between each spray.
Soap and oil are good insecticides, but they don't kill eggs. The repeated spraying catches newly hatched critters.
If things go well, you won’t have pests indoors over the winter. But…sometimes it happens. On a couple of occasions I’ve paraded my potted plants outdoors on a mild winter day so I can spray for spider mites. (I’m talking about temperatures above 10°C.) Failing that, I know people who do mid-winter sprays in the shower!
Indoors, if there’s a way to keep the humidity higher, it makes conditions less ideal for spider mites.
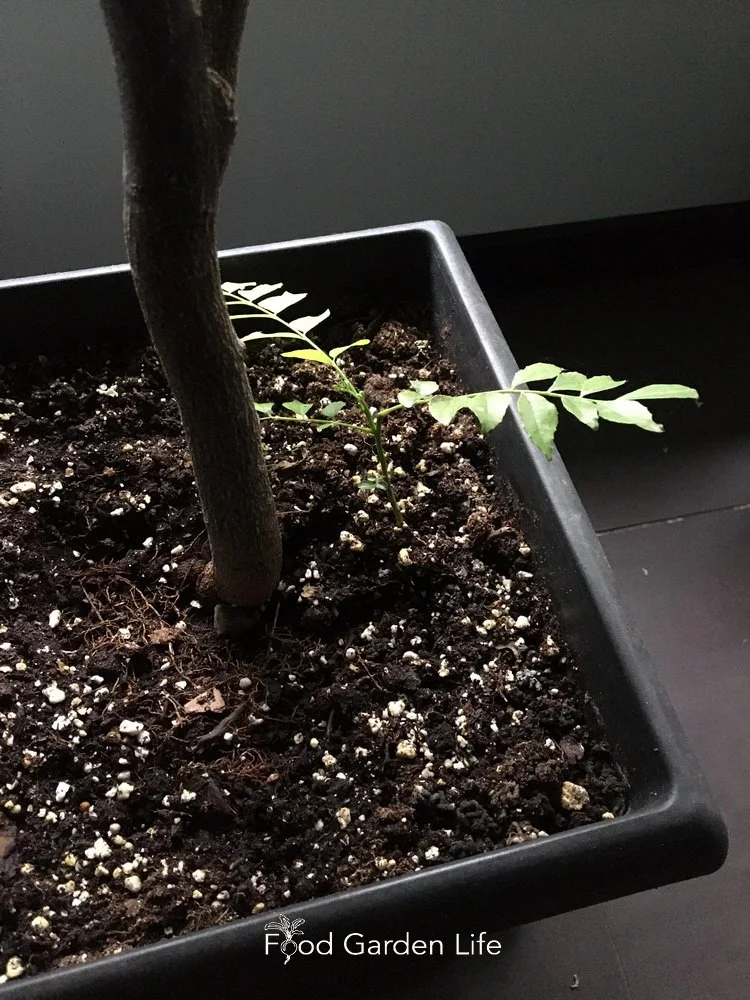
Curry leaf plant seedling growing at the base of a larger plant.
Propagation
Planting Curry Leaf Plant from Seeds
The easiest way to get started with a curry leaf tree is from someone who has a mature plant that’s dropped seeds into the pot. Then, young plants spring up on their own. That’s how I got started with curry leaf tree.
They are easy to grow from fresh seed—so if your plant makes seed, share with friends.
You can also propagate curry leaf tree by cuttings.
Where to Get a Curry Leaf Plant
If you have friends or neighbours with a curry tree, that’s a good place to start, because seeds that drop to the soil often grow at the base of the parent plant. Simply pot them up!
Check out our sources guides to find nurseries selling exotic plants such as curry tree, citrus trees, figs, and olive trees.
Harvest and Use
Pick fresh curry leaves as needed year-round.
I like fresh leaves the best. But curry leaves can also be frozen or dried for later use…although no need to do this if you have a plant growing in the kitchen. Then you’ll have a constant supply!
Pin this post!
Top Tips for Curry Leaf Tree
Pinch young plants to encourage branching if you want a multi-stemmed plants.
Spider mites love curry leaf trees…so keep your eyes open for them if overwintering in a centrally heated, dry space! (Grab a magnifier, and look on the undersides of the leaves.)
Curry Tree FAQ
Why are there two botanical names for curry tree?
It's common to find more than one botanical name used for a plant. Plant taxonomists continually regroup and rename plants. And because they don’t always agree with each other, home gardeners get to enjoy Latin-name overload.
Does it have medicinal properties?
Curry leaves are used in ayurvedic medicine. I’m not an expert on its medicinal properties, so I’ll say nothing more.
How do I make my curry leaf plant bushy?
If starting with a young plant, pinch out the tip early on to get it to branch out. If your curry leaf plant is already tall, you can prune it back quite drastically. It will bounce back.
Why is my curry leaf plant losing its leaves?
This is common when overwintering the plant in cool, indoor conditions. As days get longer and growth restarts with warm temperatures, you won't have to worry about leaf production.
Find This Helpful?
Enjoy not being bombarded by annoying ads?
Appreciate the absence of junky affiliate links for products you don’t need?
It’s because we’re reader supported.
If we’ve helped in your food-gardening journey, we’re glad of support. You can high-five us below. Any amount welcome!
More on Growing Exotic Edibles
Interview
Tune in to this episode of the Food Garden Life show to hear about growing guava, yacon, starfruit, cinnamon, curry leaf, and black pepper.
Articles
Find out about other exotic edible crops for cold-climate gardeners.
Courses on Growing Exotic Crops in Cold Climates
Here are self-paced masterclasses to help you grow figs and lemons:

Books on Exotic Crops
Meyer Lemon Tree: Planting, Care, and Growing Guide
Meyer Lemon Tree: Planting, Care, and Growing Guide
By Steven Biggs
This Little Lemon is Absolutely Prolific!

50 Meyer lemons on a knee-high bush.
The branches hung to the ground under the weight of the fruit. The bush was yellow with fruit. Not a single branch broke under the weight of the fruit. Meyer lemon trees are work horses. If you want to grow your own citrus, it's what I recommend starting with.
'Meyer' lemon (Citrus x meyeri) is the lemon that's not fully a lemon.
It's a hybrid between a lemon and an orange or mandarin orange. While the leaves of Meyer lemon trees look like true lemon leaves, the fruit are thin-skinned, taking on an orange tinge as they ripen.
I love the mild taste of the fruit and the distinctive smell of the rind. It makes an unbeatable sorbet.
Here's my Meyer lemon sorbet recipe.
Lemons and Meyer Lemons are the fruits I recommend for first-time home citrus growers. They're the gateway citrus trees. They're easy to grow, and have a better chance of ripening in the short summers we get in cold climates.
Here are more reasons that lemons are a good choice for gardeners in cold climates.


Learn How to Easily Grow Meyer Lemon Trees in Pots
Meyer lemon trees are a great choice for cold-climate gardeners who want an exotic crop. They have a compact, bushy form that makes them suitable for growing in a pot, and they're quite cold hardy—more cold hardy than true lemons. (See more about hardiness below.)
In northern gardens Meyer lemon is usually grown as a potted plant...but there are gardeners pushing the boundaries in warm zones.
Potted Meyer Lemon Size
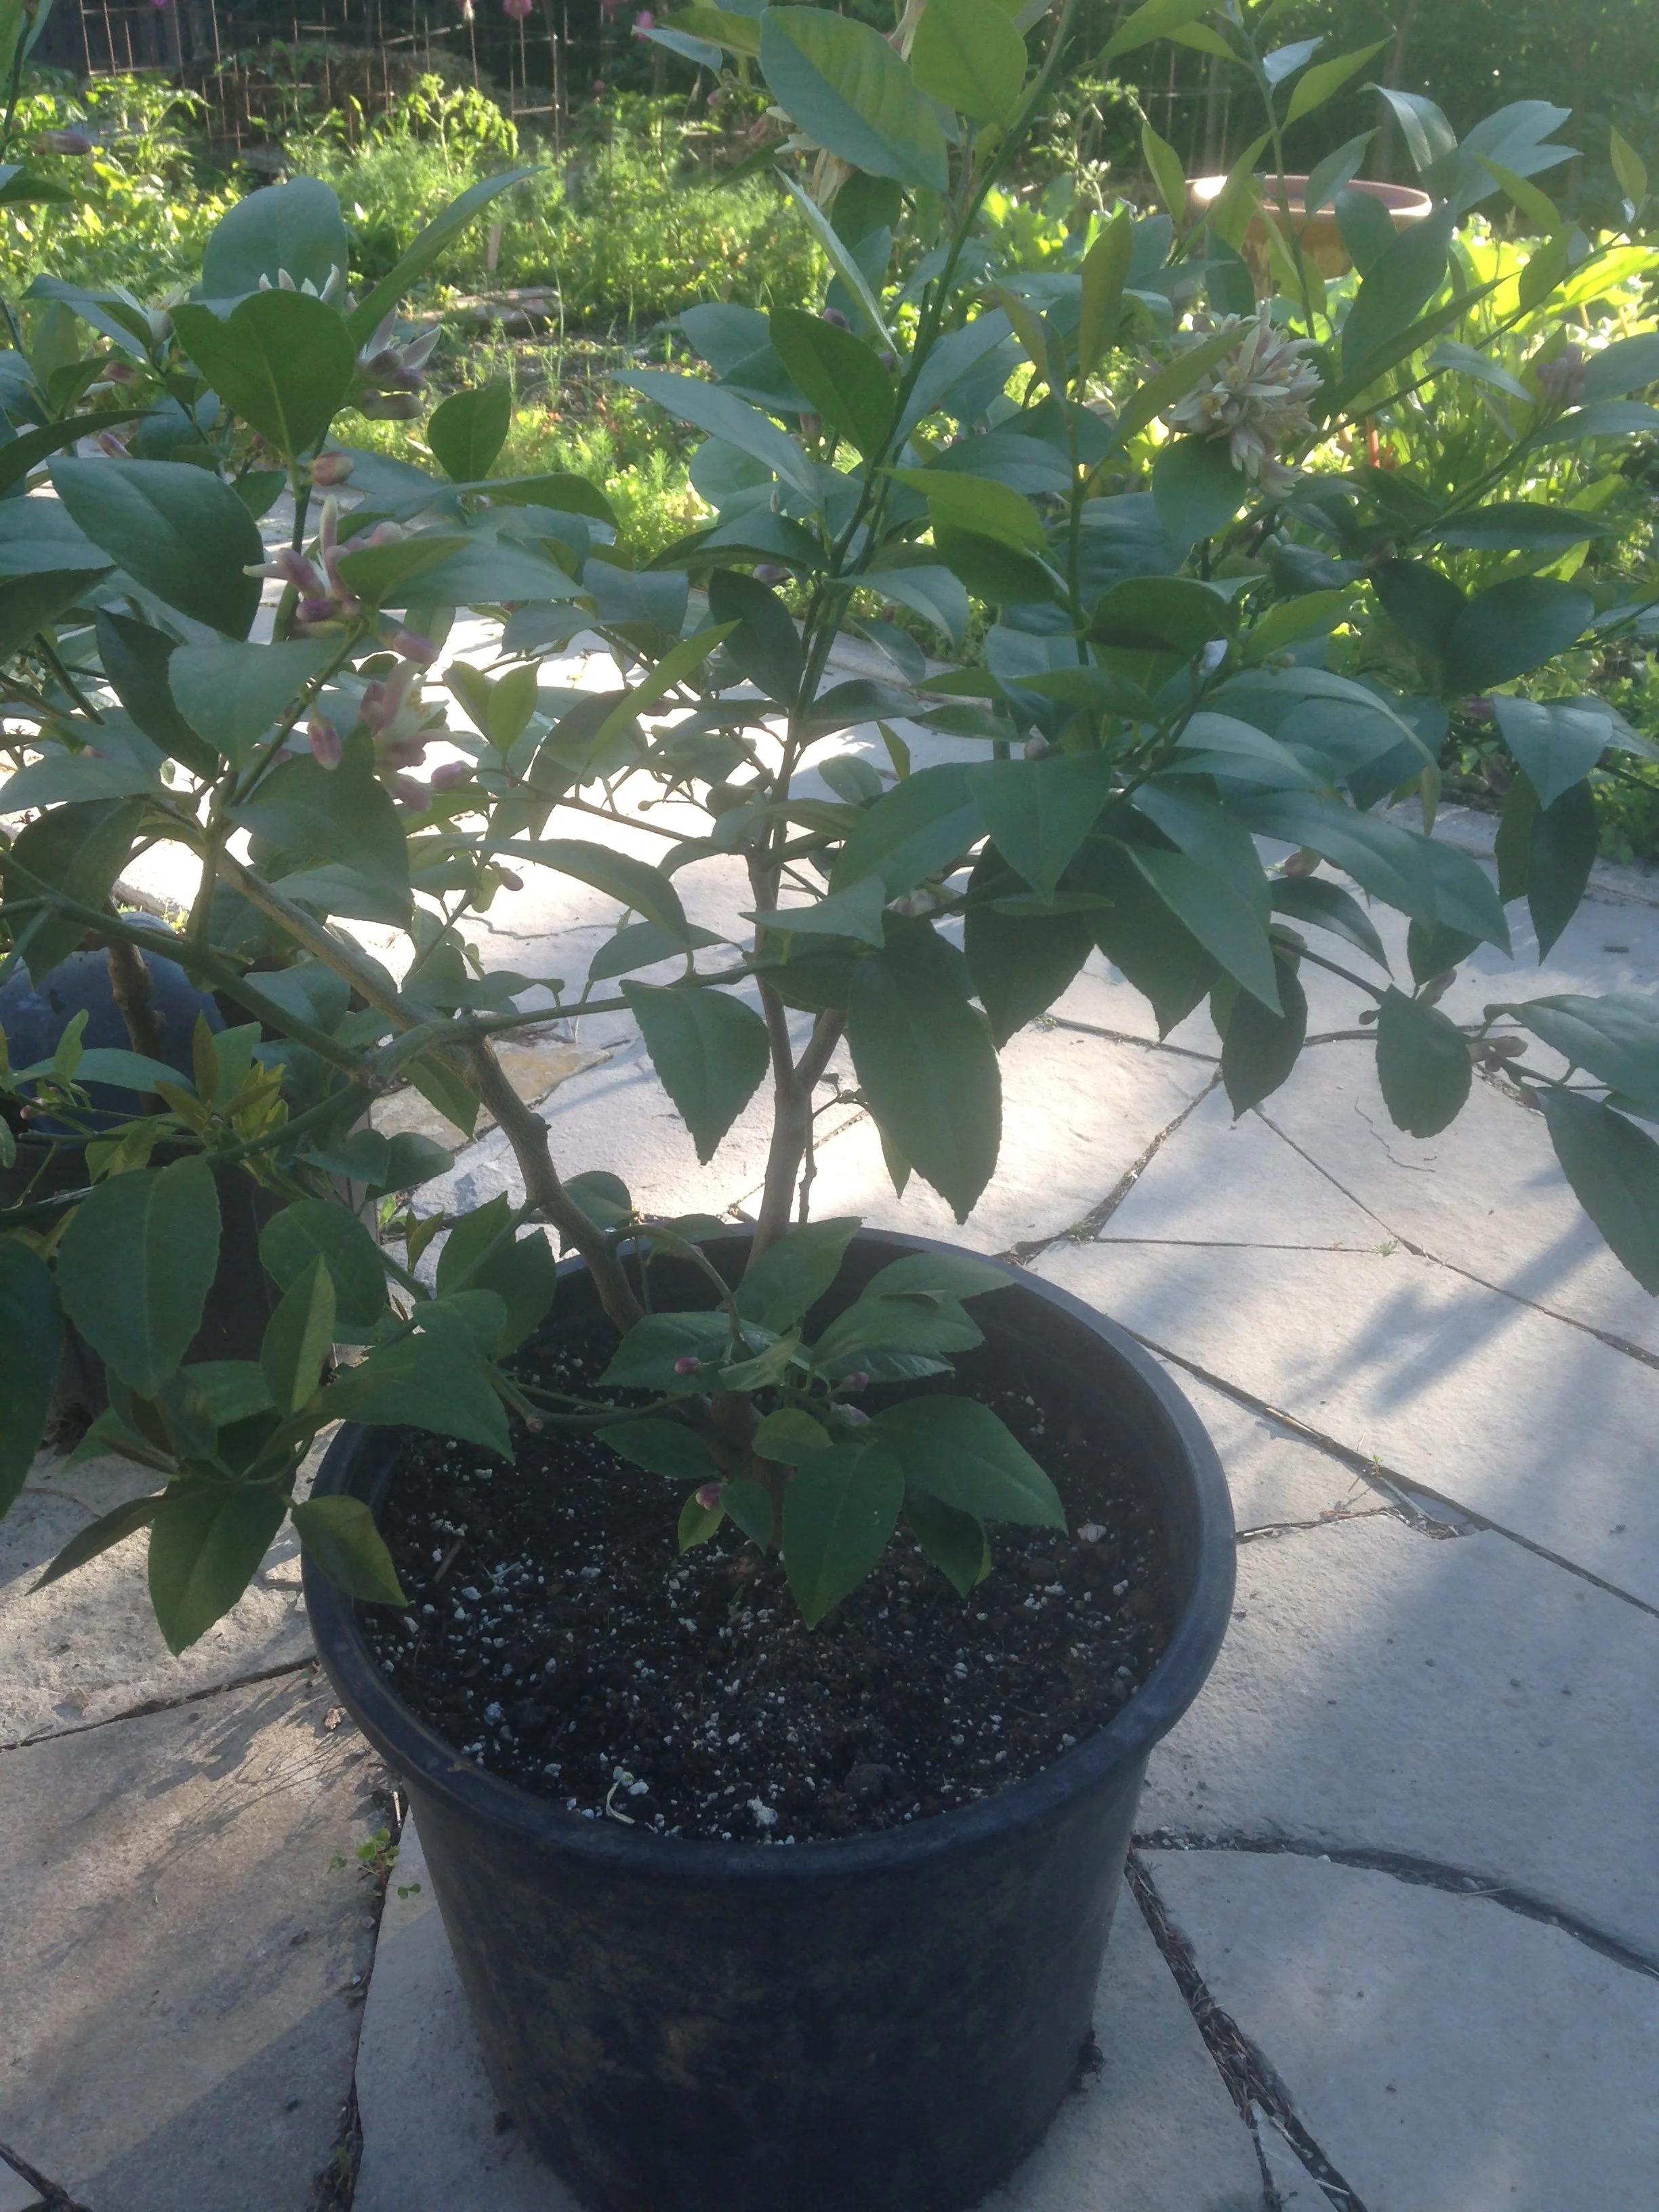
This full-grown potted Meyer lemon is pruned into a bush form to keep it compact.
When it comes to the size of the plant, you’re the boss. You control plant size with pot size and pruning. Think of bonsai, where a decades-old tree is only knee high.
The other thing that affects size is the rootstock; some types of rootstock are dwarfing and keep a tree smaller. Meyer lemon trees sold in garden centres are often on dwarfing rootstock.
Meyer Lemon Tree Care
While it's outdoors over the summer, keep your Meyer lemon tree in a sunny location.
As with any potted plant, your pillars of success are:
Suitable pot size
Good potting soil
Regular feeding
Proper watering
If you get these four things right, you'll keep your Meyer lemon tree happy.
Here's a full guide to growing a potted lemon tree year round and getting the conditions right.
Keep Your Lemon Tree Through the Winter
And enjoy fresh homegrown lemons!
Watering a Meyer Lemon Tree
When it comes to watering Meyer lemon trees, more is NOT better.
Meyer lemon trees hate wet feet. That's another way of saying that when the soil is constantly wet, the roots can die.
I aim to keep the soil of my potted Meyer lemon trees on "the dry side of moist." Keep the soil moist but not soggy.
If you're in doubt, wait another day before watering. Lift up small potted lemon trees and let the weight help you gauge how dry the soil is.
Find out more about how to water a lemon tree so that it thrives.
Feeding
Potted lemon plants must be fed! There's a small volume of soil feeding the whole plant.
Start feeding in the spring, when new growth begins. Cut back on feeding in late summer as cooler temperatures and less light cause plant growth to slow.
There are many fertilizing products on the market. And each lemon grower has a favourite formula.
Not sure where to start?
Look for “all-purpose” or “general-purpose” product. Make sure it has micronutrients
Decide what suits your style of gardening (do you want to mix solutions regularly – or apply slow-release fertilizer granules just once in the spring)
Find out more about feeding and micronutrients in this article.
Repotting Meyer Lemon Trees
Mature Meyer lemon trees don’t need to be repotted annually. Just replace the top few centimetres of soil every couple of years. Faster growing young Meyer lemon trees can be moved to a bigger pot each year if the roots have filled the current pot.
Soil structure breaks down over time, so you will eventually want to repot mature Meyer lemon trees in new potting soil.
Meyer Lemon Tree Pollination
Meyer lemon flowers have both male and female parts and are “self-fertile.” That means you don’t need pollen from a different lemon tree for a Meyer lemon tree to bear fruit.
If the plant is outdoors over the summer, insects and wind move the pollen. You don't have to help with pollination.
Pollinate flowers on lemon trees growing indoors using a small paintbrush.
Keep Your Lemon Tree Through the Winter
And enjoy fresh homegrown lemons!
Propagating Meyer Lemon Trees
Growing Meyer lemon trees from seed is easy...but be prepared to wait years for fruit. That's because seed-grown plants go through a juvenile stage before they begin to flower and fruit.
To get fruit more quickly, buy a plant, or root a cutting from a mature plant. (Meyer lemon trees grow well on their own roots, so it's not necessary to graft them.)
Meyer Lemon Challenges
Insect Pests
Outdoors, pest problems are usually minimal. It's when a potted Meyer lemon tree is indoors for the winter that you're more likely to encounter pests. Two common pests are scale and spider mite.
Watch for spider mites when overwintering lemon plants indoors at room temperature. That’s because spider mites do well in the dry air in centrally heated homes.
Find out more about controlling scale and spider mite on lemon trees.
Leaf Drop
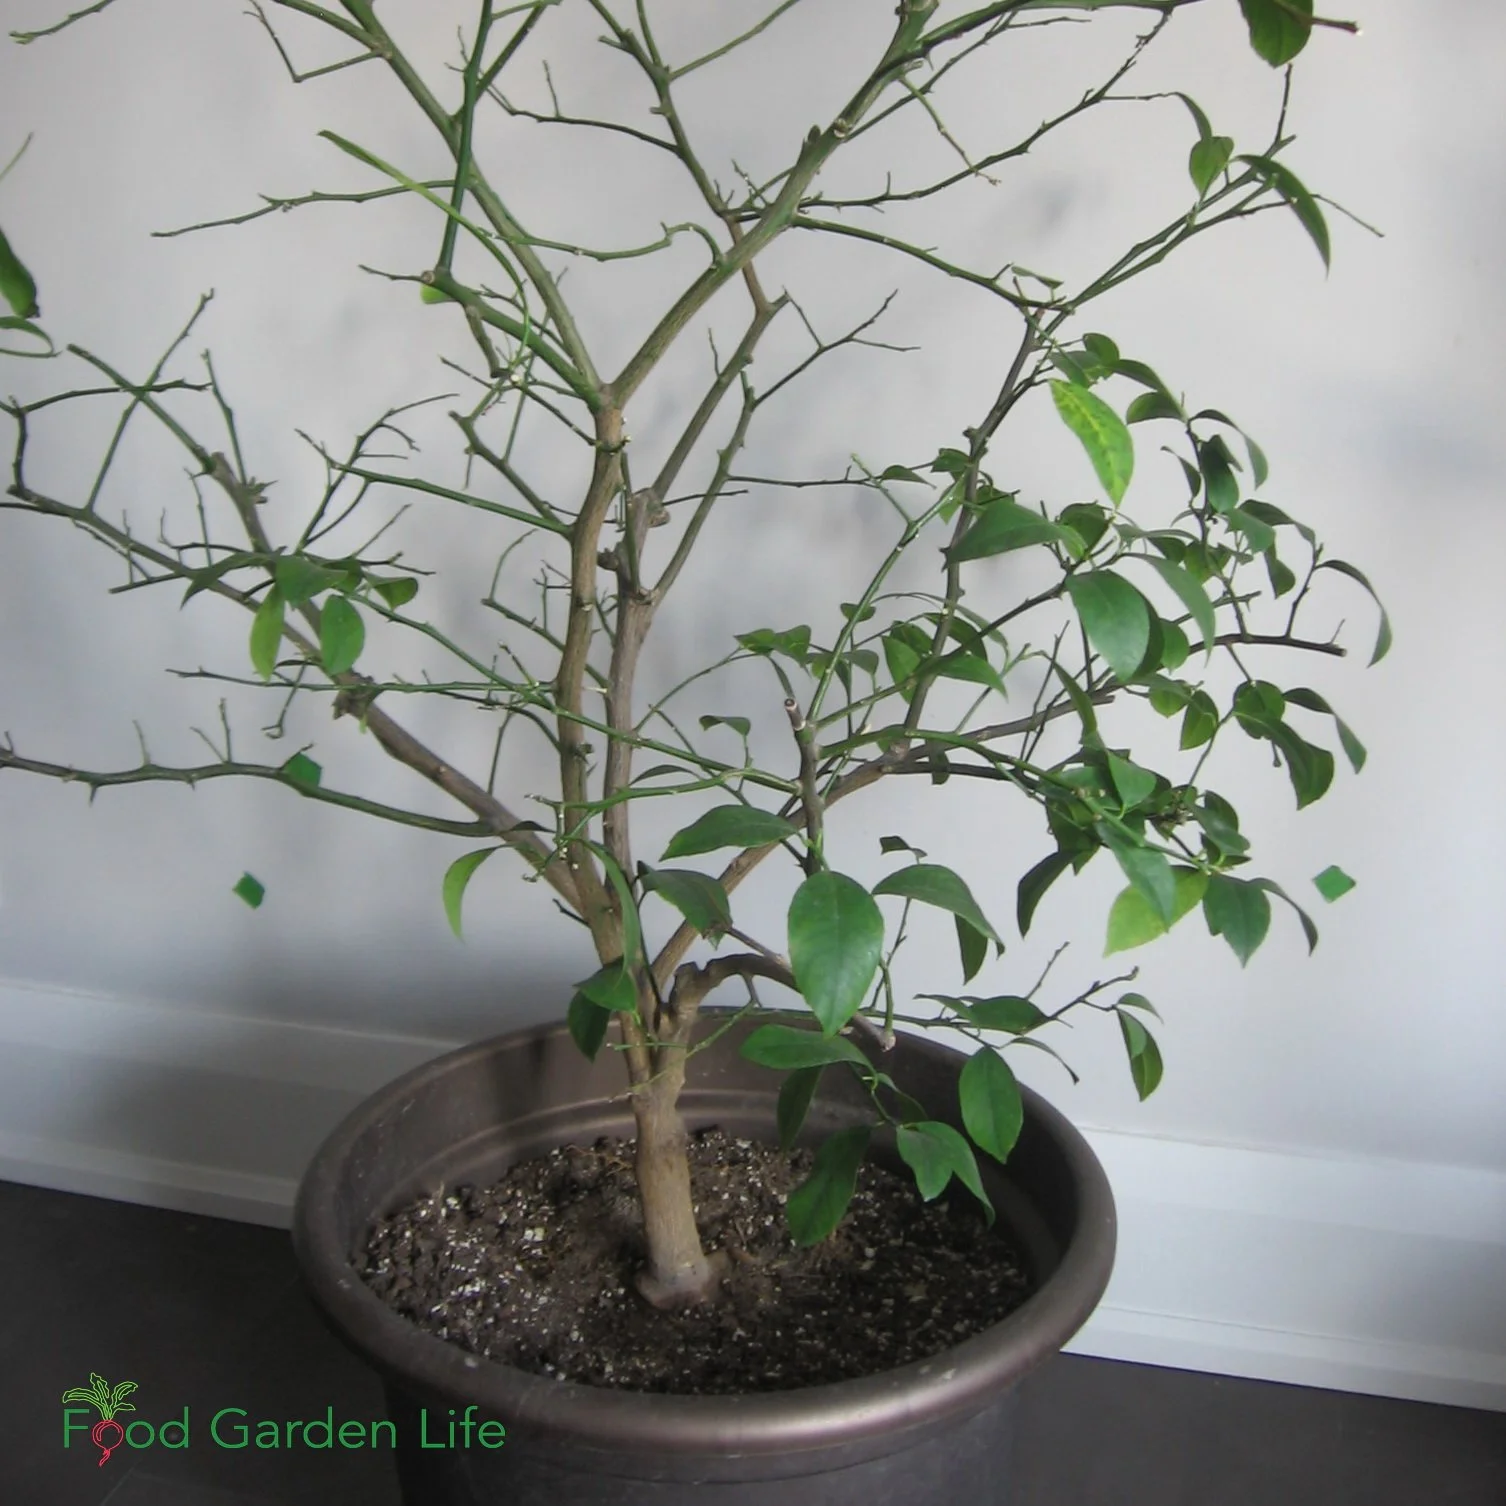
Leaf drop is common when Meyer lemon trees are brought into warm, centrally heated homes.
On more than one occasion, I’ve had a naked Meyer lemon in my kitchen over the winter. It reminded me of the Grinch's Christmas tree!
When Meyer lemons are brought into the house in the autumn, expect leaves to drop. It's normal. The warm, dry air in centrally heated homes is not ideal.
Higher humidity helps reduce leaf drop.
If you want less leaf drop, cool, bright overwintering locations are ideal. (See below for ideas.)
Fruit Drop
Some fruit drop is normal when the fruit are still pea-sized. If only a few little lemons drop, it's nothing to worry about.
If all the fruit drop off, that's not normal. Two common causes are poor pollination and not enough water.
Meyer Lemons Over the Winter
Meyer Lemon trees are evergreen and keep leaves through the winter. (As I note above, if your plant is unhappy in the house, it might drop quite a few leaves.)
Meyer lemon plants tolerate more cold than many people realize (see below). When they are in cold conditions, they also tolerate darkness, because the plant stops growing.
Cold Tolerance
Meyer lemon is hardy to about -6°C (21°F). Hardiness is never exact, so expect younger growth to be more tender and susceptible to cold.
But the important temperature to remember is the temperature at which the fruit is at risk of freezing, around -3°C (27°F)
Indoors
Consider moving Meyer lemon trees indoors earlier rather than later, so there is less of a drastic change in temperature and humidity. This helps to minimize leaf drop.
While the fragrance of the flowers makes it nice to have Meyer lemons in a bright kitchen or living room window, you might have other options:
What about a cool, bright attic window?
A cool sunroom with a temperature just above freezing
A cold, dark garage or shed
Find out more about how cold a lemon tree can get during the winter.
Indoors – Care over Winter
Keep soil on the dry side of moist
Too much water can rot the roots
Higher humidity helps minimize leaf drop and make conditions less suited to spider mites
Watch for scale and spider mites
Meyer Lemon FAQ
Why is my potted Meyer lemon tree turning yellow?
There are a few things that can cause this. It could be not enough nutrients in the soil. It could also be that the soil is too alkaline, so that plant can't take up the nutrients that are in the soil. But another common cause is overwatering—which kills the roots and sends the tree into a downward spiral.
What time of year do you repot Meyer lemon?
The best time to repot Meyer lemon is in the spring, just before new growth begins.
Are bees needed to produce fruit?
If you put your tree outdoors for the summer, bees and other insects will take care of pollination. When the tree is indoors, you can pollinate the flowers using a cotton swab.
Can I grow a lemon tree indoors in Canada?
Yes! Here's what you need to know.
Should I mist my Meyer lemon tree?
If it's growing in a centrally heated home with dry air, misting is a simple way to raise humidity.
If I want to propagate my Meyer lemon tree myself, do I have to graft or can I root cuttings?
You can root Meyer lemon cuttings. Your rate of success is better if you use rooting hormone and apply bottom heat (e.g. with a heat mat.)
What is an Improved Meyer Lemon tree?
The original Meyer lemon tree was introduced to North America in the early 1900s. ‘Improved Meyer’ is more disease-resistant than the earlier variety.
Find This Helpful?
Enjoy not being bombarded by annoying ads?
Appreciate the absence of junky affiliate links for products you don’t need?
It’s because we’re reader supported.
If we’ve helped in your food-gardening journey, we’re glad of support. You can high-five us below. Any amount welcome!
How to a Grow a Mulberry Tree
How to grow mulberry in cold climates.
By Steven Biggs
Fowling in Love with Mulberry
My neighbour Hubert handed me a pheasant and a duck from his freezer. I was working for the summer in a rural part of the UK, and regularly saw pheasant when I went out for a jog. Now I’d get to taste one!
As a 20-something-year-old, I’d never cooked either before…and had never even tasted pheasant.
But I remembered reading that the meat is rich and dark, well-suited to a tangy accompaniment.
And I remembered a mulberry tree in a nearby hedgerow.
I’d been grazing fruit from the mulberry tree every time I walked past it. But I had yet to cook the mulberry fruit.
This was my chance! Not really sure what I was doing, I made up a mulberry-Cointreau sauce for basting the roast. The company I had for supper thought it was pretty good.
Roasted fowl with mulberry-Cointreau sauce cemented my appreciation for the taste of mulberry.
Mulberry for Home Gardens
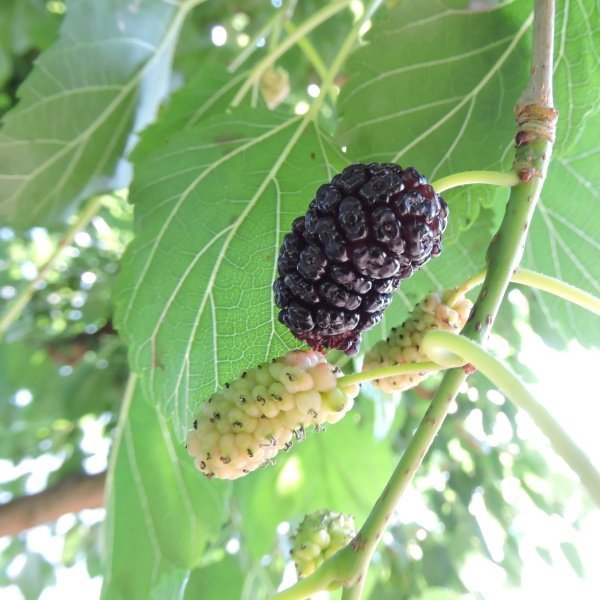
There are many types of mulberry suited for gardens in cold climate. Photo by Grimo Nut Nursery.
Mulberries gets a bad rap. Mention mulberries and many people picture polka-dot-stained sidewalks and bird-bespattered cars. Or experienced gardeners worry that it’s a weedy plant.
Why is it that gardeners always want what’s difficult to grow? Why not appreciate what grows on its own?
This fruit does not play hard-to-get.
Mulberry is a great fit for home gardens because it’s:
Fast-growing
Hardy
Problem-free
Tolerant of many conditions
Very fruitful
And it’s a fruit that you likely won’t find for sale at grocery stores. Too fragile to ship when ripe.
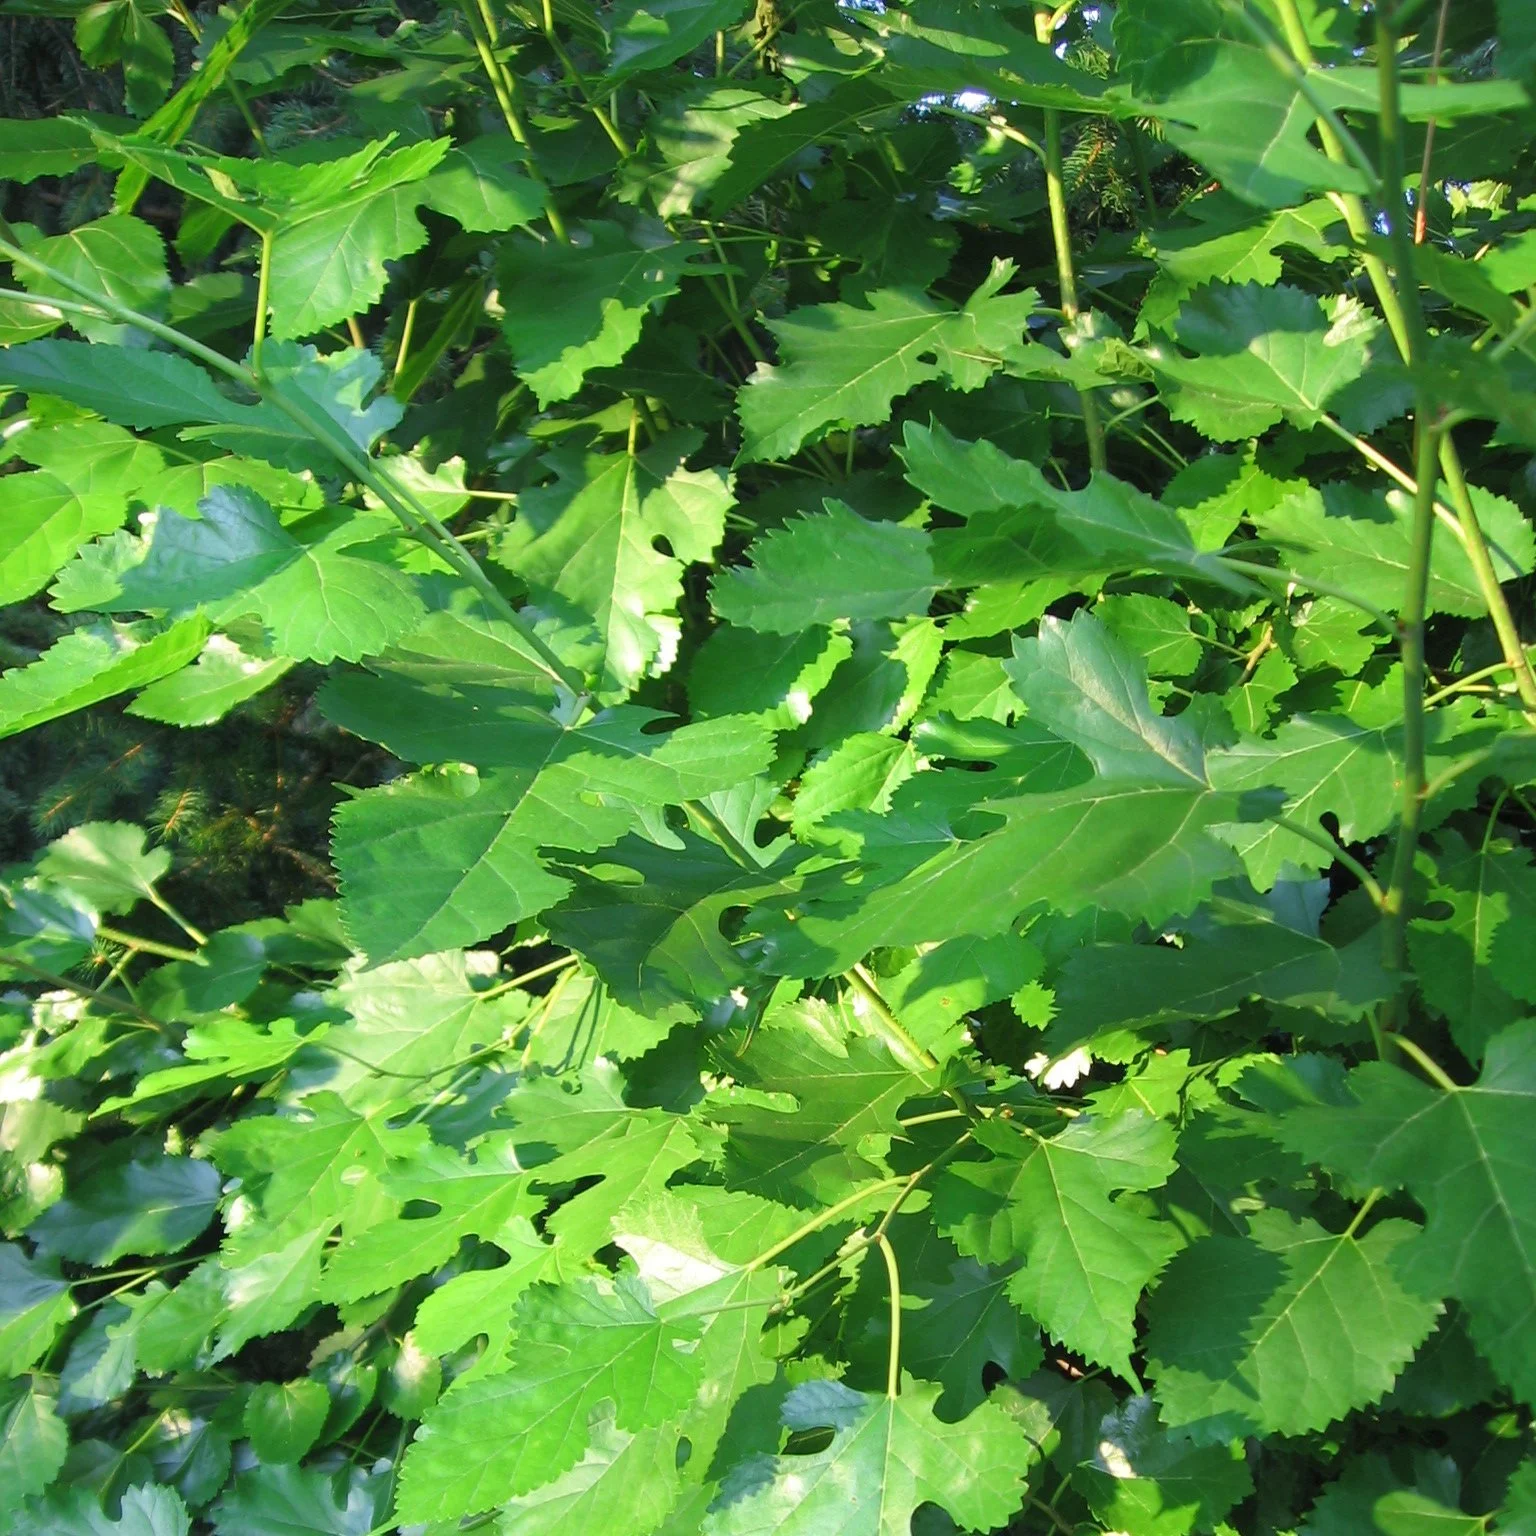
Too bad mulberries get a bad rap for being vigorous growers.…and for the purple stains from falling fruit. They’re a great fruit for home gardens in cold climates.
What does a Mulberry Tree Look Like?
What does it look like? The question should really be, “What does a mulberry tree look like when pruned to feed people, not birds. (More on that below.)
Don’t grow this as a specimen shade tree. There are nicer shade trees out there.
Grow mulberry as a fruit-producing crop – which means you’ll keep it much smaller than if left unchecked.
Types of Mulberry for Cold Climates
Mulberry names don’t describe the fruit colour. That means a white mulberry tree could be black-fruited, red-fruited, or white-fruited.
If you’re shopping for a mulberry tree, here at the three types you’re likely to find in North America:
• White mulberry (Morus alba)
• Red mulberry (Morus rubra)
• Black mulberry (Morus nigra)
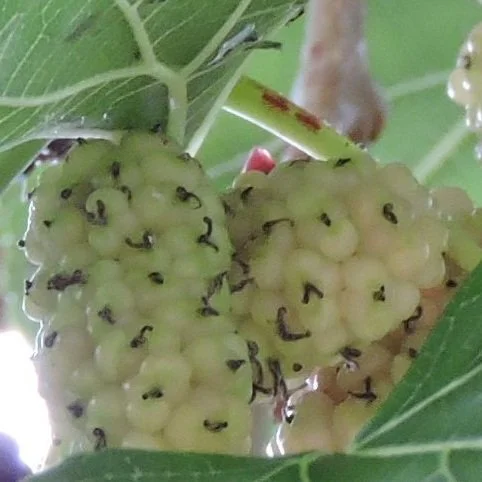
Mulberry names don’t describe the fruit colour. While this ‘Carman’ white mulberry fruit is white, other white mulberry varieties can be purple or black. Photo by Grimo Nut Nursery.
For cold-climate fruit growers, it’s the white mulberry and its hybrids with the red mulberry that are hardiest, some into USDA zone 4.
I’ve read articles in British gardening magazines that disparage the less flavourful white mulberry…but it’s what we have.
White mulberry can grow up to about 15 metres (50’) tall. Because it grows easily from seed—and because birds quickly spread the seeds—feral white mulberry trees are common. (It’s considered a weed tree in some jurisdictions.)
Red mulberry is a native of North America. Pure red mulberry trees are rare because feral white mulberry and red mulberry hybridize readily. Here in Ontario, where red mulberry is native in the south of the province, its threatened by the white mulberry due to their promiscuous hybridizing.
The more diminutive black mulberry, noted for the quality of its fruit, is less hardy, and not suited to northern gardens. It’s suited to conditions in USDA zones 6 and higher.
Other thoughts on selecting a mulberry tree:
There are weeping varieties that get to about 3 metres (10’) tall and can be perfect for small-space gardens (just beware, as there are fruitless varieties of weeping mulberry on the market)
There are dwarf varieties that get to about 6 metres (20’) tall
White-fruited varieties might be the ticket is you’re averse to mulberry stains
‘Illinois Everbearing’ is noted for having a long season of fruiting
Plant a Mulberry Tree
Mulberry trees fend for themselves quite well once established, but here are things you can do to give them a good start.
If you’re planting a container-grown mulberry tree, the first thing to do is look at the roots. Because mulberry is a vigorous grower, it’s common to find roots tightly wound around and knitted together.
Use your fingers to tease apart the roots. We want the roots to grow outwards into the surrounding soil once planted, not continue to grow around in circles.
Water well when first planted and until established.
Pruning Mulberry Trees
Many sources suggest that regular pruning is not necessary with mulberry.
That’s fine if you want to feed the birds.
But if you’re growing the mulberries for yourself, I suggest a different approach: Be aggressive – and do it every year.
Your goal is to create a permanent scaffold of branches that you cut back to every year (see below).
Formative Pruning

Grow mulberry trees in an umbrella shape, so you can reach all of the fruit. Photo by Grimo Nut Nursery.
The best way to get a tree with a well-arranged scaffold is to make it yourself. Get a whip, which is a young, unbranched tree. (You probably won’t find this sort of tree at a garden centre; look for a specialist fruit-tree nursery.)
Then prune that whip so that it grows into a spreading tree. Think short and wide.
Start this pruning process by removing the “leader,” which is the growing tip of the tree. Linda Grimo, at Grimo Nut Nursery, a specialist nursery, suggests, “Stand as tall as you can with your pruners in your hand and clip off the top of the tree.” She explains that this stops it from growing upwards, and encourages the growth of side branches at a height you can reach without a ladder.

Umbrella-shaped mulberry tree in summer. Prune hard to keep berries at picking height. Photo by Grimo Nut Nursery.
Grimo says she likes to grow mulberry trees in an umbrella-shaped scaffold, with side branches (laterals) spaced out around the tree. For ease of getting under the tree to pick, don’t grow the side branches too low on the tree; her preferred height is just over a metre (4’) above the ground.
Annual Pruning
Mulberry trees growing in good soil put on a tremendous amount of growth every year. After formative pruning is complete, prune back almost all of the new growth every year, leaving just 1-2 buds from which the tree can send up replacement shoots.
This harsh pruning doesn’t affect cropping because fruit forms on new growth. “Don’t be afraid, you can’t kill a mulberry tree,” is what Grimo tells concerned first-time mulberry growers.
Prune in late winter, when dormant.
Mulberry Tree Feed and Water
Mulberry trees have extensive root systems, which means that they can do quite well without coddling.
Mulch with compost around the base of the tree to feed the soil and suppress weed growth.
Landscape with Fruit
That’s easy to grow in a home garden!
Mulberry Tree Pollination
Mulberry trees are self-fertile, which means you only need one tree to get fruit.
The small, unremarkable flowers are wind pollinated. (There are even some varieties that set fruit without pollination.)
Mulberry Tree Propagation

Dwarf or weeping mulberry varieties are well-suited to use in small-space foodscapes, even in more traditional gardens.
Mulberry plants grown from seed will be different from the parent plant. Just like apples. There is a juvenile period before a seed-grown mulberry tree will flower and produce fruit, often 5-10 years.
It’s easy to grow from seed. In fact, this is a tree that might just seed itself in your garden.
I don’t recommend growing mulberry from seed, because you don’t know what the fruit quality will be like—and you’ll have to patiently wait through that juvenile stage.
Another unknown if growing from seed: Some mulberry trees are dioecious, meaning male and female flowers are on separate plants…and that could leave you with a tree that doesn’t bear any fruit.
If you want good fruit quickly, start with a known variety. Clonally produced trees—grafts and cuttings—can fruit right away because the clone is from a mature tree, and no longer in the juvenile stage.
Some nurseries propagate mulberry by cutting, some by grafting. For grafting, Grimo says cleft grafts work well. Propagation from cuttings can be more challenging for home gardeners without a misting system, bottom heat, and rooting hormone.
Mulberry Trees in Garden Design
Mulberry trees are quite versatile in garden design. Here are ideas for using mulberry trees in the landscape:
Dwarf or weeping varieties are well-suited to use in small-space foodscapes
Large, minimally pruned mulberry trees can be used for a canopy layer in a food forest
Smaller mulberry varieties can fit a forest-edge niche in a food forest because the tree tolerates partial shade
From a permaculture perspective, mulberry is an interesting option because along with fruit, it can provide poles and animal fodder (see below)
Mulberry for More than the Fruit
Because it grows very quickly, mulberry is well suited to pollarding and coppicing techniques. Here are branches from my neighbour’s mulberry pollard that I use as poles in the garden.
Mulberry is an excellent tree choice if you’re gardening with a permaculture mindset.
My neighbour Troy used to give his mulberry tree a harsh haircut every year. The long, straight branches made excellent poles that he gave me for staking plants and making trellises.
He grew his tree as a “pollard,” meaning he lopped off all of the growth a few feet above the ground. (Pollarding is often done with catalpa trees, for ornamental purposes.)
The other twist on this idea of using your mulberry tree to produce poles, is to grow it as a “coppice.” Coppicing is when you cut off a tree close to the ground to get it to send out lots of stems. Coppicing has traditionally been used to produce wood for baskets, fences, and fuel.
Mulberry Tree Location
Mulberry trees prefer full sun and rich soil. But they tolerate partial shade and a variety of soils.
And much worse.
To say they’re forgiving of poor conditions is an understatement.
I’ve seen lovely mulberry trees growing between cracks in the pavement. They do amazingly well in inhospitable locations. As I write this I’m looking out the window at the self-seeded mulberry tree in my front garden that I’m training into an espalier. It’s growing right underneath a row of spruce trees, hardly an ideal location. But it persists!
So save the prime real estate in your garden for plants that really need it. Your mulberry isn’t fussy. And, remember, pick a spot where purple spotting is not a nuisance.
The one thing to avoid is standing water. Pick a well-drained location, though occasional wetness is fine.
Challenges
Your mulberry tree will be a bird beacon.
Got a white car? Hanging out clothes to dry?
Then you might want to net the tree to keep away the birds. Netting is easier to do when you’ve grown a compact mulberry tree.
Harvest and Store Mulberries
If you’ve started with a tree grown from a graft or cutting, you might start getting fruit in as little as 2-3 years.
Not all the fruit on a tree ripens at the same time. As they ripen, fruit fall to the ground.
White mulberries can be very sweet, while black mulberries are more balanced, with some tartness. I prefer white mulberries a little bit under ripe—while they’re less sweet. (Remember, a white mulberry tree can have black fruit!)
A couple notes on picking mulberries:
The fruit are fragile, and the juice easily comes out of the fruit when picked…so expect red hands if it’s a dark-coloured variety
Ripe fruit will drop from tree as you pick
A common recommendation when harvesting from large mulberry trees with many unreachable fruit above is to place a sheet on the ground and shake the branches.
The fruit has a short life once picked. There’s a little stem on it – and you can eat it stem and all.
Here are 6 simple ideas to grow lots of fruit in a home garden.
Mulberries in the Kitchen
You can use mulberries raw, use them in preserves, or cook them. Here are ideas:
Mulberry pie
Mulberry wine
Mulberry cobbler
Mulberry liqueur
Dried mulberries (great in a trail mix!)
Mulberry juice
Mulberry FAQ
How fast do mulberry trees grow?
Mulberry trees grow very quickly.
Where do mulberry trees grow?
White mulberry and its hybrids are suited to cold-climate gardens into USDA zone 4. Black mulberry is less cold-tolerant.
Can you grow a mulberry tree from a cutting?
Yes. You can grow mulberry trees from cuttings.
Do mulberries grow on trees or bushes?
Mulberries naturally have a tree form, but you can prune to encourage branching and a bush-like shape.
Can you grow a mulberry tree in a pot?
Cold-climate gardeners who are determined to try black mulberry can grow it in a pot that is stored in a protected area over the winter.
How do you keep a mulberry tree small?
Prune it very aggressively every year.
Do mulberry trees grow near black walnut trees?
Mulberry trees are not affected by the compound “juglone” that is given off by black walnut trees. So if a black walnut tree has limited your growing options, consider mulberry.
Find out more about gardening where there’s walnut toxicity.
Find This Helpful?
Enjoy not being bombarded by annoying ads?
Appreciate the absence of junky affiliate links for products you don’t need?
It’s because we’re reader supported.
If we’ve helped in your food-gardening journey, we’re glad of support. You can high-five us below. Any amount welcome!
More on Growing Fruit
Get our free guide with 6 ways to grow more fruit in your garden.
Articles and Interviews about Growing Fruit
Here are more resources to help you grow fruit.
Courses on Fruit for Edible Landscapes and Home Gardens
Home Garden Consultation
Book a virtual consultation so we can talk about your situation, your challenges, and your opportunities and come up with ideas for your edible landscape or food garden.
We can dig into techniques, suitable plants, and how to pick projects that fit your available time.
Mom's Rhubarb Pie Recipe
Mom’s rhubarb pie recipe. This is a very good rhubarb pie!
By Steven Biggs
Stalking Out the Best Rhubarb for Pie

In spring, Mom put an upside-down bushel basket over a corner of her rhubarb patch. The dark, warmer conditions within coaxed longer, rosy-red stalks from the rhubarb roots below.
Those rosy-red stalks made great rhubarb pie.
Ingredient for an Extra Special Rhubarb Pie
Mom’s spring-forced rhubarb made great pie because when you force rhubarb—when you grow it in warmer, dark conditions—you get stalks with a bright red colour. It’s quite different from the stringier, greenish-red stalks you get from rhubarb exposed to sunlight.
Along with the colour, the other thing about forced rhubarb is that it’s more tender. Cooked into a pie, it’s melt-in-your-mouth tender.
So I recommend forced rhubarb if you want an extra special rhubarb pie.
If not, though, regular rhubarb still makes great rhubarb pie. I share Mom’s recipe below.
Where to get Forced Rhubarb

Rhubarb I forced in my basement.
Force it yourself: You can force it in the garden, like Mom did—or you can even force it indoors over the winter.
Find out how to force your own rhubarb indoors over the winter.
Depending where you are, you might also be able to buy forced rhubarb in the winter and early spring.
Another Special Ingredient for Rhubarb Pie
Mom always added orange zest to her rhubarb pie. It’s a pairing that I love. I think they’re made to go together. The orange zest doesn’t blunt the tanginess of the rhubarb or disguise the flavour.
Because I grow potted citrus here in Toronto, I experiment with other types of citrus zest. Yuzu and Meyer lemon zest both work very nicely with rhubarb.
Hear about cold-hardy citrus such as yuzu.
Find out how to grow a potted Meyer lemon tree.
The Rhubarb Pie Crust
Mom used vegetable shortening. My wife, Shelley, swears by lard, like her grandmother taught her to use.
I’m not too sophisticated when it comes to pastry…but I appreciate a good one. If I’m in a rush, I just buy a pre-made pastry shell.
These days I have a rolling pin, but in my first kitchen, I rolled my pastry with a quart beer bottle. (Labatt 50 in case you’re wondering!)
Pastry-Related Tip
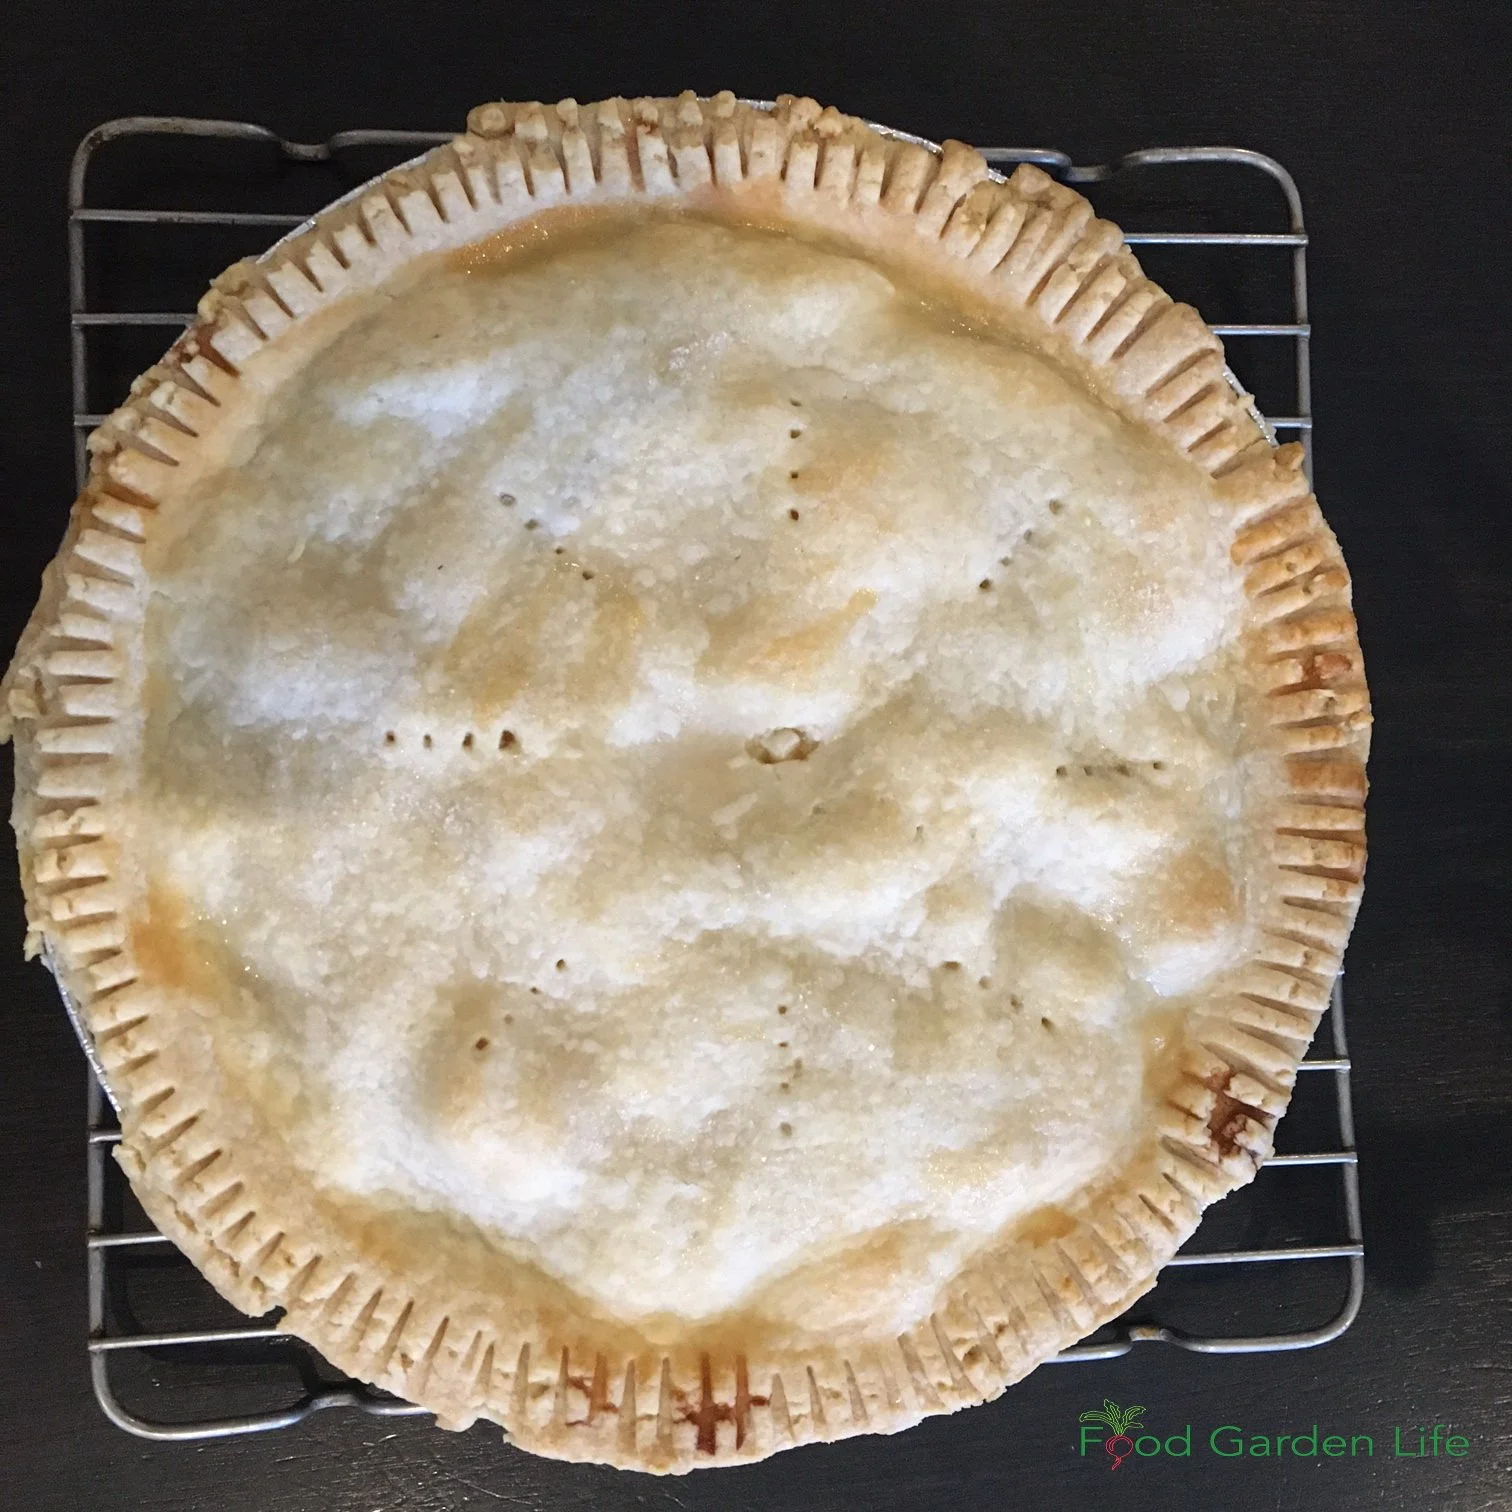
Something that I think works very nicely with rhubarb pie is sugar granules on the crust. It looks nice—and fits well with the sweet-and-sour in a rhubarb pie.
Here’s what to do:
Before you pop your pie into the oven, brush the top with milk, and then lightly sprinkle sugar over the top.
Serving Rhubarb Pie
Keep it simple.
Vanilla ice cream or whipped cream are all that I’d pair with rhubarb pie.
I was once served rhubarb pie with chocolate ice cream. Yuck! It hid the rhubarb flavour.
Soggy Bottom Crust and Rhubarb Pie
When I was learning to make pie, Mom explained why she liked to start off her rhubarb pie at a higher temperature. The higher temperature was to make sure the bottom crust isn’t soggy.
Because there’s a lot of moisture in rhubarb, it’s common to get a soggy lower crust. A blast of higher heat when you first start baking helps prevent that.
Rhubarb Pie Recipe
Ingredients
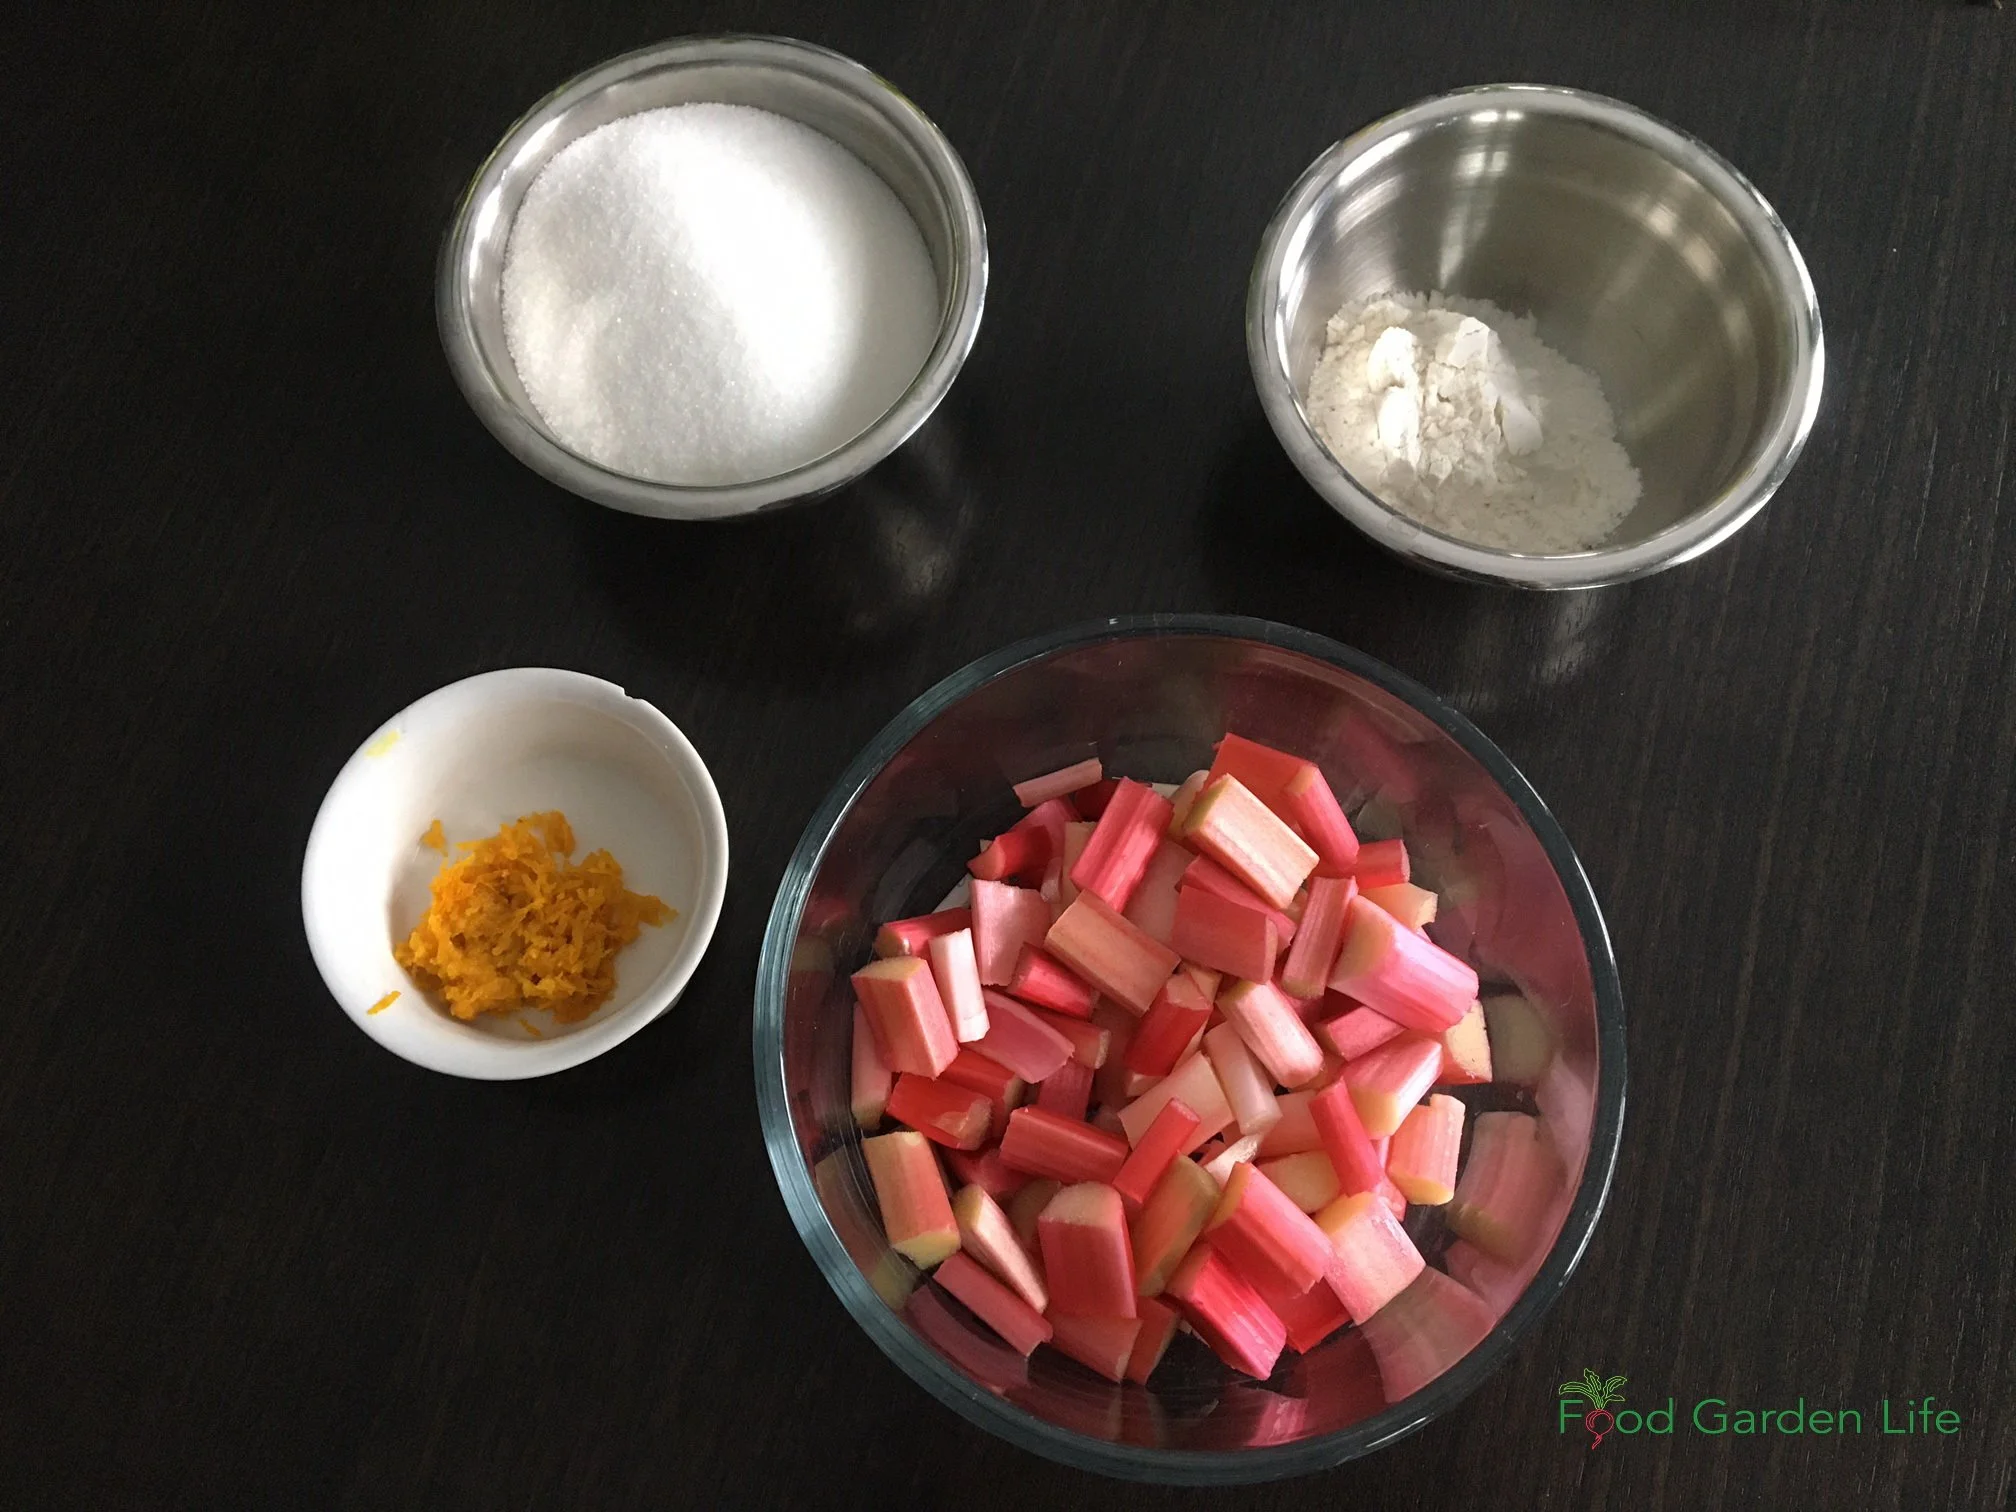
Only 4 ingredients in this easy-to-make rhubarb pie recipe.
4 cups chopped rhubarb
1 cup sugar (I actually prefer pie with ¾ cups of sugar, but Mom used a cup)
¼ cup flour
Zest of half an orange
Directions
Chop rhubarb into 2 cm (3/4”) pieces
Mix together ingredients
Place in a pie shell
Put on the upper crust (crimp well with a fork because this is a juicy pie, and you don’t want that precious juice coming out the side!)
Use a fork to poke some vent holes in the upper crush
Bake at 450°F for 10 minutes
Turn down the temperate to 350°F and bake 30 more minutes
More on Rhubarb
Hear farmer Brian French explain how he forces rhubarb.
Find out how to force your own rhubarb.
Did You Know?
Rhubarb looks great in an edible garden. My neighbour Chris planted it next to his pond because of the large tropical-looking leaves and the charming flowers.
If the idea of a garden that has edible plants woven into it, you might be interested in my Edible Garden Makeover masterclass.
Pin this post!
Find This Helpful?
Enjoy not being bombarded by annoying ads?
Appreciate the absence of junky affiliate links for products you don’t need?
It’s because we’re reader supported.
If we’ve helped in your food-gardening journey, we’re glad of support. You can high-five us below. Any amount welcome!
More Food Gardening Resources
Course
Create your own edible oasis…including a patch of rhubarb. Edible Garden Makeover guides you through creating an edible garden you love.
Guide to Growing Nanking Cherry: An Easy-to-Grow Bush Cherry
Guide to growing Nanking Cherry, an easy-to-grow cherry bush.
By Steven Biggs
Grow Nanking Cherry
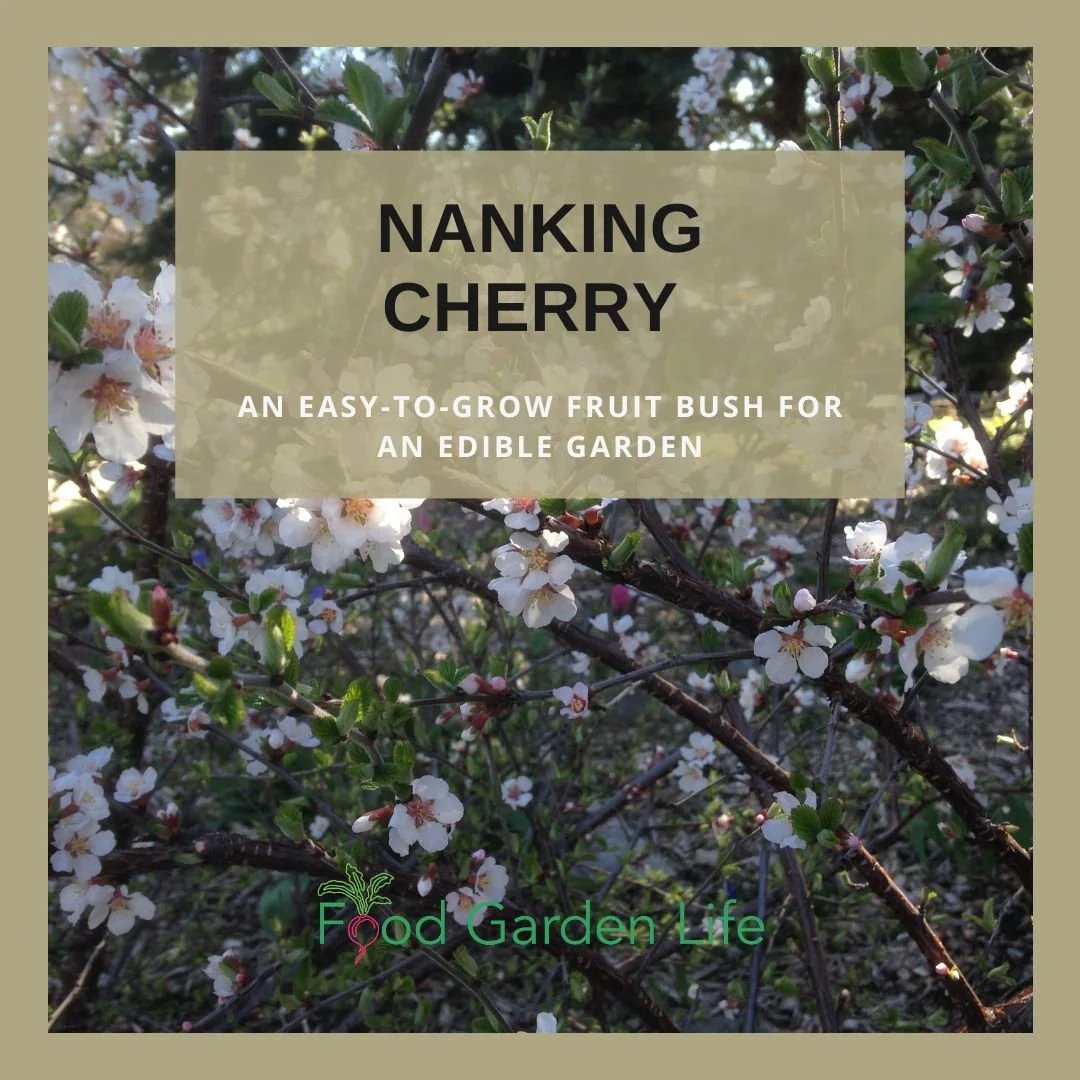
The Nanking cherry bush has a spectacular bloom early in the spring.
“Dad, someone’s taking a picture of your garden,” shouts one of the kids. It’s early May, so I know which plant will be in the photo.
The Nanking cherry, a.k.a. Prunus tomentosa. Even though our front garden is a party of spring flowering bulbs, when the Nanking cherry is blooming, it steals the show.
The Nanking cherry bush is like a stop sign. Pedestrians going past our house change gears from a brisk walk to a full stop and then take photos.
Spring isn’t the only time it looks great: it looks great again as the fruit colours up. And unlike cherry trees, where you have to look upwards, this cherry bush is at eye level.
Perfect Fruit for a Home Garden
Nanking cherry is ideal for a home food garden because it’s compact, ornamental, and easy to care for. By comparison, many fruit trees require a fair bit of pruning and pest and disease management. And they take more space.
The small, bright-red cherries are juicy. I’d place the taste somewhere between sweet and sour cherries.
Where to get Nanking Cherry
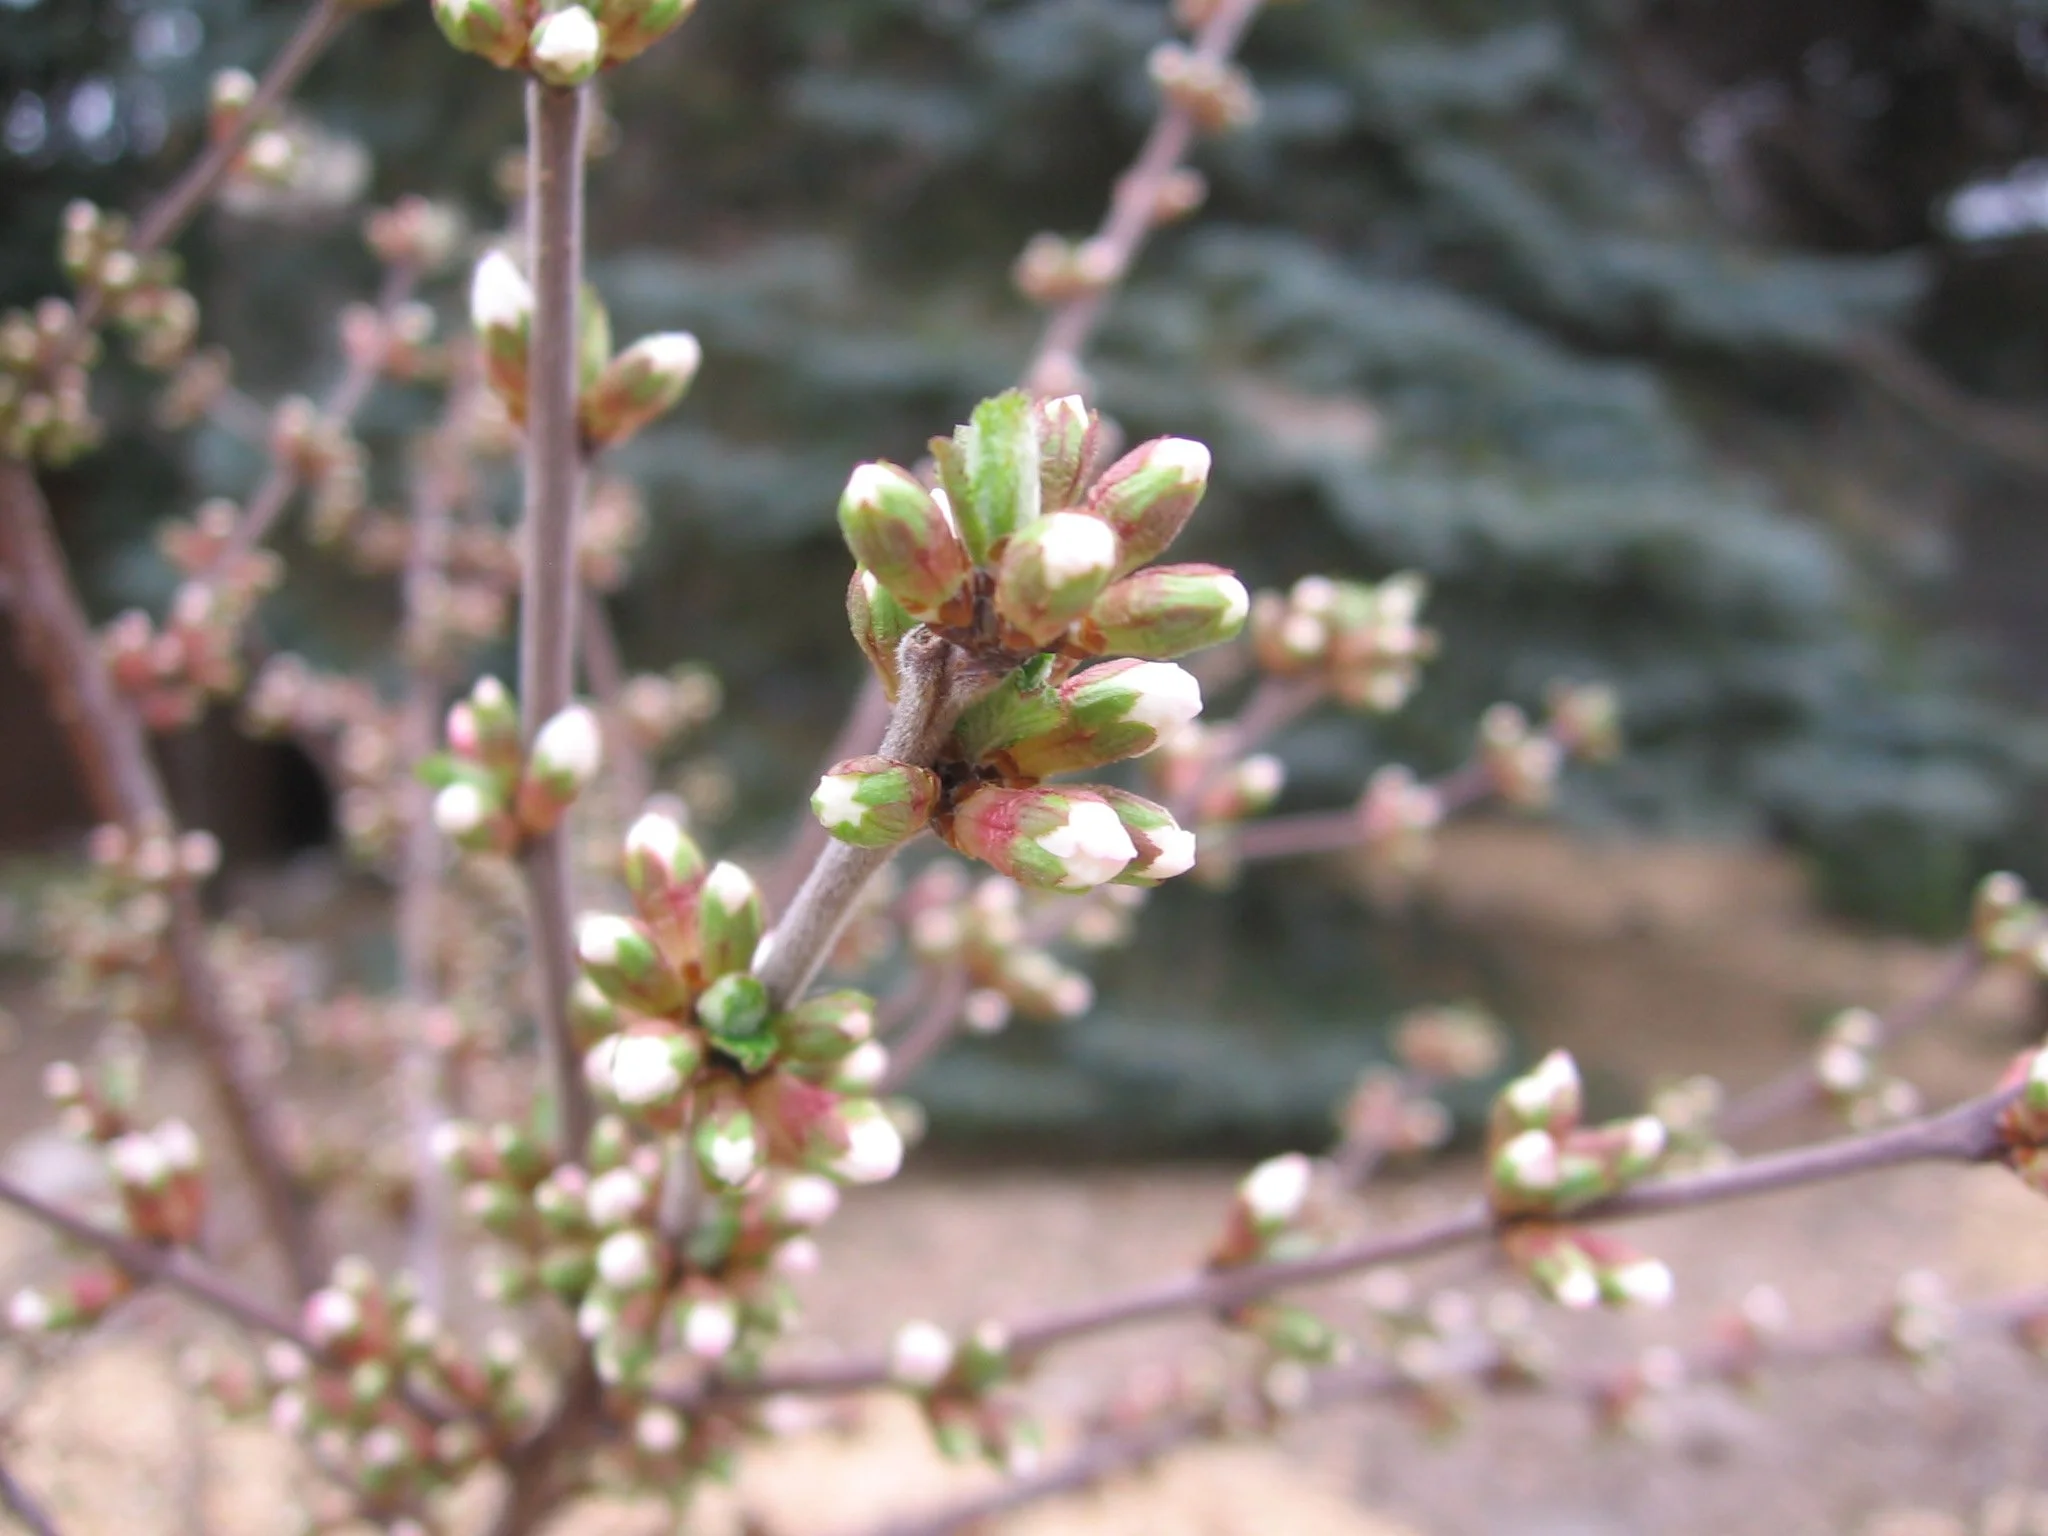
Nanking cherry flower buds
When I teach about edible landscapes, most students haven’t heard of Nanking cherry because it’s not too common in the horticultural trade. It’s a pity because this is such a fantastic home garden fruit bush.
Look for a nursery specializing in fruit and cold-hardy plants. Or, better yet, find somebody who is already growing it, because many of the seeds that drop around the bush will grow.
(I once mentioned this to my class and was asked by students if that meant I had extras to share. I did. And I took in a tray of small cherry bushes the following class.)
By Seed
While many fruit trees and bushes are propagated commercially by cuttings or grafting, Nanking cherry is commonly seed grown. You can grow them from seed at home:
Look for small Nanking cherry plants growing from seed near a mature, fruit-bearing bush.
When saving seeds to grow, don’t let them dry out too much
In the fall, place seeds in damp potting soil
Store potted seeds in a cold location until spring (a fridge or animal-free shed or garage is fine)
In spring, watch them grow!
When you grow from seed, the seedlings will all be genetically distinct, so expect some variability between plants. Seed-grown plants often flower in less than five years.
Cuttings
If you have a Nanking cherry plant that you really like, you can also propagate it from cuttings. Root softwood cuttings in early summer, as fruit ripens, or root cuttings from dormant hardwood in the spring. High humidity and rooting hormone increase the percentage of cuttings that root.

Create Your Own Unique Edible Landscape
That fits for your yard, and your style!
Layering
Another way to propagate Nanking cherry is by layering. This is the practice where a low-lying branch is covered with soil until it grows roots and can be detached from the main plant. I find it’s often enough to simply to pin a low-lying branch to the soil by covering it with a brick.
Nanking Cherry Varieties
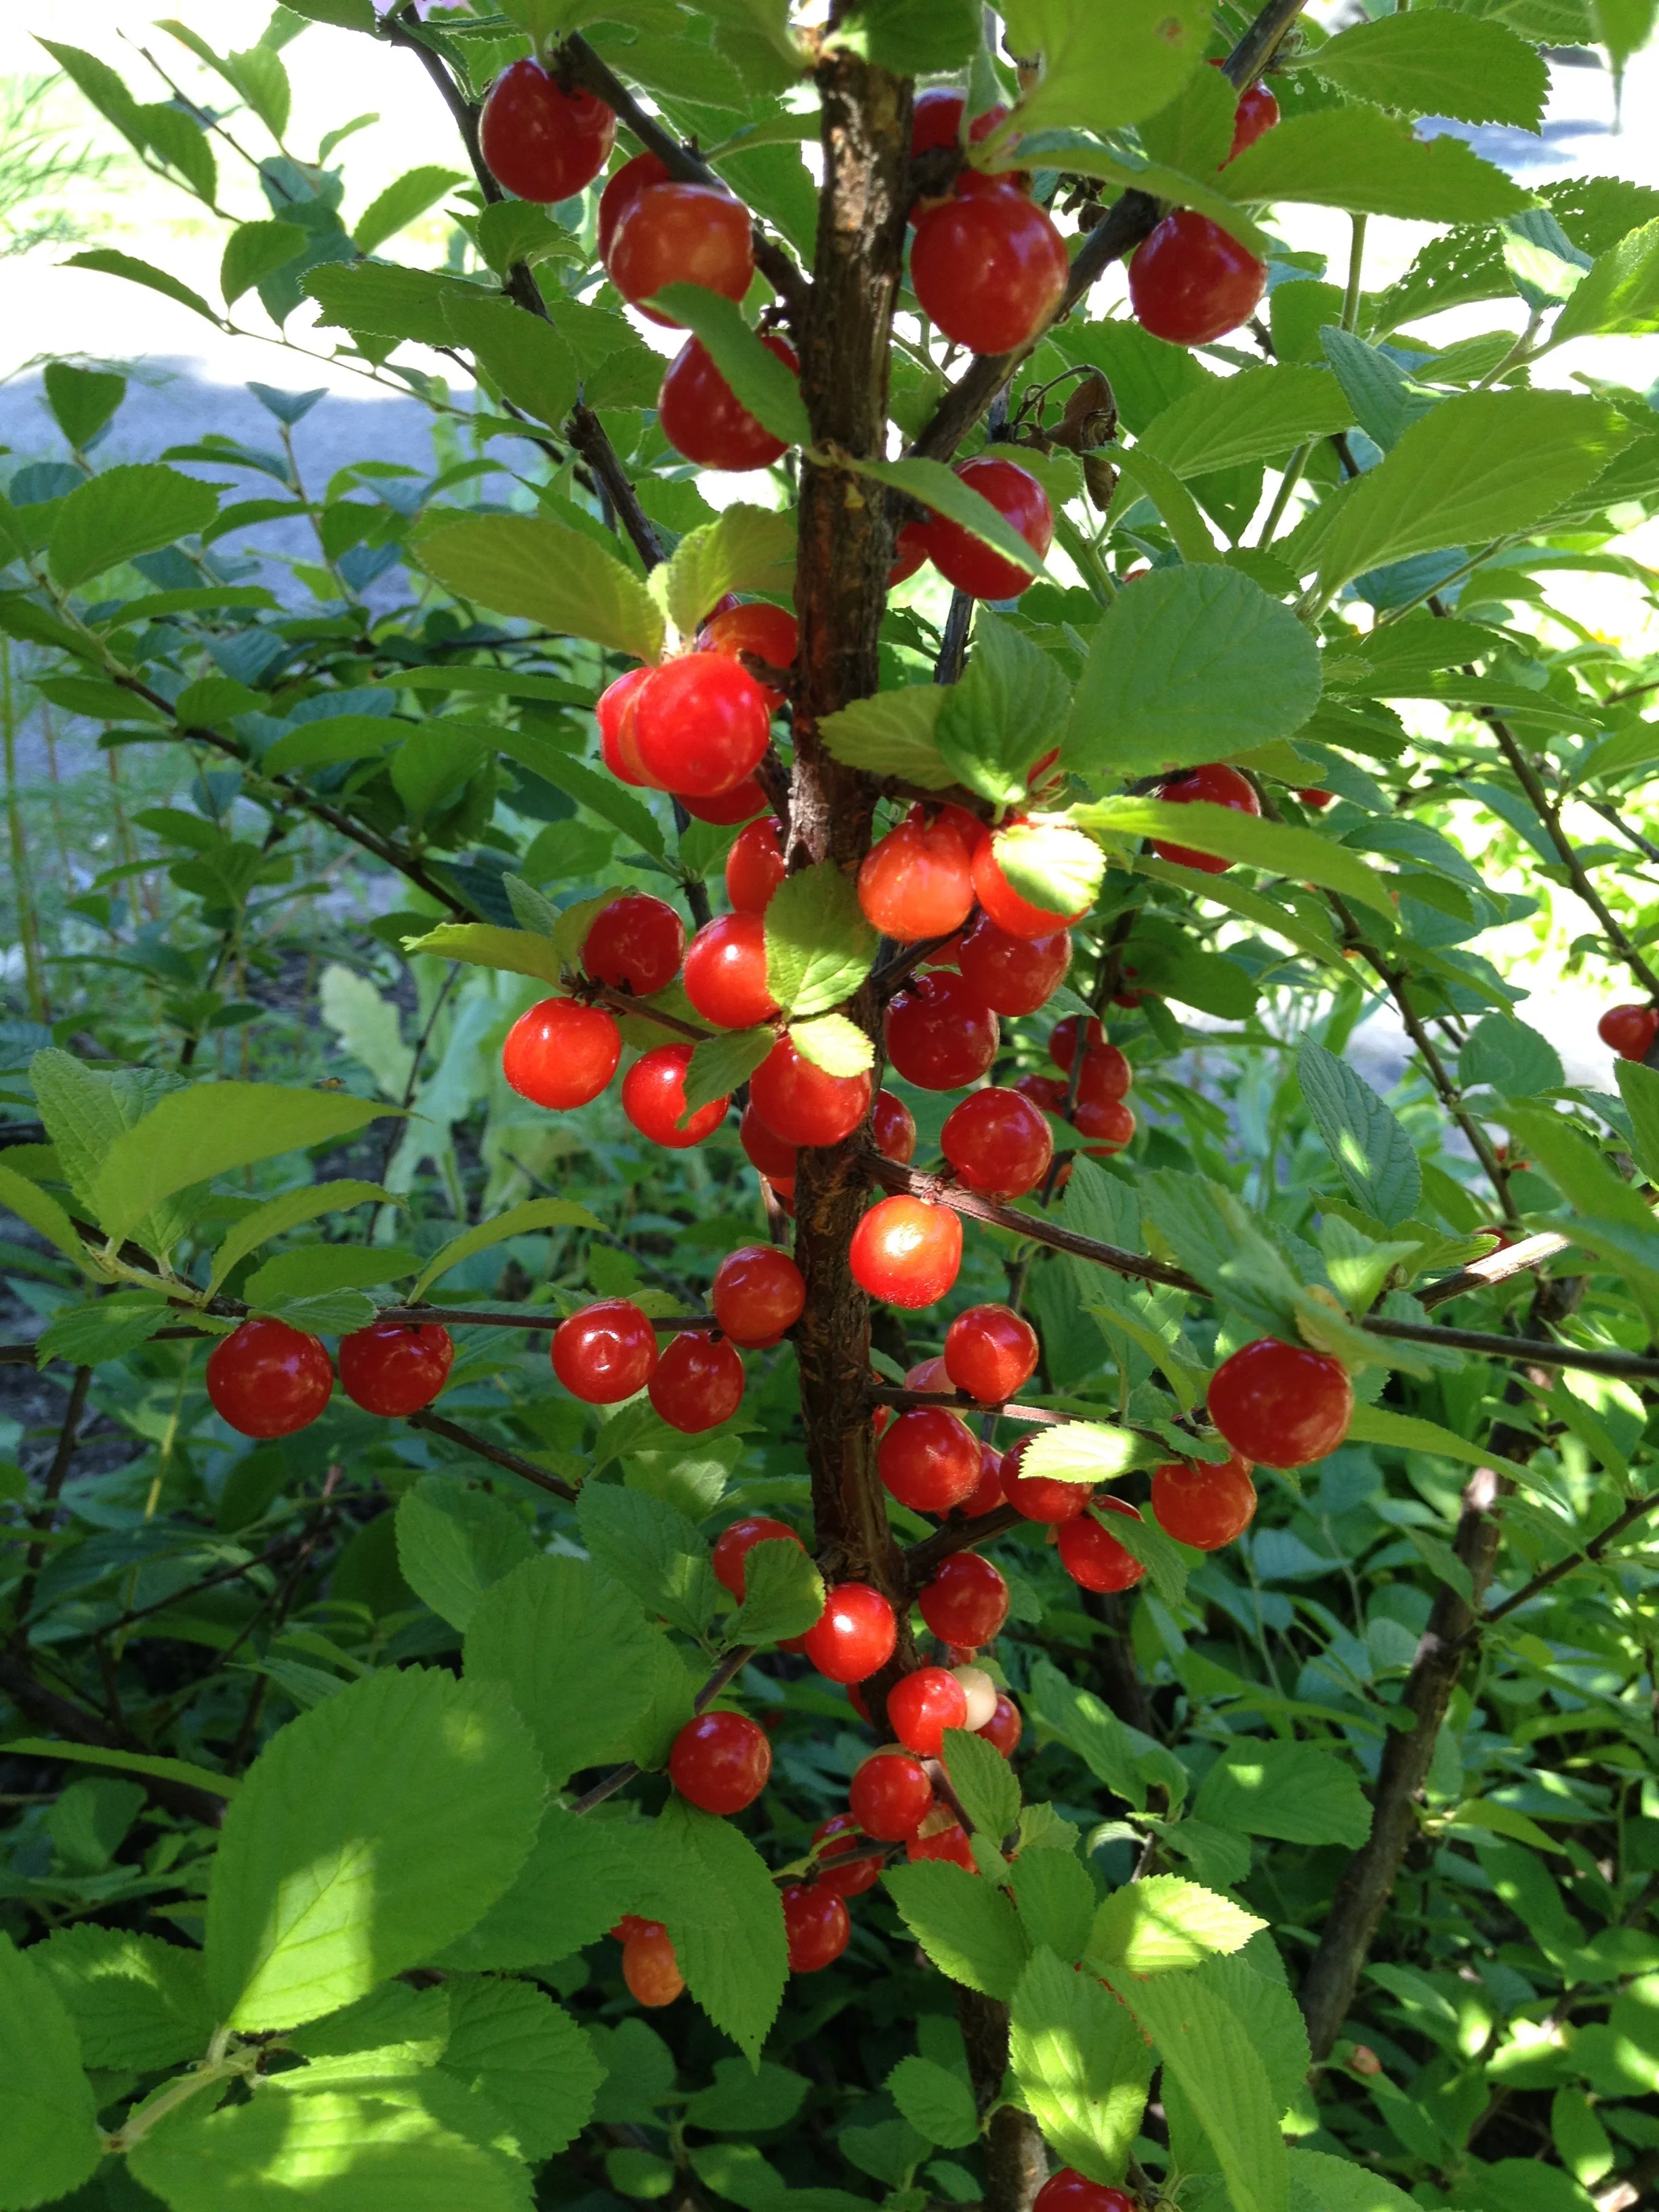
Red-fruited, white-flowered varieties of Nanking cherry are the most common in the horticultural trade.
There are not a lot of improved varieties available commercially. At the time of writing this, I’ve just ordered one called ‘Pink Candles.’
Along with the common seed-grown, white-flowered, red-fruited Nanking cherry varieties, look for:
White-fruited varieties
Pink-flowered varieties (like ‘Pink Candles, above)
Cold-Climate Cherry
If you’re gardening in a cold zone, Nanking cherry withstands cold winters and hot summers. My grandfather grew Nanking cherry in Calgary, a mercurial climate if ever there was one. His cherry bushes soldiered on through snow in summer and balmy winter chinook winds.
(Incidentally, he also made wine from Nanking cherry, although I was too young at the time to partake!)
Cold hardiness is never an exact science as there are many variables. But this is a very cold hardy plant, surviving winter temperatures as low as -40°C (-40°F).
Pick a Location for your Nanking Cherry
Sunlight: Full sun is best. As with many crops, if you only have partial sun, it’s worth a try. You’ll still likely get something.
Soil: Well-drained soil, enriched with compost.
Snow load: Winter snow coverage is, if anything, helpful, as it insulates the bush. I have one next to my driveway, and it’s covered every year with heaps of snow.
Landscape with Fruit
That’s easy to grow in a home garden!
Prune Nanking Cherry
One of the things that makes fruit bushes far more suited to home gardens is that the burden of pruning is less. You can prune annually if you want – and you’ll be rewarded with a nicer form and more yield. But if you’re busy and don’t get around to it, that’s fine too.
Timing: Prune in late winter.
Size: Remember, as the gardener, you decide the final height of your Nanking cherry bush. Depending on the growing conditions, it will get to 1.5 – 3 metres high (5 – 10 feet). Bushes can get fairly wide if space permits.
I keep mine pruned to about 1.5 metres (5’) high. That’s because I don’t want it to block the sight line between my garden and the sidewalk. And another important consideration is not to let the bush get any higher than you can pick!
In general, pruning that encourages young branches encourages more fruit. Keeping the canopy open with pruning helps to minimize the chance of any diseases because there is good air circulation. Pruning tips:
Remove some of the older branches
Trim out dead branches
Cut out crossing branches
Prune to shorten the bush
Nanking Cherry Pests and Diseases
Nanking cherry is in the same family as cherries and plums, which are affected by a number of pests and diseases. But I’ve never found the need for pest or disease control.
The one challenge I occasionally encounter is branch dieback where leaves on a branch dry up, and the branch eventually dies. Some sources attribute this to fungal diseases. For dieback, prune affected branches back to the main stem.
Harvesting Nanking Cherries
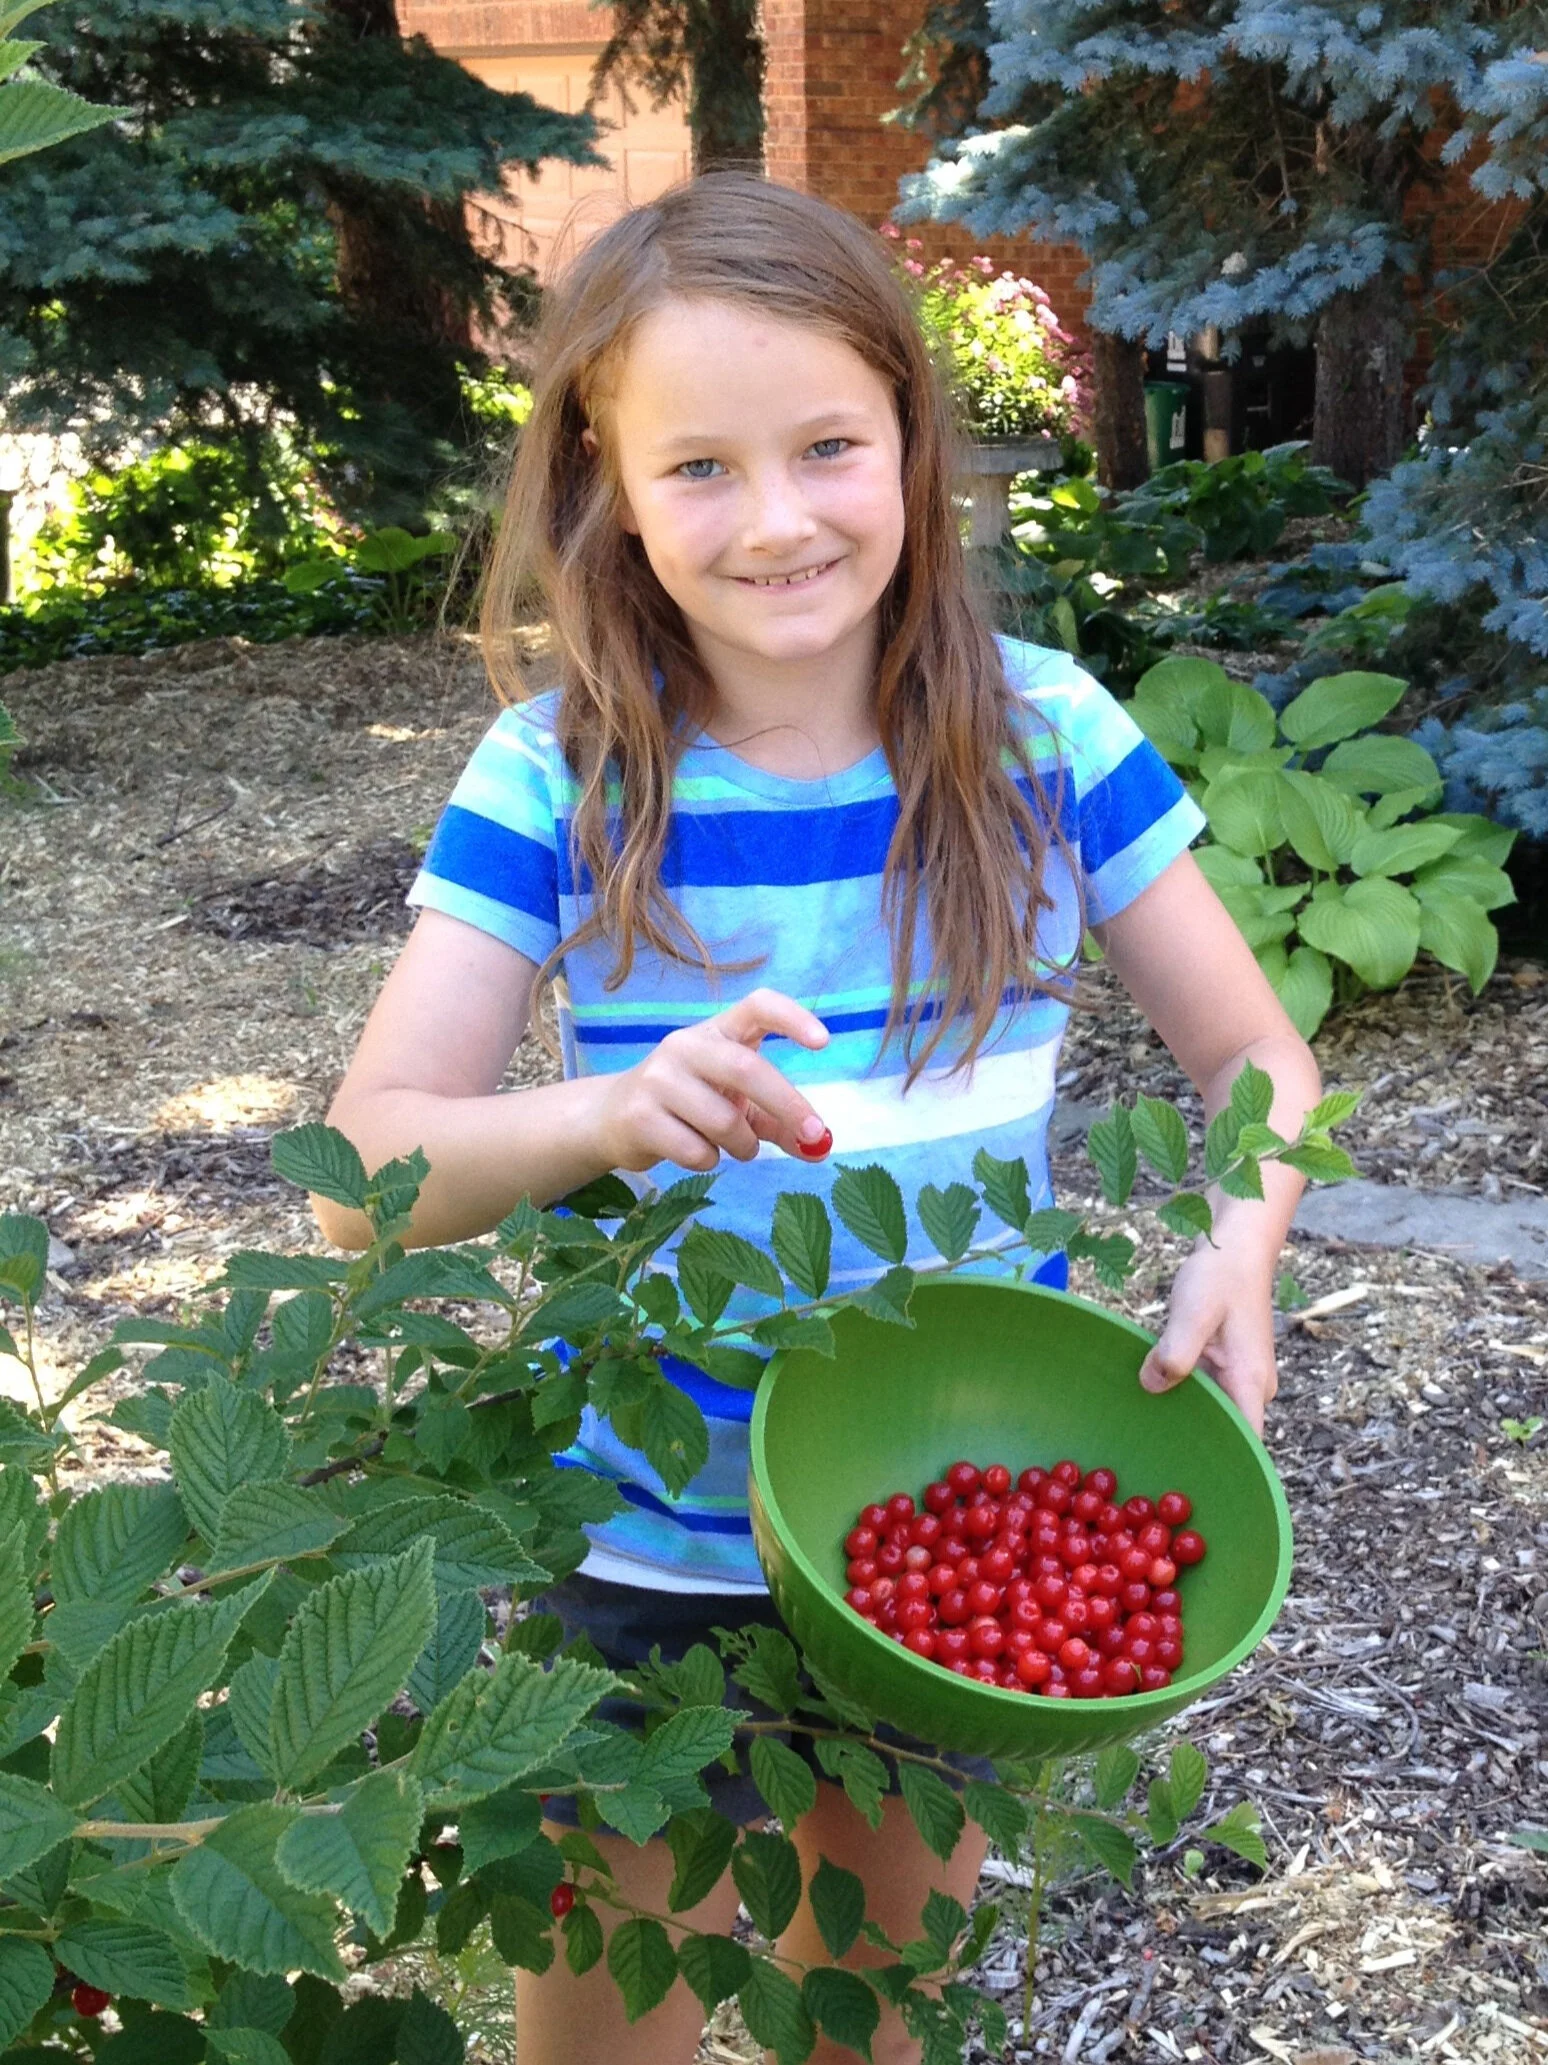
We eat lots of our Nanking cherries right in the garden! But they are versatile in the kitchen too.
Nanking cherries are an early summer fruit. Around here, that means that I’m picking them around the same time as strawberry season is finishing up.
Unlike sweet and sour cherries, where the stem is left attached to the fruit when picked, the stubby little stems on Nanking cherry stay on the bush. As a result, the fruit don’t last as long as other cherries.
Nanking Cherry in the Kitchen
The kids and I sometimes stand around a bush and guzzle cherries and then see who can spit the seeds the farthest. And that’s an important point I should make: like all cherries, there’s a pit!
Use Nanking cherries for whatever recipes call for sour cherries. I also freeze some for winter use. Because of the size, they are a bit fiddlier to pit than larger cherries.
Here are ways we enjoy using Nanking Cherry:
Nanking cherry juice
Nanking cherry compote
Nanking cherry bump (not for the kids!)
And…one other food related idea: I consider cherry wood the finest wood for smoking meat. So when I prune my Nanking cherry, I keep the branches to use for smoking.
Nanking Cherry FAQ
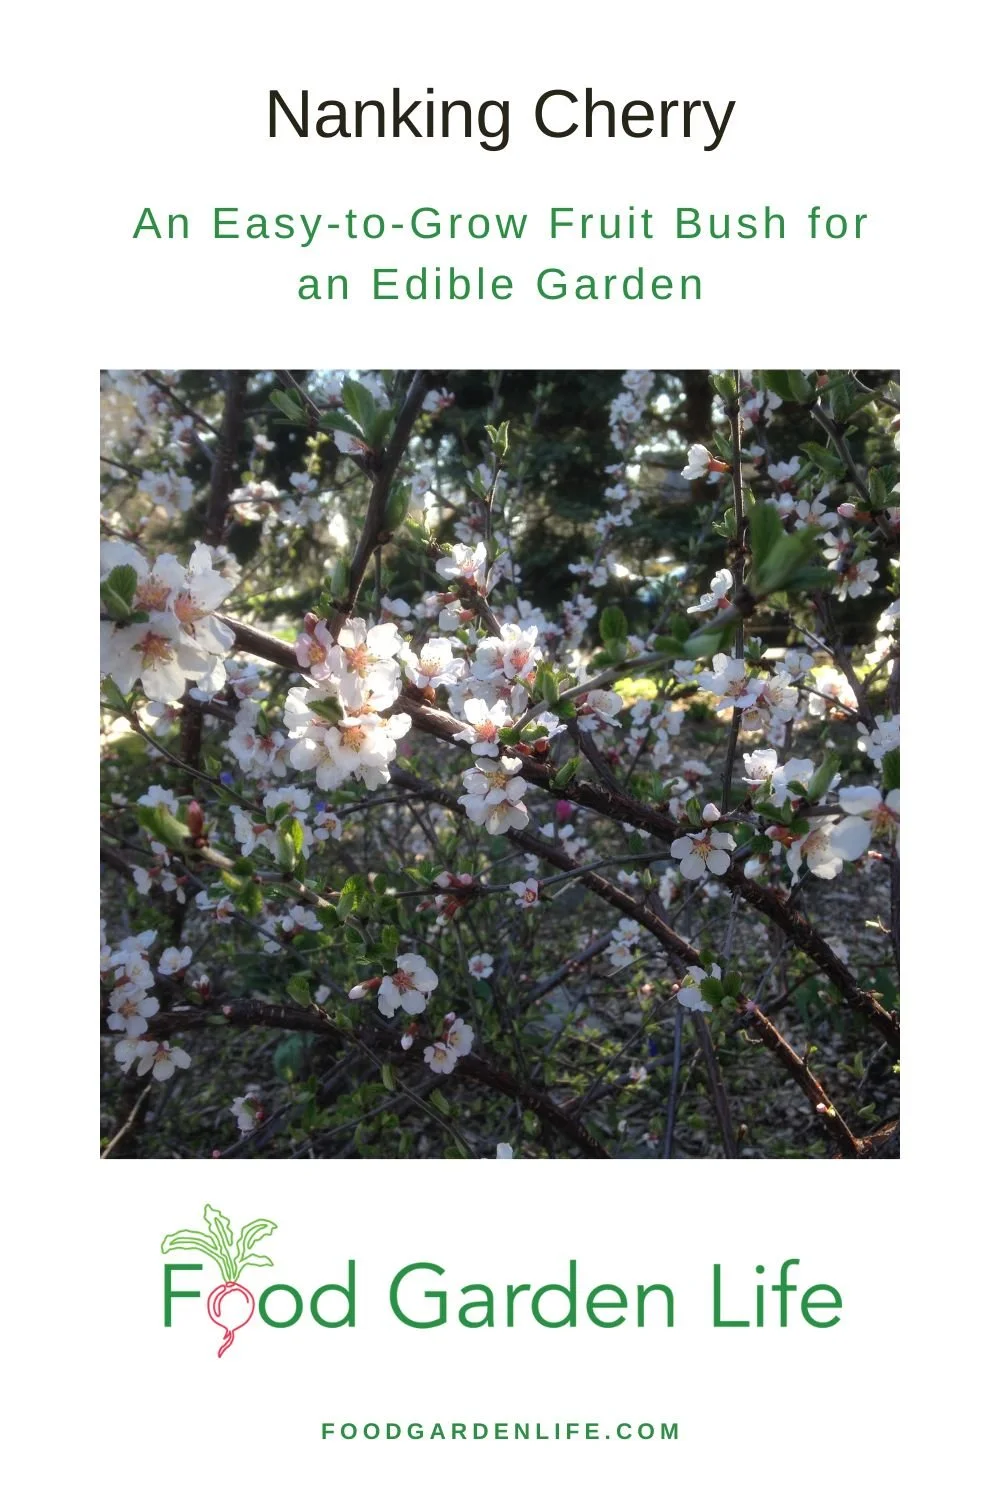
Do I need more than one Nanking cherry bush?
Many sources report the need for two bushes for cross pollination. I started out with one bush – the only one in the neighbourhood – and had good fruit set. There are reports of some self-fertile varieties.
When should I move my Nanking cherry bush?
The best time to move it is in the spring, while it’s still dormant.
Can I grow my Nanking cherry bush in shade?
It will grow best in full sun, but can grow respectably well in part sun/shade. Just know that you probably won’t get as much fruit as you would if it were growing in a full-sun location. As home gardeners we don’t always have perfect conditions.
Can I grow my Nanking cherry in a wet location?
Well drained soil is best. If the water table is high, consider growing in a raised bed.
What about animal pests eating the Nanking cherries?
The birds will like them just as much as you do. But unlike large tree fruit, such as apples and peaches, there’s much more to share when we grow small-fruited crops such as cherries.
Should I cover my Nanking cherry if there’s a frost?
The flowers are early in the season, when the risk of frost is still high. Most years I still get good fruit set here in Toronto. I’ve had reduced fruit set caused by a freeze once in a dozen years.
Is there a Nanking cherry tree?
Nanking cherry naturally grows as a bush.
Find This Helpful?
Enjoy not being bombarded by annoying ads?
Appreciate the absence of junky affiliate links for products you don’t need?
It’s because we’re reader supported.
If we’ve helped in your food-gardening journey, we’re glad of support. You can high-five us below. Any amount welcome!
More on Growing Cherries
Find out about 5 Types of Cherry Bush to Grow in Edible Landscapes and Food Forests
Hear Dr. Ieuan Evans talk about the Evan’s Cherry
More on Growing Fruit
These Courses Can Help you Grow Your Own Fruit
Edible Native Plants...and My Quest for a Rare Toronto Persimmon Tree
Native North American Fruits and Nuts (including persimmon and pawpaw!)
By Steven Biggs
Ontario Native Edible Fruits and Nuts
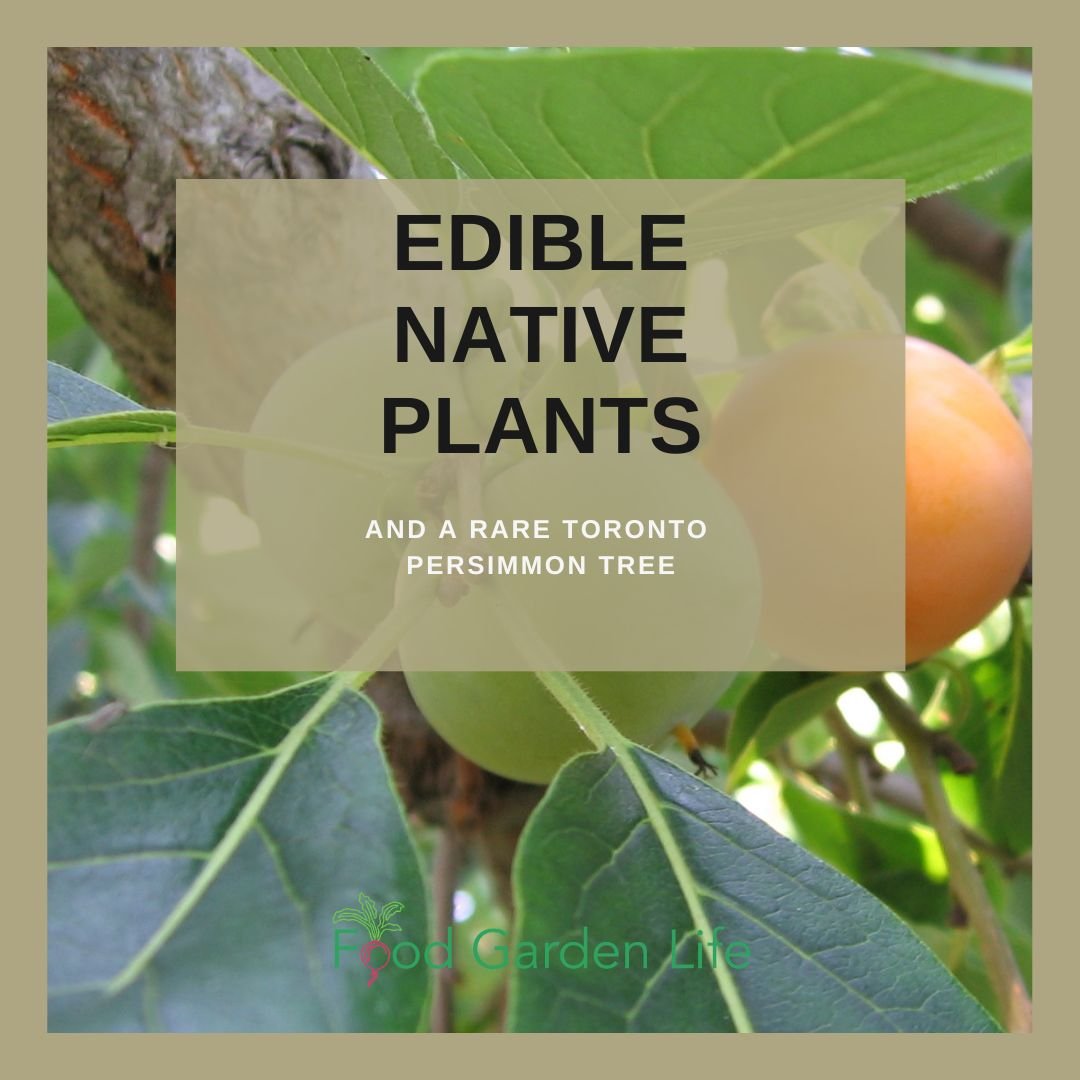
Pointing to two trees, Tom Atkinson explains that we have the makings of a golf club.
“There you have the shaft of the club; here you have the head,” he says, pointing from one tree to the other:
The shagbark hickory, with a bit of give in the wood, is ideal for the shaft.
The American persimmon, as part of the ebony family, has extremely hard wood that is suitable for whacking the ball.
Both are native North American species; and both have edible parts.
Hunting Pawpaw and Persimmon in Toronto
Our tree trek today is the result of my interest in another North American native, the pawpaw tree.
Because of my fascination with pawpaw, I tracked down Atkinson, a Toronto resident and native-plant expert, whose backyard is packed with pawpaw trees.
After I visited his yard and soaked up some pawpaw wisdom, he mentioned a fine specimen of American persimmon growing here, in Toronto.
I took the bait.
Under a Toronto Persimmon Tree
Now, in the shadow of that persimmon tree, I’m learning far more from Atkinson than persimmon trivia:
The nut of the shagbark hickory, a large native forest tree, is quite sweet.
He points to a pin oak, explaining that the leaves are often yellowish here in Toronto, where such oaks have trouble satisfying their craving for iron.
Waving toward a couple of conifers, Atkinson explains that fir cones point upwards, while Norway spruce cones point down.
There’s stickiness on the bud of American horse chestnuts, but not on their Asian counterparts.
And while the buckeye nut is normally left for squirrels, he’s heard that native North Americans prepared it for human consumption using hot rocks.
Landscape with Fruit
That’s easy to grow in a home garden!
A Backyard Native Fruit Food Forest
In his own garden, Atkinson’s focus is on native trees and shrubs. Many of them are considered Carolinian and are, here in Toronto, at the northern limits of their range.
My own interest in native trees and shrubs has gustatory motivations, but Atkinson’s came about because of his woodworking hobby. “I thought, if I was using wood, I should be putting it back,” he explains. While no longer woodworking, he still has a garden full of native trees and shrubs.
The edible native North American fruit and nut trees in his backyard food forest include sweet crabapple, black walnut, bitternut hickory, red mulberry and beaked hazelnut. “It is really for the creatures of the area, all this bounty,” he adds. I’m taken aback by his generous attitude towards harvest-purloining wildlife, but it’s consistent with his approach of putting something back.
Find out about elderberry, a native fruit bush.
American Persimmon
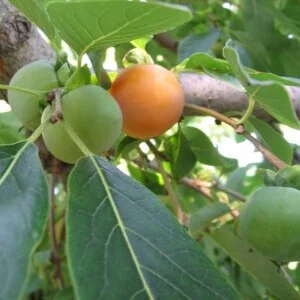
In the shadow of an American persimmon in Toronto. Grow persimmon in the warmer parts of Ontario.
Sitting under the American persimmon tree and looking up, I’m dismayed to find that the fruits are still green. Atkinson cautions that the fruit are astringent and bitter when unripe, so I satisfy myself with snapping pictures.
He explains that although this is a native North American species, it doesn’t usually grow wild this far north. But it grows well under cultivation.
(I found ripe, orange American persimmons a week later at Grimo Nut Nursery in Niagara, where the more temperate climate aids in ripening fruit earlier than in Toronto. They are sweet and velvety on the tongue; I’m delighted that the young persimmon tree I’ve been nurturing in my garden will have been worth the effort when it starts to fruit. And the fruit-laden trees are beautiful.)
Pawpaw
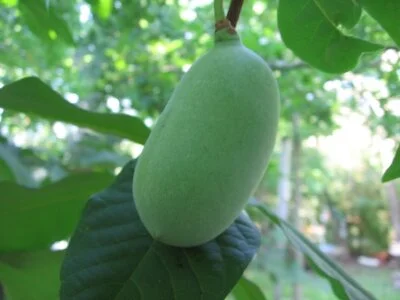
Atkinson's Toronto backyard, where he grows pawpaw trees and other native fruit trees.
Pointing to clusters of mango-like fruit, Atkinson says, “The fragrance of the pawpaw when ripe is aromatic.” He finds that the texture is like custard.
Each fruit usually contains four to eight seeds. “Like a watermelon, spit out the seeds,” Atkinson adds.
Don’t wait too long to pick it. “If it’s starting to turn brown, give it to the squirrels or raccoons,” he advises.
Pawpaws can be found growing wild on the north shore of Lake Erie into the Niagara region. Like the American persimmon, you’re not likely to find wild ones here in Toronto, but they do grow well here when planted. The large, lush leaves add a tropical feel to the garden.
Serviceberry
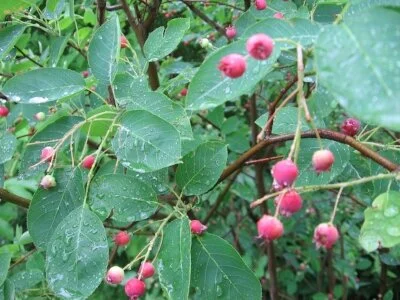
Serviceberry is a native edible plant well suited to growing in the city.
When it comes to native edible plants, Atkinson believes that one of the best to grow in the city is the serviceberry.
“There’s a whole bunch of them,” he explains, listing the related members of the serviceberry (Amelanchier) clan. They all have in common an edible fruit similar in size to a blueberry.
Palatability varies by species and variety. The saskatoon berry, which is also grown commercially, has consistently good fruit quality, according to Atkinson.
Serviceberry is widely planted in Toronto parks and is common in the nursery trade. They can be grown as a small tree or a bush.
In my own garden, I end up sharing my serviceberry harvest with robins if I don’t pick them quickly enough. Atkinson says that cedar waxwings like them, too.
Aside from the fruit, the serviceberry leaves turn a vibrant orange-red in the fall and the bark, smooth and grey, is showy, too.
Here’s a member of the serviceberry family that’s grown as a commercial crop: Guide to Growing Saskatoon Berries: Planting, Pruning, Care
American Hazelnut
Pin this post!
American hazelnut is a native nut bush. It’s related to the European hazelnuts sold in grocery stores, but the nuts are smaller.
Hazelnuts send out attractive catkins in late winter, before any leaves are out.
Crabapple
“They’re a delight to look at,” agrees Atkinson as we change gears and talk about the sweet crab, a wild crabapple. “It puts on a really good show of flowers,” he says as he describes a blush of pink on white flowers in the spring, adding, “It’s as good as a flowering dogwood but in a different sort of way.” The fruit is very waxy, and very attractive, having a greenish yellow colour.
“Squirrels don’t touch it,” he exclaims. He likes the fall leaf colours, which range from yellow to burnt orange.
On the culinary side, he says the sweet crab fruit is sour, but a perfect accompaniment when roasted with a rich meat such as pork, where the tartness of the fruit cuts the richness of the meat.
Black Walnut
Atkinson speaks warmly of towering black walnut trees and of the beautiful dark wood they yield. He notes how common they are in the Niagara peninsula: “They’re almost like weeds.”
I agree with the weedy bit: My neighbour’s black walnut stops me from growing anything in the tomato family at the back of my yard. Despite its hostile actions towards my tomatoes, I have grown fond of sitting under that tree, never really considering why. “The shade under a walnut is really quite lovely,” he says, describing dappled light that results from the long leaf stalks adorned with small leaflets.
He discourages me from promoting the black walnut for edible uses because the nut meat is very difficult to extract: the shells are rock hard, requiring a hammer to crack. And the meat doesn’t come out easily like an English walnut, but has to be picked out. But by this point I’ve already decided to write about edible native plants because of their ornamental appeal.
Read about wicking beds, a way to deal with black walnut toxicity, a.k.a. juglone.
Find out how to garden successfully when there’s a black walnut tree nearby.
Growing Native Fruit in Urban Areas
I thank Atkinson for the tour and email correspondence. A couple of weeks later, Atkinson emails me a photo of a broken pawpaw branch. He writes: “Steve, here is what befalls a pawpaw when in an urban setting, and there are hungry raccoons about. I do not begrudge my masked friends at all for doing what inevitably they will do when after pawpaws.”
FAQ American Persimmon
Can persimmon grow in Ontario? Can you grow persimmons in Canada?
American persimmon is reported to be hardy into Canadian hardiness zone 4, though a long growing season with summer heat is needed for fruit ripening. Best in zones zones 5b-8.
Remember: Zones are only a guideline. Sometimes you can cheat if you have a warm microclimate.
Can I grow a persimmon tree from seed?
If you grow American persimmon from seed, the main thing to remember is that they are “dioecious.” This just means that a plant can be male or female. If you grow a seed and get a male plant, you won’t get fruit from it.
Many commercial varieties produce fruit without a male.
Interested in Forest Gardens?
Here are interviews with forest garden experts.
Find This Helpful?
Enjoy not being bombarded by annoying ads?
Appreciate the absence of junky affiliate links for products you don’t need?
It’s because we’re reader supported.
If we’ve helped in your food-gardening journey, we’re glad of support. You can high-five us below. Any amount welcome!
More Information on Growing Fruit
Articles and Interviews about Growing Fruit
Courses on Fruit for Edible Landscapes and Home Gardens
Home Garden Consultation
Book a virtual consultation so we can talk about your situation, your challenges, and your opportunities and come up with ideas for your edible landscape or food garden.
We can dig into techniques, suitable plants, and how to pick projects that fit your available time.
Guide: How to Grow Sorrel (& How to Use it!)
Find out how to grow sorrel, and get ideas for creative sorrel recipes.
By Steven Biggs
Planting Sorrel: An Easy-to-Grow Perennial Vegetable

Sorrel is one of my favourite crops because it checks off a number of important things for me:
It’s easy to grow (it’s a perennial that comes back year after year)
It’s difficult to find fresh sorrel leaves in stores (and if you find them, they’re expensive)
It is versatile in the kitchen (soups, meat, salads, and more)
(And I've cooked with sorrel on TV!)
Sorrel also has a rich herbal history, with a variety of uses.
I’m no herbalist, so in this post I’ll tell you how to grow sorrel and give you lots of ideas for using it in the kitchen.
Haven’t Seen a Sorrel Plant? You’re Not Alone!
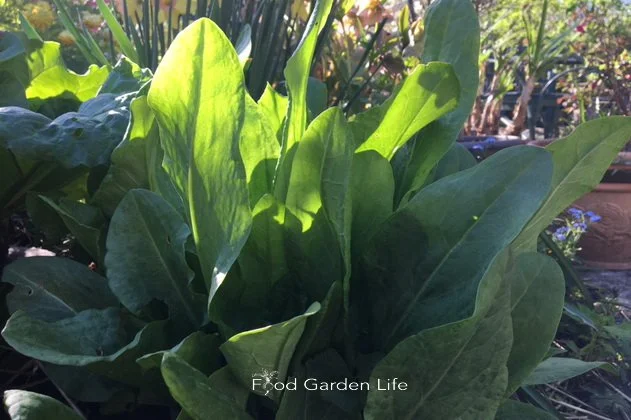
Garden sorrel is a hardy perennial.
Sorrel is a familiar ingredient in European cuisine. That’s how it came to North America—with European settlers.
The “wild” sorrel sought after by foragers is simply sorrel that’s escaped cultivation.
Yet many people in North America don’t know to sorrel.
If you’re new to sorrel, it’s grown for its leaves. It’s sour leaves. I think of it as a lemon substitute for northern gardeners.
When I shop at eastern European shops, I see jarred sorrel…horrid sludge. I don’t recommend it. Grow yourself fresh sorrel!
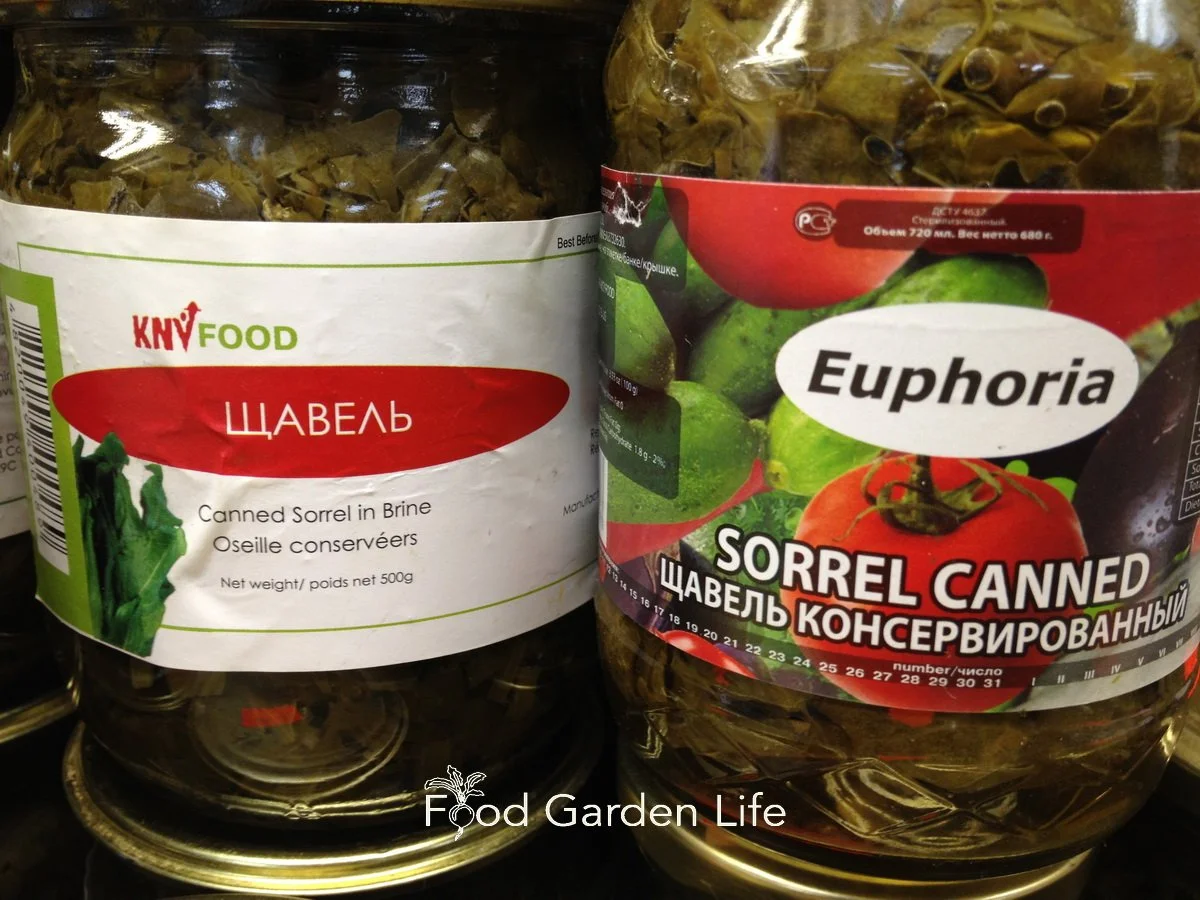
Grow your own sorrel, and skip the brined sorrel!
But it was an eastern European connection that go me growing sorrel. As a teen, I took Ukrainian lessons (hoping to learn my mom’s first language—which she never taught us.) I never did pick up the language—but the teacher, who knew I was a gardener, couldn’t believe I’d never heard of sorrel. And brought me a clump of this plant that she said was an essential ingredient in the old country.
What is Sorrel?
Sorrel is a hardy perennial plant that grows in a clump. It’s tough as nails, hardy into Canadian zone 4.
The long, narrow leaves are ready to pick early in the season, making it one of the first greens to harvest.
You can use the leaves fresh—or cook with them. (See How to Use Sorrel, below.)
Types of Sorrel
There’s more than one type of sorrel. Here are three common ones:
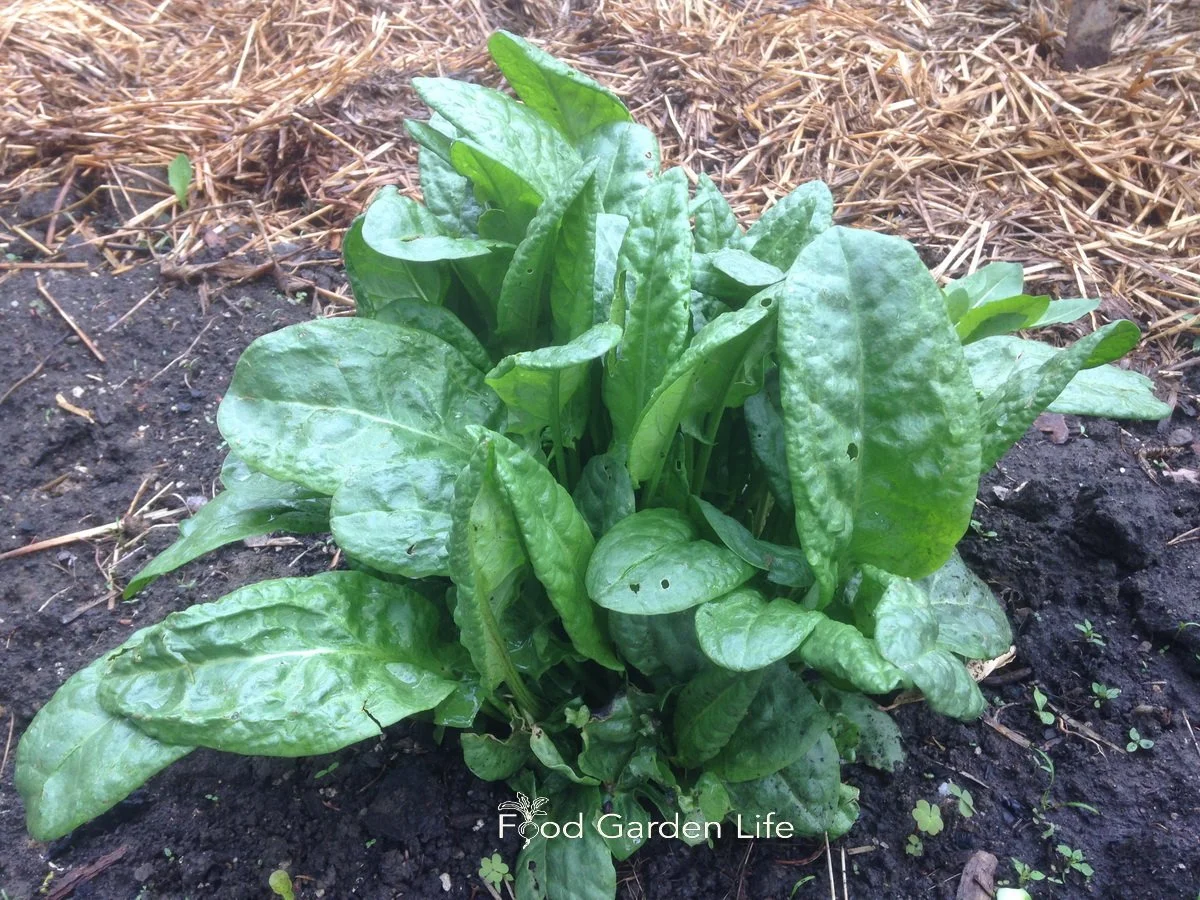
Garden sorrel leaves can be over 30 cm long when plants are in moist, rich soil.
Garden Sorrel (Rumex acetosa). Garden sorrel was brought to north America by European settlers. It's grown in gardens, but is also an escapee that can be found growing wild. Leaves reach 30-60 cm (12-24 inches) long, depending on the growing conditions.
Sheep Sorrel (R. acetosella). Sheep sorrel is another escapee. Sometimes called sourgrass. You might find it filling in exposed spots like vacant lots and roadsides. Seed stalks take on a reddish colour. Spreads by seed and running roots. This is the less-loved cousin to garden sorrel, with smaller, narrower leaves that have a distinct lobe at the base, a bit like an arrowhead. I wouldn’t plant this fast-spreading plant in the garden, but it’s an excellent edible, and popular with foragers.
French Sorrel (R. scutatus). French sorrel is also called round-leaved sorrel. The leaves are shield shaped. Plants are shorter than garden and sheep sorrel.
Grow a Container Vegetable Garden
And get an early harvest of crops that usually take too long!
How Sorrel Grows
Sorrel grows best in rich, moist soil, in full sun or partial shade. Though that doesn’t mean it won’t grow elsewhere…as evidenced by the behaviour of sheep sorrel in vacant lots!
But in a garden setting, give it water if it’s in a dry location. If it’s in partial shade, you won’t need to water as much.
Flower stalks turn into red-tinged seed spikes. Remove stalks to encourage young leaves—unless you want to collect sorrel seed. If you’ve been diligently removing flower stalks, you’ll be able to continue harvesting for the whole growing season, until the plant shuts down for winter—when the top dies back with fall frosts.
Where to Grow Sorrel Plants
Because sorrel is ready to harvest early, I like to have mine close to the kitchen.
Growing Sorrel in Perennial Borders
As a perennial plant, sorrel is at home in the perennial border. Stick it at the front so it’s easy to reach.
Sorrel in the Vegetable Patch
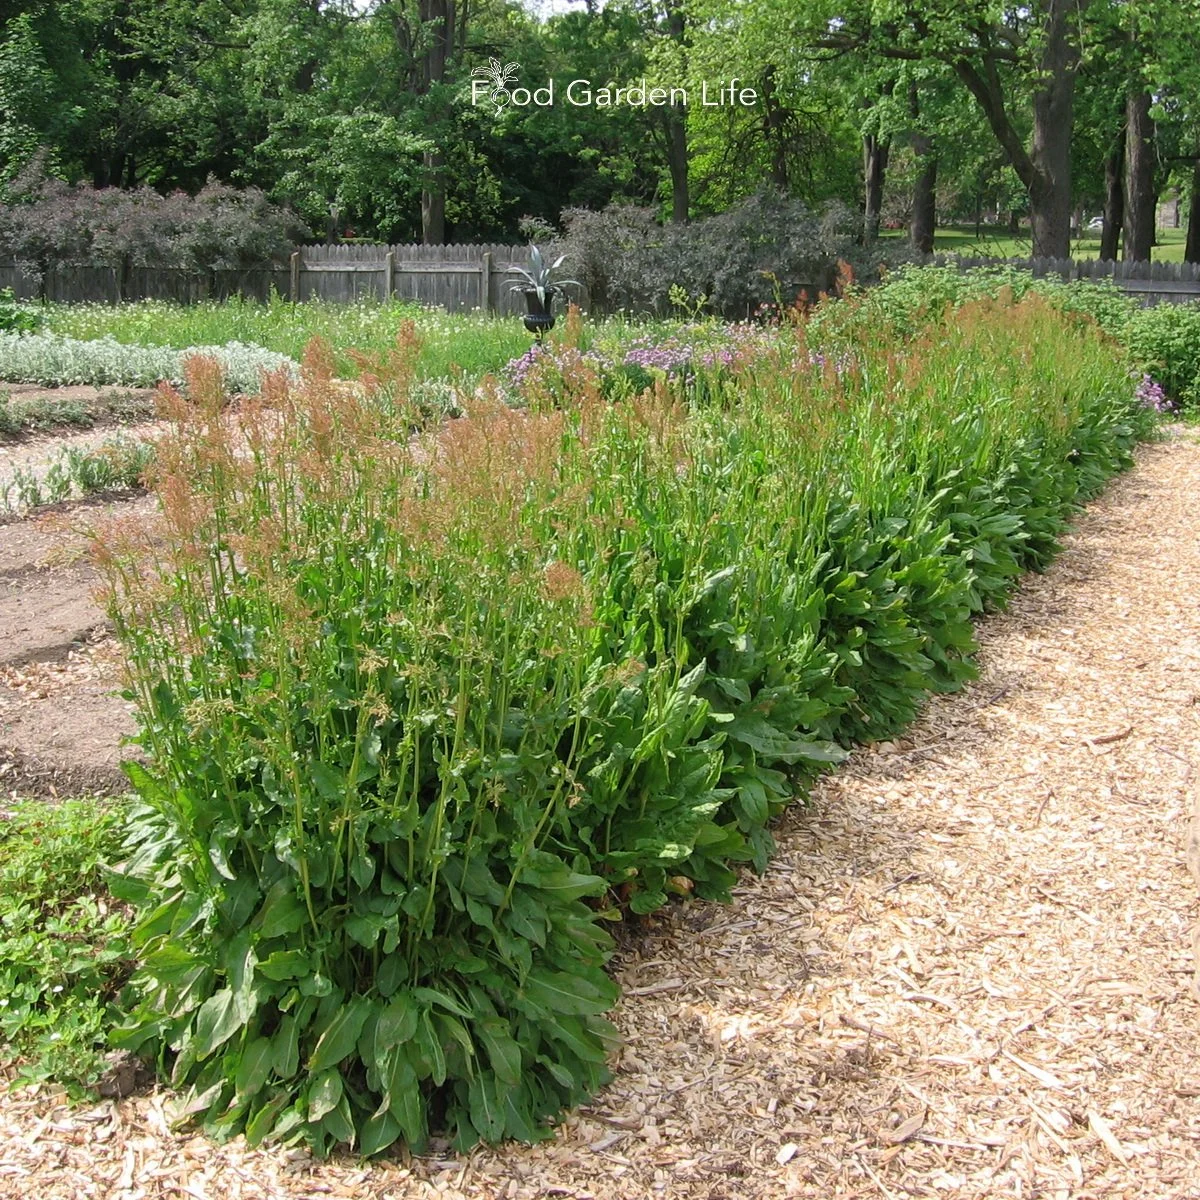
A row of garden sorrel with seed heads. See the red tinge?
I don’t plant sorrel in my main veggie patch, where I move around crops from year to year. Because it is a perennial plant, I grow sorrel around the periphery, with the rhubarb and asparagus—other perennial vegetables.
I’ve seen an entire row of sorrel plants used as a border in a formal edible garden.
Find out more about perennial vegetables.
Sorrel in the Herb Garden
Garden sorrel and French sorrel are well behaved plants that make a nice addition to a herb garden.
Looking for vegetable garden planning ideas? Here are articles to help you plan and design your vegetable garden.
How to Harvest Sorrel
Young sorrel leaves in the spring are the most tender.
You’ll get the best flavour and texture in spring, from young leaves.
But you can harvest sorrel until fall frosts shut the plant down for winter.
How to Propagate Sorrel
There are two ways to propagate sorrel plants.
Division. When a clump is big enough, divide it in the spring.
Seed. Sow sorrel seeds indoors in early spring. Move to the garden after the risk of frost has passed. Space plants about 30 cm (1 foot) apart in the garden.
FAQ: Sorrel Plants
Will Sorrel Grow in Shade?
Sorrel grows in full sun and partial shade. Because it produces larger, more tender leaves in moist soil, semi-shaded conditions are a good option where conditions are hot.
Are sorrel and hibiscus the same?
An unrelated plant, Hibiscus sabdariffa, also goes by the name sorrel. It’s tangy flowers are used in Caribbean cuisine.
Can I forage for sorrel?
In North America, both garden sorrel and sheep sorrel grow wild.
If you’re interested in foraging, listen to our chat with foraging expert Robert Henderson.
What are oxalates?
Wood sorrel is of no relation to garden sorrel, but it, too, has a sour tasting leaf.
Sorrel contains oxalic acid, a compound also found in spinach and rhubarb. If you go overboard and eat too much, it can cause tummy upset. That means don’t be a pig. You wouldn’t eat a whole bowl of lemons, would you? Consume it with other foods. It’s for flavour—not the main course.
One other thing about oxalic acid is that it can provoke existing joint and kidney problems. So if you have a history of kidney stones, skip the sorrel
What about wood sorrel?
Related in name only, wood sorrels (Oxalis sp.) can be grazed too.
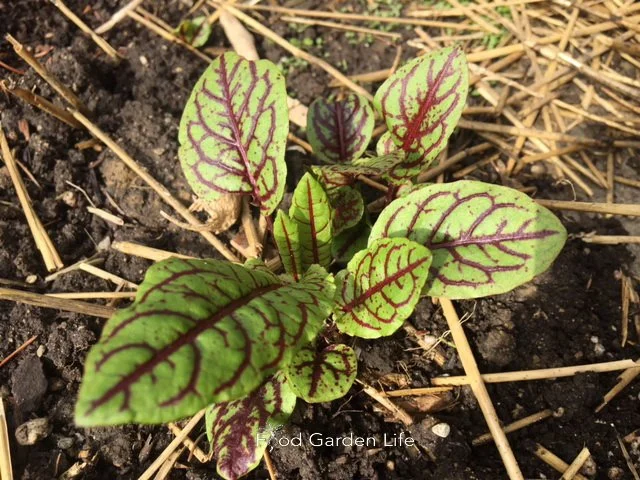
Bloody dock is also known as red-veined sorrel.
Is bloody dock a sorrel?
Bloody dock, R. Sanguineus, is also known as red-veined sorrel. It’s related to sheep, garden, and French sorrel.
But don’t waste a second on it. Unless it’s as an ornamental. (It's quite beautiful.) You’ll find shoe leather that’s more tender than bloody dock leaves.
How to Use Sorrel
Before we get to using sorrel in the kitchen, enjoy sorrel while you’re in the garden. You can graze as you garden. The tangy leaves are refreshing.
Because sorrel is tangy, it pairs well with rich food.
Here are ways to use sorrel:
Use sorrel leaves in salads (I find a sorrel-only salad a bit too tangy, so I mix it with other greens)
Sorrel leaves in sandwiches
Sorrel soup (see recipes below)
In recipes that call for greens such as spinach or lambs quarters, substitute part or all of the greens with sorrel (I add it to my Swiss-chard-and-leek spanakopita)
Add it to sauces for a lemony flavour (I throw in pieces of sorrel leaf when braising meat)
Add sorrel leaf bits to an omelette or frittata
Chop and freeze for use through the winter
I’ve seen a recipe for devilled eggs that includes bacon and sorrel…sounds divine
Gourmet butter: Finely chop sorrel leaves and mix in with soft butter
Making a ranch-style sour-cream or yogurt dip? Add chopped sorrel
Make ordinary pesto shine by adding a bit of sorrel (oh yeah, pairs nicely with blue cheese!)
Sorrel Recipes
Sorrel Soup
Pin this post!
Here’s an easy-to-make sorrel soup recipe.
Ingredients
3 tbsp. butter
1 onion, chopped
3 potatoes, cubed
3 cups sorrel leaves, stem removed
8 cups broth
½ cup sour cream
Salt and pepper to taste
Directions
Fry onion in butter until golden
Add potato, sorrel, broth and simmer (covered) for about 15 minutes, until potatoes are soft
Puree (I use a hand immersion blender)
Whisk in sour cream
Heat to serve (don’t boil)
Sorrel Vichyssoise Soup
If you want to take sorrel soup to the next level—and use some of your homegrown leeks—this take on the creamy potato-leek classic is delicious.

Sorrel vichyssoise soup, topped with a sorrel leaf, a dollop of sour cream, and edible redbud flowers.
Ingredients
2 tbsp. butter
3 cups of sorrel leaves, stem removed
1 large leek, chopped (use both white and pale green parts)
1 onion, chopped
3-4 potatoes, cubed
4 cups water or broth
2 tbsp. salt
4 cups whole milk (use cream if you want something more decadent)
Directions
Fry leek and onion in butter until onion is golden
Add potato, salt, water/broth, sorrel and bring to a boil
Simmer until potatoes are tender
Stir in milk, and then puree
Serve chilled
When serving, I like to float a dollop of sour cream on top, alongside a raft of croutons.
Sorrel Paste and Sorrel Soup
Hear this interview with forager Robert Henderson, who talks about how to make sorrel paste and sorrel soup.
Find This Helpful?
Enjoy not being bombarded by annoying ads?
Appreciate the absence of junky affiliate links for products you don’t need?
It’s because we’re reader supported.
If we’ve helped in your food-gardening journey, we’re glad of support. You can high-five us below. Any amount welcome!
Courses
Edible Garden Makeover. Here’s a course that guides you through creating an edible garden you love. It’s my ode to edible gardening. You’ll find out how to think outside the box and create a special space. Get the information you need about a wide range of edible plants.
Container Vegetable Gardening Masterclass. Here’s a course that gives you everything you need to know for container vegetable gardening success.
Move Over Bedding Plants...and Try These Edible Garden Plants Instead
Replace some of your bedding plants with edible plants! Find out how to choose suitable crops to use as bedding plants.
by Steven Biggs
A Few Plants for Edible Landscaping

Attractive? Check.
Low maintenance? Check.
Edible? Check.
The peppers were the finishing touch in my front-yard edible landscape. Right by the sidewalk. A nice pop of colour.
What had been my front lawn three months before was an edible front yard—edible plants including salad greens, herbs, vegetables, fruit bushes, and edible flowers.
I was enjoying the mix of colour, height, and texture as I popped one of those peppers into my mouth.
Sound the fire alarm. My face lit up scarlet. I grabbed a basket and, between hiccups, plucked all those hot peppers…worried about hot-pepper misadventures with the school kids that go by twice a day.
So the hot peppers were not a home run.
But with those little scorchers harvested, I left the pepper plants. They had dark green leaves and compact form. Nice bedding plants nonetheless. Just not next to the sidewalk.
If you’re interested in edible plants for edible landscaping, keep reading. This post gives you design ideas and top crops for using as edible bedding plants.
What’s a Bedding Plant?

Bedding plants are display plants for seasonal plantings. Here’s a good example, at Butchart Gardens in BC.
Bedding plants are display plants for seasonal plantings. Garden bling. So choices usually combine fast-growing, colour, and resilience.
Some, like coleus, have fabulous foliage. Many have showy flowers. Commonly they’re flowering annuals—though not always. Others, like fuchsia, are tender perennials.
But what they have in common is that they’re typically transplanted into a garden to give an immediate show. Then they’re yanked out at the end of the season.
Lots of common vegetable-garden and herb-garden plants can fit the bill as bedding plants in an edible landscape.
What Makes a Good Bedding Plant?
A good bedding plant is low maintenance. It doesn’t need pruning or staking. You don’t need to hold its hand.
For summertime plantings, a good bedding plant also performs well through the heat of the summer.
Why Use Edible Plants as Bedding Plants?
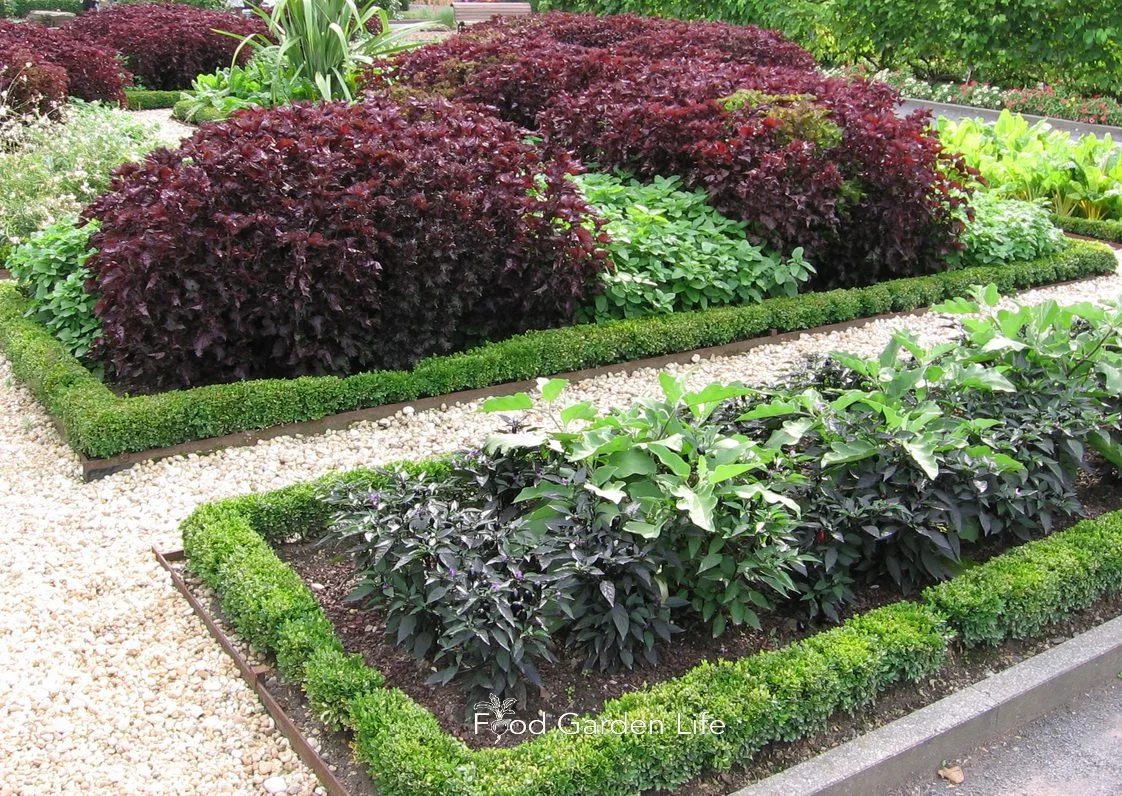
Using edible plants to make ornamental plantings—instead of traditional bedding plants.
I have nothing against flowers. I go overboard planting flowers every year.
But like many home gardeners, I never have enough space to grow all of the plants I want to grow.
So if I can kill two birds with one stone—edibles for both eating and appearance—count me in. Give me space in the flower garden for some veggies…I'll make it into an edible landscape.
Bedding Plants Through the Seasons

Pin this post!
Most ornamental bedding plants are planted after the last spring frost, but there are exceptions. The most common is pansies—which shine on despite a frost.
(If you didn’t know, pansy flowers are edible!)
You might see plantings of ornamental kale and cabbage in the fall. They soldier on through fall frosts while most bedding plant snivel.
(You can eat ornamental cabbage and kale—though they’re bred for looks, not as gustatory delight.)
Just as plant choice can keep the curtains open longer for a flower garden, choosing the right edible bedding plants keeps an edible landscape looking tip-top into the fall.
Designing Edible Landscapes with Edible Bedding Plants
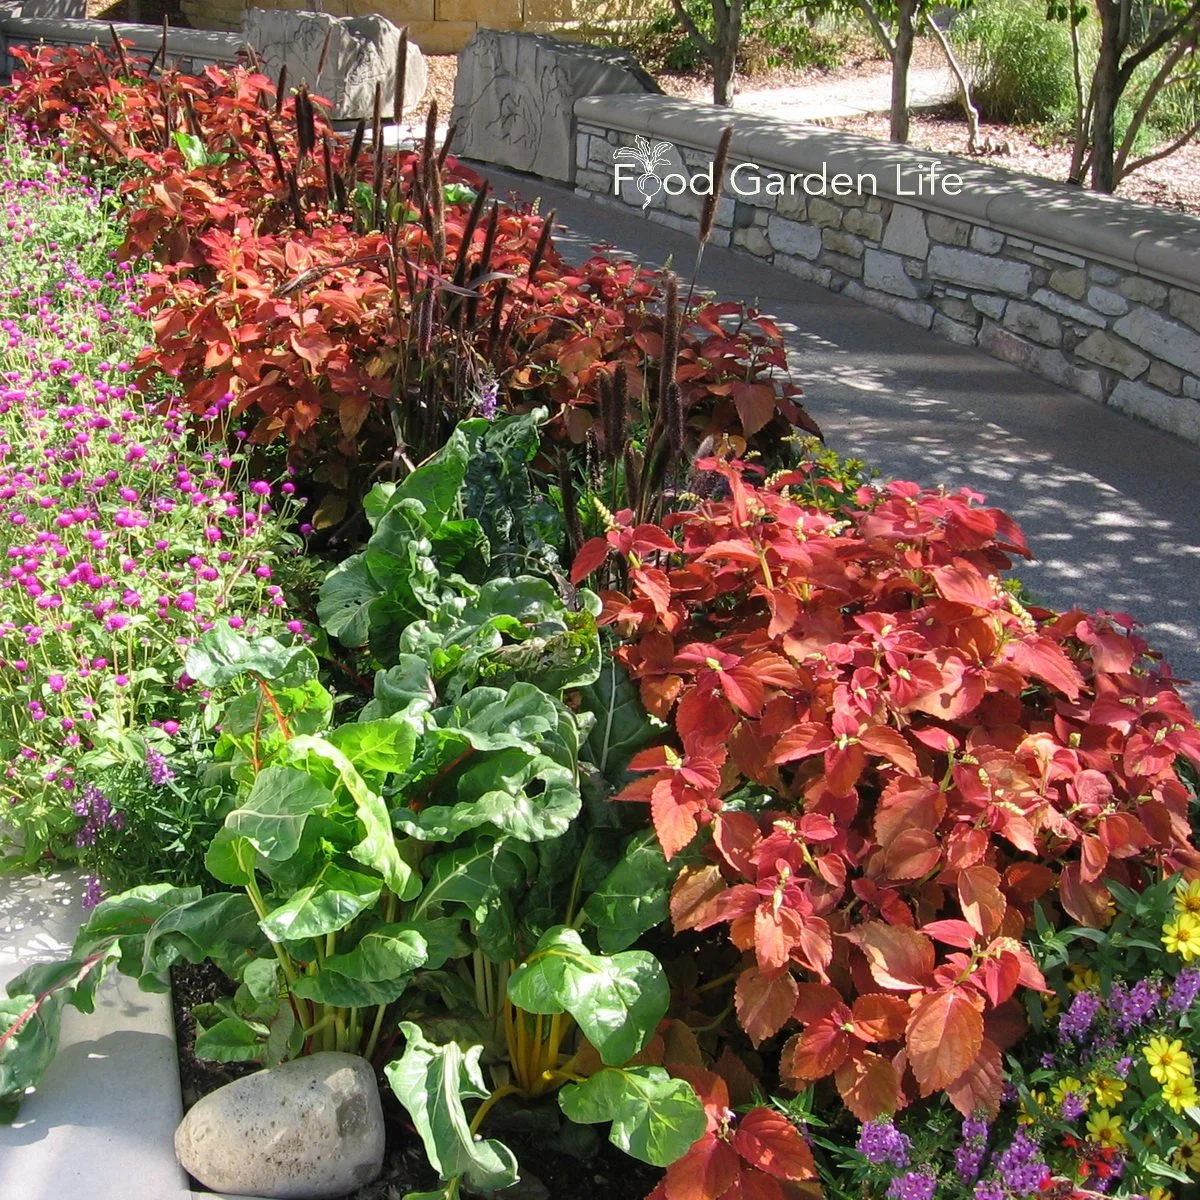
Swiss chard hanging out with some ornamental bedding plants.
The way you use bedding plants depends on the situation and your taste (sorry about the pun.)
My advice? Be wildly creative and do something that your neighbours aren’t doing. Gardening can be more than practical; it can be creative, too.
(It should be creative, that’s the fun part!)
To get your creative juices going, here are three broad ways of using bedding plants in your edible landscape:
Formal. Think of public display gardens with formal flower beds and symmetrical patterns. (If you’re a detail person, this might be up your alley.)
Informal. This is where you’re getting playful with colour and texture and not constrained by having one big formal flower bed. Like icing on a cake, you “ice” the garden bed…a smear of bedding plants here and there.
Carpet. I once worked at a company where we made the company logo from bedding plants. That’s carpet bedding. We’re talking about a tightly planted, intricate pattern. Like painting with plants.
5 Edible Bedding Plants to Start With
Here are five edible bedding plants you can start with. There are lots more (including the pansies and kale I mentioned above.) But these five edible plants are all work horses, easy to find, and give a good mix of colour and texture.
Swiss Chard. Such an underrated plant. While so many of its leafy-green brethren make haste to flower and die, Swiss chard just grows leaves all summer. And along with green varieties, there are red, orange, yellow—even striped red-and-white varieties. Find out why Swiss chard is also a great choice in the fall garden.
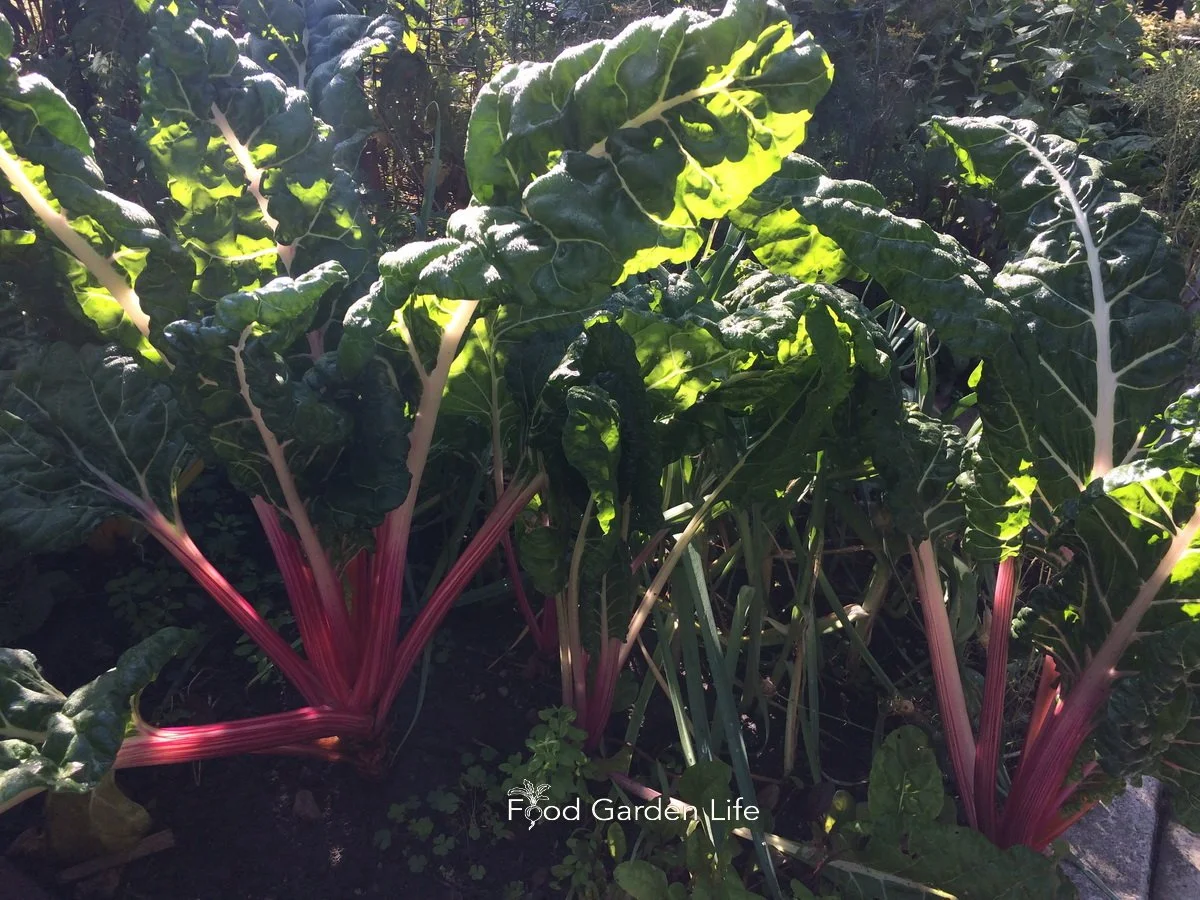
Swiss chard. This underused leafy green makes an excellent bedding plant.
Parsley. The world needs more parsley. Seriously. Beyond garnishing a cheese tray or bulking out your bruschetta mix, parsley is a performer in the edible landscape. Great for edging borders. Planted in larger blocks, curly-leaf parsley is a brush-stroke of texture. And it lasts nicely even as fall frosts fell heat-loving crops.
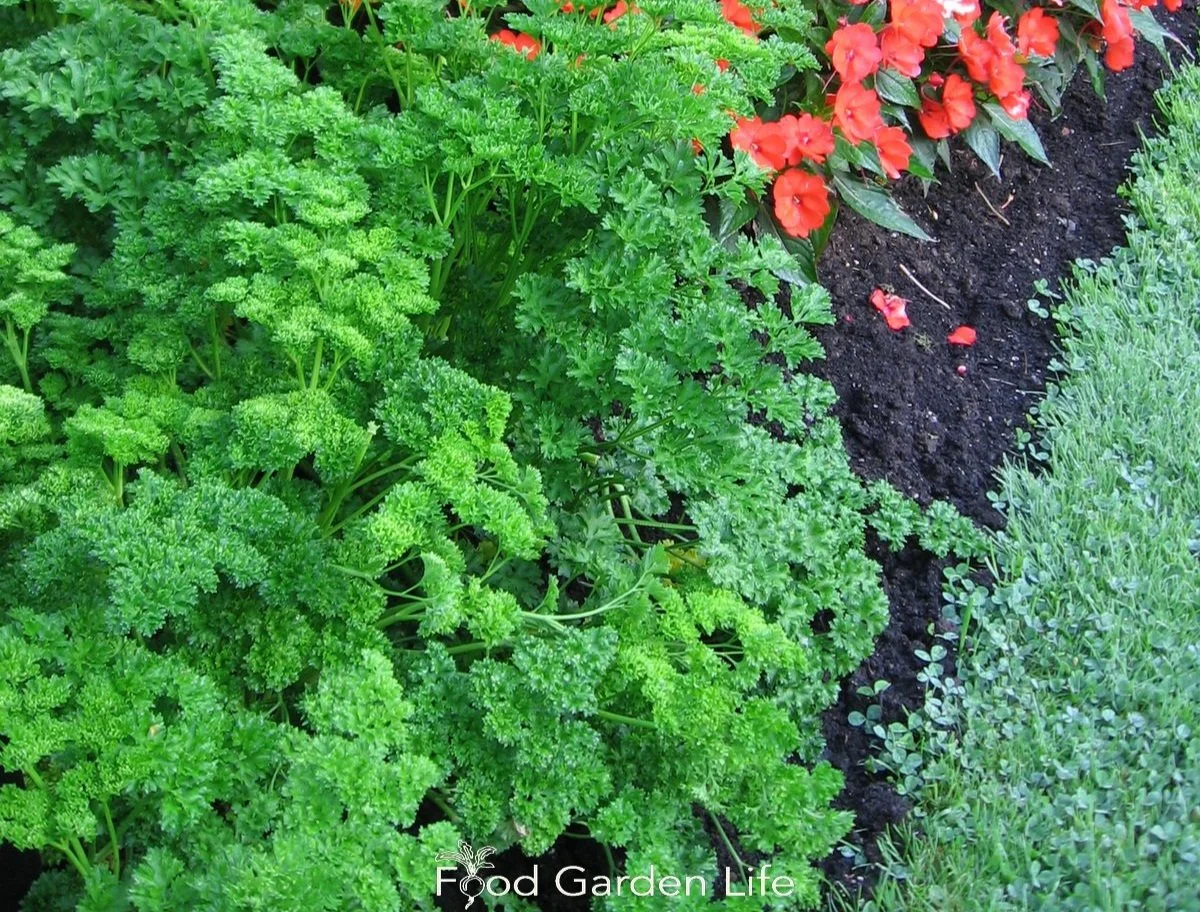
Parsley. A top-notch bedding plant.
Cardoon. How many edible plants can you describe as elegant? This one has a touch of class. I was riveted when I saw cardoon punctuating the landscape of the historic Spadina House mansion in Toronto. What a bold beauty this plant it! Find out more about cardoon.

Cardoon. An elegant bedding plant!
Basil. From compact, little-leaf varieties to more gangly family members, you can choose from quite a range of plant and leaf sizes. And for leaf colour, remember there’s red and purple, as well as green. The compact basils are great for carpet-style designs. Keep in mind that basil, after a spell of cold fall weather, will quickly pack it in for winter.
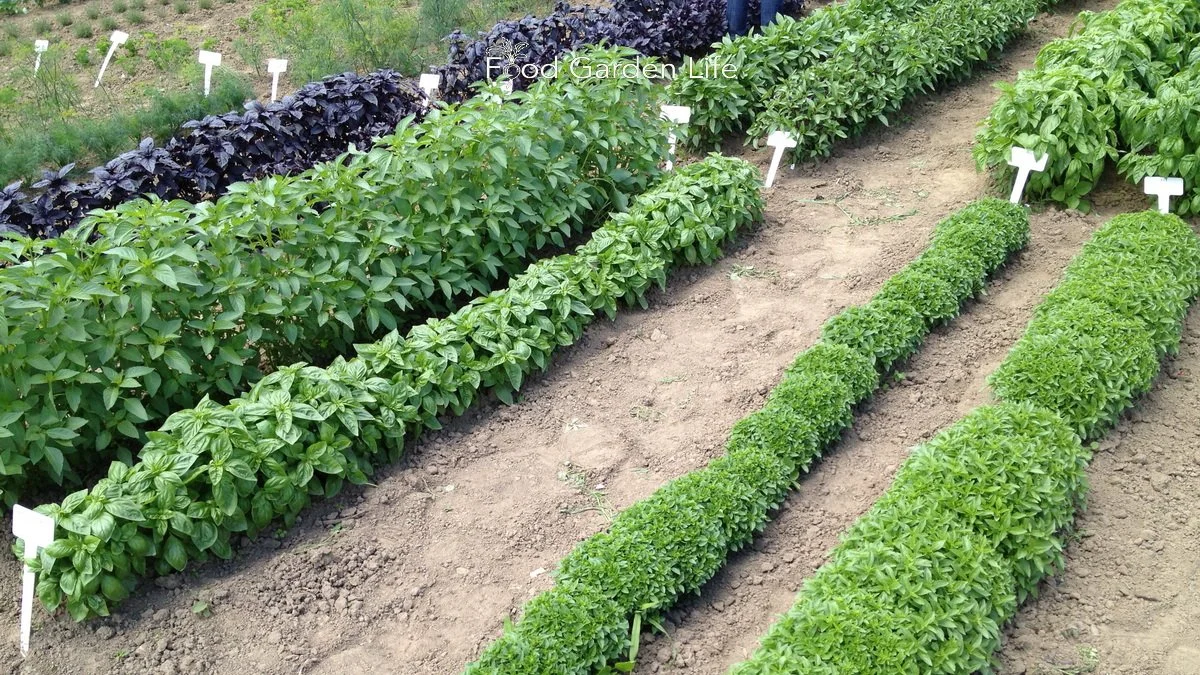
Basil. So many choices…here’s a shot from a trial garden.
Eggplant. Compact plant. Attractive flowers. Beautiful fruit. Eggplant can be front and centre in an edible landscape. I love the small-fruited varieties with interesting colours, such as red-fruited eggplant or the skinny striped ones. Eggplant as a bedding plant? I bet your neighbours aren’t doing this!
Eggplant. Even if you don’t love eggplant, you have to admit it’s beautiful!
Find This Helpful?
Enjoy not being bombarded by annoying ads?
Appreciate the absence of junky affiliate links for products you don’t need?
It’s because we’re reader supported.
If we’ve helped in your food-gardening journey, we’re glad of support. You can high-five us below. Any amount welcome!
Courses
Here’s a course that guides you through creating an edible garden you love. It’s my ode to edible gardening. You’ll find out how to think outside the box and create a special space. Get the information you need about a wide range of edible plants.