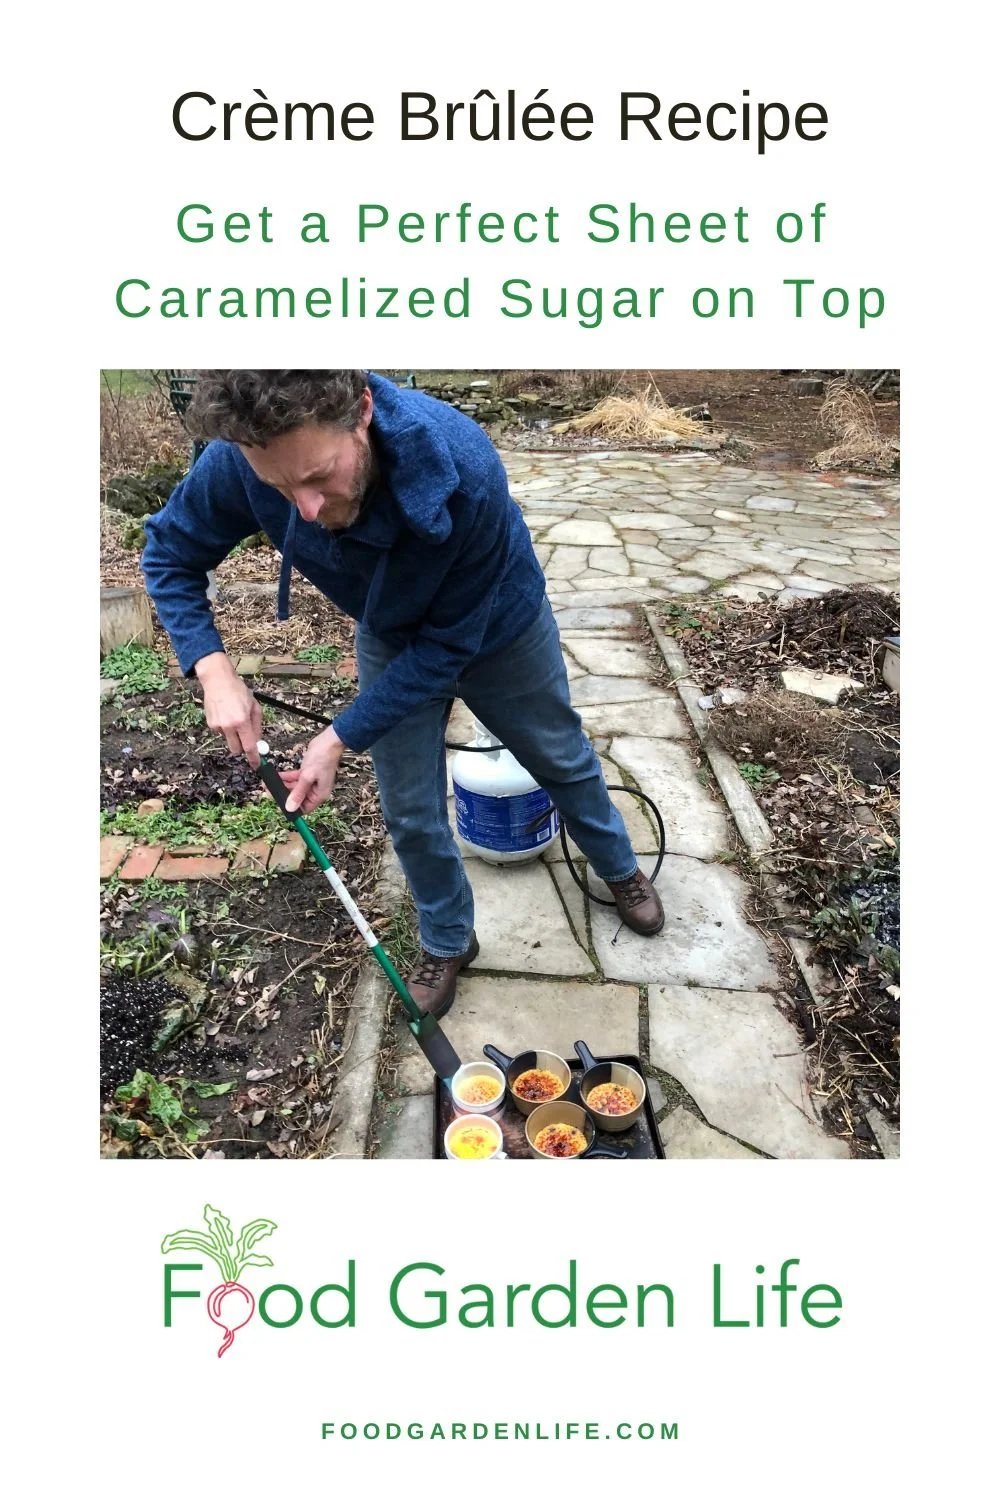
How to Make Crème Brûlée for Gardeners
Learn how to make creme brulee with a perfect, thin crust of caramelized sugar.
Crème Brûlée Recipe for Garden-to-Table Living

It’s like a thin coating of ice on a pond. You can’t quite see what’s below…but you know what’s there. The thin, amber-hued sheet of caramelized sugar over top of this dessert is as important as what’s underneath.
An assertive tap with a spoon, and you’re through—and into the creamy custard.
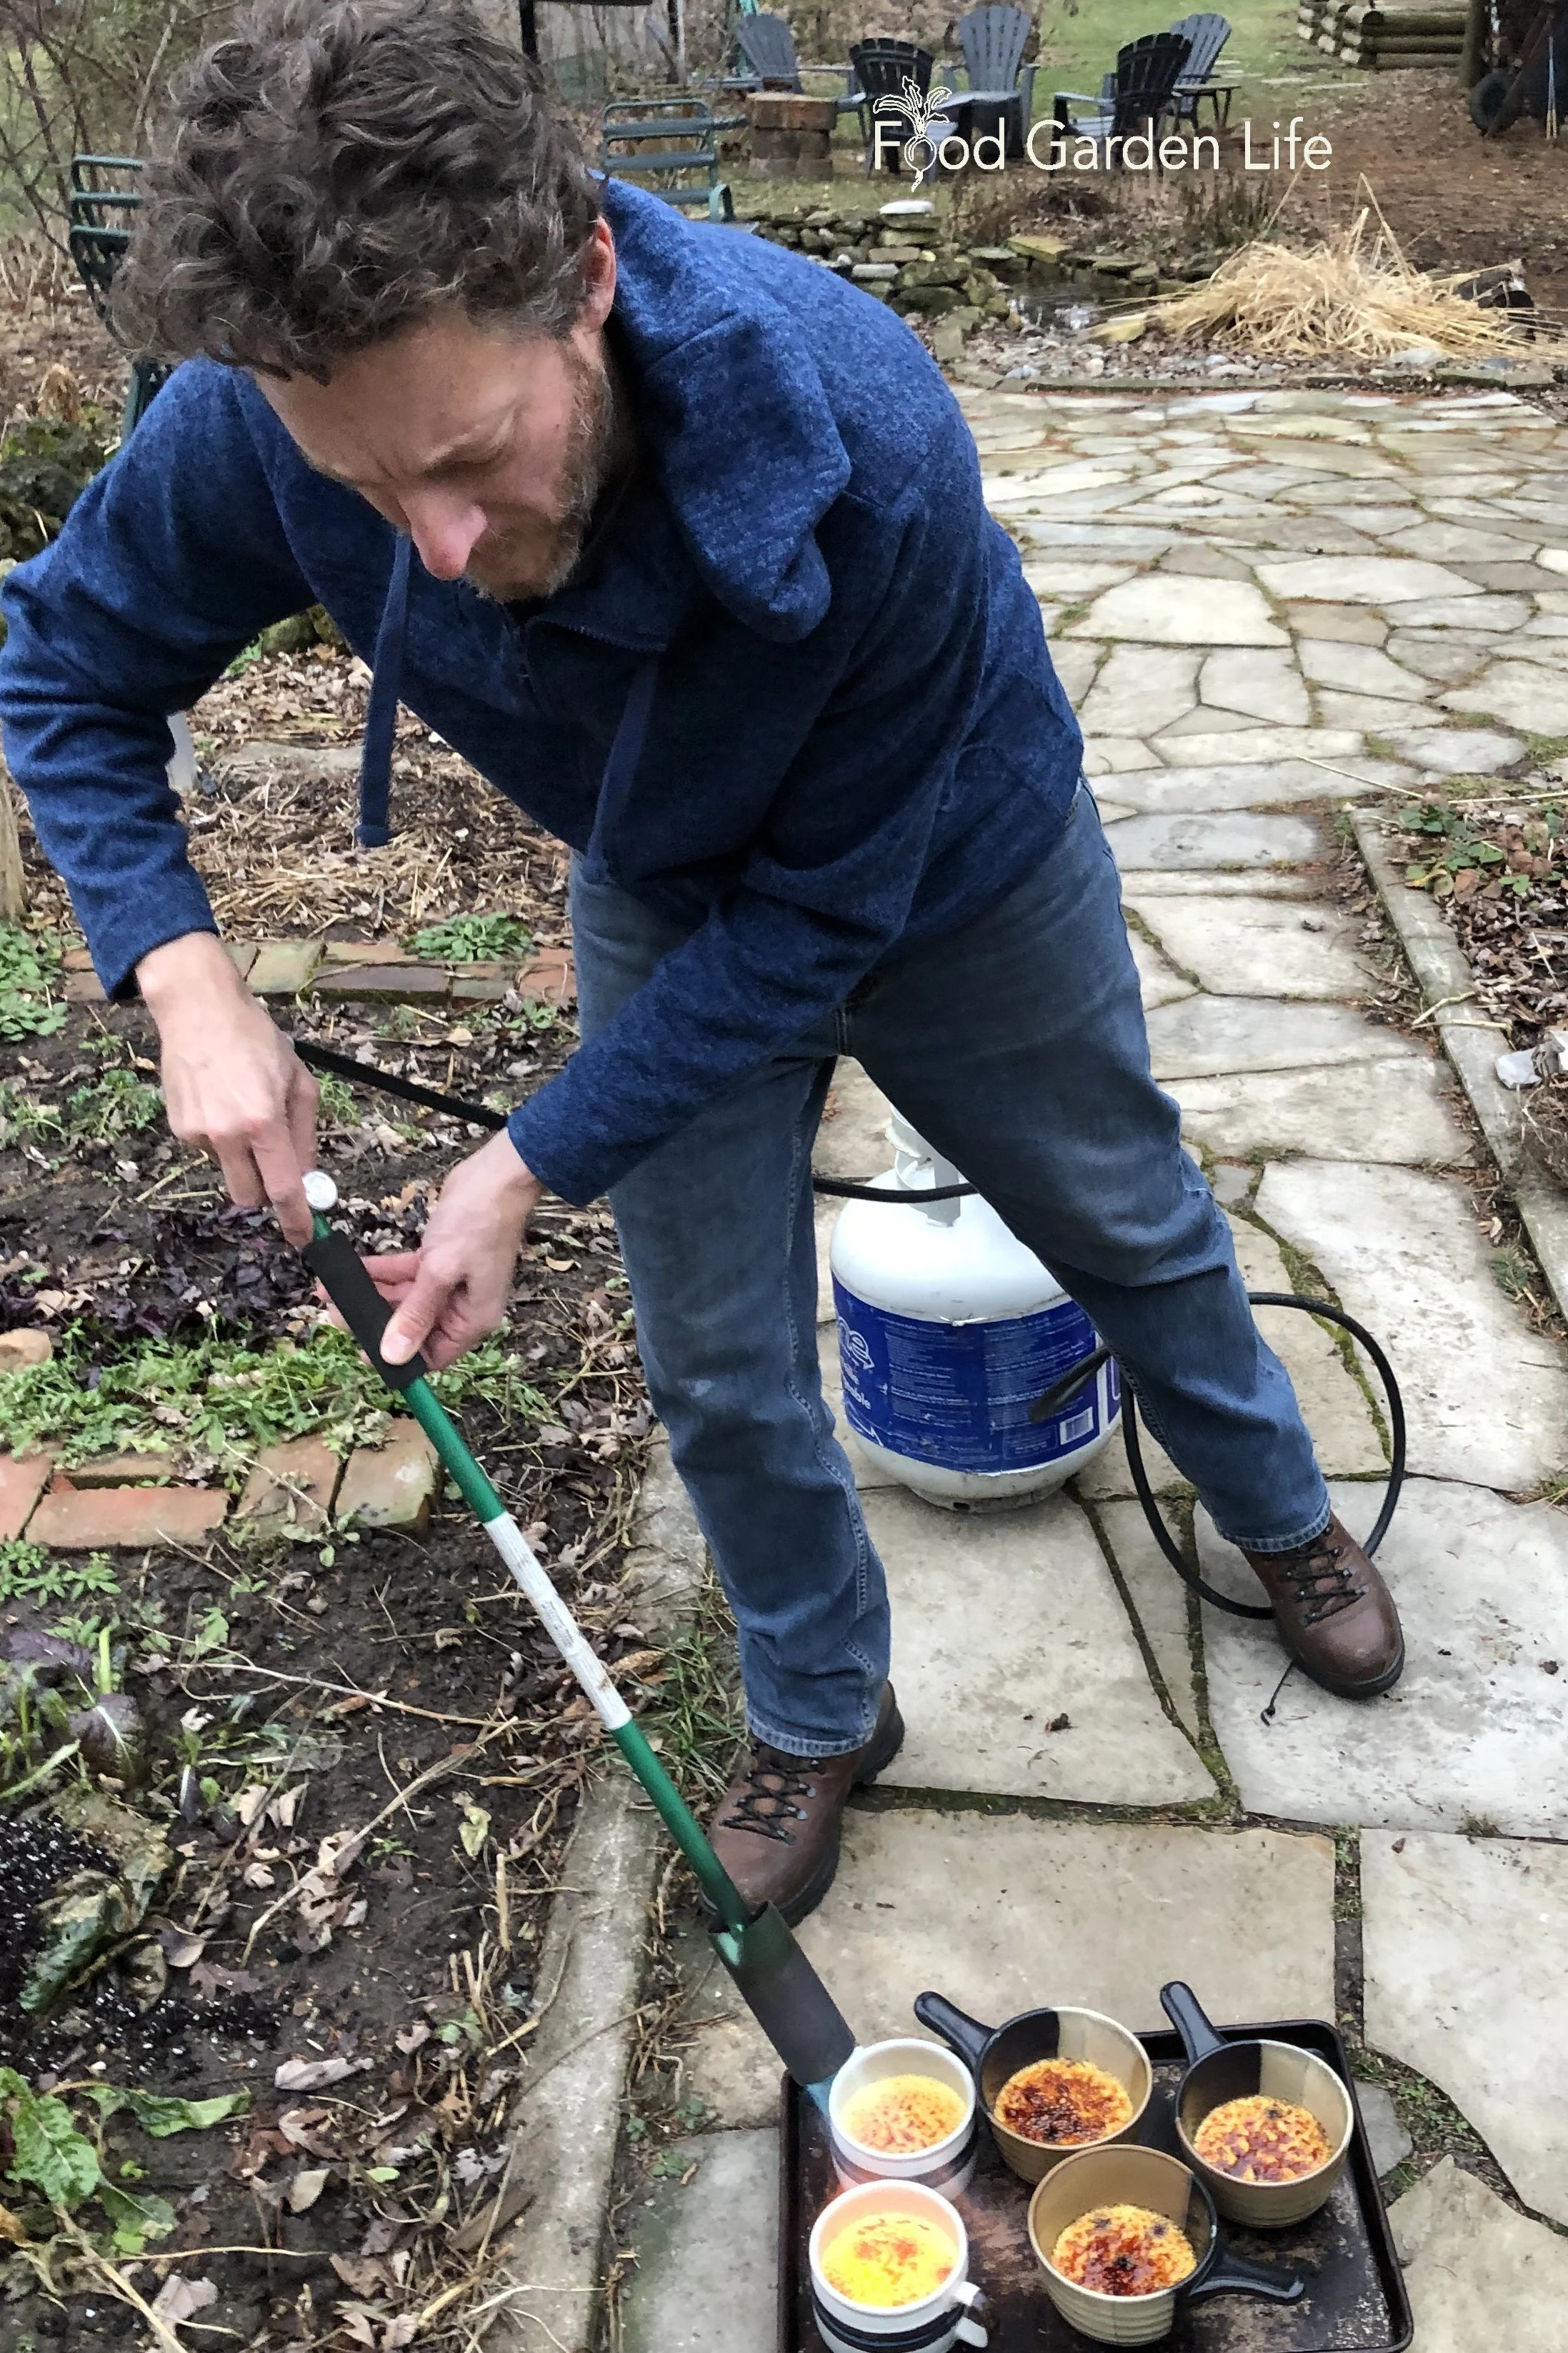
I’ve never had a kitchen blowtorch. Using the broiler, I could never get the sugar to melt into that perfect, thin, brittle sheet of caramel.
When I got a weed torch to flame-weed my flagstone walkways, I had a vision. And it had nothing to do with gardening.
My family thought I was nuts as I carried the tray of custard to the garden.
But they smiled as their spoons clinked through the brittle topping.
I’m pleased to say that a weed torch is versatile for garden-to-table living (though I don’t recommend using it in the house!)
Ingredients
3 cups whipping cream (35% cream)
1 tsp vanilla extract
6 egg yolks
1/4 cup granulated (white) sugar for the custard
¼ tsp. salt
Granulated sugar for the top (Just use granulated sugar…no need for darker “raw” sugars. Plus, with granulated sugar you see darkening as the caramelization happens, and it’s easier to know when you’ve torched it enough.)

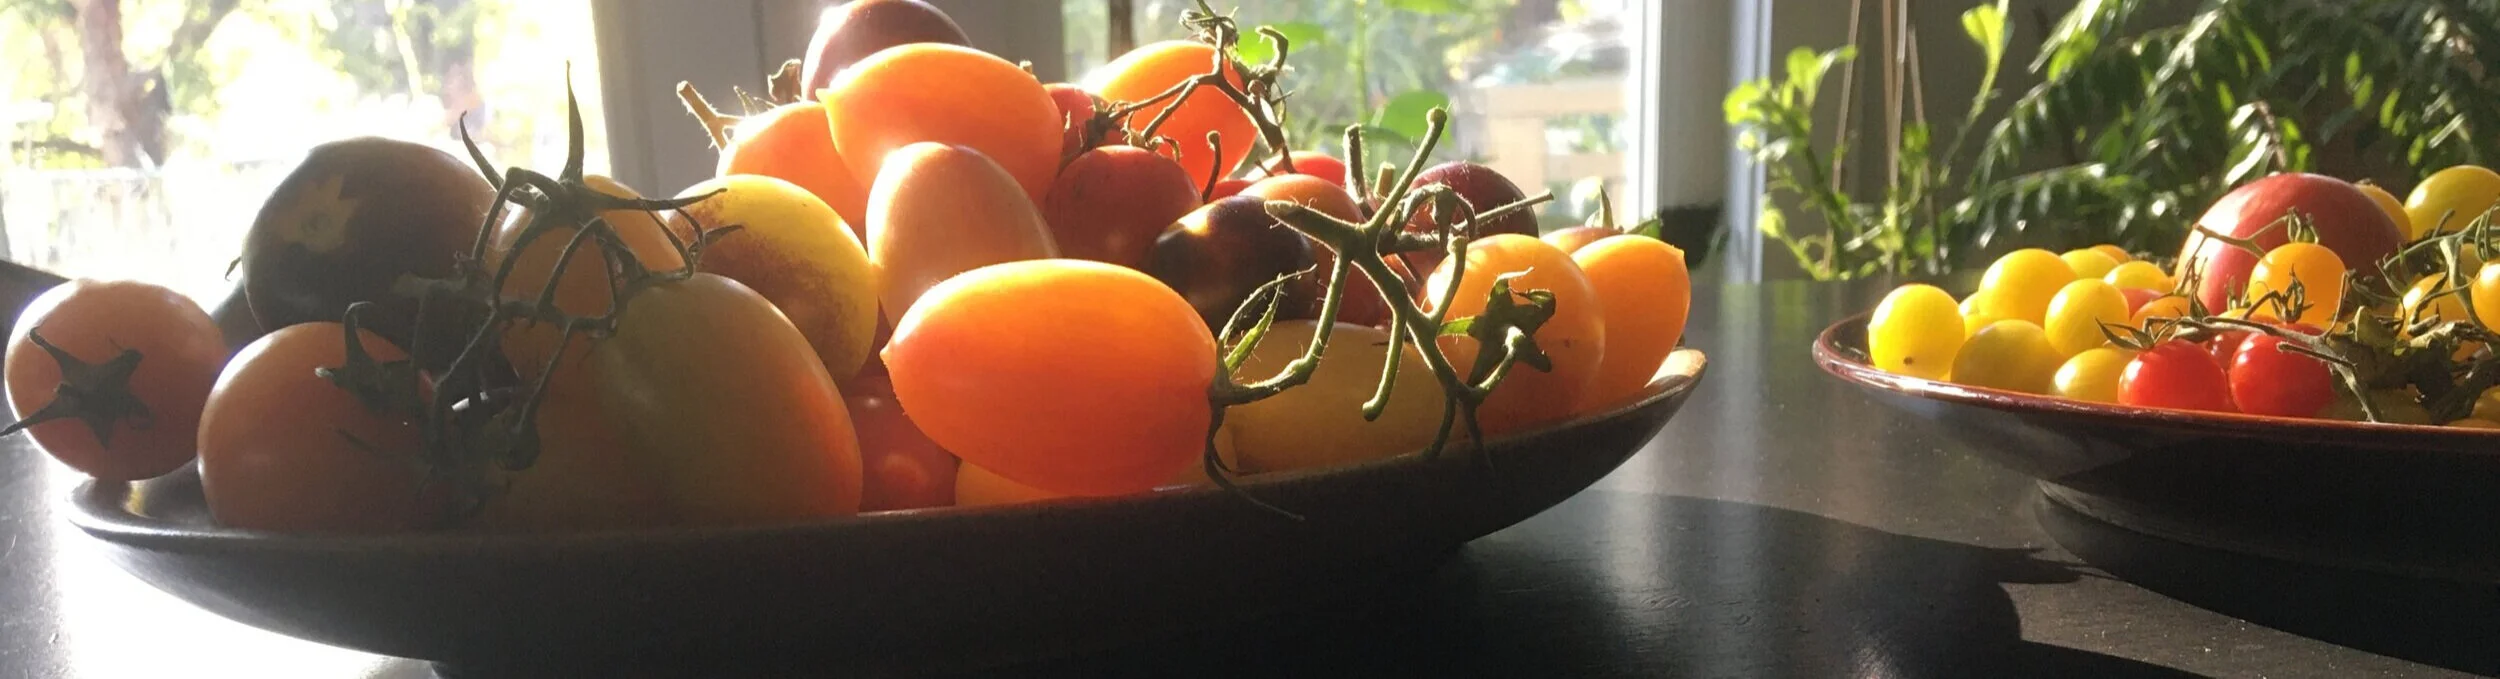
Crème brûlée with blueberries. You can get the perfect, brittle topping with granulated (white) sugar, no need for fancy raw sugars.
Directions
Make the custard early in the day if you want this ready for an evening meal.
Keep the torch moving to prevent burning the sugar.
Preheat oven to 325°F
Heat cream in a saucepan until it’s steaming, but not boiling
Whisk together egg yolks, salt, and sugar
Slowly add hot cream to yolk mixture as you continue whisking it (do this slowly…you don’t want to make scrambled eggs)
Sieve the cream-yolk mixture to remove any stringy bits from the egg yolks
Whisk in vanilla
Divide up into ramekins or other heat-proof dishes
Time for the water bath: Put the ramekins into a deep pan (I use a roasting pan) and add boiling water up to about half the height of the ramekins
Bake 30 minutes
Remove from roasting pan to cool
Refrigerate uncovered for 4 hours
The last step is just before serving: sprinkle sugar evenly over the top, so that all the custard is covered, and then flame it with your weed torch
The goal is a dark, golden-brown layer, and the trick is to keep the torch moving so it doesn’t rest in any one place and burn the sugar…brown is good, black is not
After you’ve torched them, give them 5 minutes to cool before you serve your guests
Wait for the accolades
Pin this post!
Variations
Add Fruit
I love putting blueberries or raspberries in the custard, after it’s cooled, and before I pop it into the fridge to set. The tanginess plays well with the richness of the custard.
Bigger Bowls
Why limit yourself to small ramekins?
I like to use the larger, oven-proof bowls we use to make French onion soup!
Like Creamy Desserts?
Another one of my favourites is panna cotta, an egg-free custard that’s set with a bit of gelatine.
Like crème brûlée, it goes nicely with berries.
But we do something different. We make it with fig leaves. You don’t eat the leaves—but steep them in the cream to pull out the fig-leaf flavour. I’d describe the flavour as somewhere between toasted almond and coconut.
Here’s my recipe for fig-leaf panna cotta.
Find This Helpful?
Enjoy not being bombarded by annoying ads?
Appreciate the absence of junky affiliate links for products you don’t need?
It’s because we’re reader supported.
If we’ve helped in your food-gardening journey, we’re glad of support. You can high-five us below. Any amount welcome!
More Garden-to-Table Cooking Ideas
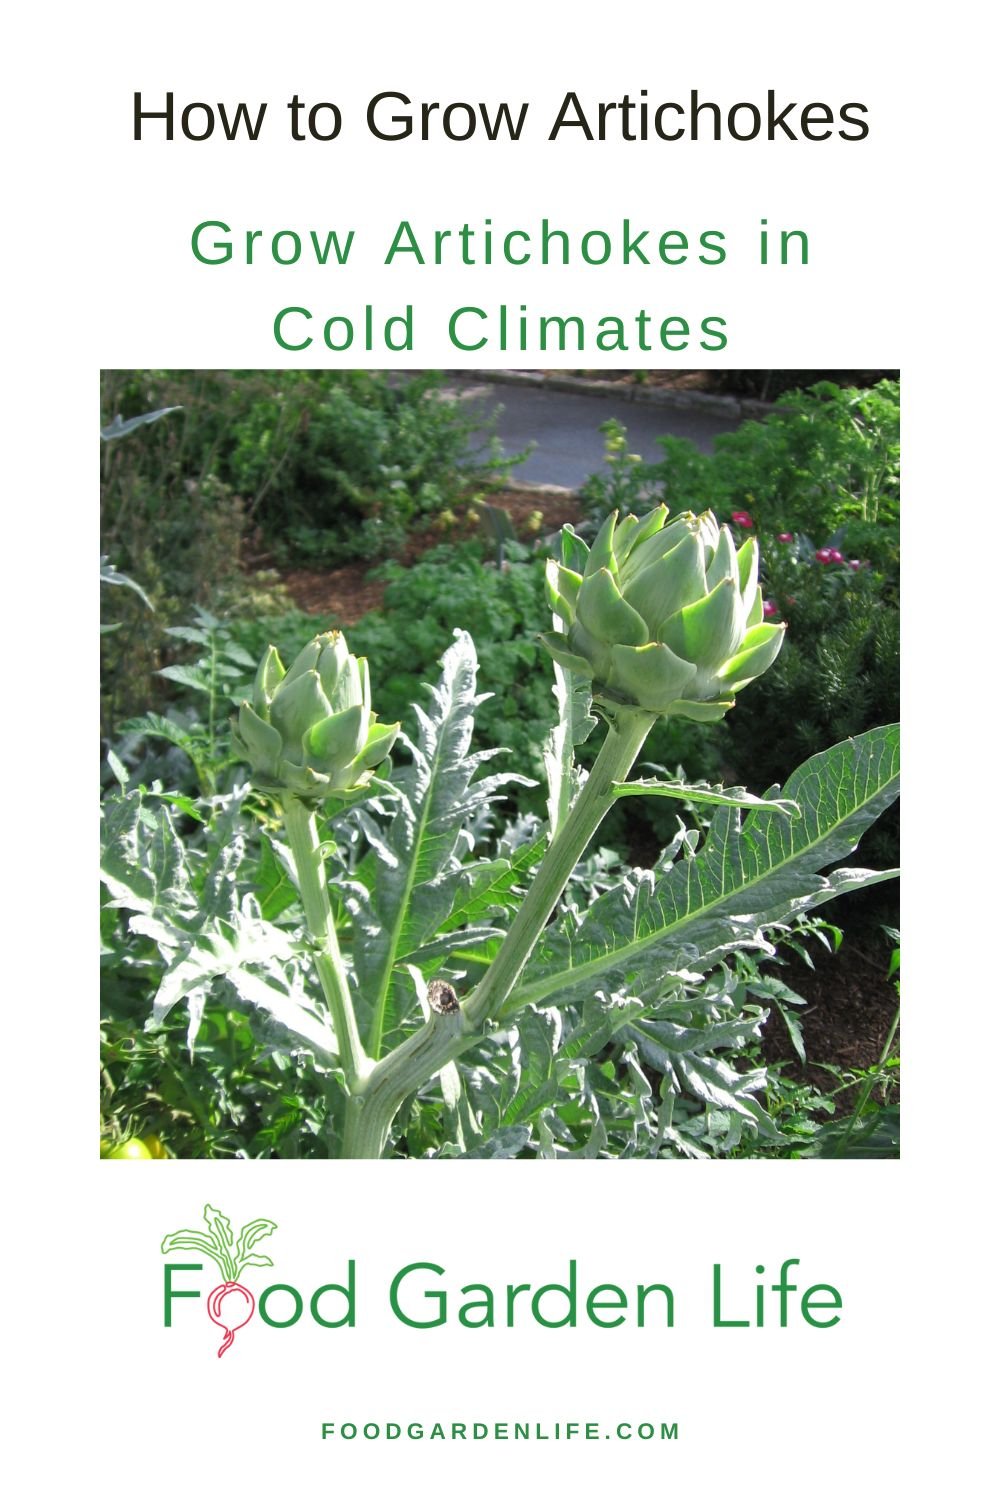
Guide: Grow Globe Artichokes in Cold Climates
Yes, you can grow this Mediterranean vegetable even if you're in a cold climate. This guide tells you what to do to harvest your own homegrown artichokes.
By Steven Biggs
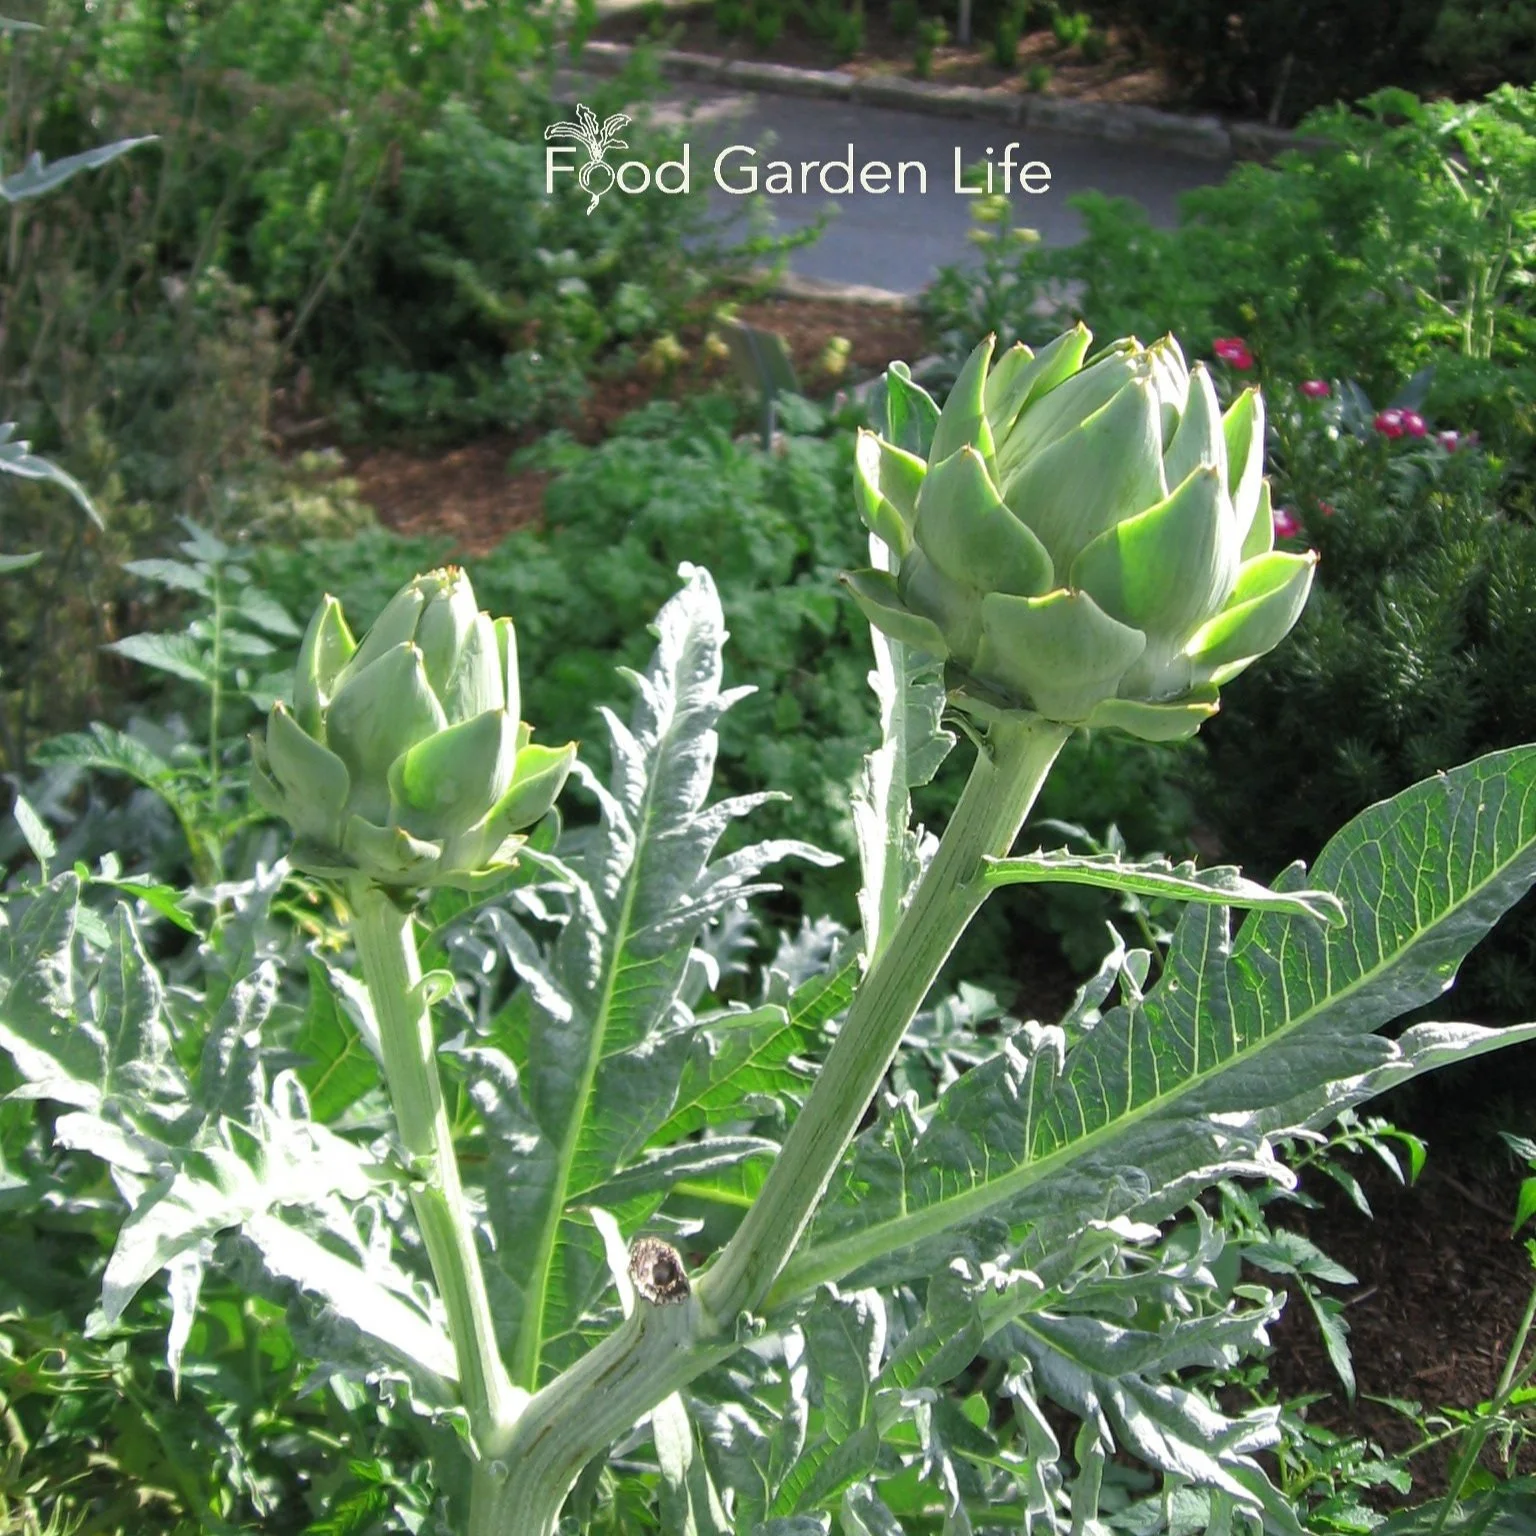
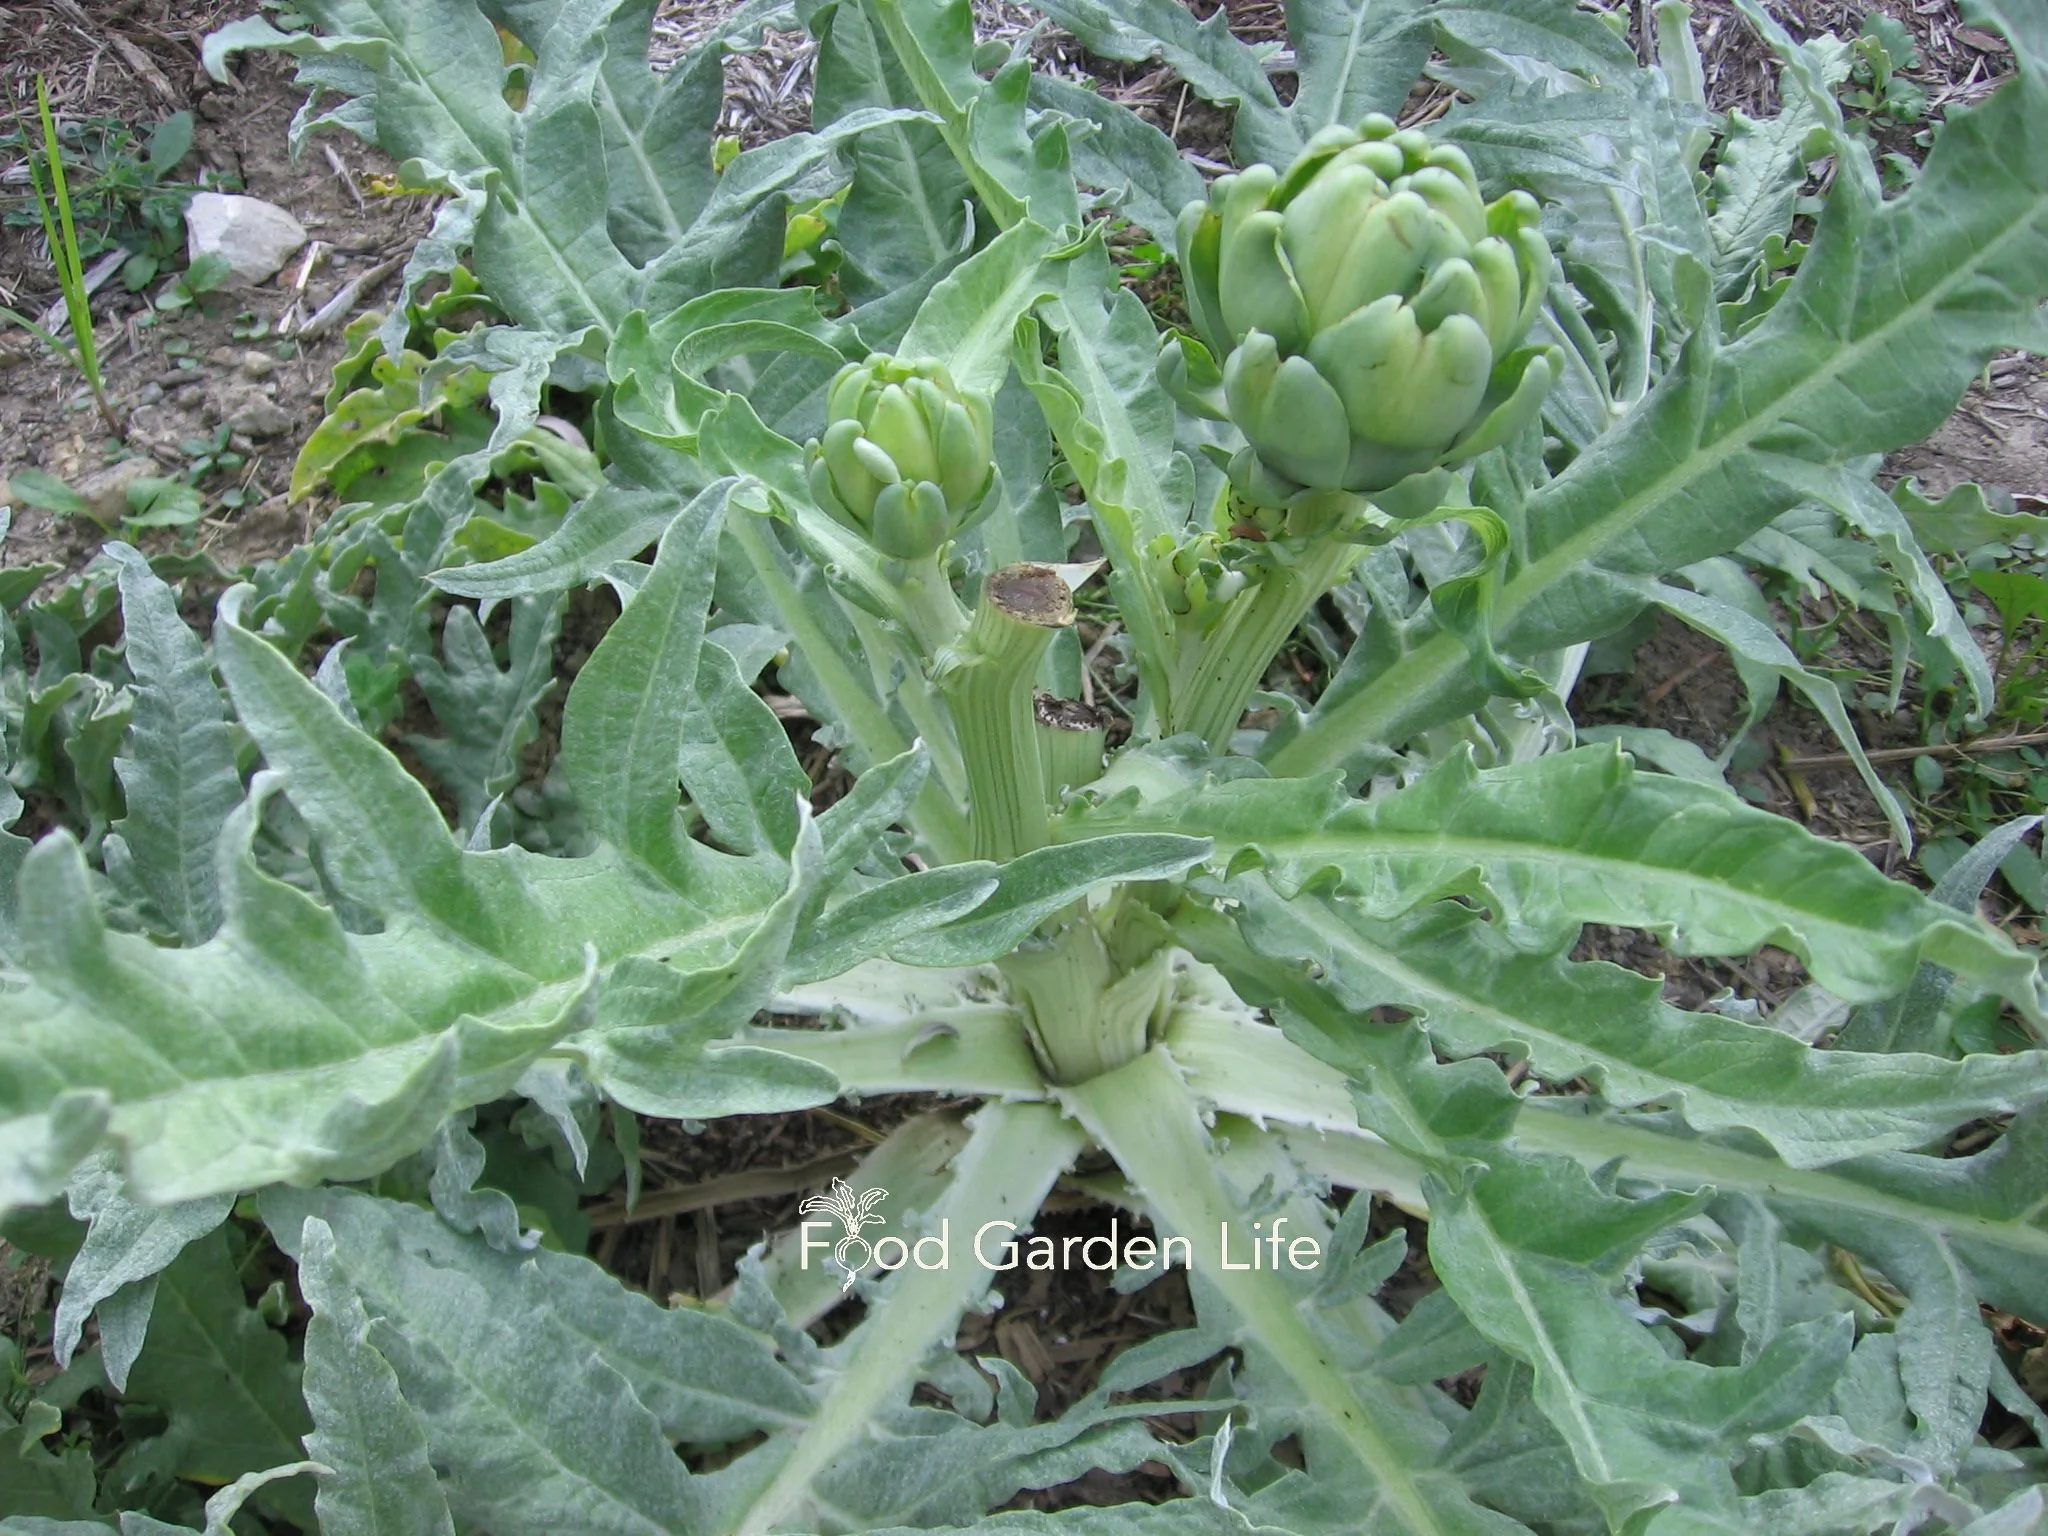
Planting Artichokes for the Delicious Flower Buds
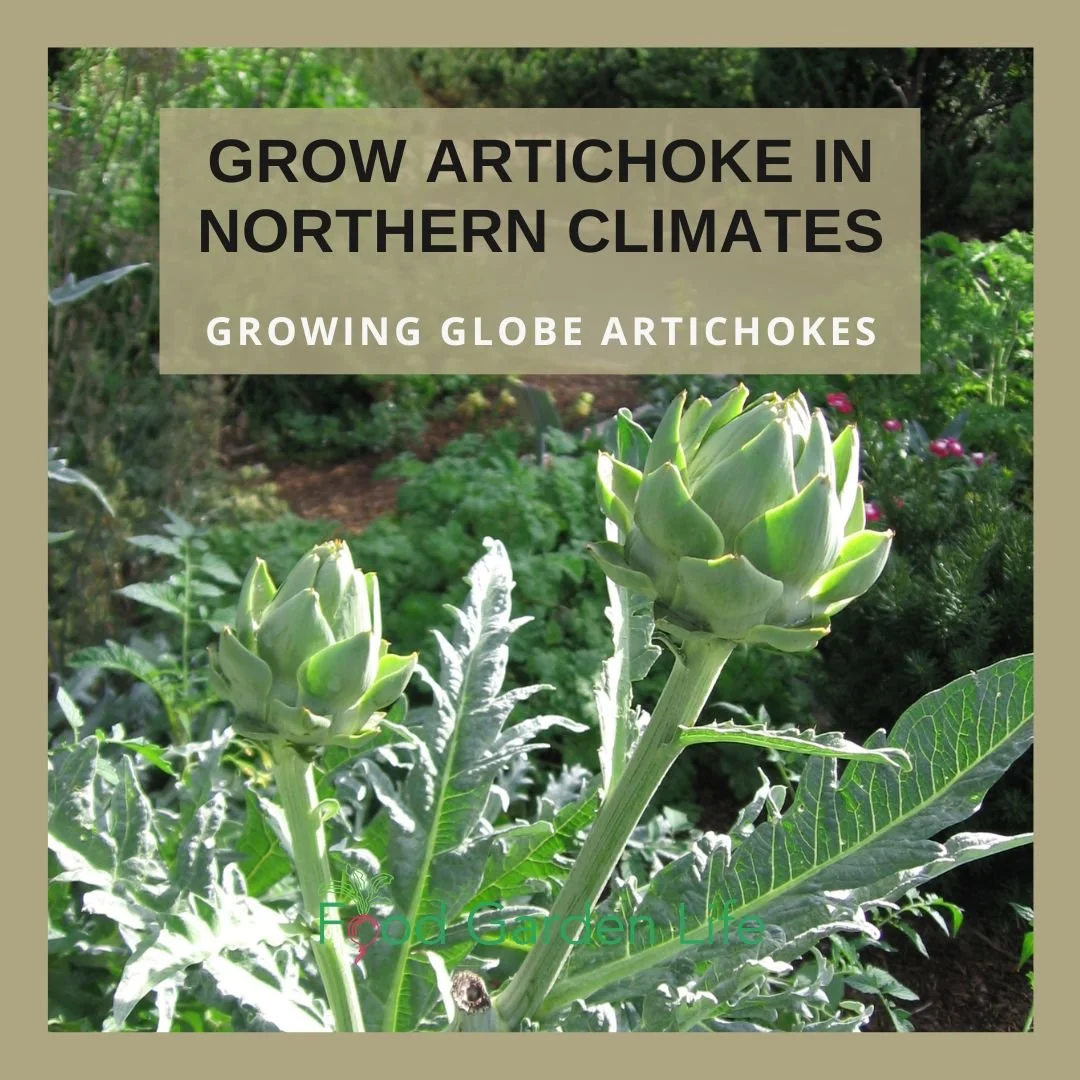
Growing artichokes in cold climates is done differently than in milder climates.
“Dad, make lots of garlic butter!” It’s the first thing my kids say when I tell them I’m cooking fresh artichokes. Fine with me! I love the garlic butter as much as they do.
Besides the taste (and the garlic butter) there’s another thing I love about globe artichoke: It’s slow to eat, so there’s lots of time for family banter. We chat as we peel off bracts, dip them in butter, and repeat.
It’s the antithesis of fast food.
In our household we just call them artichokes. But some people call them globe artichokes – and in the UK you might hear them called French artichokes. (And if you like Latin names, Cynara cardunculus, var scolymus.)
Whatever you call them, you’re eating unopened artichoke flowers. Edible flower buds! (Unlike Jerusalem artichoke, where you’re eating a tuber.)
It can be a challenge to grow artichokes in cold climates. Keep reading, this article will explain how to grow your own artichoke plants and get flower buds.
You can grow artichokes in northern climates…with the right variety, temperature, and timing.
Growing Artichokes in Northern Gardens
Artichoke is a tender perennial, meaning that it lives for a number of years where there are mild winters. But in a colder, northern climate, it does not survive the winter.
That means northern gardeners grow artichoke as an annual. (I have tried digging up mature plants in the fall to overwinter in my cold cupboard…but, frankly, it’s not worth the bother.)
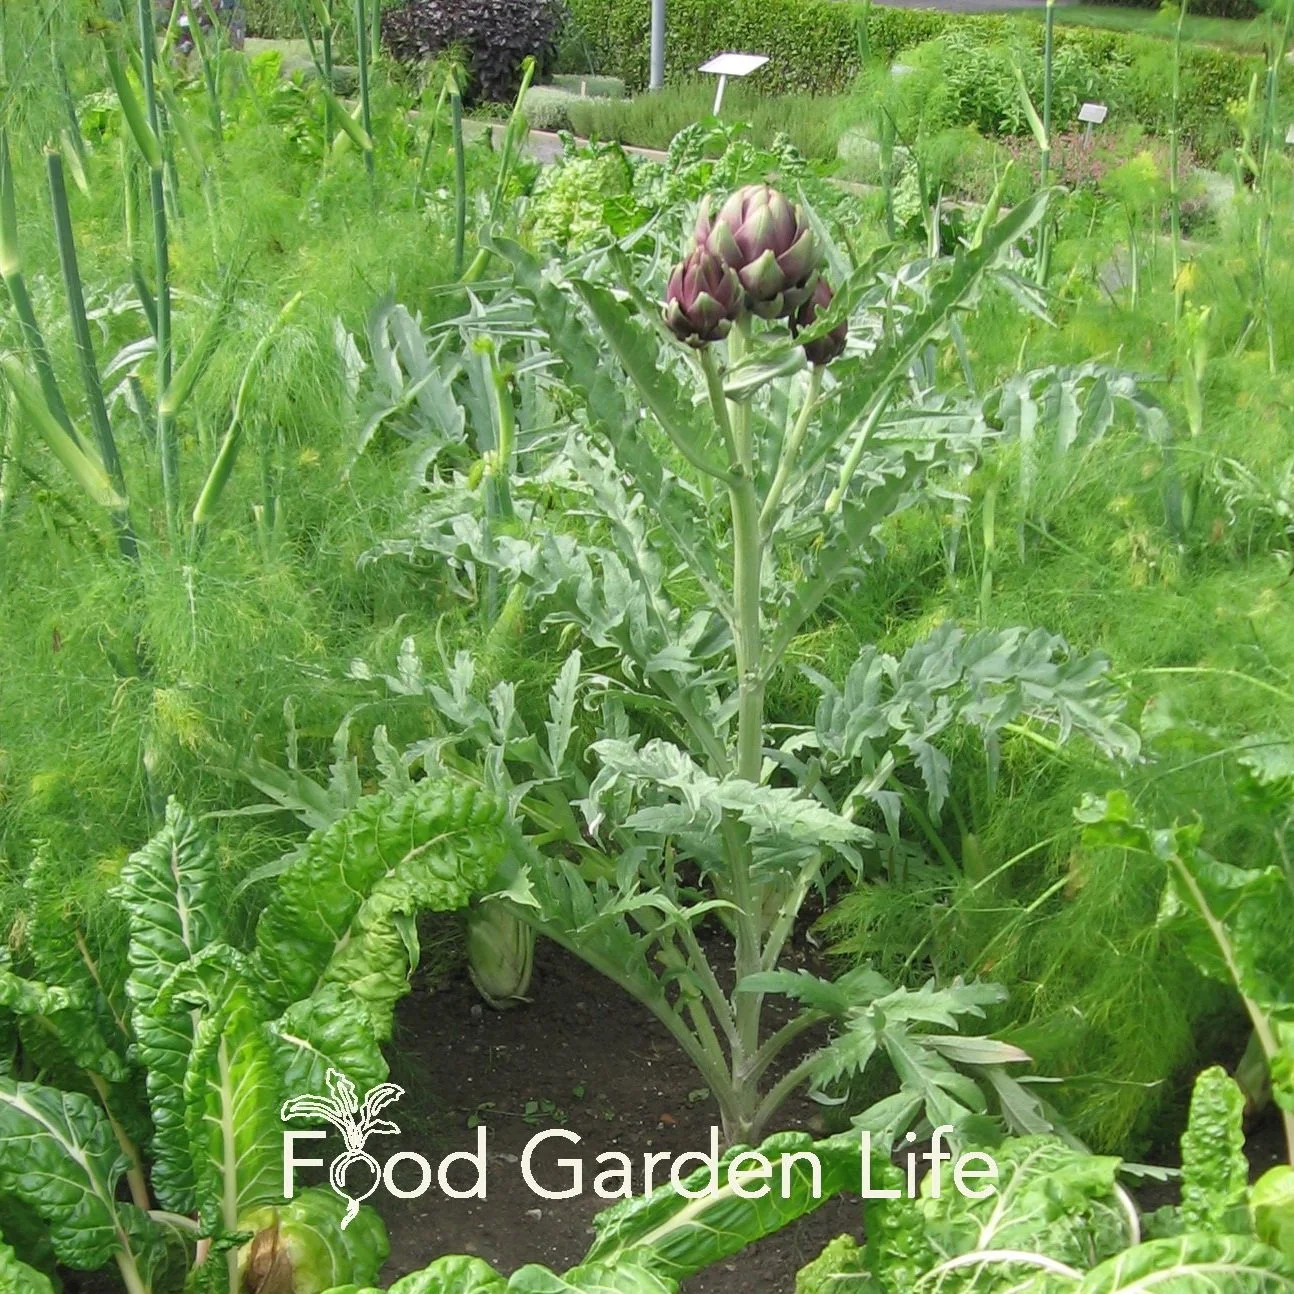
In warmer areas, artichoke can be a big plant. But in the cold-climate garden, one metre (3’) high and wide is the biggest I’d expect…and probably smaller.
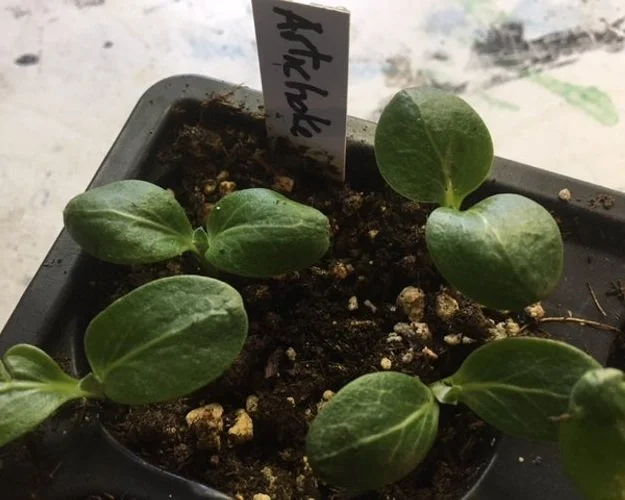
In cold climates, artichoke can be grown successfully from seed
How to Grow Artichoke in a Cold Climate
In areas where it survives the winter, it is often grown from “offsets,” which are side shoots that come up from established plants. These are cut off and rooted to make new plants.
If you’re in a cold climate, you probably won’t find offsets for sale. The alternative is to grow artichoke from seed.
That’s what I do.
Don’t think of seed-growing artichoke as second best. I know of a farm near where I live, in Toronto, that grows first-rate seed-grown artichokes on a large scale.
Just make sure you have a long enough growing season, upwards of about 100 frost-free days.
Grow Artichoke from Seed
Start artichoke seeds indoors, 8-10 weeks before the average last frost date for your area. Plant seeds about 6 mm (1/4”) deep. A warmer temperature helps with germination, so I put mine on a heat mat. (Hot water radiators or heated floors are good heat sources too!)
Once your artichoke seedlings are up and growing, take them off the heat.
I usually plant 3-4 seeds in a small pot. Once they’ve grown a second set of leaves, I separate them and give them their own pots.
Trick
Like many seed-grown perennials, flowering in the first year isn’t assured. To get flowers in same year that you grow your artichokes from seed, you give your young plants a cool-temperature treatment.
It seems counter-intuitive to a lot of gardeners. We’re used to coddling our seedlings. And that’s true for lots of the heat-loving crops we grow such as tomatoes, peppers, eggplants.
But…artichoke plants are different. And the cool-temperature tweak helps induce flowering.
So here’s the idea:
Imagine a young artichoke seedling growing in a warmer zone, where it grows as a perennial: The first year it makes leaves, then it lives through the mild winter, and then, finally, it flowers in its second year
You don’t have the luxury of a second year because your cold winter temperatures will kill your artichoke
But…you can expose your artichoke seedlings to cool conditions before planting them into the garden
And those cool conditions before transplanting into the garden do the same thing as a winter would – they move the plant into flower-production mode
Chill Treatment for Artichoke Plants
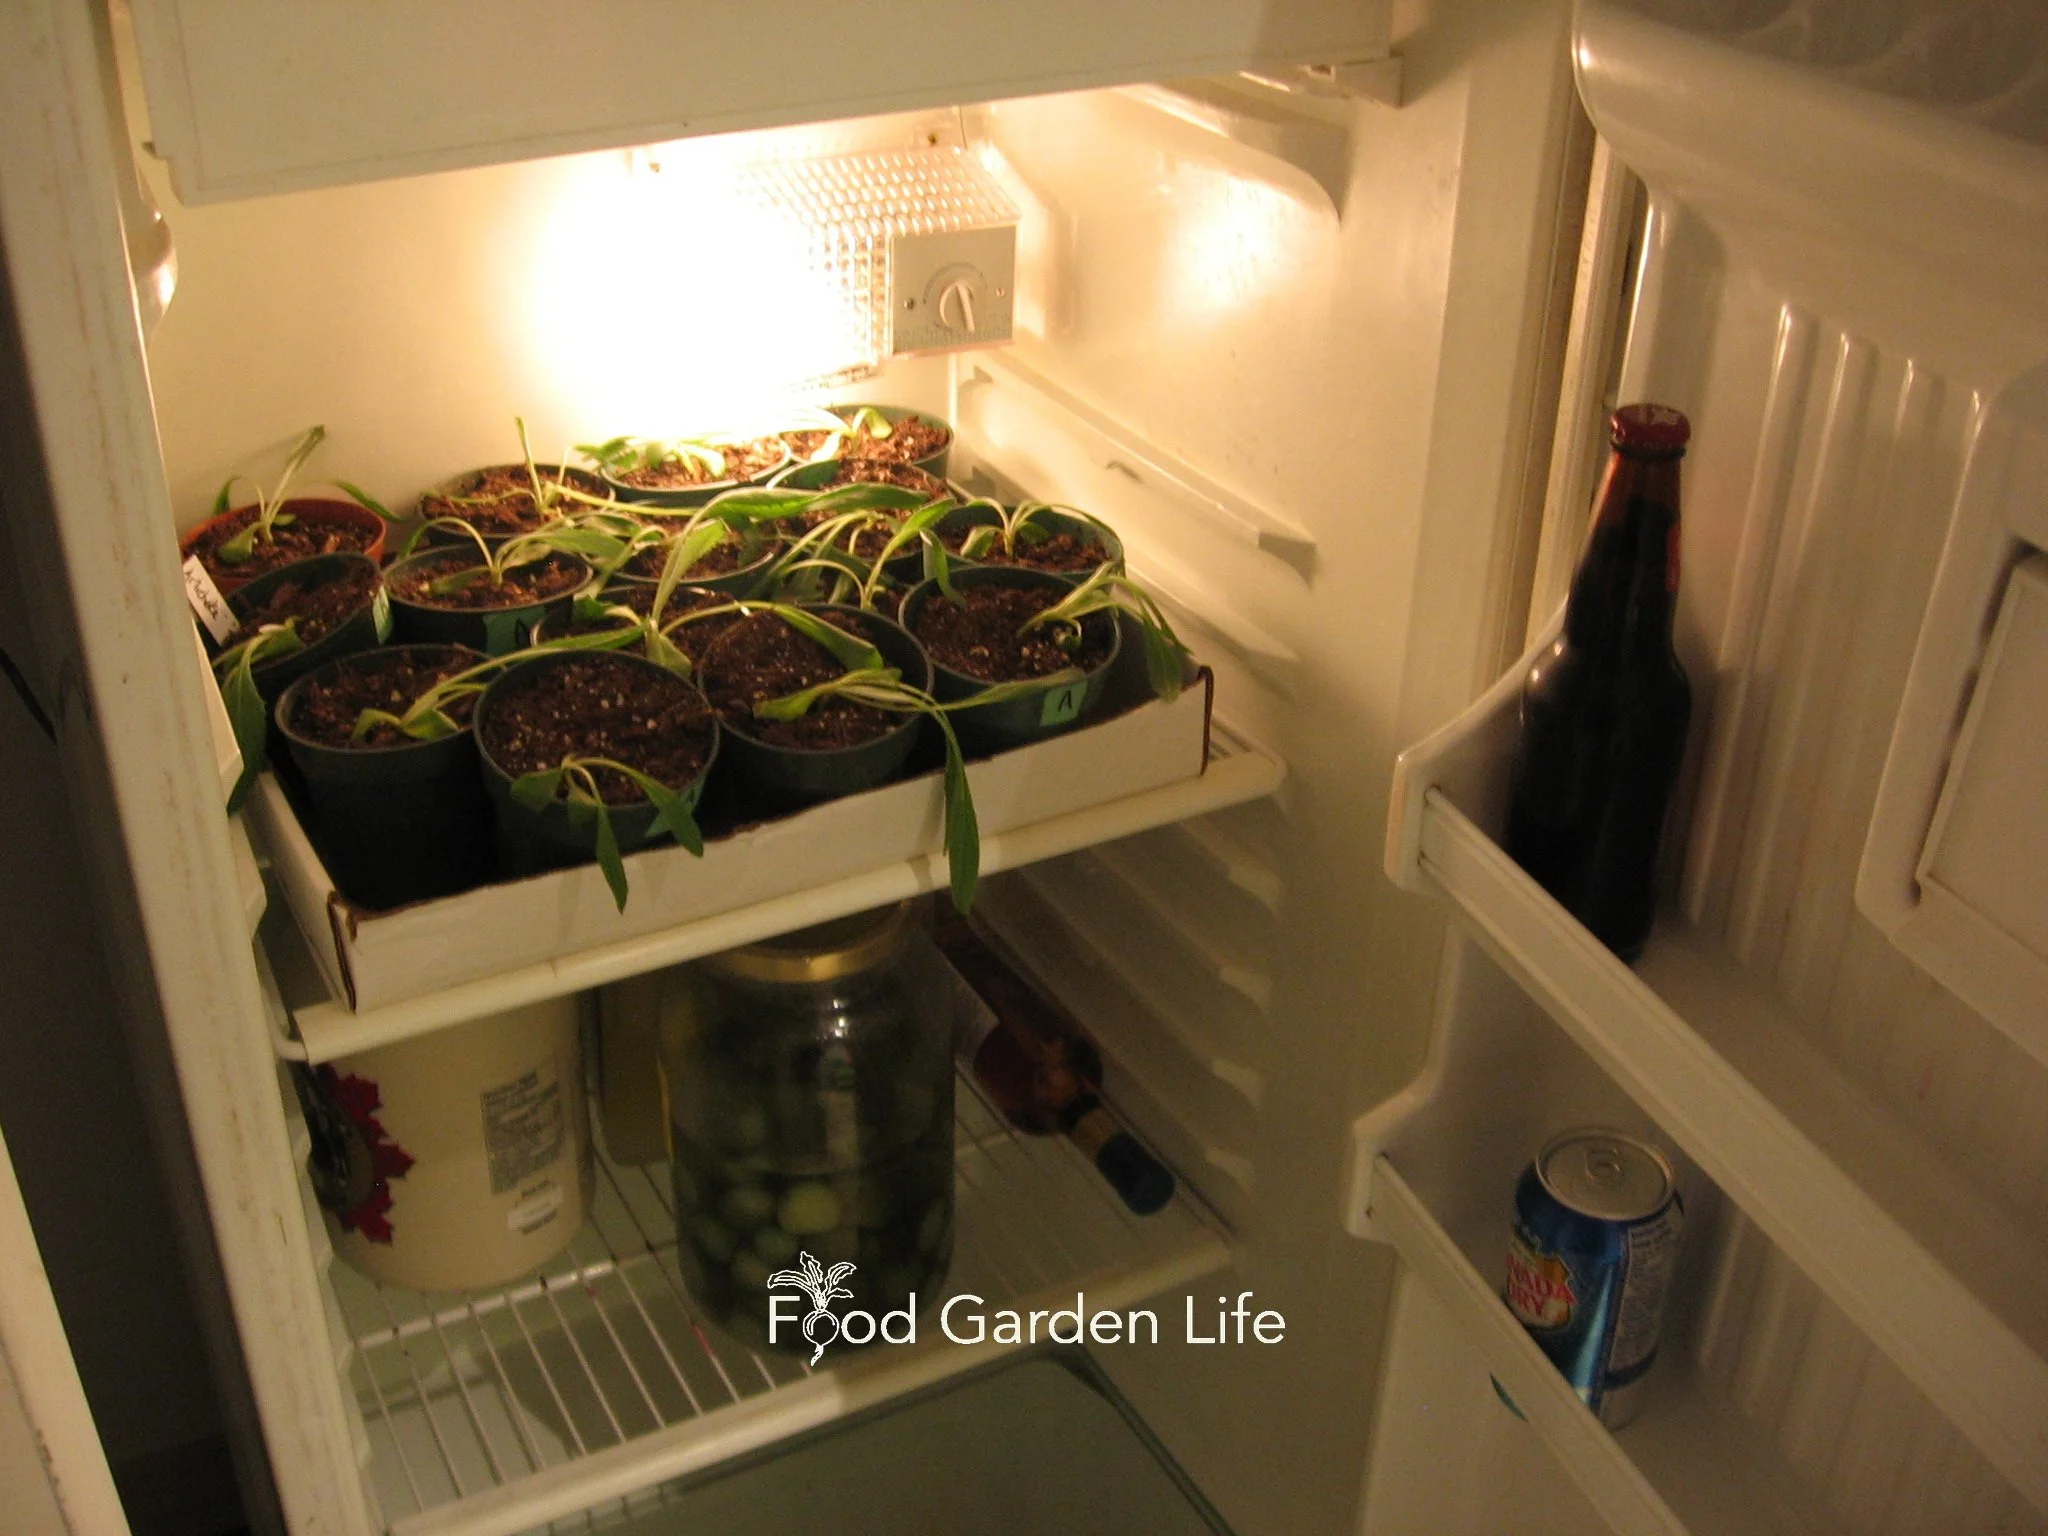
Another way to provide a chill treatment to artichoke seedlings is with a stint in a fridge…but make sure they don’t dry out, as fridges have a drying effect.
Move artichoke plants outdoors when they won’t be exposed to frost, but will still get a week or two of cool temperatures.
Ten to 14 days of temperatures less than 10°C (50°F) helps to get flower buds to form.
Artichoke Seed
Get artichoke varieties known to produce artichokes buds in the first season when grown from seed.
Two well-known varieties are:
‘Green Globe’
‘Imperial Star’
Planting Artichoke Plants in the Garden
Artichoke plants won’t grow as large in cold climates, so a spacing of up to 1 metre (3’) between plants is ample.
Artichoke plants can grow very large plants in areas where they survive the winter. So you might come across recommendations to space them as far apart as 1.5 metres (5’). Don’t!
Spacing: In cold climates, plant artichokes 1 metre (3’) apart
Light: Full sun is best
I’ve seen artichoke plants grown in straw-bale gardens, 2 plants to a bale. Find out more about straw-bale gardening.
Care
If your goal is large artichoke buds, remember that there is a main, central flower; and there will also be secondary flowers. I leave them all to grow, and get 5 or more artichokes from a plant.
But…gardeners out to grow large, prize-winning artichokes can prune off secondary flowers. (But don’t discard them! Use these in the kitchen as baby artichokes, see below.)

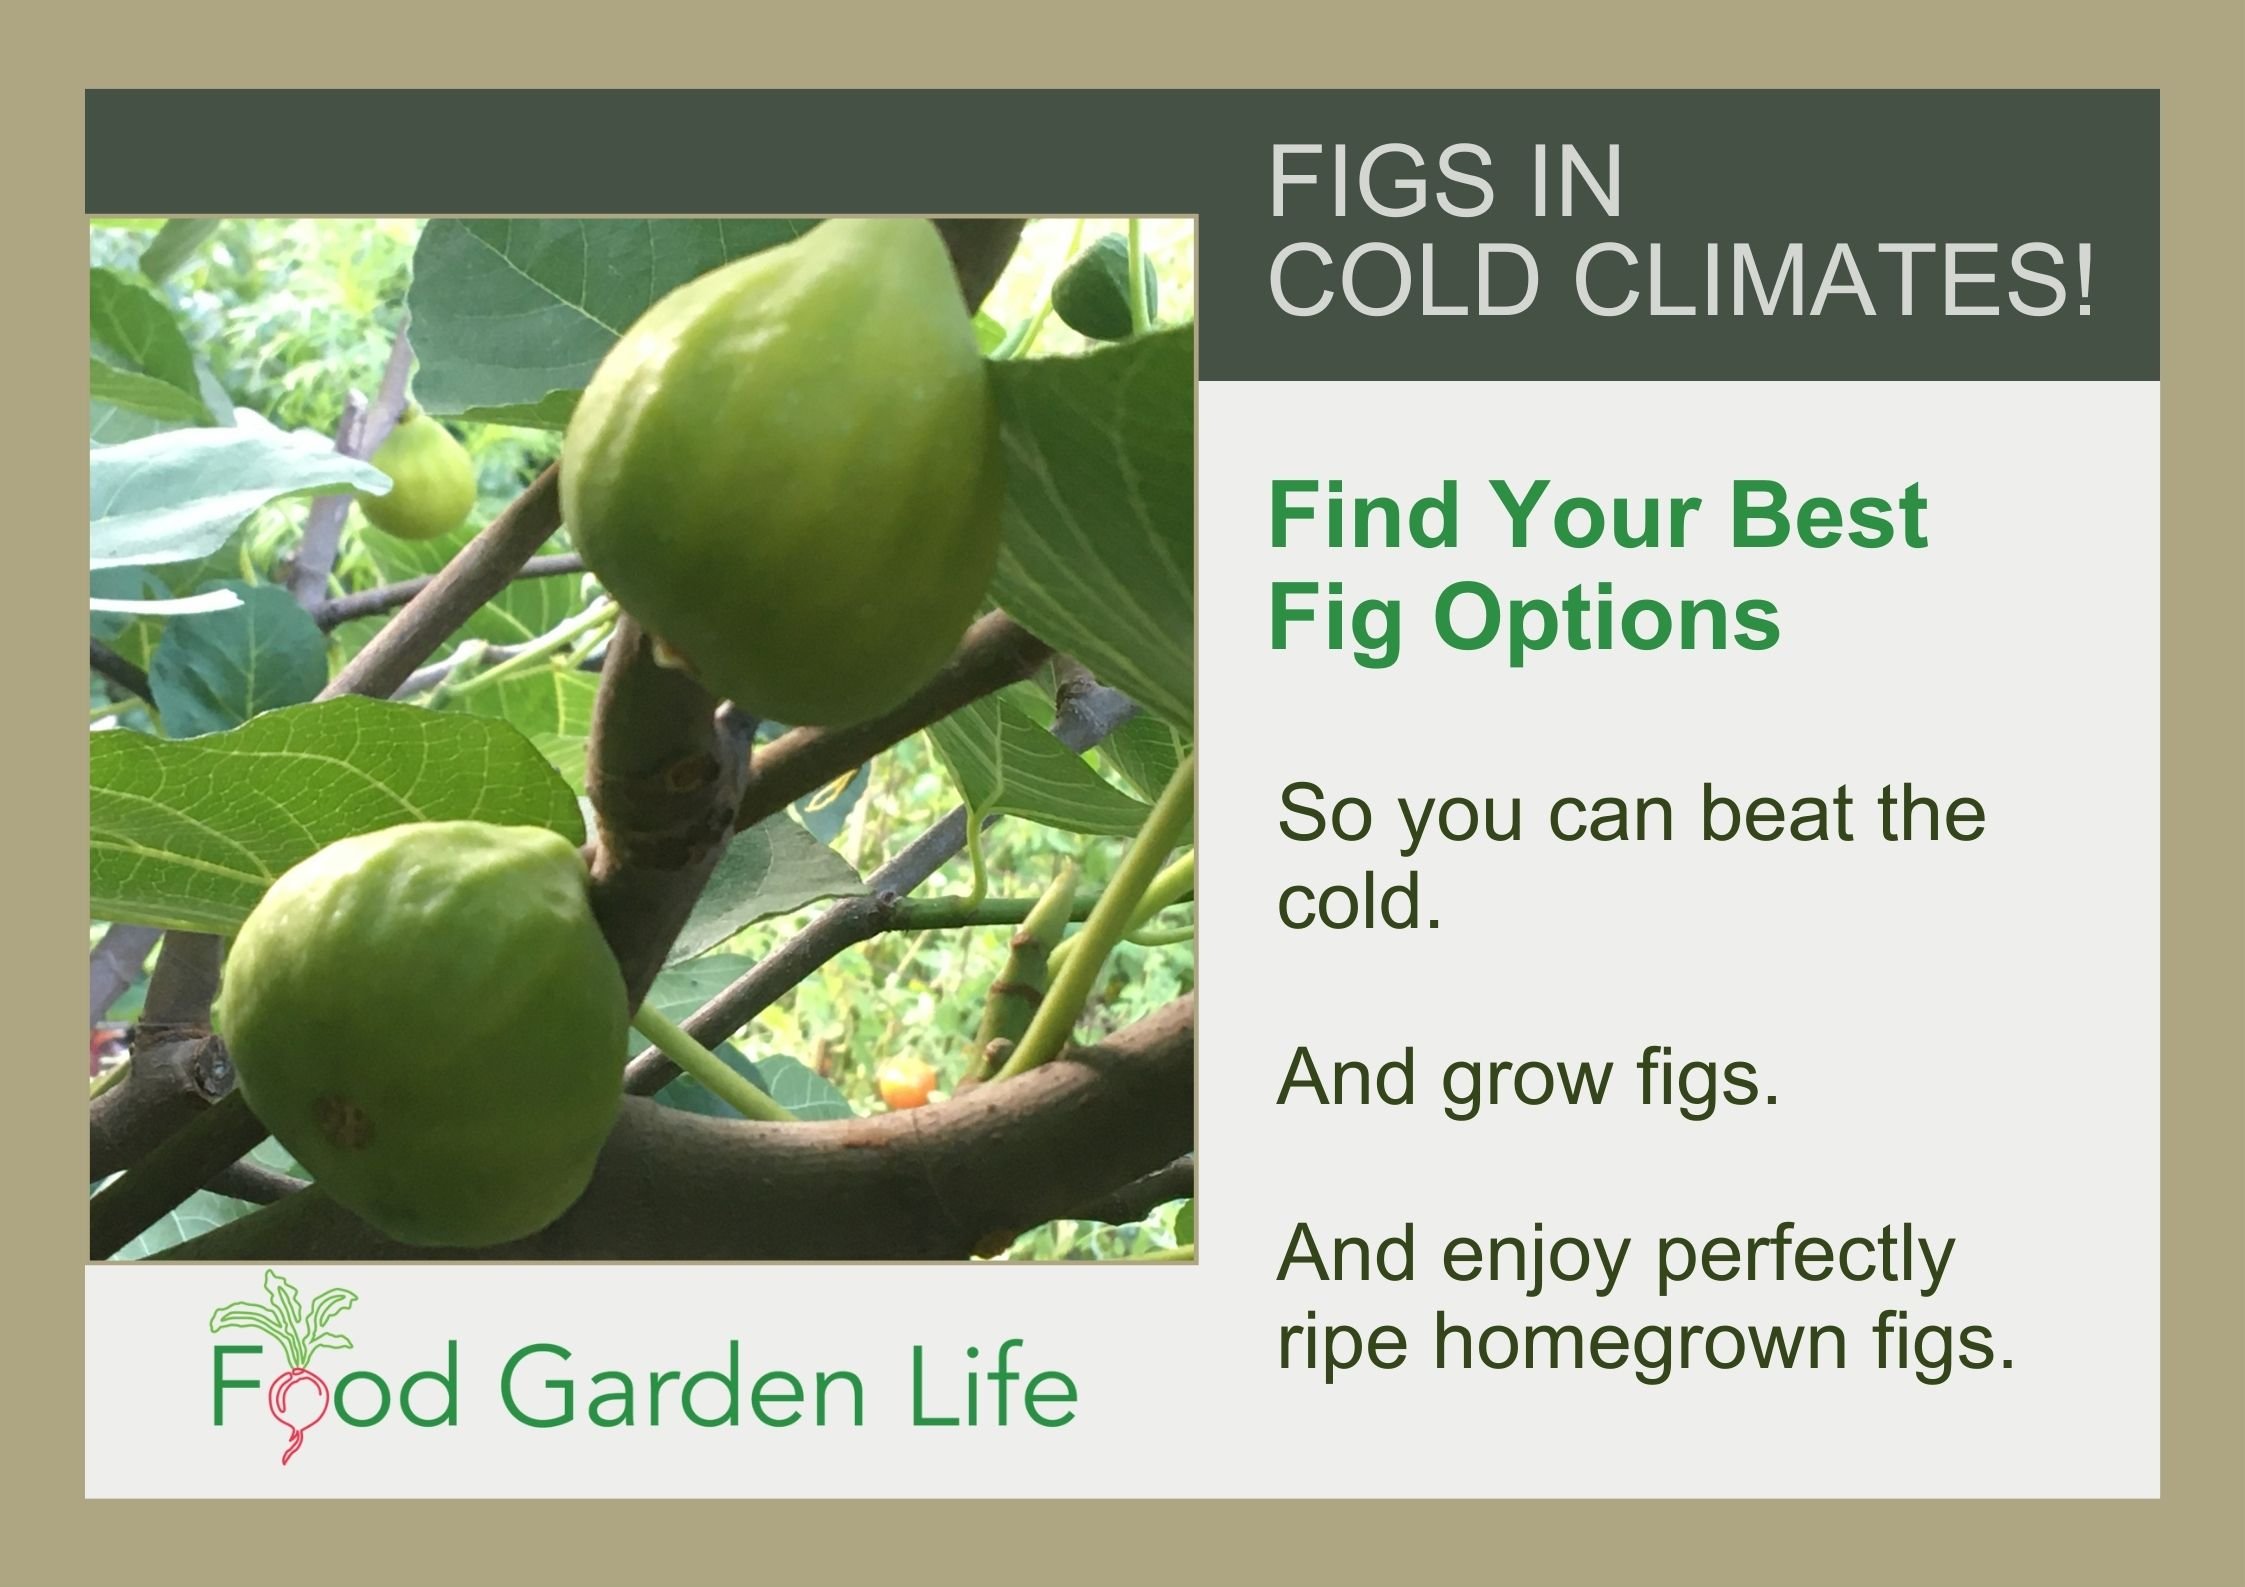
Get Your Fig Trees Through Winter
And eat fresh homegrown figs!
Top Tip
A lot of people think of Mediterranean climates – hot sun and dry conditions – when thinking of artichoke plants. They survive these conditions. But for the best crop, give your artichoke plants conditions that encourage uninterrupted growth. (And, remember, very dry conditions interrupt growth!)
Top Tip: Well-fed soil and ample moisture for uninterrupted growth
Challenges
Most years, artichoke plants are pest- and problem-free in my garden. On occasion, black aphids stop by for a visit. If beneficial insects don’t dispatch the aphids, insecticidal soap will clear them up.
Harvesting Artichokes
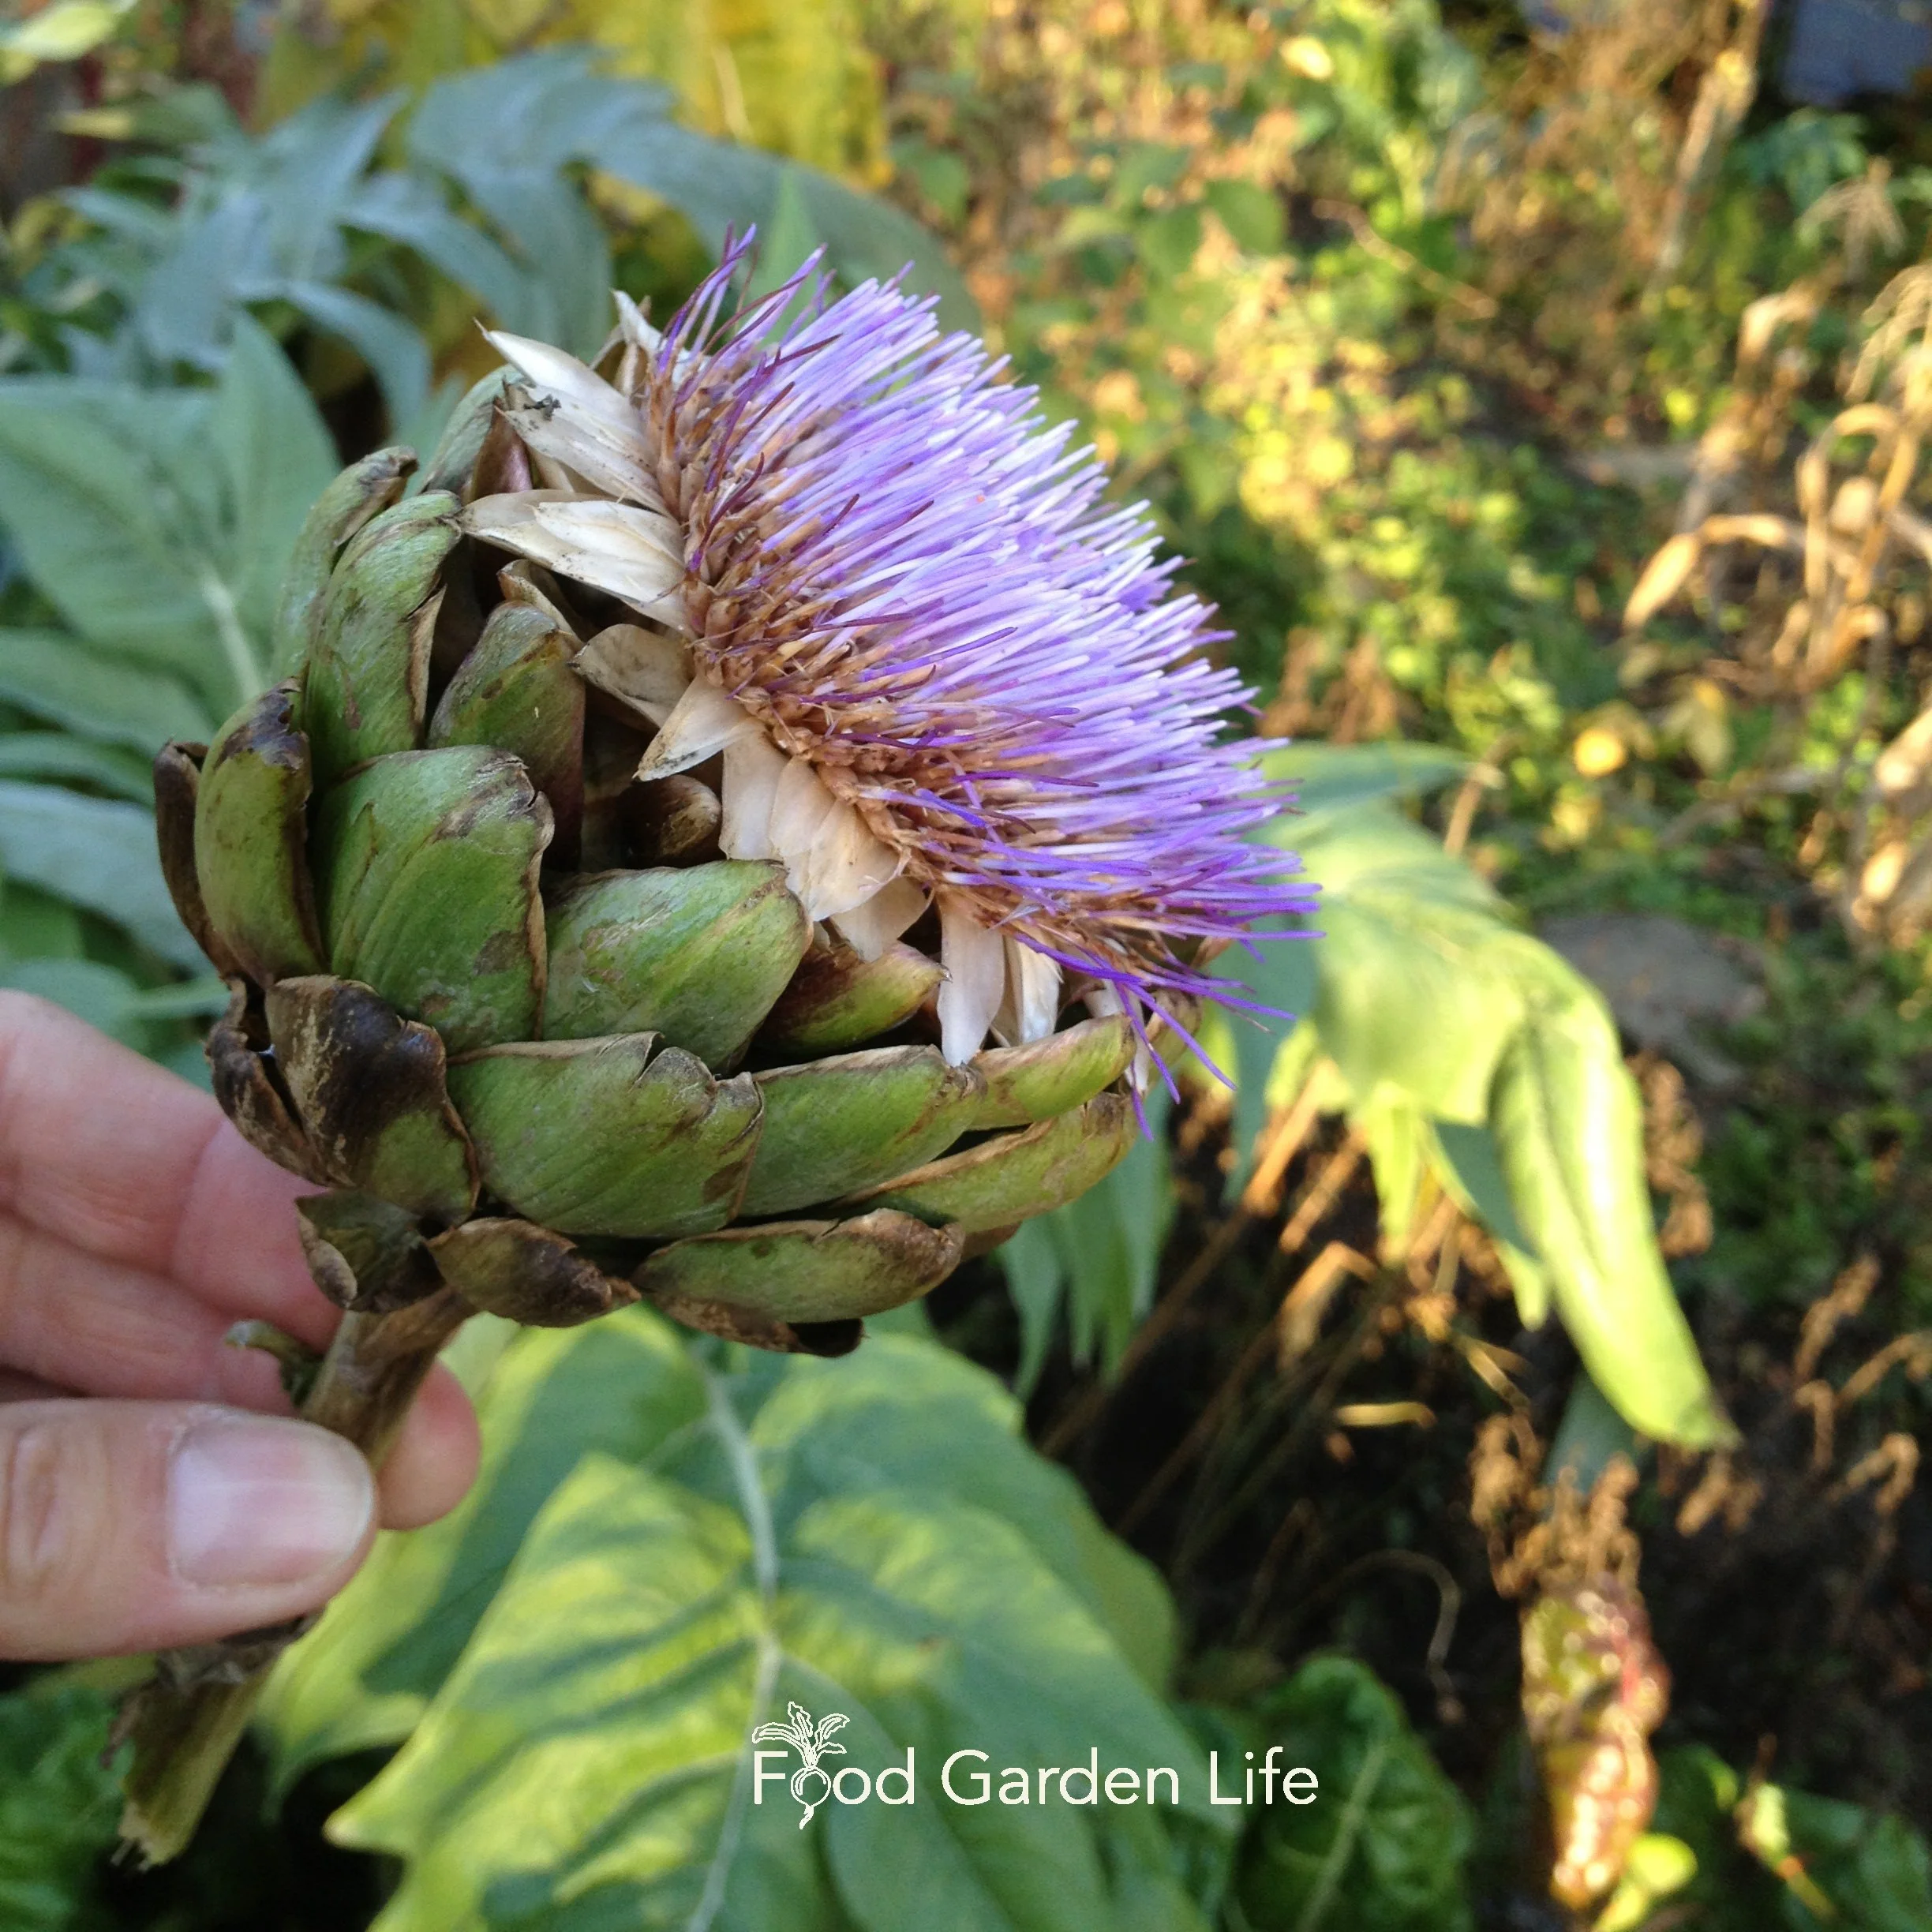
Harvest artichoke before the bracts open into a thistle-like flower.
Harvest artichokes before the bracts start to separate. You want them to be compact.
If you leave the flowers too long and they begin to open, you will get purple-blue thistle-like flowers.
They’re beautiful – but past best-eating.
Artichoke Harvest Tip
As you harvest artichokes, don't cut back the stem any further than you need to. You'll get side shoots from the same flower stalks. These secondary artichokes are not quick as large as the first ones, but just as tasty.
How to Eat Artichokes
For those new to artichokes, you’re peeling off the bracts, dipping them in the butter, and then dragging them against your teeth to scrape off the flesh on the inside. You don’t eat the bracts; they’re too fibrous.
And about those bracts…well, they look like petals. And some people call them scales. (I’ve seen people call them leaves, too.) But, technically, botanically, they’re bracts.
Pin this post!
As you get to the centre, there’s a cone with many small bracts. The bottom of these is usually tender enough to bite right off.
Beneath these, you come the hairy “choke,” a fibrous mat that you scrape off and discard. You don’t eat it. Use a spoon or your fingernails to dislodge the choke, but keep the thick saucer-shaped bit below. It’s called the heart – and artichoke hearts are the prize. Bathe them in butter dip before eating.
To Cook Large Artichokes:
Cut off the stem flush with the bottom of the artichoke
Remove the smaller, lower outer bracts
Use a knife to cut off the top of the artichoke (I take off the top quarter, and find that a bread knife works best to cut through the fibrous bracts)
Steam 30 minutes, top facing downwards (some people boil them, but I prefer steaming them)
Drain well and serve with garlic butter
And don’t skimp on the garlic butter. For a half pound of butter, I usually add a half teaspoon of salt, a crushed clove of garlic, and the juice of half a lemon. Where there are kids in the house demanding extra butter sauce…you can stretch it out by adding olive oil instead of more butter.
To Cook Small Artichokes:
When they’re still small, some of the stem beneath is still probably tender enough to eat. And you’ll be eating the choke too.
Halve artichokes lengthwise
Put in skillet with hot olive oil, garlic, salt and pepper and brown for a moment
Add lemon juice and water and braise until the liquid has evaporated and they’re tender (how much lemon juice will depend how tangy you like them…so play around with it.)
These braised baby artichokes are great as a side dish or on a salad.
Artichoke Plants in Garden Design
If you have a small garden, keep in mind artichoke plants are space hogs. There are more practical food plants you can grow in a small space.
But they are delicious. And they are really beautiful.
The jagged silver-grey leaves have a whitish underside. I love the colour and texture they bring to the edible garden. (Although they never quite look as good once the artichokes are removed.)
And lastly, if you like the look of artichoke leaves but don’t like to eat artichoke, grow cardoon, the leafy cousin to the artichoke.
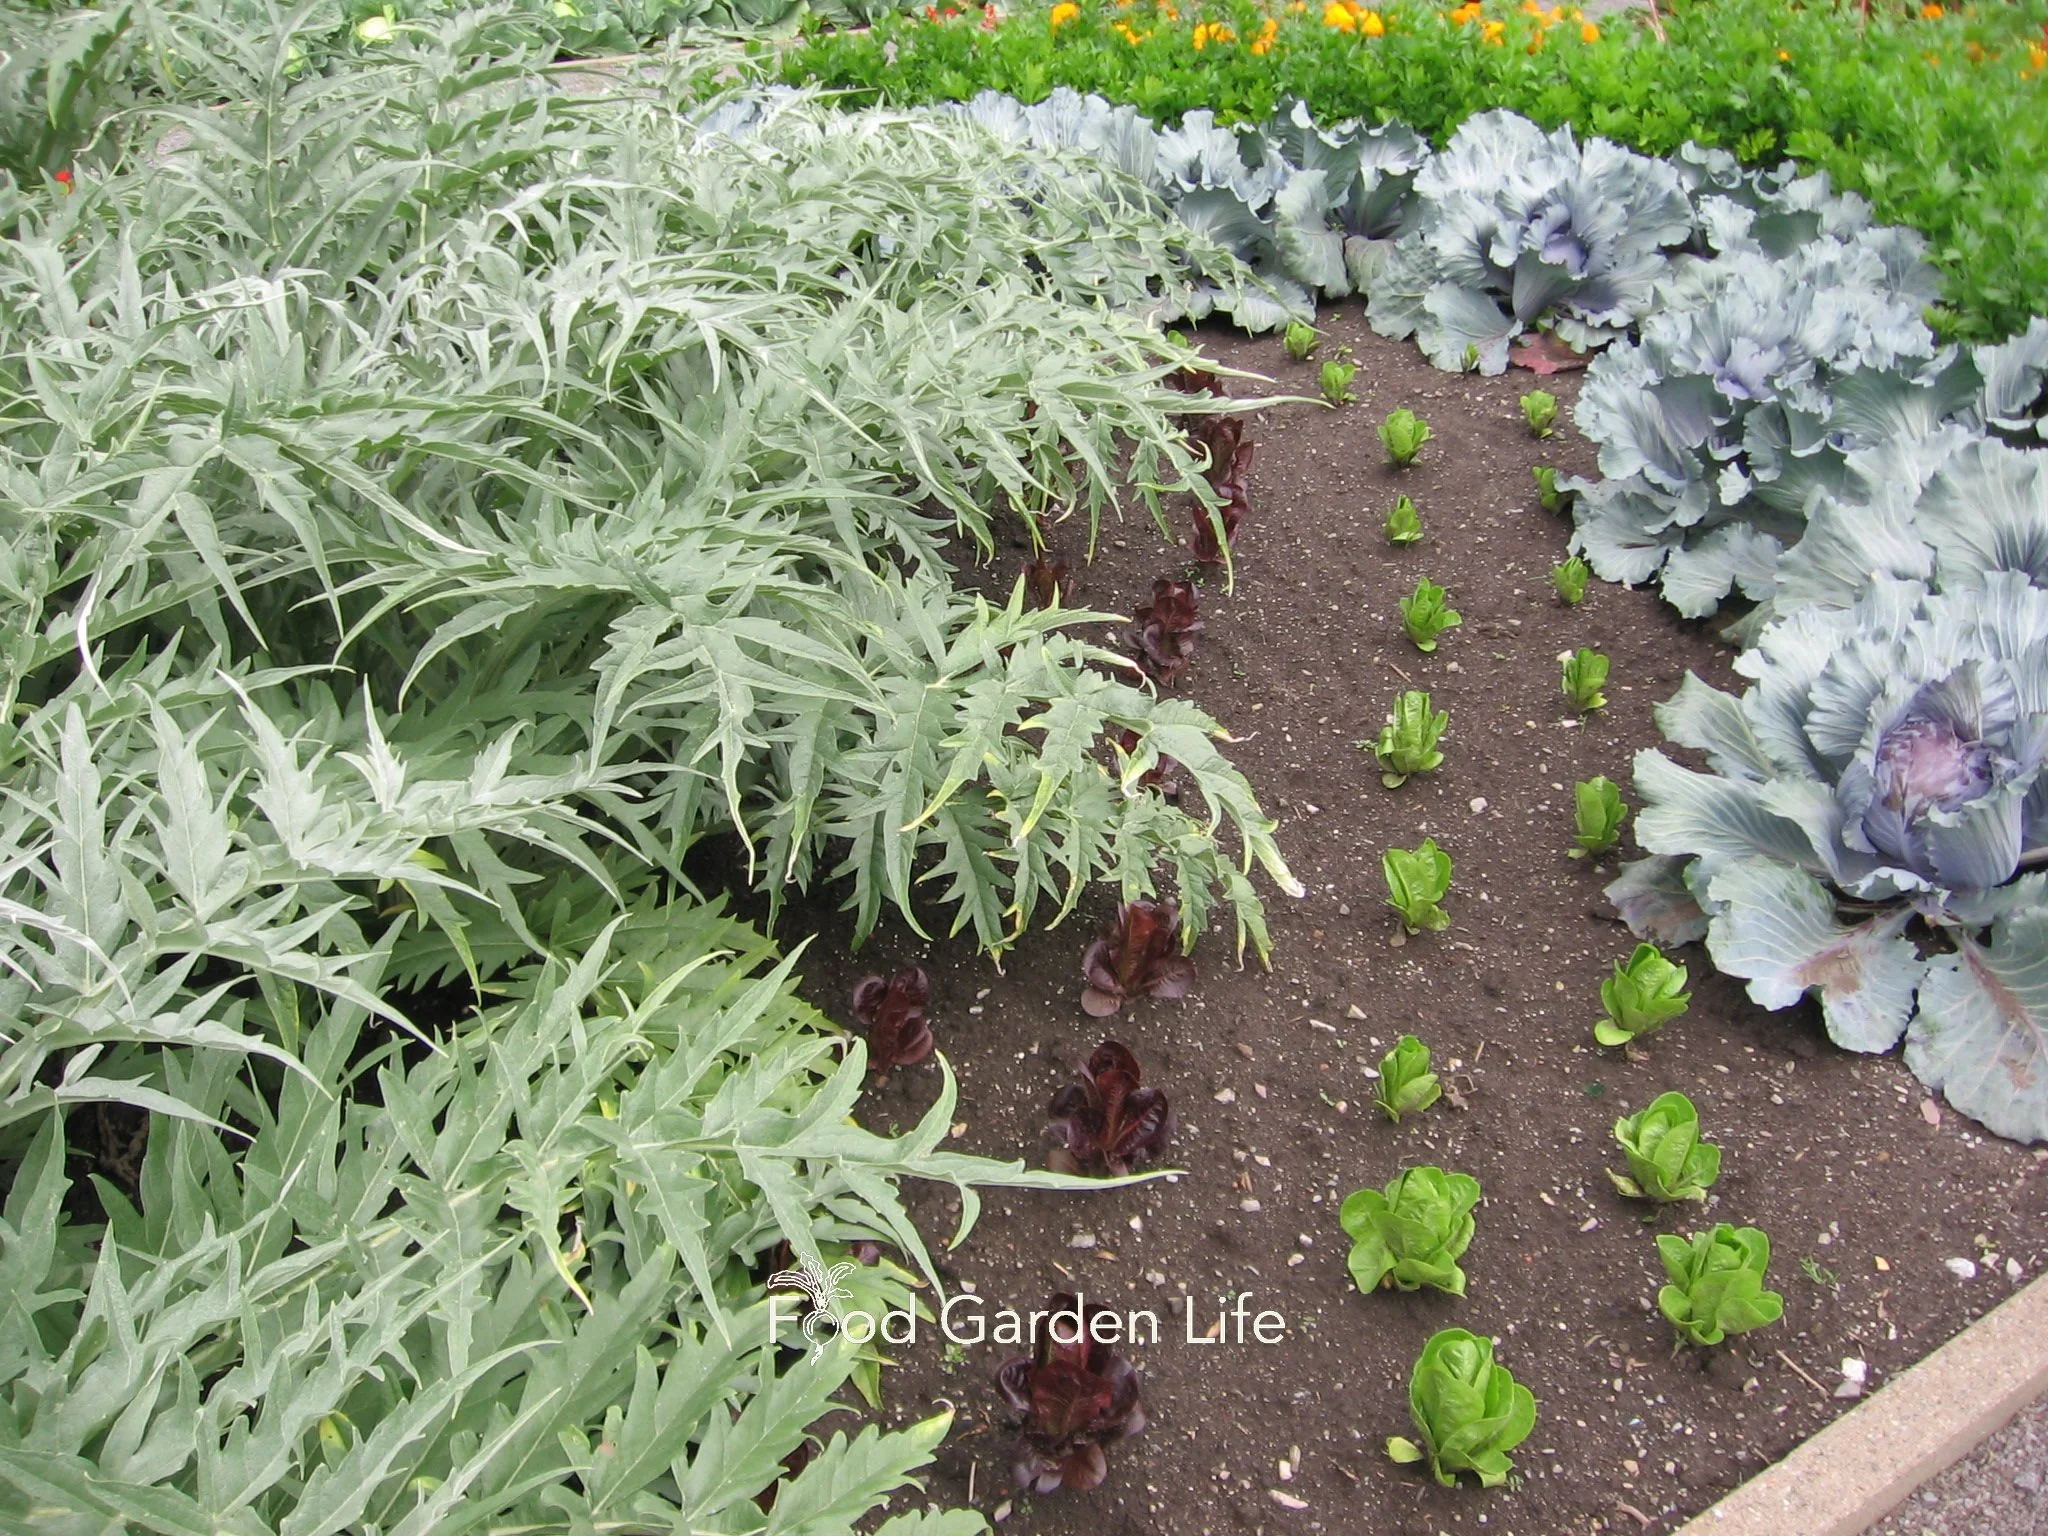
Garden design with artichoke: Use it to add colour and texture to the edible garden.
Find This Helpful?
Enjoy not being bombarded by annoying ads?
Appreciate the absence of junky affiliate links for products you don’t need?
It’s because we’re reader supported.
If we’ve helped in your food-gardening journey, we’re glad of support. You can high-five us below. Any amount welcome!
More Vegetable Gardening Ideas
Articles and Interviews
Courses: Edible Gardening
More Mediterranean Crops
Articles and Interviews
Courses: Figs and Lemons

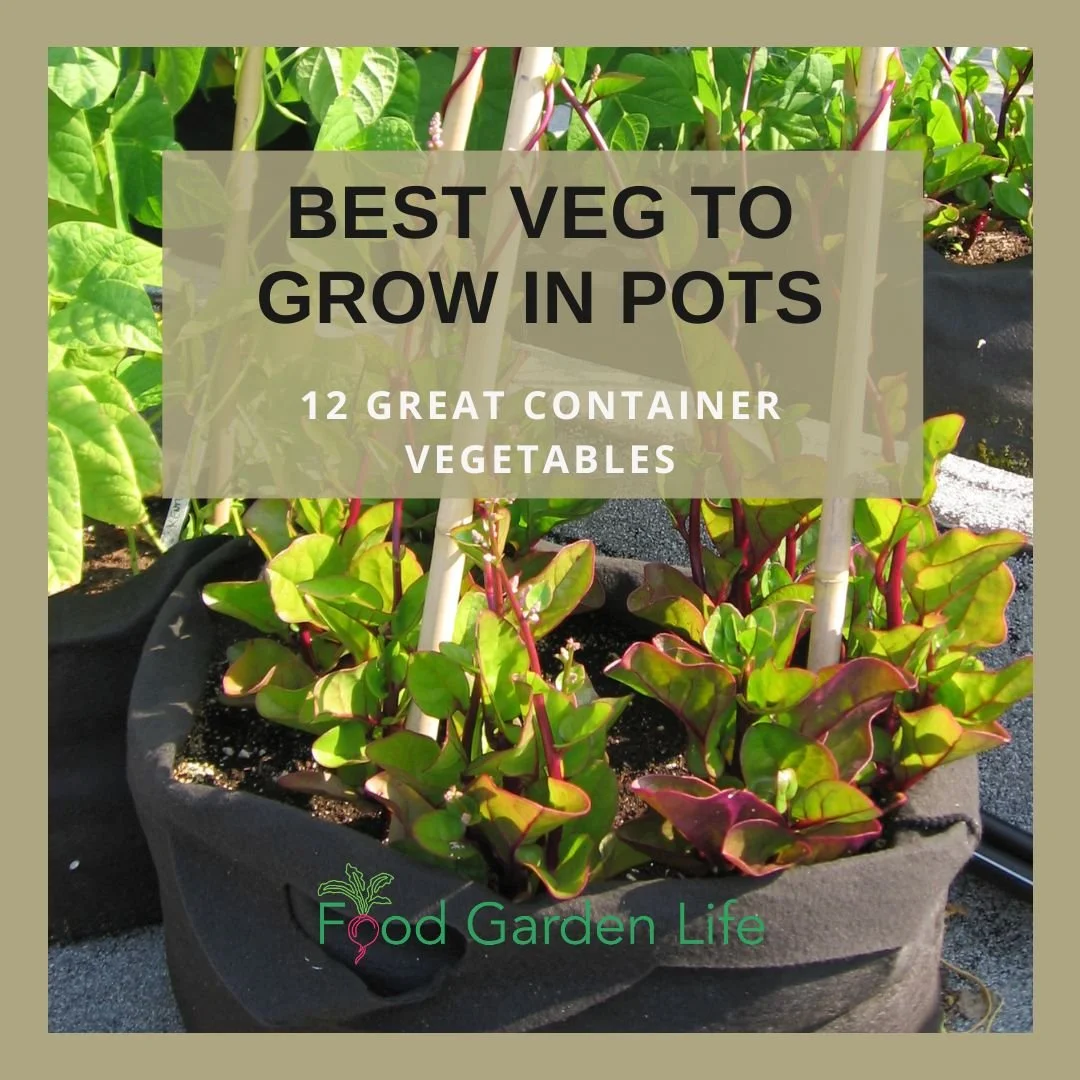
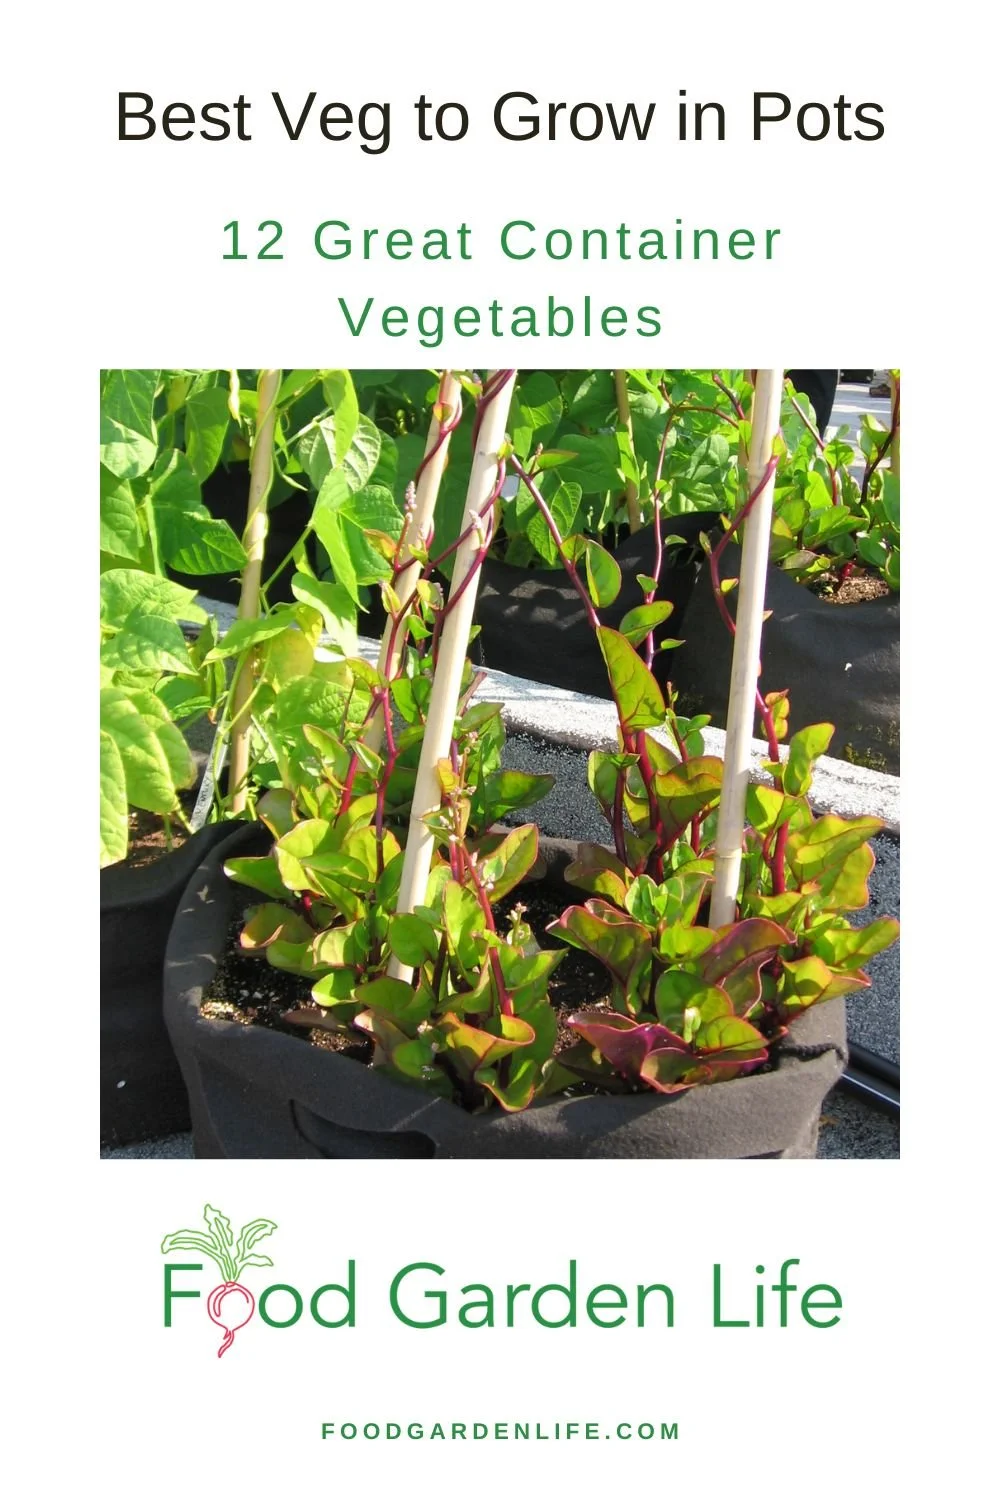
Best Vegetables to Grow in Pots (12 Great Container Vegetables)
Want vegetable container crops that will grow well? Here are 12 crops that thrive in container gardens.
By Steven Biggs
Container Gardens for Vegetables
I share my favourite vegetables to grow in pots.
I started growing vegetables in containers when I moved to my first apartment. I loved that apartment! It was in a low-rise yellow-brick building right on the water in suburban Montreal.
(I had the basement…not always a good choice in a waterfront location, but that’s another story.)
My landlord, Mr. Crevier, had ornamental garden beds in the yard. No vegetable plants. But when he decided to get rid of his boat, there was a weedy, hard-packed area where he’d parked his boat trailer. Knowing I worked in the horticulture industry, he asked if I’d like to make a garden there.
He didn’t have to ask twice.
The hard-packed soil was laced with gravel and debris. So I got nursery pots and soil from work, and had a vegetable container garden ready to plant within a couple of days.
Until that first container garden, I wasn’t a fan of container gardening. Seemed like a lot of work…second best to growing in the ground.
But my opinion changed.
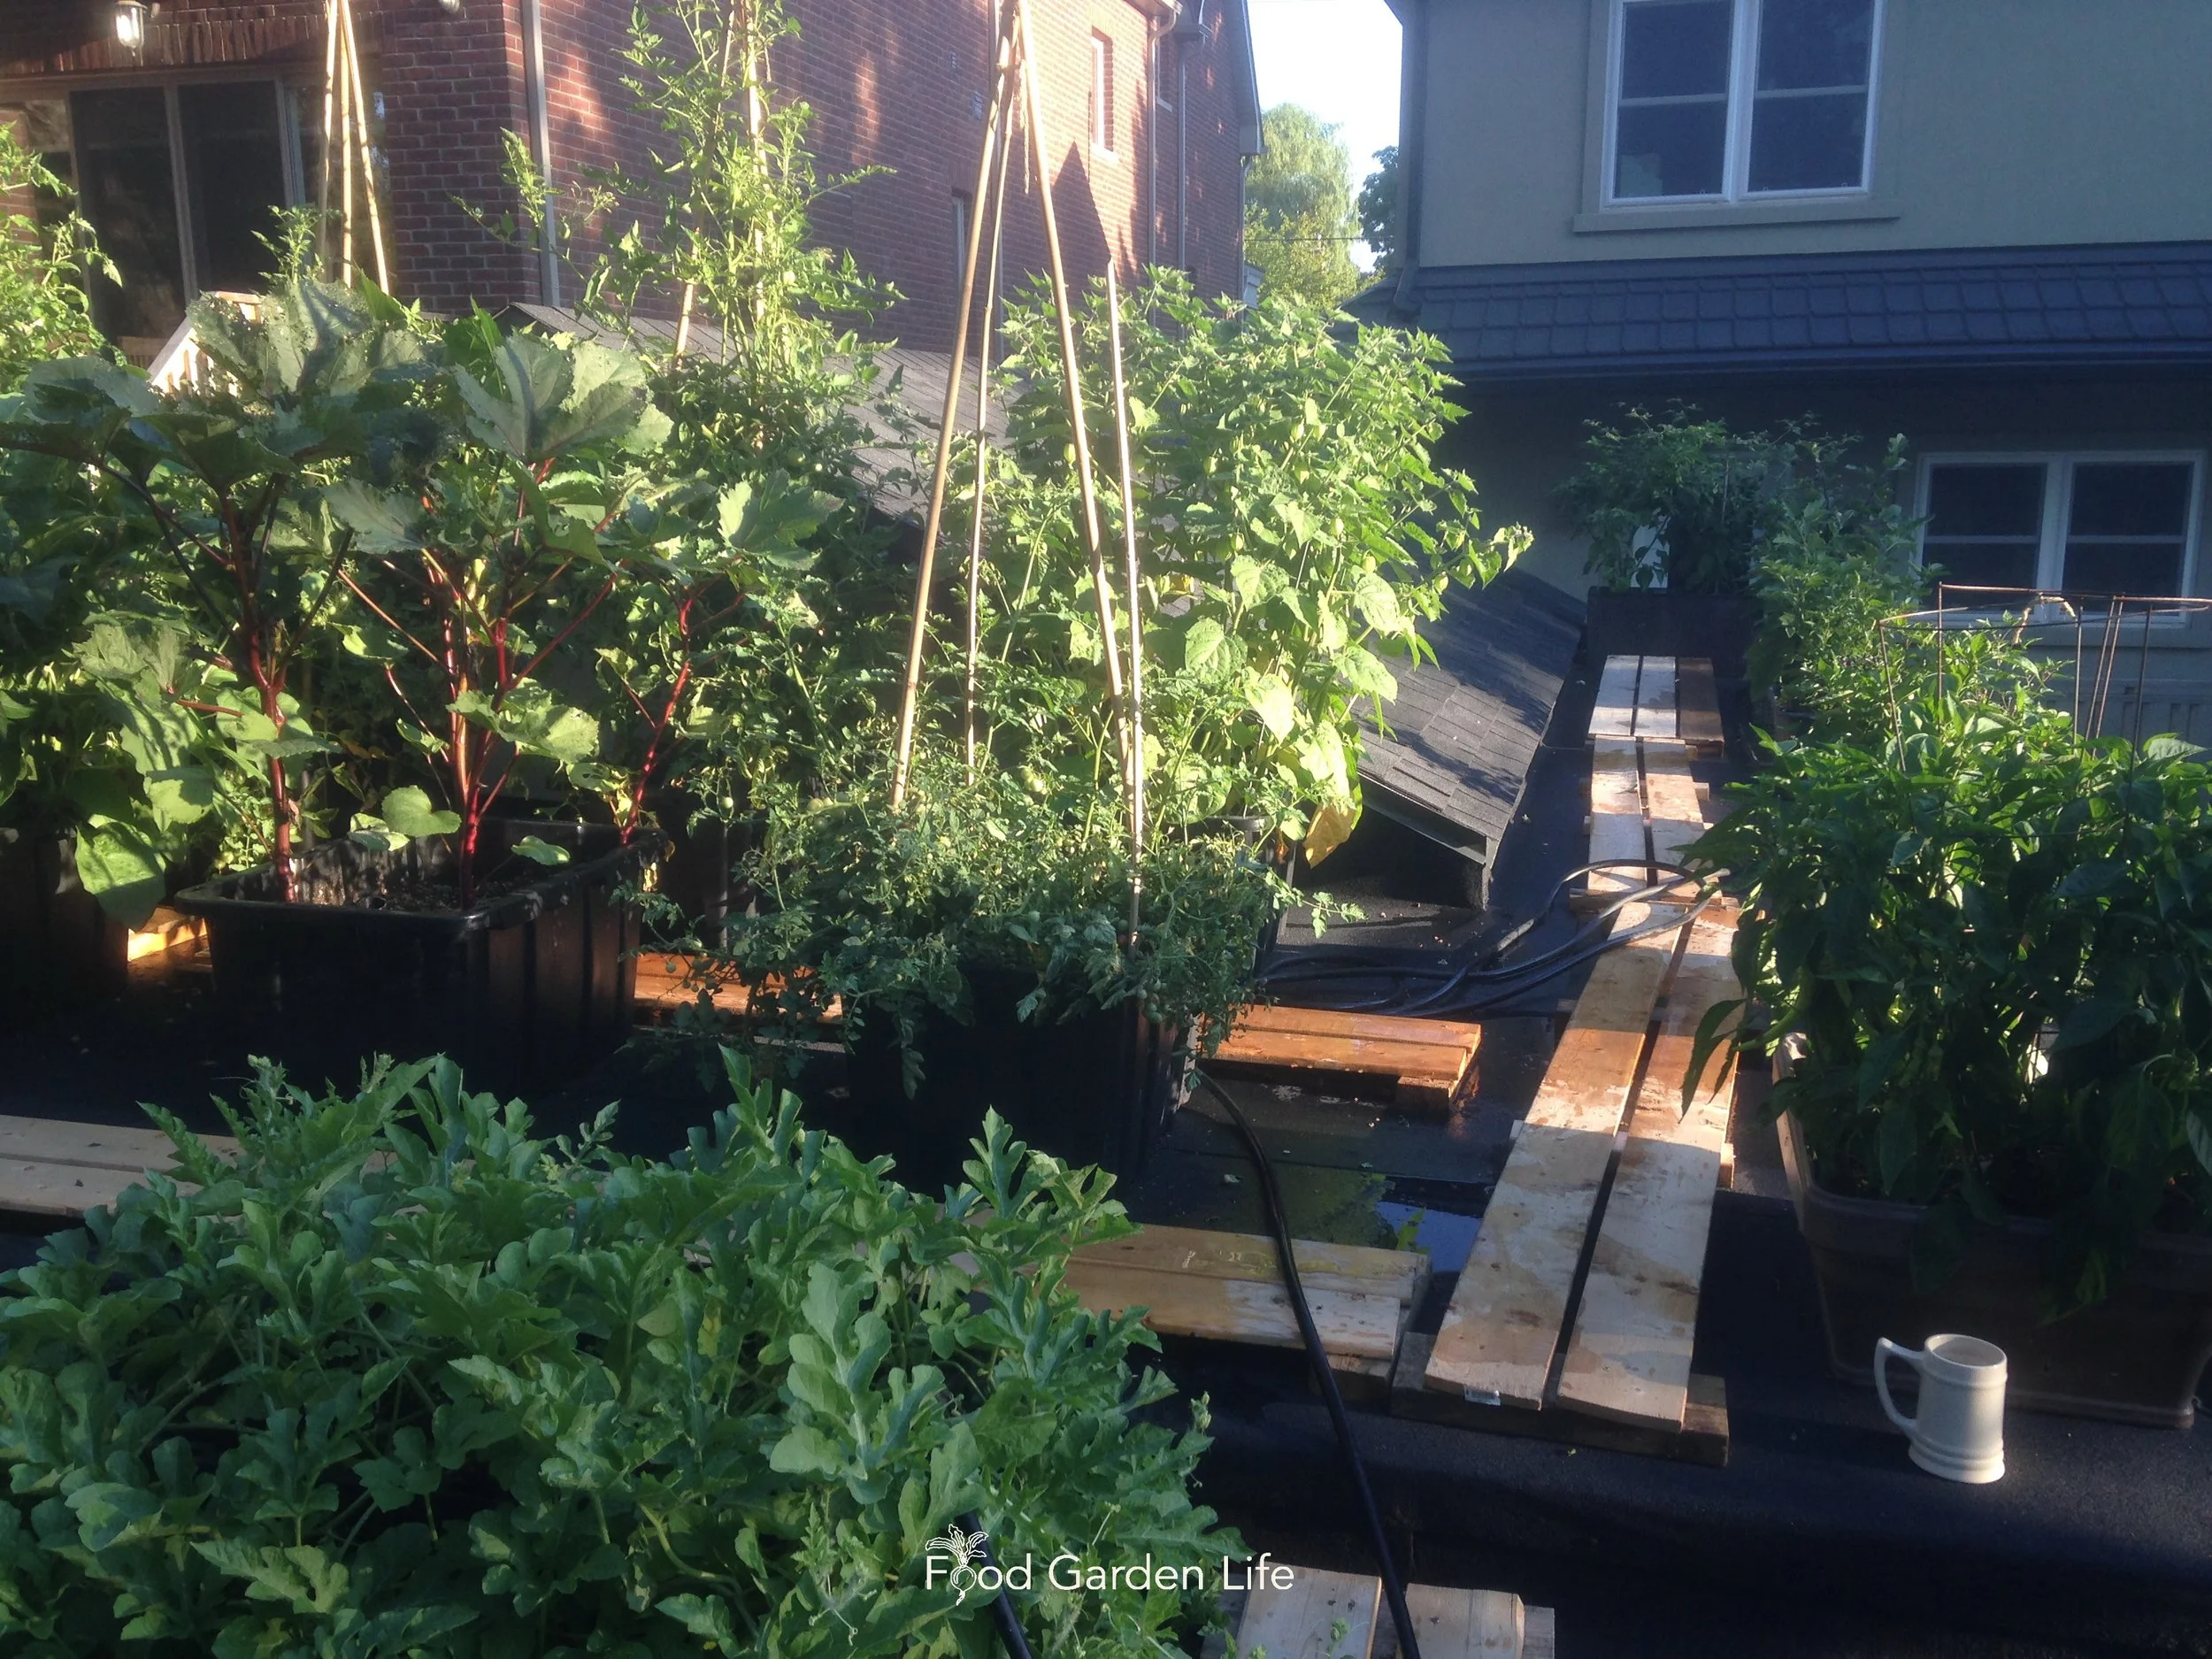
My rooftop vegetable garden! Growing vegetables in containers.
One of my container tomato plants birthed a 3-pound tomato. I had more lettuce than a bachelor could possibly eat. Buttered beans for supper every night…
Since that first container garden, I’ve made rooftop gardens, patio gardens, and driveway gardens full of planter vegetables…even when I have lots of space for veggies in my garden beds.
If you’re thinking of a container gardening, keep reading: This post covers key things to think about, and gives you a list of my top vegetables to grow in pots.
3 Benefits of Vegetable Container Gardening
Container Gardening Gives Vegetable Crops More Heat
The soil in containers warms up more quickly than garden beds—making it possible to grow vegetables earlier in the spring.
Then, during the summer, the soil in containers gets warmer than in-ground beds. Think of sun hitting the side of a container and warming it up. That makes containers a great place to successfully grow heat-loving crops in areas with cool climates or short summers.
Containers Help Squeeze More into a Small Space
It goes without saying that container gardening is a great way to garden in small spaces by using otherwise unused spaces where there’s paving, poor soil, or competing roots.
To squeeze even more vegetable container crops into limited yard space, think in layers:
Low containers
Containers filling space higher up
More containers up above—maybe hanging baskets
Containers to Overcome Soil Issues
Container gardening is also a good option in places with possible soil contamination.
Find out more about soil contamination.
Containers can be a good way to garden near a black walnut tree. Find about about walnut toxicity.
Even if the soil is OK, sometimes tree roots make gardening in the ground impractical. Containers to the rescue!
Grow a Container Vegetable Garden
And get an early harvest of crops that usually take too long!
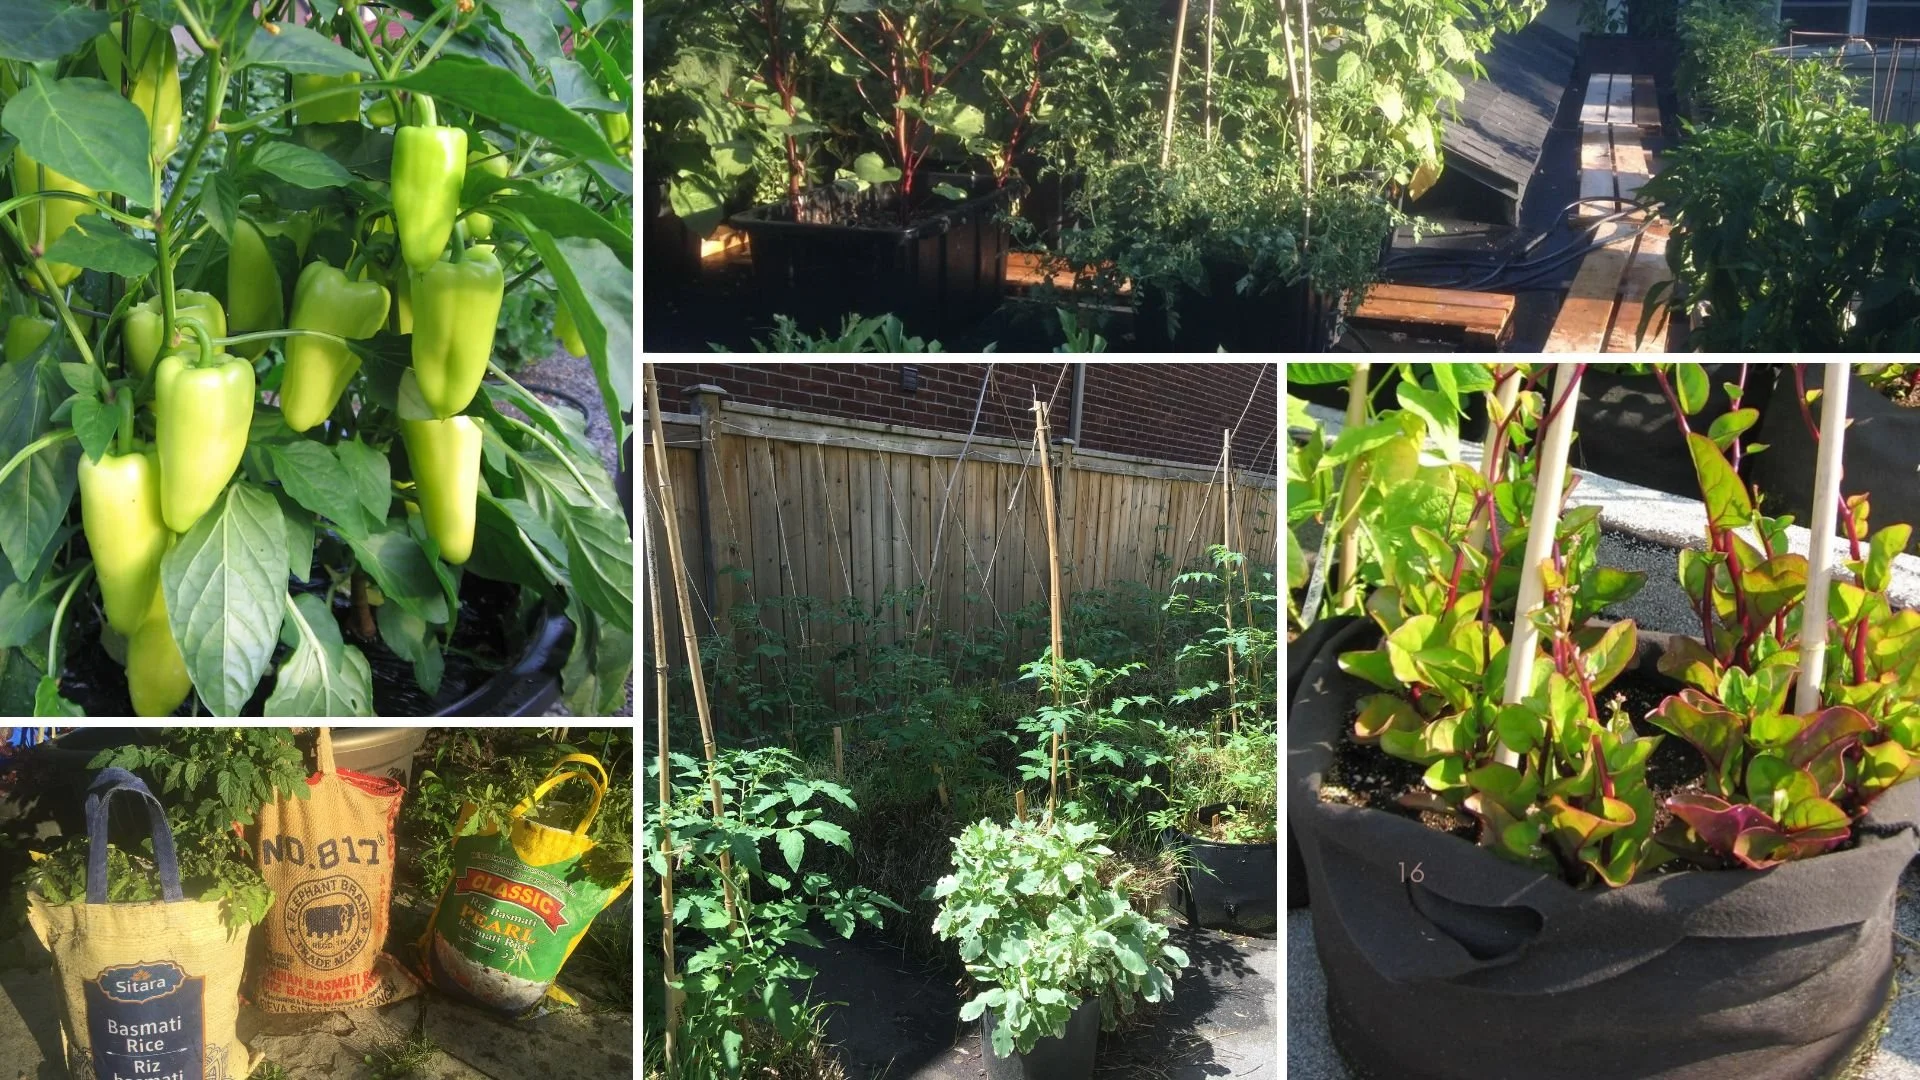
My Top 12 Vegetable Container Plants
Here are my top vegetables to grow in pots. (In that first container vegetable garden in Montreal I had a lot of these—and they’re still my top choices.)
Beans
Bush, pole, and runner beans all do well as container vegetable crops. Pole and runner beans are a good option where there is a wall, trellis, or railing for support.
I grow both bush beans and pole beans in my driveway container garden. The pole beans hide an ugly fence, while the bush beans fill in space in front of tomato plants.
Recently I’ve been growing beans in my straw-bale gardens. Like container gardens, straw-bale gardens are great for small and paved spaces.
Find out more about straw-bale gardens.
Beet
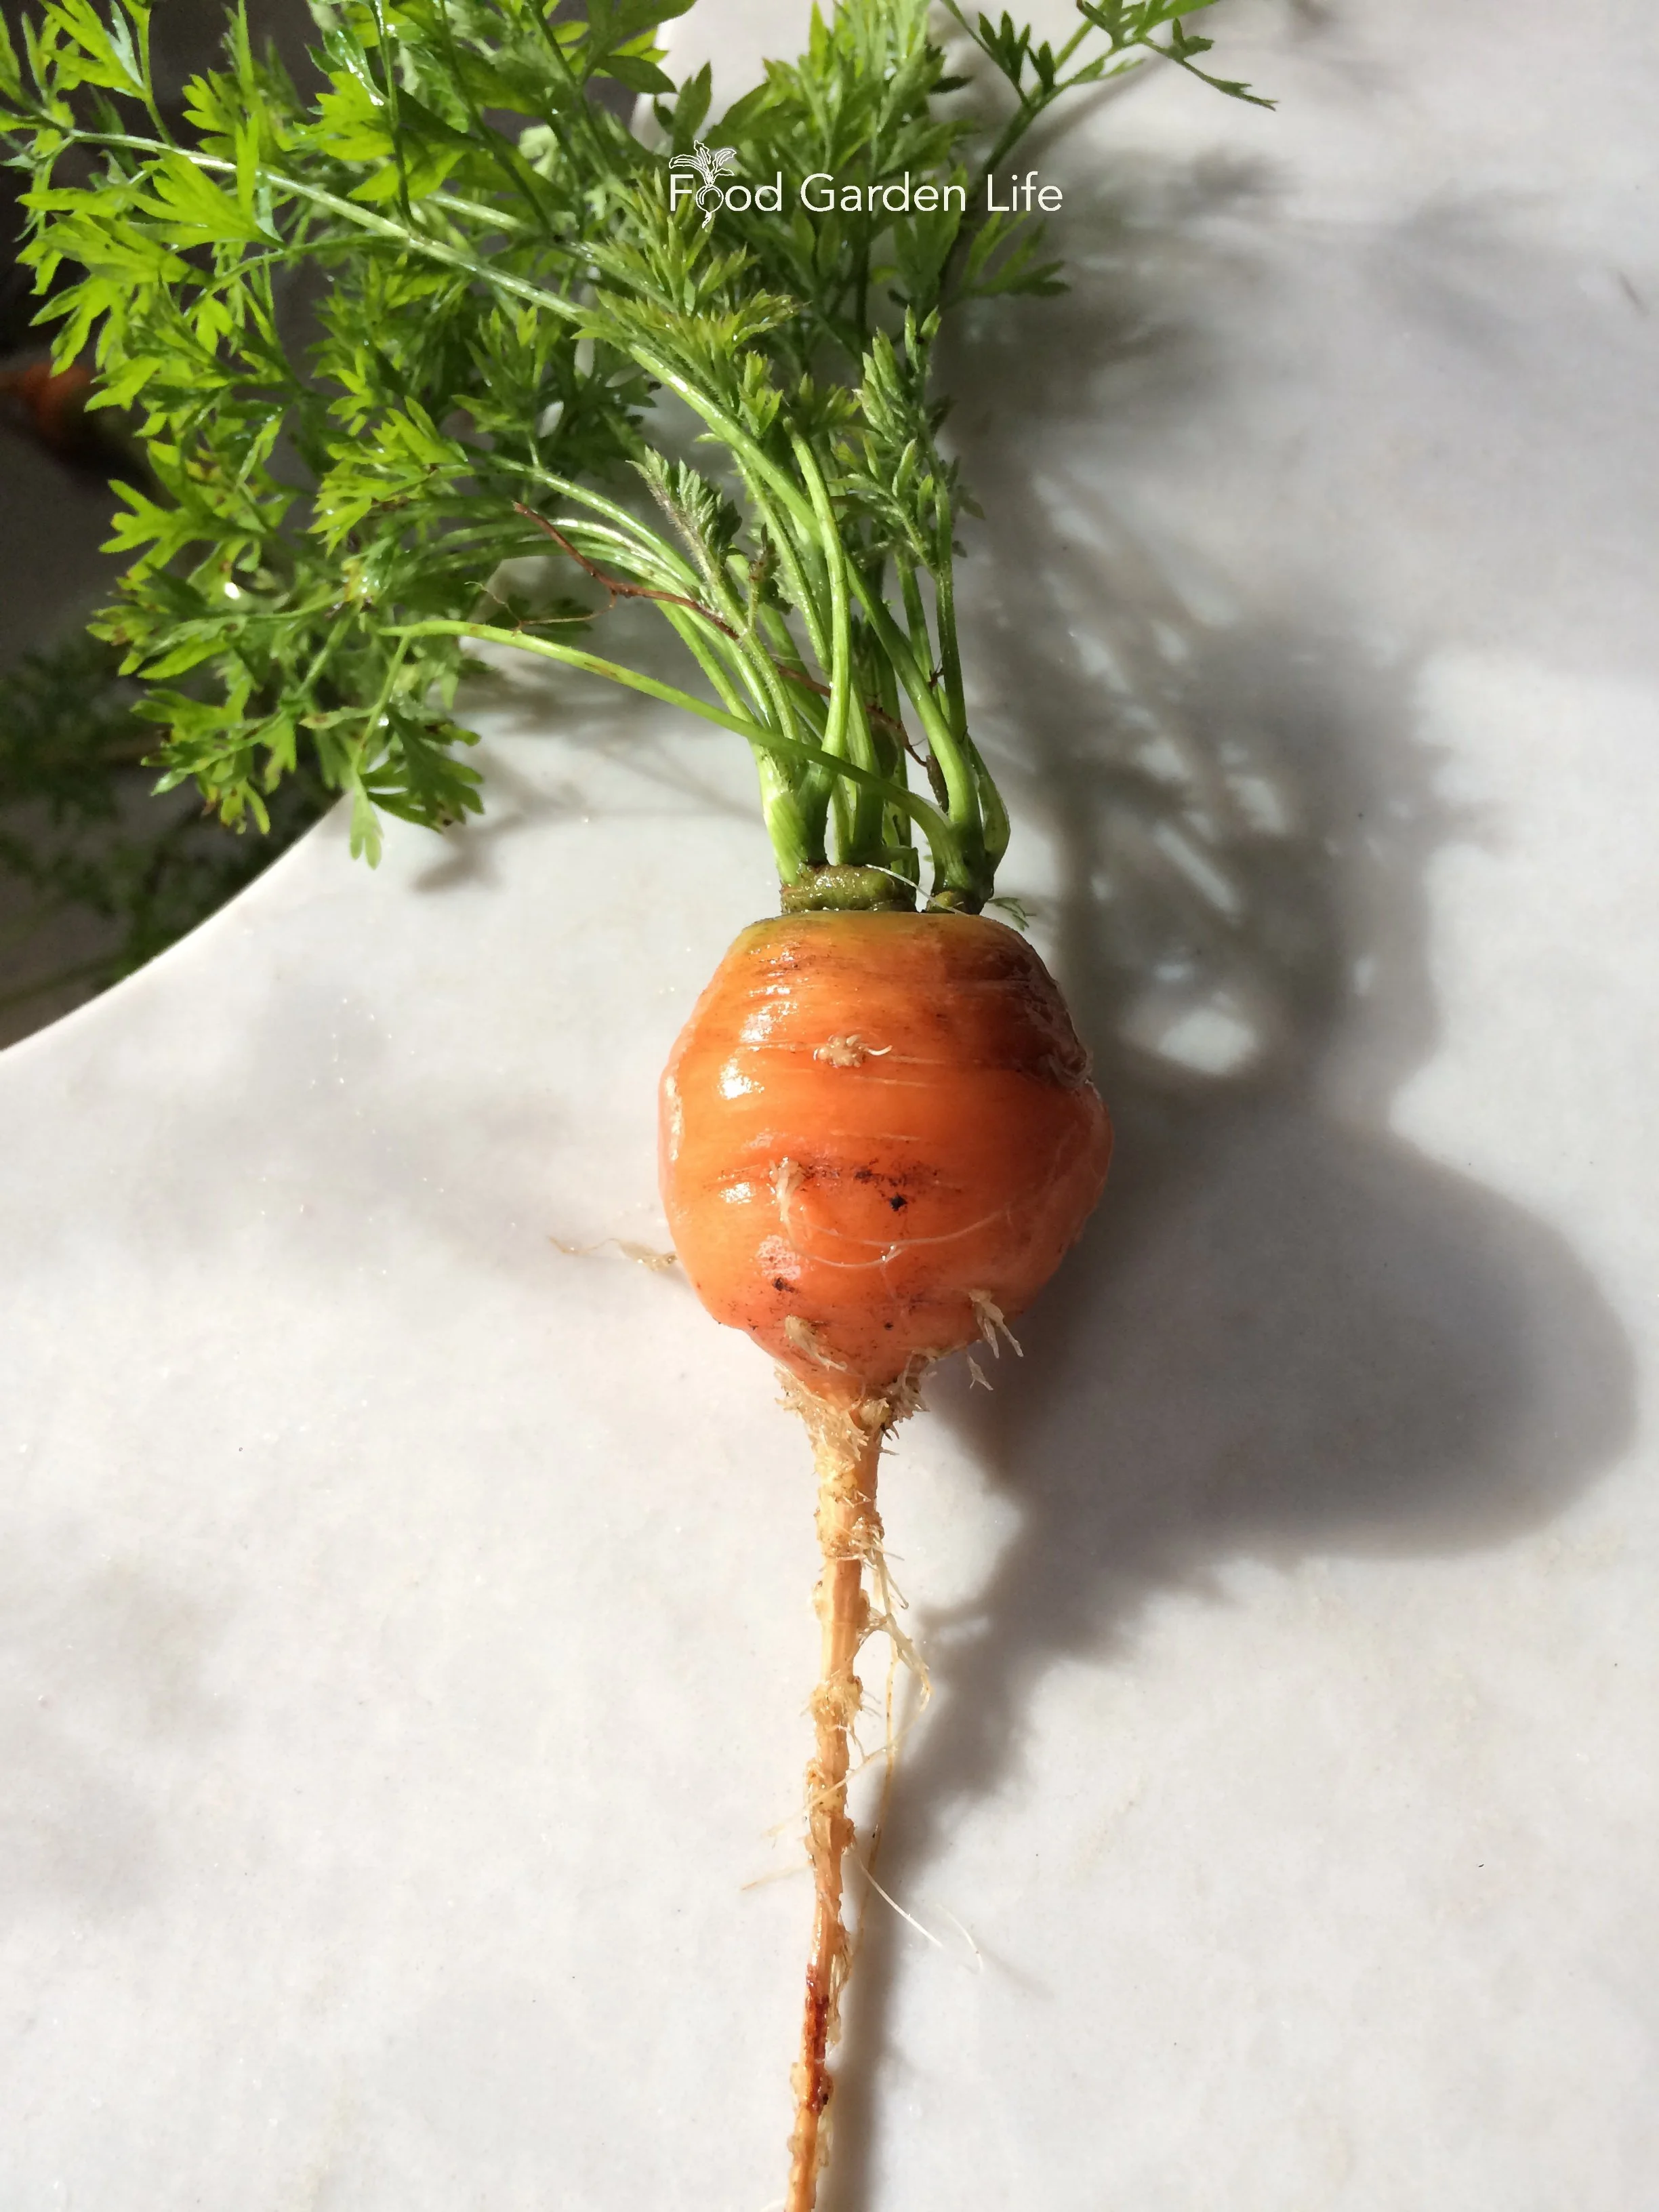
Paris Market carrot, a small carrot that’s well-suited to smaller containers.
Something that puts beets high on my list of is that there are two edible parts: the root, and the leaves.
Beet root is a great storage crop. Here are 25 storage crops you can grow at home.
‘Bulls Blood’ has red foliage prized as a colourful salad green.
Carrot
You can still grow carrots if you have small containers. For shallow containers, look for short varieties that have shallow roots, such as the little, round ‘Paris Market.’
As with beets, this is a crop with two edible parts: Leaves and roots are both edible.
Eggplant
Eggplant loves heat, making it a great choice for growing in containers. Pick the sunniest location you have.
Eggplant flowers are very attractive, making this one of those vegetable crops that’s very ornamental, too.
For novelty, look for red, white, or striped varieties.
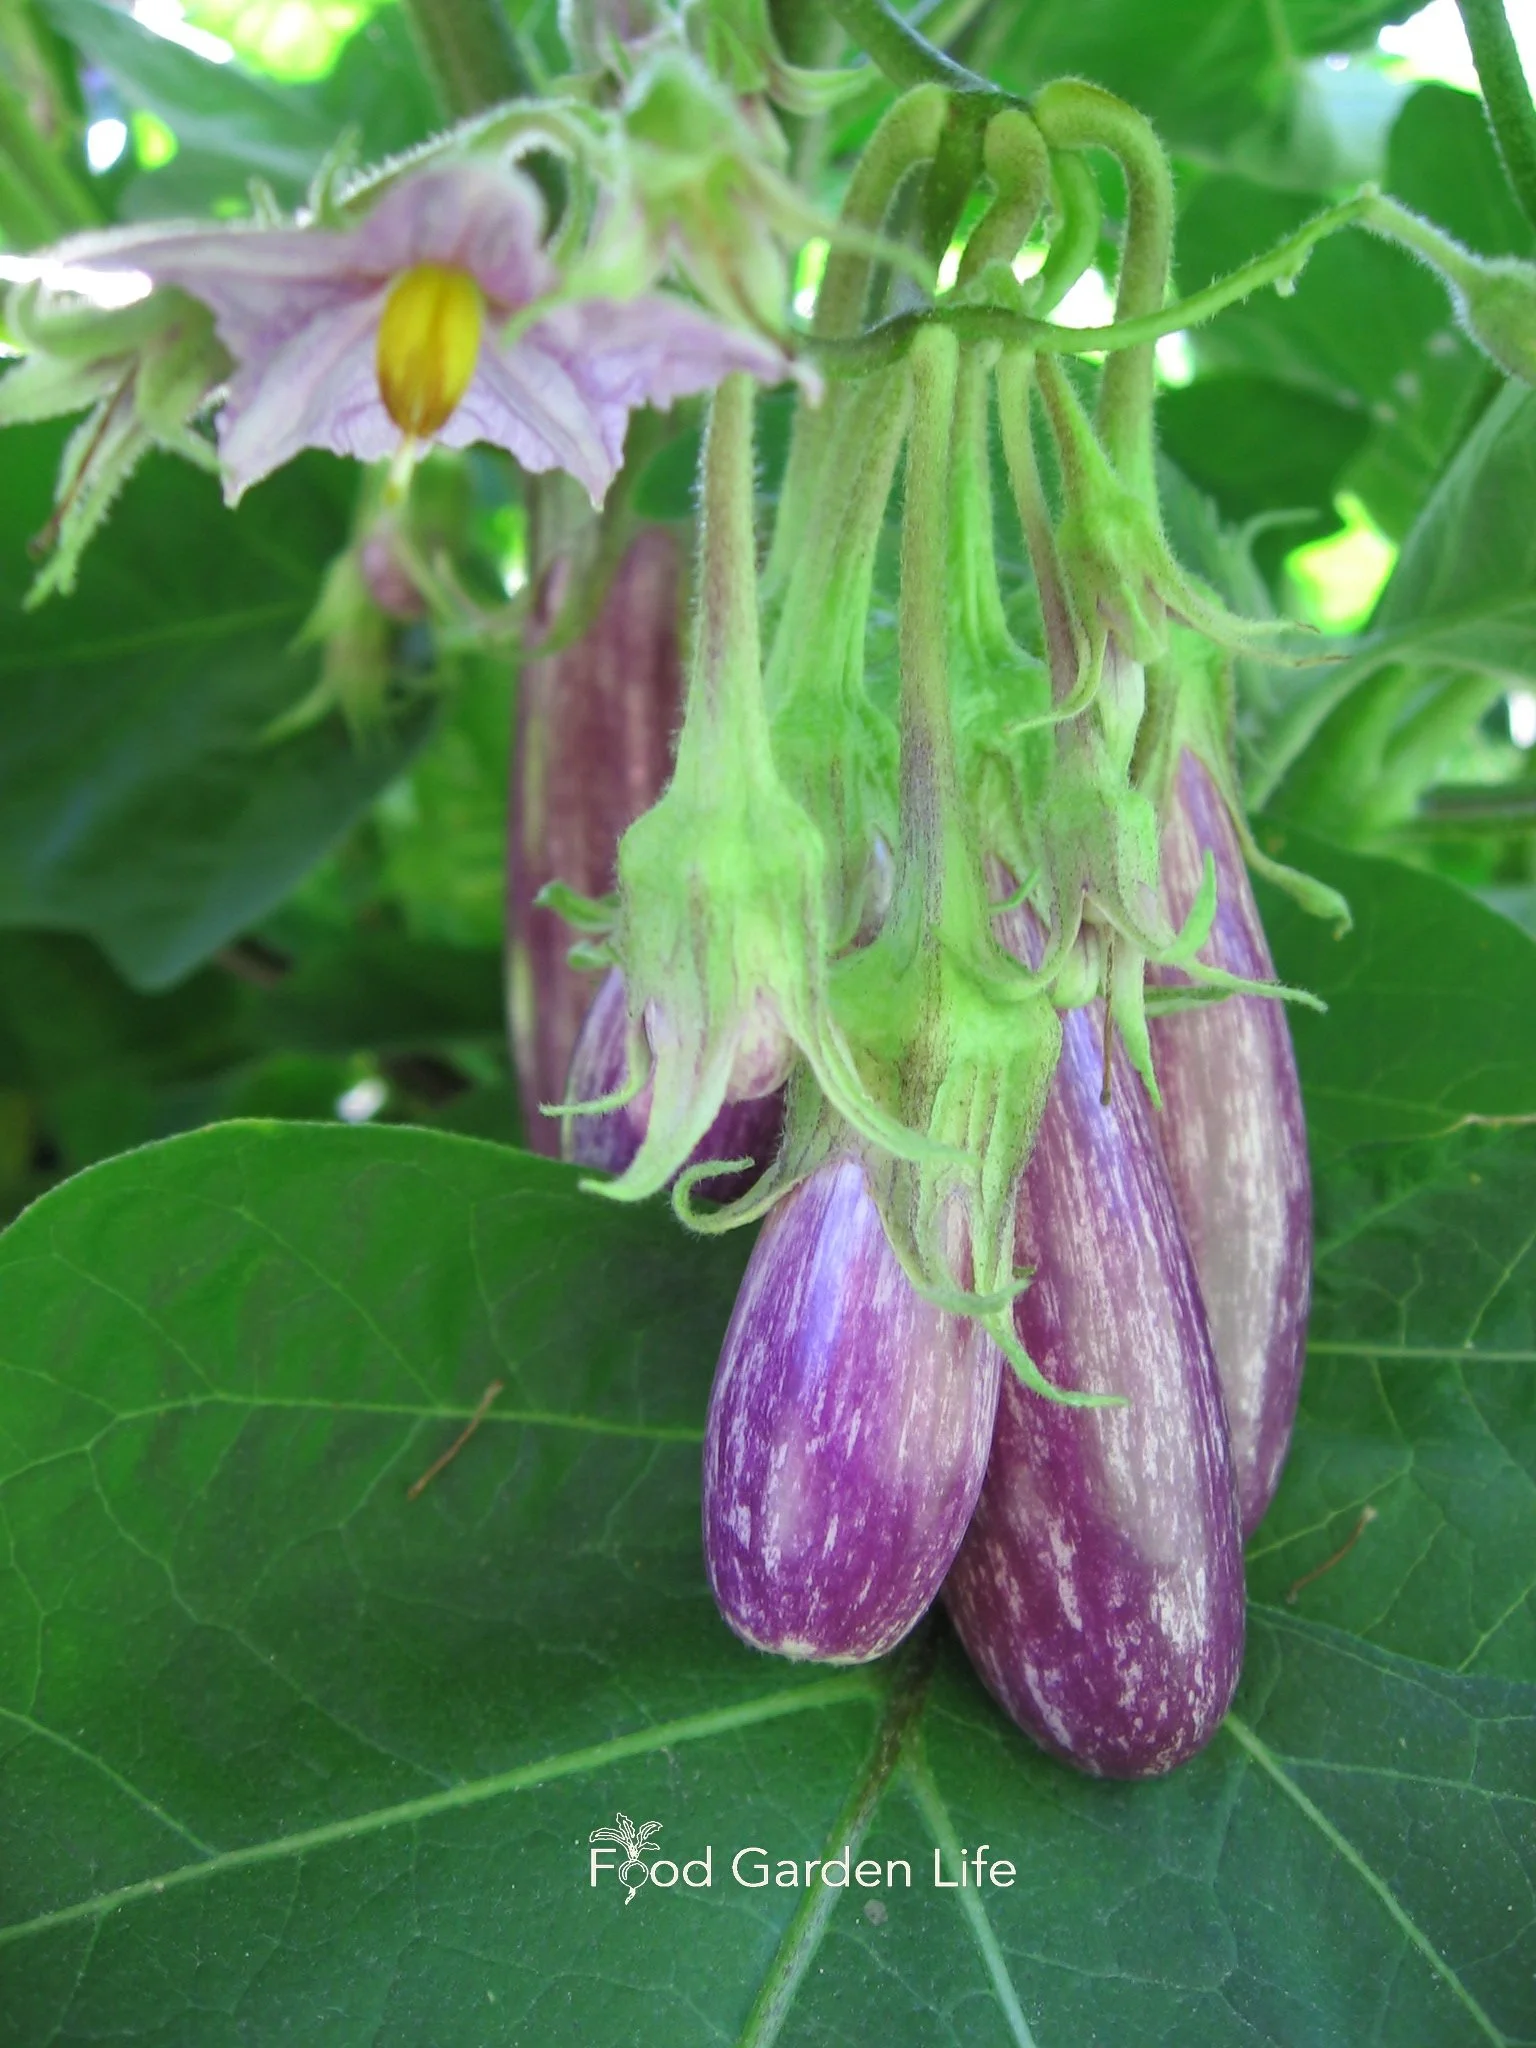
Potted plants that look beautiful! Try some eggplant.
Kale
Kale has excellent ornamental properties as it comes in many colours and has many leaf shapes and textures.
It holds up well through fall frosts and into winter, making it a must-have crop if you want a long harvest window.
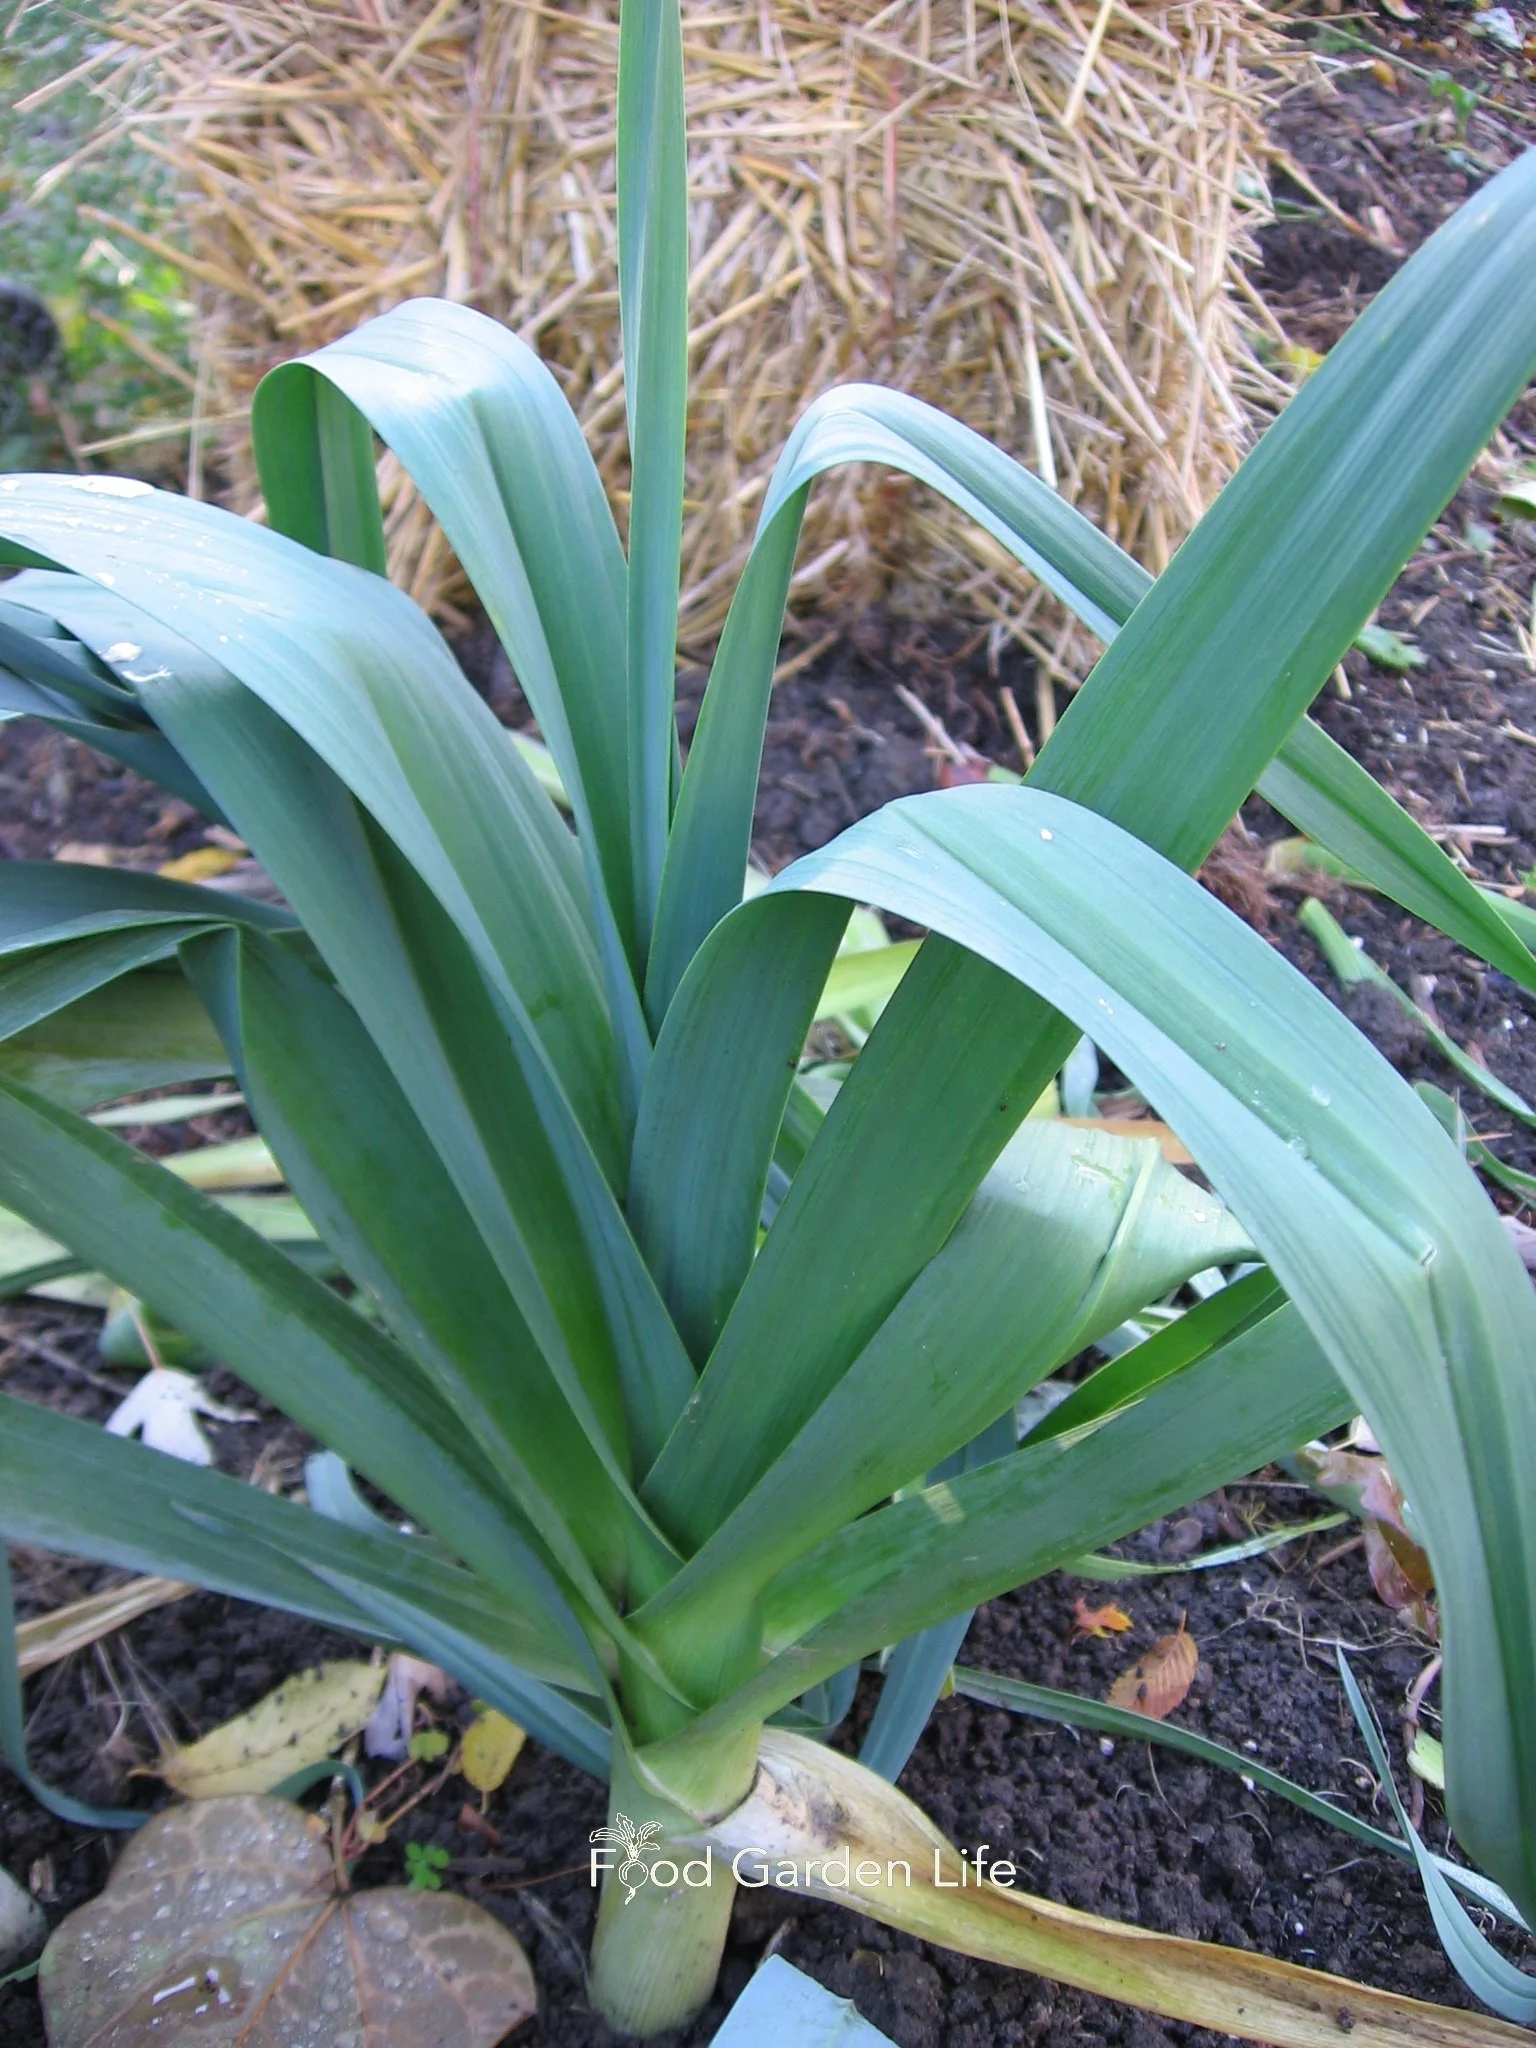
Leeks have a beautiful shape and a long harvest window.
Leek
So often overlooked, the leek is something to add to a container vegetable garden for two reasons:
It lasts right into the winter, making it perfect for gardeners wanting a long harvest window
It has a beautiful shape, and makes an excellent centrepiece in a decorative fall container.
(Makes a nice centrepiece in a fall planter, surrounded by colourful Swiss chard and filly parsley!)
Malabar Spinach
A vining plant with edible stems and leaves that are a good addition to a stir fry. There’s a green variety, and also a red-leafed variety that’s very beautiful.
It’s a great crop for vertical gardening.
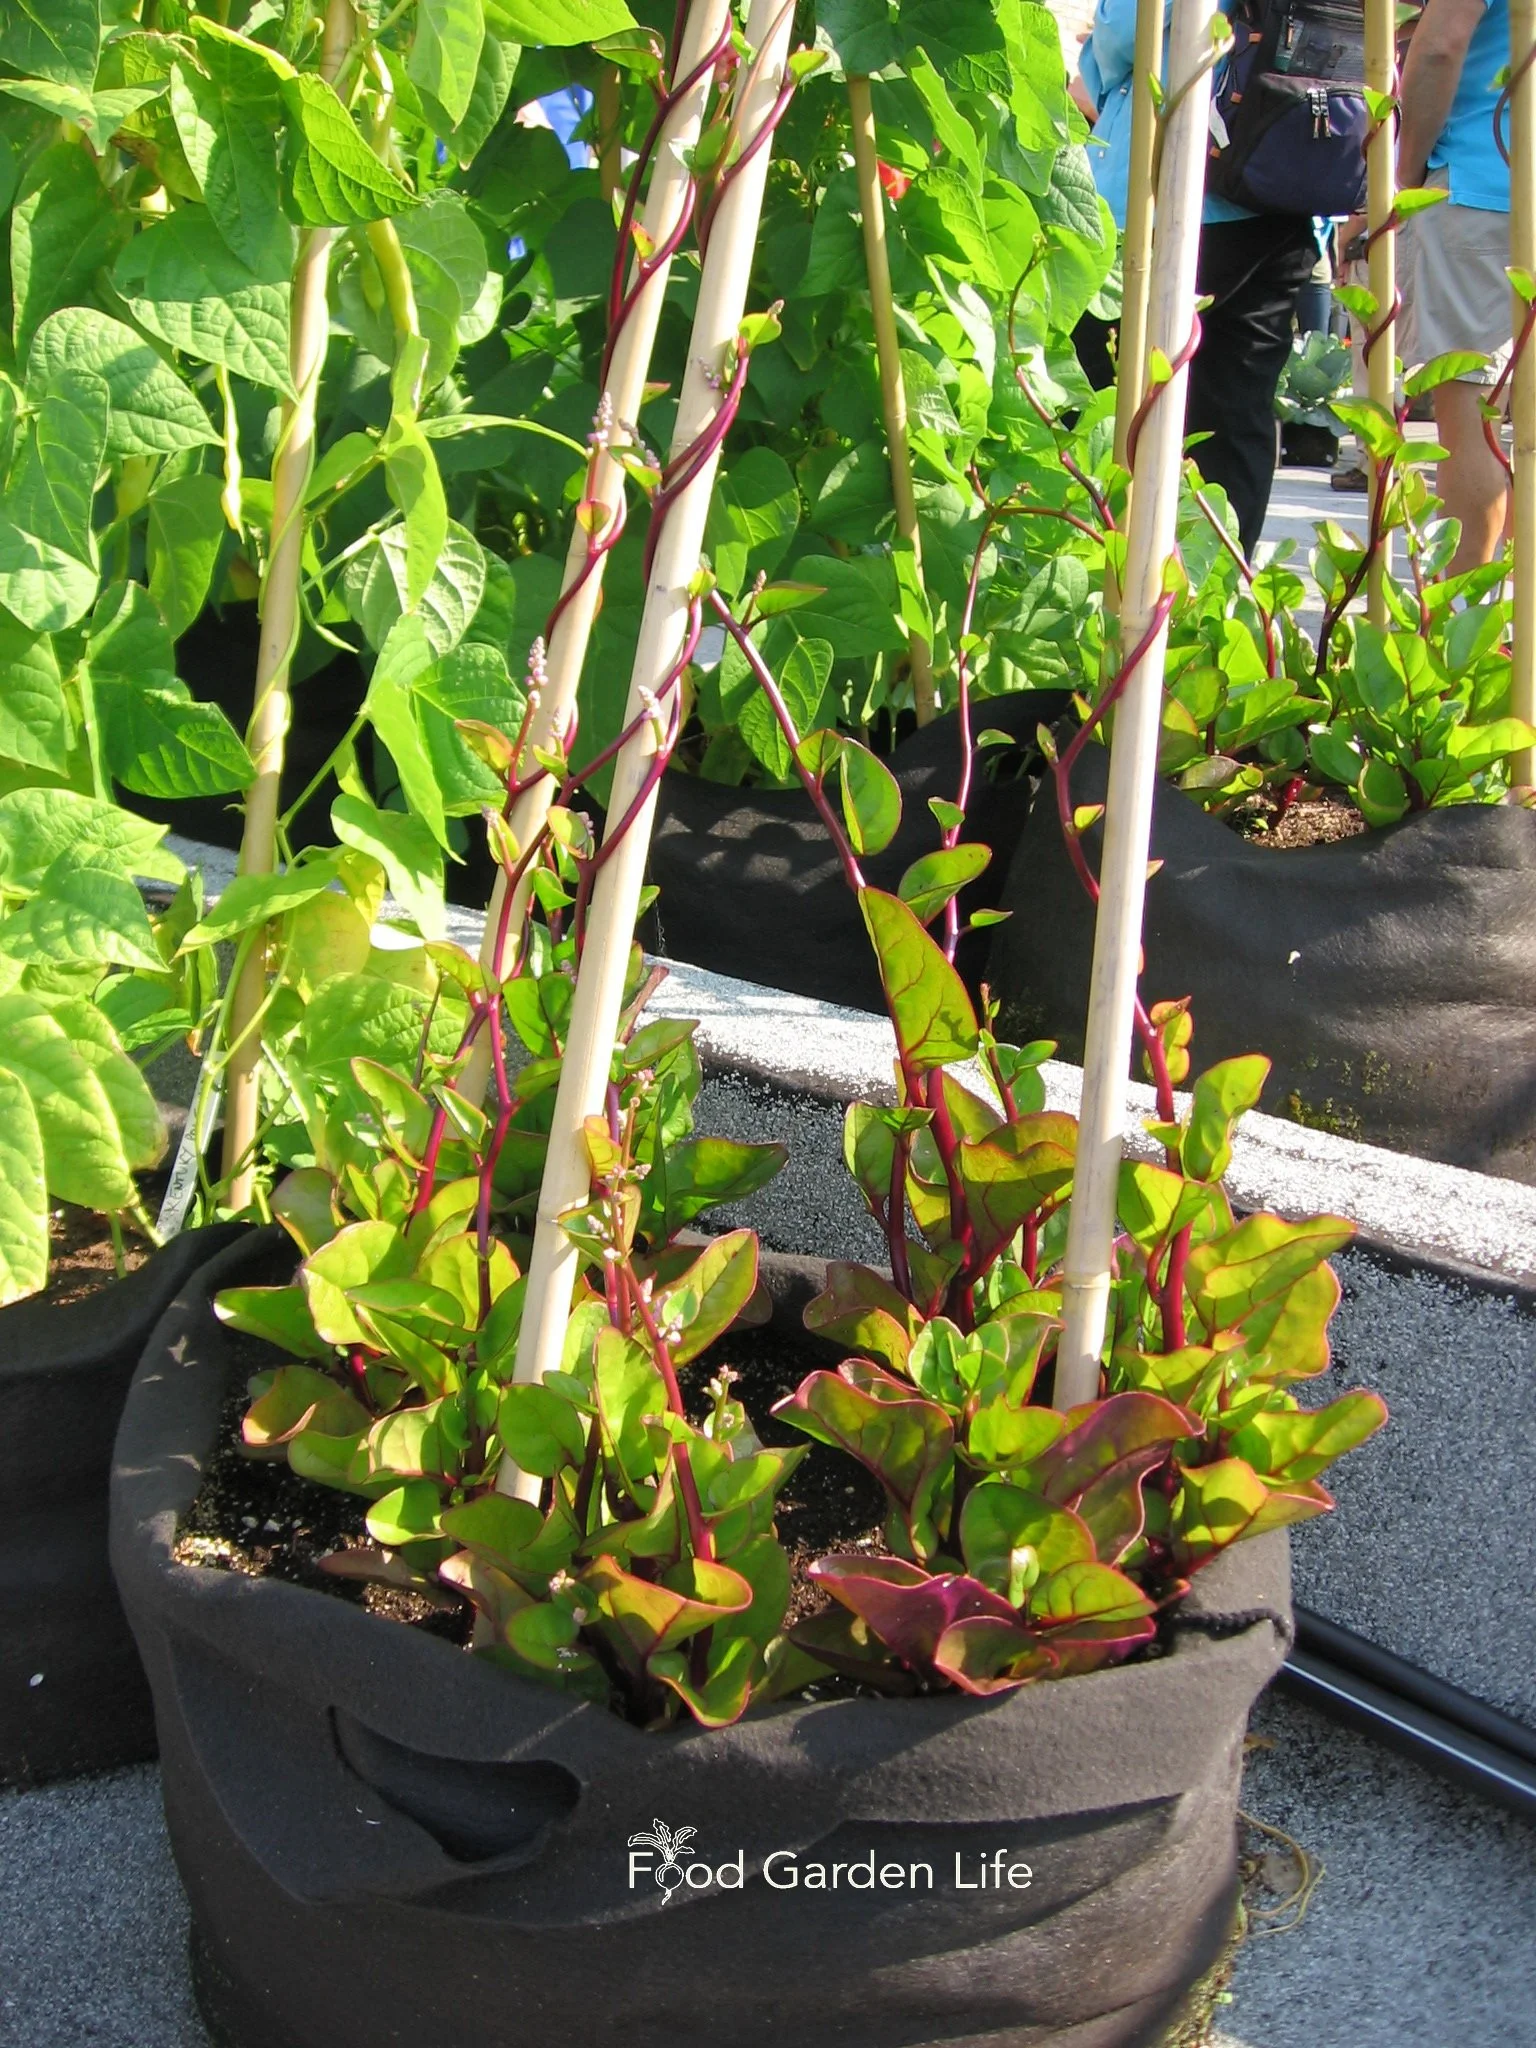
Malabar spinach is a great vegetable to grow in containers because it looks beautiful, produces a lot in a small space, and thrives in the heat.
Okra
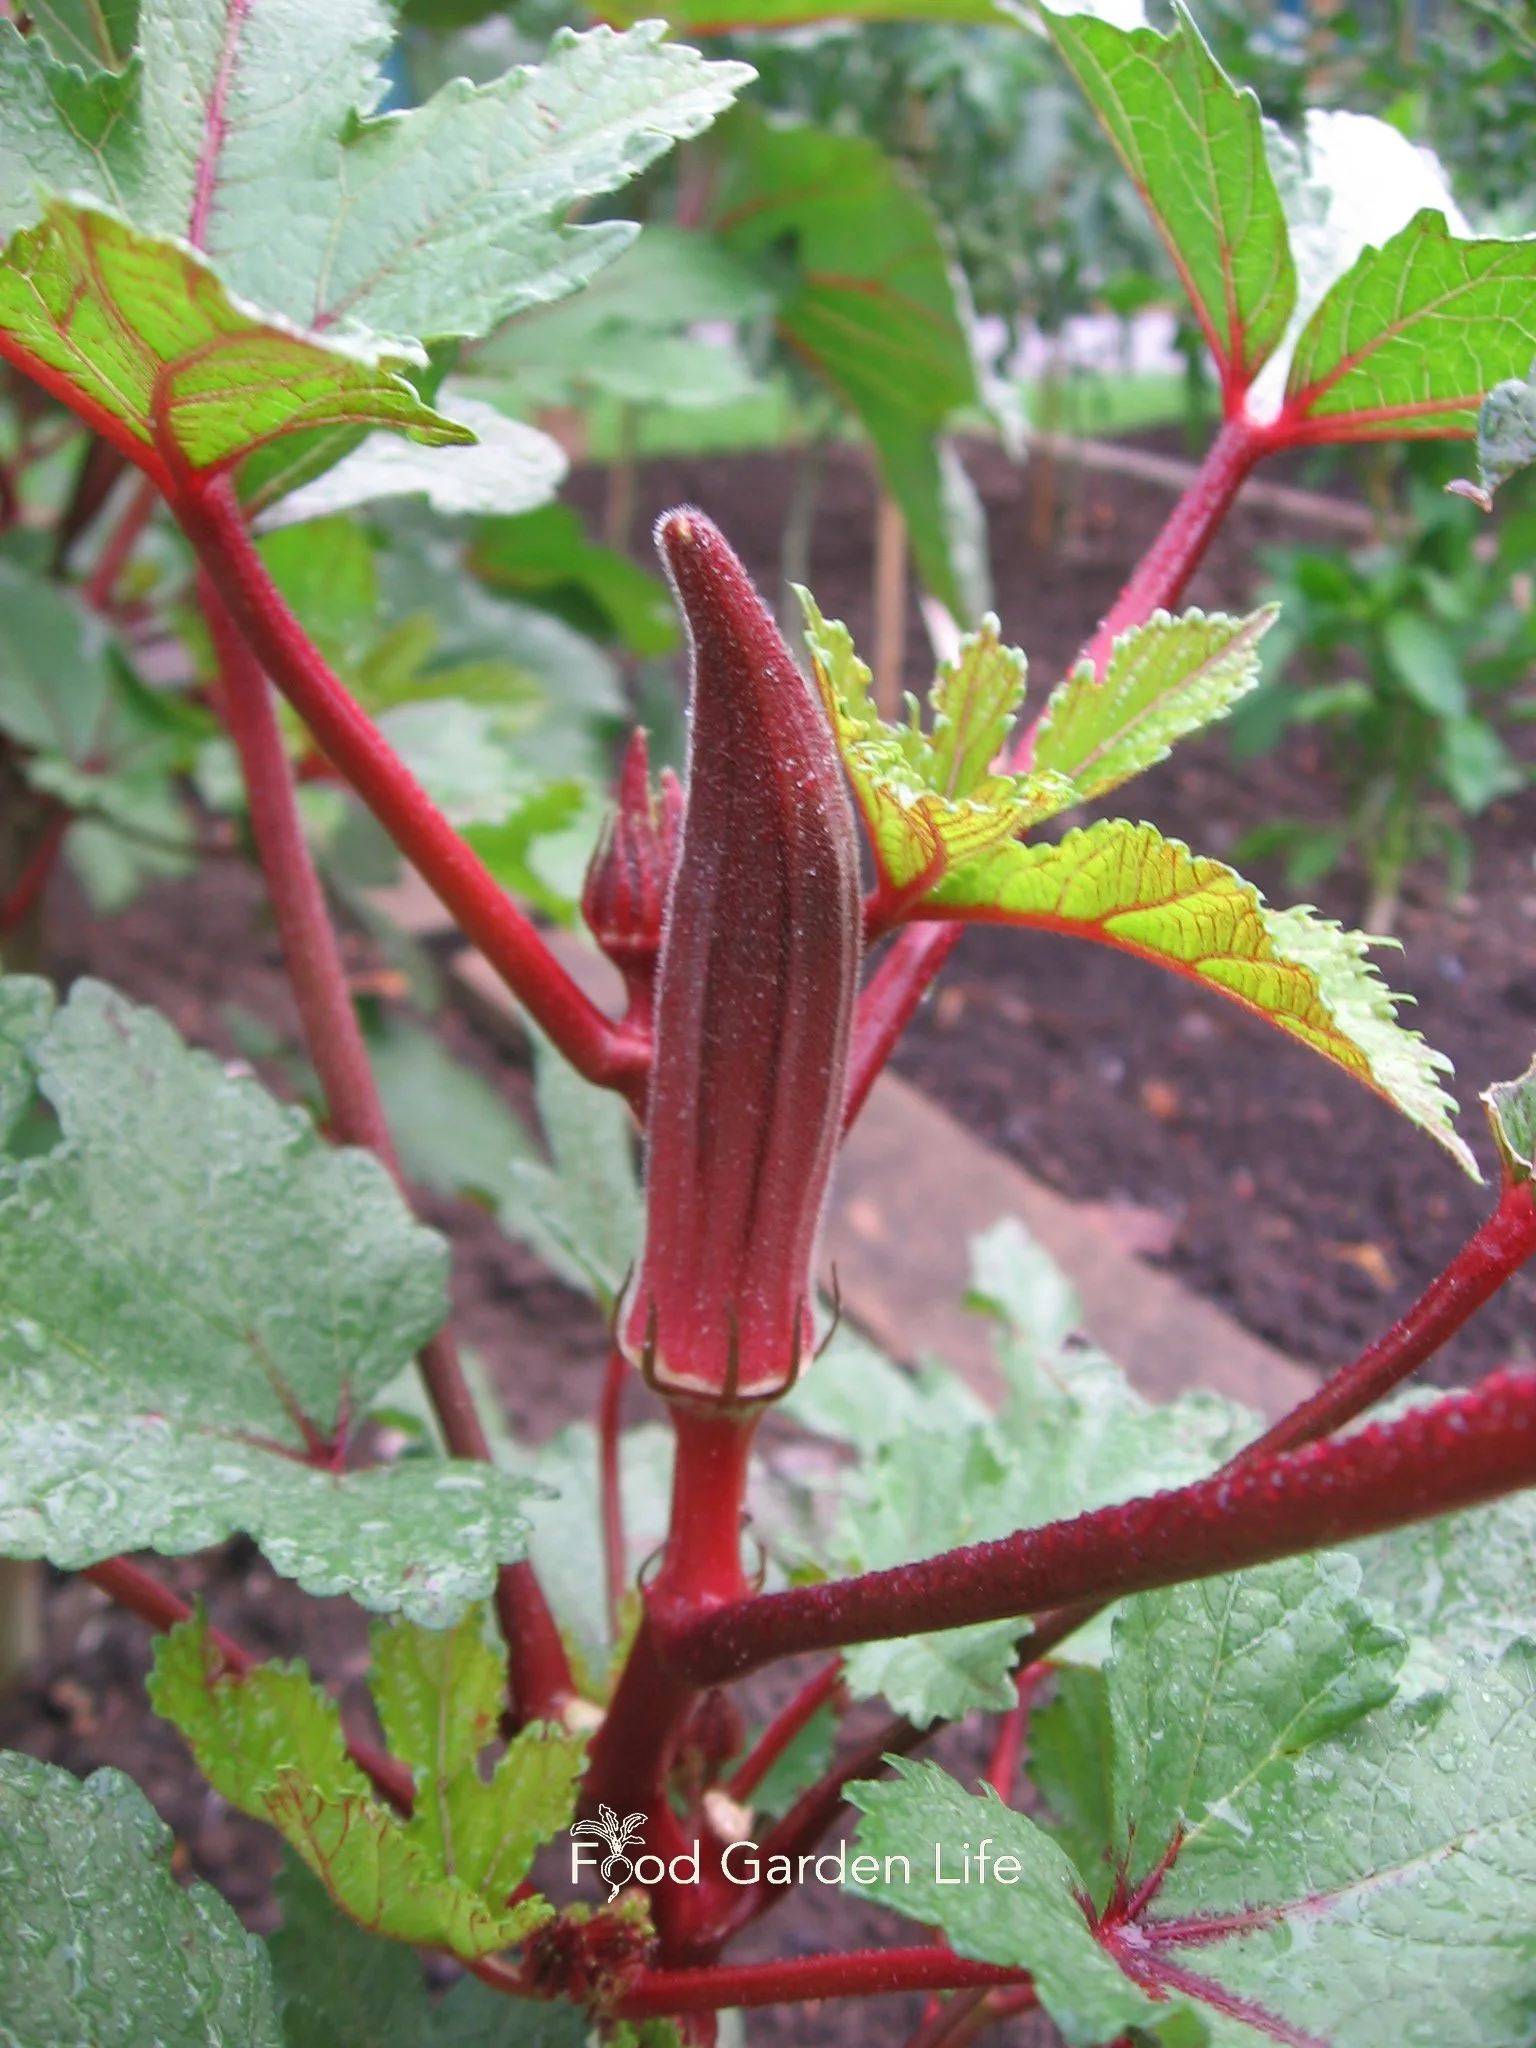
Red-podded okra.
Okra loves heat, making it a good choice for containers in sunny locations.
The red-podded varieties are beautiful, with red stems and red veins on the leaves. Nice ornamental value.
Here’s a chat with the Indiana Jones of okra.
Pepper
Peppers thrive in the heat, so are very well suited to growing in containers in sunny locations.
Both sweet peppers and hot peppers do well as container plants.
Many of the hot peppers have a compact form and look beautiful when the plants are covered with colourful peppers. (A favourite around here it Chinese 5 Colour Pepper, where the peppers go through 5 colours as they ripen—it’s beautiful.)
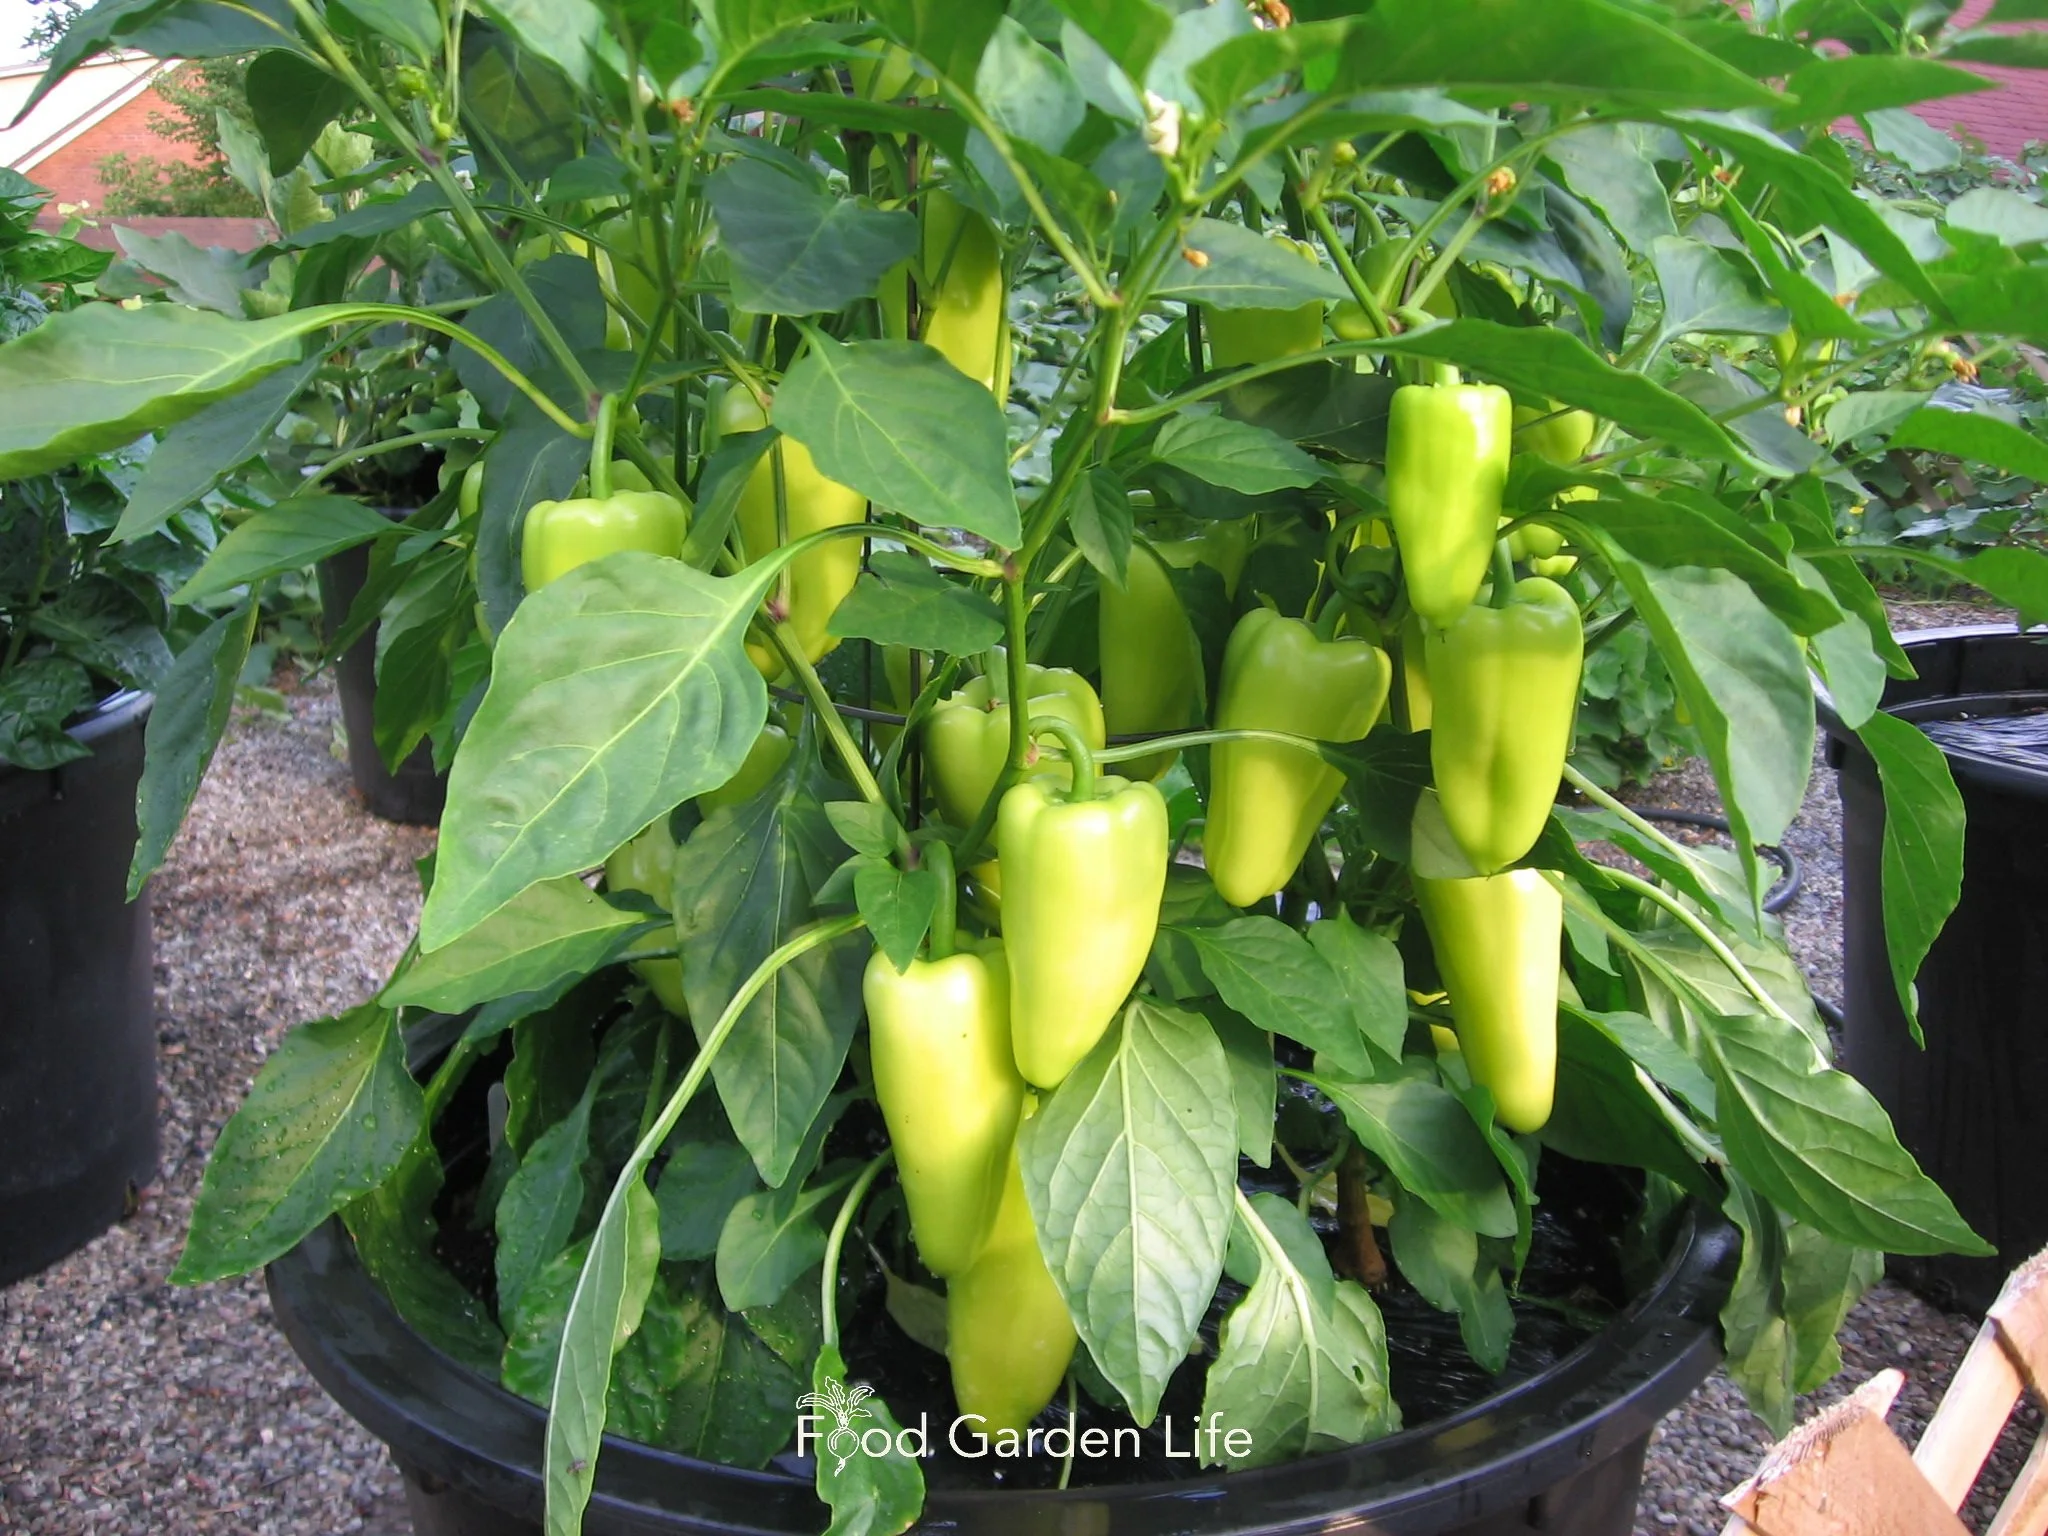
This container pepper plant is laden with peppers!
Potato
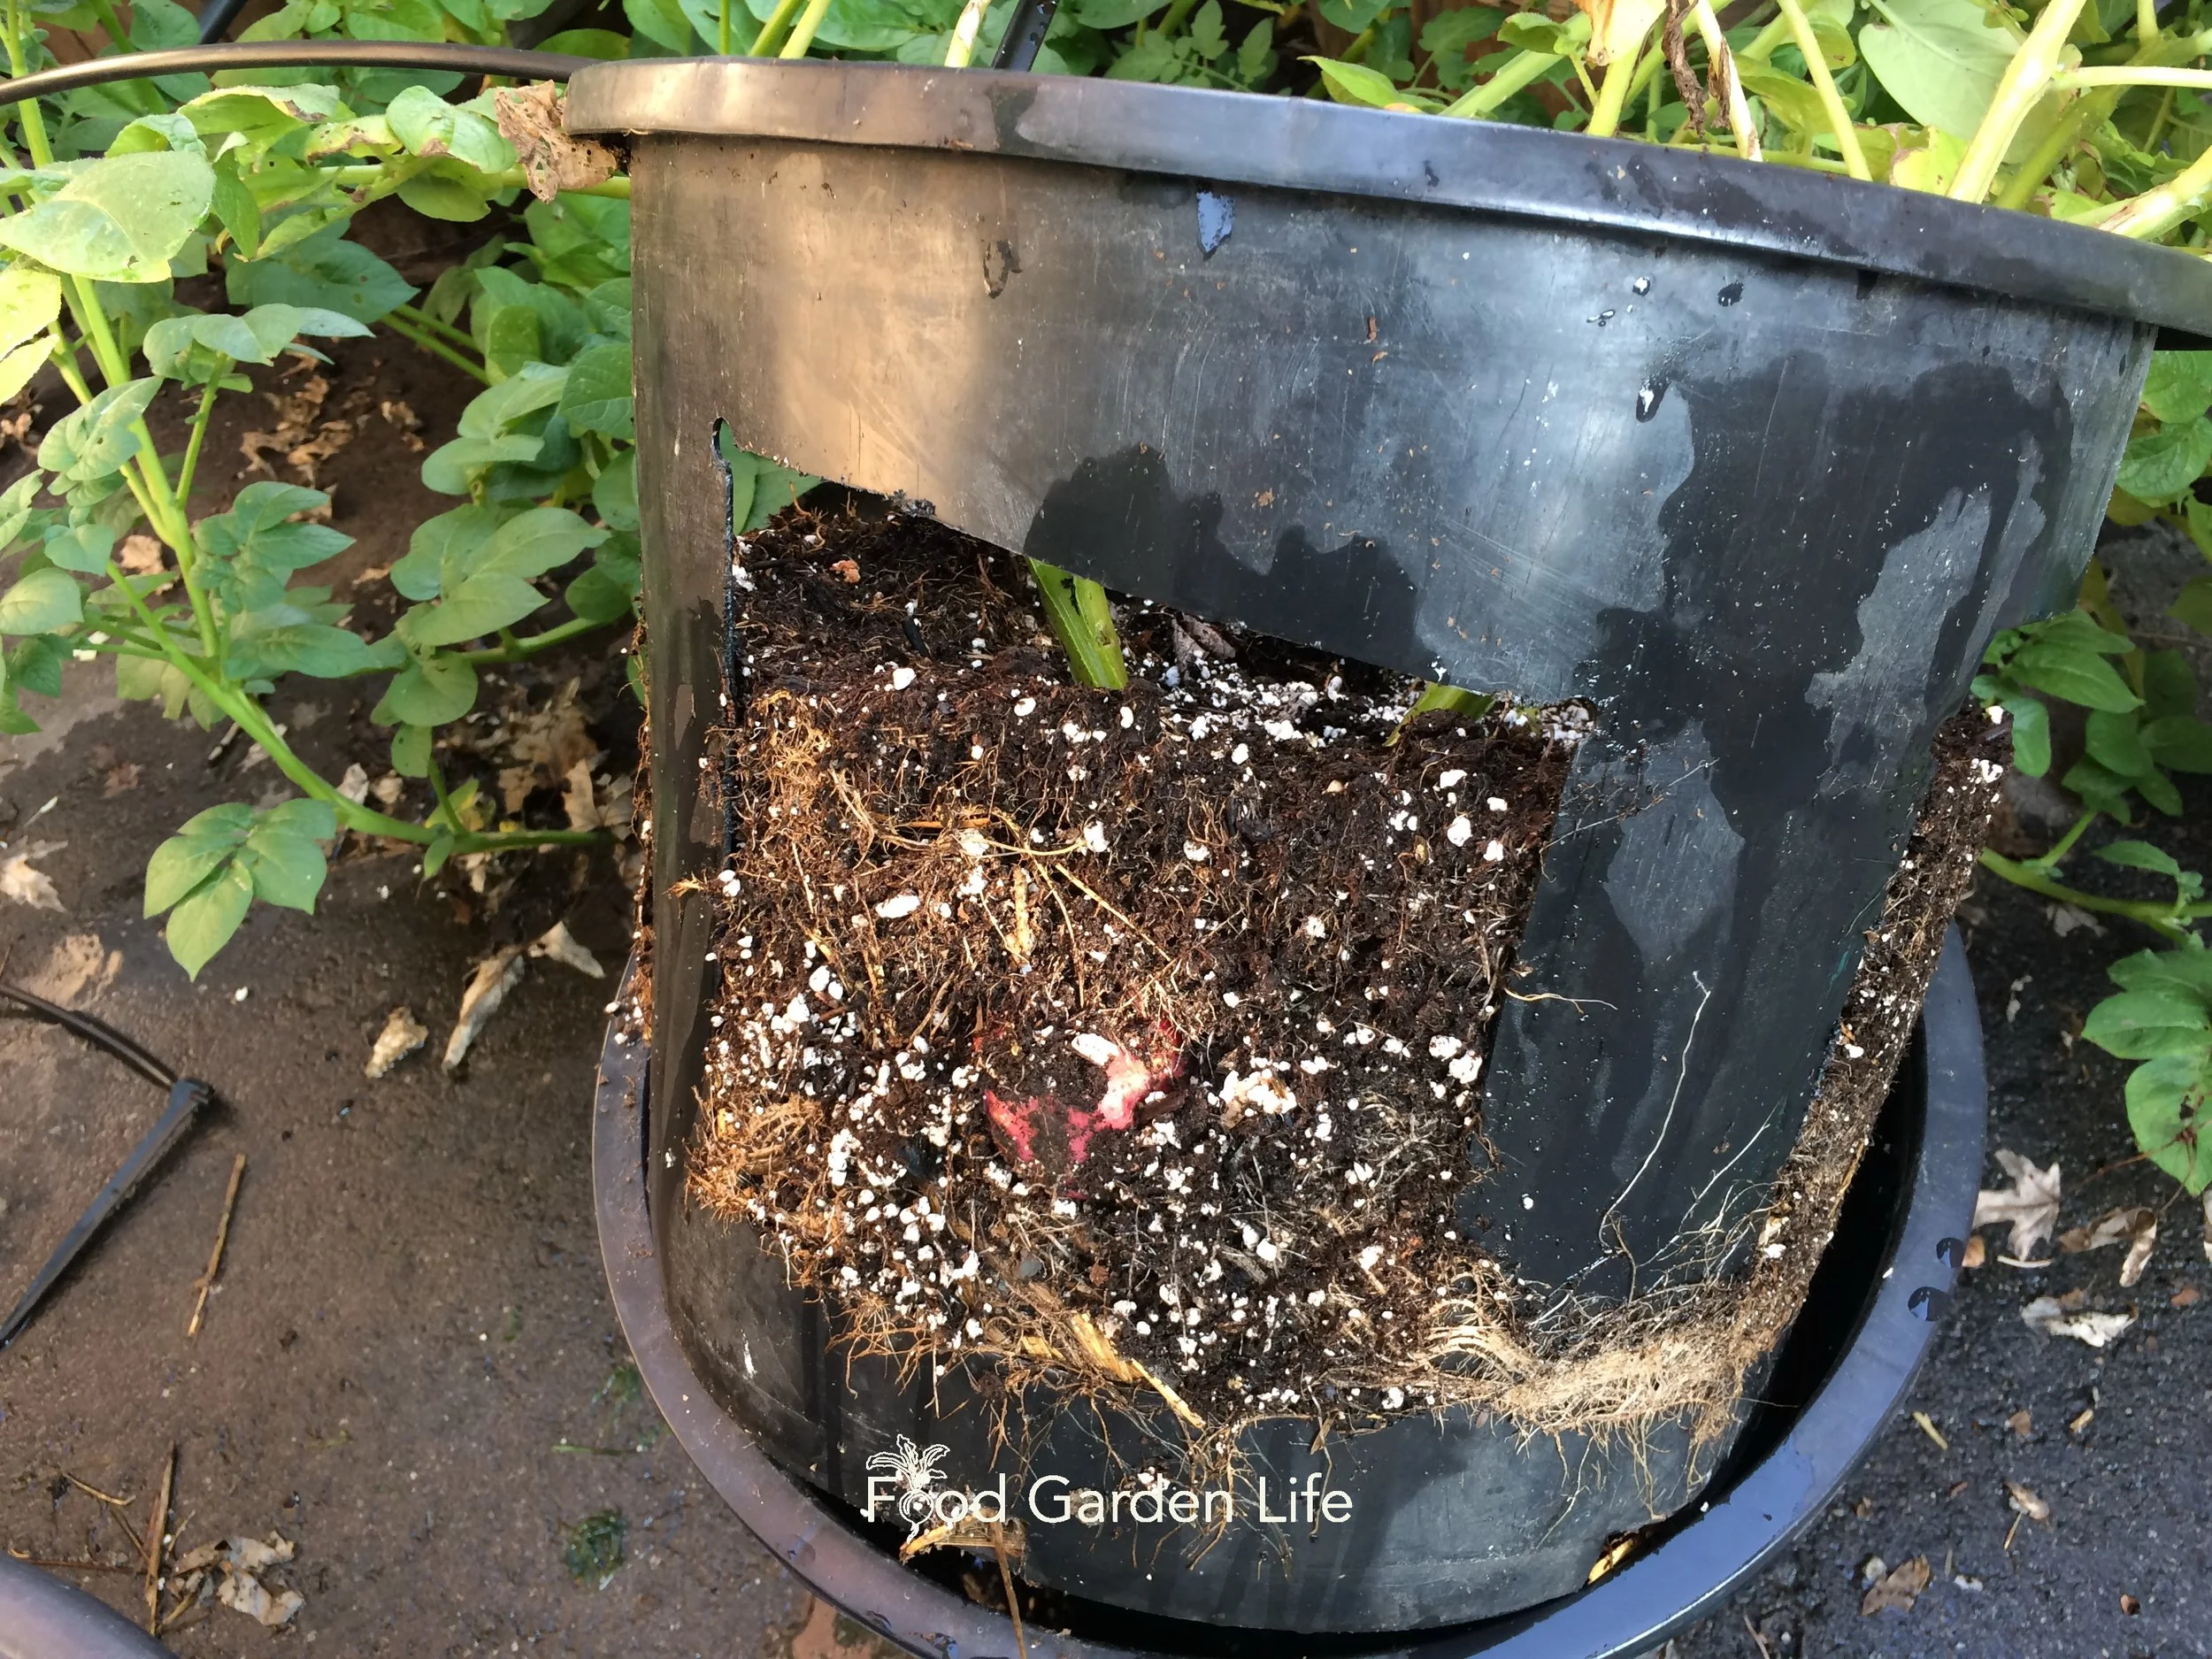
Check out this potato pot! I made it by cutting holes into a nursery pot, and then sliding the nursery pot into another one of the same size.
I love the special fingerling potato varieties that make great potato salads. Don’t waste precious container garden space on big clunky storage potatoes!
Tip: Potatoes form near the soil surface, and it’s important to keep them covered with soil so that they do not go green with exposure to sunlight. Start with just a small amount of soil at the bottom of the pot, then keep adding as the plant grows.
There are even planters with openings in the side for easy early harvest without digging up the whole plant—perfect when you only want a couple of potatoes at a time.
Swiss Chard
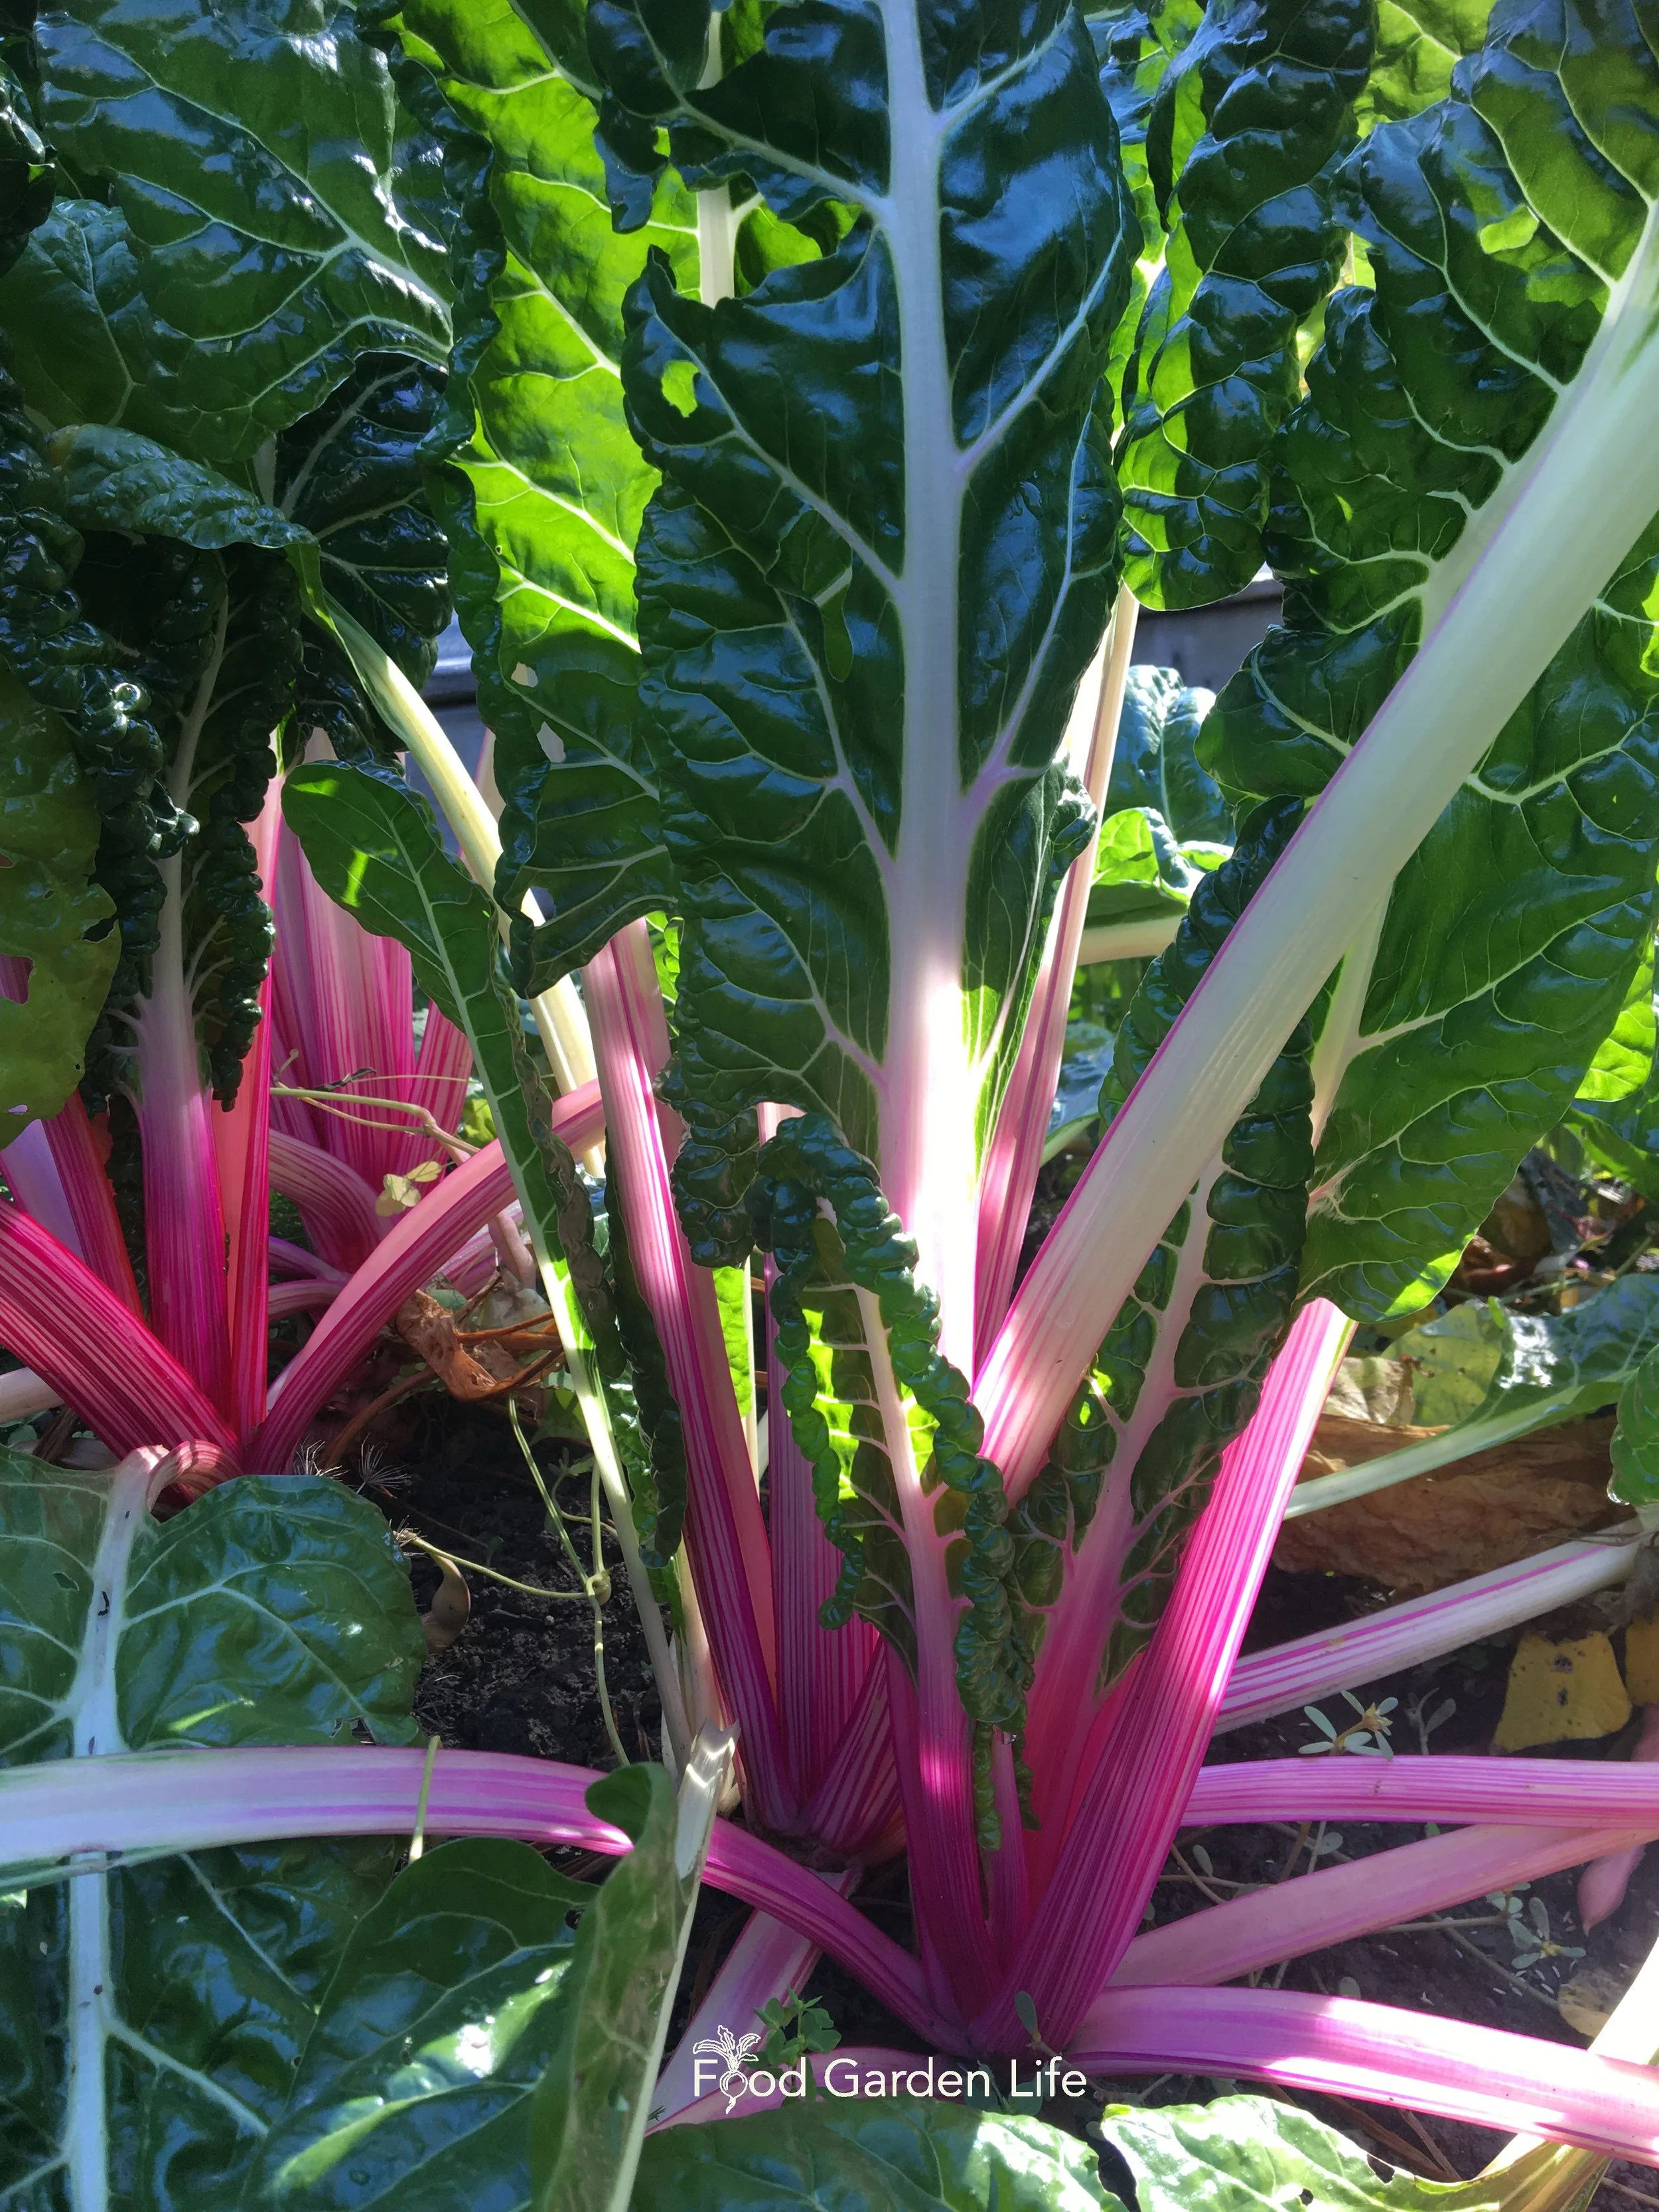
When it comes to salad greens, Swiss chard is easy to grow and long lasting.
I love Swiss chard because it keeps making leaves all summer long…while lettuce and spinach bolt at the first sniff of summer heat. This is the crop if you want leafy greens.
Chard has excellent ornamental properties as it comes in many colours. It holds up well through light fall frosts.
Chard is also a very ornamental vegetable and looks great in the fall.
Check out what chard looks like in the fall.
Tomato
For containers, look for “bush” or “determinate” tomatoes. Or the even more compact “dwarf” types.
I wish I remembered the variety that I grew in that first container garden in Montreal. It was a big, thin-skinned pinky-red coloured variety. But it wasn’t a bush type—which made it more work to stake.
‘House’ is a very compact variety that does well in containers, one that my daughter Emma often grows. Hear her chat with tomato expert Linda Crago about ‘House’ tomato and other fun tomato varieties.
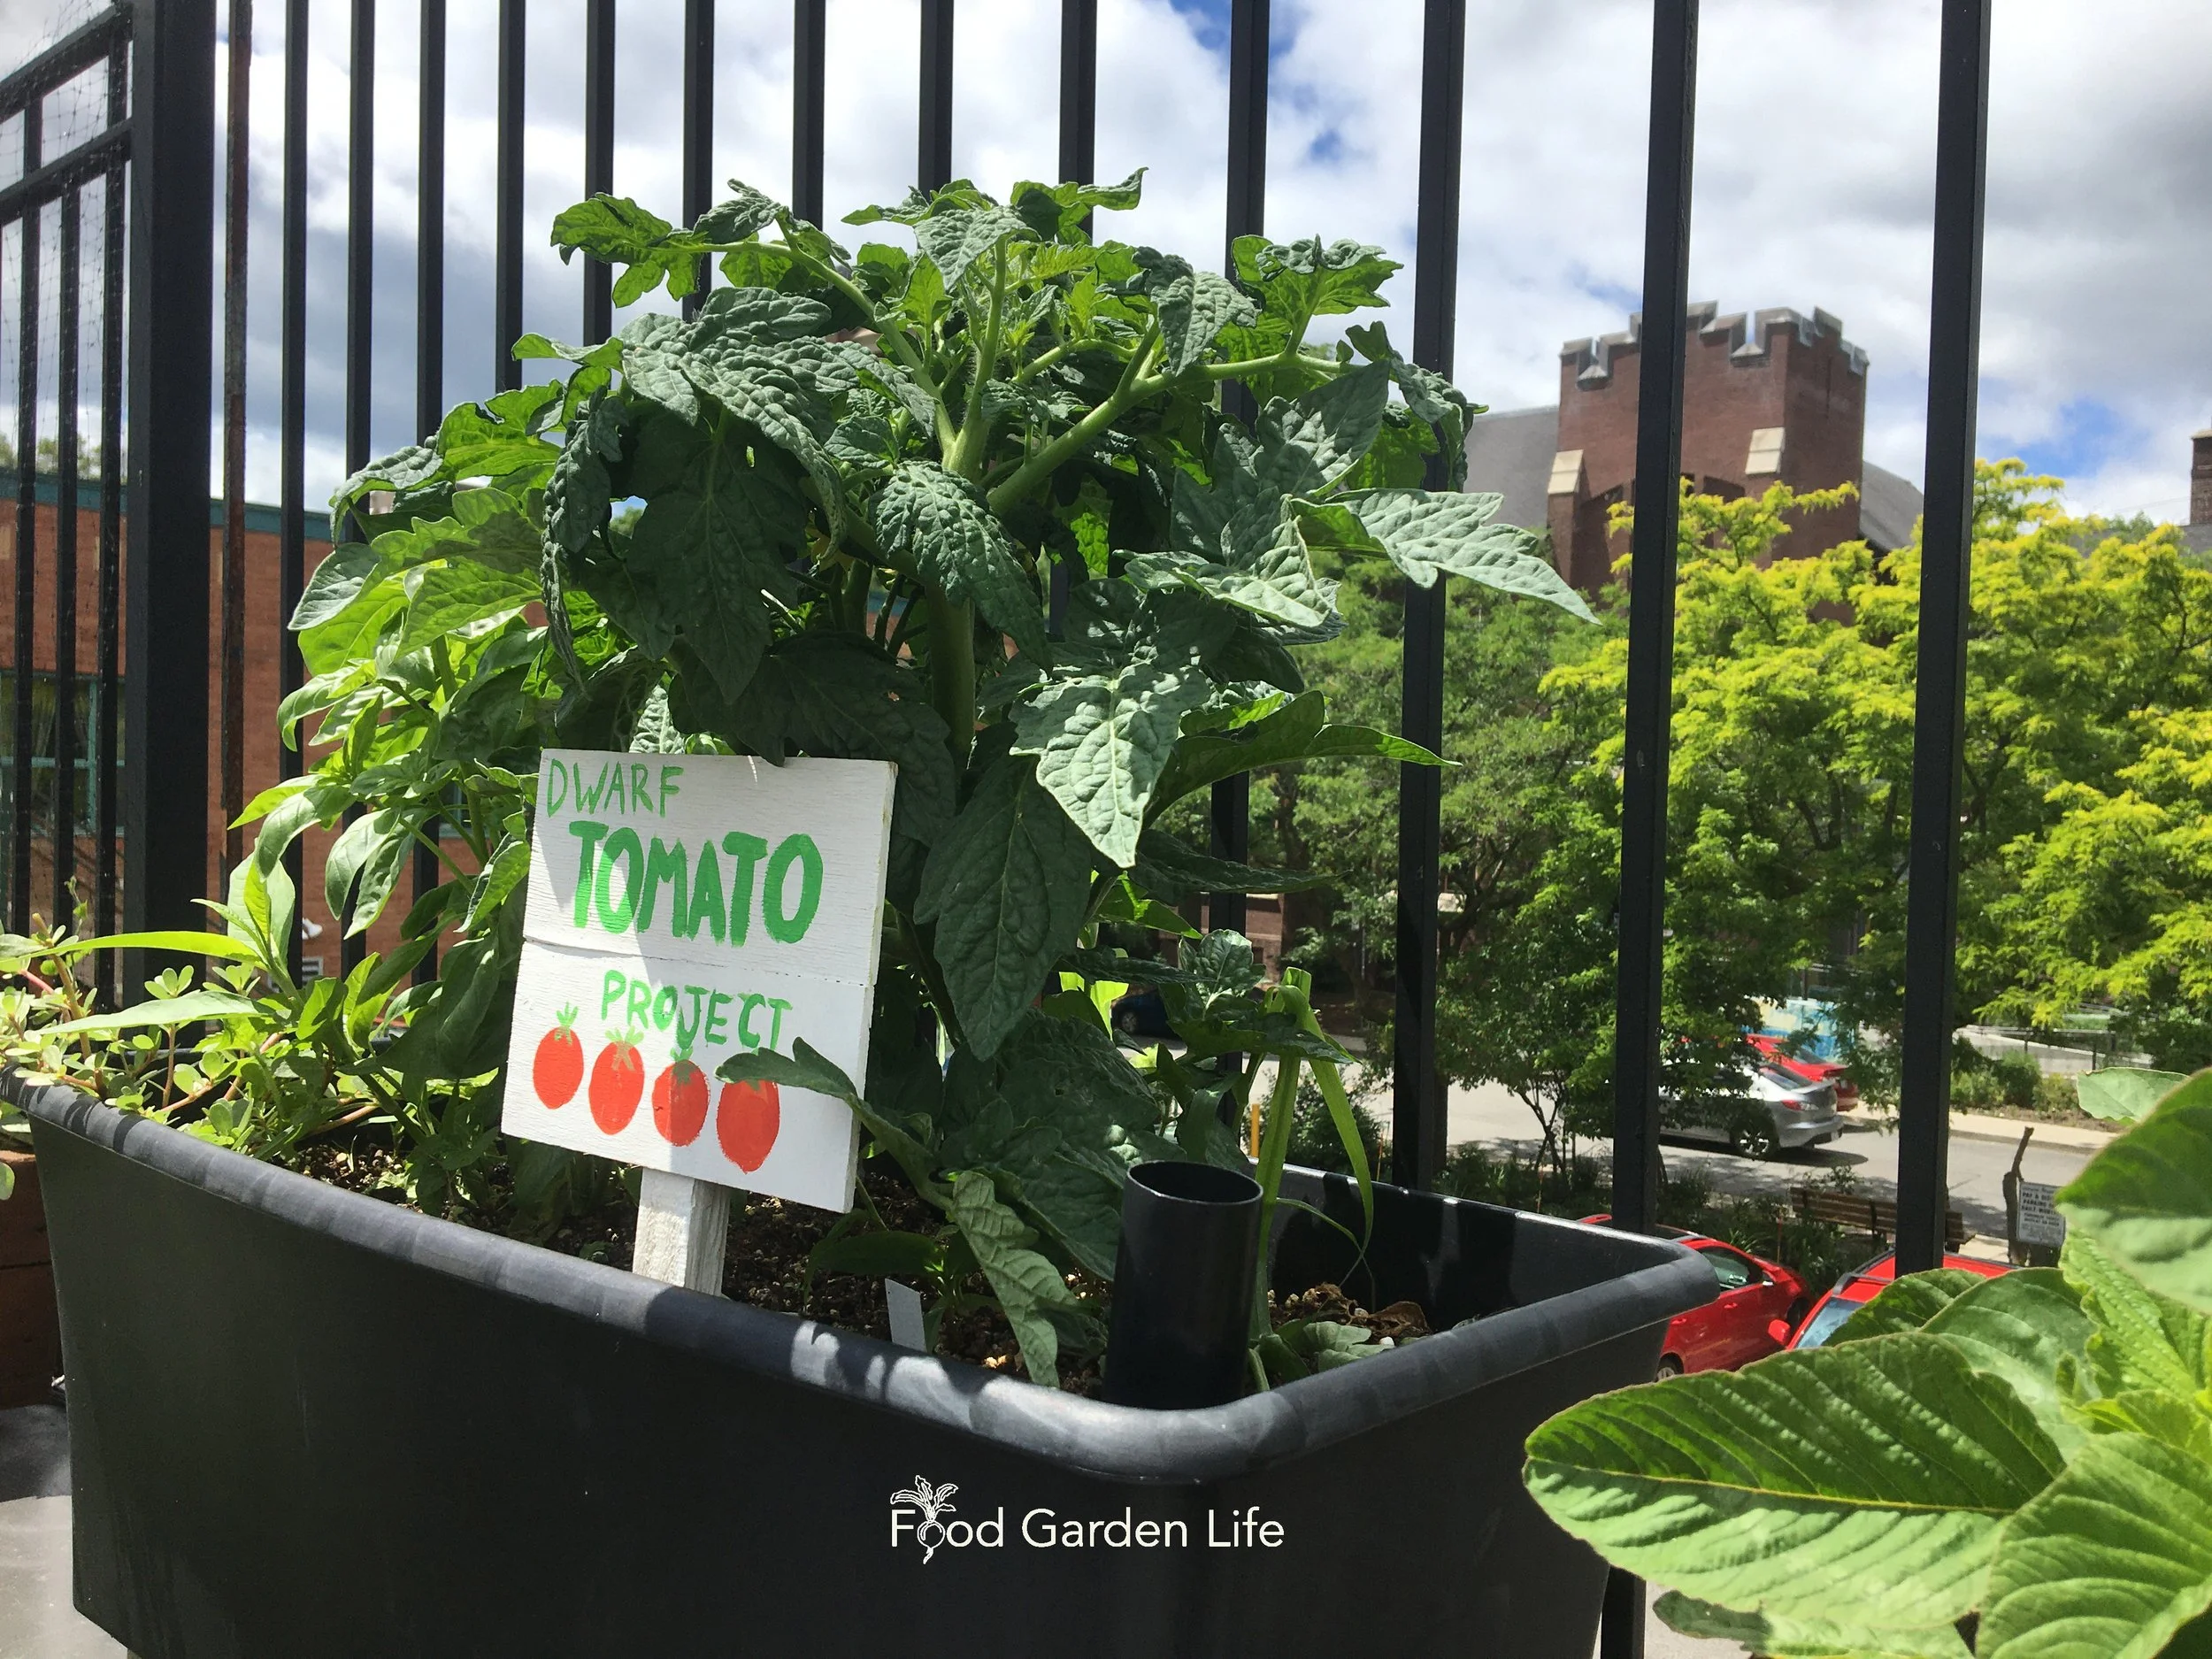
Dwarf tomatoes growing in a rooftop container. No need for staking or support!
Got Shade?
Is shade a challenge in your garden. Don’t worry, you still have lots of options. Find out vegetables that do well in the shade.
Find This Helpful?
Enjoy not being bombarded by annoying ads?
Appreciate the absence of junky affiliate links for products you don’t need?
It’s because we’re reader supported.
If we’ve helped in your food-gardening journey, we’re glad of support. You can high-five us below. Any amount welcome!
More Container Vegetable Gardening Ideas
Pin this post!
Planters with Reservoirs
“Sub-Irrigated planters” can reduce the amount of time you spend watering container gardens.
Find out about how sub-irrigated planters can cut your watering in half.
Straw-Bale Gardens
Think of straw bales as a temporary container garden. They’re quick to set up, and can give great results.
Find out more about straw-bale vegetable gardening.
Here’s a Fun Crop
Cardoon has amazing ornamental value—so it's a fun crop to consider, even if you won’t eat it.
Find out all about cardoon and how to grow and cook it.
More Articles on Vegetable Gardening
Courses: Growing Edibles
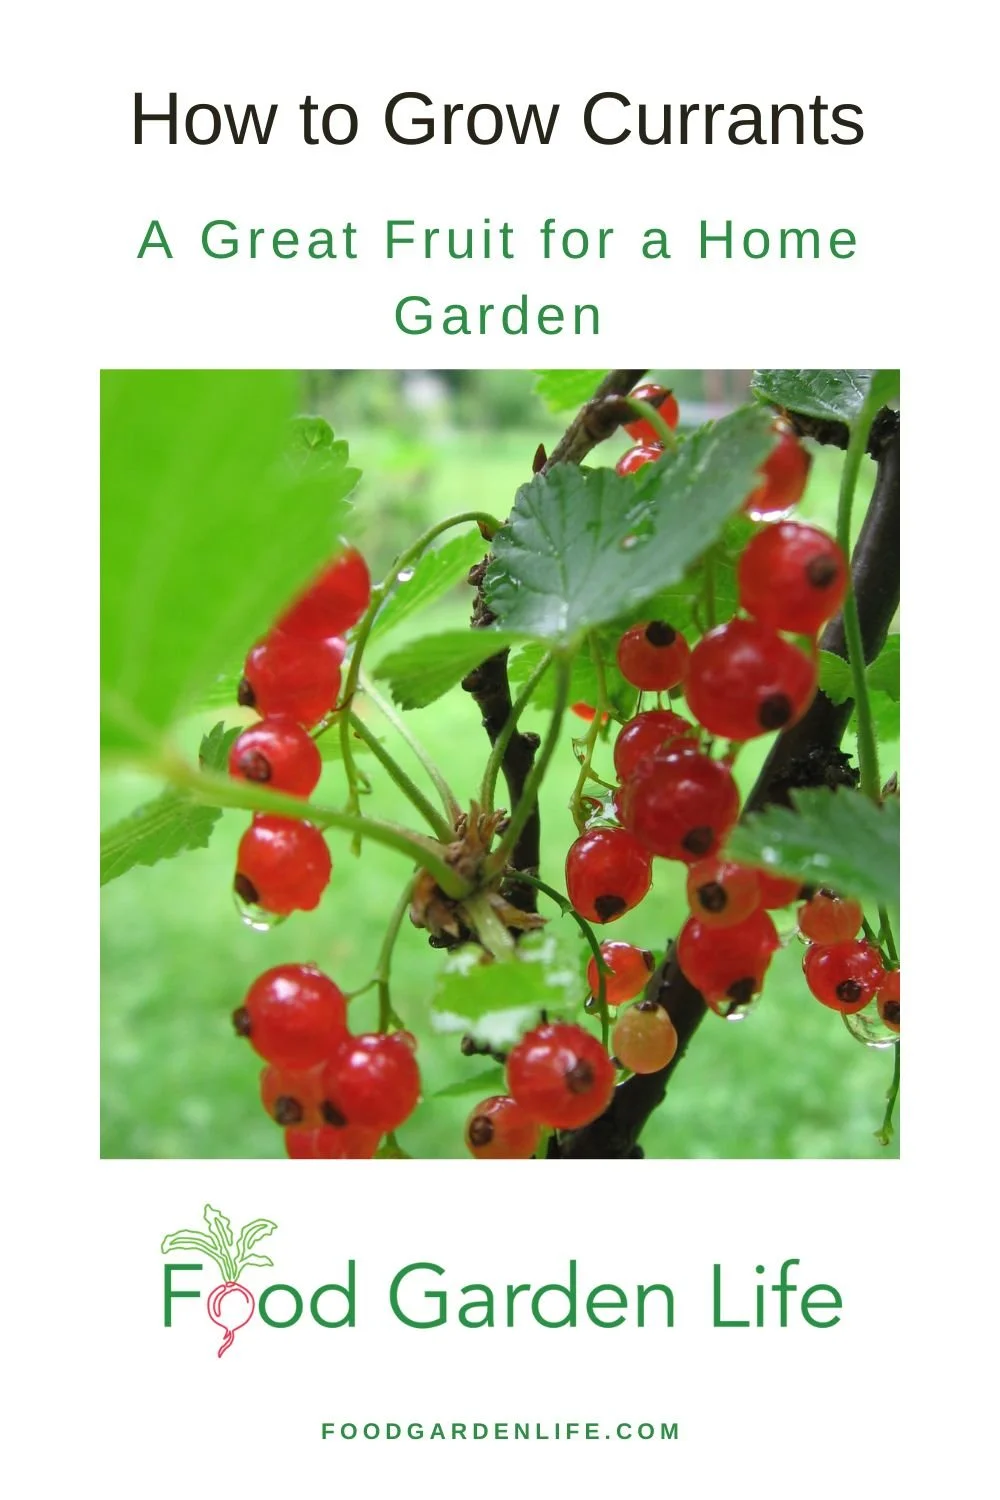
How to Grow Currants - A Great Fruit for a Home Garden
How to grow currants
By Steven Biggs
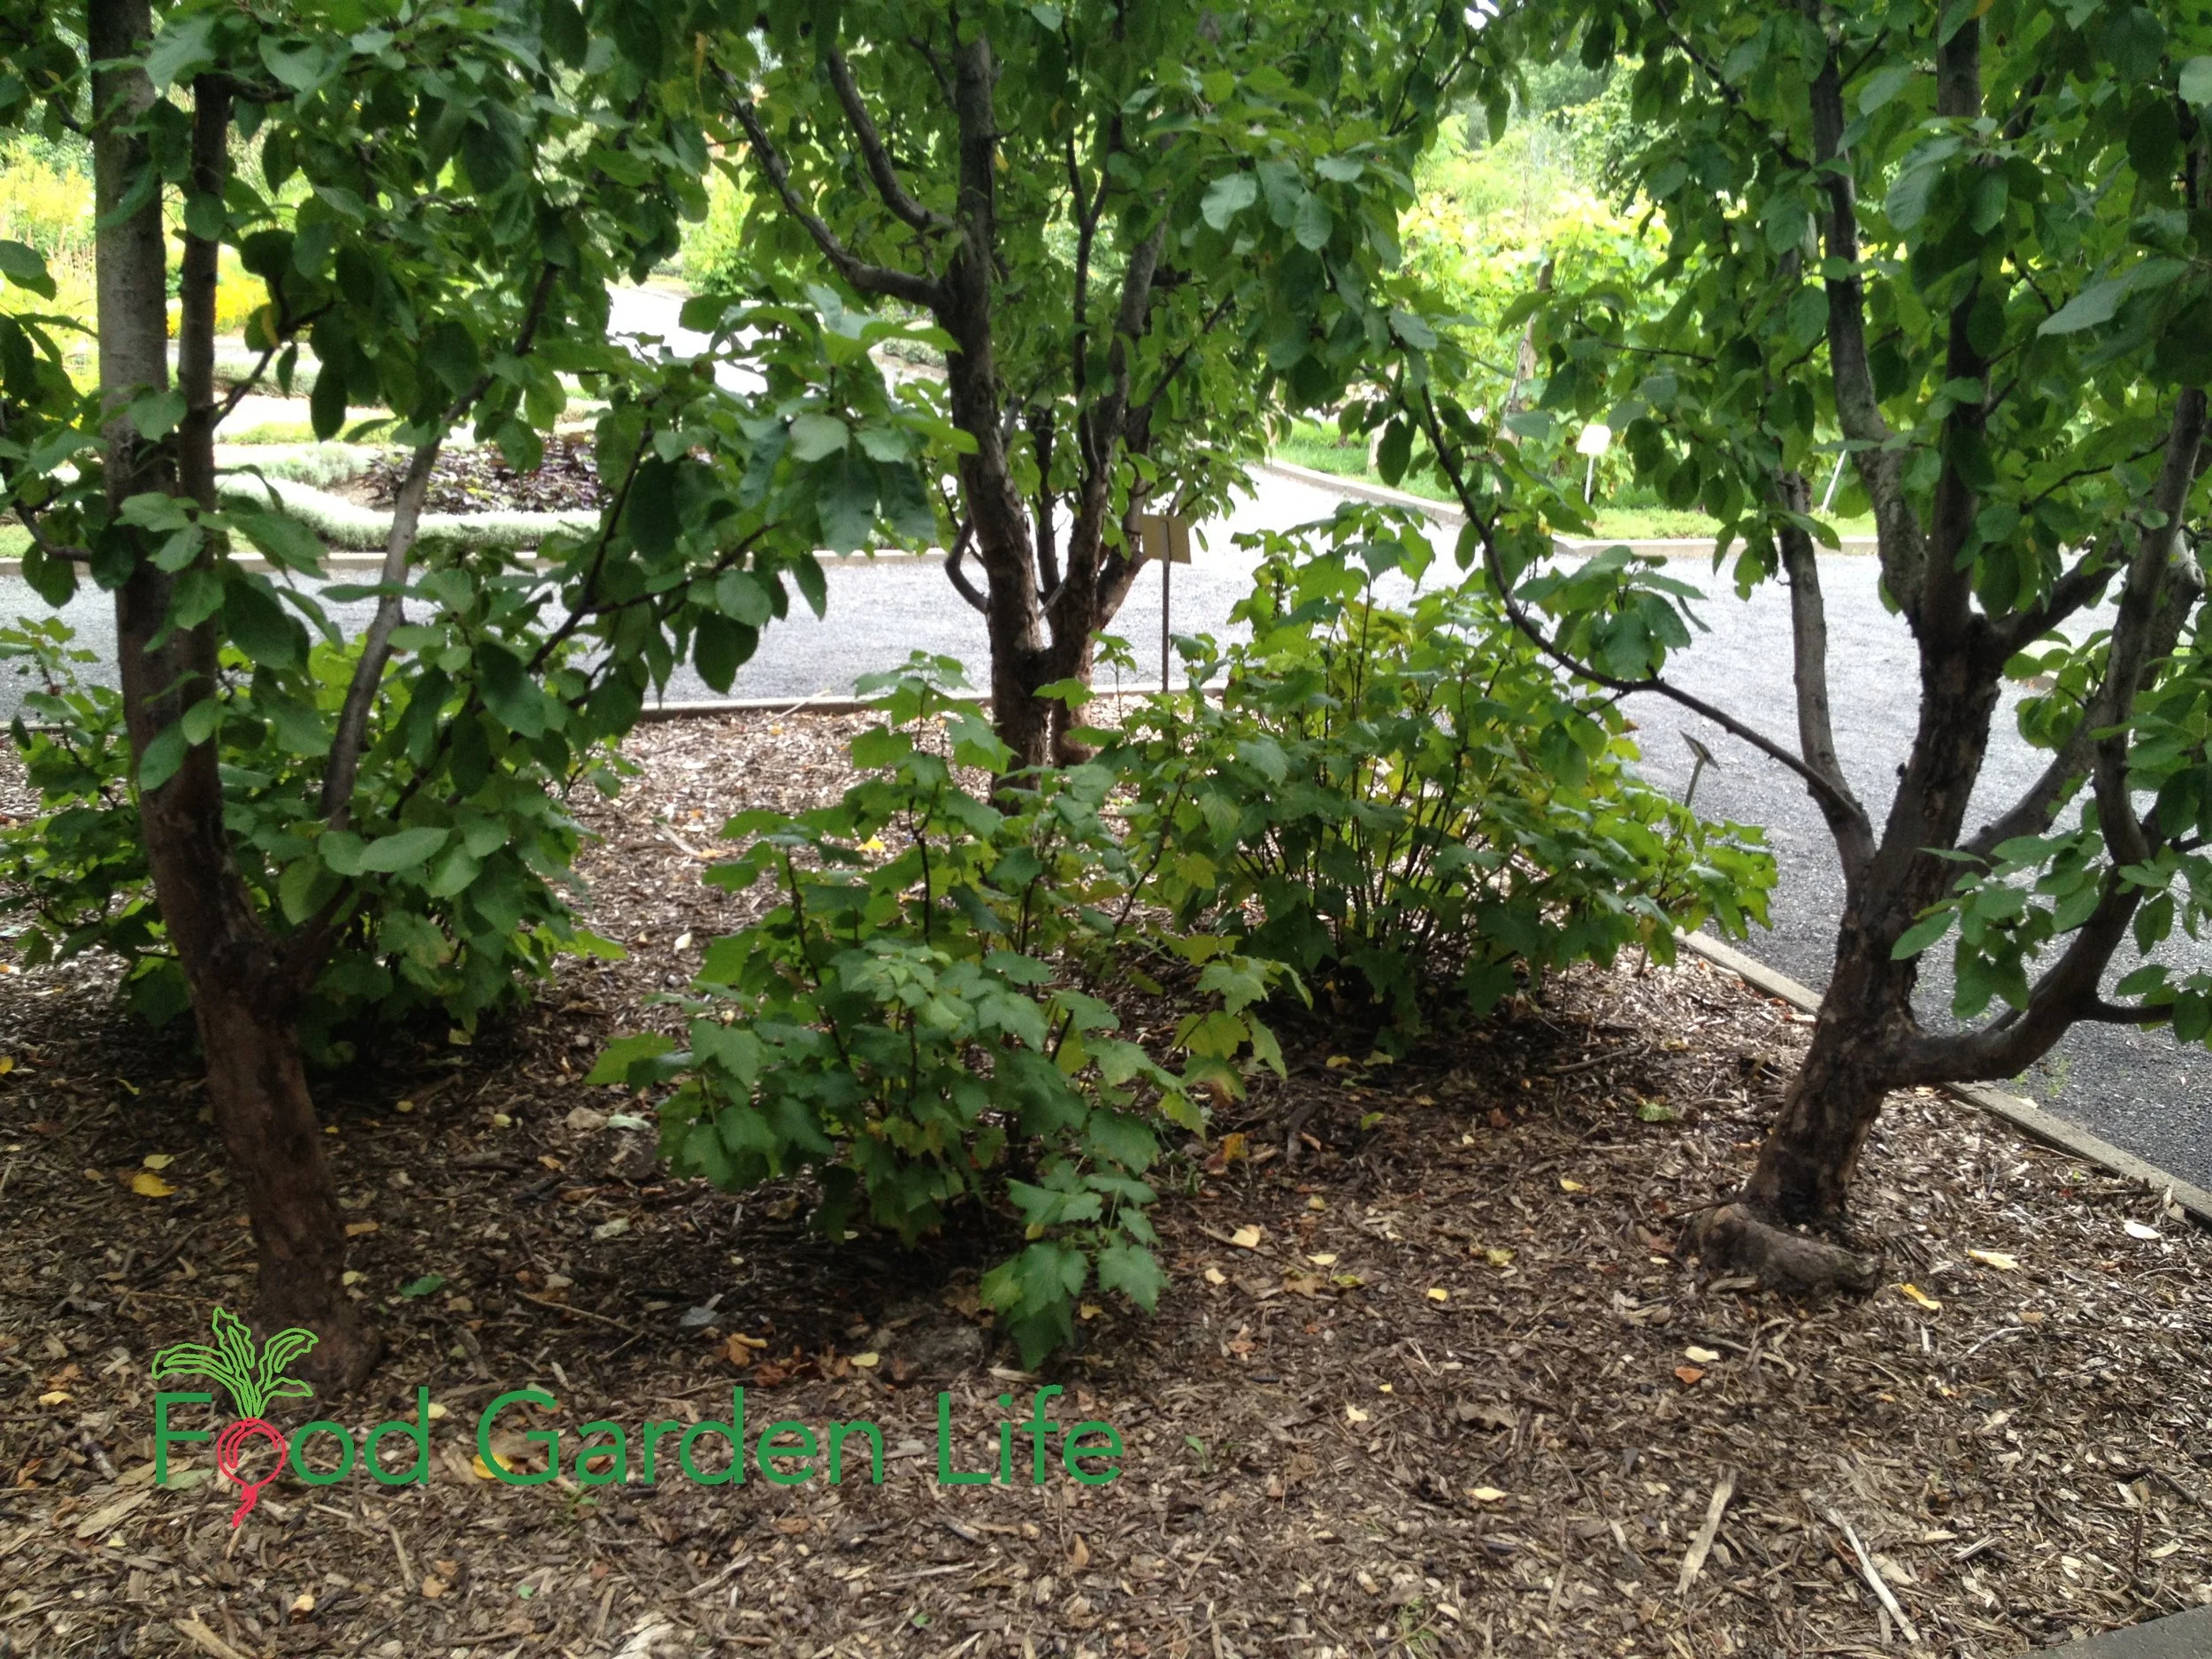
A Neglected Currant Bush
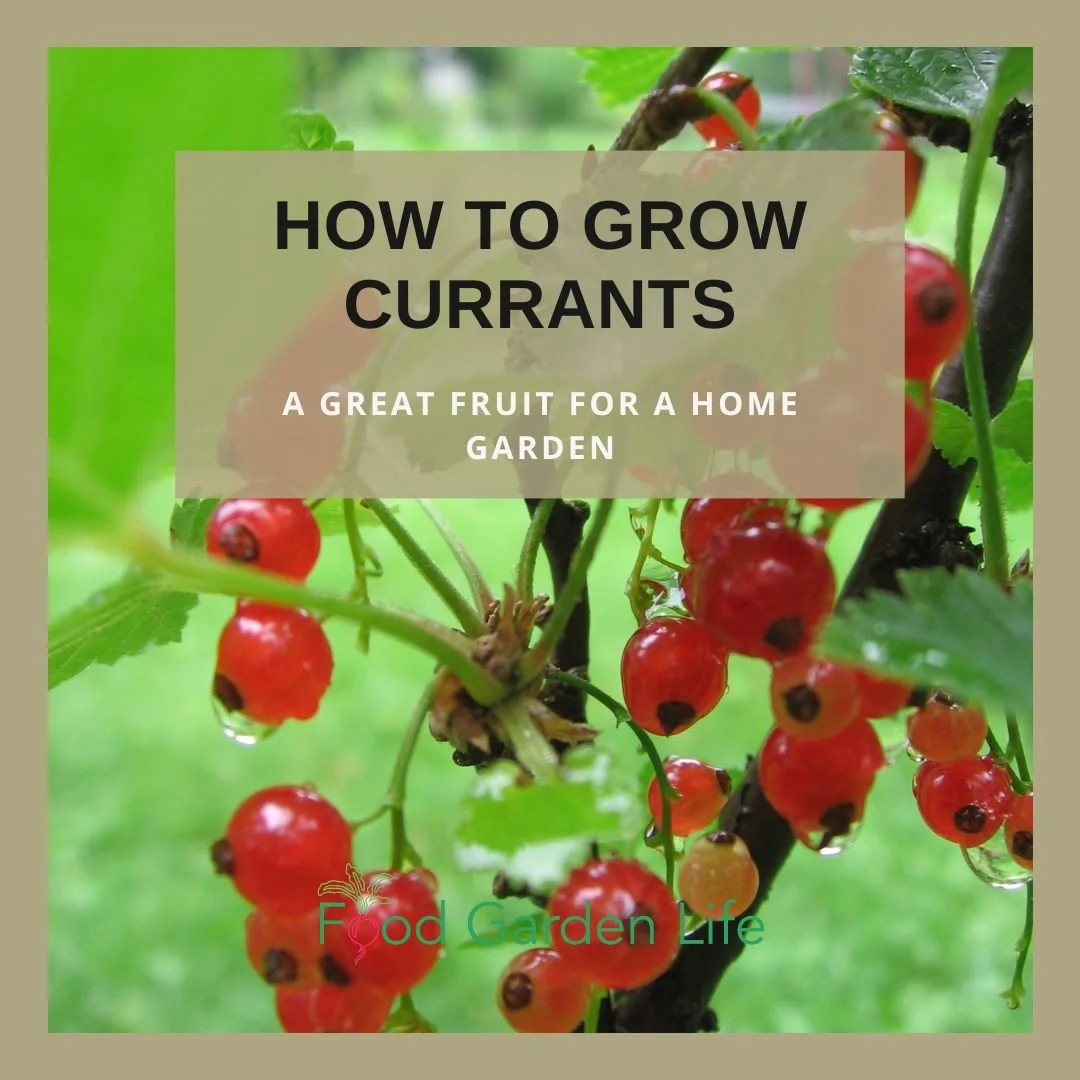
Red currants are easy to grow, making them well suited to home gardens.
A lonely red currant bush under the apple tree next door showed me currants are a perfect fruit for home gardens.
That forlorn currant bush had been untended for years, growing in shade and heavy clay soil.
It had a lot going against it. Yet it reliably grew currants every year…and when they went unpicked, I reached through the fence to harvest them.
Why Grow Currants?
Currants are a great fit for home gardens for a few reasons:
They are easy to grow
They tolerate the less-than-perfect conditions of a home garden
They produce fruit even when neglected
They are versatile in the kitchen (syrups, jellies, cordials, compotes)
The fruit is rarely sold at stores (and expensive if you find it)
Despite all of these reasons to grow currants, they are less common here in North America than in Europe, where they are a garden staple. Keep reading to find out how to grow this versatile fruit in a garden, edible landscape, or food forest.
Currant Fruit
Black currants, red currants, and clove currants are all different species. There are some differences in pruning, but they’re all simple to grow and can be planted together.
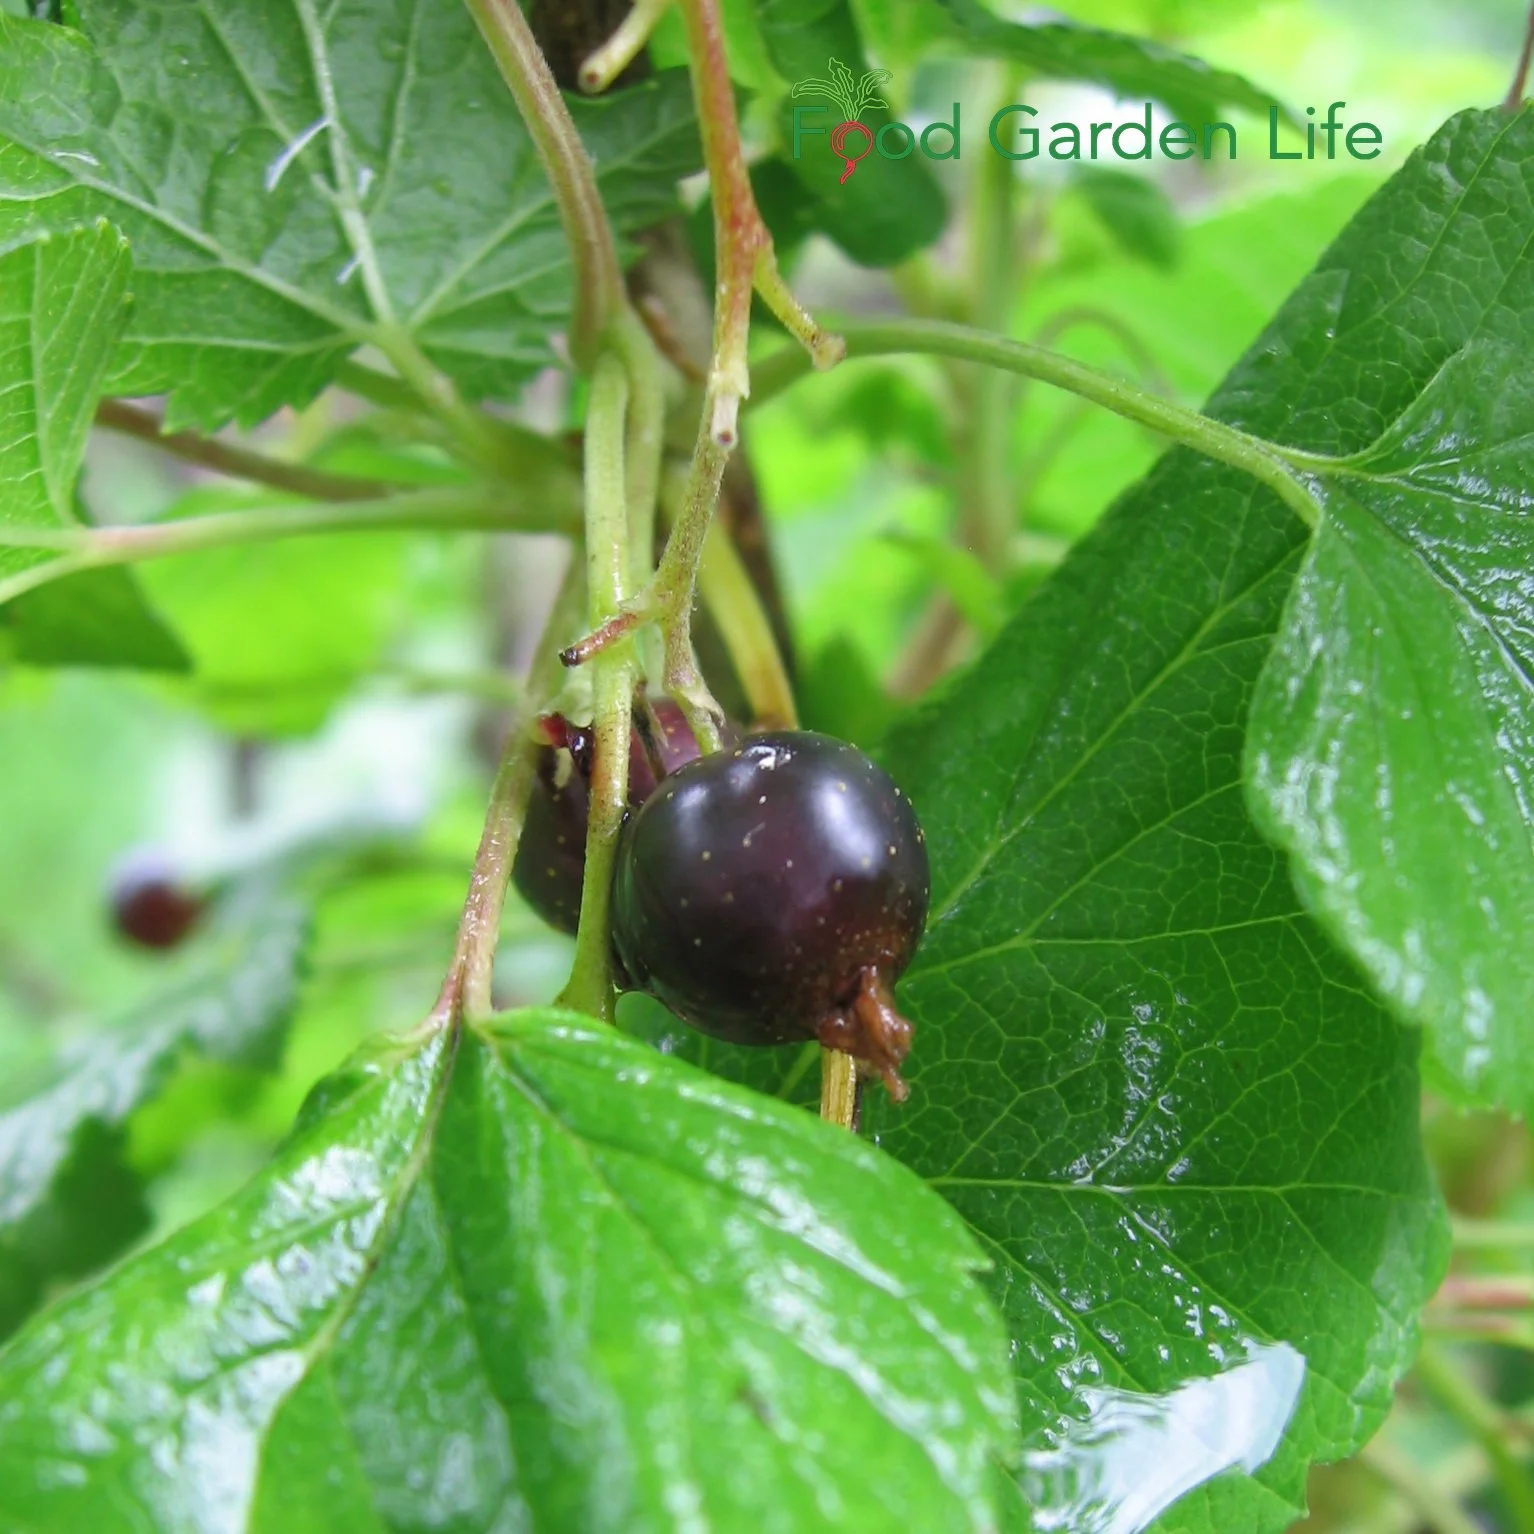
Black currants have an intense flavour…people usually love them or hate them!
Black currant fruit can get up to 1 cm across. They have an intense flavour that I’ve heard variously described as piney, resinous, musky—and scrumptious. With black currants, it’s usually a love or hate relationship, there’s no in between.
Red currant fruit (and I’m lumping in pink and white currants here) tend to be a bit smaller than black currants, with fruit that get up to about 0.5 cm across.
Clove currants taste like a mild black currant. These are also known as buffalo or golden currant, and are often grown as an ornamental plant. (Also known as Missouri currant.)
How to Use Currants
They are similar in size and shape to blueberries. But while blueberries are often eaten fresh, currants are often made into jelly and juice because of the seeds and tartness.
The seeds are edible (I know a gardener who make black currant oil from the seeds). But the seeds are also the right size to get stuck in teeth and partial plates.
(One year I made a mixed fruit jam with currants, raspberries, and blueberries. After I gave my Uncle Bill a jar he teased me about my partial-plate-buster jam. These days I strain out the seeds when using them in jams.
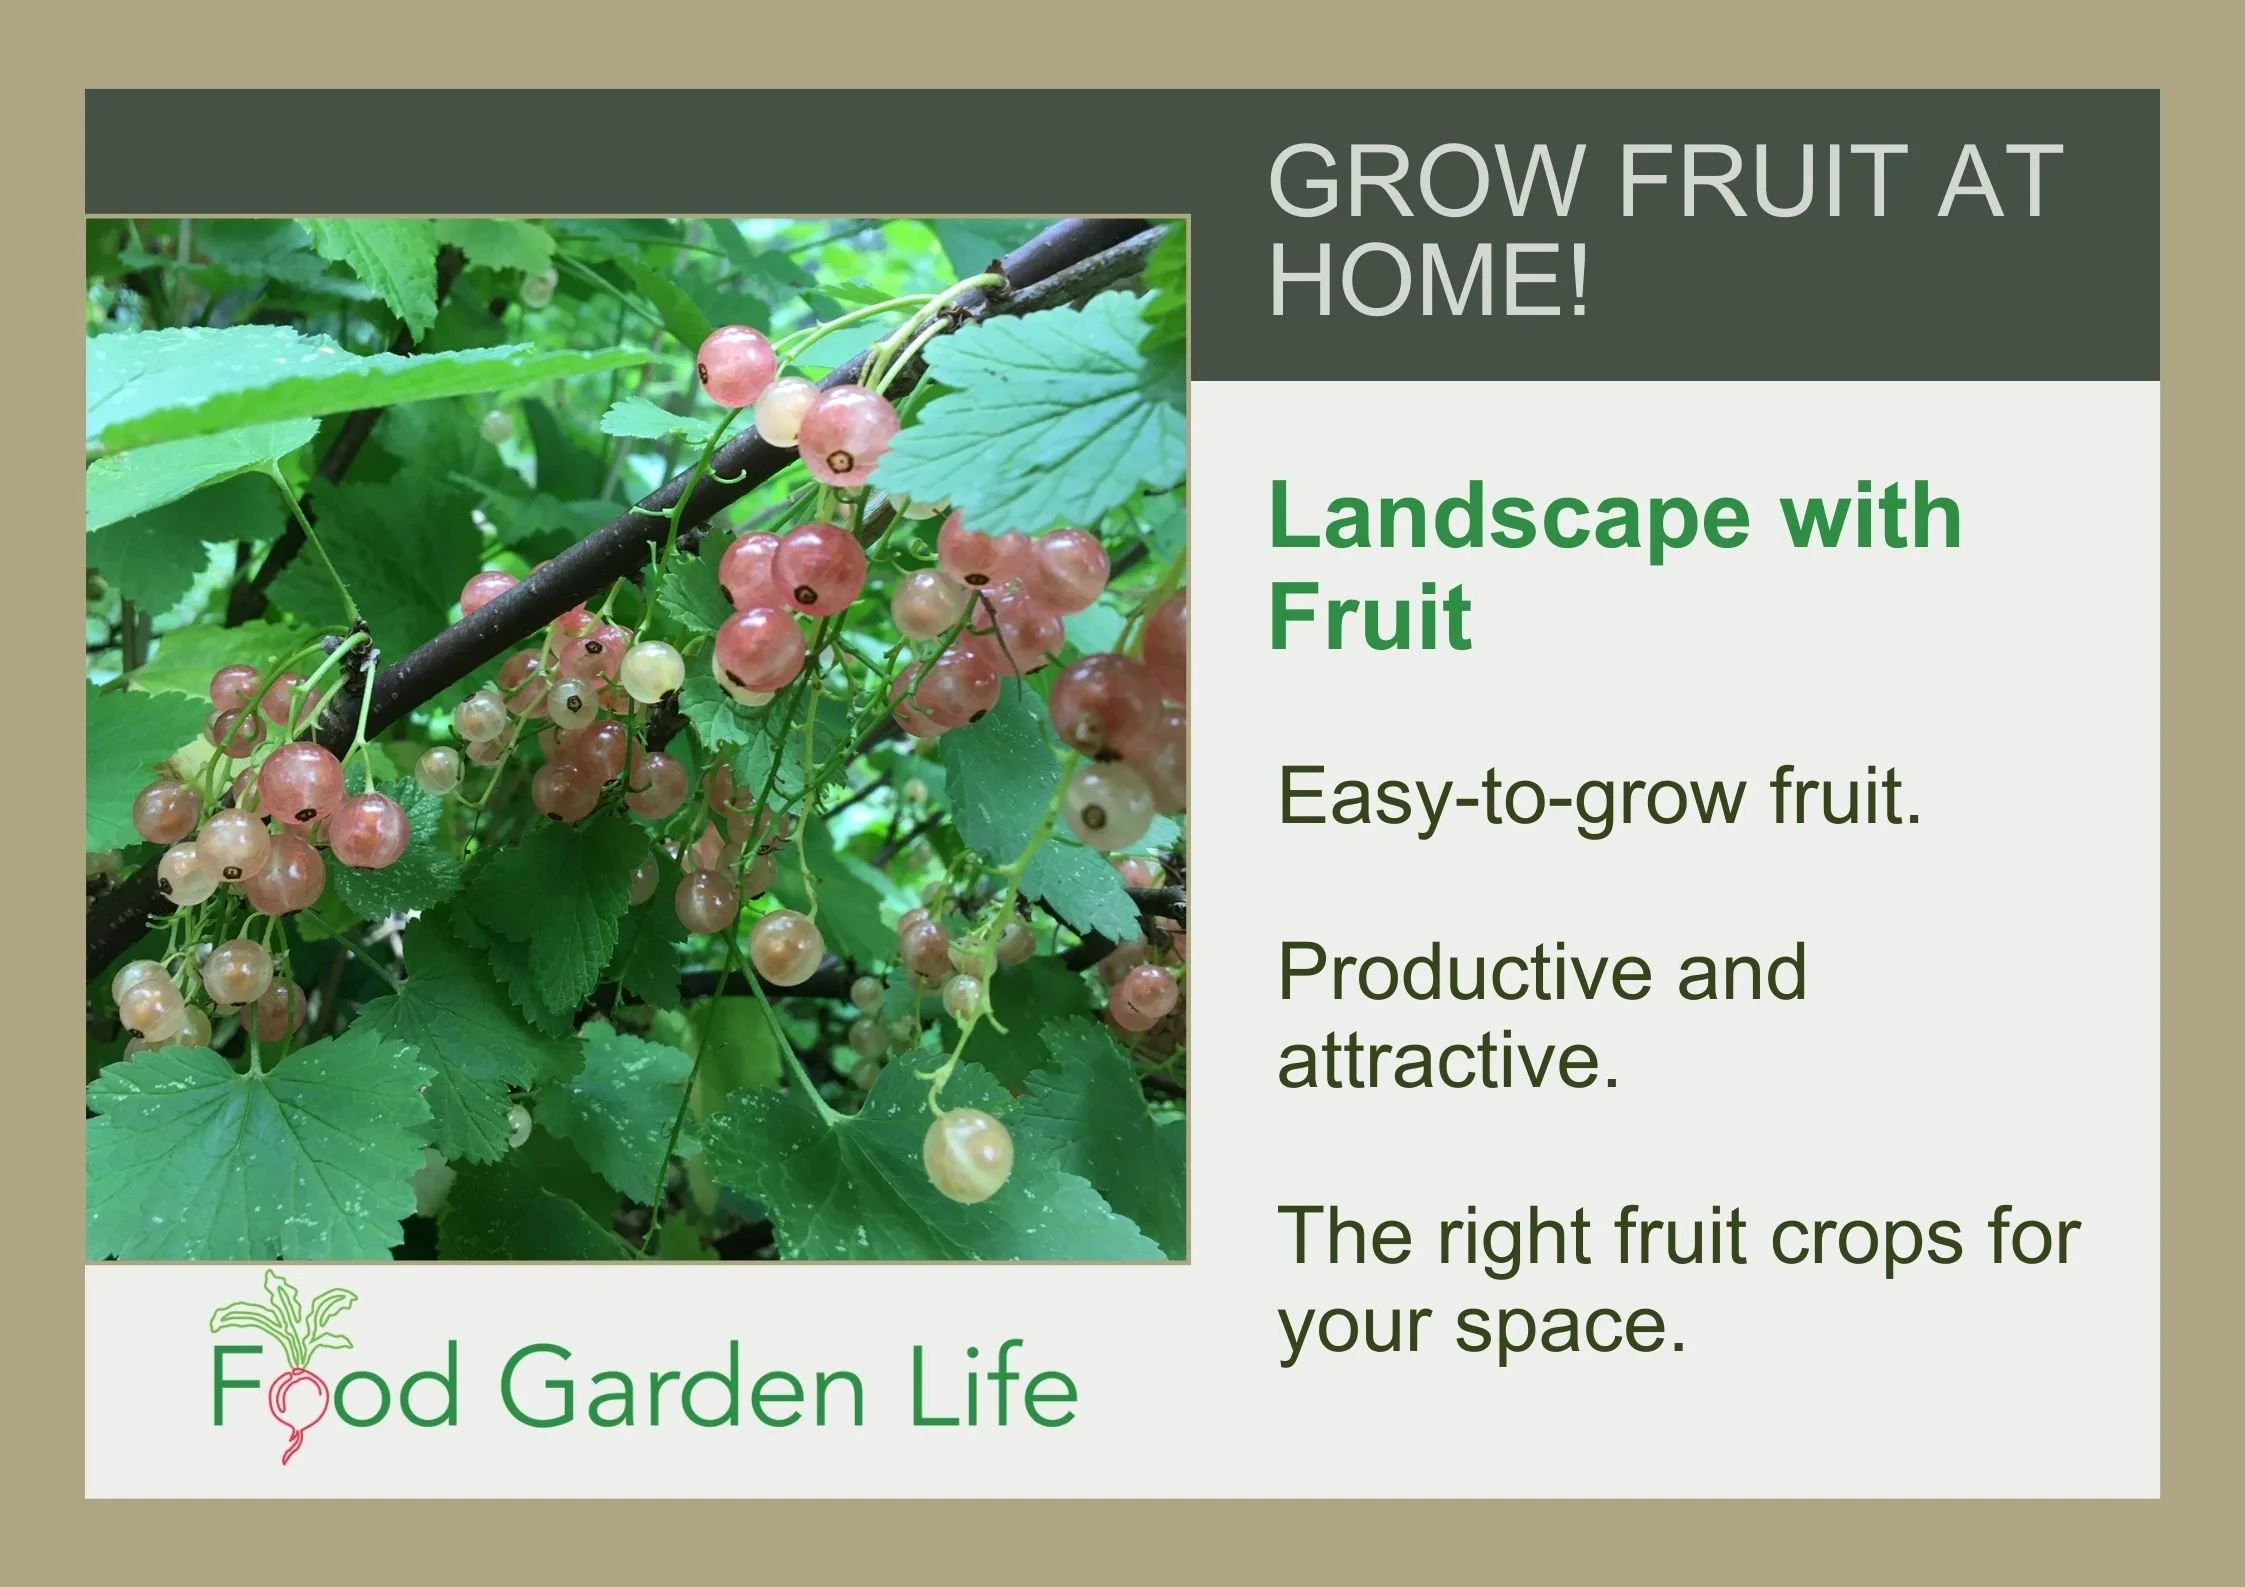
Landscape with Fruit
That’s easy to grow in a home garden!
Forget Store-Bought Pectin
Currants contain lots of pectin. Use them as a source of pectin when making jams and jellies from fruits that contain less pectin. My favourite combo is a raspberry-red-currant jam.
How Currants Grow
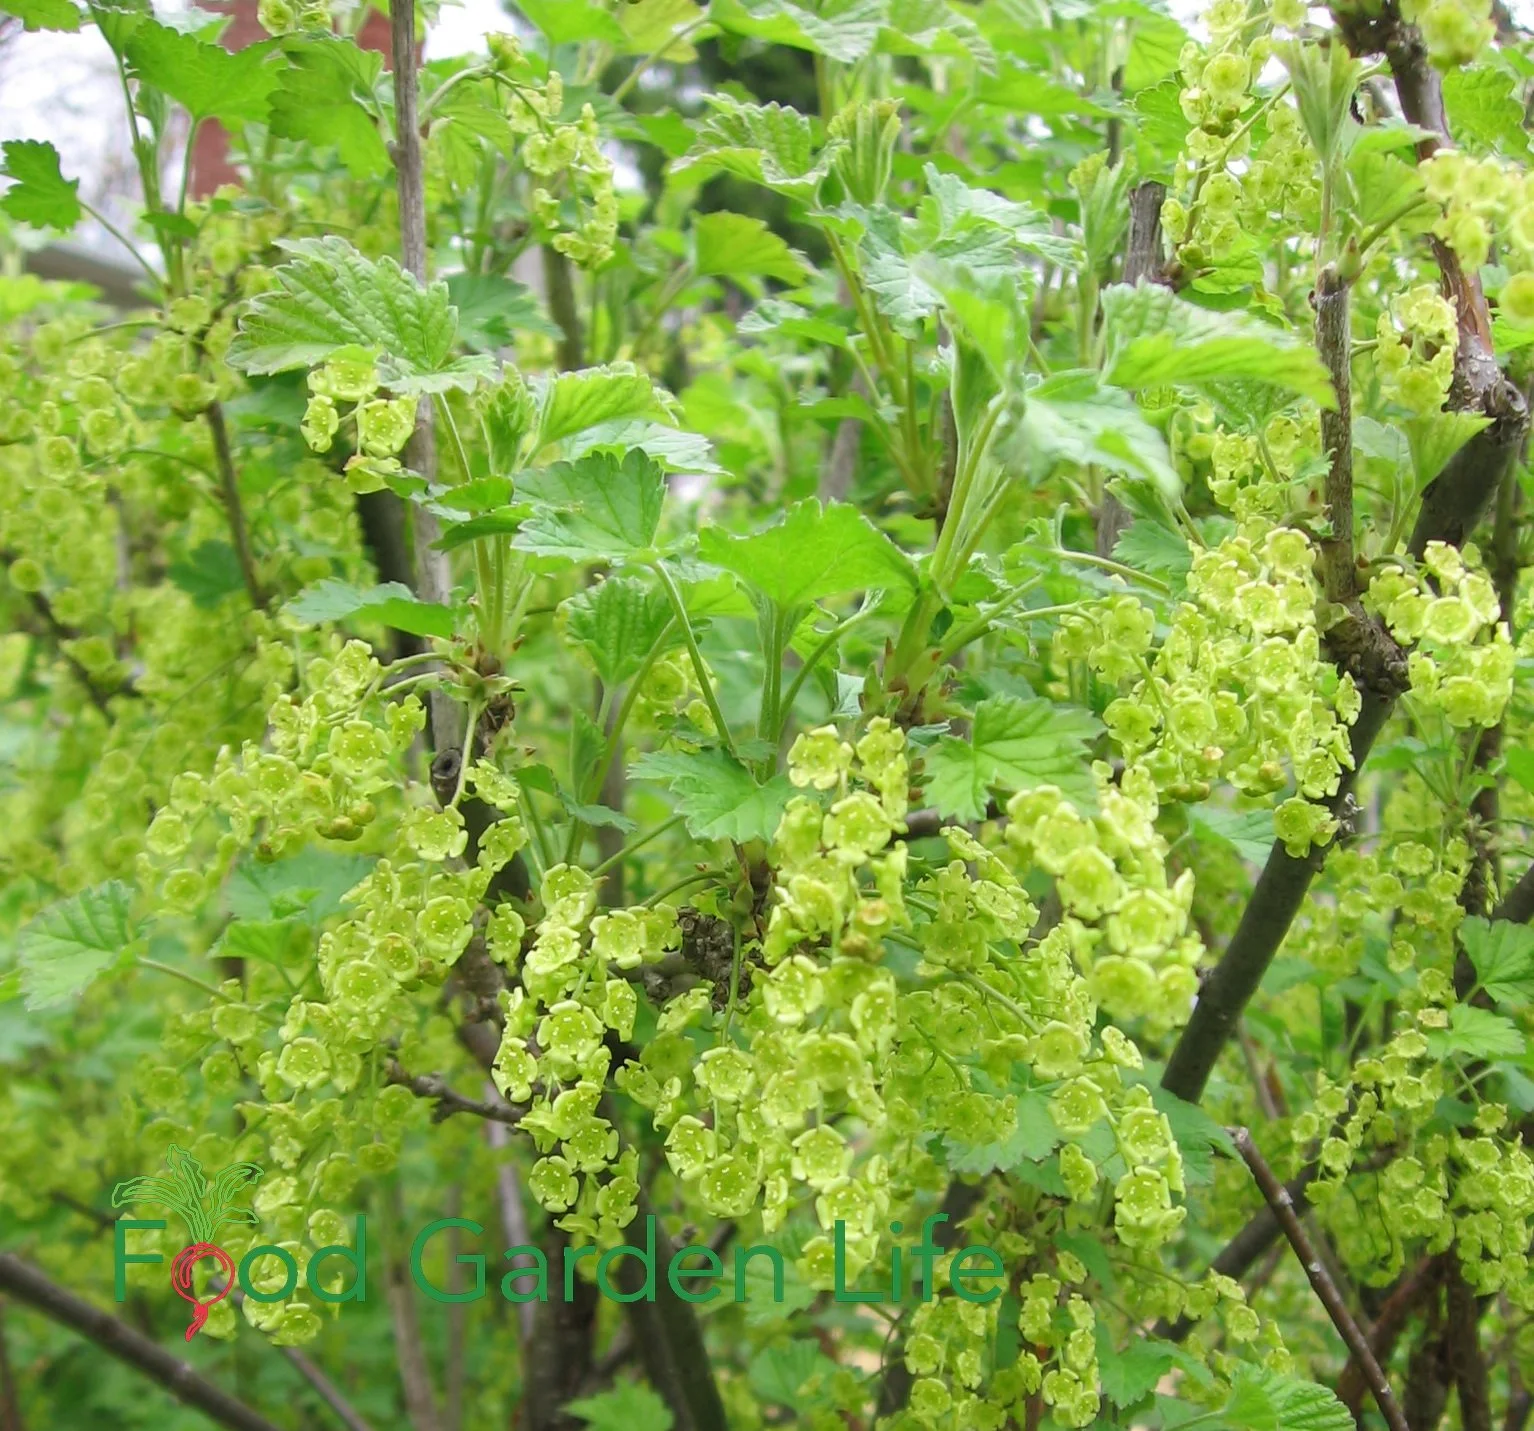
Red currant bushes in flower
Currants are multi-stemmed shrubs that can grow 1 - 2 metres high and wide, depending on the type and variety.
Red and black currants have clusters of green, frilly flowers. Clove currants have fragrant yellow flowers. The clusters turn into “strigs,” which are thin stems that carry a chain of fruit.
Red currants make flowers on “spurs” on older branches; while black currants make flowers on young wood.
Self-Fruitful
The flowers are “self-fruitful,” which means that you don’t need more than one variety for pollination and fruit production. Some sources recommend having two black currant varieties for better pollination, but if space is an issue, don’t sweat it: I’ve had gardens with a single black currant that performed well.
Immature currants look like little green peas. They can be beautiful as they ripen. Especially the red currants, which have long strigs laden with over a dozen fruit. They look like colourful jewellery on the bushes.
If you can’t tell apart your black and red currant plants, pick a leaf and crush it. You will have no doubt which plant is your black currant because of the distinctive smell of black currant leaves.
Currants in Garden Design
Currants are a great fit for a home gardens because you can weave them into your landscape.
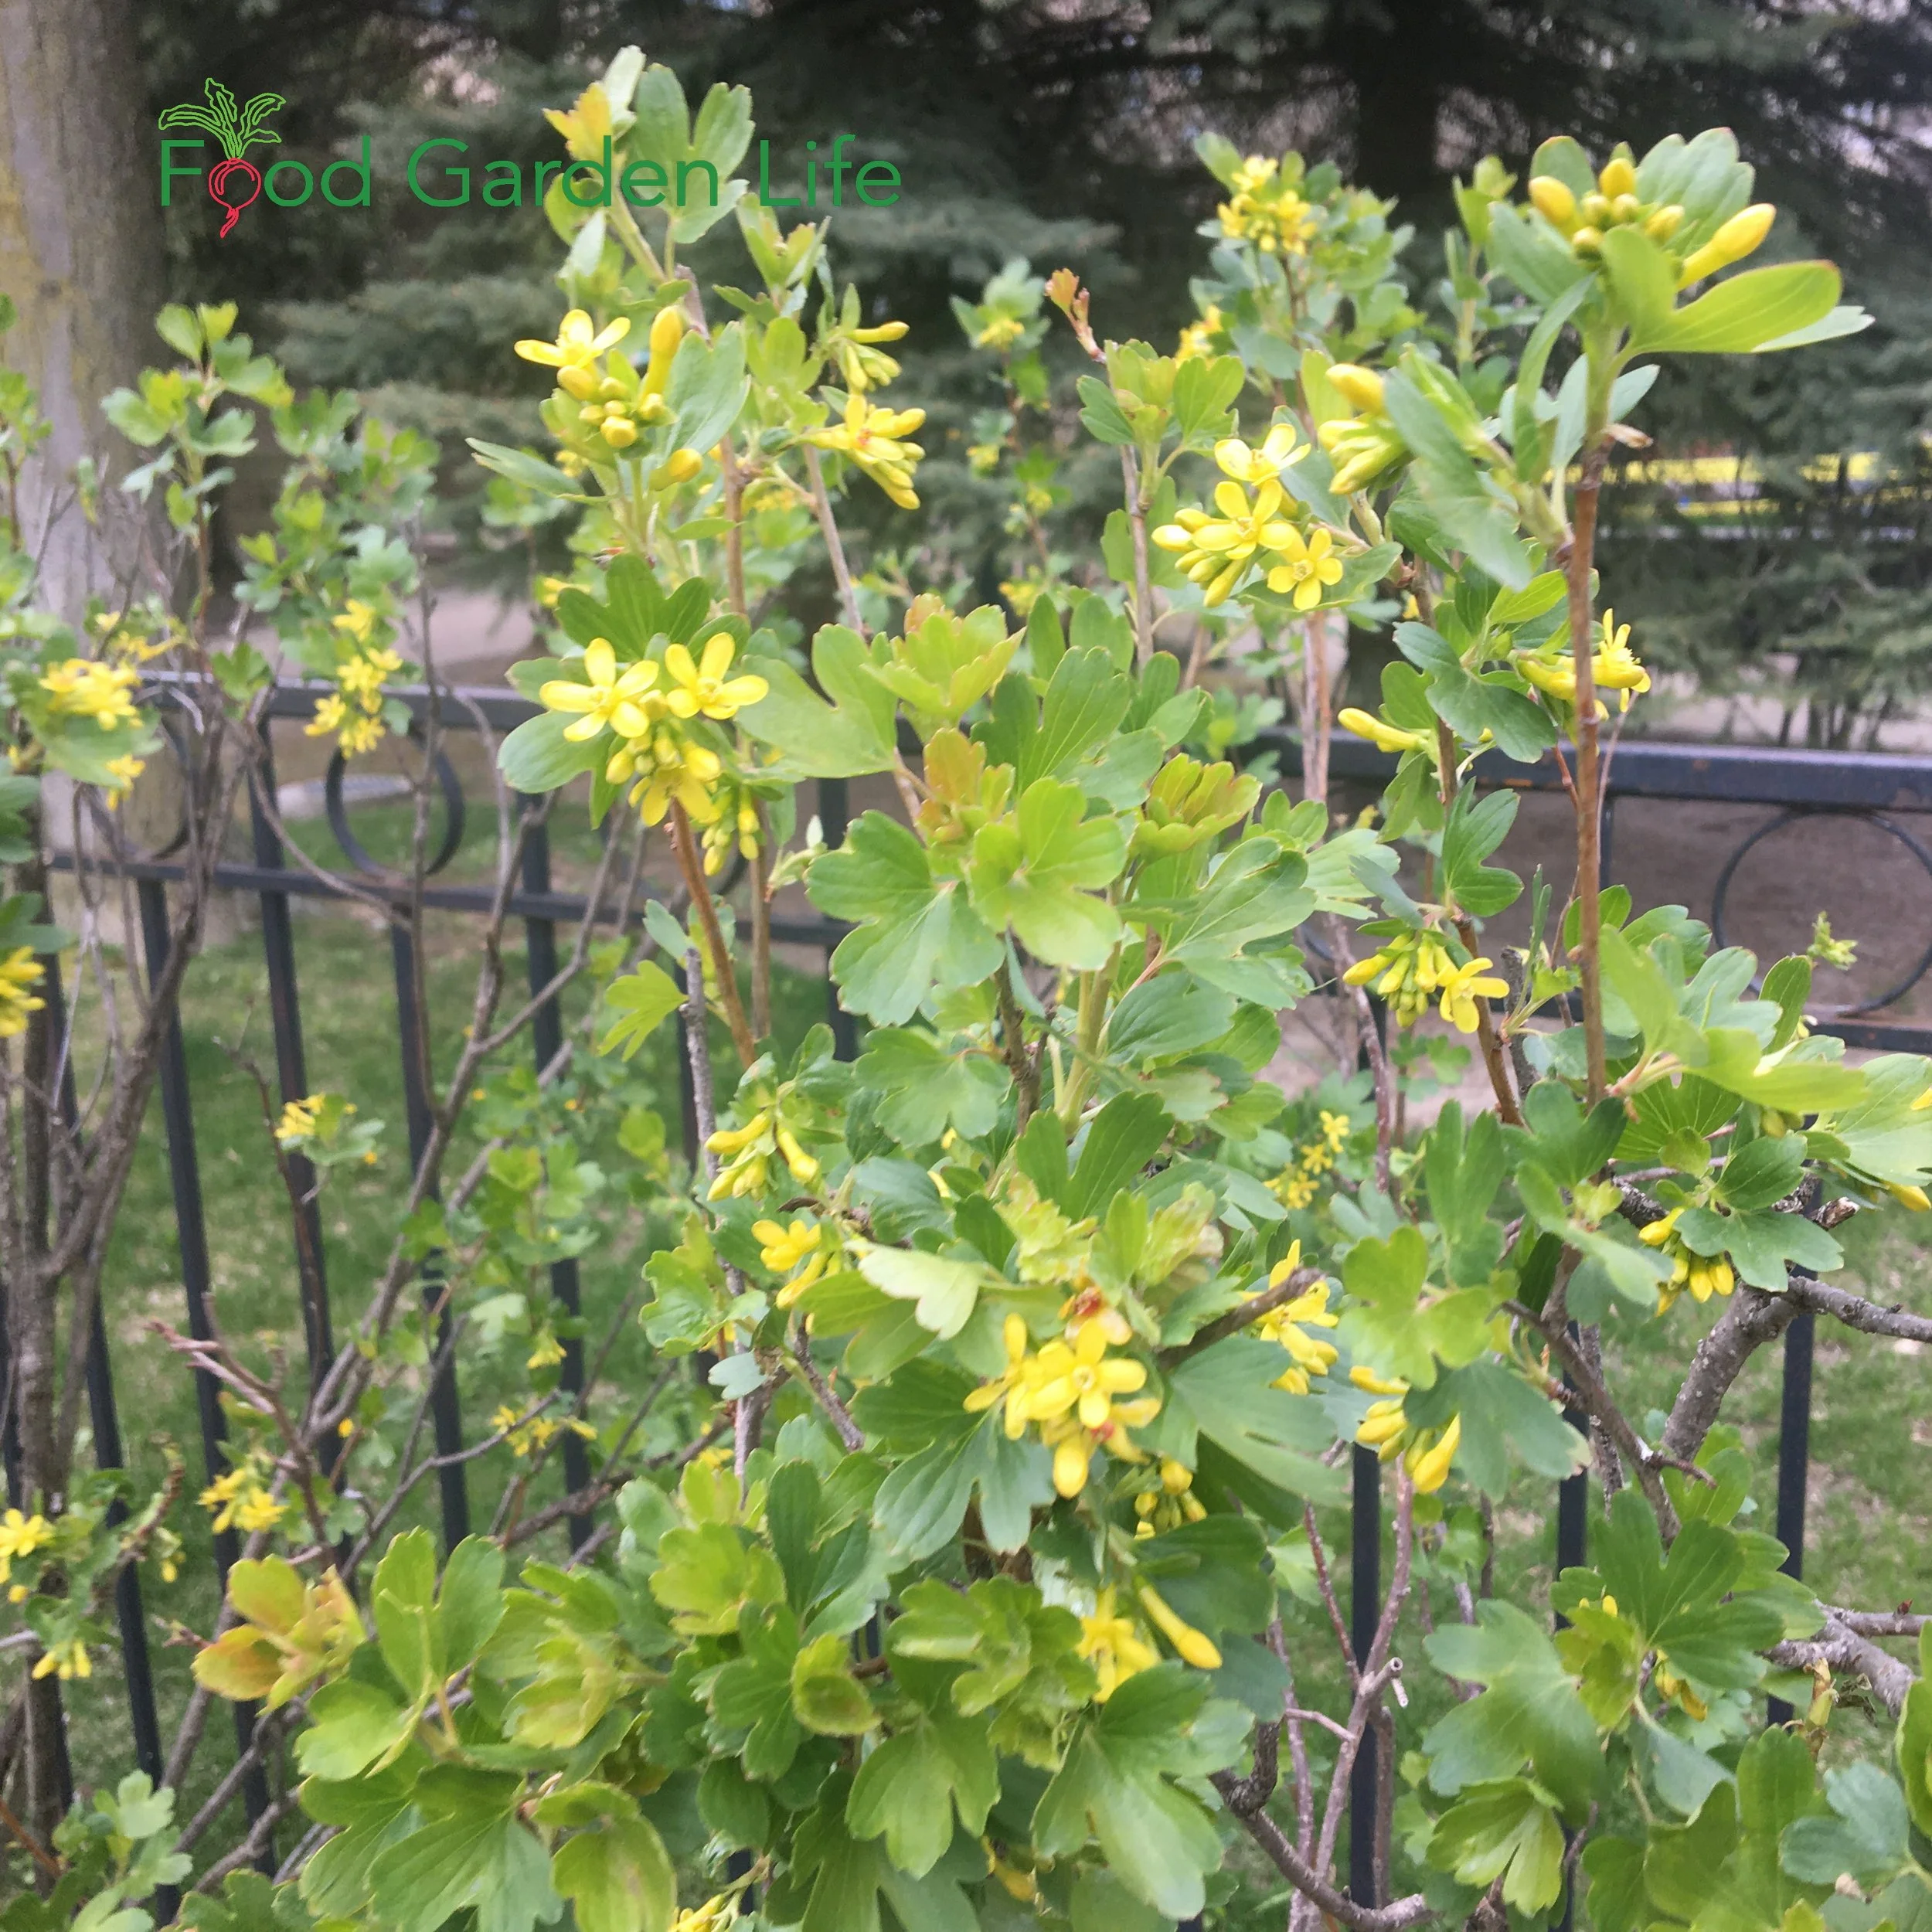
Clove currant flowers
In designing edible home landscapes, many gardeners have trouble coming up with ideas for the shady north side of a building. Look no further. Currants are your answer.
Here are ideas:
Because they are well-behaved shrubs that don’t grow too tall or spread excessively, they are well suited to planting as a hedge around a vegetable garden
Red currants have branches that live for a number of years, making them a candidate for espalier
A well-behaved currant bush can be nestled right into an existing flower bed
Plant amongst taller trees, adding another layer of fruit-bearing plants to your garden
There are other fruit crops that do well in shade. Find out which fruit crops you can grow in shade.
Currants are not bothered by juglone. So if black-walnut toxicity is a challenge in your yard, they are a good option. Find out more about black walnut toxicity.
How to Plant Currants
The best time to plant or transplant currants is in the fall. That’s because they leaf out very early in the spring. If planting in spring, the earlier the better. Like any shrub, if you move it while dormant there is less stress to the plant.
Container-grown currant plants can be planted throughout the summer, but spring and fall are the best times.
Here are spacing guidelines:
In a row or hedge, aim for a spacing between plants of 0.5 – 1.5 metres, with rows 2 – 2.5 metres apart
For individual plants, plan for a clear area of up to 1.5 metres around the plant
Where to Grow Currants
Currants do great in climates where summers are moist and not too hot. Plant-hardiness zones are never an exact science, and hardiness varies with variety and site. But in general, currants are hardy in USDA zones 3-7.
Plant currants amongst taller trees, adding another layer of fruit-bearing plants to your garden
Gardeners in warmer zones can sometimes extend the range by growing in shadier areas where there is less heat stress.
In cold, borderline zones, a north-facing slope slows down growth in spring, making it less likely flowers will be hit by a late cold snaps. Mulching also keeps soil cooler and delays spring growth.
Soil for Currants
Currants tolerate a wide range of soils. Whatever the soil, amend with lots of organic matter to improve drainage, aeration, and moisture retention. This is important because currants have shallow roots.
Ideal: a moist clay soil with lots organic matter
The least ideal: a dry sandy soil
Pruning Currants
With regular pruning it’s possible to coax more fruit from a currant bush. However, as I explained earlier, in a laid-back gardener’s garden, they still fruit respectably well.
Here’s the key thing to know when pruning: Black currants grow differently from red currants (and white and pink). That means that you prune your black currants differently than red, white, and pink ones.
Red Currant Pruning (pink, white)
Red currant bushes have branches that produce fruit for a number of years, so you create a more permanent framework
Red Currants produce most heavily on three- and four-year-old branches
Aim for four to six stems each of one-, two-, and three-year-old wood
Gradually trim out stems after 4 years (unless you’re doing espalier…in which case you might keep them longer)
A healthy shrub sends up a number of new branches each year; prune out all but the best half dozen or so
*Note: If you read European texts, they often talk about red currants grown on “legs,” which means that there is a single stem coming out of the ground, and all the branches start to come out of that single stem a few inches above the ground level. It looks as if the plant is on a little leg. (I have never seen red currants growing on legs in garden centres here in Ontario, so if you have read about “legs” but can’t find bushes grown in this way, don’t sweat it.) The advantage, if you choose to propagate your own red currants on legs, is that the fruit branches are higher off the ground, and your fruit is less likely to get muddy. Black currants are not suited to legs because, as you’ll read below, their manner of growth is different.
Black Currant Pruning
Pin this post!
Black currant shrubs fruit most heavily on one-year-old wood, meaning that instead of creating a permanent framework as you do with red currants, you want lots of new growth. Prune to fully renew the bush over three years
Remove about a third of the bush each year
Remove any branches older than 3 years
Keep strong one-year-old shoots, and two- and three-year shoots with lots of one-year-old branches coming off of them
Keep 10-12 shoots per mature bush—aim for half of them being one year old
Plant new black currant bushes slightly deeper than they were planted before, to encourage more branches from below ground level
*Note: you might see the term “stooled” bush used to describe the best way to grow a black currant. This means that there are many stems coming from ground level, as opposed to a leg.
Many growers prune currants in late winter, while dormant. However, my preference is to prune soon after harvest. It’s when I have the time to do it.
Other Currant Bush Care
Mulch the soil below currant bushes with a couple of inches of straw, wood chips, composted leaves, or grass clippings. This does three things:
It keeps the soil moist
It helps to prevent fruit on lower branches from getting muddy
It prevents the growth of weeds
FAQ Growing Currants
What about white pine blister rust?
Currants are an “alternate host” for the disease white pine blister rust. Alternate host means that the disease requires more than one type of plant to complete its life cycle.
In the case of white pine blister rust, white pine trees, an important commercial species—can be killed by the disease. Currants infected with the disease may drop some leaves, but it doesn’t have a big impact on currant yield.
But the currants permit the disease to complete its life cycle—it can’t move from pine to pine.
Some things to consider when thinking about currants and white pine blister rust:
Are there white pines growing nearby? If you’re concerned about the disease, don’t plant currants within 300 m (1,000' feet) of white pines.
Are there wild currants and gooseberries in the area? (Wild currants and gooseberries are widespread, and are also alternate hosts for the disease.)
There are disease-resistant varieties of black currant (e.g. Titania, Consort)
Black currants are more susceptible to the disease than red and white currants.
Is it legal to grow currants?
Federal legislation in the USA made it illegal to grow currants until 1966. When the federal rules changed, many states continued to ban growing currants.
It is now legal to grow currants in many American states—but check to make sure that they’re permitted in your state. It’s not legal to grow currants in all states.
It is legal to grow currants in Canada.
What can I do about birds eating my currants?
Some people net bushes, though I find it’s too much work. If the birds are taking more than their fair share, pick before they’re perfectly ripe. They’re still perfectly good for your cordial, jellies, and sauces.
Where can I buy a currant bush?
Check out our list of nurseries that sell fruit trees and bushes.
Find This Helpful?
Enjoy not being bombarded by annoying ads?
Appreciate the absence of junky affiliate links for products you don’t need?
It’s because we’re reader supported.
If we’ve helped in your food-gardening journey, we’re glad of support. You can high-five us below. Any amount welcome!
Want More Fruit Ideas?
Articles: Grow Fruit
Visit the Grow Fruit home page for more articles about growing fruit.
Here are a few popular articles:
Courses
Here are self-paced online courses to help you grow fruit in your home garden.
Home Garden Consultation
Book a virtual consultation so we can talk about your situation, your challenges, and your opportunities and come up with ideas for your edible landscape or food garden.
We can dig into techniques, suitable plants, and how to pick projects that fit your available time.
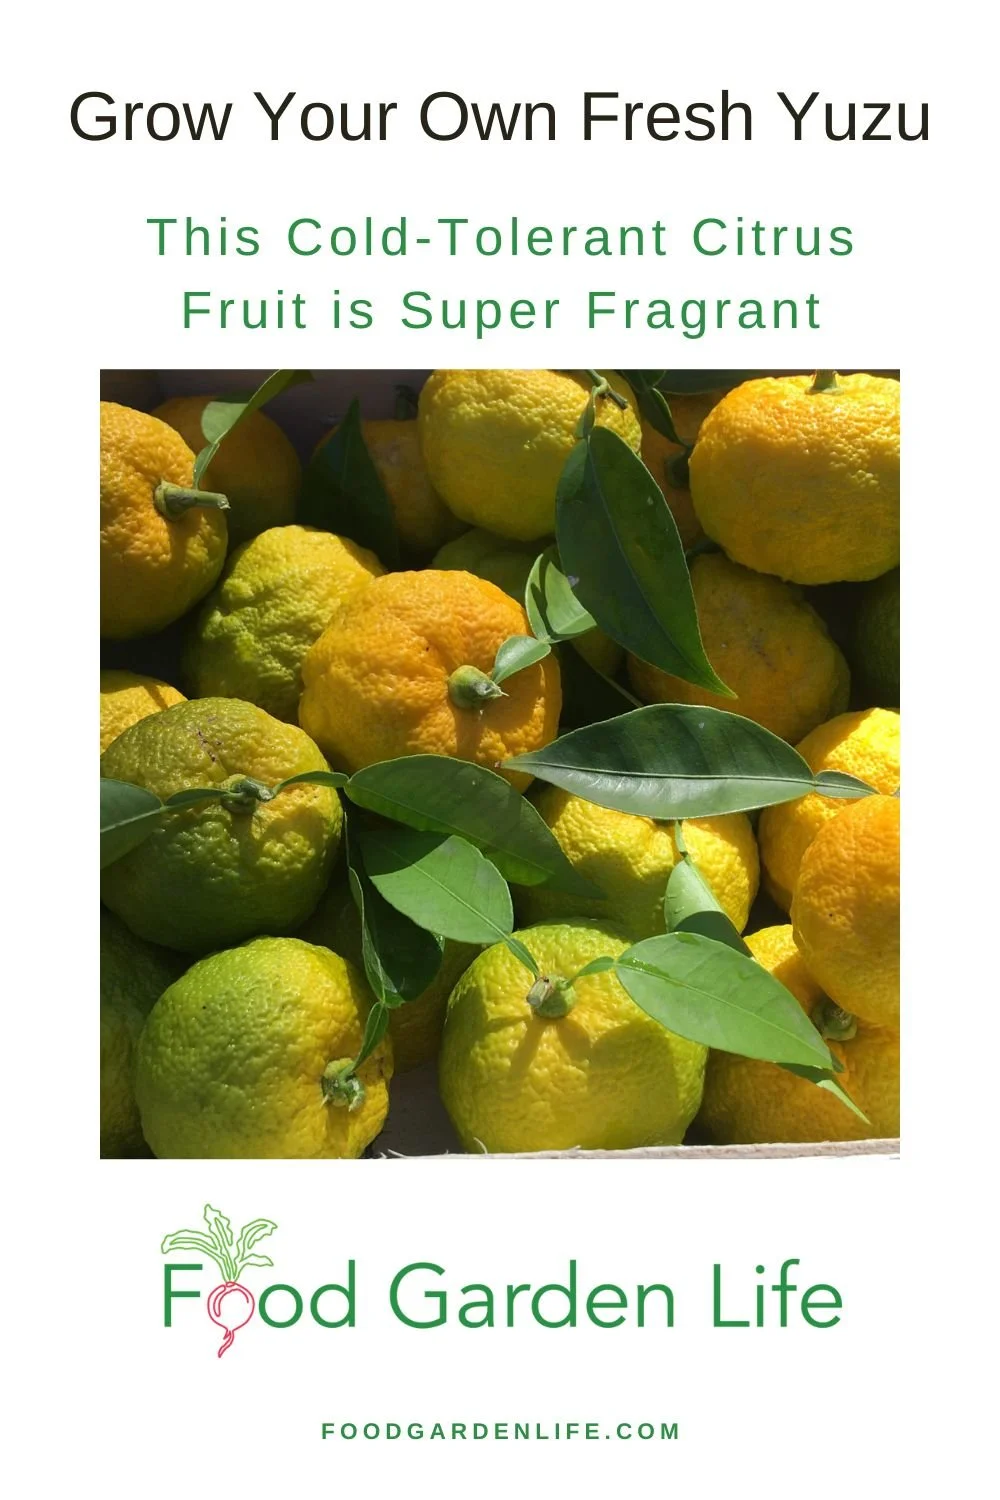
This Cold-Tolerant Citrus Fruit is Super Fragrant: Yuzu
Yuzu: This Citrus is a Rare and Fragrant Foodie’s Delight (And You Can Grow it in a Cold Climate!)
By Steven Biggs
Grow Your Own Fresh Yuzu Citrus
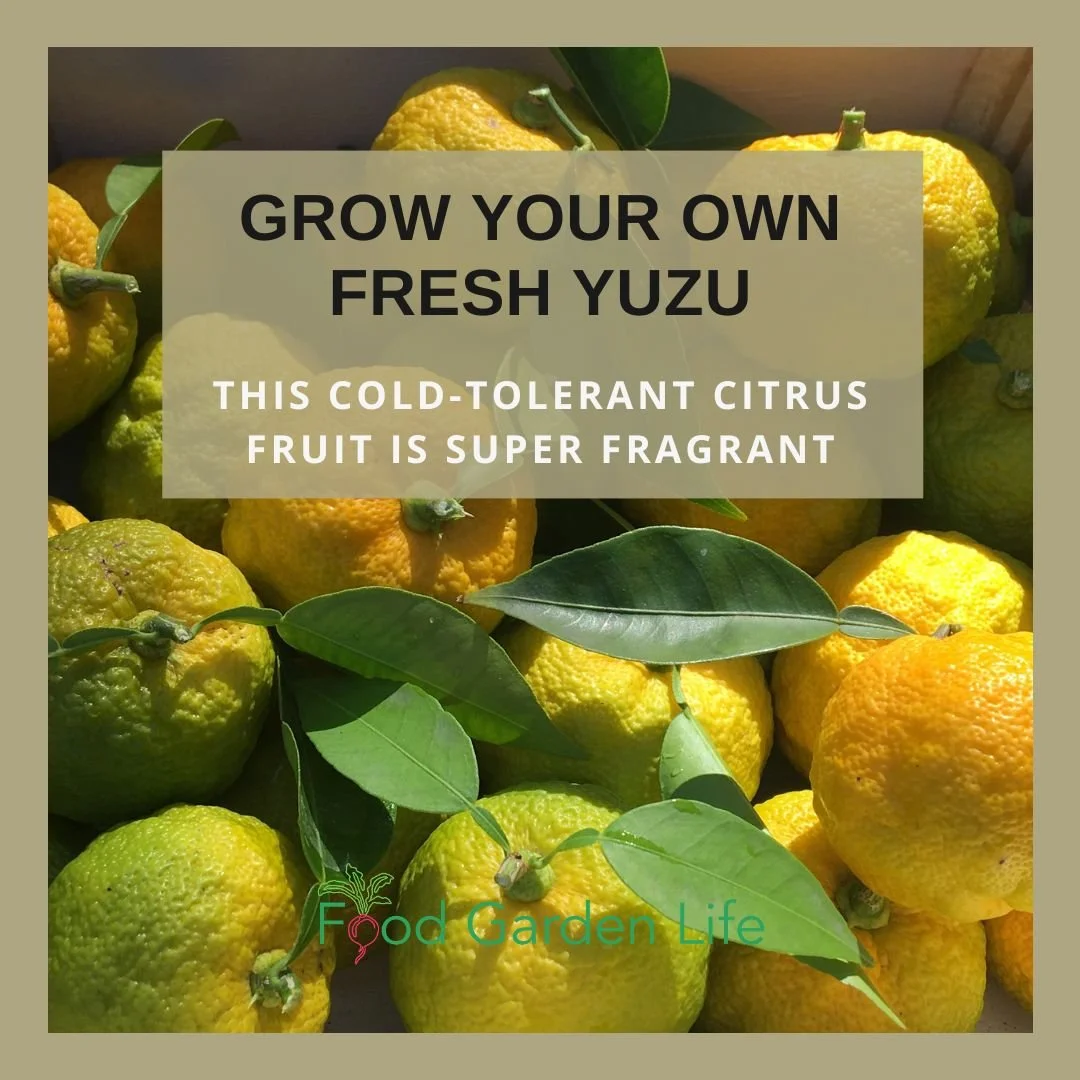
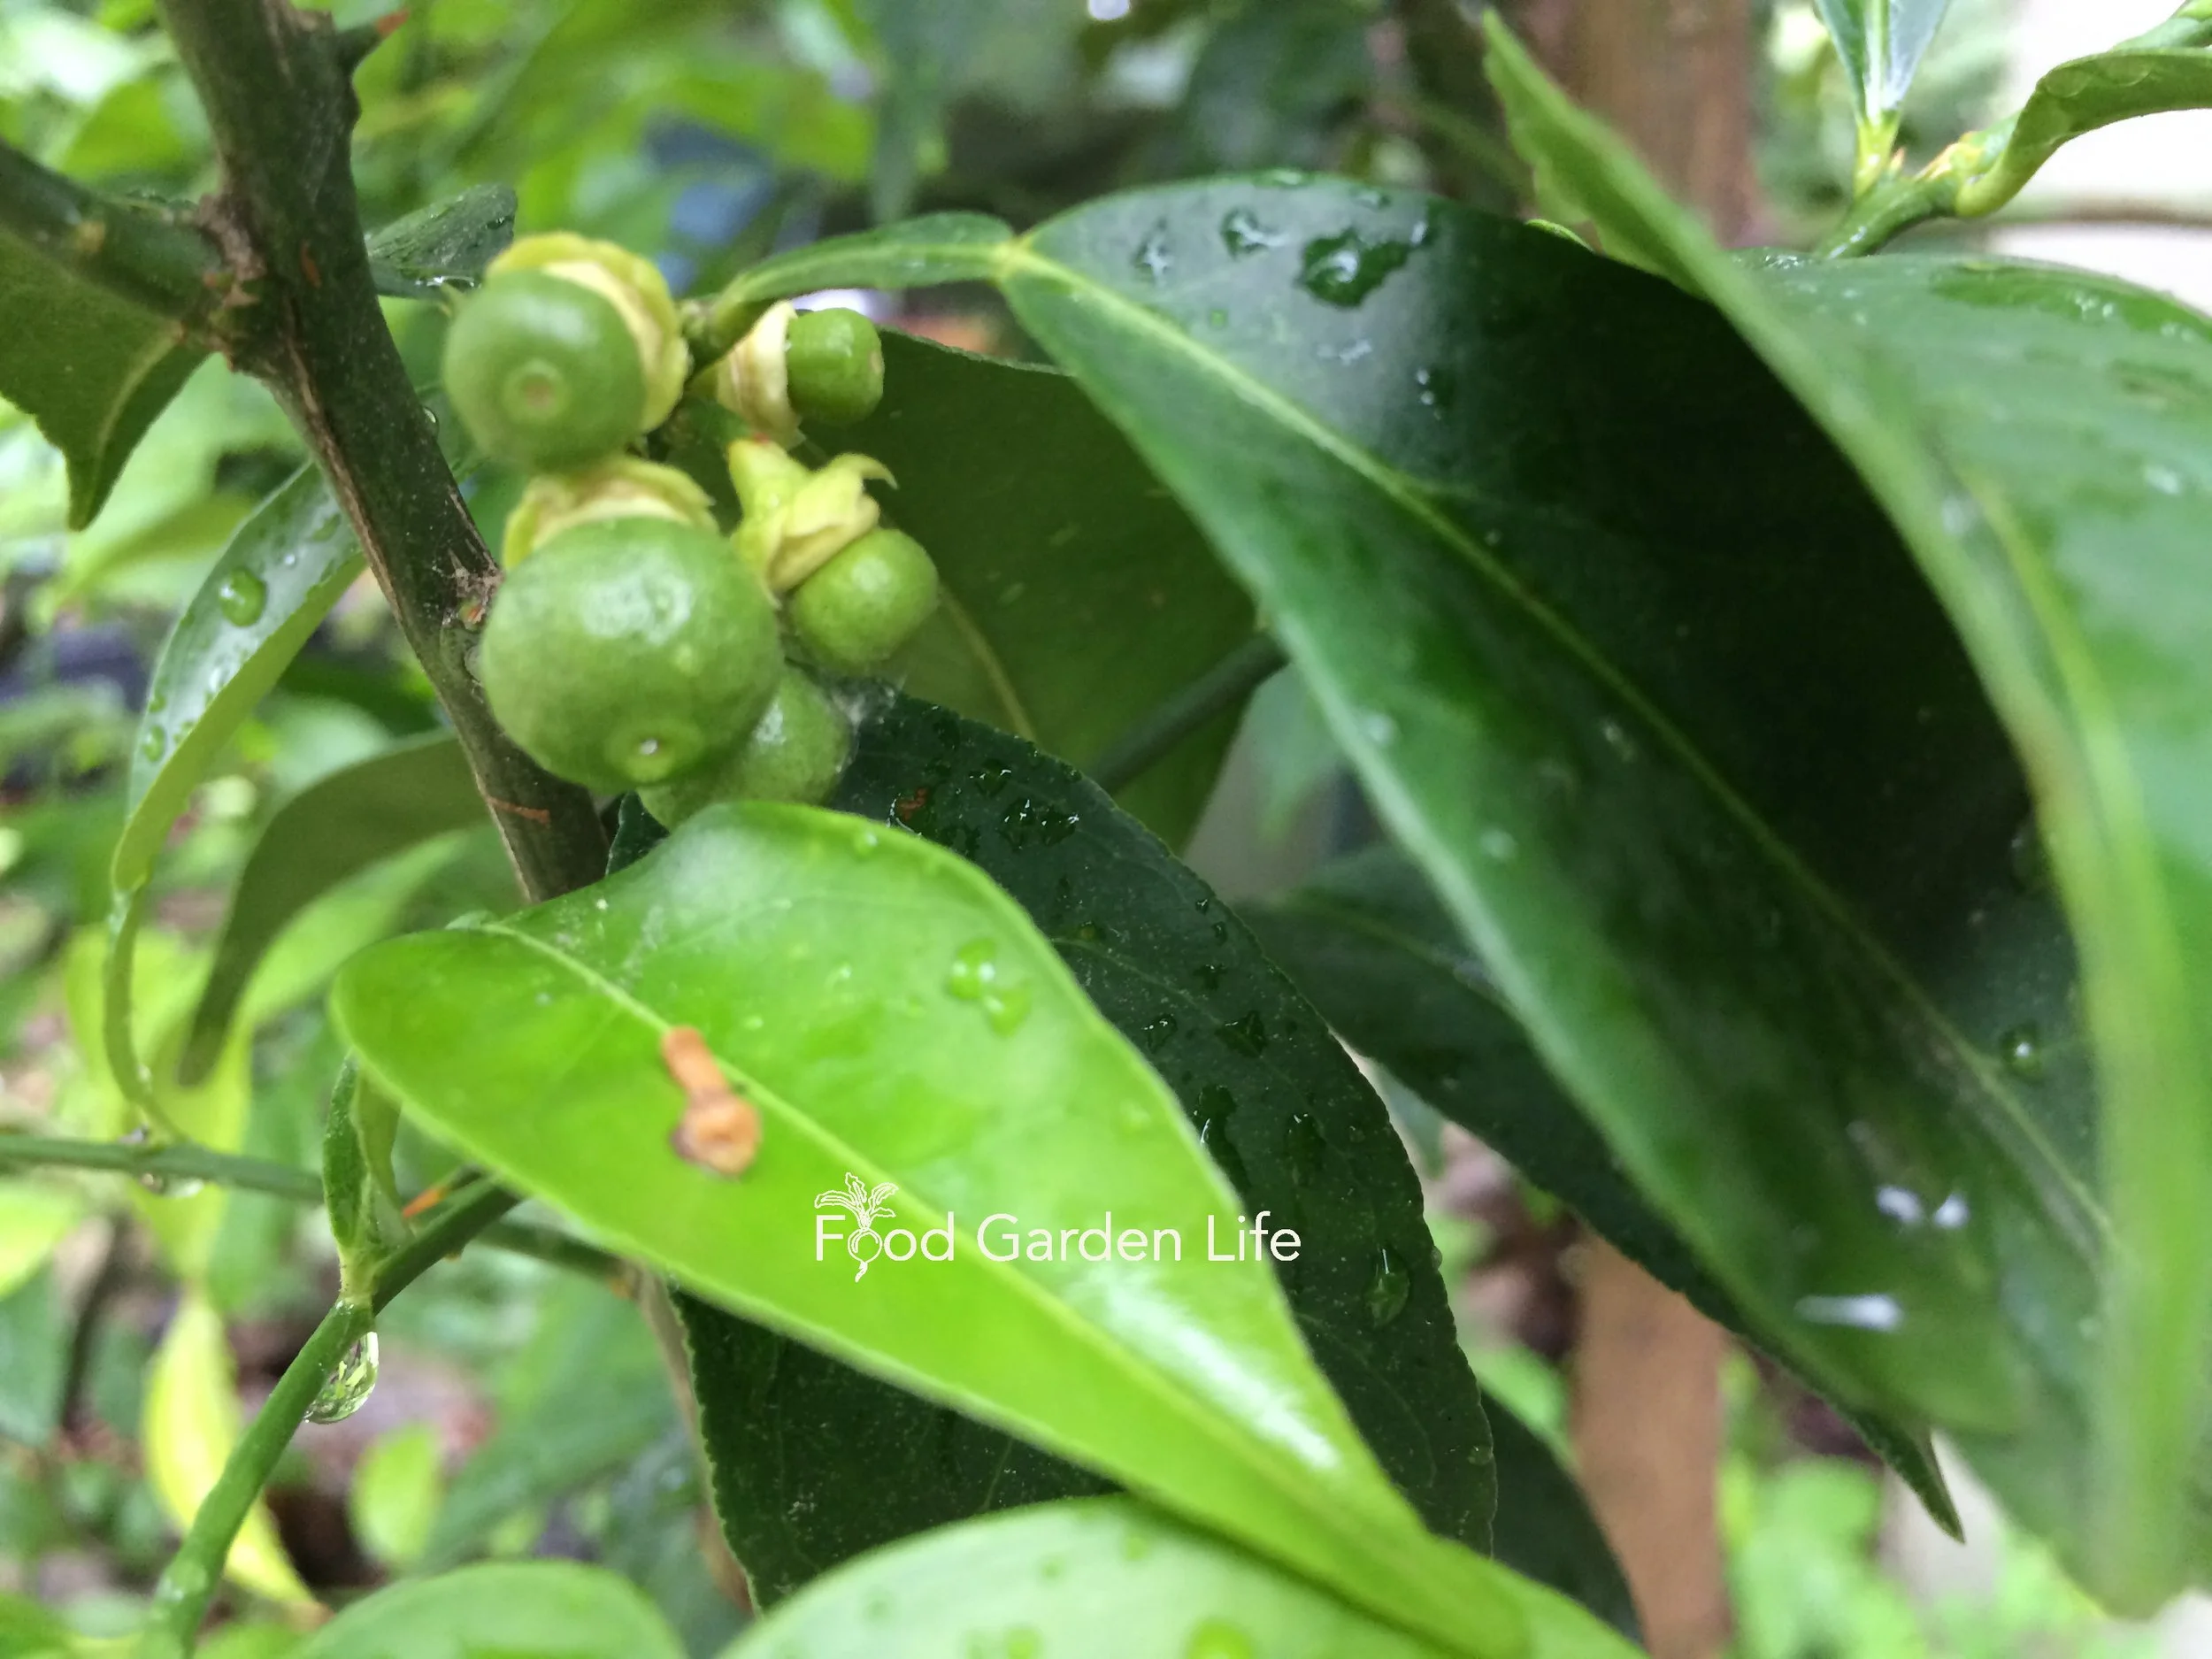
Yuzu fruit, also called yuzu citrus, is very cold tolerant.
This citrus fruit looks similar to a mandarin orange. But scratch the rind and you’ll quickly know it’s not.
Don’t pop it in your mouth, either. This isn’t a peel-and-eat fruit.
Unlike a mandarin it’s:
Pucker-up sour
Super seedy
Delightfully aromatic
Chefs and food enthusiasts know all about yuzu. Yuzu juice and yuzu zest are prized.
But good luck finding fresh yuzu fruit for sale—or finding a yuzu plant at a garden centre. The gardening world hasn’t caught up with the culinary world when it comes to yuzu.
It’s too bad, because yuzu is easy to grow. And—for cold-climate gardeners—it’s even more cold tolerant than lemon.
With its fragrant flowers and glossy leaves, it’s a fine addition to the cold-climate kitchen garden. Grow it as a potted plant—or an in-ground plant in borderline zones.
Keep reading this article to find out how to grow and harvest your own yuzu in a cold climate.
What is Yuzu
Pin this post!
Yuzu (Citrus junos) is a very cold-tolerant citrus plant. The cold-tolerance is no surprise given its pedigree: It’s thought to be a naturally occurring hybrid of two other cold-tolerant citrus fruits, mandarin and ichang lemon.
Yuzu plants are fairly upright, making them easy to grow as a single-stem potted tree. I keep my potted yuzu at about 1.5 metres (5’) high.
When the fragrant white flowers come out in the spring, they’re a magnet for pollinators. Bees love them.
Unlike mandarin, yuzu peel is a bit pebbly.
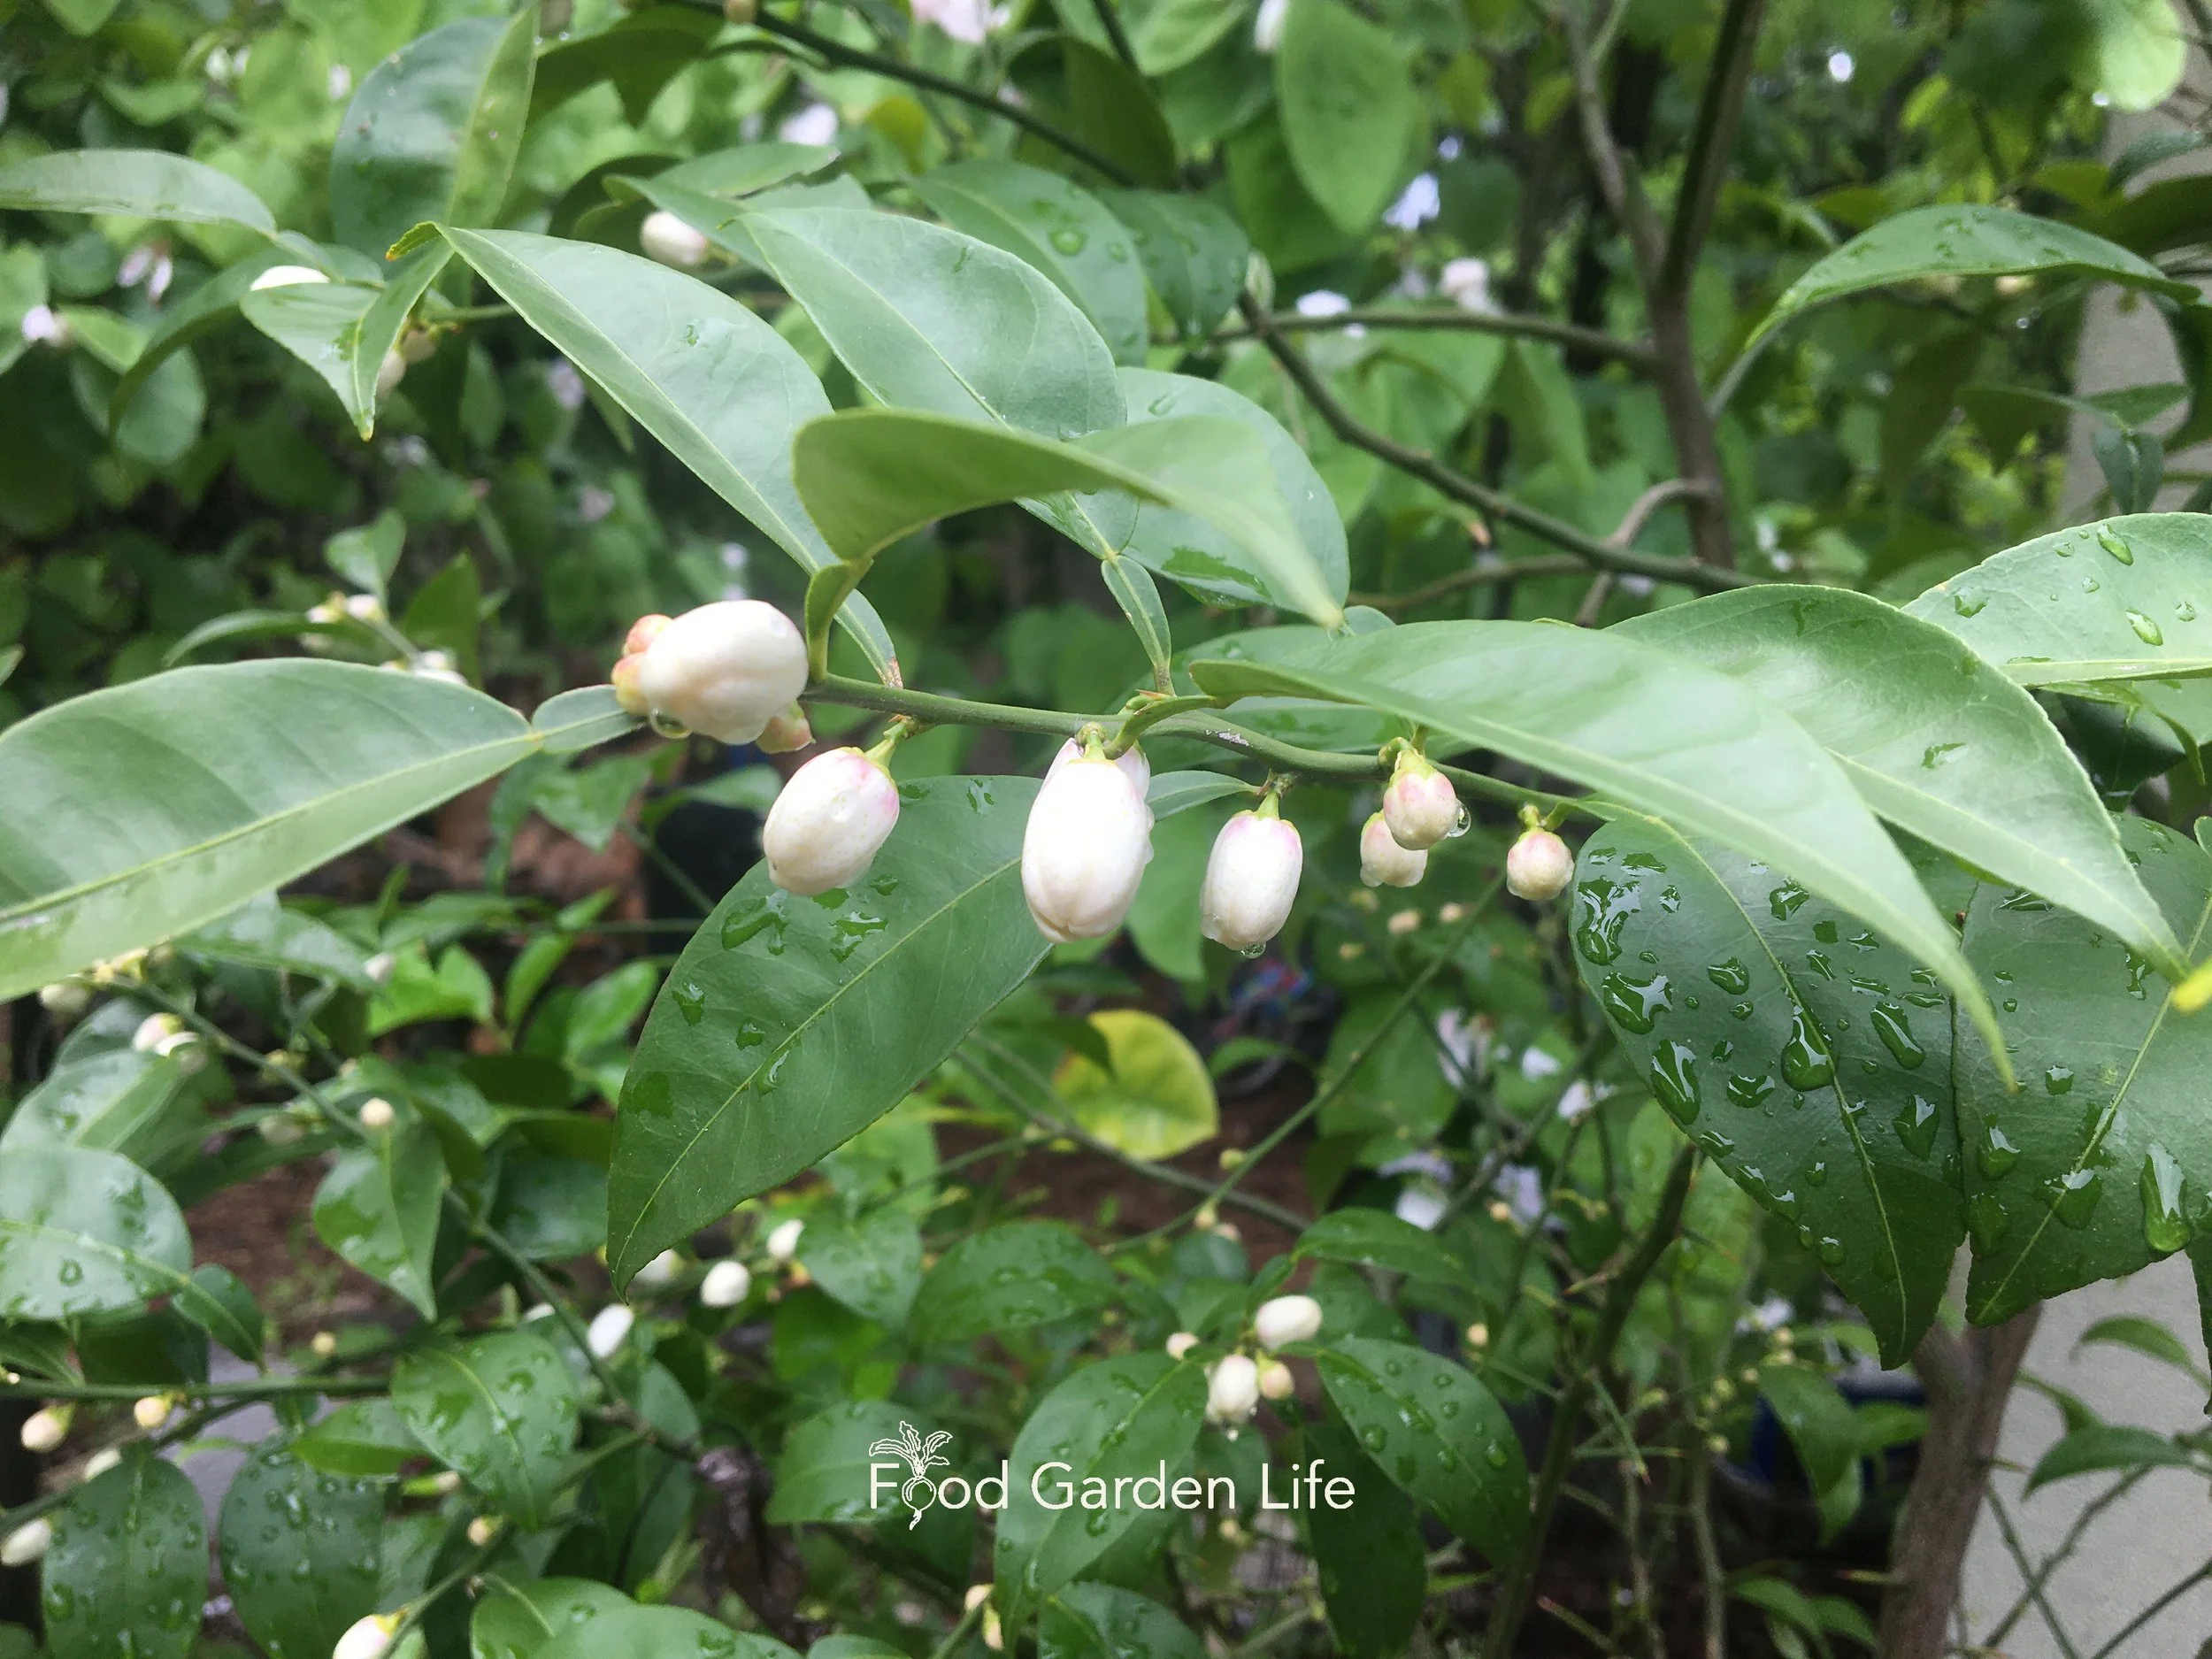
Yuzu flowers are fragrant—and are a magnet for pollinators.
Like most citrus fruits, yuzu is evergreen, meaning it has leaves on it year round. (Unless you really stress it out, see below.)
Acid Citrus Fruits for Cold Climates
When it comes to growing citrus fruit in cold-climate gardens, here’s a great way to set yourself up for success: Start with “acid” citrus.
Acid citrus are the sour ones like lemon or lime—and yuzu
For sweet citrus, think navel oranges and grapefruit
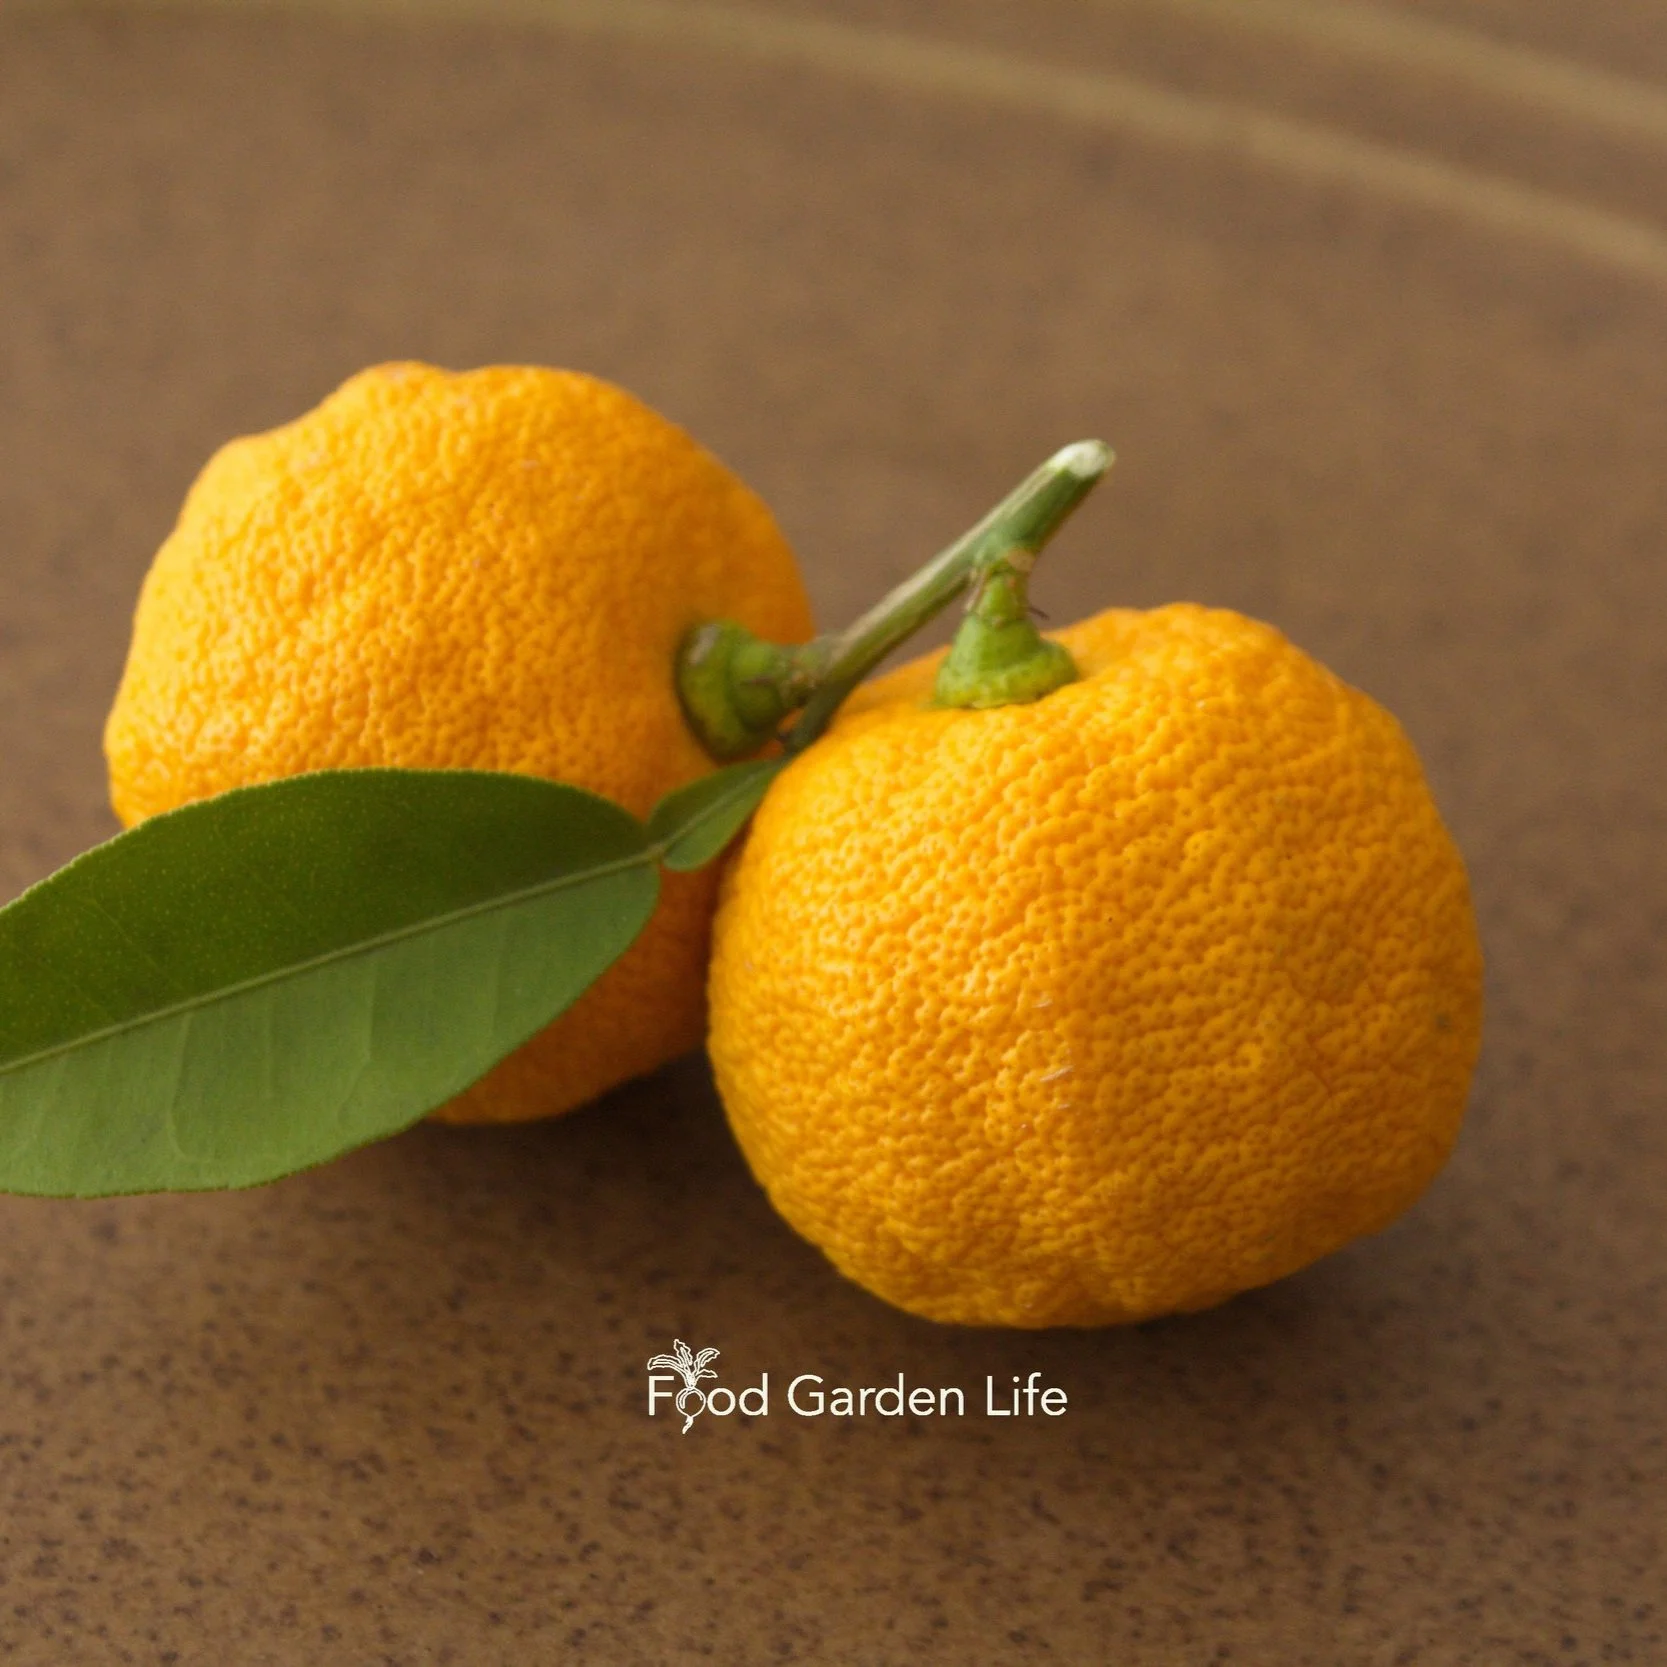
Yuzu fruit is a bit pebbly, not smooth like a mandarin.
The reason to start with acid citrus fruit is that they can ripen in a cold-climate garden with cool or short summers. Sweet citrus need hot summers with sustained heat to ripen...and don’t always ripen.
Yuzu is an acid citrus. Perfect in colder climates.
Yuzu Tree Cold Hardiness
Yuzu Minimum Temperature
Yuzu fruit is an acid citrus, making it a good choice where summers are short or cool.
I’ve never pushed the lower temperature limits here in my Canadian Zone 6 (USDA Zone 5) garden because my yuzu tree spends the winter in a cold greenhouse, kept near freezing.
But yuzu can survive much colder temperatures than that.
Yuzu hardiness—like any plant hardiness—isn’t an exact thing. Hardiness guidelines vary, depending on who you ask. You’ll see recommendations down to -10°C (14°F) –and colder!
But one thing is for sure: As citrus go, yuzu is very cold-tolerant.
The reason for the varying minimum temperature recommendations is that hardiness is affected by a few things.
Here are a few things that affect the hardiness of a yuzu (or any plant!)
The rootstock used for grafted yuzu trees
Young trees are more tender than mature trees
New growth is affected by cold before older, woodier stems
The duration of cold temperatures
How sheltered or exposed the tree is
How many degrees the temperature drops
Container trees are more susceptible to cold than in-ground trees because the temperature around the roots fluctuates more
Yuzu Cold Tolerance: Bonus Point!

Covering everything from lemon varieties, to location and watering, to pruning and shaping, to overwintering, dealing with pests, and more—and including insights from fellow citrus enthusiasts—this book will give you the confidence you need to grow and harvest fresh lemons in cold climates.
Some citrus (e.g. lemon) bloom on an ongoing basis—so a plant can have unripe fruit going into winter. This can be fun if it’s indoors and you want to pick lemons over winter.
But the fruit can’t get as cold as trees; when the fruit freezes it spoils.
That means that the temperature at which the fruit freezes (around -2°C, 28°F) becomes the minimum winter temperature for cold-climate gardeners growing lemons outdoors.
Find out how cold lemon fruit can get over the winter.
Unlike lemon, yuzu has a spring bloom and fall ripening…so there is no fruit on the tree over the winter. That give you a wider temperature range for overwintering. You’re not constrained by the freezing temperature of the fruit.
How to Grow Yuzu
Grow Yuzu in a Pot
Yuzu does well as a potted plant. With its upright growth, it’s easy to manage.
Here are a couple of top tips for growing yuzu as a potted plant:
Use a potting soil that drains well
Keep the soil moist, but not wet
Potted Plant Yes: Houseplant No
Just because it grows well in a pot doesn’t not make it a good houseplant.
It’s not suited as a houseplant over the winter. Centrally heated homes are too warm. Instead, pick a bright and cool spot for winter. If you have a sunroom or a cool greenhouse, that’s perfect.
(I’ve also stored my yuzu in a cold, dark garage. The plant isn’t growing in cold weather—so it will tolerate the dark.)
No Place in Winter?
Not sure where to put a potted yuzu for the winter? A friend has a spare bedroom and turns off the heat there over the winter. It has a bright window, and is 10°C (50°F) cooler than the rest of the house. Perfect for citrus!
Outdoors for Summer
Wherever you store it for the winter, be sure to put it outdoors for the summer. Pest pressures are lower—and you have pollinators for the flowers.
Grow Yuzu in the Ground Outdoors
The first time I came across in-ground, unprotected yuzu trees growing here in Canada was when Bob Duncan gave me a tour of his experimental orchard on Vancouver Island. He has a great video about yuzu; watch it here.
Beyond USDA Zones 9-10, in borderline areas, choose a protected site with full sun and good drainage.
In borderline areas, you can grow yuzu flat (as an “espalier”) against a south-facing wall and protect it from winter extremes with horticultural fleece and a string of incandescent Christmas lights, as is done for lemons in borderline areas.
Another option in borderline areas is to grow yuzu in the ground in an unheated greenhouse.
As cold temperatures get close to the cold-hardiness limit—especially when coupled with cold wind—yuzu plants might drop their leaves. If the branches are still alive, they will grow new leaves in the spring. Scratch the bark to see if the cambium is still green…and if it is, you might be in luck.
Beware the Thorns
Whether it’s in the ground or a pot, mind the thorns! They are far from dainty! We’re talking horticultural acupuncture…
If you have yuzu on a patio where people might brush past it, snip off protruding thorns with your garden shears. If you have a larger tree and you’re reaching into it to harvest, thick gloves are a good idea.
Yuzu Tree Care
When a lot of fruit set, some small fruit drop off…but if they all drop off, the plant is stressed.
Potted yuzu plants need more care than in-ground ones. Like most fruit trees, when they’re stressed, they might drop fruit and leaves. A common stress with potted plants is drying out.
Here’s a good way to think of watering:
Don’t overwater and keep the soil continuously wet
Allow the soil to dry a bit before watering—let is get to the dry side of moist
When you water, water enough so that all of the soil in the pot is moistened and you have water coming out the bottom
Feeding
The top tip for feeding is to use a fertilizer that has “micronutrients.” Deficiencies of the micronutrients iron and zinc are common.
Pruning Yuzu Trees
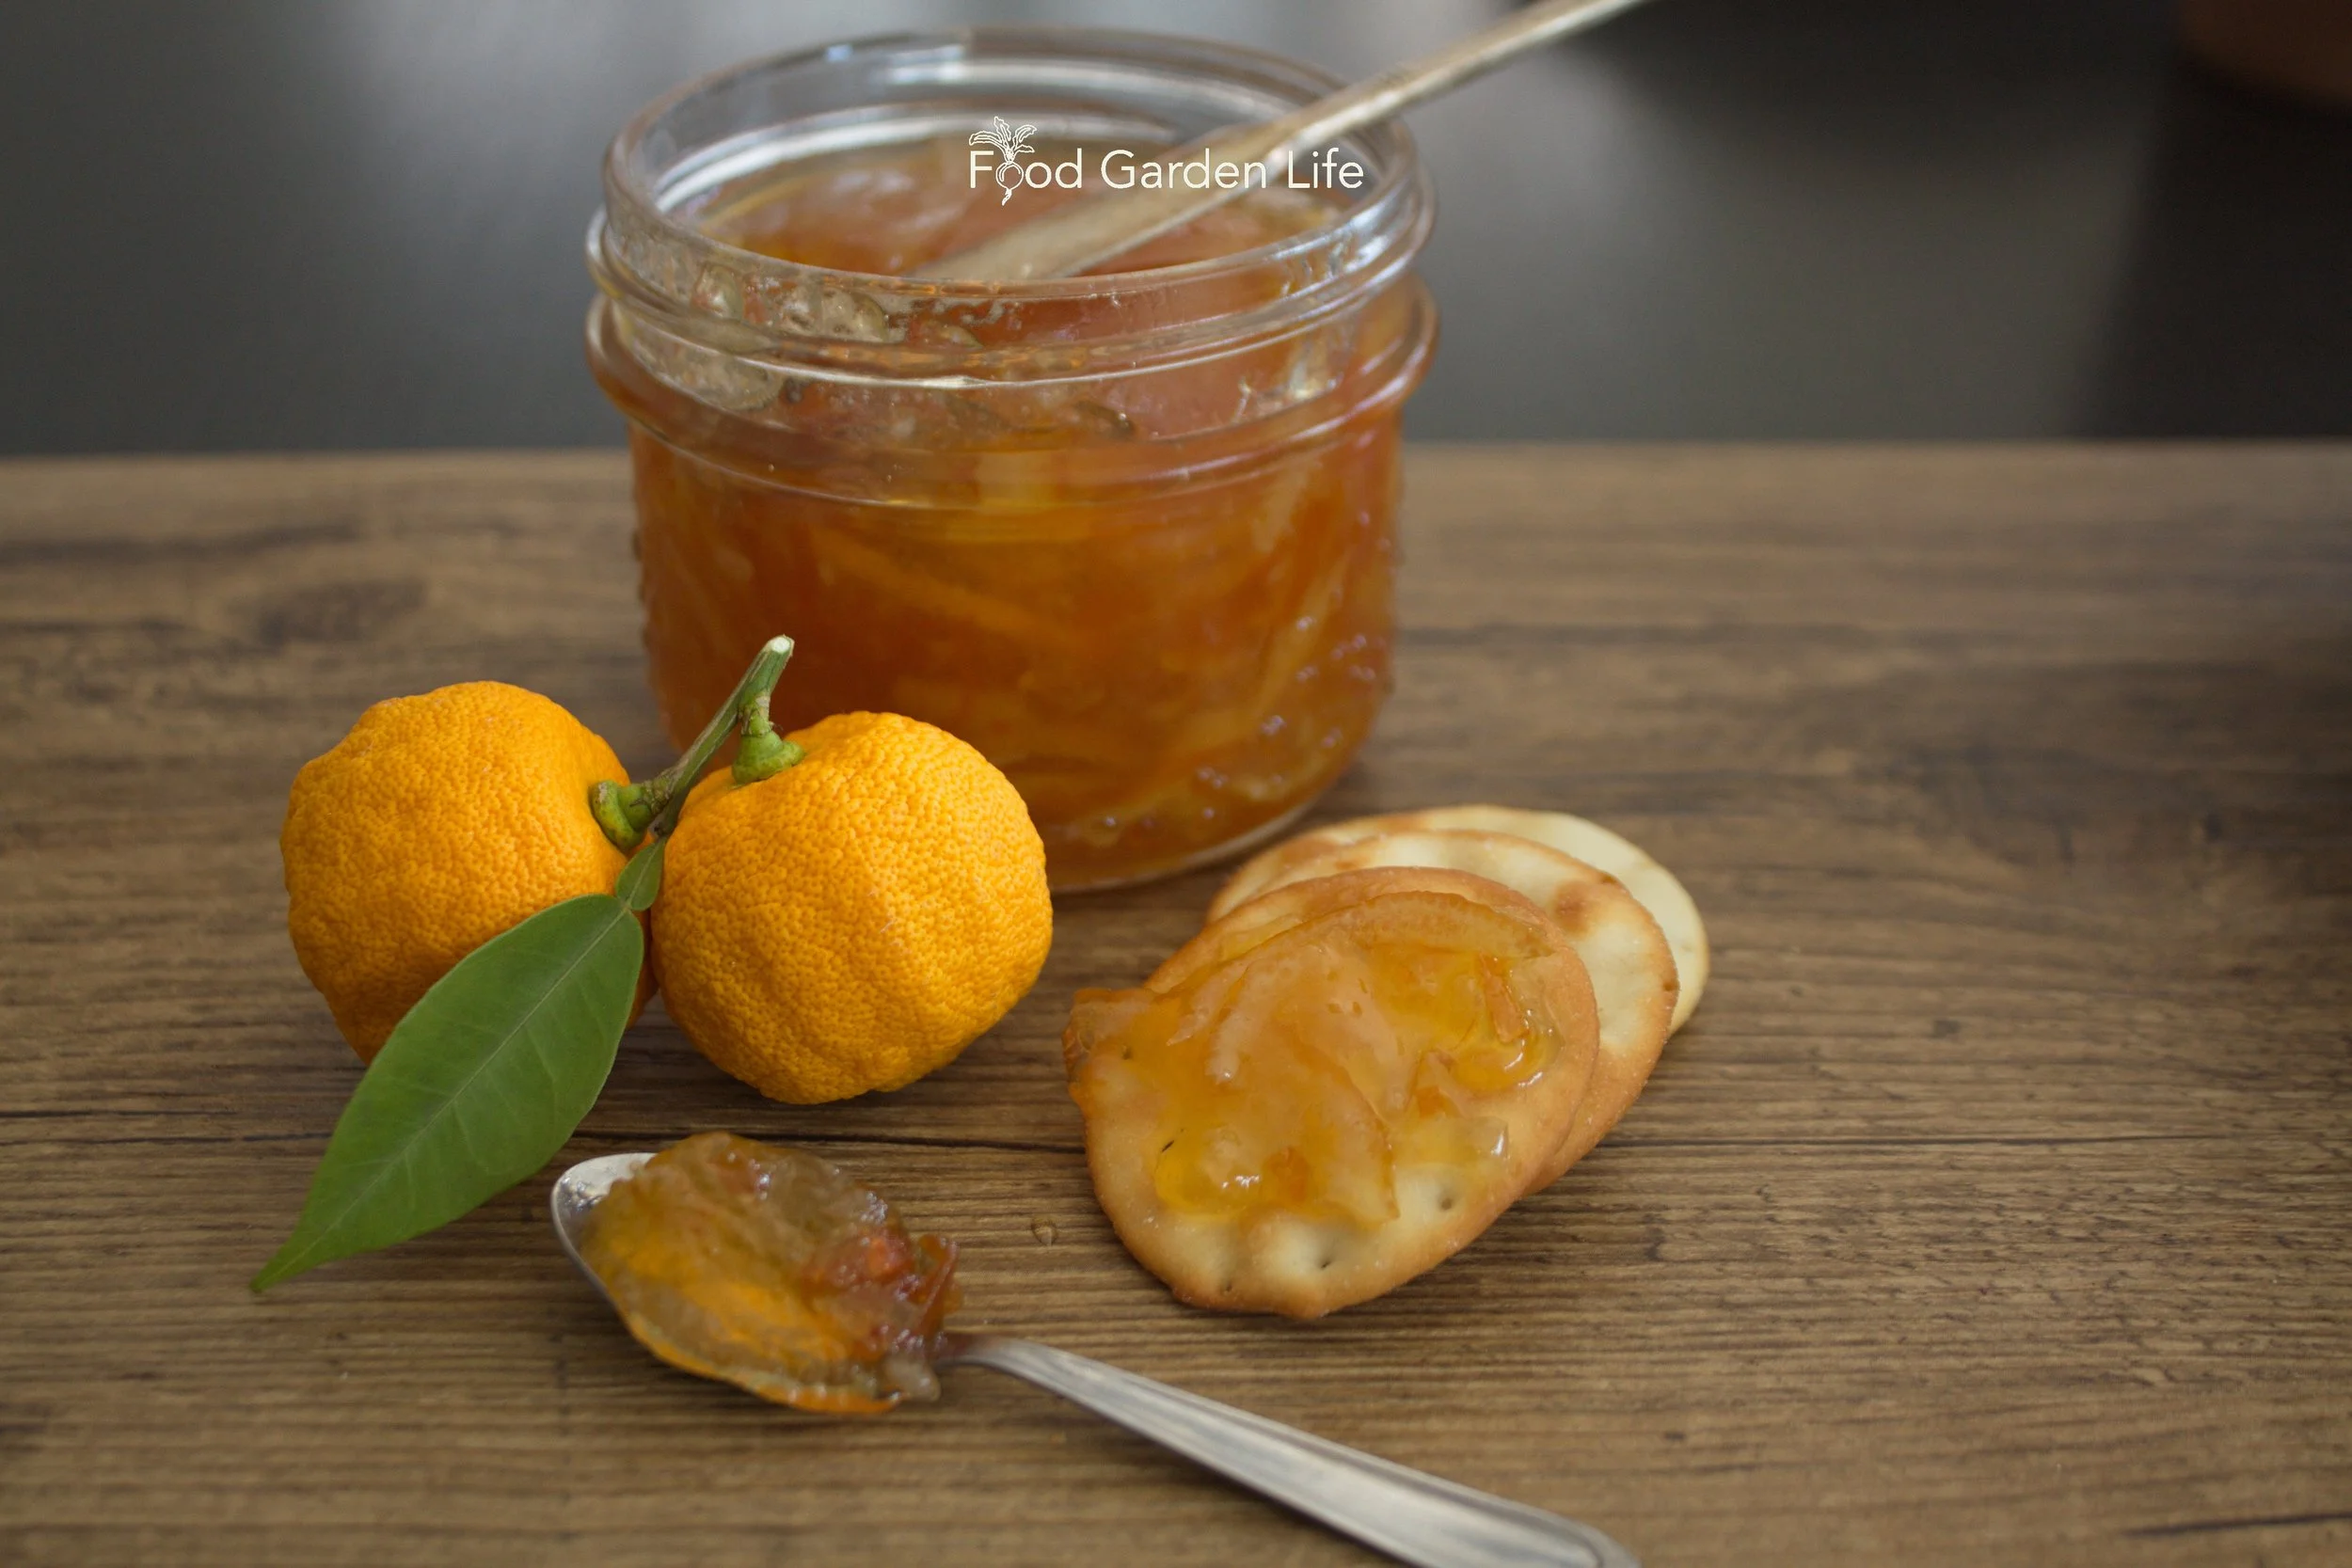
Yuzu marmalade. It makes great marmalade on its own—or mixed with other citrus fruit. More yuzu cooking ideas below.
For starters, remove growth from below the graft line…it’s your rootstock sneaking up. Not sure where the graft is? Look for a bump on the main stem close to ground level. (More on grafting yuzu below.)
Next, tidy things up:
Remove dead branches,
Cut out damaged branches
Remove interior branches that don’t get a lot of light and have few leaves
Next:
Prune to allow air movement within the plant
Prune so branches are well spaced and fruit will get some light
Trim back branches that have grown too long
Next, let’s look at how to prune a young tree compared to how to prune a mature tree.
Keep Your Lemon Tree Through the Winter
And enjoy fresh homegrown lemons!
Shape Young Trees
With young trees, we’re pruning to develop the shape. We’re creating a permanent framework of branches.
If you have a single-stem young plant (a “whip”) you want to get it to branch out. This is done with a “heading” cut. It just means cutting off the top of the stem.
If it’s a grafted plant, first find the bump on the stem so you know where the graft is. Make your heading cut well above this.
As side branches form after the heading cut, pinch the tips once they have 3-4 sets of leaves, which will cause them to send out side branches. You’re causing a shorter branch with side branches.
A well-shaped tree has branches coming out from the main stem at different heights…a bit like a spiral staircase.
Pruning Older Trees

This book will help you apply creative “fig thinking” in your garden and harvest fresh figs even if you have a short summer or cold winters. With some fig thinking, you can harvest figs in areas where they don’t normally survive the winter! In this book, I share many of the questions I have been asked about growing figs in temperate climates, along with my responses.
With young trees we’re creating a framework of branches. With older trees, the focus is size control.
My yuzu is at its final size: I don’t want it to get any bigger. So every year, I prune it back to the permanent framework of branches.
Prune in spring, before there’s new growth. If you heavily prune an actively growing tree in summer, it can cause lots of new growth that is less likely to survive cold winter temperatures.
Where to Get a Yuzu Plant
Canadian garden centres often bring in citrus plants from California in the spring. Ask in good time to see if they’ll bring in yuzu.
Mail order from a specialist nursery that carries citrus. Many specialist nurseries take pre-orders, and then bring in a load of citrus in the spring.
Propagating Yuzu
Can you Grow Yuzu Plants from Seed?
Yuzu is easy to grow from seed.
But…
I hear from gardeners who seed-grow yuzu plants…and then wait and wait and wait. For years. I’ve seed-grown yuzu too…and I’ll report back in a few years when they fruit for me!
The reason for the wait is that seed-grown plants go through a juvenile stage. It can be years before they produce fruit.
Grafting and Budding
With grafting and budding, we’re putting bits of a mature yuzu plants onto a set of roots that has desirable traits (smaller plant size, early bloom and fruit, cold hardiness).
Because we’re using mature wood to graft and bud, the result is a plant can produce fruit more quickly than seed-grown plants.
Flying dragon (Poncirus trifoliata) is a common rootstocks that has good cold-hardiness and dwarfing properties.
Cuttings and Air Layering
Like many other citrus, you can also propagate yuzu from cuttings and air layering.
Yuzu Flowering and Pollination
A cool period over the winter months encourages flower bud formation.
Yuzu is self-pollinating, meaning you can get a crop if you have only one plant.
(It doesn’t mean you don’t need insect pollinators…so if the plant is indoors where there are no pollinators, be prepared to act the part yourself! Simply jostlie flowers with a cotton swab to move around pollen.)
Small fruit will already be forming from early flowers as the blossoms finish up.
Harvest Yuzu Fruit
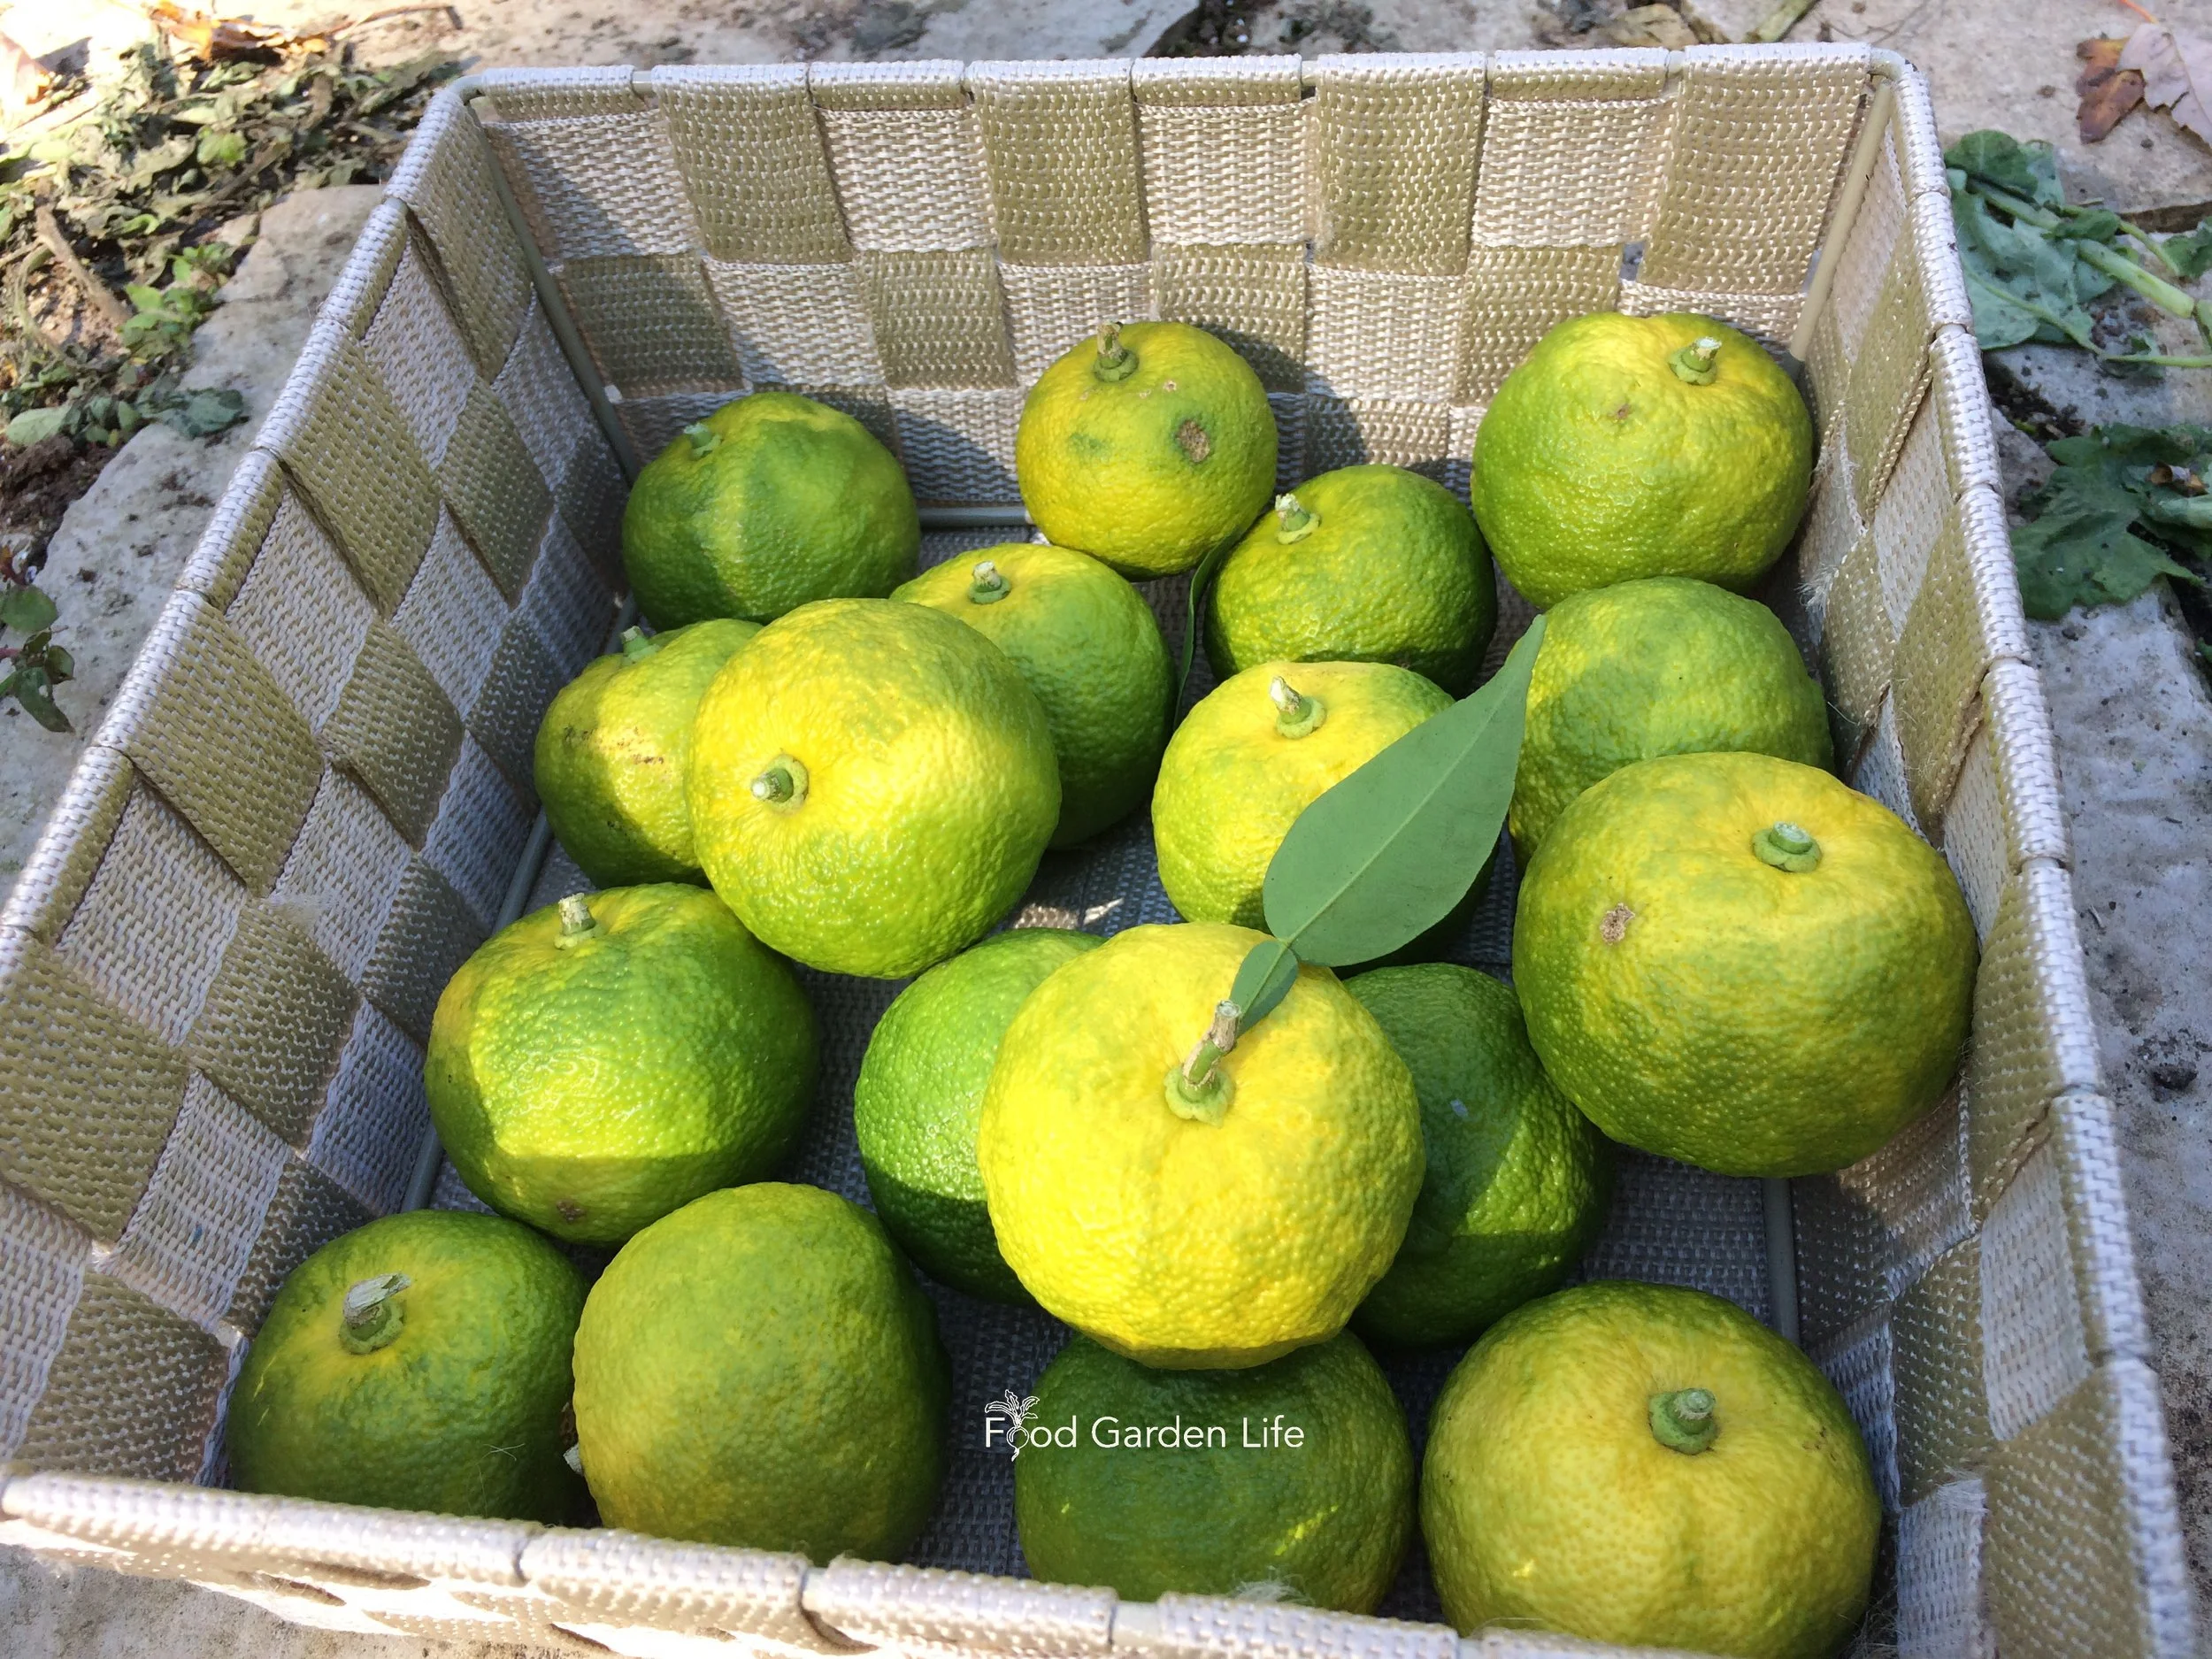
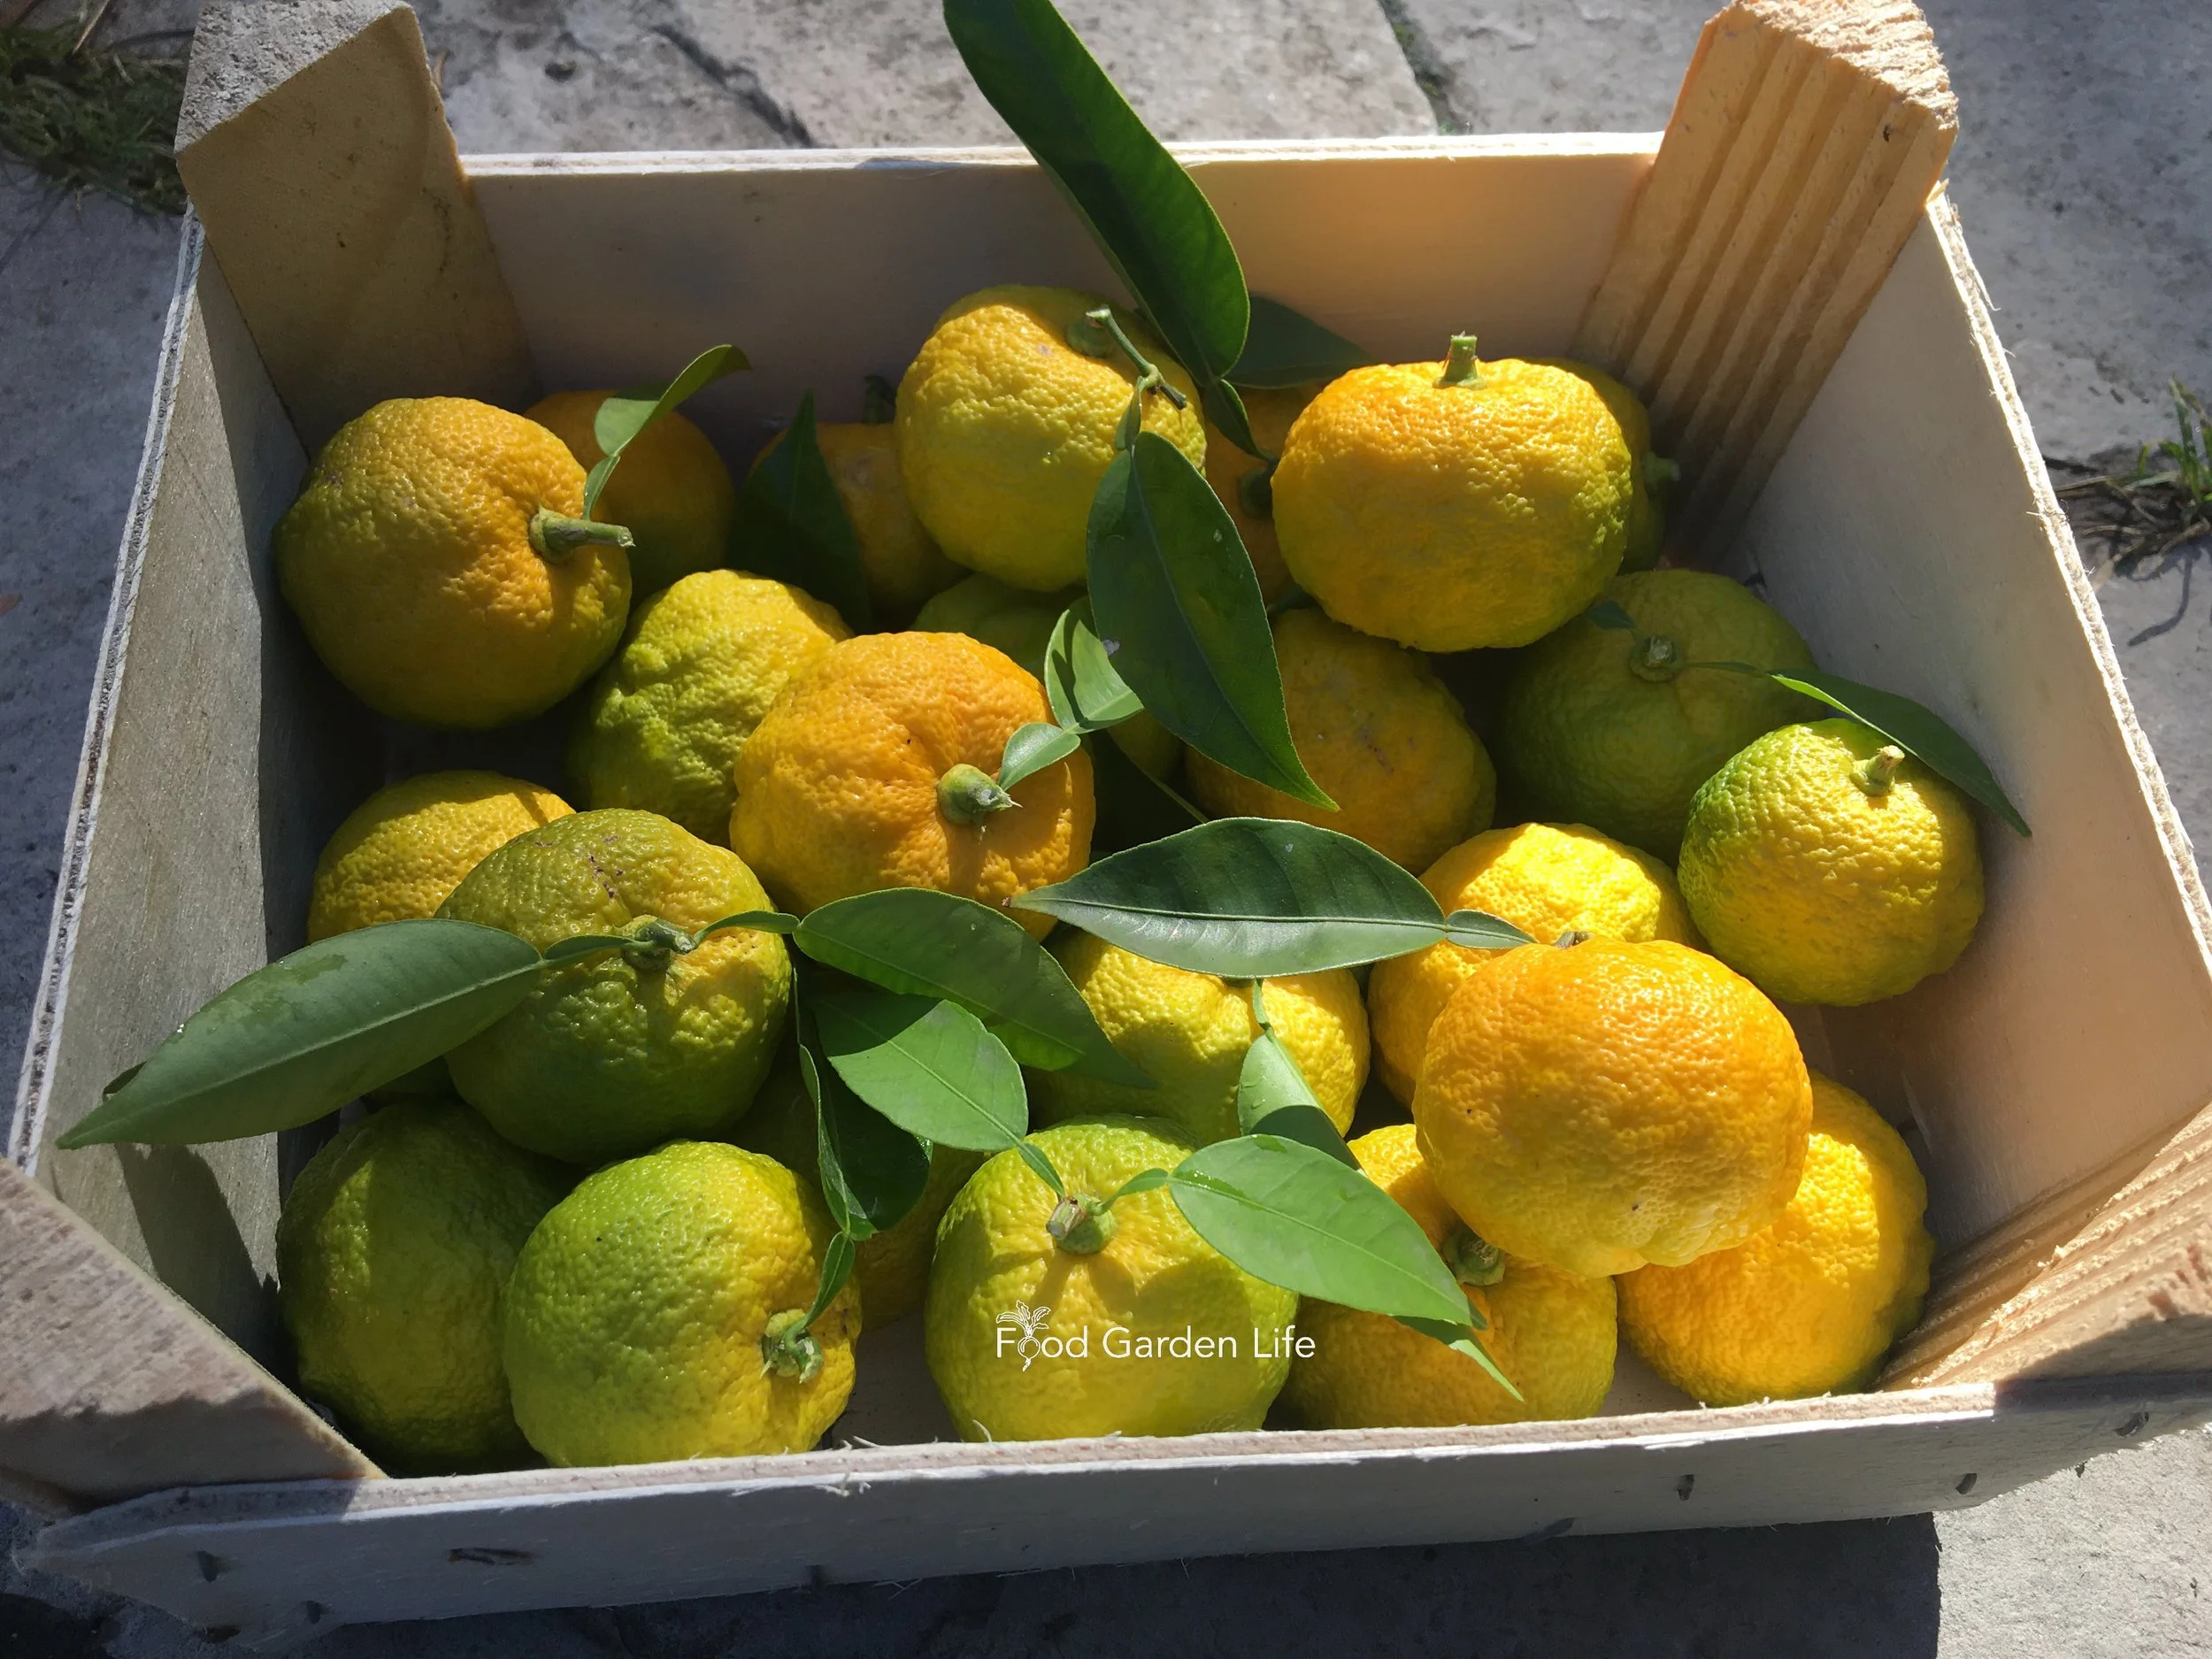
Yuzu is often picked green, or as it just begins to change colour.
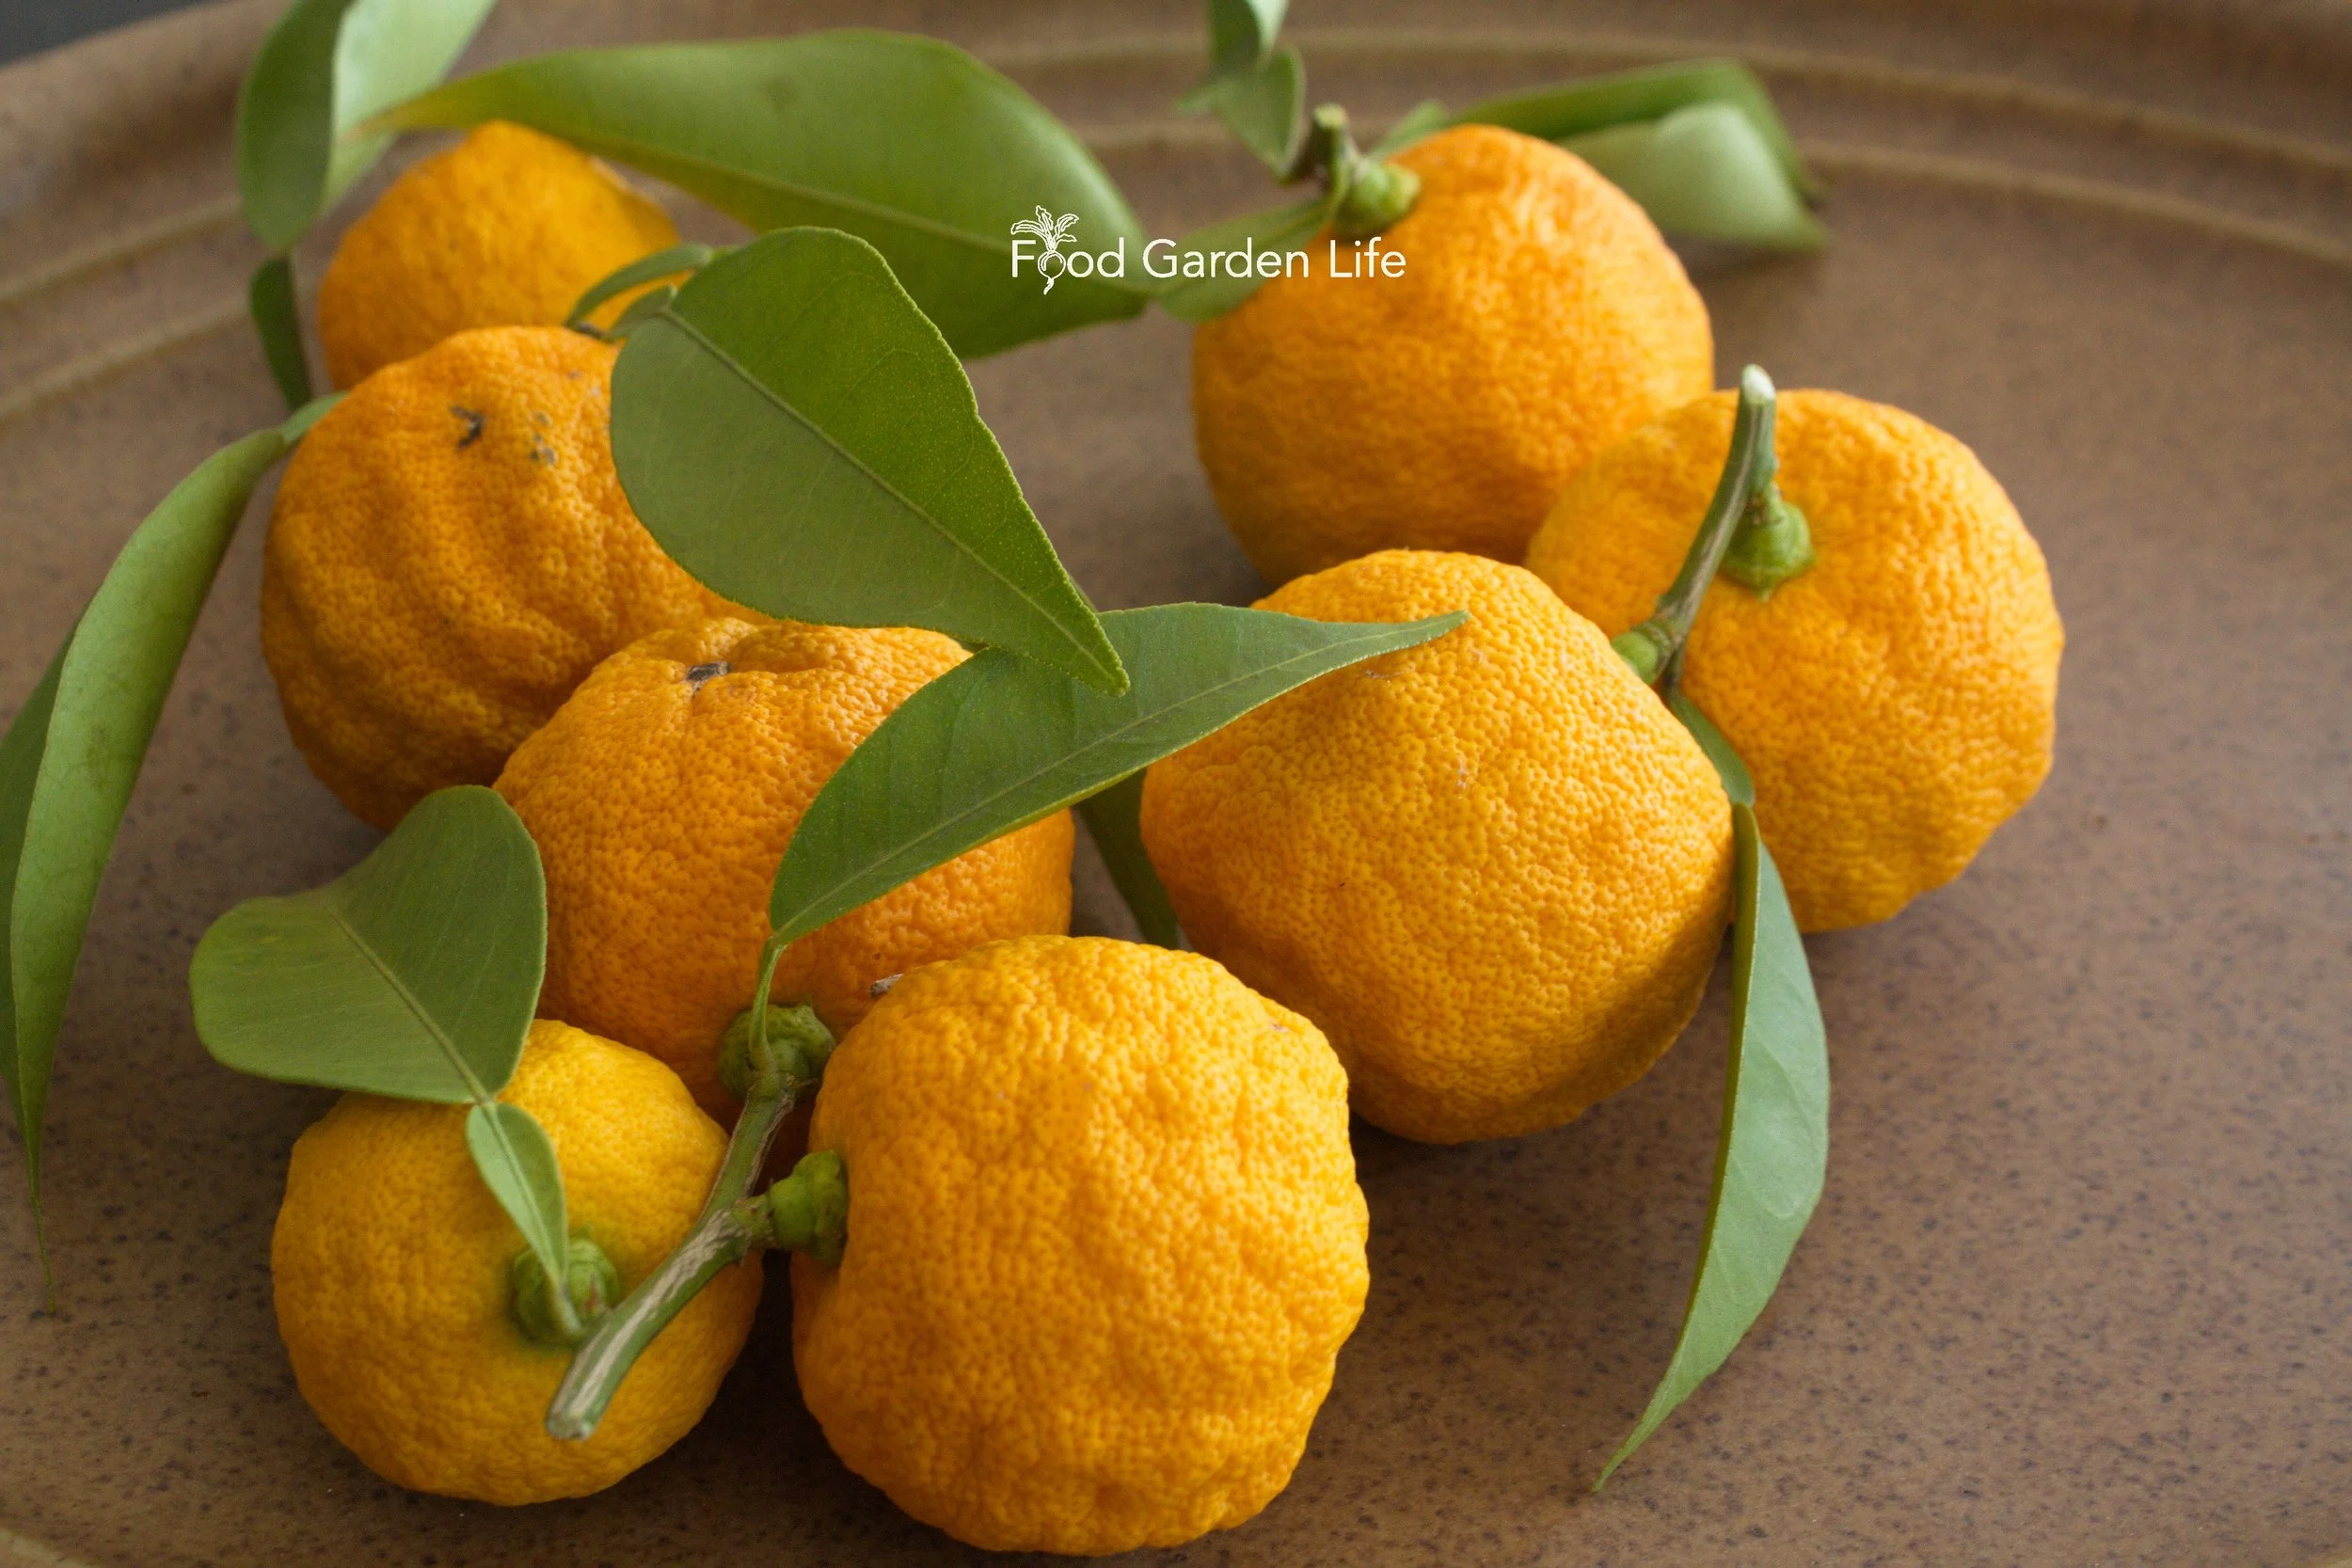
Ripening time depends on where you are and how soon your plant starts growing in the spring. My yuzu ripen in the fall.
Commercially, yuzu is often harvested green. (If this sounds strange, it’s the same thing with limes; they are picked green, even though they eventually ripen to yellow.)
In a home garden setting, you can experiment by picking at different stages of ripeness and seeing how the flavour evolves. Try picking all the way from green through to orange. As it gets very ripe, it feels puffy when you squeeze it—and at this point, it’s harder to zest and the fruit is no longer very juicy.
Yuzu Pests
In cold-climate gardens, pest problems are minimal.
Pests are more of a problem indoors—as with most plants.
A common indoor pest is spider mites. Because I overwinter my yuzu somewhere cold, I have no spider mite problems through the winter. But if the plant were somewhere warmer I’d expect spider mites. Insecticidal soap and horticultural oil are both useful for controlling spider mites.
Yuzu Recipes
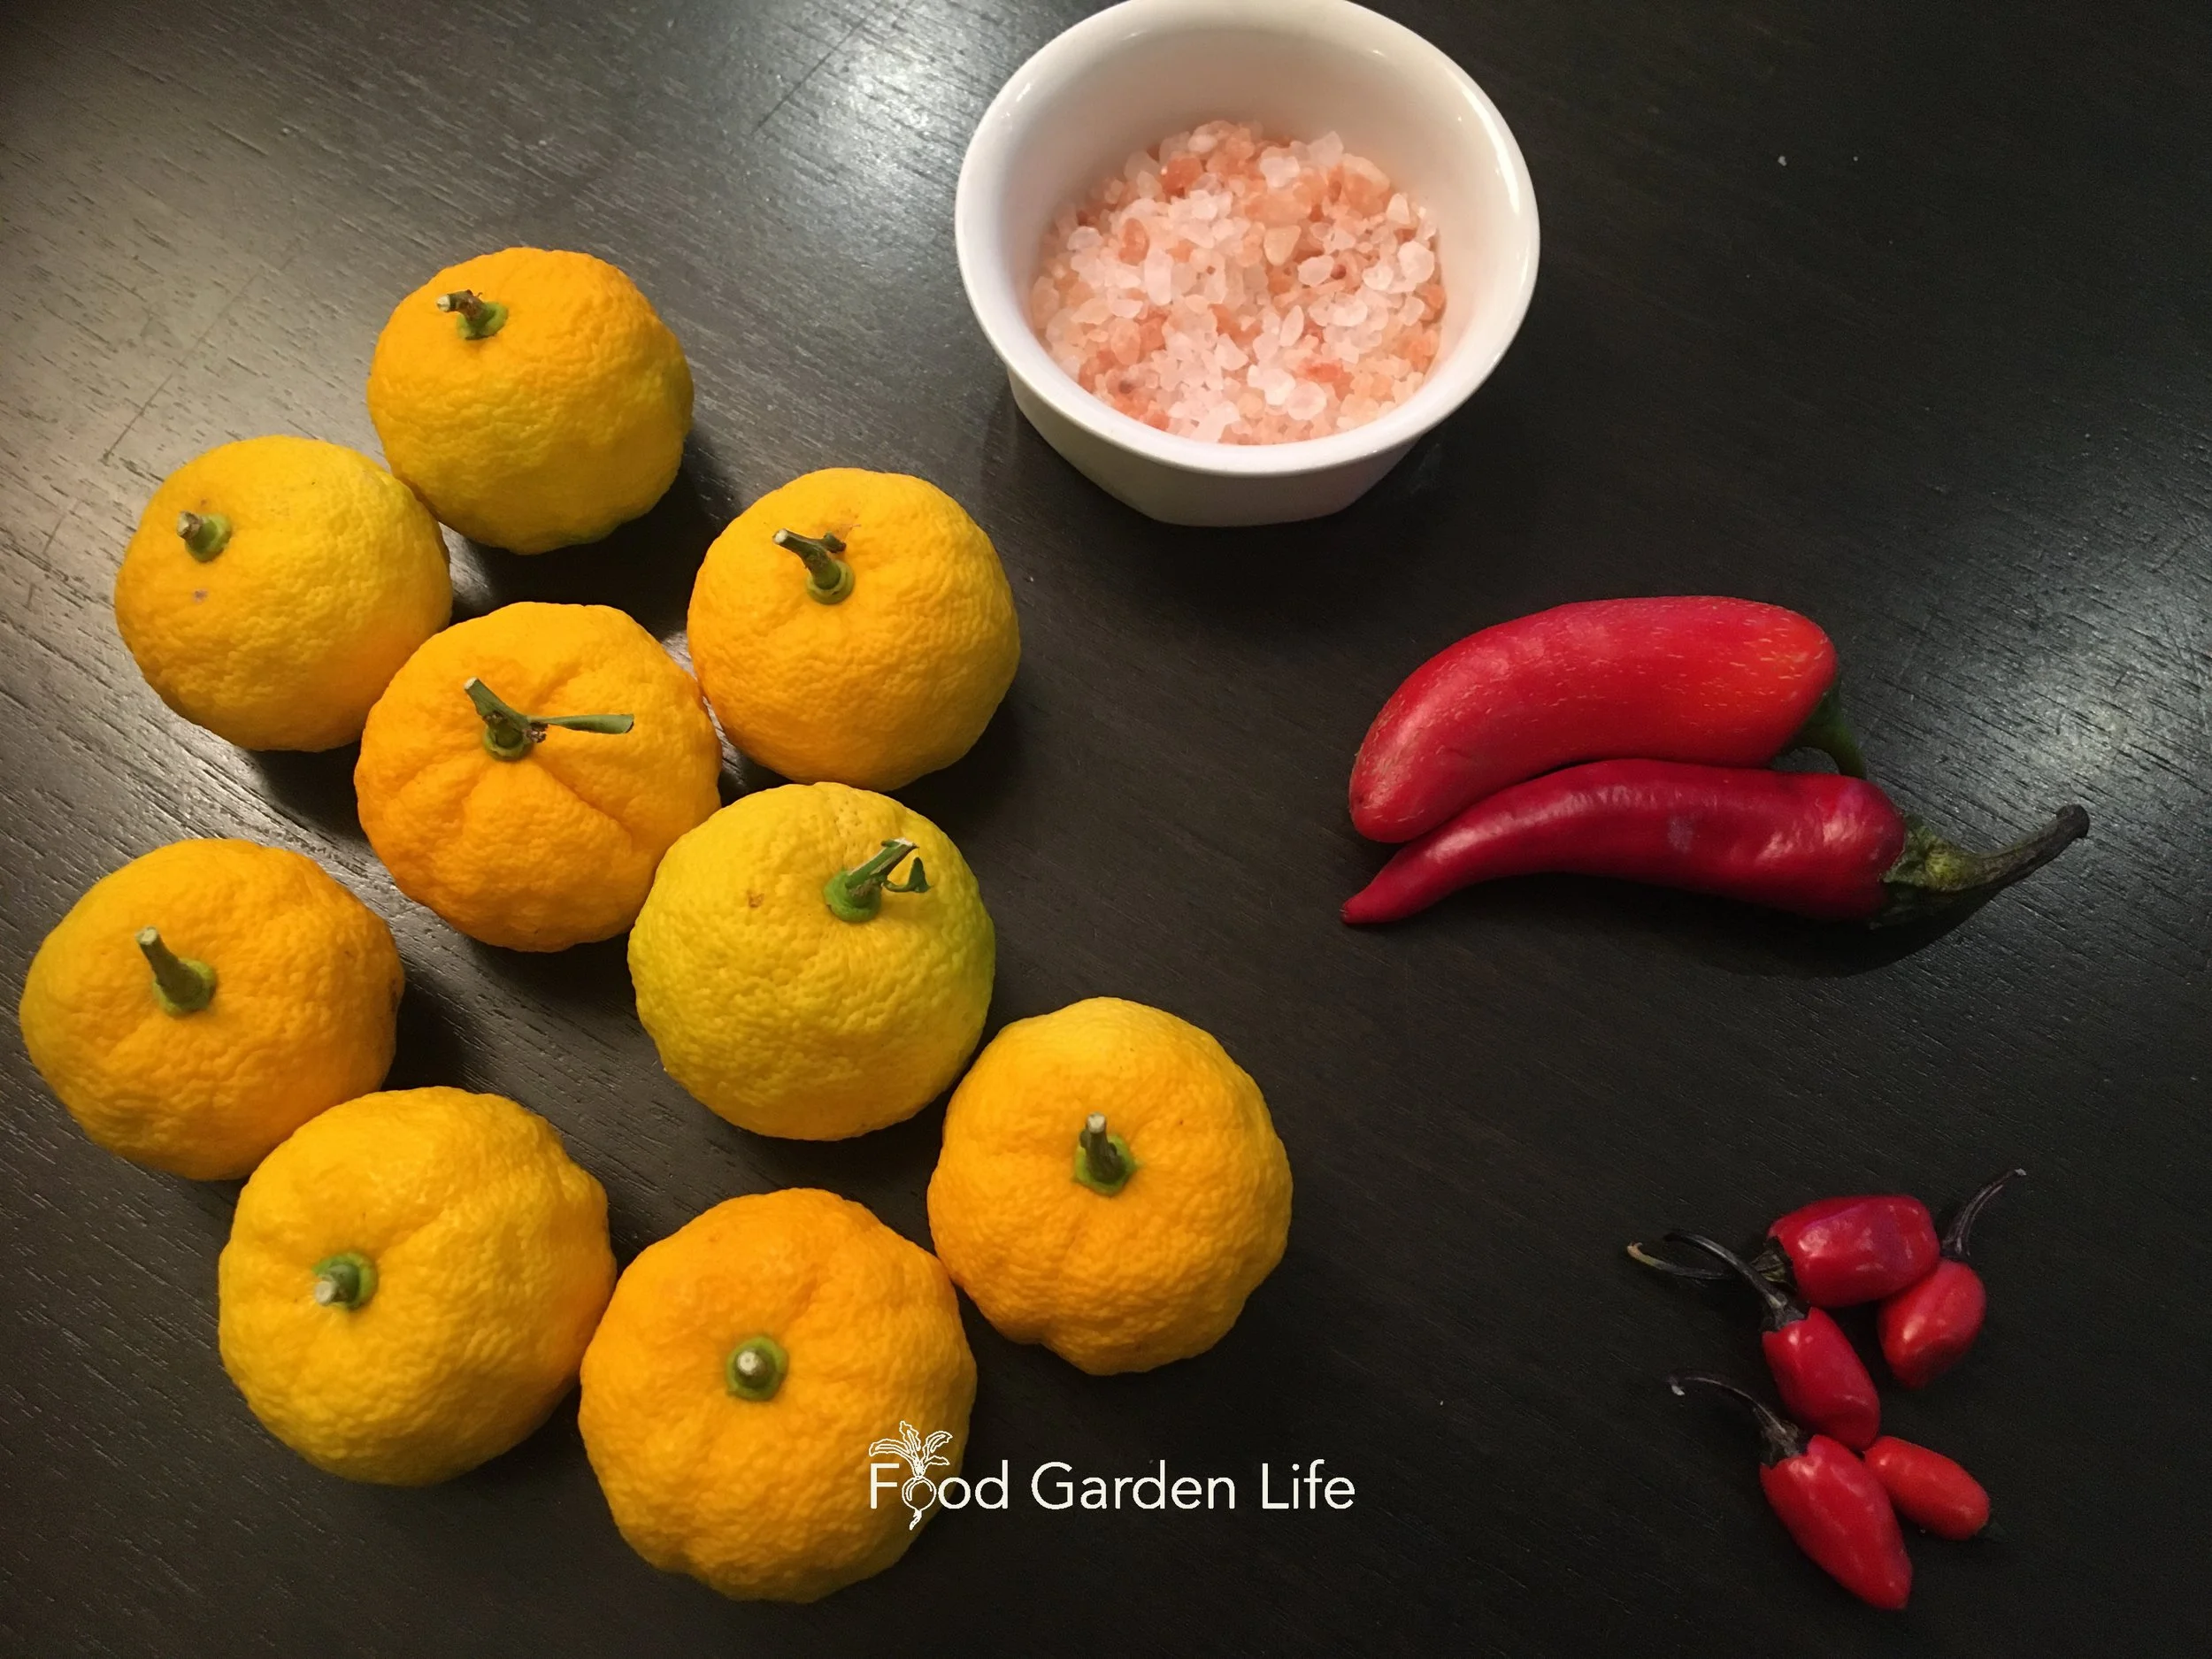
The ingredients to make yuzu kosho paste: yuzu fruit, salt, hot peppers.
The fruit is versatile. It works well in savoury dishes and desserts. Try it in cocktails, marinades, and desserts.
And like other citrus, it contains lots of pectin, so you can make yuzu marmalade.
The yuzu taste is distinct. I find it very floral. The yuzu juice is tart, and the yuzu peel is full of aromatic oils. Use both.
You can also use it where you might normally use other citrus fruits.
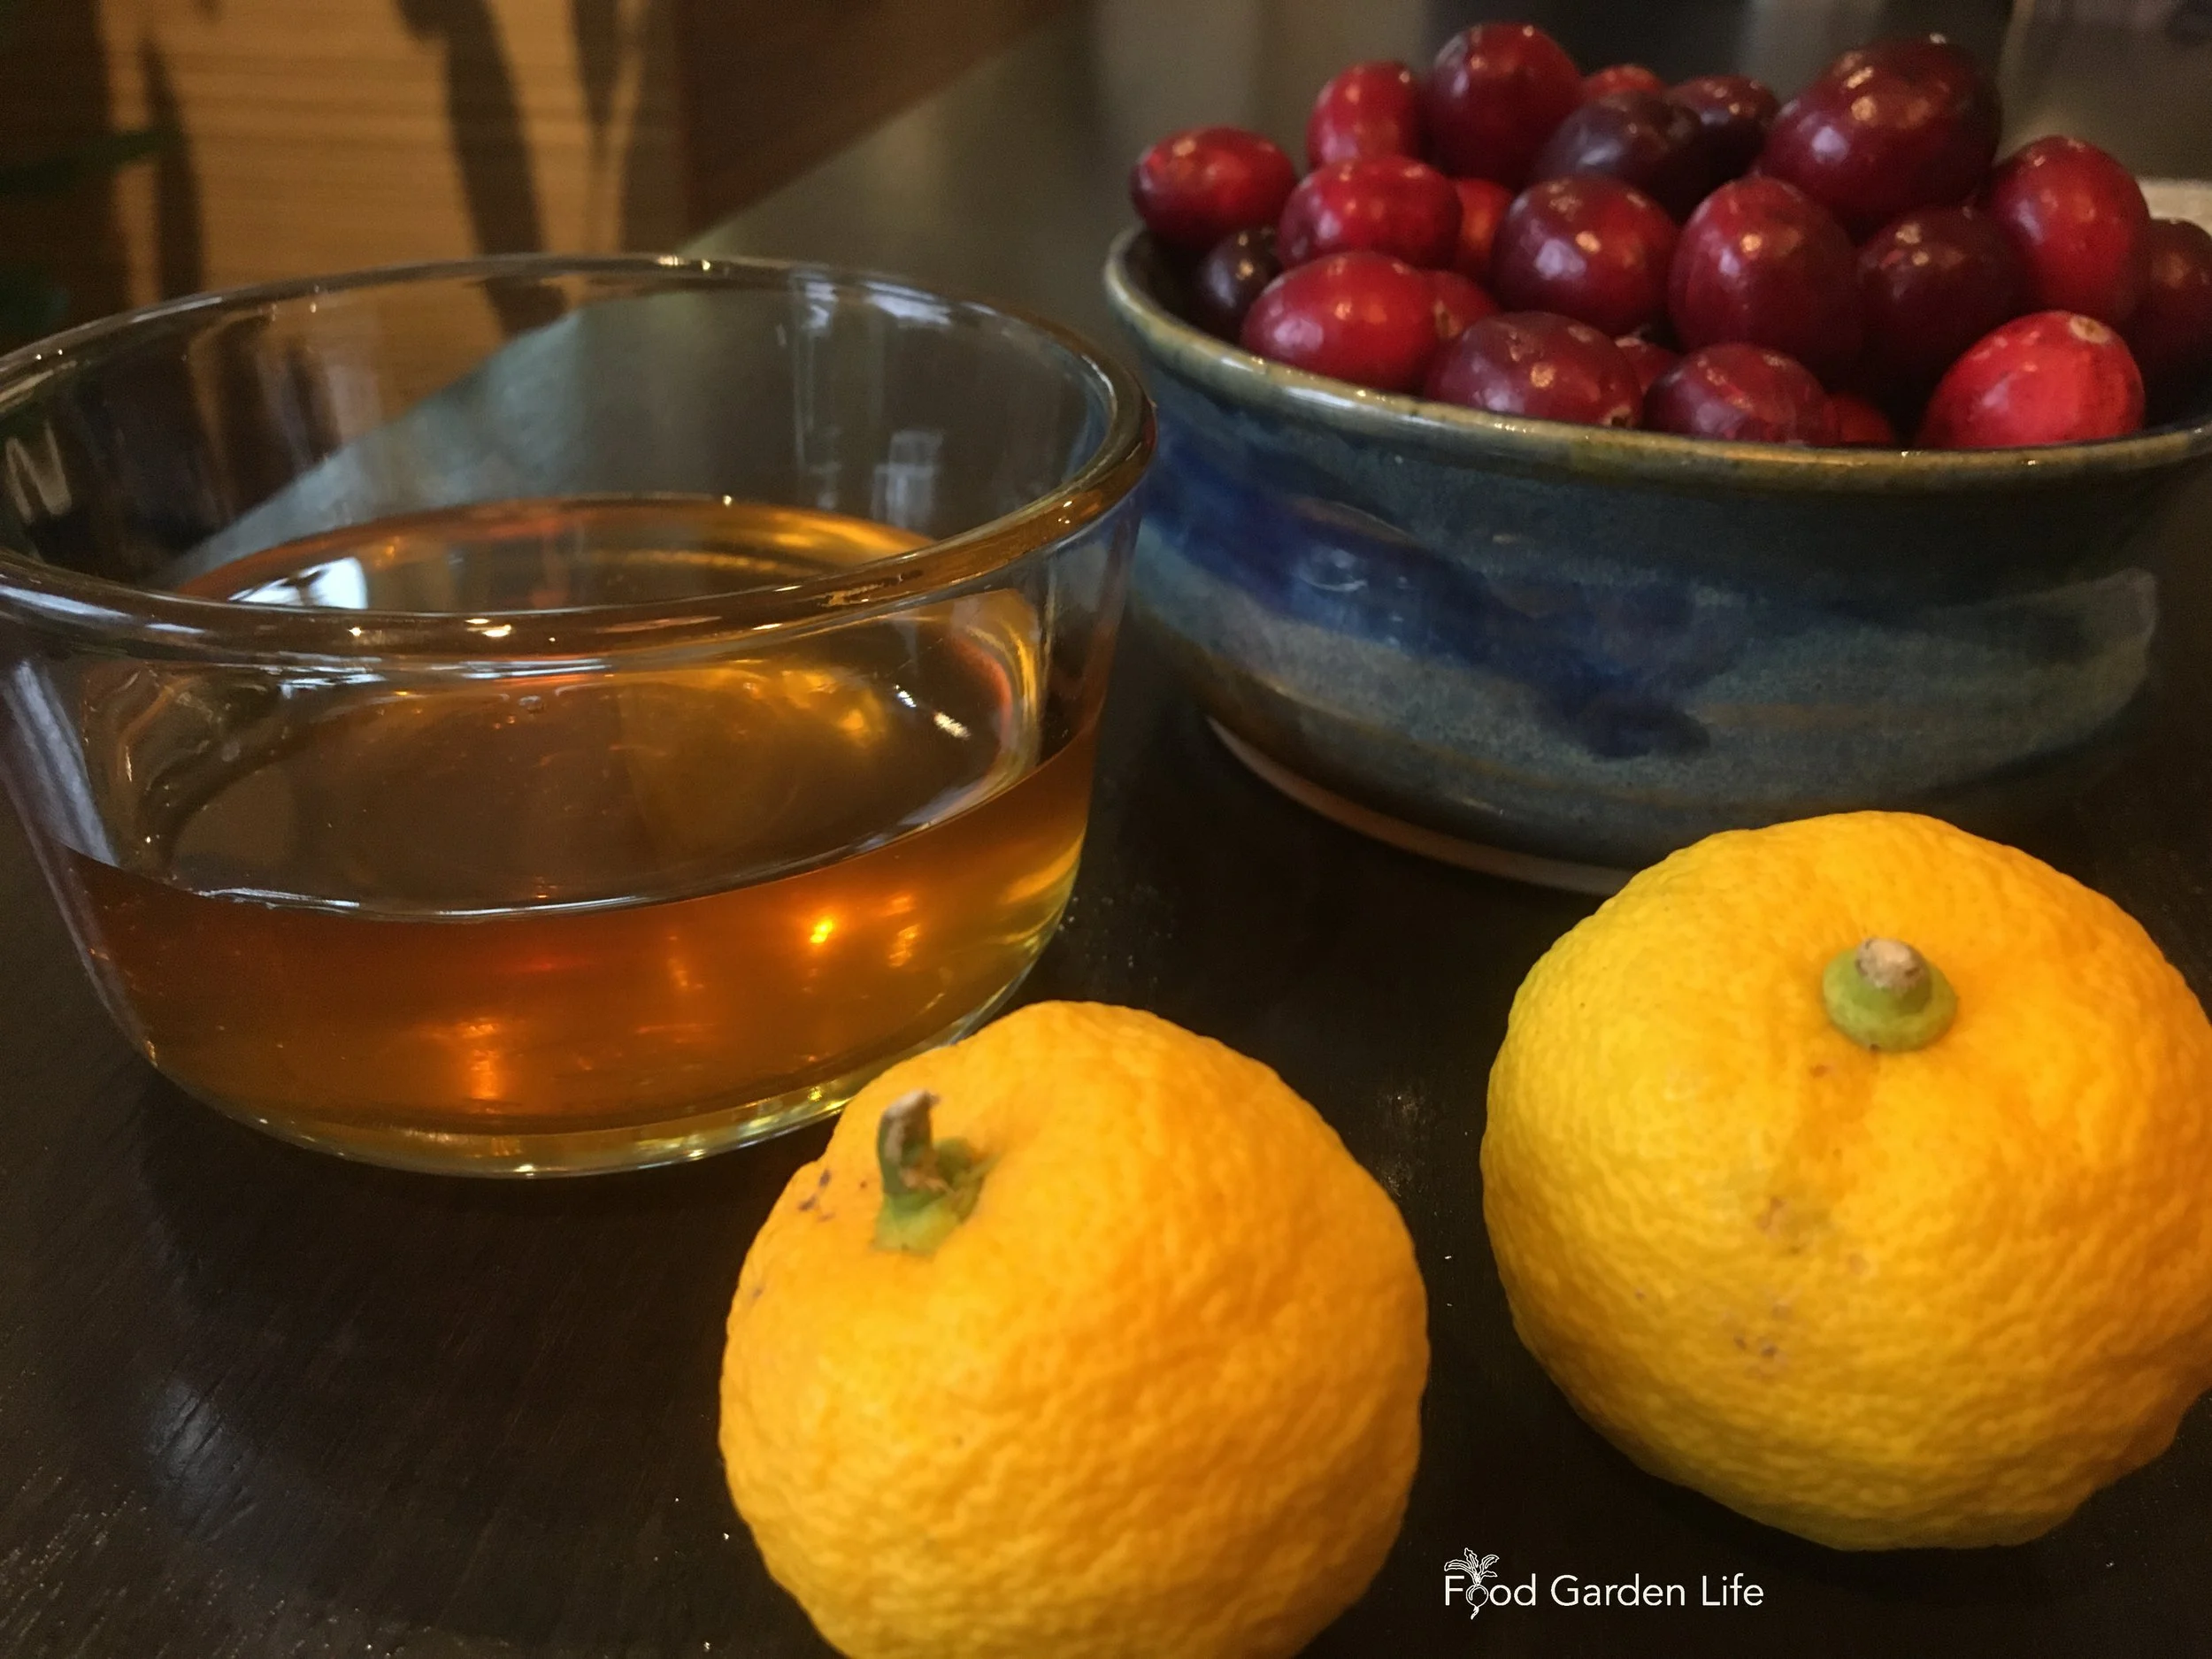
Yuzu, honey, and cranberries to make cranberry sauce.
Here are a few ideas:
Yuzu kosho (citrus chili paste) – I love this in ramen
Salad dressings
Marinade
Instead of lemon in a spanakopita-style pastry
In cranberry sauce (instead of orange) – a big hit in my family
Marmalade
Yuzu tea


Top Tips for Growing Yuzu
Cool temperatures over winter is best
Don’t overwater in winter
Trim off thorns if it’s somewhere you walk past!
Yuzu FAQ
What is a yuzu lemon?
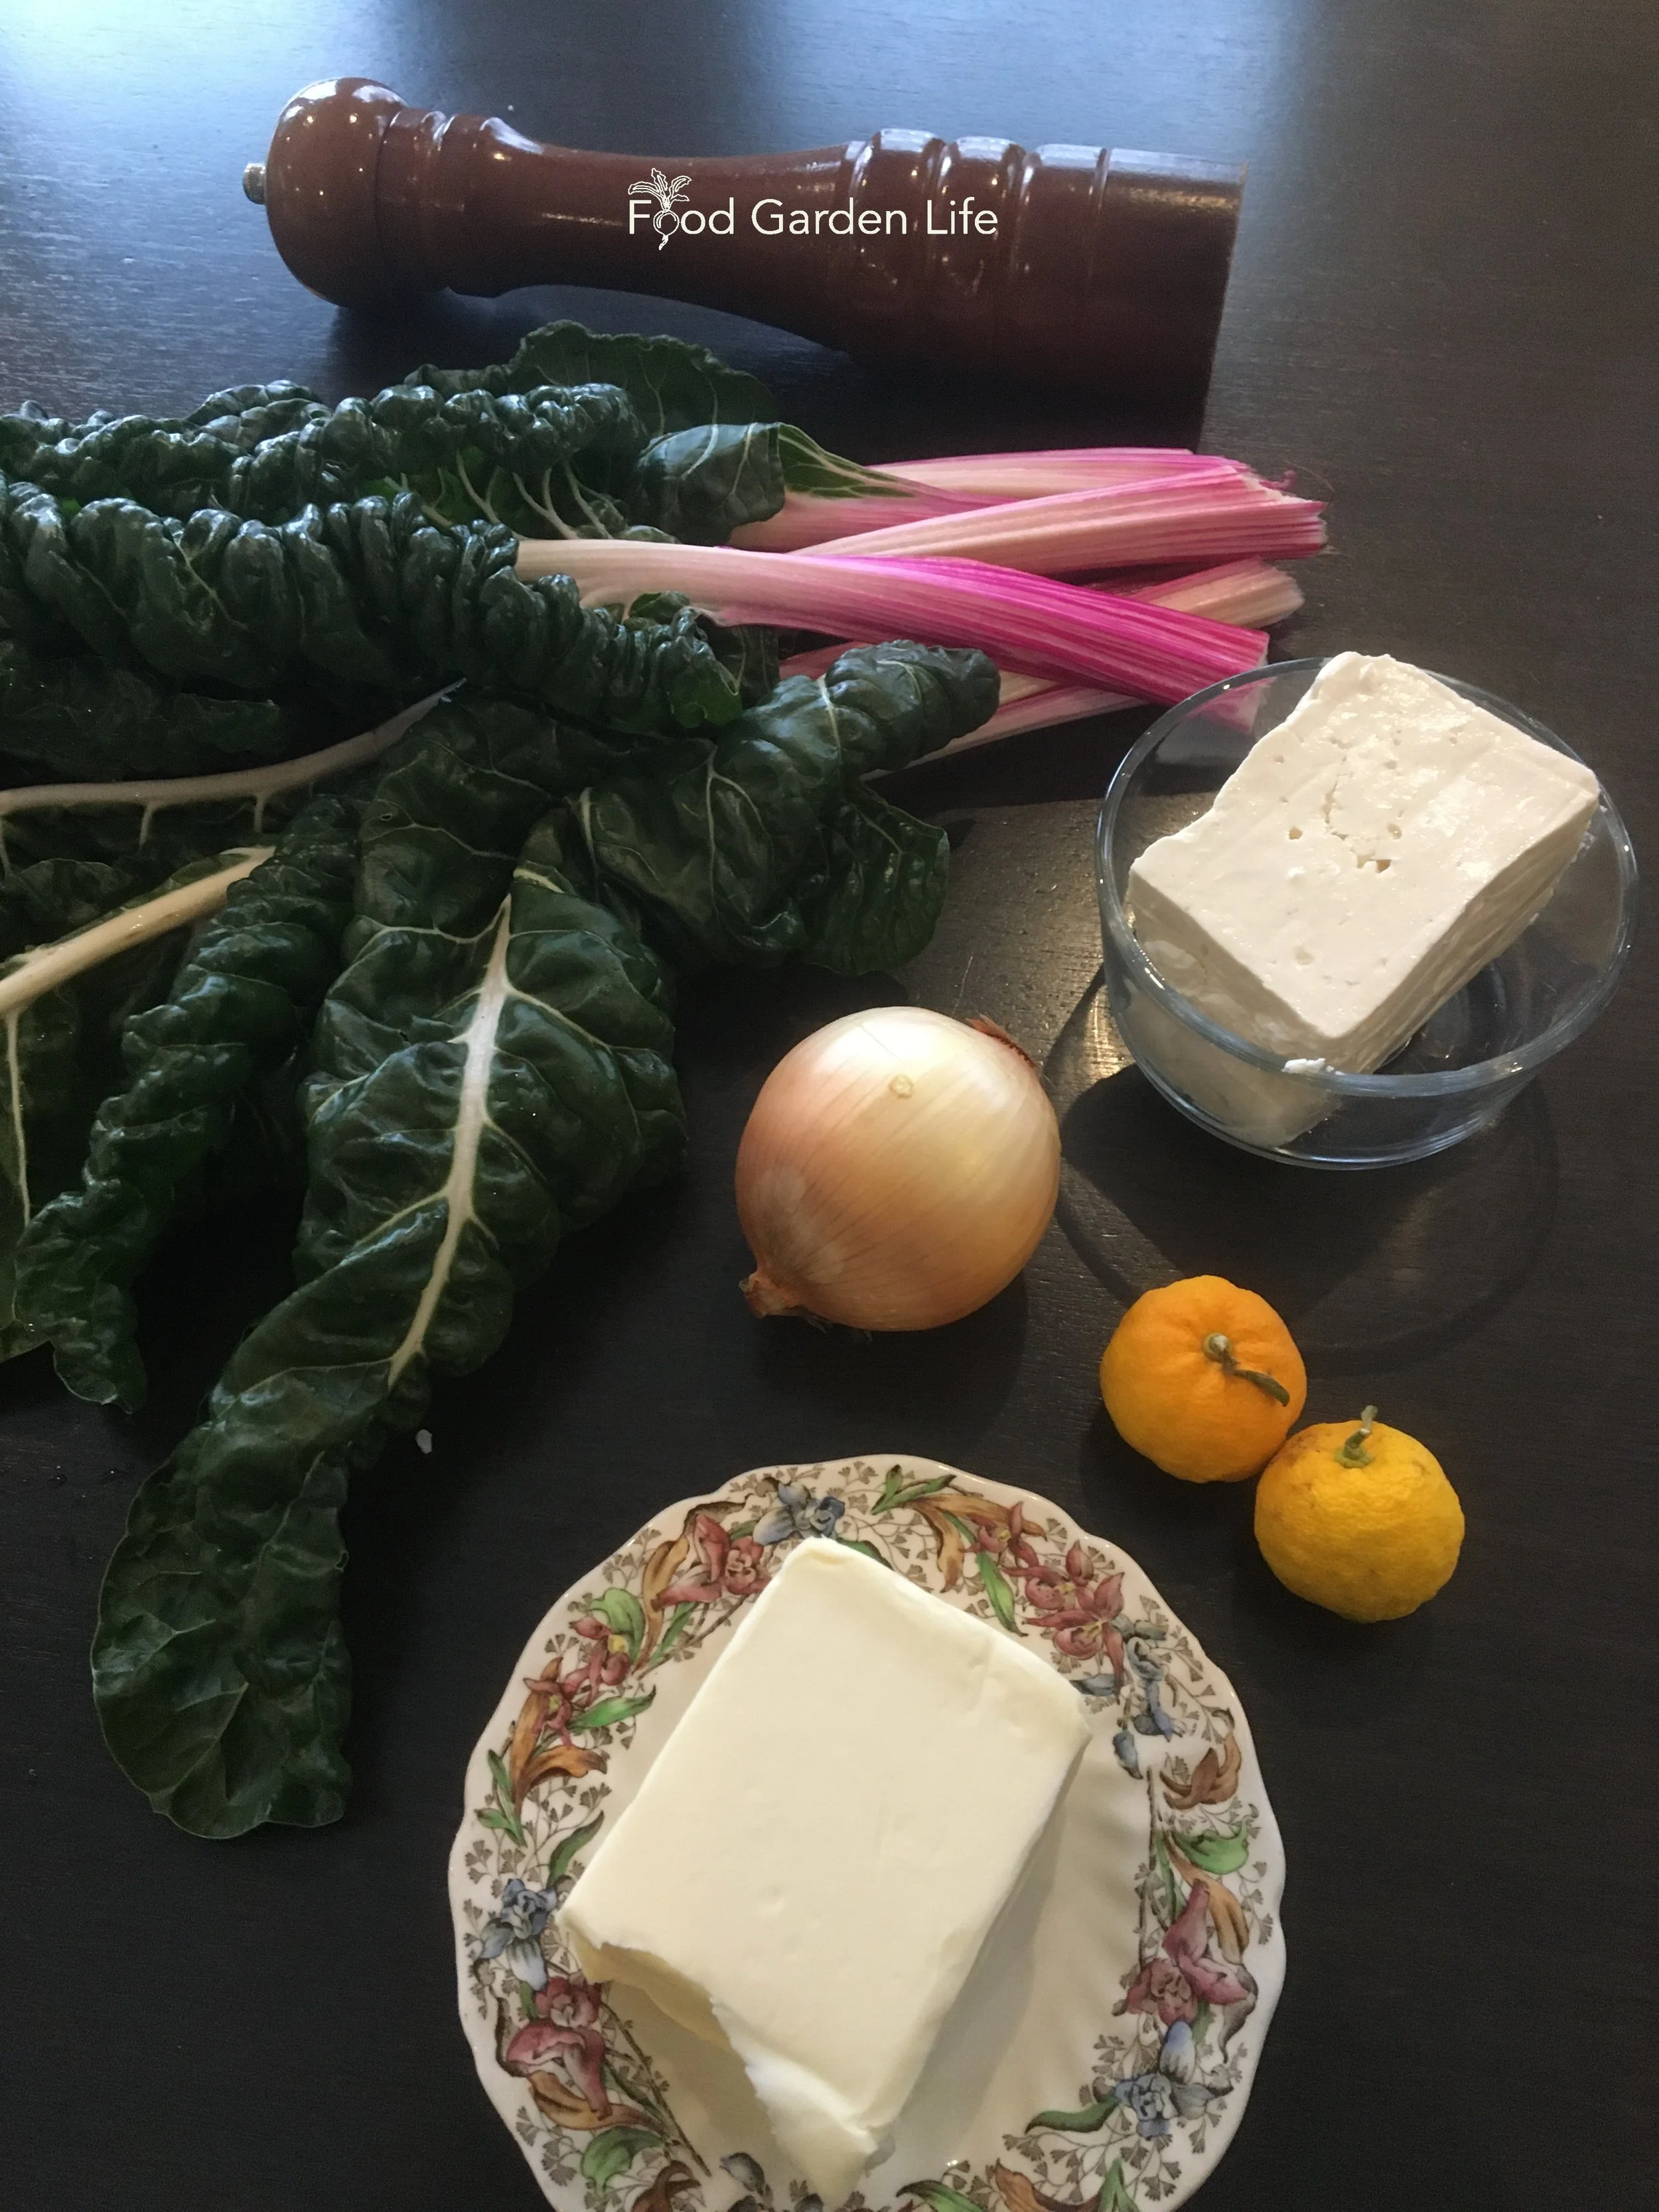
Savoury pastry: The ingredients to make a chard-and-yuzu spanakotpita-style pastry.
It’s another name for yuzu fruit. It’s also called yuzu citrus, Japanese citron, and Yuzu Ichandrin
Can yuzu grow in Canada?
You can grow it in the ground, unprotected in the mildest areas of Canada. In other areas, grow in the ground with protection—or as a container plant.
How long does it take to grow yuzu?
A grafted or budded tree (which is what trees at garden centres usually are) can produce fruit while still quite young.
Can yuzu be grown in pots?
Yes! For more insights into growing citrus in pots, read this article about how to grow a lemon tree in a pot.
Can yuzu be grown from seed?
Yuzu grows easily from seed. Don’t let the seeds dry out after removing them from the fruit. Place them in a pot with moist potting soil, and cover with some more potting soil—about the same thickness as the seed. Then keep it moist and be patient.
What is Sudachi?
Sudachi (Citrus sudachi) is another acid citrus with similar parentage to yuzu. Like yuzu, it is often harvested green. The fragrance is slightly different from yuzu. It is less seedy than yuzu.
Do people grow it commercially in cold climates.
Yes. There’a a greenhouse in Laval Quebec selling yuzu and sudachi. And here’s a story about yuzu in New Jersey. (I love the whole yuzu fruits filled with tasty treats!)
Find This Helpful?
Enjoy not being bombarded by annoying ads?
Appreciate the absence of junky affiliate links for products you don’t need?
It’s because we’re reader supported.
If we’ve helped in your food-gardening journey, we’re glad of support. You can high-five us below. Any amount welcome!
More Citrusy Ideas
Here’s a Guide to Growing Meyer Lemon Trees.
How To Grow a Lemon Tree in a Pot
Book: How to Grow Lemons in Cold Climates
Covering everything from lemon varieties, to location and watering, to pruning and shaping, to overwintering, dealing with pests, and more—and including insights from fellow citrus enthusiasts—this book will give you the confidence you need to grow and harvest fresh lemons in cold climates.
Online Course: Grow Lemons in Cold Climates
New to growing citrus in cold climates? Or bitten by the lemon bug and want to up your game?
Lemon Masterclass equips you with information and creative ideas so that you can make the most of your cold-climate garden for growing lemons and other citrus.
Harvest from Your Hedge! Get These Edible Hedge Ideas
By Steven Biggs
Edible Hedge to Food-Forest Hedge

Find out how to grow an edible hedge.
Need more space in your garden? I’m always looking for ways to squeeze more food plants into my edible landscape. My “foodscape.”
I recently dotted my rows of currant and gooseberry bushes with plum trees. At the base of the rows are strawberry plants and mint. My edible hedge of currant and gooseberry bushes is becoming a “food forest hedge.”
The currants tolerate shade—so as the plum trees get bigger and shade them, the two can co-exist. The strawberry plants need some sun, and along the south-facing edge they get it. And the rapacious mint (which I never normally plant in the ground because it’s so aggressive) fills in shadier nooks.
If your challenge is space—if you have a list of fruit trees and bushes you want to grow, but can’t see how they’ll fit into your yard—an edible hedge might be the answer.
Keep reading because this article will give you ideas for creating an edible hedge suited to your space.
My Edible Hedge Inspiration was a Hedgerow
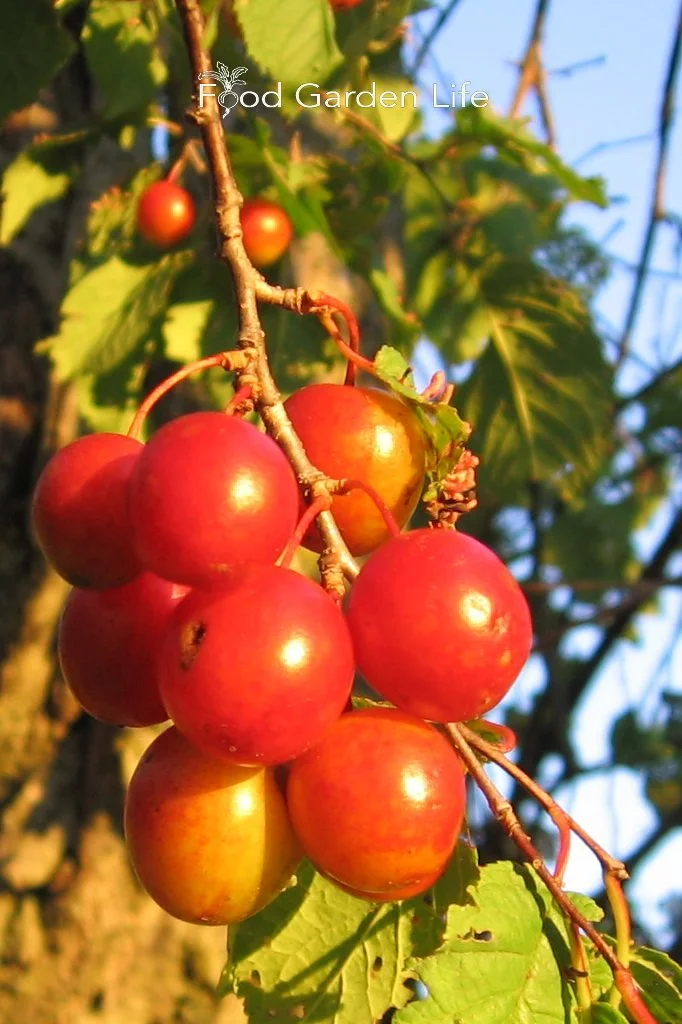
Wild plums growing in a hedgerow at my friend’s farm got me excited about the idea of an edible hedge and food-forest hedges.
When I was walking the edge of a field at my friend Anton’s farm one day, I came to a spot where the hedgerow was painted red by a heavy crop of fruit. Wild plums. I stood there grazing plums—and when I was full I went back to the farmhouse to get Anton.
We picked a bushel of plums and barely scratched the surface. They made excellent plum pie and plum jam.
I remember thinking that if fruit grows so prolifically on its own, the manicured approach of an orchard might not always be the best approach for a busy home gardener.
That experience also made me think of when I lived in the UK, in a rural area where small fields were separated by hedgerows. From those wild hedgerows I picked plums, blackberries, and raspberries.
(And come to think of it, my neighbour gave me a pheasant that he hunted from the hedgerows too! I made roast pheasant with a mulberry-Cointreau sauce.)
What is an Edible Hedge?
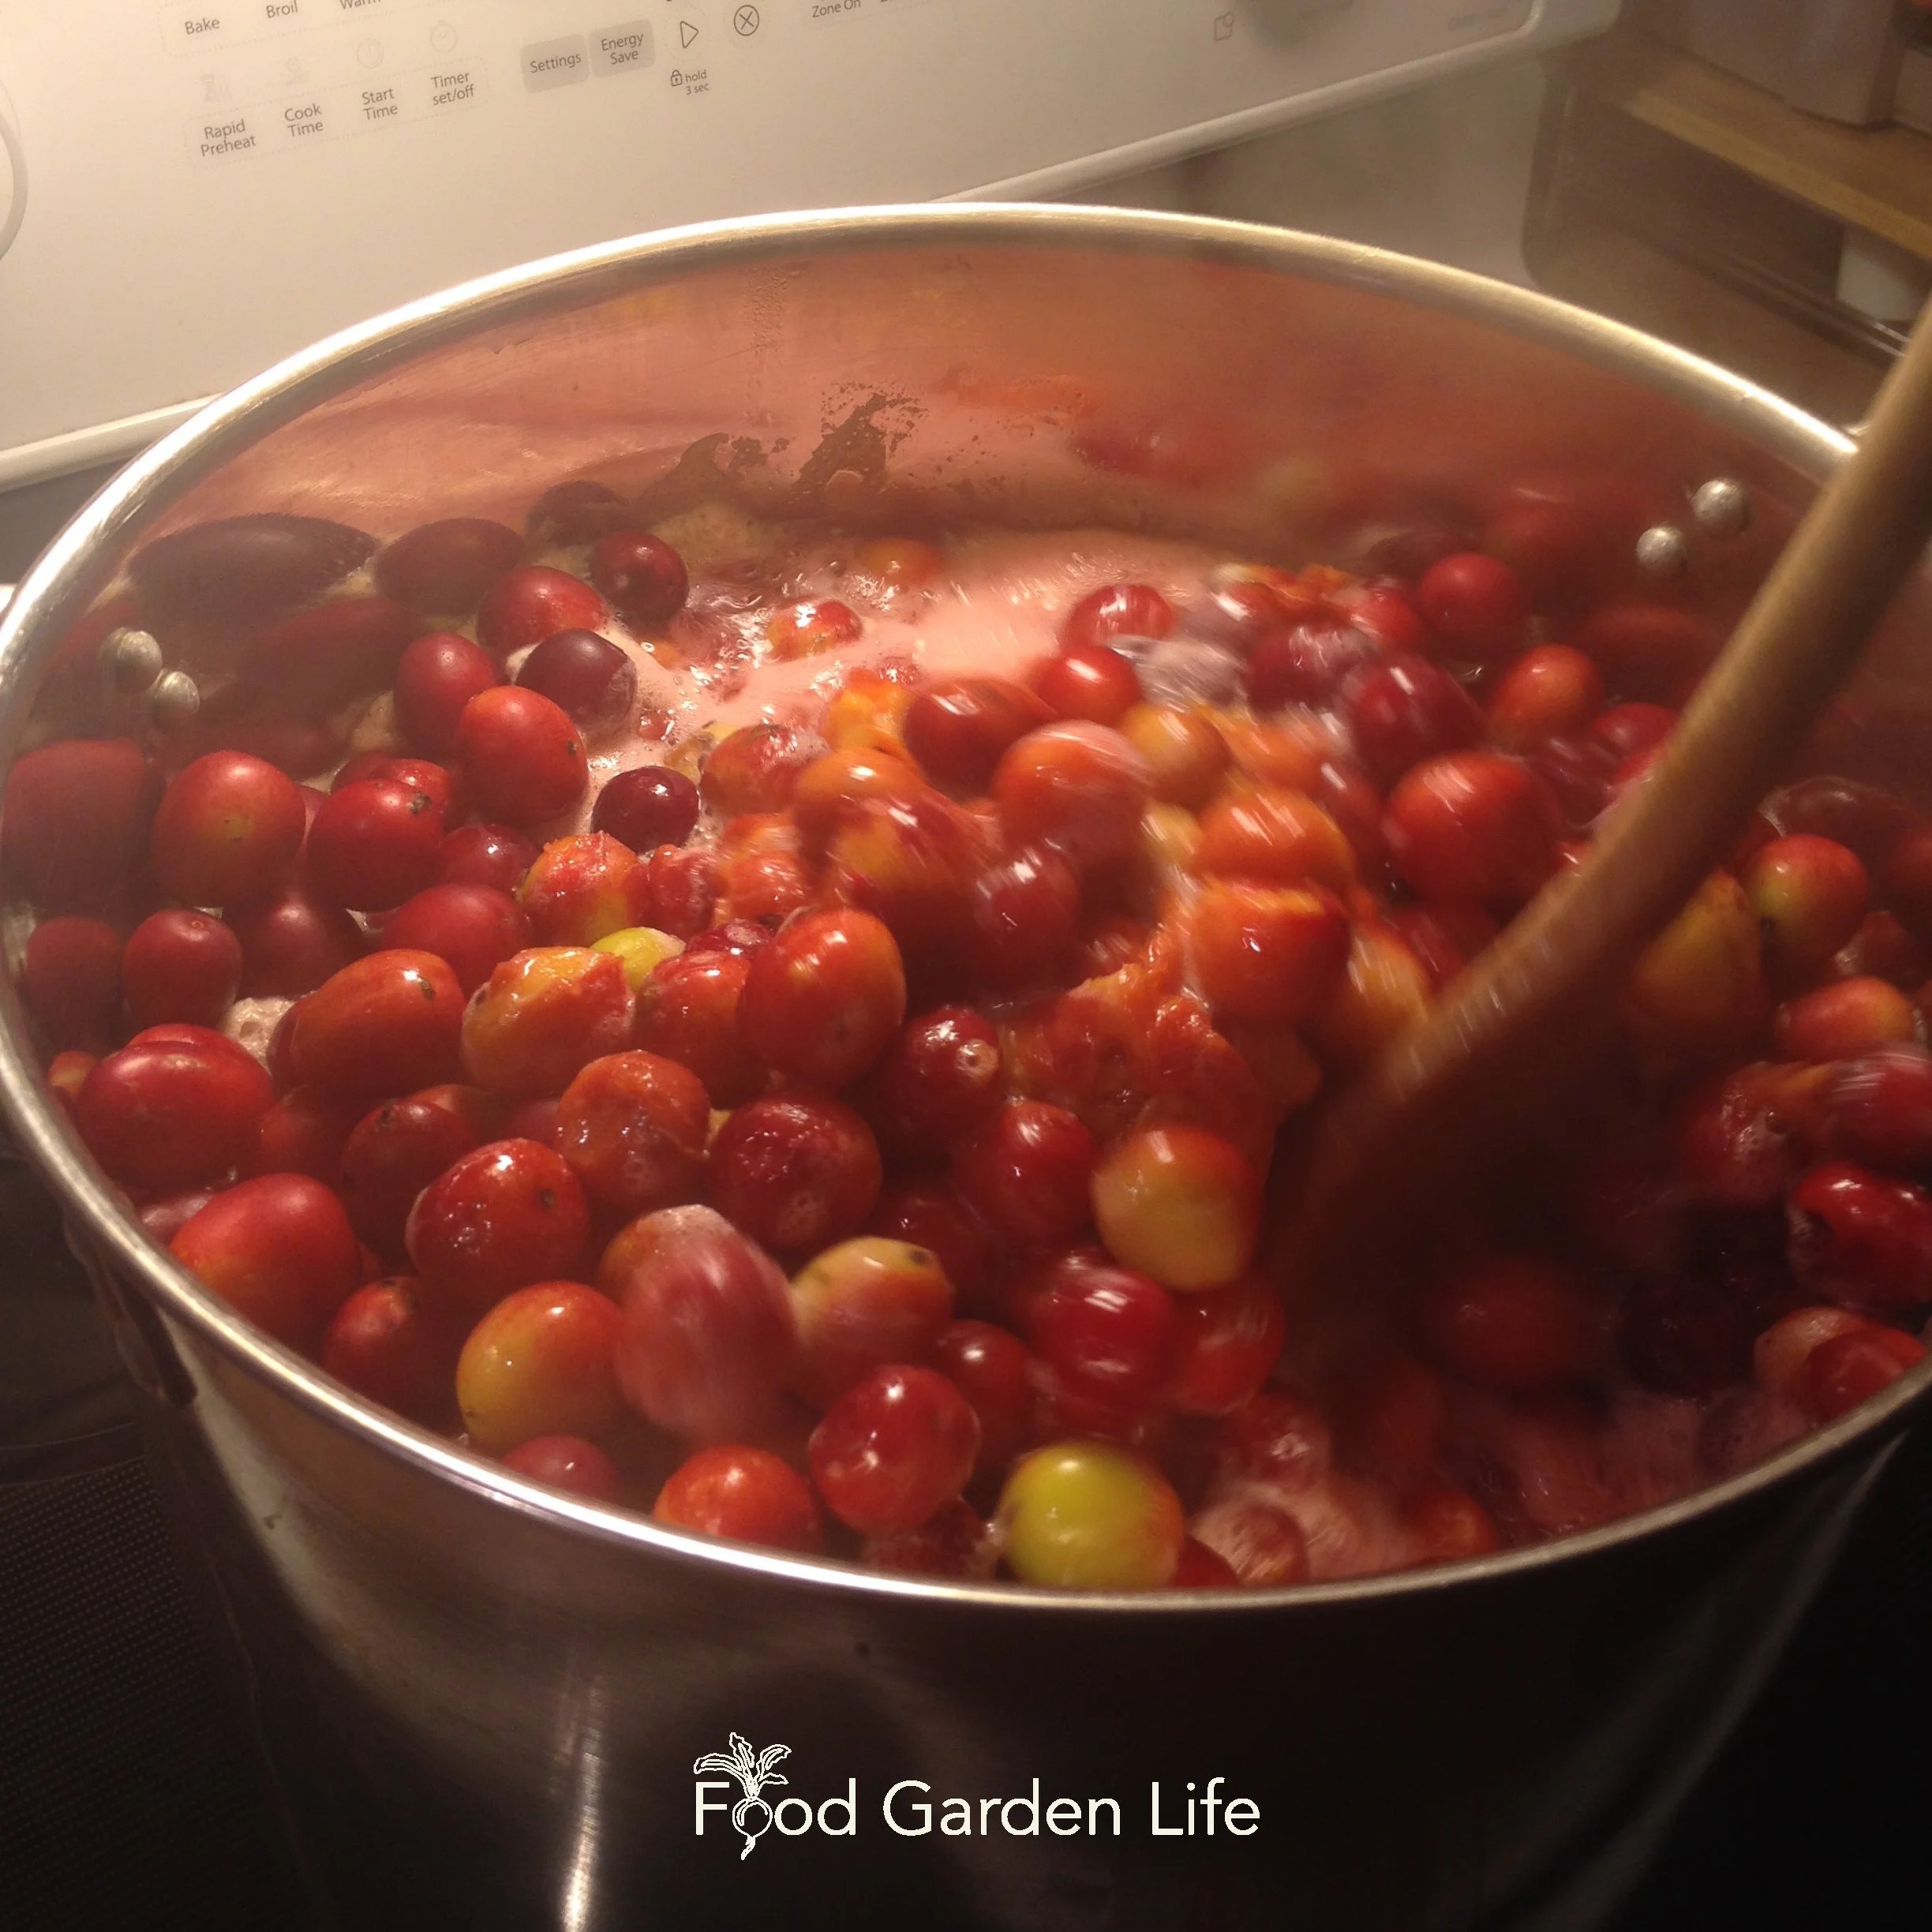
Cooking wild plums from the hedgerow.
Whenever I see a perfectly clipped cedar hedge boxing in a yard, I wonder what it would look like to instead have a perimeter of edible plants. An edible hedge.
An edible hedge is just a row of food-producing trees, shrubs, and herbaceous plants:
It can be a row of a single type of plant, like my former currant hedge – or it can be a mixed and layered planting, sometimes called a “food-forest hedge”
It can be manicured – or it can look more natural, like that plum-laden hedgerow
The plants in your edible hedge can have different edible parts:
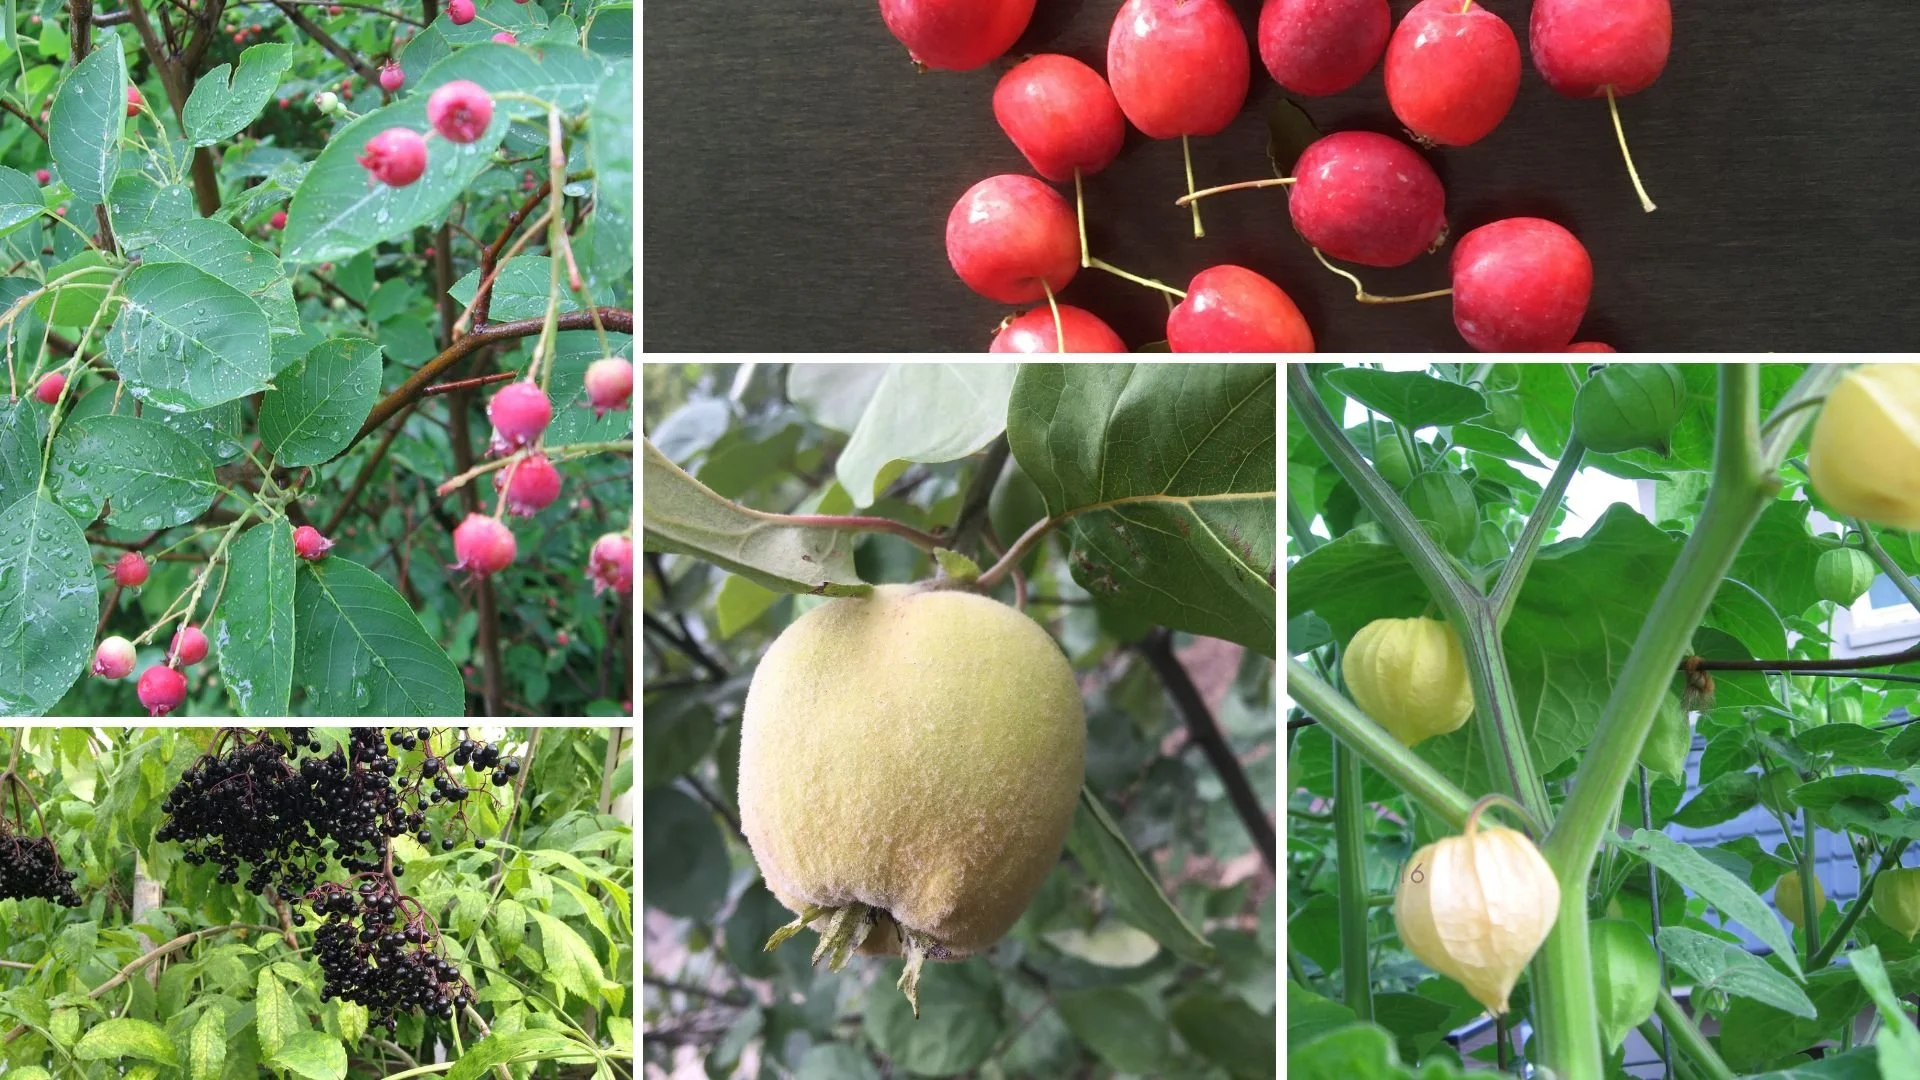
Fruit (e.g. plum, blueberry, elderberry)
Nuts (e.g. hazelnut)
Flowers (e.g. rose, elderberry, redbud)
Leaves (e.g. grape leaves)
What is a Food-Forest Hedge?
Pin this post!
With a food-forest hedge, we take the idea of an edible hedge and weave in ideas used in permaculture, giving a dense, mulit-layered planting.
Whichever approach you prefer, with a diverse planting you can get a staggered harvest. In a home garden we’re focusing on a hedge for year-long grazing. We’re not trying to replicate the way a commercial grower maximizes yield over a short period.
One other thing: The more diverse the mix of plants in your edible hedge, the better your “garden insurance.” If one plant flounders, another takes over.
Using Edible Hedges in an Edible Landscape
There are different ways you can weave an edible hedge into an edible landscape.
Backbone. Use the hedge as the backbone of your garden, the feature that leads you into your space. I’ve often seen deep yards with long perennial beds that serve this goal…why not an edible hedge?
Backdrop. Your edible hedge is at the perimeter of your space. It defines the space, gives you privacy—and gives you food.
Windbreak. In open areas where wind is a challenge, use your edible hedge as a windbreak.
Garden room. Use your edible hedge to separate part of your yard and create a separate garden room.
Create Your Own Unique Edible Landscape
That fits for your yard, and your style!
Remember the Rules…and Maybe Break Them
If what I’ve said so far sounds like blasphemy to you—if you’re picturing a tangled mess—here’s a bit more to think about:
Small-space gardens don’t have to follow the rules that orchardist follow or that textbooks prescribe. You can plant multiple fruit trees in one hole! Check out these ideas from Dave Wilson Nursery.
Permaculture orchardist Stefan Sobkowiak joined me on The Food Garden Life Show to talk about his orchard system of “trios” that mixes up different fruit tree species with nitrogen-fixing trees. You can tailor the same sort of “polyculture” to your yard. Tune in here to hear about his system.
Gardening is a great cure for perfectionism.
Edible Hedge Plants Ideas
Here are plant ideas for your edible hedge, edible food-forest, or hedgerow.

Barberry bush in the winter. The berries are edible.
Barberry
I love barberry for the red berries that last right into the winter. Beautiful—and edible. (Try dried barberry with rice.)
Blackberry and Raspberry
Raspberry canes sucker a lot, so be prepared for them to spread. My thornless blackberries are well behaved and don’t sucker. (But they do “tip layer.” Here’s more on tip layering.)
Some raspberry varieties fruit only in summer. Some also fruit in the fall. Take your pick.
Blueberry
Not something I grow here because my soil isn’t ideal, but a staple for edible hedges where it grows well.
Bush Cherries
There are a few different members of the cherry family that have a bush-like growth habit and can be a good fit for an edible hedge, edible landscape, food forest, or hedgerow.
Nanking Cherry
Dwarf Sour Cherry
Evan’s Cherry
There are also a couple of native cherries that grow as small trees or bushes—and you can prune them so that they have a bush form.
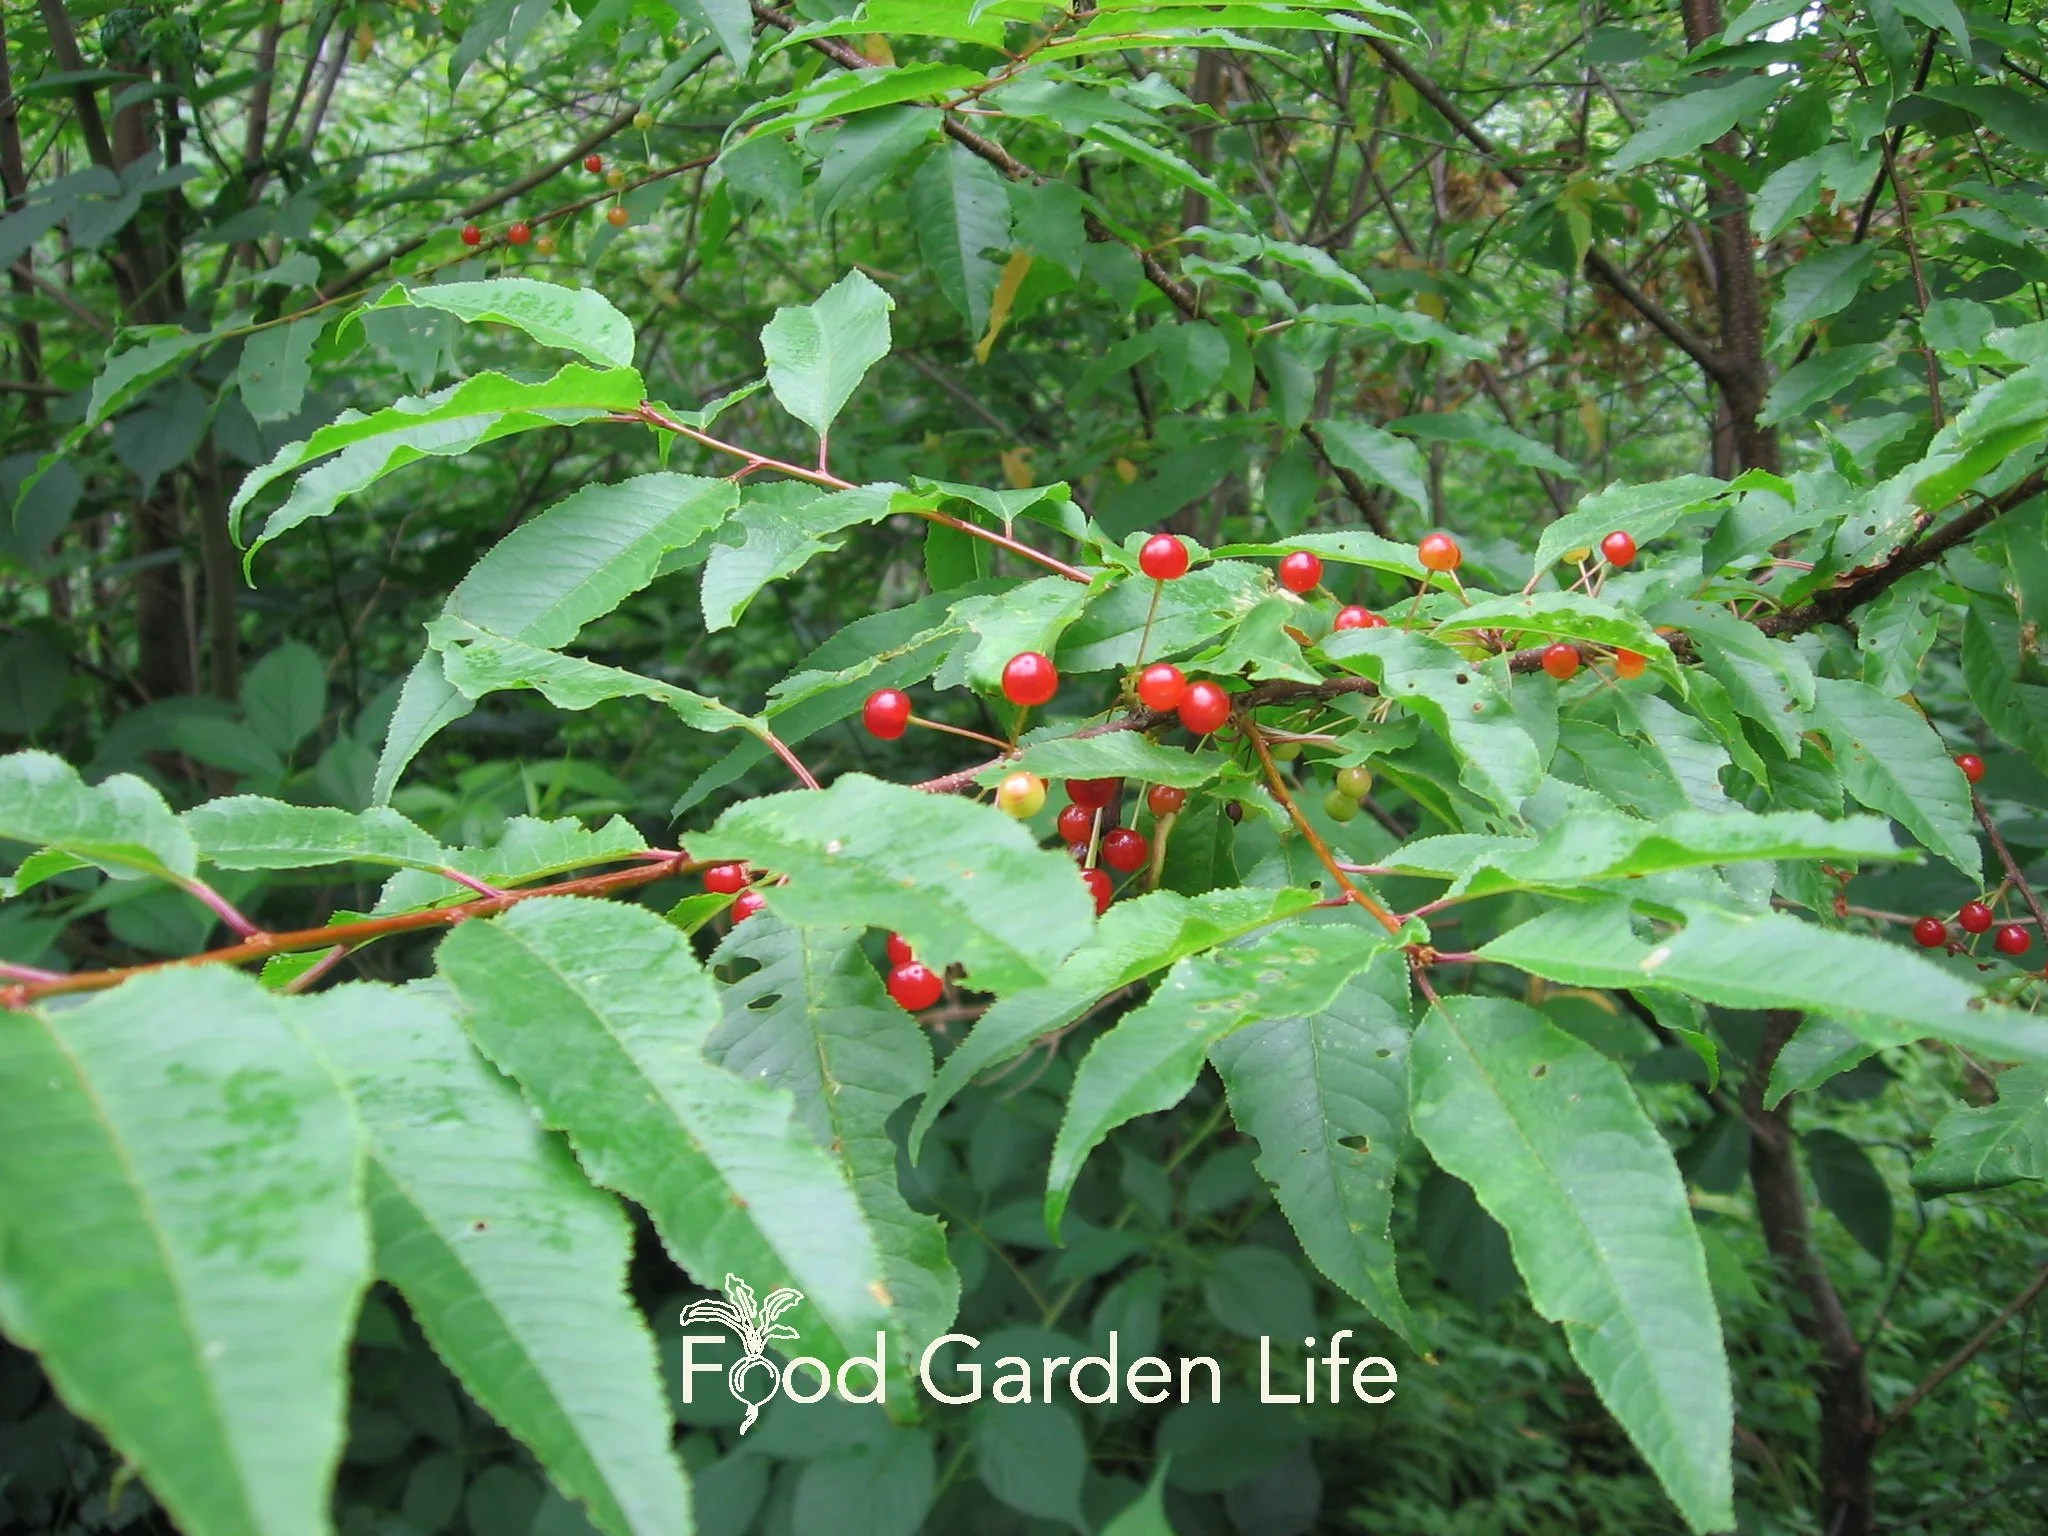
Pin cherry, a native cherry that works well in an edible hedge.
Chokecherry
Pin Cherry
Find out more about different cherries for your edible hedge.
Take a deep-dive into Nanking cherry.
Cherry Plum
The cherry plum (Prunus cerasifera) isn’t too common in the landscape trade—and that’s a pity. It’s extremely cold tolerant, had attractive spring bloom, edible fruit, and nice fall colour.
Chokeberry
The chokeberry (Aronia melanocarpa) is a native North American shrub that is often overlooked. It’s also simply called “aronia” sometimes. The fruit has pucker power, but mixed with other fruit in smoothies, or made into a syrup, it’s great.
Hear more about aronia in this chat with agronomist Laurie Brown.
Crabapple
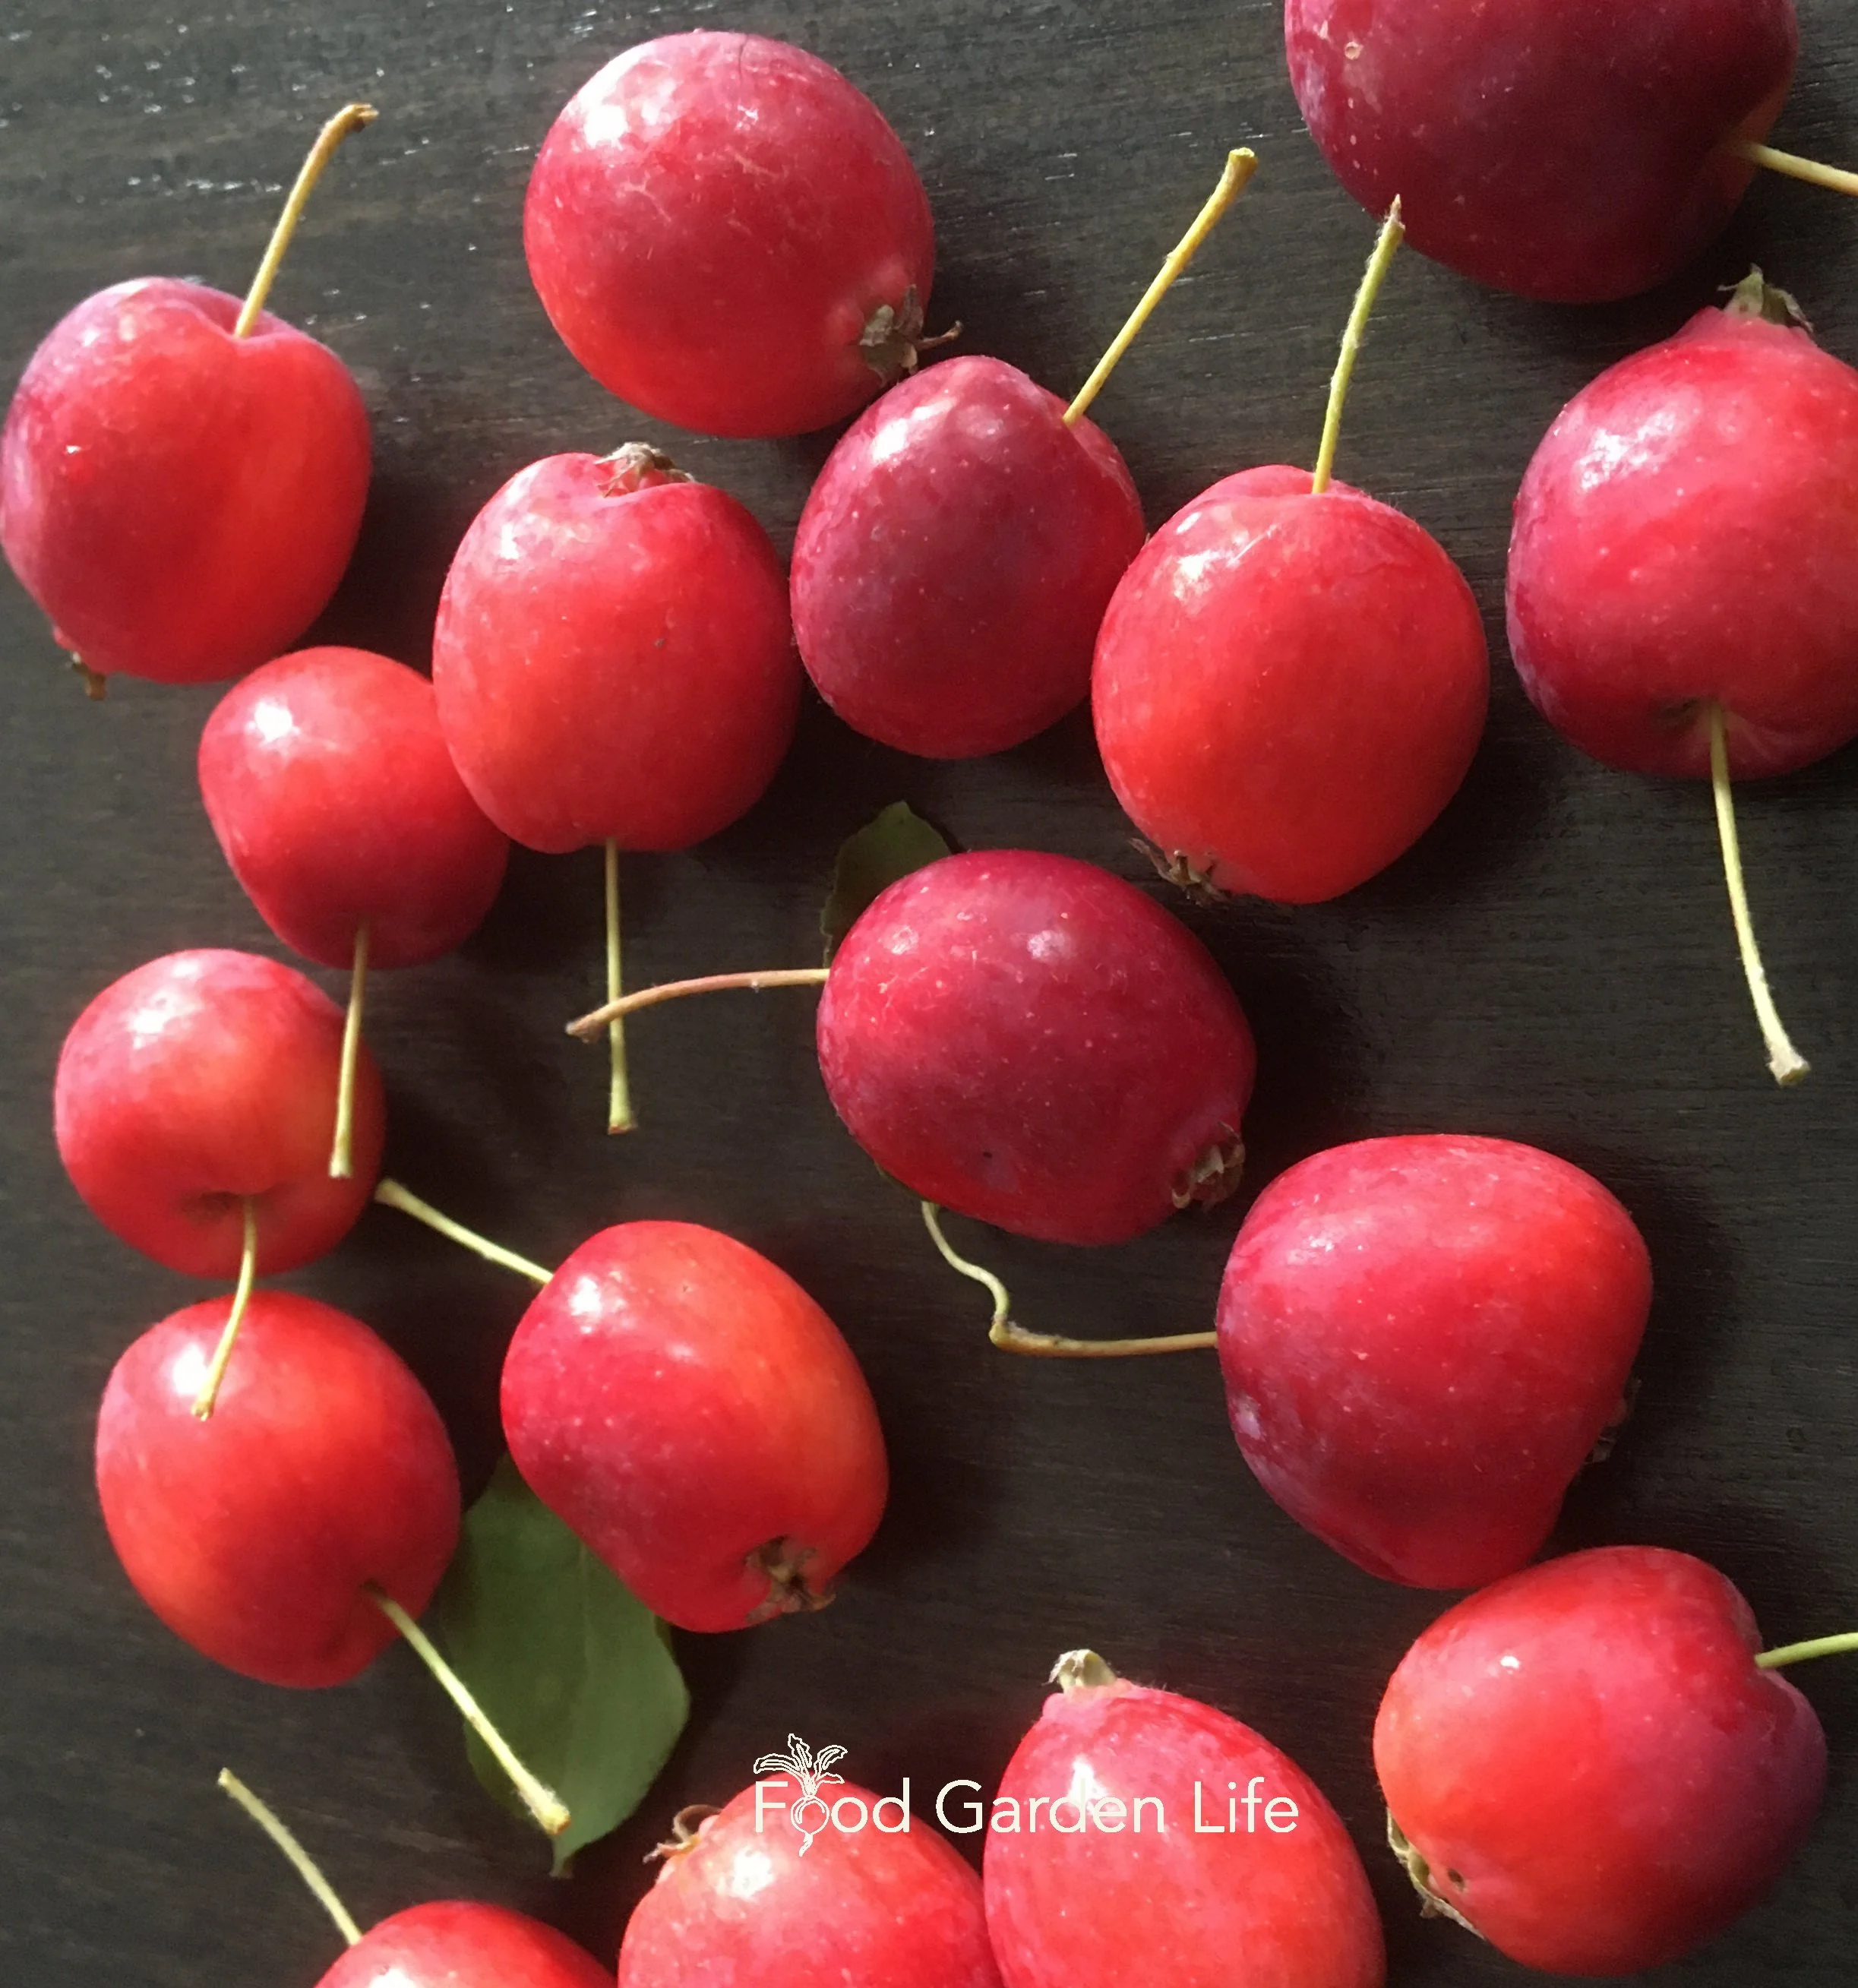
Dolgo crabapples.
There’s crabapple…and then there’s crabapple! Some are small and horrid, so sour and astringent that you’ll regret tasting them.
But there are others that are so tasty you’ll go back for more. My favourite crabapple is ‘Dolgo,’ a variety known for its excellent culinary properties. (We make it into a beautiful red sauce—and into crabapple ice cream.)
Currants
I have a lot of good things to say about currants (Ribes sp.) for home gardeners in cold climates. They’re great for edible landscapes, edible hedges, food forests, and more! In a nutshell, they tolerate shade and poor soil, and still fruit well even when not pruned to perfection.
Find out how to grow a great crop of currants.
Hazel
The American hazelnut (Corylus americana) is a fast-growing shrub that’s very cold hardy. If it weren’t for the army of squirrels that marches on my garden as soon as anything emerges, I’d have lots of hazel.
Like currants, it does fine in poor soil.
(And one more idea for you: If you’ve ever thought of coppicing as a way to produce your own garden poles and stakes, hazel is a good candidate.)
Hardy Kiwi
Here’s an easy-to-grow, hardy fruit vine that can be a nice addition to an edible hedge.
Hear about hardy kiwi as we chat with agronomist Laurie Brown.
Rose
Rose petals are edible, and rose hips (the fruit) are good for teas, jellies, and liqueurs.
Whatever you do, don’t put a hybrid tea rose or a fussy floribunda rose in your edible hedge. Get a disease-resistant shrub rose.
Elderberry
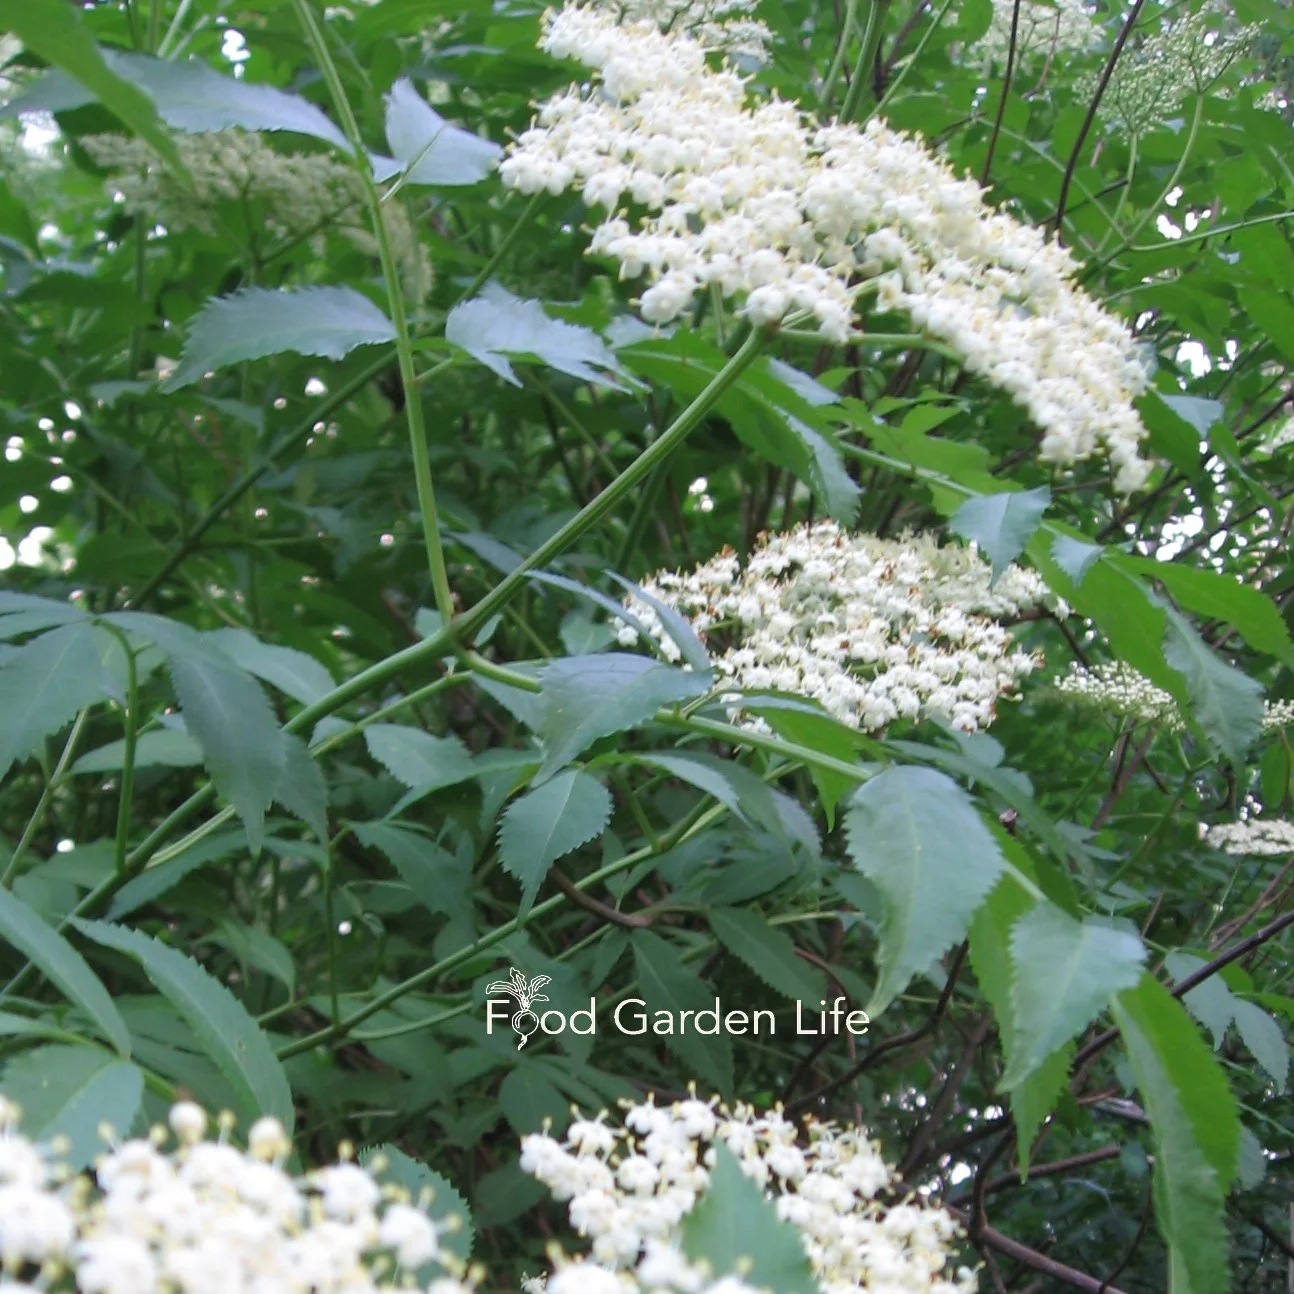
Flowers on elderberry are edible too!
Elderberry (Sambucus canadensis) has both edible fruit and flowers. We make elderflower champagne and elderberry syrup.
Elderberry tolerates partial shade and moist conditions. My first elderberry patch was from a wild plant I dug at a friend’s farm. But there are also improved varieties for larger fruit size and increaded yield.
Hear our chat about elderberry with agronomist Laurie Brown.
Grape
Probably not for those who want a more manicured look…but a grape vine can wend its way through a hedge until if finds space and light.
Remember, along with the fruit, young grape leaves are great for making dolmades (stuffed grape leaves.)
Looking for grape variety ideas but not sure where to start? Hear about “Canada’s Grape.”
Haskap
Haskap (Lonicera caerulea) is a very cold-hardy bush with fruit that looks like elongated blueberries.
They’re a great fit in a mixed planting such as an edible hedge because they’re the first fruit of the summer, usually ready at the same time as strawberries.
Hear our chat with Haskap breeder Bob Bors.
Highbush Cranberry
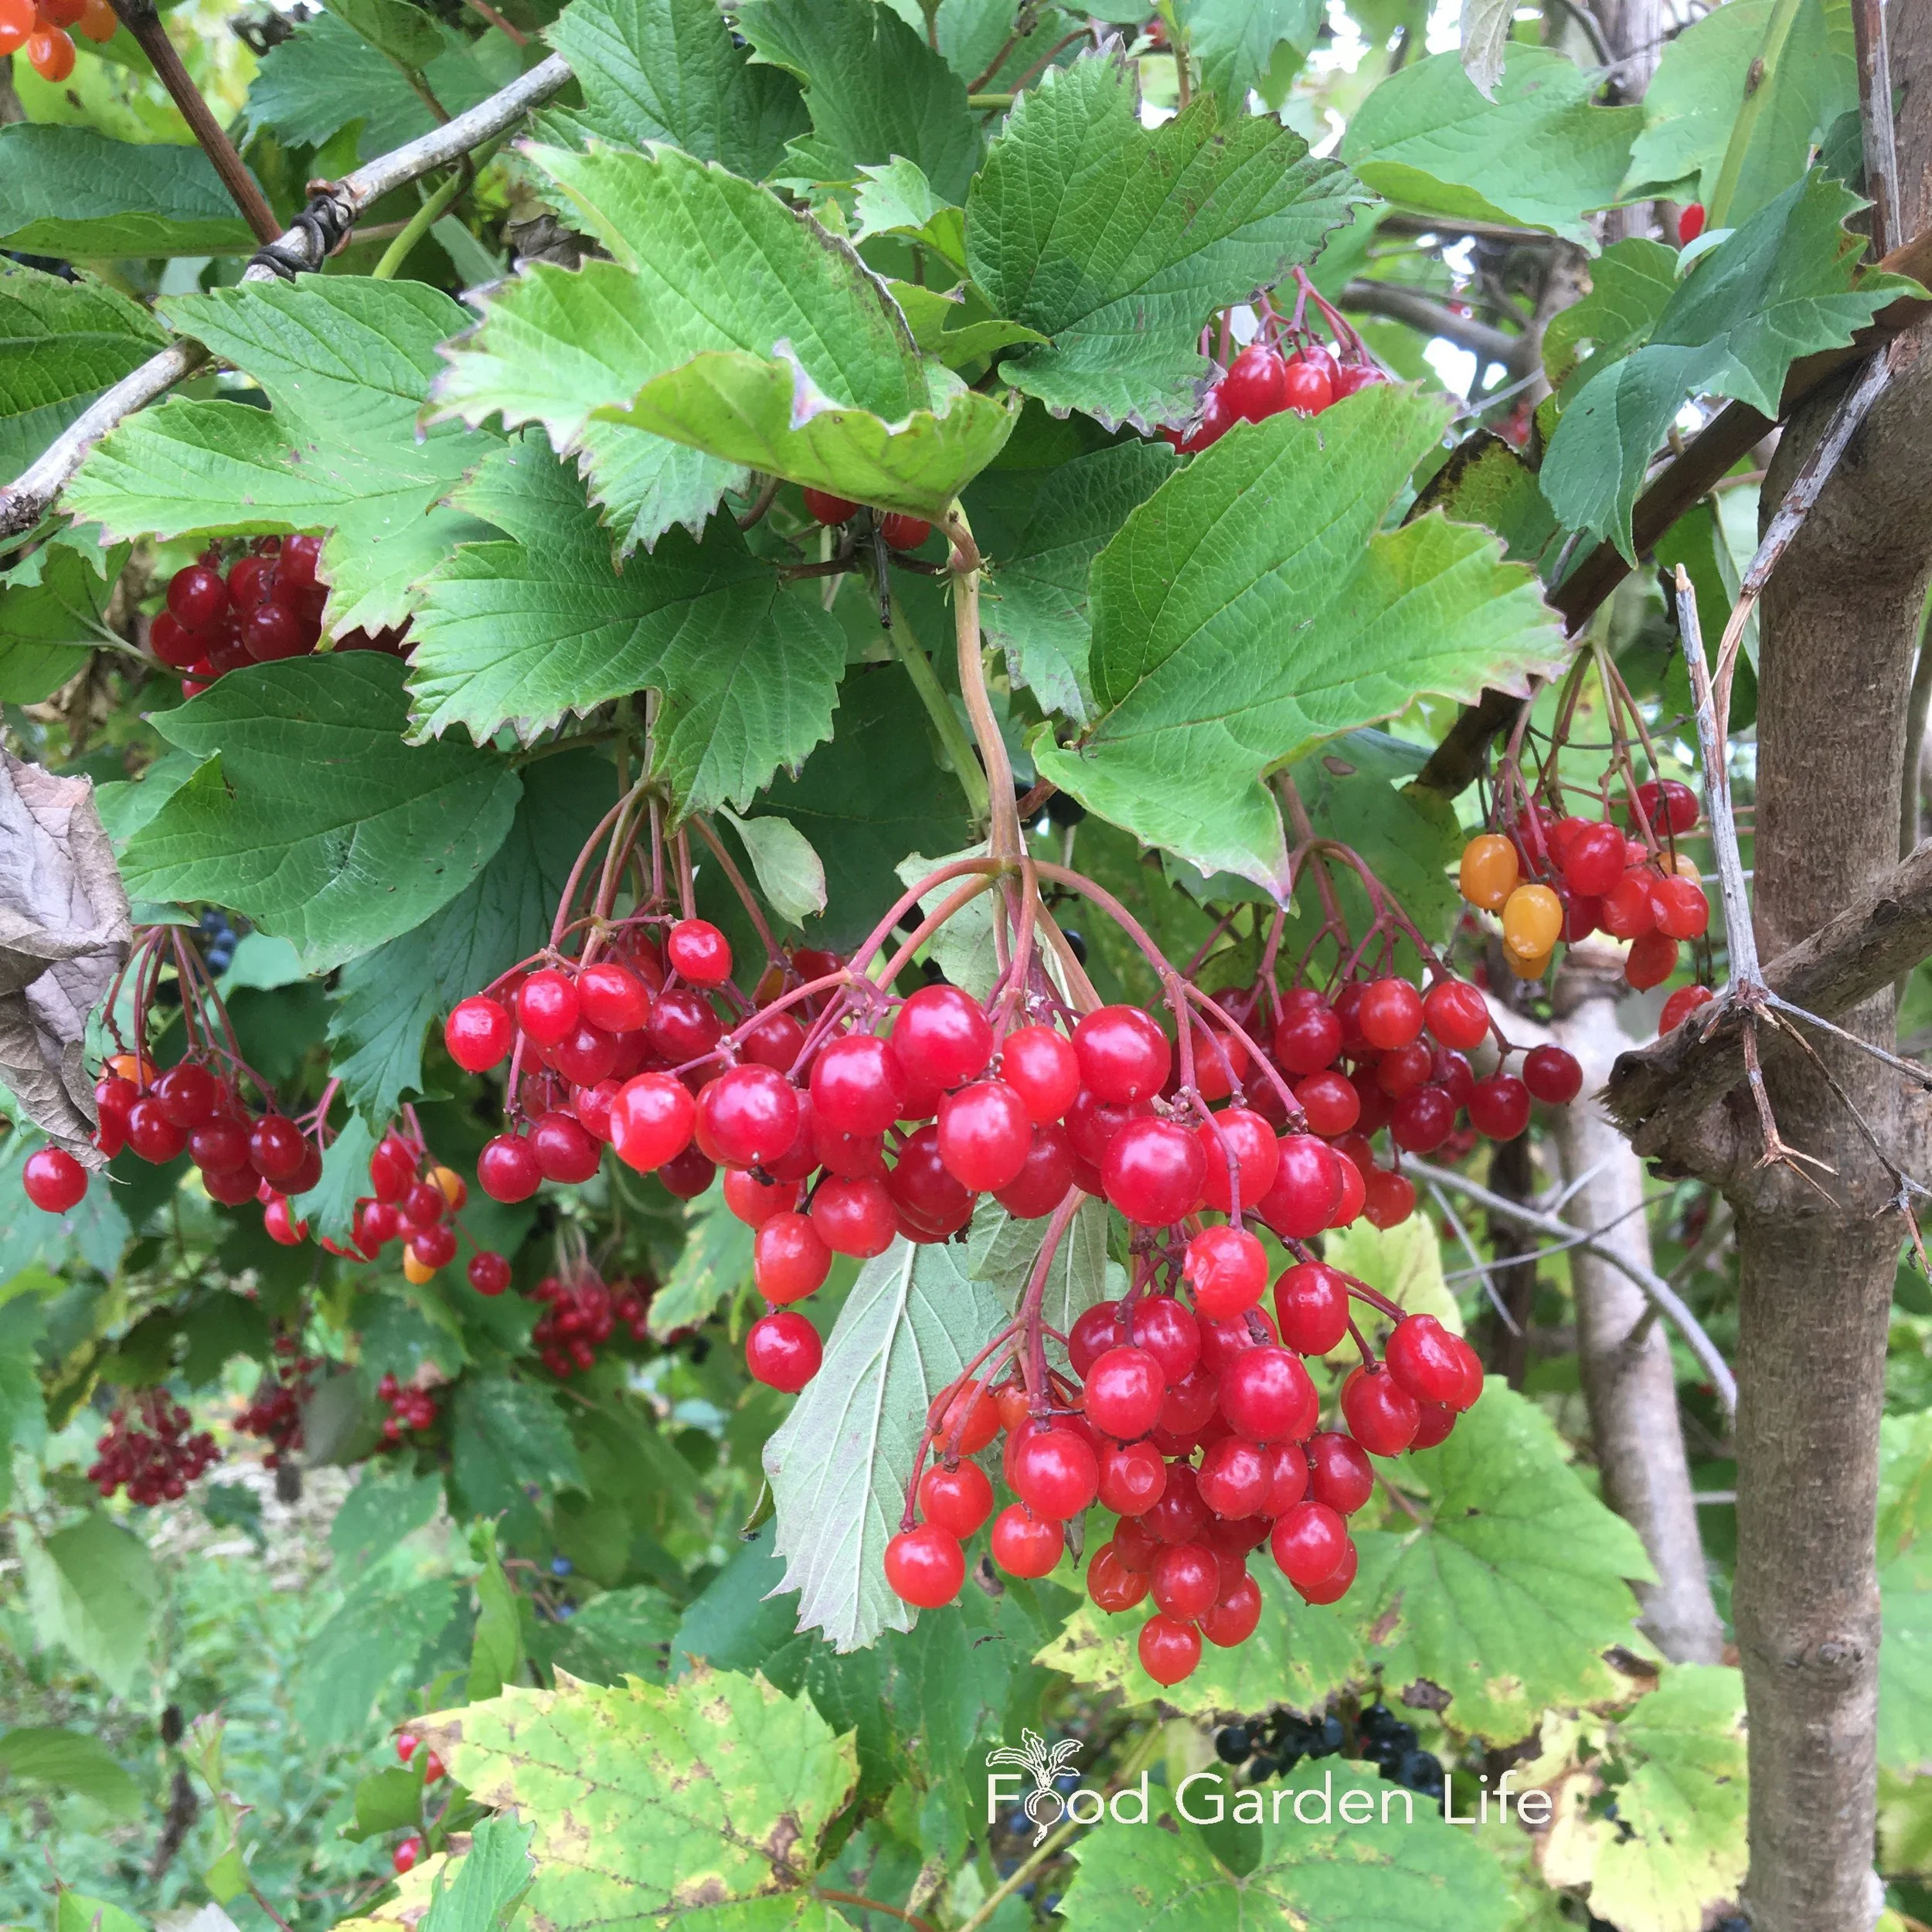
Highbush cranberry fruit.
Highbush cranberry (Viburnum trilobum) is a native North American plant that’s very cold-tolerant. It looks very nice too. There are flowers mid-summer, bright red berries for winter appeal, and you don’t harvest until after there’s been frost.
Like elderberry, it’s a good candidate for areas with more soil moisture.
(Highbush cranberry is not related to commercially produced cranberries.)
Hear foraging expert Robin Henderson talk about foraging highbush cranberry.
Plum
You have lots of choice when it comes to plums. There are wild plums, European plums, Japanese plums—and plum relatives such as damsons.
I planted damsons because I can’t find the fruit for sale anywhere…and I remember the damson-jam tarts my Nana made for me when I was a kid.
Quince
There’s the quince tree (Cydonia oblonga), and also the unrelated Japanese quince bush (Chaenomeles sp.). Both give fruit that’s too hard and acrid to eat when picked—but which can be cooked into marvellous delights.
Find out more about how to grow quince.
Sea Buckthorn
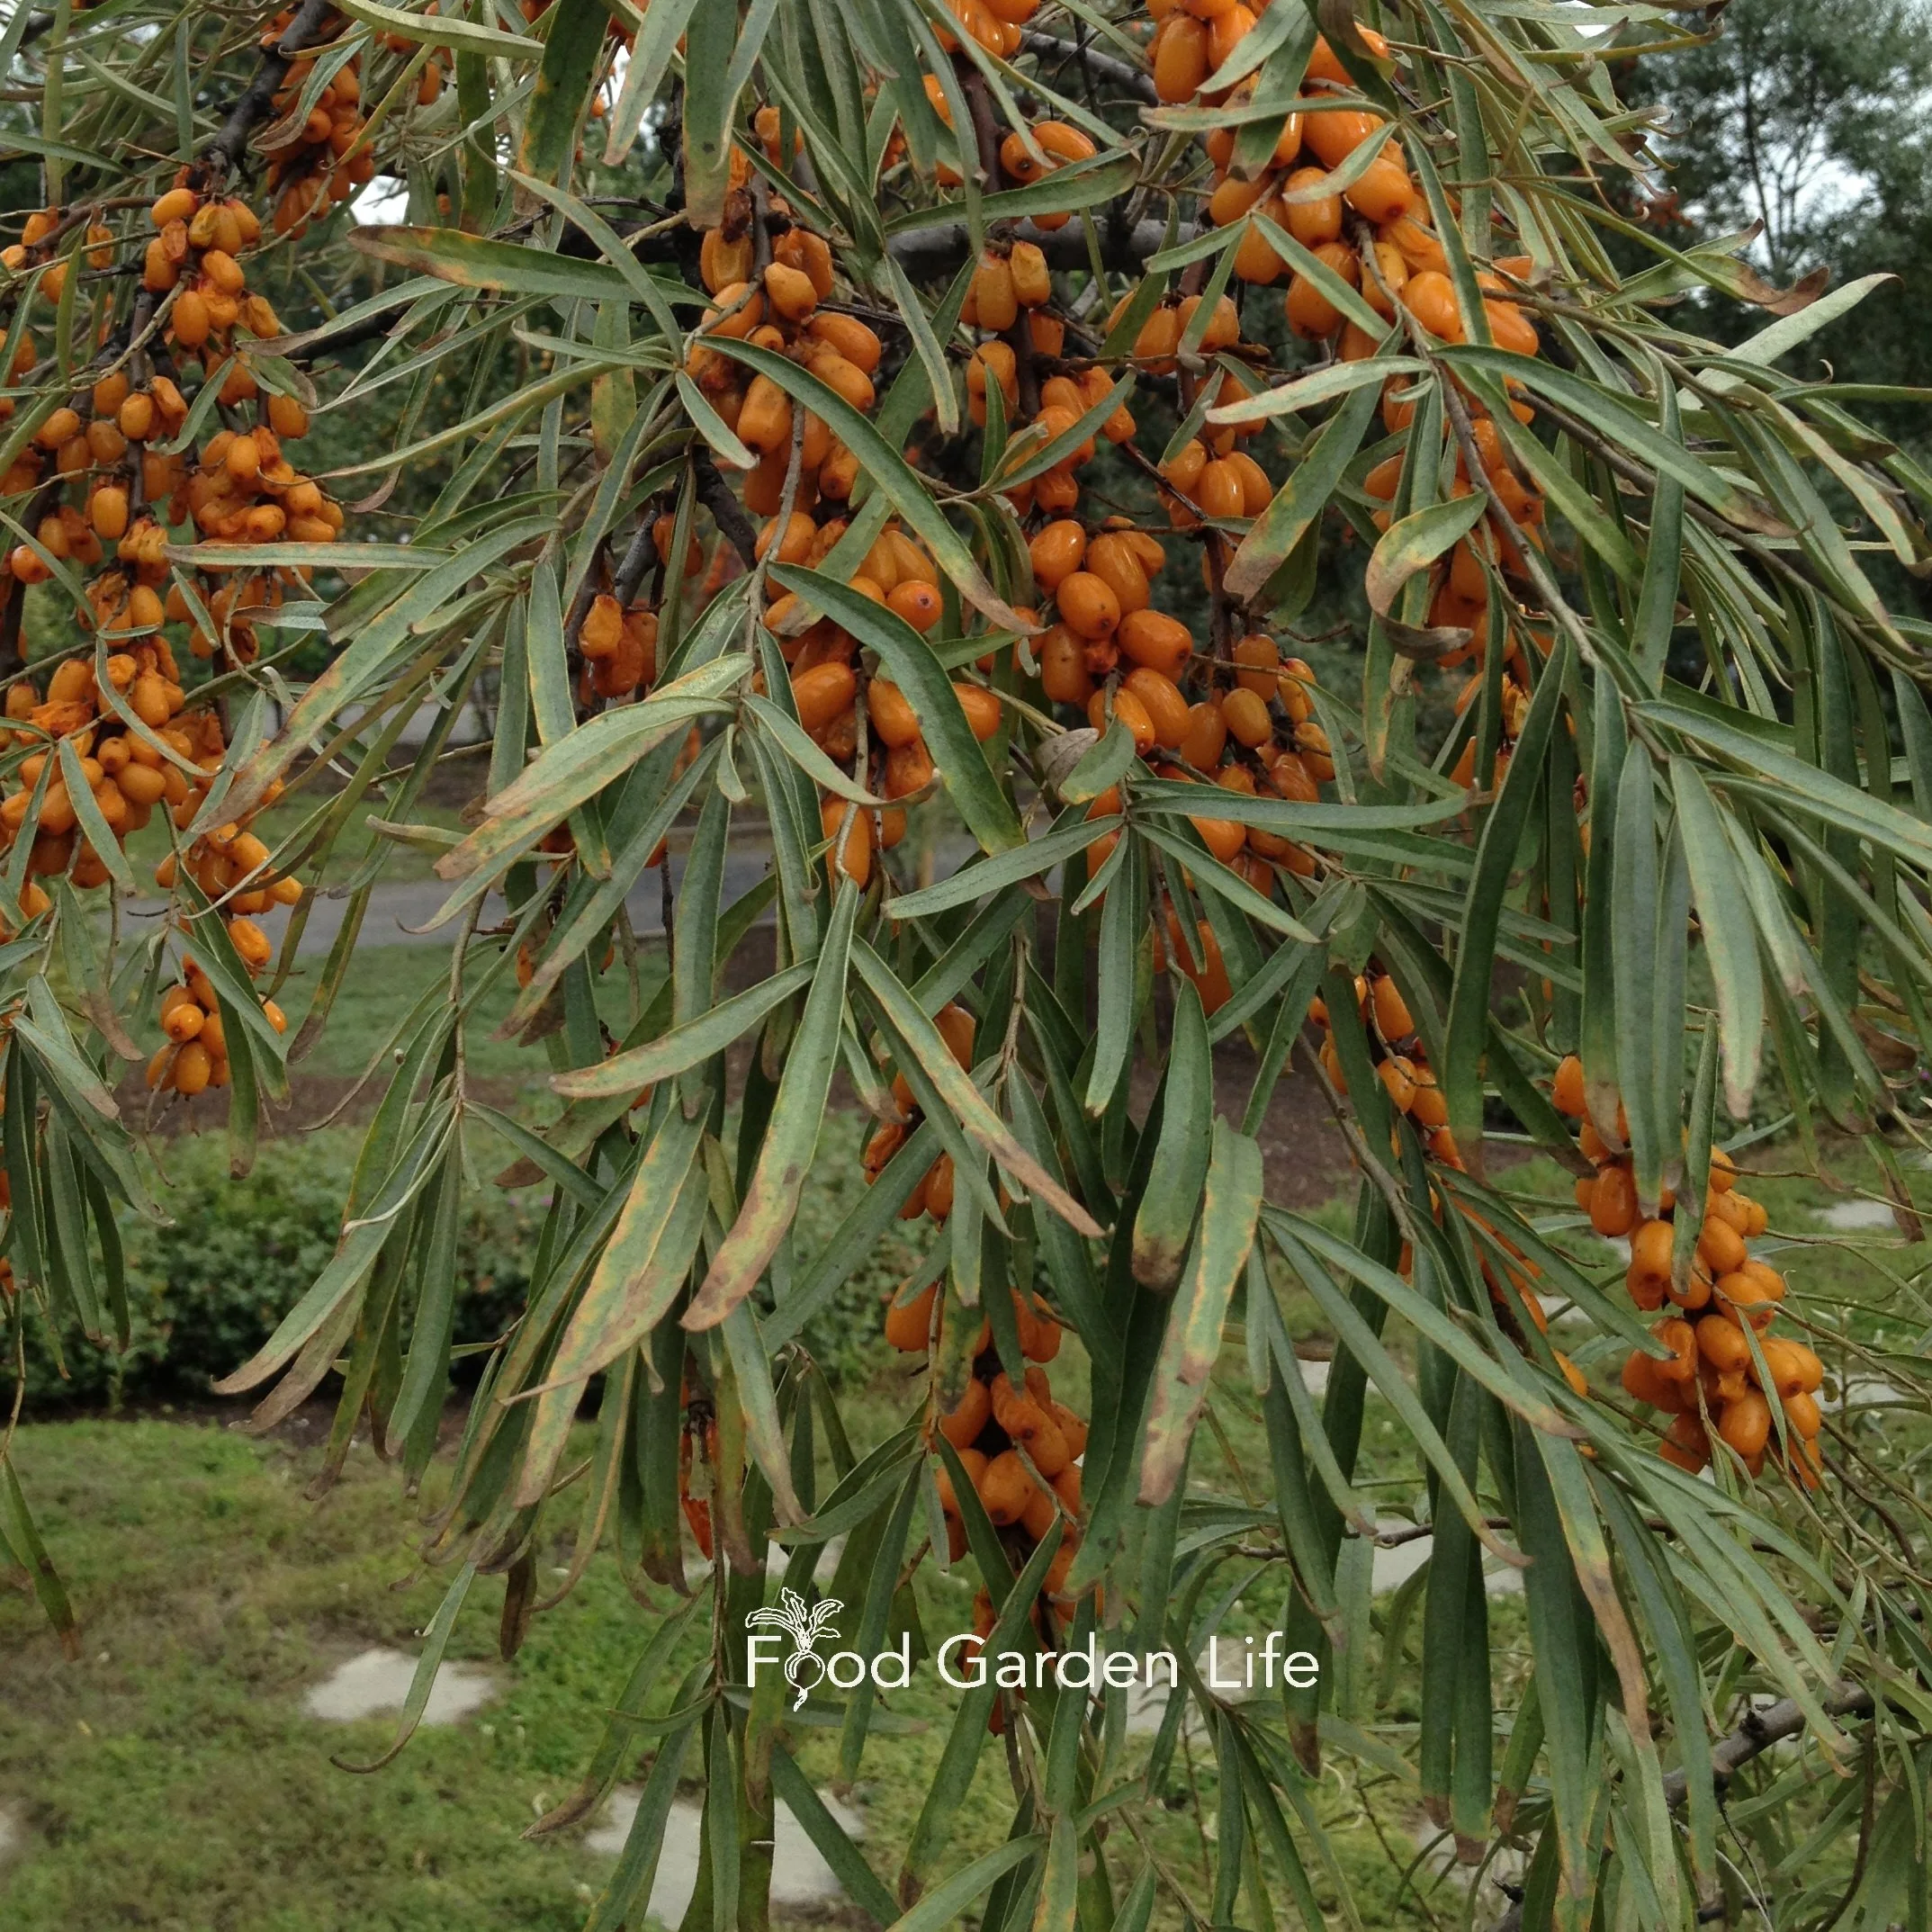
Sea buckthorn adds nice contrast to an edible hedge.
Sea buckthorn (Hippophae rhamnoides) is a super tough, wind, heat, and drought-resistant plant that grows in poor soil.
The silvery leaves and orange berries make it a beautiful addition to an edible hedge (although I can’t say I’m in love with the taste…)
Hear agronomist Laurie Brown talk about sea buckthorn.
Serviceberry
With serviceberry, we’re talking about a family of related fruiting bushes and small trees. Also called Juneberry in the USA. Saskatoon berry is a member of this clan that’s grown commercially, and has many improved varieties.
Find out how to grow the Saskatoon berry (a.k.a. Juneberry).
You Don’t Have to Rule Out Tree Fruits
If you’re not worried about a manicured hedge clipped to a low height, remember that you can add in fruit trees too.
And you don’t even have to grow them as trees…as Dr. Ieuan Evans tells us, many of what we think of as tree fruits can grow as bushes too. Find out more about growing fruit trees as bushes.
Remember You Can Add Herbaceous Plants
Permaculture design encourages multiple layers, something you can incorporate into an edible hedge.
Read about perennial edible plants for edible landscapes.
Looking for More Ideas?
Looking for more food-hedge ideas? Hedgerows might give you inspiration.
How About an Alcoholic Hedge?
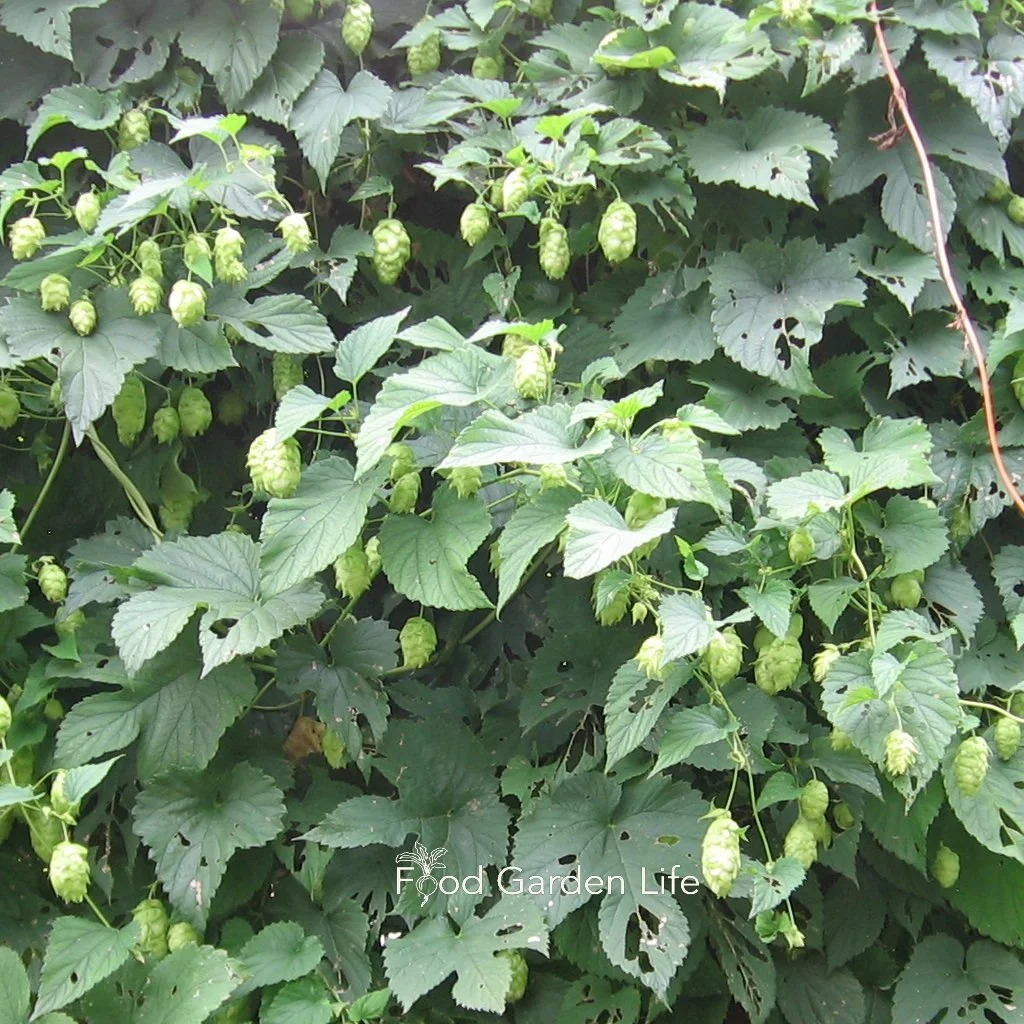
Hops as a hedgerow plant.
UK garden designer Matt Rees-Warren talks about hedgerows with food plants such as blackberry, sloe berry, hops, raspberry, and hazelnuts.
Wondering about sloe berries? They’re in the same family as plums—and are often used to make sloe gin. That’s why Rees-Warren says sometimes these hedgerows are called, “alcoholic hedges.”
Edible Hedges in Permaculture
Permaculture farmer Tim Southwell in Montana grows what he calls a “food hedge” (or “fedge”) on his permaculture farm. It provides privacy, blocks wind, attracts birds, and keeps livestock where they are supposed to be.
Find out more about Tim’s food hedge.
Edible Hedges Have Much in Common with Forest Gardens
Dani Baker is a forest-garden expert. A forest garden, like a food-forest hedge, is set up with layers of edible plants, designed to be a self-sustaining system once established.
Many of her ideas can be applied to an edible hedge. Hear about how to grow a home-scale forest garden.
Edible Hedge Hints and Tips
Pick plants for your garden hardiness zone.
Think of sunlight…but don’t be a perfectionist, because a hedge isn’t a perfect setting for a crop.
Mulch so that weeds don’t get the upper hand.
FAQ

Pin this post!
How do I prune an edible hedge?
If you a growing an edible hedge with a number of different plants in it, forget having a manicured, uniform hedge.
Prune each of the different plants within the hedge to optimize fruit production. For example, elderberry fruits best on second-year branches—so when you get to your elderberry bushes, prune away many of the old branches to encourage new growth.
I said above to forget the notion of a manicured hedge, but that doesn’t mean you can’t pick a maximum height. You might want to cap the height so you can harvest without a ladder. (That’s what I do with my pawpaw trees, keeping them short enough to pick from the ground.)
But what about birds?
Depending on where you are, you might find that some of your edible crops are very attractive to birds. I know that my haskaps are ripe when I see robins darting into the bush!
My approach to birds is to pick fruit that they favour in good time. The longer it’s on the bush, the more they get. This doesn’t mean picking the fruit before it’s ripe—but not waiting long once it’s ripe. I don’t get as much as I would if I netted the bushes…but netting takes time.
What about plant spacing for edible hedges?
Spacing recommendations are often for commercial production. A hedge is different; we’re creating a dense, layered mix of plants. Don’t be afraid to play around with spacing.
What if my garden is shady?
If your garden is shady, you can’t grow everything I mentioned above. But you DO have options. Find out more about plants for shade.
Find This Helpful?
Enjoy not being bombarded by annoying ads?
Appreciate the absence of junky affiliate links for products you don’t need?
It’s because we’re reader supported.
If we’ve helped in your food-gardening journey, we’re glad of support. You can high-five us below. Any amount welcome!
More on Edible Landscaping
Need Help?
Get professional advice from horticulturist Steven Biggs.
Edible Gardening Course
Guide: How to Grow a Quince Tree
Find out how to grow a quince tree. It’s an unusual fruit that’s easy to grow in a home garden. (And it smells amazing!)
By Steven Biggs
Unusual Quince Fruit a Great Addition to the Garden
Quince fruit grows as a bush or small tree, and is a great fit for a home garden or edible landscape.
It’s rock hard. But looks soft and fuzzy.
It’s tart. But smells sweet…so sweet you wish you could eat the smell.
It’s quince fruit. And since I started growing a trio of quince trees in my Toronto garden, I’ve had fun experimenting with this versatile ingredient.
It works well in desserts:
Added to apple sauce
In an apple pie
It’s also great in savoury dishes:
Cooked in a tangine with meat
Pickled or poached
In my part of the world quince is hardy—but rarely found in home gardens or orchards.
But that doesn’t mean there are no quince roots nearby…because quince is often used as a rootstock for pears and medlar. (Read more about medlar here.)
Quince trees are easy to grow, but rarely grown in orchards and home gardens.
How to Grow Quince
Quince is an easy-to-grow tree fruit suited to home gardens, edible landscapes, and food forests. This guide to how to grow quince tells you what you need to get started.
Quince (Cydonia oblonga) is a naturally dwarf tree that grows 3-6 metres (10-20 feet) high. This makes it a fine choice for home gardens.
(It’s different from a common flowering landscape bush called Japanese quince or flowering quince, Chaenomeles spp.)
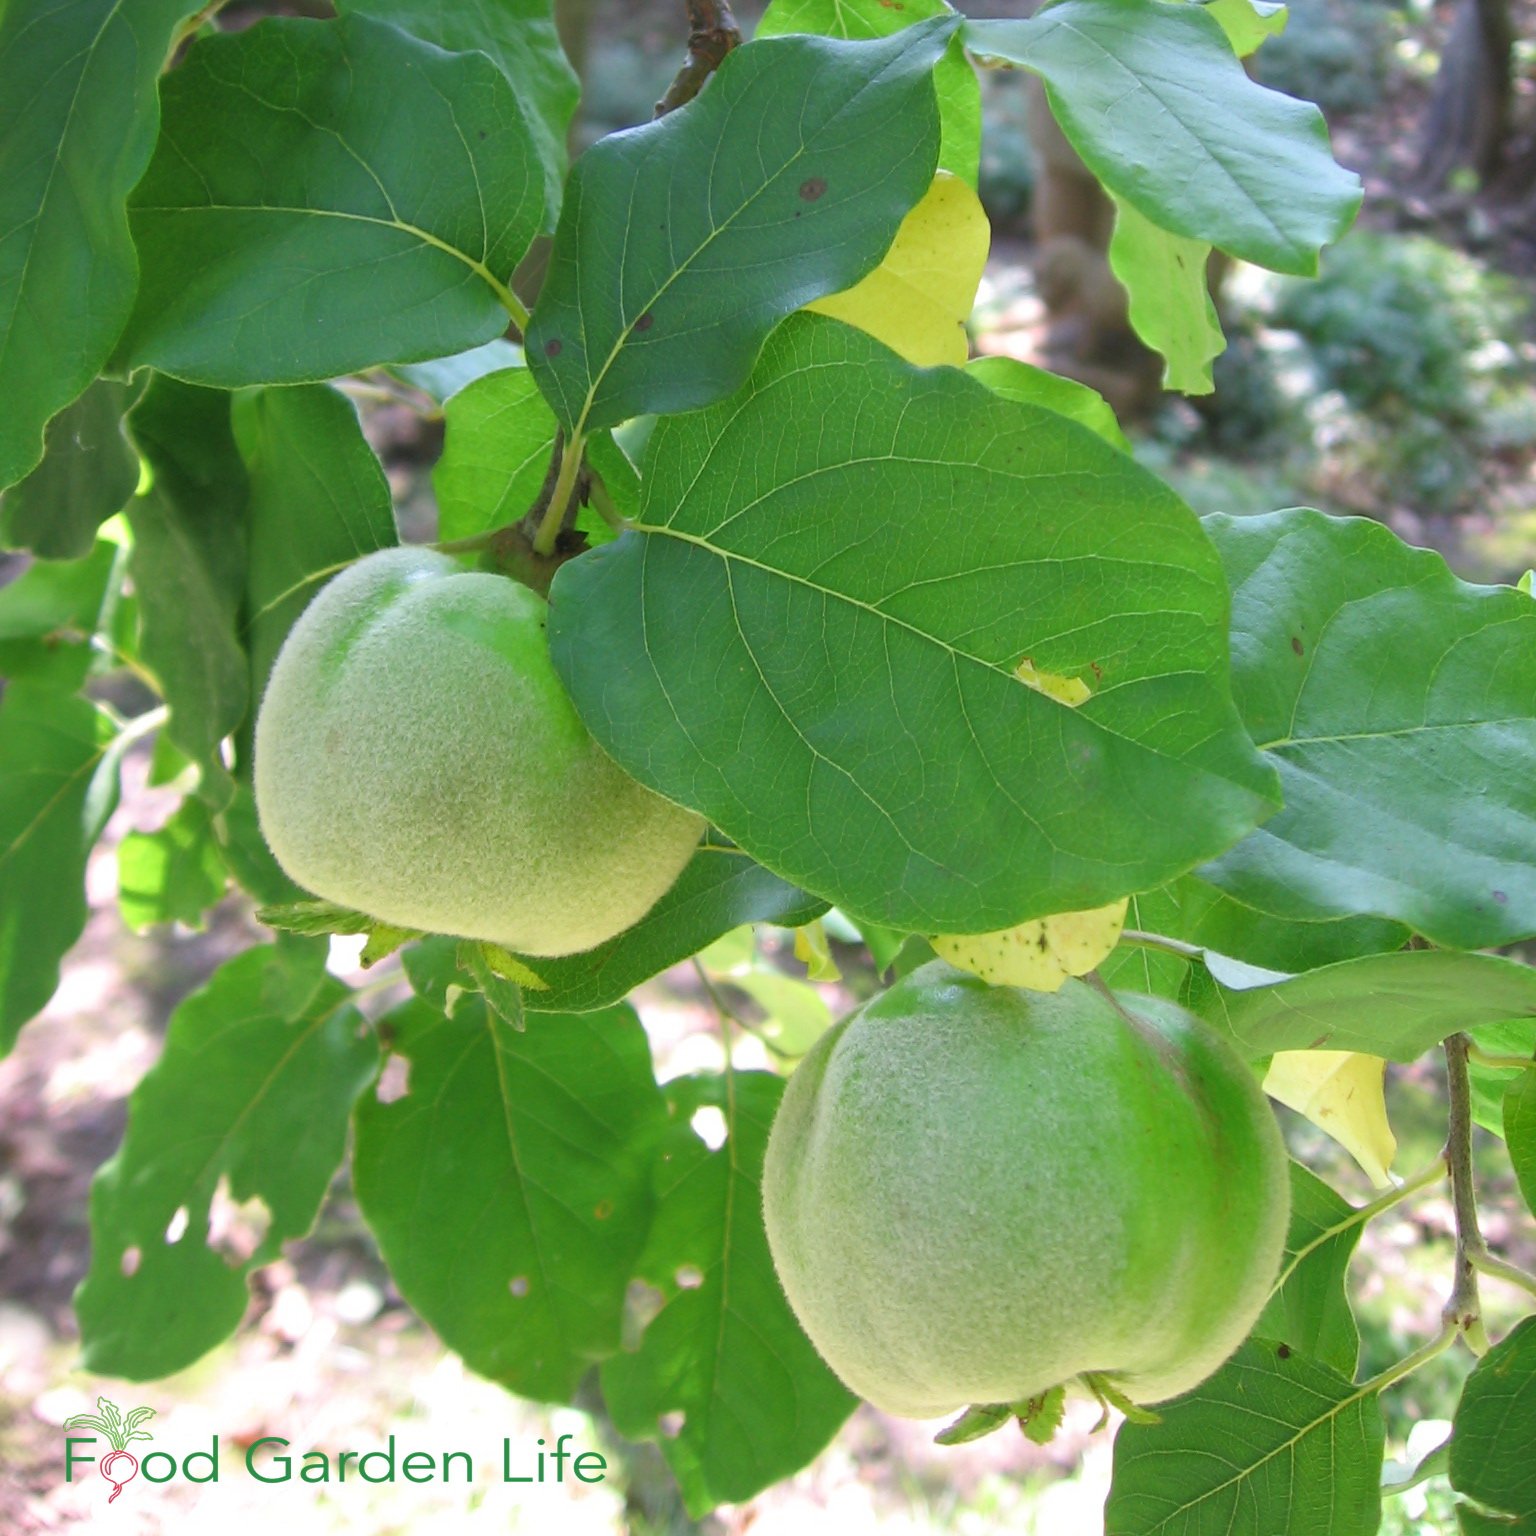
The quince fruit tree is related to apples and pears, so it’s no surprise that the fruit can resemble either. Some varieties give pear-shaped fruit, while some are apple-shaped. They are fuzzy, and ripen to a golden colour.
Pin this post!
The fruit grows on year-old wood and short spurs. Branches often droop from the weight of the fruit growing near the tip.
Best Location for a Quince Tree
Sunlight
Quince trees do best in full sun, but are tolerant of partial shade.
Sun helps with fruit ripening, so in areas with a short growing season, the more sun the better.
Soil
Quince grows in a wide variety of soil types. A well-drained soil that holds moisture is ideal. Dry, sandy soils are the least ideal.
They tolerate more soil moisture than many fruit trees, meaning that if you’re planting your yard and have a spot with moist soil, save that spot for the quince tree. (Moist is OK; waterlogged is not.)
Amend light and heavy soils with organic matter before planting.
Quince Pollination
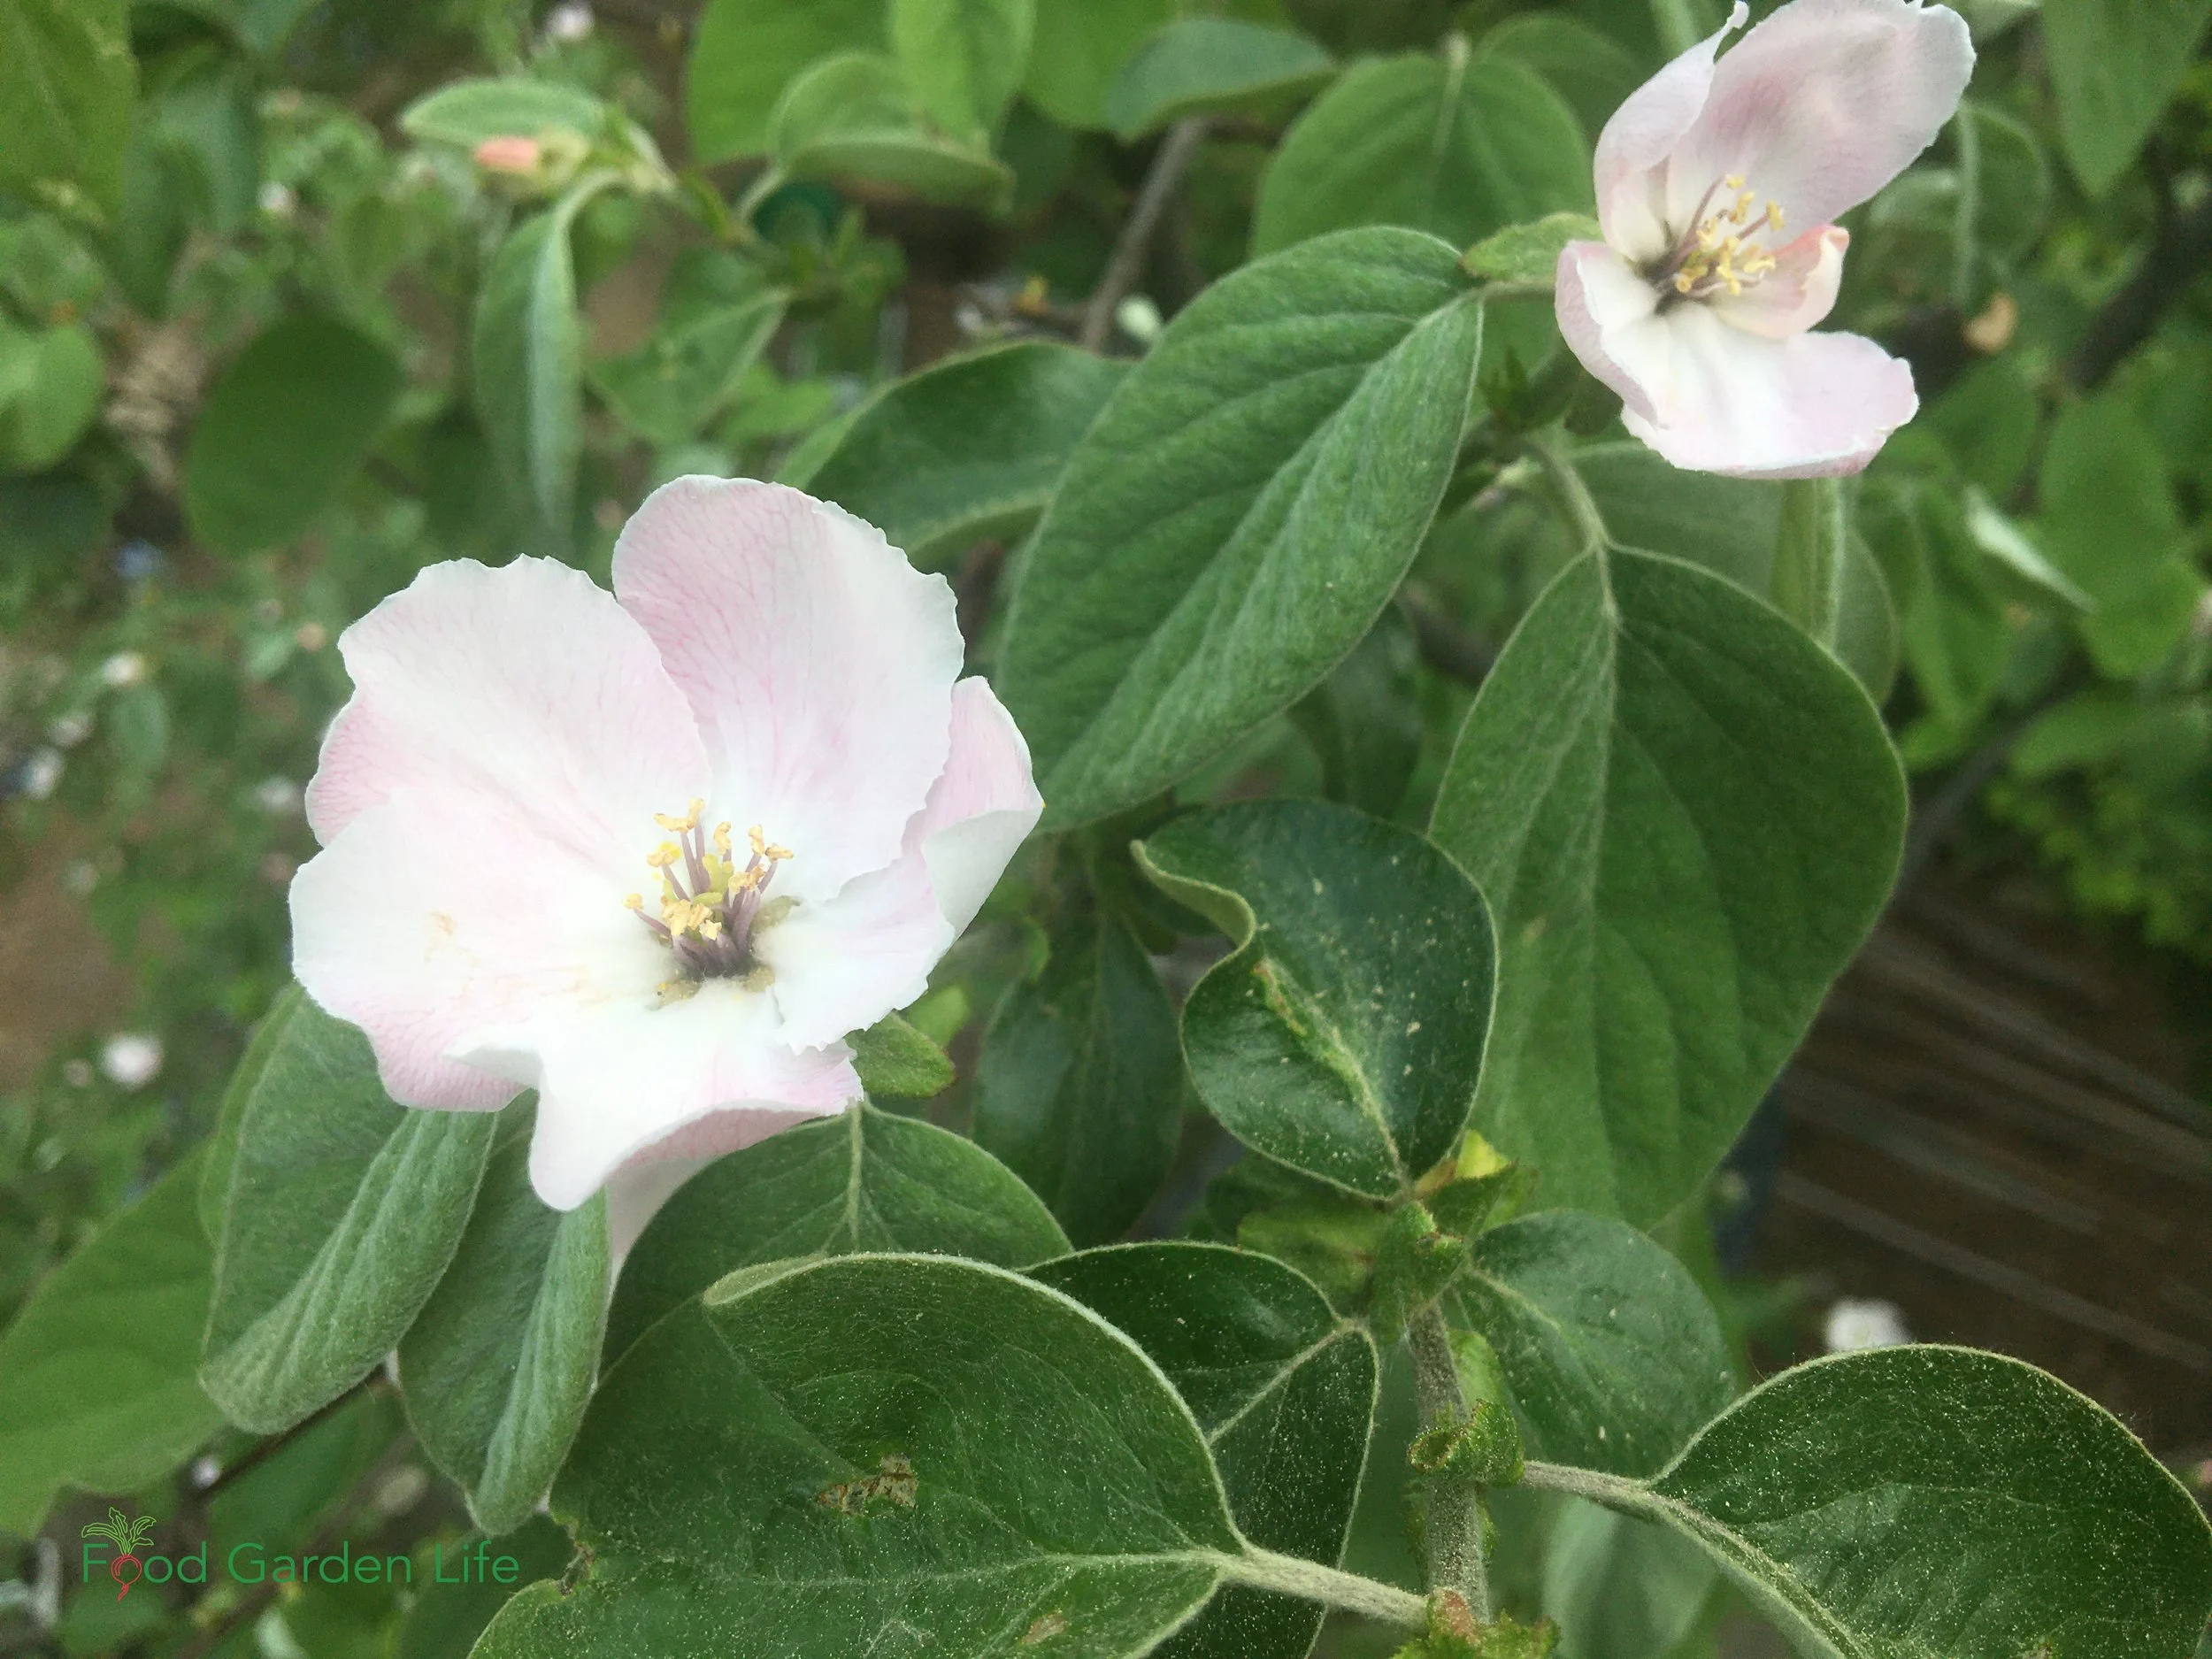
The solitary quince flowers look similar to apple flowers.
The solitary flowers look similar to apple flowers.
Quince trees are self-pollinating, which means you only need one tree to get fruit. However, you can get better yields if there is cross pollination with other quince trees.
Quince Pruning
Quince trees are naturally small, requiring less pruning than many other fruit trees.
You can grow your quince in a tree form or as a multi-stemmed bush. (See more on quince rootstock, below.)
Trees at garden centres will likely already have been pruned into shape for you (not always that well…)
If it’s an option, buy a “whip,” a young, single-stem, unbranched plant from a specialist nursery. This way you can shape it the way you want.
Pruning a Quince Whip - Formative Pruning
For the first couple of years, prune to develop the shape of your young quince tree.
A common approach with quince is to keep a length of unbranched trunk (about a metre, or 3 feet). Above that, develop an open-centred framework of branches. In short, an open-centred tree. (Think of a goblet!)
(This goblet shape is common because quince can be difficult to grow in a “central-leader” style, which has a main trunk.)
Prune back your whip to where you want branching to begin. It may seem harsh, but you’re pruning to induce side branching (There are buds that you don’t see that will grow into side branches as you prune the top off of your whip.)
When you have a choice between which branches to keep, and which to snip, a wider angle is better than a narrower angle.
Landscape with Fruit
That’s easy to grow in a home garden!
Annual Quince Pruning
Once there’s a good branch structure on the quince tree, prune the annually in late winter, while it’s dormant. This annual pruning is to optimize the size and shape of the tree for fruit production.
We prune quince over the winter, while it’s dormant, to reduce the chance of fire blight infection. (See more on fire blight below.)
Here’s what to do:
Remove crossing and crowded branches…quince can get quite choked up with willy-nilly growth
Cut out dead and broken branches
Remove suckers that grow from the base
Trim back the top of the tree if it gets too high
Shorten side shoots
Remove shoots growing from the base of the tree (the unbranched portion of the trunk)
If you’re gardening in a small space and a tree form is out of the question, quince on dwarfing rootstock can be grown in a bush shape. Quince trees can also be trained into a fan shape and grown on a wall.
Quince Tree Rootstock
Like most fruit trees, commercially produced quince trees are usually grafted onto “rootstock.” (A variety with nice fruit is grafted atop a variety that has roots with a desirable trait, a.k.a. the rootstock.)
The choice of rootstock determines the size of the tree. Two common quince rootstocks are Quince A and Quince C.
Quince A rootstock is more vigorous than Quince C, allowing trees to get up to about 5 metres (15 feet) tall. It is suited to growing as espaliers and trees.
Quince C rootstock has a dwarfing effect, giving a tree that gets 3-4 metres (8-12 feet) tall. If you want to grow quince in a bush shape, look for this rootstock.
Home Quince Tree Propagation
Home gardeners might opt to grow quince from seed. It grows easily from seed. Just know that the seed will give you something different from the fruit it came from…perhaps better, perhaps not. You won’t know fruit quality, tree size, fruitfulness until your seed-grown quince tree matures...years later.
Seed-grown quince can be used as rootstock if you have known quince varieties that you want to propagate by grafting.
Quince trees can also be reproduced cuttings and layering (where you bury a low-lying branch.)
Quince Varieties
There are not many quince varieties available commercially. Some varieties have fruit with an apple-like shape; and some are pear-like. Here are three common quince varieties that I’ve seen for sale here in Ontario:
Meeches Prolific. Vigorous variety with flavourful fruit.
Champion. Medium fruit on a vigorous plant.
Vranja. Strongly scented, large fruit.
Planting Quince Trees
Prepare the ground as you would to plant most trees and shrubs, by digging a hole that’s as deep as the roots—but wider.
Once the tree is in the ground, check to make sure that you’ve planted it at the same height—not deeper, not shallower. Then backfill the hole using soil amended with compost.
Get Your Fig Trees Through Winter
And eat fresh homegrown figs!
Quince Tree Spacing
Because it’s a small tree, it’s great for home gardens. I have a trio of quince trees in a 3 x 3 metre patch (9 x 9 feet).
As with other fruit trees, the spacing recommended for orchards isn’t needed for a home garden.
Remember that seed-grown trees and grafted plants on Quince A rootstock need more space than trees grafts on Quince C rootstock.
Quince Trees in Permaculture and Forest Gardens
Because quince trees are relatively short and tolerate some shade, they can be useful when developing plant layers in a garden.
For example, taller trees can be hemmed with quince, under which are shade-tolerant fruit bushes such as currant. Think of a forest edge setting.
Using Quince Trees in Garden Design
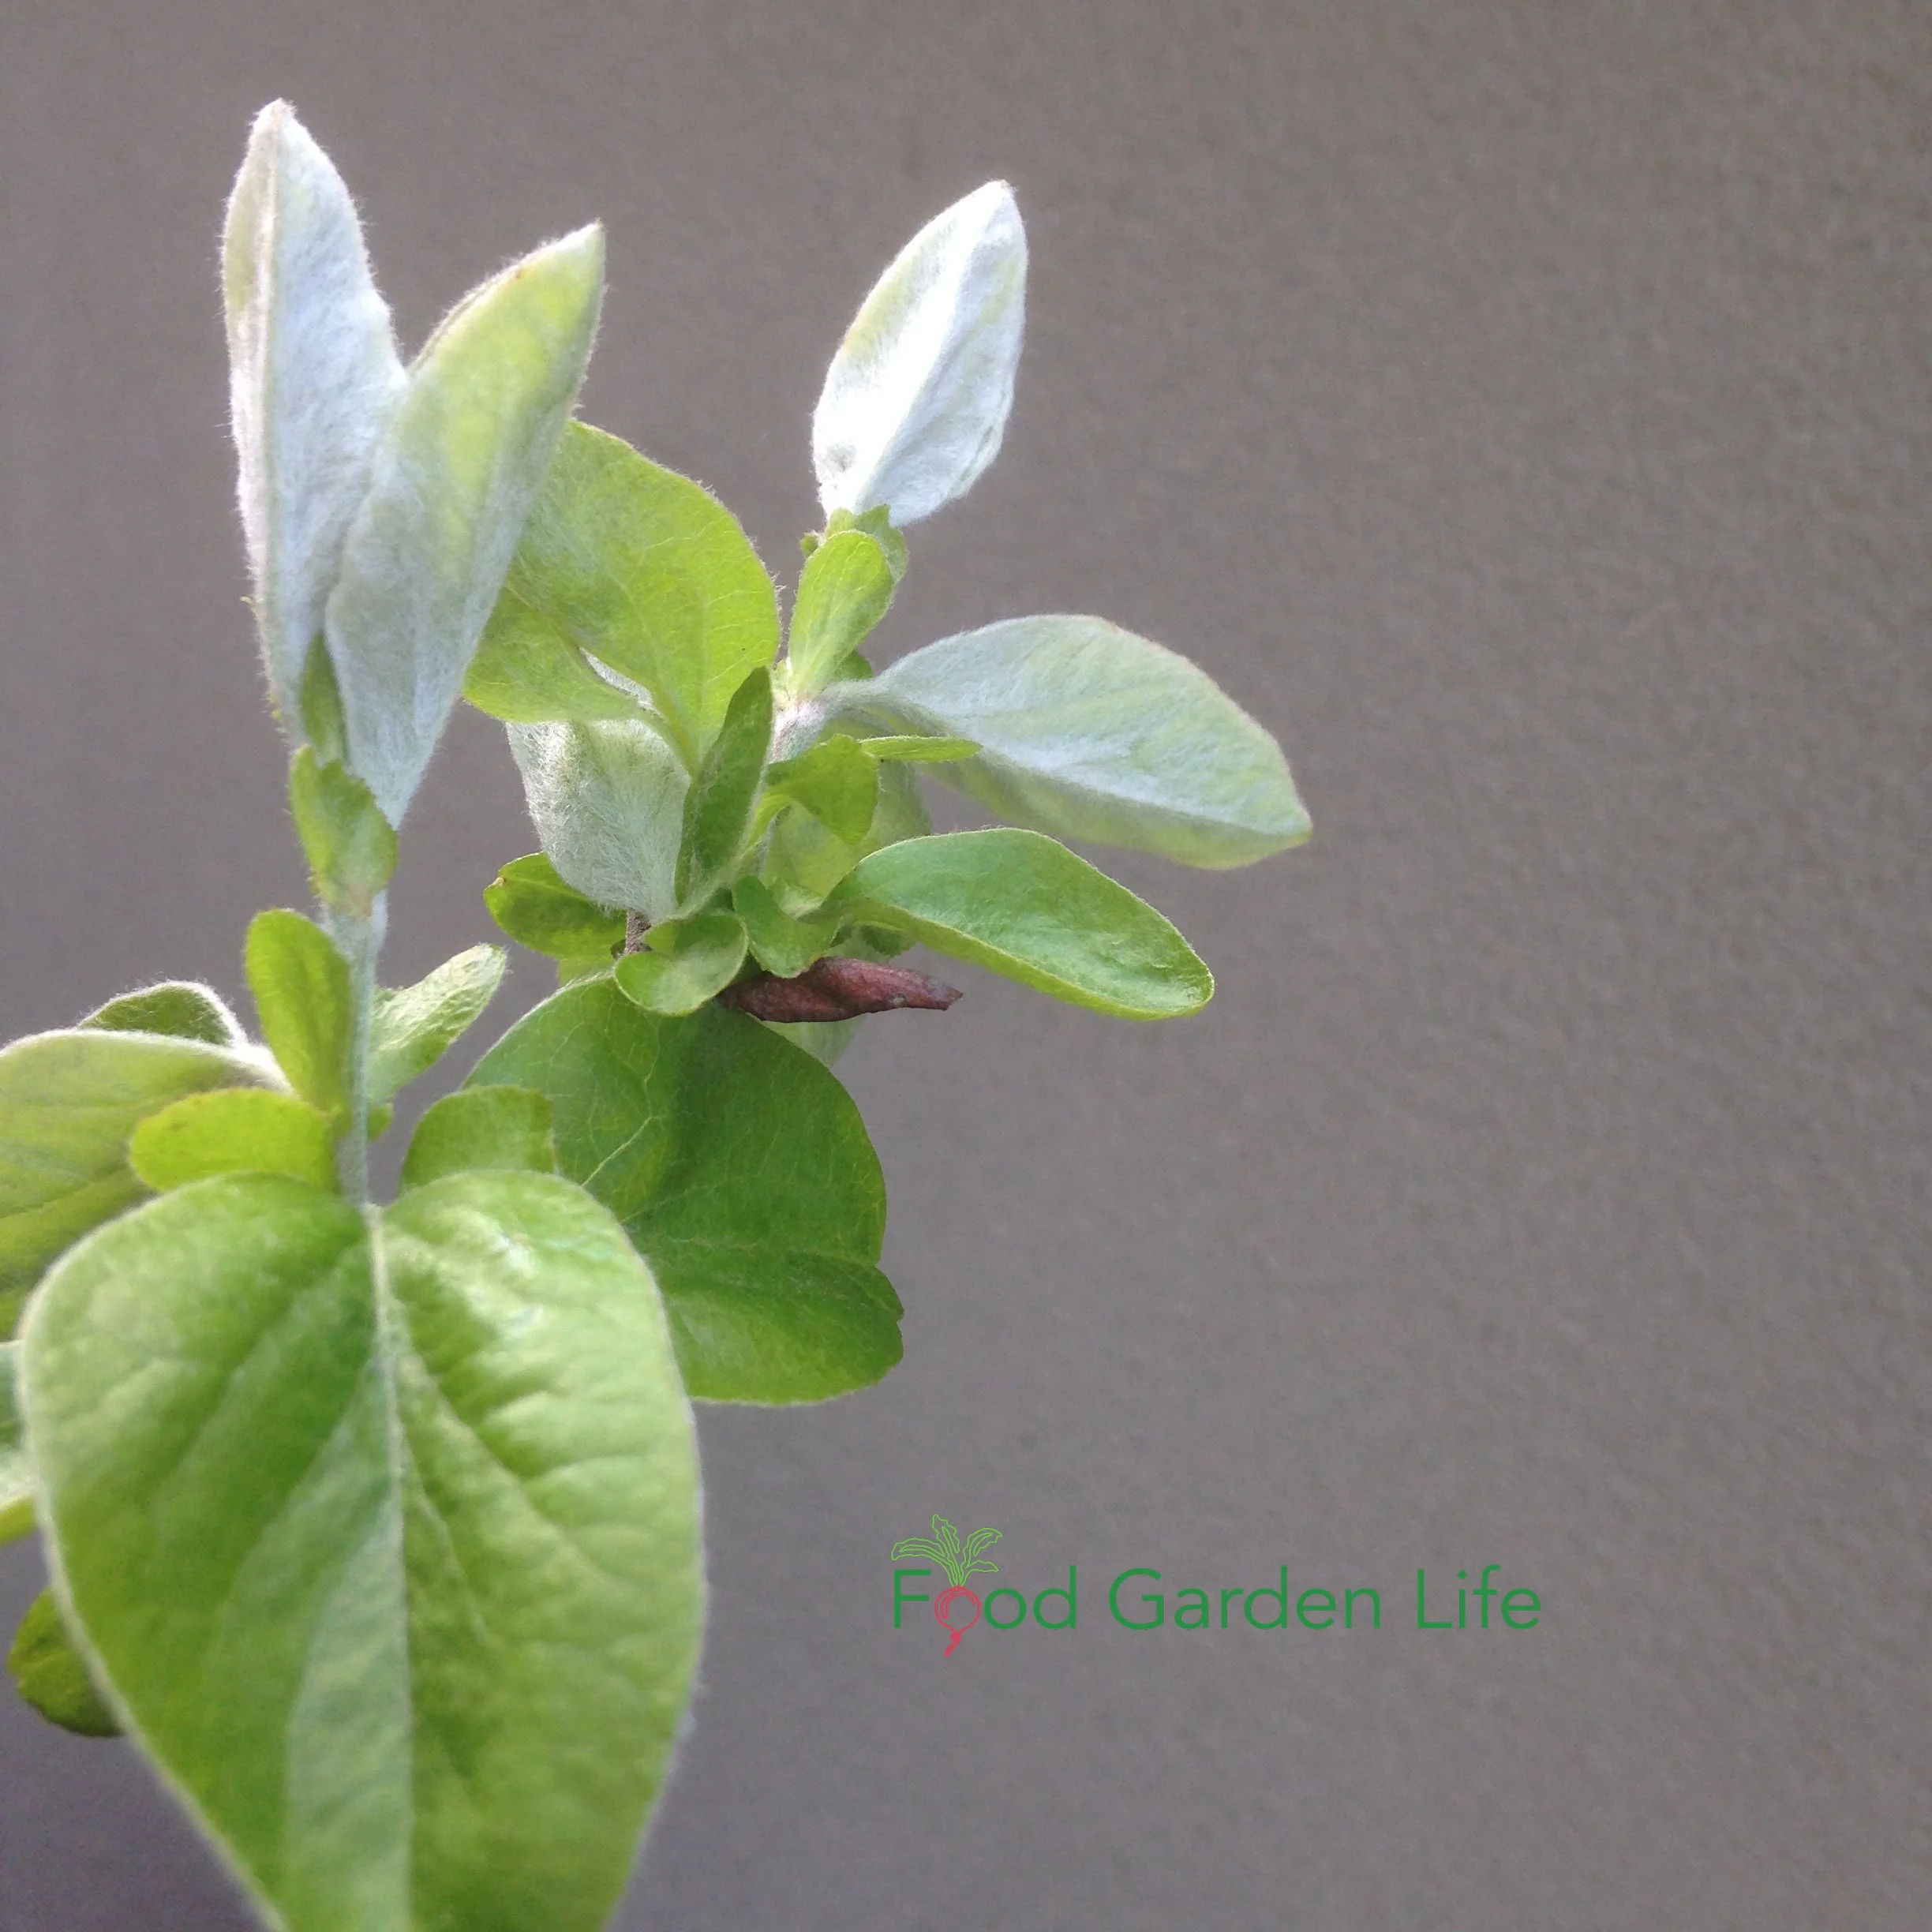
Fuzzy young quince leaves have a silvery colour.
Quince is a great dual-purpose tree—edible and very ornamental.
The fuzzy leaves, springtime bloom, attractive fruit, gnarly branches, and peeling bark on older trees make them stand out in the landscape, particularly in winter.
(And if you’ve ever been smitten with the silvery sheen that comes from an olive tree, young quince leaves have the same effect. Read more about potted olive trees here.)
Quince Tree Care
Grown in a fertile soil, you might find that the only annual care you need is pruning.
If feeding, the main caution is not to give too much nitrogen. That’s because too much nitrogen stimulates rapid vegetative growth—and that growth is more susceptible to fire blight (see below). For this reason, avoid composted animal manures, and instead choose composted leaves when amending soil.
Quince Tree Hardiness
Where do quince grow? Quince trees are less hardy than apples, generally hardy in USDA zones 5-9. They can take temperatures down to about -26°C (15°F).
BUT…many gardeners grow them in colder zones. If you’re gardening in a cold climate, look for varieties recommended for borderline areas—and when planting, look for protected microclimates.
Want tips on planting fruit in cold climates? Tune in here.
Interested in hardy apples? Check out this episode of The Food Garden Life Show.
Quince Tree Challenges
As a relative of apples and pears, quince suffers from many of the same afflictions.
Fire Blight

Fire blight on quince.
This bacterial disease is the scourge of European pears, quince, apples, mountain ash, and hawthorn. The bacteria get into the plant through flowers, wounds, and pruning cuts made early in the year.
That’s why it’s best to stick with winter pruning for quince.
With fire blight, you’ll see leaves suddenly wilt and then turn brown, giving a scorched-like appearance. When that happens, prune back at least 10” below the infected area. Don’t prune around flowering time. Clean your pruners with alcohol or bleach between cuts to avoid spreading the disease.
Fire blight is more of a problem in areas with warm, humid conditions.
Codling Moth
The young caterpillars of this moth tunnel into the fruit, and exit a few weeks later, well before you harvest your quince. Like all pests, some years there are more…and some, fewer.
In a home garden setting, I suggest accepting coddling moth. They go to the core, for seeds—and since you cut up quince before eating it, can cut out the tunnel and the core, removing evidence of these pests in the quince you’re using.
Squirrels
As an urban gardener, squirrels are my biggest quince challenge!!!###.
The main things they do to my quince are:
Bite marks on young fruit as the squirrels taste their way around my garden
Outright fruit theft as the quince fruit ripen
If you don’t have too many quince fruit, consider using organza bags over the fruit as a deterrent. Netting is possible too if you have a short tree or a bush (but it’s ugly!)
Squirrels got you down? Find out 50+ ways to foil squirrels in the garden.
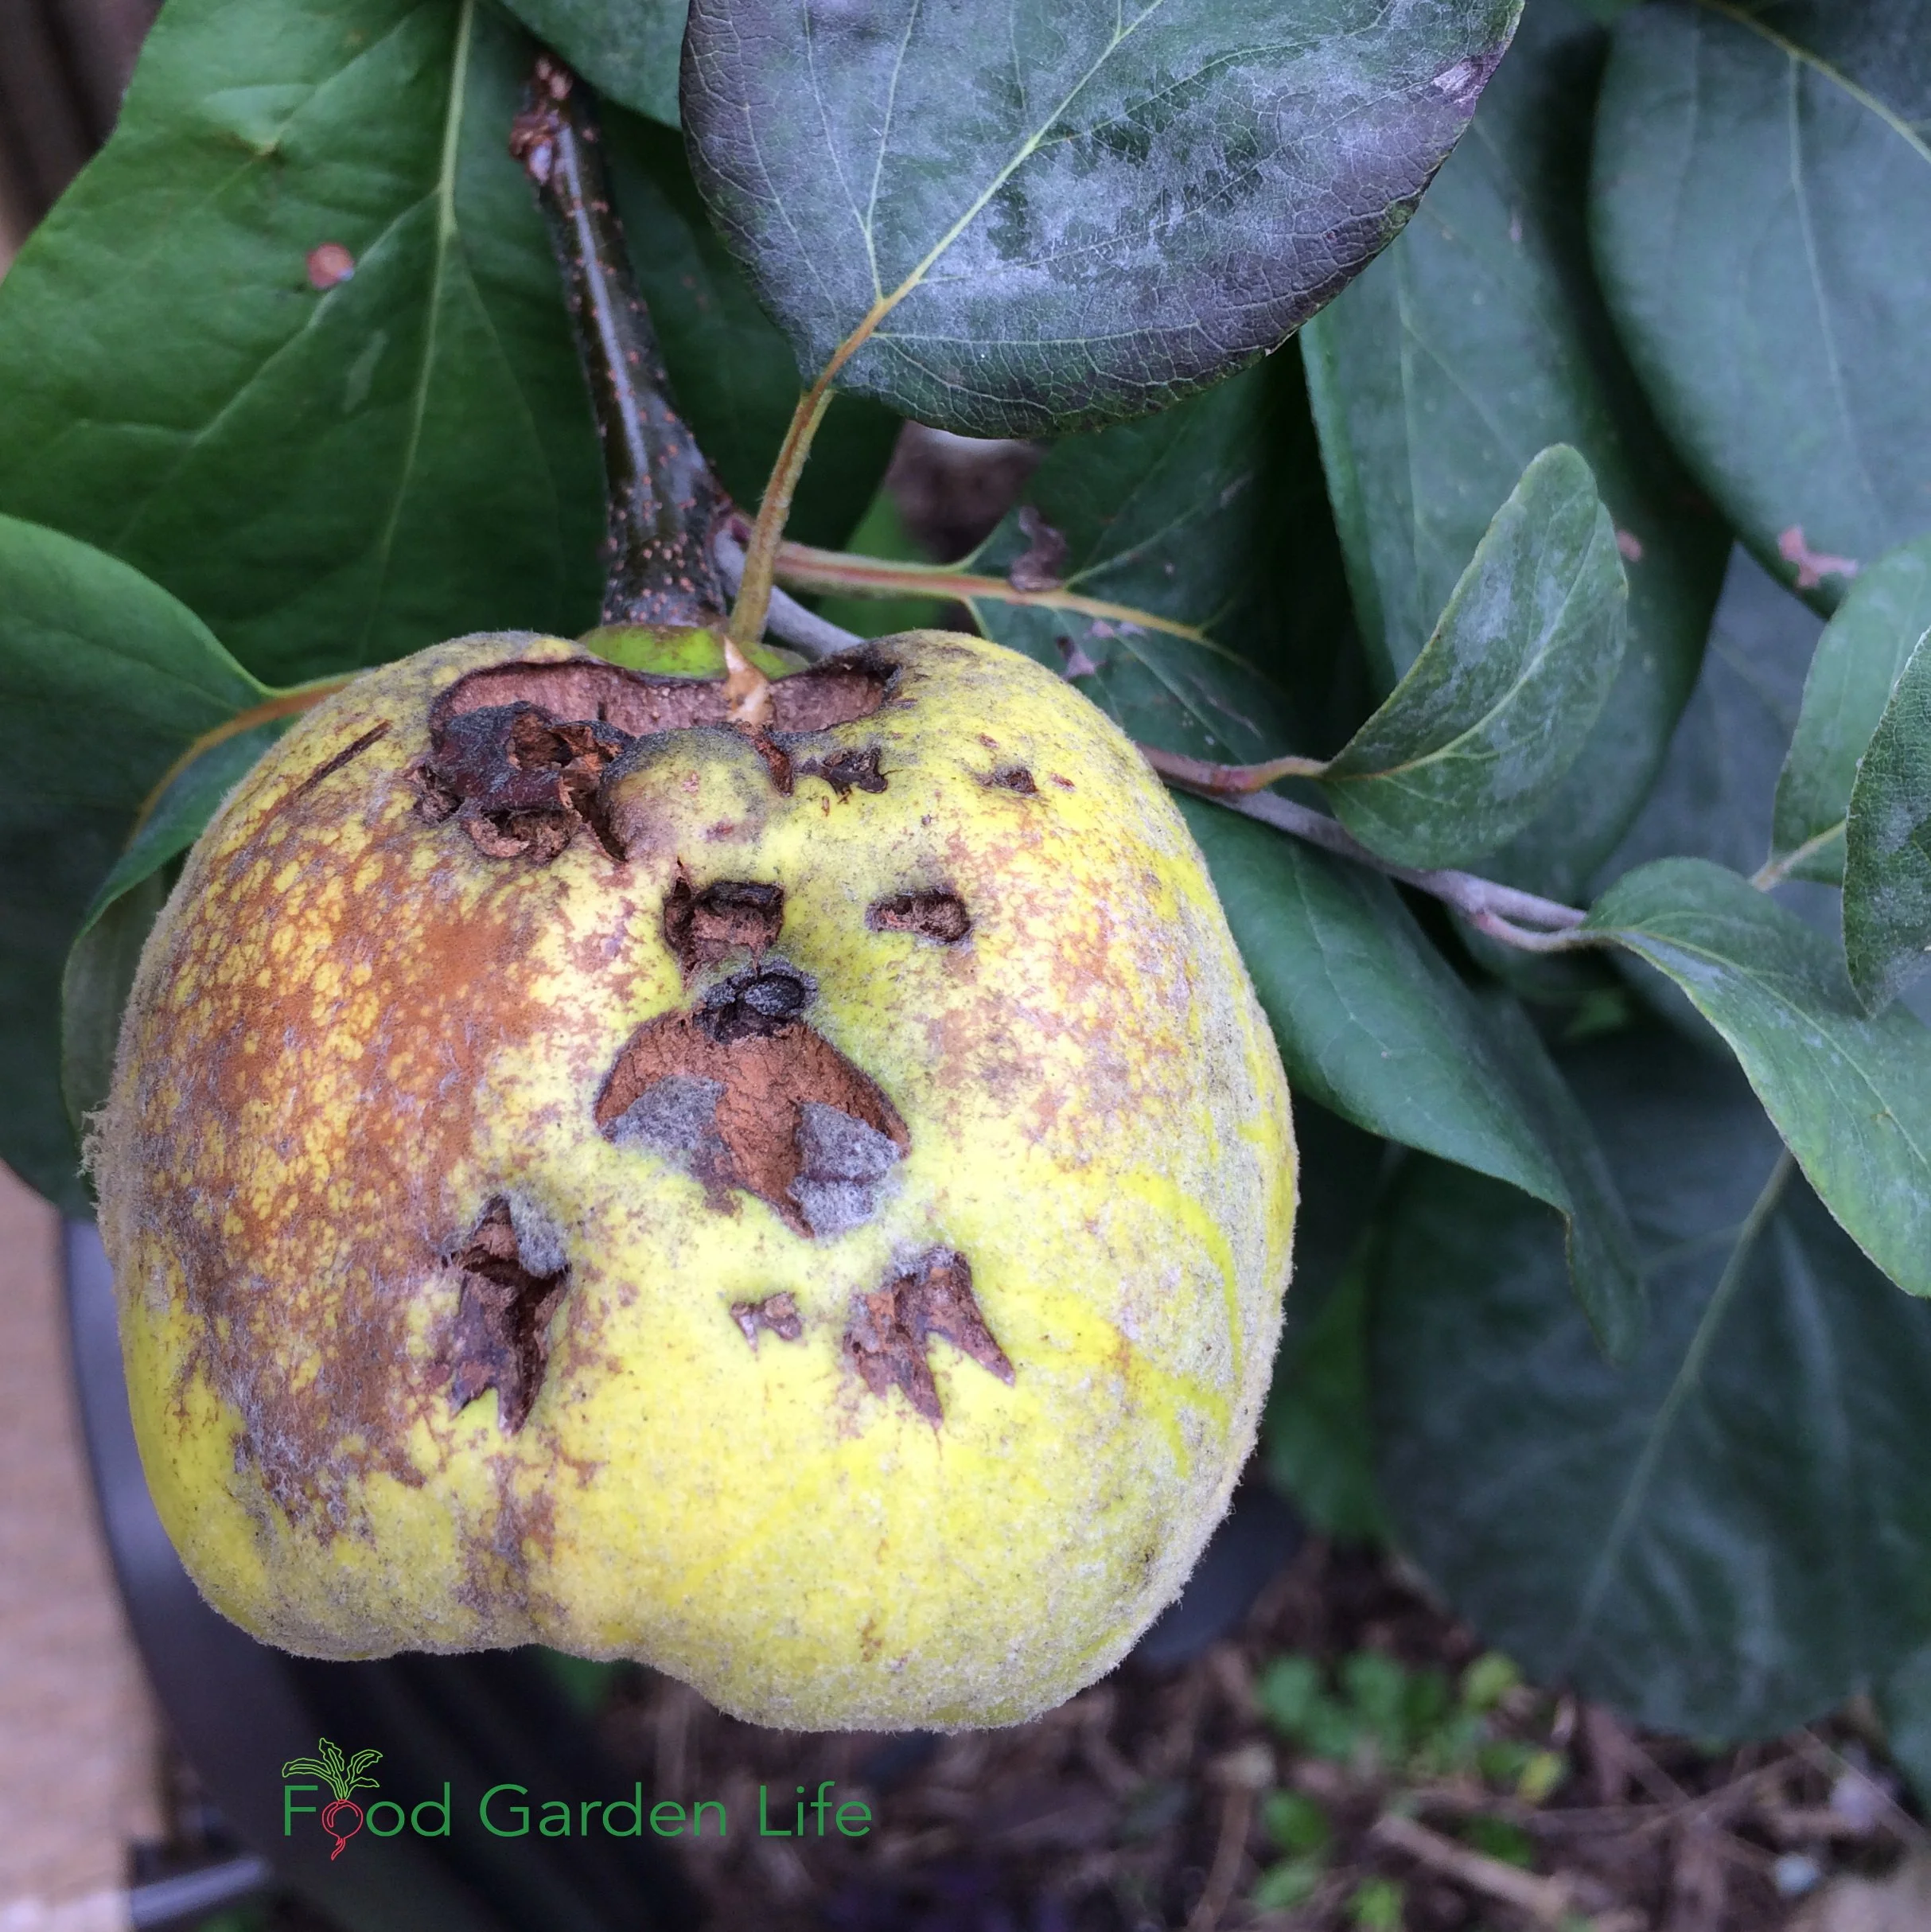
Bite marks on young fruit as the squirrels taste their way around my garden.
Harvest Quince Fruit
Harvest quince in the autumn, as they turn a golden-yellow colour. Pick before frost for best fruit quality.
Note: Even though quince fruit are hard as rocks, they bruise very easily. Be gentle.
Pick quince with secateurs in hand as the fruit don’t easily break off from the stem like apples do. By cutting off the fruit you’ll avoid damaging branches.
Store Quince Fruit
The fruit continues to ripen once picked and stores well in a cool, dark area free from frost. Having said that, I often just leave quinces on my kitchen counter until I’m ready to use them. They can last a number of weeks. They don’t last quite as long as they would somewhere cooler…but with the volume of quince I grow they’re long gone well before we get to that point. And they look beautiful and smell amazing.
Because quince has a strong scent, store away from other things that could absorb the smell. (Yes, away from your apples…unless you want them to taste like quince!)
Quince Fruit in the Kitchen

I often leave quince fruit on my kitchen counter until I’m ready to use it.
If you’re new to quince, use them in a simple recipe where the flavour shines through. Here are ideas:
Poached in a light syrup with vanilla and lemon juice
Added to apple sauce
When you make jam from quince, it changes colour and goes pink, then red. It’s beautiful! And on that note, quince fruit is very high in pectin, making it very well suited to using for preserves.
Here’s a recipe book dedicated to quince: Simply Quince, by Barbara Ghazarian.
Quince Tree FAQ
What if I forget to prune one year?
Your tree will be fine if you don’t prune. We prune to maintain the size and shape, and optimize fruit production.
Is it the same as my flowering quince?
Your flowering quince is sometimes called Japanese quince (Chaenomeles spp.). it, too gives rock-hard pectin-rich fruit.
When should I take quince cuttings?
When you prune your quince trees in late winter, keep that wood for use as cuttings.
AND here’s something you can do with any remaining quince branches you’ve pruned from the trees: Quince wood gives a flavourful smoke and is excellent for smoking meat. Use it in a smoker, or add it to a charcoal BBQ to enhance the flavour.
See how I roast my Thanksgiving turkey on a charcoal BBQ.
Find This Helpful?
Enjoy not being bombarded by annoying ads?
Appreciate the absence of junky affiliate links for products you don’t need?
It’s because we’re reader supported.
If we’ve helped in your food-gardening journey, we’re glad of support. You can high-five us below. Any amount welcome!
More on Growing Fruit
Fruit for Northern Gardens Masterclass
Landscape with Fruit
That’s easy to grow in a home garden!
Fruit Articles
Fruit Interviews
Mom’s Creamy Carrot Soup Recipe
Try this velvety Cream of Carrot soup recipe.
By Steven Biggs
An Impulse Buy and Lots of Carrot Soup with Cream

A velvety carrot soup with cream.
It was an impulse buy. Pure and simple.
But a bushel of carrots for $10? I couldn’t help it.
“They’ll keep nicely in the basement,” I thought to myself.
They didn’t. My basement is too warm…even my unheated storage room.
I needed to do something with the carrots quickly,before they spoiled.
So into the stockpot they went. That fall, my family ate a lot of smooth, velvety, cream of carrot soup.
(A bushel of carrots makes a lot of this pureed carrot soup!)
Luckily, this cream of carrot soup freezes well. So make up a big pot of this carrot cream in the fall, and enjoy it through the winter.
Finding Carrots in Bulk
Look for seconds…those imperfect carrots that don’t make the grade so they get sold in large quantities for very little.
I often see seconds at farm markets in the fall.
Grow Your Own Carrots
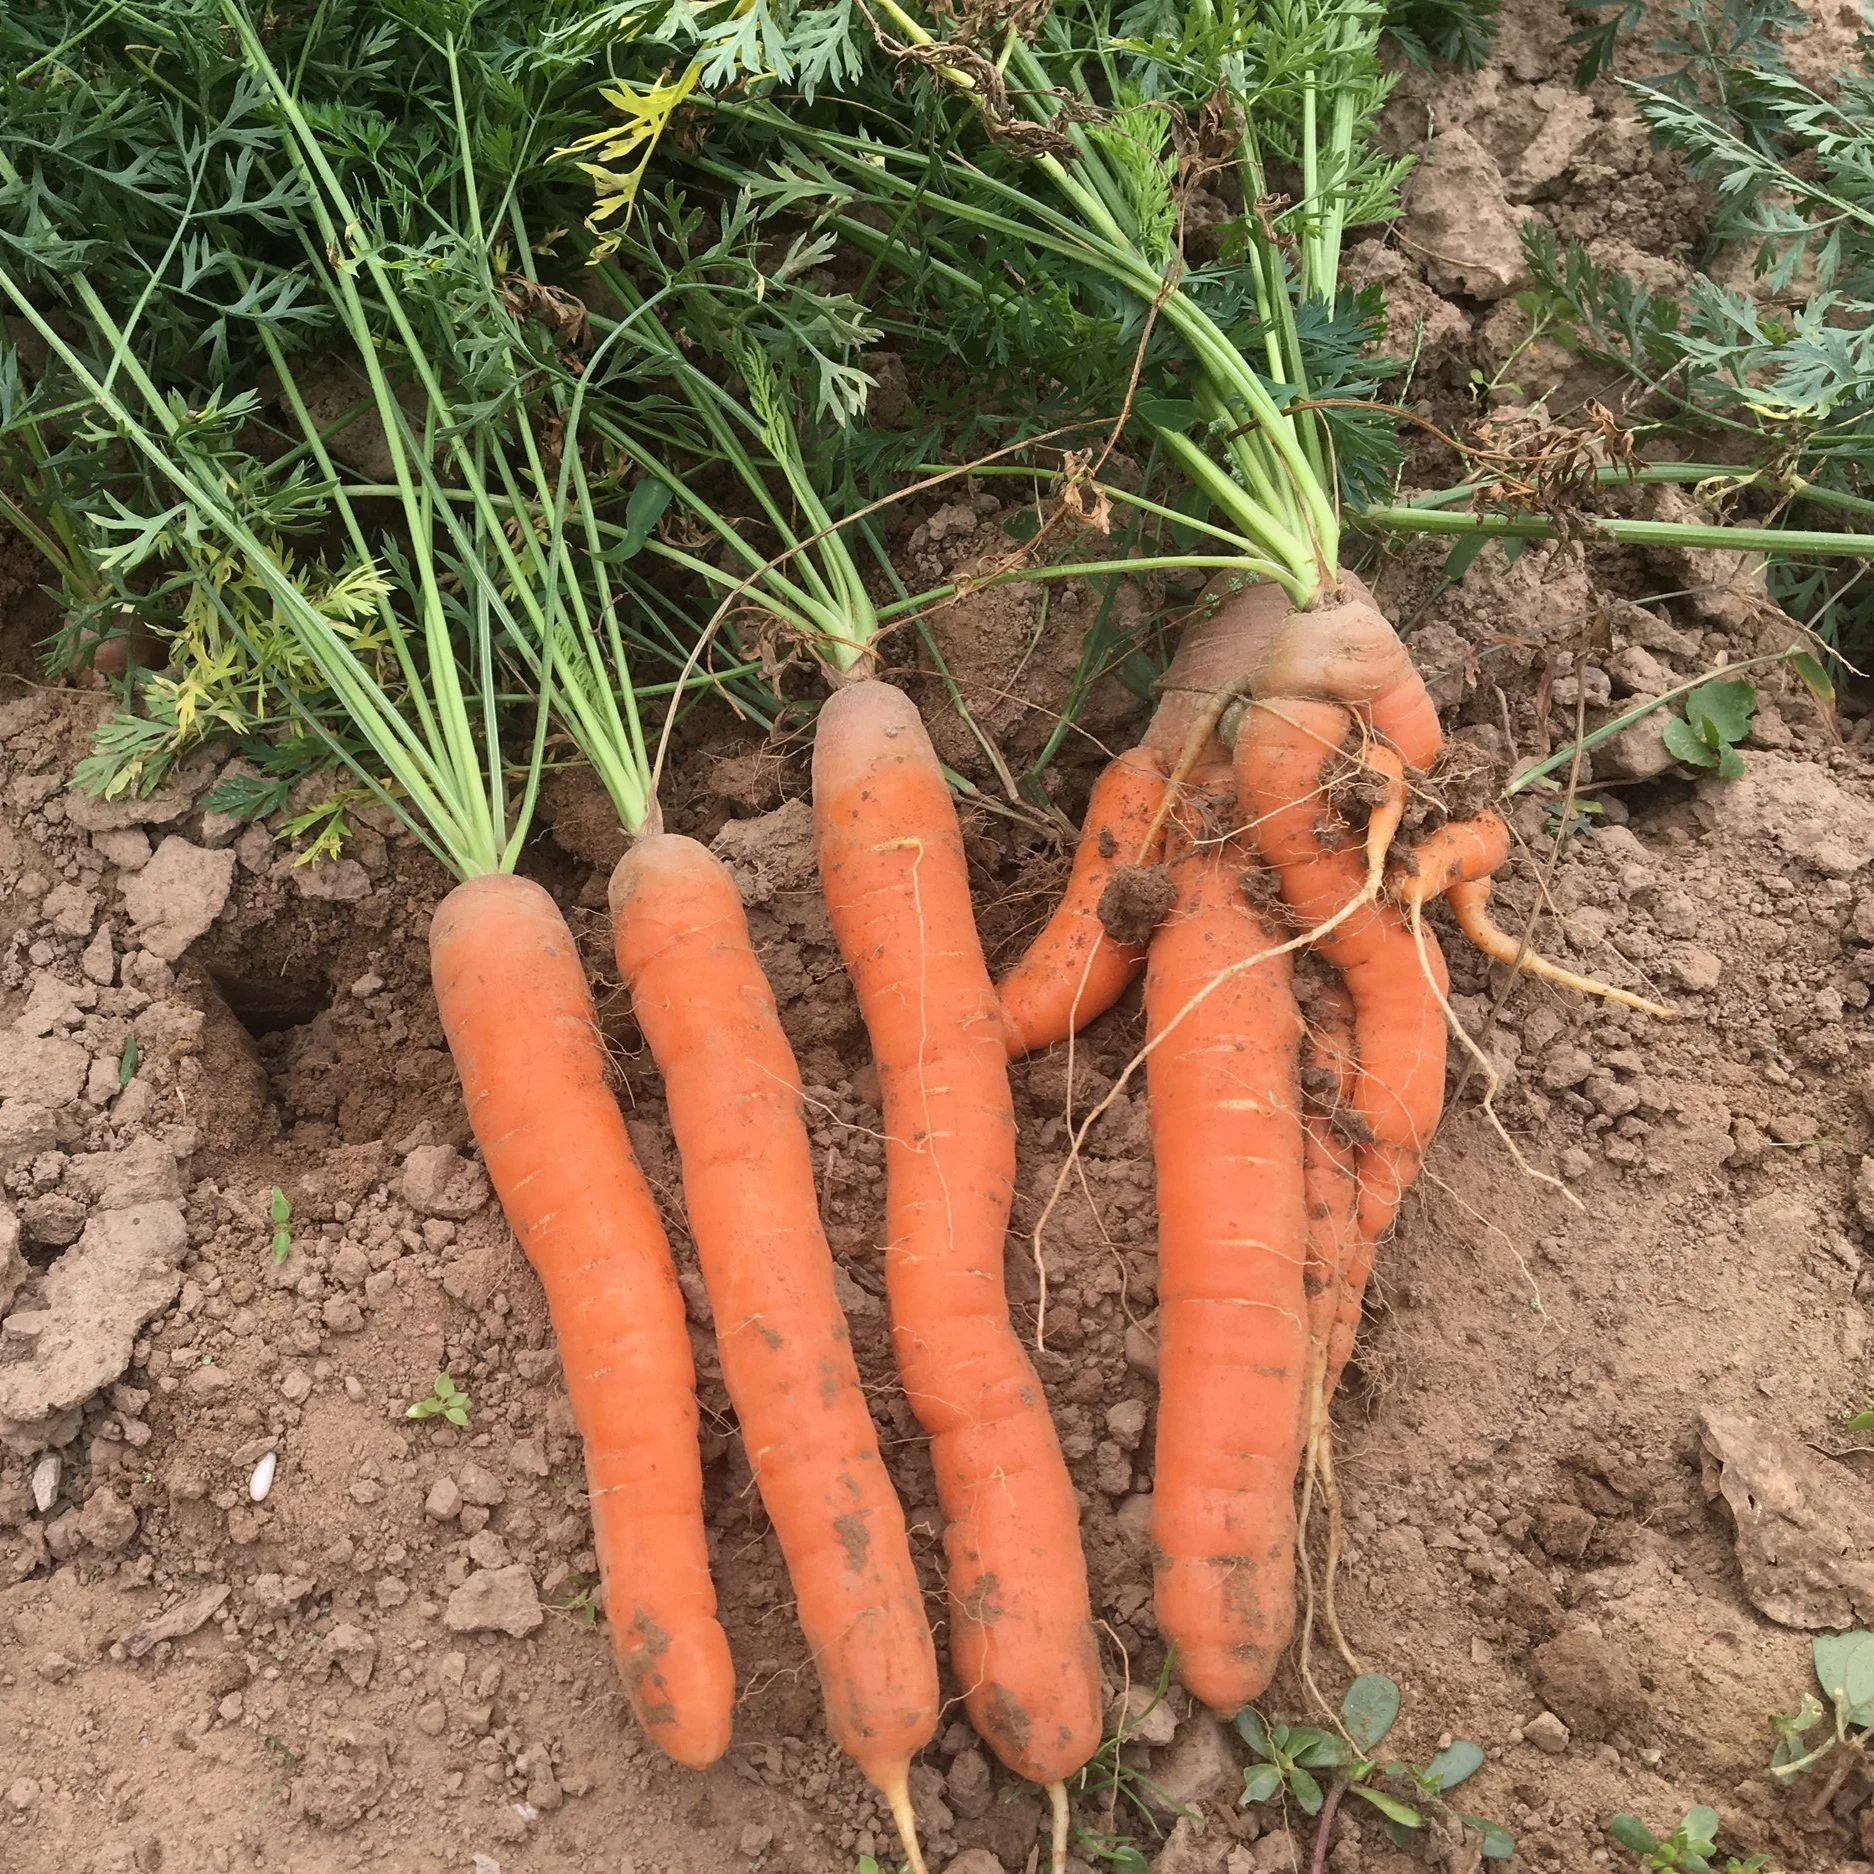
Cream of carrot soup is a great way to enjoy homegrown carrots.
Carrots are a great home garden crop. I start planting them in spring, and continue planting until August—and then harvest right into the winter. (Cover carrots with a straw bale to extend the harvest window as the ground freezes.)
Carrots are also an excellent succession crop to follow other crops. Find out more about succession crops.
For gardeners who are interested in a year-round harvest, carrots and onions are great storage crops—even if you don’t have a root cellar. Find out how to store them—and find out 25 storage crops you can grow in your garden.
Serving Ideas - Cream of Carrot Soup
Serve with homemade garlicky croutons sprinkled on top.
(Don’t add the croutons too soon…only at the last minute, so they don’t get soggy.)
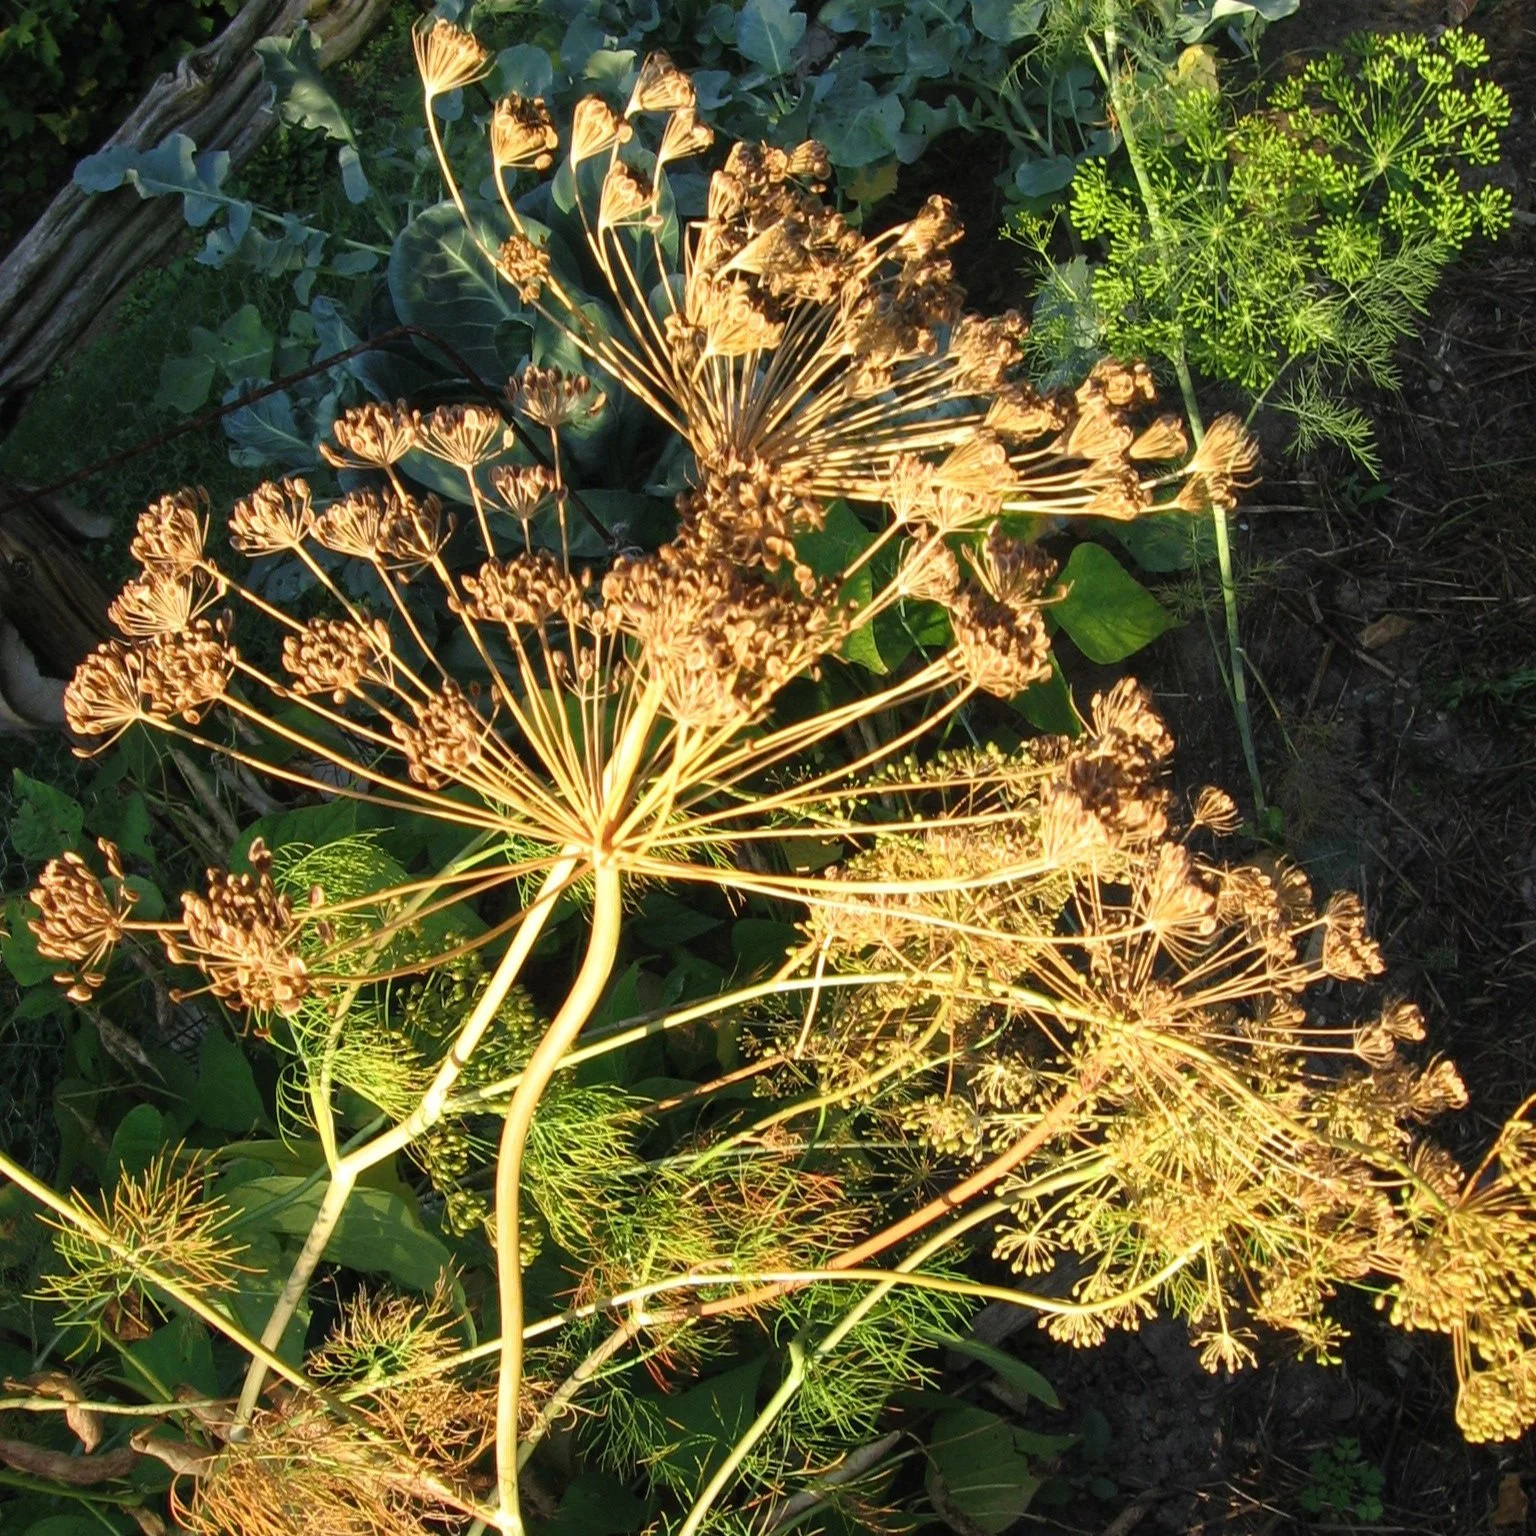
Dill seed in the garden.
Secret Ingredient – Dill Seed
Dill seed is like little nuggets of dill flavour. It’s easy to grow your own dill seed; just let a couple of dill plants flower and go to seed, and then harvest the dill seed once it’s dry.
I also use dill seed in my homemade beet borsch. Here’s Mom’s borsch recipe…it’s fantastic!
If you don’t have dill seed, chopped dill works well instead. Add it at the end, when you add the cream.
Recipe for Mom’s Cream of Carrot Soup
Mom made this soup every fall…but not using bushels of carrots, as I did in my cream-of-carrot misadventure.
Ingredients
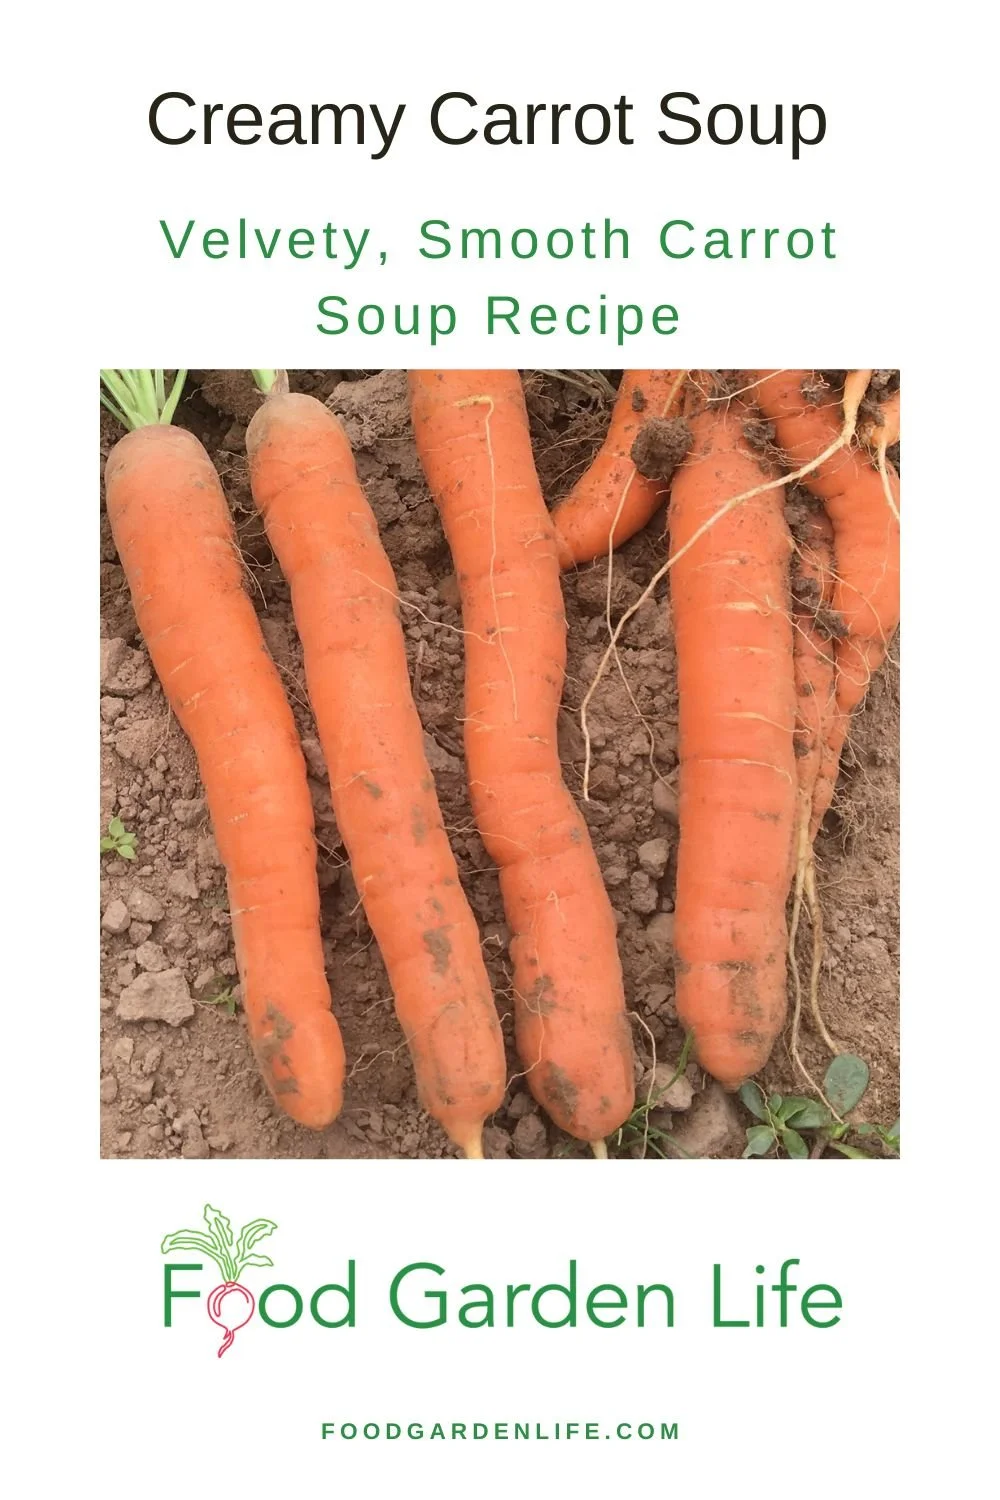
Pin this post.
Onion, coarsely chopped (I use 2 onions, adjust to your preference)
1 tsp curry powder
1 tsp. dill seed
5 cups chicken stock
2 lbs. coarsely chopped carrots
1 cup cream
I often use my homemade turkey stock in this recipe instead of chicken stock. I make turkey stock from my BBQ-roasted turkey. Find out how I roast turkey on my charcoal barbecue.
Directions
Brown onions in butter in the stock pot (don’t rush this step…if they’re not browned, they’re not as sweet and flavourful)
When onions are browned, add the rest of the ingredients
Cook for about half an hour, until the carrots are soft
Blend (mom always did this in her blender, but I find a hand-immersion blender is easier)
Add cream
Find This Helpful?
Enjoy not being bombarded by annoying ads?
Appreciate the absence of junky affiliate links for products you don’t need?
It’s because we’re reader supported.
If we’ve helped in your food-gardening journey, we’re glad of support. You can high-five us below. Any amount welcome!
More Cooking Ideas
More on Growing Your Own Vegetables
Articles and Interviews
Courses
Want a Bold Vegetable? Grow This Promethean Plant (the Cardoon)
Grow Cardoon, a bold, beautiful vegetable that has great ornamental appeal.
By Steven Biggs
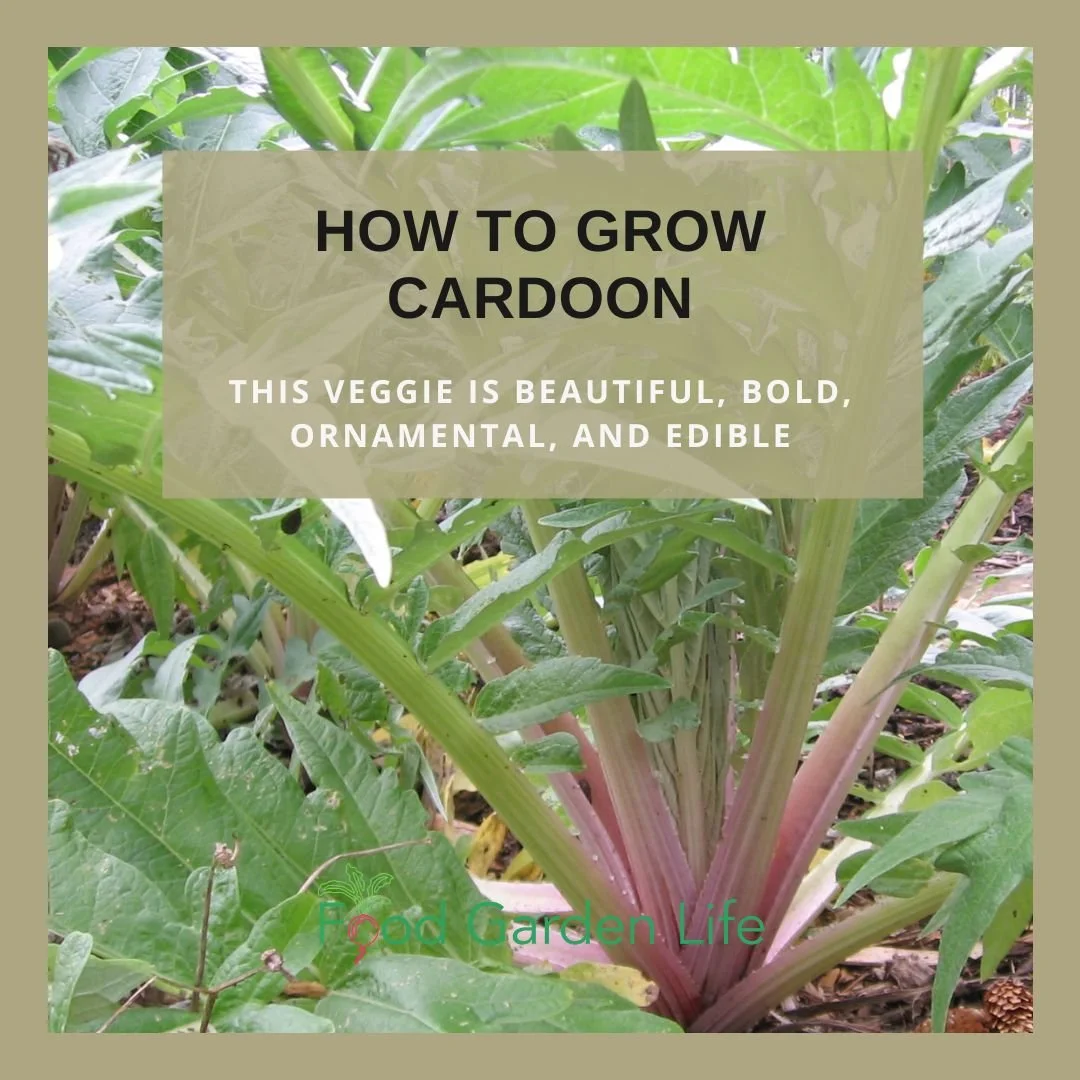
A cardoon plant is beautiful, enormous, and edible.
Cardoon Plant is Beautiful, Enormous, and Edible
“I MUST KNOW THE NAME OF THE PROMETHEAN PLANTS IN YOUR FRONT YARD,” exclaimed the caller, describing bold, arching, grey leaves.
I was delighted by the call, mainly because I love talking about plants—but also because I learned a new word.
I Knew which Plant the Caller Meant
I knew right away the plant in question was cardoon (Cynara cardunculus). The caller was captivated by the four-foot (1.2-m) tall, silver-grey, spiny-leaved plants arching over the edge of my driveway.
Cardoon resembles its cousin, the globe artichoke, but has bigger leaves.
Cardoon plants had prime front-garden real estate because they fit the edible theme I have for the space. Cardoon leaf stalks and flower buds are edible. (And you can do something else with it too…keep reading.)
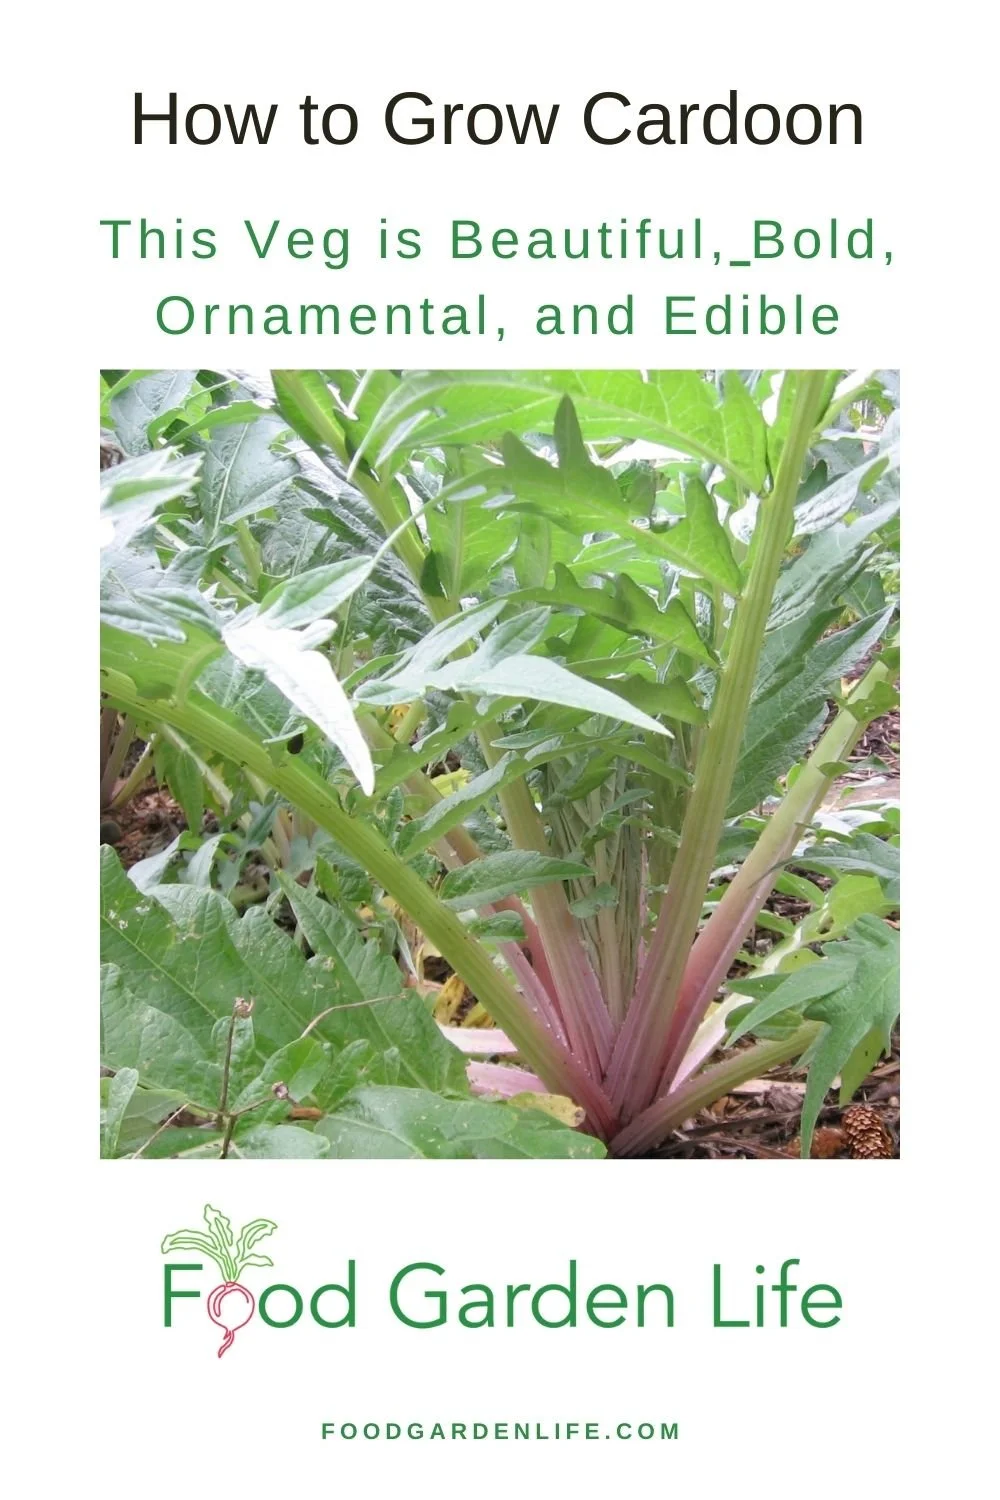
Pin this post!
An Annual Around Here
Is cardoon perennial?
A perennial in warmer climates, cardoon grows as an annual in many parts of Canada.
Many years mine die over the winter here in Toronto, Canada.
But sometimes, with the right combination of mild temperatures and an insulating blanket of snow, they survive.
When they survive the winter and grow for a second season, they flower.
Cardoon Flowers
Cardoon flowers are smaller than globe artichoke flowers, but look very similar.
They are purple and thistle-like, arriving mid-late summer.
When you grow cardoon as an annual, starting with new seedlings every year, there’s a good chance it won’t flower. It flowers in its second year.
If you’re growing cardoon as an annual and do want flowers, here’s a trick:
Give the plants a chill treatment, which tricks the plant into blooming in its first year.
Chill Treatment for Cardoon Seedlings
Chill young plants before planting out in the spring to induce flowering. (Cold-climate artichoke growers do the same thing.)
Put the seedlings somewhere cold—but not freezing—for about 10 days.
A fridge works well; or put them outdoors on cool days, and move them somewhere protected overnight so they don’t freeze.
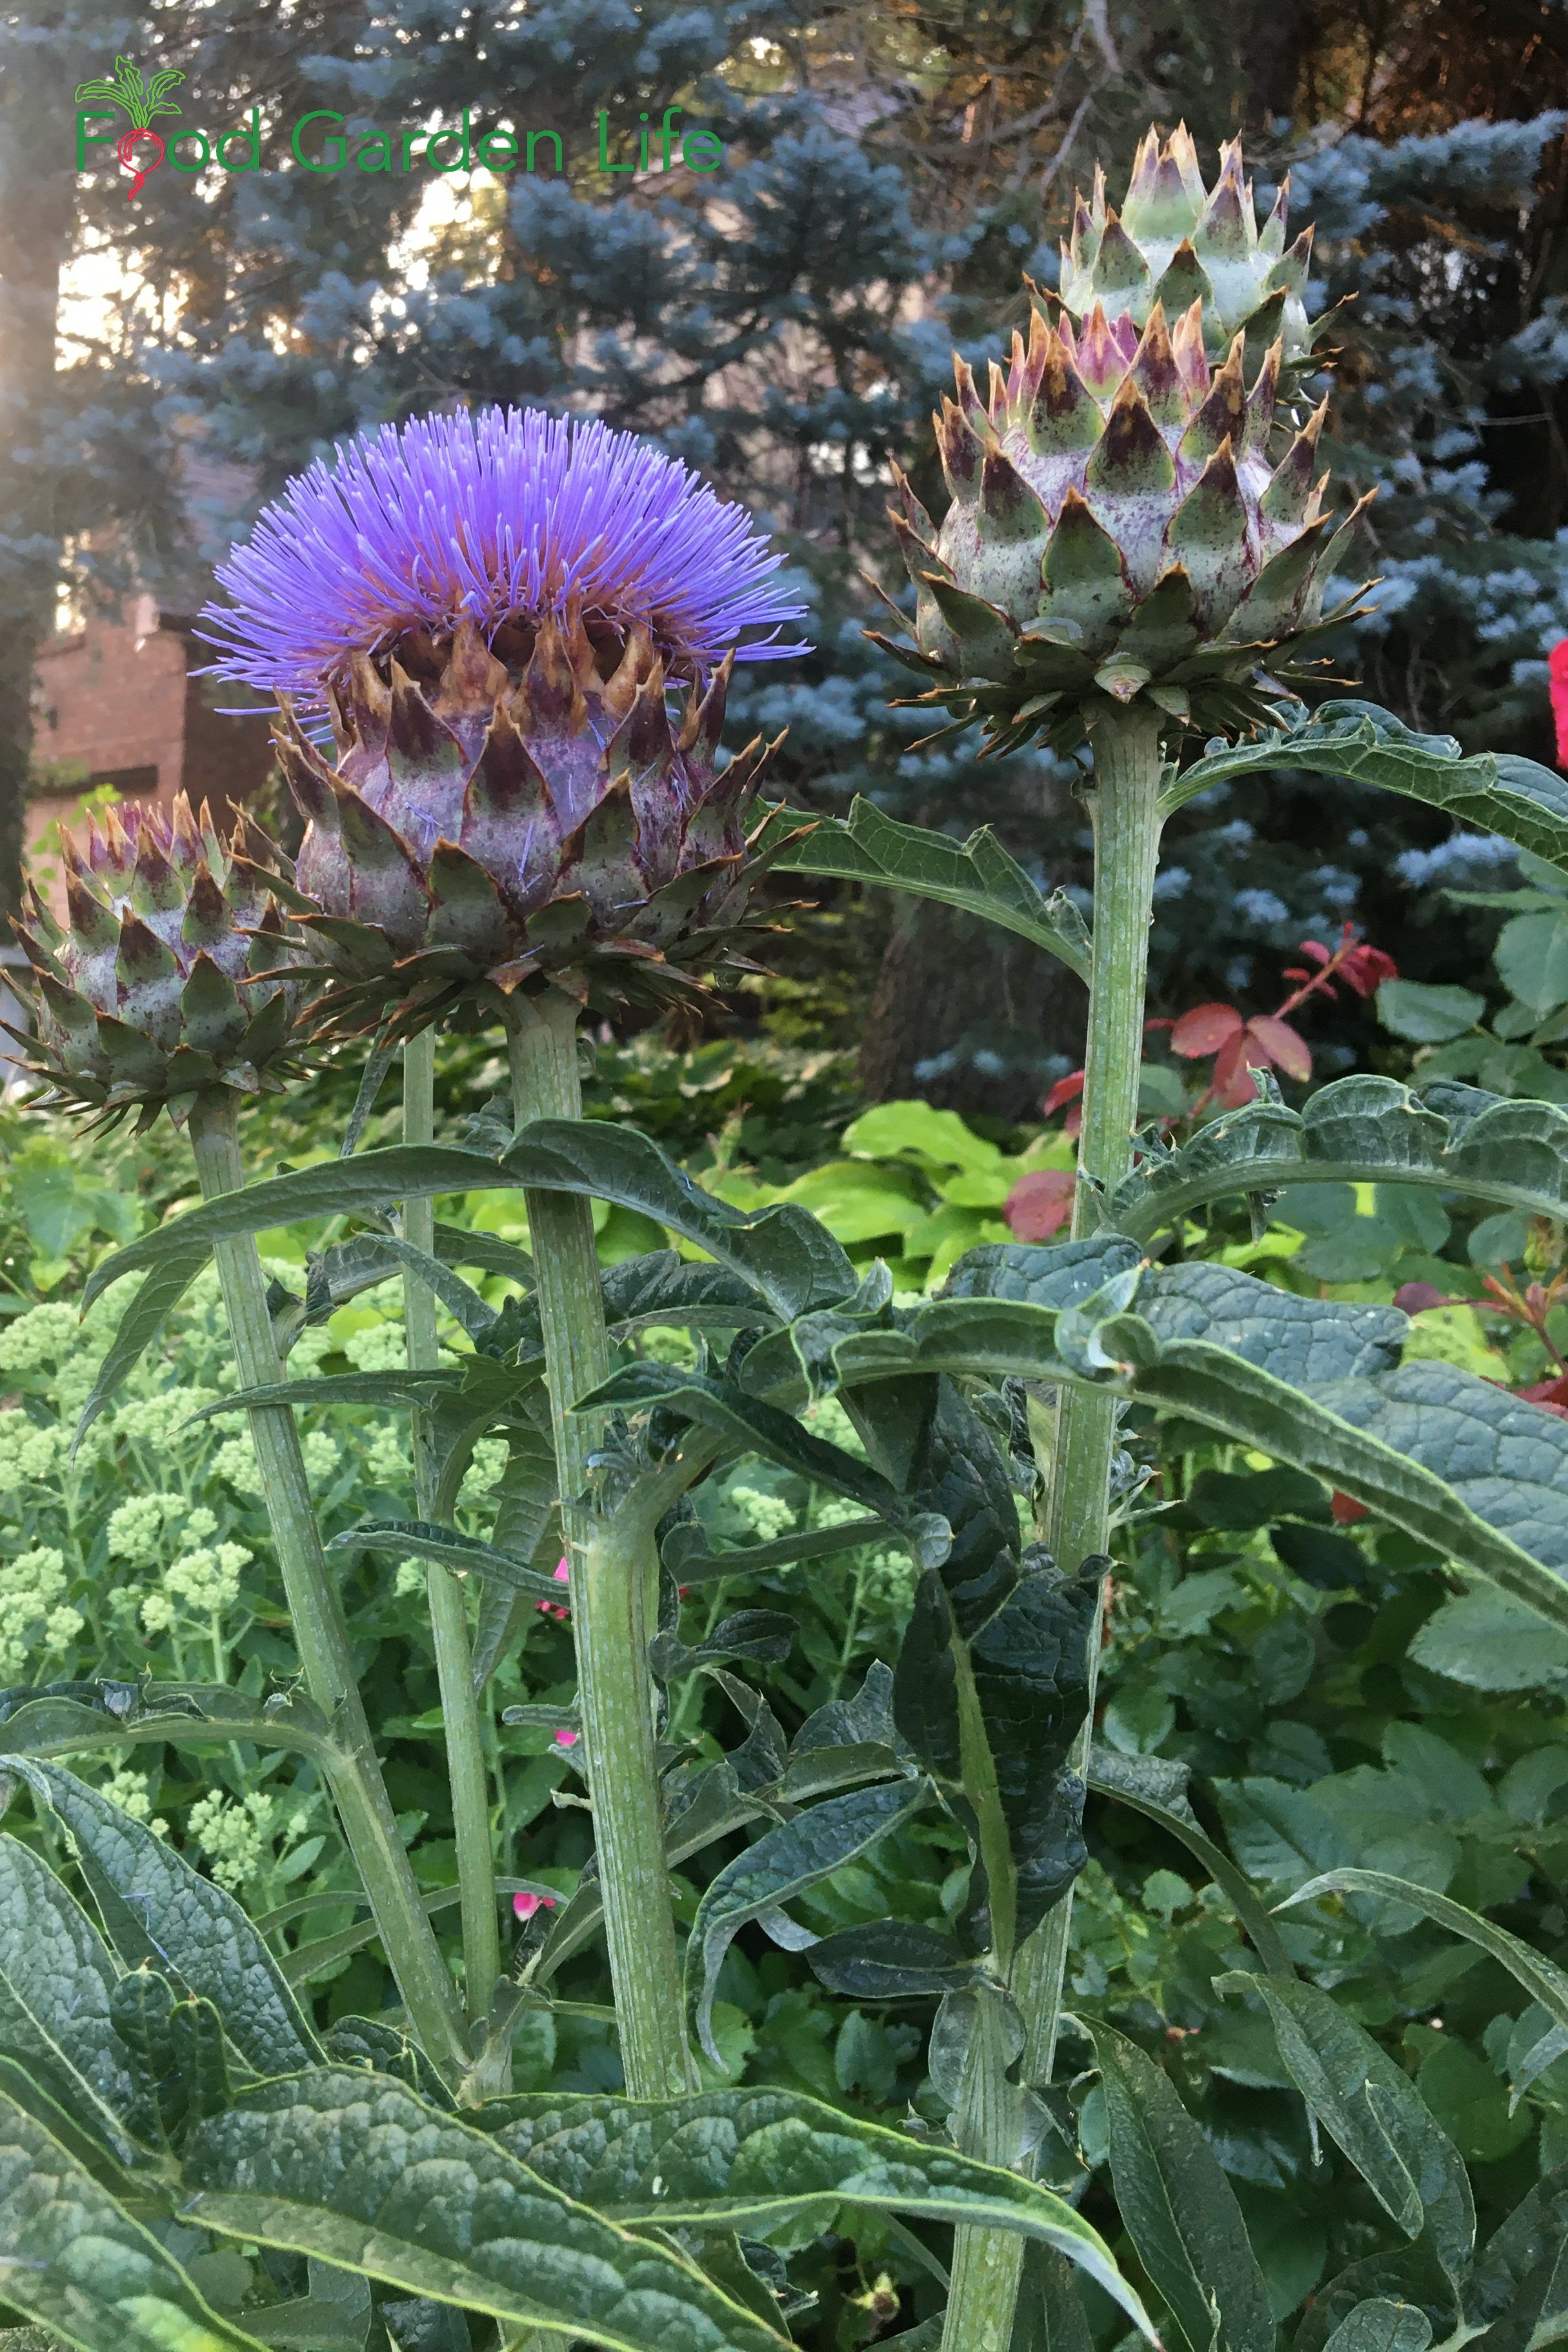

Can You Eat Cardoon Flowers?
I was told by a Palestinian chef that while the leaf stalks are what is eaten in Southern Europe, in parts of Palestine it’s the flower heads that are eaten. I have not yet tried cooking the heads—but it’s on my to-try list.
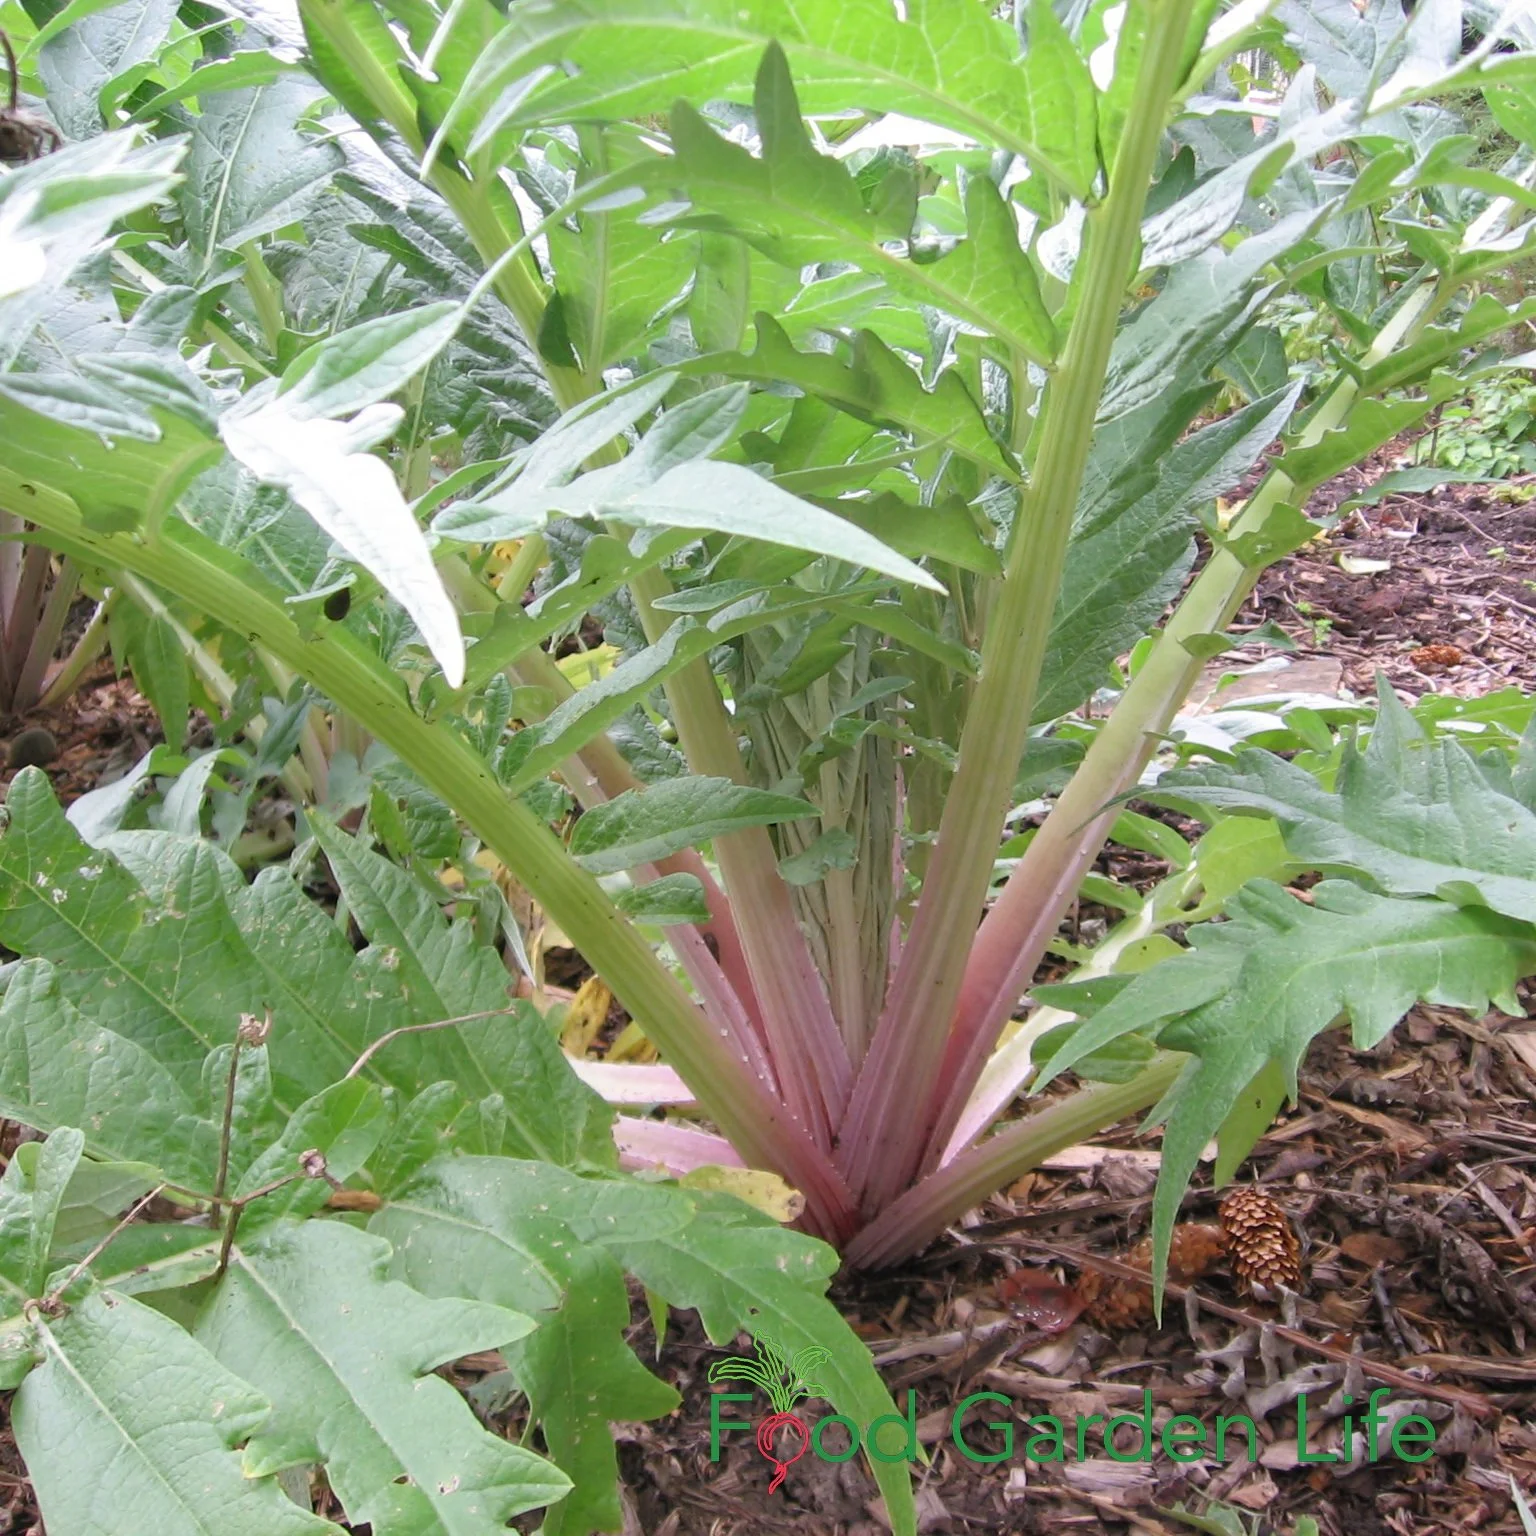
Grow cardoon, an edible and attractive relative of the artichoke. Pictured is ‘Rouge d’Alger’ cardoon.
Grow Cardoon From Seed
Cardoon transplants are a rare find at garden centres. Luckily, it’s easy to grow cardoon from seed.
(If you don’t find cardoon seeds in the vegetable section of seed catalogues, check under annuals.)
Start cardoon seeds indoors, about 10 weeks before the last spring frost. Transplant outdoors after the risk of frost is over.
Another advantage to growing cardoon from seed is that you can grow a showy variety such as ‘Rouge d’Alger,’ which has red-tinted stalks.
Cardoon In the Garden
How to Blanch Cardoon Stalks
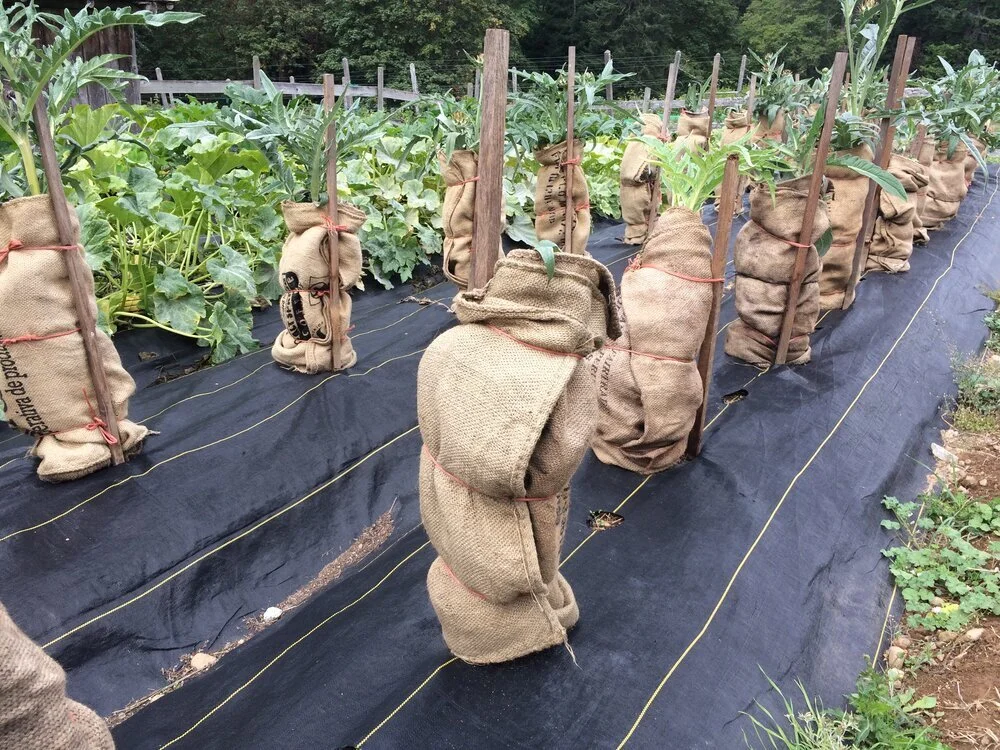
If you grow cardoon, wrap it with cardboard, newspaper, or burlap (pictured here) to get a milder flavour.
To get cardoon stalks that are whiter, more tender, and less bitter, blanch them.
Blanching simply means excluding sunlight.
To blanch cardoon stalks, wrap the bottom 12 inches (30 cm) of the plant in cardboard or newspaper two to four weeks before harvesting
Harvest inner stalks, not outer the more stringy outer ones
I’ve also seen cardoon stalks wrapped with burlap or fabric.
Find out how to blanch vegetables in the garden.
Grow Cardoons in Containers
If you’re gardening in a small space, you can still grow cardoon, either as an edible or an ornamental plant. Cardoon grows very well in containers.
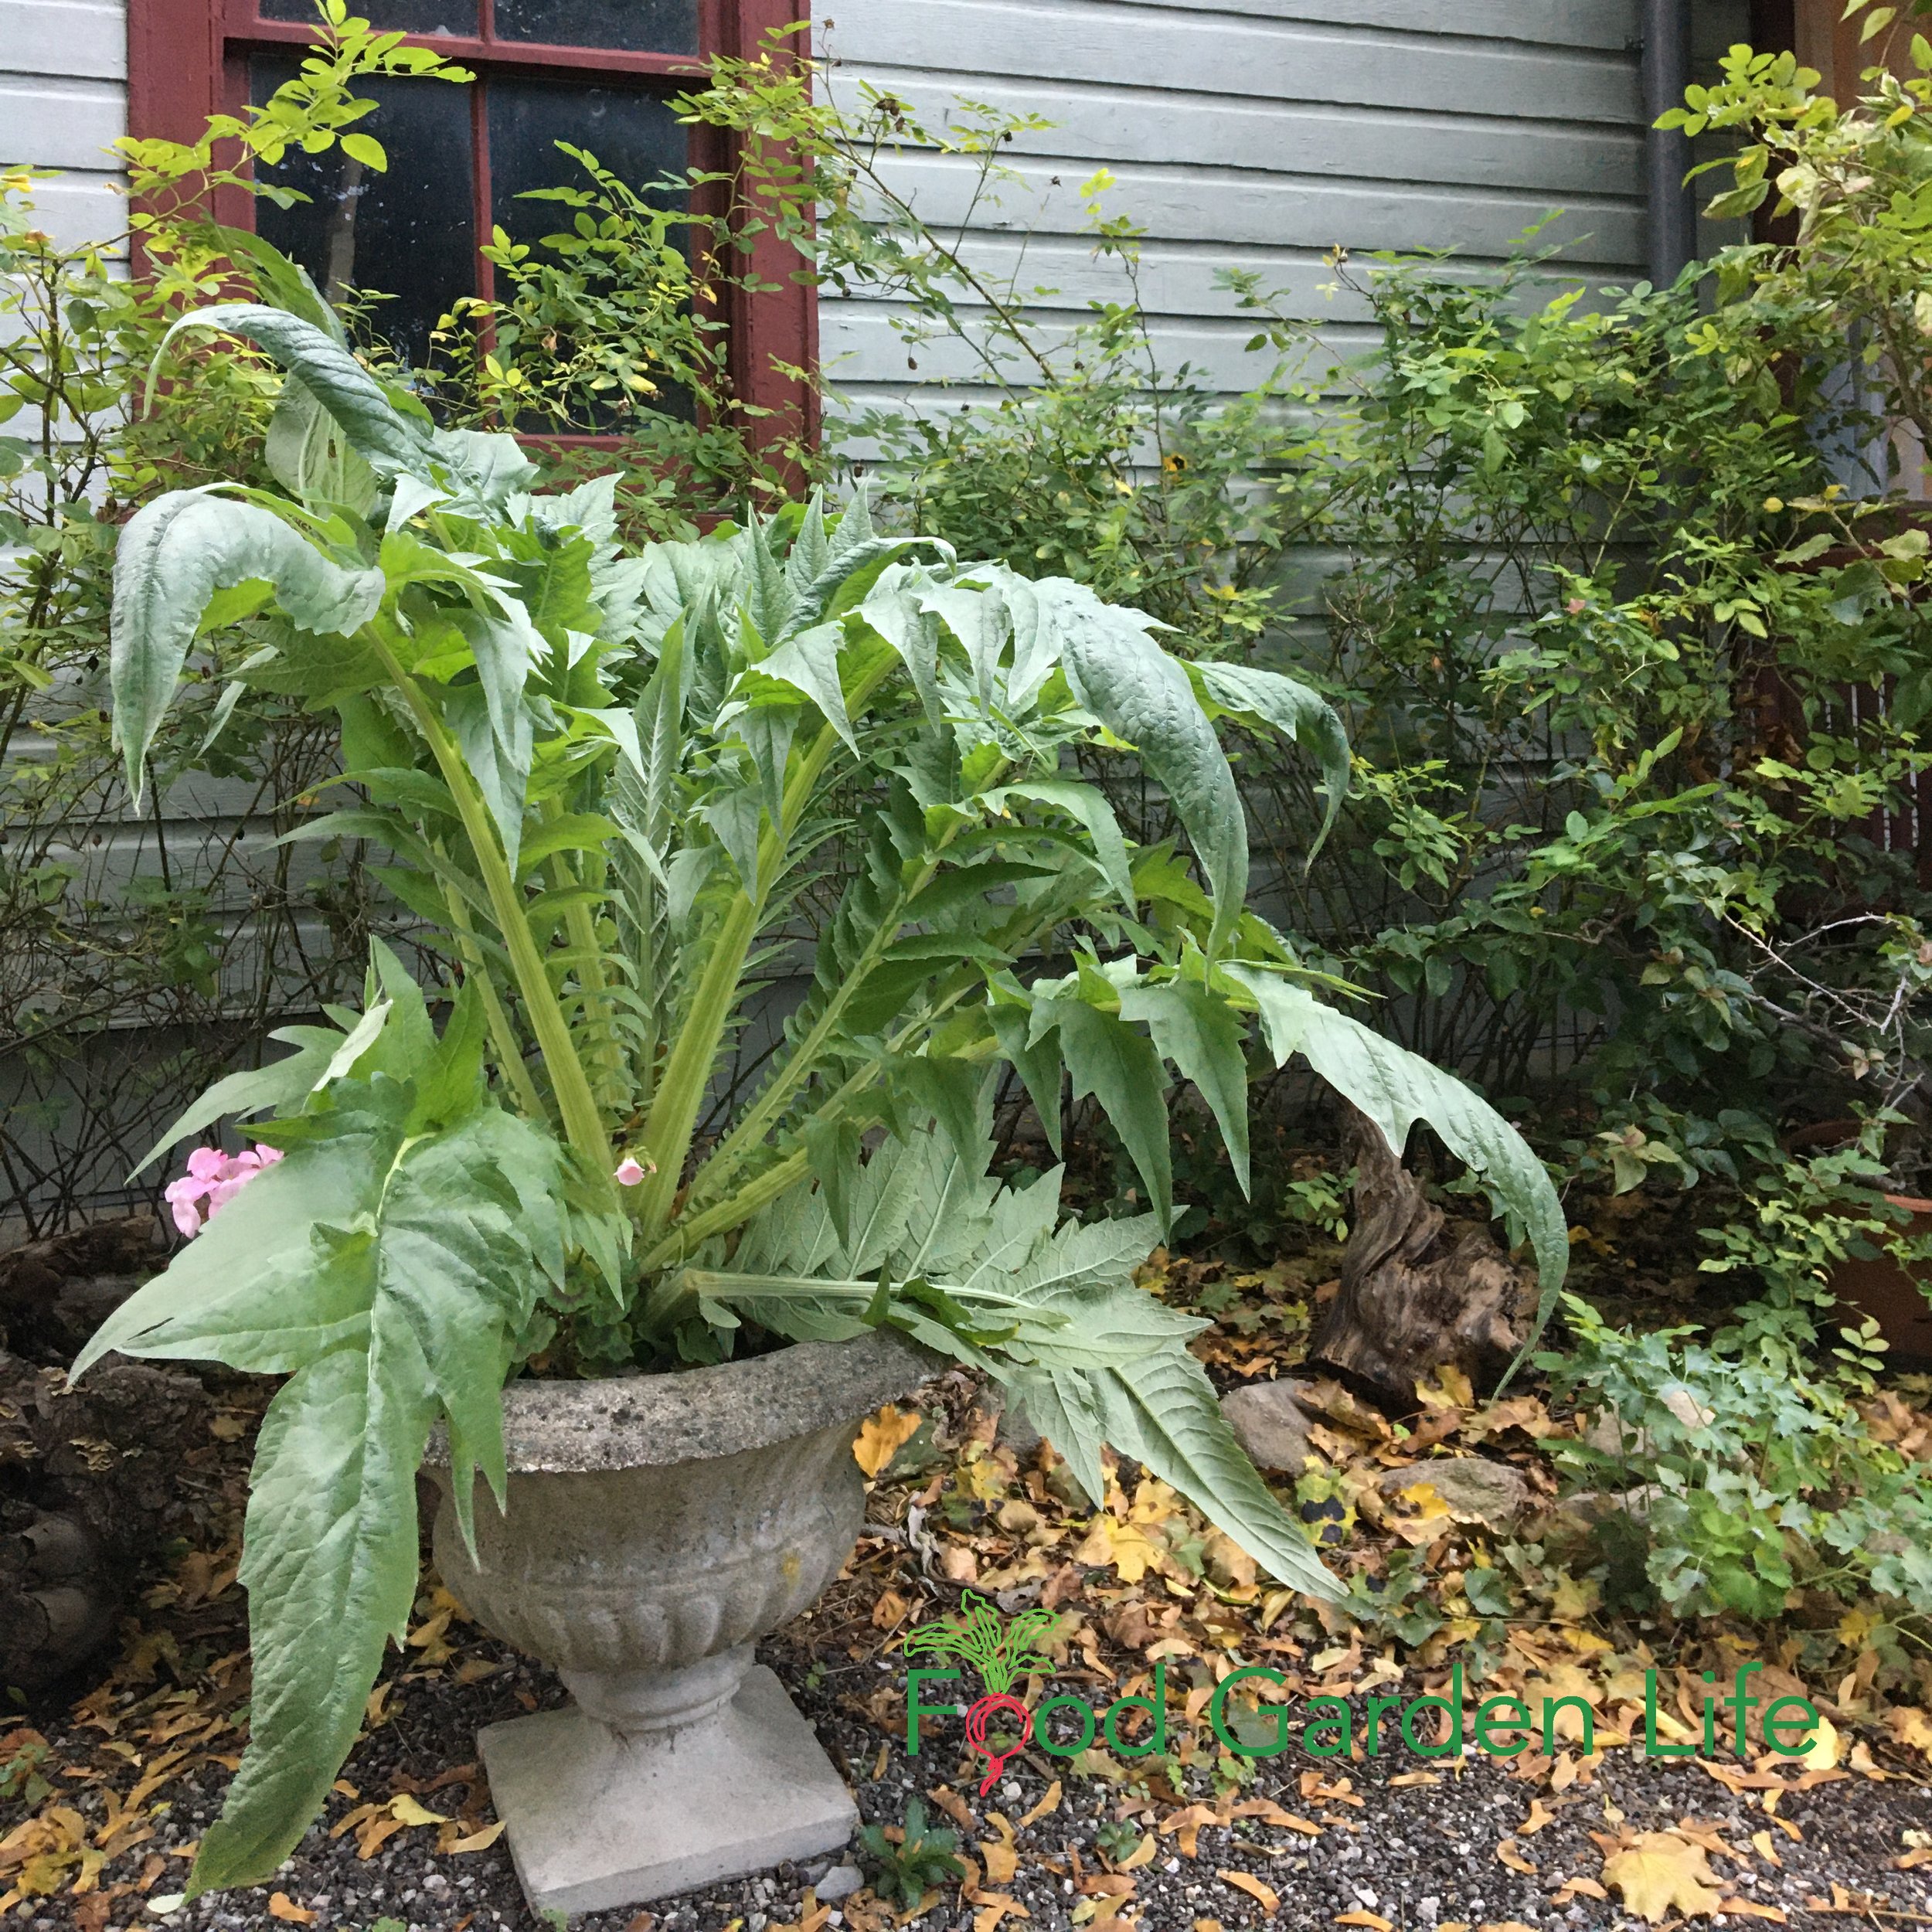
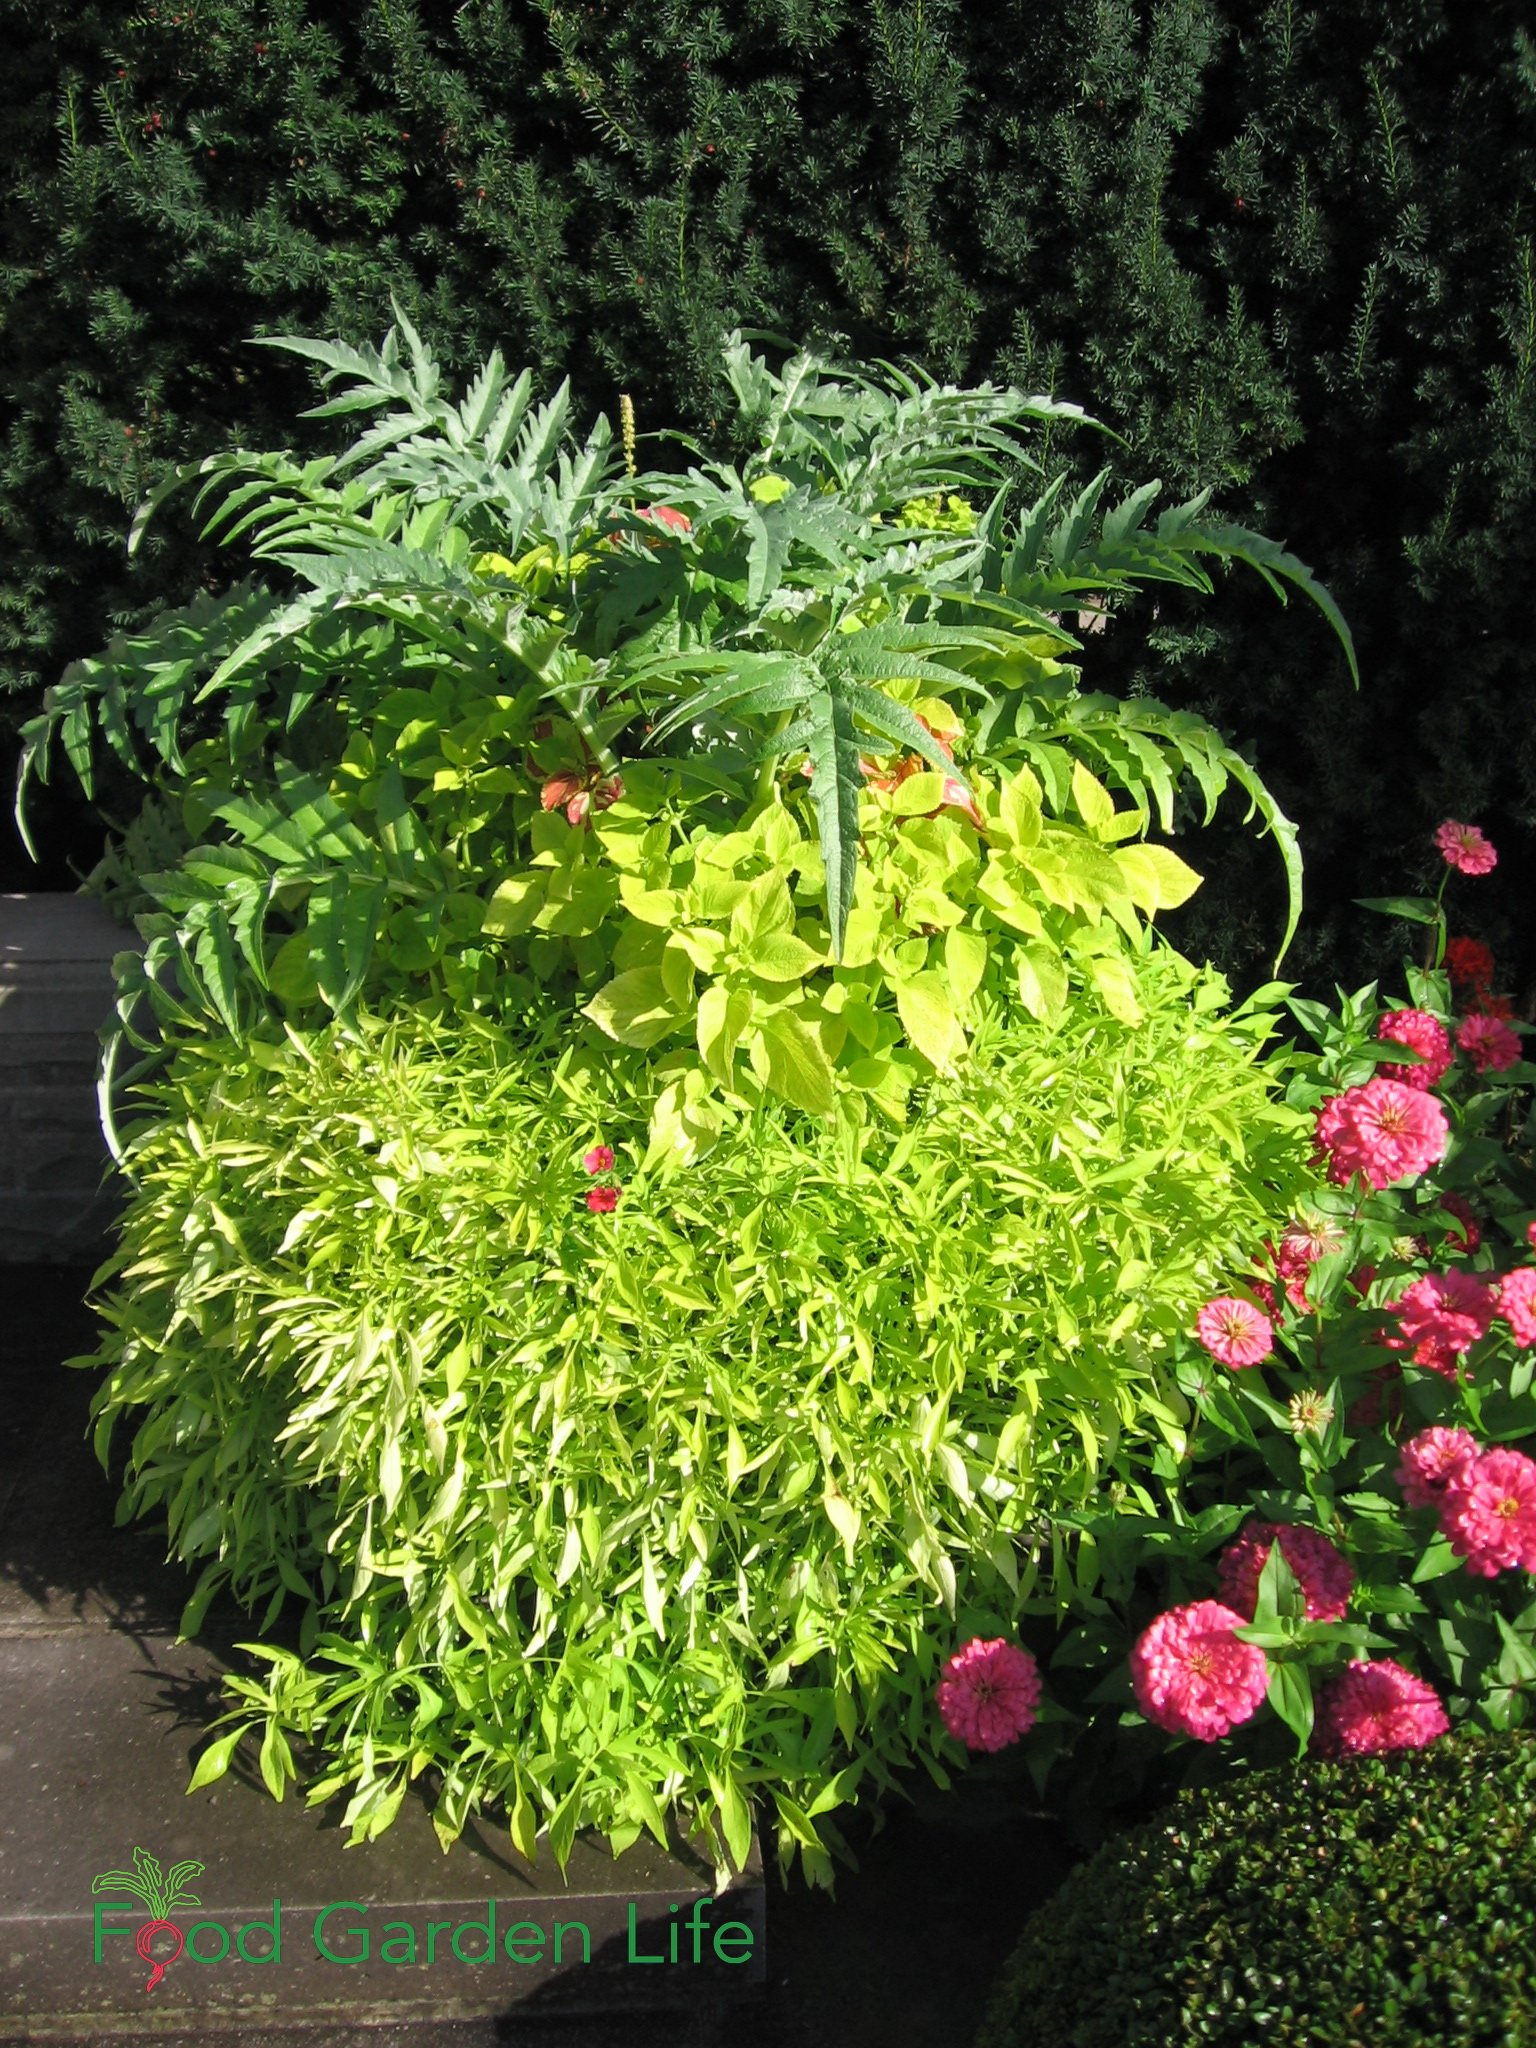
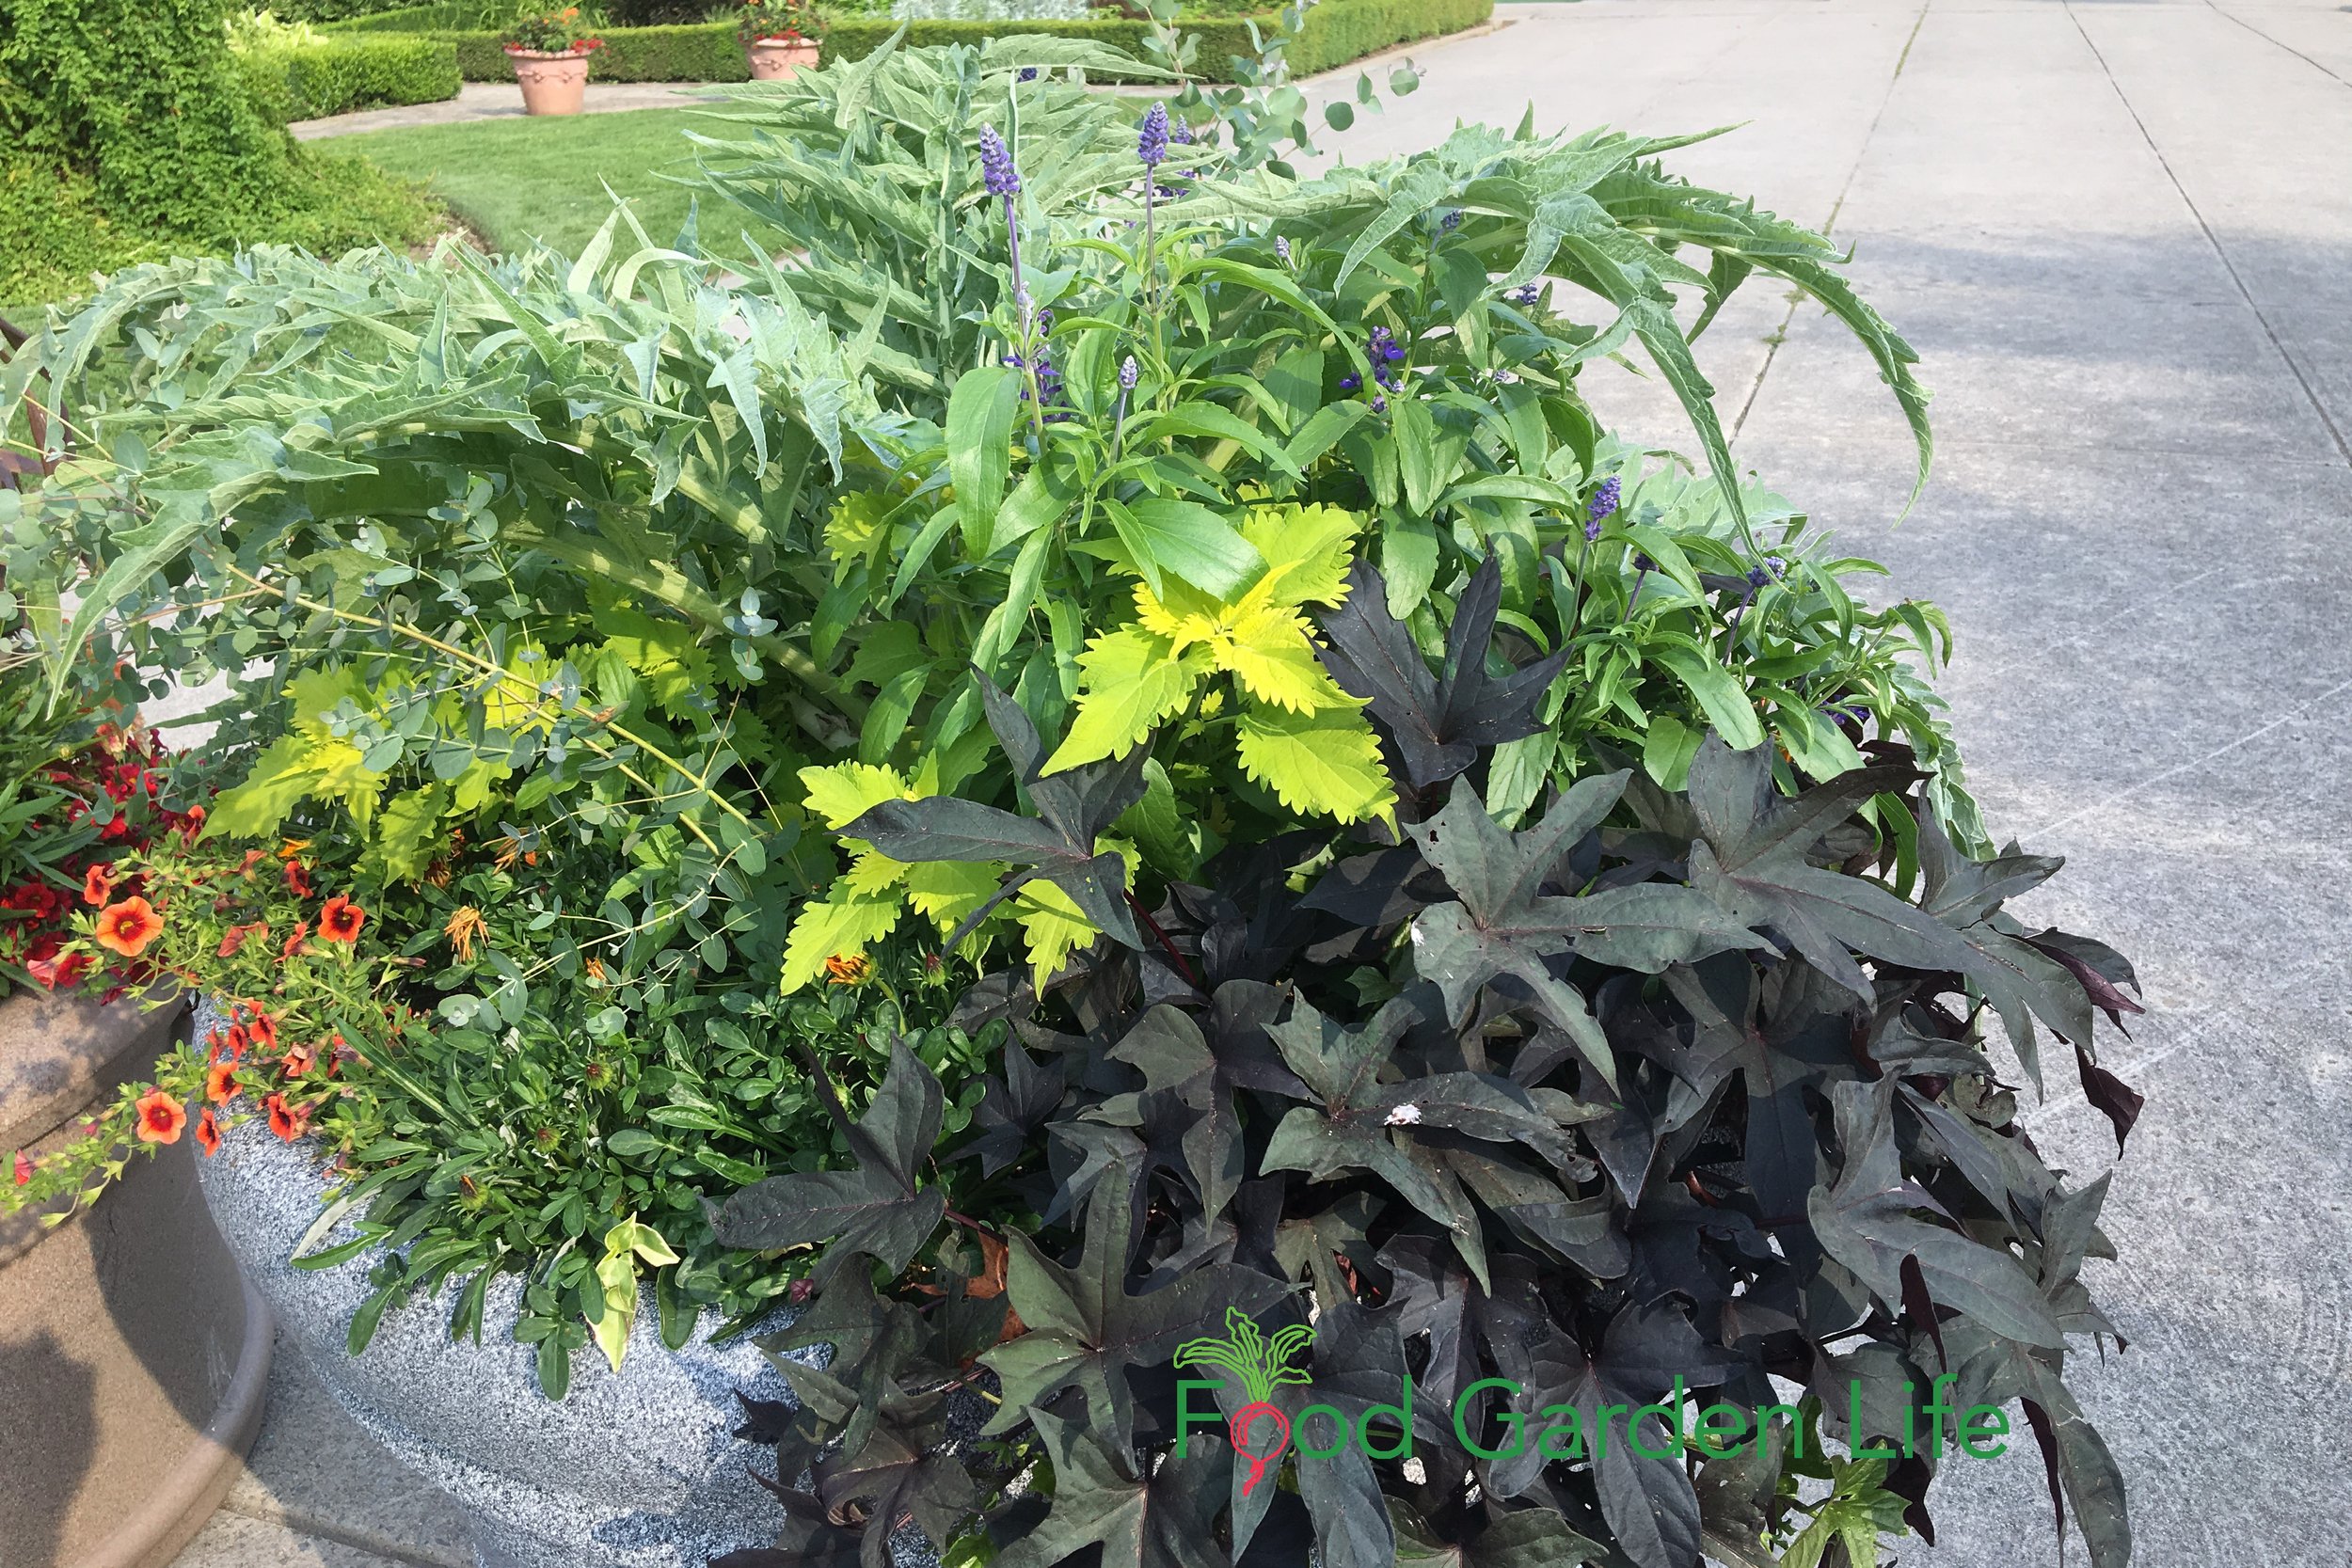
Cardoon in Edible Landscapes
While cardoon is a sun-loving plant, it grows respectably well in partial sun, making it very versatile for use in an edible landscape.
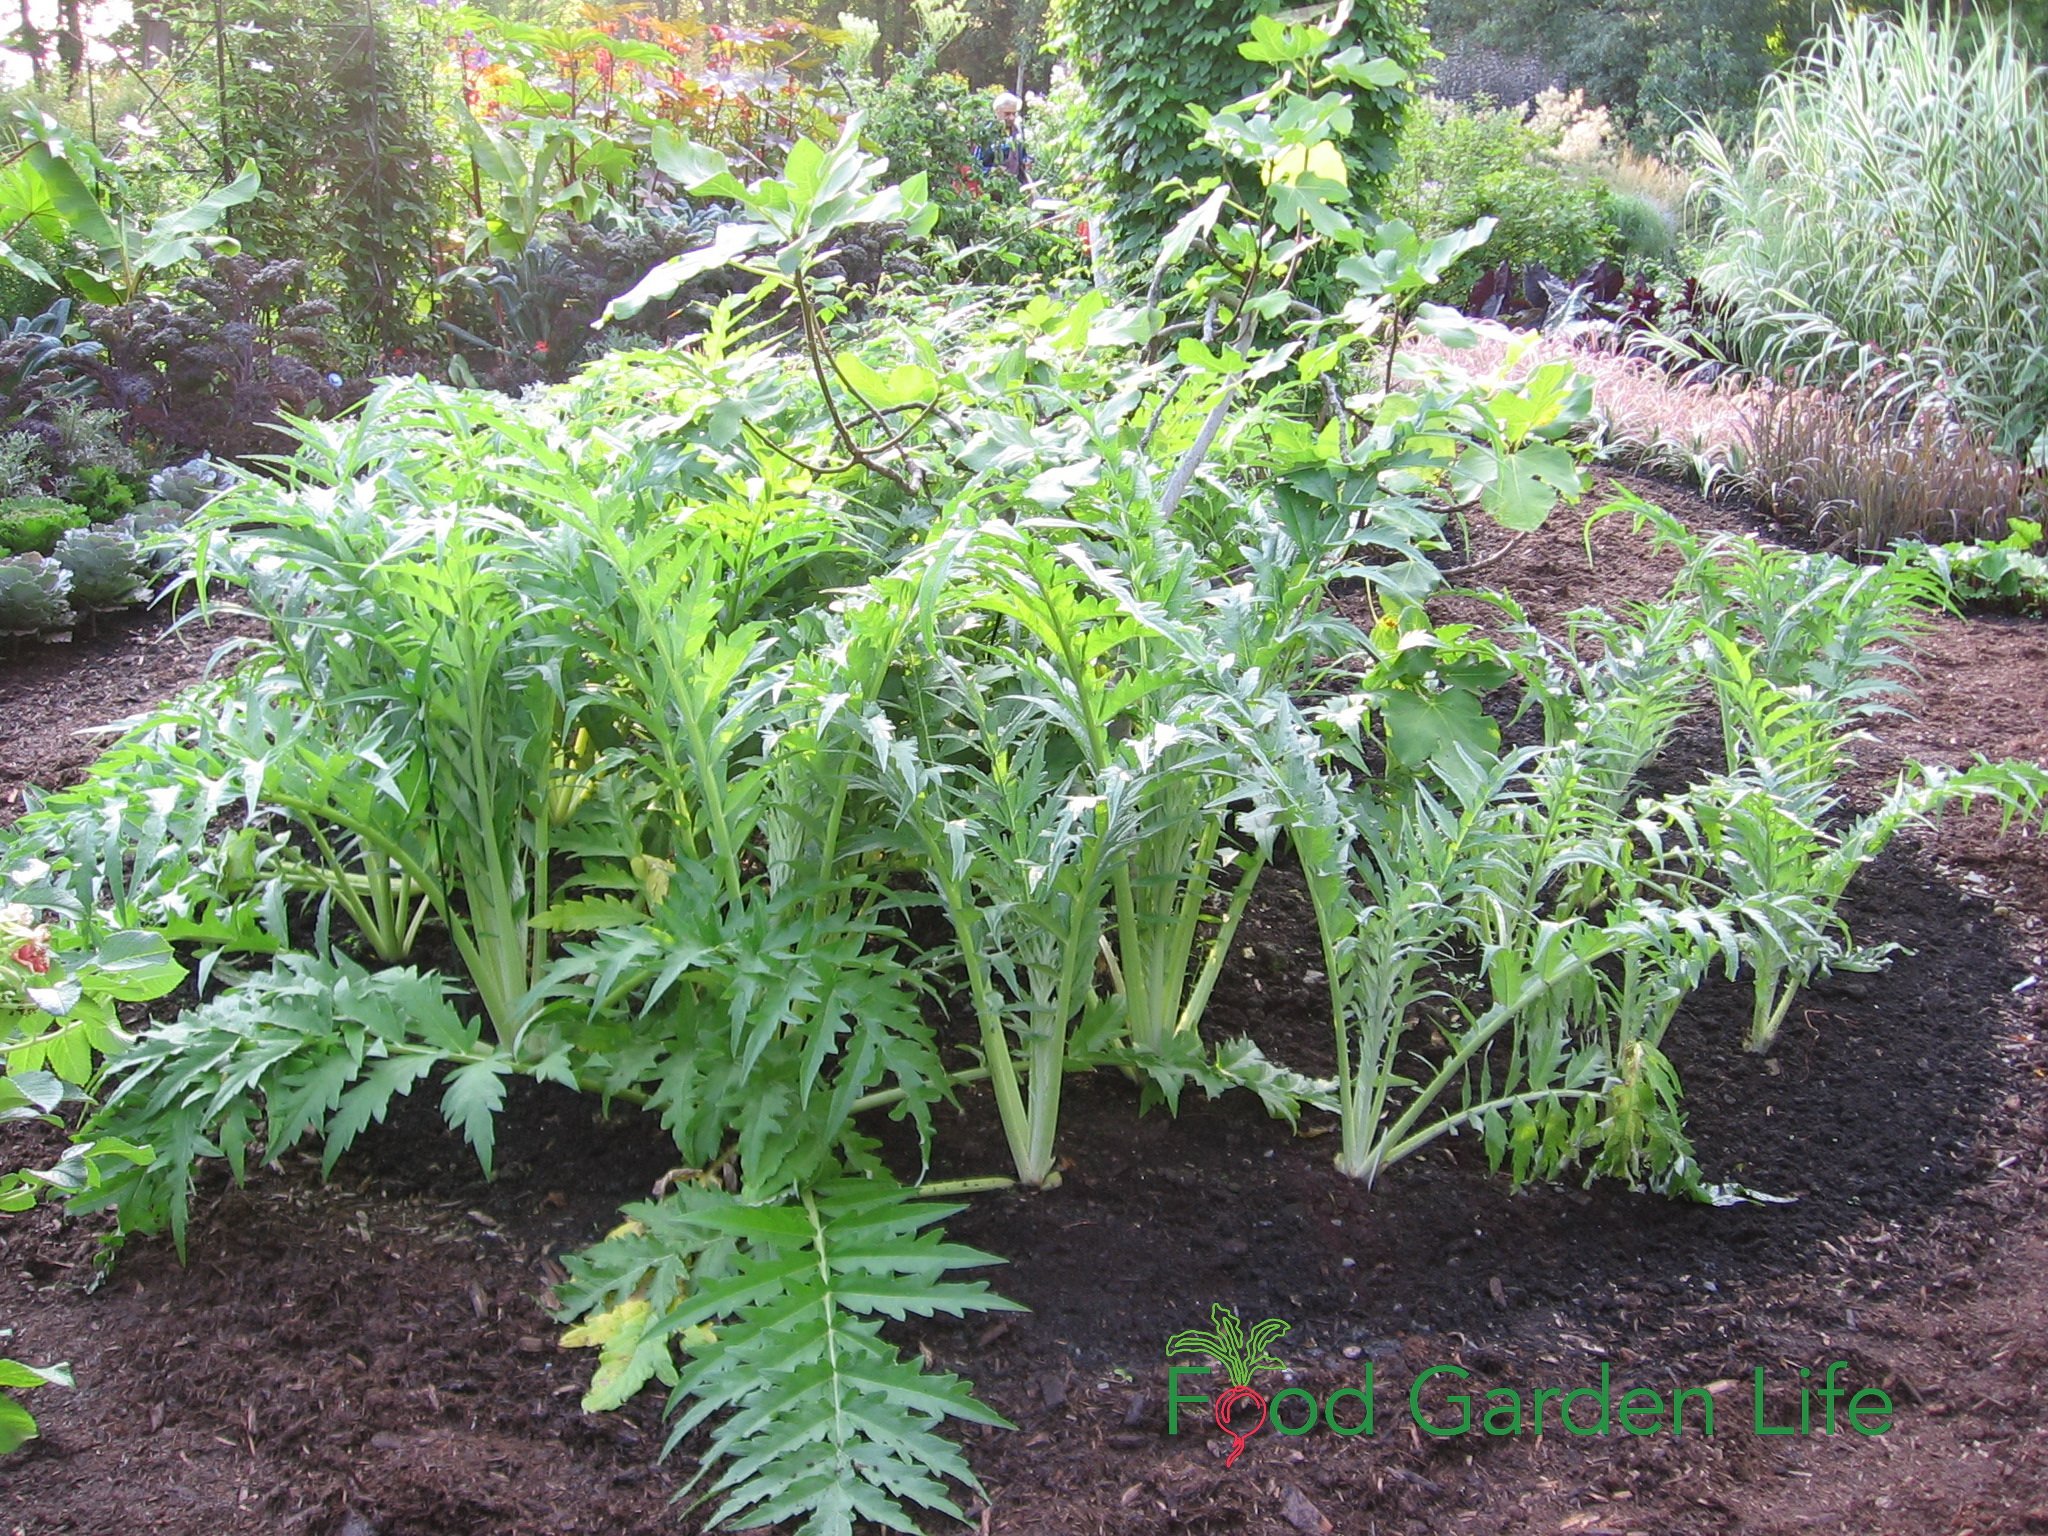

Cardoon for Fall and Winter Interest
Cardoon plants soldier on when cold fall weather arrives. When brushed with frost, they droop a bit, and then spring back as the sun burns off the frost.
As very cold weather with hard freezes arrives, the cardoon plants will be done for the year.
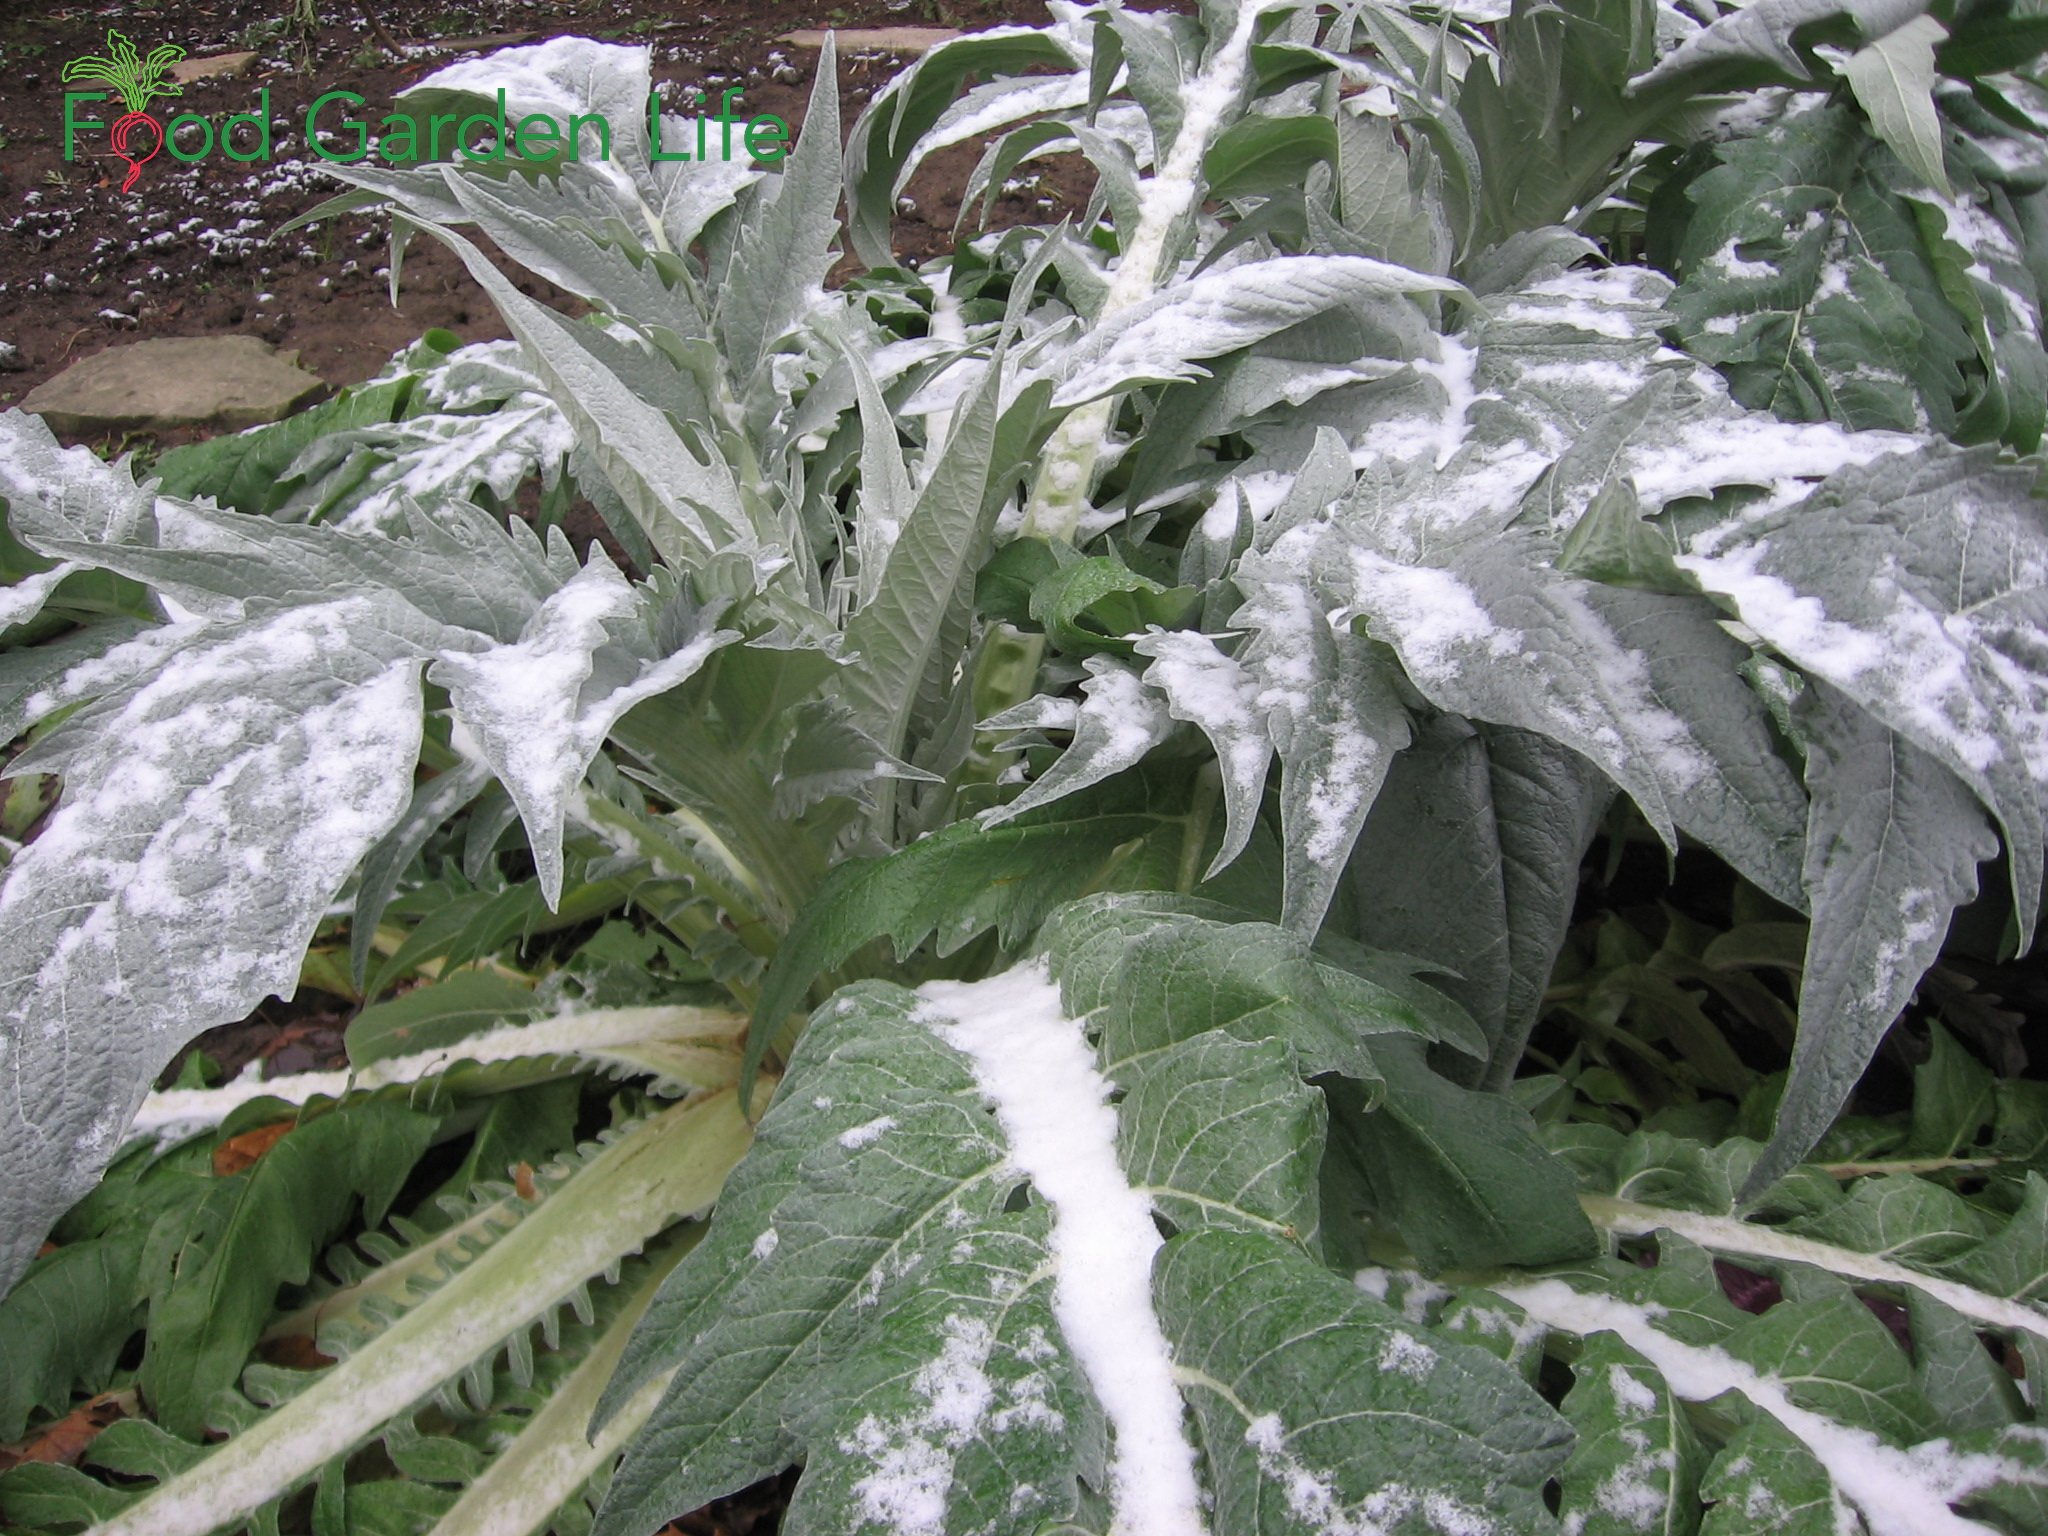
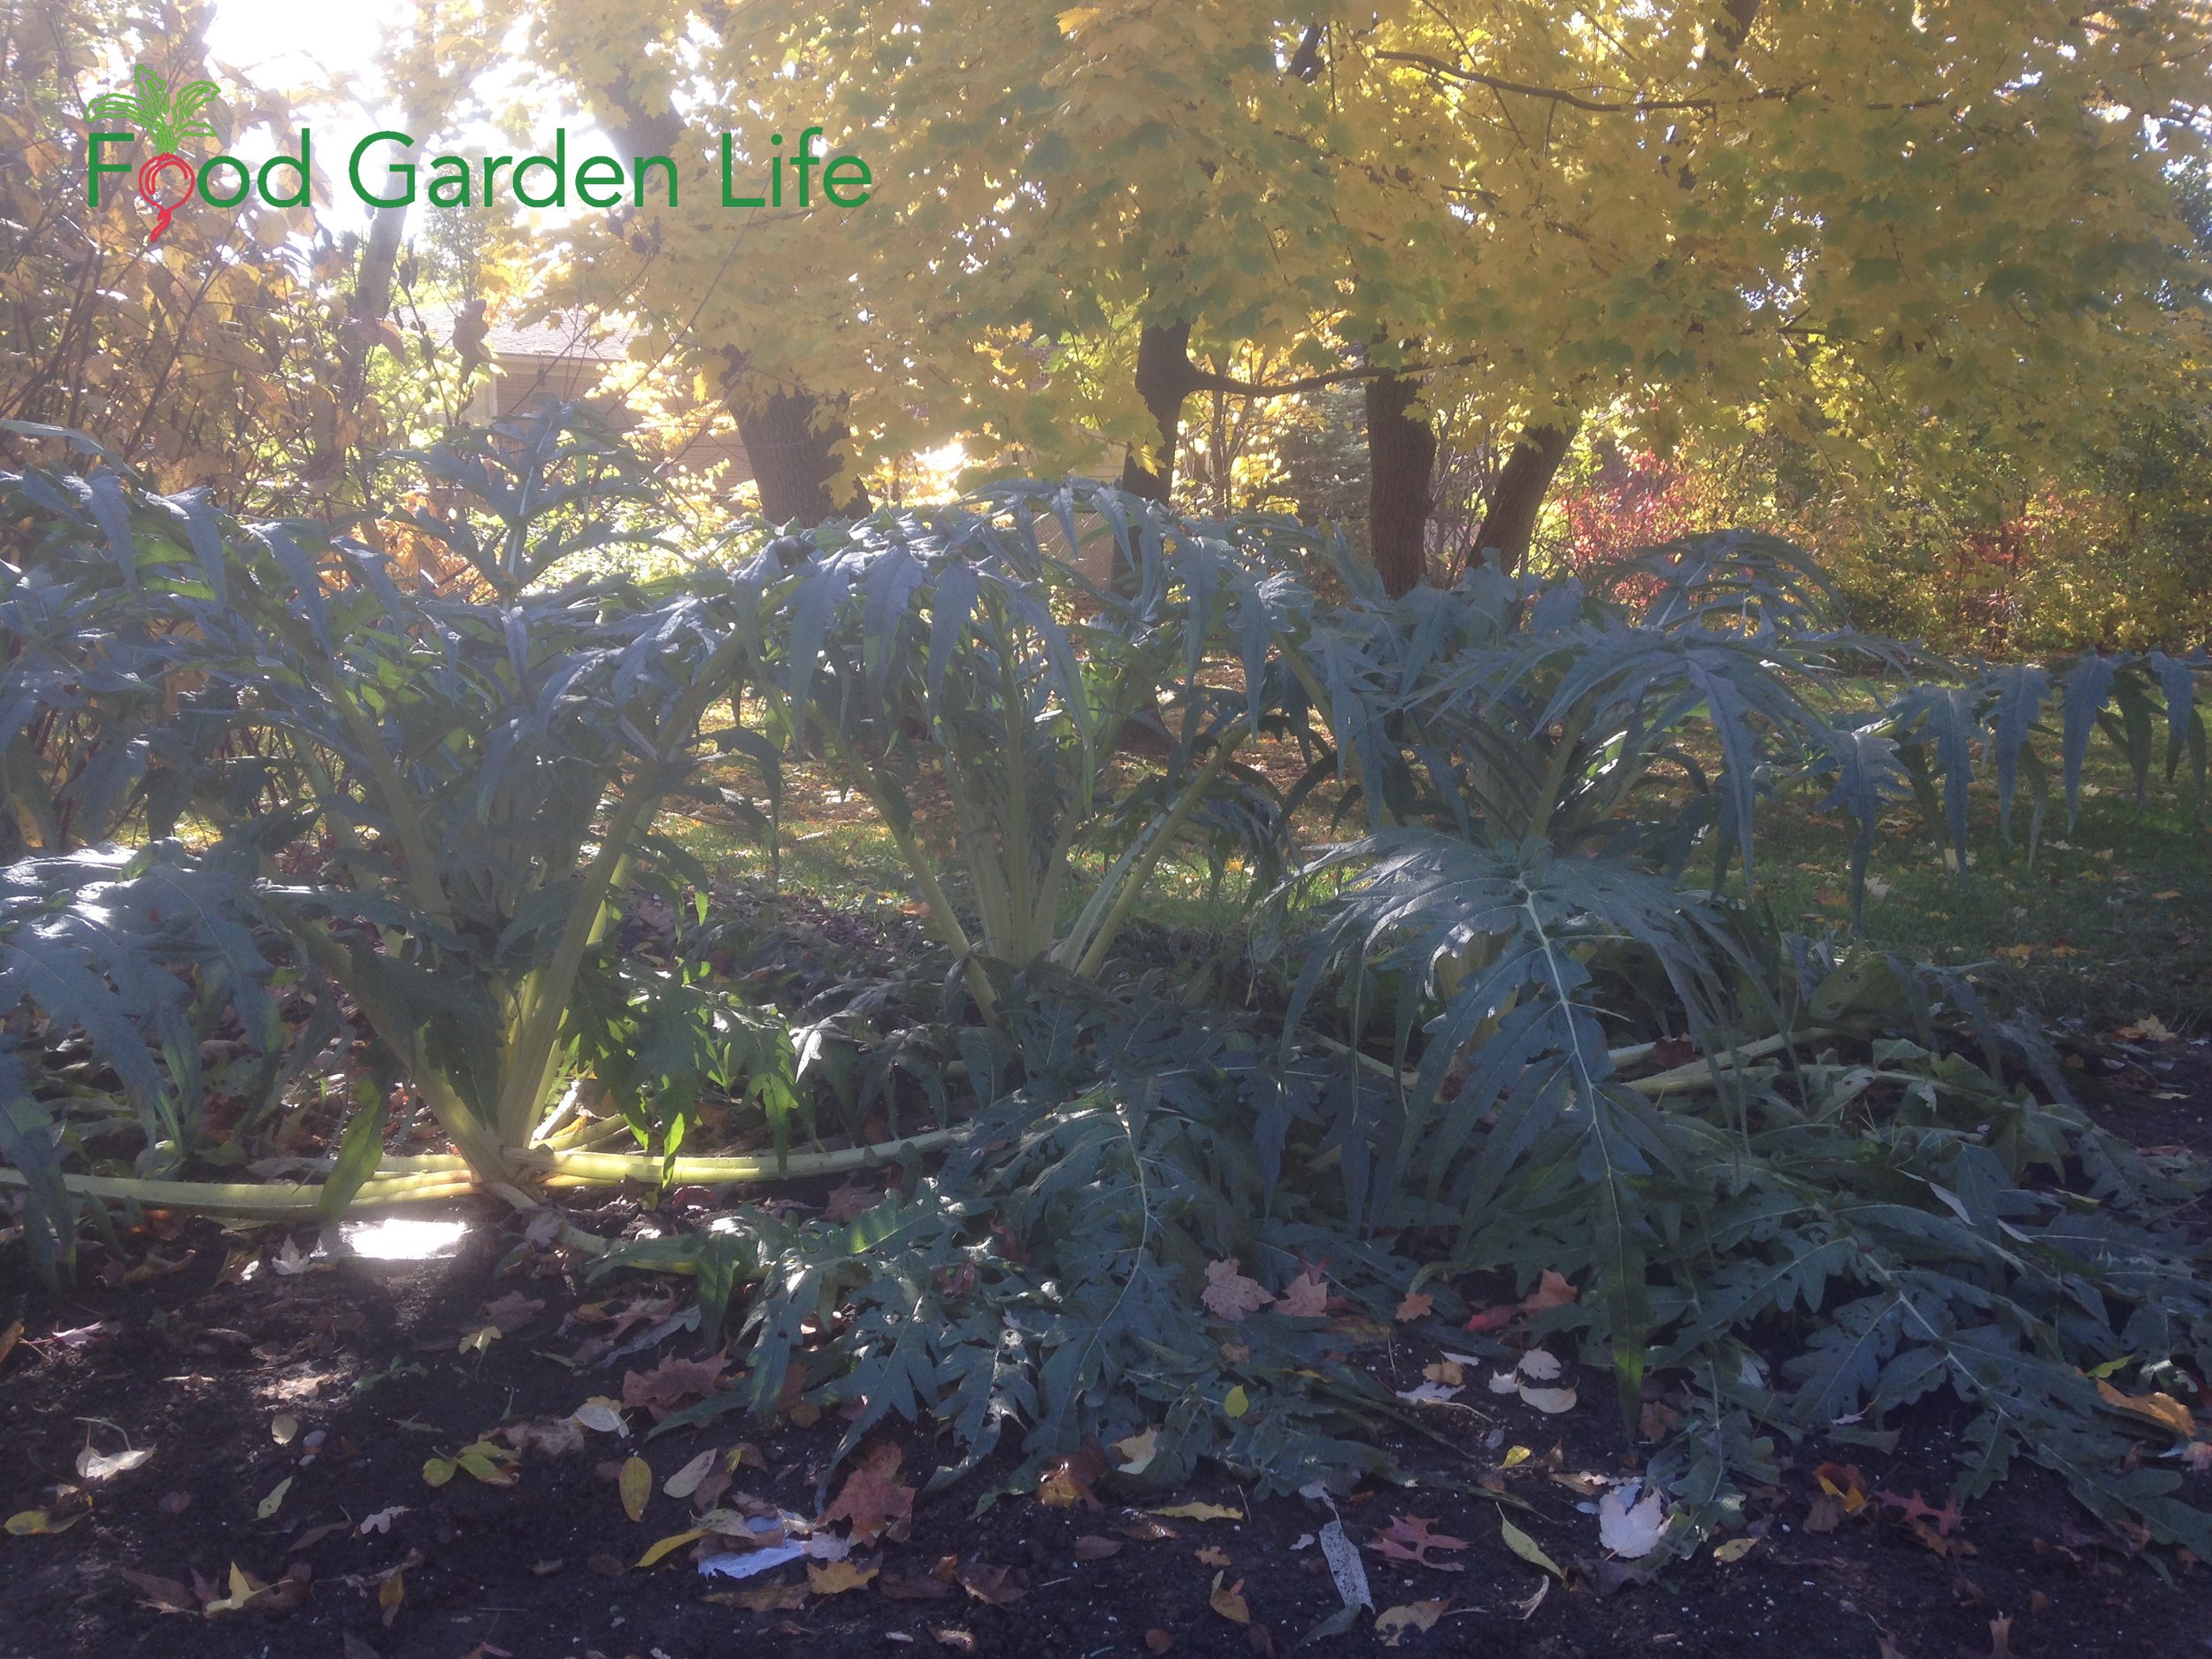
Cardoon as a Cut Flower
No need to say too much here. These bold, dramatic flowers are a great addition to flower arrangements.
Cardoon in the Kitchen
How to Eat Cardoon
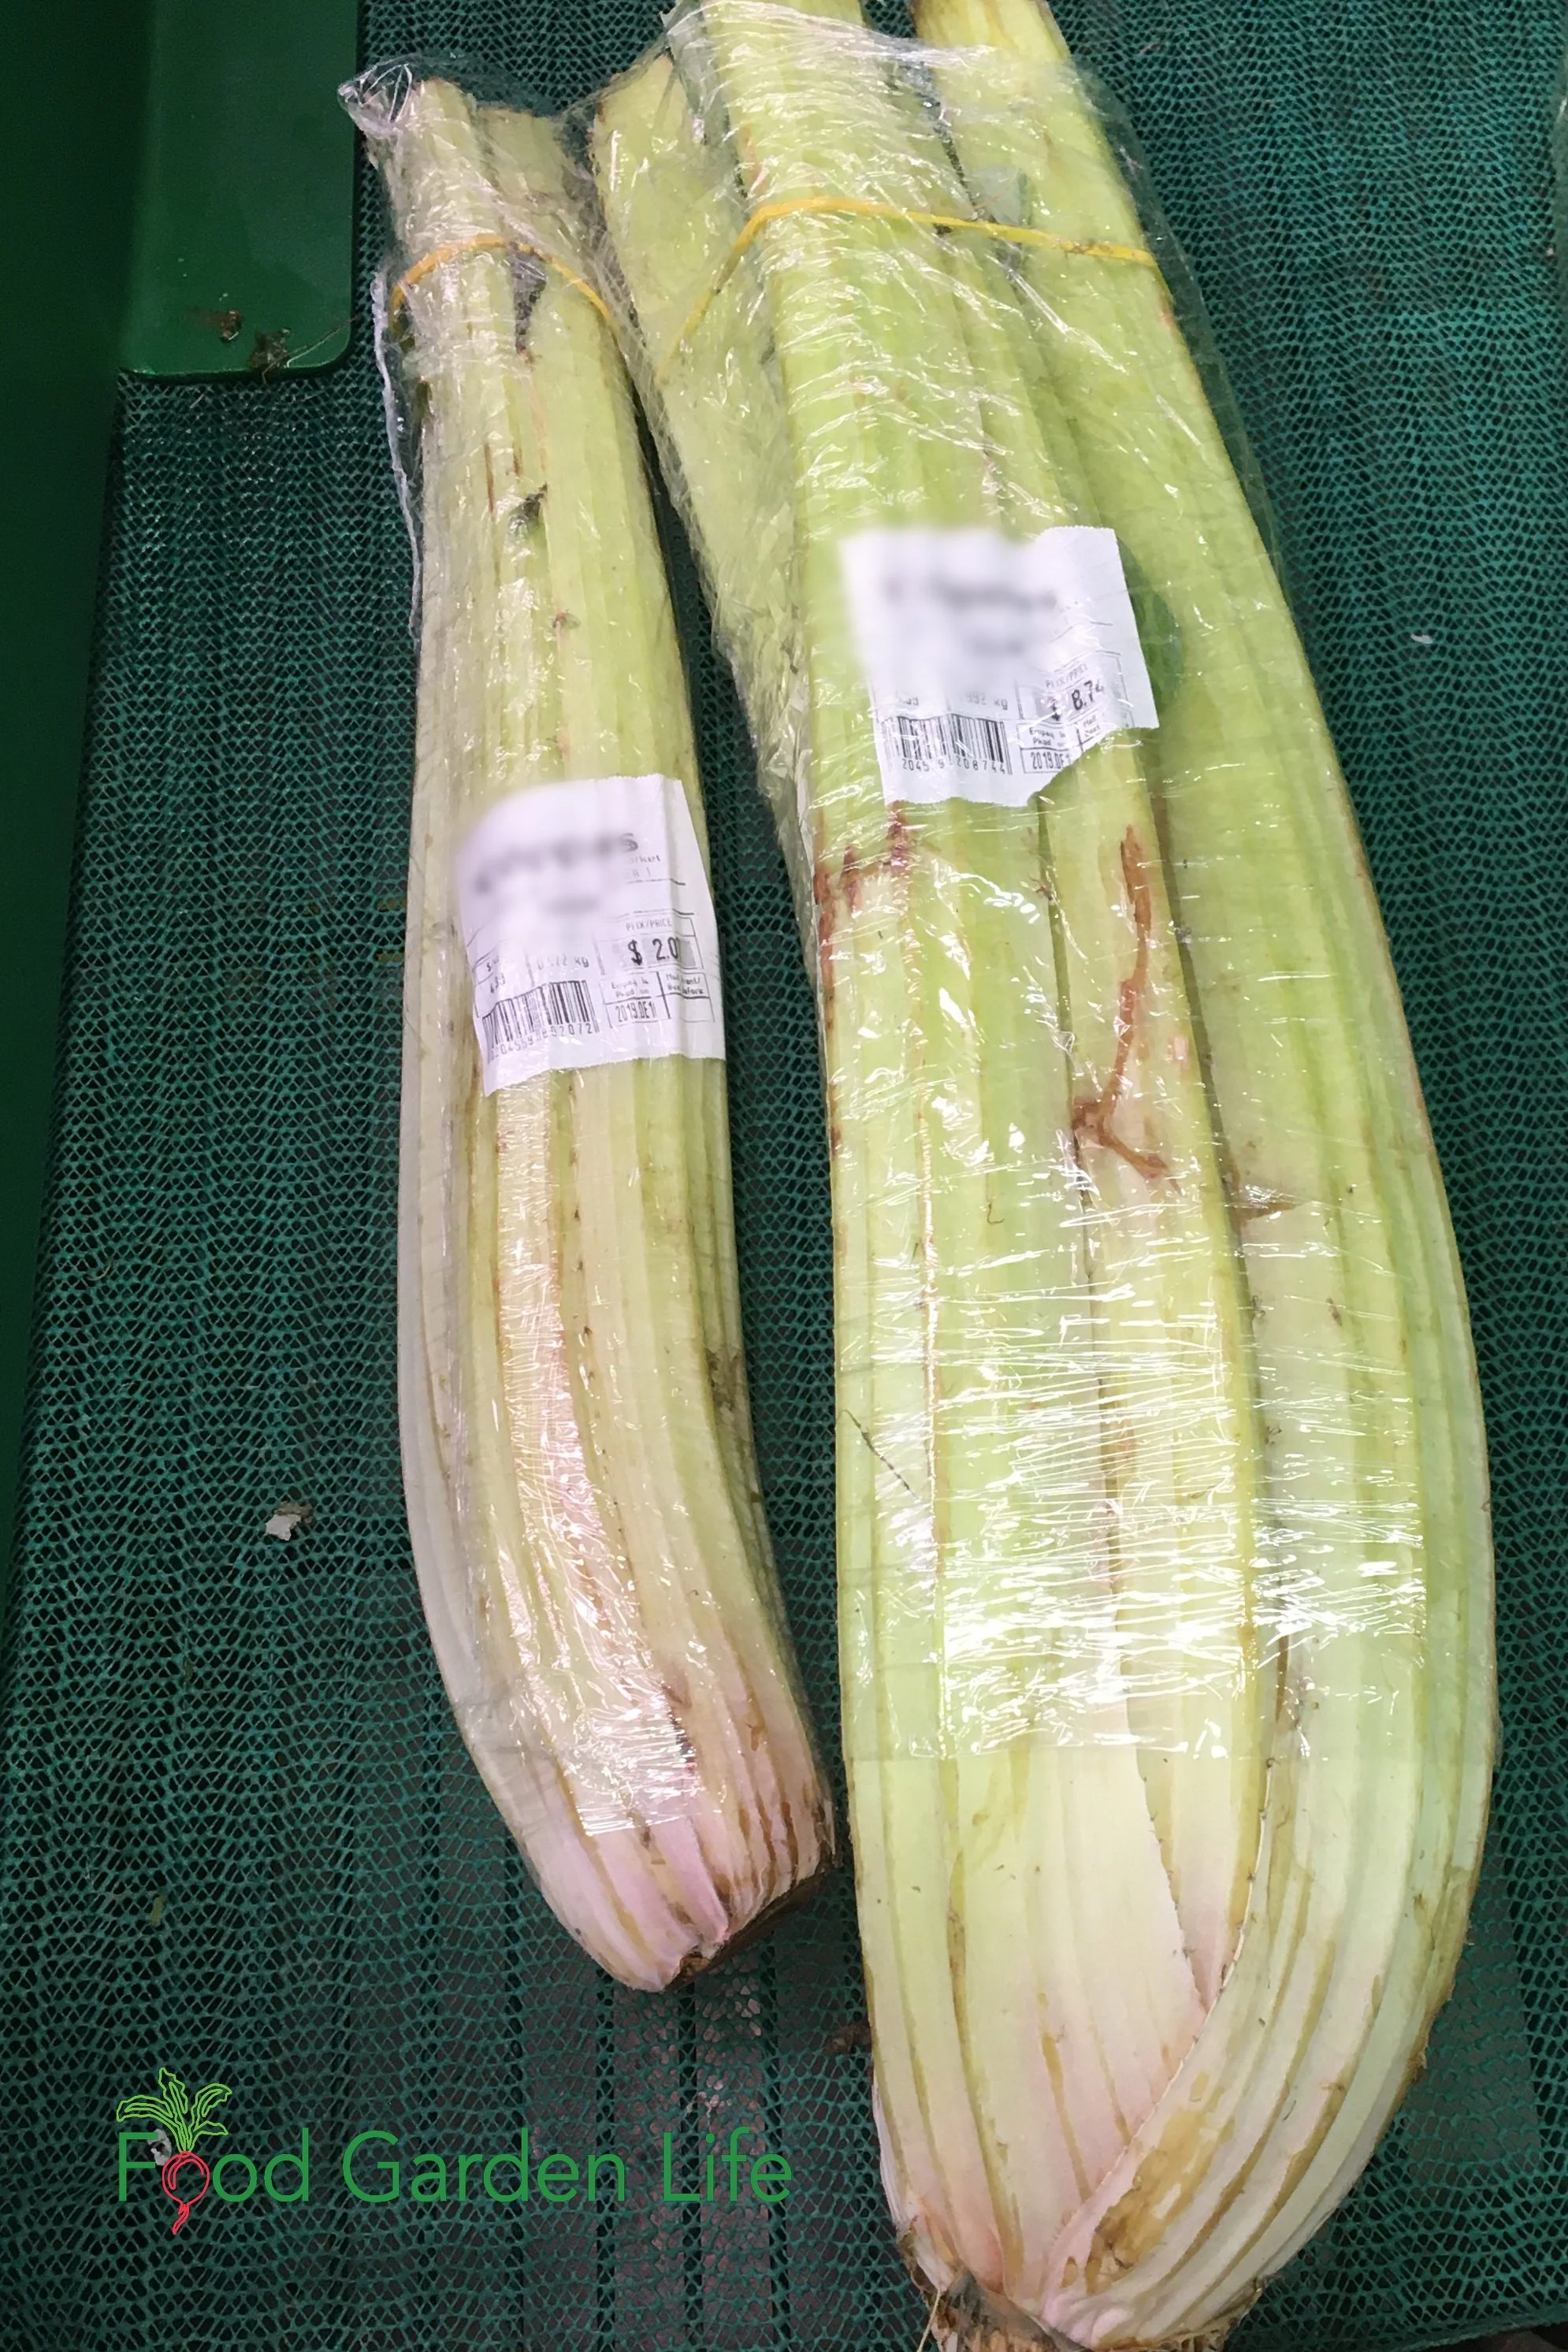
I’ve sent home many visitors with leaf stalks from that dashing row of cardoon plants in my front yard.
But take care if you’ve never cooked it!
“Wow, that was disgusting!” my wife and I stammered to each other after our first attempt at eating steamed cardoon.
But I’ve heard from people who love cardoon, and a festive seasonal cardoon soup served in parts of Italy.
Preparing Cardoon Stalks
Use a knife or vegetable peeler to remove the stringy, outer part of the stalk.
Inner stalks on plants that have been blanched are less stringy.
Best Way to Cook Cardoon
I have found that the best way to cook cardoon is to cut stalks into inch-long (2.5-cm) pieces, then bread and deep-fry them, giving crunchy morsels that are a perfect vehicle for a dip.
Minimize Bitterness
Cook cardoon to minimize bitterness, using these pointers from a chef who heard about my reaction the first time I cooked it:
Deep frying helps counter bitterness
Add salt to the water if boiling cardoon (and it’s best to change the water at least once during cooking)
Or roast and lightly char stalks to counter bitterness
Other Ways to Use Cardoon
Cardoon as Rennet Substitute
Extracts from the cardoon flower are used to make a vegetarian substitute for rennet—which is used to make cheese.
Shopping for Cardoon Stalks
Cardone Vegetable
If you want to buy cardoon stalks, they might not be labelled “cardoon.”
At a local grocery store, cardoon stalks are labelled as “cardone.”
Find This Helpful?
Enjoy not being bombarded by annoying ads?
Appreciate the absence of junky affiliate links for products you don’t need?
It’s because we’re reader supported.
If we’ve helped in your food-gardening journey, we’re glad of support. You can high-five us below. Any amount welcome!
More Vegetable Gardening Ideas
More Mediterranean Crops to Grow in Cold Climates
Guide to Growing an Olive Tree in a Pot
Intro to Growing Figs in Cold Climates
How to Grow Artichoke in Northern Climates
Guide: How to Grow Lemon Trees Indoors That Actually Produce Lemons
Courses to Help You Grow Mediterranean Crops
Books to Help You Grow Mediterranean Crops
7 Vegetable Garden Layout Ideas To Grow More Food In Your Garden
By Steven Biggs
Garden Layout for Vegetables
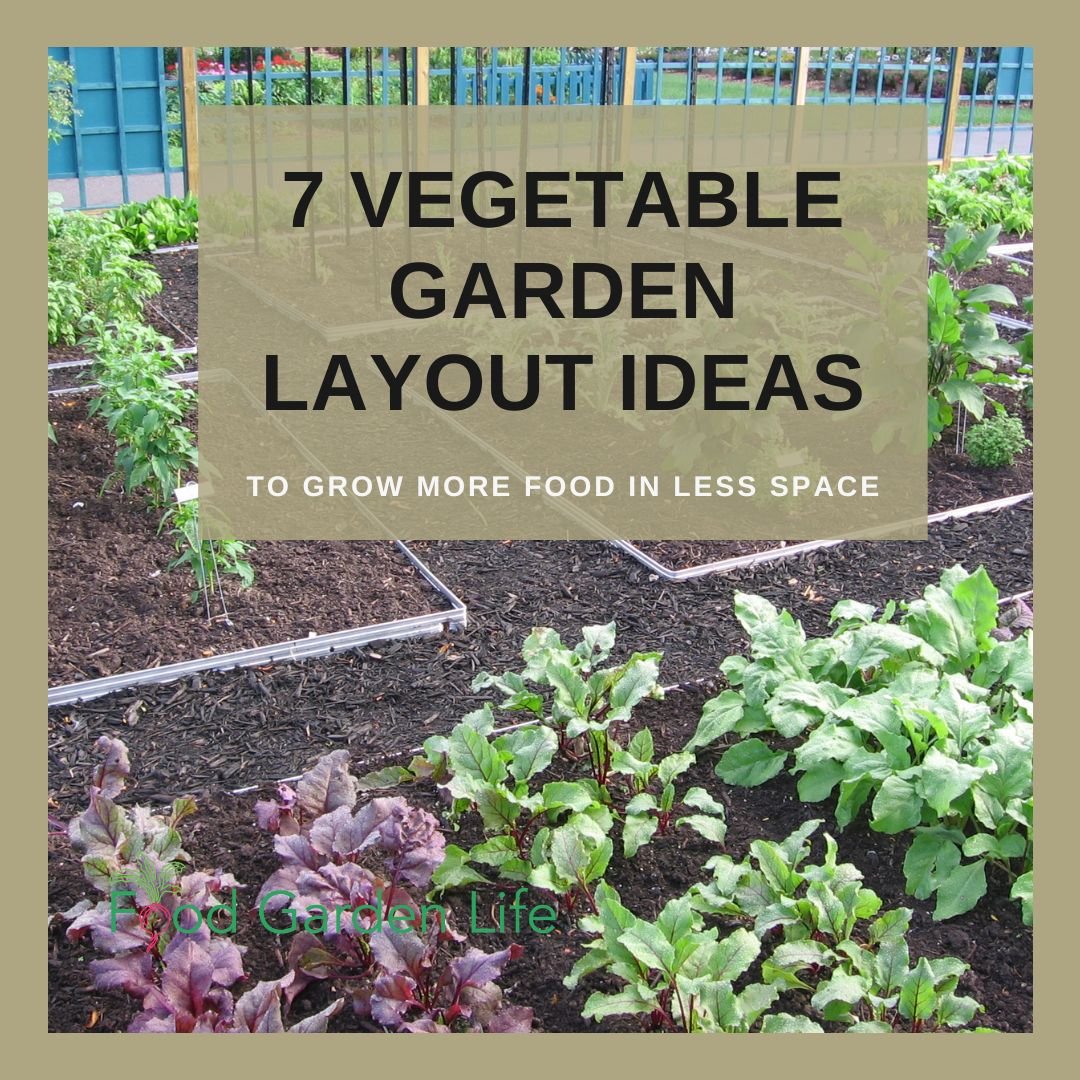
Need help planning a vegetable garden layout? Here are ideas to get your started!
I was delighted when a neighbour removed her front lawn to grow vegetables.
One more edible garden in the neighbourhood! It's a nice departure from the driveway-and-shrub aesthetic around here.
She asked me to help her plan her vegetable garden layout.
But...
I didn’t have a simple explanation about how to make a vegetable garden layout! Keep reading, because this inspired me to map out the way I think when I'm veggie gardening.
As we studied her small, partially shaded front yard, I saw numbers in my mind—distances between plants, between rows, and between crops. I saw centimetres and inches (because we’re in Canada and can’t decide on which to use.)
There's a simpler approach, and I share it below.
Before we get to my top tips: Remember that there are lots of possible vegetable garden layouts. There are many ways to organize and space out vegetables in a garden. There's the growing. And then there's a creative aspect to it. That means that two gardeners given the same garden bed can come up with completely different layout plans. Enjoy the creative journey! There’s no perfect vegetable garden layout—there’s a layout that suits you and your situation.
Keep reading for 7 tips to help you come up with a vegetable garden layout that suits your situation:
1. Grow in Blocks
Rows are for Farms
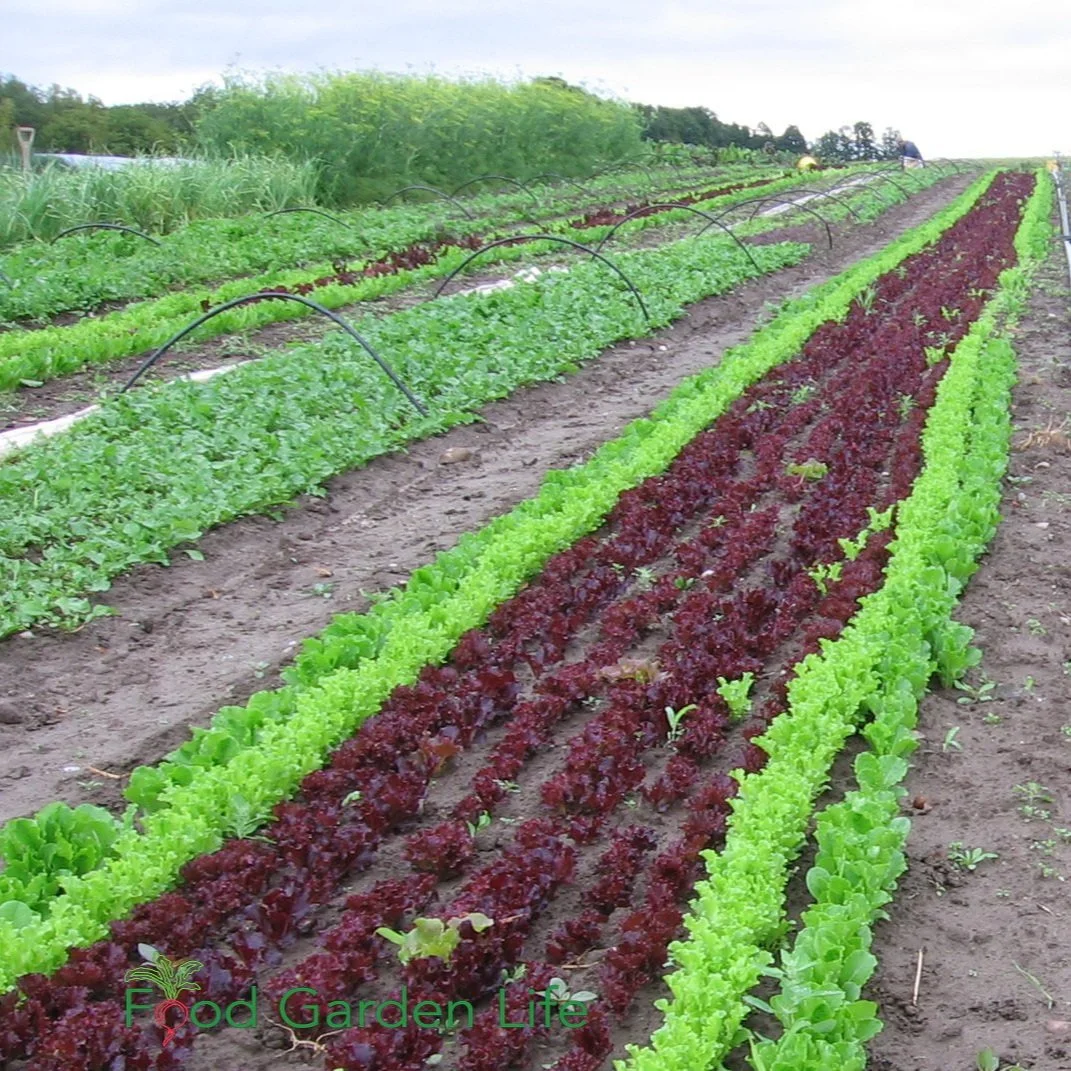
There’s lots of bare soil when growing in rows. Grow in blocks instead of rows to optimize the use of space.
In a traditional row-gardening layout, there's space between rows for cultivating. That cultivating chops down little weed seeds that are germinating. Gardening this way allows one person to weed and tend a lot of plants when labour—not space—is limited.
Planting in rows can make sense on big pieces of land.
But in a home vegetable garden, we're growing on a different scale. In a home veggie garden, we’re limited by space.
And that means growing some vegetables in blocks, instead of spread-out rows of plants. By growing in solid blocks of plants, we fit lots of plants into a plot and have less bare ground showing.
(There are still some vegetables that will do best as single rows of plants, and we'll cover them below.)
Perennial Plants
If your garden design includes perennial vegetable plants, give them a separate block.
2. Grow Vegetables Vertically
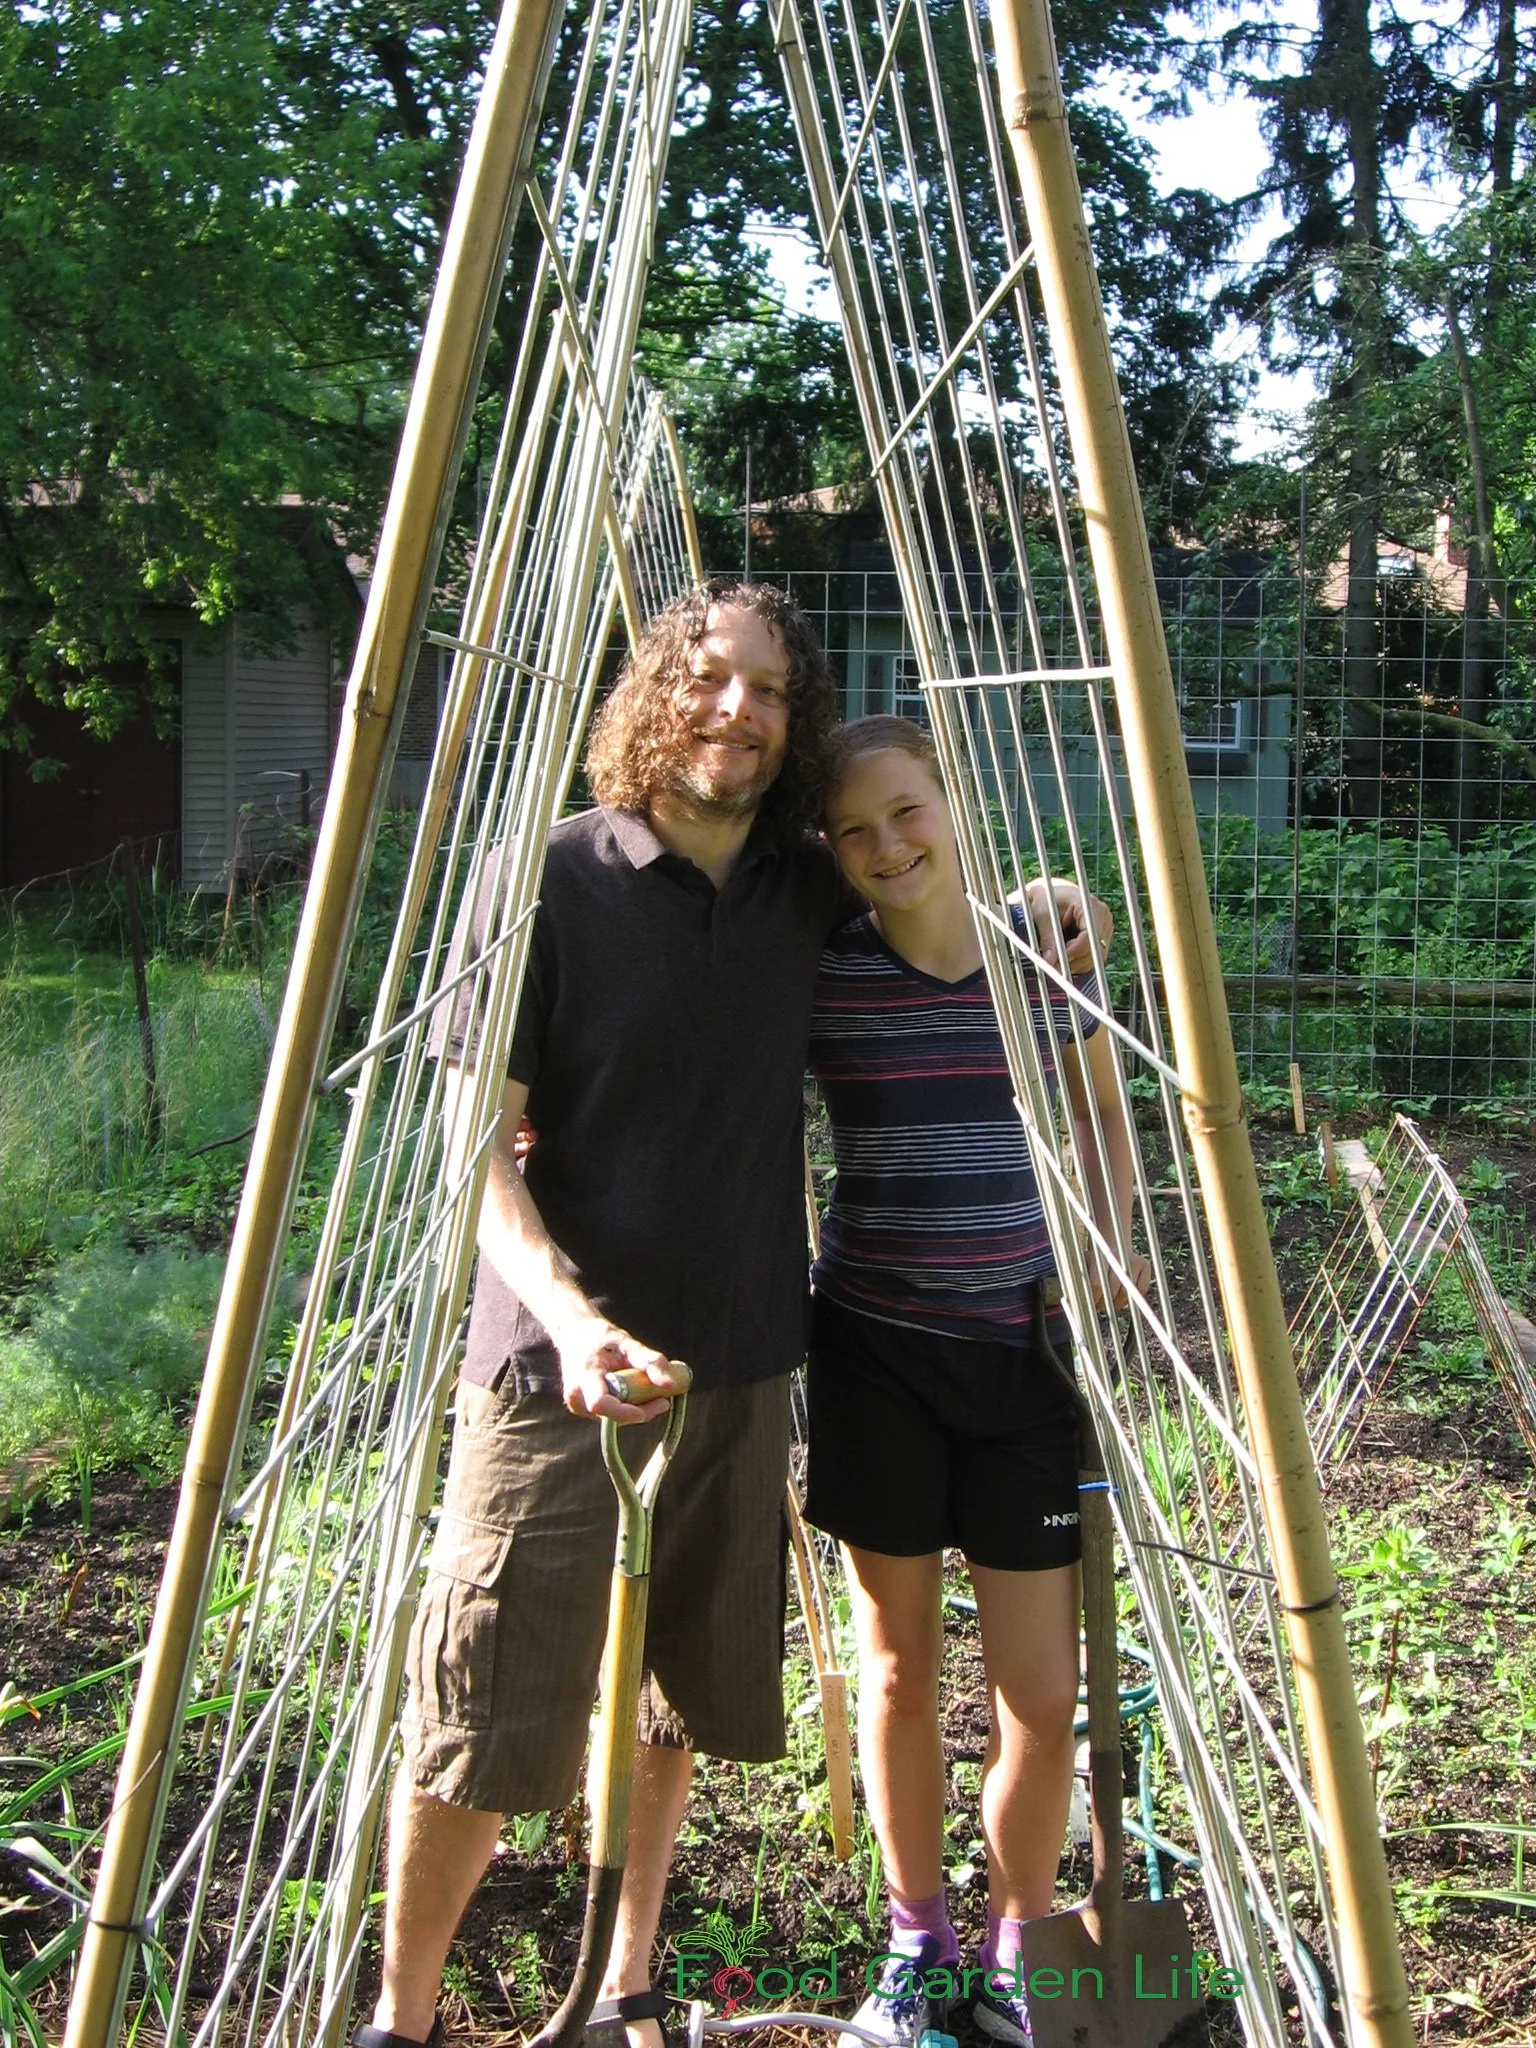
Add height to your garden plan! A bamboo-and-wire-mesh A-frame is one way to make good use of the vertical space in a garden.
Plan for the dimension of height in your garden. Use the vertical space! This just means growing some plants upwards instead of letting them sprawl around the ground.
For example:
Growing a climbing plant up a stake or trellis frees up space on the ground for different plants.
Grow crops in layers. By growing vertically, you can also grow more than one crop in a small space. For example, make an A-frame for cucumbers, and underneath the A-frame, plant leafy greens that benefit from some shade during the summer.
And one more idea if you're making layers in your garden: Hanging baskets. They're great for herbs and many of the leafy greens.
Climbing Plants for Vertical Gardens
Here are a few of my favourite climbers to grow in a small space.
Malabar spinach (a vining spinach substitute, not really a spinach…but excellent during the heat of summer)
Achocha (a.k.a. Bolivian cucumber, it’s absolutely prolific, and a fun novelty)
Vining peas
Pole beans
Runner beans
Cucumber
Squash
Need more ideas for climbing plants? Get more crop ideas in this article about vertical gardening.
3. Plant Densely, and then Thin
Seed Spacing…How Many plants?

Plant densely to grow more food in a small space. Here are densely planted carrots, and as the larger ones develop roots big enough to eat, they’re pulled out so there’s space for the remaining ones to develop.
Seed-spacing recommendations on seed packets and in articles are often geared towards commercial production. And these recommendations work fine in a home garden.
But…
Most plants do well with less than the spacing recommended on a seed packet.
So if you want to grow more food, plant more densely.
Forget Finicky
Commercial growers (or hard-core gardeners with big gardens) often use seeding machines to place seeds at a specific spacing. There are also hand-operated seed dispensers to help get perfect spacing.
Your plants won’t know the difference—and you can make your seeding less complicated by not being finicky.
Scatter-Seeding a Block is Not Finicky
When seeding a block, I hand-scatter seed. With practice, you can scatter seeds so that they are spread at approximately the distance you want. Don't sweat the exact spacing.
It’s not an exact process. You will get some seeds too close together; and some too far apart. (Remember, gardening is detox for perfectionists.)
Where seeds are too close, thin as plants start to grow.
Beets too close? Thin out a few and enjoy baby beet greens.
Carrots too close? Thin your block of carrots and have some baby carrots for supper.
When scatter-seeding blocks, you will use more seed than if you seed in rows.
That’s fine: It saves time and you get more veg from the same area.
4. Choose Crops to Maximize Your Harvest
To grow more food in less space, be strategic with your crop choices as you’re laying out a vegetable garden.
My first rule of vegetable gardening is to grow things you like. Sure, radishes are easy to grow. But do you like eating them three times a day?!
Here are three other things to think about as you fit more food plants into your space.

You might choose spreading crops that take a lot of space. That’s fine, just grow them upwards. You don’t see it in this picture, but there’s a whole crop of Swiss card below.
Next, avoid the space hogs. These are crops that take up a piece of garden for the entire growing season...and only give you something at the end of the year. That's right: if you have a small garden, think twice about those parsnips and Brussels sprouts!
Keep the vining space hogs, but grow them vertically (see above.) So instead of squash sprawling around the garden, grow it up a fence or trellis. (I’ve even grown squash along a cedar hedge!)
If you have a small plot, skip the stingy crops. I'm talking about something like edamame, which is easy to grow and delicious...but takes a fair bit of space considering what you get from it. You'll get way more bang for your buck with something like bush beans.
And let’s get back to the idea of rows versus blocks as we think about choosing which vegetables to grow.
What to Grow in Blocks
Here are examples of crops that I like to grow in solid blocks, instead of rows.
Beet
Carrot
Leafy greens
Garlic
Check out Edible Garden Makeover and have fun doing some vegetable garden landscaping!
What to Grow in Rows
It makes sense to grow certain crops in rows. Here are the ones I prefer to grow i rows:
Potatoes (so I can easily "hill" them)
Tomatoes (because I stake them, and it's easiest when I can access them from both sides)
Peas (for ease of picking)
Pole beans (for ease of picking)
5. Keep Pathways to a Minimum

How much growing space could you add in this layout if the pathway down the middle didn’t go all the way through the bed? Lots!
An easy way to grow more food in less space has nothing to do with the distance between your plants!
Use less of the available ground for pathways.
As you map out your beds and pathways, play around with different layout options. Easy access is important, but sometimes there are ways to plan a garden that has access, but fewer pathways. A simple way to do this is with dead-end pathways that go part of the way into big beds…but not all of the way through. That way less of the growing space is sacrificed for pathway. (Having trouble picturing this? Imagine a keyhole garden, where there’s a pathway into the middle—but it doesn’t go all the way through.)
6. Plant Two Crops Together
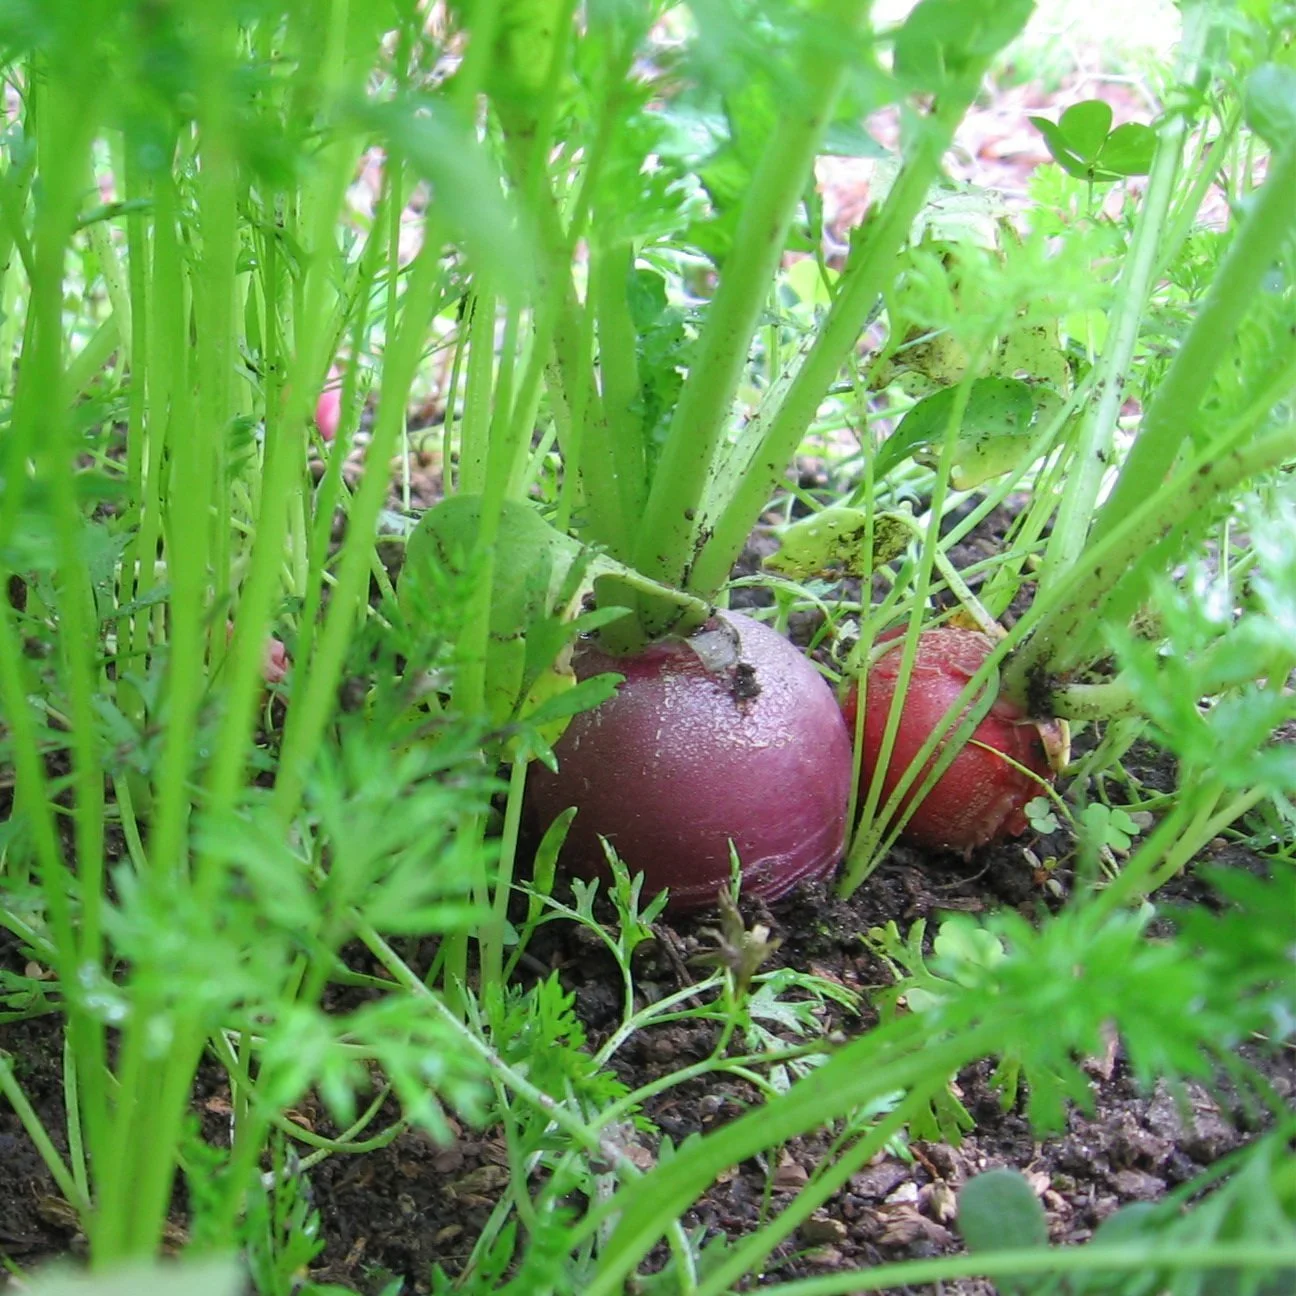
Radishes and carrots seeded at the same time,. The radishes are ready to harvest, while the carrots roots are nowhere near ready for harvest, even as baby carrots.
Companion planting is another way to fit more plants into your vegetable garden.
Plant two vegetables in the same space—ones that are good companions because they mature at different speeds.
My favourite combination is fast-growing radish, with slower-growing carrots or beets.
When I scatter carrot seed on a block of garden, I also scatter radish seed. The radish grows much more quickly than the carrot, and is ready to harvest while the carrot seedlings are still quite small.
Harvesting the radishes frees up space for the carrot seedlings, and as the tap root of the radish comes out, it also loosens the soil around the carrot seedlings. It's a perfect combination.
(There is a lot of rubbish information out there on companion planting. I suggest this science-based book: Plant Partners: Science-Based Companion Planting Strategies for the Vegetable Garden.)
7. Grow Succession Crops
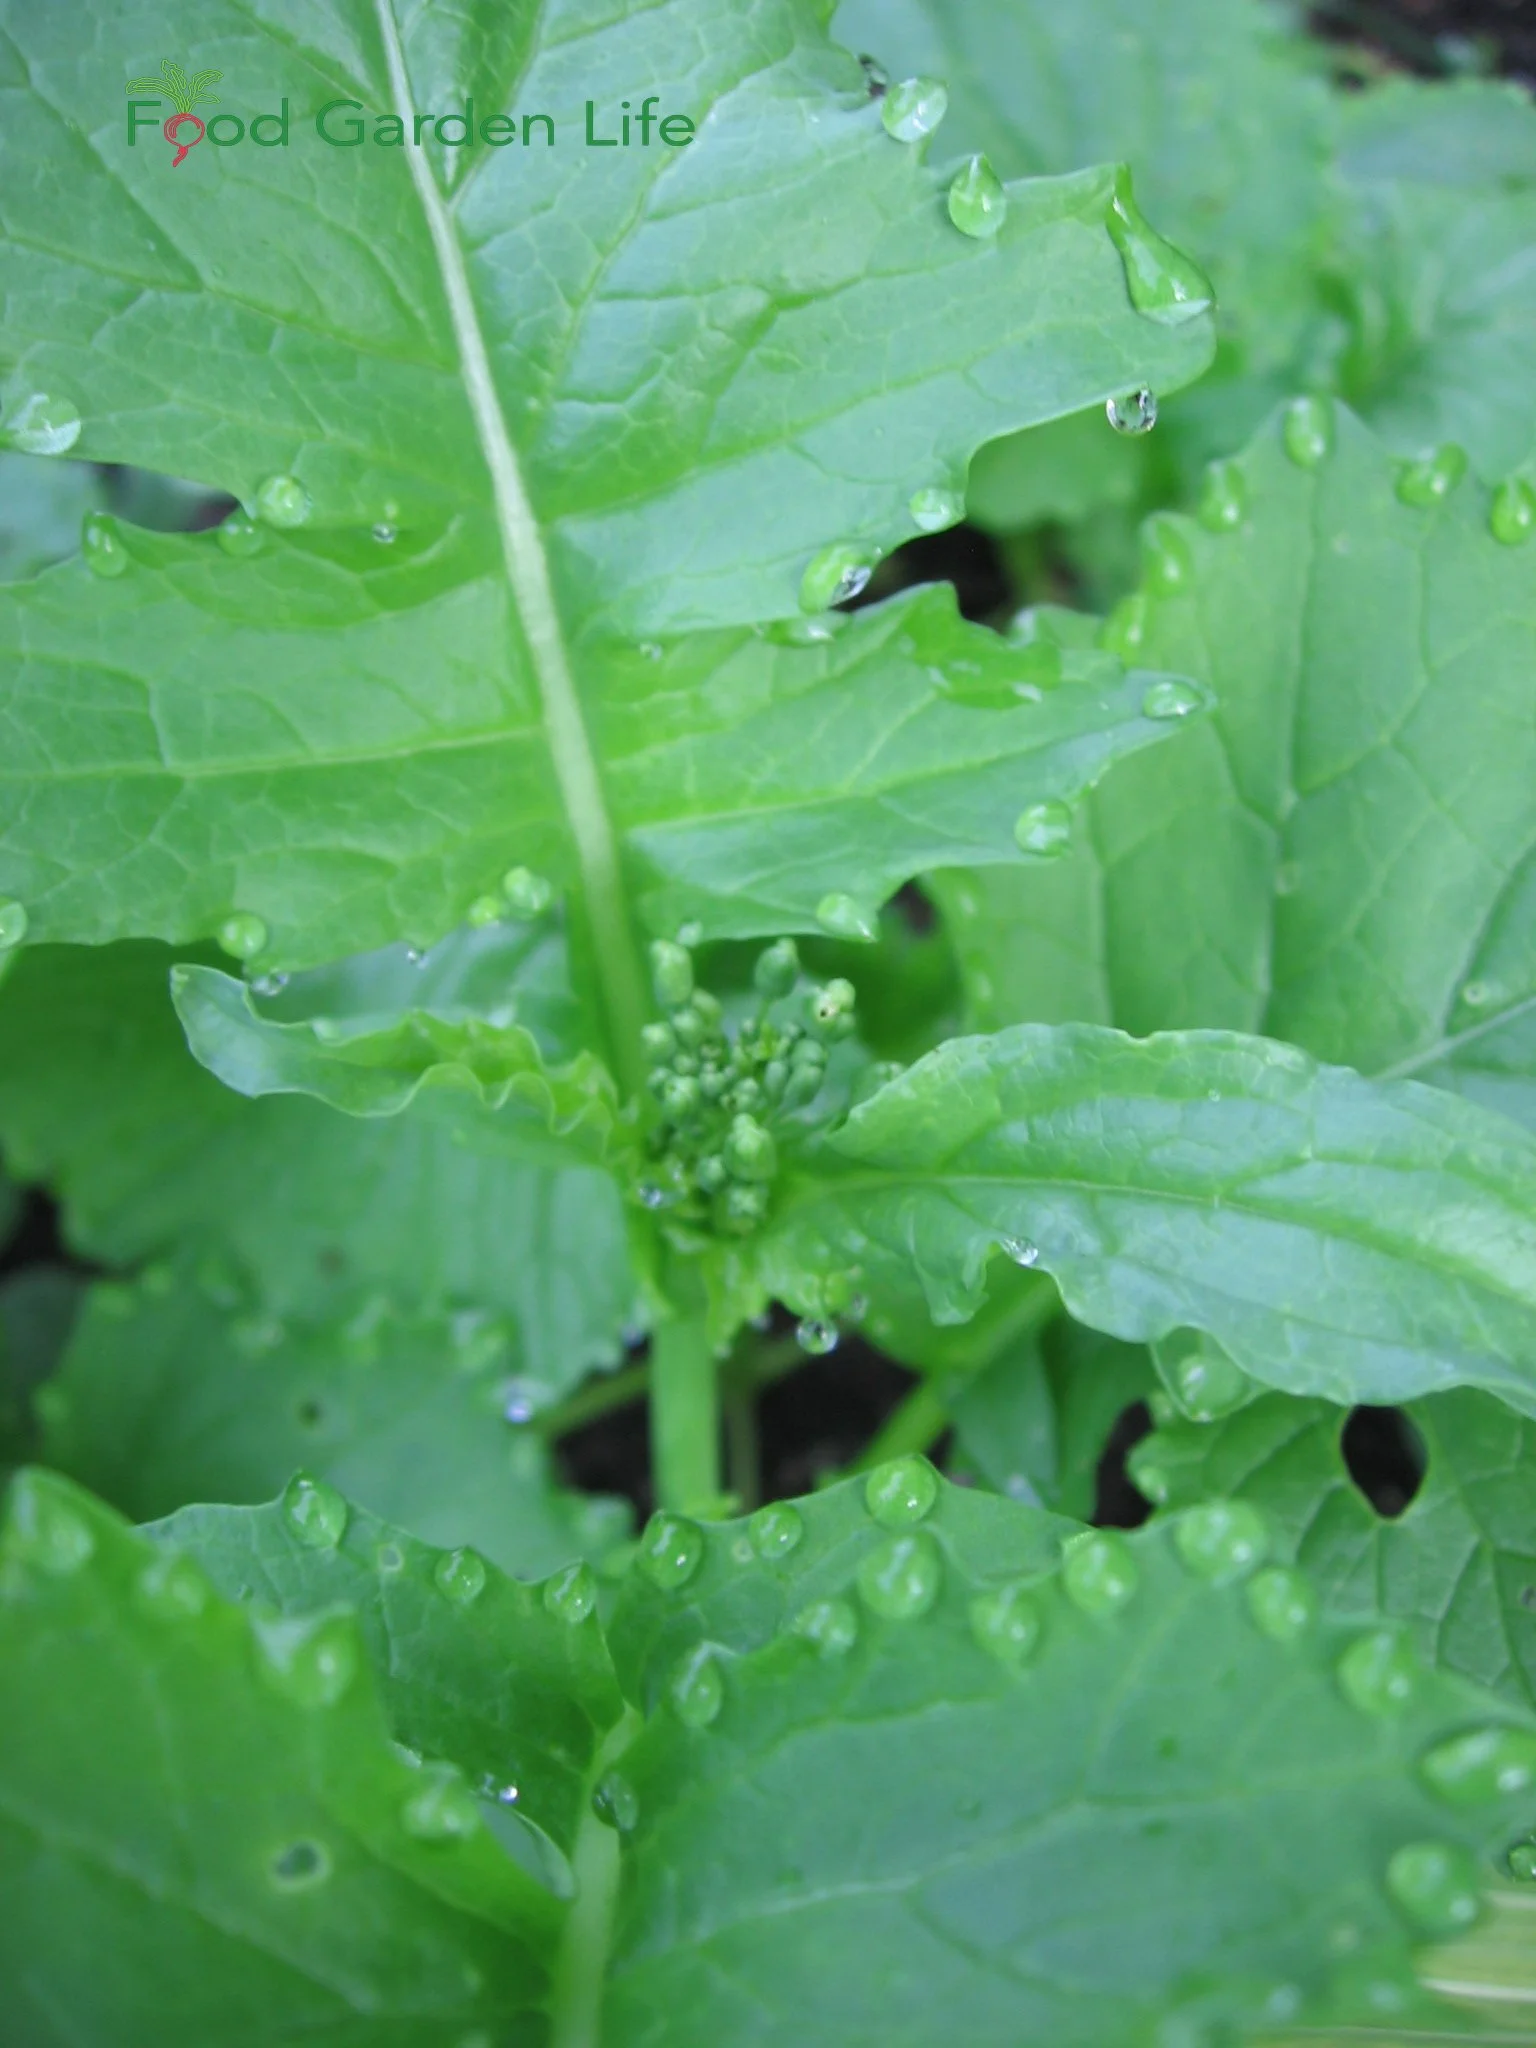
Rapini is one of my favourite summertime succession crops.
Growing vegetables in succession as each parcel of your garden makes sure none of it goes unused during the growing season.
As your spring-planted cool-season crops finish, plant a heat-loving crop for summer.
Bush beans done? Sow some beets.
Garlic done? I like to grow rapini (and for those of you who are avowed rapini haters because of the bitterness, get yourself a bowl of orecchiette pasta with rapini and some chunks of spicy sausage fried to crispy, and you’ll see rapini in a different light.)
Need more Vegetable Garden Layout Ideas?
In Edible Garden Makeover I walk you through lots of vegetable garden layout ideas, raised beds, making garden beds, raised beds, and lots of other ideas that help you grow your own food in a way that suits your setup. I help you imagine an amazing kitchen garden, and also an entire edible garden layout. Find out how you can make your yard into an edible landscape.
Still Not Enough Space?
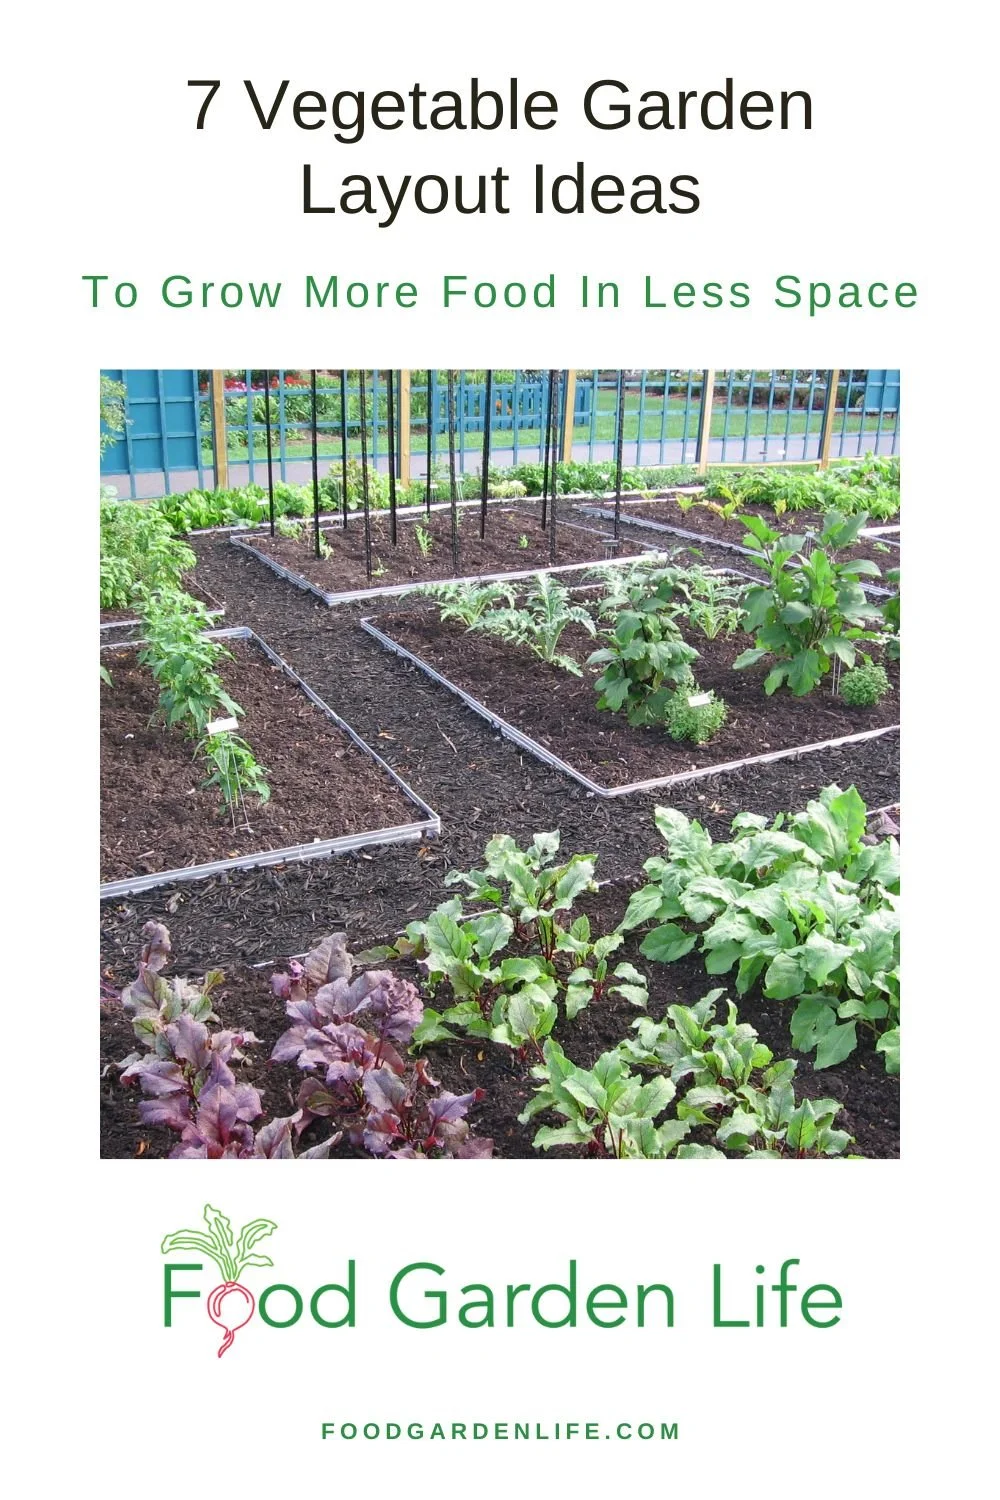
Pin this post!
If you're using these seven approaches to make the best vegetable garden layout for your garden area, and you still want to grow more, think about adding containers to your vegetable garden.
Plant vegetables in containers on:
Paved spaces such as driveways
Decks or balconies
See how I converted my driveway into a tomato plantation.
You can also incorporate containers as part of a vertical garden, to add the element of height. (I've squeezed in pepper crops between an asparagus and horseradish patch...where normally they wouldn't have stood a chance because of the competition. But because they were elevated above the ground in a container, they got sun exposure and had lots of growing space in the container.)
One more space-making idea for you, something that I've used to transform a long, little-used driveway into a tomato oasis.
This idea is quick to set up, easy to care for, and inexpensive compared with permanent container or raised-bed systems.
Add a straw-bale garden to your garden layout. Find out more about straw-bale gardens.
Wondering about Shade?
Shade is something we often deal with in home gardens. Don’t worry, there’s still lots you can grow. Find out vegetable crops that you can grow in the shade.
Find This Helpful?
Enjoy not being bombarded by annoying ads?
Appreciate the absence of junky affiliate links for products you don’t need?
It’s because we’re reader supported.
If we’ve helped in your food-gardening journey, we’re glad of support. You can high-five us below. Any amount welcome!
More Gardening Ideas
Courses
Here are self-paced online courses to help you grow an awesome vegetable garden.
Host an Apple Tasting
Host an apple tasting and find the best-tasting local apple variety. This guide tells you how.
By Steven Biggs
It Tastes Like What?

We had a couple of pleasant surprises during our apple tasting!
The kids nodded when I asked if they like Pink Lady. “Really good,” declared Emma.
“It is like candy!” said Keaton with a grin. And he was right: It was fruity and tangy like the sour candy he loves.
When we got to a ripe-yet-crisp Mutsu, we were all stumped. We were picking up an unusual but pleasing taste…something familiar. But we couldn’t find a word to describe it. My wife, Shelley, pointed out that it was a bit honey-like.
Then Emma nailed it: “It tastes like the pawpaw fruit we ate this fall!”
That was a surprise!
Describing an Apple
Other things that the family shouted out as we tasted our way around a cutting board with sliced apples were:
Tart
Juicy
Fragrant
“Smells like flowers”
Pineapple
Tropical
Crisp
An Unplanned Apple Tasting
Pieter's Appleyard. This is a great spot, with a scenic lookout.
Our family apple tasting started when I pulled over at an orchard to grab a bushel of my favourite apple variety, Idared.
It was early December. We were near Colborne, Ontario, an apple-growing region. (We were actually getting a Christmas tree…but I had apples on my mind too.)
December is well past the pick-your-own window here in Ontario, but it’s a time of year when well-stored apples are still fantastic. (Actually, well-stored apples can be fantastic much later than that.)
I was hankering for Idared apples. I haven’t seen them lately at my local grocers. (I’m no fan of a lot of the newer sweet-but-bland apple varieties: I like a tangy and fruity apple.)
So we pulled into Pieter's Appleyard. We’ve stopped there before to pick our own. (Note: This is a great spot, with a scenic lookout—I highly recommend it.)
The shop was closed and I was about to turn around and drive away when Shelley, said, “There’s someone in the field.” The guy in the field stopped his tractor, made a quick phone call, and in a moment the owner came out to greet me.
“I’d like a bushel of Idared,” I said.
He motioned for me to follow him.
When we were in the cold storage, he said, “If you like Idared, you might like Enterprise. Take this one home with you.” And then he handed me a Pink Lady. And a Golden Russet. And a Braeburn.
Apple Jackpot

Pin this post!
To a horticultural nerd like me, this assortment of apples was a jackpot.
As I thought about how the family could enjoy the apple jackpot together, I was though of what Susan Poizner from Orchard People does: An apple tasting event.
Read about Susan Poizner’s apple-tasting event here.
Fun Holiday Activity
An apple tasting is a fun addition to Thanksgiving, winter solstice, or Christmas festivities.
That’s because late fall is a great time to find locally grown apples at their prime. Stop by roadside stands, orchards, and farmer’s markets. You’ll find a broader selection than at most supermarkets.
Apple-Tasting Checklist
If you’re getting your apples ahead of time, store them properly so they stay crisp. Cool and humid—like the crisper in a fridge—is best.
Try a few varieties of apples (the more the better, I think, but at least 3)
2 of each variety is a good idea if you want guests to see what an uncut apple looks like while they taste slices of it
A cutting board
A knife to core and slice the apples
Labels or cards
A pen and paper to jot down comments and favourites
At wine tasting events there’s often water and bread or crackers to cleanse the palate. We skipped this step, but it might be a nice touch.
Preparing for an Apple Tasting
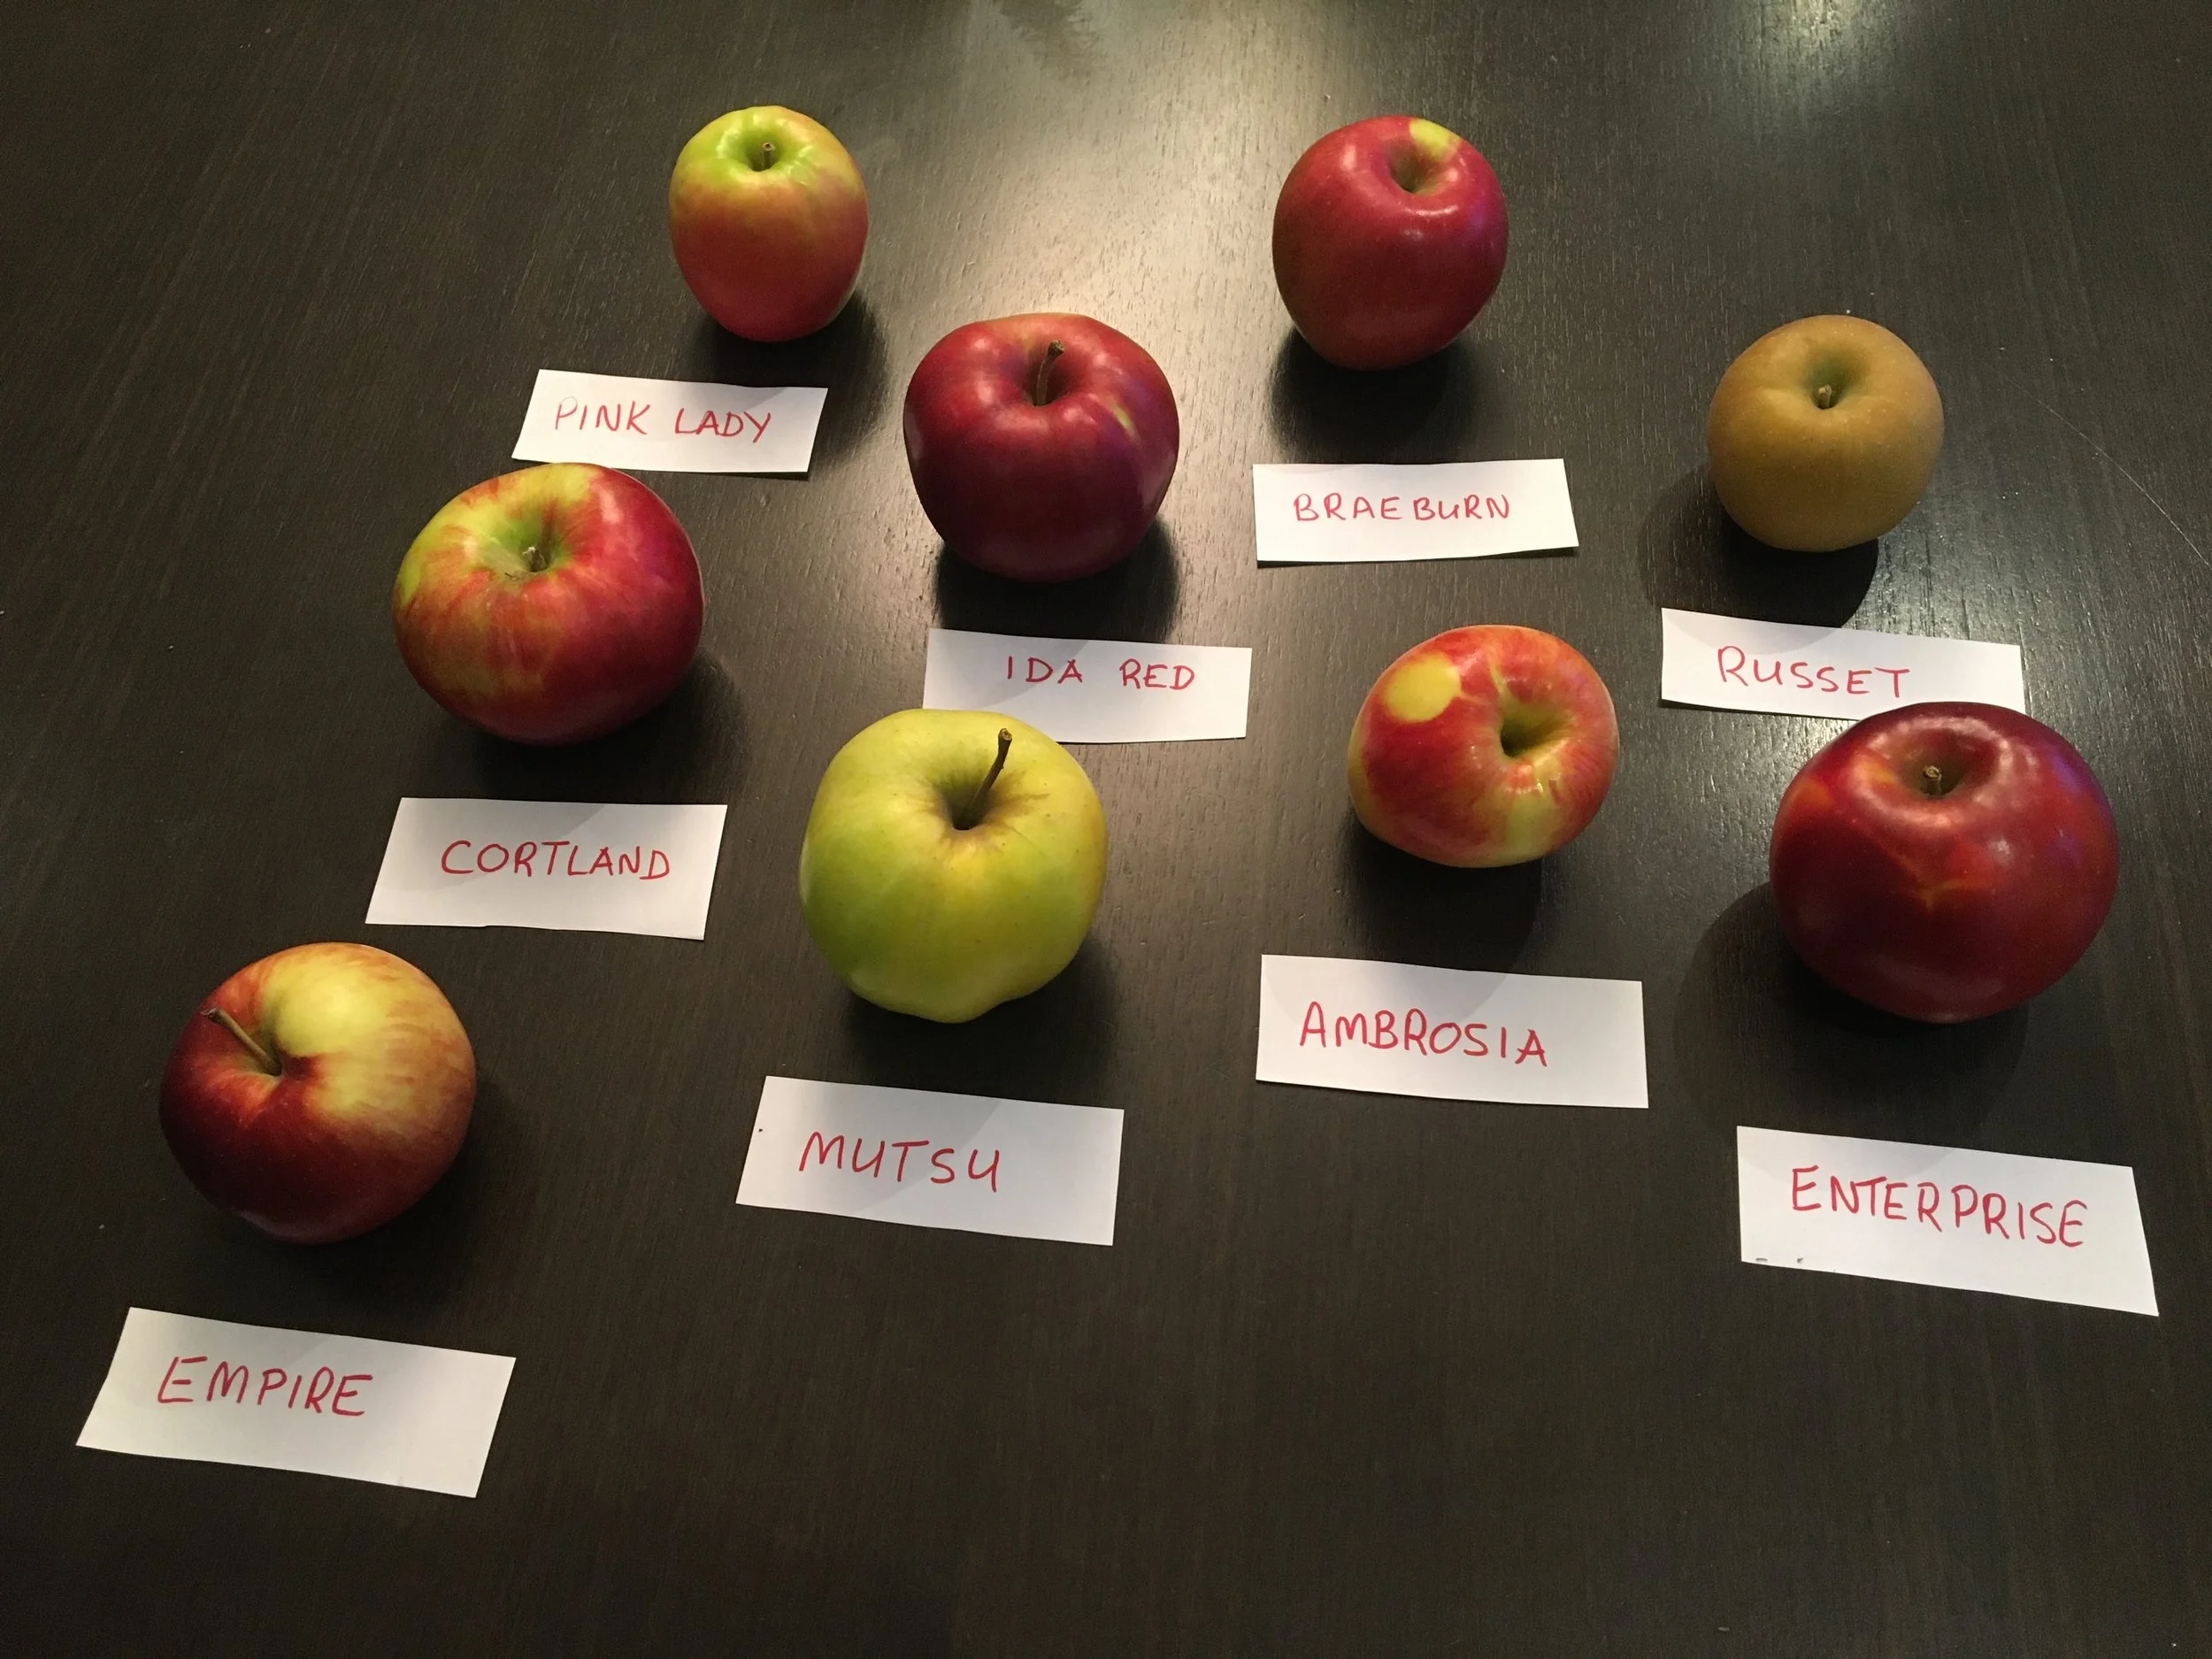
Make up a label for each apple variety.
You can get set up for an apple-tasting event fairly quickly.
Make up a label for each apple variety
Slice apples right before you begin, as some varieties brown quickly
Don’t forget to shine the apples so they look their best!
Guide Your Apple Tasting
Guide your guests through the varieties (e.g. you could do a quick online search for a history of the variety)
Before everyone tastes a variety, get them to look at the colour of the flesh and the skin
Then get everyone to smell the apple slice and describe the aromas they’re picking up
As they taste each slice, ask about the texture and juiciness
Then get feedback on the flavour (Is it like another fruit? Or floral? Maybe honey – or even herbaceous)
Then debate the merits of the variety!
Apple Varieties
Here are the varieties we included in our family apple tasting. The varieties you’re able to get will depend on where you are and whether the store or orchard you visit has mainly commercial varieties, or some lesser-known, specialty varieties.
Ambrosia

On our tasting notes I scribbled down that it was the most fragrant, had a honey taste, and floral smell. It was crisp and juicy.
It’s a variety I often find at my local grocer, and my kids love it. The skin is red with yellow. The flesh is creamy white. And it’s sweet, crisp, aromatic—and not too acidic. (Not tart enough for me!)
Braeburn
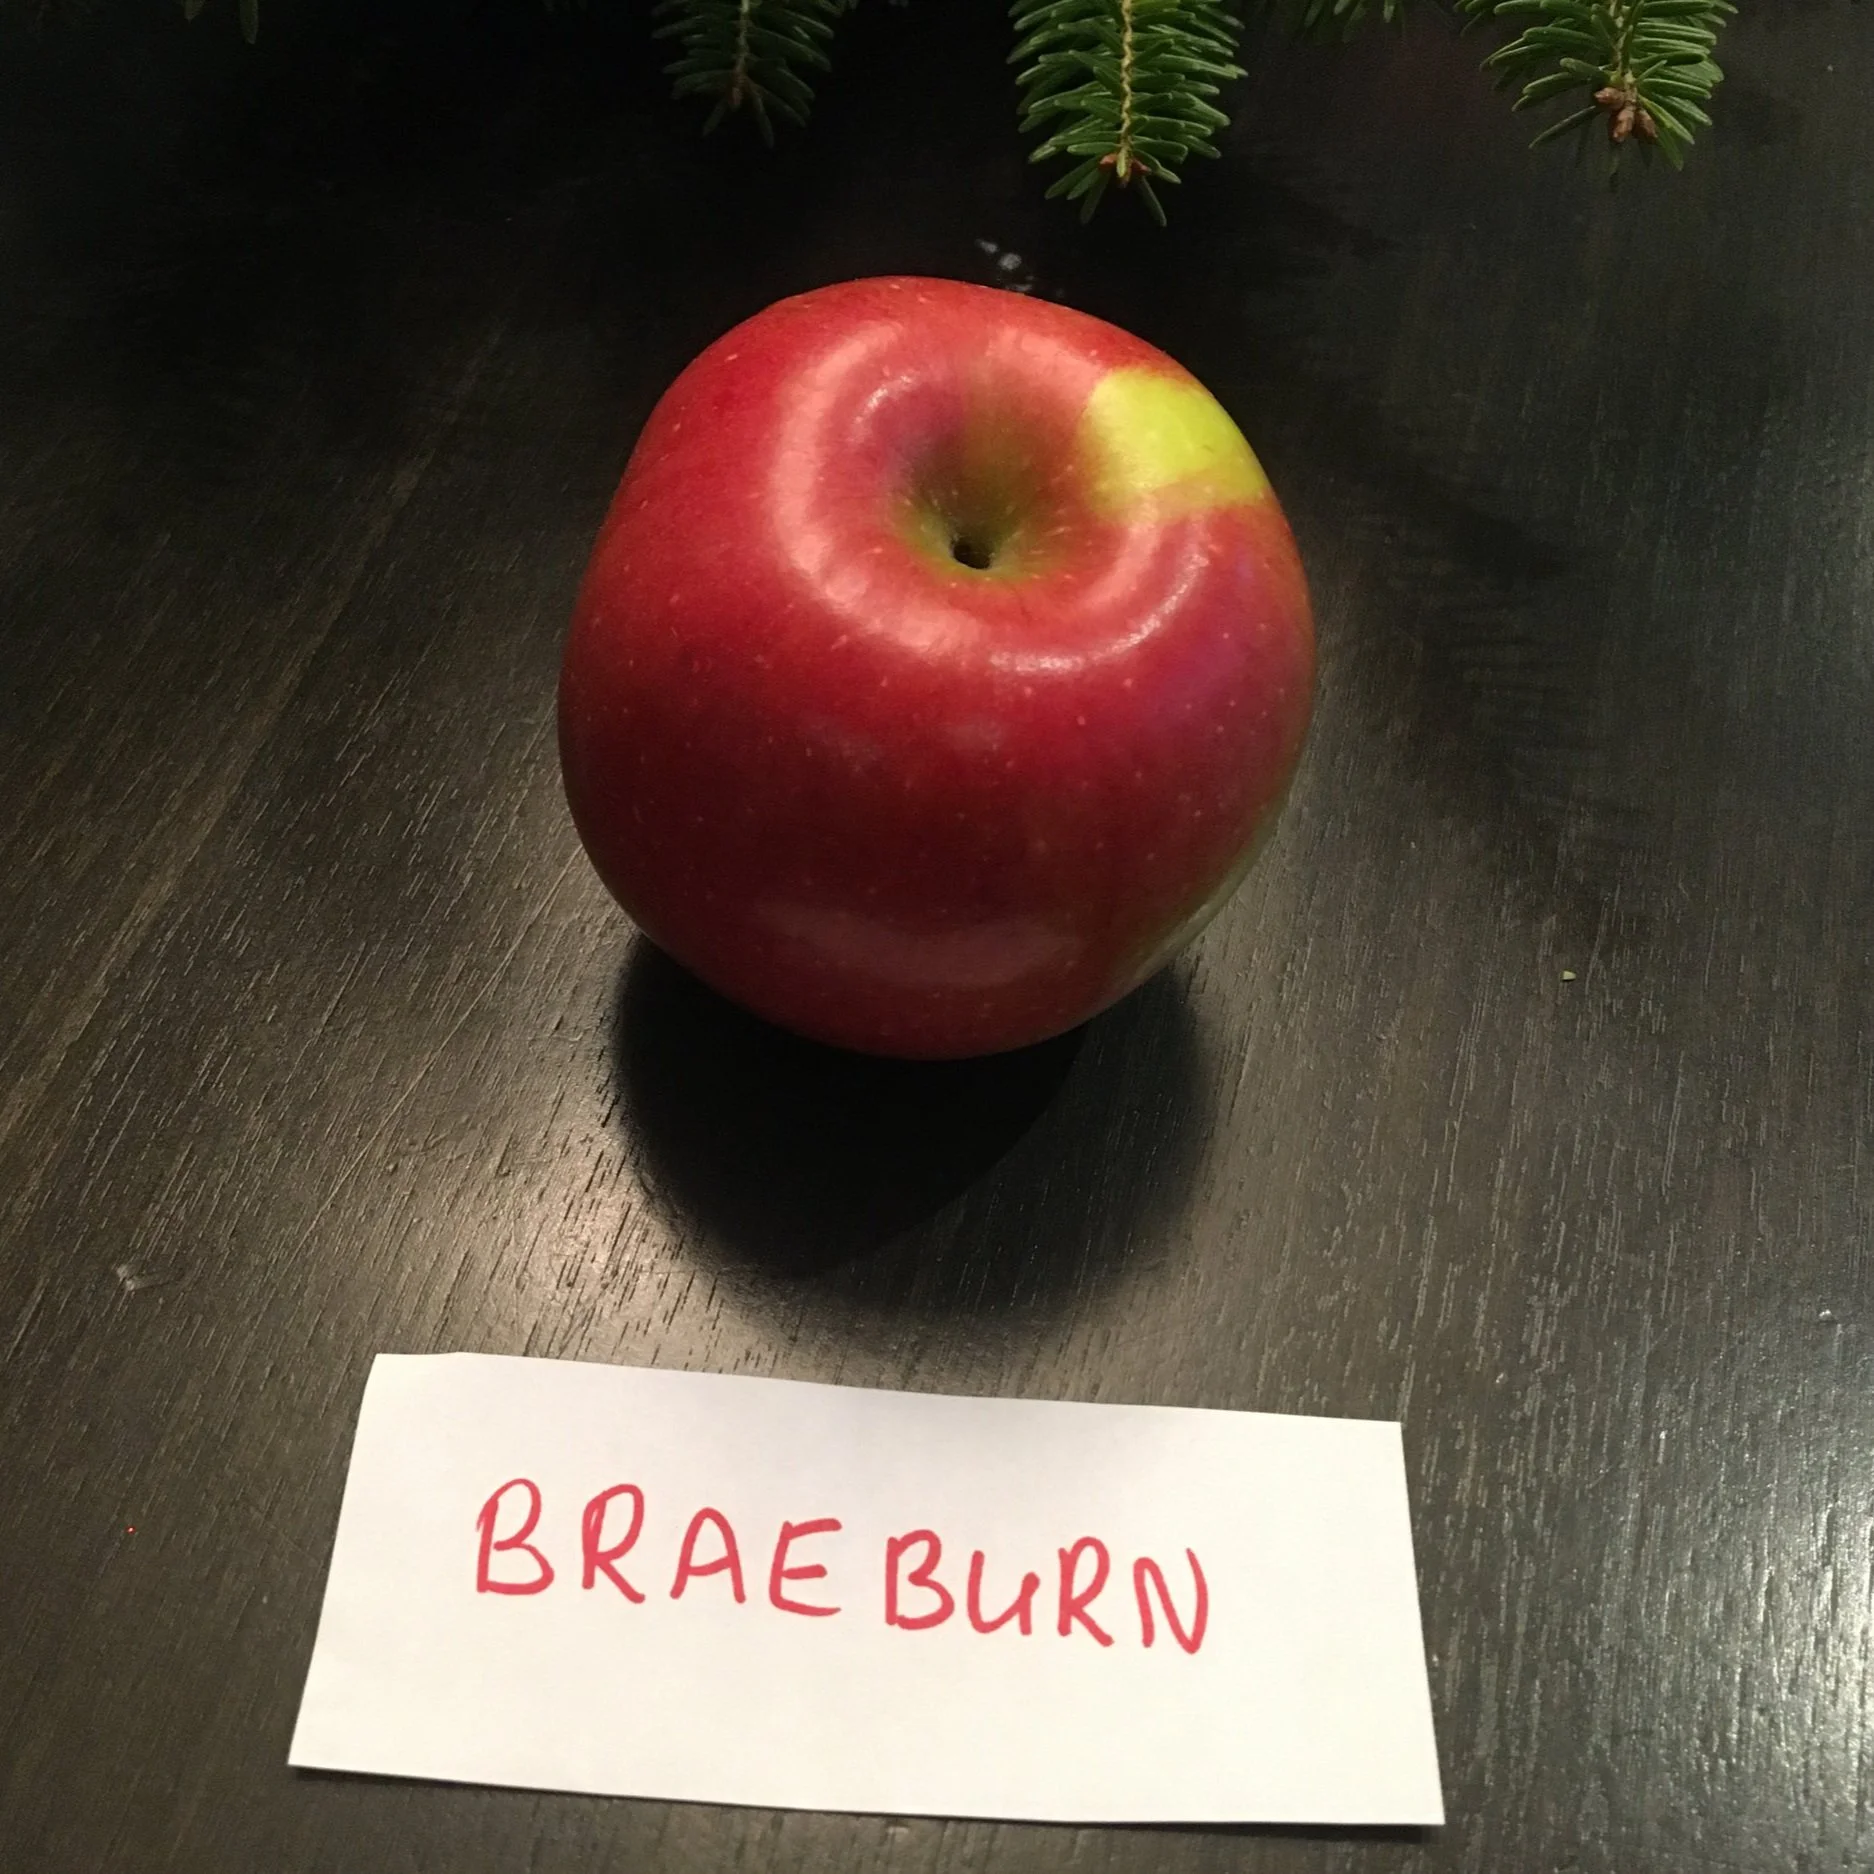
I hadn’t tasted Braeburn until our tasting. It turned out to be my favourite apple! We agreed that it’s firm, tart, crisp, and juicy.
The Pieter's Appleyard website notes that this variety is good for cooking because it keeps its shape.
Cortland
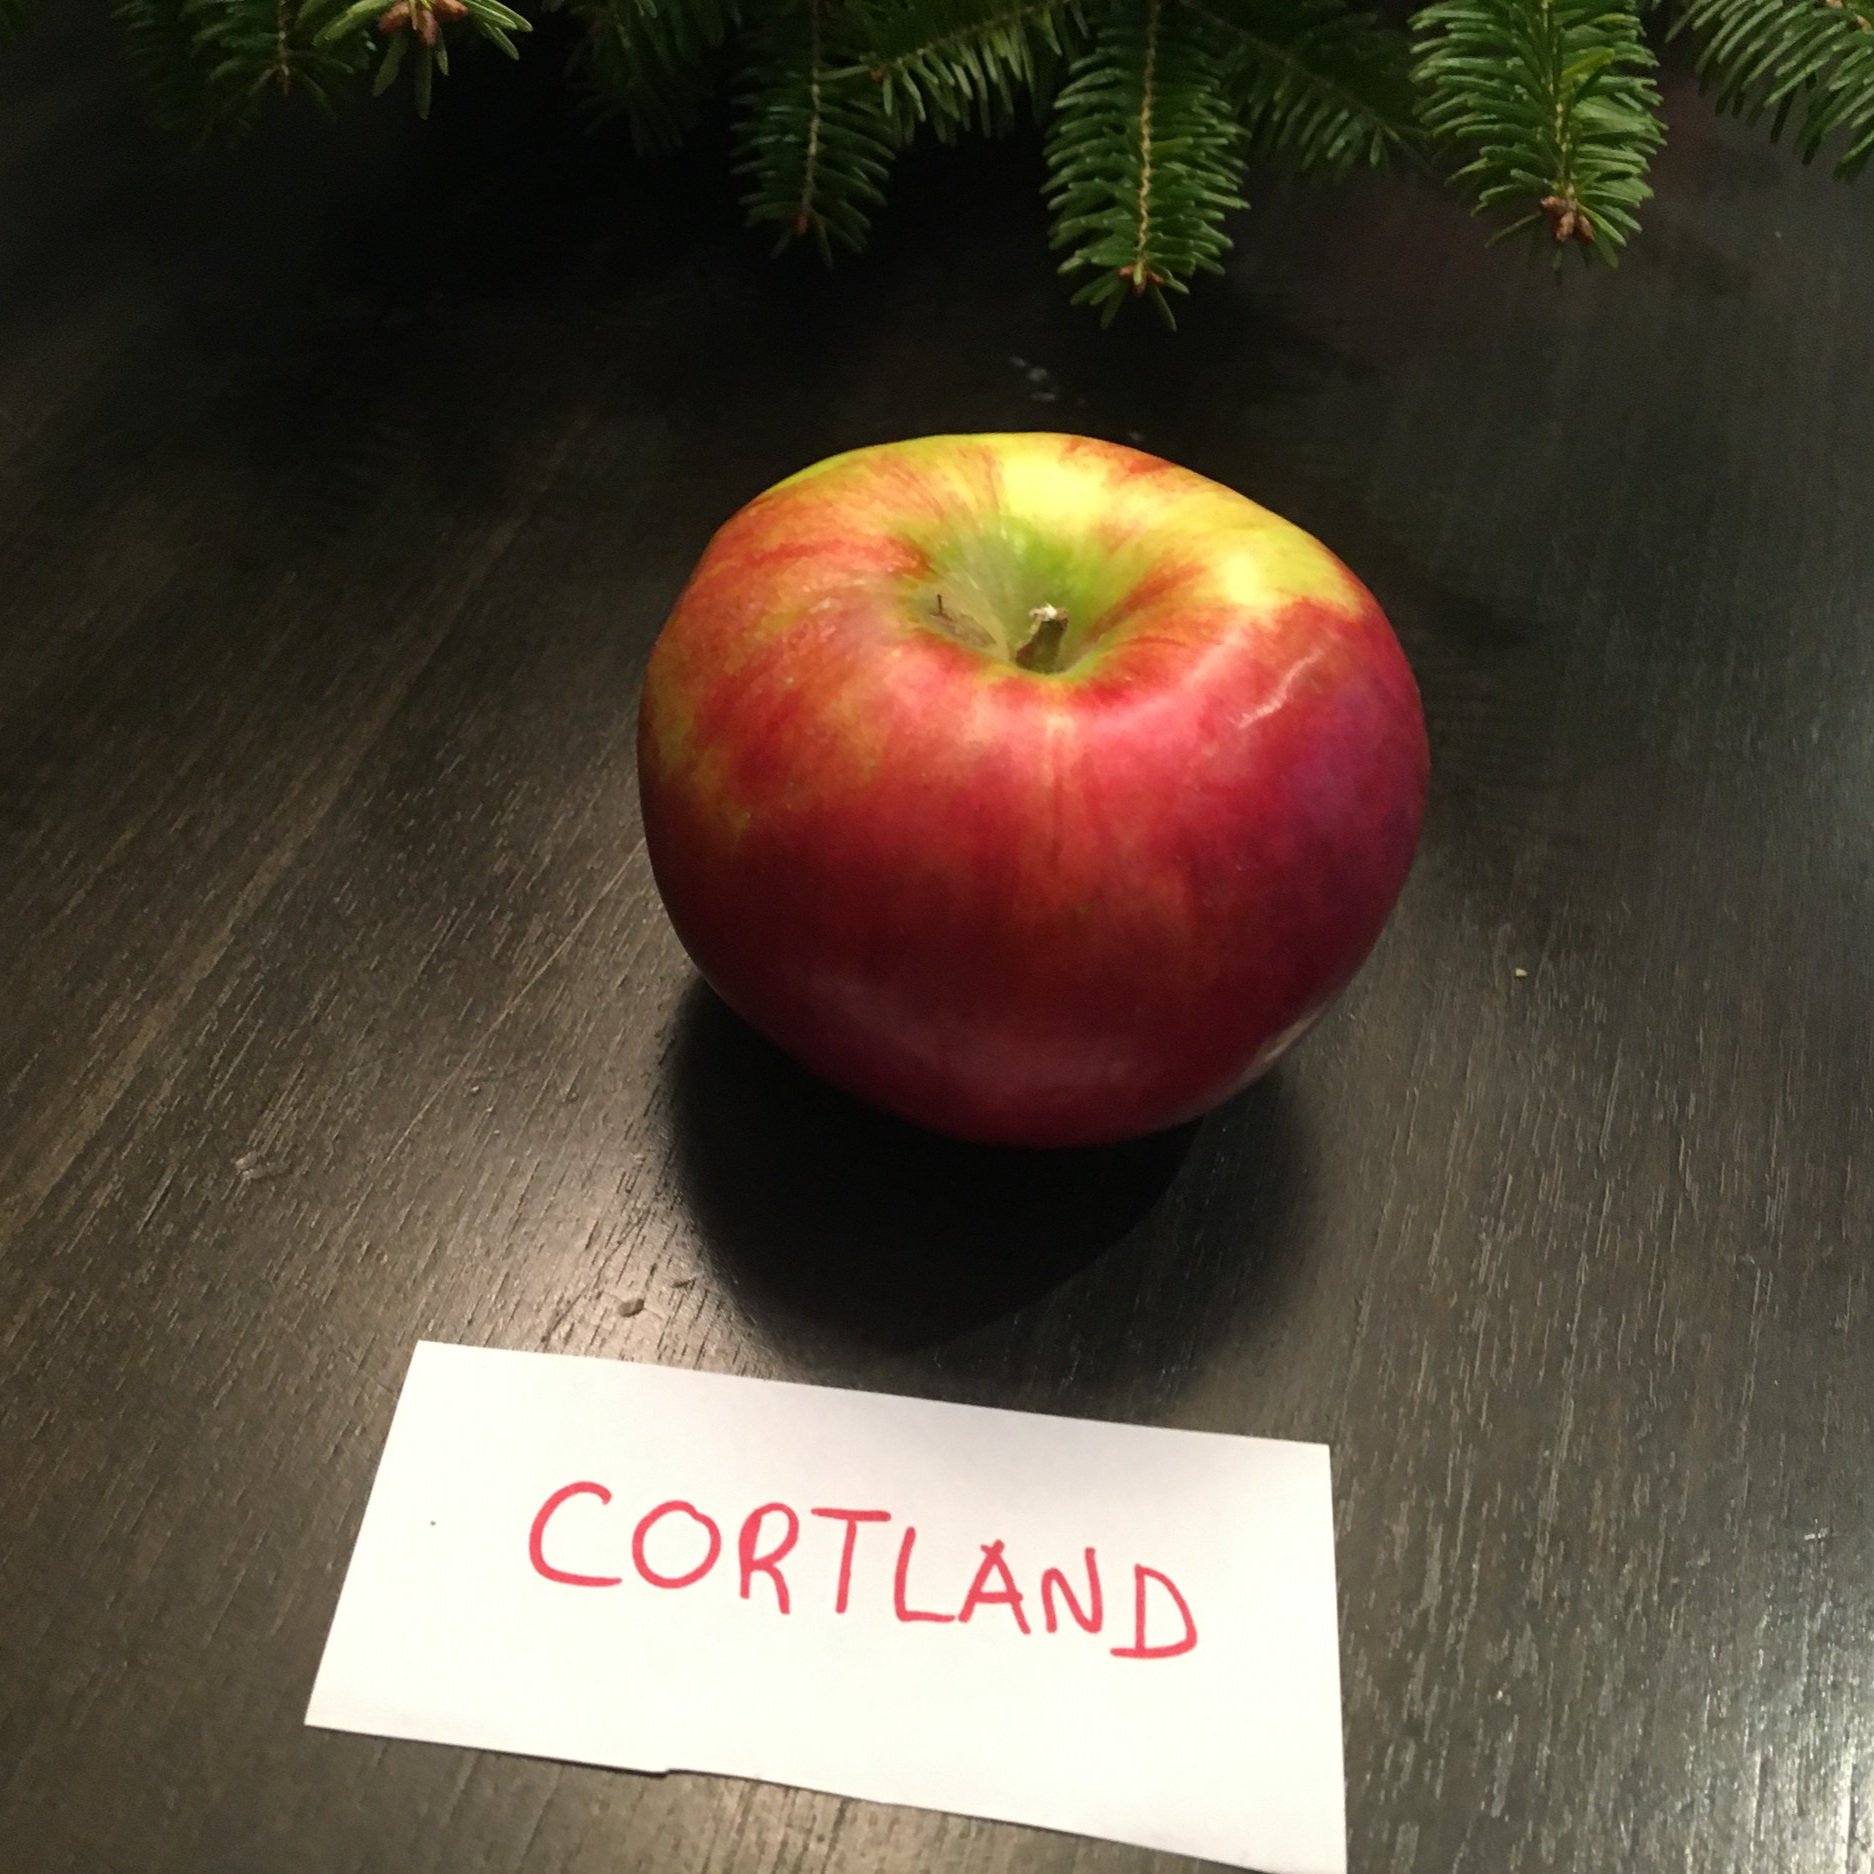
This was Mom’s favourite for apple pie because it’s large and holds its shape when you bake it. I often buy it to make sauce.
It didn’t rank too well for our family tasting—probably because the ones I got from the grocery store weren’t stored in optimal conditions. We noted its soft flesh, mild taste, white colour, and thick skin.
Empire

I often get empire when I make apple cider in the fall because, like its parent the Mcintosh apple, its very juicy. There’s some acidity.
We noted that it’s tangy, fruity, and the skin was on the thick side. Like the Cortland apples I had on hand, our Empire apples hadn’t been optimally stored, so it lost points for being soft.
Enterprise
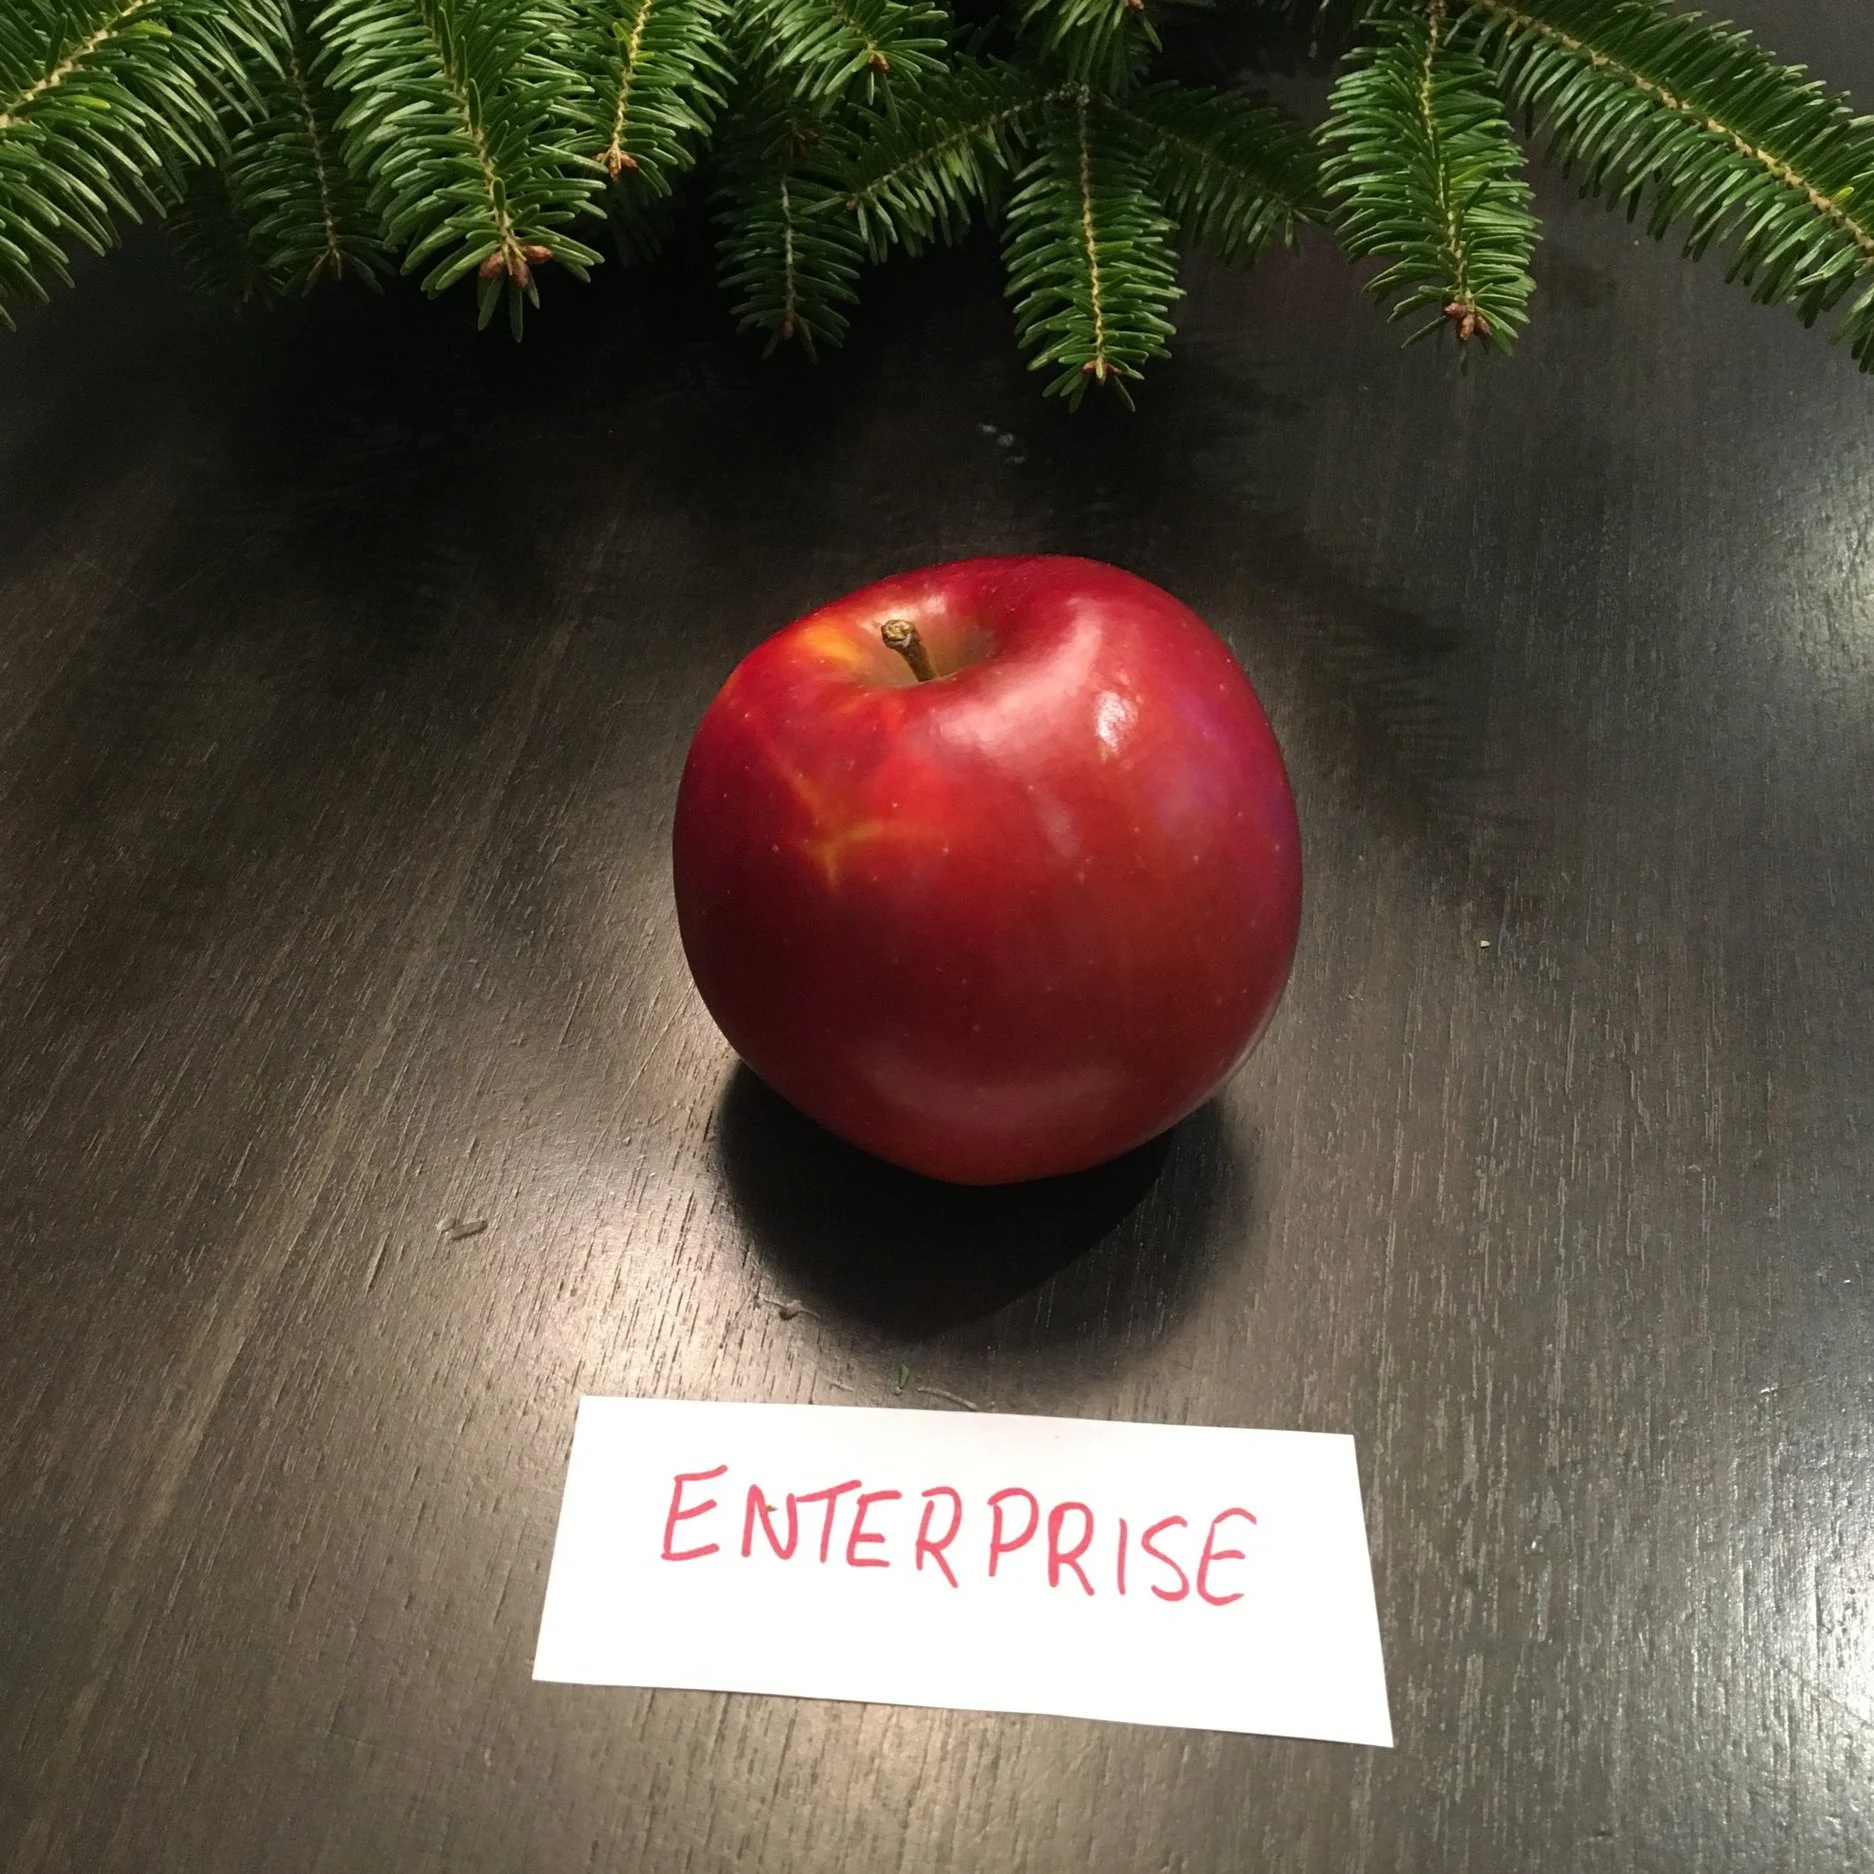
Enterprise was new for me. It surprised us with a banana-like smell, a tropical taste that Keaton described as pineapple. It was tart and crisp.
This is a newer, late-ripening variety with intense red-coloured skin. The fruit is large.
Golden Russet
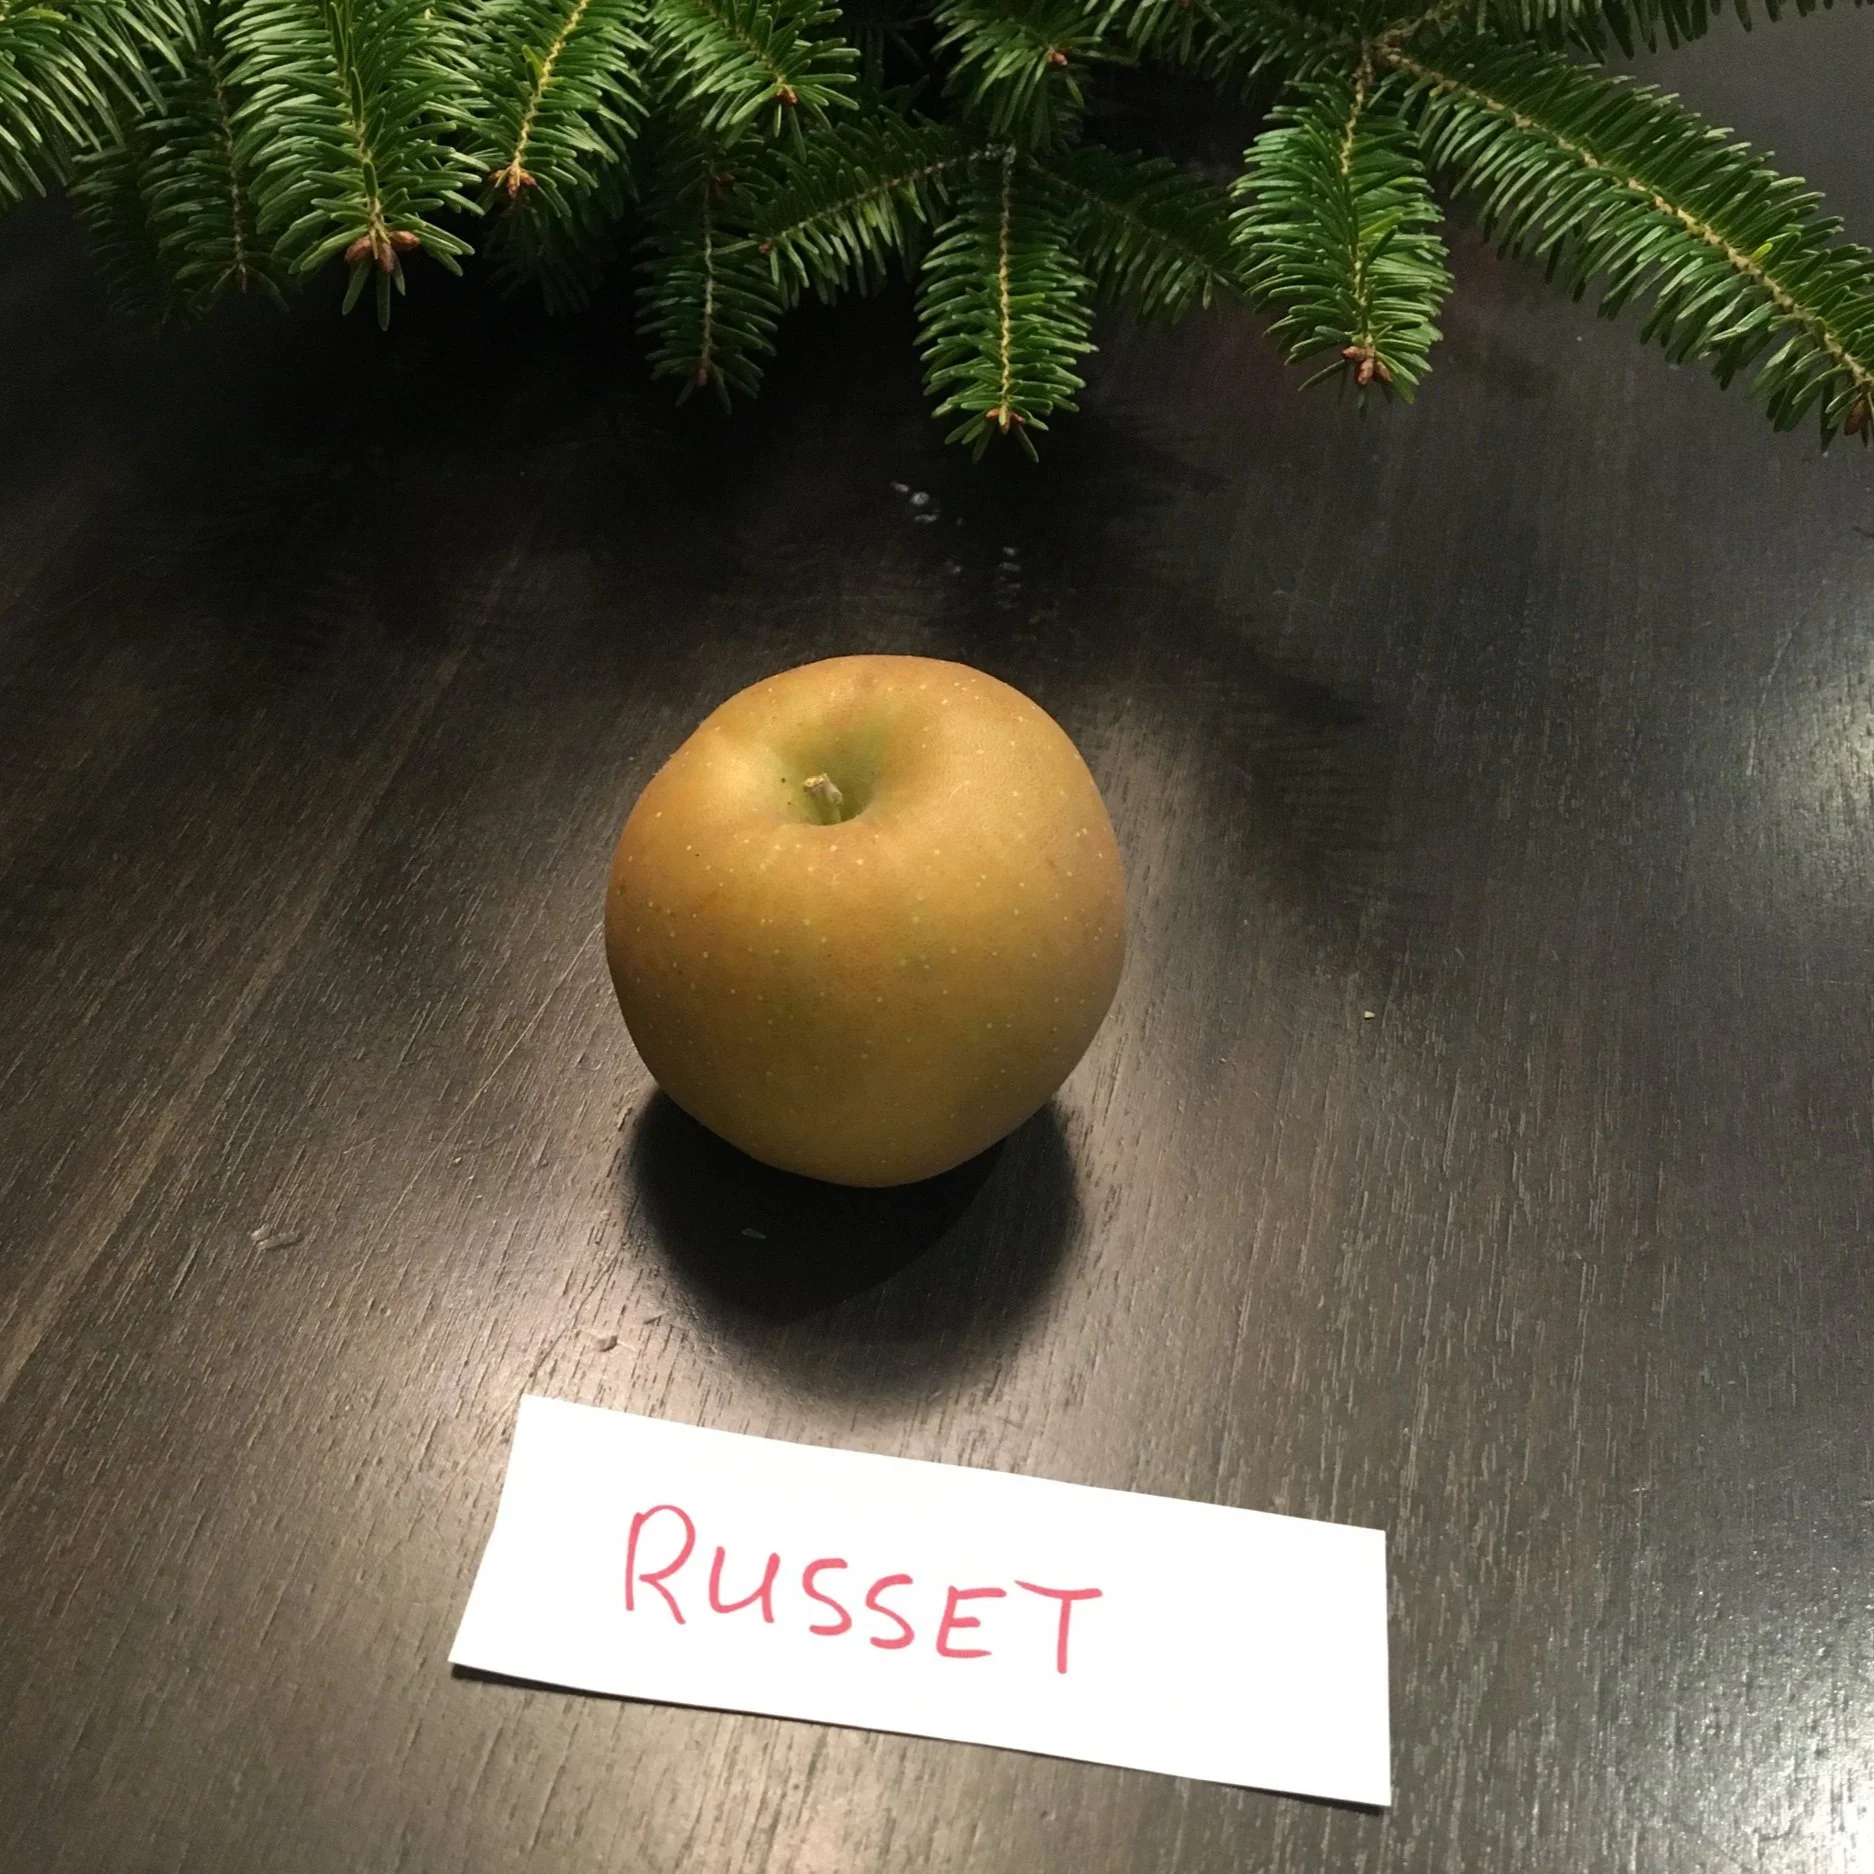
This has always been a staple in our fruit bowl in the fall. I love the intense sweetness and acidity. The kids are less excited about it because of the mealy texture.
It’s an old variety, and often recommended for use when making cider. The skin is russeted, giving it a distinct appearance from the other apples in our family apple tasting.
Idared
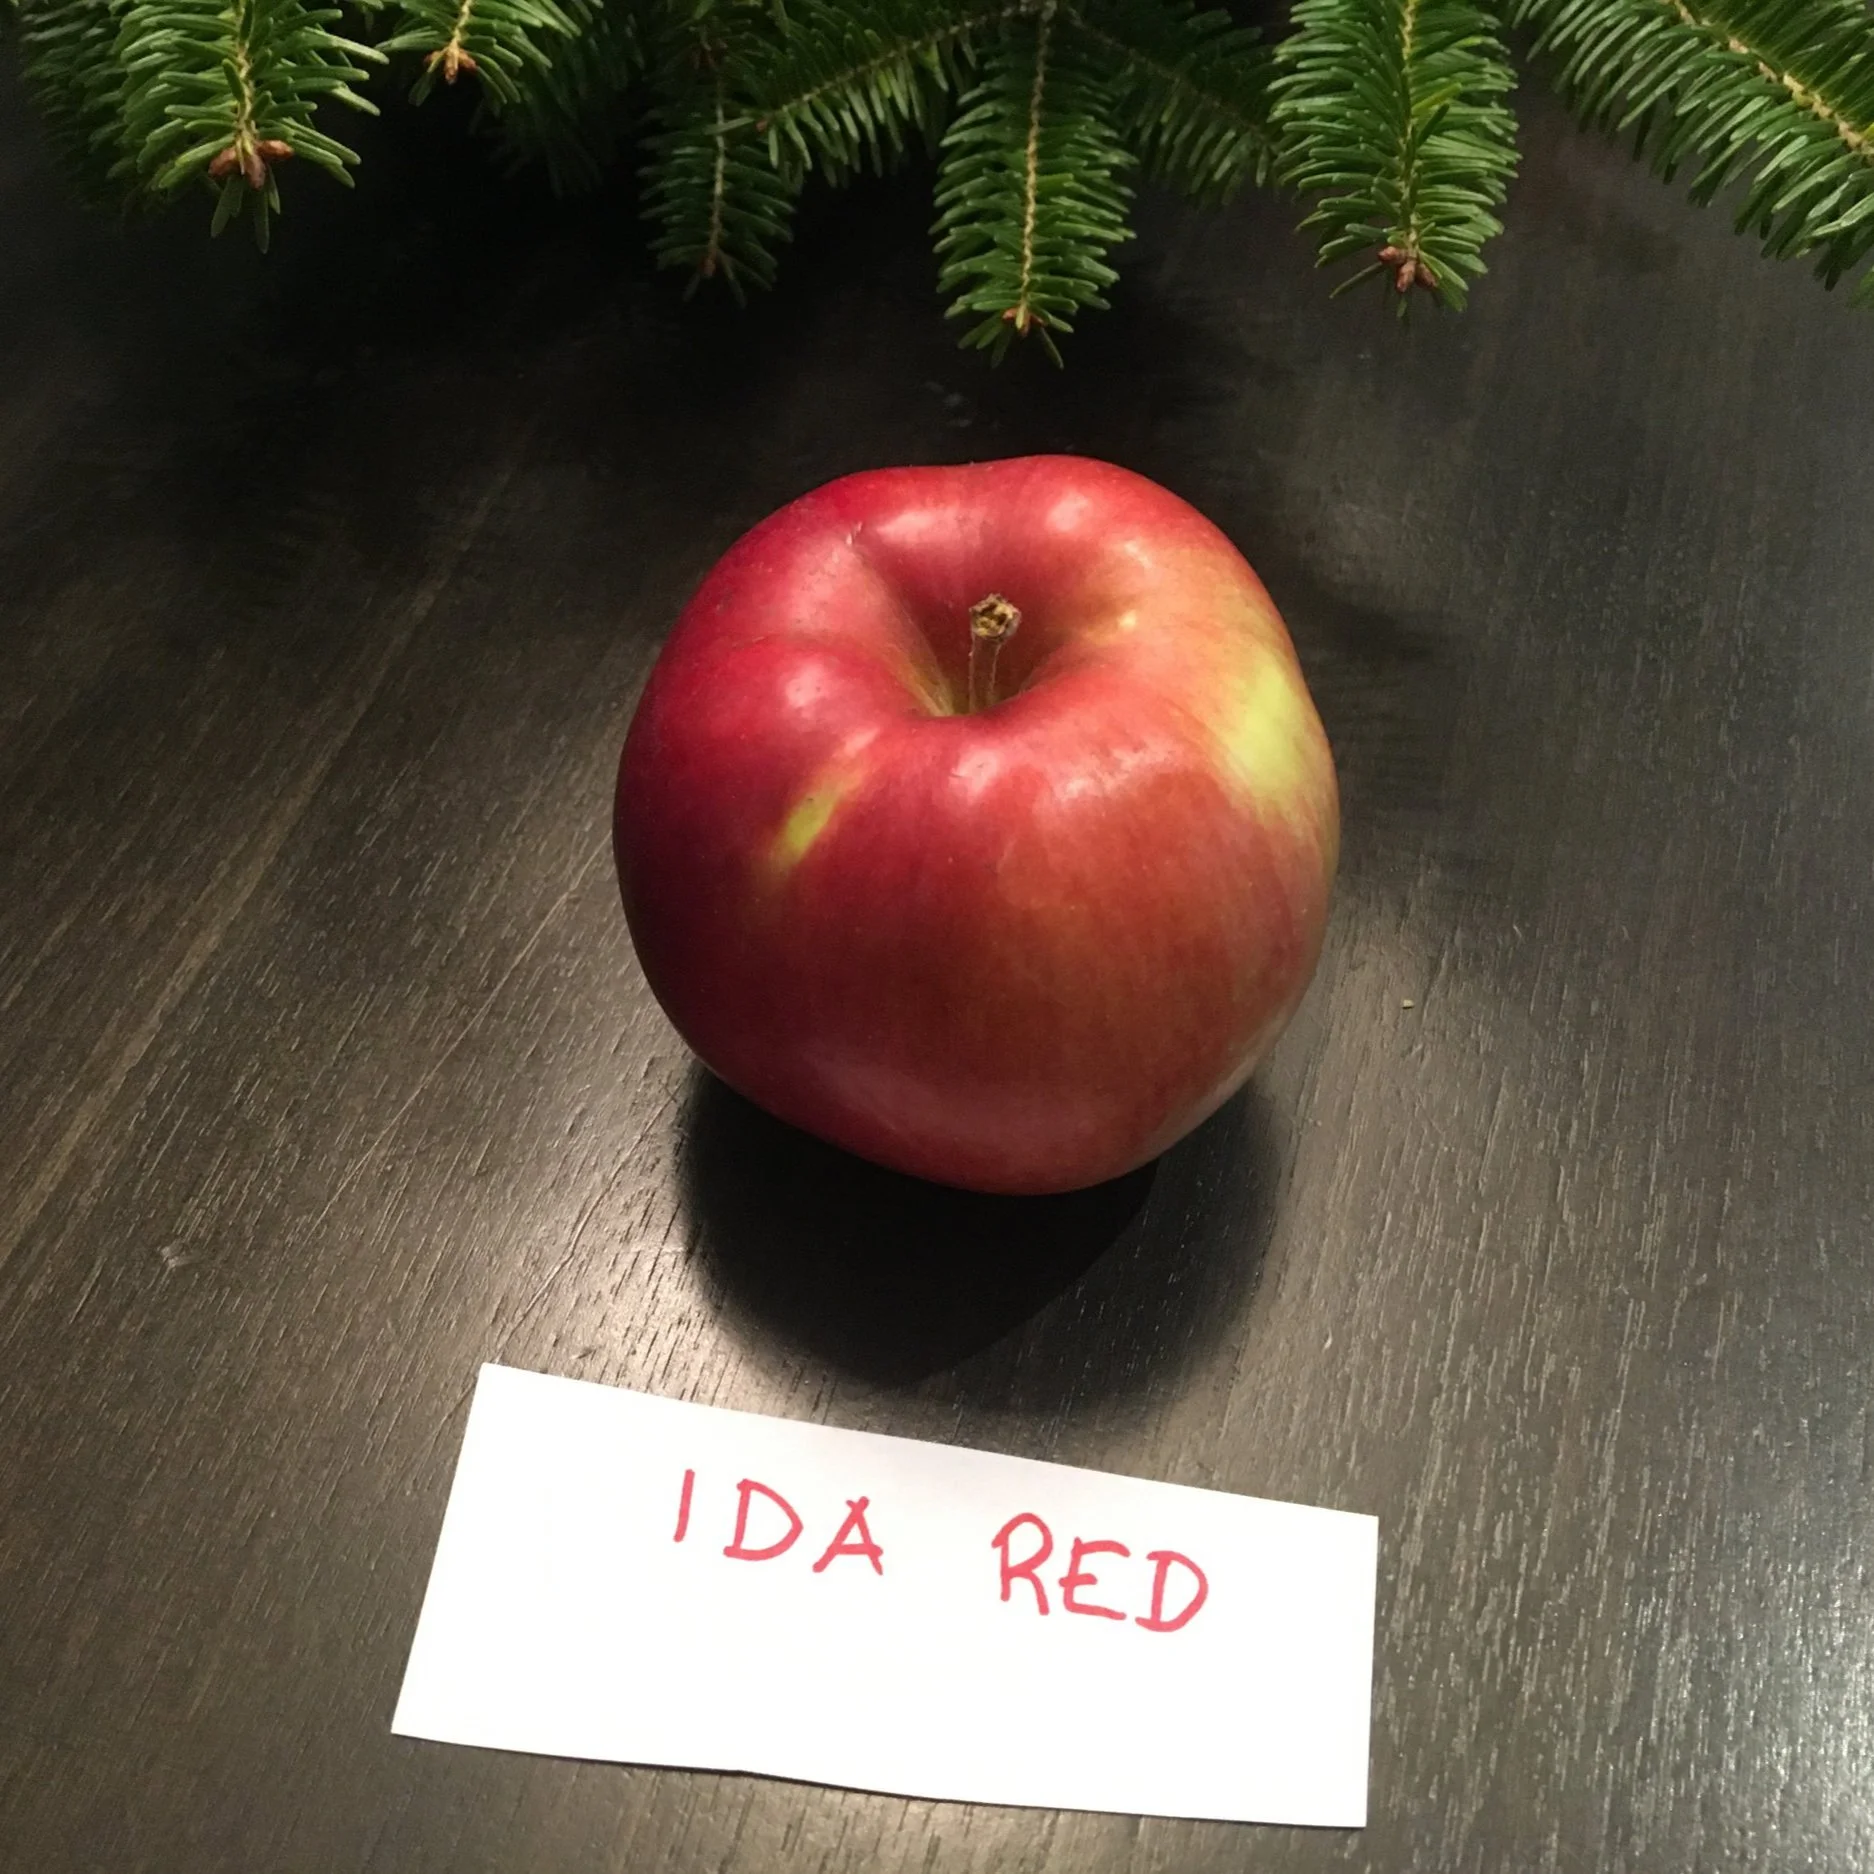
Sorry Idared, you started out as my favourite, but by the end of the apple tasting you came up as #2—after Braeburn.
Nonetheless, it’s still a great apple, with firm, white, tart flesh, aromatic notes (I’d say a mix of herbaceous and tropical). It’s a good keeper—and has a beautiful colour.
Mutsu (a.k.a. Crispen)
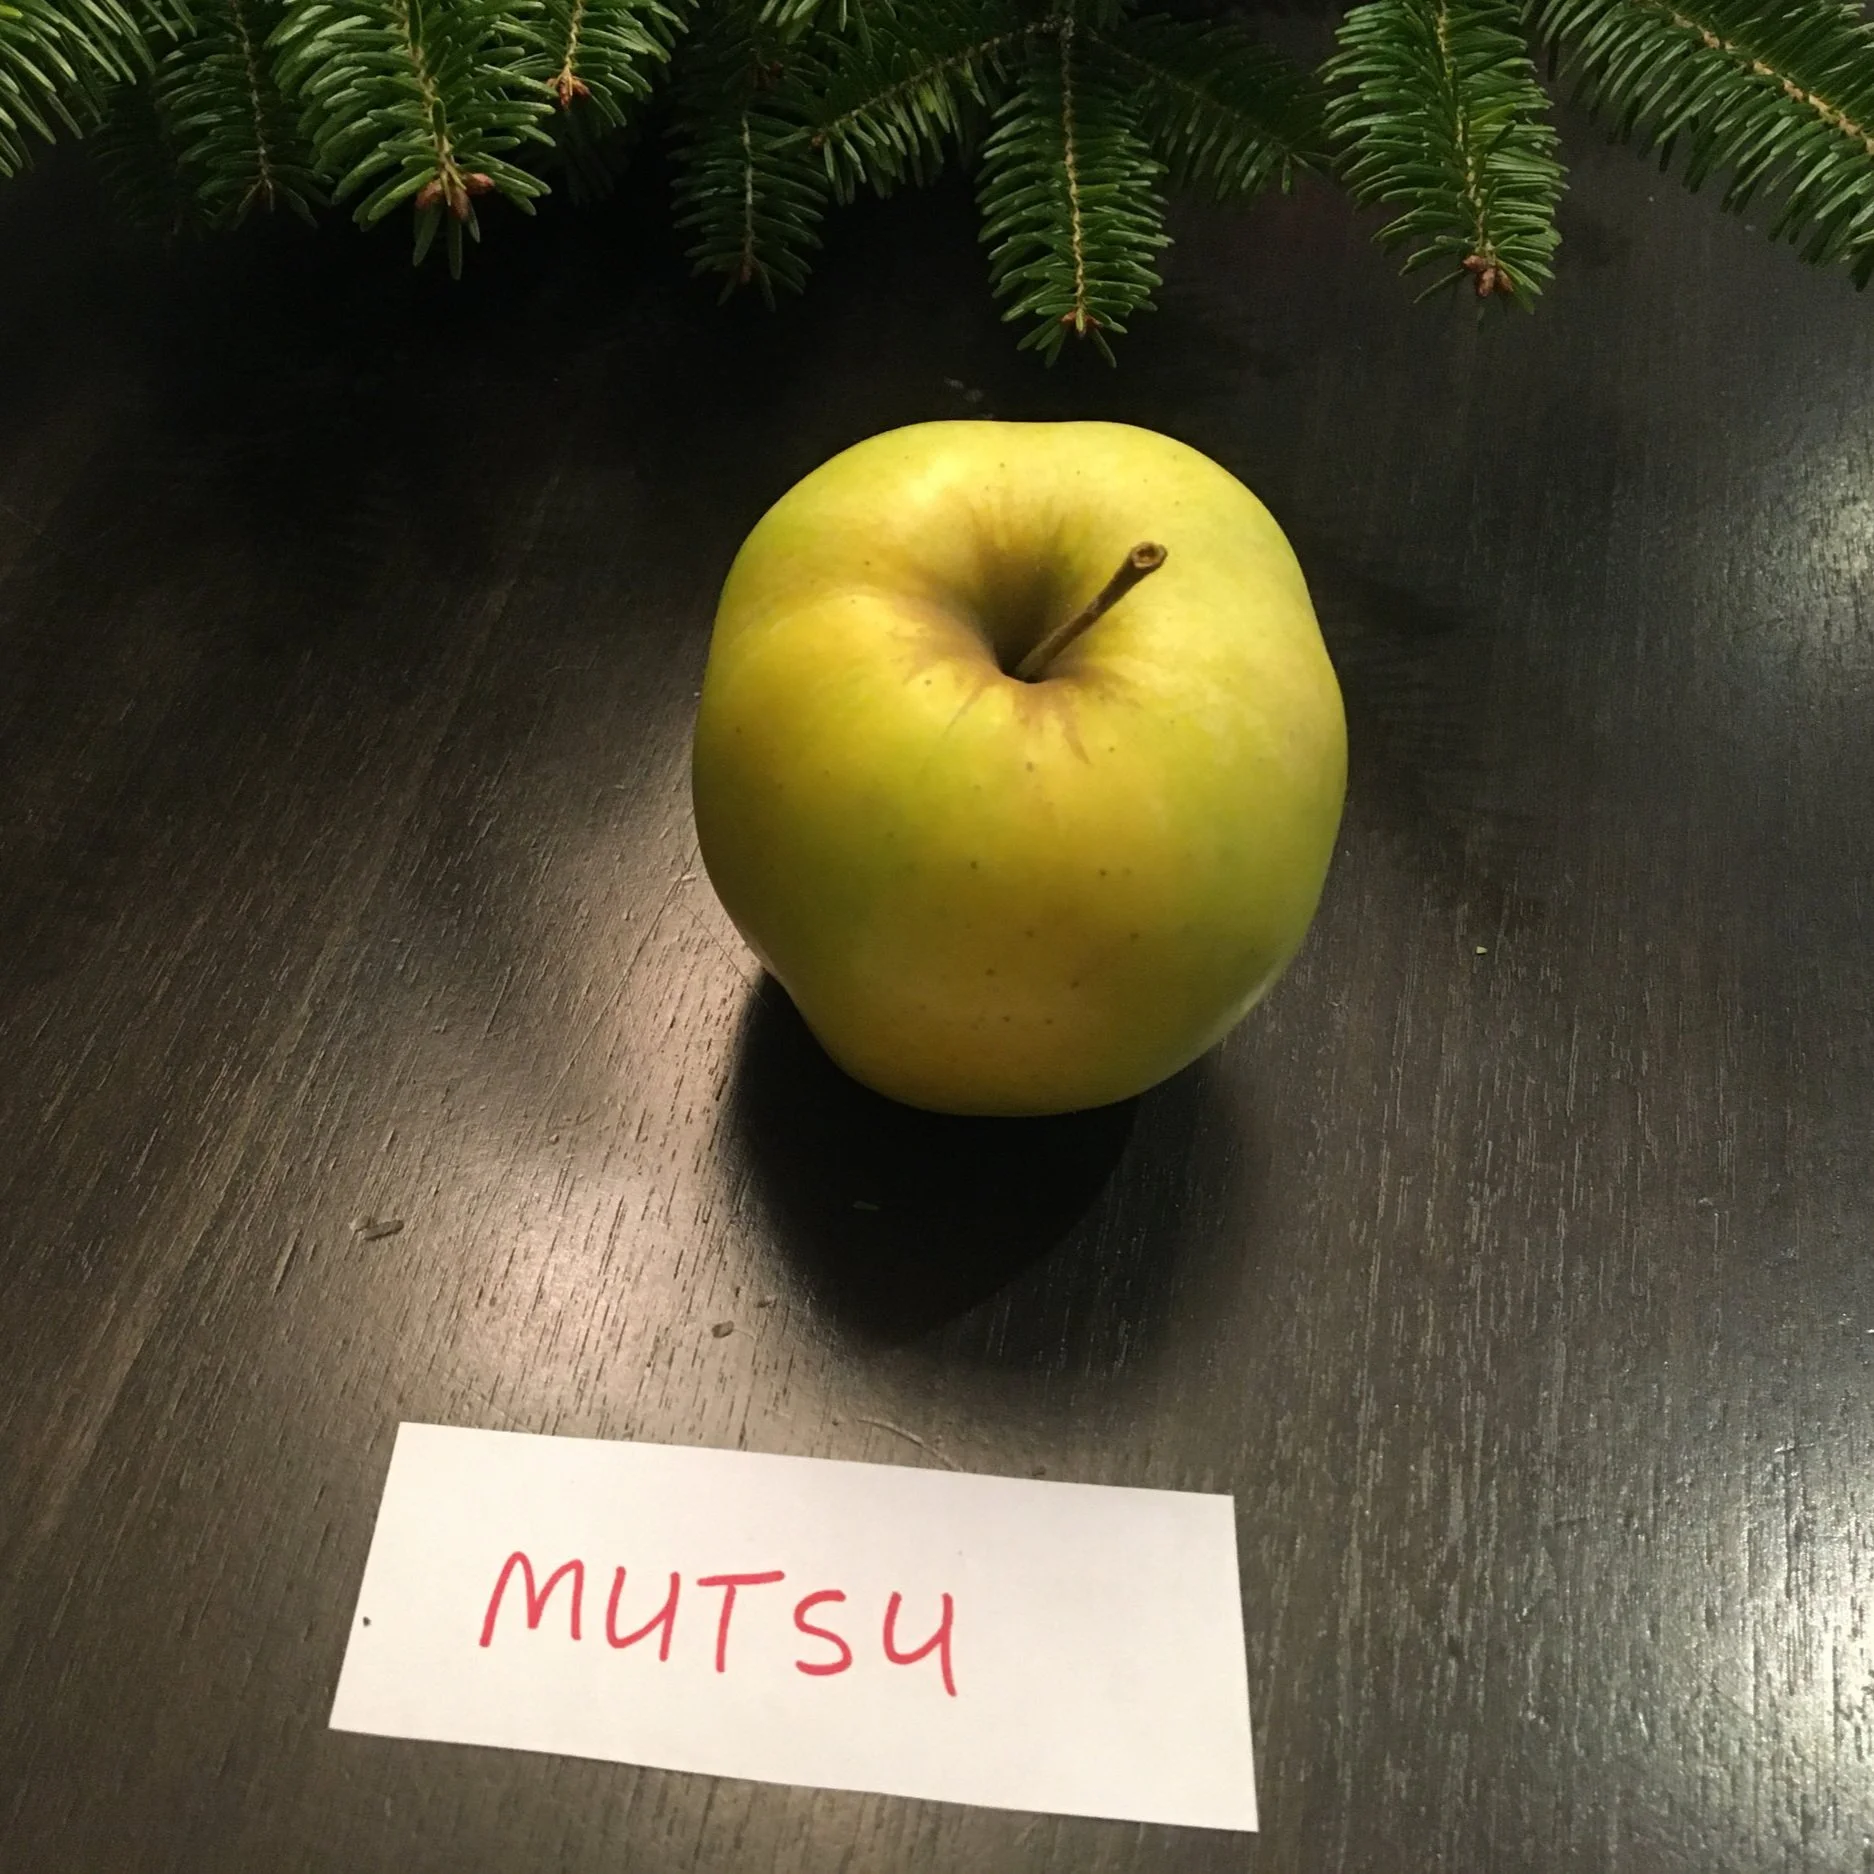
We have a big old Mutsu tree in our yard, and tend to pick them on the green side…before the squirrels pick them.
The Mutsu we got at the orchard was riper—and had changed from the more common light-green colour to yellow. But it was still firm. As I said above, Emma described one of the flavours we picked up as pawpaw-like. We also noted that it had a “green and floral smell,” was crisp, and had a honey flavour. I put a star beside this one on the tasting notes because the kids ranked it as a favourite, with Pink Lady.
Pink Lady

Firm, dense, fruity and tangy. We all loved this apple. It also had very nice colouring on the skin, with a red-pink on a green background.
Along with the Mutsu, it got a star rating from my kids.
Find This Helpful?
Enjoy not being bombarded by annoying ads?
Appreciate the absence of junky affiliate links for products you don’t need?
It’s because we’re reader supported.
If we’ve helped in your food-gardening journey, we’re glad of support. You can high-five us below. Any amount welcome!
Looking for More Apple Ideas?
Hear Susan’s Poizner’s tips on holding an apple tasting — and see an apple flavour wheel!
More Gardening Posts
Online Gardening Masterclasses
To Taste This Fruit, You'll Need to Grow it! (Meet the Medlar)
How to grow medlars in cold climates…and how to make medlar jelly.
By Steven Biggs

Medlar (Mespilus germanica): A little-known fruit that’s easy to grow and a great fit for a home garden.
The Guide to Medlar
Medlar Stumps Museum Staff
“Anyone know what this is?” read the online post.
The post, by a local historical museum, showed a photo of a fruit carving on an old piece of furniture. The curators couldn’t identify the fruit.
“It’s medlar,” I replied.
This obscure fruit, popular in past centuries, was unknown even to historical interpreters.
And that obscurity means that if you want to taste medlar, you’ll probably have to grow it yourself (or share this post with someone who will grow it for you!)
Grow Medlar at Home
Even though the fruit is little known, the plant deserves of a spot in more home gardens. Here’s what I like about medlar:
Low maintenance. It needs minimal pruning.
Ornamental. It has flowers, fall colour, and winter interest.
Hardy. It’s winter hardy, and resistant to diseases and pest.
Suited to cold climates. The late bloom means fruit production isn’t affected by a late spring frost.
And there’s one other intriguing thing about medlar: For gardeners who love the idea of enjoying homegrown food throughout the year, medlar adds to the winter fruit larder.
Medlars are Ornamental
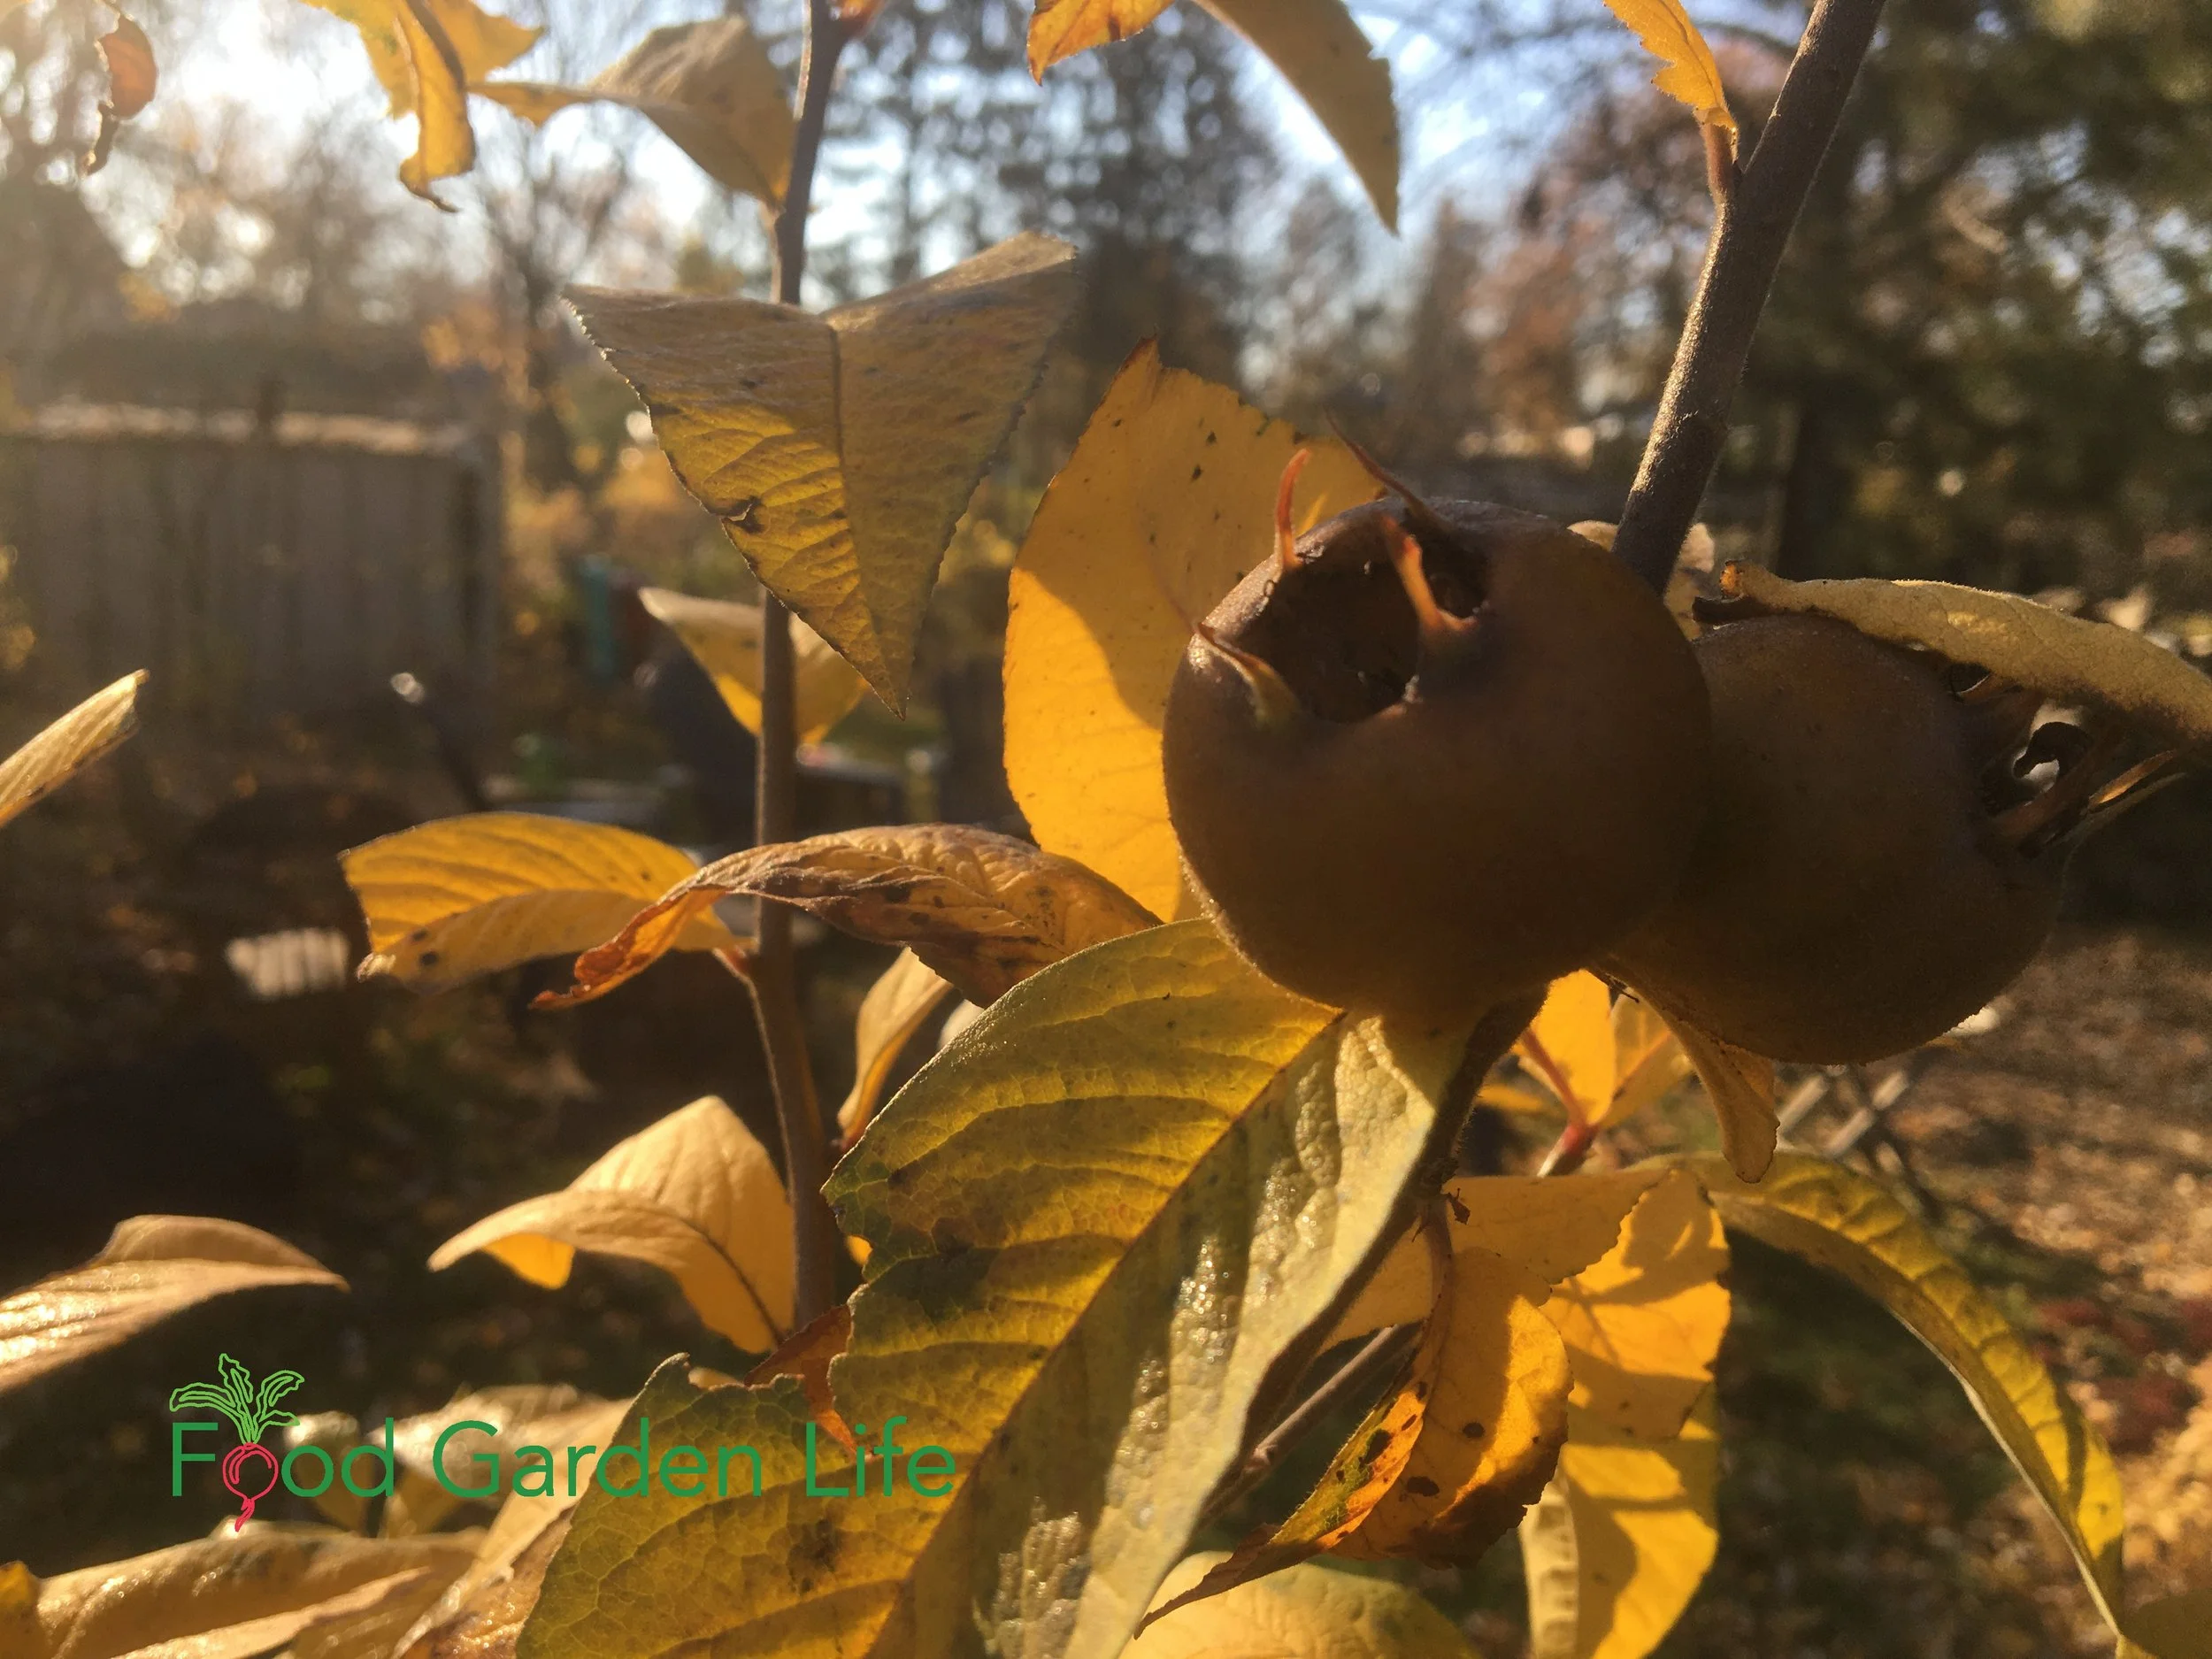
Medlar plants have nice leaf colour in the fall. Depending on the year, the leaves can turn a vibrant gold, taking on hues of orange and copper.
Medlar plants have large star-shaped white blossoms in spring, and nice leaf colour in the fall. Depending on the year, the dark-green, leathery, oblong leaves can turn a vibrant gold, taking on hues of orange and copper. If you’ve ever admired the fall leaf colour of cherries, medlar are just as good.
The fruit is decorative too. I pick my medlar fruit in mid- to late-November, once the leaves have dropped. And in years that I harvest late, those fruit are still there, adding winter interest to my garden. They really dress up the naked medlar bush.
How Medlar Plants Grow
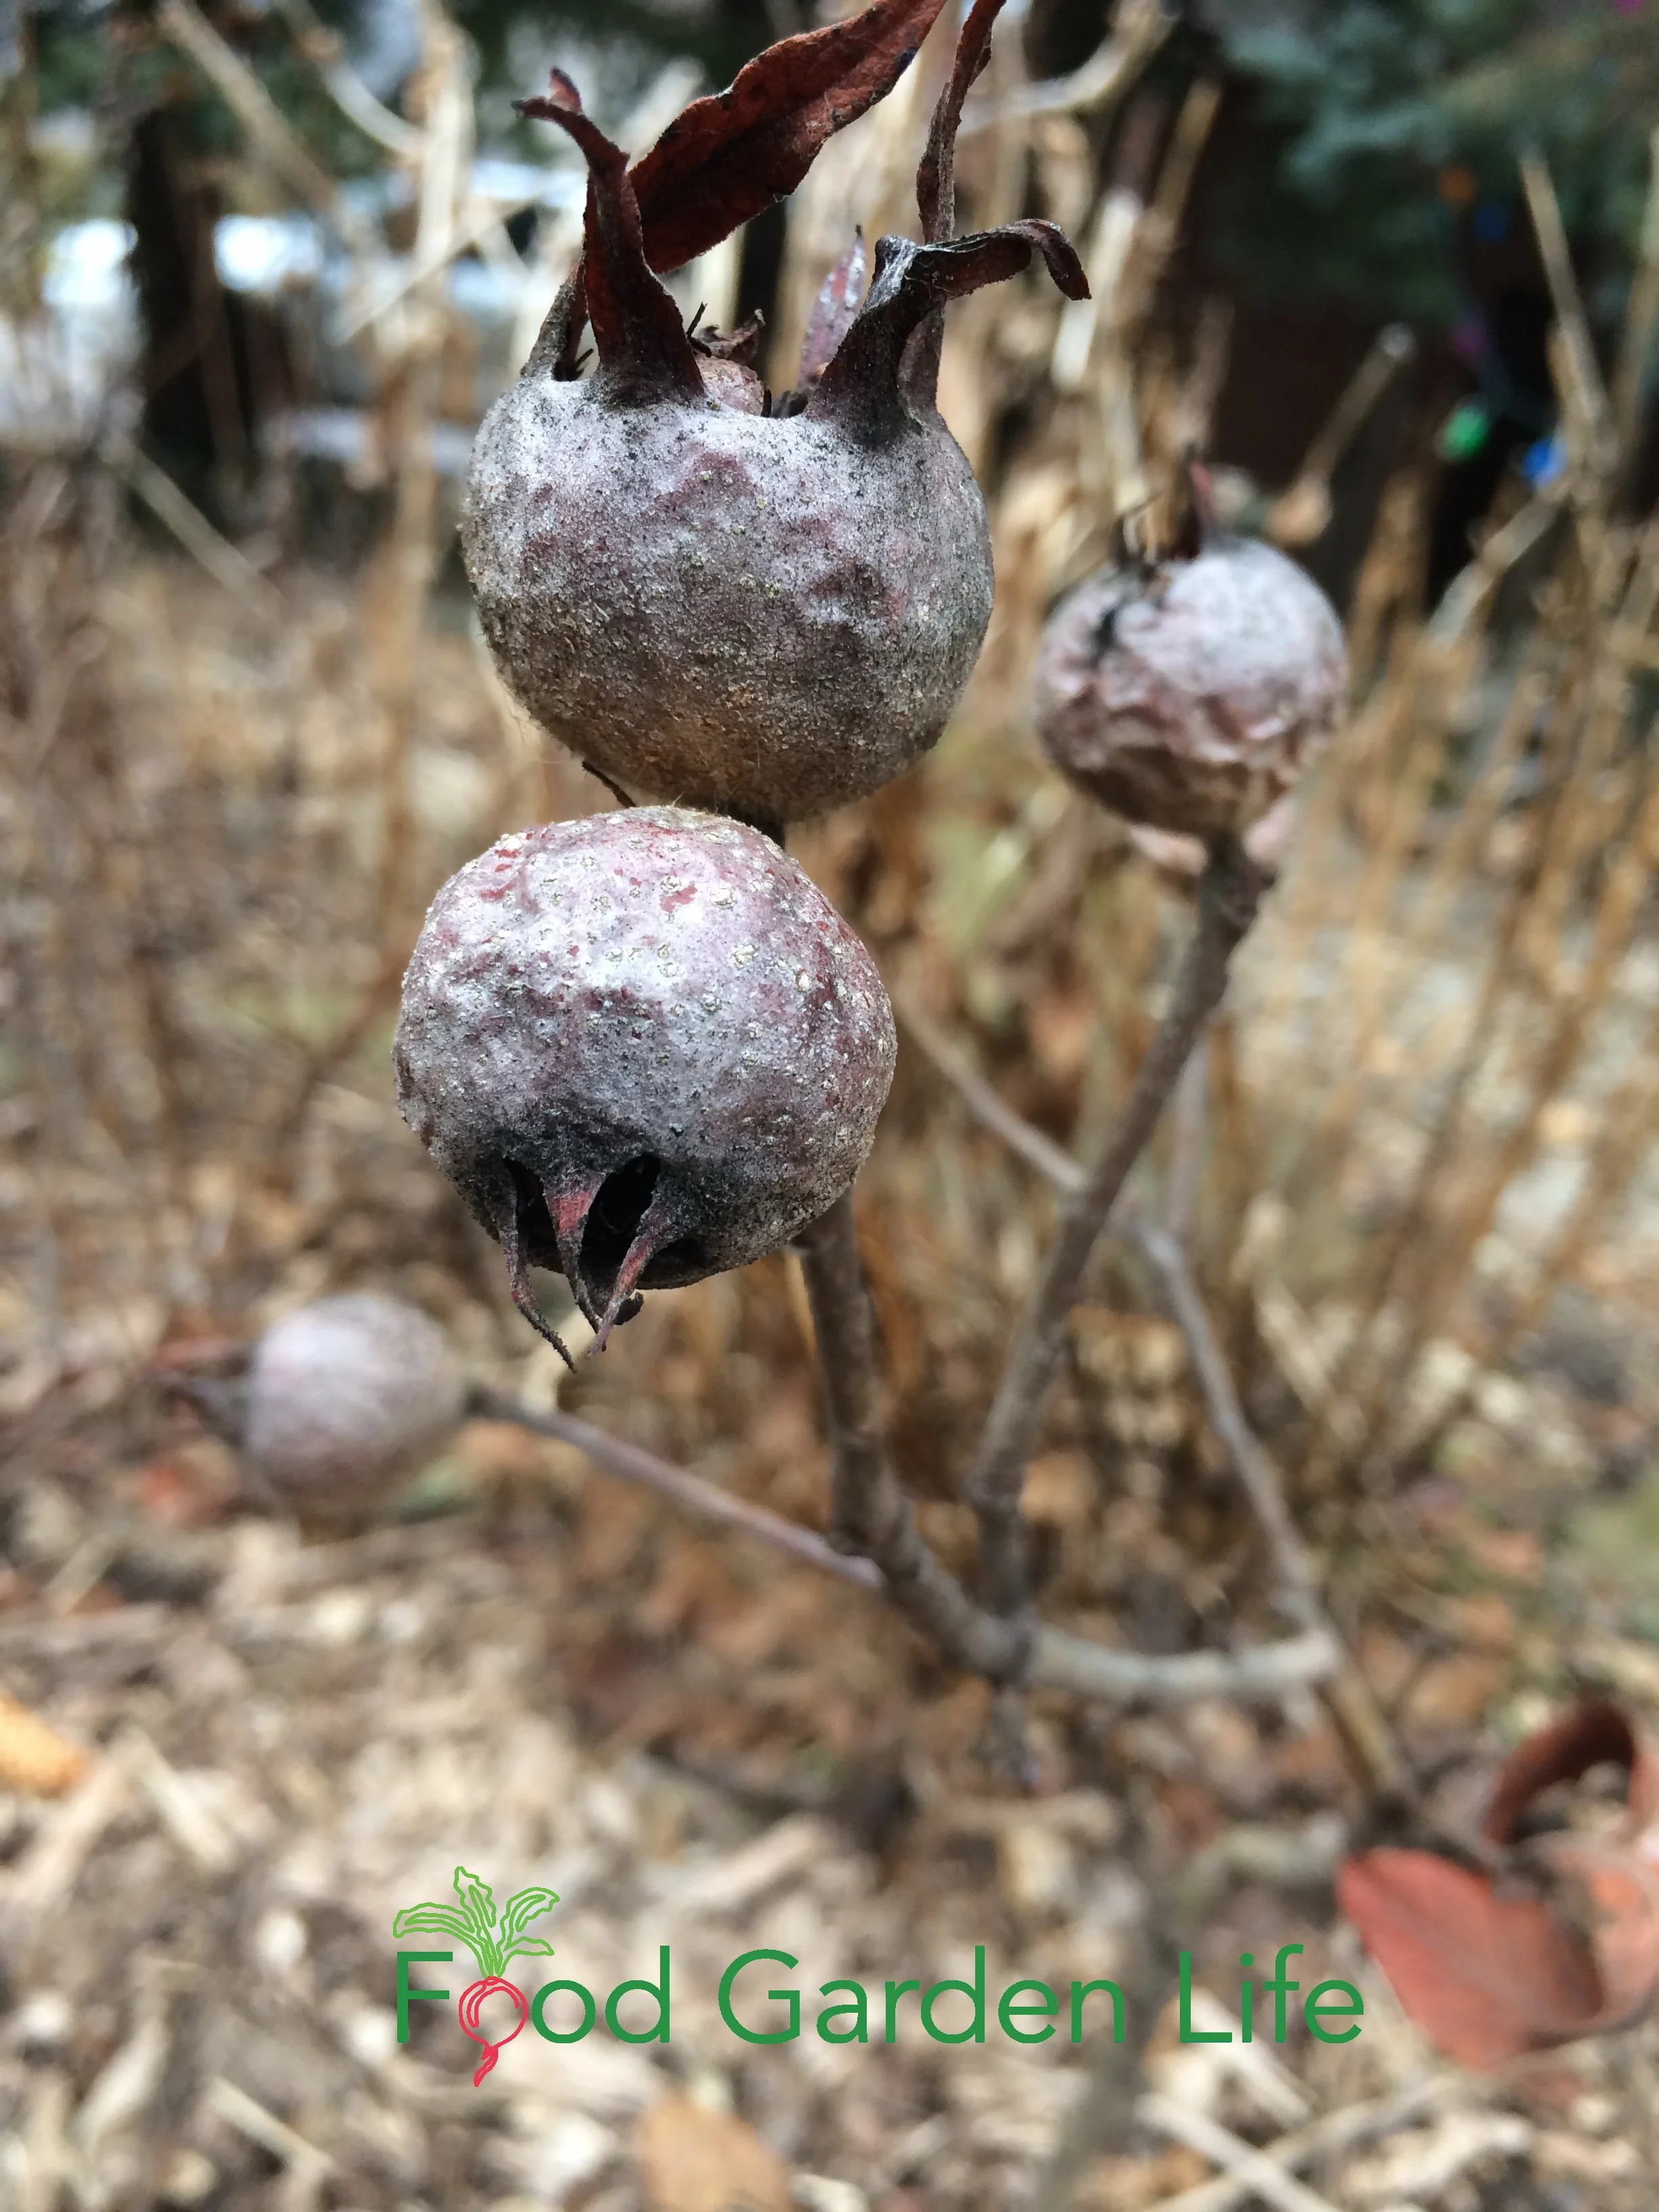
If you don’t harvest all of your medlar, they add winter interest to the garden.
Medlar is fairly slow growing. But as it fills in, it takes on a fascinating gnarled look thanks to the ways the branches grow into a nest of twisted shoots.
My medlar is a bush. No taller than me. But it can be either a large shrub or a small tree. Like apples, you determine shape and size with pruning – and like apples, it can be grown on a rootstock that dwarfs it. A medlar tree on its own roots can get bigger, 4-6 metres (13-20’) high.
Ultimately, the size depends on the rootstock, the growing conditions, and how you prune it.
Best Site for a Medlar
Medlar grows best in full sun, but does respectably well in partial shade. Mine is underneath a towering silver maple, where it gets 4-6 hours of sun a day.
It’s not fussy about soil. The important thing is that the soil is well drained.
Landscape with Fruit
That’s easy to grow in a home garden!
Does Medlar need a Mate?
Medlar is self-fertile.
That means that if you have just one plant, you’ll still get fruit.
How to Prune Medlar
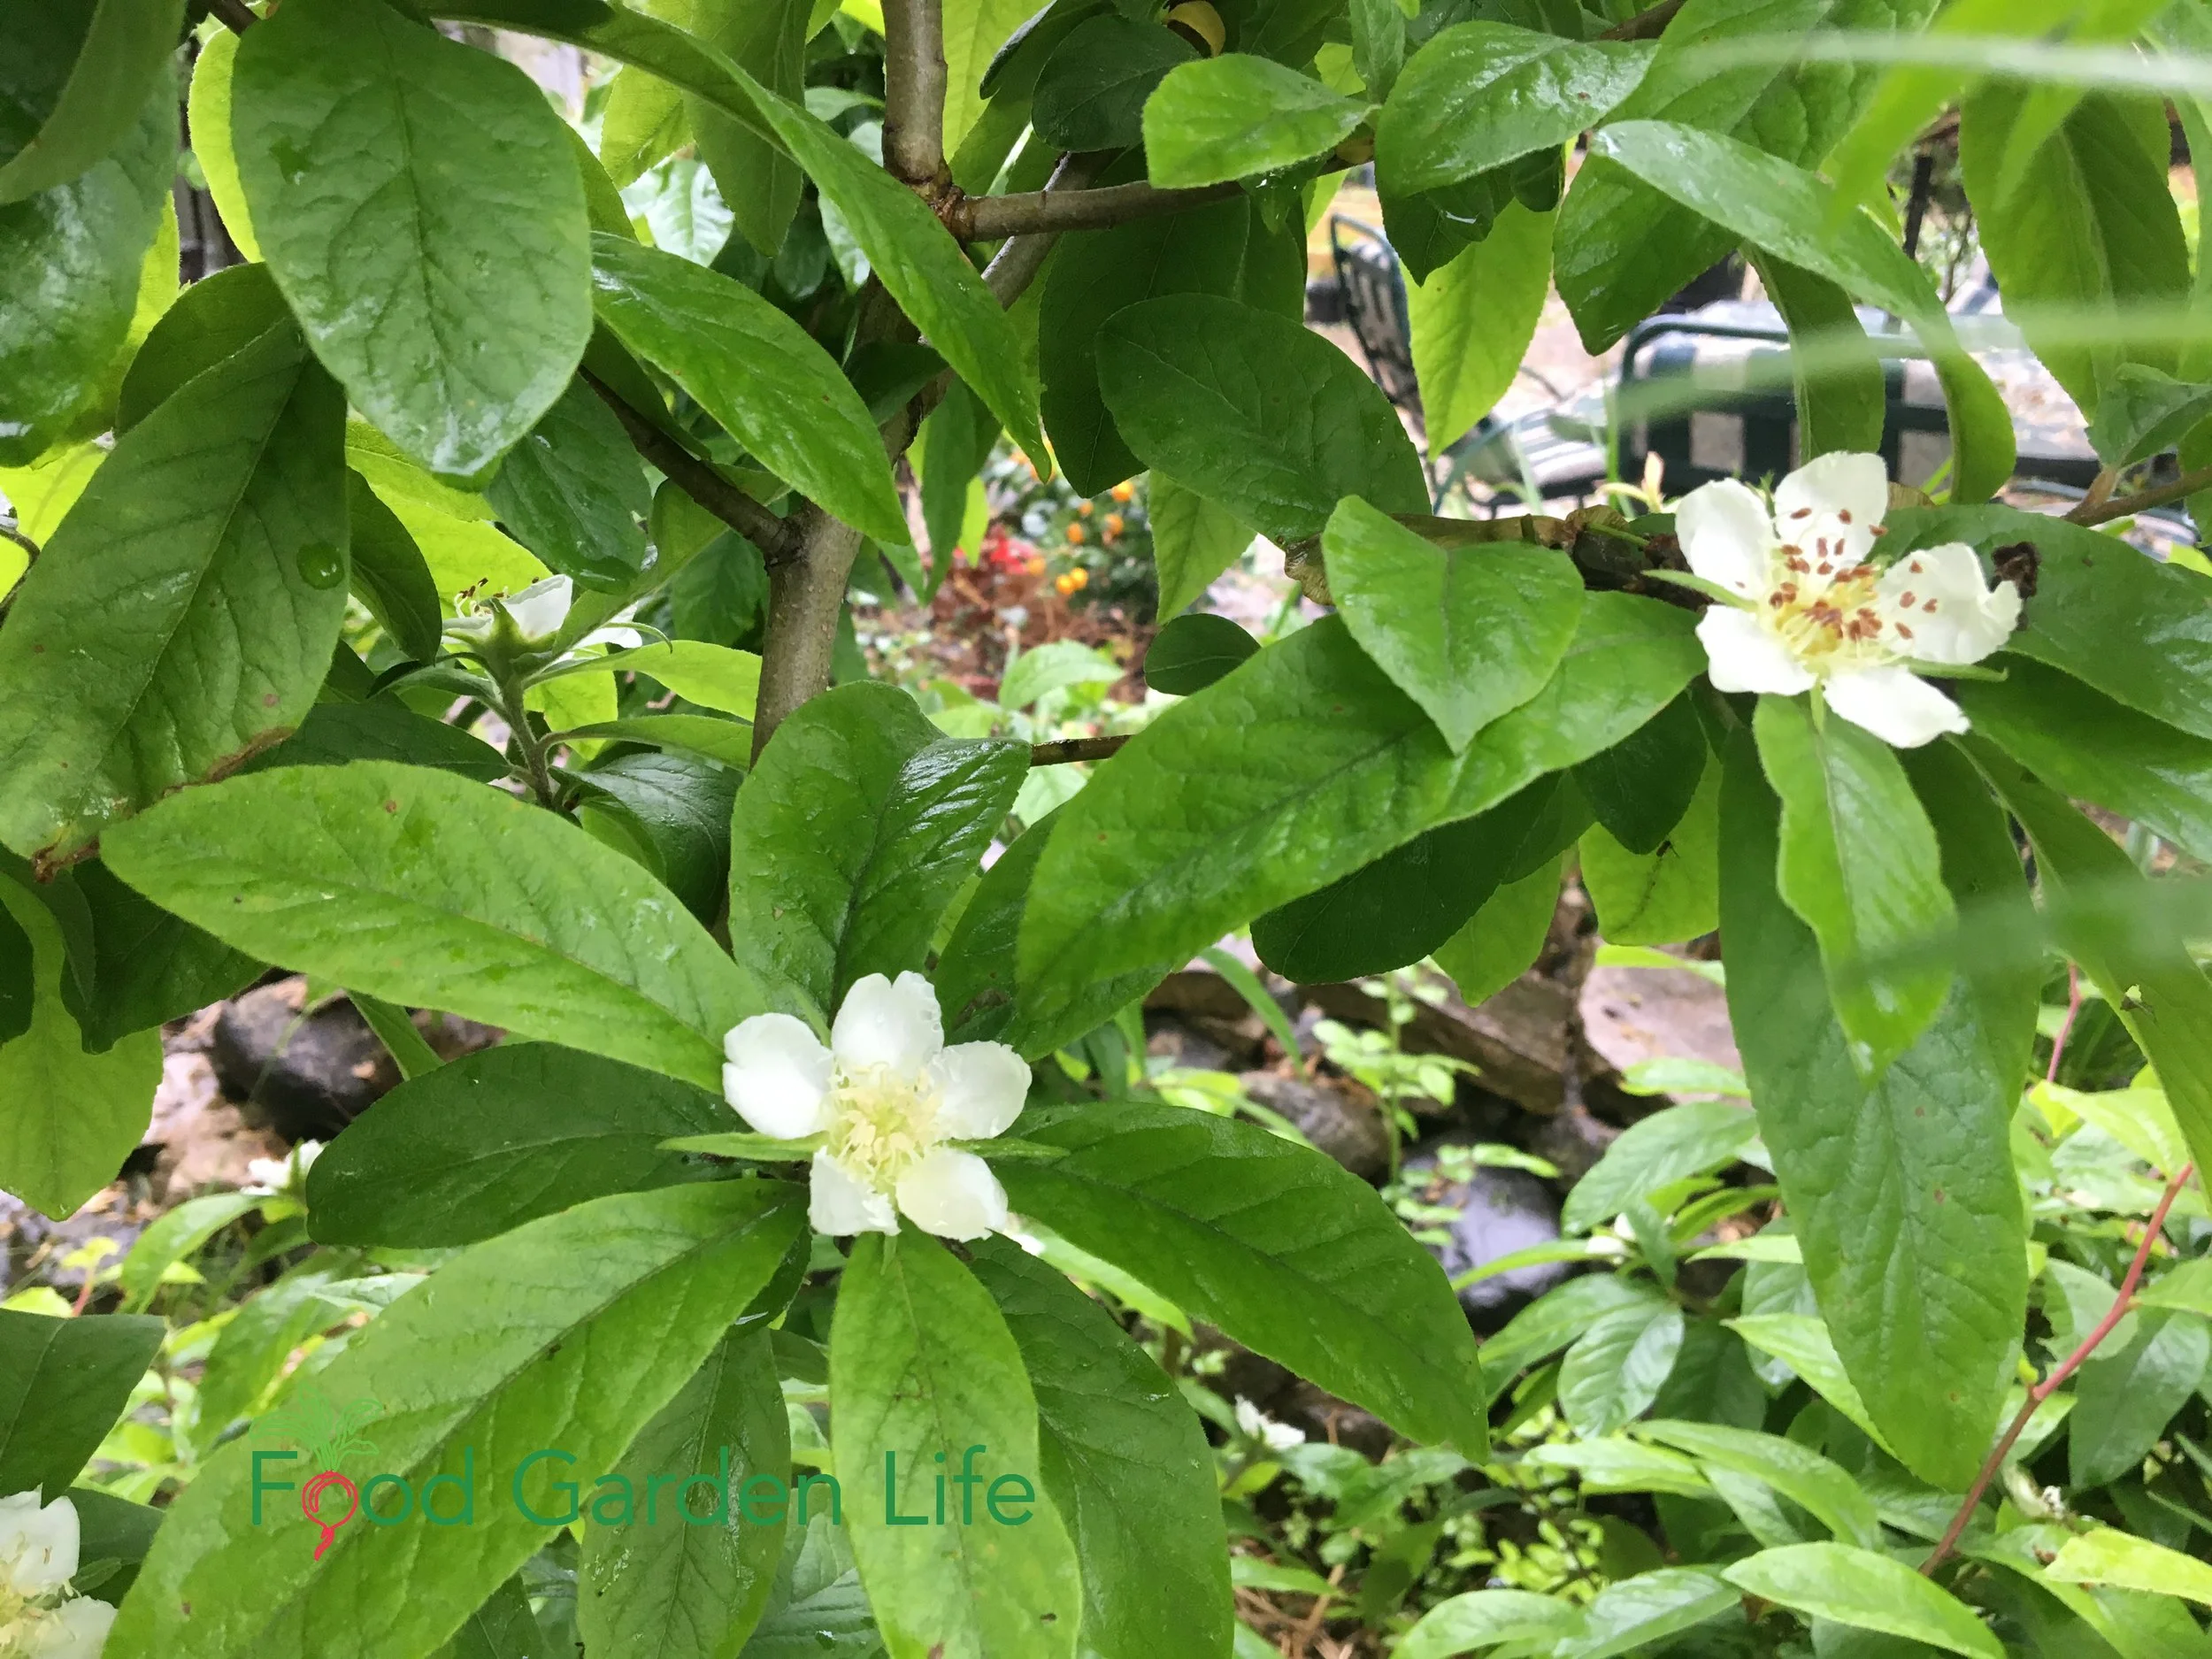
Medlar plants have large star-shaped white blossoms in spring.
Nursery-grown medlar bushes and trees are often pruned to have a length of bare trunk before side shoots are allowed to grow. This is so that when the branches are bent from the weight of fruit, they are high enough above the ground that they don’t touch it.
I prune my medlar once a year, in late winter, while it’s dormant. There’s an art to pruning many fruit trees, but pruning medlar is simple. Like most fruit trees and bushes, we want an open framework of branches that gives good air circulation and lets in some light.
Here are tips for pruning your medlar:
Remove dead, damaged, spindly, diseased, and crossing branches
Shorten long branches that might touch the ground when bearing a heavy crop of fruit (fruit forms on spurs on branches, so when you remove the tip of a branch, you’ll still get fruit)
Remove any suckers that grow from the base
Prune your medlar while it’s dormant, in late winter.
(And if you don’t get around to pruning for a year or two? Sometimes life gets busy for home gardeners. Your medlar will keep growing, and you can prune it the following year.)
Medlar in the Landscape
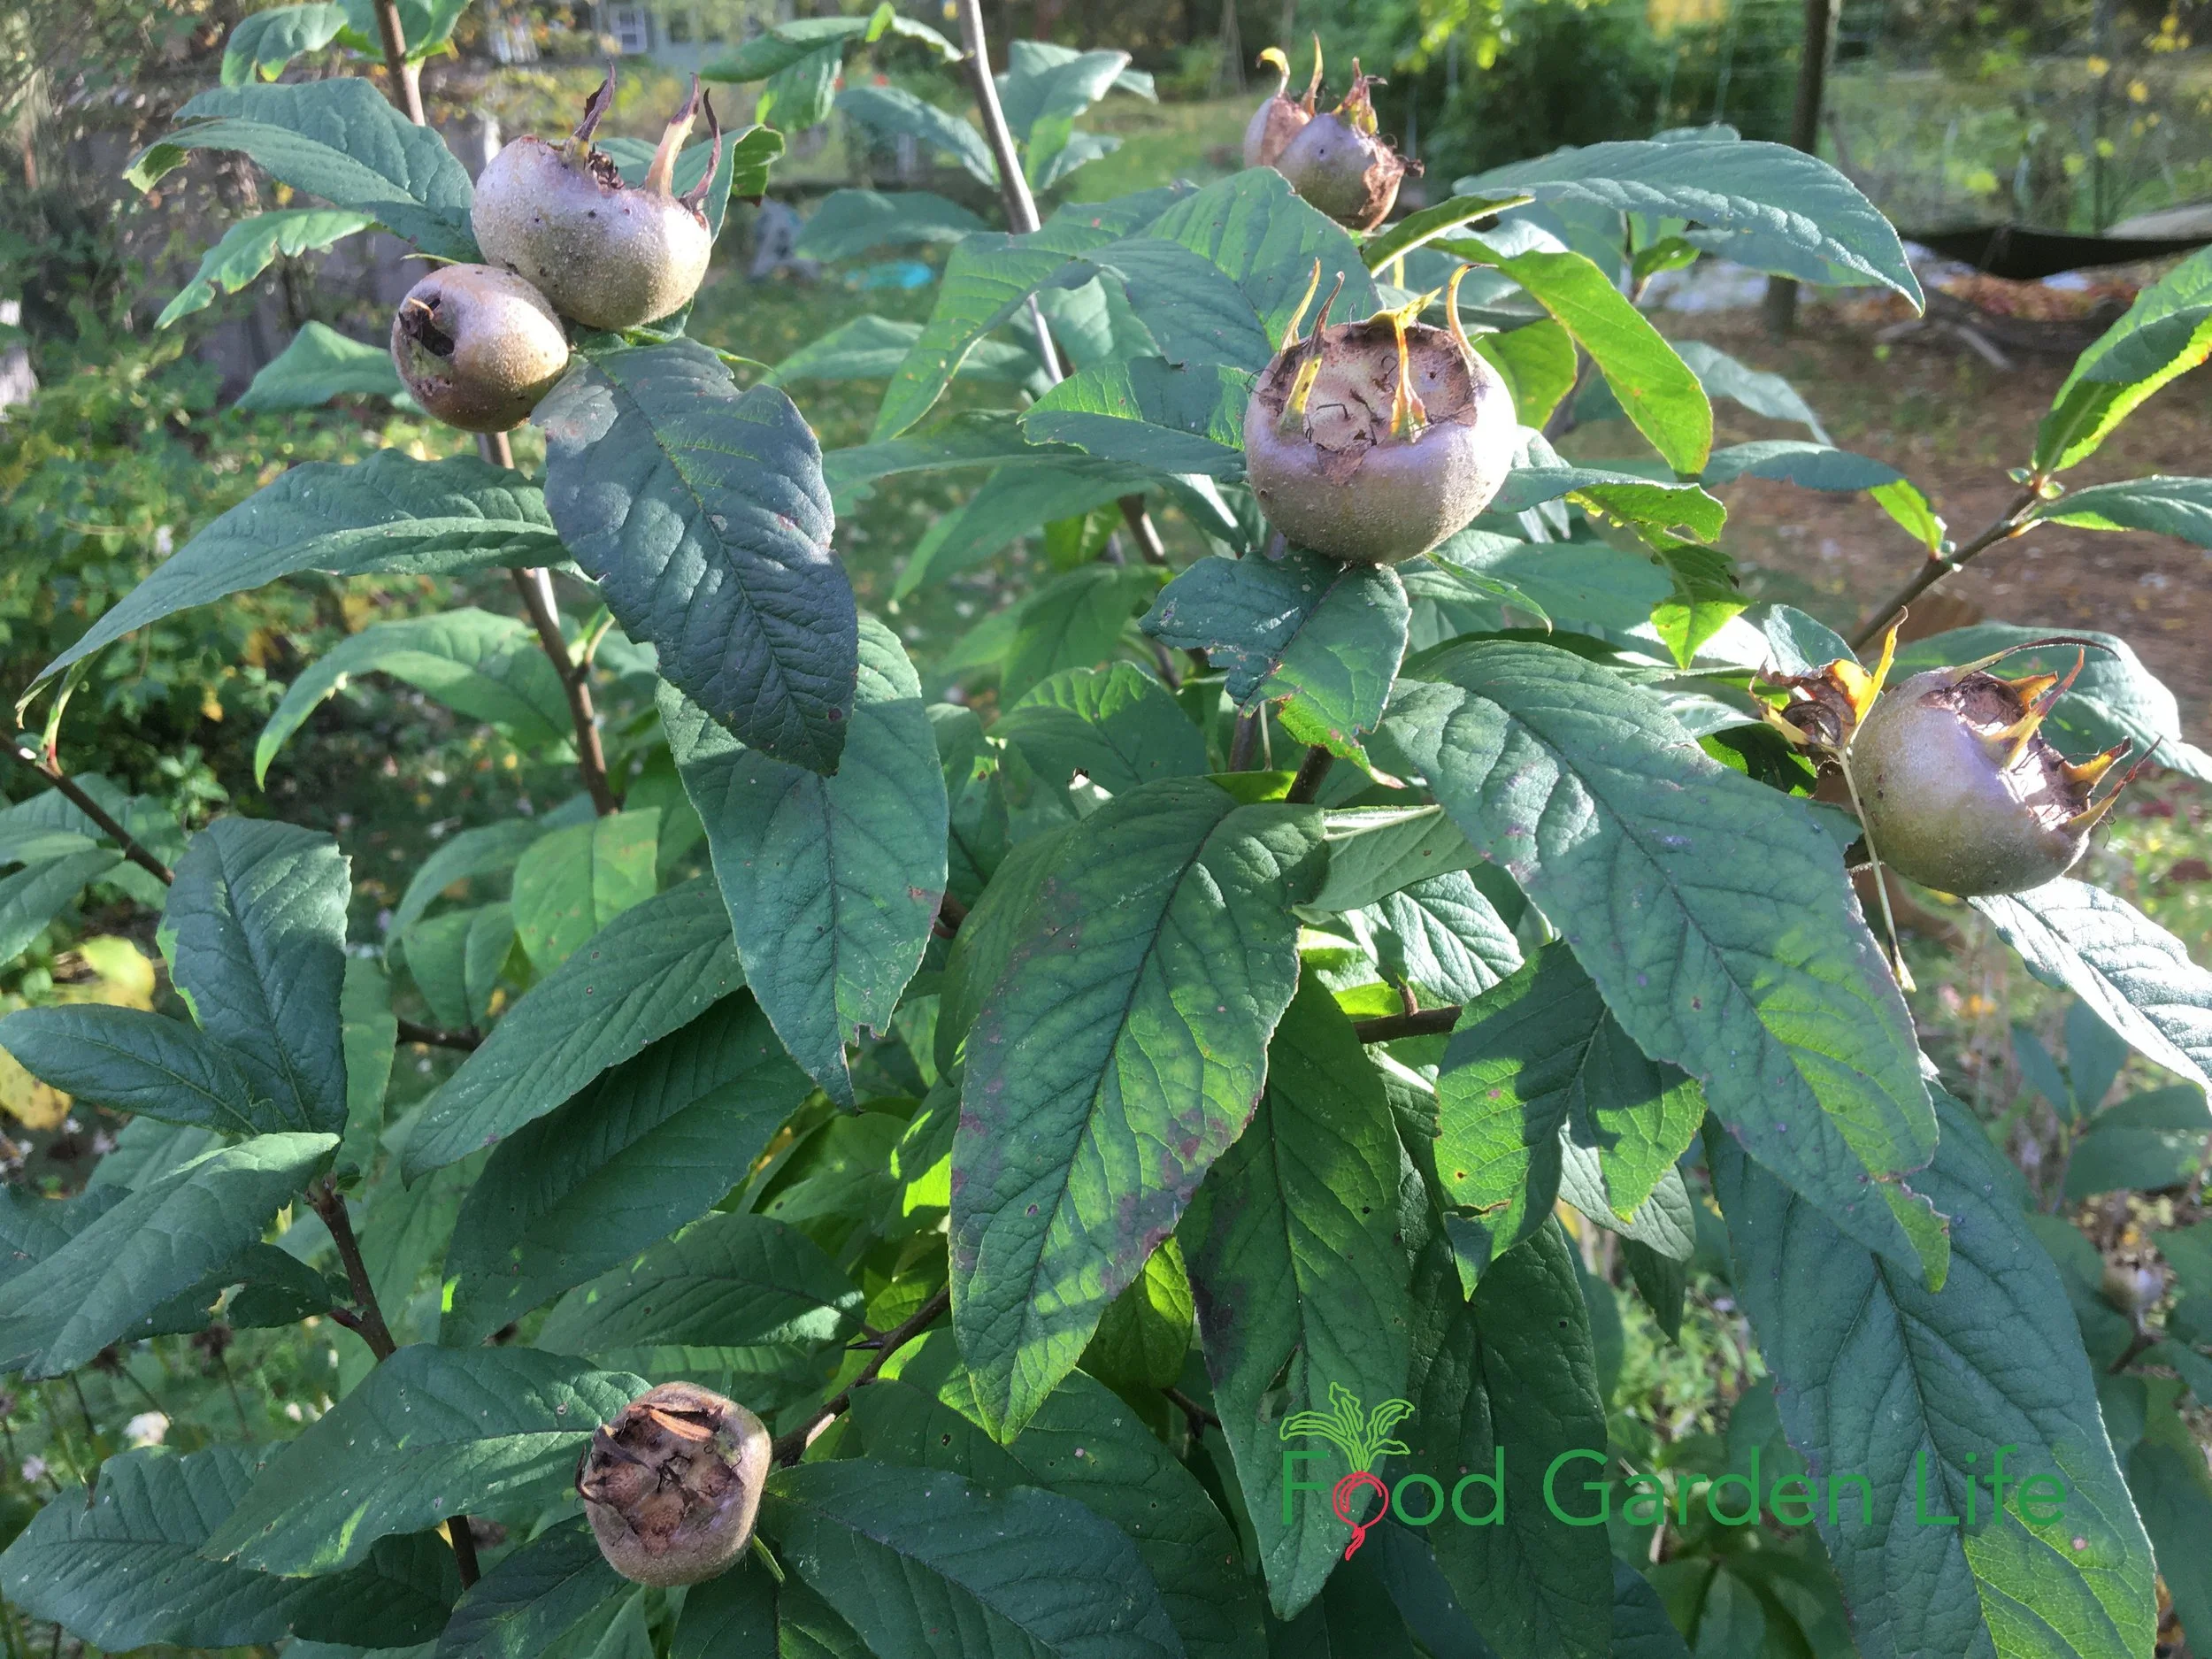
A medlar bush is a great addition to a forest garden and an edible landscape.
I hope that with the increasing interest in edible landscapes and forest gardens, more people will try to grow medlar.
Forest Gardens
In forest gardens and polycultures, a medlar bush can be part of the lower canopy; or a medlar tree as part of the canopy.
Edible Landscapes
In edible landscapes, where aesthetics matter too, the addition of a medlar bush brings spring flowers, fall colour, winter interest.
Food Gardens
For hard-core food gardeners, you can use a more intensive approach to maximize your medlar production. I’ve seen medlar in a demonstration orchard being trained in a high-density system, tightly spaced, and trained along horizontal wires.
Harvest Medlar Fruit
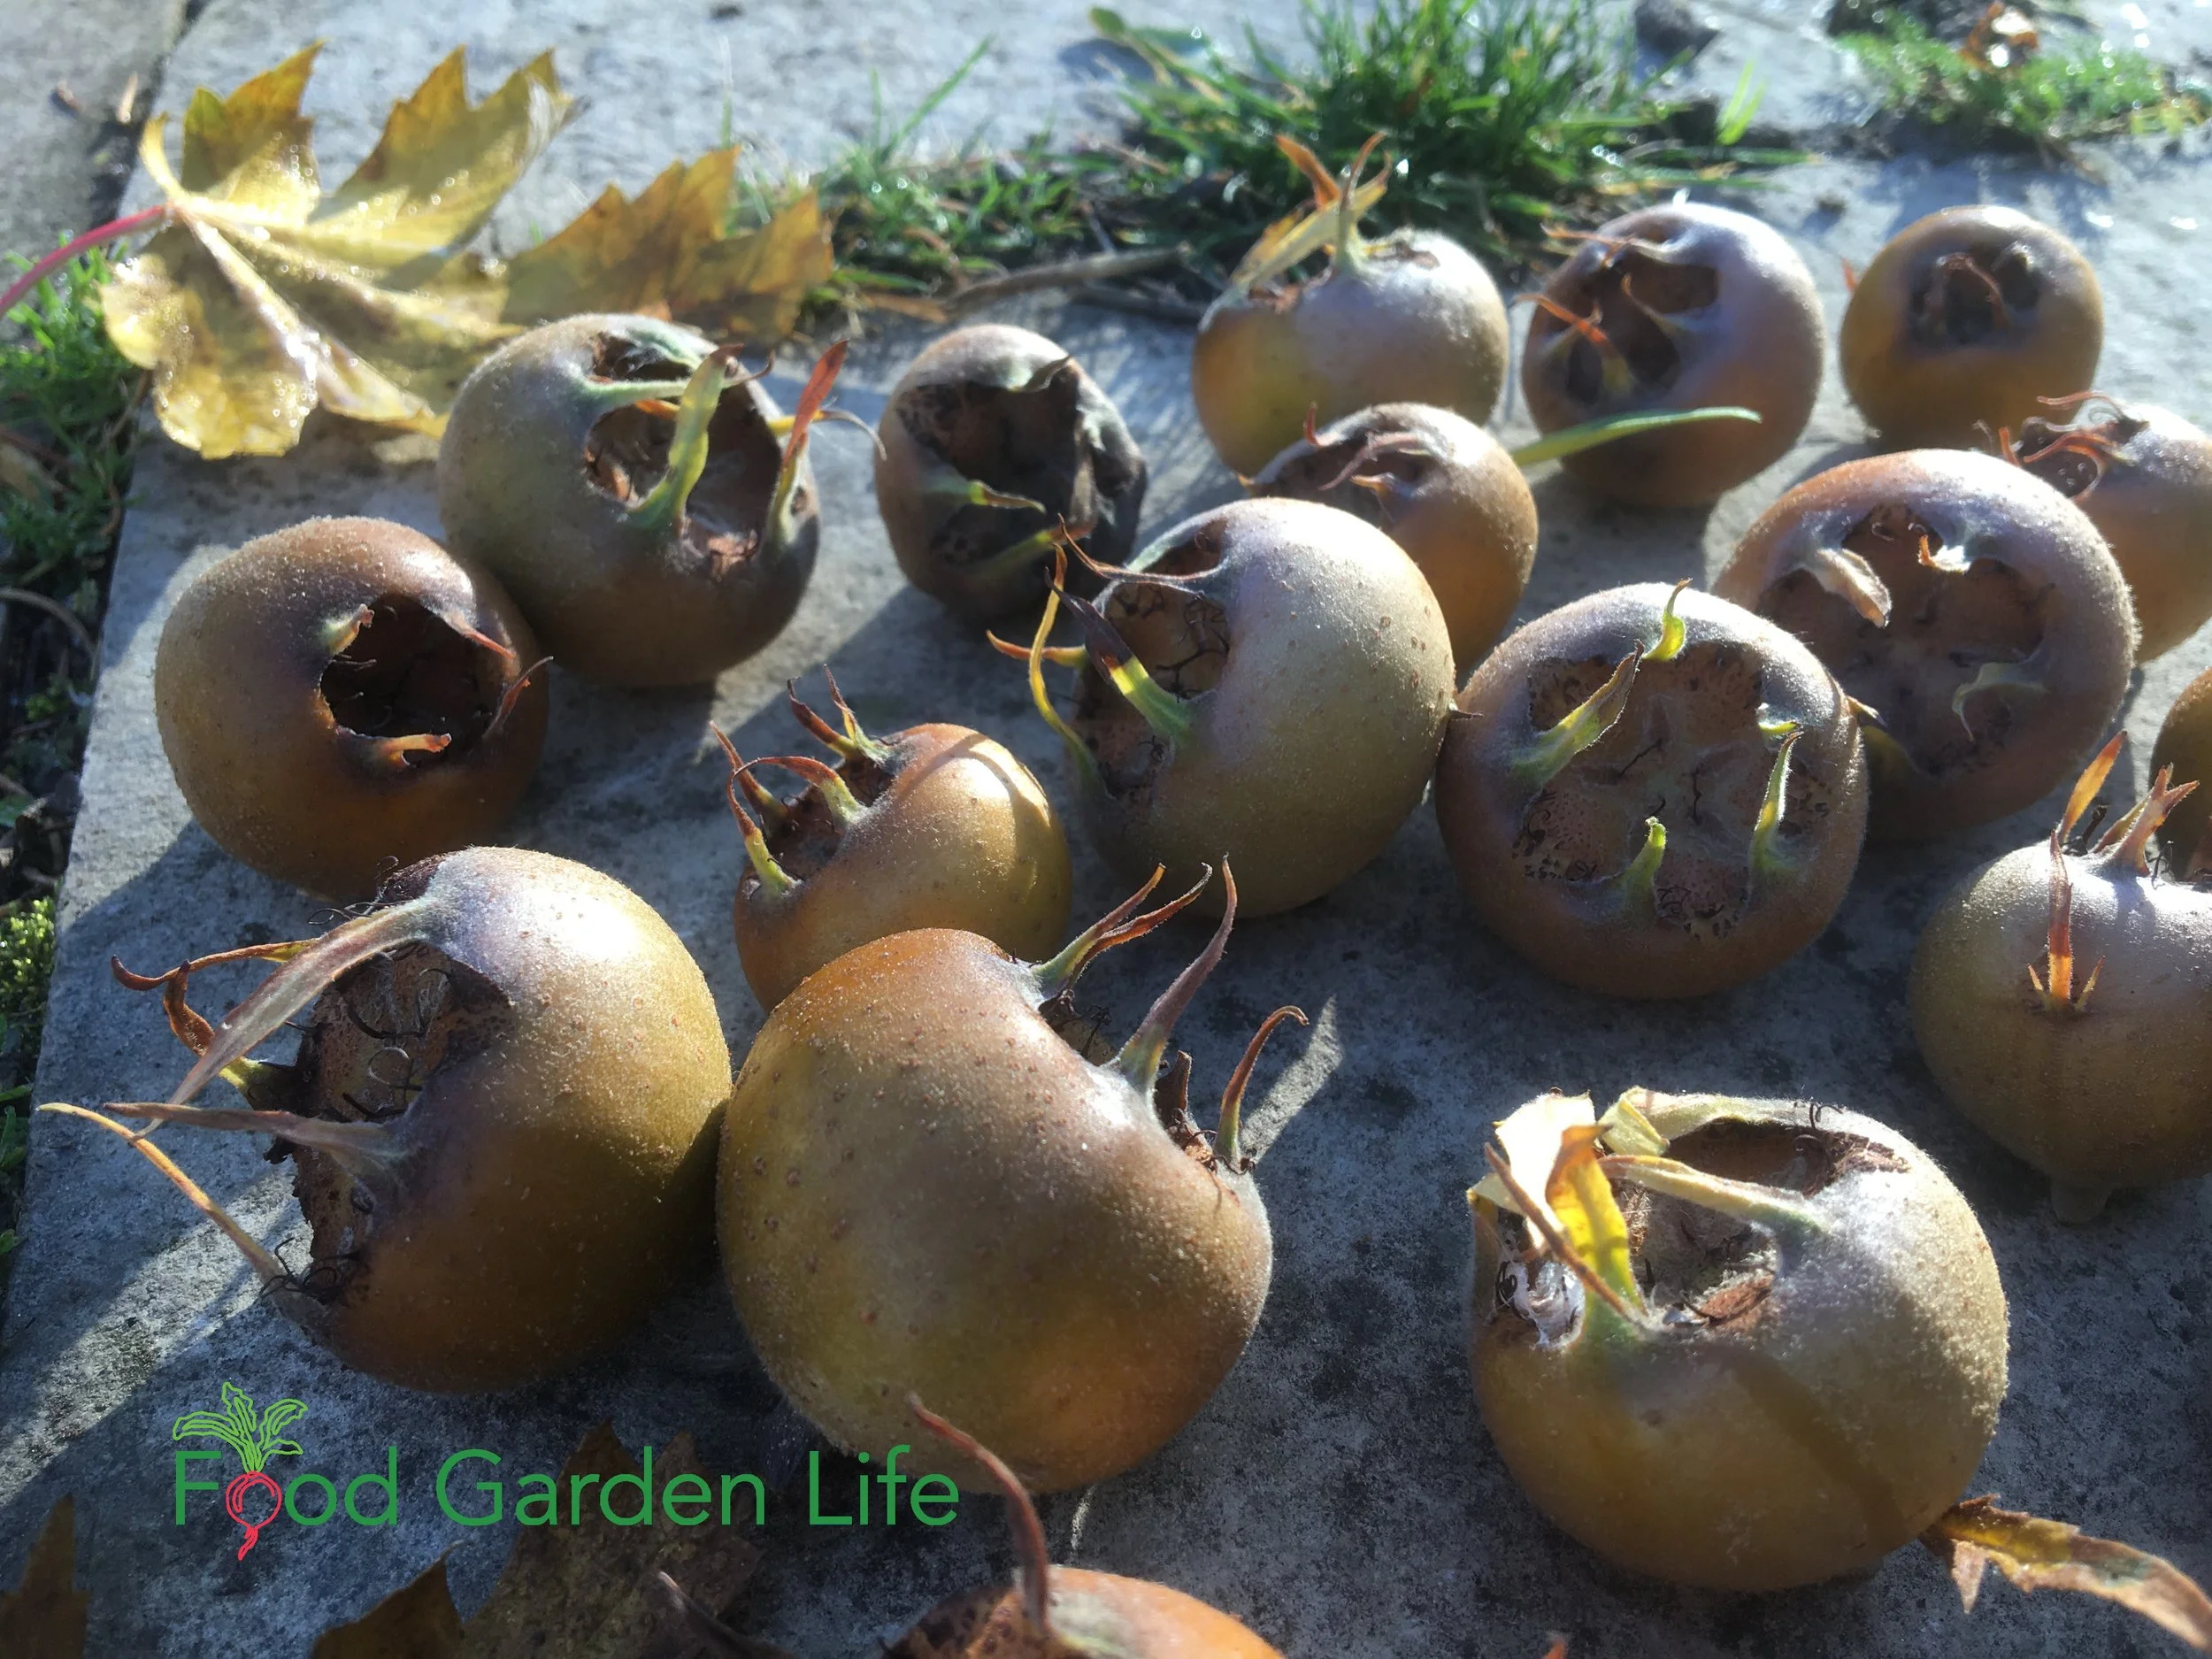
Medlar harvest, after the leaves have fallen
The fruit size depends on the variety and growing conditions, but they’re often 3 - 6 cm (1 ¼ - 2 ½”) across. They’re a bit fuzzy when small, and as they grow the skin starts to look like a russet apple. You’ll find 5 large seeds inside.
Pick medlar fruit in the fall, once the fruit has fully sized up. It will be greenish-brown. Don’t rush to pick it, though, as it is fine with some light frost. This is a fruit that takes a long time to mature, so you want to give it as much time on the plant as you can. And besides, it’s a winter treat, so don’t rush to pick it while there are still apples and other fall fruit to eat.
I pick my medlars here in southern Ontario in mid-November, after the leaves on my medlar bush start to fall. You’ll know it’s time when the fruit detaches from the branch fairly easily.
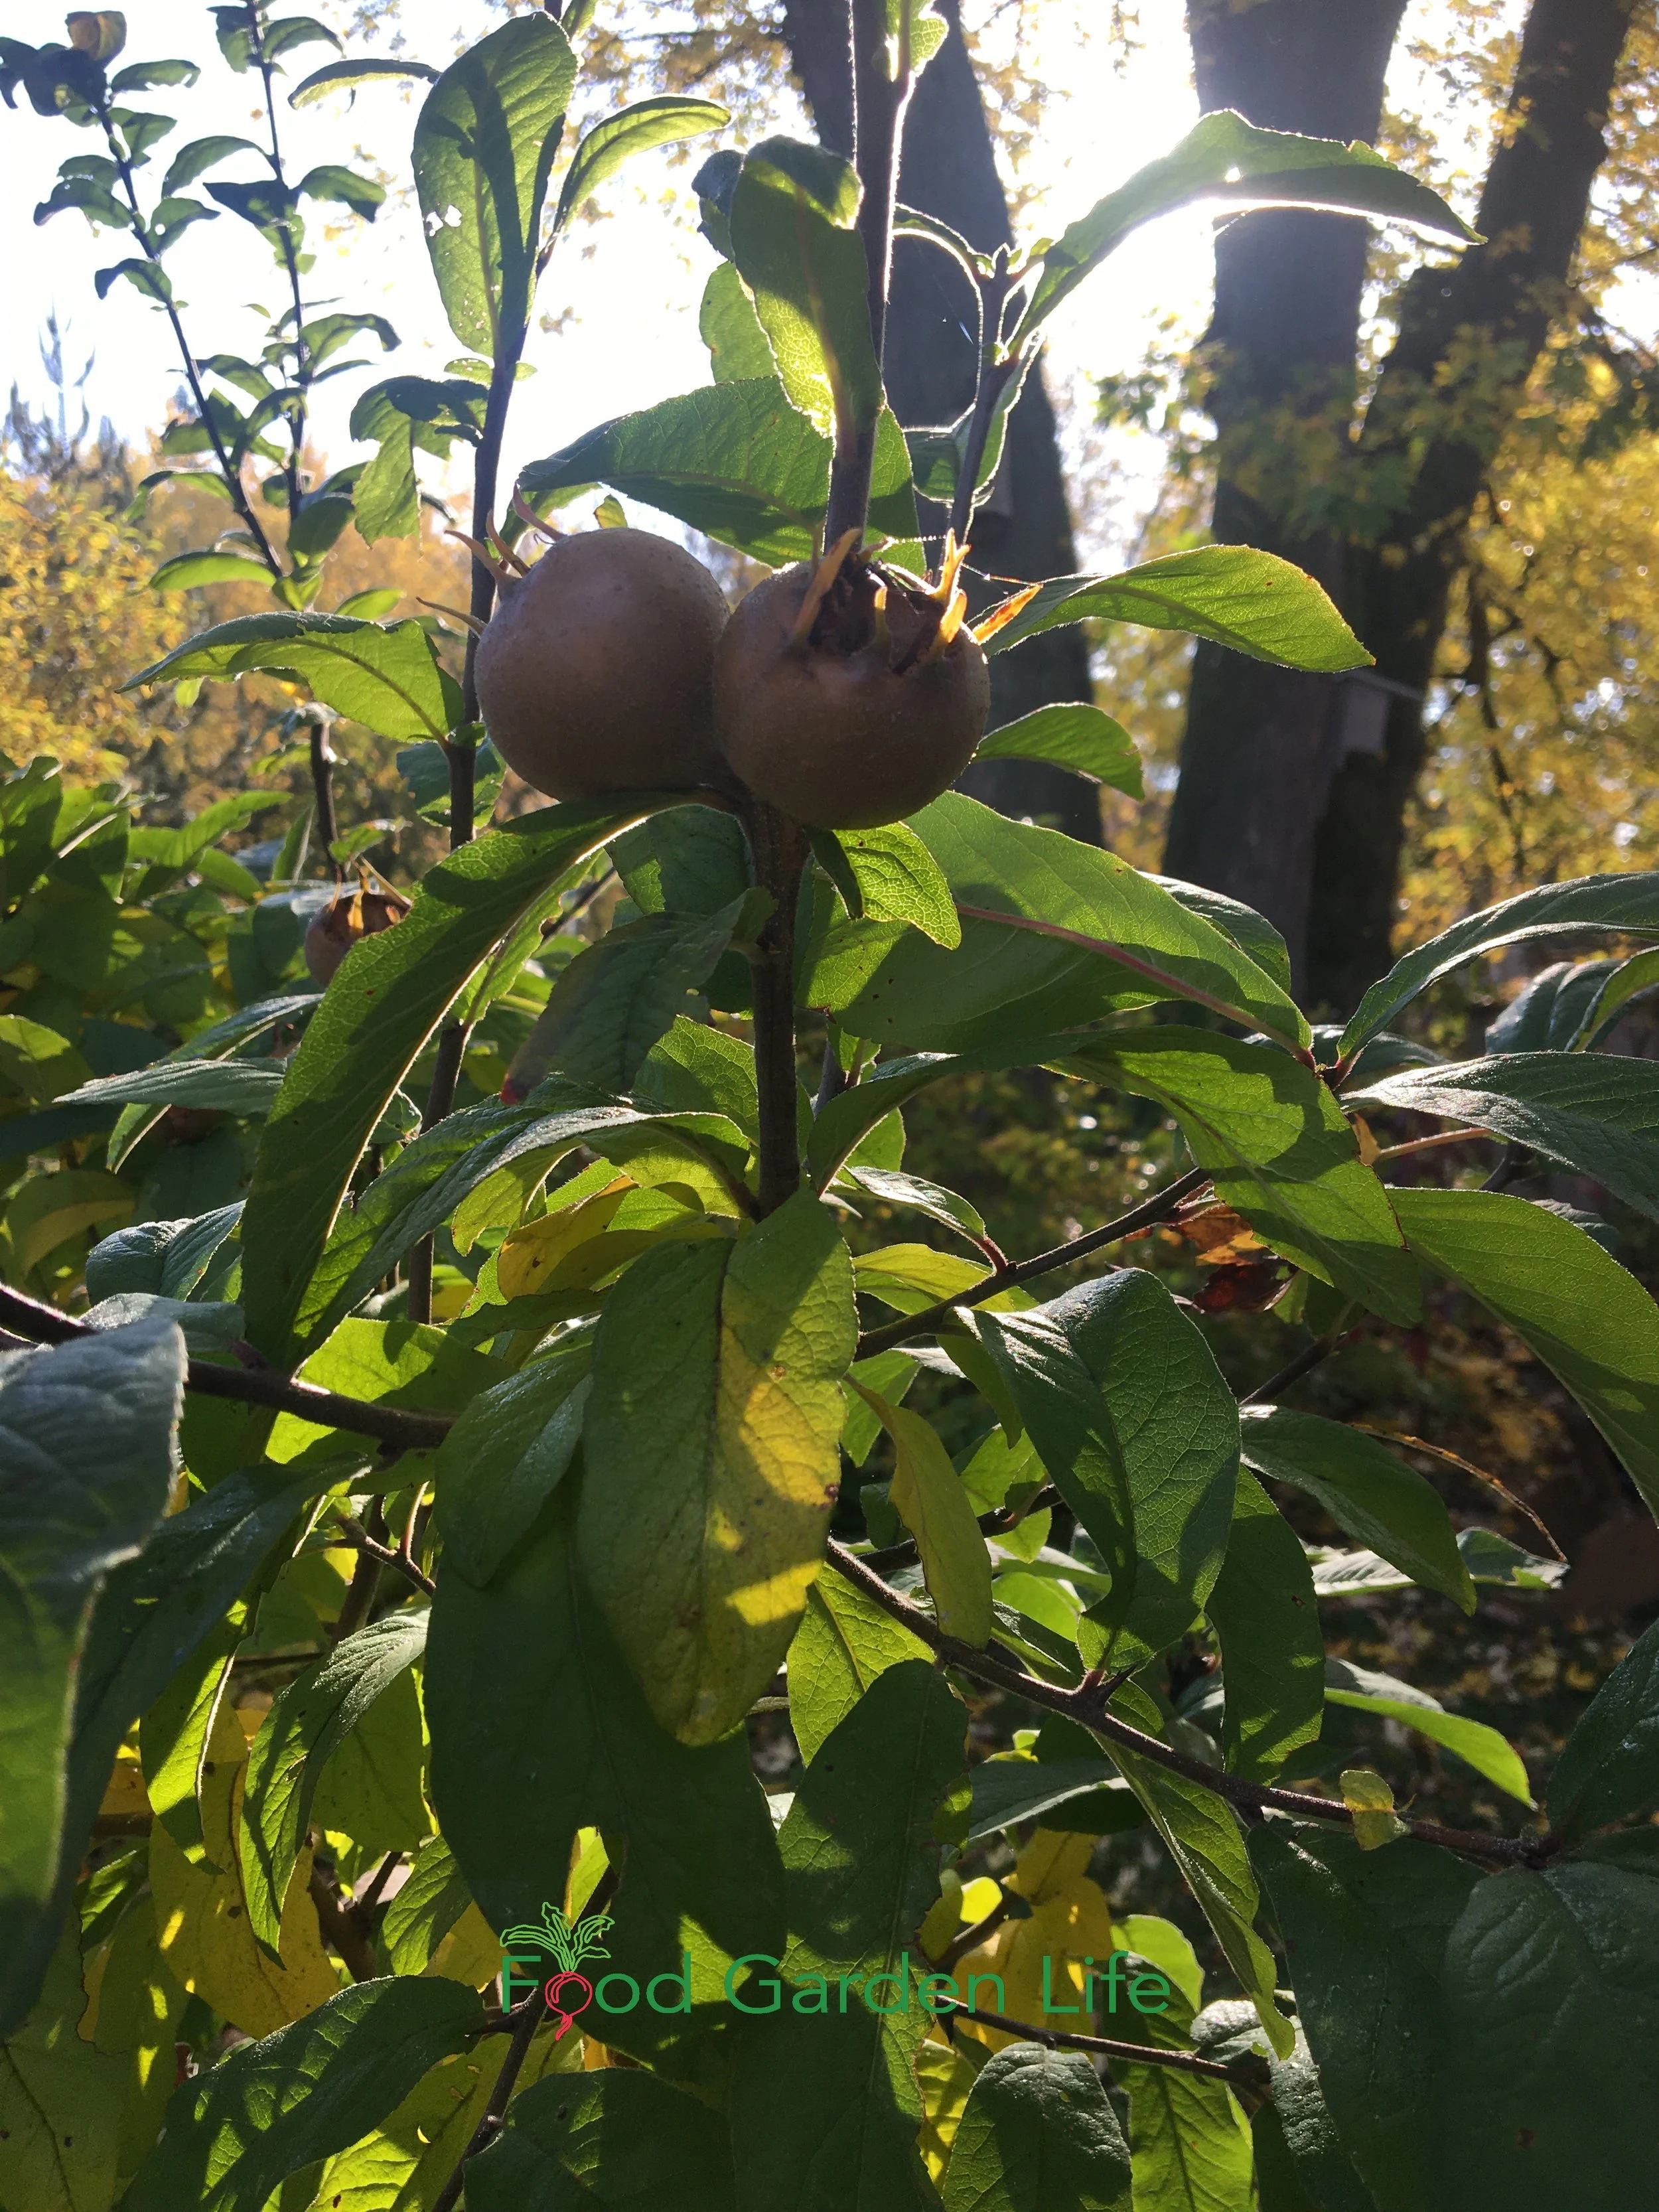
Don’t pick medlars too early. Even though the trees in the background are changing colour, these medlar fruit can stay on the bush until it drops its leaves.
(You can harvest earlier, if the fruit are fully sized up…but without the frost, it takes longer for them to be ready to eat, after a treatment called “bletting.”)
Bletting Medlar
There’s a special word we use with medlar, the verb “to blet.” It means to give the fruit time to ripen and soften. I’ve seen some sources liken this to “decay” though I think that’s a bit harsh. We give wine time to reach its best, so why not medlars!
Don’t skip the bletting process. You won’t try to eat an unbletted medlar more than once because of the pucker power! Just like an unripe persimmon.
But when bletted, the white, acrid flesh becomes a brown apple-like puree with a sweet taste. To me it tastes a bit like very sweet fig with a touch of citrus.
Here’s more on bletting:
To make them last longer, blet your medlars in a cool spot
If you want them sooner, blet them on a plate in the kitchen
Either way, the timeframe measures in weeks
Face the eye (called the calyx) downwards
Some people place them in sawdust or a bed of straw, although I’ve never done this
As bletting progresses, the skin turns a darker brown and begins to wrinkle.
If you’re picking medlar from your garden in late fall or early winter and it’s already soft, it might not need further bletting. A taste test will tell you.
Landscape with Fruit
That’s easy to grow in a home garden!
Medlar in the Kitchen
The first thing to do if you haven’t tasted medlar before it to take a well-bletted medlar and just scoop out some of the insides—a bit like baked apple—with a spoon. Then taste it as is.
Other uses are to make jam or jelly – or to make a “cheese,” where the pulp is retained, cooked down, then put into a mould to set. (It sets nicely because medlar fruit has lots of pectin.) Fruit cheeses are a nice addition to a cheese platter.

More medlar ideas:
Medlar fruit leather
Medlar compote
Medlar Pedigree
Medlar is in the same family as apples, rose, quince, hawthorn, and pear. But you won’t confuse it with any of these relatives because of its long strap-like leaves.
Because they’re in the same family, medlar is often grafted onto quince and hawthorn rootstock.
Where to Find it

Pin this post!
Pity it’s not more easy to find medlar at garden centres. You’ll probably have to find a specialist nursery if you want to buy a medlar plant. Or, if you’re lucky, a fruit-growing enthusiast who can share a plant with you.
I’ve never found feral medlar trees here in southern Ontario. But in some places you might. In Cultivated Fruits of Britain, author F.A. Roach talks about medlar growing in hedges of southern Europe and being used as a hedging material in Florida.
Propagate Medlar
Medlar is usually propagated by grafting onto hawthorn or quince rootstock.
Just like apples, seeds don’t grow to be like the parent plants. They don’t “come true” from seed.
I’ve never tried growing medlar from seed, but it’s said to be tricky because the hard seed coat causes erratic germination. Seeds need a cold treatment (called stratification). This cold treatment can be from leaving potted seeds somewhere protected from rodents (a shed or garage) or in the fridge.
Get Your Fig Trees Through Winter
And eat fresh homegrown figs!
Medlar FAQ
What are the growing zones for medlar?
Hardiness is never an exact science, and different sources report different levels of hardiness. Many sources suggest USDA hardiness zones 5-8…but I’ve also seen USDA zone 4. A microclimate can help push zone boundaries. You might also be able to track down cold-adapted varieties..I’ve seen medlar near Montreal.
Are there named Medlar varieties?
Yes. But not many. Unlike apples, with countless varieties, there are very few improved varieties of medlar. ‘Nottingham’ and ‘Breda Giant’ are two varieties that I’ve come across here in Canada. But your choice will probably be dictated by what your local specially fruit nursery carries.
Is there another name for medlar?
Yup. The large eyes (calyx) on the bottom of the fruit inspired a number of bawdy references in the past. There are lots of aliases for medlar. A common one is “open-arse.” I’ll leave you to research the rest.
Is it true that the Romans at medlar?
Apparently. I’m no historian, but here’s a very fun article that tells you about the history of medlar.
What is the botanical name?
Mespilus germanica
Medlar Jam Recipe

Medlar jam
Ingredients
Medlar fruit, well bletted
Lemon
Sugar
Water
Directions
Cut up medlars and put in a pan (if you are saving seeds to grow, remove them now, before cooking)
Add enough water to cover the fruit
Simmer until you have a brown pulp
Strain (some people use cheese cloth or a jelly bag to make a very clear jelly…but I just use a coarse sieve…which lets through some pulp, giving me jam)
Measure the liquid you’ve just strained out – and for each pint of liquid, add 1 ½ cups of granulated sugar, and the juice of ½ a lemon
Boil until you get to the setting point
A note on setting point. I’m no expert at making preserves, but here’s what I do:
I put a saucer into the freezer for a few minutes before I need to test for the setting point. Then, when I’m ready to test, I put a spoonful of the jelly on the plate. If I press into it and get wrinkles, I figure I’m done.
Find This Helpful?
Enjoy not being bombarded by annoying ads?
Appreciate the absence of junky affiliate links for products you don’t need?
It’s because we’re reader supported.
If we’ve helped in your food-gardening journey, we’re glad of support. You can high-five us below. Any amount welcome!
More About Growing Fruit
Find out How to Harvest More in These Masterclasses
Articles and Interviews
These Edible Perennials and Perennial Vegetables Make a Delicious Edible Landscape
Edible perennials are perfect for an edible landscape! Find out which ornamental perennials are edible, and get ideas for perennial herbs and vegetables.
By Steven Biggs
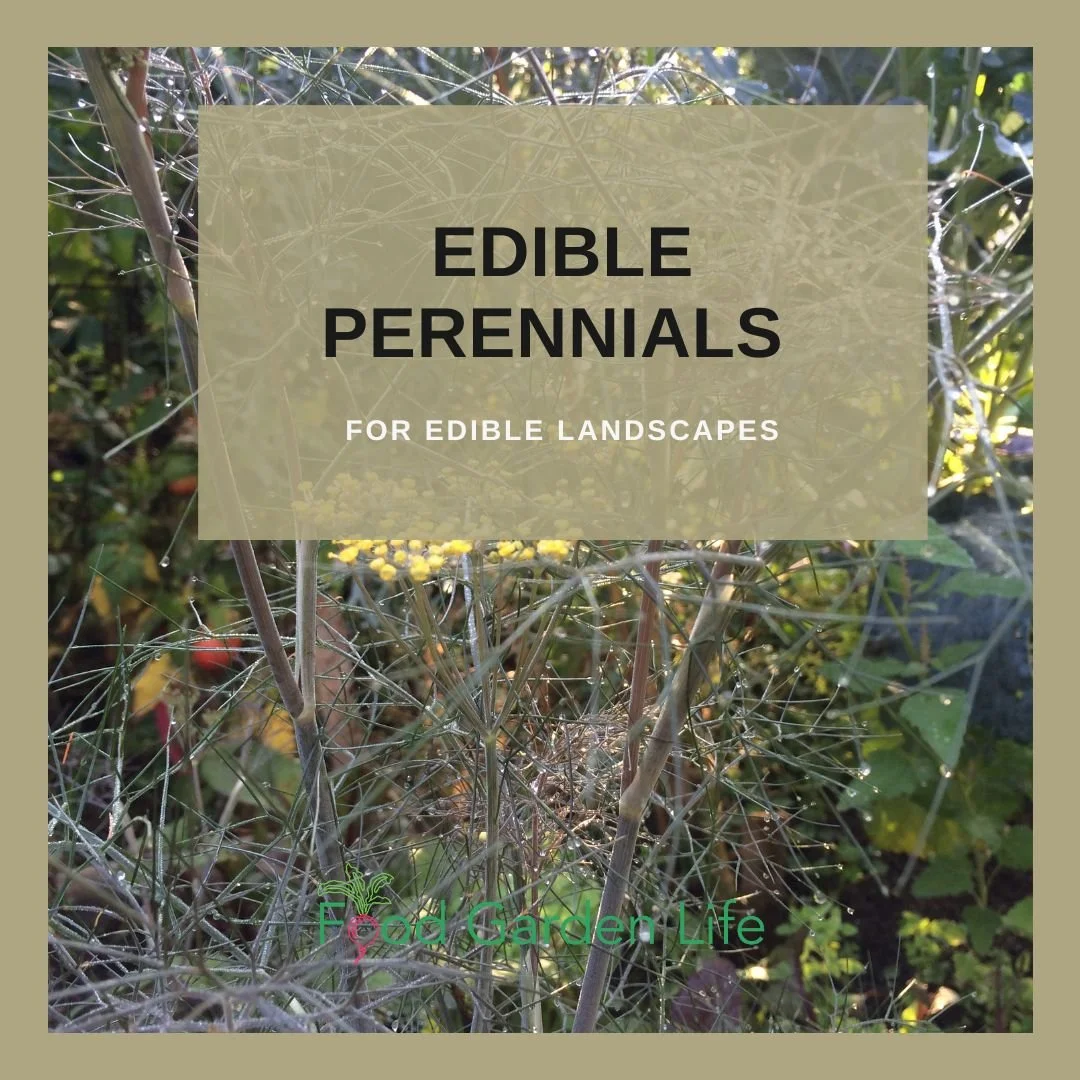
Grow a Grazing Garden with Edible Perennials and Perennial Vegetables
When I was a child my dad showed me how to take a leaf of stonecrop sedum, methodically press the whole surface of the leaf between my thumb and forefinger to soften it, and then gently push sideways to loosen the skin on the front and back.
Once the skin was loose, we’d blow into the sedum leaf to inflate it – like a little balloon!
It’s a fun trick for a kids. And I still have fun showing it to kids who visit my garden.
Multi-Purpose Plants
In a small-space garden, I like to include multipurpose plants, plants that are more than just ornamental. Edible perennials and perennial vegetables are great for small-space gardens.
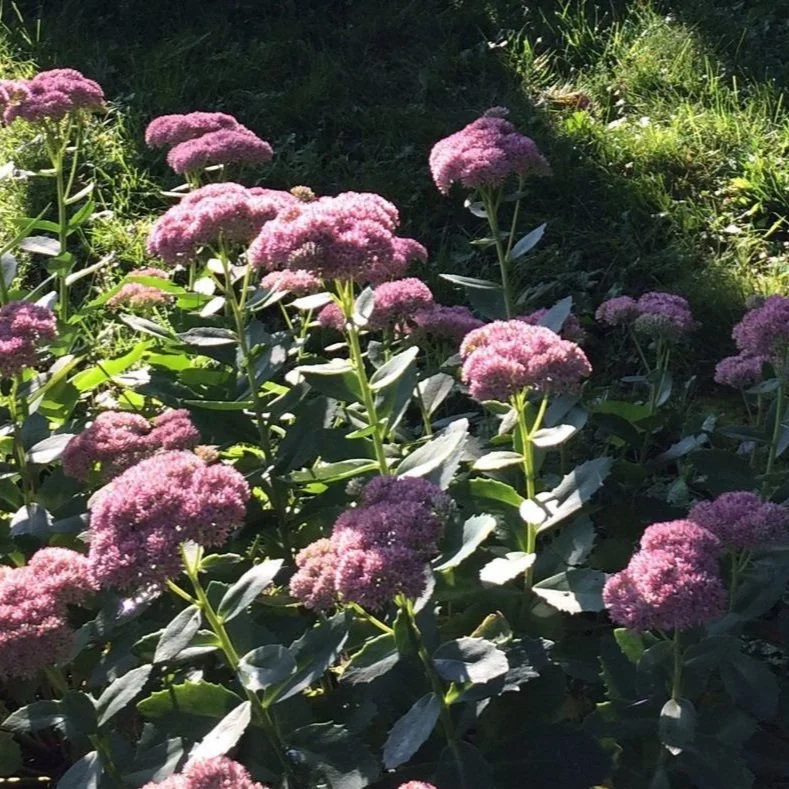
Stonecrop Sedum flowers late in the summer. And it’s edible!
Stonecrop sedum is very ornamental. It’s a reliable, easy-to-grow perennial that flowers in the late summer when most other perennials are done flowering.
It also adds winter interest to the garden. I leave the dry stalks and flower heads in the garden all winter. They add texture and catch the snow.
Beyond it’s ornamental appeal, chalk up two other things for stonecrop sedum (or, as Dad always calls it, frog’s belly.)
The balloon-like leaves are amusing for kids (and adults too!)
It’s edible. You can eat the leaves. They’re mild, slightly lemony.
Keep reading for some of my favourite edible perennials, including herbs, ornamental perennials, and vegetables.
Use Edible Perennials in the Landscape
Traditional vegetable gardening involves a lot of annual crops and annual preparation of the ground. It includes starting transplants indoors, sowing seeds directly into the garden, and preparing the garden soil to make a nice bed.
Even no-dig vegetable gardening systems usually include some sort of soil preparation, whether it’s solarizing the ground (by covering with tarps), scuffing the soil surface to kill small weed seedlings, or mulching.
With this traditional approach to food gardening, there’s often a focus on growing enough to preserve by canning, freezing, or drying.
Perennials for an Edible Landscape
What if you just want to be able to go out into your garden and pick something for the meal you’re about to cook? To see what looks good in the garden – and see what inspires you to be creative in the kitchen?
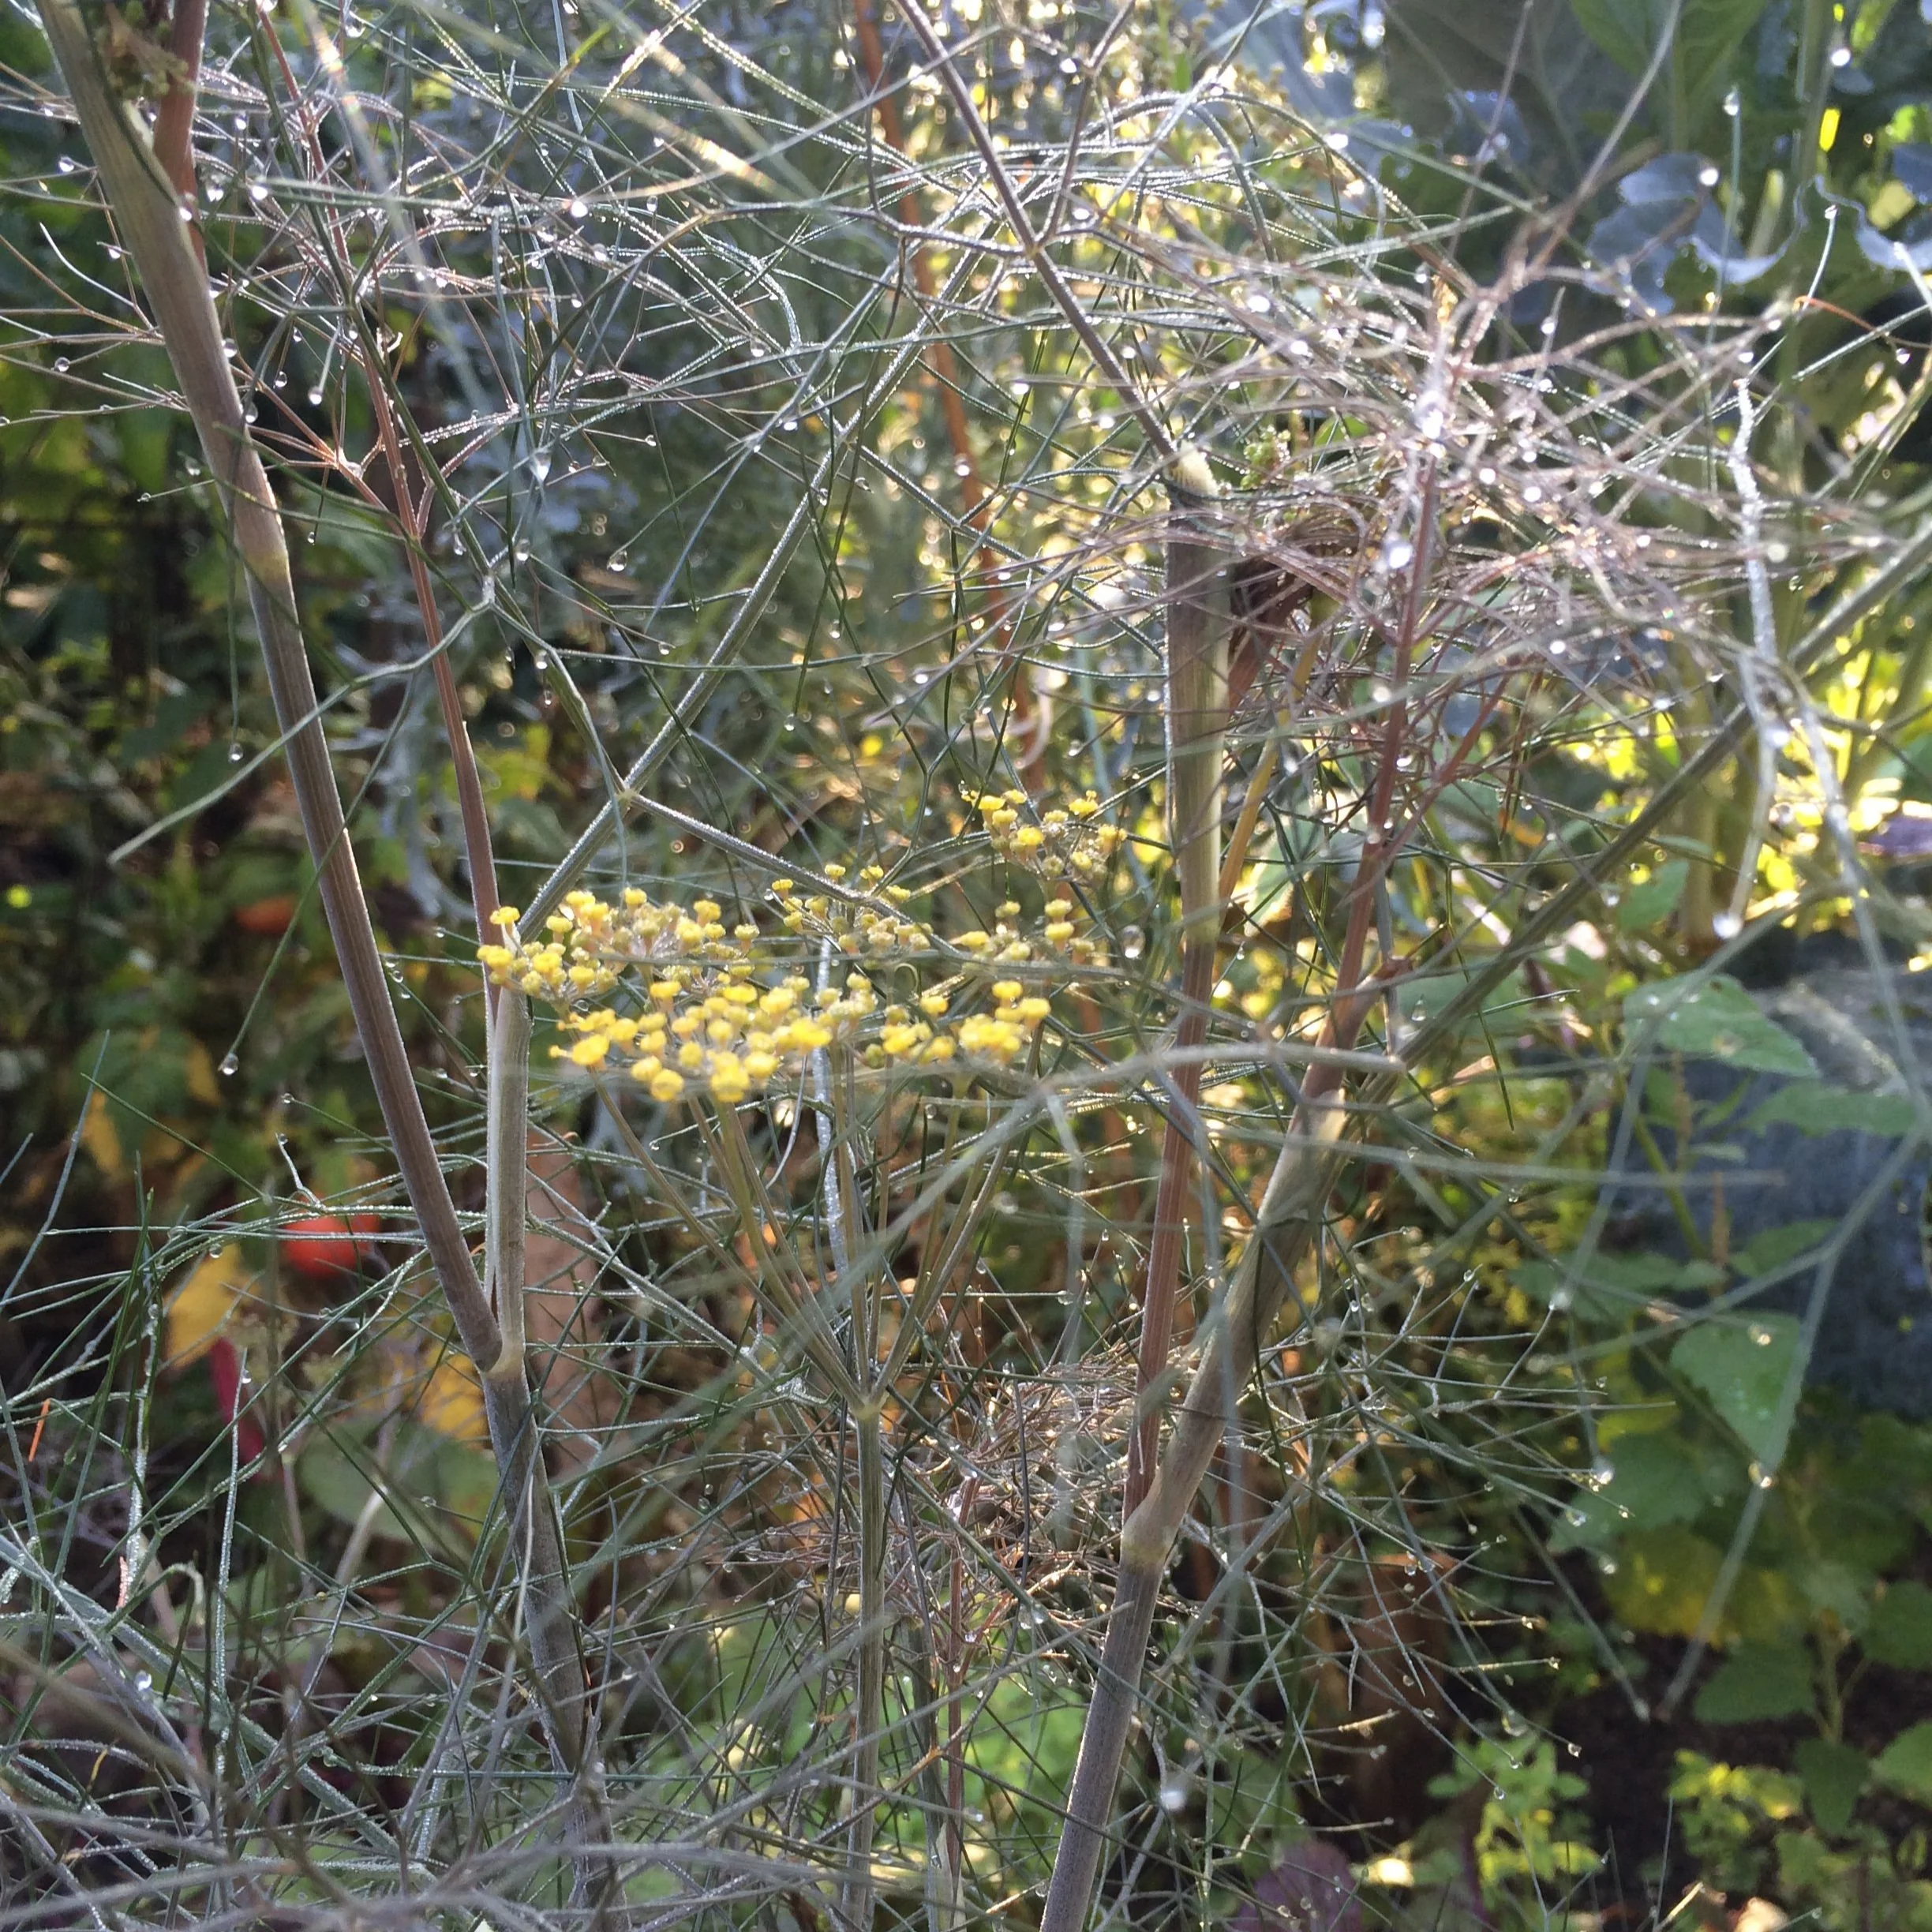
An attractive edible perennial: Airy yellow flowers and a bronze coloured leaf make bronze fennel a beautiful addition to a perennial garden. And leaves and flowers are edible too!
I call this “grazing.” It’s picking just enough for the meal at hand, and letting what you find in the garden inspire what you create in the kitchen.
If you’re a fan of the potager-style garden, which mixes up veggies with herbs, edible flowers, flowers for cutting, and fruit, you’ll get the idea. We’re talking about a grazing garden.
So let’s take this idea of a grazing garden and use it in our perennial flower beds, dotted the landscape with perennial plants that are edible and look nice. This approach to gardening is a great way to grow some of your own ingredients even if you don’t have the space or the time to undertake a more traditional vegetable garden.
Here are some of my favourite edible perennials for a grazing garden:
Perennial Vegetables and Herbs

Lovage deserves a space in any ornamental perennial bed. The celery-like leaves are great in soups and salads.
Asparagus: After you’ve finished harvesting asparagus spears in the spring, this perennial grows into a tall, ferny plant that adds great texture and movement to a garden. Because it’s tall, put it at the back of the garden. Support it to prevent it flopping onto its neighbours.
Bronze Fennel: The feathery, bronze leaves are edible, as are the flowers. The pollen can be used to decorate a plate: Tap the flowers over a white plate to adorn it with the brightly coloured yellow pollen. I like to use the seeds when I make sausage.
Chives: Both leaves and flowers are edible. A tidy, well-behaved plant that looks great when used to edge a garden.
Horseradish: The root is grated to make the well-known condiment. Leaf pieces are sometimes added to pickles. This is a bomb-proof plant with a deep root system that’s hard to remove once established, so put some thought into where you would like it to be in the long term.
Pin this post!
Jerusalem Artichoke: This one is in the Weed Guide of Ontario…so beware. But it’s a versatile plant, taking full sun to part shade. The tubers are plentiful.
Lemon Balm: Use young leaves in salads, and dry leaves for tea. This is not a timid plant; it spreads. But I love if for the fragrant foliage. Plant it somewhere where you’ll brush against it while in the garden and you’ll be glad you have it.
Lovage: My neighbour Dave says that this is the secret ingredient for an award-winning tomato soup. Or you might use it in a bouquet garni. It’s a super celery substitute. (Try mature stems as straws when serving Caesars!) This imposing perennial deserves a space in any ornamental perennial bed.
Mint: My daughter got 19 types of mint one year: chocolate mint, spearmint, pineapple mint… There are so many types. It’s excellent for teas, and we enjoy making mint ice cream. Mint can be invasive. So grow it in containers if you don’t want it to overrun your garden. But if you have a shady corner where not much grows, this might be a suitable place to plant your mint in the ground.
Oregano: A well-known herb that is hardy and an excellent ground cover too. When it’s in bloom watch to see what a bee magnet it is.
Rhubarb: My neighbour Chris planted it next to his pond because the big leaves are so beautiful. Easy to grow and productive. Recommended for sun, tolerates part sun very well. Find out how to force rhubarb indoors in the winter.
Sage: Along with the common grey-green leafed sage, there are varietgated and tri-colour varieties. If, like me, you’ve over-saged the thanksgiving turkey stuffing one too many times and don’t care if you ever cook with it again, some of these tricolour sages still make a beautiful addition to a herb garden.
Sorrel: My favourite. Easy to grow, rarely for sale at the supermarket. I use these tangy leaves mixed in with salad greens, to make soups, and when braising fish and poultry. Think of sorrel as a lemon substitute for northern gardeners. There’s wild sorrel, as well as large-leaved cultivated varieties.
Edible Ornamental Perennials
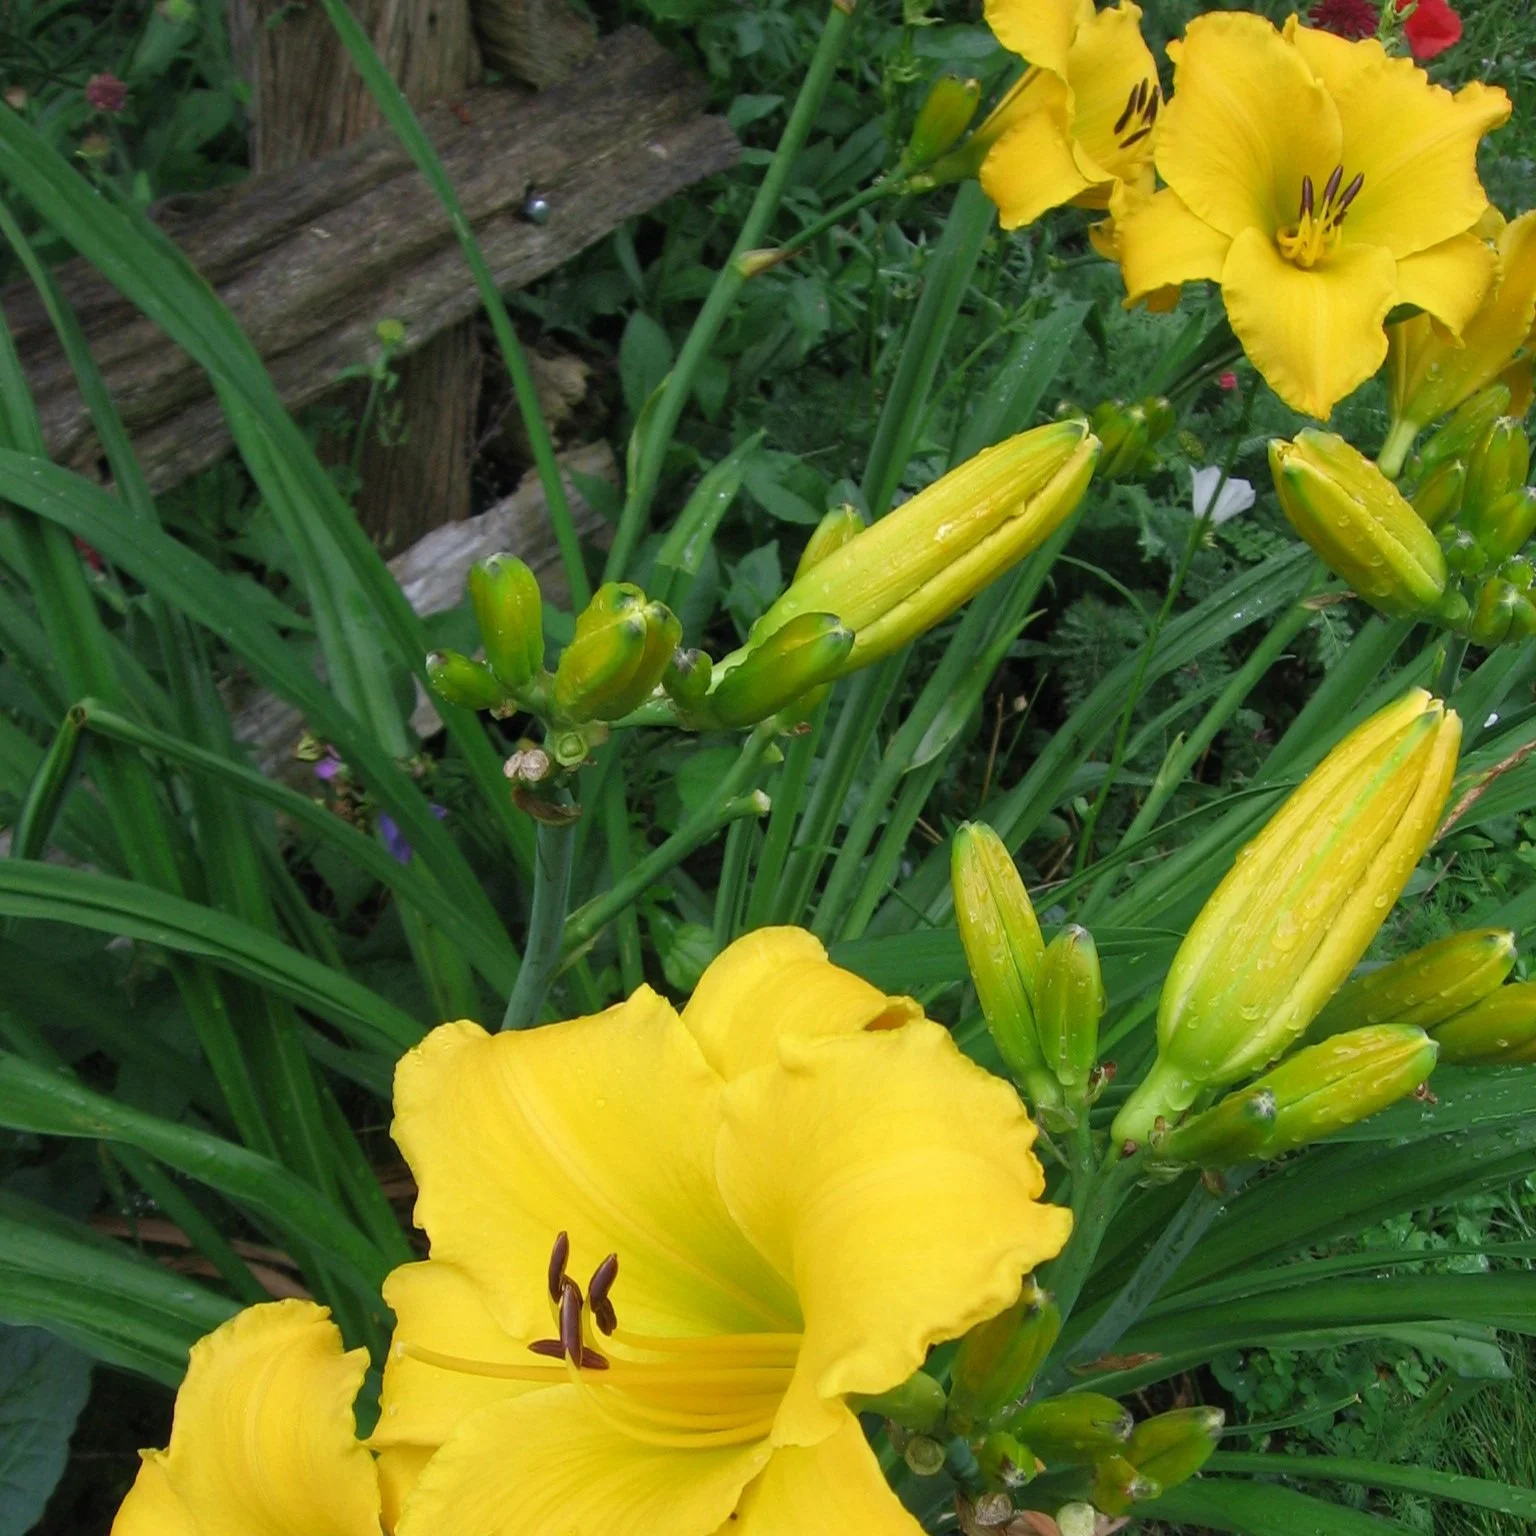
Daylily flowers and buds are edible.
Bergamot: Great for attracting pollinators, very ornamental – and edible. The leaves can be used to make tea. And the edible flowers are nice when tossed into a fruit salad.
Daylily: A perennial that has naturalized in some rural areas here in southern Ontario, it’s grown as a vegetable in other parts of the world. Unopened flower buds are a great addition to a stir-fry. And the flowers are an excellent garnish. Idea: How about a daylily flower instead of an ice cream cone? Daylily thrives near black walnut trees. Are you dealing with black-walnut toxicity? Here’s an article about juglone-tolerant plants that you can grow near black walnut trees.
Hosta: This ornamental perennial is a very widely used perennial. It does well in shade, makes a good ground cover – and the unfurled leaves in spring are nice steamed and buttered.
Stonecrop: Like hosta, a perennial garden workhorse, with flowers late in the summer when many other plants in the perennial garden are done blooming. But the leaves are edible and can be used in salads. And…there’s the fun of blowing up the leaves!

Stonecrop sedum is an edible perennial, and it's also lots of fun to grow in a kids garden because the leaves are like mini balloons!
Wondering about Shade?
Wondering what vegetable plants and fruit crops grow in the shade? Find out what fruit and vegetables grow well in the shade.
Find This Helpful?
Enjoy not being bombarded by annoying ads?
Appreciate the absence of junky affiliate links for products you don’t need?
It’s because we’re reader supported.
If we’ve helped in your food-gardening journey, we’re glad of support. You can high-five us below. Any amount welcome!
More Edible-Landscape Ideas
Plant ideas, techniques, and creative ideas to transform yards into fantastic edible landscapes.
Big Lemon Flavour Before Your Tree Grows Lemons (Hint: Lemon Leaf Uses)
Growing a potted lemon tree? Even before you get your first fruit, you can get lemony goodness in your recipes using the lemon leaves.
By Steven Biggs

Lemon Leaves are Packed with Citrusy Flavour
Here’s a delicious cooking idea that often flies under the radar: Add citrusy flavour to your cooking with lemon leaves.
Whether you have lemon trees outdoors, or are growing a potted lemon tree, even before you get fruit, you can pluck a lemon leaf to add a delicious lemon flavour to your cooking.
In the excerpt below from Grow Lemons Where You Think You Can’t, I share ideas for using lemon leaves, lemon zest, and lemon juice.
The Whole Bird…The Whole Lemon Plant
I’ve heard the term “the whole bird” used in nose-to-tail cooking classes that teach people how to minimize waste in the kitchen. When it comes to lemons, I encourage you to use “the whole plant”!
Leaves
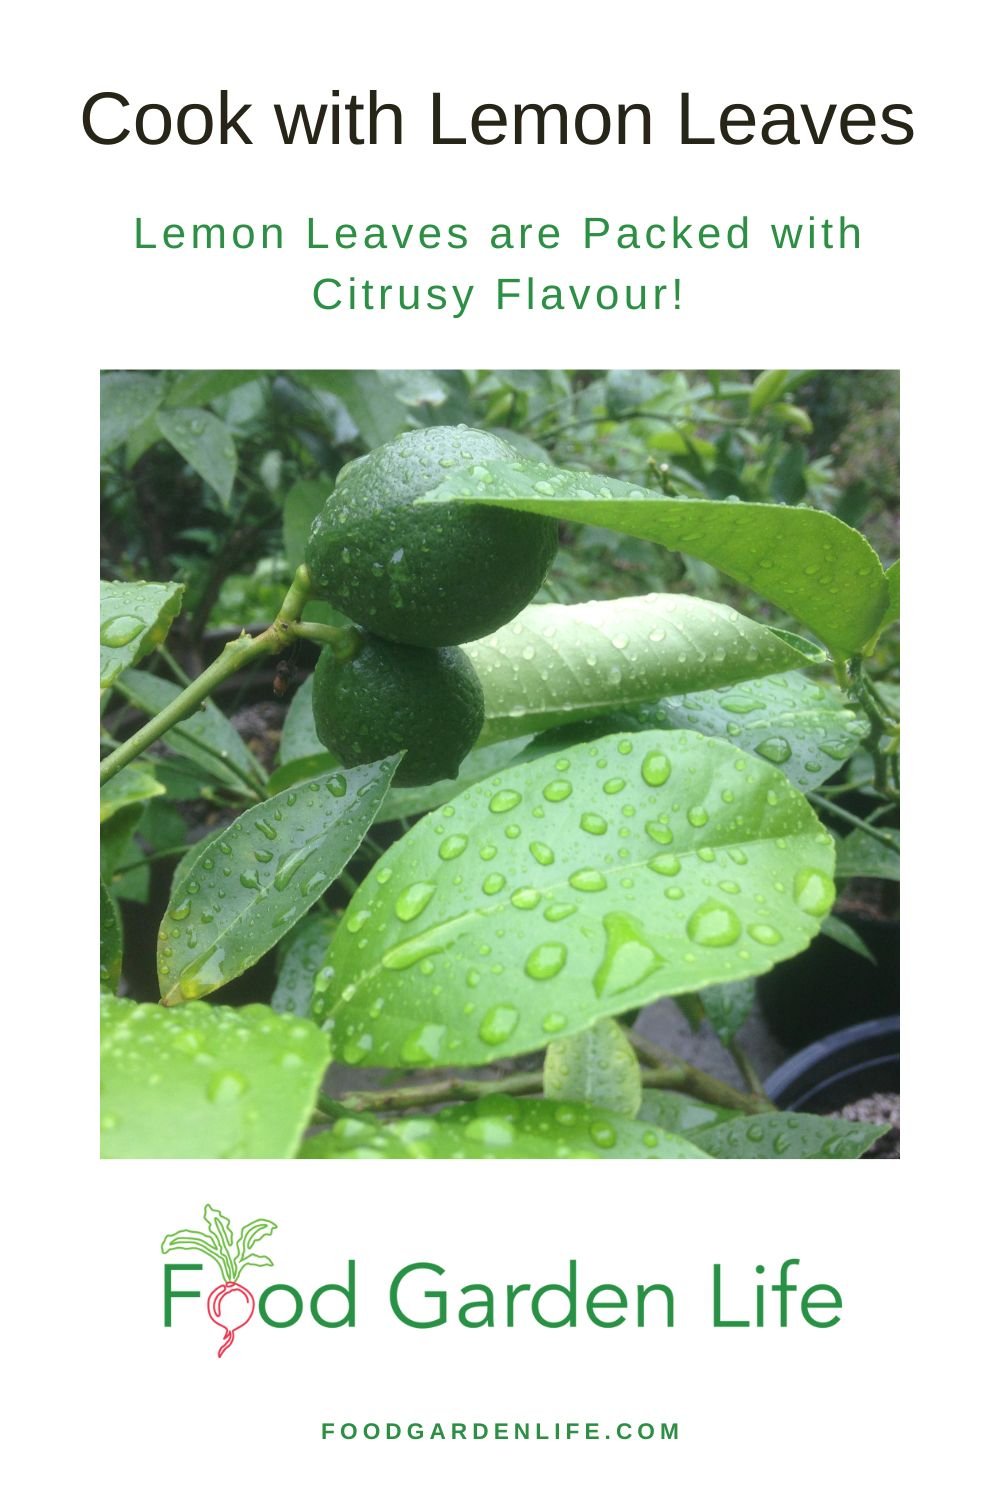
Pin this post!
When you crush a lemon leaf in your hands you will understand why they are useful in the kitchen. They give off a scrumptiously citrusy fragrance. I’d say the smell is lemon-like but not quite the same as the rind of the fruit, maybe a bit more “green.”
I had grown lemons for years before I realized that you can use the leaves in cooking. My friends Ashok and Marlene came back from Italy raving about meat wrapped and grilled in lemon leaves. They described removing the charred leaf, which kept the meat inside succulent while imbuing it with fragrance and flavour.
It didn’t take me long to try lemon leaves in my kitchen! As I read more about cooking with lemon leaves I learned that there is a long tradition of using them, and not just in Italy when grilling meats.
For example, they are often used in South African bobotie meat pies or for roasting pork in Greek cuisine. I recently stumbled on a recipe for a lemon-leaf soda that I’m eager to try. If you’re creative in the kitchen, you’ll love lemon leaves.
You don’t eat the leaves — they are tough and bitter. Use them as you would bay leaves. They add a bright citrus flavour. Here are more ways you can use lemon leaves:
When I roast a chicken or turkey, I’ll often put a couple of lemon leaves in the cavity, along with other ingredients that provide flavour as the bird roasts, such as garlic cloves, bay leaves, and rosemary.
Try wrapping large leaves around a kebab before you grill it. The leaves hold in some moisture, while imparting a delicate lemon flavour.
If you have only small lemon leaves that are not big enough to wrap around a kebab but still want to use them to flavour the kebab, thread some on the skewer, in between the pieces of meat.
I often include a fresh bay leaf when I cook up a batch of custard. Substitute a lemon leaf for a delicious variation.
While writing this, I was braising beef in the slow cooker in ale, with a lemon leaf for added flavour.

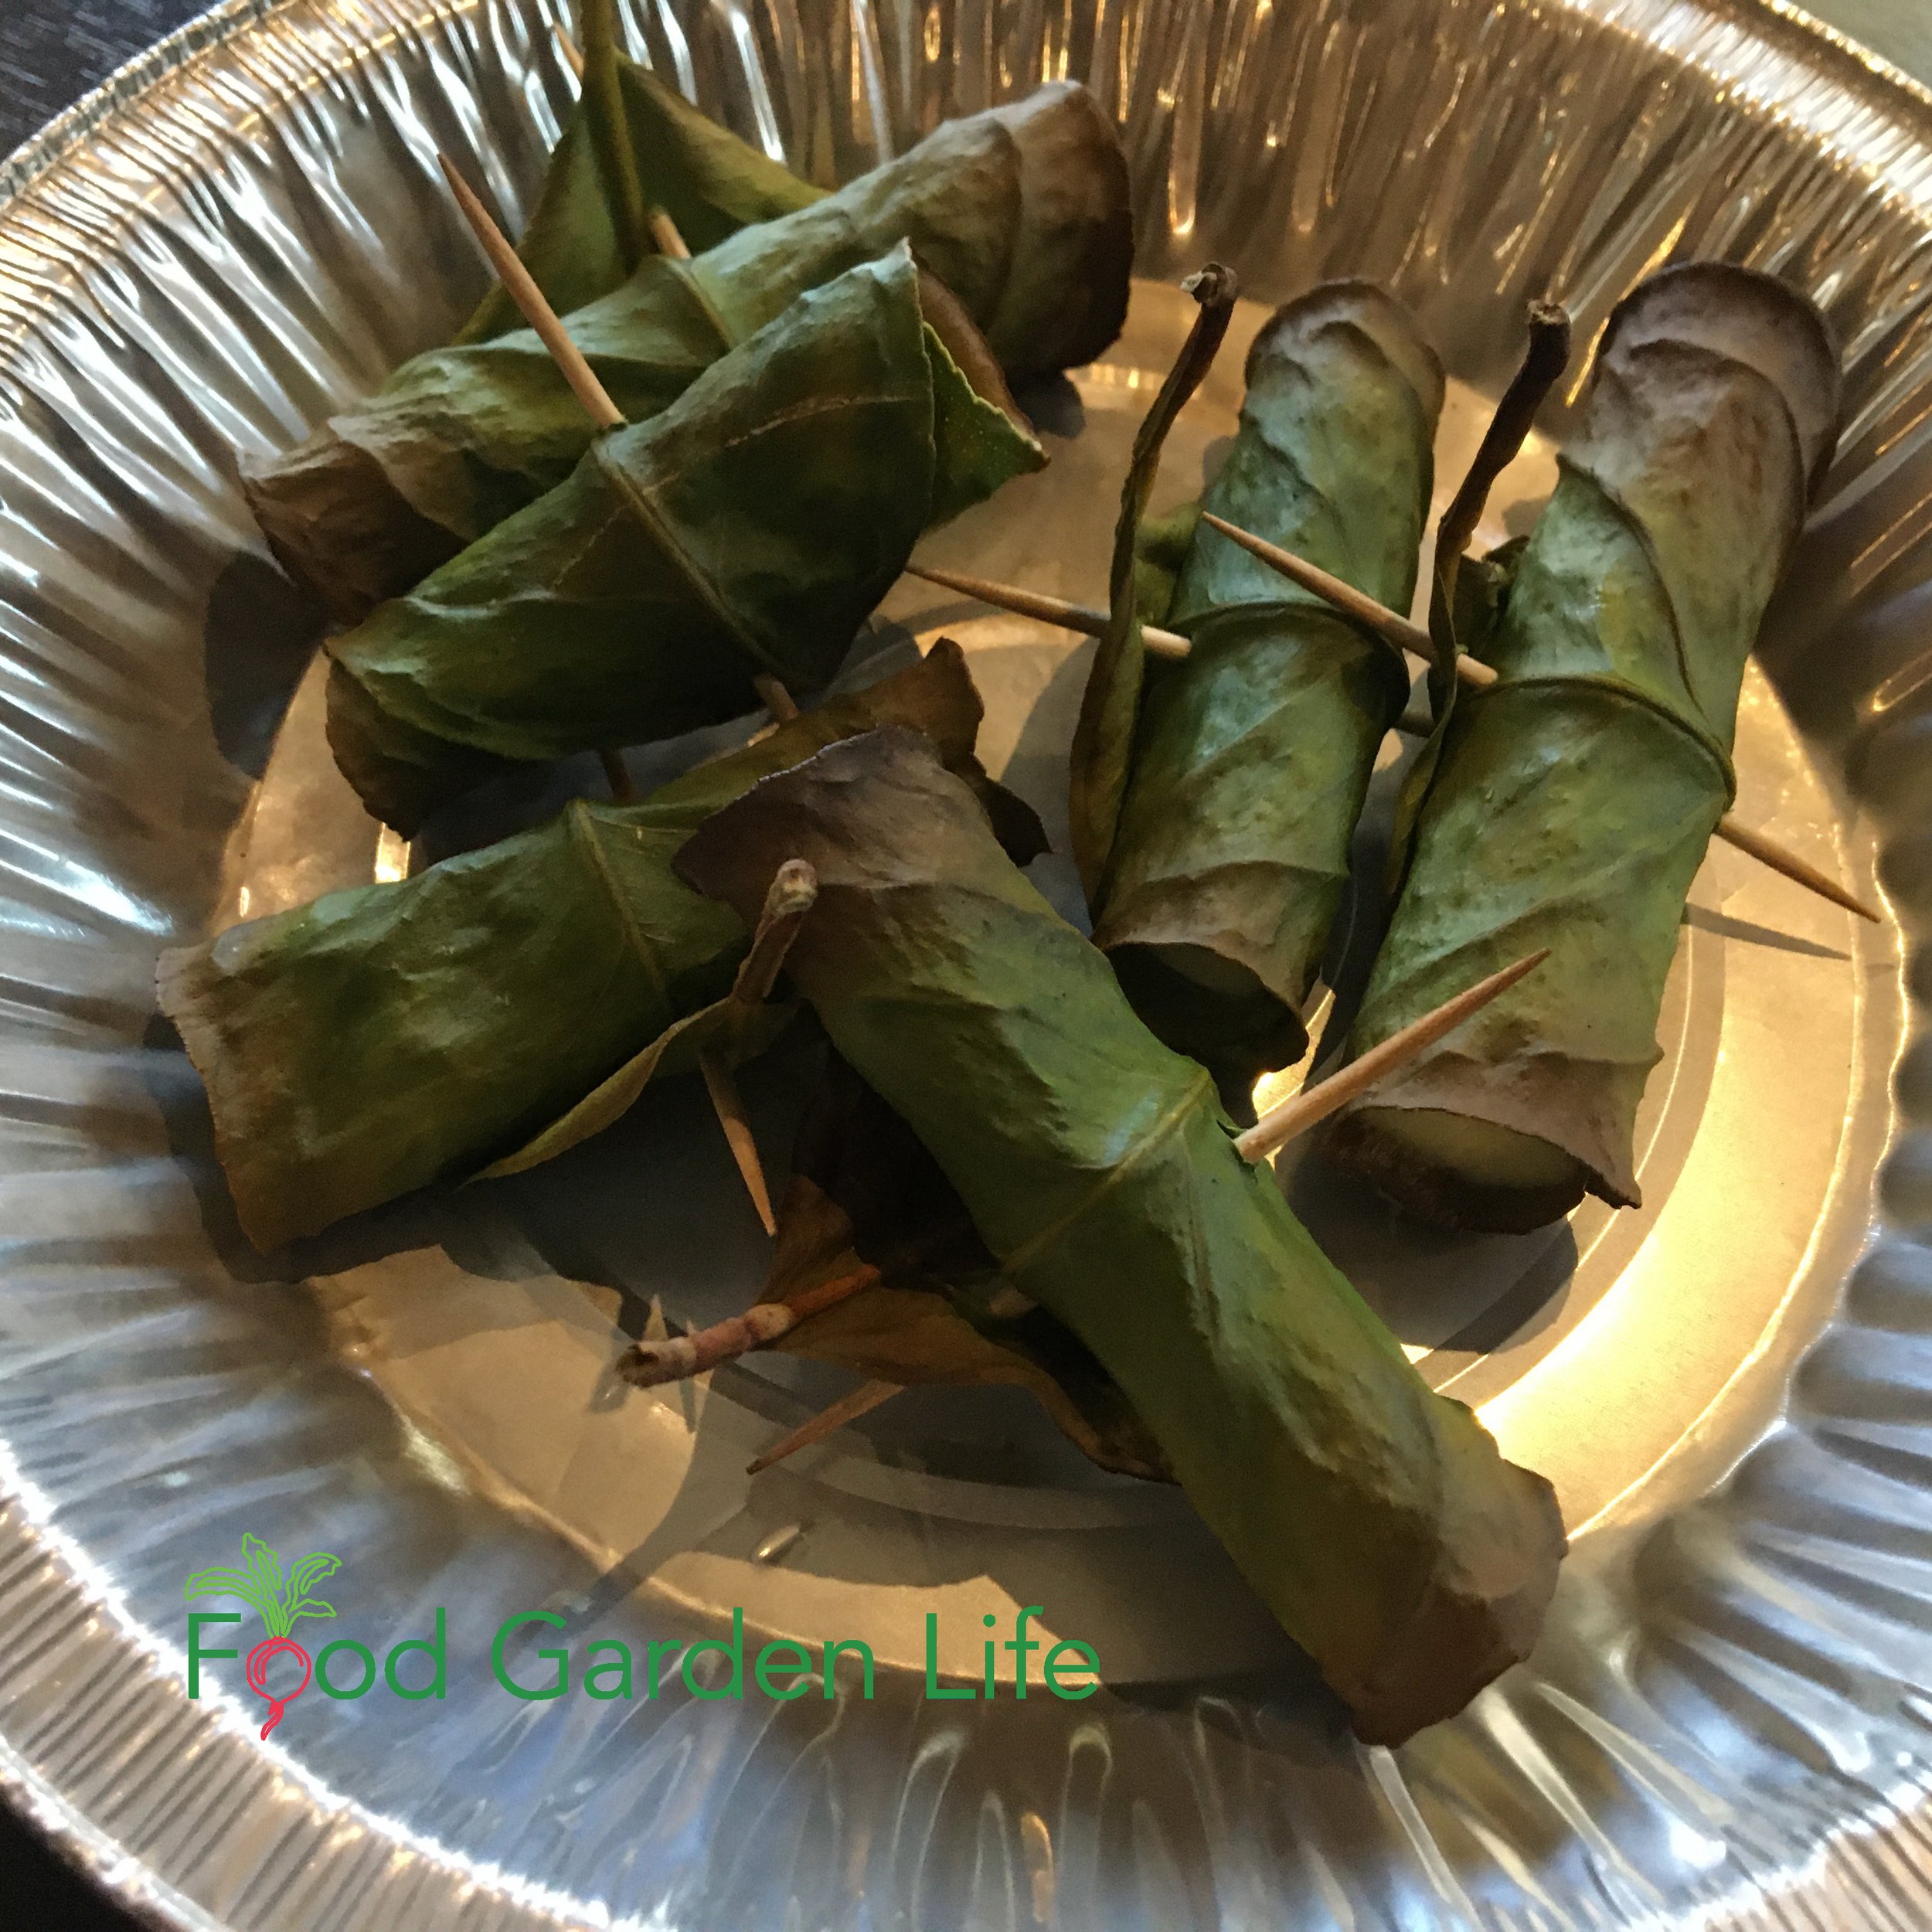
Zest
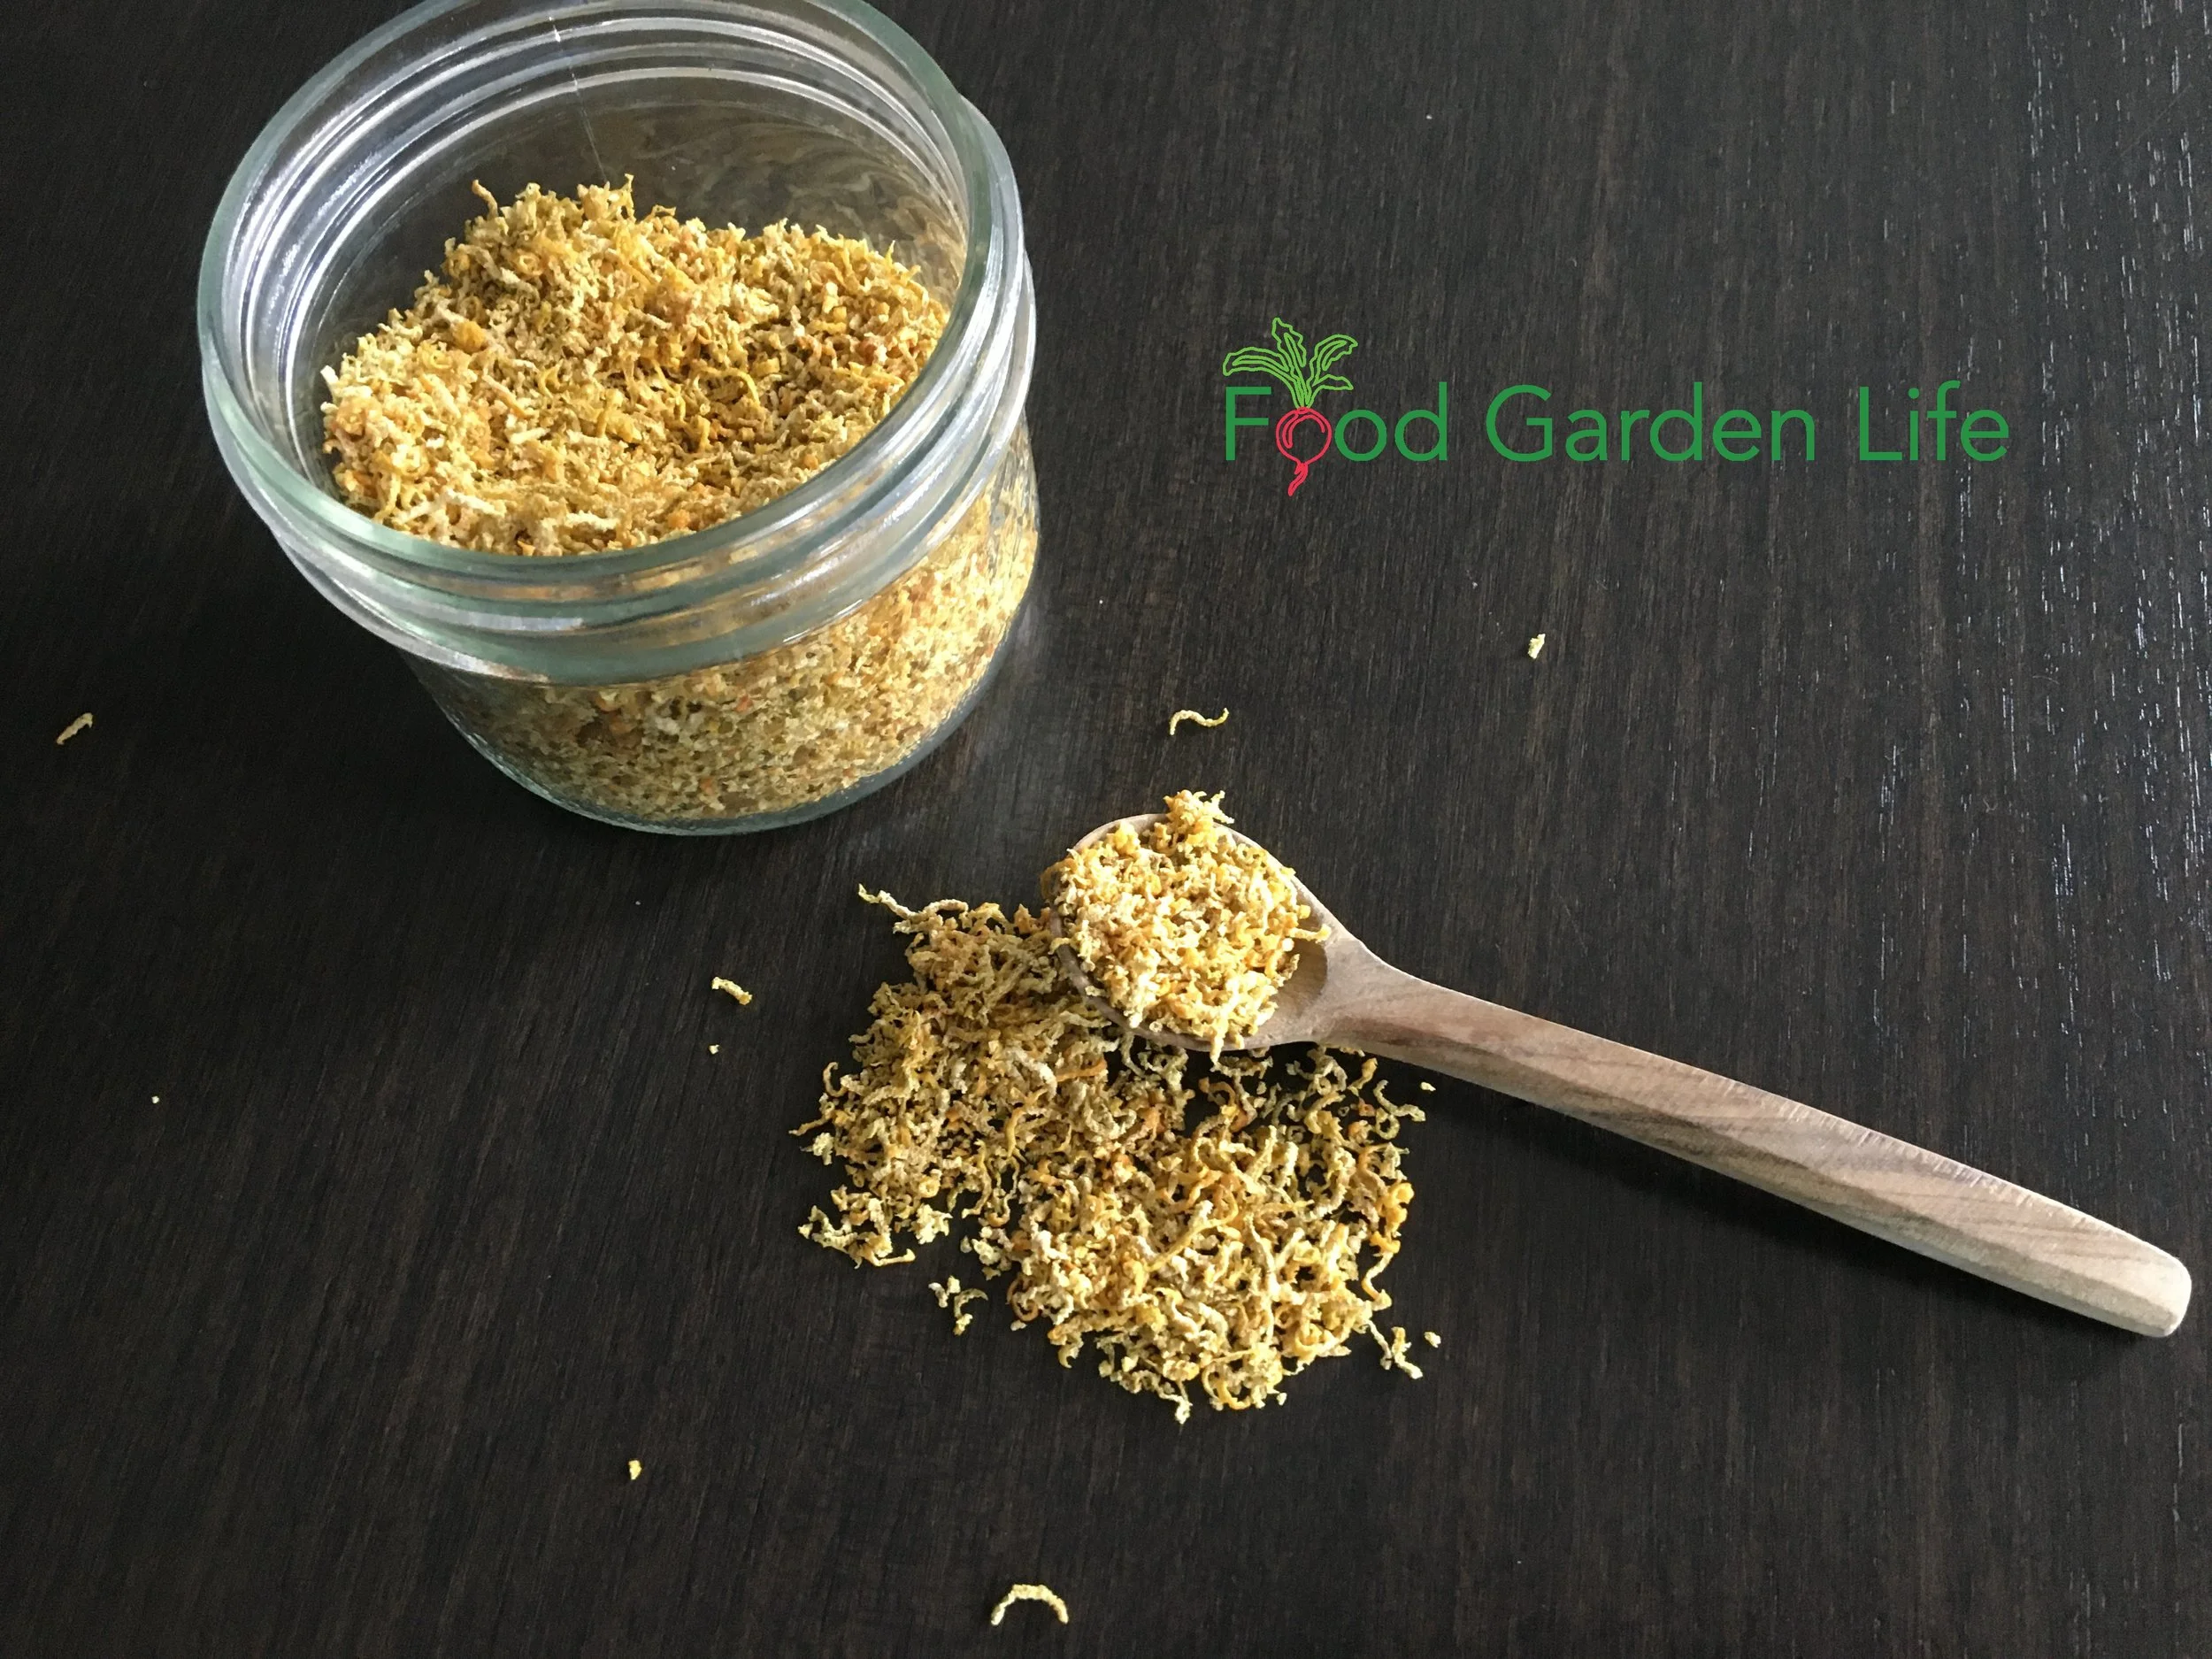
Dried lemon zest, so I can enjoy zest from my homegrown potted lemon trees year-round.
I think it’s a sin to use a lemon without first zesting it. The zest is the outer yellow part of the rind — and it’s the part with the most flavour. It adds a complexity to many dishes. Use lemon zest in marinades, add it to the butter that you rub on a chicken before roasting, fold it into plain cake batter — there are countless applications. Lemon zest works well in both sweet and savoury dishes.
To zest a lemon, use a fine-toothed grater or kitchen rasp (like a Microplane). I’ve also seen people peel the white pith, which can be bitter, off the inside of the rind, leaving just the rind, and then thinly slicing it.
The taste of the zest can vary greatly between citrus plants. One day I came home with sweet limes that I found at the grocer, and they were vastly different from any citrus zest I’d come across before. The Ponderosa zest and Meyer lemon zest are very distinct from the zest of more conventional lemons. I would describe Meyer lemon zest as milder, yet quite distinct, with some hints of orange. But it really is its own flavour. I find that Ponderosa lemon has some lime-like notes.
Juice
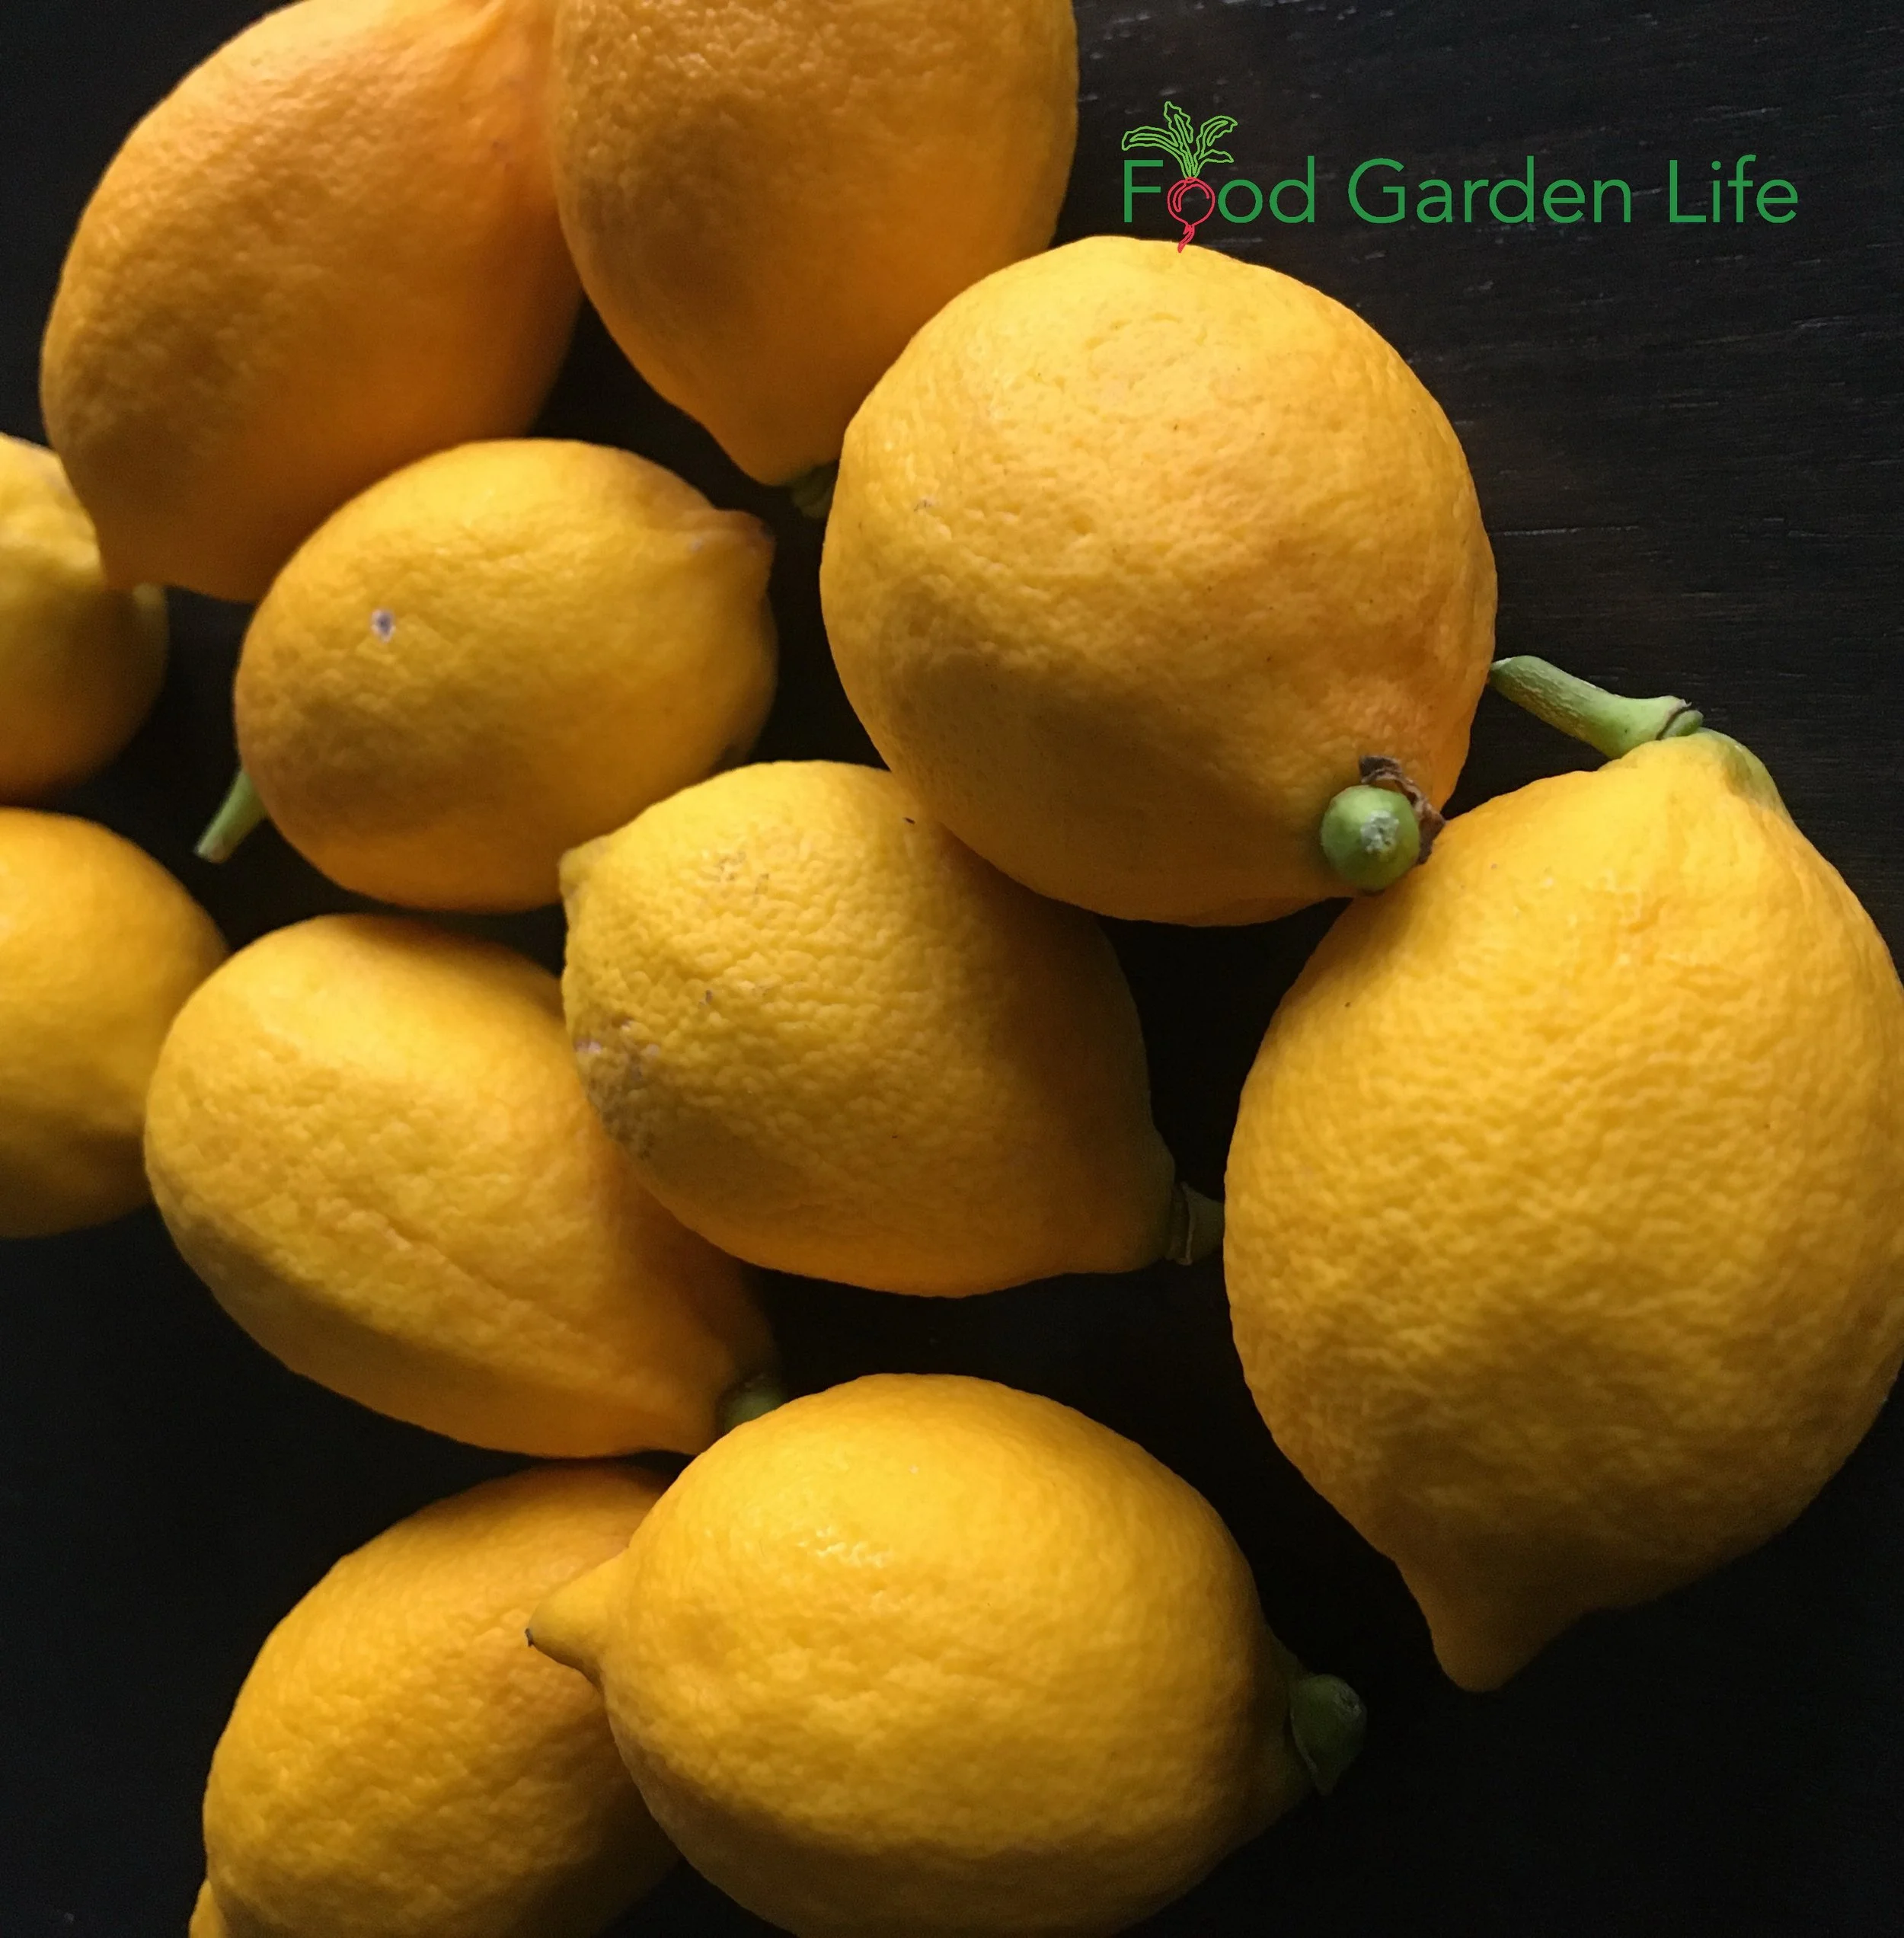
Use lemon juice to enliven fruit salads, when roasting and stewing meat, and to liven up bland food.
Most people use lemons for the juice, so it goes without saying that you shouldn’t waste it. I love to use lemon juice to enliven fruit salads, when roasting and stewing meat, and, in general, to liven up bland food (especially those nights when you can’t quite get the balance of the curry right).
Try combining lemon zest and juice with butter, and then pouring it over steamed broccoli or cauliflower. It’s quick and simple — and absolutely delicious.
Another great use for lemon juice is in homemade salad dressings. Substitute some (or all of) the vinegar with lemon juice — don’t forget to add some zest, too!
Seeds and Membrane
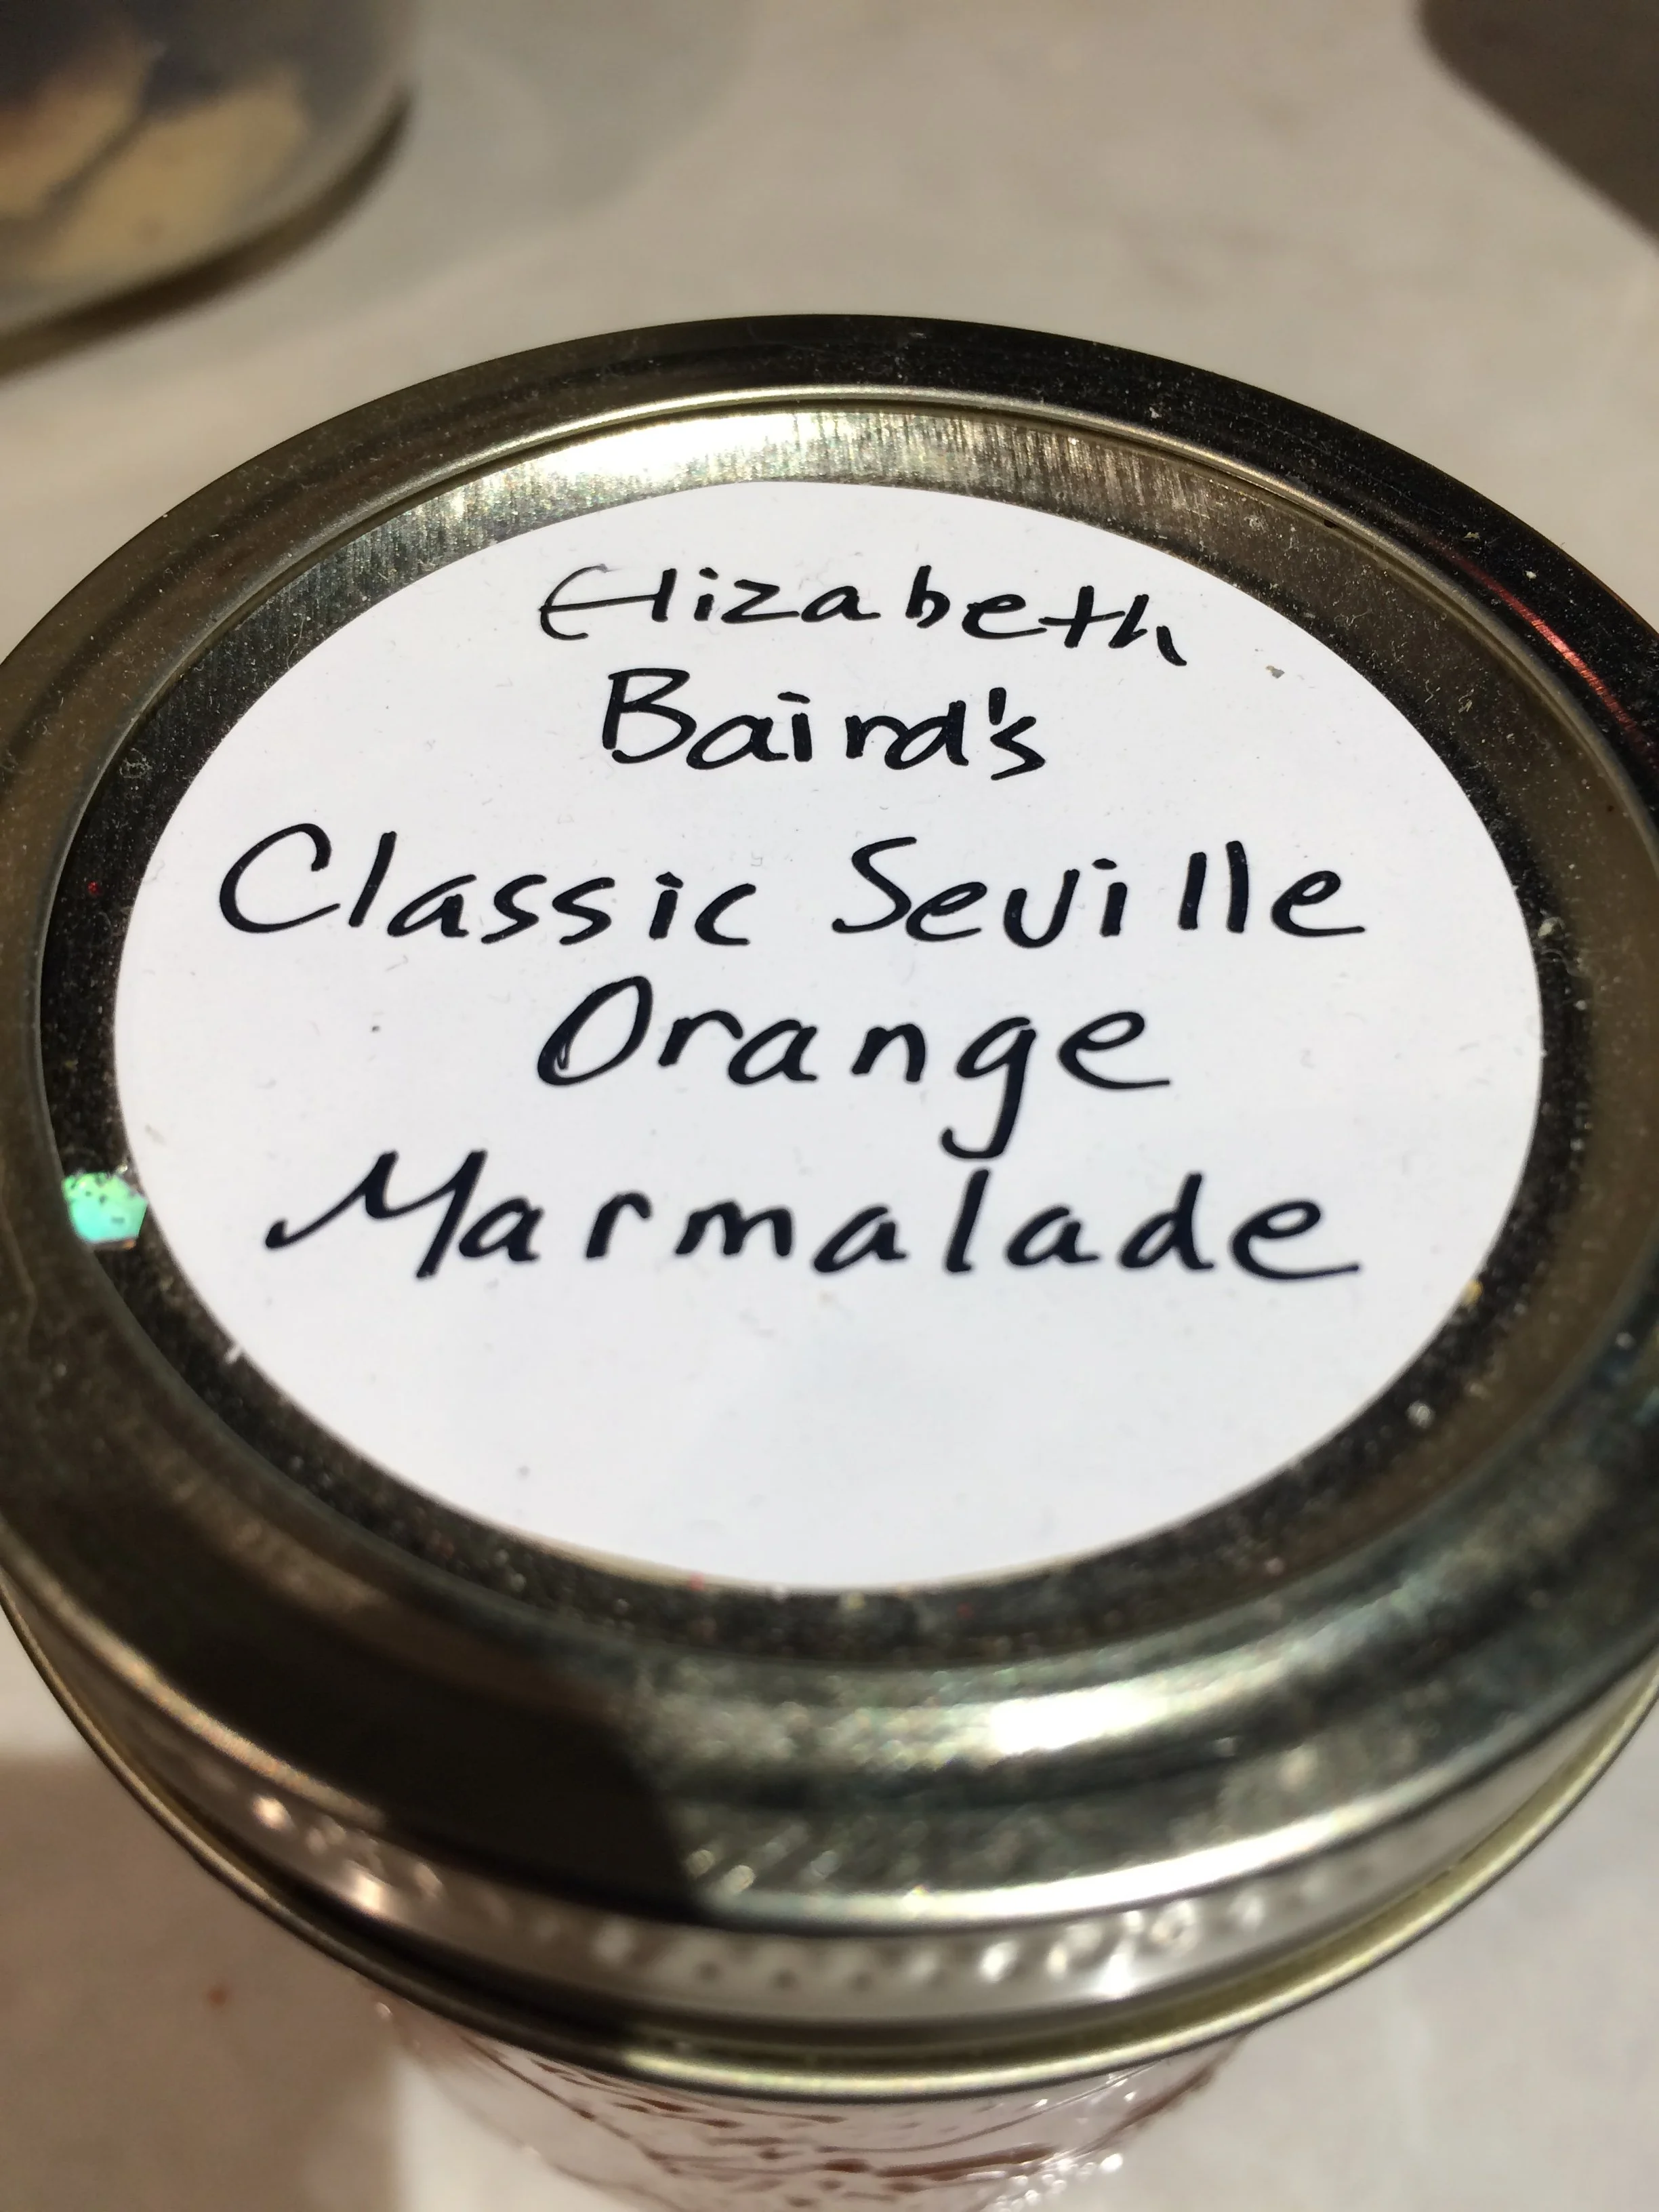
If you’re making lemon marmalade, don’t throw out the seeds…they’re full of pectin!
My wife Shelley and I once took a fantastic marmalade-making workshop with Elizabeth Baird, a well-known Canadian food writer. Elizabeth’s Seville orange marmalade recipe included a couple of lemons.
The surprise for me was that the marmalade includes the seeds in addition to the rind and juice. The seeds are not for eating: they are cooked (along with the inner membranes from the juiced fruits) in a cheesecloth pouch. They’re included because they contain a lot of pectin — the stuff that causes jams and jellies to thicken. When the cooking is done, the cheesecloth pouch with the seeds is removed and discarded.
Lemon Recipes
Grow Lemons Where You Think You Can’t is primarily a book about growing lemons, but I’d be remiss if I didn’t include some recipes for you to try with your crop of lemons — especially when some pretty wonderful Canadian cooks were kind enough to contribute some favourites. I’ve also included three of my family’s go-to lemon recipes.
Here are the delicious recipes included in the book:
Pat Crocker’s Citrus Salt
Tonia Wilson’s Lemon and Parmesan Roasted Chickpeas
Voula Halliday’s Chicken Ball Avgolemono
Steve’s Lemon Pepper Chicken Marinade
Biggs Kids’ Favourite Cranberry Lemon Muffins
Liz Pearson’s Wild Blueberry Lemon Muffins
Brad Long’s Lemon Malpua
Verna Duncan’s Lemon Bars
Danielle French’s Perfect Citrus Cake
Find This Helpful?
Enjoy not being bombarded by annoying ads?
Appreciate the absence of junky affiliate links for products you don’t need?
It’s because we’re reader supported.
If we’ve helped in your food-gardening journey, we’re glad of support. You can high-five us below. Any amount welcome!
Looking for More Lemon Ideas?
For more recipes and information about growing potted lemon trees in cold climates, go to the Lemon Home Page.
How to Grow a Potted Lemon Tree (That Actually Fruits!)
If you want to grow a potted lemon tree (that actually fruits) in a cold climate, below are a couple more resources to help you on your journey. I grow lemons and other citrus here, in Toronto, Canada. (My oldest potted lemon tree is from 1967!)