
Kohlrabi Made Easy: Grow This Weird Little Veggie in Cold Climates
How to grow kohlrabi.
By Steven Biggs
Growing Kohlrabi in Home Gardens
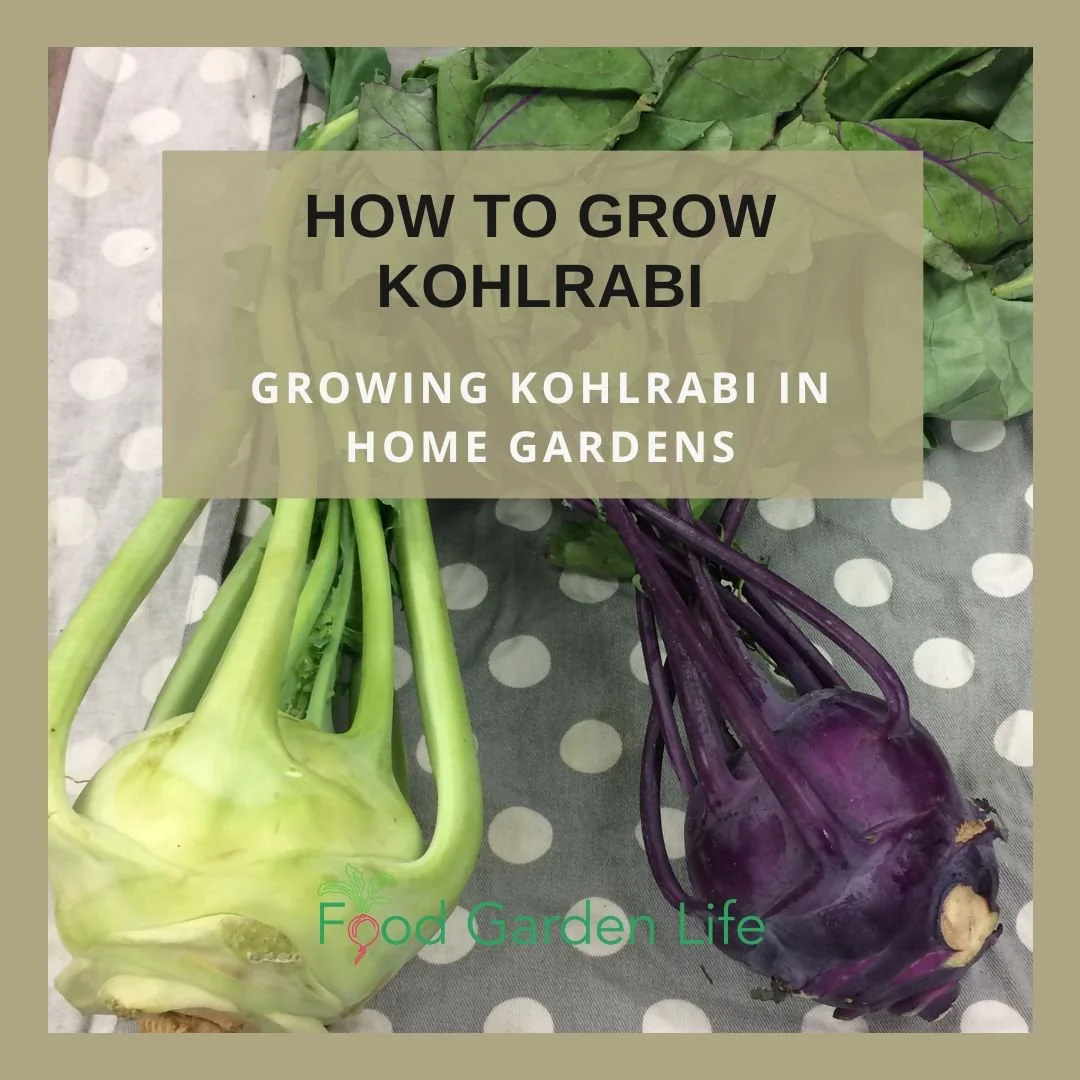
THREE CHEERS for one of the most photogenic veggies out there.
To my kids, kohlrabi looked like flying saucers. When I look at kohlrabi from the right angle I see a person having a bad hair day.
Whatever your imagination paints it as, it’s both attractive and unusual, making it a nice fit for an ornamental edible garden.
It’s also easy to grow, quick to mature, and versatile in the kitchen.
If you haven’t tasted it before, I’d describe the flavour as a cross between a mild apple and mild turnip. Let’s call it turnip light!
In this post I’ll talk about how to grow kohlrabi and how to fit it into your garden.
It Starts as a Rosette
Kohlrabi is a member of the cabbage clan. It has an edible stem that fattens up right above the soil level. Before the stem plumps up, though, the plant is a rosette of leaves. As the stem thickens, the symmetry of that rosette remains, with leaves projecting out from the bulb-like stem.
Top Tip for Kohlrabi Success
Here’s the key to your kohlrabi success: Fast, uninterrupted growth.
To get that type of growth, grow it in well-fed soil, with cool temperatures and consistent moisture.
Site
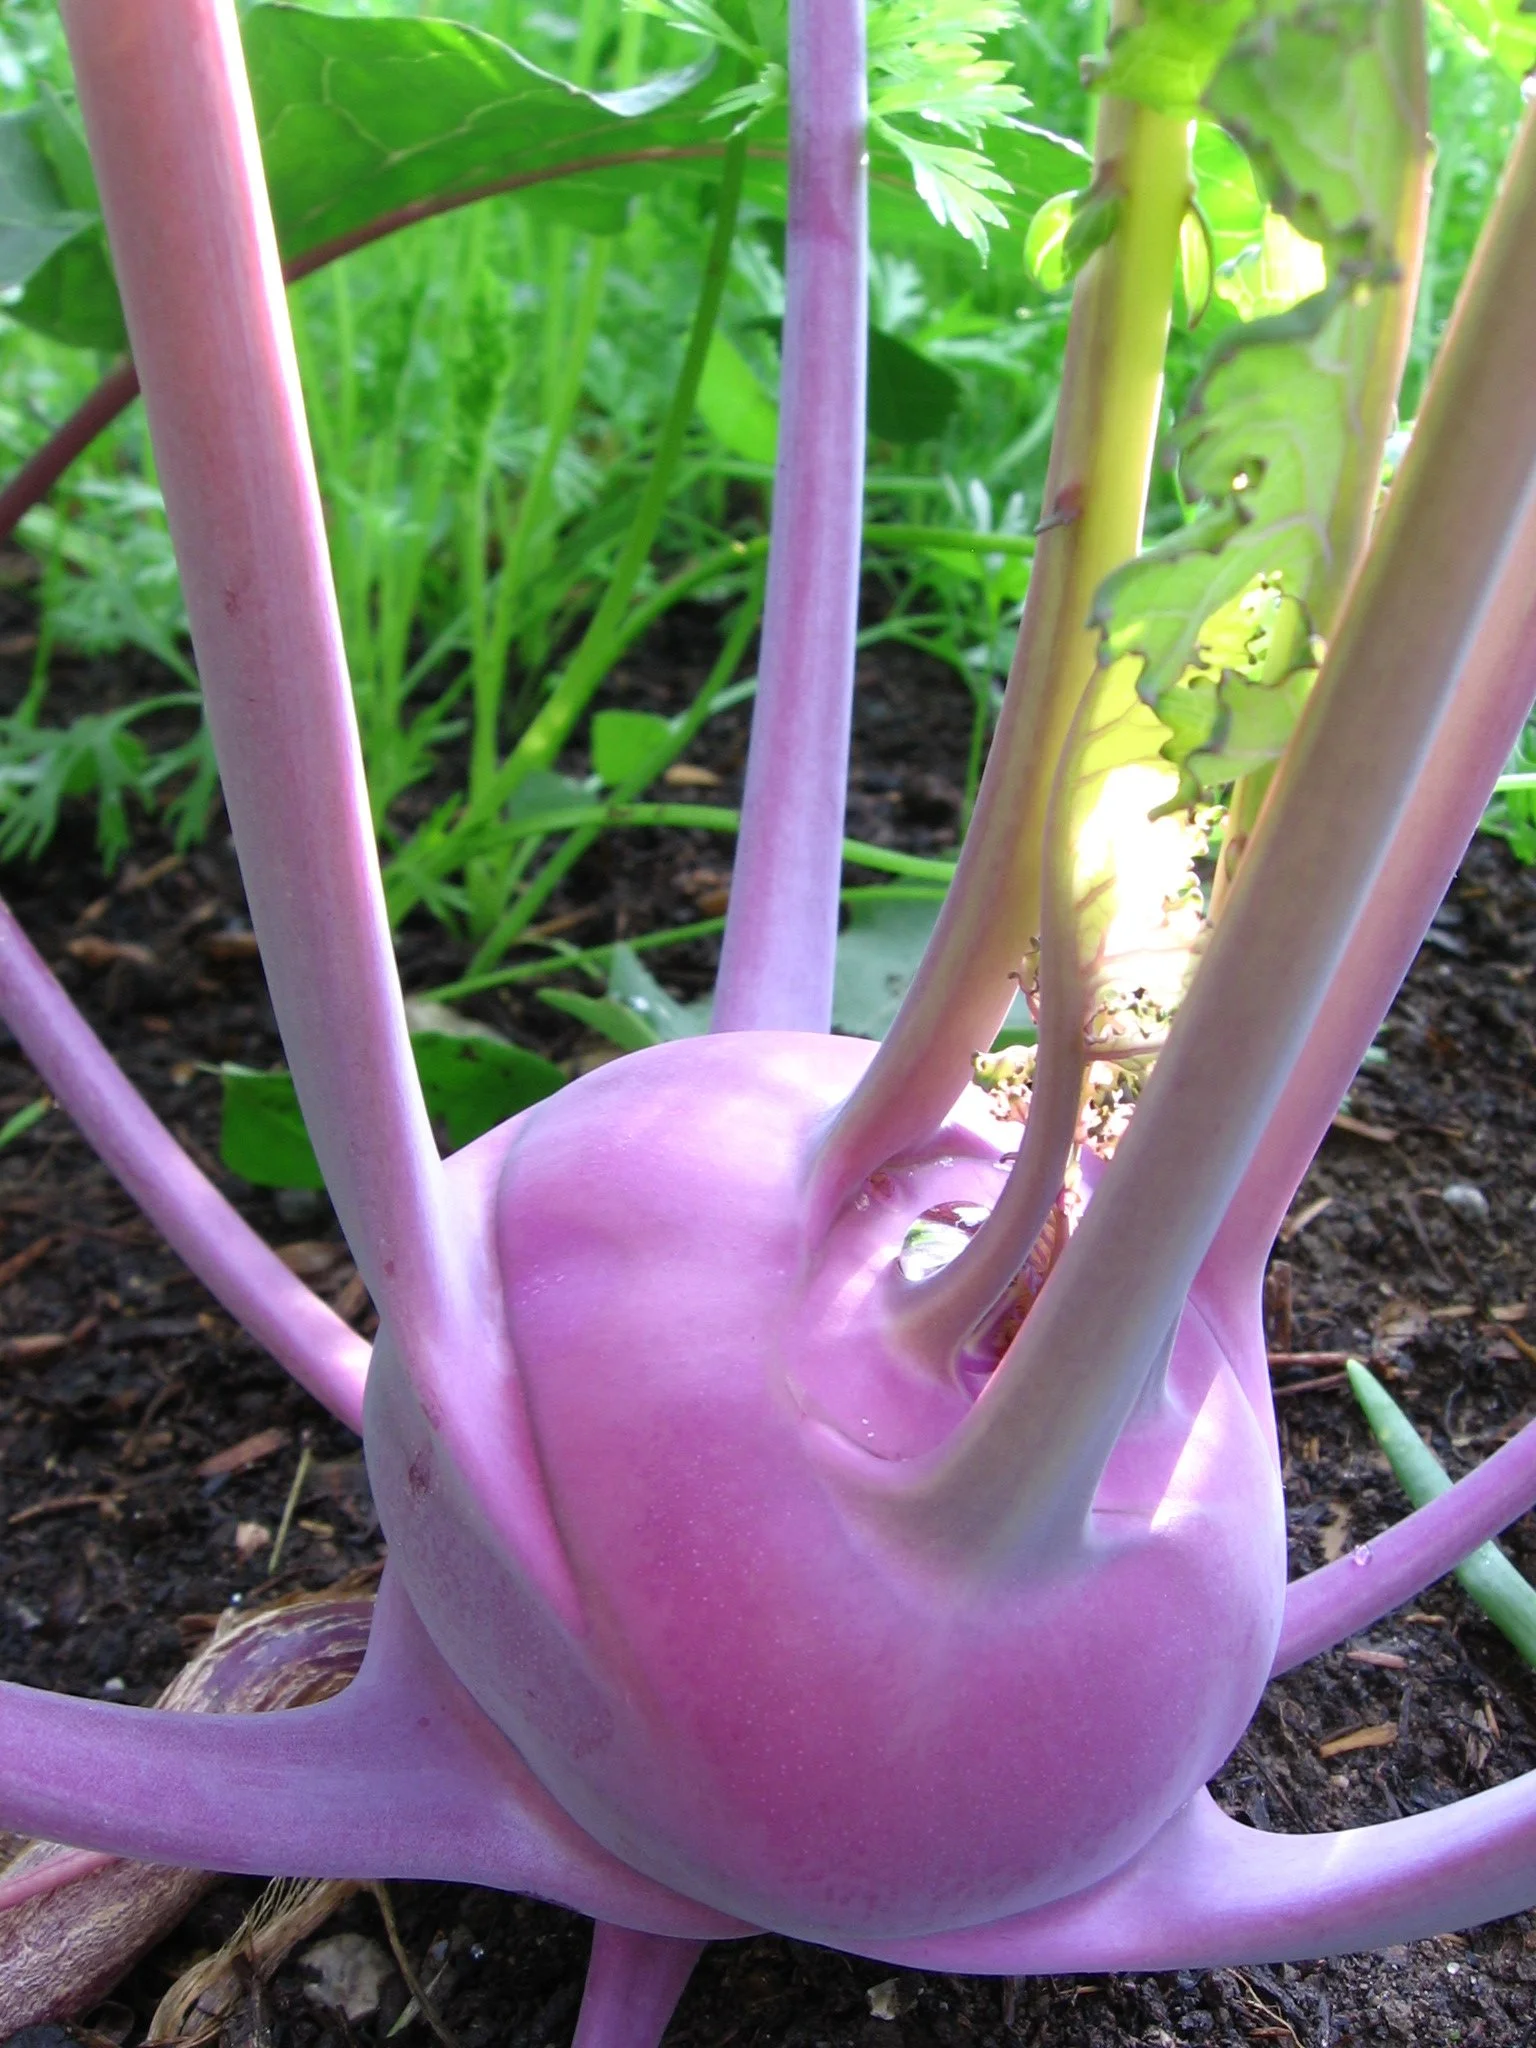
Kohlrabi is an easy-to-grow vegetable that is versatile in the kitchen.
Like its cabbage cousins, kohlrabi grows best in soil with lots of organic matter
A spot with full sun is best (although I’ve had decent results growing kohlrabi in partial shade)
Grow Kohlrabi from Seed
Kohlrabi is easy to grow from seed, indoors or outdoors. I don’t usually bother starting them indoors in the spring, but it’s an option if you want the earliest possible harvest. If you start them indoors, there’s no need for a heat mat.
Sow seeds approximately 5 mm (1/4”) deep
Outdoors: Start sowing about 1 month before the last spring frost
Indoors: Start kohlrabi transplants about 1 month before you plant to move them to the garden
Here are a couple of ways to get a longer kohlrabi harvest:
Start additional seeds every 2-3 weeks
Grow more than one variety, choosing varieties that take different amounts of time to mature
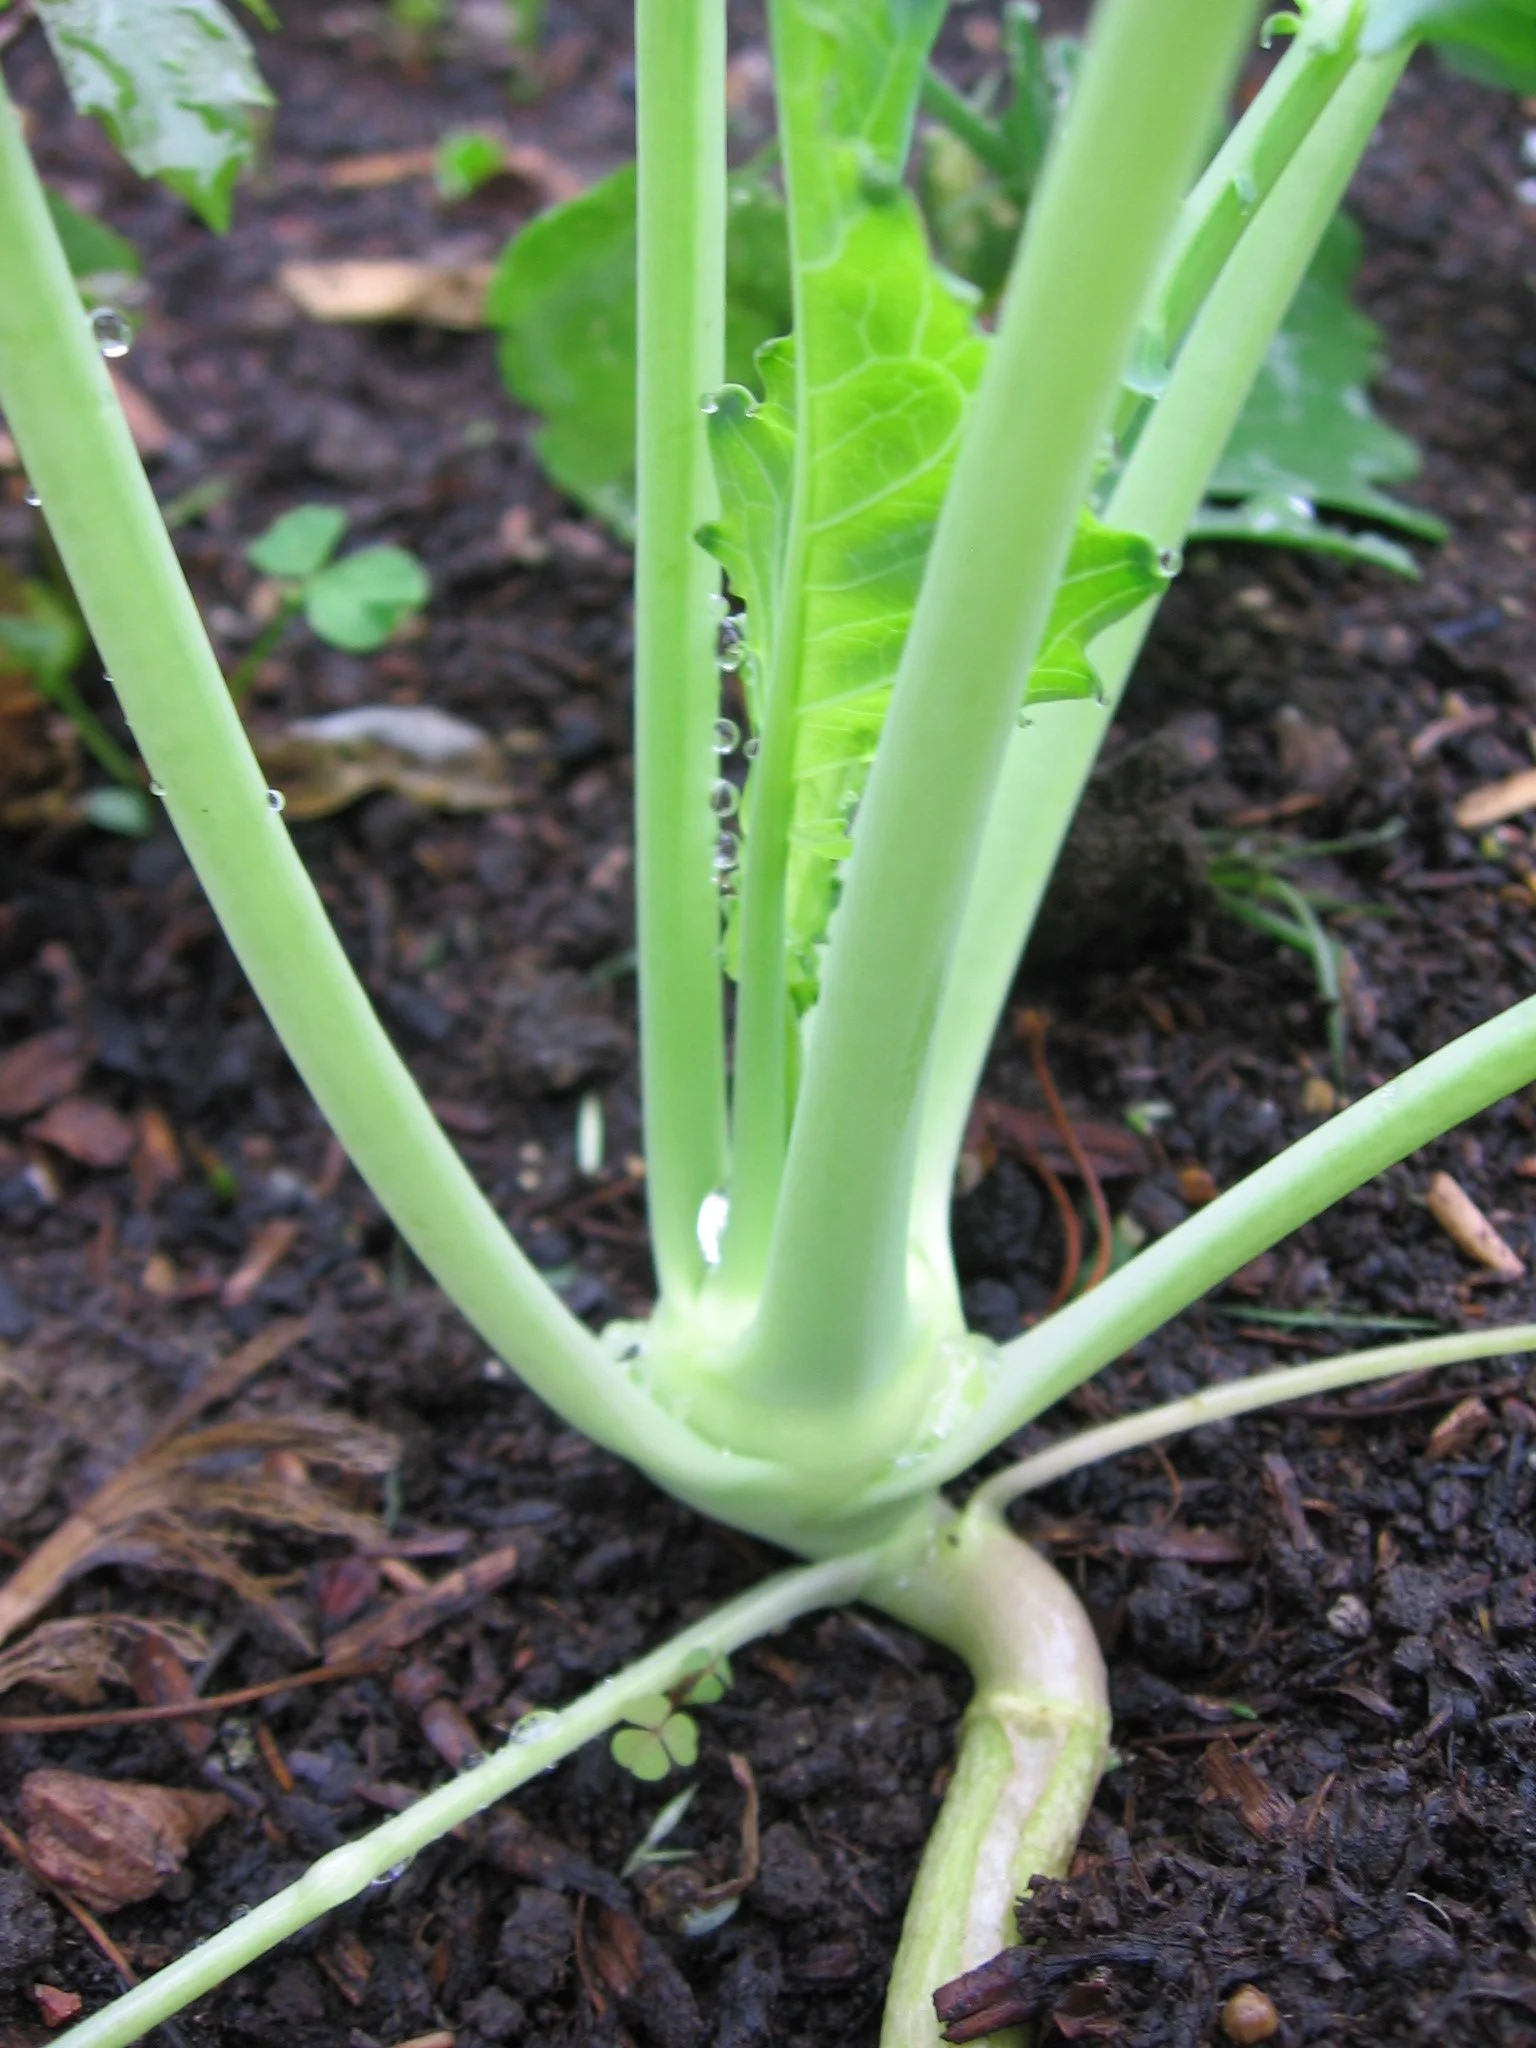
A young kohlrabi plant, before the stem has started to fatten up.
Note: While kohlrabi plants are tolerant of cold weather, a hard freeze can cause young plants to bolt – to jump right to the flowering stage. That would mean no thick edible stem. So there’s a limit to how early you can plant them out.
Kohlrabi as a Summer Succession Crop
When kohlrabi is a succession crop, I like to pre-start seedlings indoors (or outdoors, in another part of the garden). That way, I have transplants ready to go once the desired space opens up.
While I rarely start spring kohlrabi indoors in the spring, I find it’s the best way for me to grow kohlrabi for summer succession because:
It allows me to have a tighter succession...with larger plants ready as soon as the space is open
The hot, dry summer weather that I get here is not ideal for outdoor seeding
Note: Depending on growing conditions in your area – and how much attention you give your garden over the summer – kohlrabi might or might not be a suitable summer succession crop. Dry conditions can cause erratic growth and give a woody texture with a strong, bitter flavour.
Grow a Container Vegetable Garden
And get an early harvest of crops that usually take too long!
Spacing
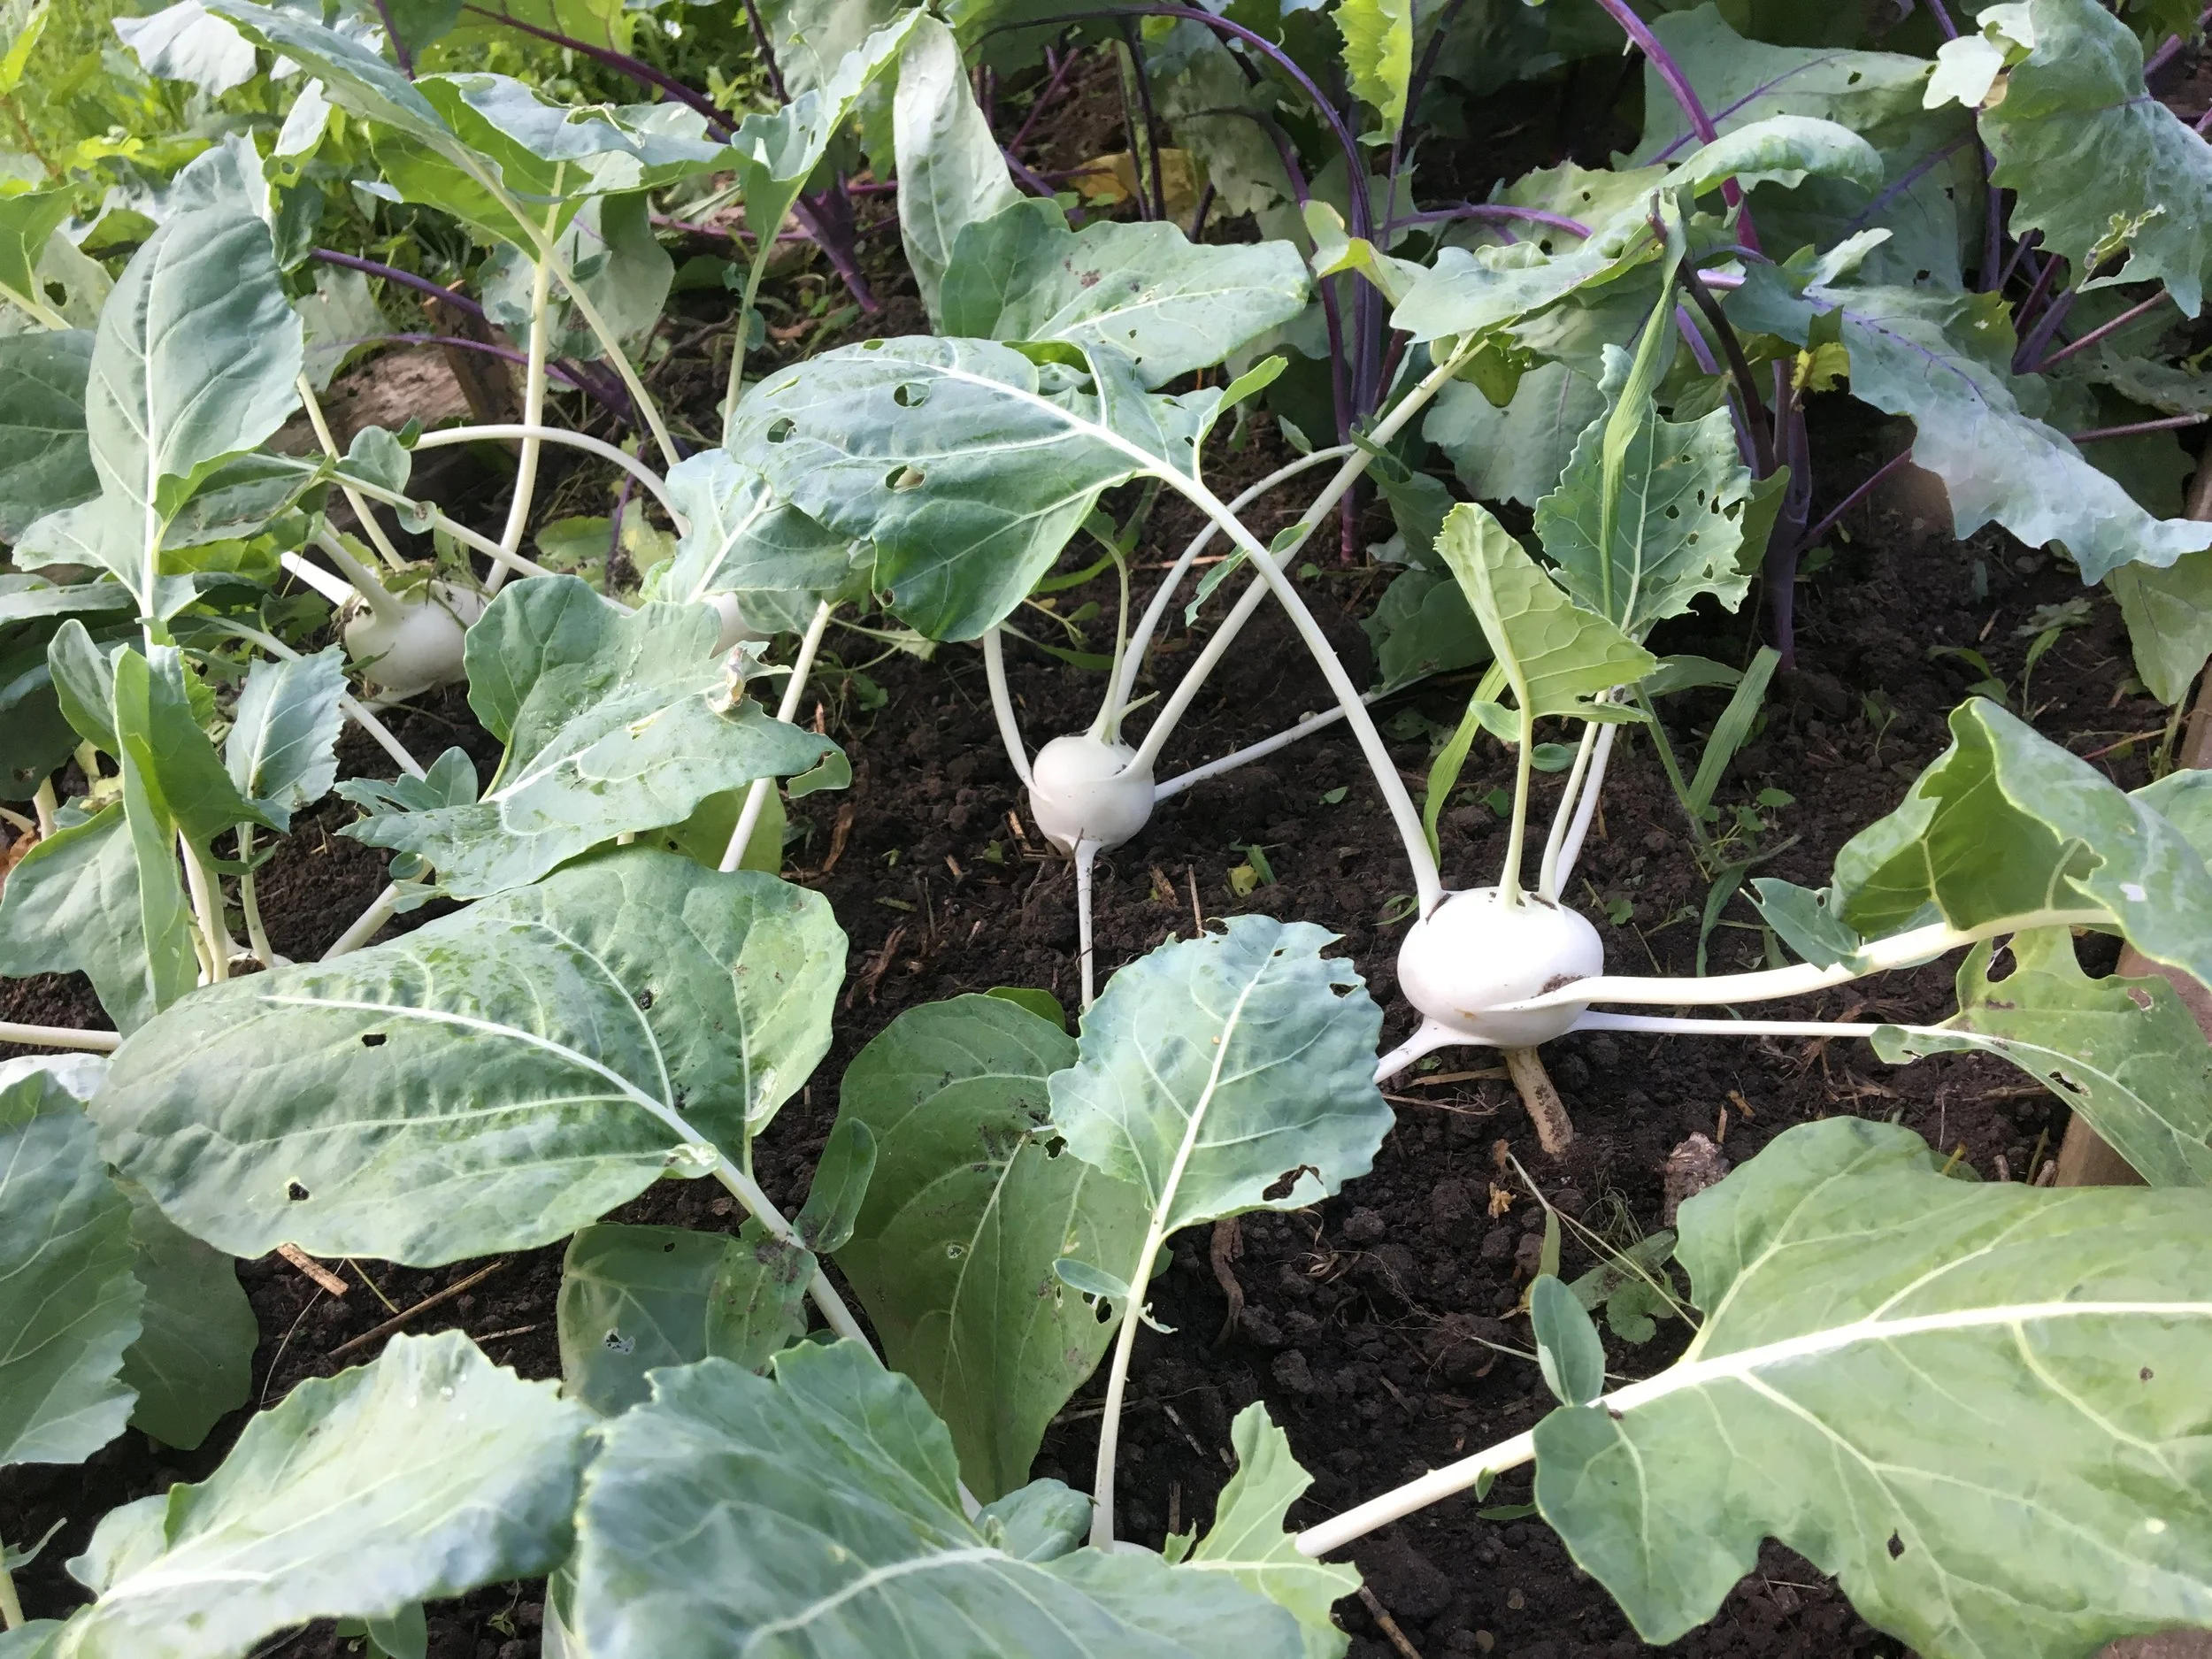
Thin kohlrabi plants to give a spacing of approximately 10-15 cm (4-6”) apart.
With direct-seeded kohlrabi, I usually plant them more densely than recommended. Then I thin out the row as the stems begin to fatten, enjoying an early harvest of young kohlrabi.
Kohlrabi leaves are edible, so if I thin out any plants before the stems enlarge, I can still add the leaves to a salad!
Planting more densely is also cheap insurance against losses and poor germination.
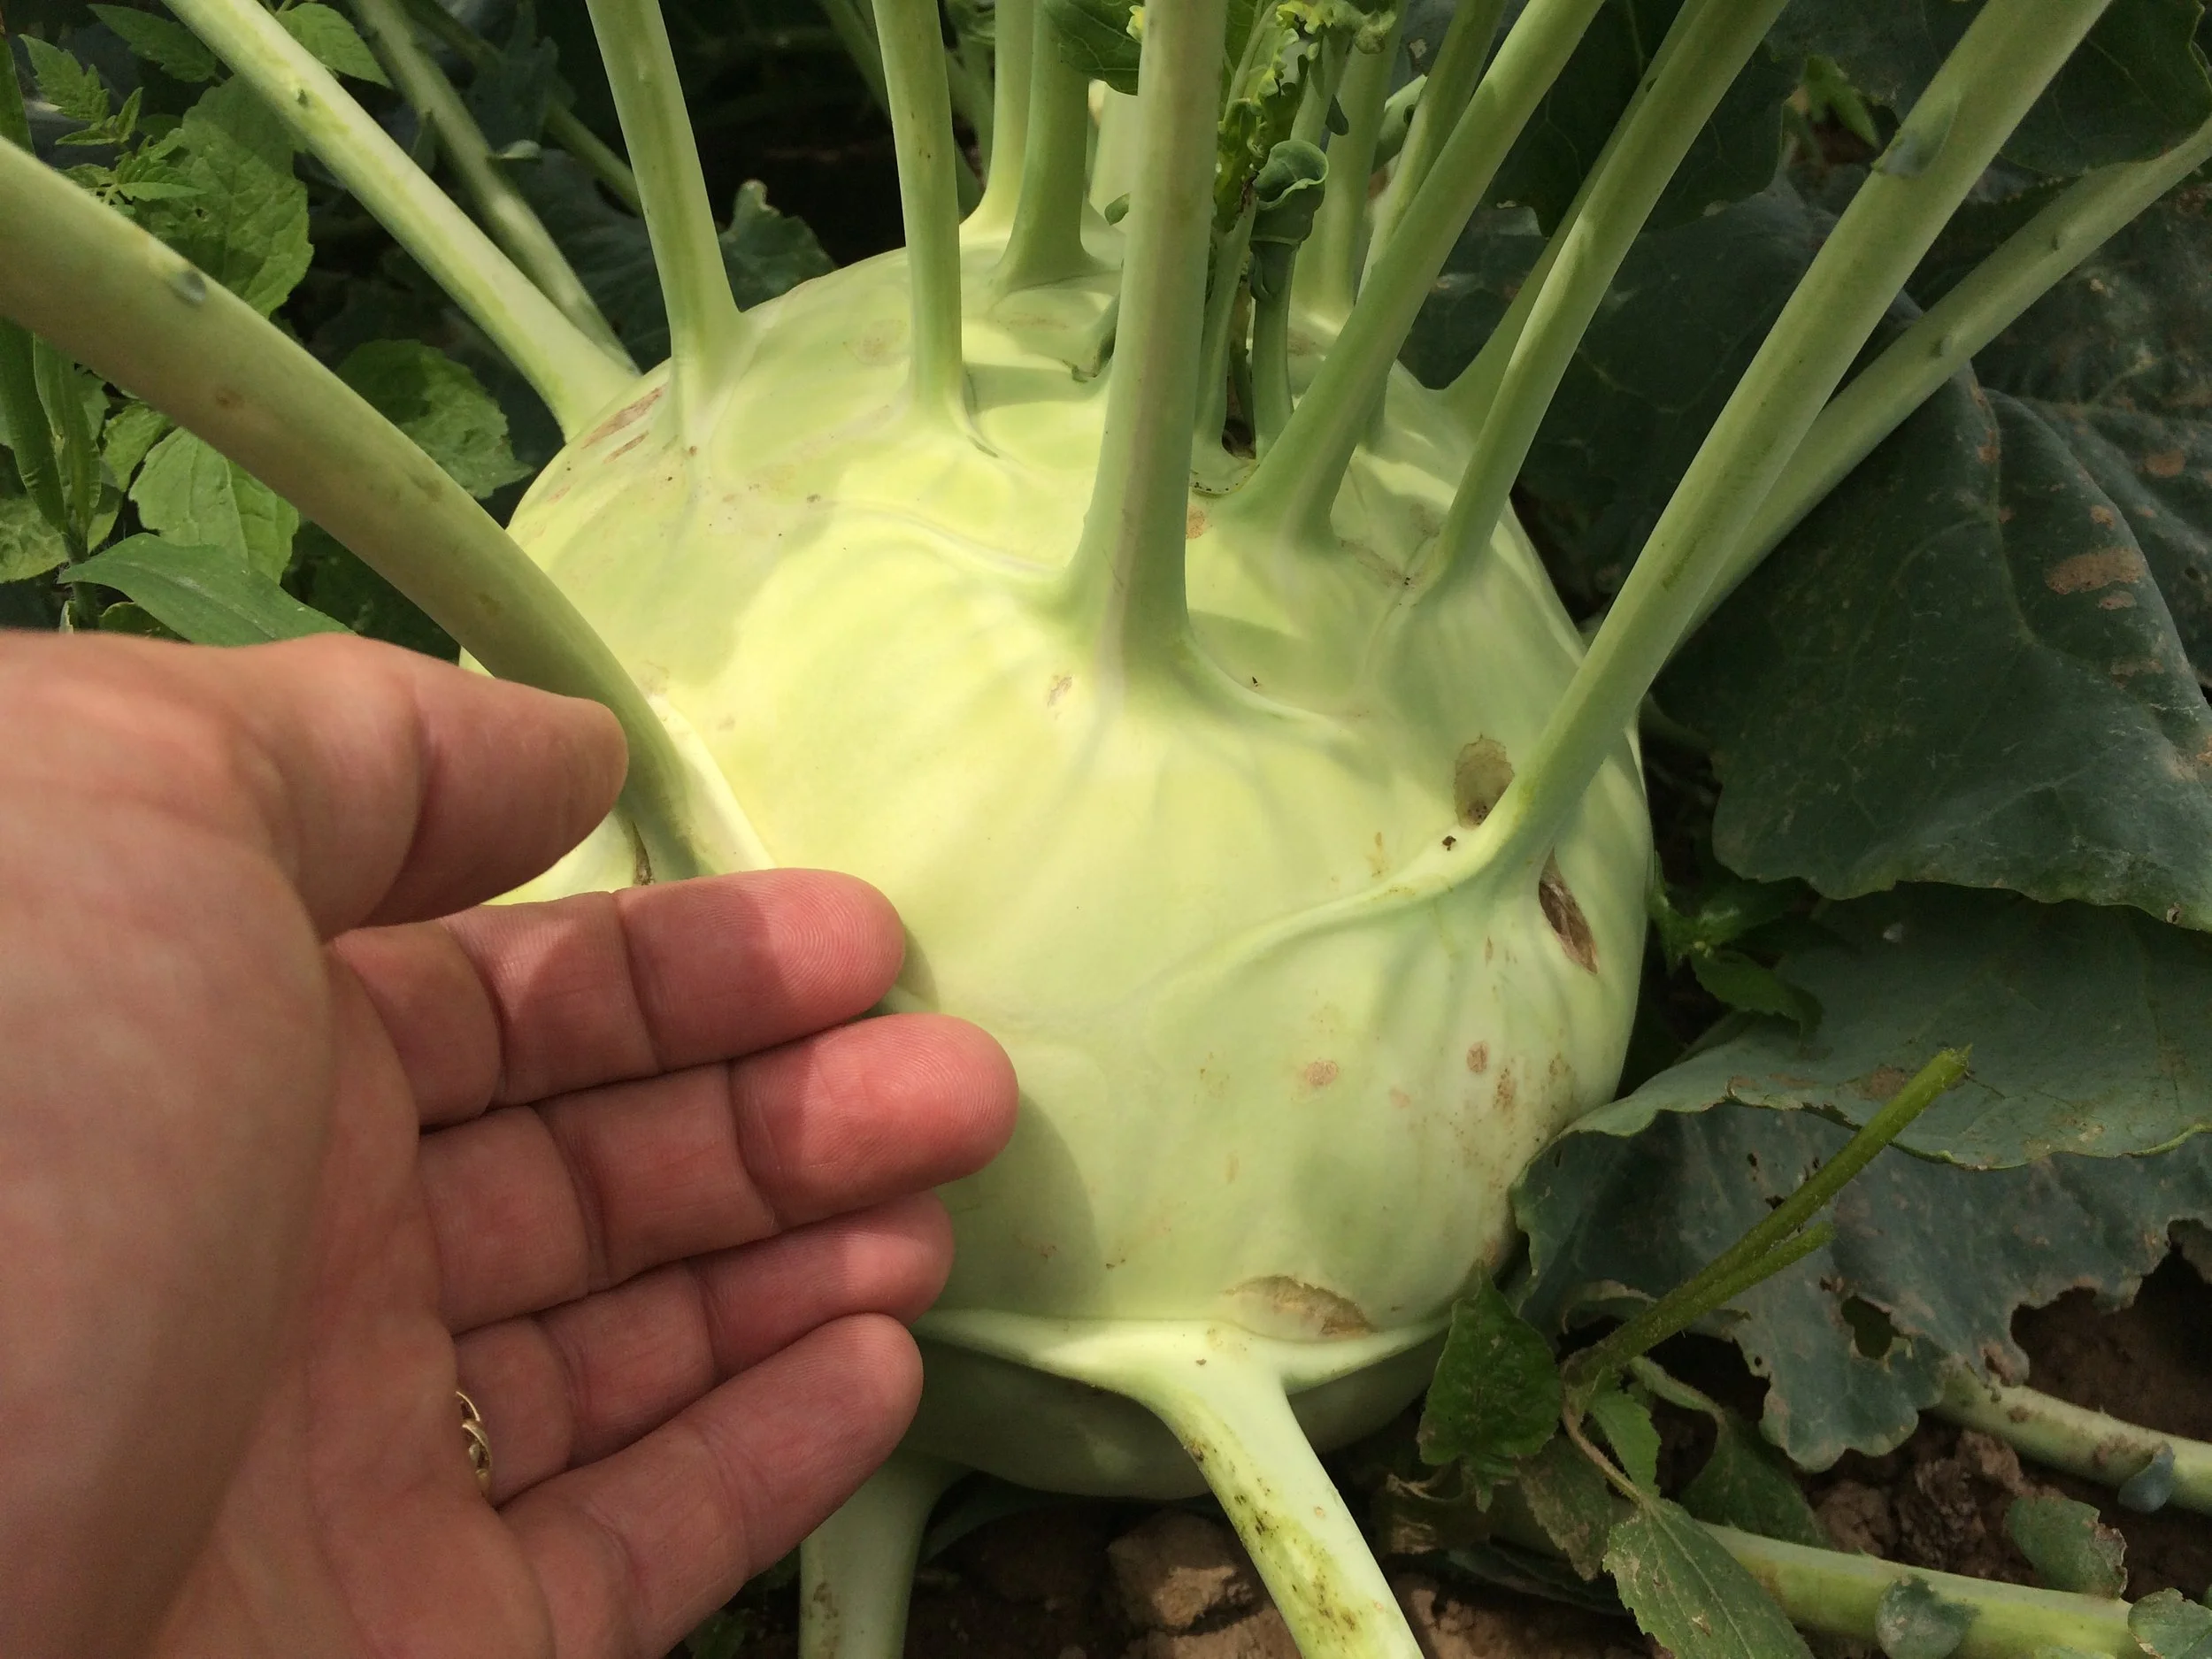
If you’re aiming to grow larger kohlrabi, increase the spacing a bit – and look for a variety know for size.
Sow the seeds approximately 5 cm (2“) apart
Thin to 10 – 15 cm (4-6”) apart
Space rows 30cm (12”) apart
If you’re aiming to grow larger kohlrabi, increase the spacing a bit – and look for a variety know for size.
Challenges
I find the early crop is not bothered much by pests. But later sowings and summer-succession transplants are growing when there are more pest pressures in the garden. That means young seedlings can be vulnerable to flea beetles, cabbage worm, and cabbage looper. An easy solution is to cover young plants with a floating row cover.
Where possible, rotate crops to minimize pest and disease pressures. That means it’s best not to plant kohlrabi where you’ve had you’ve had related crops (broccoli, cauliflower, collards, kale, turnip, rutabaga, cabbage, bok choy, Brussels sprouts, and mustards) in last 4 years.
Harvest and Storage
Kohlrabi usually take a couple of months to mature. Pick when they’re anywhere between the size of a golf ball and a tennis balls. Remember: smaller will be more tender.
Kohlrabi is frost hardy, so there is no rush to harvest it in the fall.
In the Kitchen
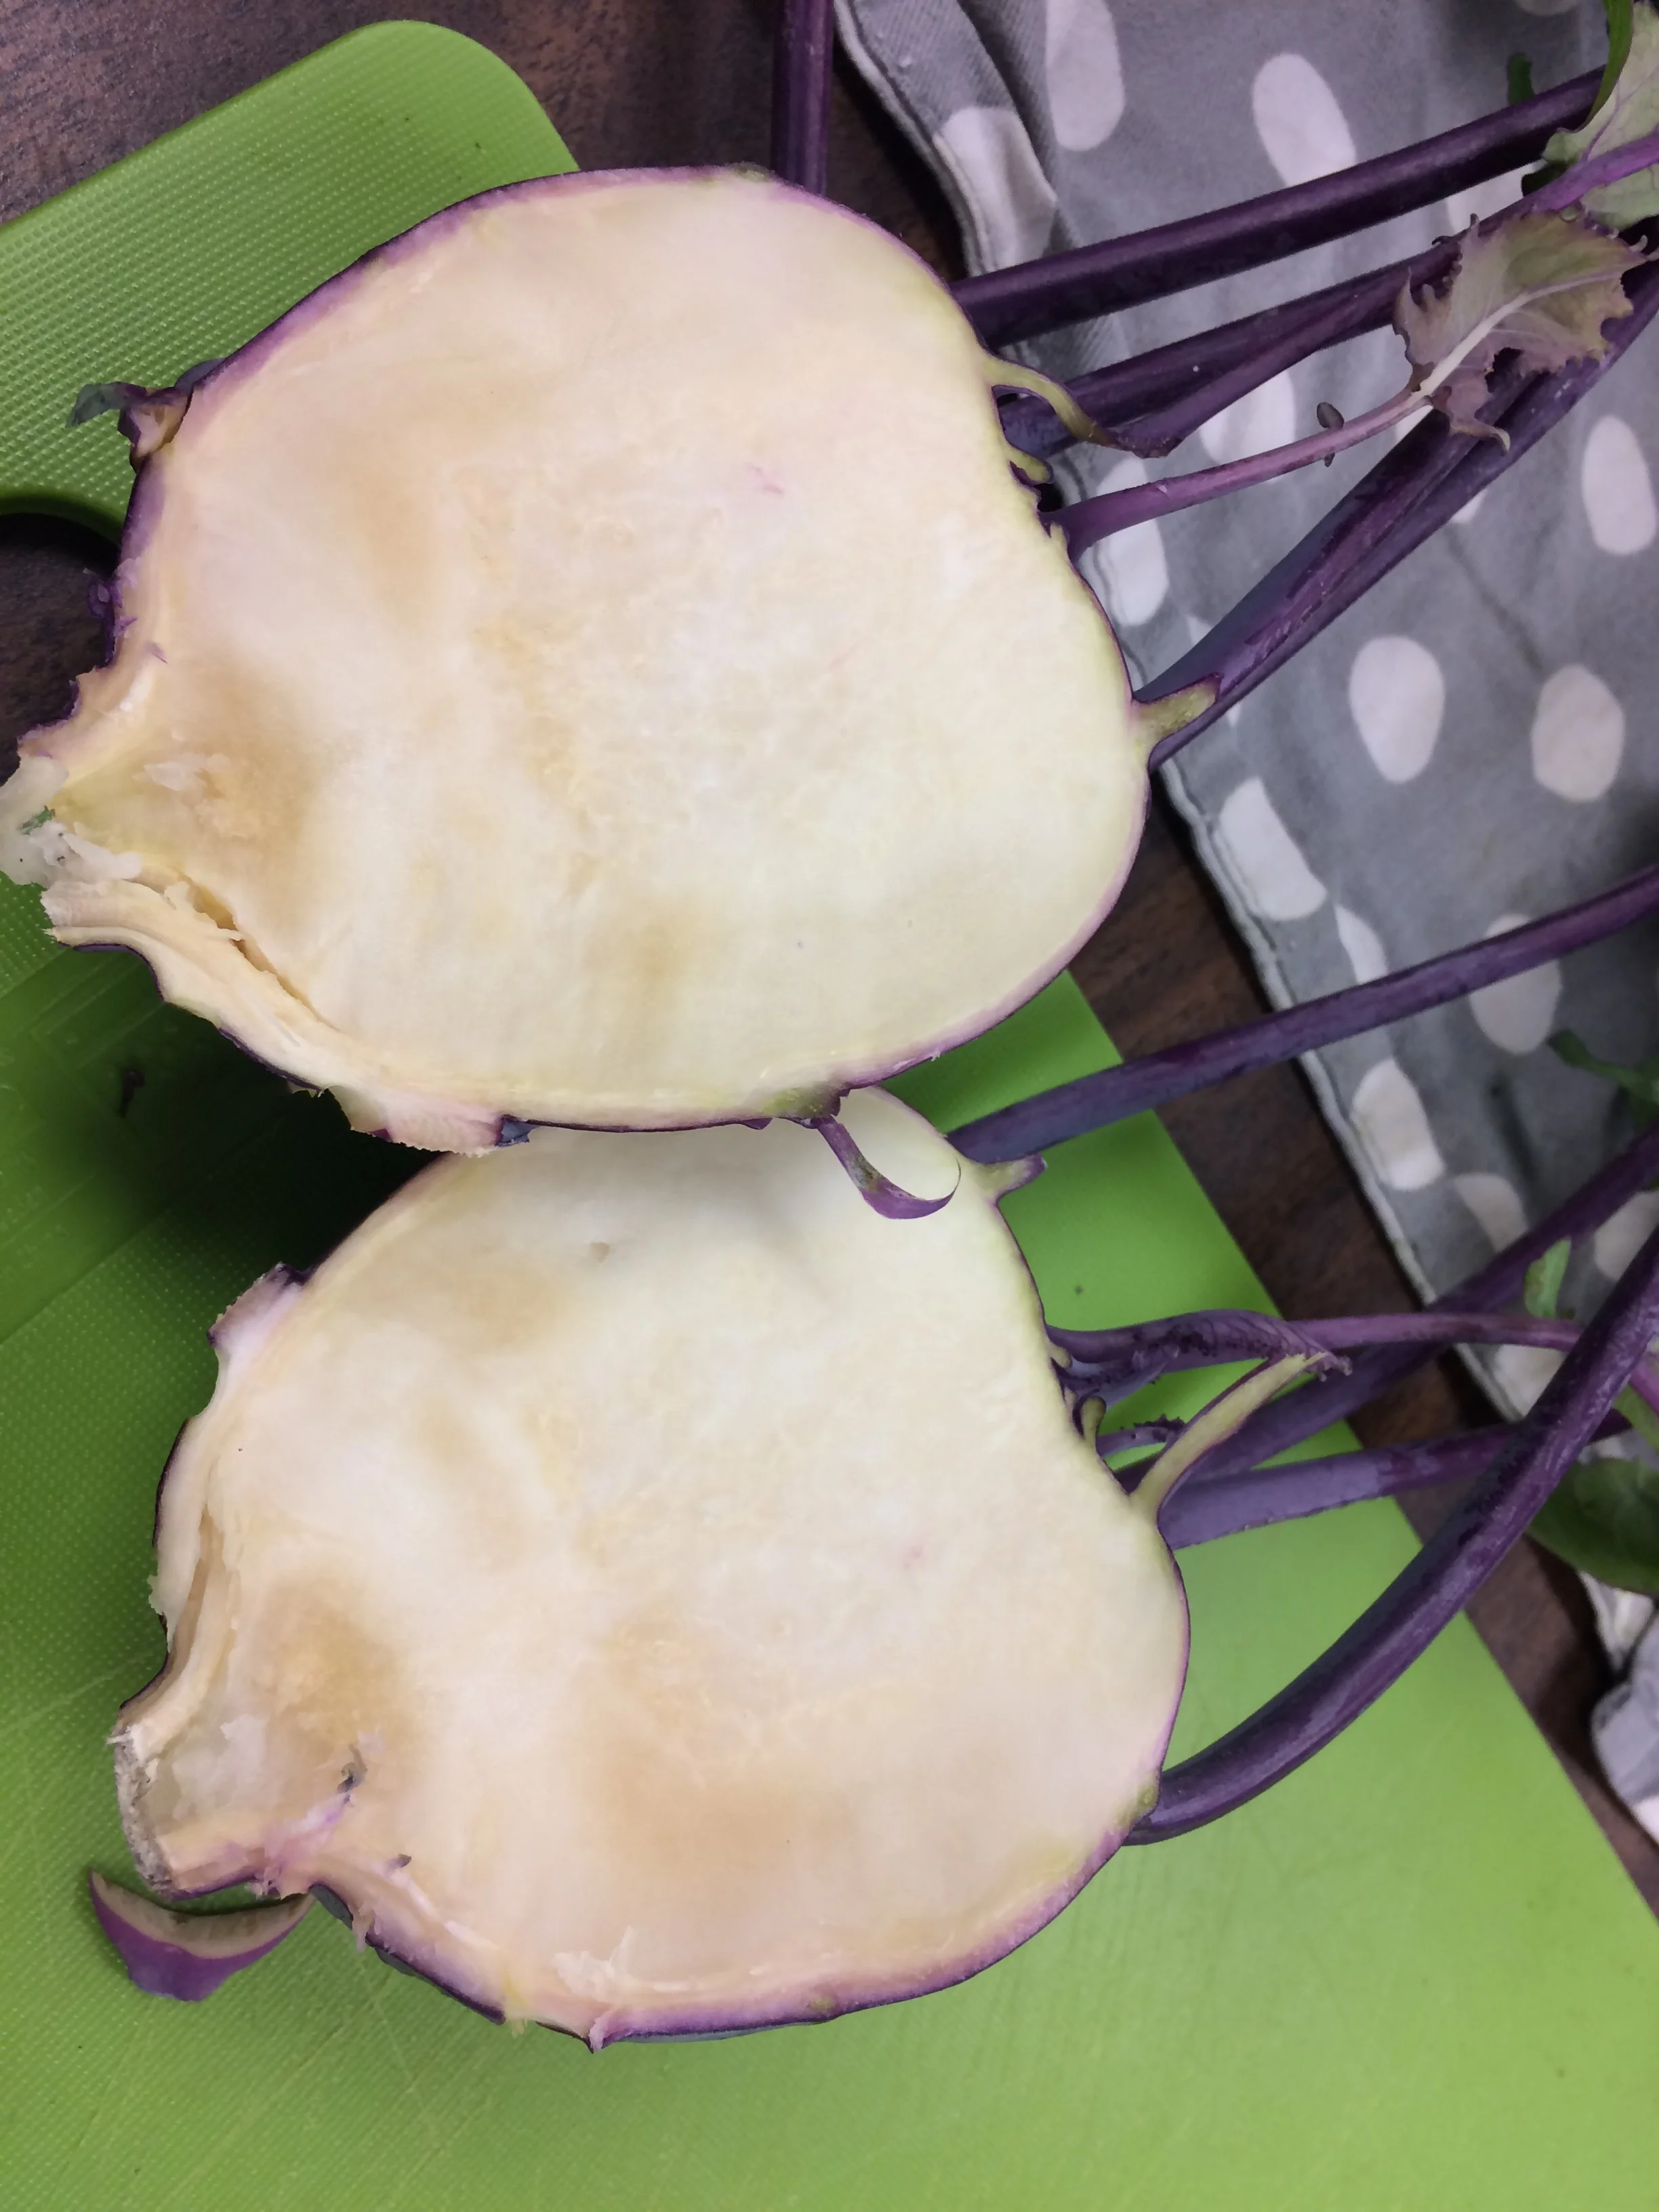
Kohlrabi is versatile in the kitchen.
You can eat kohlrabi raw or cooked. Either way, peel it first, because the skin can be tough. I prefer to use a paring knife (sometimes a potato peeler gets stuck on the spots where the leaf joined the stem.)
Here are some ways I’ve enjoyed serving kohlrabi:
Sliced, on a veggie platter
Grated, in slaws and salads
Poached (in white wine with butter is nice!)
Cut into ribbons, and added to a stir fry
Cubed and added to curries
Remember: The young leaves and leaf stalks are edible too!
Not Sure Where to Start?
A simple way to use raw kohlrabi is to grate it and then make a slaw. Here’s how:
Mix together some grated kohlrabi with a grated apple
I peel the apple first, so the white flesh of the apple and kohlrabi blend together
Use a slow-to-brown apple variety if you have one (at the moment, Pink Lady is my favourite)
Add salt, a dash of red wine vinegar, and olive oil.
That’s it!
Find This Helpful?
Enjoy not being bombarded by annoying ads?
Appreciate the absence of junky affiliate links for products you don’t need?
It’s because we’re reader supported.
If we’ve helped in your food-gardening journey, we’re glad of support. You can high-five us below. Any amount welcome!
Guide: How to Grow Sorrel (& How to Use it!)
Find out how to grow sorrel, and get ideas for creative sorrel recipes.
By Steven Biggs
Planting Sorrel: An Easy-to-Grow Perennial Vegetable

Sorrel is one of my favourite crops because it checks off a number of important things for me:
It’s easy to grow (it’s a perennial that comes back year after year)
It’s difficult to find fresh sorrel leaves in stores (and if you find them, they’re expensive)
It is versatile in the kitchen (soups, meat, salads, and more)
(And I've cooked with sorrel on TV!)
Sorrel also has a rich herbal history, with a variety of uses.
I’m no herbalist, so in this post I’ll tell you how to grow sorrel and give you lots of ideas for using it in the kitchen.
Haven’t Seen a Sorrel Plant? You’re Not Alone!
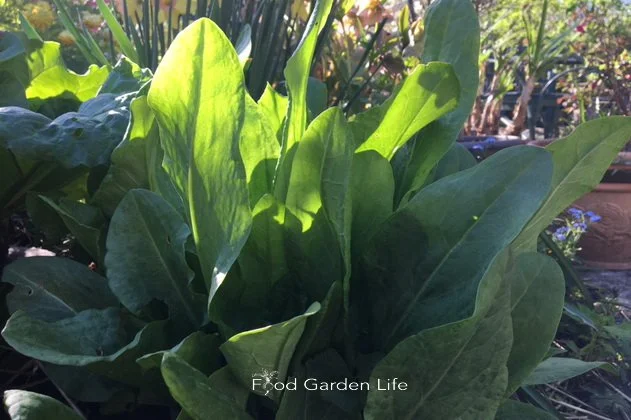
Garden sorrel is a hardy perennial.
Sorrel is a familiar ingredient in European cuisine. That’s how it came to North America—with European settlers.
The “wild” sorrel sought after by foragers is simply sorrel that’s escaped cultivation.
Yet many people in North America don’t know to sorrel.
If you’re new to sorrel, it’s grown for its leaves. It’s sour leaves. I think of it as a lemon substitute for northern gardeners.
When I shop at eastern European shops, I see jarred sorrel…horrid sludge. I don’t recommend it. Grow yourself fresh sorrel!
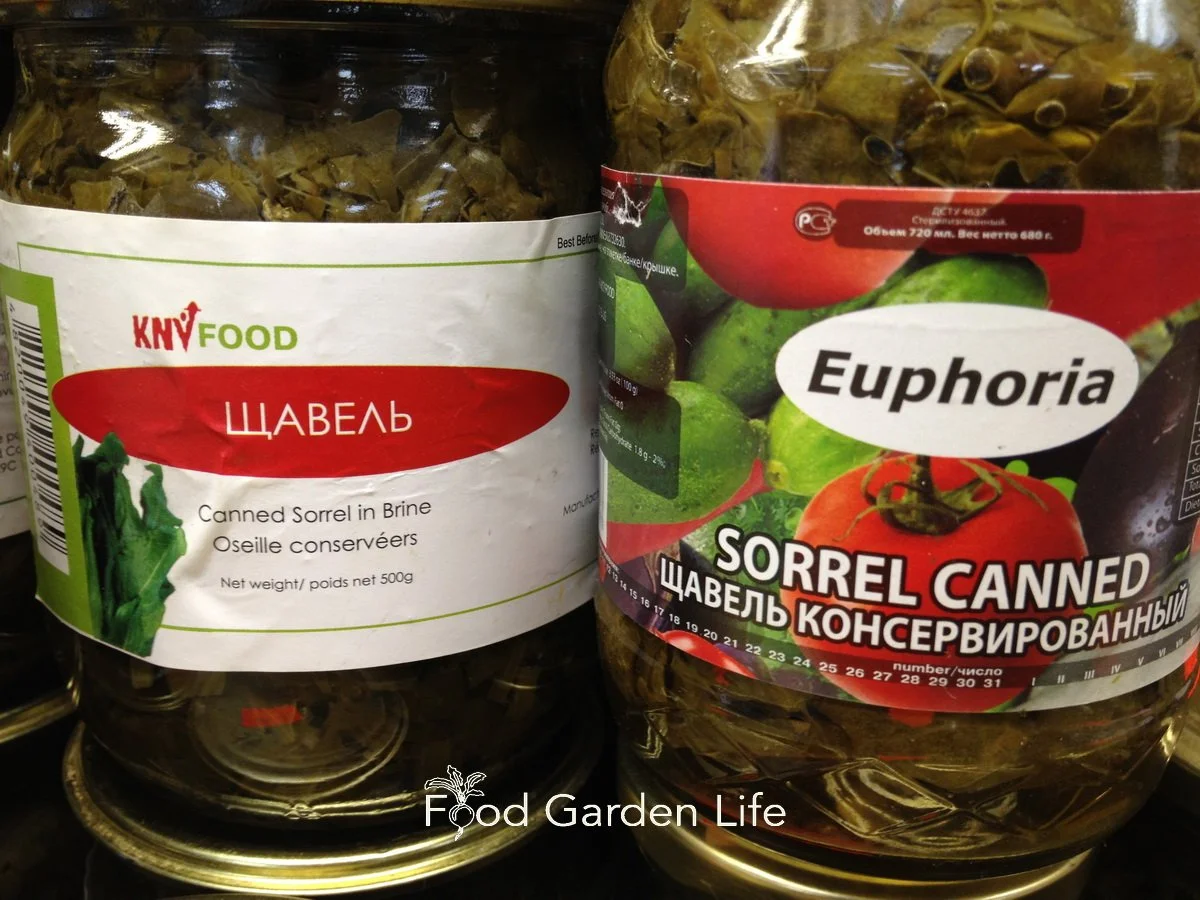
Grow your own sorrel, and skip the brined sorrel!
But it was an eastern European connection that go me growing sorrel. As a teen, I took Ukrainian lessons (hoping to learn my mom’s first language—which she never taught us.) I never did pick up the language—but the teacher, who knew I was a gardener, couldn’t believe I’d never heard of sorrel. And brought me a clump of this plant that she said was an essential ingredient in the old country.
What is Sorrel?
Sorrel is a hardy perennial plant that grows in a clump. It’s tough as nails, hardy into Canadian zone 4.
The long, narrow leaves are ready to pick early in the season, making it one of the first greens to harvest.
You can use the leaves fresh—or cook with them. (See How to Use Sorrel, below.)
Types of Sorrel
There’s more than one type of sorrel. Here are three common ones:
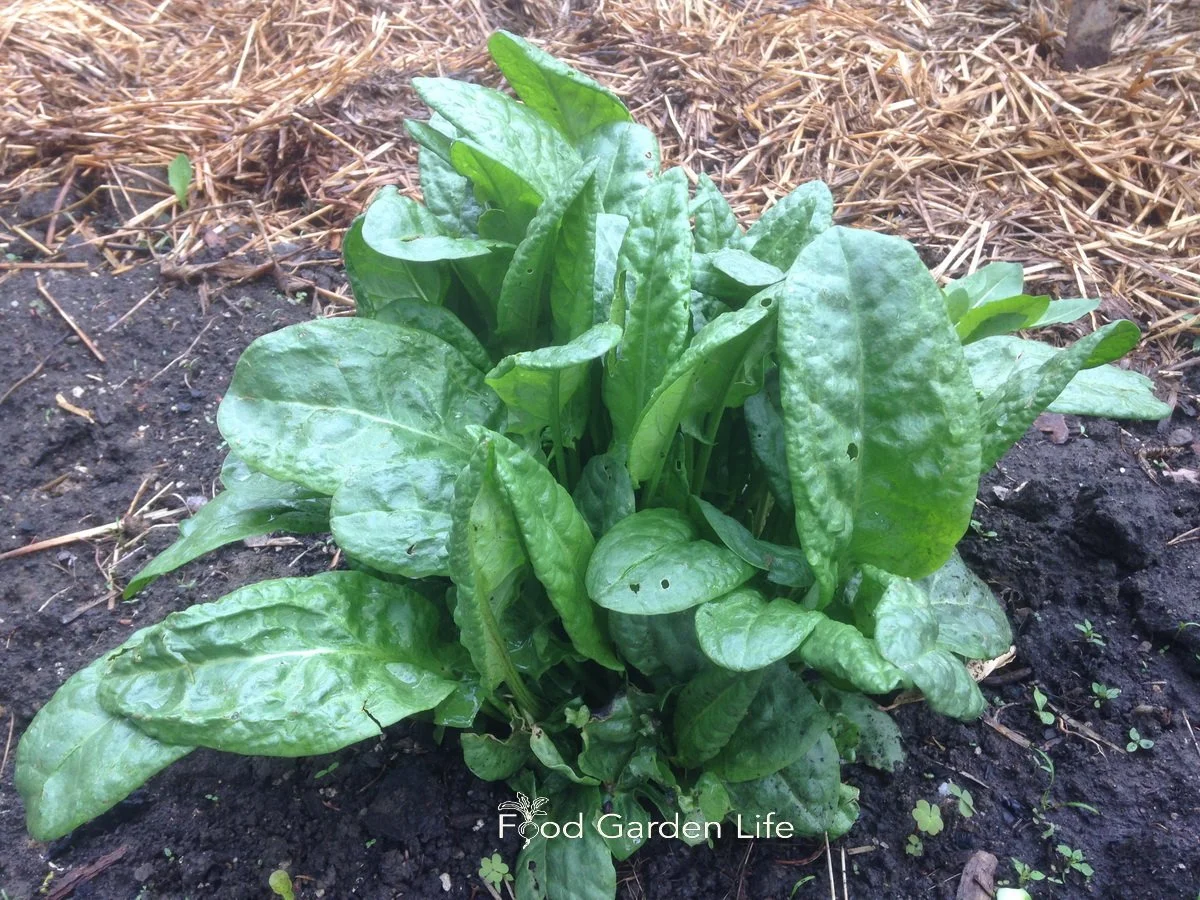
Garden sorrel leaves can be over 30 cm long when plants are in moist, rich soil.
Garden Sorrel (Rumex acetosa). Garden sorrel was brought to north America by European settlers. It's grown in gardens, but is also an escapee that can be found growing wild. Leaves reach 30-60 cm (12-24 inches) long, depending on the growing conditions.
Sheep Sorrel (R. acetosella). Sheep sorrel is another escapee. Sometimes called sourgrass. You might find it filling in exposed spots like vacant lots and roadsides. Seed stalks take on a reddish colour. Spreads by seed and running roots. This is the less-loved cousin to garden sorrel, with smaller, narrower leaves that have a distinct lobe at the base, a bit like an arrowhead. I wouldn’t plant this fast-spreading plant in the garden, but it’s an excellent edible, and popular with foragers.
French Sorrel (R. scutatus). French sorrel is also called round-leaved sorrel. The leaves are shield shaped. Plants are shorter than garden and sheep sorrel.
Grow a Container Vegetable Garden
And get an early harvest of crops that usually take too long!
How Sorrel Grows
Sorrel grows best in rich, moist soil, in full sun or partial shade. Though that doesn’t mean it won’t grow elsewhere…as evidenced by the behaviour of sheep sorrel in vacant lots!
But in a garden setting, give it water if it’s in a dry location. If it’s in partial shade, you won’t need to water as much.
Flower stalks turn into red-tinged seed spikes. Remove stalks to encourage young leaves—unless you want to collect sorrel seed. If you’ve been diligently removing flower stalks, you’ll be able to continue harvesting for the whole growing season, until the plant shuts down for winter—when the top dies back with fall frosts.
Where to Grow Sorrel Plants
Because sorrel is ready to harvest early, I like to have mine close to the kitchen.
Growing Sorrel in Perennial Borders
As a perennial plant, sorrel is at home in the perennial border. Stick it at the front so it’s easy to reach.
Sorrel in the Vegetable Patch
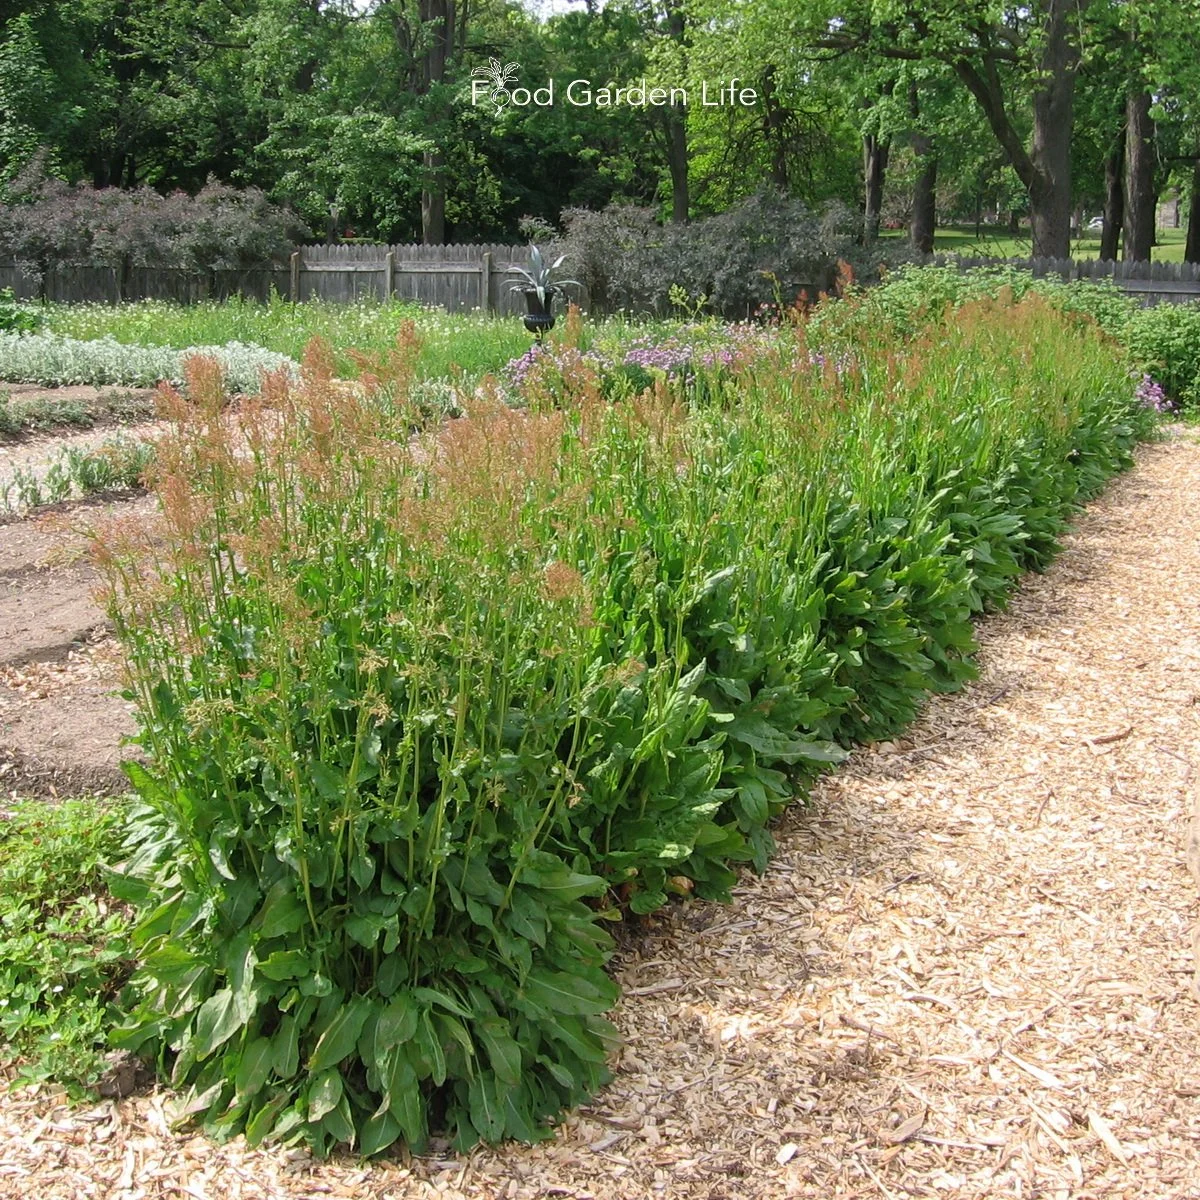
A row of garden sorrel with seed heads. See the red tinge?
I don’t plant sorrel in my main veggie patch, where I move around crops from year to year. Because it is a perennial plant, I grow sorrel around the periphery, with the rhubarb and asparagus—other perennial vegetables.
I’ve seen an entire row of sorrel plants used as a border in a formal edible garden.
Find out more about perennial vegetables.
Sorrel in the Herb Garden
Garden sorrel and French sorrel are well behaved plants that make a nice addition to a herb garden.
Looking for vegetable garden planning ideas? Here are articles to help you plan and design your vegetable garden.
How to Harvest Sorrel
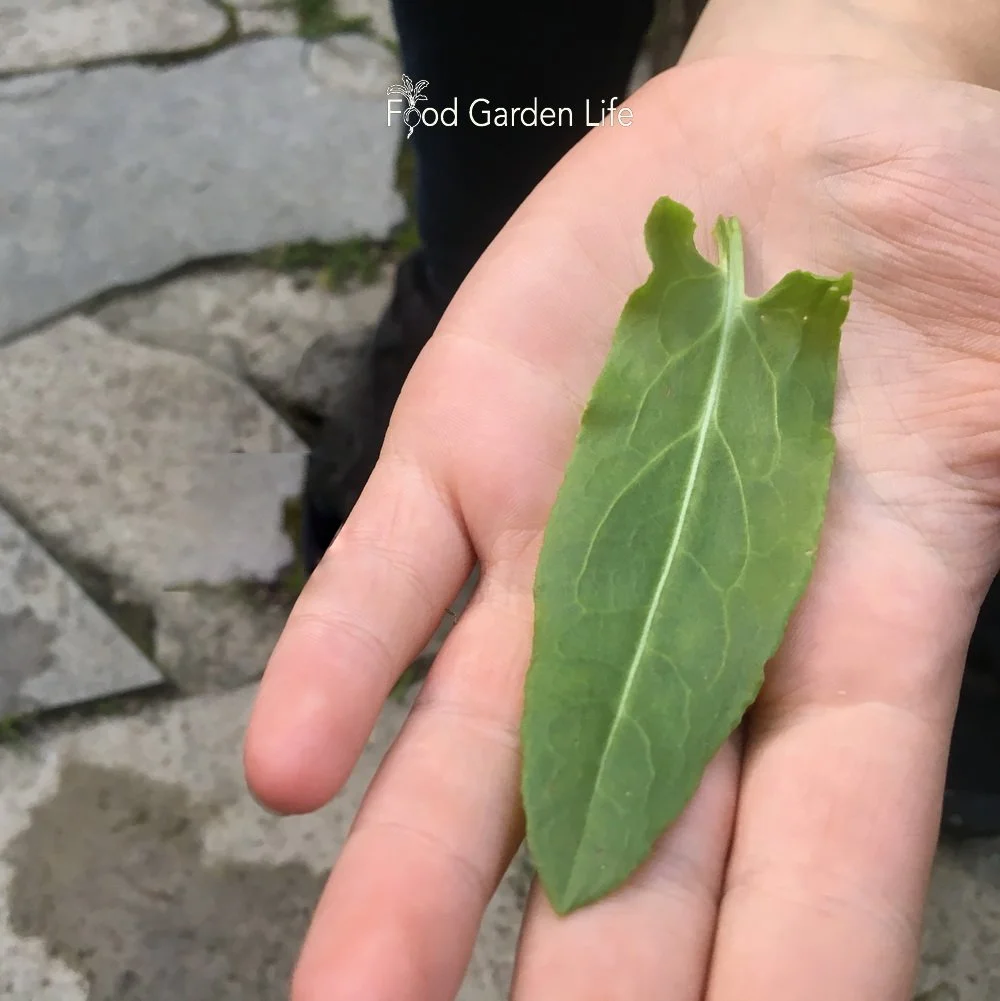
Young sorrel leaves in the spring are the most tender.
You’ll get the best flavour and texture in spring, from young leaves.
But you can harvest sorrel until fall frosts shut the plant down for winter.
How to Propagate Sorrel
There are two ways to propagate sorrel plants.
Division. When a clump is big enough, divide it in the spring.
Seed. Sow sorrel seeds indoors in early spring. Move to the garden after the risk of frost has passed. Space plants about 30 cm (1 foot) apart in the garden.
FAQ: Sorrel Plants
Will Sorrel Grow in Shade?
Sorrel grows in full sun and partial shade. Because it produces larger, more tender leaves in moist soil, semi-shaded conditions are a good option where conditions are hot.
Are sorrel and hibiscus the same?
An unrelated plant, Hibiscus sabdariffa, also goes by the name sorrel. It’s tangy flowers are used in Caribbean cuisine.
Can I forage for sorrel?
In North America, both garden sorrel and sheep sorrel grow wild.
If you’re interested in foraging, listen to our chat with foraging expert Robert Henderson.
What are oxalates?
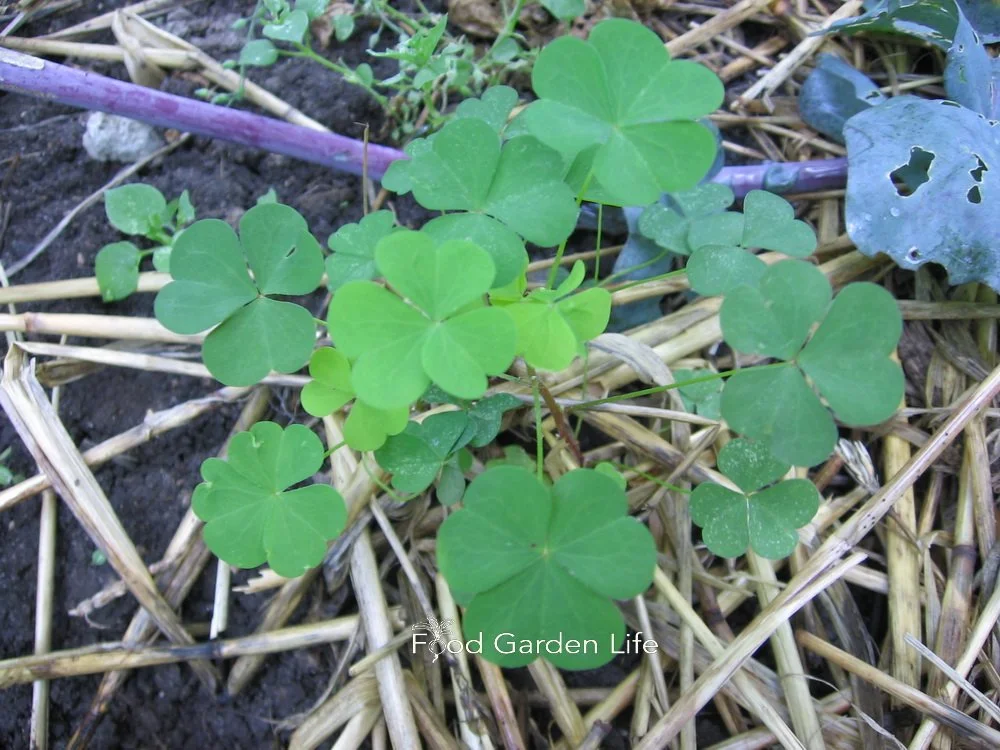
Wood sorrel is of no relation to garden sorrel, but it, too, has a sour tasting leaf.
Sorrel contains oxalic acid, a compound also found in spinach and rhubarb. If you go overboard and eat too much, it can cause tummy upset. That means don’t be a pig. You wouldn’t eat a whole bowl of lemons, would you? Consume it with other foods. It’s for flavour—not the main course.
One other thing about oxalic acid is that it can provoke existing joint and kidney problems. So if you have a history of kidney stones, skip the sorrel
What about wood sorrel?
Related in name only, wood sorrels (Oxalis sp.) can be grazed too.
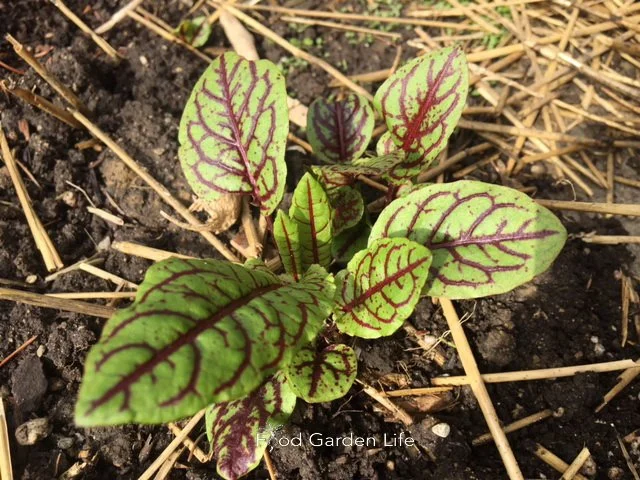
Bloody dock is also known as red-veined sorrel.
Is bloody dock a sorrel?
Bloody dock, R. Sanguineus, is also known as red-veined sorrel. It’s related to sheep, garden, and French sorrel.
But don’t waste a second on it. Unless it’s as an ornamental. (It's quite beautiful.) You’ll find shoe leather that’s more tender than bloody dock leaves.
How to Use Sorrel
Before we get to using sorrel in the kitchen, enjoy sorrel while you’re in the garden. You can graze as you garden. The tangy leaves are refreshing.
Because sorrel is tangy, it pairs well with rich food.
Here are ways to use sorrel:
Use sorrel leaves in salads (I find a sorrel-only salad a bit too tangy, so I mix it with other greens)
Sorrel leaves in sandwiches
Sorrel soup (see recipes below)
In recipes that call for greens such as spinach or lambs quarters, substitute part or all of the greens with sorrel (I add it to my Swiss-chard-and-leek spanakopita)
Add it to sauces for a lemony flavour (I throw in pieces of sorrel leaf when braising meat)
Add sorrel leaf bits to an omelette or frittata
Chop and freeze for use through the winter
I’ve seen a recipe for devilled eggs that includes bacon and sorrel…sounds divine
Gourmet butter: Finely chop sorrel leaves and mix in with soft butter
Making a ranch-style sour-cream or yogurt dip? Add chopped sorrel
Make ordinary pesto shine by adding a bit of sorrel (oh yeah, pairs nicely with blue cheese!)
Sorrel Recipes
Sorrel Soup
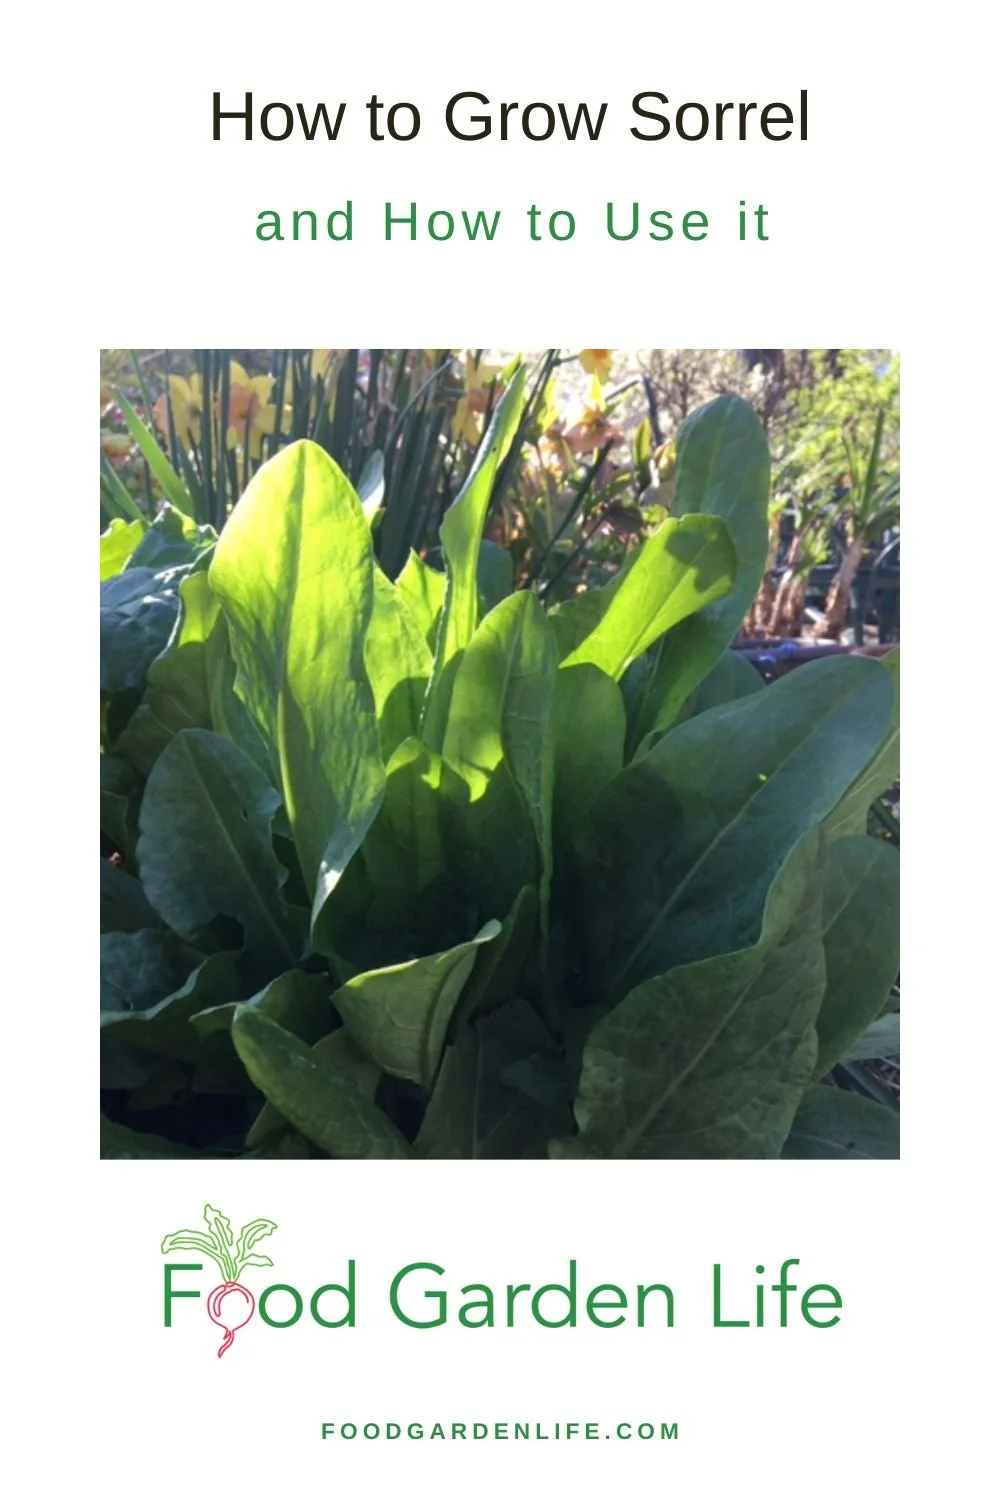
Pin this post!
Here’s an easy-to-make sorrel soup recipe.
Ingredients
3 tbsp. butter
1 onion, chopped
3 potatoes, cubed
3 cups sorrel leaves, stem removed
8 cups broth
½ cup sour cream
Salt and pepper to taste
Directions
Fry onion in butter until golden
Add potato, sorrel, broth and simmer (covered) for about 15 minutes, until potatoes are soft
Puree (I use a hand immersion blender)
Whisk in sour cream
Heat to serve (don’t boil)
Sorrel Vichyssoise Soup
If you want to take sorrel soup to the next level—and use some of your homegrown leeks—this take on the creamy potato-leek classic is delicious.
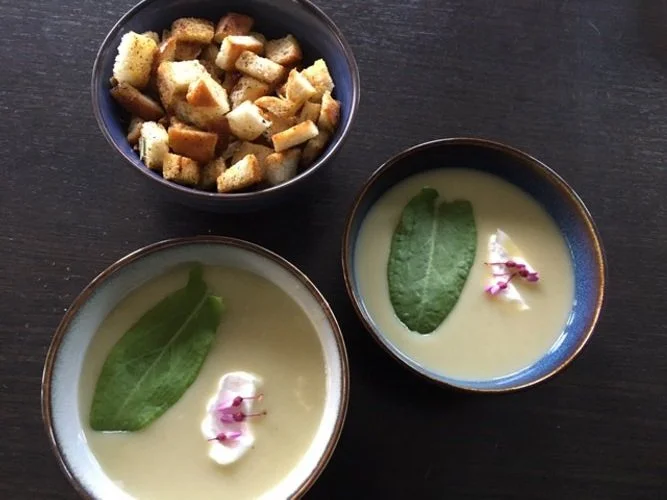
Sorrel vichyssoise soup, topped with a sorrel leaf, a dollop of sour cream, and edible redbud flowers.
Ingredients
2 tbsp. butter
3 cups of sorrel leaves, stem removed
1 large leek, chopped (use both white and pale green parts)
1 onion, chopped
3-4 potatoes, cubed
4 cups water or broth
2 tbsp. salt
4 cups whole milk (use cream if you want something more decadent)
Directions
Fry leek and onion in butter until onion is golden
Add potato, salt, water/broth, sorrel and bring to a boil
Simmer until potatoes are tender
Stir in milk, and then puree
Serve chilled
When serving, I like to float a dollop of sour cream on top, alongside a raft of croutons.
Sorrel Paste and Sorrel Soup
Hear this interview with forager Robert Henderson, who talks about how to make sorrel paste and sorrel soup.
Find This Helpful?
Enjoy not being bombarded by annoying ads?
Appreciate the absence of junky affiliate links for products you don’t need?
It’s because we’re reader supported.
If we’ve helped in your food-gardening journey, we’re glad of support. You can high-five us below. Any amount welcome!
Courses
Edible Garden Makeover. Here’s a course that guides you through creating an edible garden you love. It’s my ode to edible gardening. You’ll find out how to think outside the box and create a special space. Get the information you need about a wide range of edible plants.
Container Vegetable Gardening Masterclass. Here’s a course that gives you everything you need to know for container vegetable gardening success.
Vegetables to Grow: 12 Tips to Choose What’s Best for Your Vegetable Garden
Choose the best vegetables to grow in your garden with these 12 crop-choosing tips.
by Steven Biggs
Choose Which Veggies to Grow in a Garden
12 tips to help you choose vegetables to grow.
“Grow radishes!”
It’s a recommendation I often hear given to new gardeners. That’s because radishes are easy to grow. And they grow quickly.
True.
But in my house, it’s the radishes that are still on the veggie platter when everything else has been devoured.
So while the easy-to-grow crops are part of a good vegetable garden plan, there are other things to think about too.
I think the best food garden starts with your life, your space, and what you actually want to eat. That's a big part of my approach to home food gardening.
Keep reading to find out how to pick vegetable crops and varieties for your needs and situation. Instead of being prescriptive and telling you what you should grow, this post gives you 12 tips to help you choose which vegetables to grow.
1. Grow What You Love
So back to the radishes, there’s no point growing what you won’t eat—even if it’s easy to grow
Even if it’s nutritious.
Grow things you’ll enjoy eating.
2. Grow for How You Cook
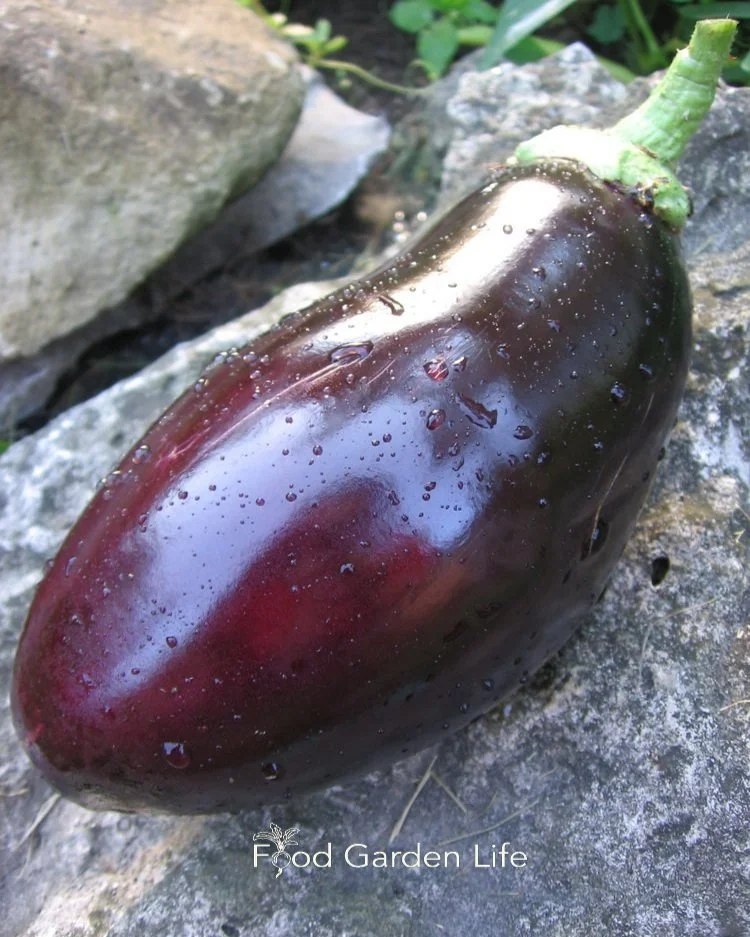
I love big slabs of eggplant that I can marinate and grill, so I grow large-fruited eggplant varieties
As you choose crops and varieties, think about how you’ll use your harvest.
Here’s an example:
I love big slabs of eggplant that I can marinate and grill—or use to make eggplant parmesan. So I always go for large-fruited eggplant varieties
For tomatoes, I like to make sauce all winter, so I grow good sauce-making varieties
3. Rule Out Some Crops
There might be crops that aren’t a fit for your garden. I’m talking about space hogs—and crops that will probably be a frustration.
Space Hogs
Some crops use up a lot of space—more than makes sense in a small garden.
For example:
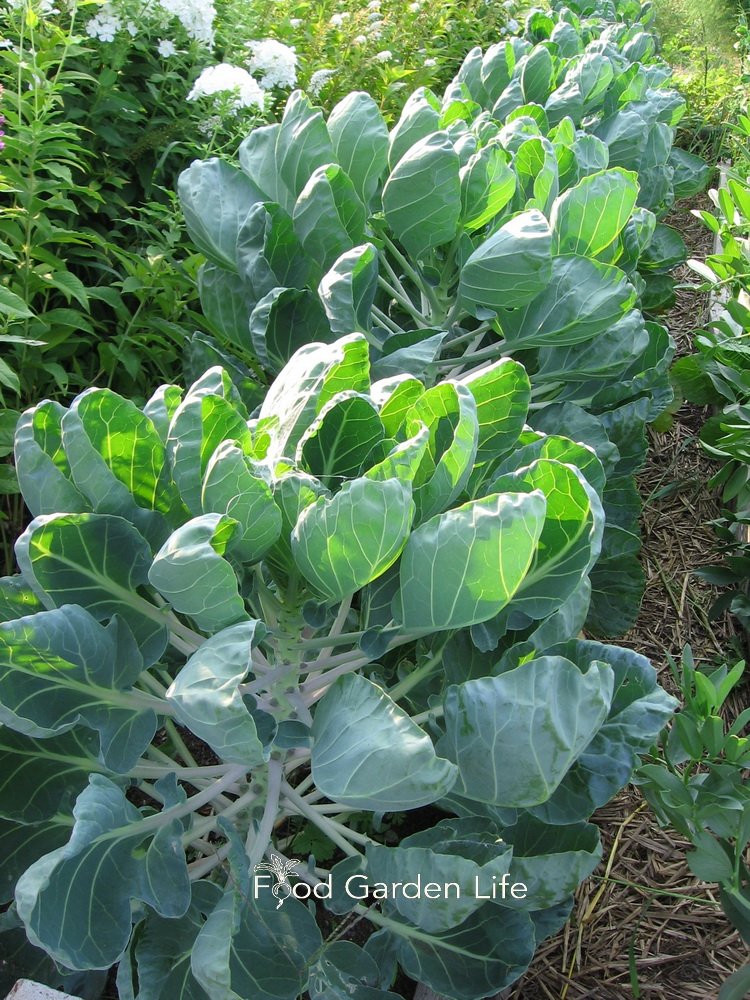
I love Brussels sprouts. But they’re big plants that tie up the same patch of garden for an entire season. So I leave them to the market gardeners.
I love edamame too. But for the amount I get considering the amount of space they take in the garden, they’re not my top choice.
Unnecessary Frustrations
Depending on what your situation, there might be crops that disappoint—or frustrate—you.
Here’s are examples:
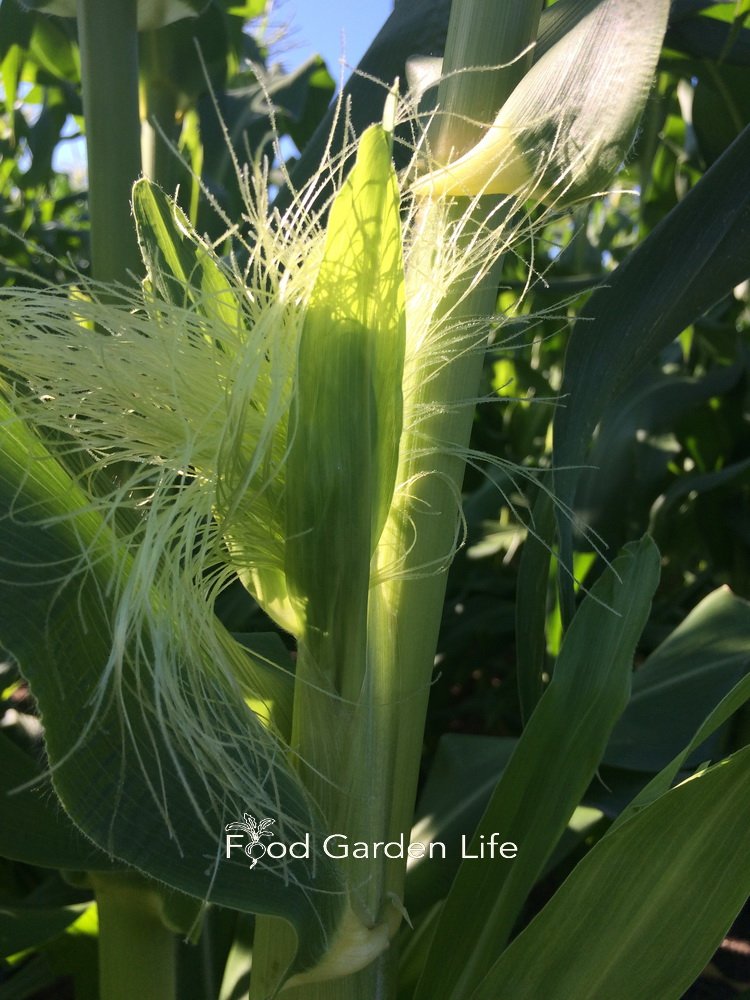
Corn. I love corn. So do all the raccoons around here. So I don’t grow it. I don’t need the chest pains!
Tomatoes. Some people prefer cherry tomatoes to big beefsteak tomatoes because that way there’s lots more tomatoes to harvest. That way, the gardener gets lots even if wildlife steals some.
4. Try Something New
Have you added something new to your garden? I like to grow something new every year.
Recently it was celtuce, a.k.a. stem lettuce. It’s easy to grow and fun to cook with. Not a new crop at all…just new to me.
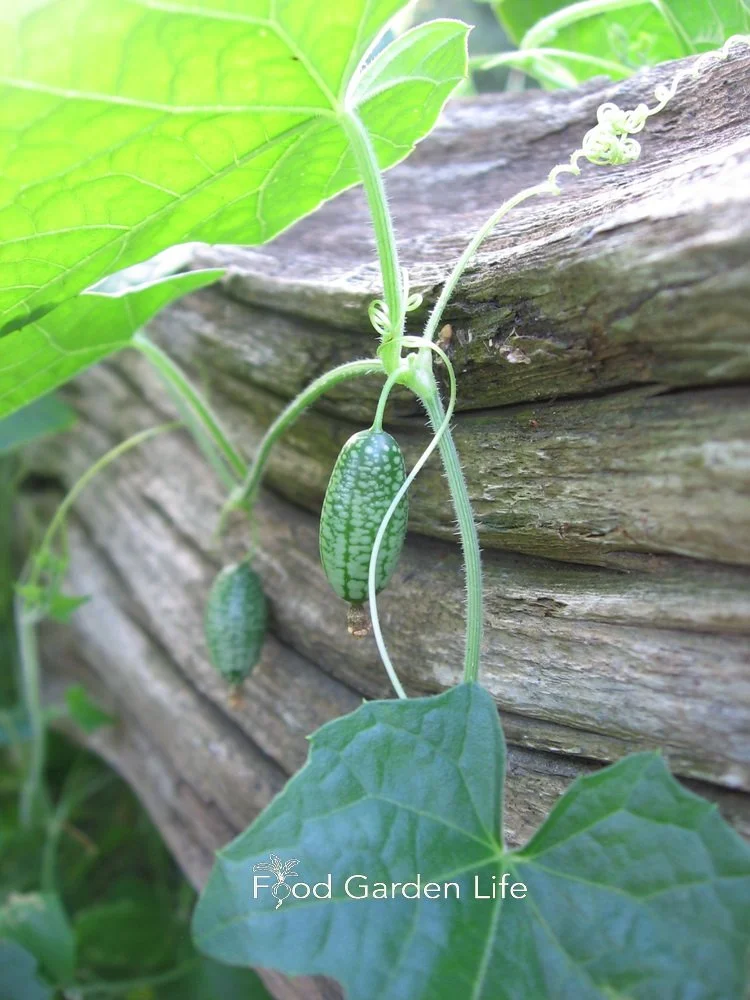
20 years ago I grew cucamelons for the first time and have grown them ever since.
20 years ago I tried cucamelons and have loved them and grown them every year since.
Look for neat varieties (e.g. a pepper variety I love is the corkscrew-shaped ‘Corbacci’
Or branch out into a crop from a cuisine you’re not familiar with (okra was new to me…but after I learnt a Cajun fiddle tune I wanted to learn how to make Cajun-style gumbo soup…and now I aways grow okra for making gumbo soup!)
5. Consider Diseases
Variety choice sometimes helps with disease problems. For example:
Downy mildew ravaged my basil for a couple of years. So now when I’m getting basil seeds, I look for mildew-resistant basil varieties
There’s no totally blight-proof tomatoes, but there are blight-resistant varieties, worth adding to the mix in a garden so that in years when blight decimates the tomato patch, there are still a few plants producing late in the season
6. Pick Crops for Small Spaces
If space is a challenge, crop choice can often help you harvest much, much more.
Crops for Vertical Gardening
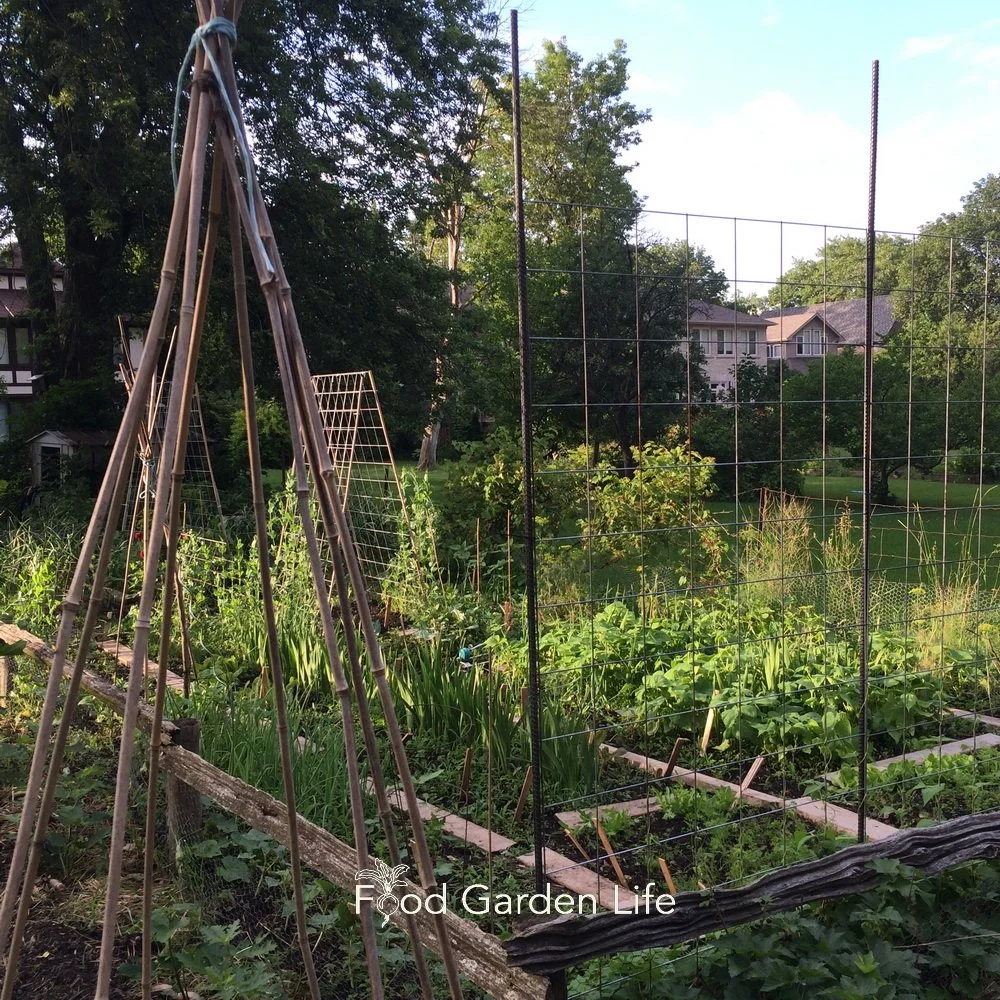
If you’re gardening in a small space, choose vegetable crops that you can grow upwards on trellises, tee-pees, or fences.
If you’re gardening in a small space, choose veg that you can grow vertically. When you grow upwards, that frees up space on the ground—so you can fit more into a small space.
Here are a couple of my favourites:
Runner beans. I love runner runner beans! The flowers are edible, great for bouquets, attract hummingbirds. Oh, did I mention there’s beans too! (If you’re in a maritime climate, you might find runner beans produce more than pole beans.)
Zucchini: Many zucchini varieties have a bush-like growth habit, and the plant can take up a fair bit of space. But if you grow a climbing zucchini variety, it won’t take up as much space…so there’s room to plant more in your garden.
Grow a Container Vegetable Garden
And get an early harvest of crops that usually take too long!
Plants with Multiple Edible Parts
You might also think about plants with more than one edible part, so in a limited space you’re getting multiple harvests from one crop
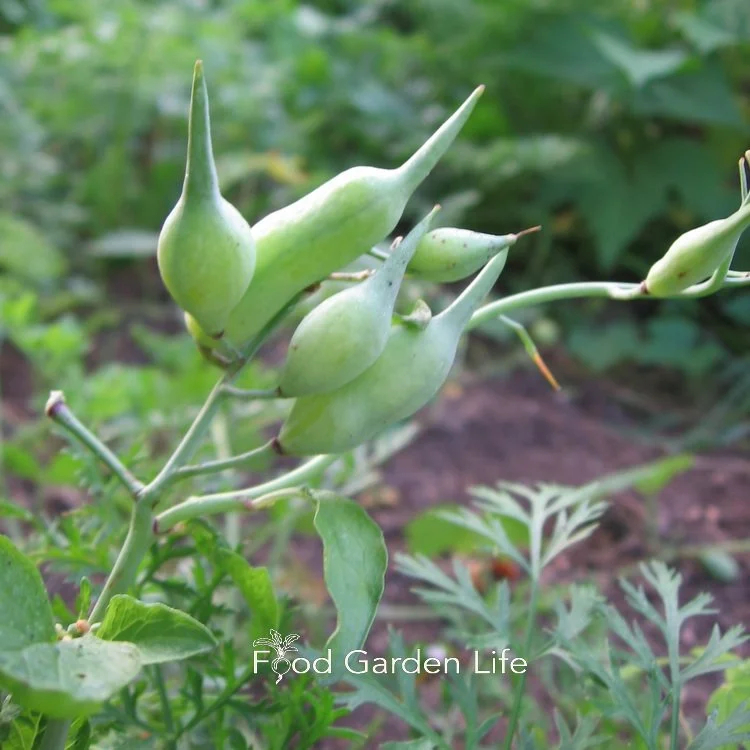
Radishes have edible seed pods.
Snap peas (you can eat the peas and the pod…and don’t forget young tendrils)
Squash (eat the flowers, the squash…and shoot tips!)
Beets (both leaves and roots are edible)
Radish (along with the roots, the seed pods are edible)
Find out more crops with more than one edible part.
Hear a chef talk about using squash shoot tips and other uncommon ingredients.
7. Choose for an Early Harvest
Look for crops and varieties that can move up your first harvest.
For example:
I like broad beans, which can be planted far ahead of all the other types of beans
Look for fast-maturing varieties (I grow fast-maturing arugula and spinach varieties in my cold frames in late winter because I want that first harvest as soon as possible)
Do the same with your beets, carrots, tomatoes and other crops
To choose faster-maturing varieties, compare the days-to-maturity information with other varieties (often called “DTM”)
8. Remember Fall Harvesting
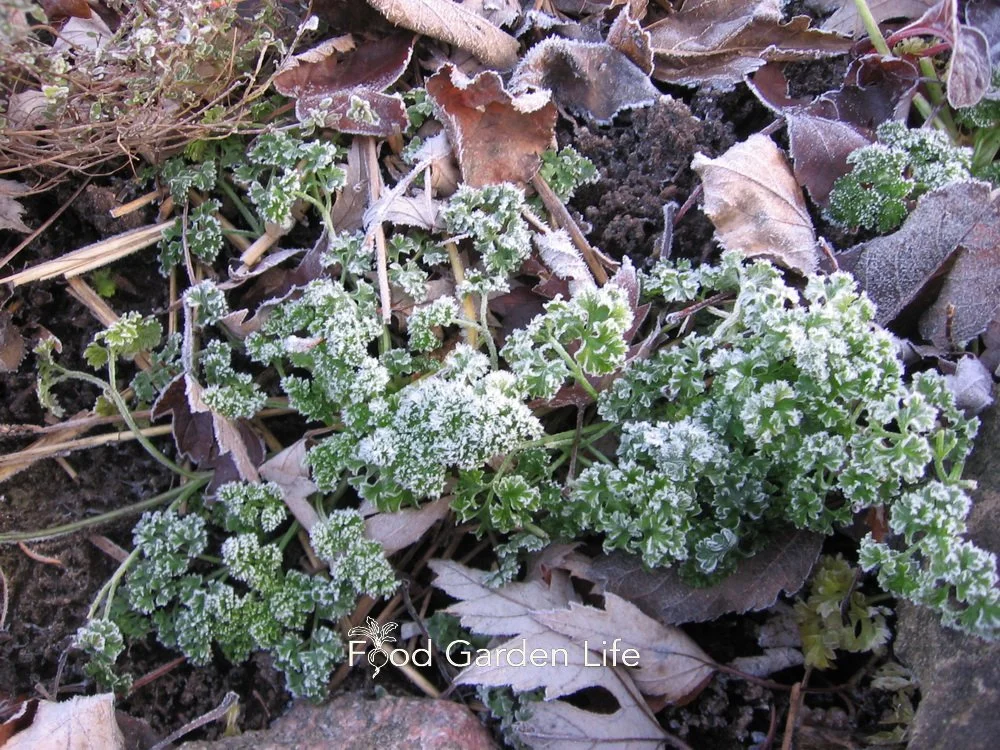
Parsley holds up well when fall frosts arrive.
Remember to add in cool-season crops that keep producing as fall frosts arrive.
Cabbage family
Kale
Celery
Parsley
9. Choose for a Short Growing Season
If you’re dealing with a short growing season, there might be some crops you don’t want to bother with. I have friends who won’t grow eggplant and pepper.
More ideas:
Bush beans give a quicker, more concentrated harvest than pole and runner beans
Look for varieties that mature more quickly (e.g. we love Cream of Saskatchewan watermelon, which ripens melons much more quickly than watermelon varieties grown in warmer zones.)
When it comes to tomatoes, there are lots of early-maturing tomato varieties
10. Grow for Year-Round Enjoyment
Many gardeners like to enjoy the harvest year-round. If that’s you, here are some ideas:
Grow dry beans that you can easily store for later use
Look for root crops that store well (these tend to be varieties that grow larger roots)
Thought of kohlrabi…there’s a storage variety too
You can harvest leeks right through the winter when there’s a thaw
Get more crop ideas for year-round enjoyment.
11. Plan an Edible Landscape
Looking for attractive veg to add an ornamental touch to a landscape?
Here are ideas:
Asparagus looks great at the back of a perennial border, with its tall, ferny foliage
Runner beans have beautiful flowers
Lovage is a perennial with a celery-like taste, great for the perennial border
Eggplant has beautiful flowers
Kale is a great way to add colour and texture into a garden
Here are more perennial edibles.
Sometimes shade is a challenge in an edible landscape. Here are fruits and vegetables that you can grow in the shade.
If you’re serious about edible landscaping and want to create an awesome out-of-the box edible landscape, check out this course.
12. Crop Substitution for Less Work
Pin this post!
Keep your workload to a minimum through crop choice!
Here are examples of the type of thinking you can use to make less work for yourself.
Leaf celery instead of stalk celery. Stalk celery takes lots of water and feeding to get tender, crispy stalks. Leaf celery doesn’t make big stalks—you just get lots of leaves on short stems, and it’s far less bother if you don’t mind consuming celery this way. (I chop it into soups, stews, and salads for that same celery taste.)
Ground cherry instead of cape gooseberry. I actually prefer the taste of cape gooseberries…but they need a longer growing season, meaning I have to start the seeds earlier, and then give them prime, hot, garden real estate to get a decent harvest. Ground cherries are far easier to grow. (Find out more about these two different husk cherries.)
Broccoli instead of cauliflower. Not only is cauliflower more finicky, to get snow-white heads it must be blanched, which is often done by tying leaves over the head with an elastic. It’s a lot of bother compared to broccoli, which requires no blanching.
Squash instead of potato and sweet potato. Squash is far less work. Instead of transplanting sweet potato plants, you just poke squash seeds into the soil. And instead of digging out sweet potato roots, you just snip squash from the vine. You still get the sweet, orange ingredient for baking.
Find This Helpful?
Enjoy not being bombarded by annoying ads?
Appreciate the absence of junky affiliate links for products you don’t need?
It’s because we’re reader supported.
If we’ve helped in your food-gardening journey, we’re glad of support. You can high-five us below. Any amount welcome!
More on Vegetable Garden Planning
More on Growing Vegetables
Vegetable Gardening Articles and Interviews
For more posts about how to grow vegetables and kitchen garden design, head over to the vegetable gardening home page.
Vegetable Gardening Courses
Grow Microgreens at Home for Easy-to-Grow Salad Greens all Year
How to grow microgreens indoors. The setup is simple. The materials are easy to get. There’s no need for fancy lights or equipment.
By Steven Biggs
Growing Microgreens at Home is Easy
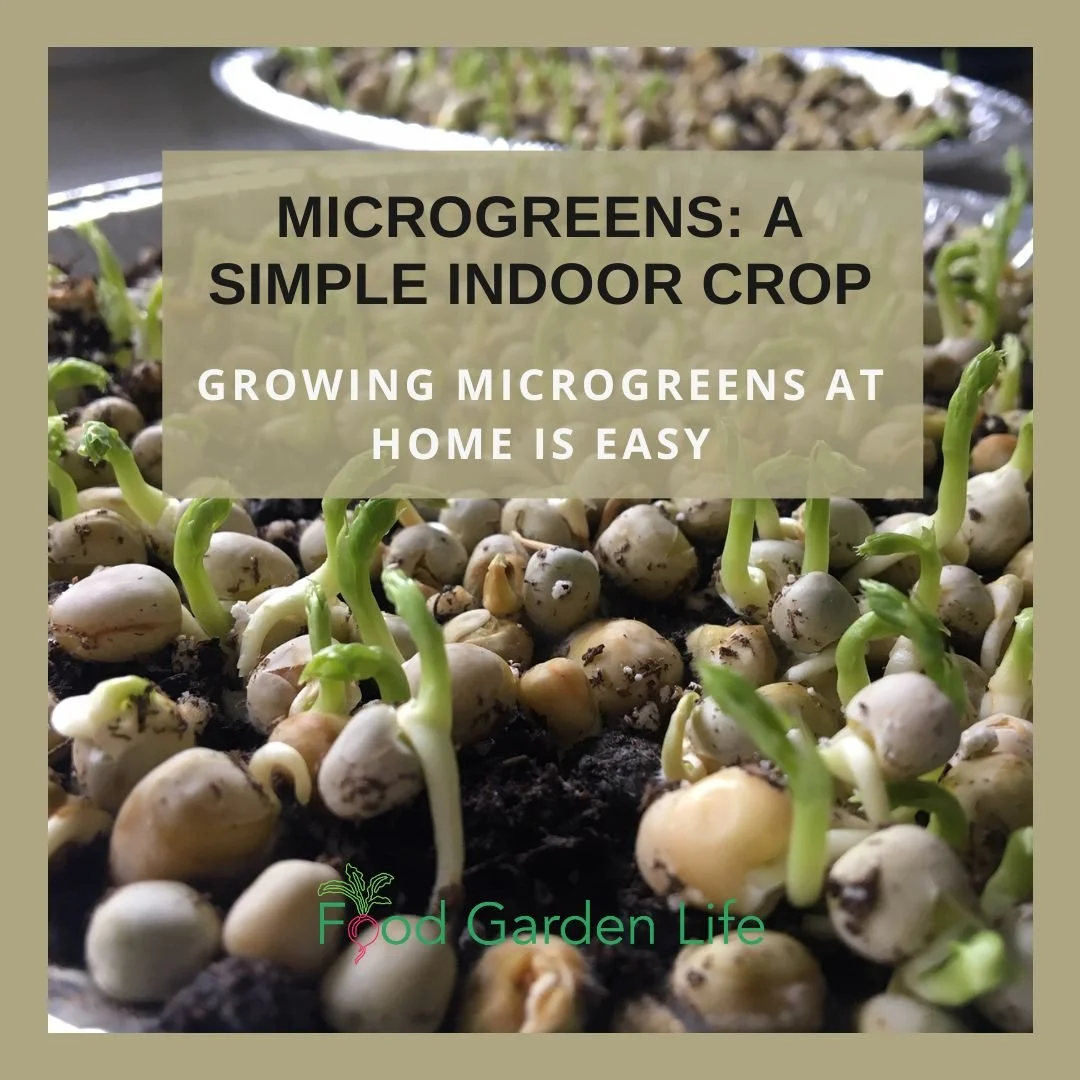
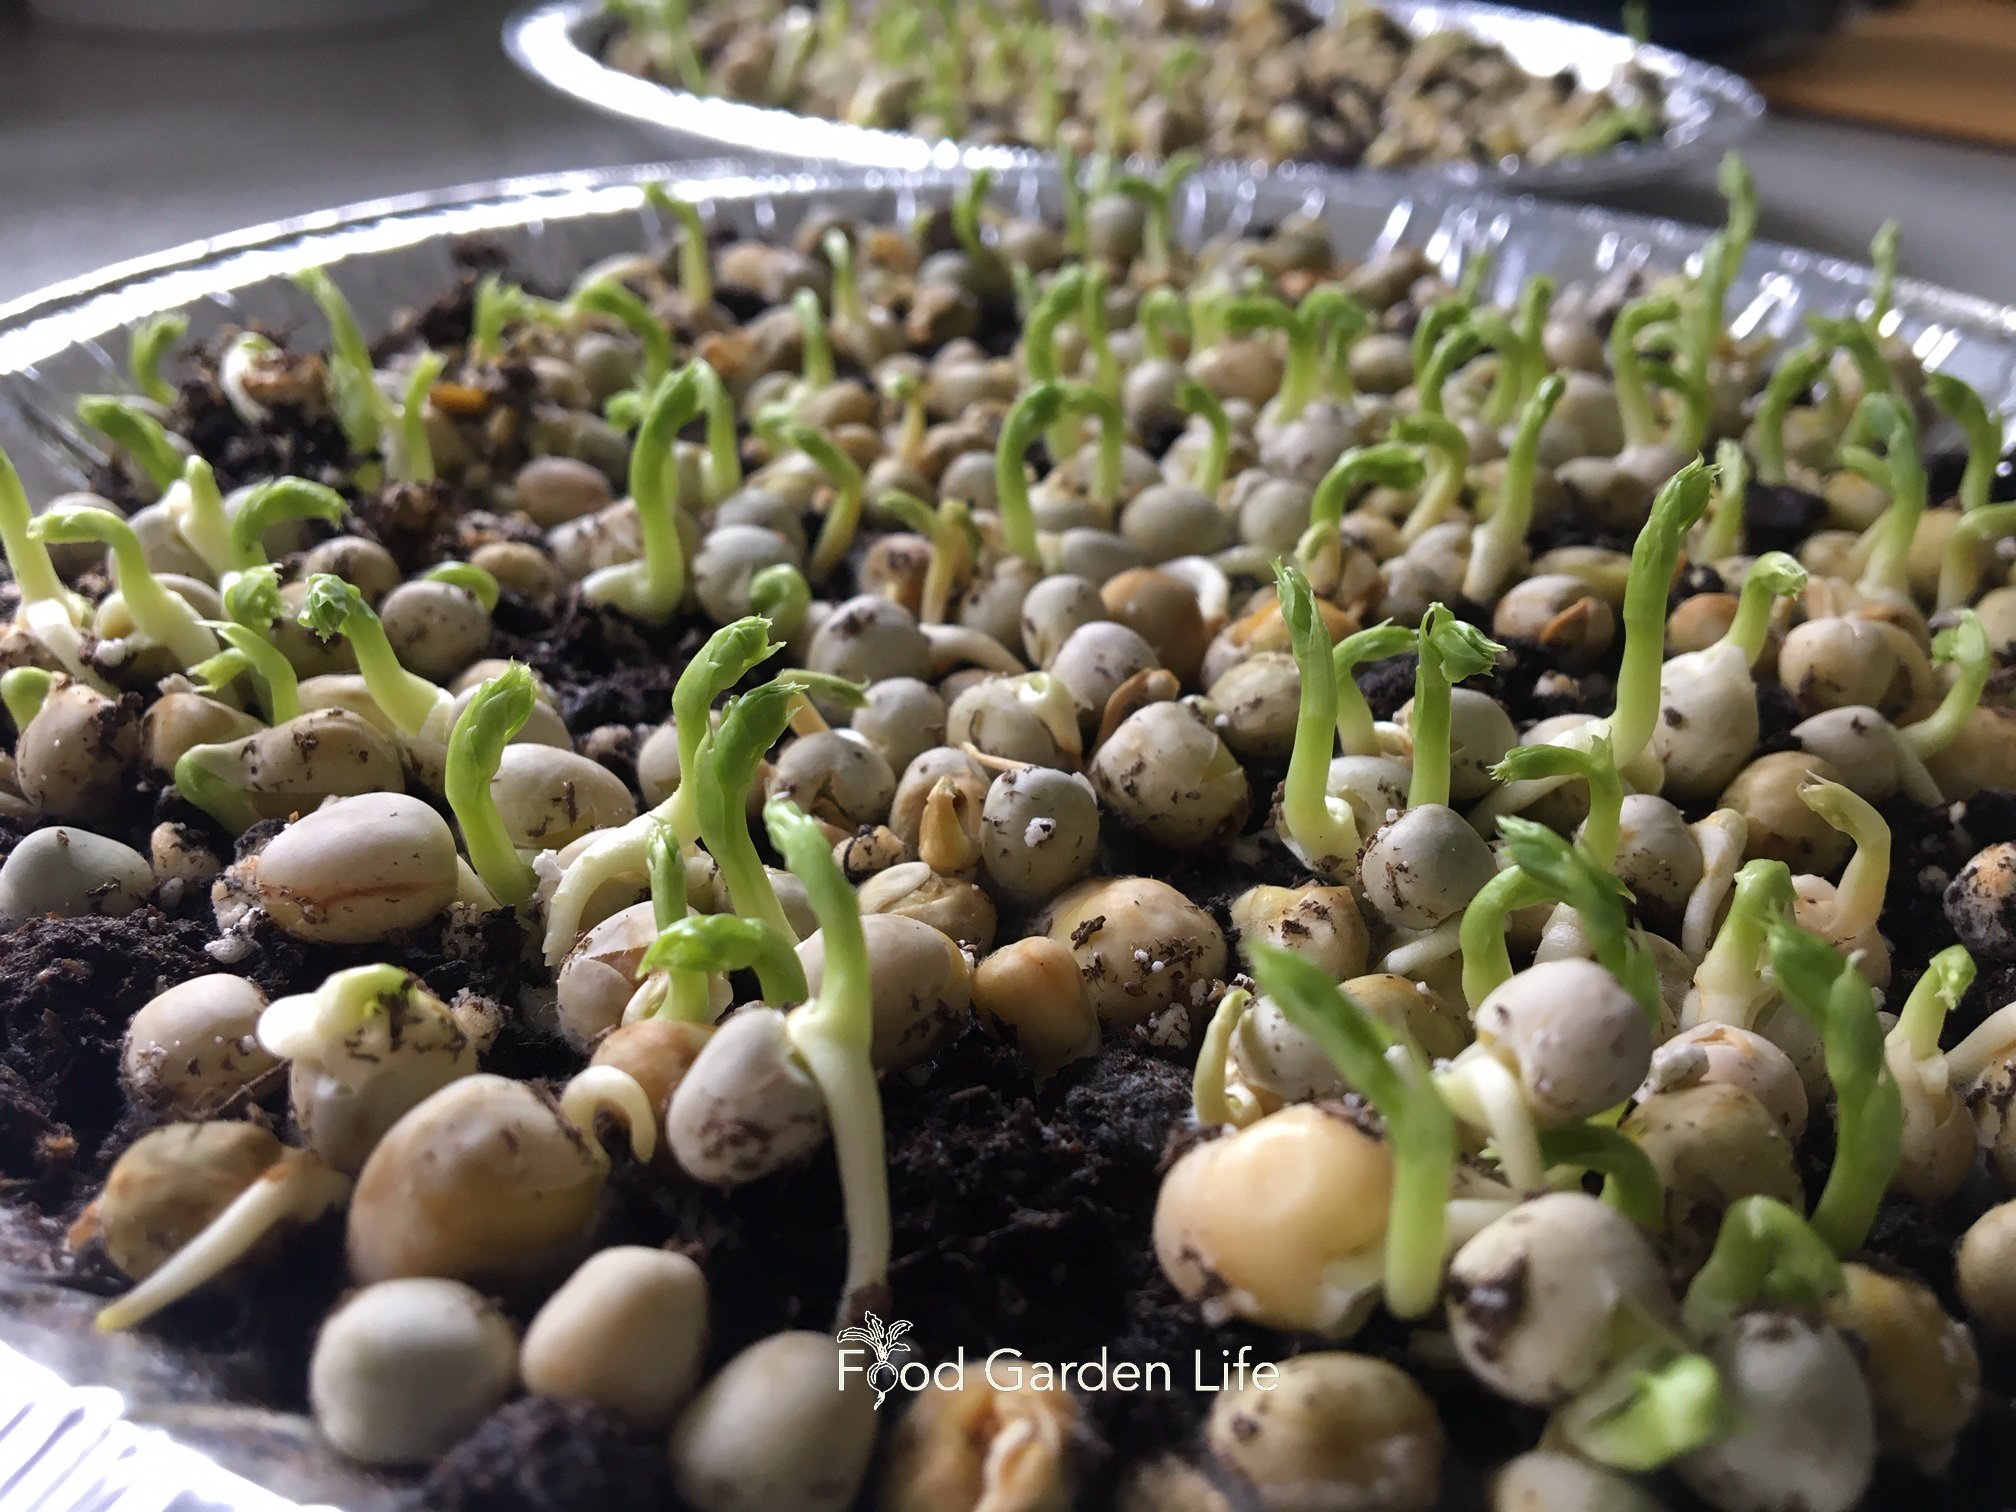
Pea shoots grown at home: All you need is a handful of dried peas, a pie plate, potting soil, and a windowsill.
On a recent trip to the grocery store I noticed small containers of pea microgreens. Gulp…a whopping $4.99.
The same amount of pea microgreens grown at home takes only a handful of dried peas, a pie plate, potting soil, and a windowsill.
Growing microgreens costs pennies—and it’s easy.
The setup is very simple. The materials are easy to get. There’s no need for fancy lights or equipment. And you can grow microgreens indoors any time of year.
Keep reading and I’ll tell you how to grow your own microgreens.
What are Microgreens?
Microgreens are immature plants. They’re often vegetable or herb plants. There are a few other fun ones, like sunflower and corn (deliciously sweet!)
They’re harvested while the plants are small and the stems still tender. Harvesting means cutting off the tops. Seems brutal, but it’s a short-term crop.
Why Grow Microgreens?
They’re easy to grow, quick to mature, and inexpensive: A perfect indoor crop for home gardeners.
I have a big garden, with lots to harvest into the fall and early winter. But microgreens are my go-to green crop for winter. When I want a green salad mid-winter, instead of lettuce or other leafy greens, I chop up microgreens.
If you’re already a microgreen connoisseur, another reason to grow microgreens at home is that you can grow microgreen crops you won’t find at the grocery store.
Grow microgreens with different tastes:
Spicy (e.g. radish)
Sweet (e.g. pea)
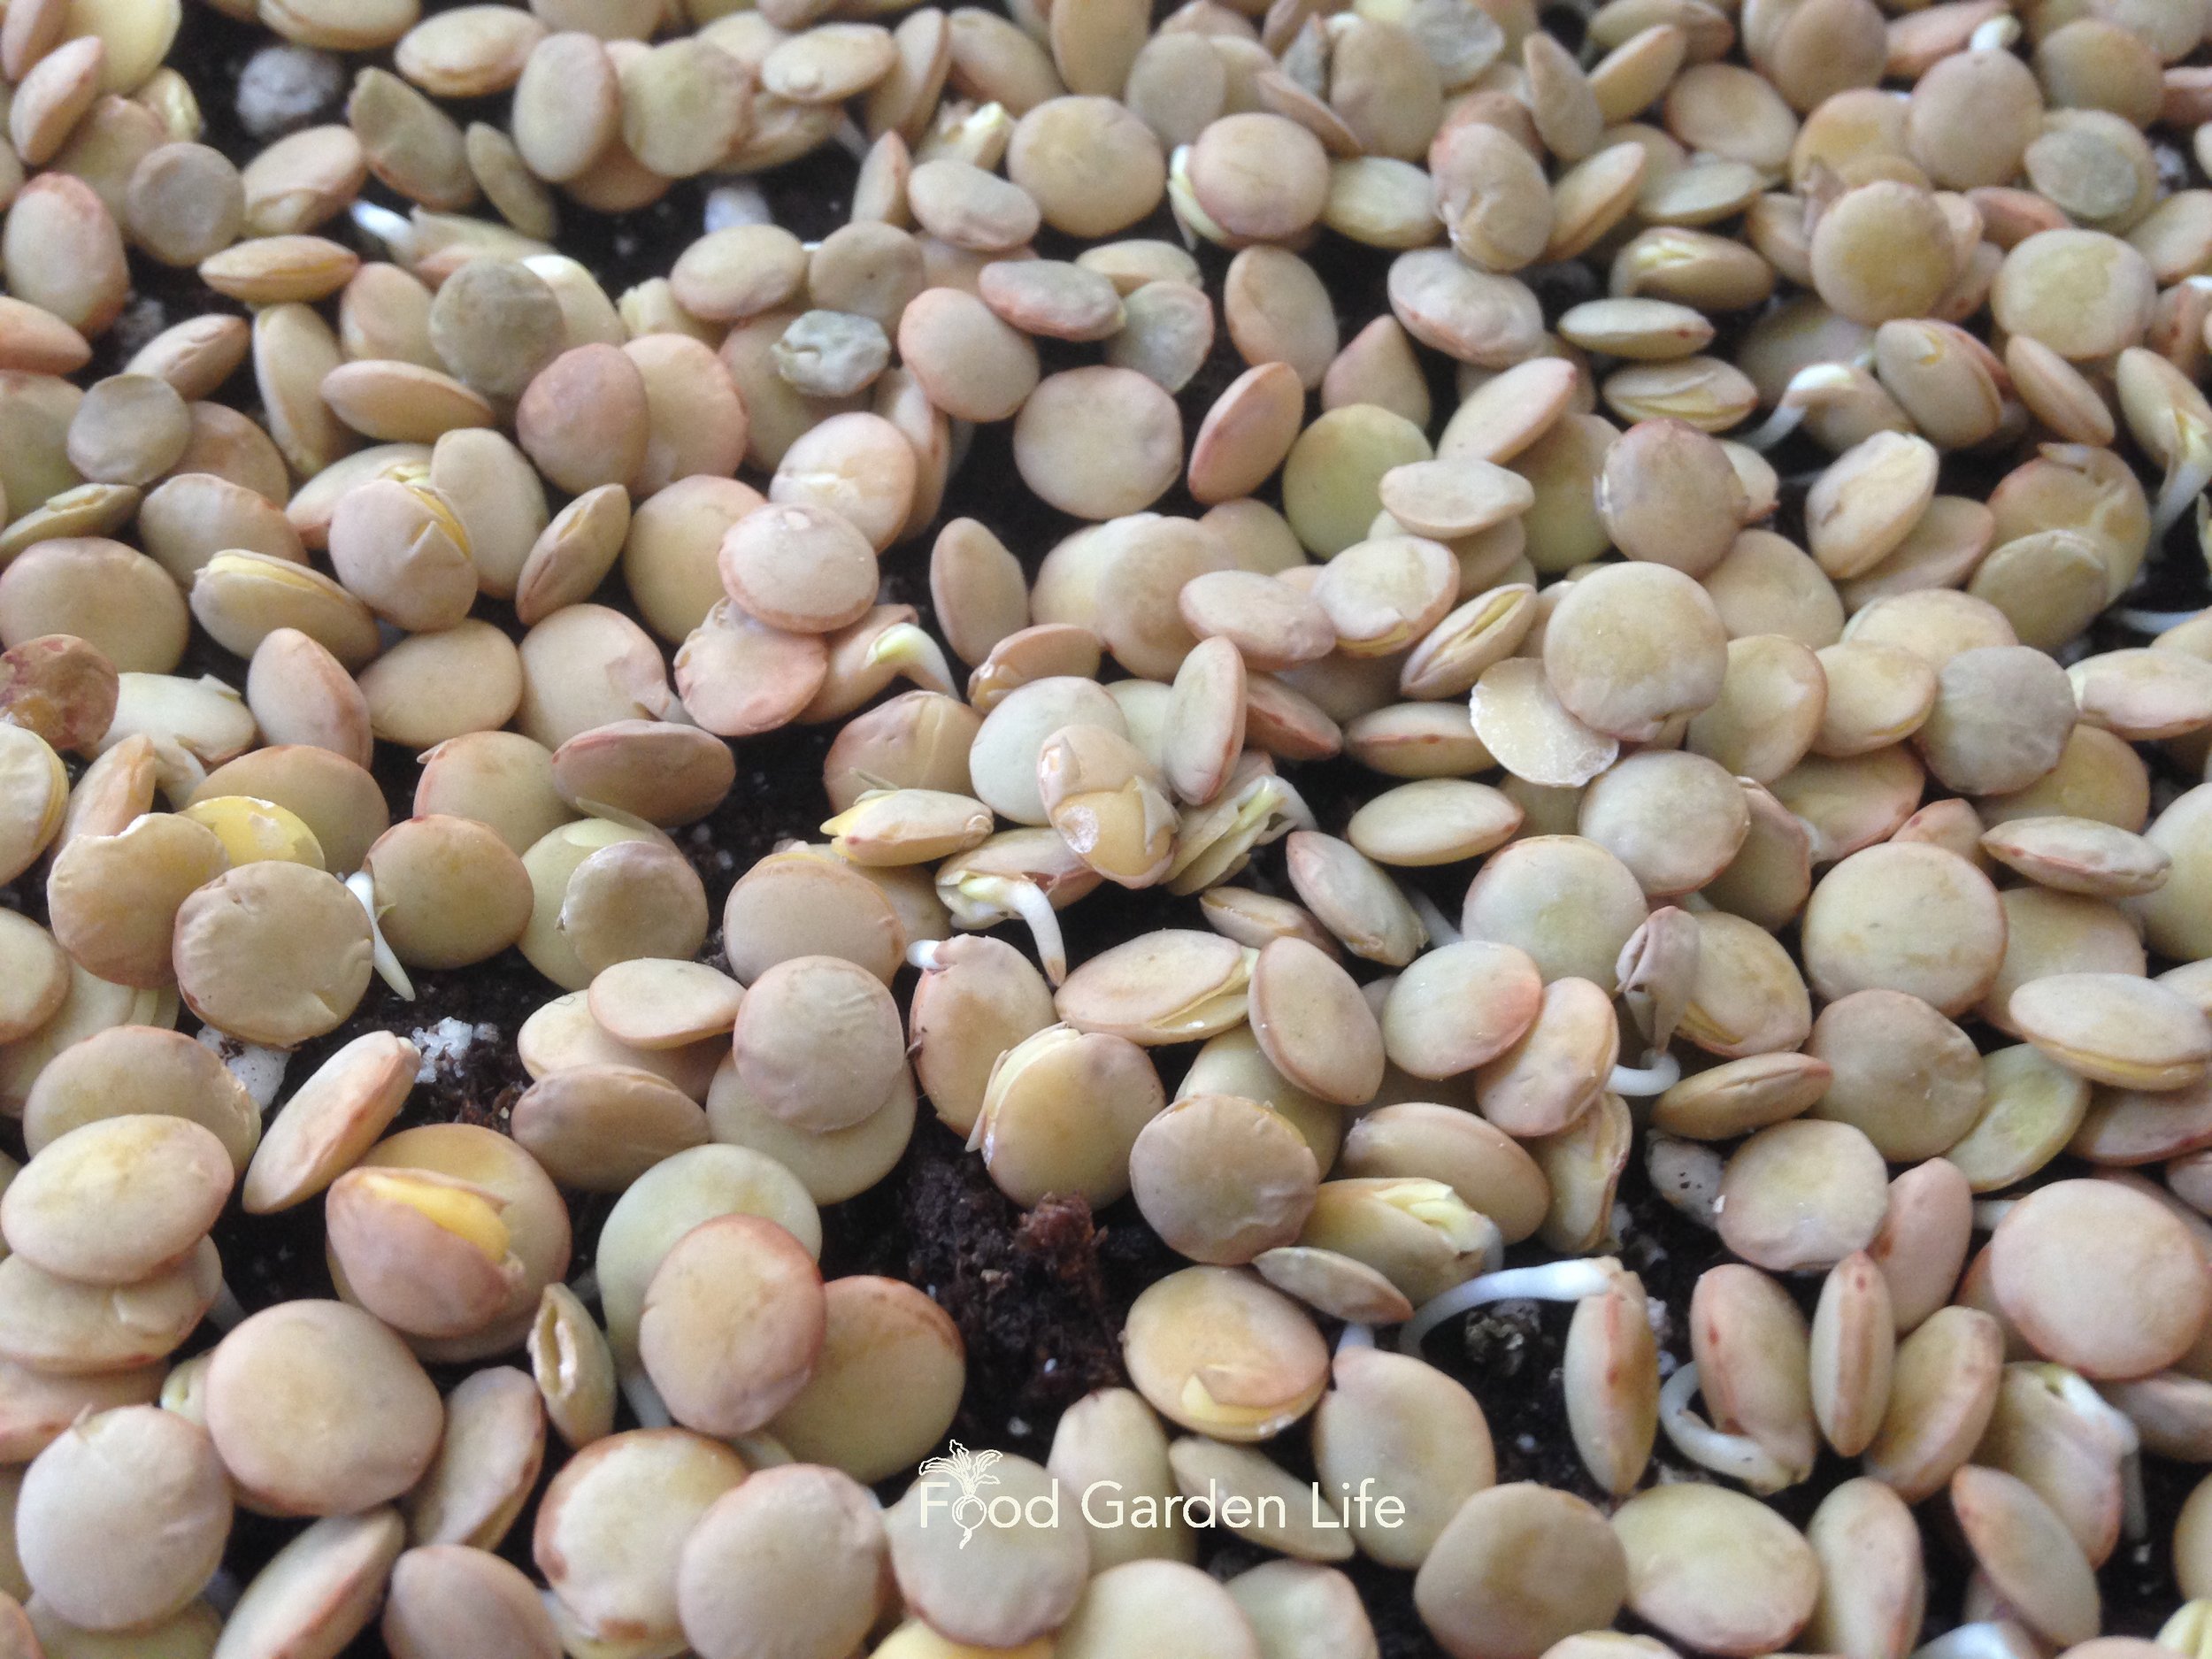
Bitter (e.g. lentil)
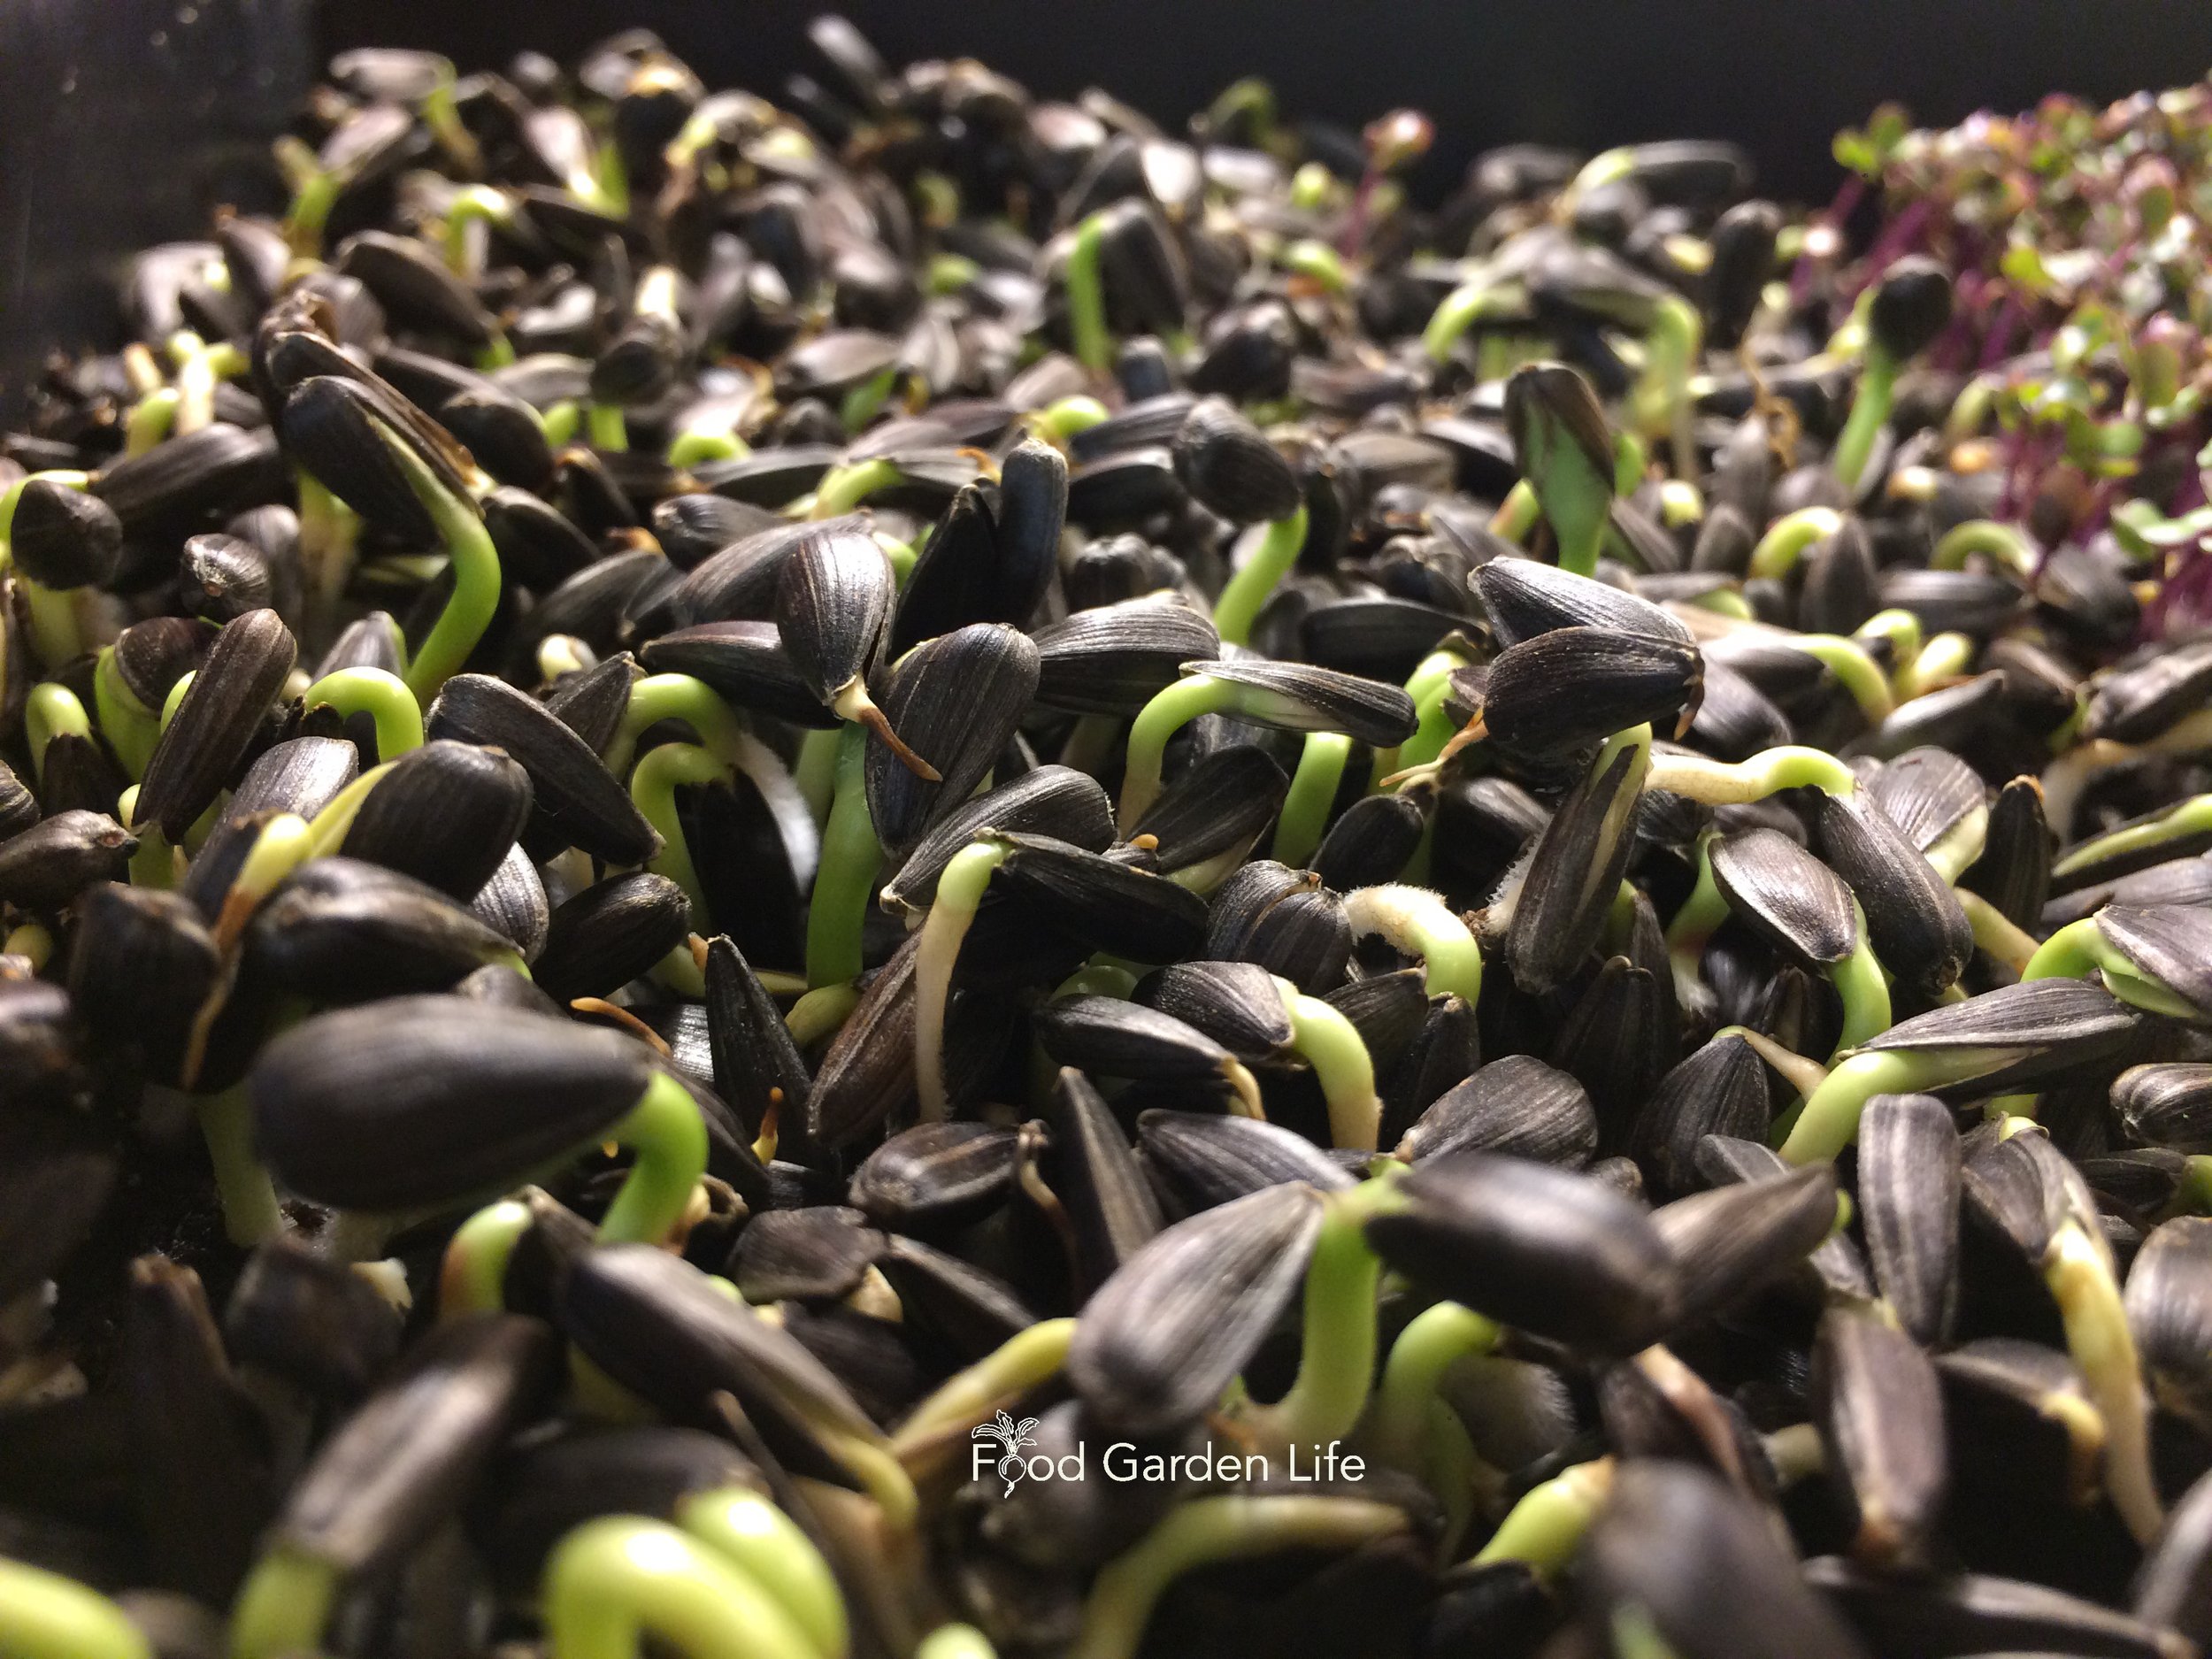
Nutty (e.g. sunflower)
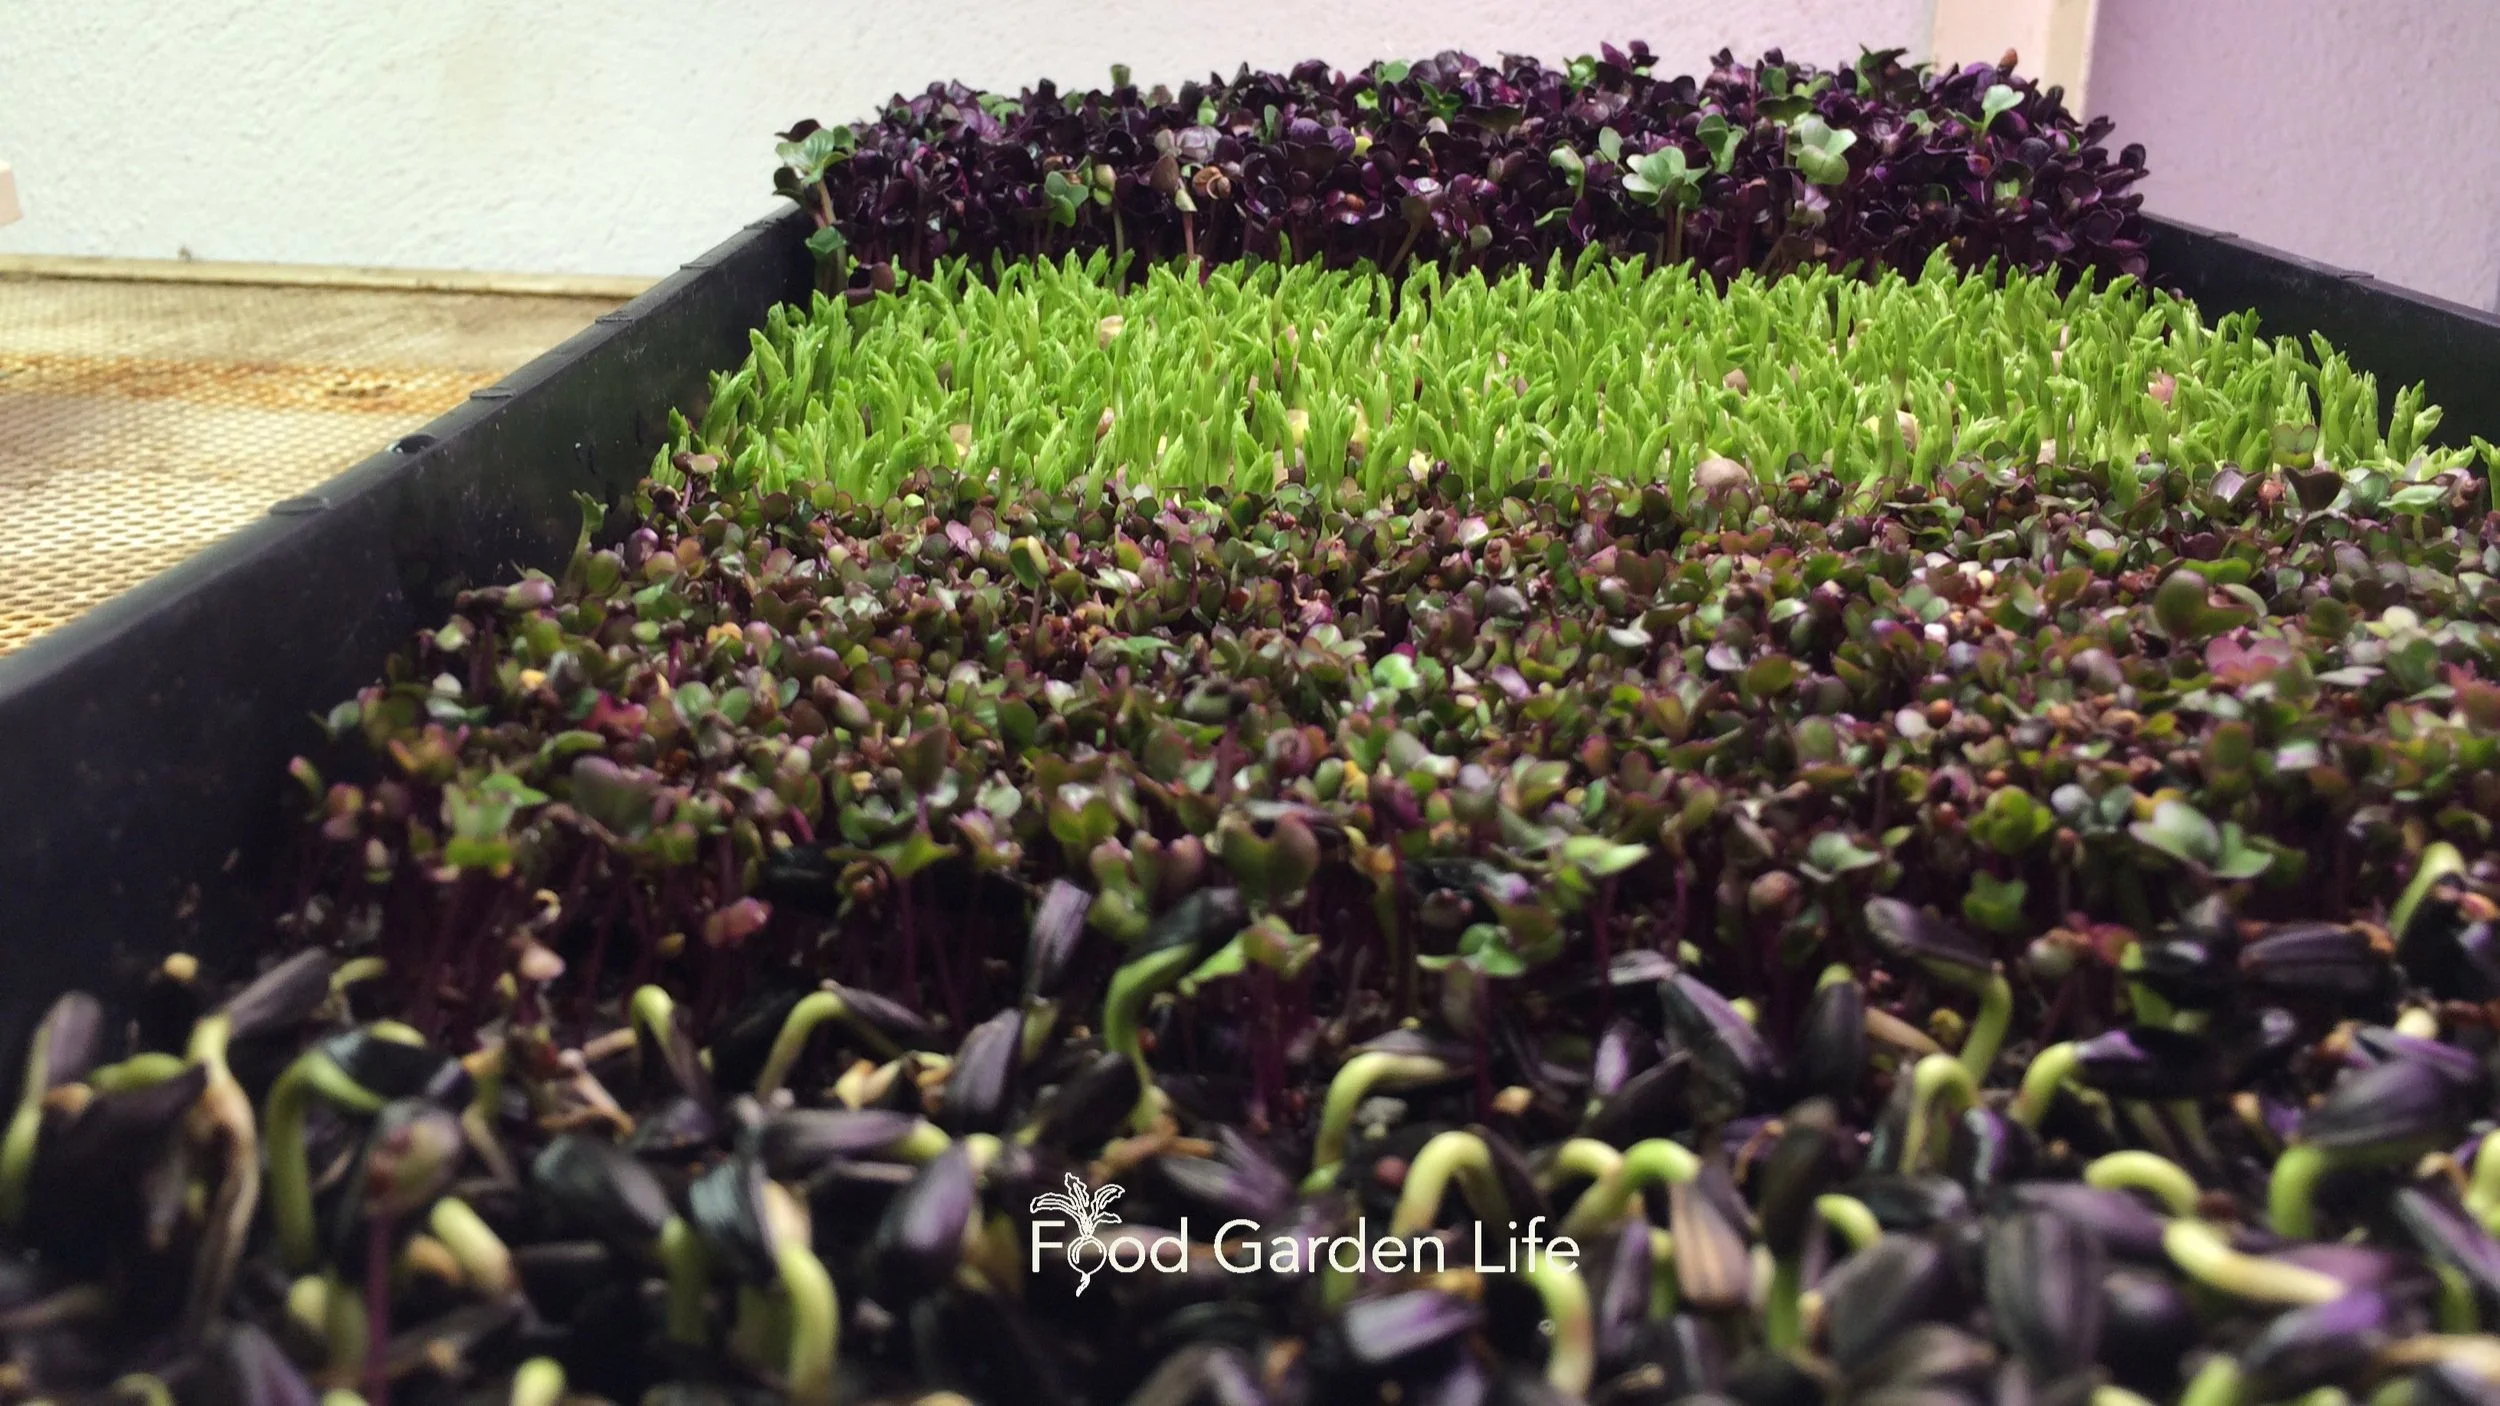
A colourful tray of fresh microgreens.
And microgreens with different colours:
Light green
Dark green
Red
Purple
Crops for Home Microgreens
There are many different plants suited to a crop of microgreens, including vegetables, herbs, flowers—and others, like some common field crops!
Before you grow something into a microgreen, make sure it it’s edible. I’ve listed many microgreen crops below. If in doubt, see what seed vendors sell for microgreens.
Vegetable Seeds for Microgreens
Here are vegetables that are commonly grown as microgreens:
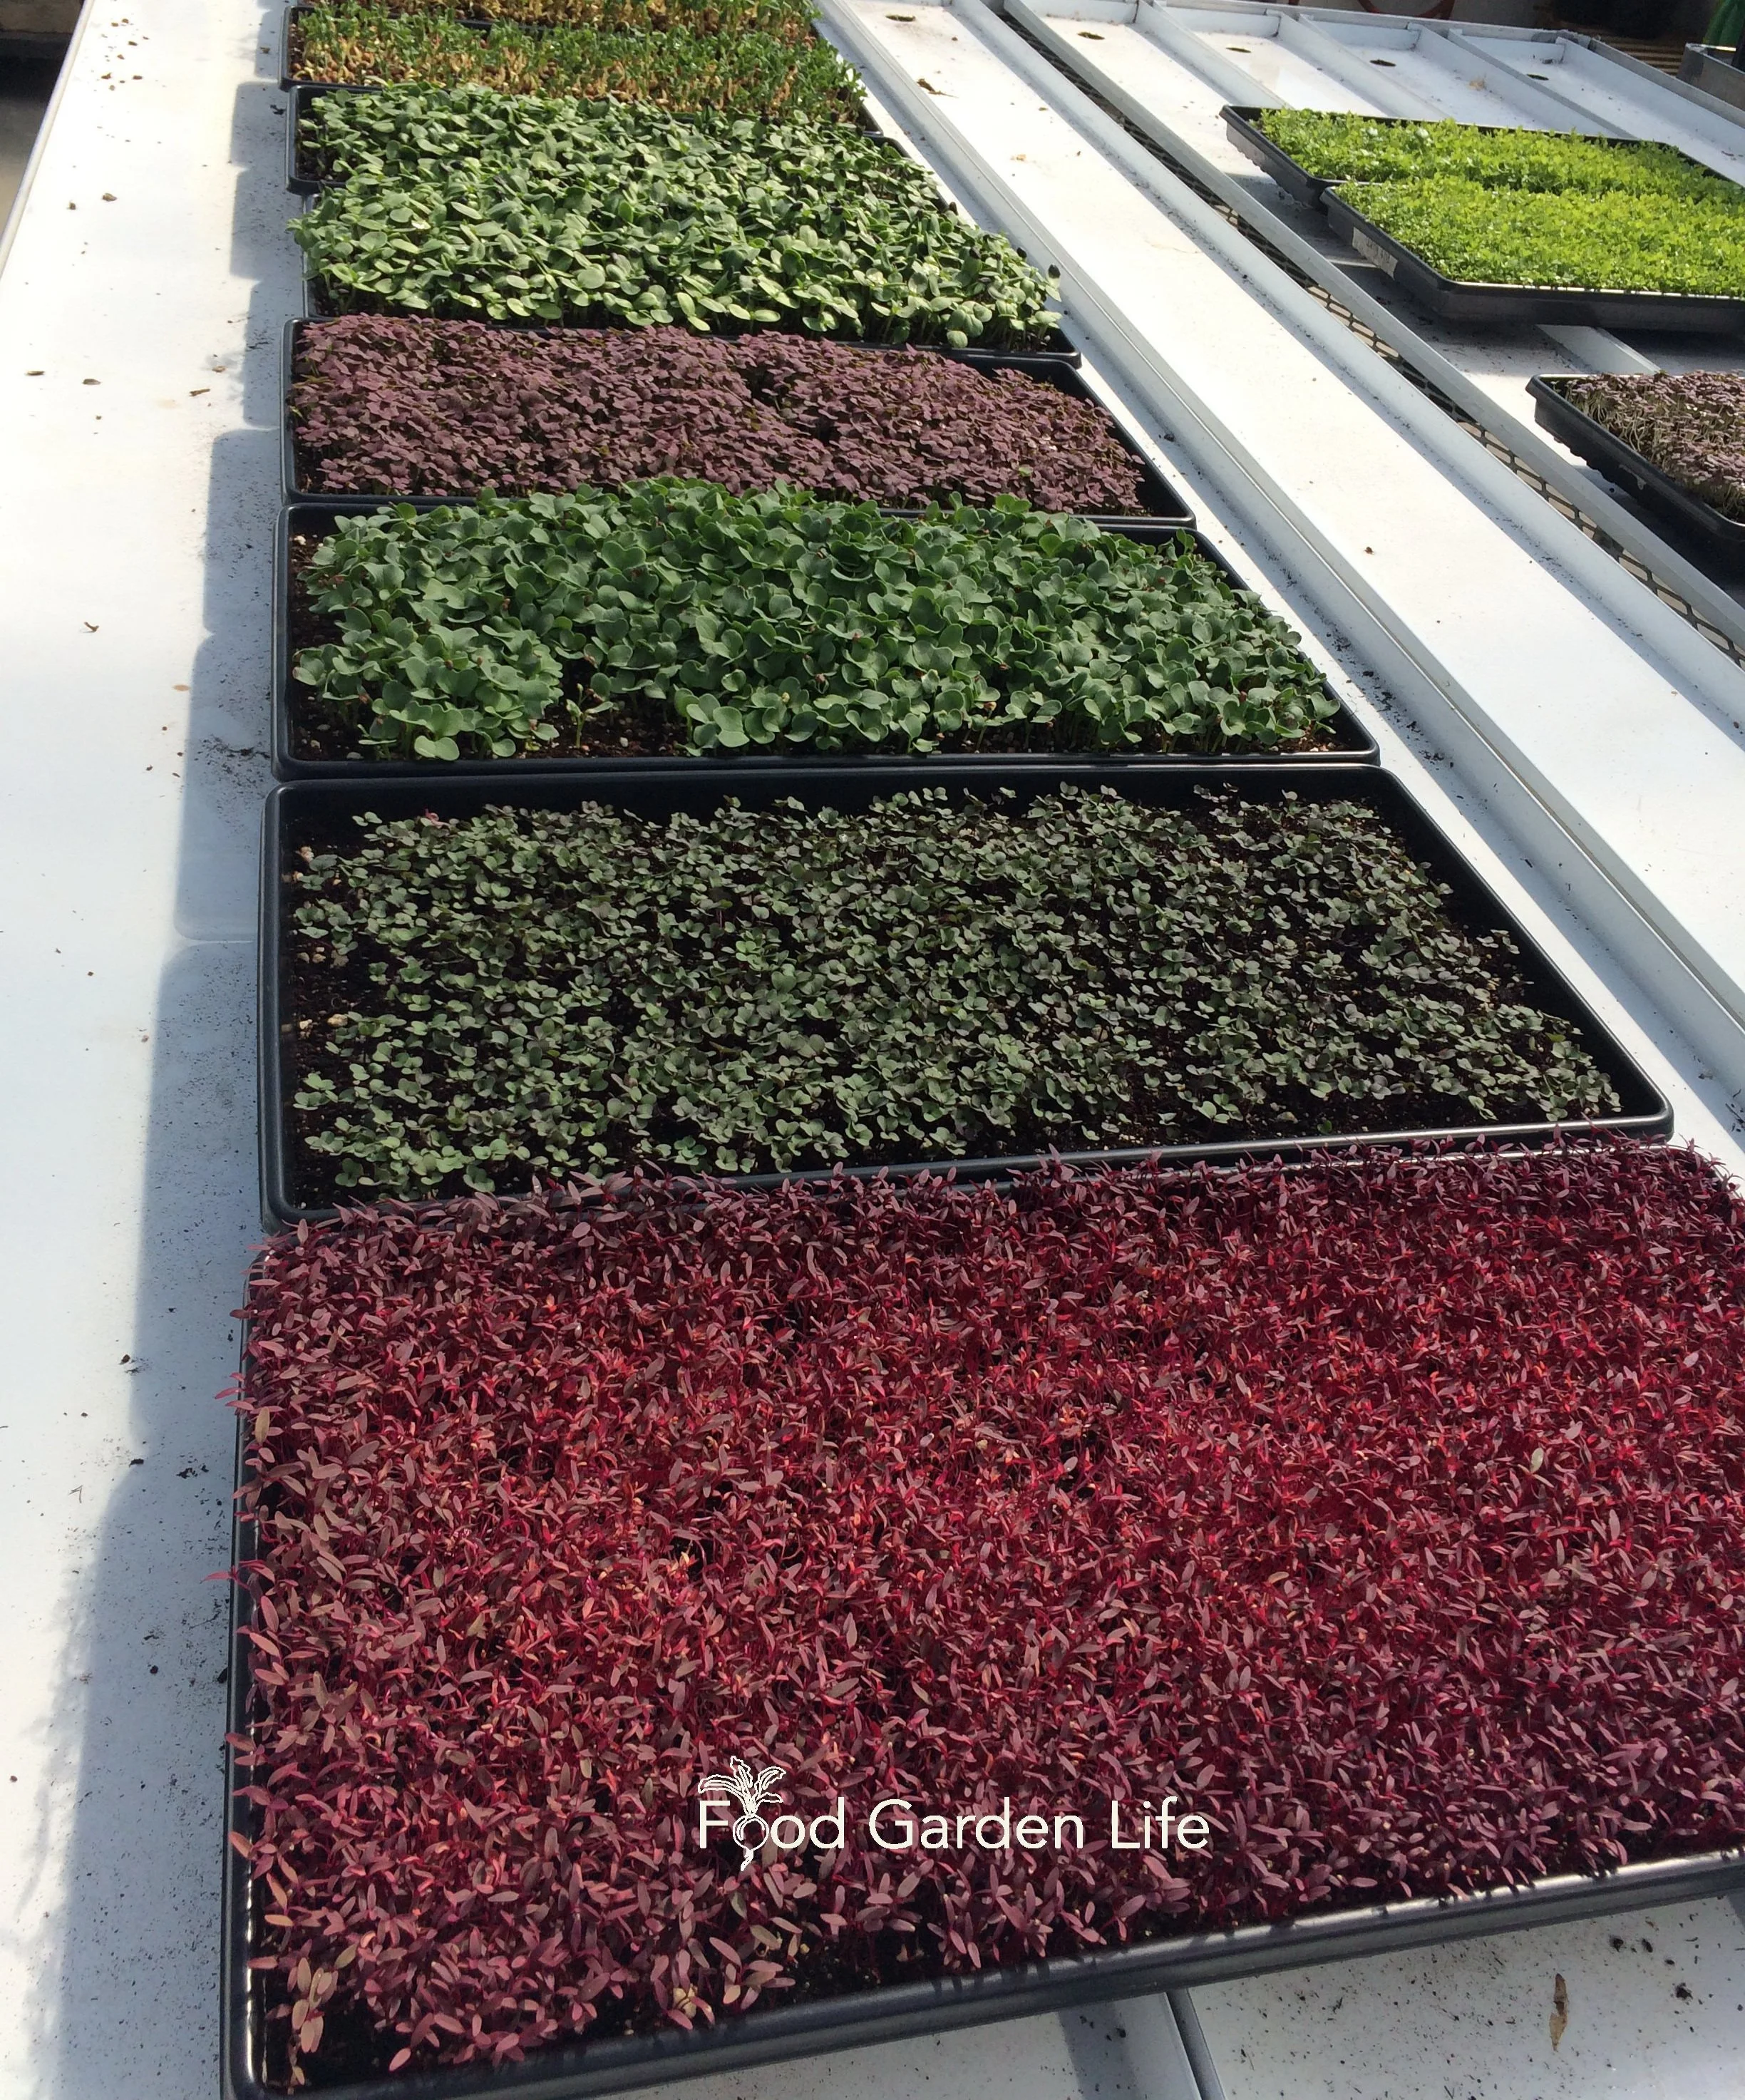
Grow microgreens from many different types of seed, giving you different tastes, textures, and colours.
amaranth, arugula, beet, broccoli, cabbage, carrot, chard, cress, dandelion, kale, kohlrabi, mizuna, mustard, onion, orach, pac choi, pea, radish, tatsoi, watercress
Herb Seeds for Microgreens
Here are herbs that are commonly grown as microgreens:
basil, cilantro, dill, fennel, lemon balm, parsley, shiso, sorrel
Flower Seeds for Microgreens
Here are flowers that are grown as microgreens:
borage, celosia, marigold, sunflower
Field Crop Seeds for Microgreens
Here are field crops that can be grown as microgreens:
alfalfa, barley, clover, chickpea, corn, lentil, quinoa, wheat
Microgreen Seed Mixes
There are also seed mixes with more than one type of microgreen seed, giving a blend of taste and colour.
My favourite is pea microgreens—a.k.a. pea shoots. They’re sweet, crunchy, and easy to grow. I also love sunflower microgreens for the delicious nutty flavour. (The husk of the sunflower seed is easy to remove as the sunflower microgreens get bigger.)
Buying Microgreen Seeds
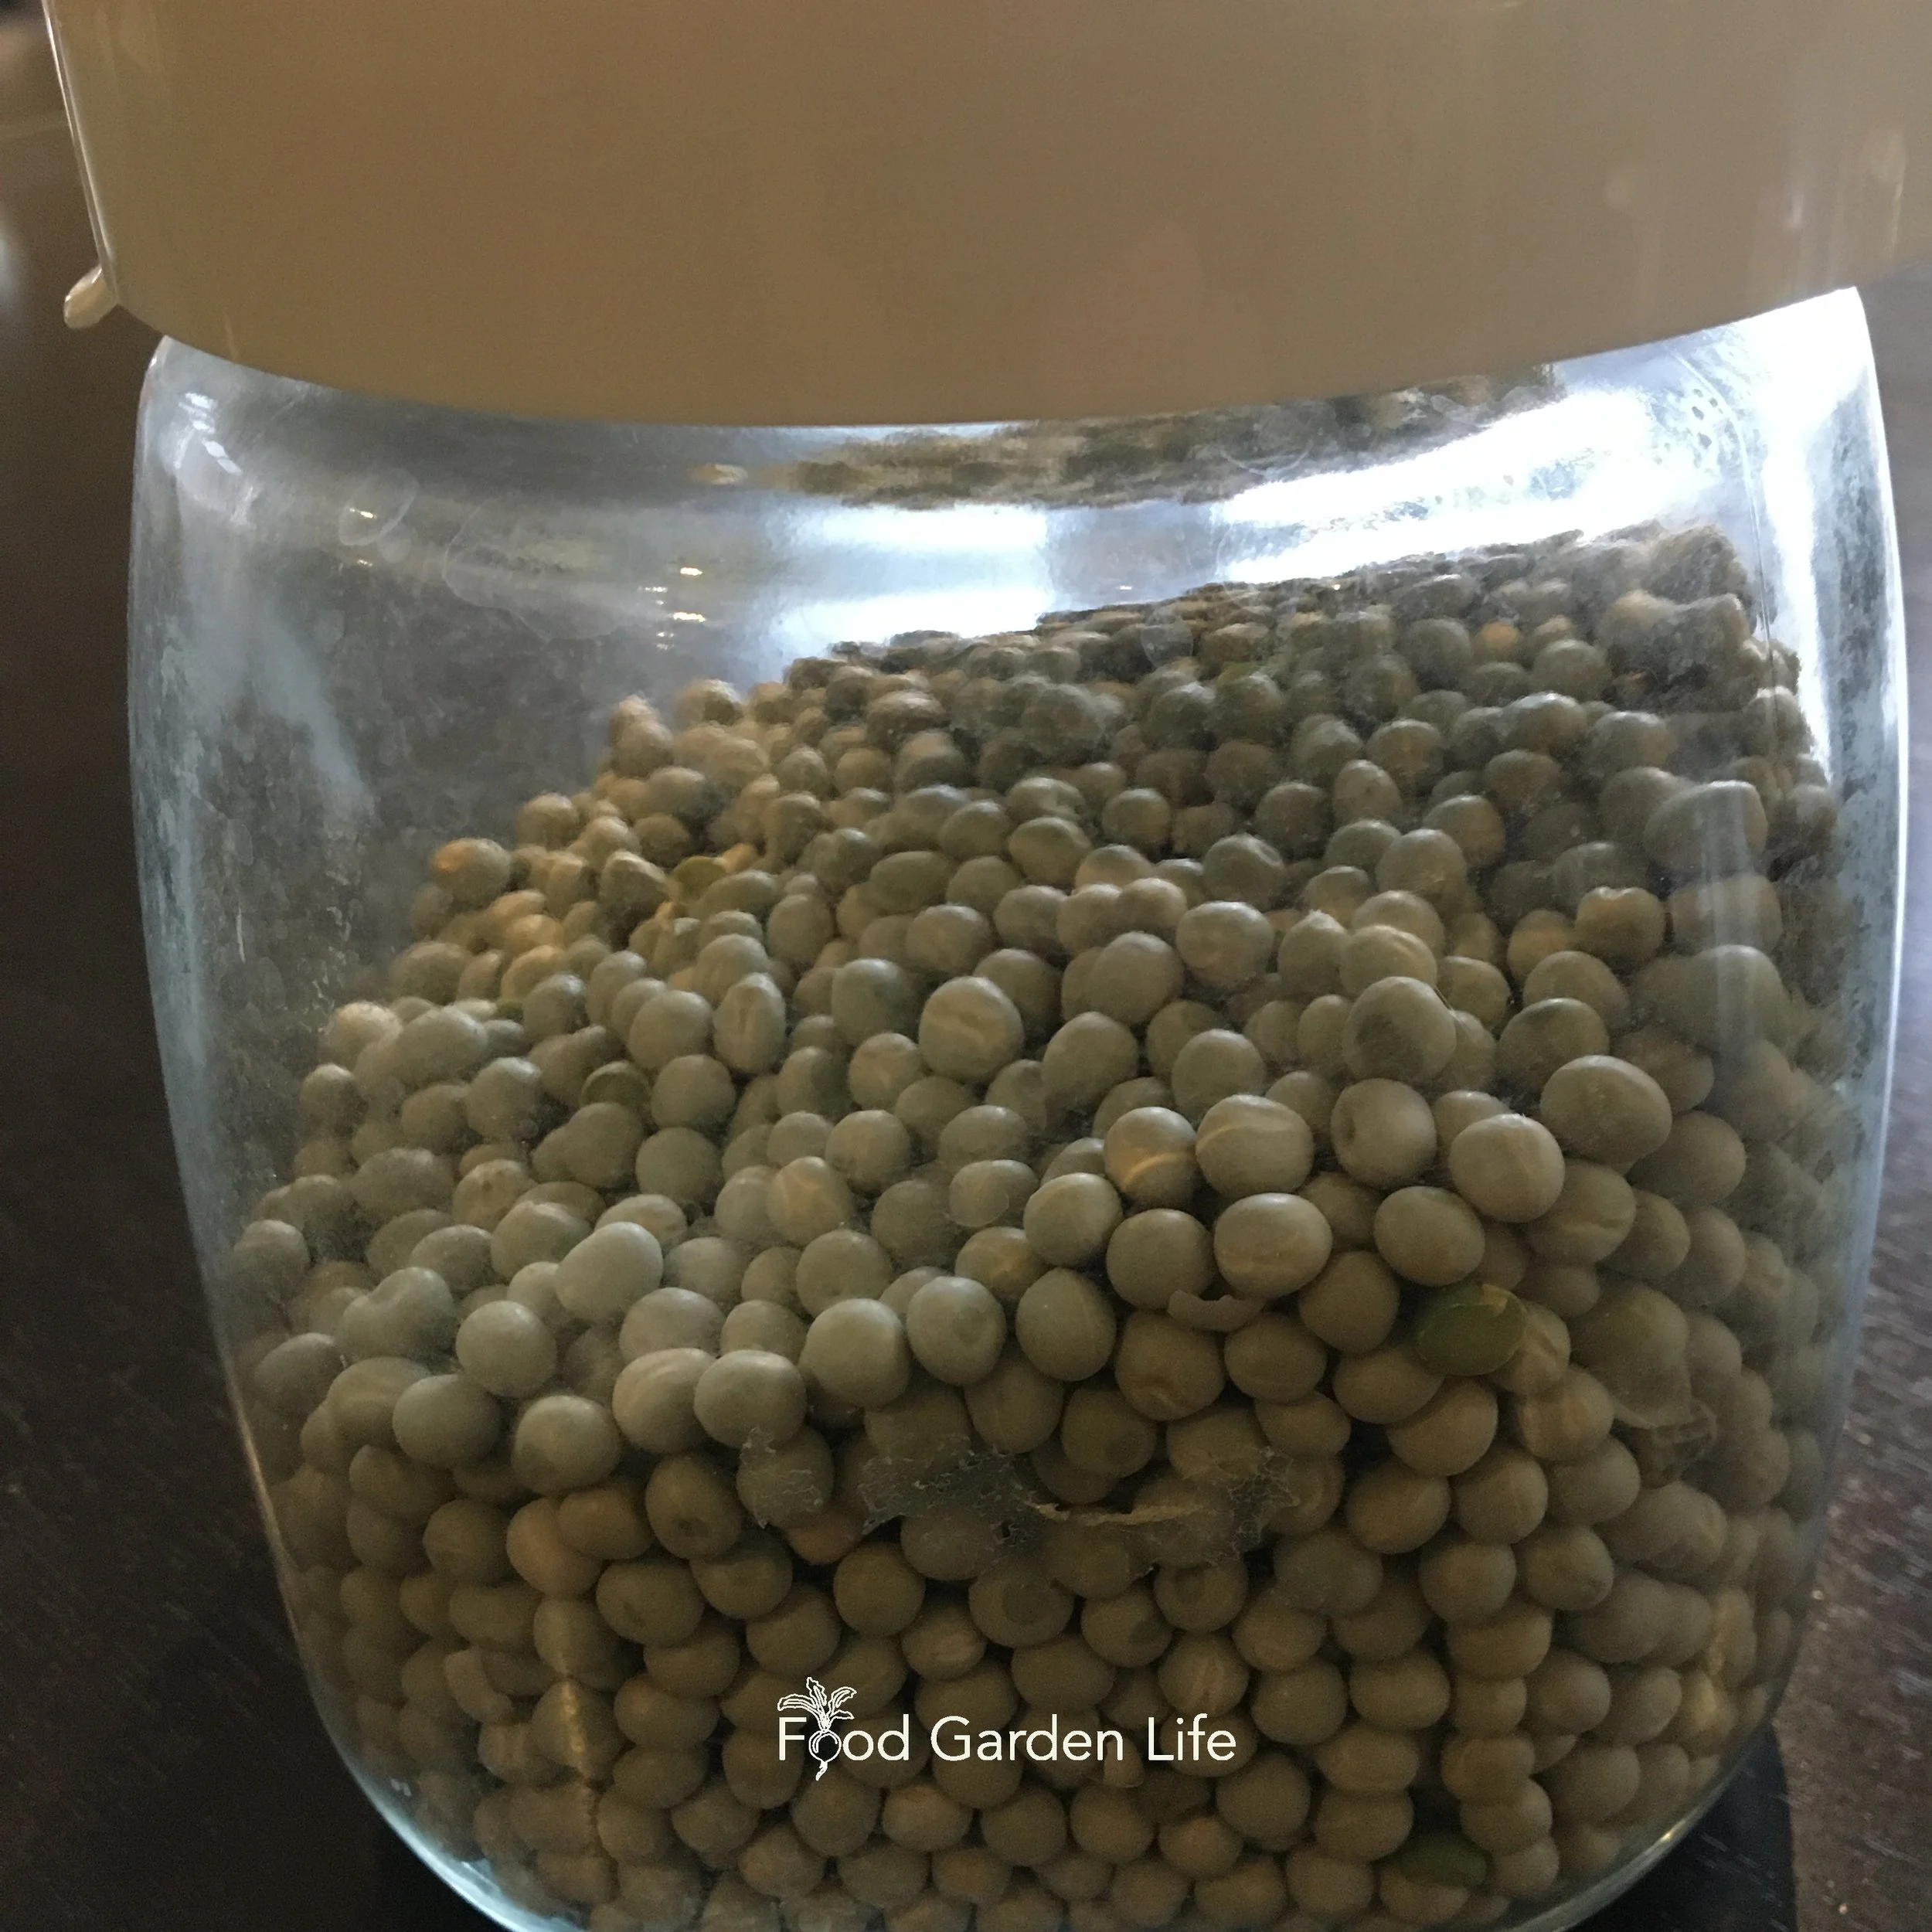
Dried green peas from the grocery store.
When shopping for microgreen seeds you might come across the interchangeable terms “sprouting seeds” and “microgreens seeds.” It means the seeds are untreated and uncoated. They’re usually sold in a larger volume than seeds intended for the garden—so it’s better value. And in some cases, it means that the seed company tests the seed to be sure there’s no contamination with pathogens.
I use dried peas and lentils from the grocery store—the same dried whole peas used for cooking.
Stick with food grade seeds from the grocery store or seeds sold for microgreens.
Seed sold for planting in the garden is sometimes “treated,” which usually means with fungicides. Treated seed is not suitable for growing into microgreens.
Wondering where to buy seed? Here’s a list of seed companies.
First Microgreen Crop? Give Peas a Chance
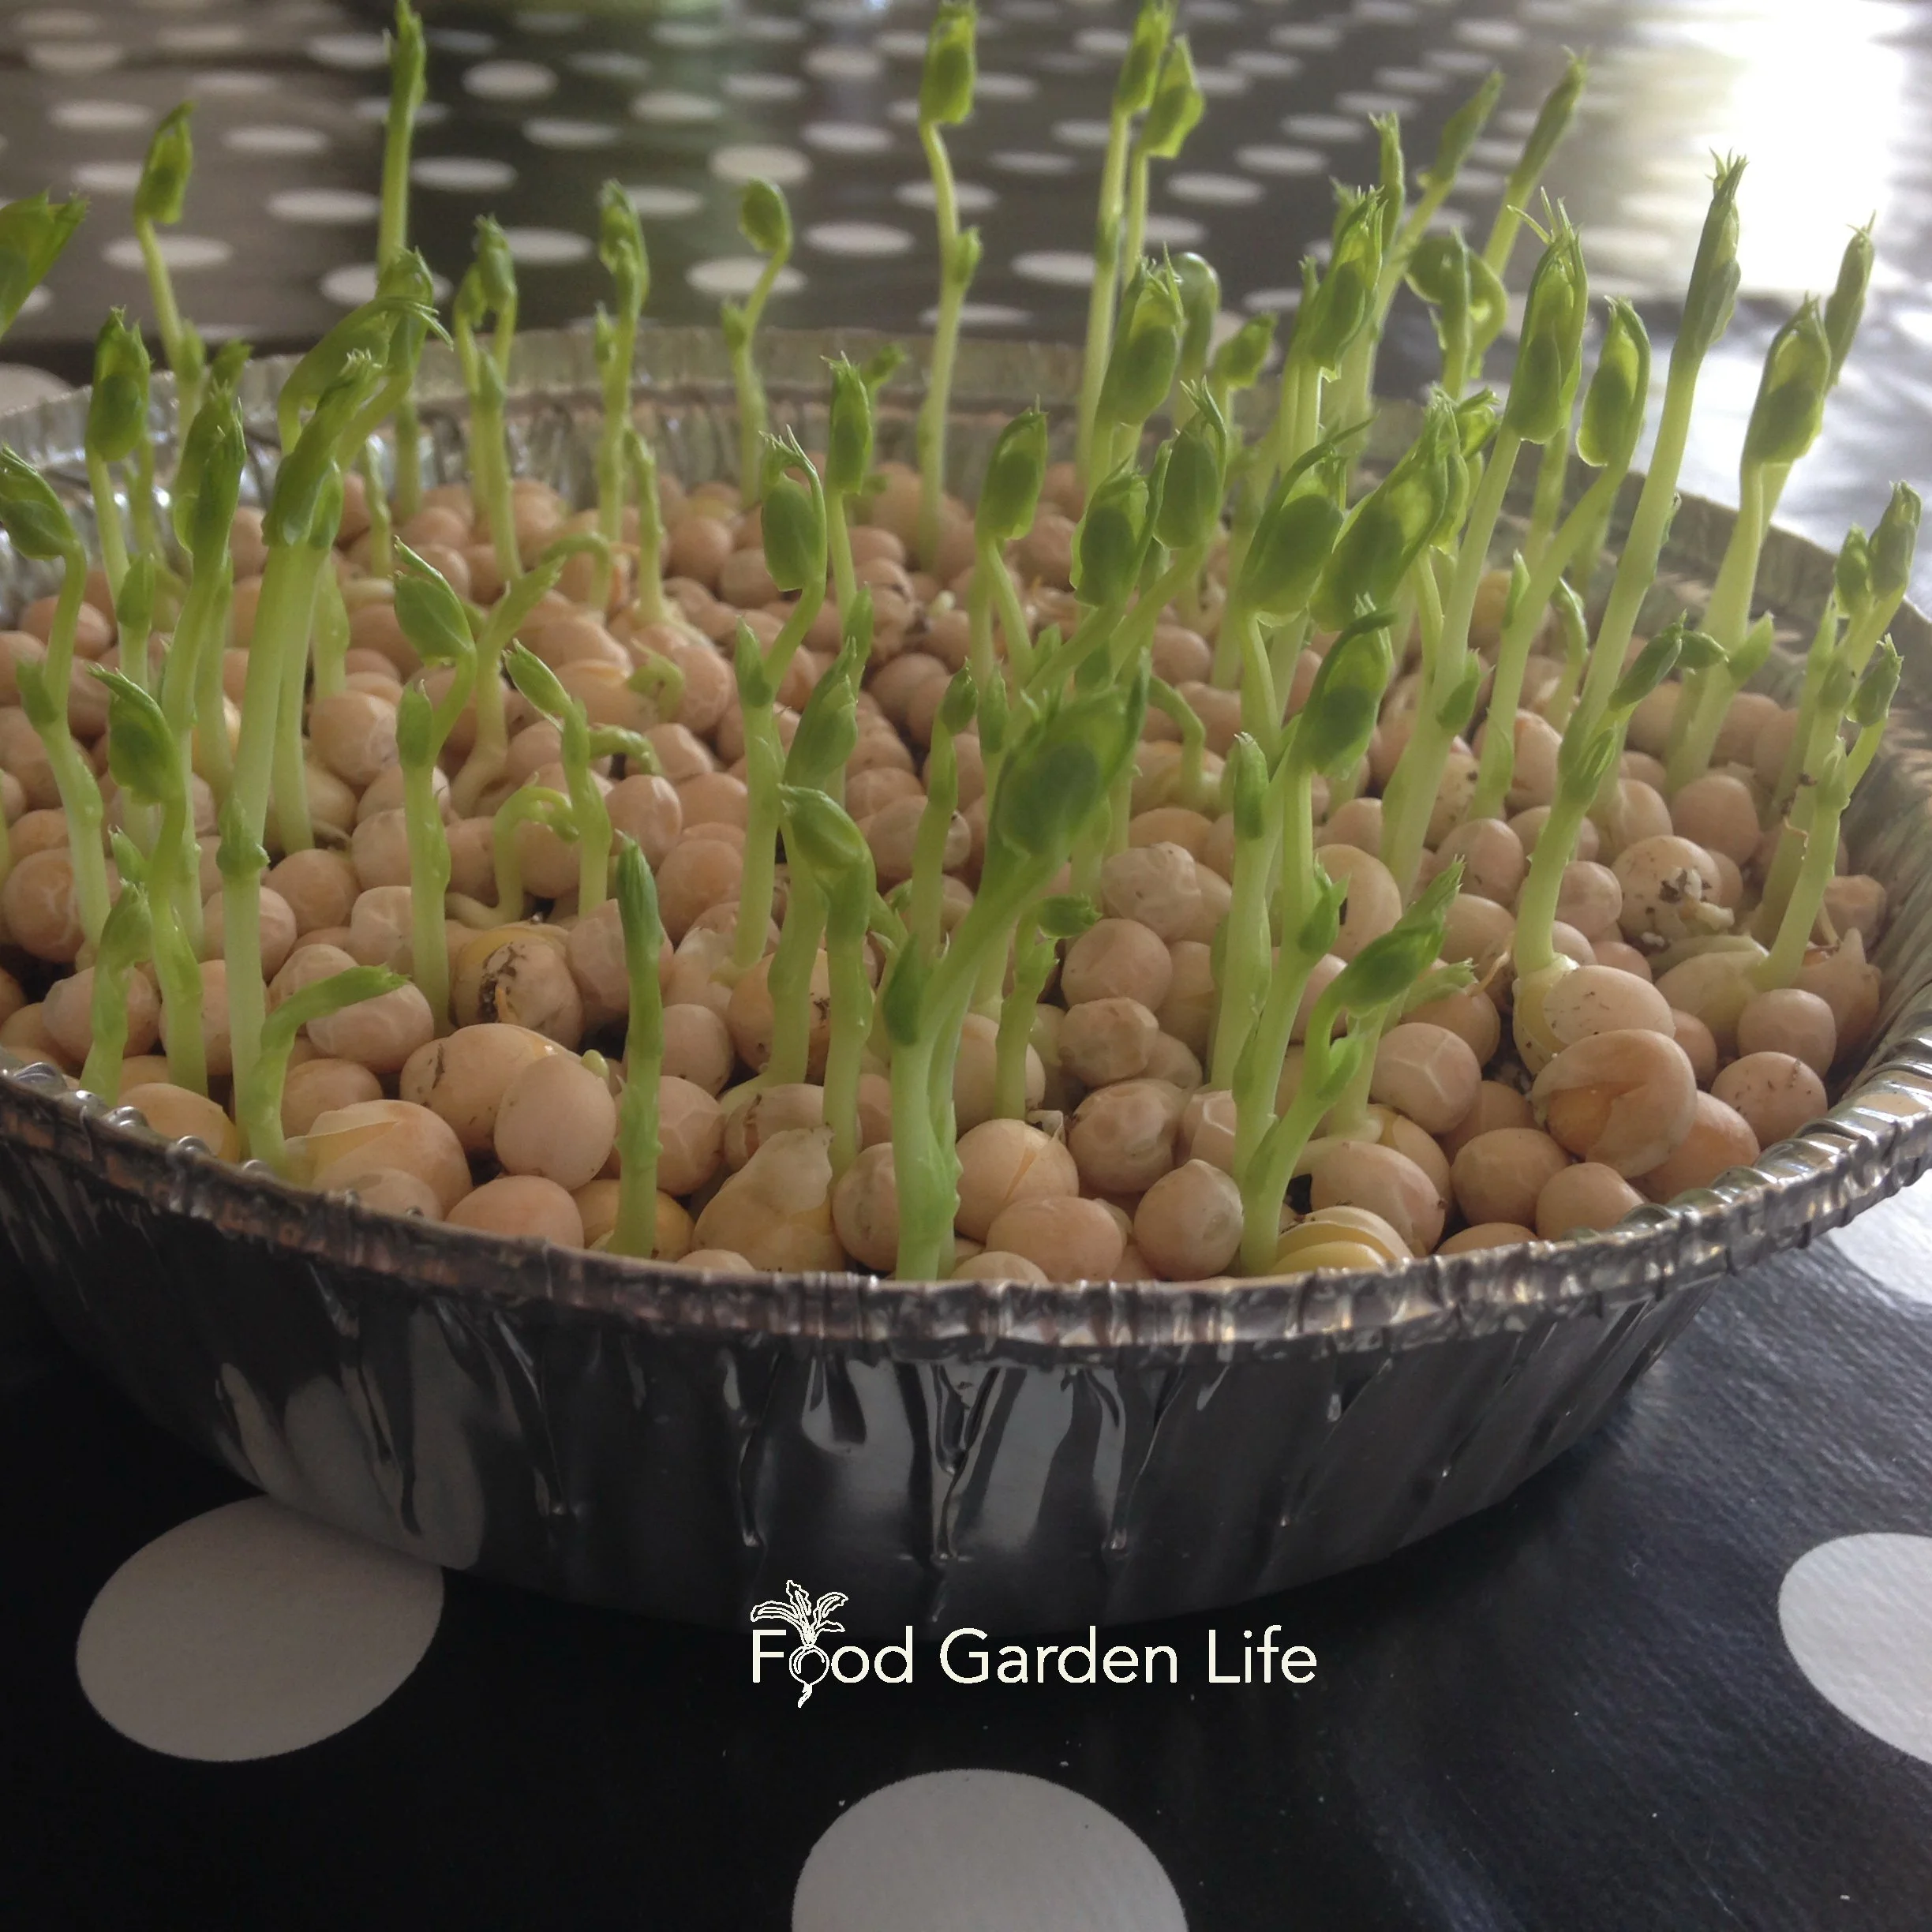
First time growing microgreens? I like the peas-and-pie-plate approach. It’s easy!
I recommend pea microgreens (also known as pea shoots) as a first microgreen crop. Dried peas are easy to find at the grocery store, easy to grow, and have a sweet flavour—much like snow peas and snap peas.
It doesn’t matter whether you use green peas or yellow peas—the key thing is to use whole peas, not split peas…they won’t grow!
How to Grow Microgreens at Home
Choose a Location to Grow Microgreens
When you grow microgreens you’re using the energy saved up in the seed. The goal is a tender young stem and leaves that you cut off and eat as a green. That means you don’t need bright light. It doesn’t matter if the plants are gangly.
Supplies for Growing Microgreens Indoors
Here are supplies to grow microgreens at home:
Seed
Potting soil
Container
Spray botte (optional)
Soil for Microgreens
The potting soil is to hold moisture and let the microgreen plants anchor themselves as they grow. You don’t need to supply nutrients because the plants are using energy stored in the seeds. Start with fresh soil every time—don’t reuse soil.
Moisten the potting soil before planting.
Use a soilless potting soil. Coir or peat moss as a growing medium work well too.
Containers for Microgreens
There are lots of options for microgreens containers. You only need to have about an inch of potting soil, so any shallow container works.
Here are examples:
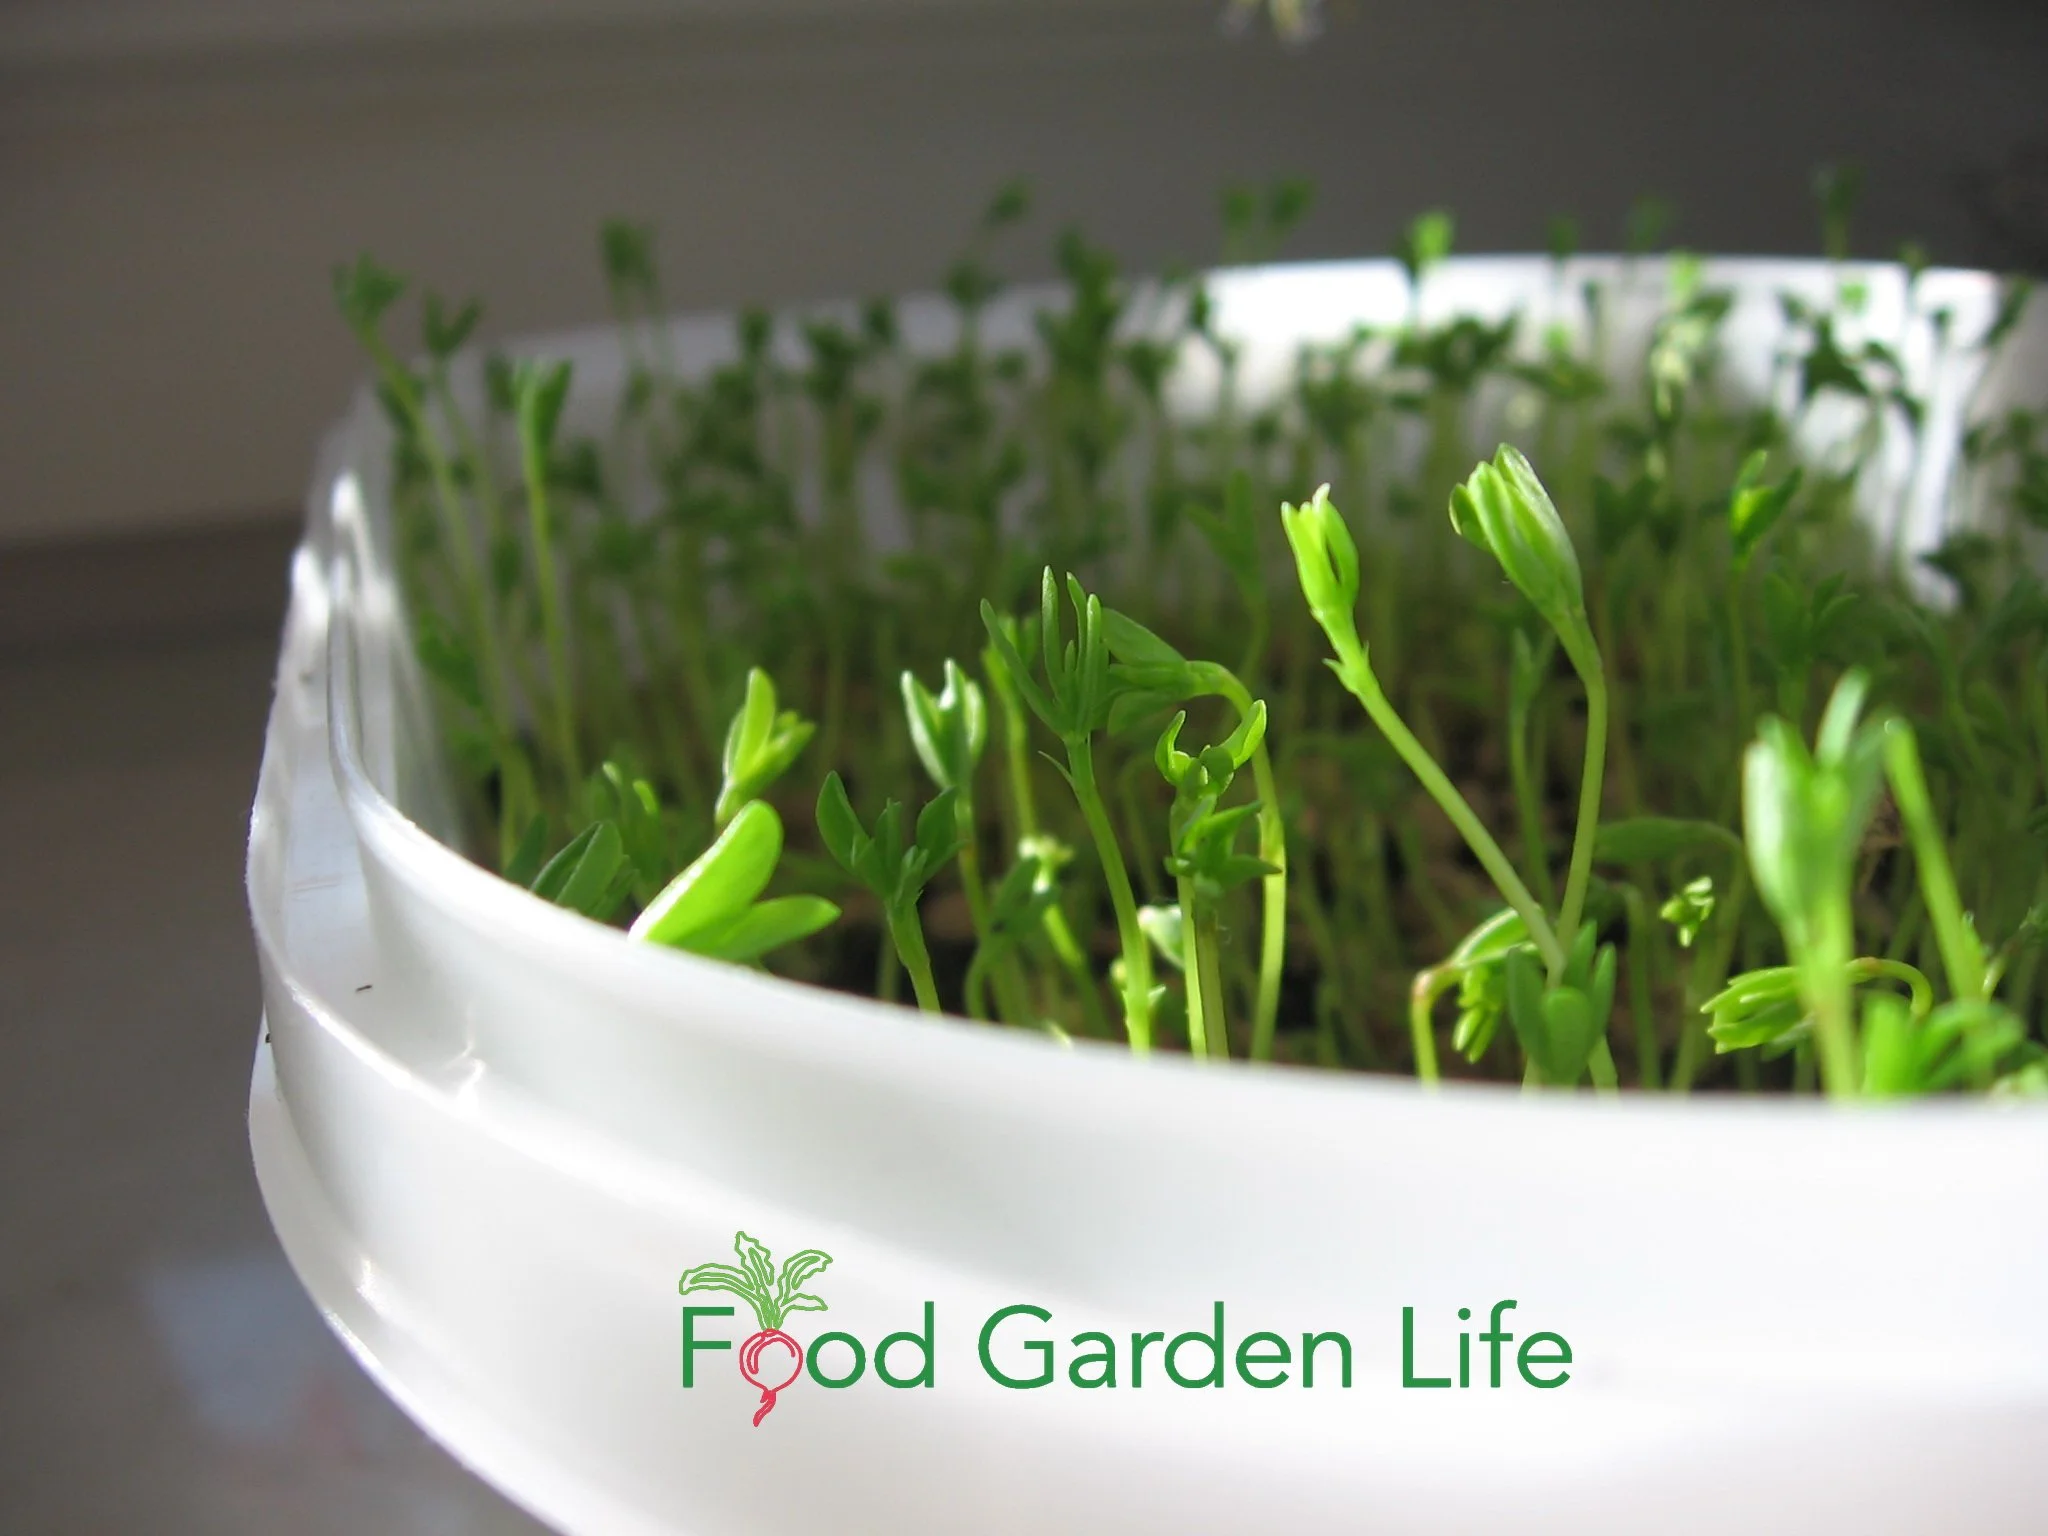
Lentil microgreens growing in a plastic container.
A standard 10”x20” plant tray
A pie plate
Takeout containers
Smaller containers dry out faster, so you’ll need to water more often.
If you trust your judgement with watering, don’t make drainage holes. But if you think you might overwater, punch a few holes in the bottom of your container.
Spray Bottles
A spray bottle for microgreens is optional. I don’t use one. Some gardeners use a spray bottle to avoid splashing around small seeds. Instead, you can water carefully with a gentle stream of water.
How to Plant Microgreens
Soak larger seeds such as pea, lentil, and sunflower overnight. (Soaking gives a faster, more uniform germination.)
Put an inch or two of potting soil in the container.
Put seeds on top of the soil, spacing them so that they’re close to each other, but not covering each other. Don’t cover seeds with soil.
Water so that the soil is moist but not wet. (You want the soil moist, not wet...don’t float your seeds!)
Place under lights or on a windowsill.
Pea Microgreens Step by Step
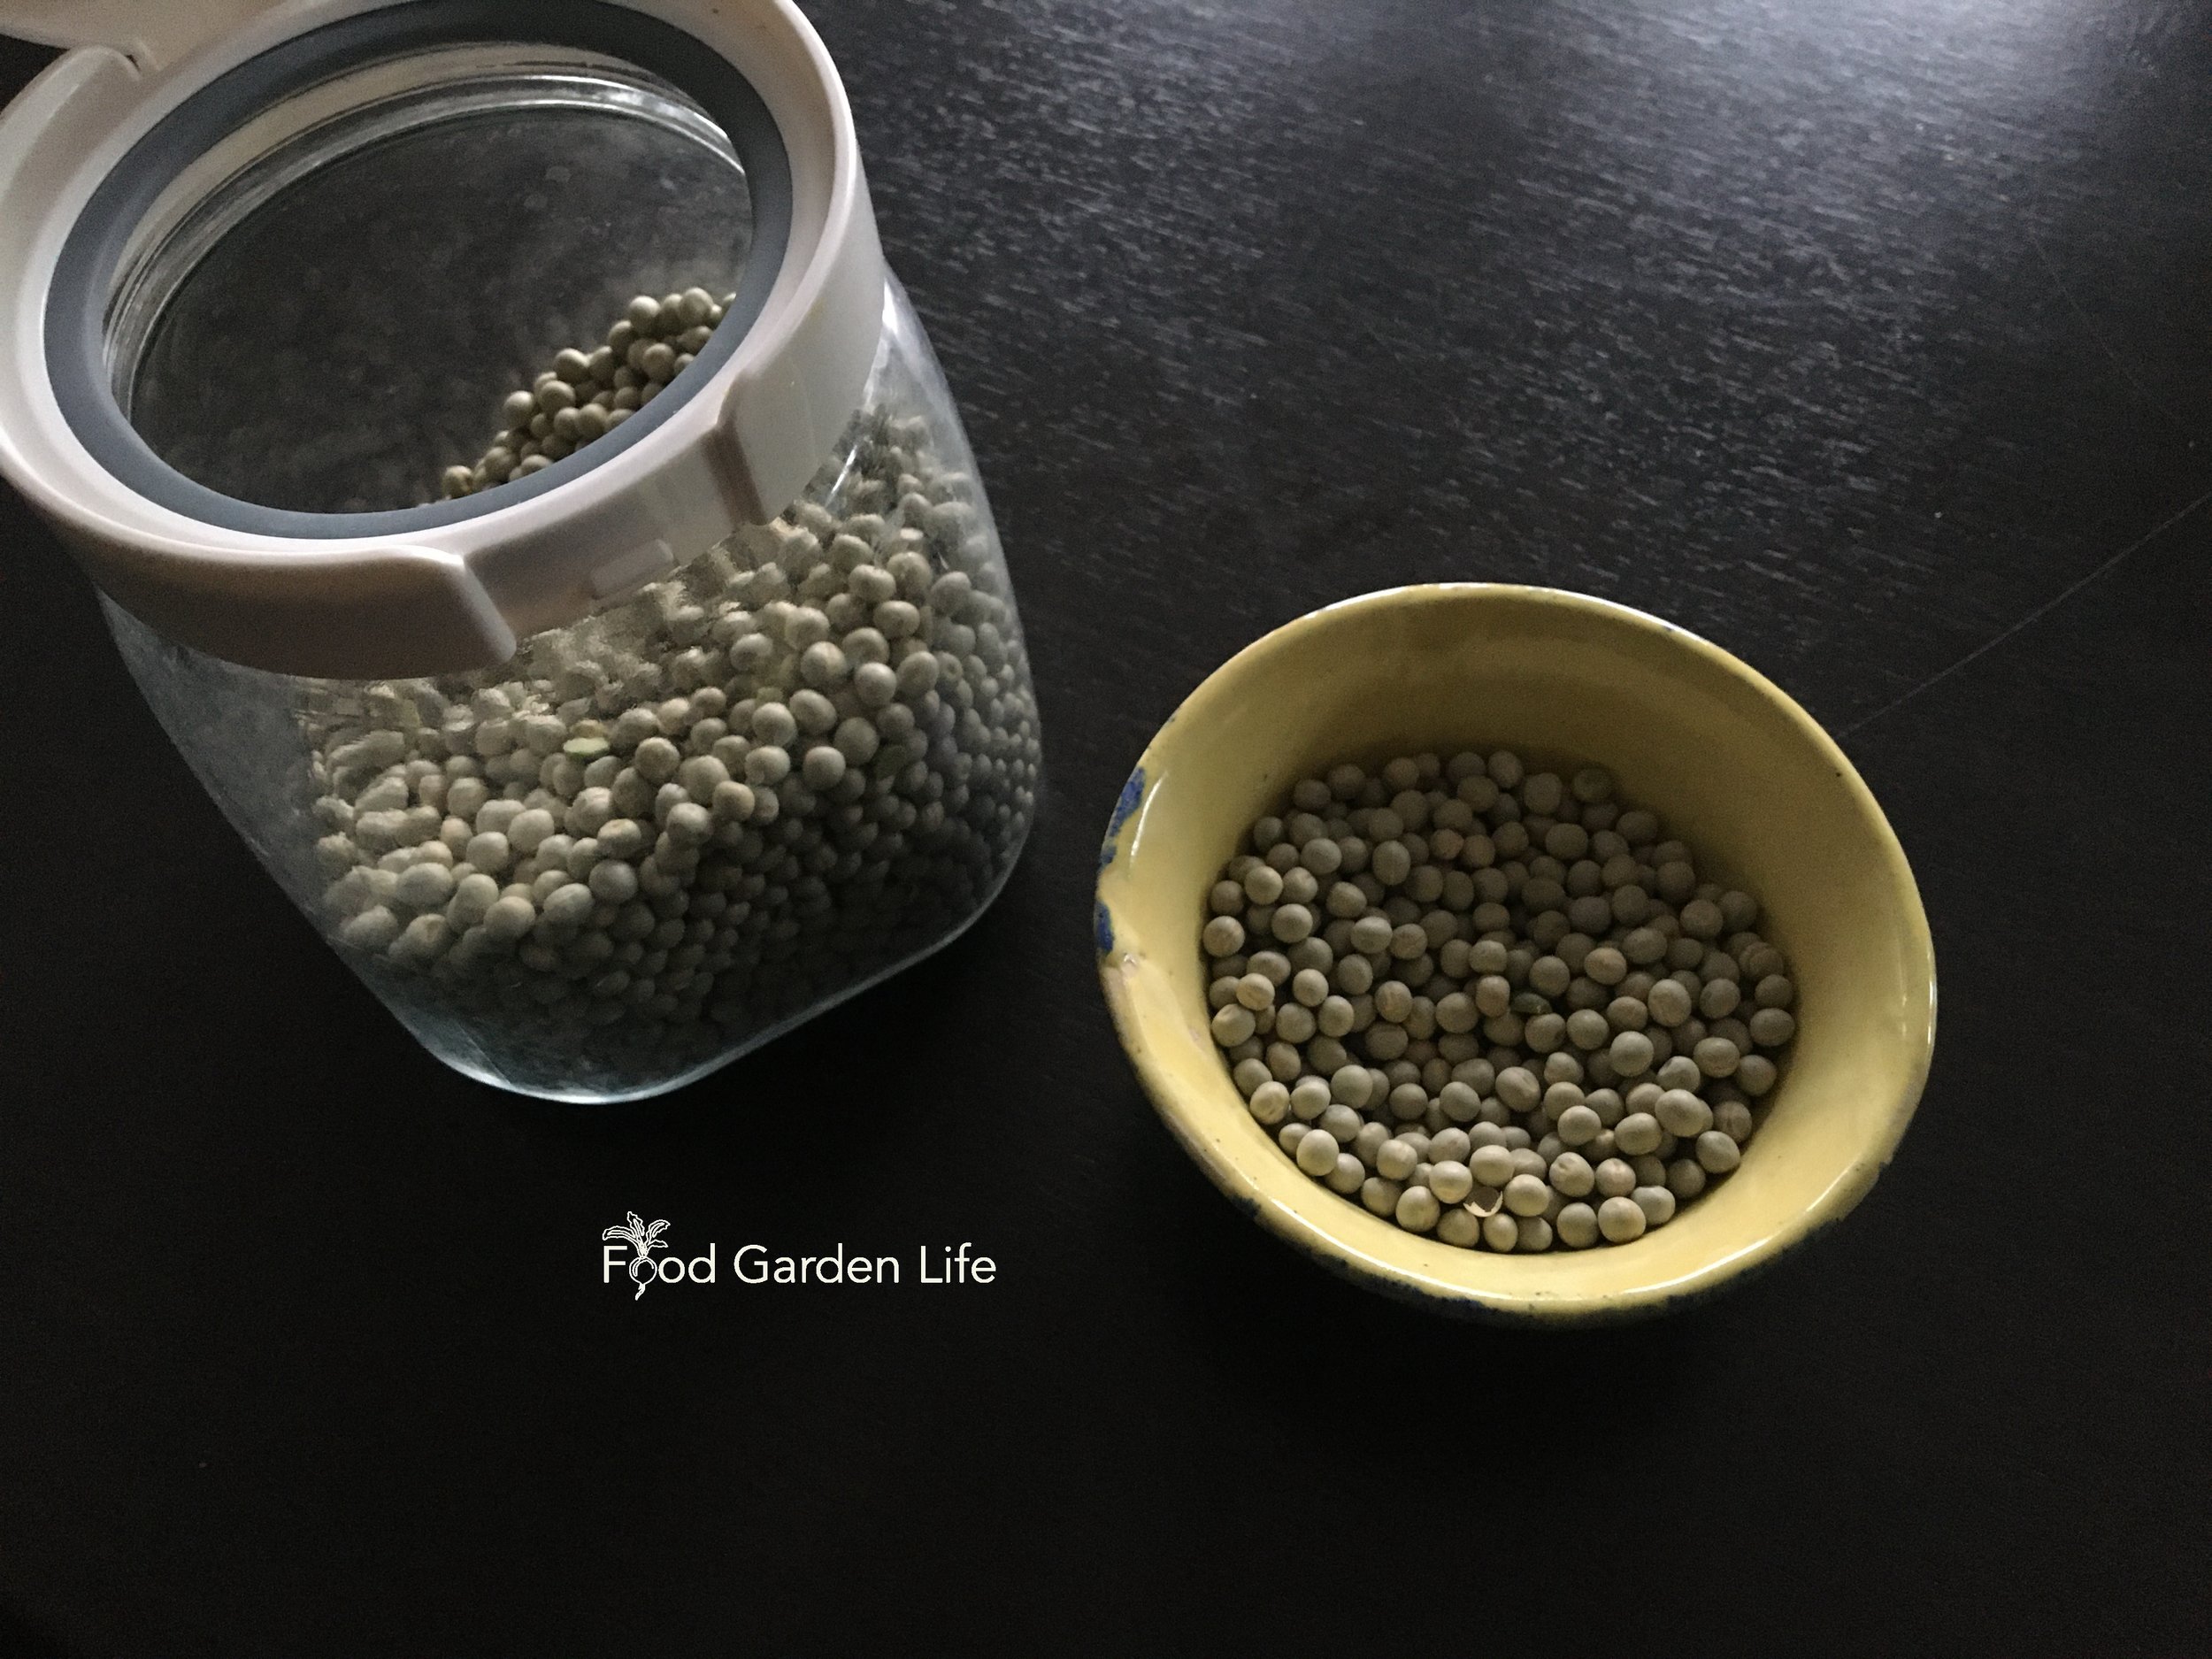
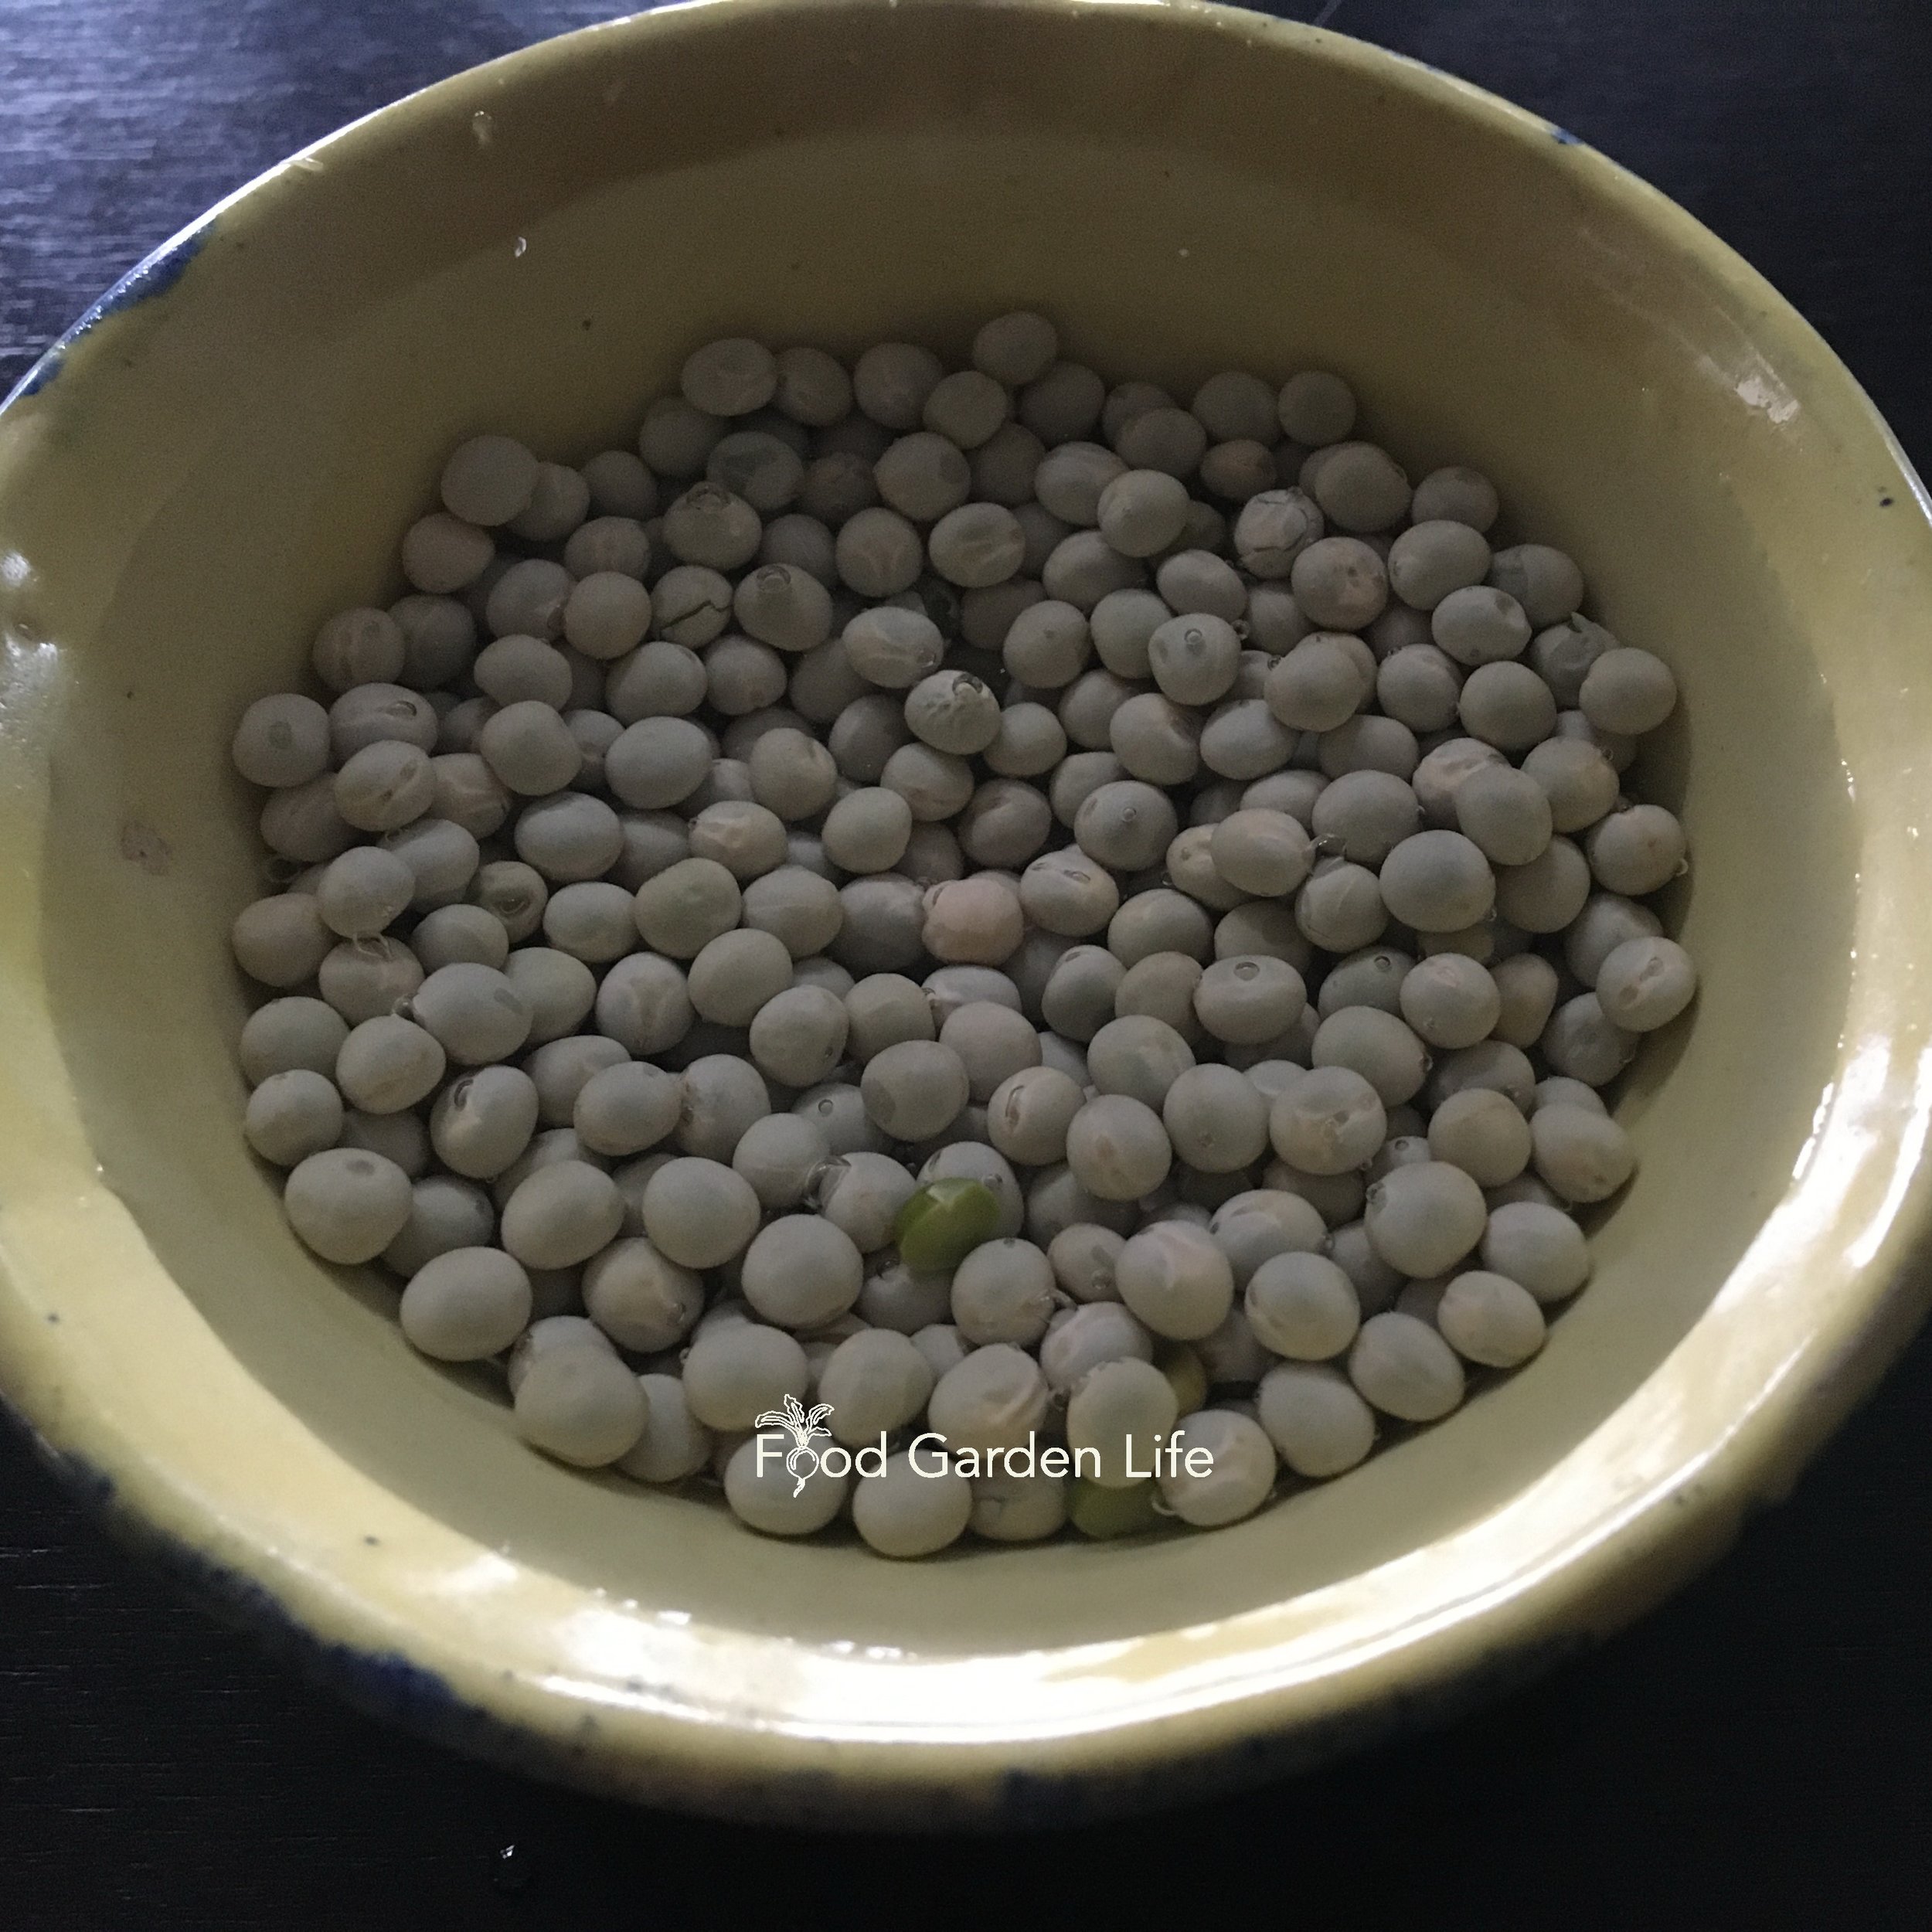
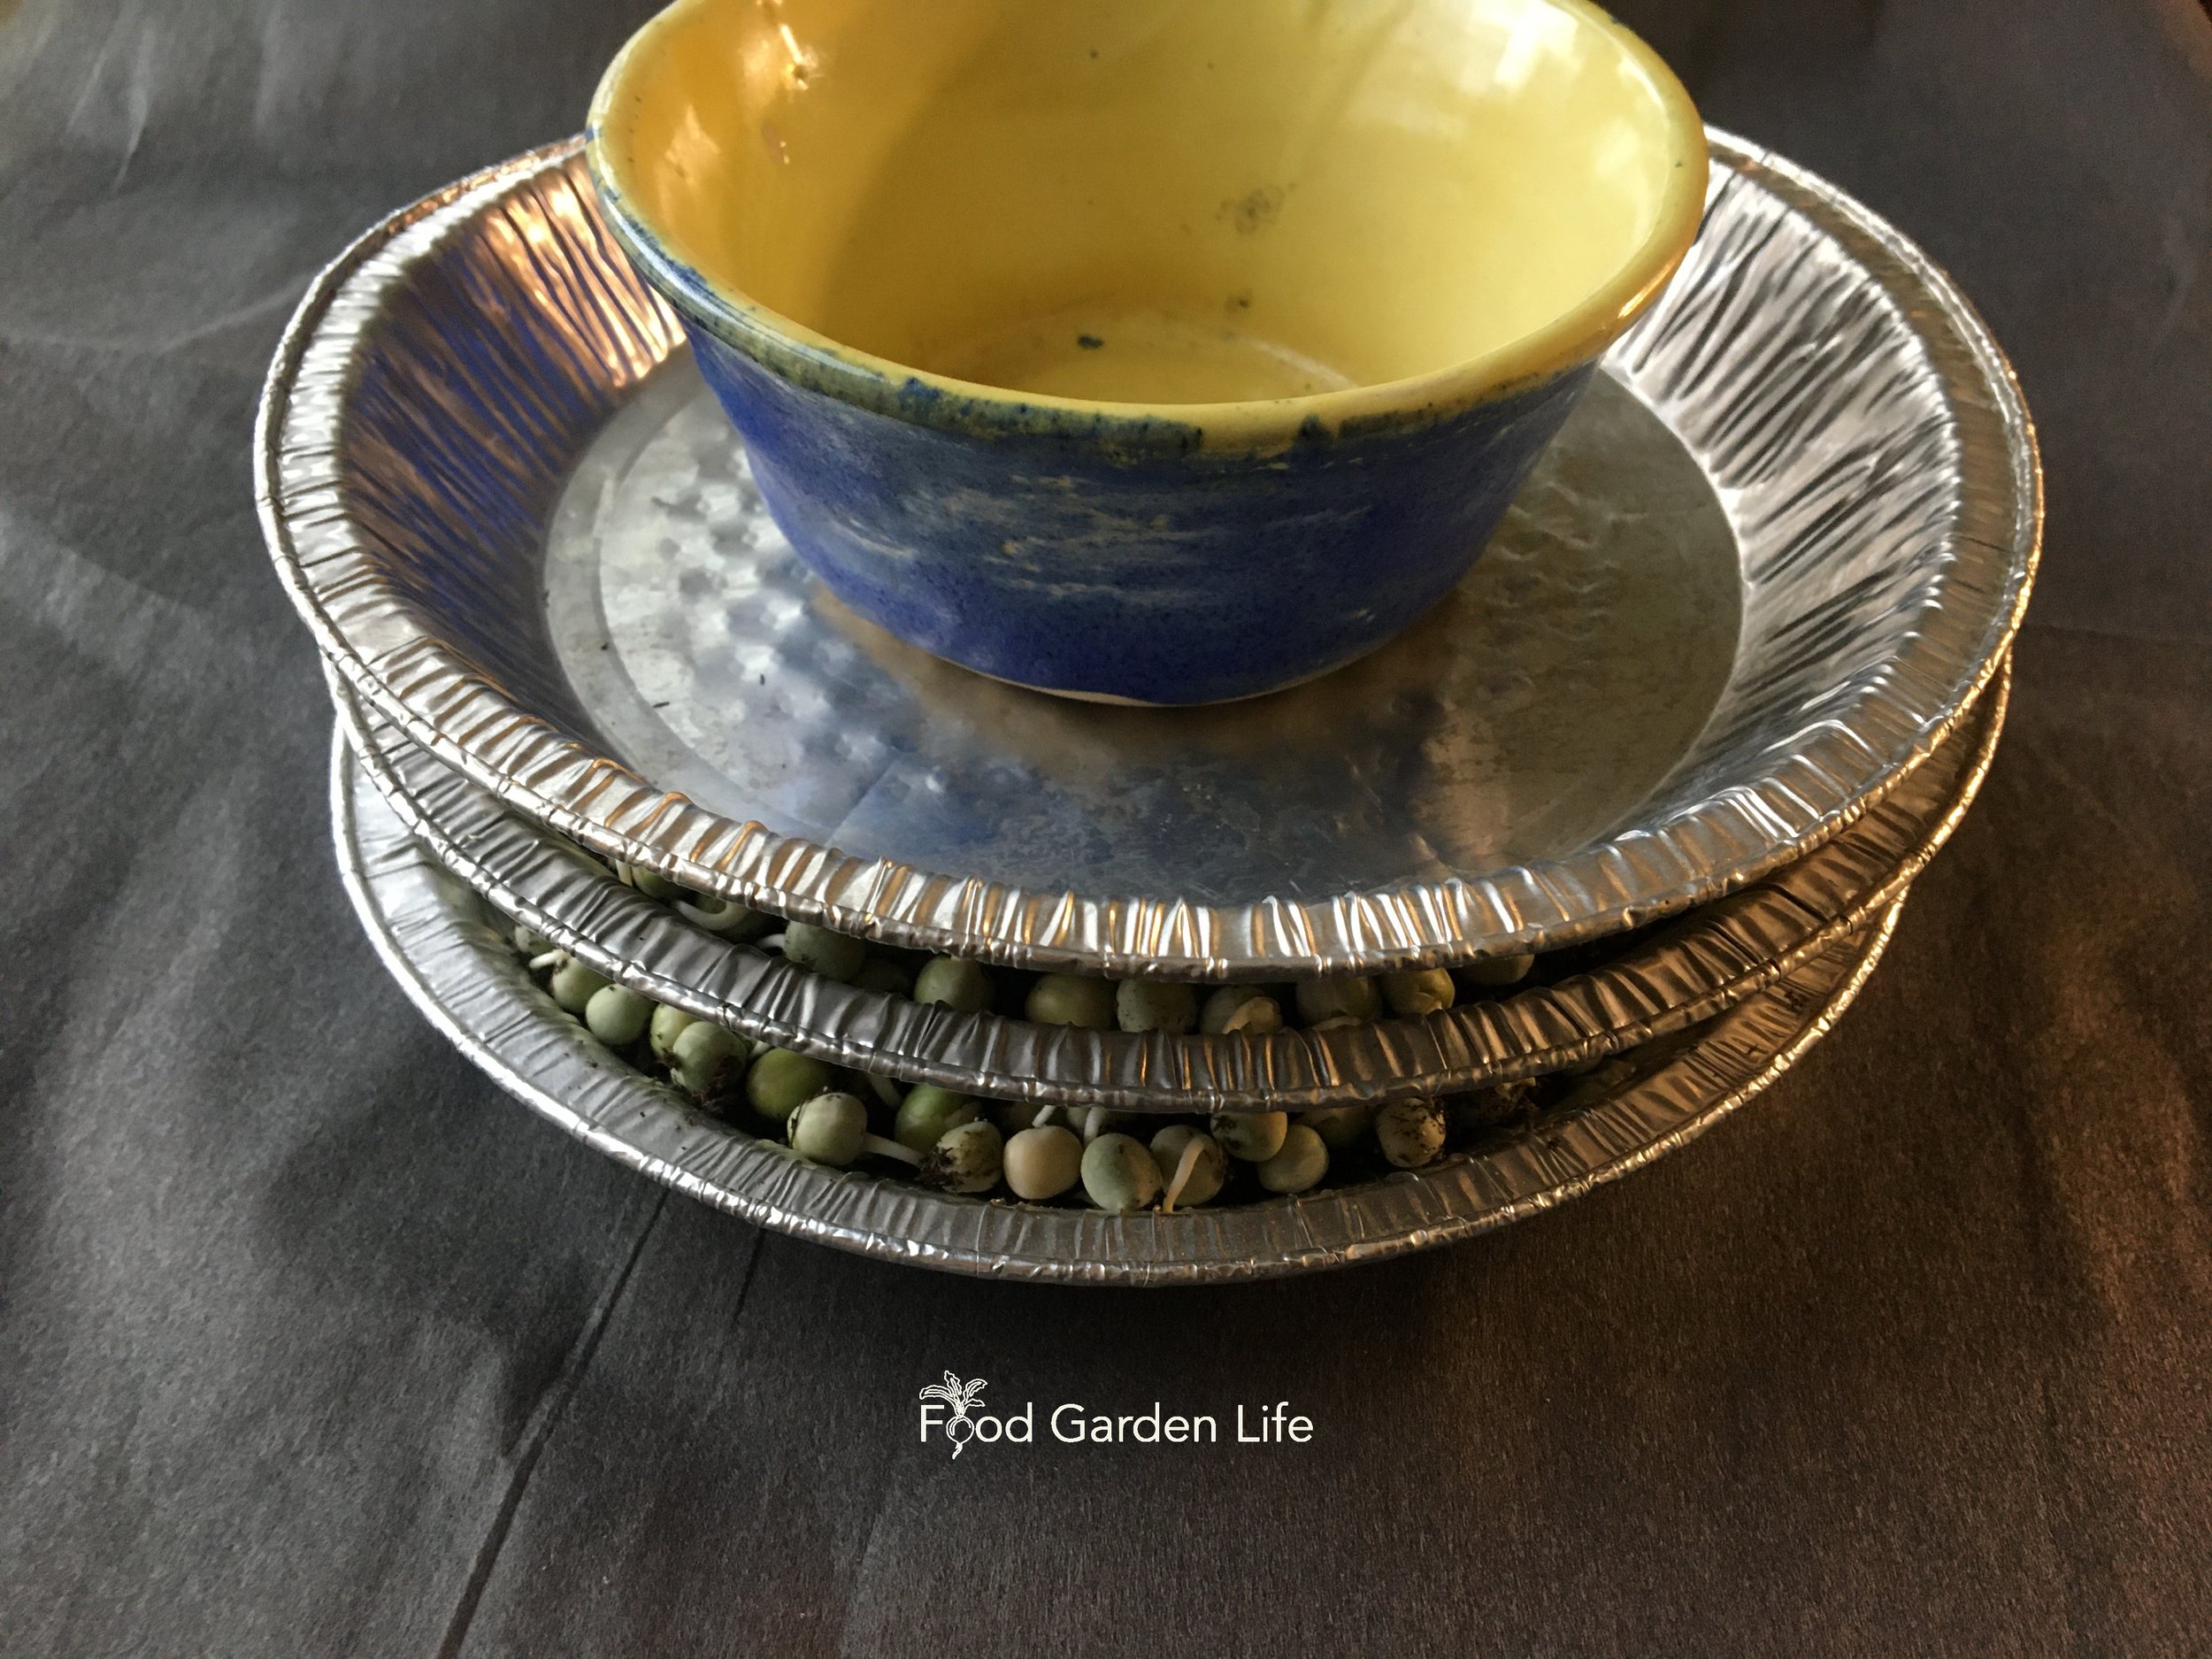
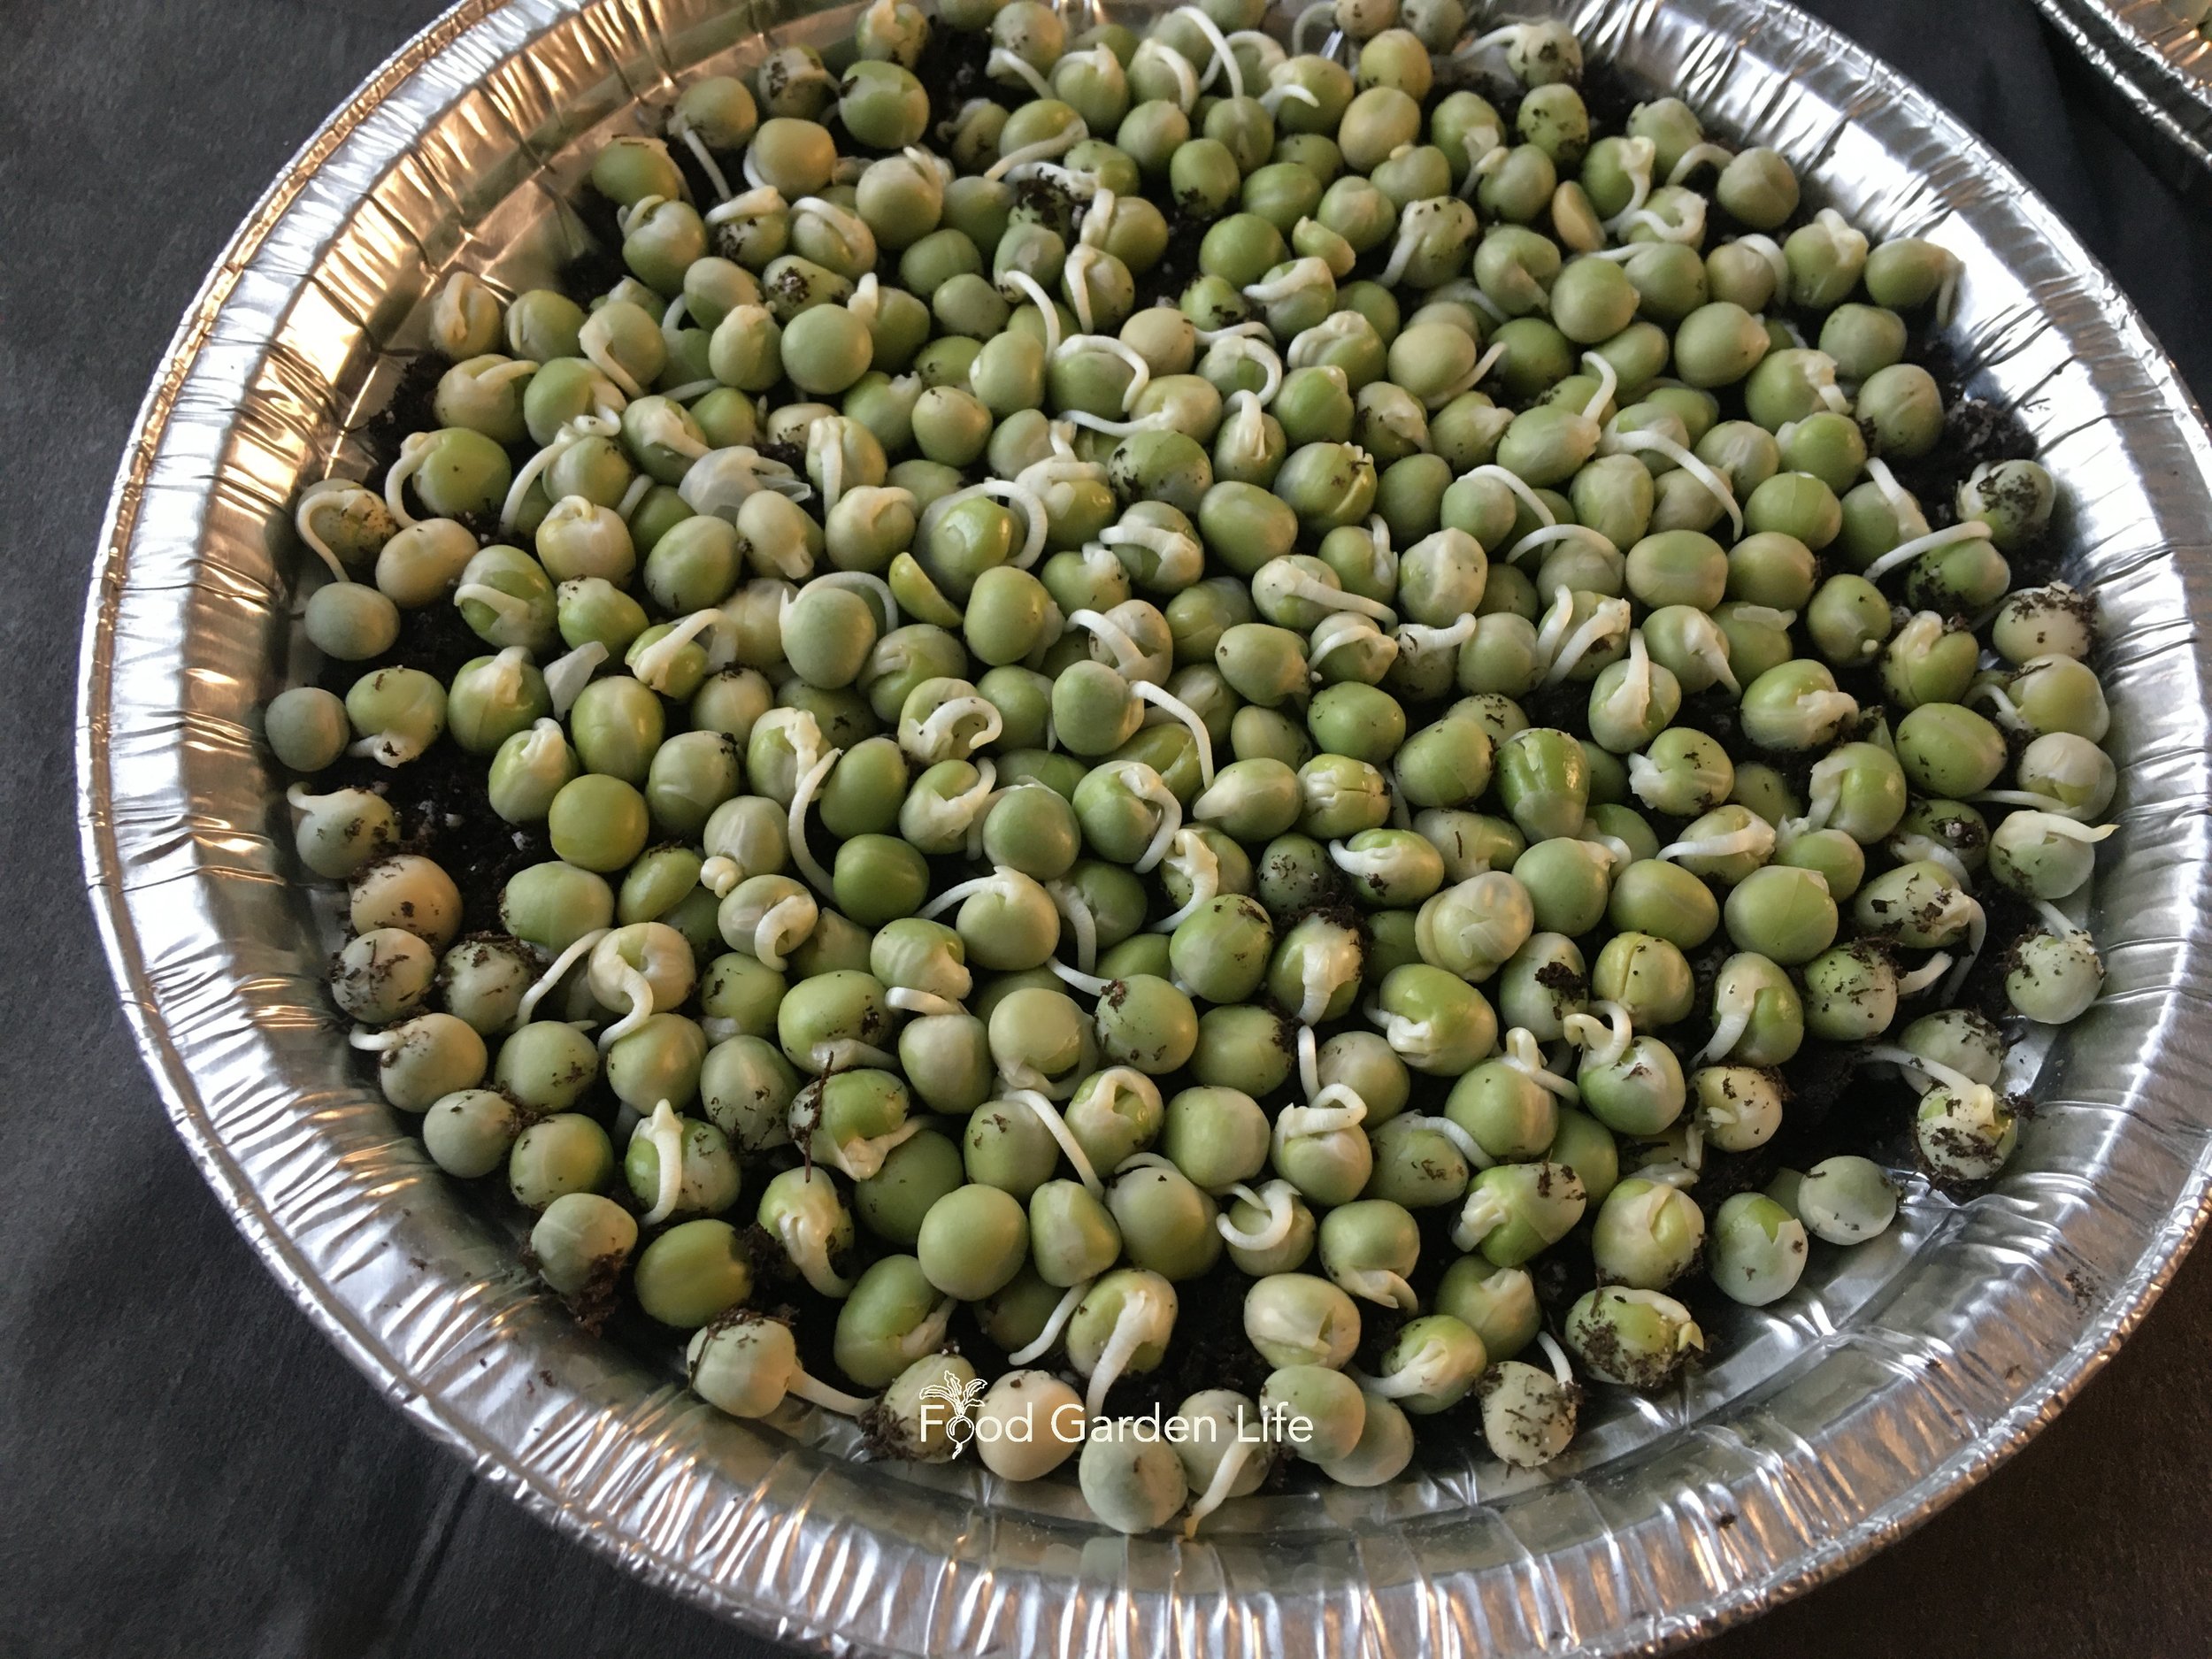
Top Tip: When seeds are in contact with the soil you get a faster, more uniform germination. Put something heavy over the microgreens after sowing. The weight pushes down on the seeds so that they are in contact with the soil. (I stack my pie plates full of seeds.)
Don’t do this: Don’t fertilize them. There’s enough stored energy in the seed to grow the microgreens until harvest.
Location for Microgreens
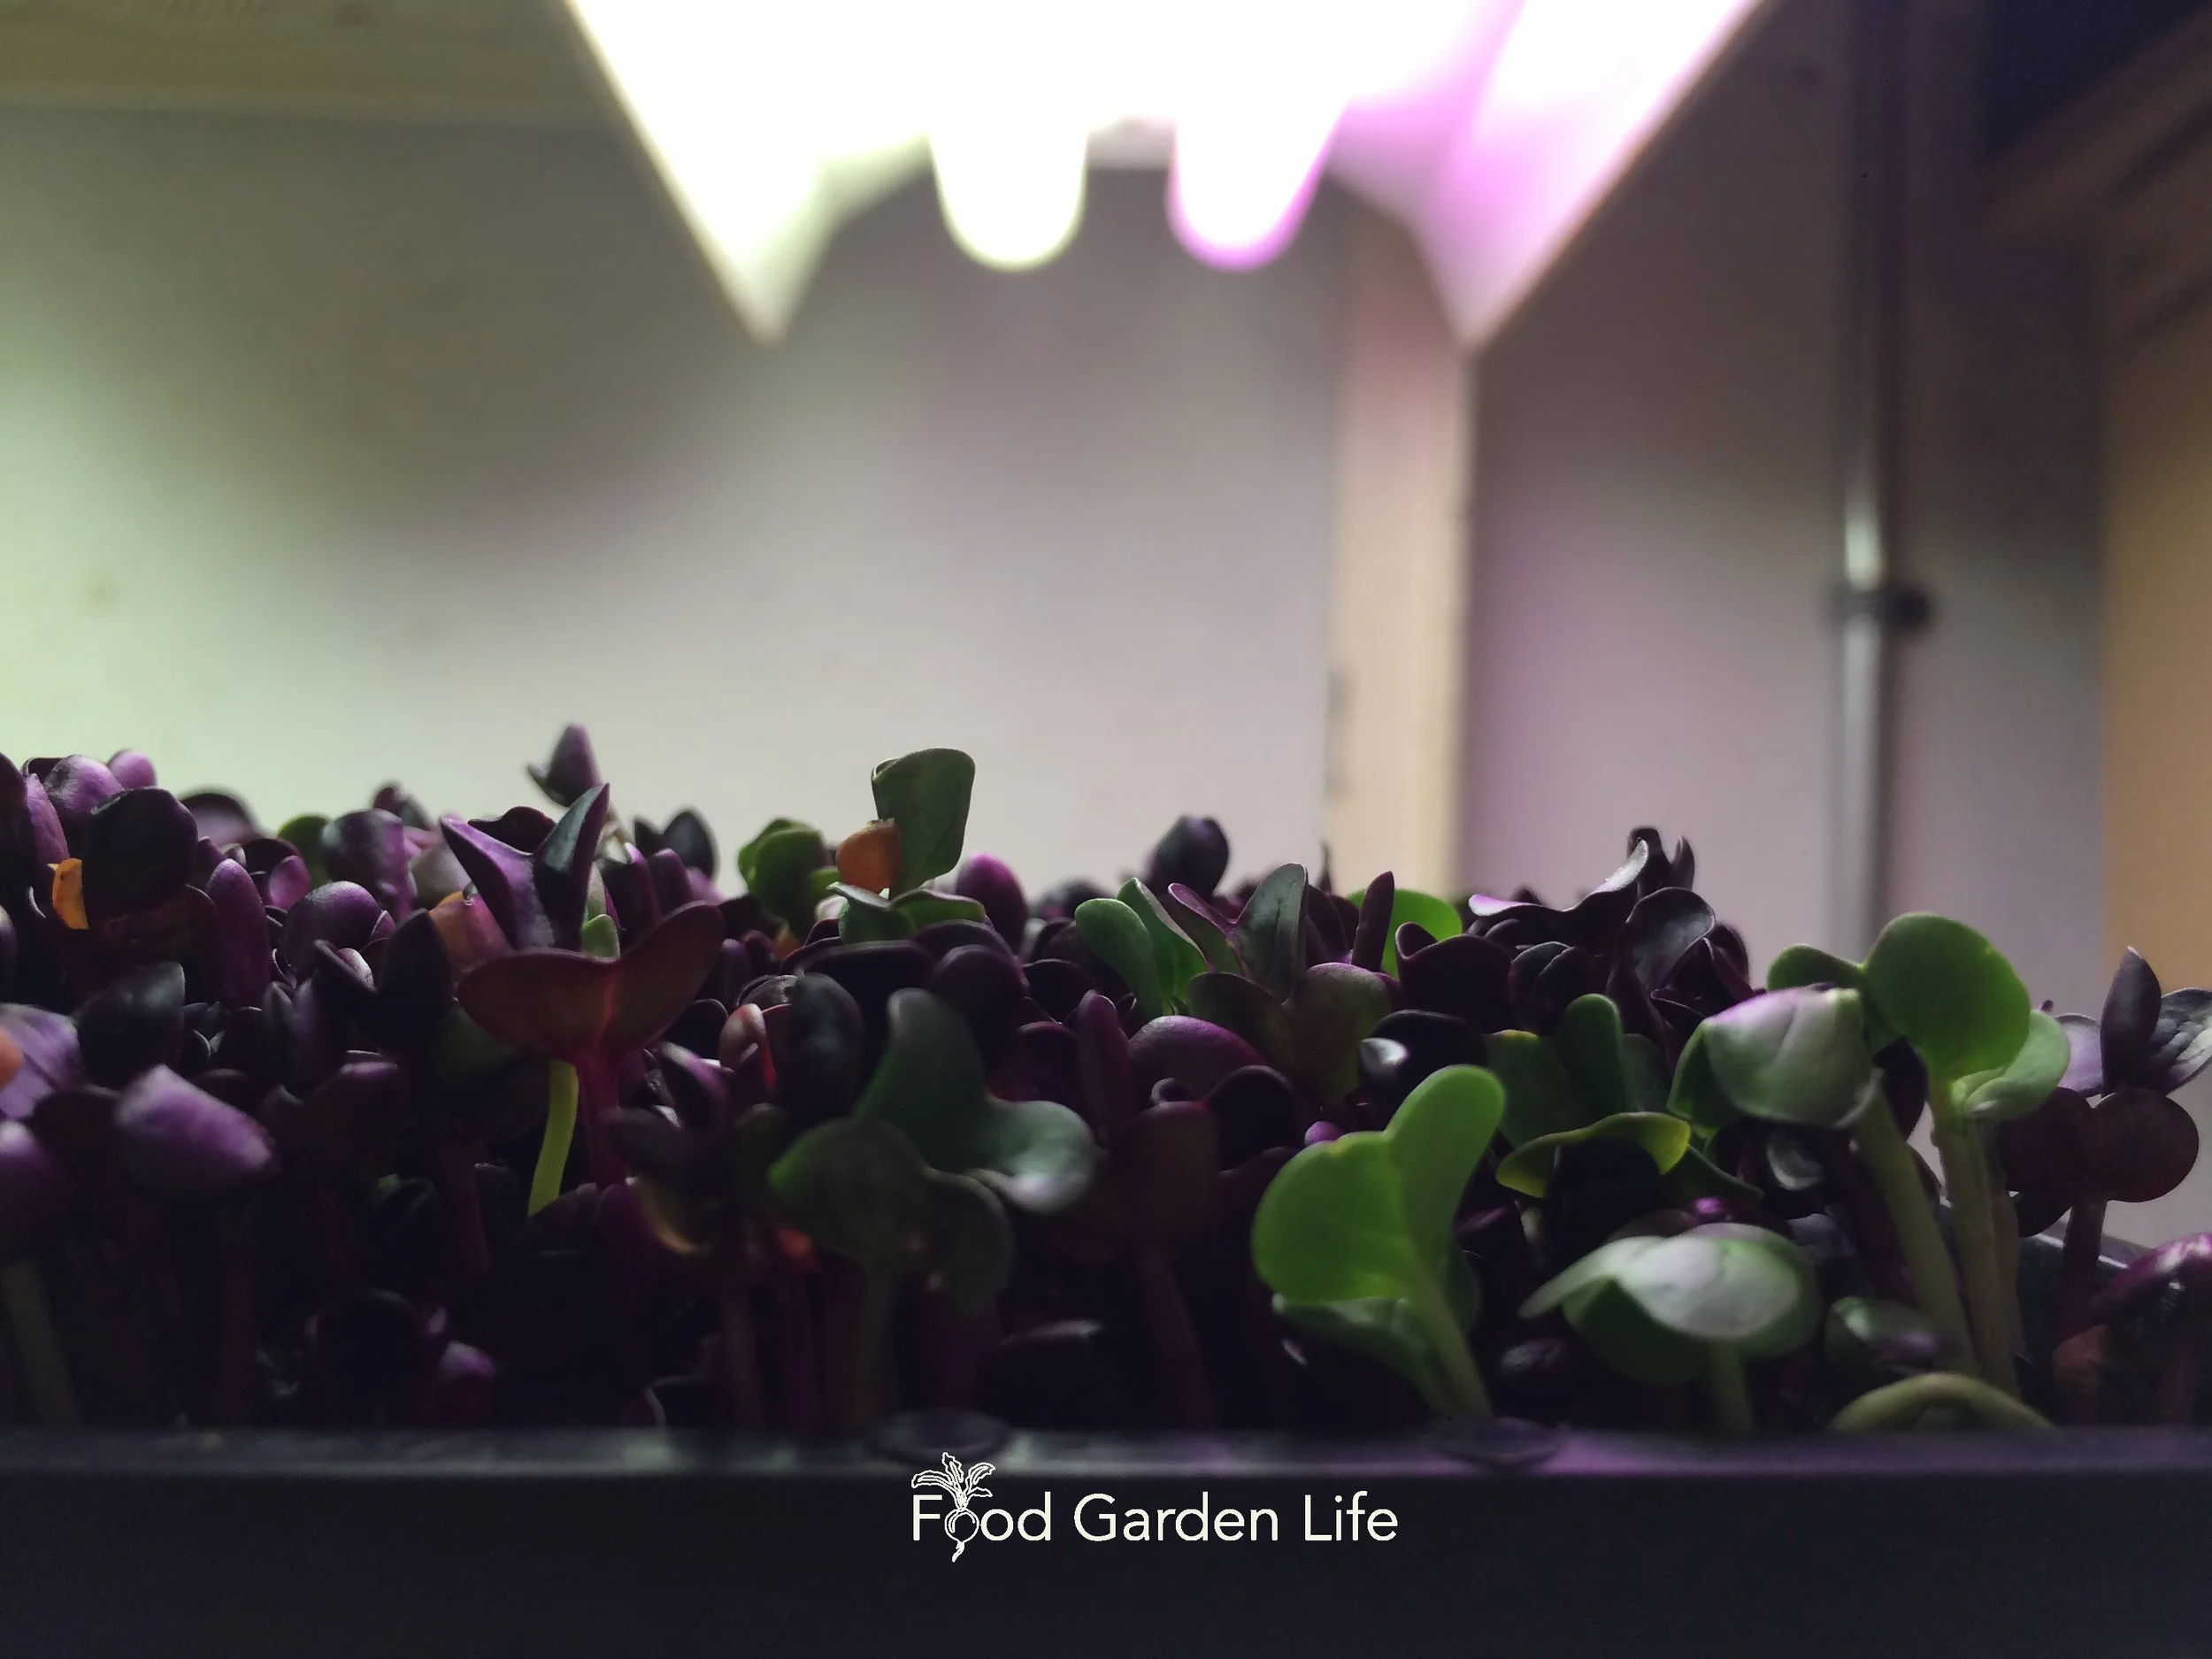
Growing microgreens under lights. Less light is OK too.
You don’t need perfect growing conditions, so make do with what you have. If you have a bright window or set of grow lights, these work well.
Low light is also OK too, because the plants are growing using energy stored in the seed. I’ve grown them on a dim countertop.
The warmer the temperature, the more quickly the microgreens grow.
Seeds sprout more quickly in warmer conditions. Here are ways to give your microgreen seeds more heat:
A heat mat
A sunny windowsill
The top of a hot-water radiator
A heated floor
Growing Your Microgreen Crop
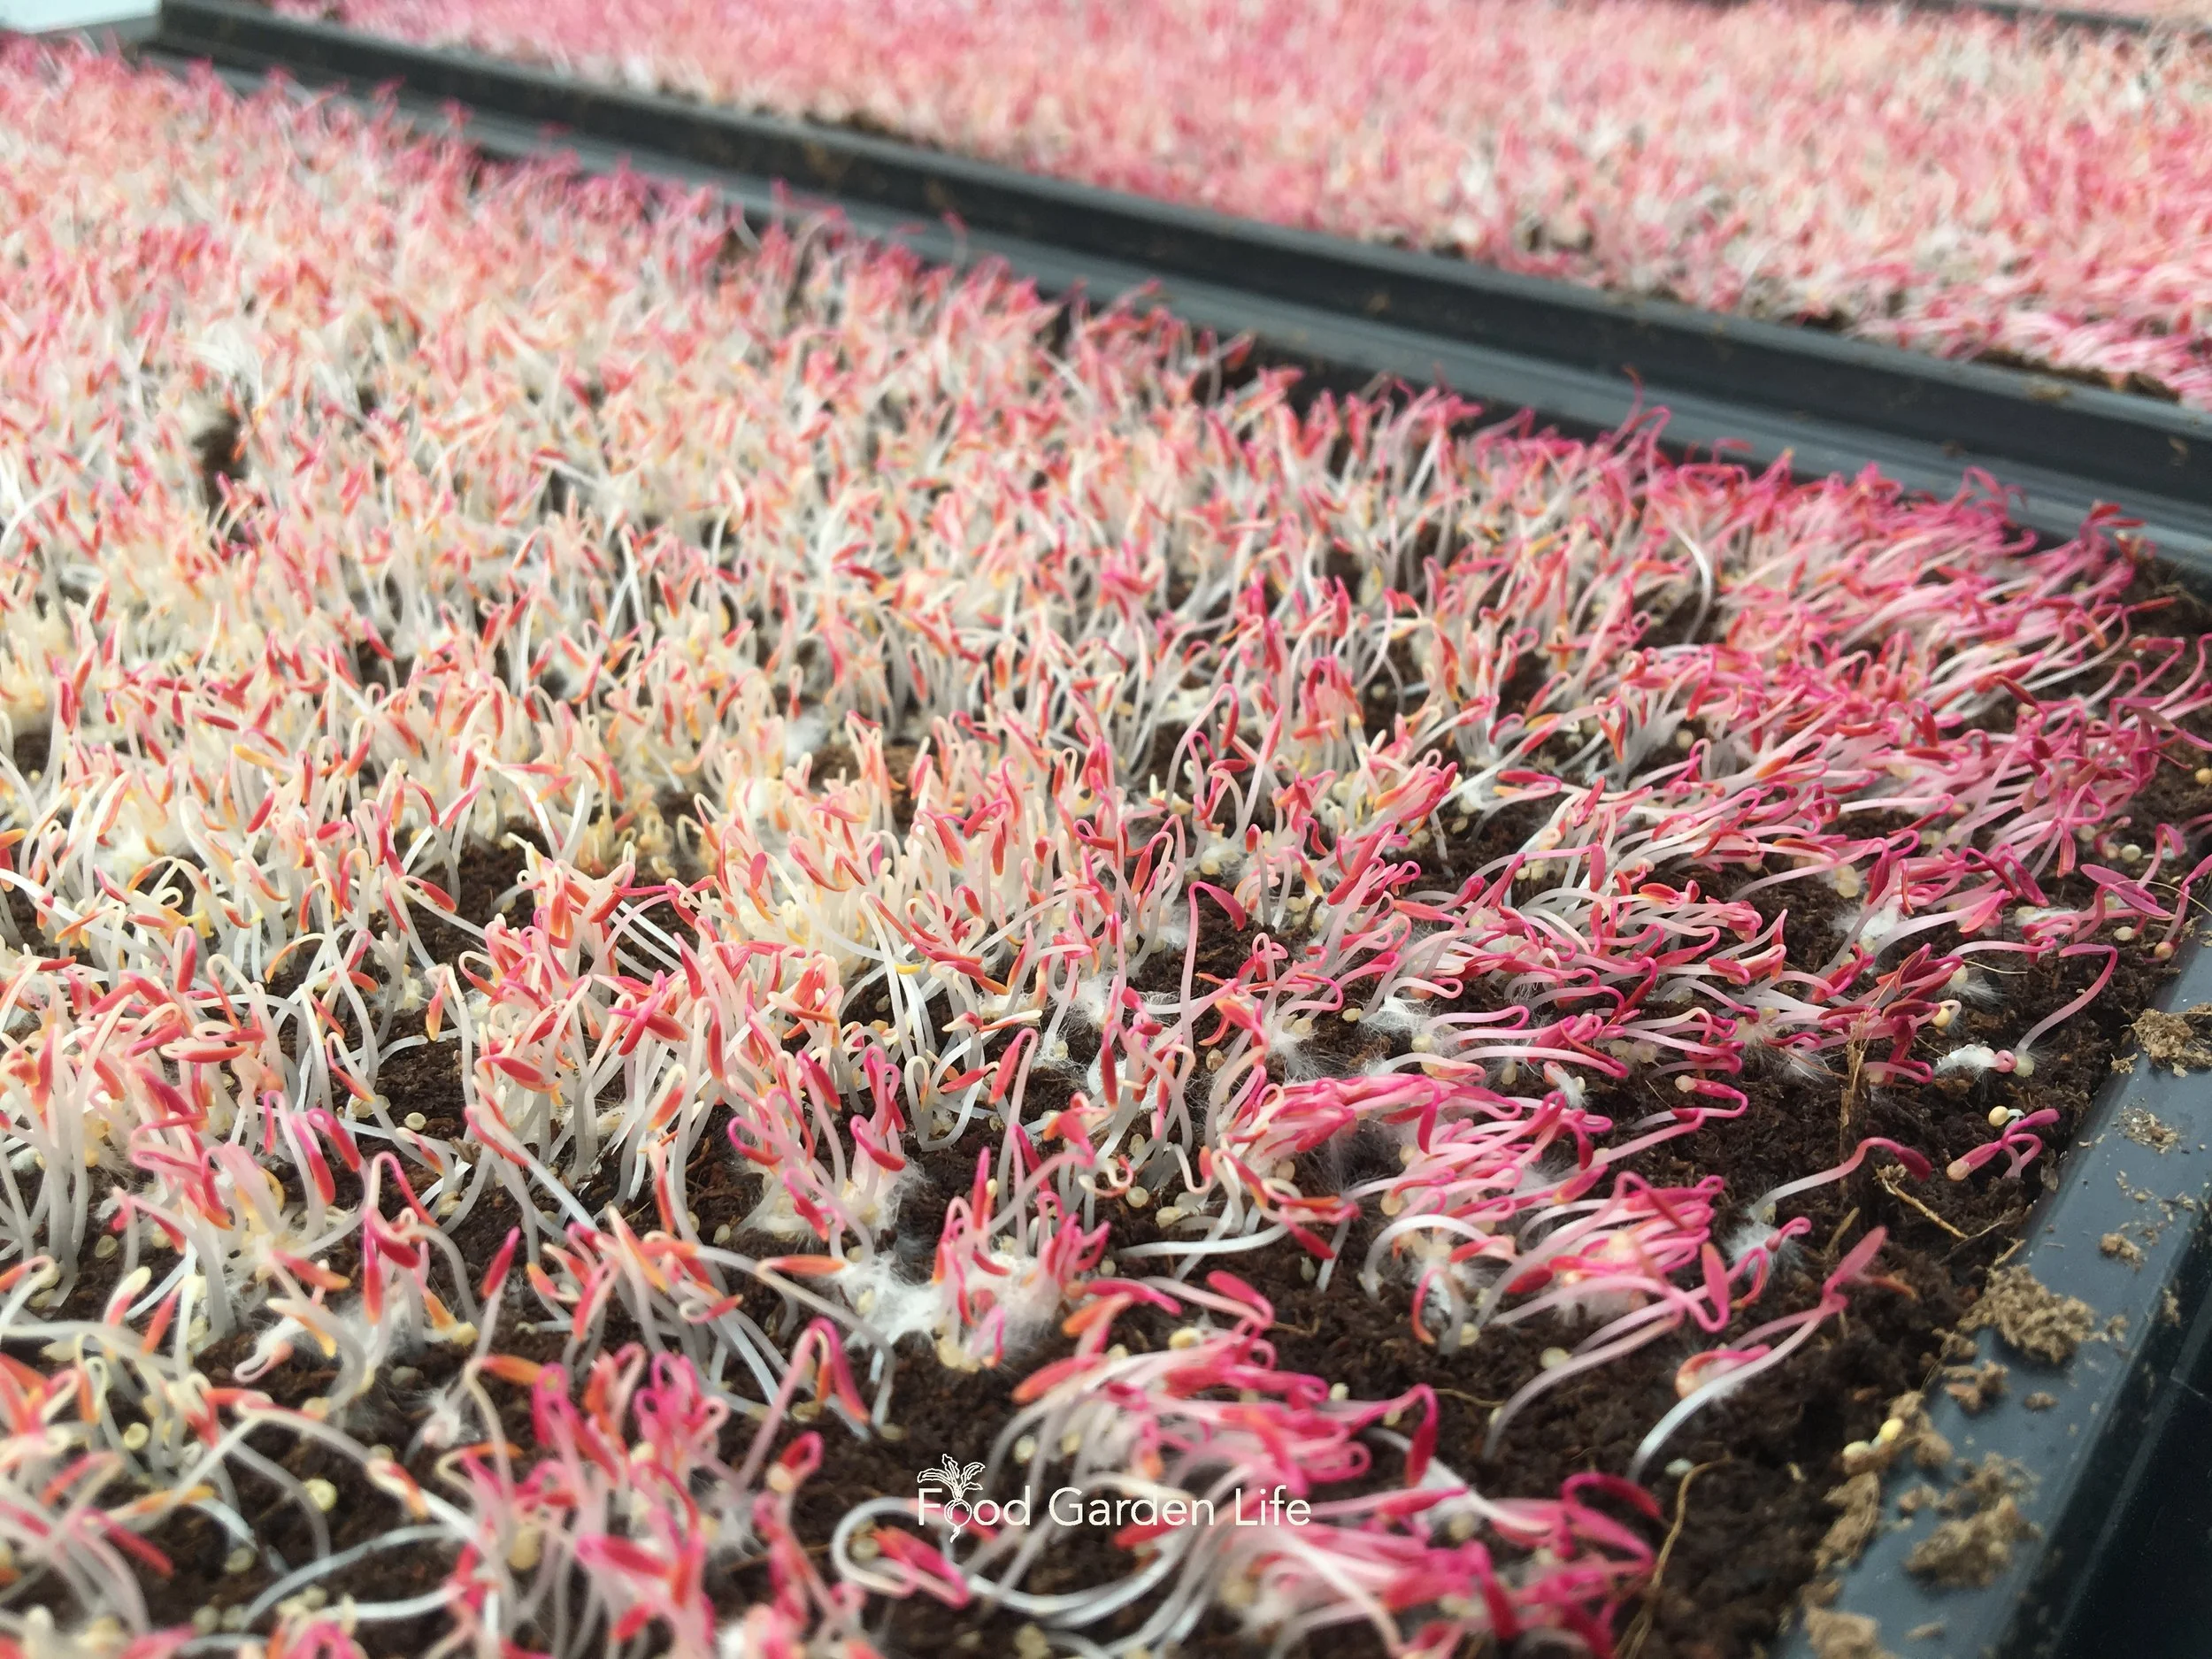
If you put something heavy on top of the seeds, remove it after a couple days. These amaranth microgreens were covered a bit too long…but they’ll bounce back.
Check daily to make sure the soil is moist and to see if your seeds are germinating.
If you put something heavy on top of the seeds, remove it after a couple days.
Harvesting Microgreens
Harvesting Pea Shoots
When I grow windowsill pea microgreens over the winter at room temperature, I expect to harvest them about 2 weeks after sowing.
Harvest microgreens when they get 3-4 inches tall, a size when they are tender and not fibrous.
The first cut is the largest. There might be a couple more smaller harvests with pea shoots. (Not all microgreens regrow from what remains after harvest.)
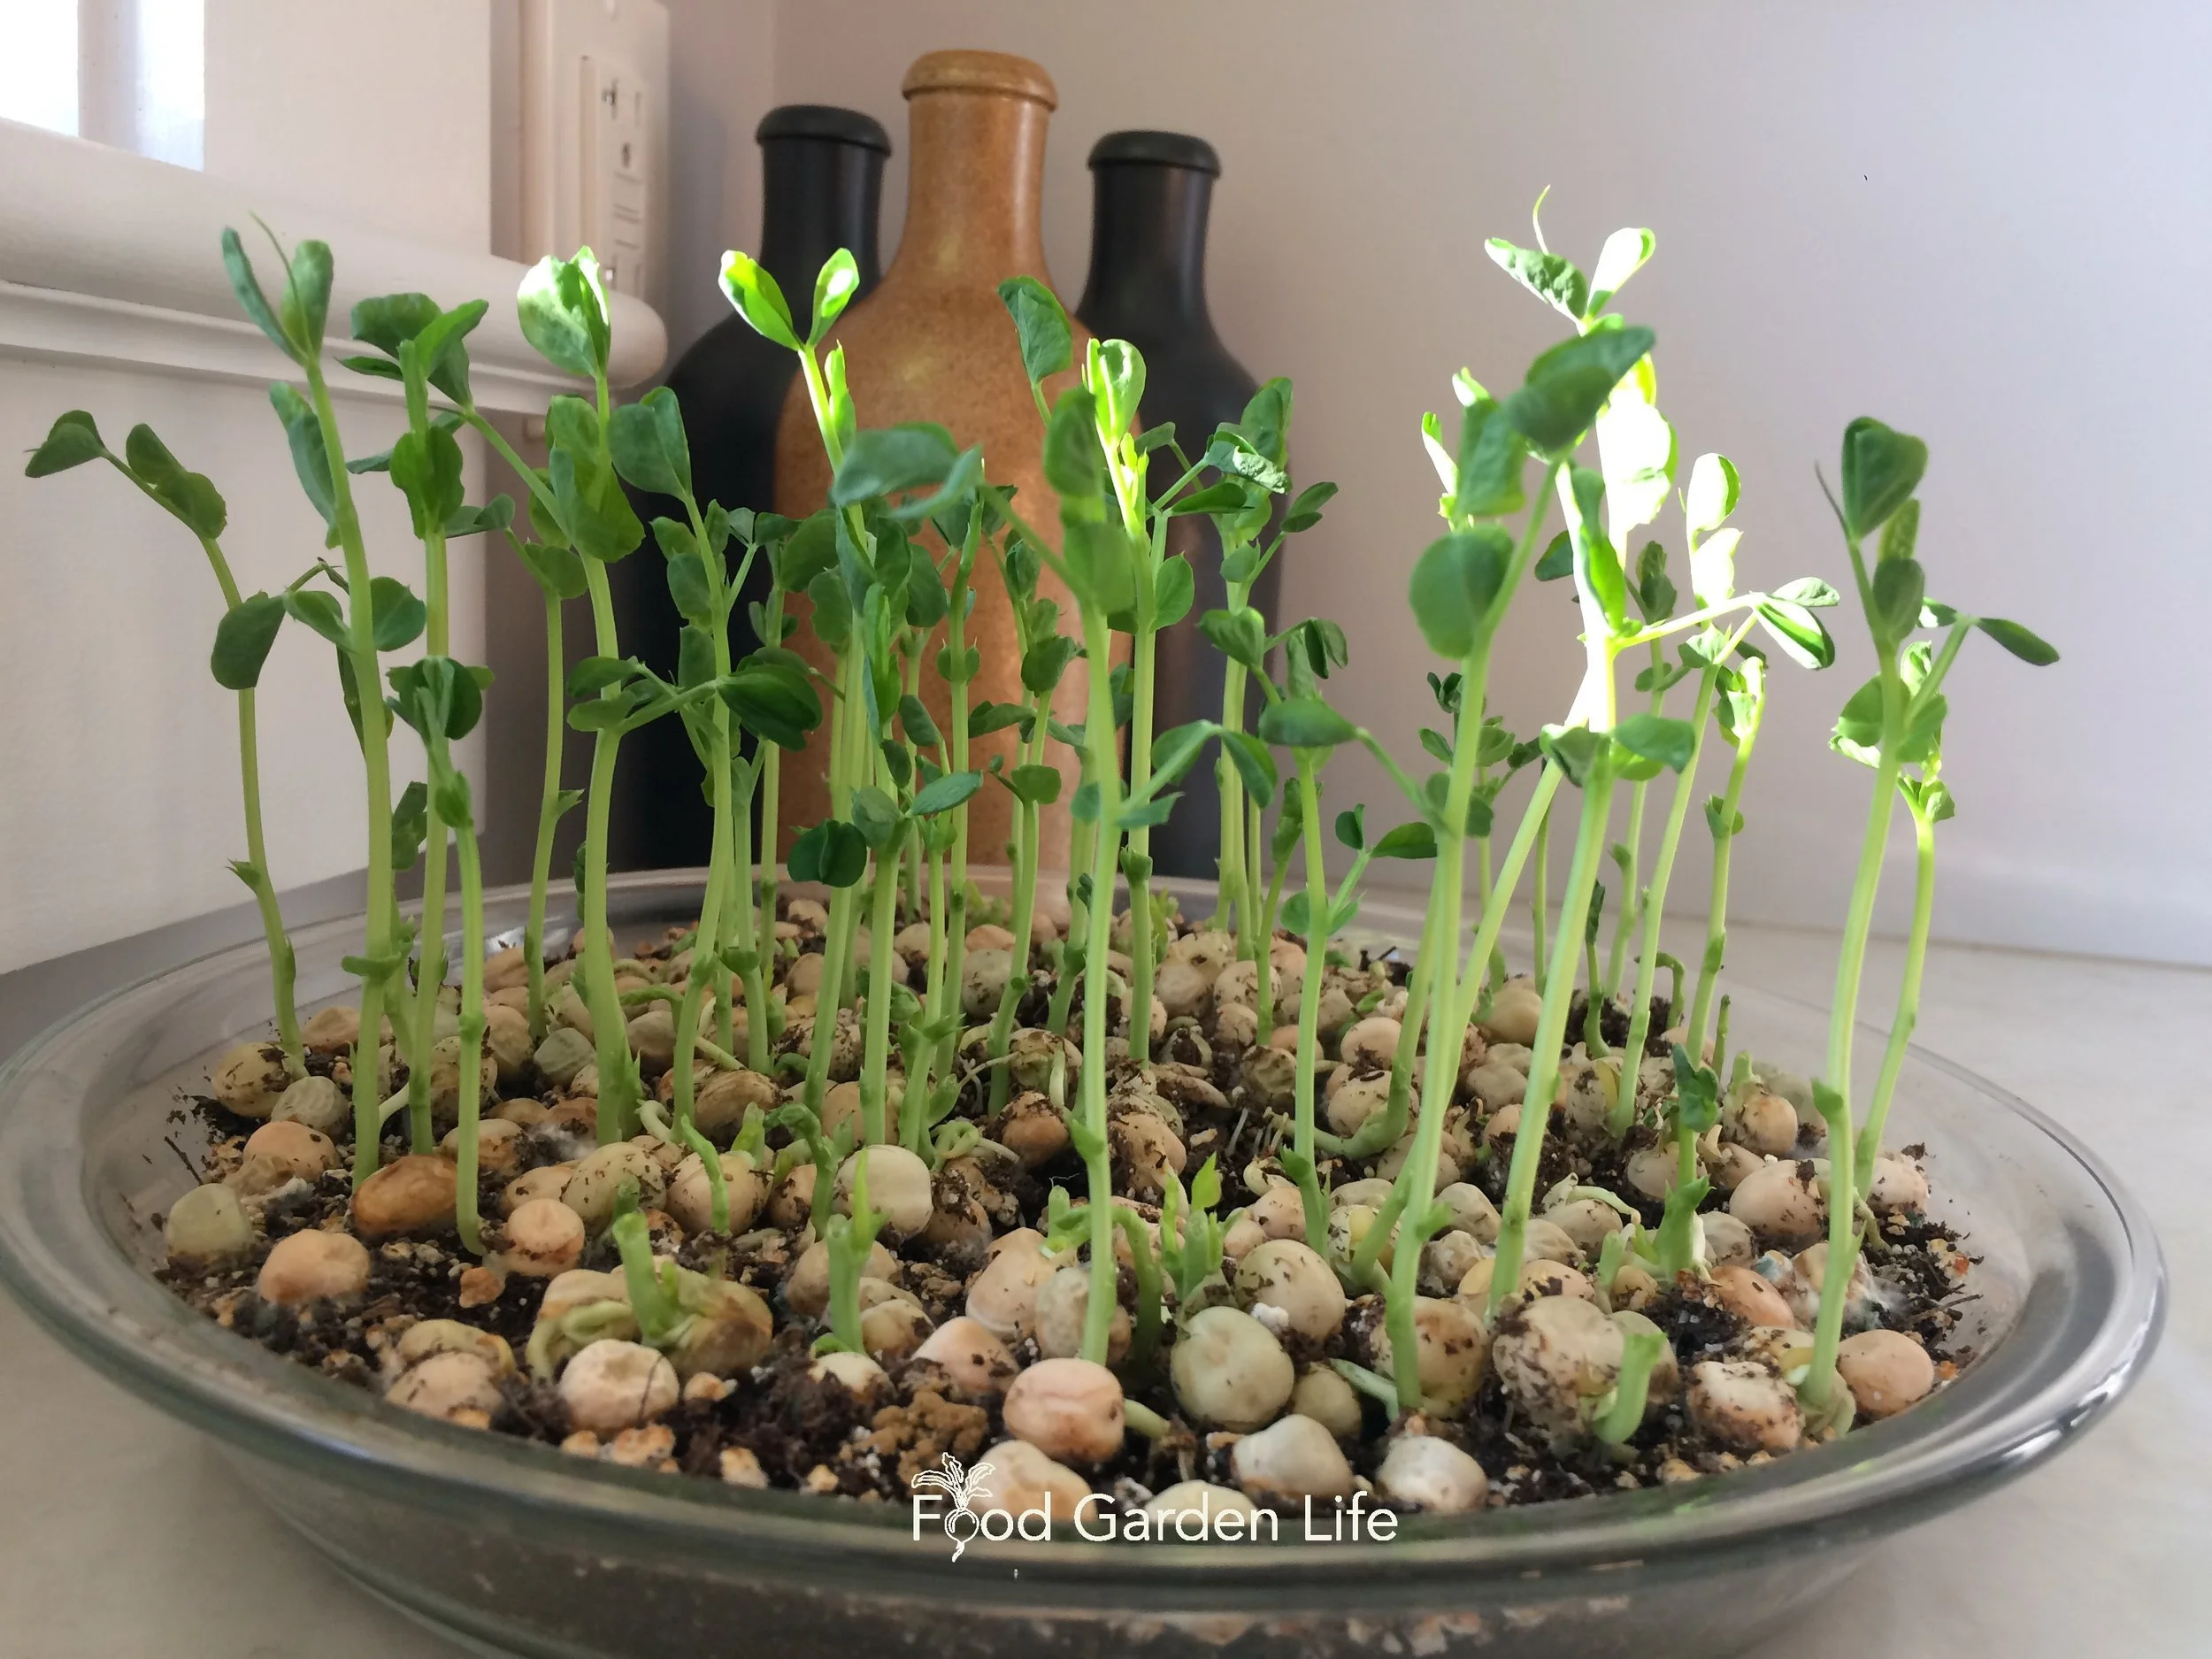
Spotty germination in this container of pea microgreens because the potting soil got too dry.
When the energy in the seeds is used up and they no longer send up new growth, compost them.
Harvesting Other Microgreens
The height and time to harvest depends on the microgreen crop. Most crops are harvested before a second set of leaves grows.
Harvesting Microgreens: Here's a Hack
In commercial operations growers often use shallow trays so that it’s easy to harvest microgreens with a knife. (With a deeper tray, the edge of the tray gets in the way of cutting close to soil level.)
My daughter grows our microgreens in shallow trays: it’s worthwhile if you’re planning to grow lots.
How to Store Microgreens
If you have more microgreens than you can use at once, store them the same way you do leafy greens.
I wrap them in damp paper towel, and then put them in a plastic bag, in the fridge.
Great for Gardening with Kids
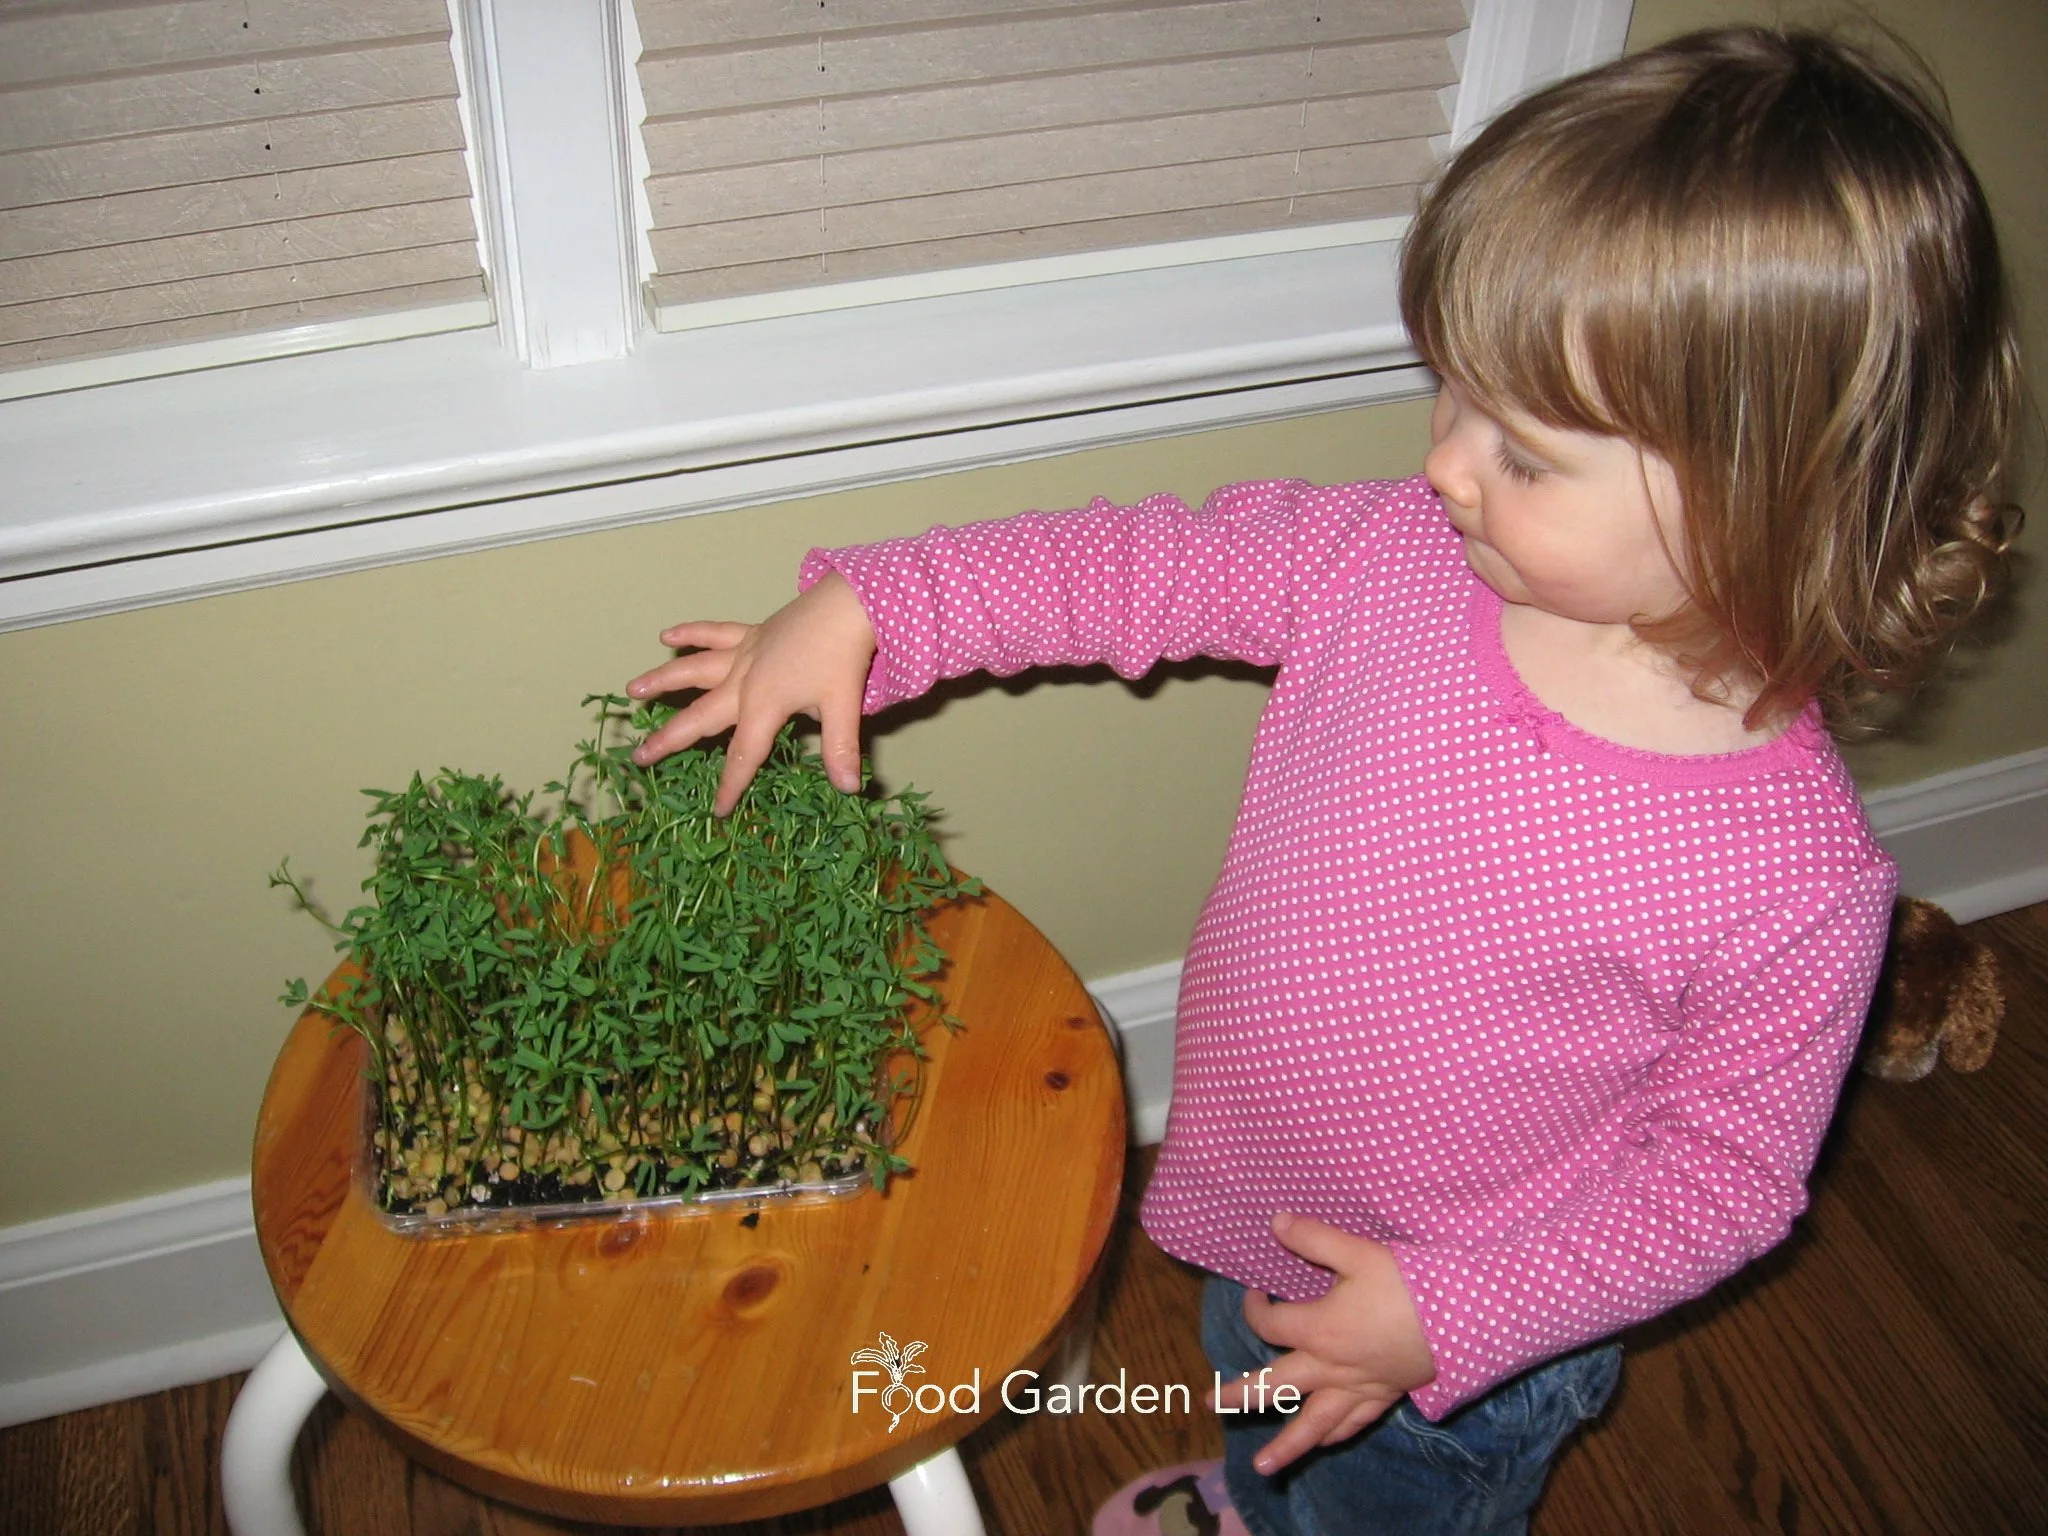
Growing microgreens is an easy and fun gardening project to do with children.
My hunch that pea shoot tendrils would be fun to tickle my kids with was what prompted me to grow microgreens in the first place.
The tendril-tickling got lots of giggles, and the sprouts were a crunchy and sweet—perfect for kids.
Growing microgreens also turned out to be a fun project to do with the kids.
If you grow microgreens with kids, start with pea shoots: They’re fairly big and easy for kids to handle.
Microgreens on the Menu
If you’re not used to eating microgreens, it’s not hard to incorporate them into the menu.
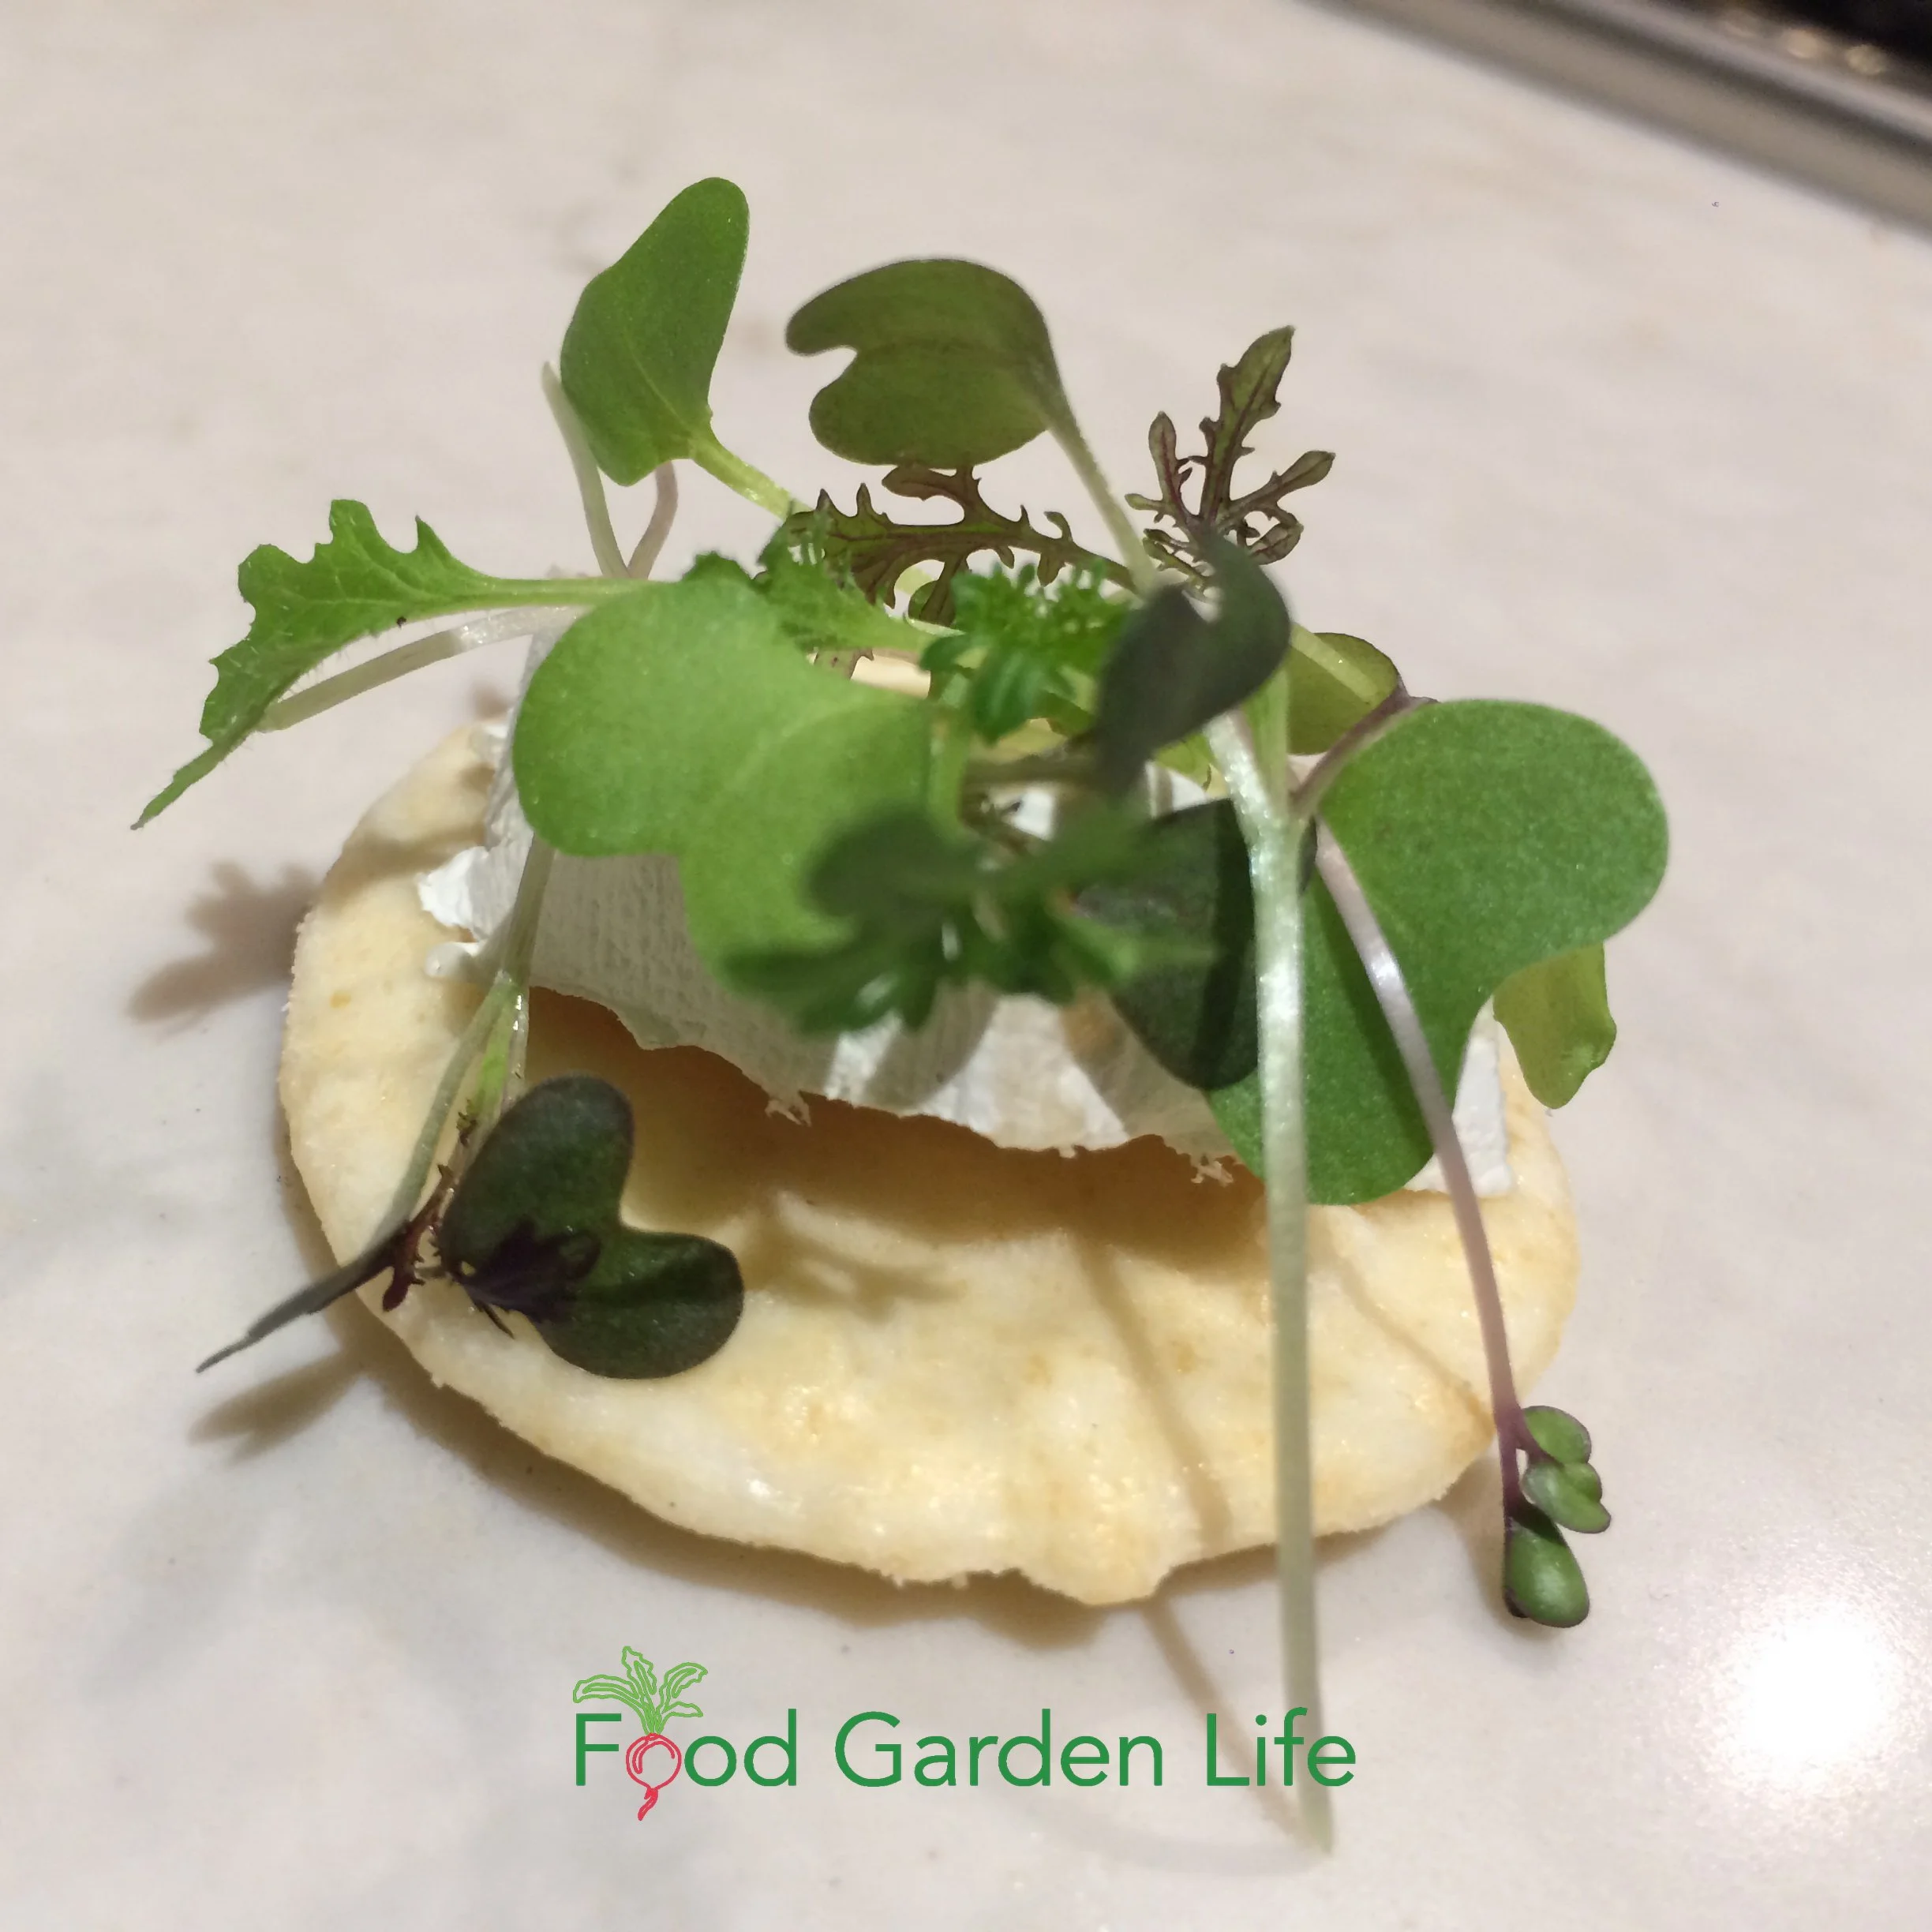
Microgreens as a finishing touch on a cracker with cheese!
Here are ideas:
Salads (our fav is chopped pea microgreens with toasted sunflower seeds and diced halloumi cheese)
Microgreens as a garnish
Served atop stir-fries
In sandwiches, instead of lettuce
FAQ: Growing Microgreens Indoors
What’s the difference between microgreens and sprouts?
Sprouts are grown in warm, humid, dark conditions, without soil. You eat the whole thing—including the roots.
Microgreens are grown in light, on a thin layer of potting soil. You eat the top—but not the roots.
I don’t bother growing sprouts. They require more attention. And there’s more chance of microbial contamination because the humid, warm, still conditions for growing sprouts are ideal for microbes to multiply.
Are microgreens safe?
Pin this post!
Many people associate sprouts with foodborne illness, a result of well-publicized cases of Escherichia coli (E. coli) and salmonella bacterial contamination.
By extension, people wonder about microgreens too. But there’s a difference between sprouts and microgreens.
Microgreens are exposed to light and air movement, making conditions less suitable for bacterial growth on microgreens. (Sprouts grow in conditions that are like a microbe incubator—in warm, moist conditions in a closed container.)
Do microgreens regrow after cutting?
It depends on the crop. Pea seeds and some of the larger seeds do send out another shoot after they're cut back. Many of the smaller seeds don't regrow once they're cut back.
But sometimes it looks like microgreen seeds are regrowing: It's seeds that didn't yet germinate starting to grow.
Find This Helpful?
Enjoy not being bombarded by annoying ads?
Appreciate the absence of junky affiliate links for products you don’t need?
It’s because we’re reader supported.
If we’ve helped in your food-gardening journey, we’re glad of support. You can high-five us below. Any amount welcome!
More Indoor Food Garden Ideas
Articles and Interviews
For more posts about how to grow vegetables and kitchen garden design, head over to the indoor food garden home page.
Courses: Edible Gardening
Want more ideas to make a great kitchen garden? We have great online classes that you can work through at your own pace.
Edible Gardening Consultation
Book a virtual consultation so we can talk about your situation, your challenges, and your opportunities and come up with ideas for your food garden.
We can dig into techniques, suitable plants, and how to pick projects that fit your available time.
Guide: Grow Globe Artichokes in Cold Climates
Yes, you can grow this Mediterranean vegetable even if you're in a cold climate. This guide tells you what to do to harvest your own homegrown artichokes.
By Steven Biggs
Planting Artichokes for the Delicious Flower Buds
Growing artichokes in cold climates is done differently than in milder climates.
“Dad, make lots of garlic butter!” It’s the first thing my kids say when I tell them I’m cooking fresh artichokes. Fine with me! I love the garlic butter as much as they do.
Besides the taste (and the garlic butter) there’s another thing I love about globe artichoke: It’s slow to eat, so there’s lots of time for family banter. We chat as we peel off bracts, dip them in butter, and repeat.
It’s the antithesis of fast food.
In our household we just call them artichokes. But some people call them globe artichokes – and in the UK you might hear them called French artichokes. (And if you like Latin names, Cynara cardunculus, var scolymus.)
Whatever you call them, you’re eating unopened artichoke flowers. Edible flower buds! (Unlike Jerusalem artichoke, where you’re eating a tuber.)
It can be a challenge to grow artichokes in cold climates. Keep reading, this article will explain how to grow your own artichoke plants and get flower buds.
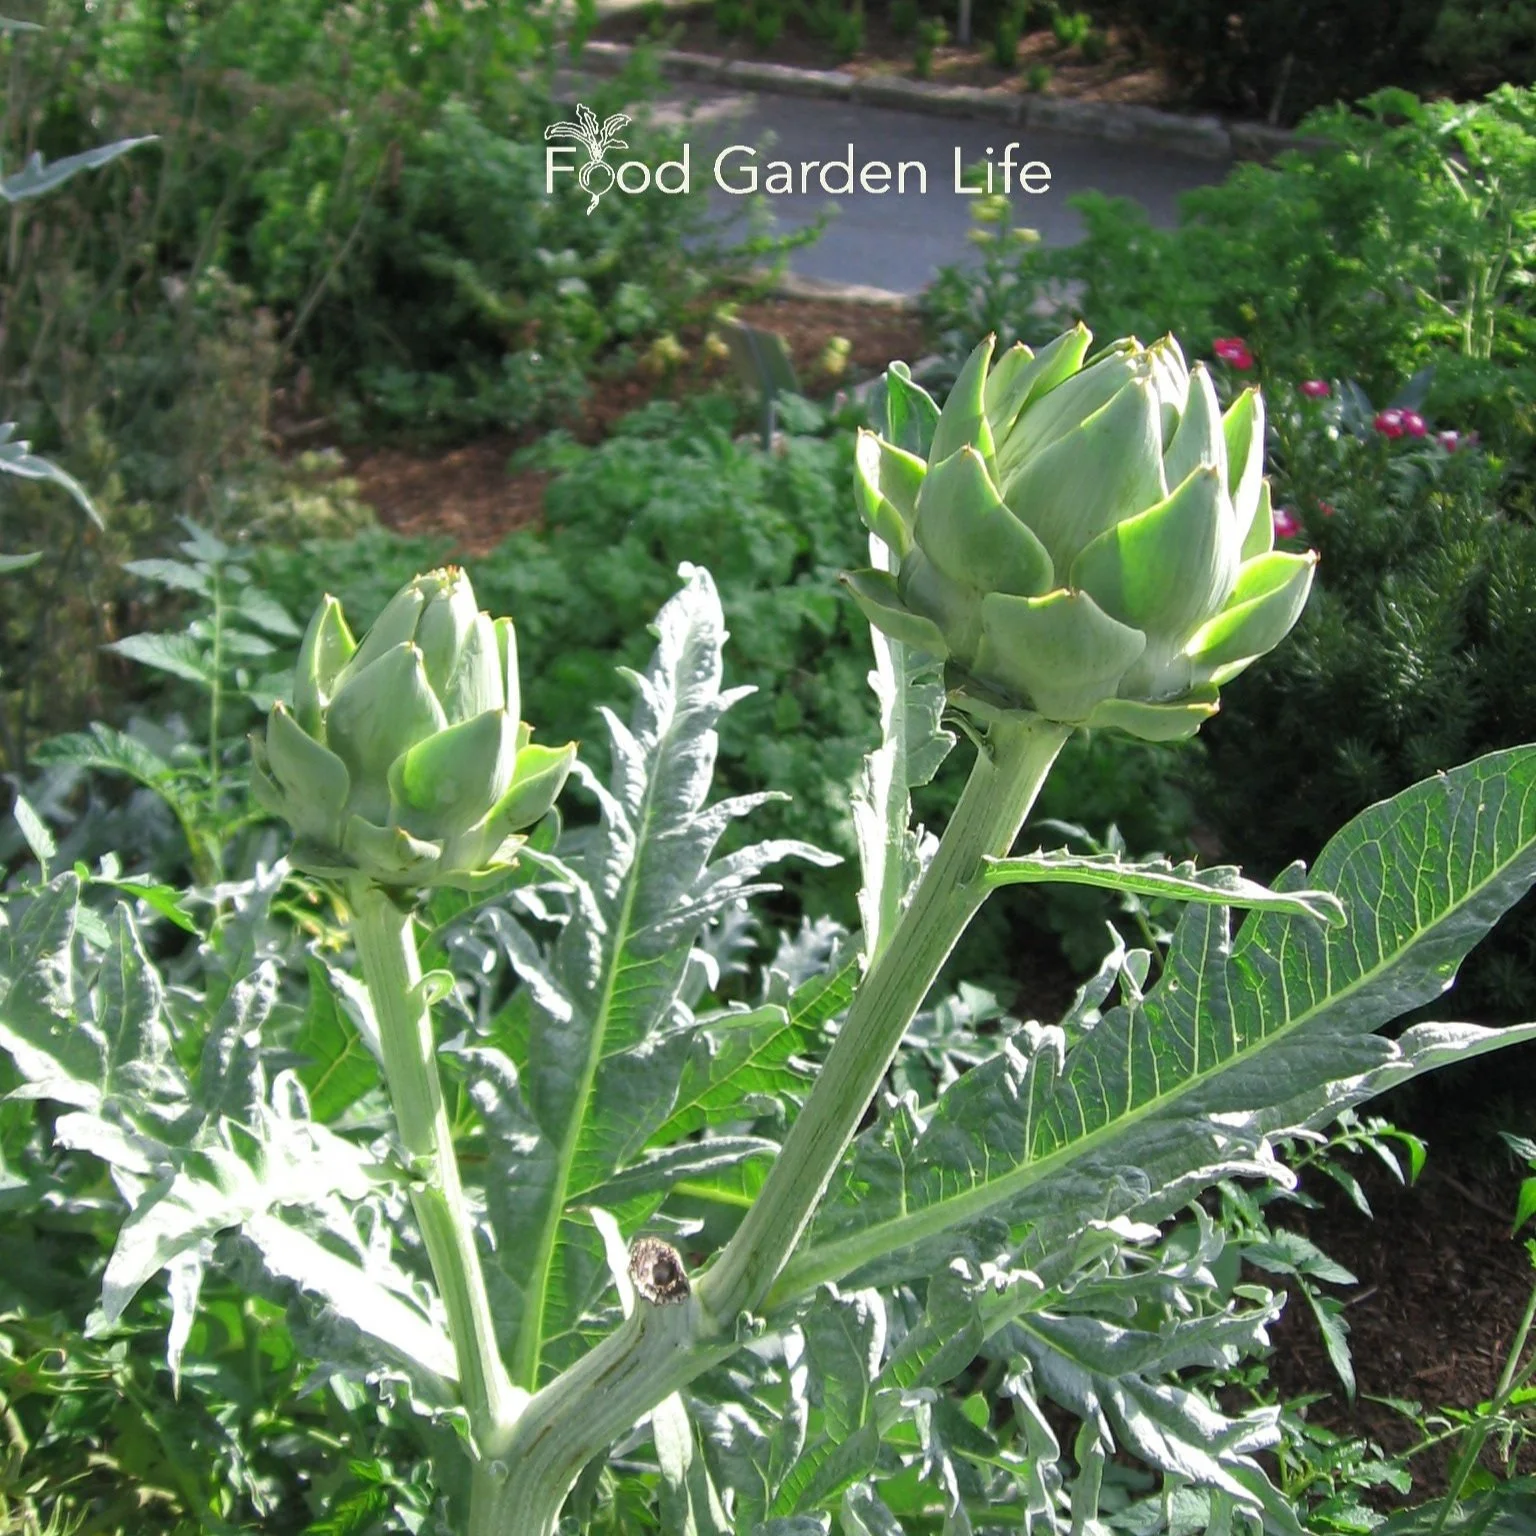
You can grow artichokes in northern climates…with the right variety, temperature, and timing.
Growing Artichokes in Northern Gardens
Artichoke is a tender perennial, meaning that it lives for a number of years where there are mild winters. But in a colder, northern climate, it does not survive the winter.
That means northern gardeners grow artichoke as an annual. (I have tried digging up mature plants in the fall to overwinter in my cold cupboard…but, frankly, it’s not worth the bother.)
In warmer areas, artichoke can be a big plant. But in the cold-climate garden, one metre (3’) high and wide is the biggest I’d expect…and probably smaller.
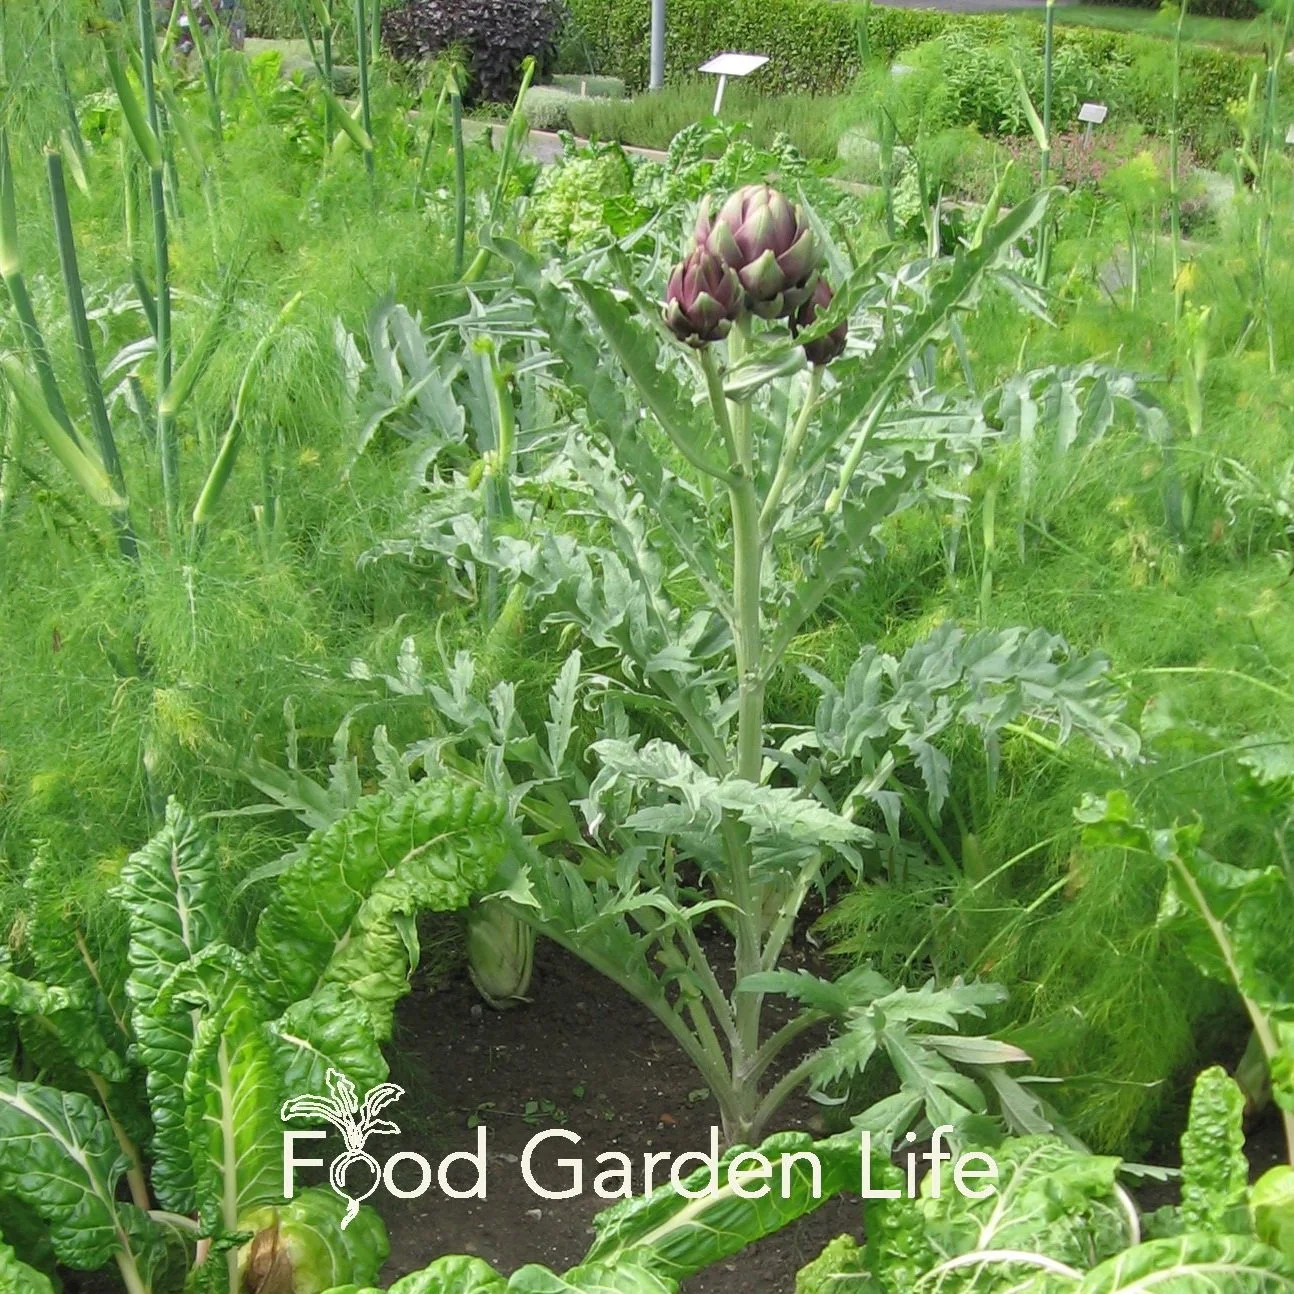
In cold climates, artichoke can be grown successfully from seed
How to Grow Artichoke in a Cold Climate
In areas where it survives the winter, it is often grown from “offsets,” which are side shoots that come up from established plants. These are cut off and rooted to make new plants.
If you’re in a cold climate, you probably won’t find offsets for sale. The alternative is to grow artichoke from seed.
That’s what I do.
Don’t think of seed-growing artichoke as second best. I know of a farm near where I live, in Toronto, that grows first-rate seed-grown artichokes on a large scale.
Just make sure you have a long enough growing season, upwards of about 100 frost-free days.
Grow Artichoke from Seed
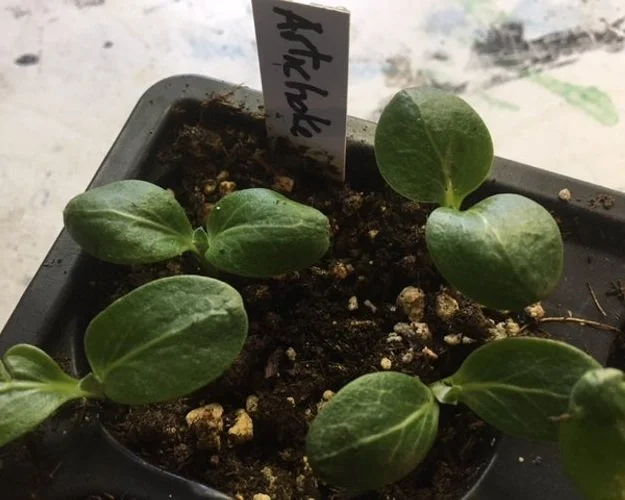
Start artichoke seeds indoors, 8-10 weeks before the average last frost date for your area. Plant seeds about 6 mm (1/4”) deep. A warmer temperature helps with germination, so I put mine on a heat mat. (Hot water radiators or heated floors are good heat sources too!)
Once your artichoke seedlings are up and growing, take them off the heat.
I usually plant 3-4 seeds in a small pot. Once they’ve grown a second set of leaves, I separate them and give them their own pots.
Trick
Like many seed-grown perennials, flowering in the first year isn’t assured. To get flowers in same year that you grow your artichokes from seed, you give your young plants a cool-temperature treatment.
It seems counter-intuitive to a lot of gardeners. We’re used to coddling our seedlings. And that’s true for lots of the heat-loving crops we grow such as tomatoes, peppers, eggplants.
But…artichoke plants are different. And the cool-temperature tweak helps induce flowering.
So here’s the idea:
Imagine a young artichoke seedling growing in a warmer zone, where it grows as a perennial: The first year it makes leaves, then it lives through the mild winter, and then, finally, it flowers in its second year
You don’t have the luxury of a second year because your cold winter temperatures will kill your artichoke
But…you can expose your artichoke seedlings to cool conditions before planting them into the garden
And those cool conditions before transplanting into the garden do the same thing as a winter would – they move the plant into flower-production mode
Chill Treatment for Artichoke Plants
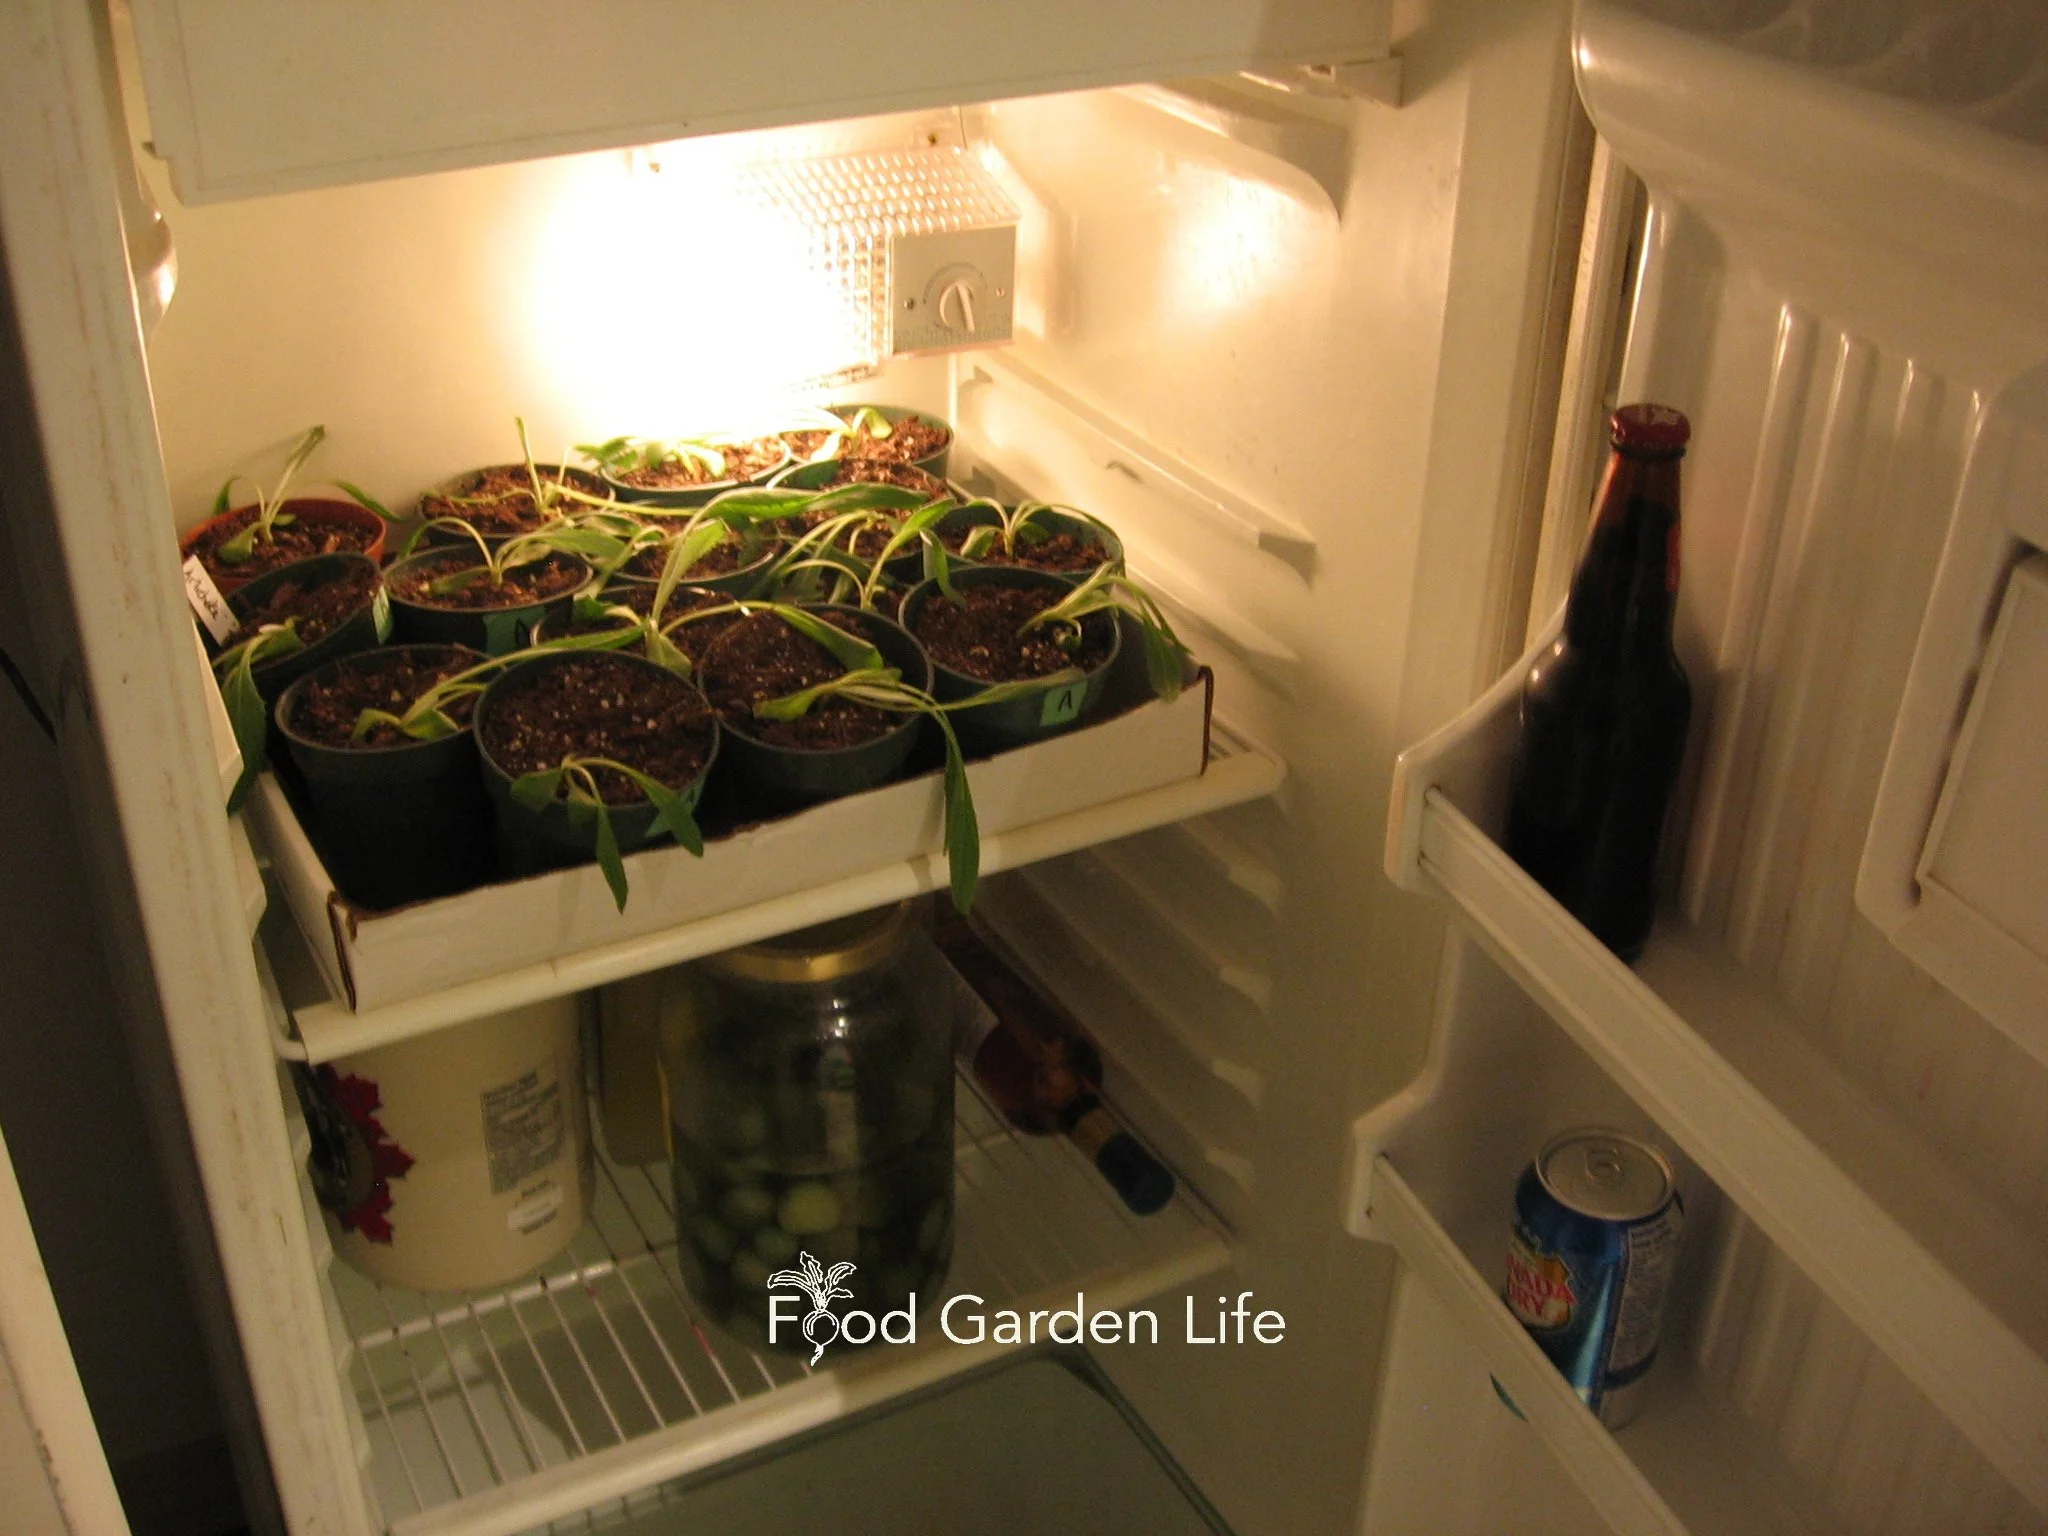
Another way to provide a chill treatment to artichoke seedlings is with a stint in a fridge…but make sure they don’t dry out, as fridges have a drying effect.
Move artichoke plants outdoors when they won’t be exposed to frost, but will still get a week or two of cool temperatures.
Ten to 14 days of temperatures less than 10°C (50°F) helps to get flower buds to form.
Artichoke Seed
Get artichoke varieties known to produce artichokes buds in the first season when grown from seed.
Two well-known varieties are:
‘Green Globe’
‘Imperial Star’
Planting Artichoke Plants in the Garden
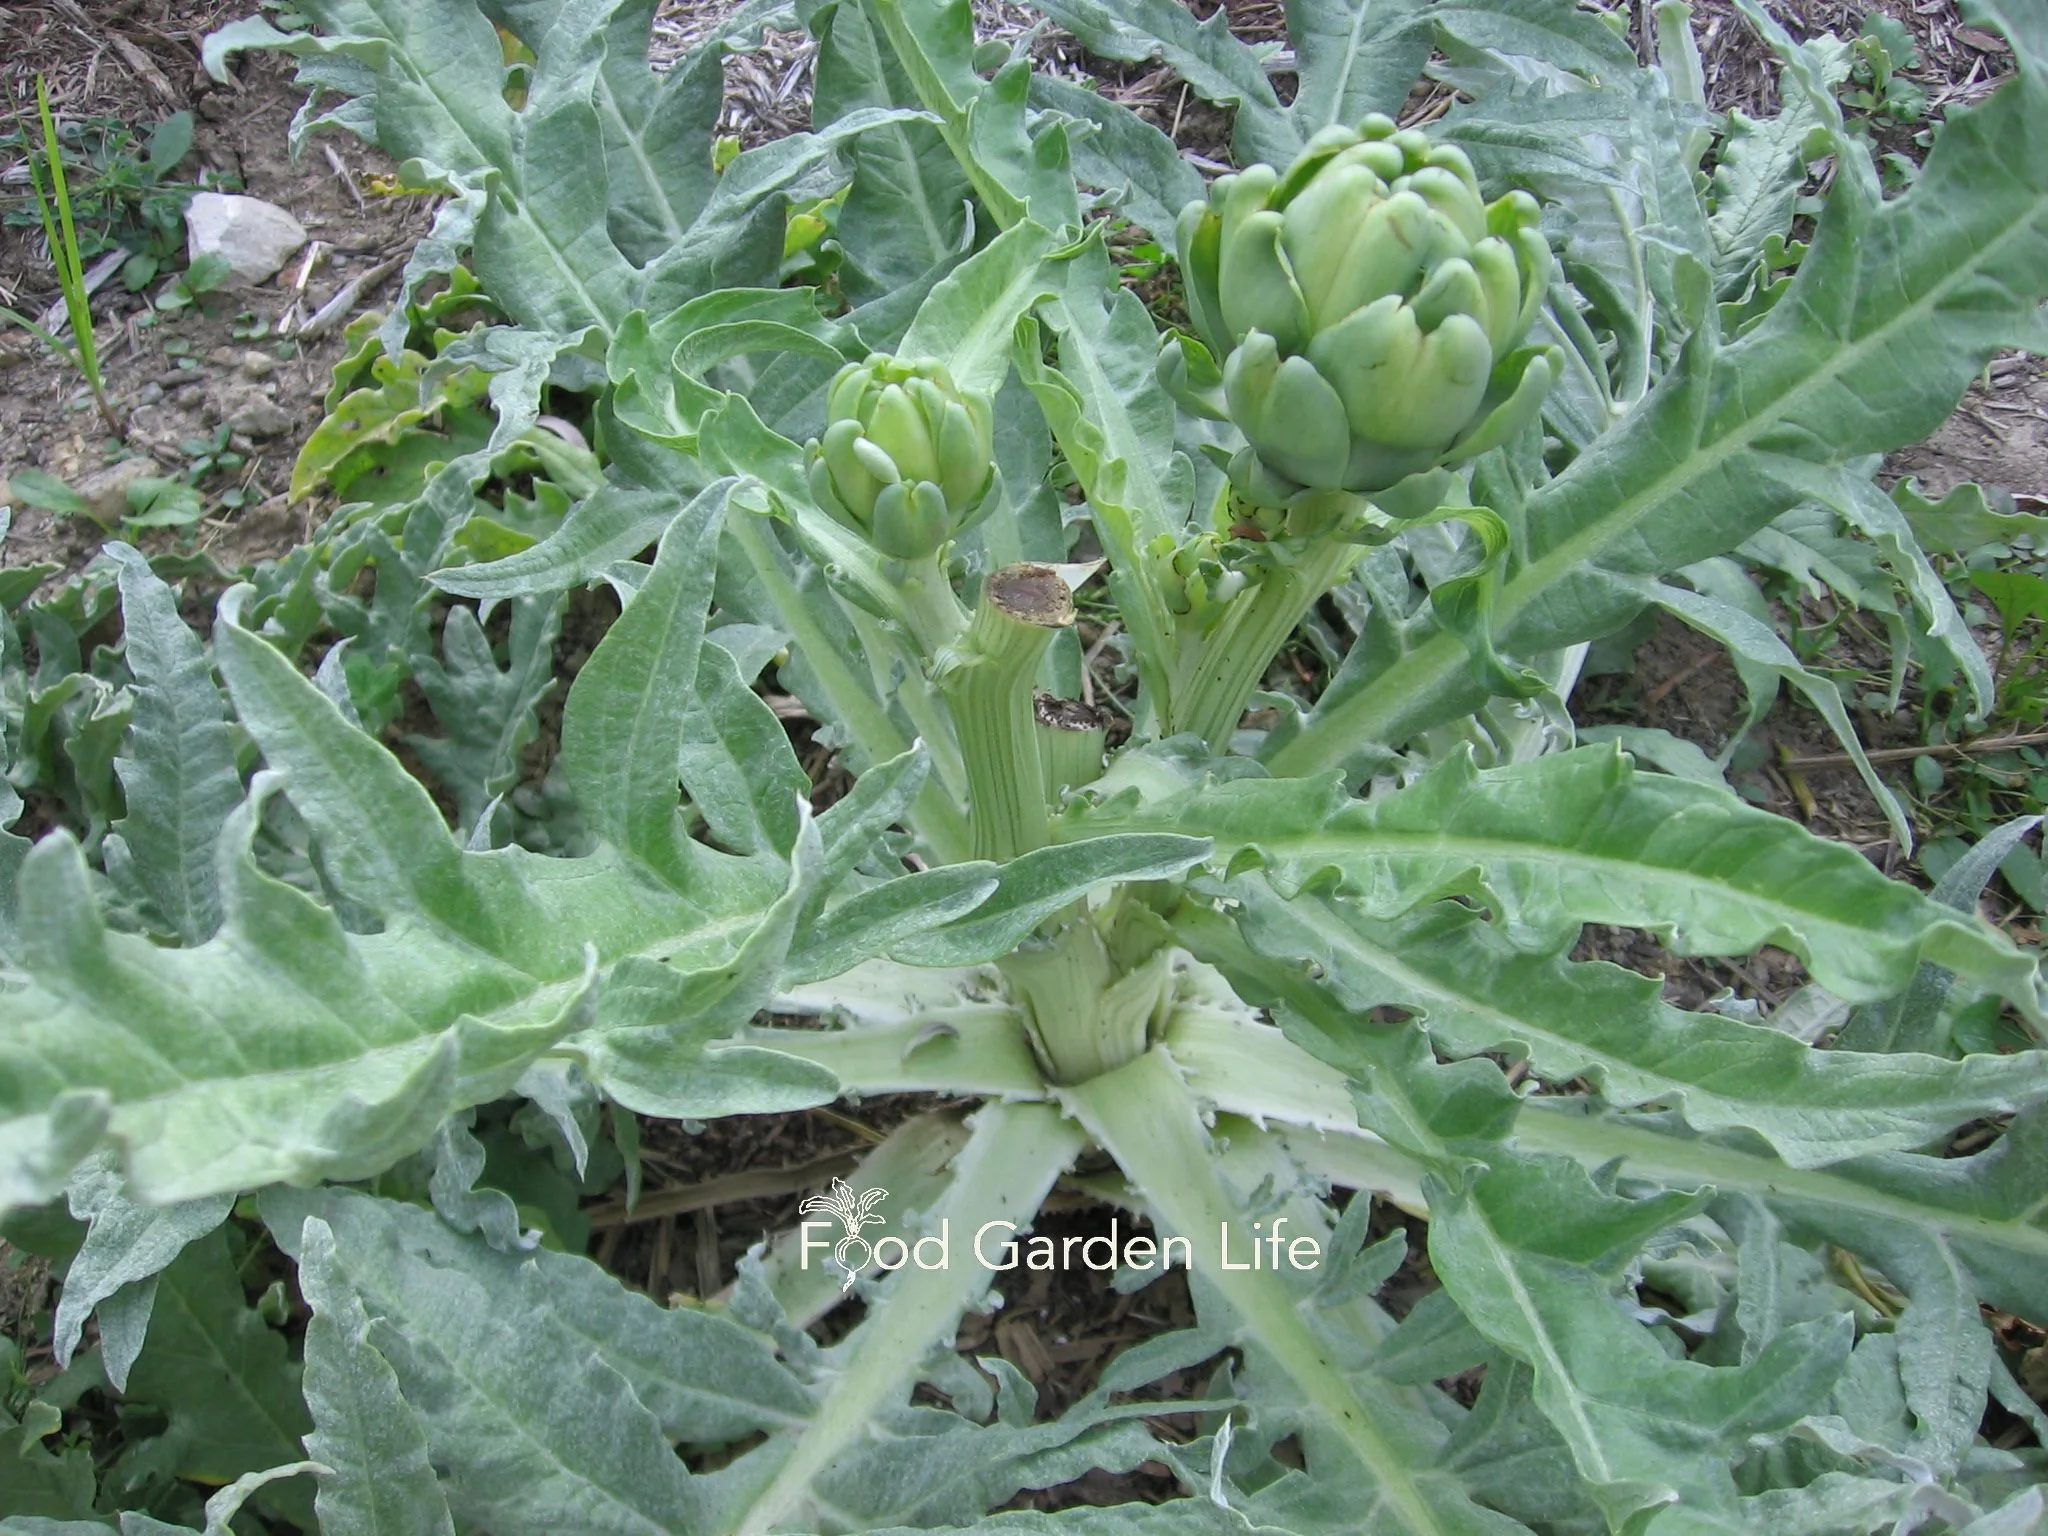
Artichoke plants won’t grow as large in cold climates, so a spacing of up to 1 metre (3’) between plants is ample.
Artichoke plants can grow very large plants in areas where they survive the winter. So you might come across recommendations to space them as far apart as 1.5 metres (5’). Don’t!
Spacing: In cold climates, plant artichokes 1 metre (3’) apart
Light: Full sun is best
I’ve seen artichoke plants grown in straw-bale gardens, 2 plants to a bale. Find out more about straw-bale gardening.
Care
If your goal is large artichoke buds, remember that there is a main, central flower; and there will also be secondary flowers. I leave them all to grow, and get 5 or more artichokes from a plant.
But…gardeners out to grow large, prize-winning artichokes can prune off secondary flowers. (But don’t discard them! Use these in the kitchen as baby artichokes, see below.)

Get Your Fig Trees Through Winter
And eat fresh homegrown figs!
Top Tip
A lot of people think of Mediterranean climates – hot sun and dry conditions – when thinking of artichoke plants. They survive these conditions. But for the best crop, give your artichoke plants conditions that encourage uninterrupted growth. (And, remember, very dry conditions interrupt growth!)
Top Tip: Well-fed soil and ample moisture for uninterrupted growth
Challenges
Most years, artichoke plants are pest- and problem-free in my garden. On occasion, black aphids stop by for a visit. If beneficial insects don’t dispatch the aphids, insecticidal soap will clear them up.
Harvesting Artichokes
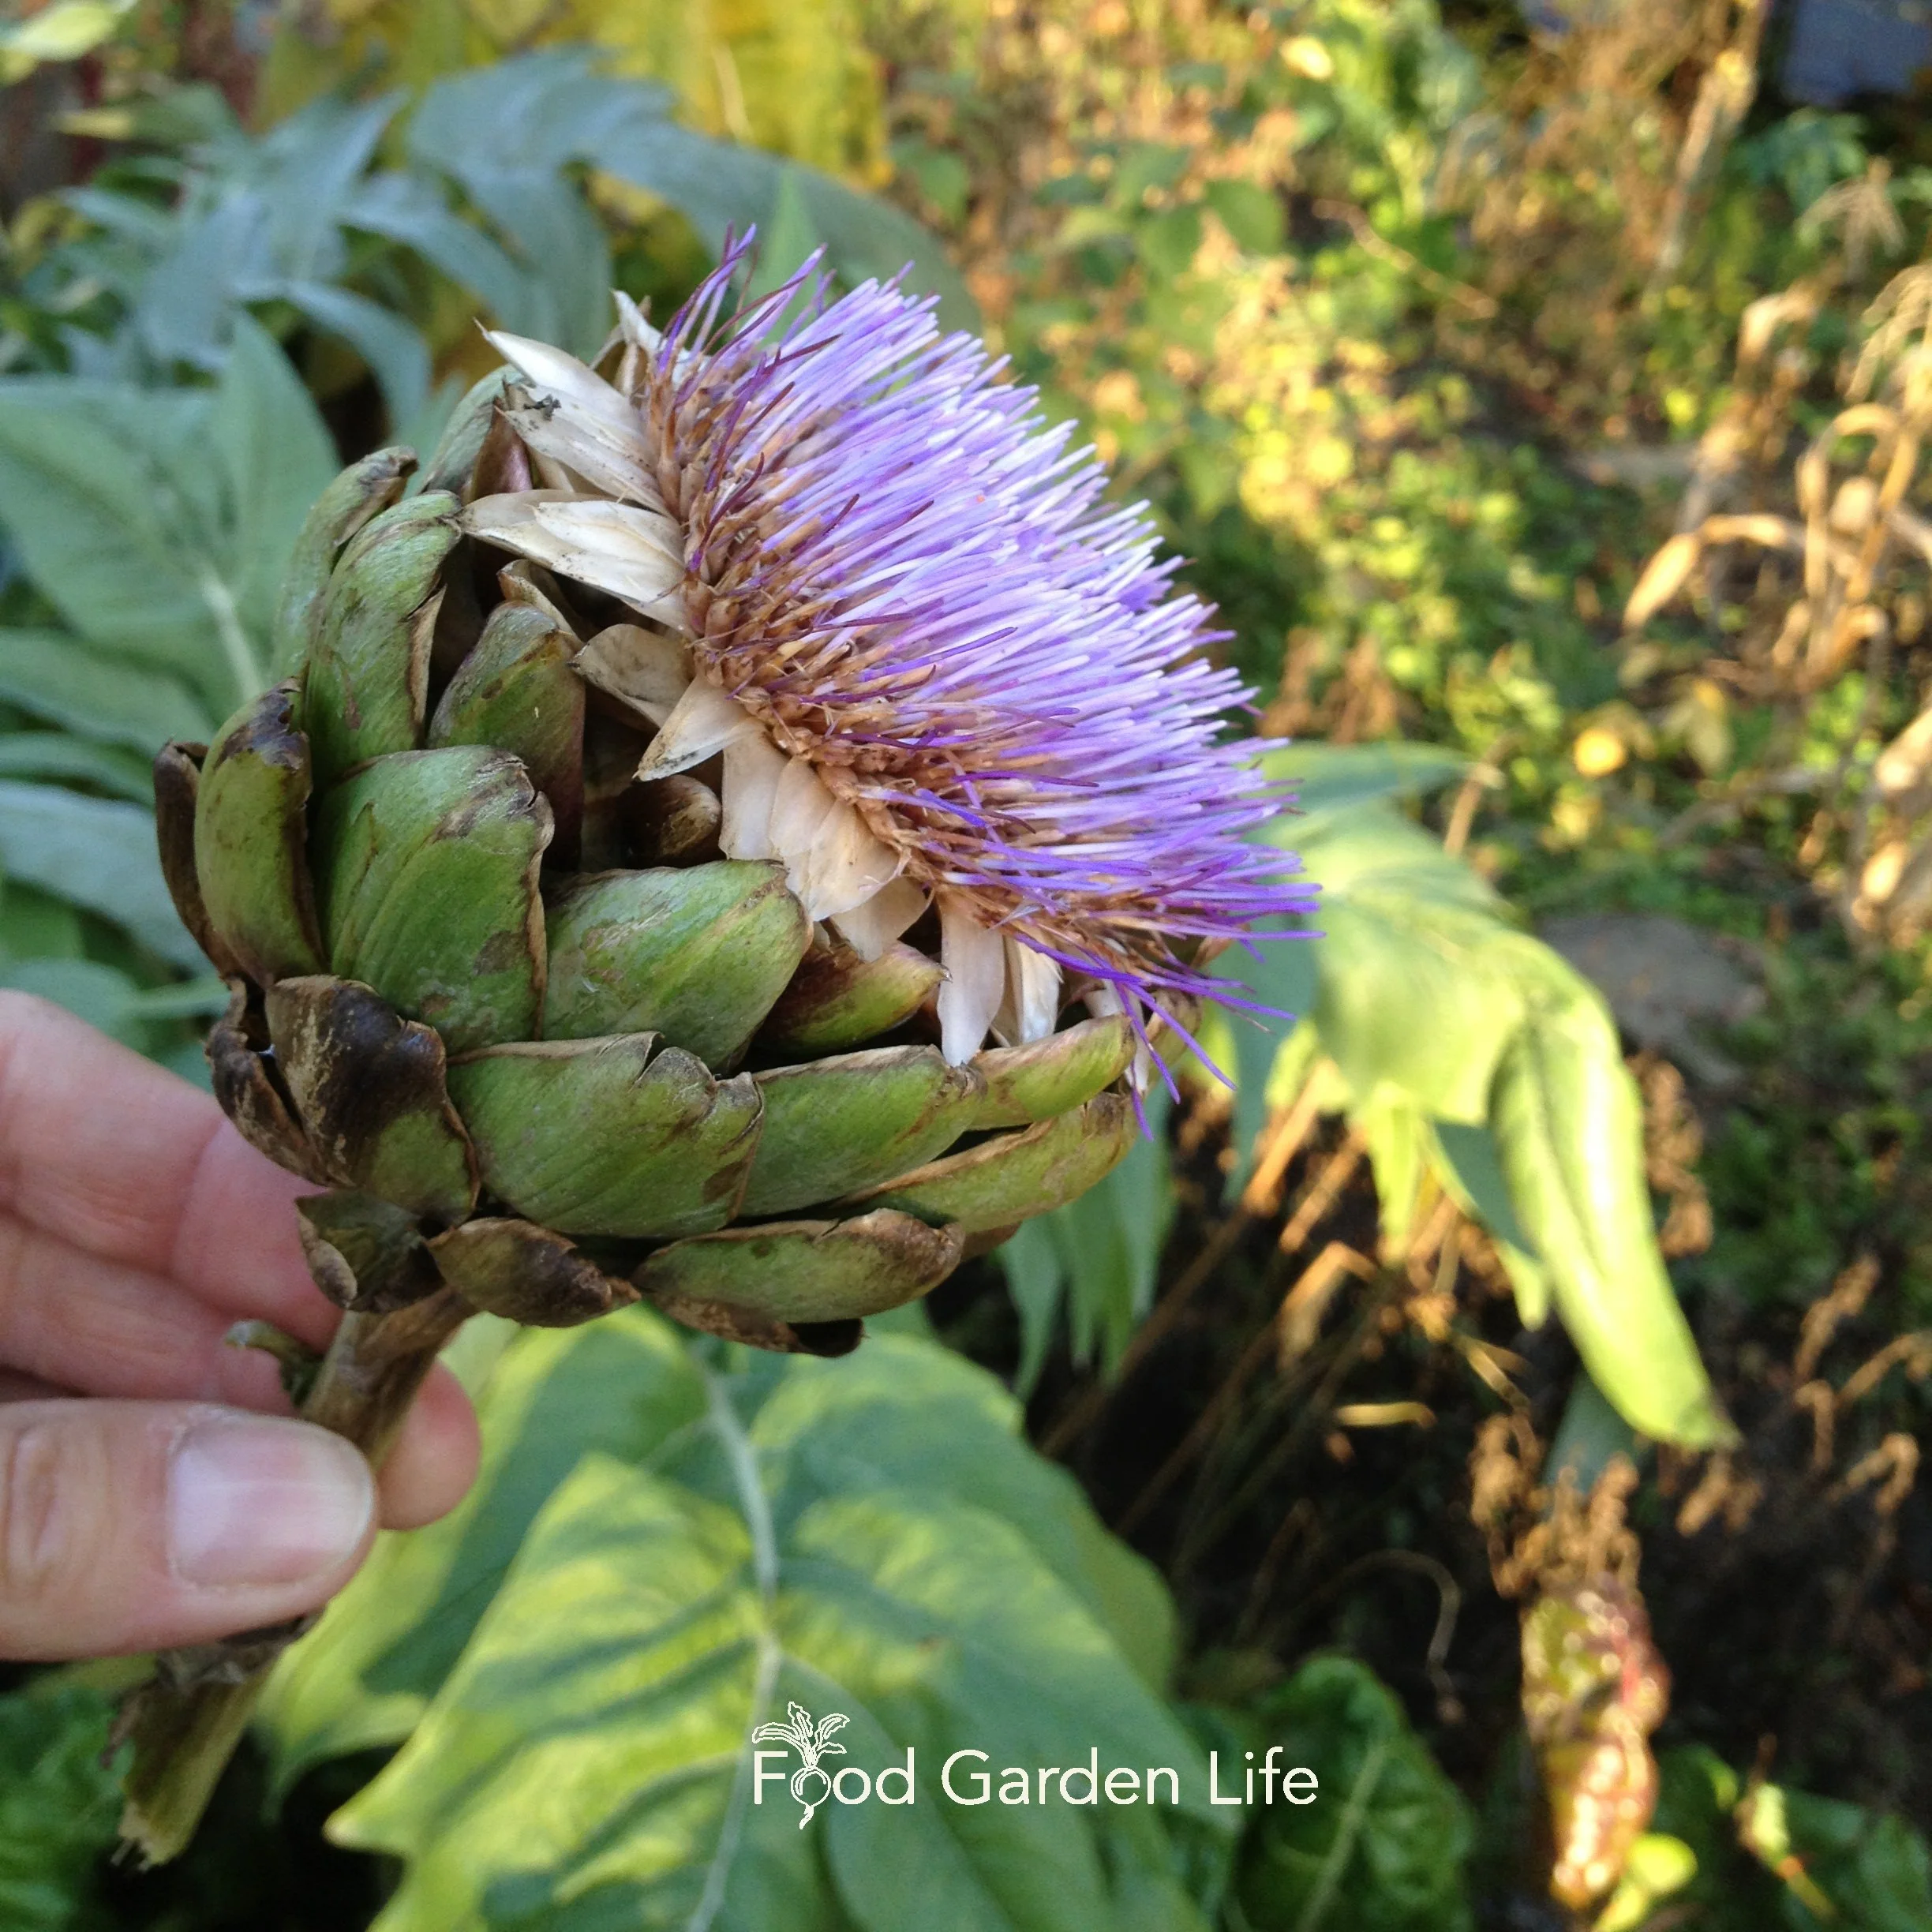
Harvest artichoke before the bracts open into a thistle-like flower.
Harvest artichokes before the bracts start to separate. You want them to be compact.
If you leave the flowers too long and they begin to open, you will get purple-blue thistle-like flowers.
They’re beautiful – but past best-eating.
Artichoke Harvest Tip
As you harvest artichokes, don't cut back the stem any further than you need to. You'll get side shoots from the same flower stalks. These secondary artichokes are not quick as large as the first ones, but just as tasty.
How to Eat Artichokes
For those new to artichokes, you’re peeling off the bracts, dipping them in the butter, and then dragging them against your teeth to scrape off the flesh on the inside. You don’t eat the bracts; they’re too fibrous.
And about those bracts…well, they look like petals. And some people call them scales. (I’ve seen people call them leaves, too.) But, technically, botanically, they’re bracts.
Pin this post!
As you get to the centre, there’s a cone with many small bracts. The bottom of these is usually tender enough to bite right off.
Beneath these, you come the hairy “choke,” a fibrous mat that you scrape off and discard. You don’t eat it. Use a spoon or your fingernails to dislodge the choke, but keep the thick saucer-shaped bit below. It’s called the heart – and artichoke hearts are the prize. Bathe them in butter dip before eating.
To Cook Large Artichokes:
Cut off the stem flush with the bottom of the artichoke
Remove the smaller, lower outer bracts
Use a knife to cut off the top of the artichoke (I take off the top quarter, and find that a bread knife works best to cut through the fibrous bracts)
Steam 30 minutes, top facing downwards (some people boil them, but I prefer steaming them)
Drain well and serve with garlic butter
And don’t skimp on the garlic butter. For a half pound of butter, I usually add a half teaspoon of salt, a crushed clove of garlic, and the juice of half a lemon. Where there are kids in the house demanding extra butter sauce…you can stretch it out by adding olive oil instead of more butter.
To Cook Small Artichokes:
When they’re still small, some of the stem beneath is still probably tender enough to eat. And you’ll be eating the choke too.
Halve artichokes lengthwise
Put in skillet with hot olive oil, garlic, salt and pepper and brown for a moment
Add lemon juice and water and braise until the liquid has evaporated and they’re tender (how much lemon juice will depend how tangy you like them…so play around with it.)
These braised baby artichokes are great as a side dish or on a salad.
Artichoke Plants in Garden Design
If you have a small garden, keep in mind artichoke plants are space hogs. There are more practical food plants you can grow in a small space.
But they are delicious. And they are really beautiful.
The jagged silver-grey leaves have a whitish underside. I love the colour and texture they bring to the edible garden. (Although they never quite look as good once the artichokes are removed.)
And lastly, if you like the look of artichoke leaves but don’t like to eat artichoke, grow cardoon, the leafy cousin to the artichoke.
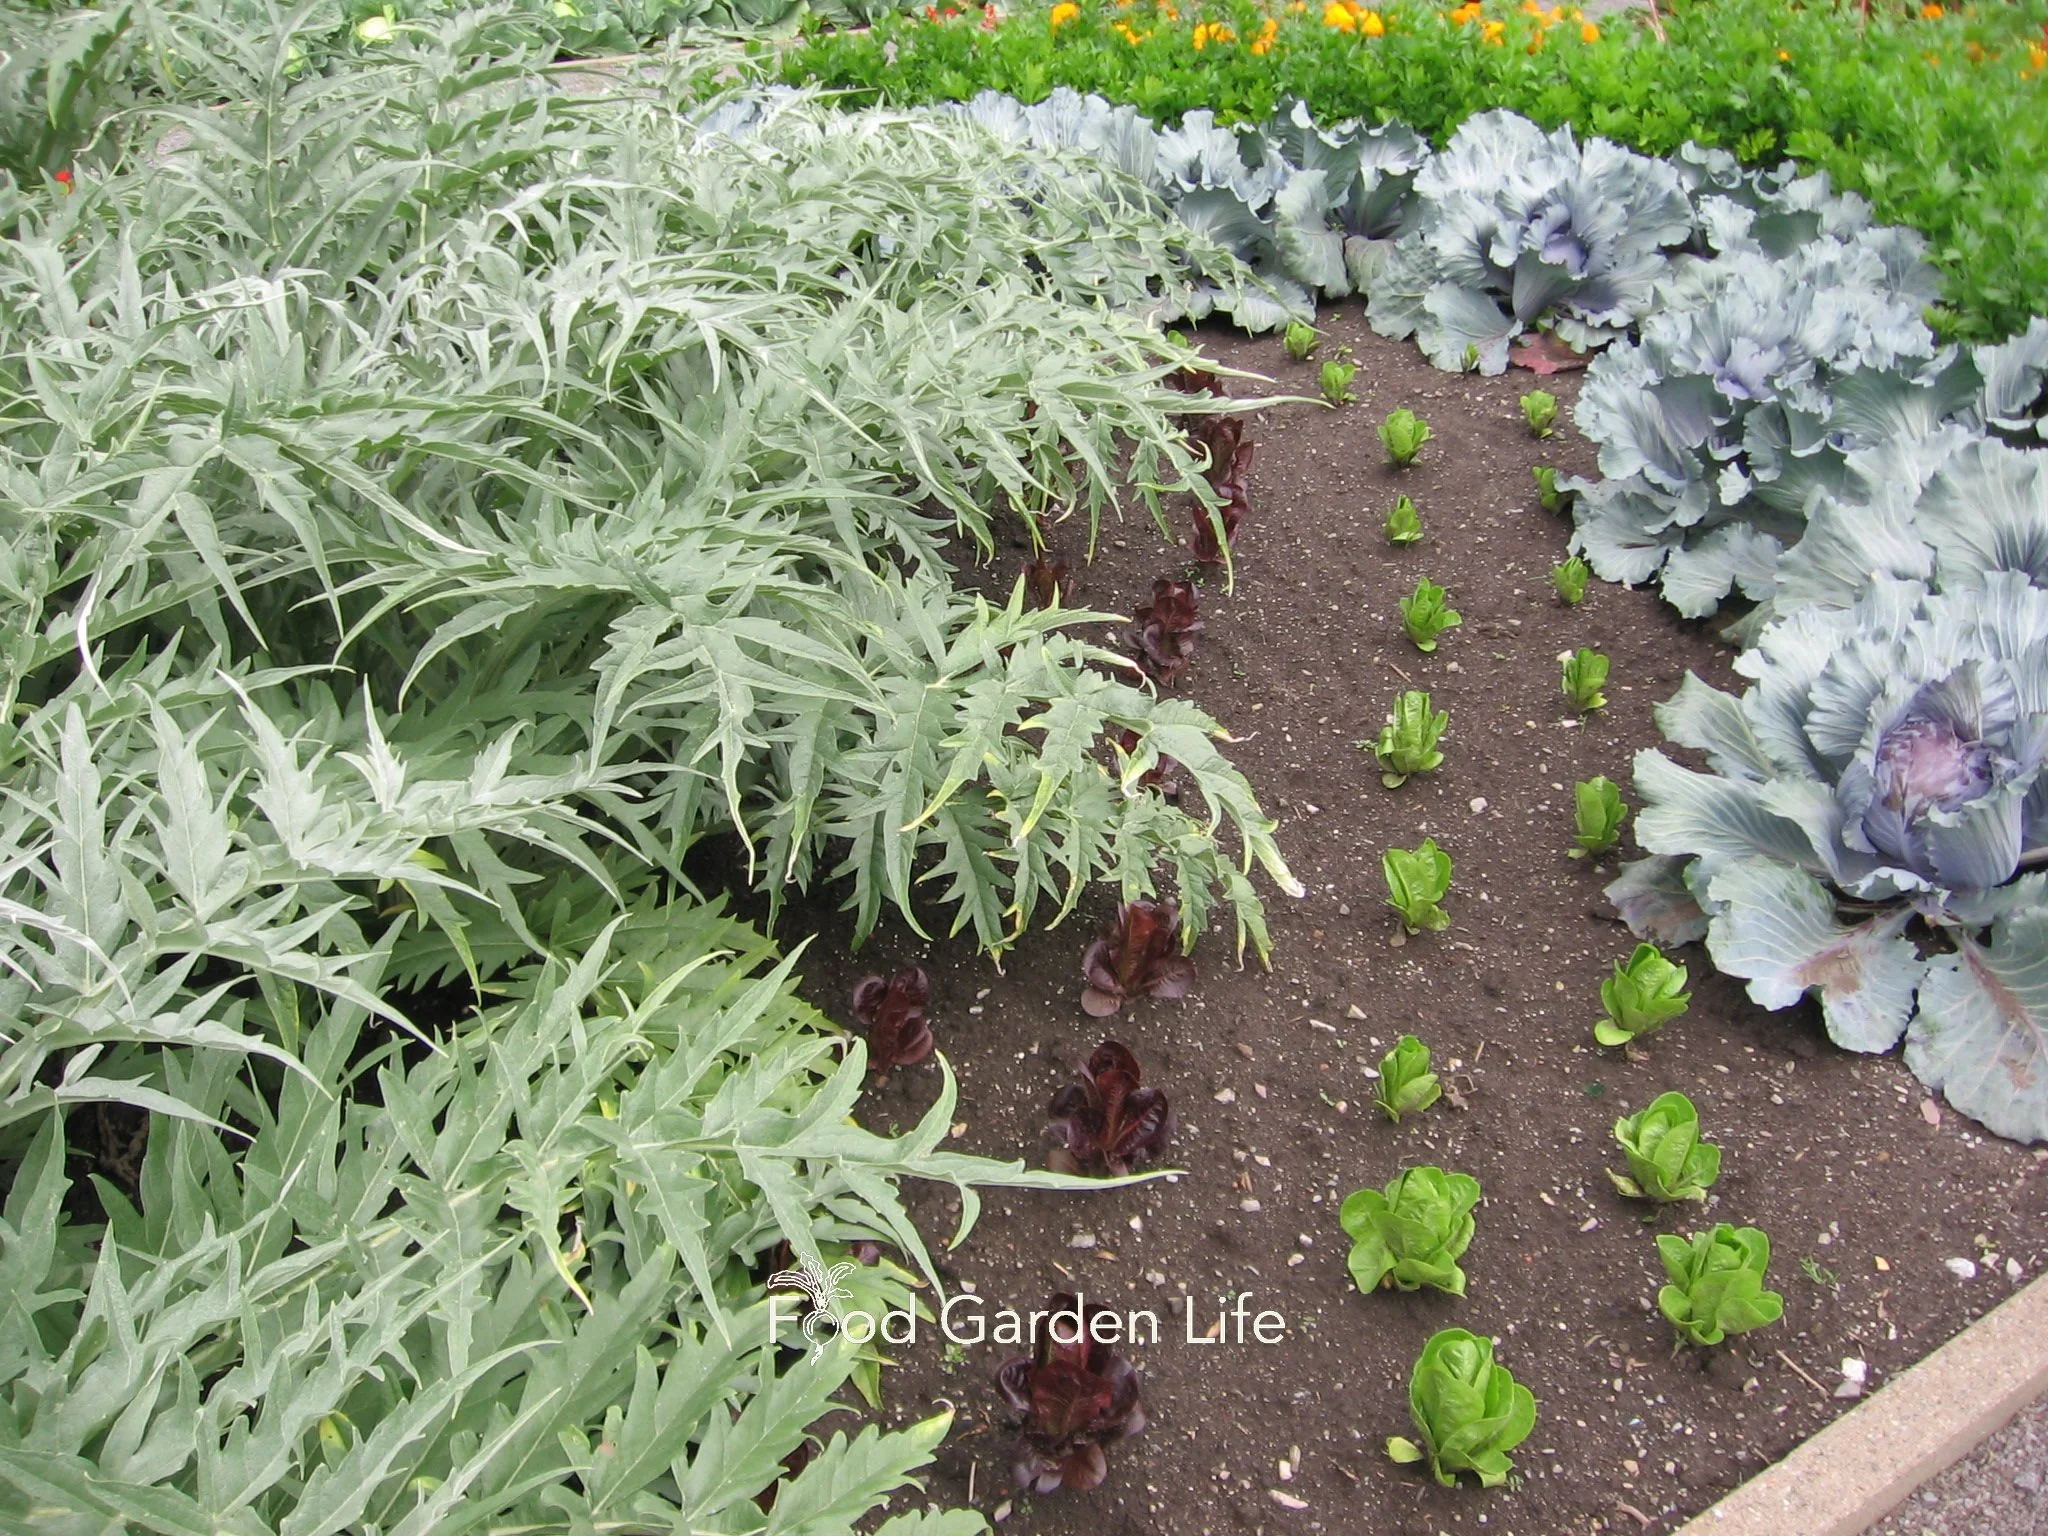
Garden design with artichoke: Use it to add colour and texture to the edible garden.
Find This Helpful?
Enjoy not being bombarded by annoying ads?
Appreciate the absence of junky affiliate links for products you don’t need?
It’s because we’re reader supported.
If we’ve helped in your food-gardening journey, we’re glad of support. You can high-five us below. Any amount welcome!
More Vegetable Gardening Ideas
Articles and Interviews
Courses: Edible Gardening
More Mediterranean Crops
Articles and Interviews
Courses: Figs and Lemons

Want a Bold Vegetable? Grow This Promethean Plant (the Cardoon)
Grow Cardoon, a bold, beautiful vegetable that has great ornamental appeal.
By Steven Biggs
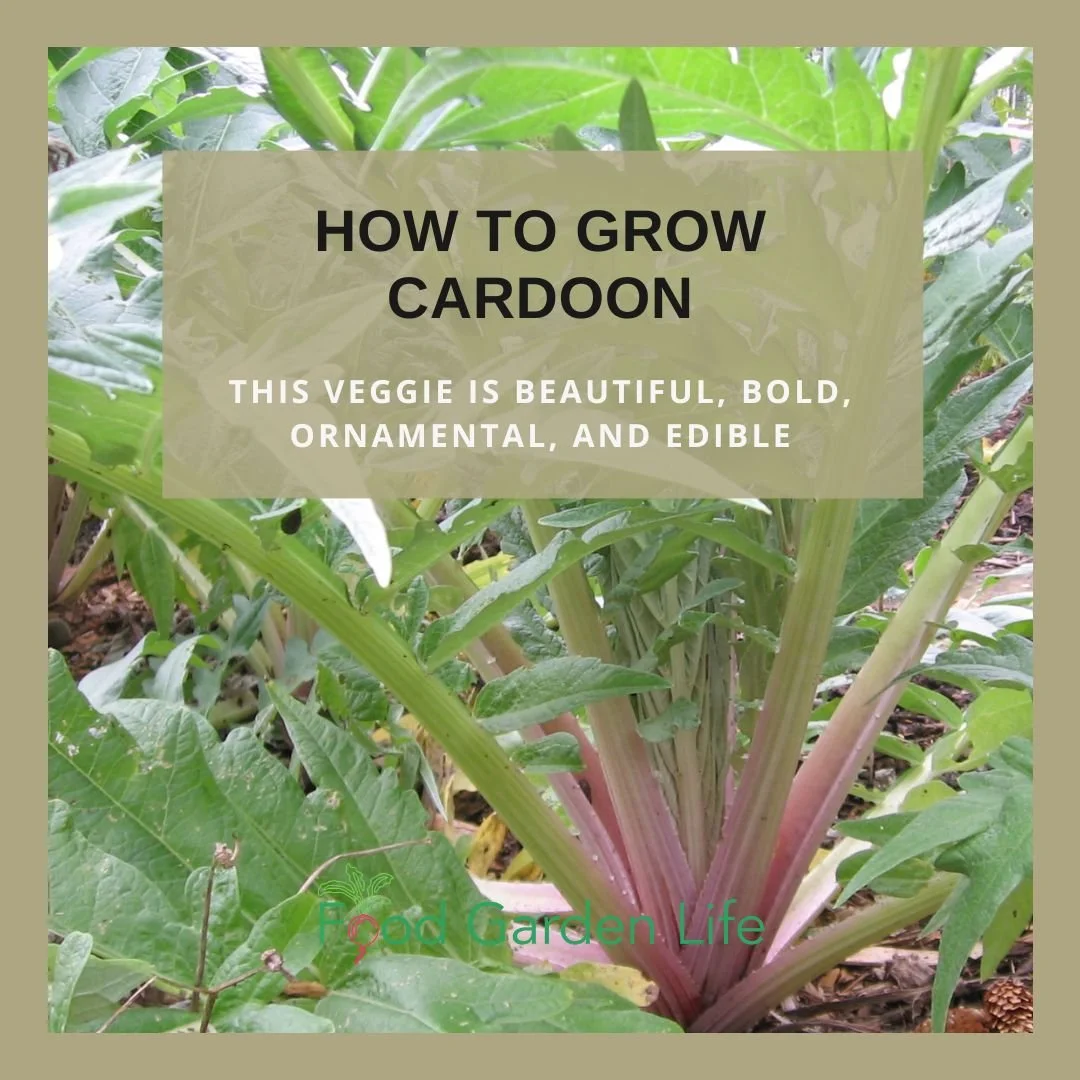
A cardoon plant is beautiful, enormous, and edible.
Cardoon Plant is Beautiful, Enormous, and Edible
“I MUST KNOW THE NAME OF THE PROMETHEAN PLANTS IN YOUR FRONT YARD,” exclaimed the caller, describing bold, arching, grey leaves.
I was delighted by the call, mainly because I love talking about plants—but also because I learned a new word.
I Knew which Plant the Caller Meant
I knew right away the plant in question was cardoon (Cynara cardunculus). The caller was captivated by the four-foot (1.2-m) tall, silver-grey, spiny-leaved plants arching over the edge of my driveway.
Cardoon resembles its cousin, the globe artichoke, but has bigger leaves.
Cardoon plants had prime front-garden real estate because they fit the edible theme I have for the space. Cardoon leaf stalks and flower buds are edible. (And you can do something else with it too…keep reading.)
Pin this post!
An Annual Around Here
Is cardoon perennial?
A perennial in warmer climates, cardoon grows as an annual in many parts of Canada.
Many years mine die over the winter here in Toronto, Canada.
But sometimes, with the right combination of mild temperatures and an insulating blanket of snow, they survive.
When they survive the winter and grow for a second season, they flower.
Cardoon Flowers
Cardoon flowers are smaller than globe artichoke flowers, but look very similar.
They are purple and thistle-like, arriving mid-late summer.
When you grow cardoon as an annual, starting with new seedlings every year, there’s a good chance it won’t flower. It flowers in its second year.
If you’re growing cardoon as an annual and do want flowers, here’s a trick:
Give the plants a chill treatment, which tricks the plant into blooming in its first year.
Chill Treatment for Cardoon Seedlings
Chill young plants before planting out in the spring to induce flowering. (Cold-climate artichoke growers do the same thing.)
Put the seedlings somewhere cold—but not freezing—for about 10 days.
A fridge works well; or put them outdoors on cool days, and move them somewhere protected overnight so they don’t freeze.
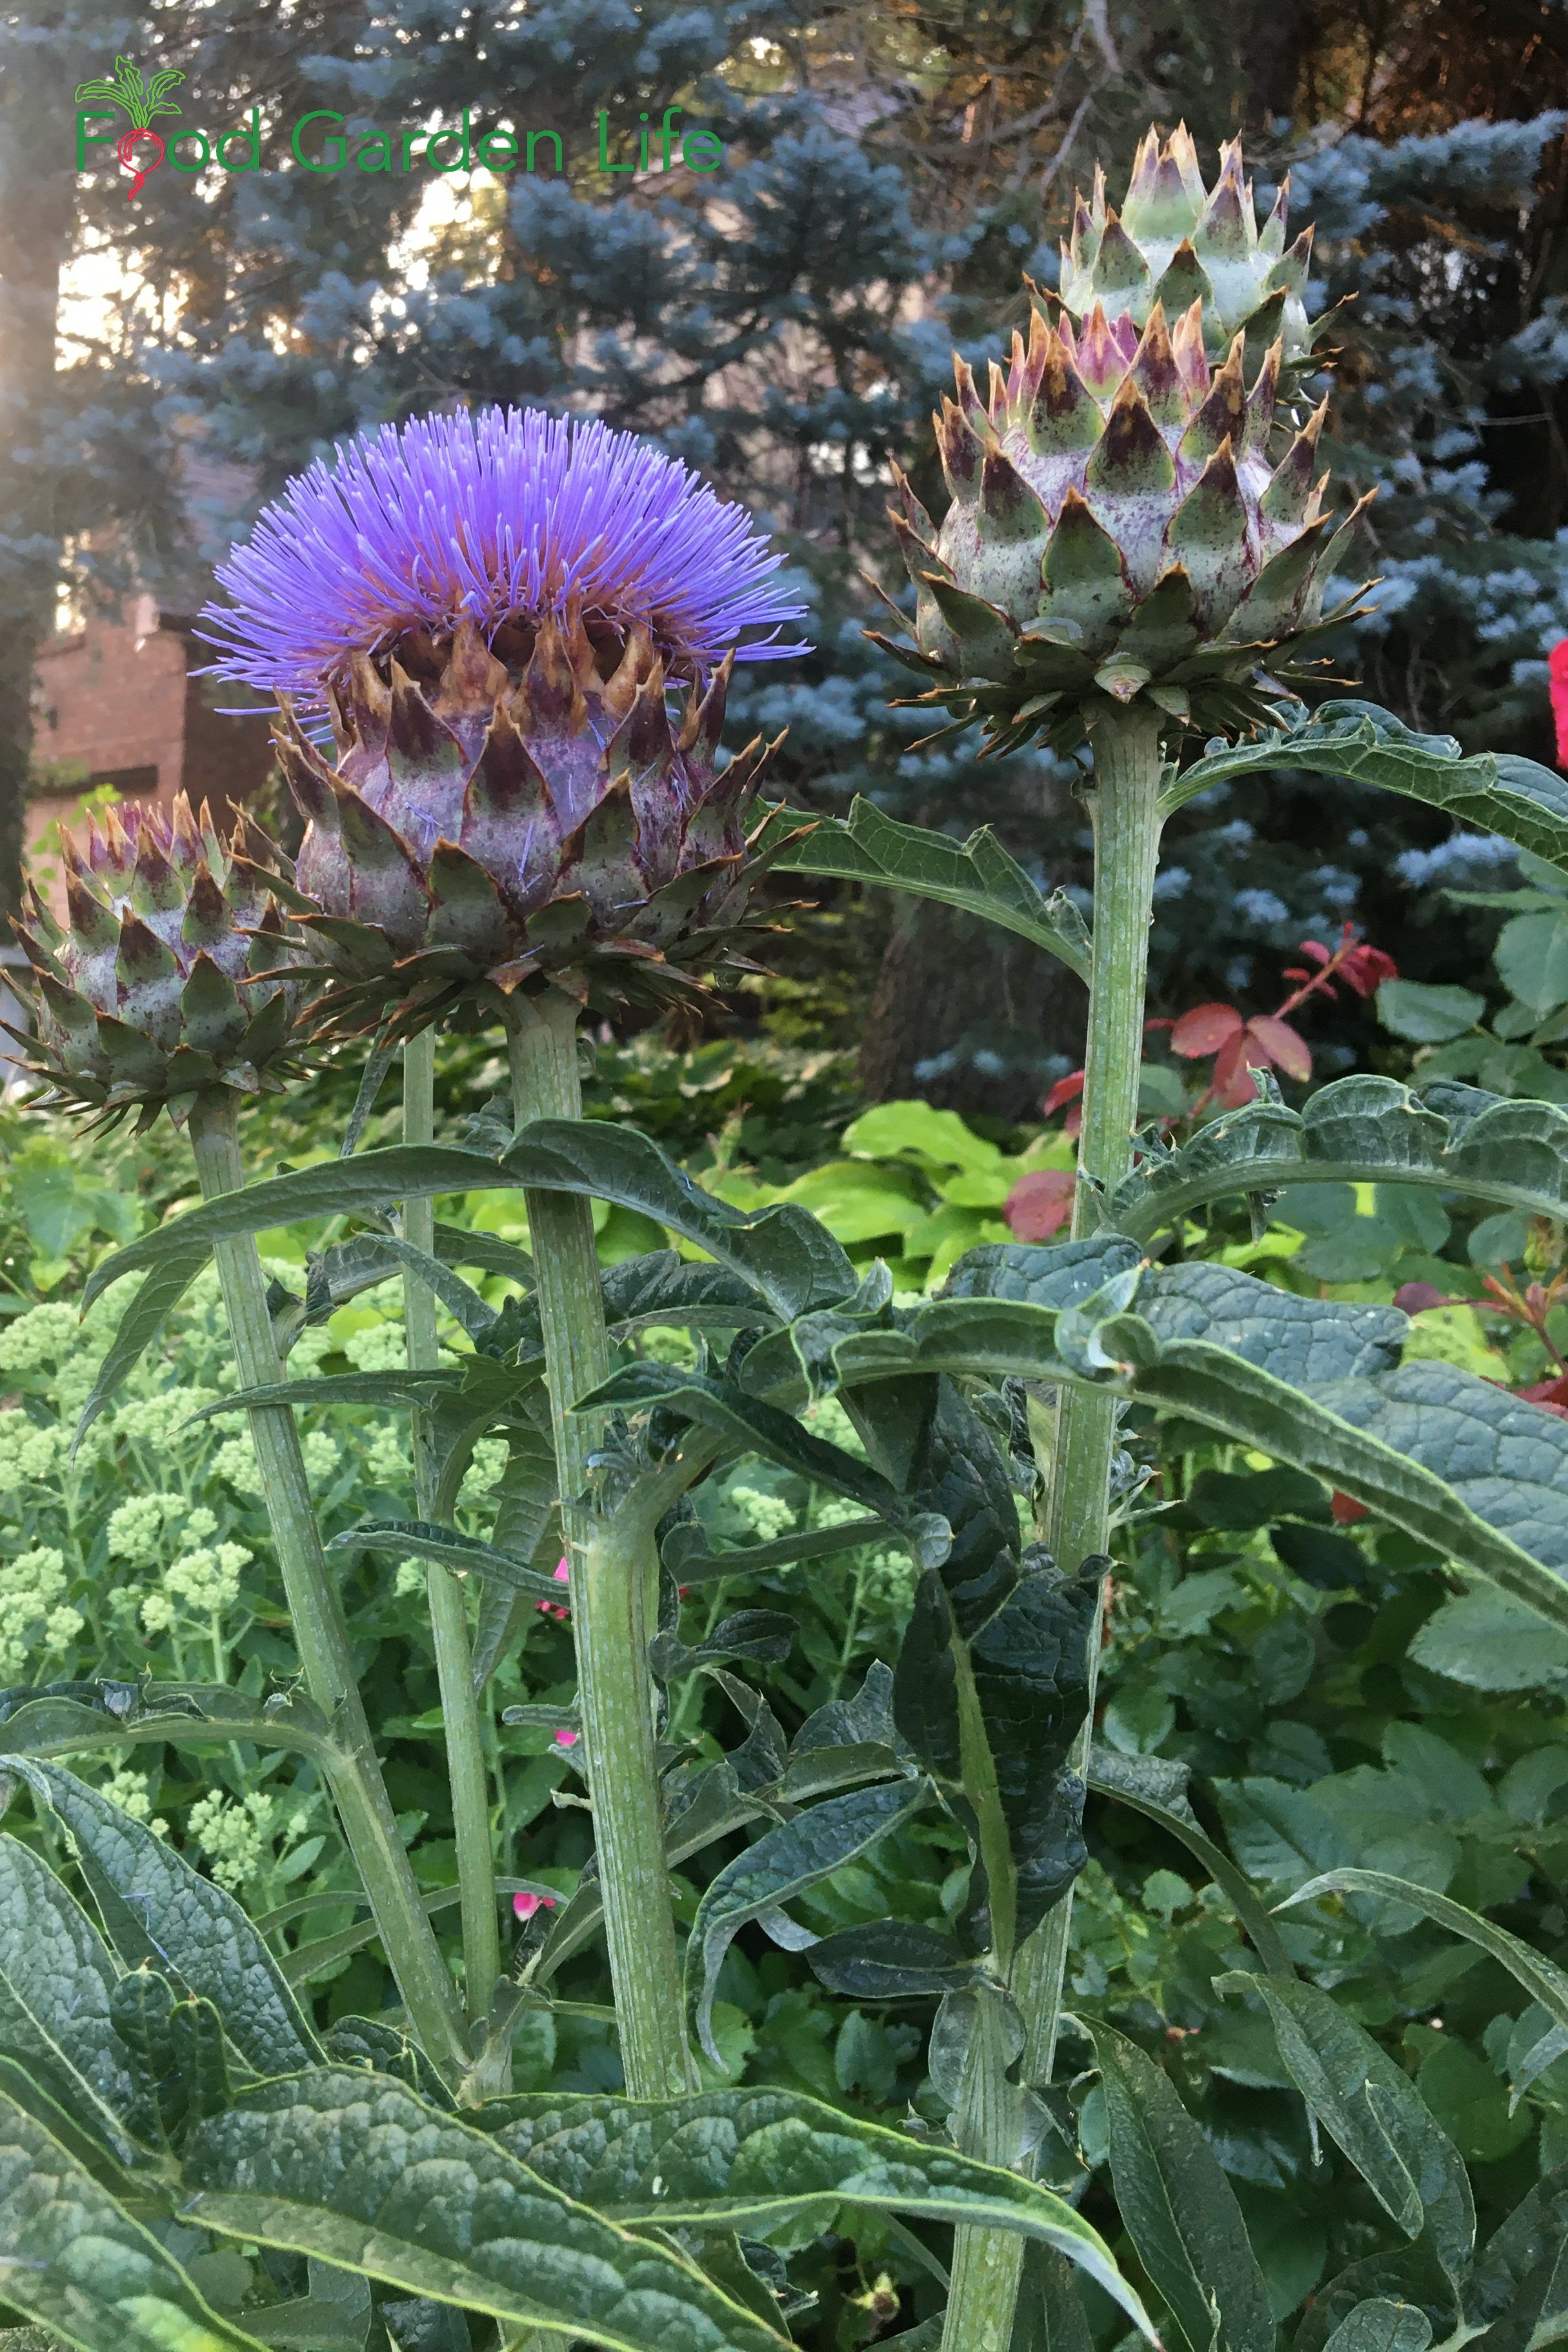

Can You Eat Cardoon Flowers?
I was told by a Palestinian chef that while the leaf stalks are what is eaten in Southern Europe, in parts of Palestine it’s the flower heads that are eaten. I have not yet tried cooking the heads—but it’s on my to-try list.
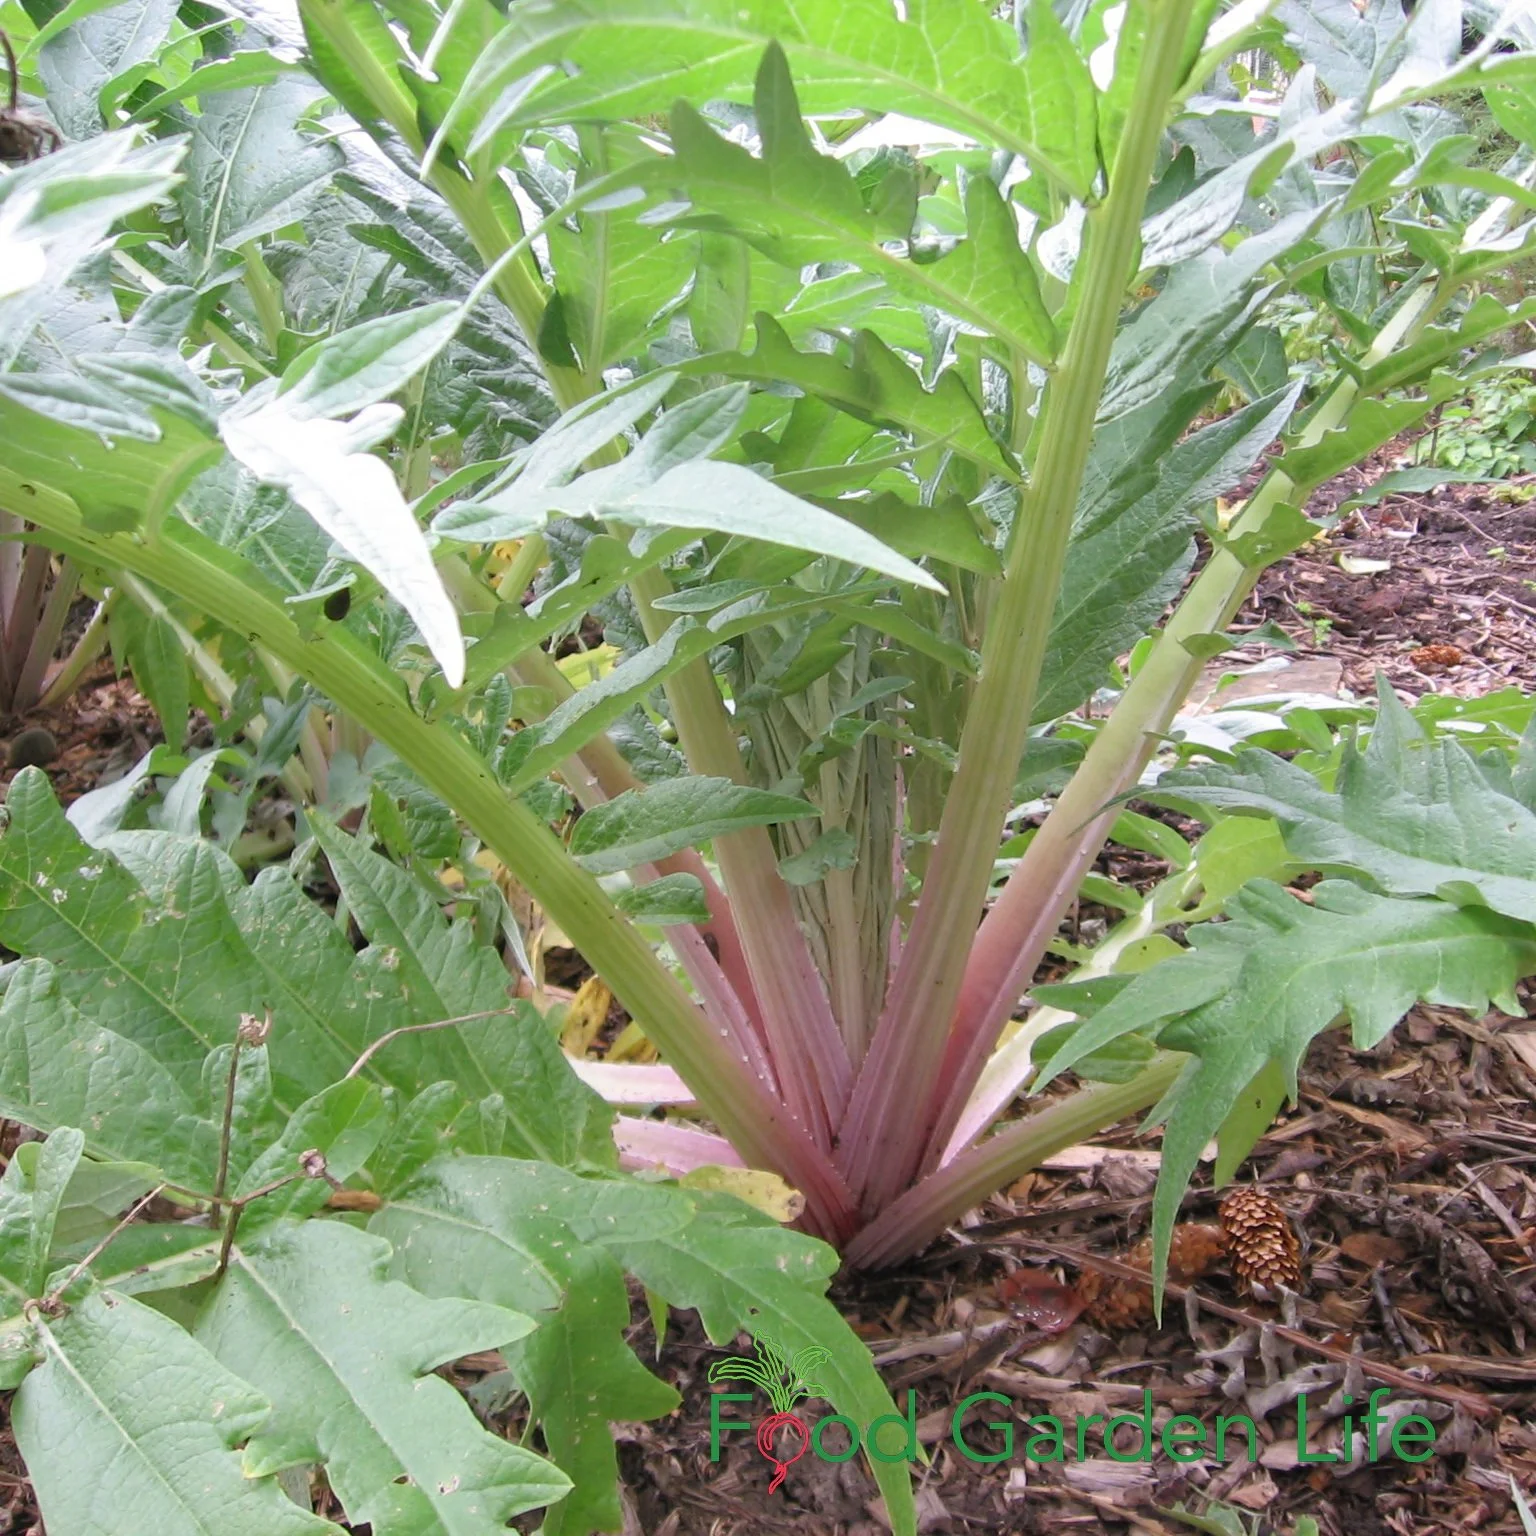
Grow cardoon, an edible and attractive relative of the artichoke. Pictured is ‘Rouge d’Alger’ cardoon.
Grow Cardoon From Seed
Cardoon transplants are a rare find at garden centres. Luckily, it’s easy to grow cardoon from seed.
(If you don’t find cardoon seeds in the vegetable section of seed catalogues, check under annuals.)
Start cardoon seeds indoors, about 10 weeks before the last spring frost. Transplant outdoors after the risk of frost is over.
Another advantage to growing cardoon from seed is that you can grow a showy variety such as ‘Rouge d’Alger,’ which has red-tinted stalks.
Cardoon In the Garden
How to Blanch Cardoon Stalks
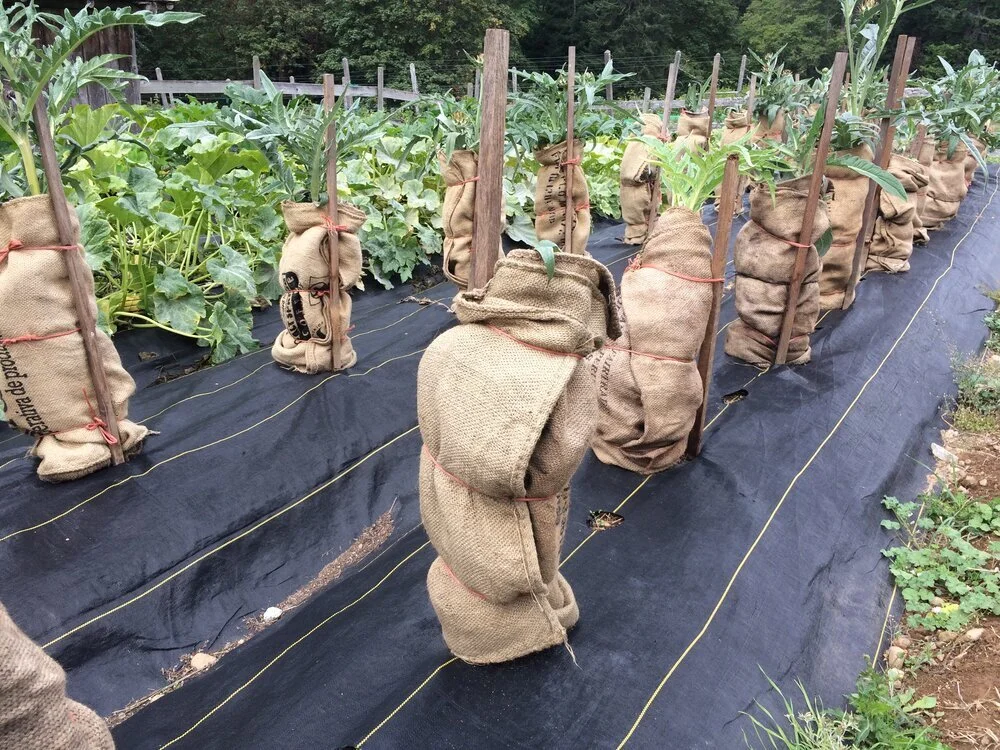
If you grow cardoon, wrap it with cardboard, newspaper, or burlap (pictured here) to get a milder flavour.
To get cardoon stalks that are whiter, more tender, and less bitter, blanch them.
Blanching simply means excluding sunlight.
To blanch cardoon stalks, wrap the bottom 12 inches (30 cm) of the plant in cardboard or newspaper two to four weeks before harvesting
Harvest inner stalks, not outer the more stringy outer ones
I’ve also seen cardoon stalks wrapped with burlap or fabric.
Find out how to blanch vegetables in the garden.
Grow Cardoons in Containers
If you’re gardening in a small space, you can still grow cardoon, either as an edible or an ornamental plant. Cardoon grows very well in containers.
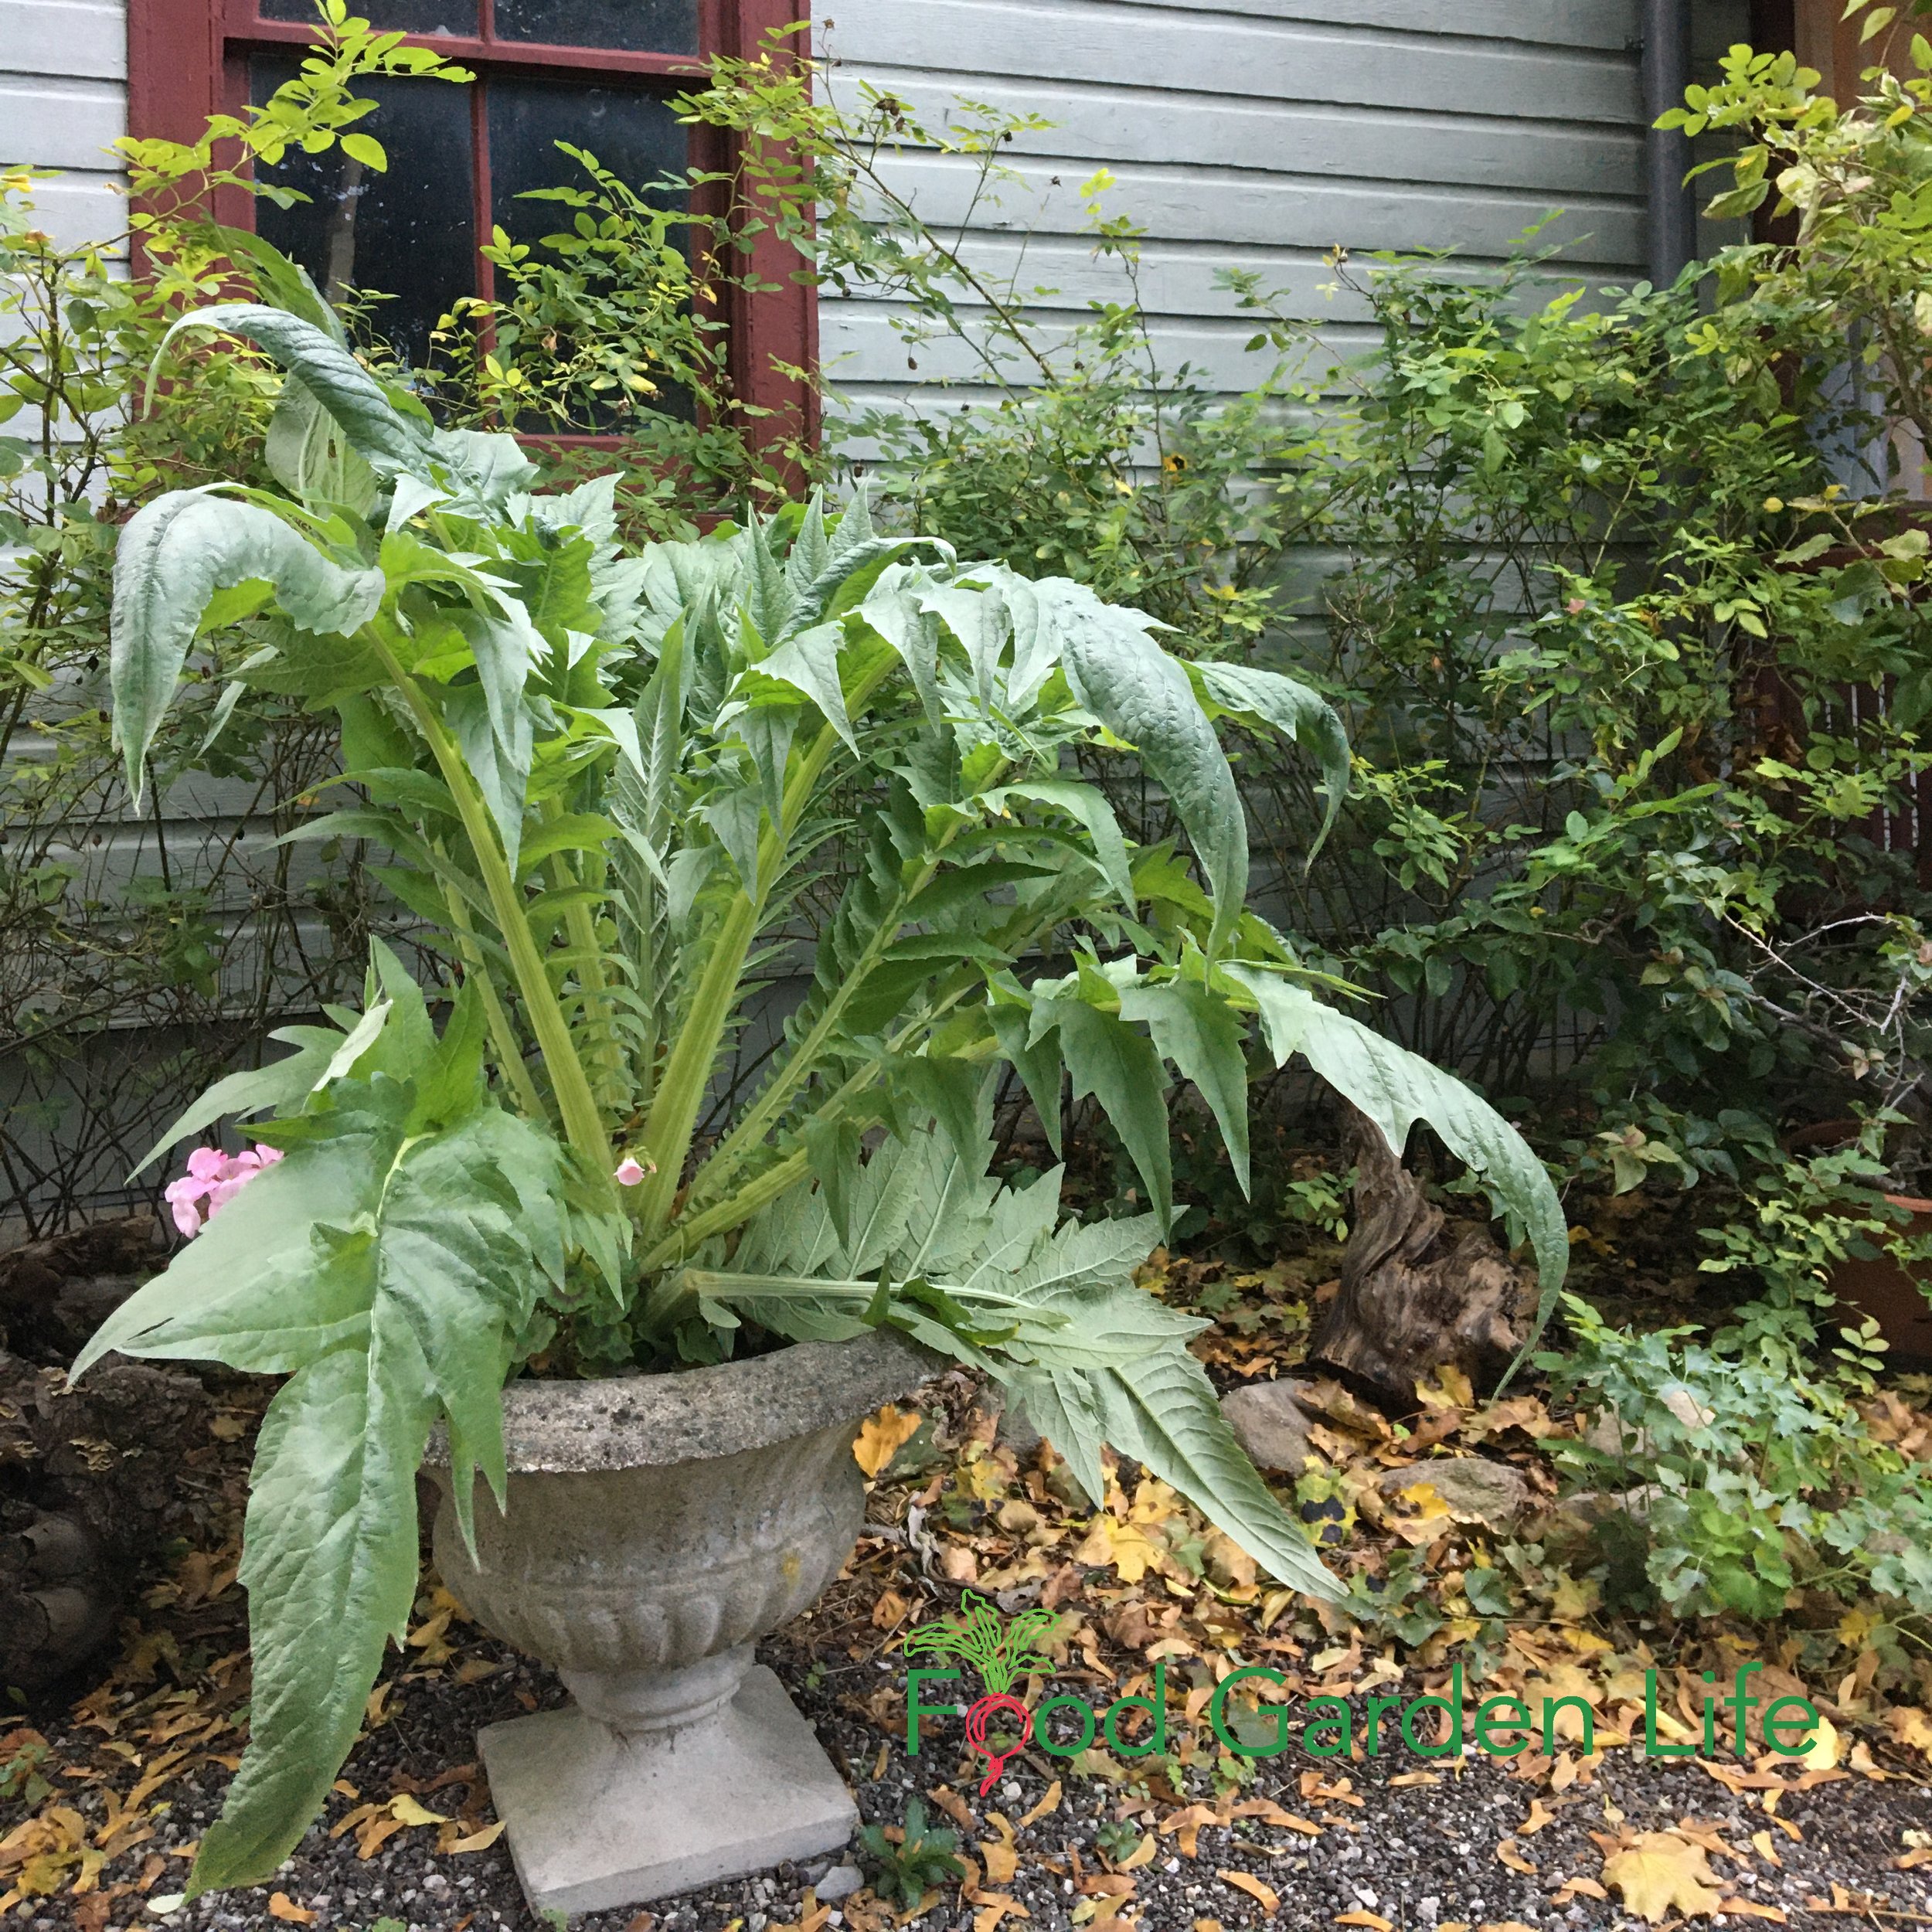
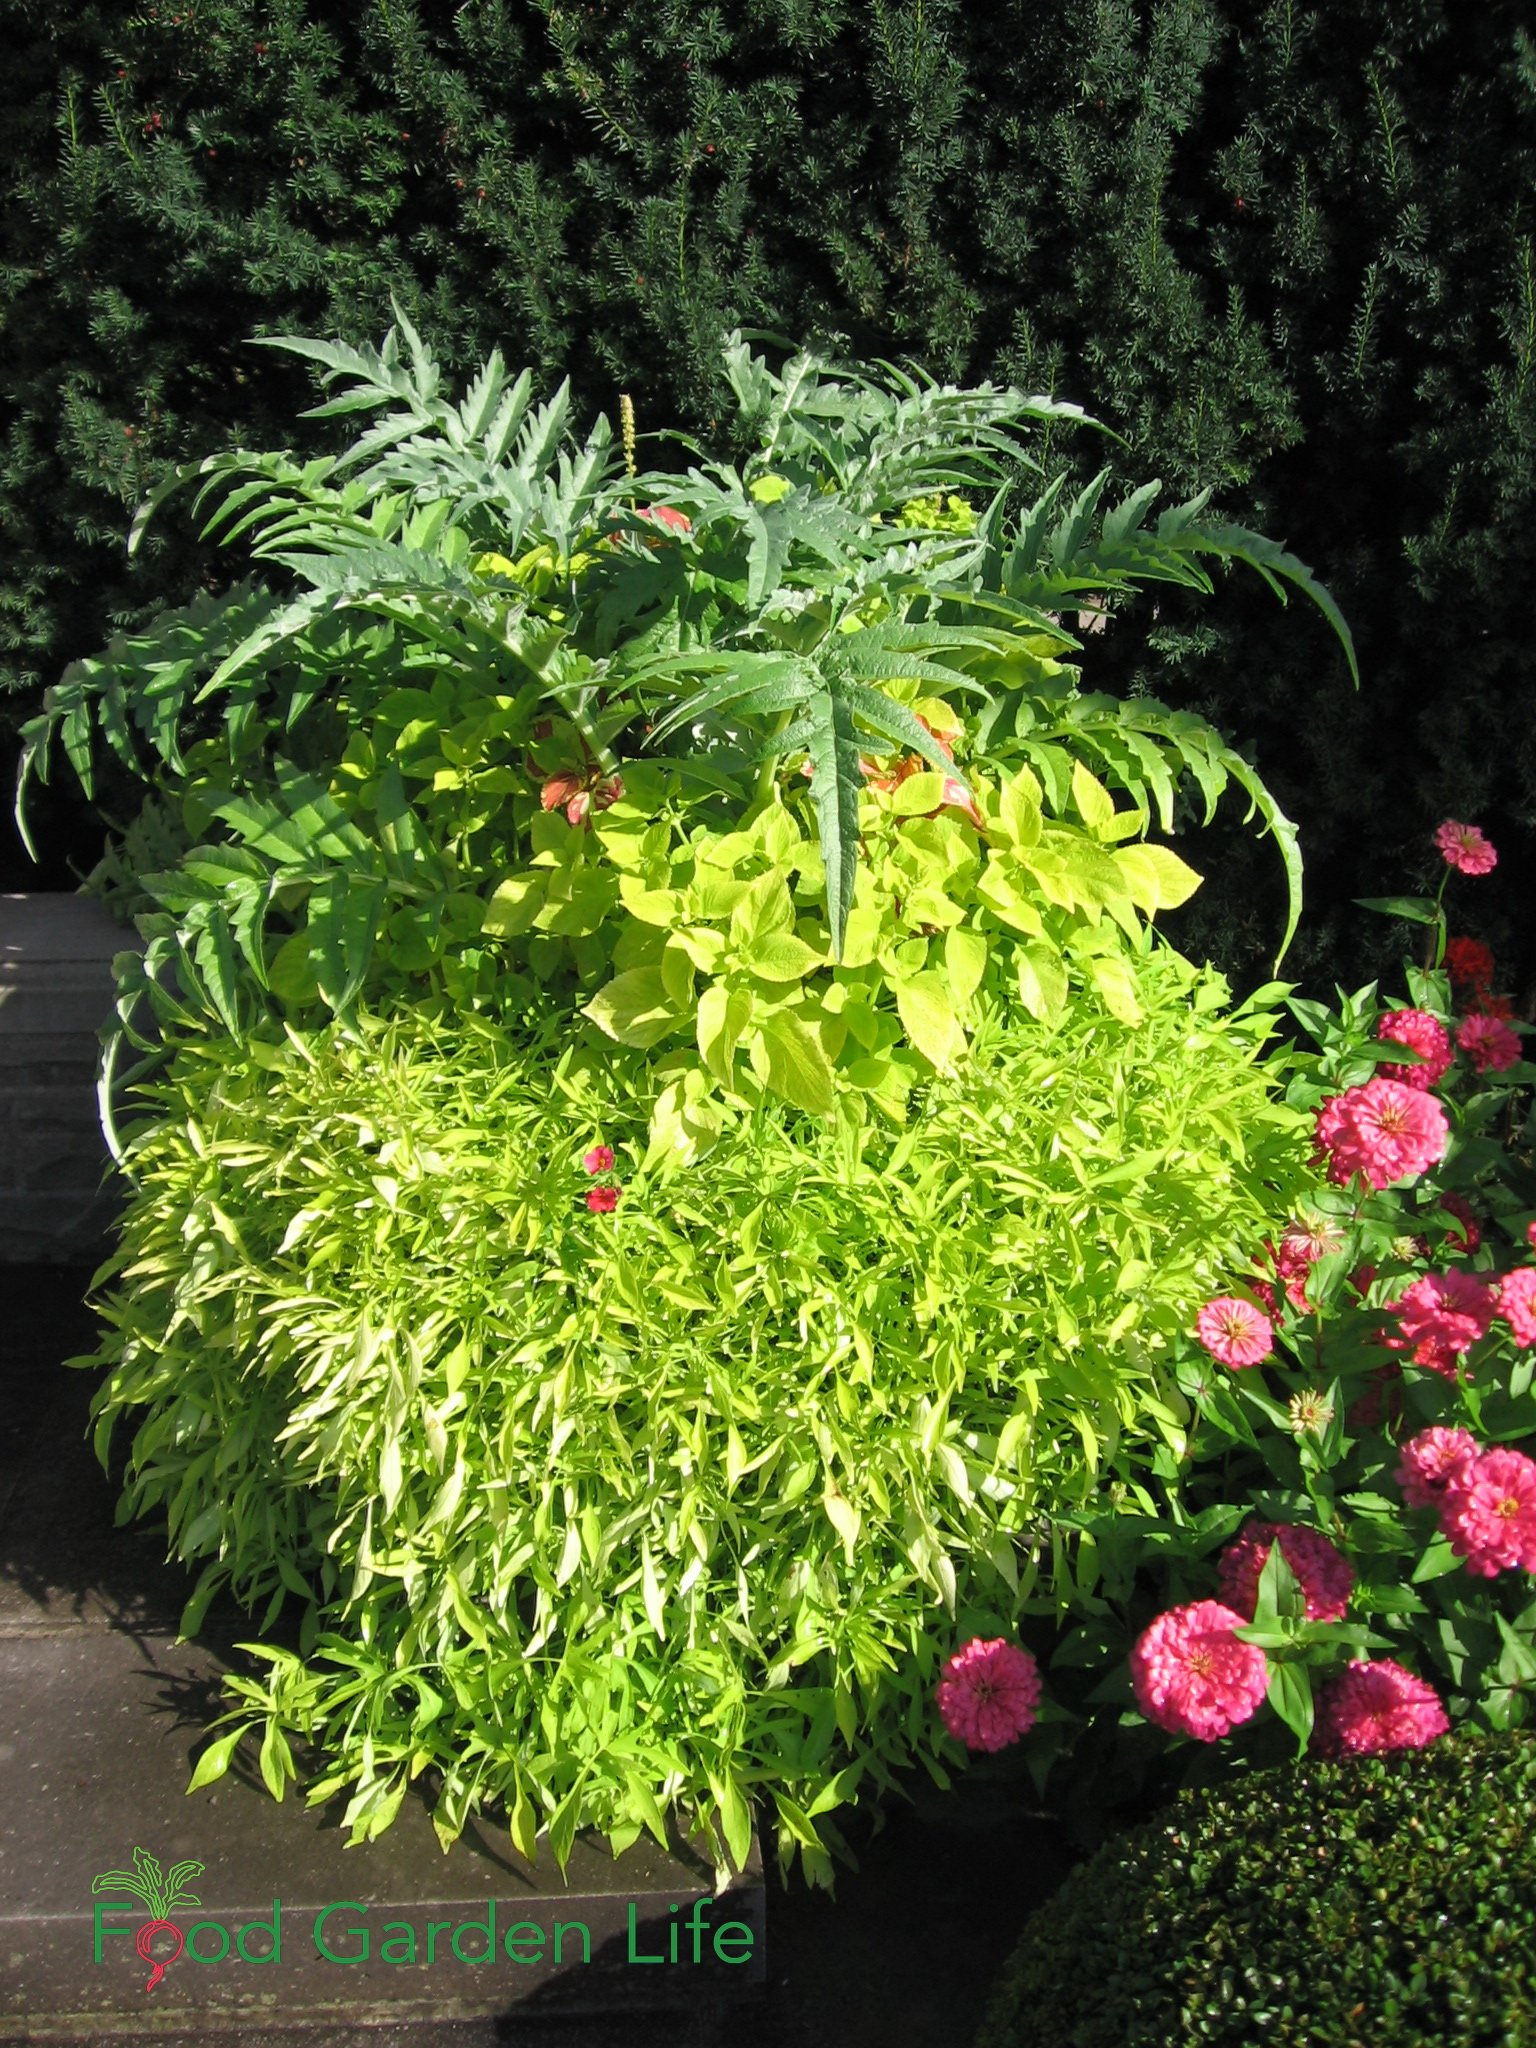
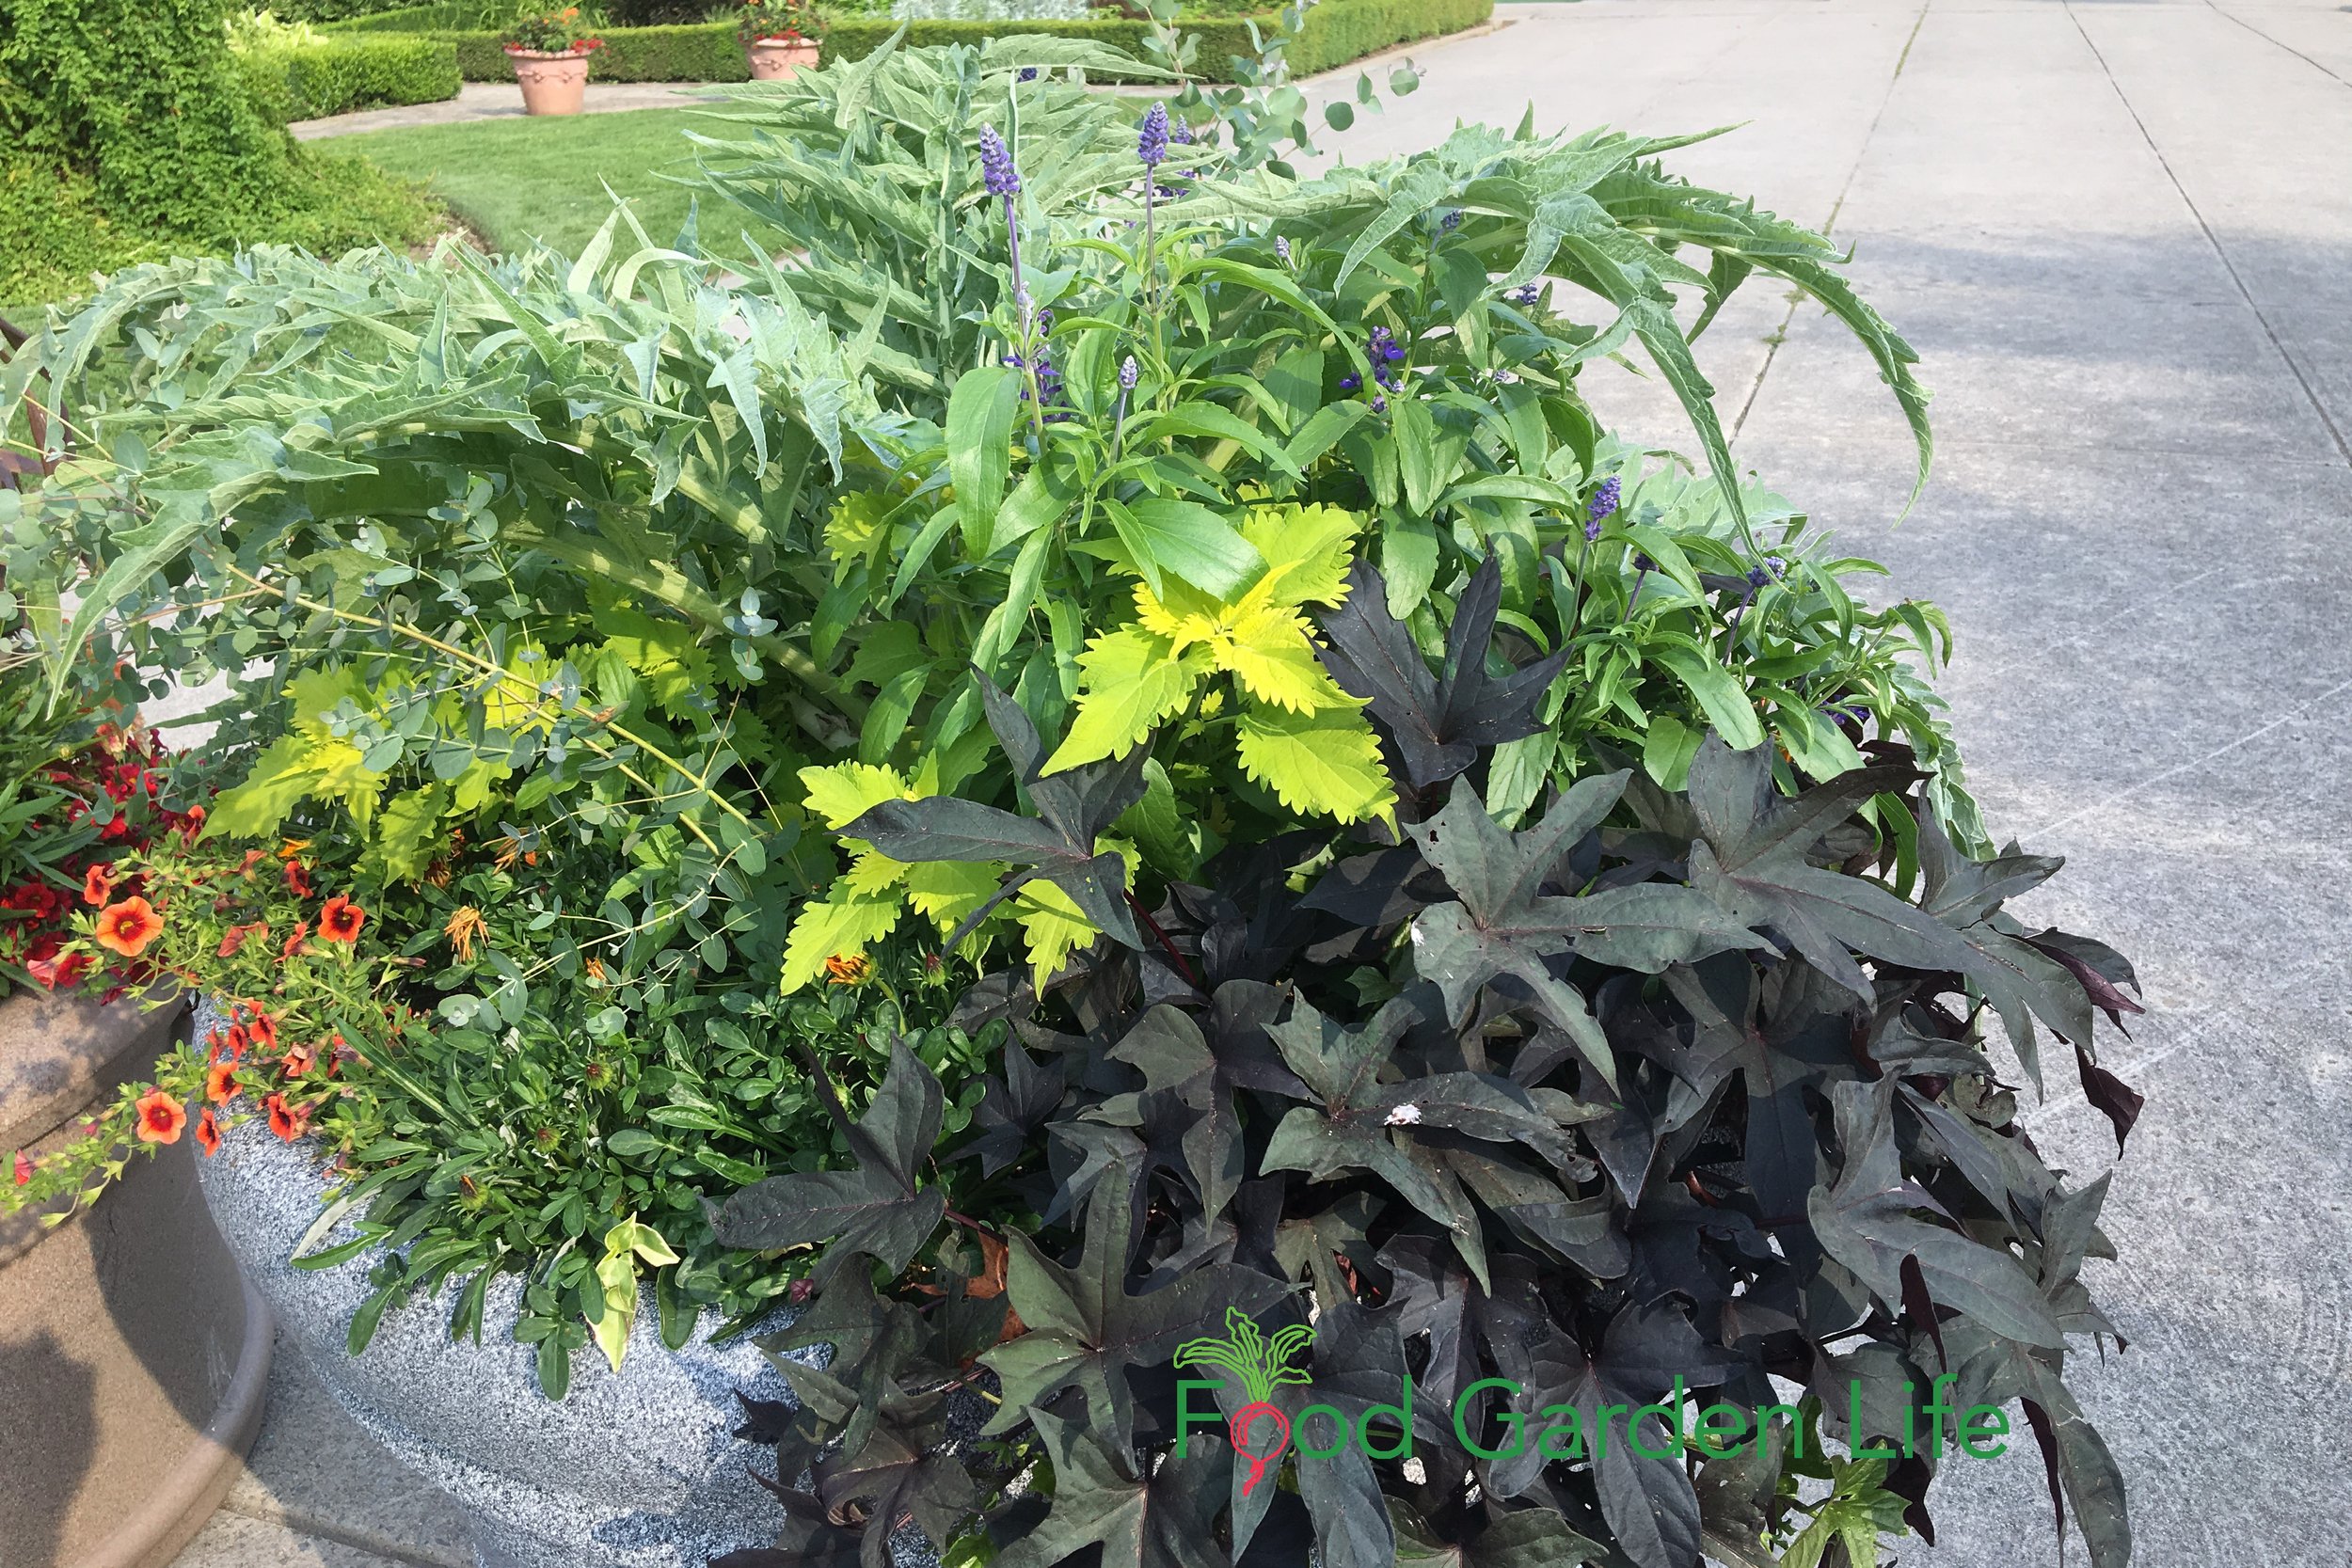
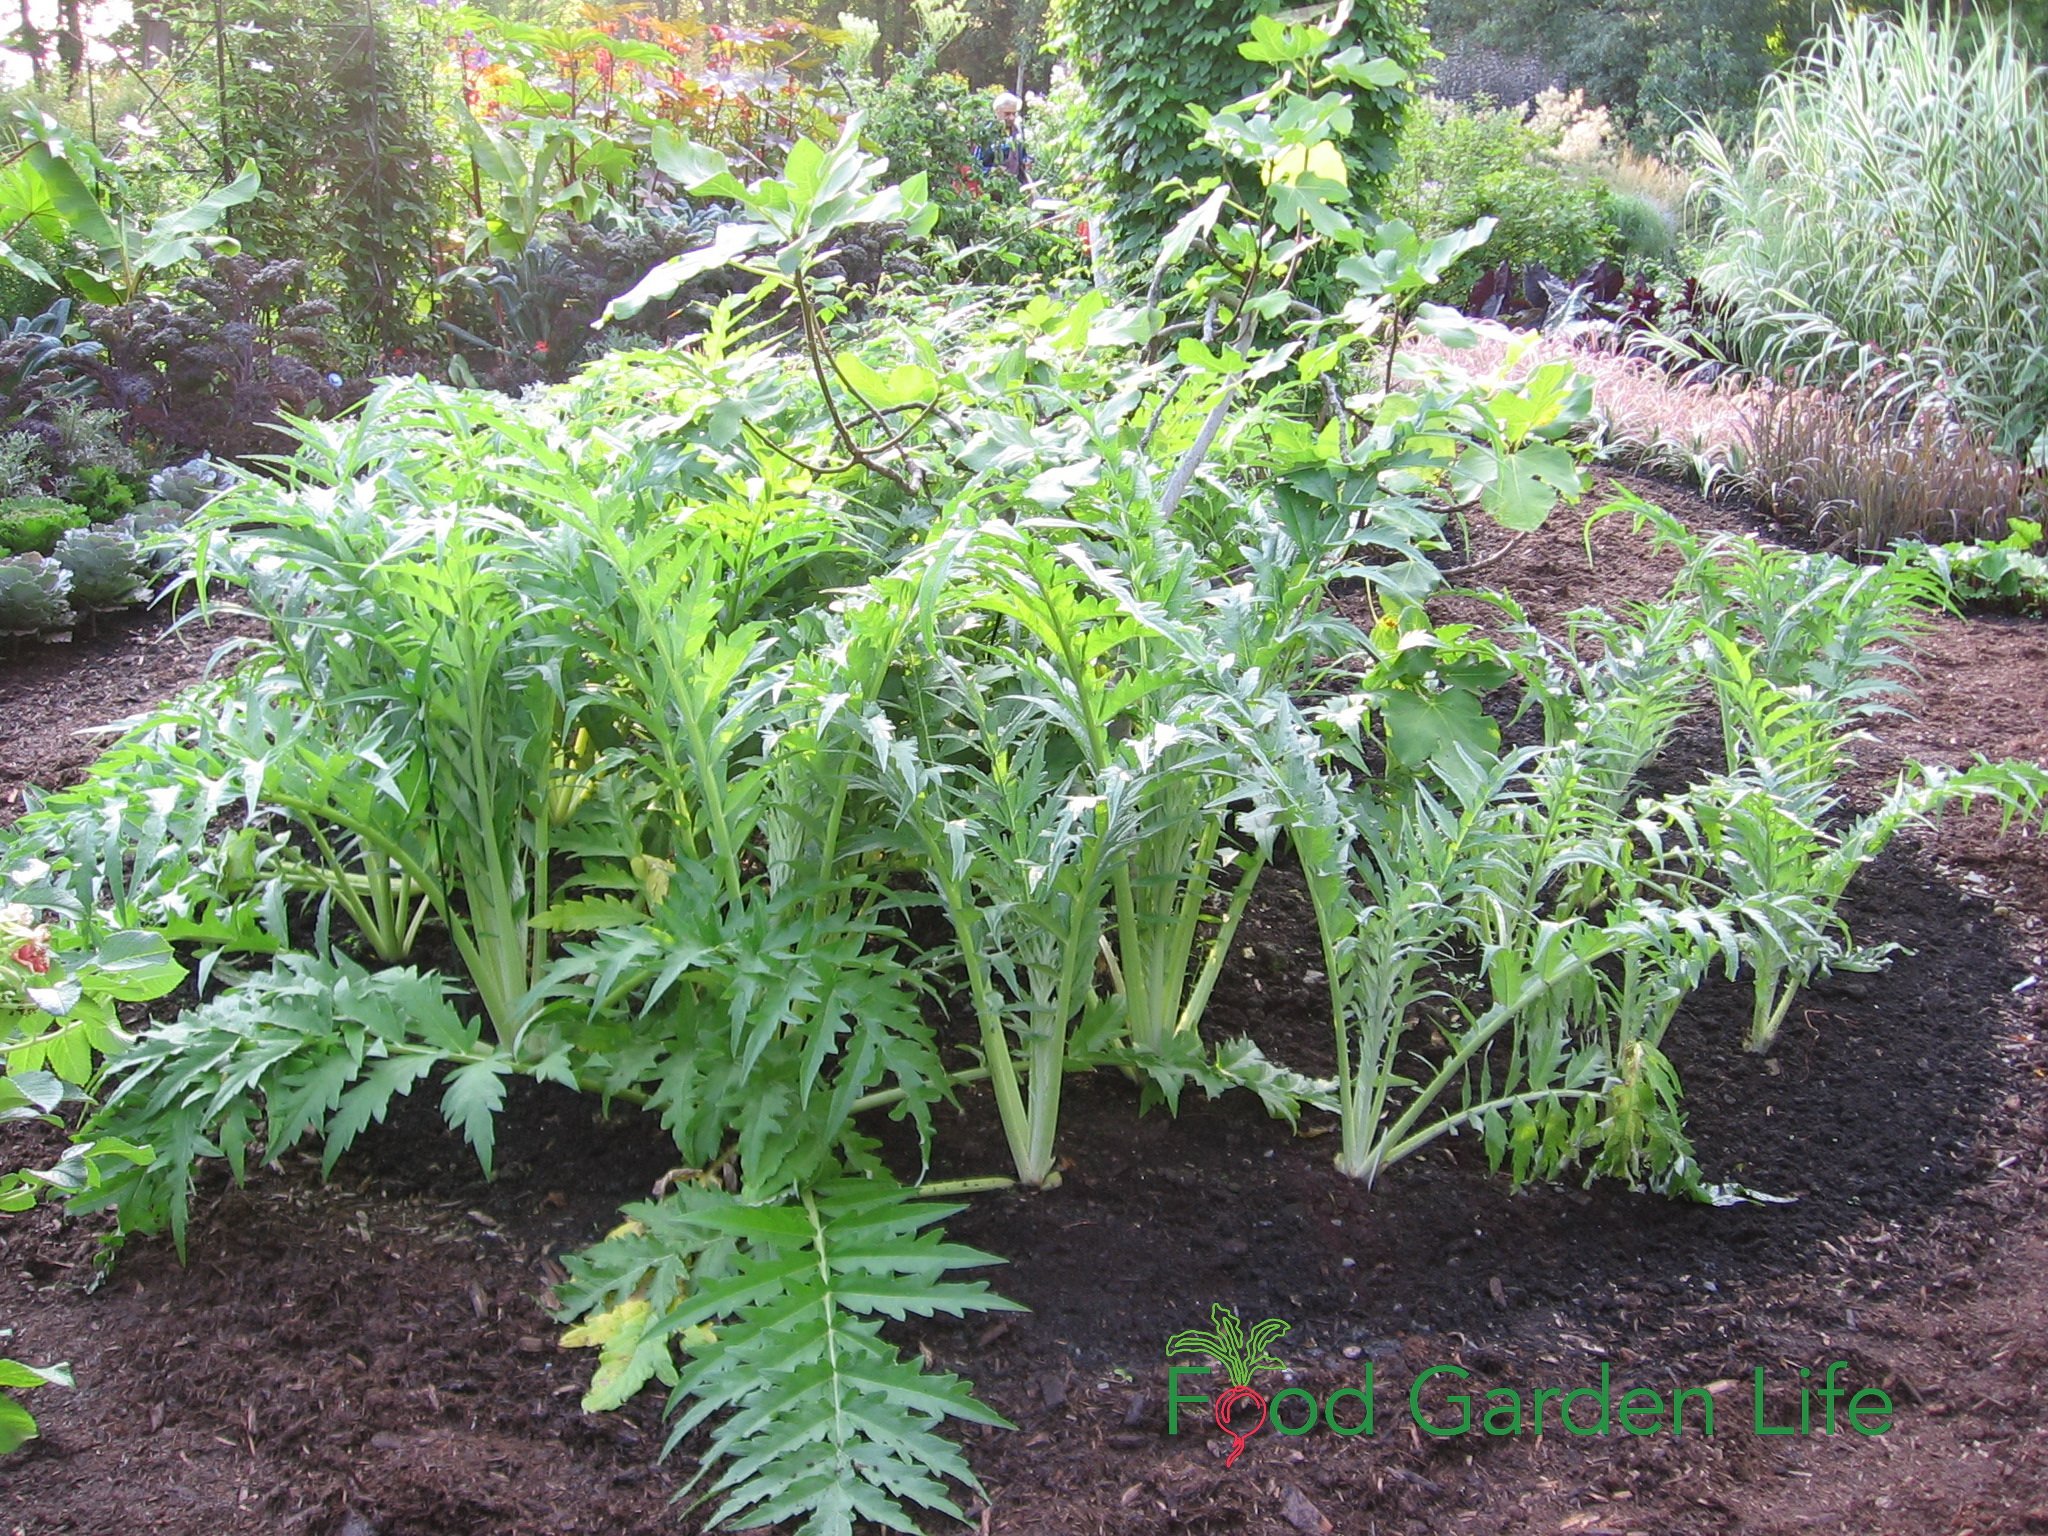
Cardoon in Edible Landscapes
While cardoon is a sun-loving plant, it grows respectably well in partial sun, making it very versatile for use in an edible landscape.

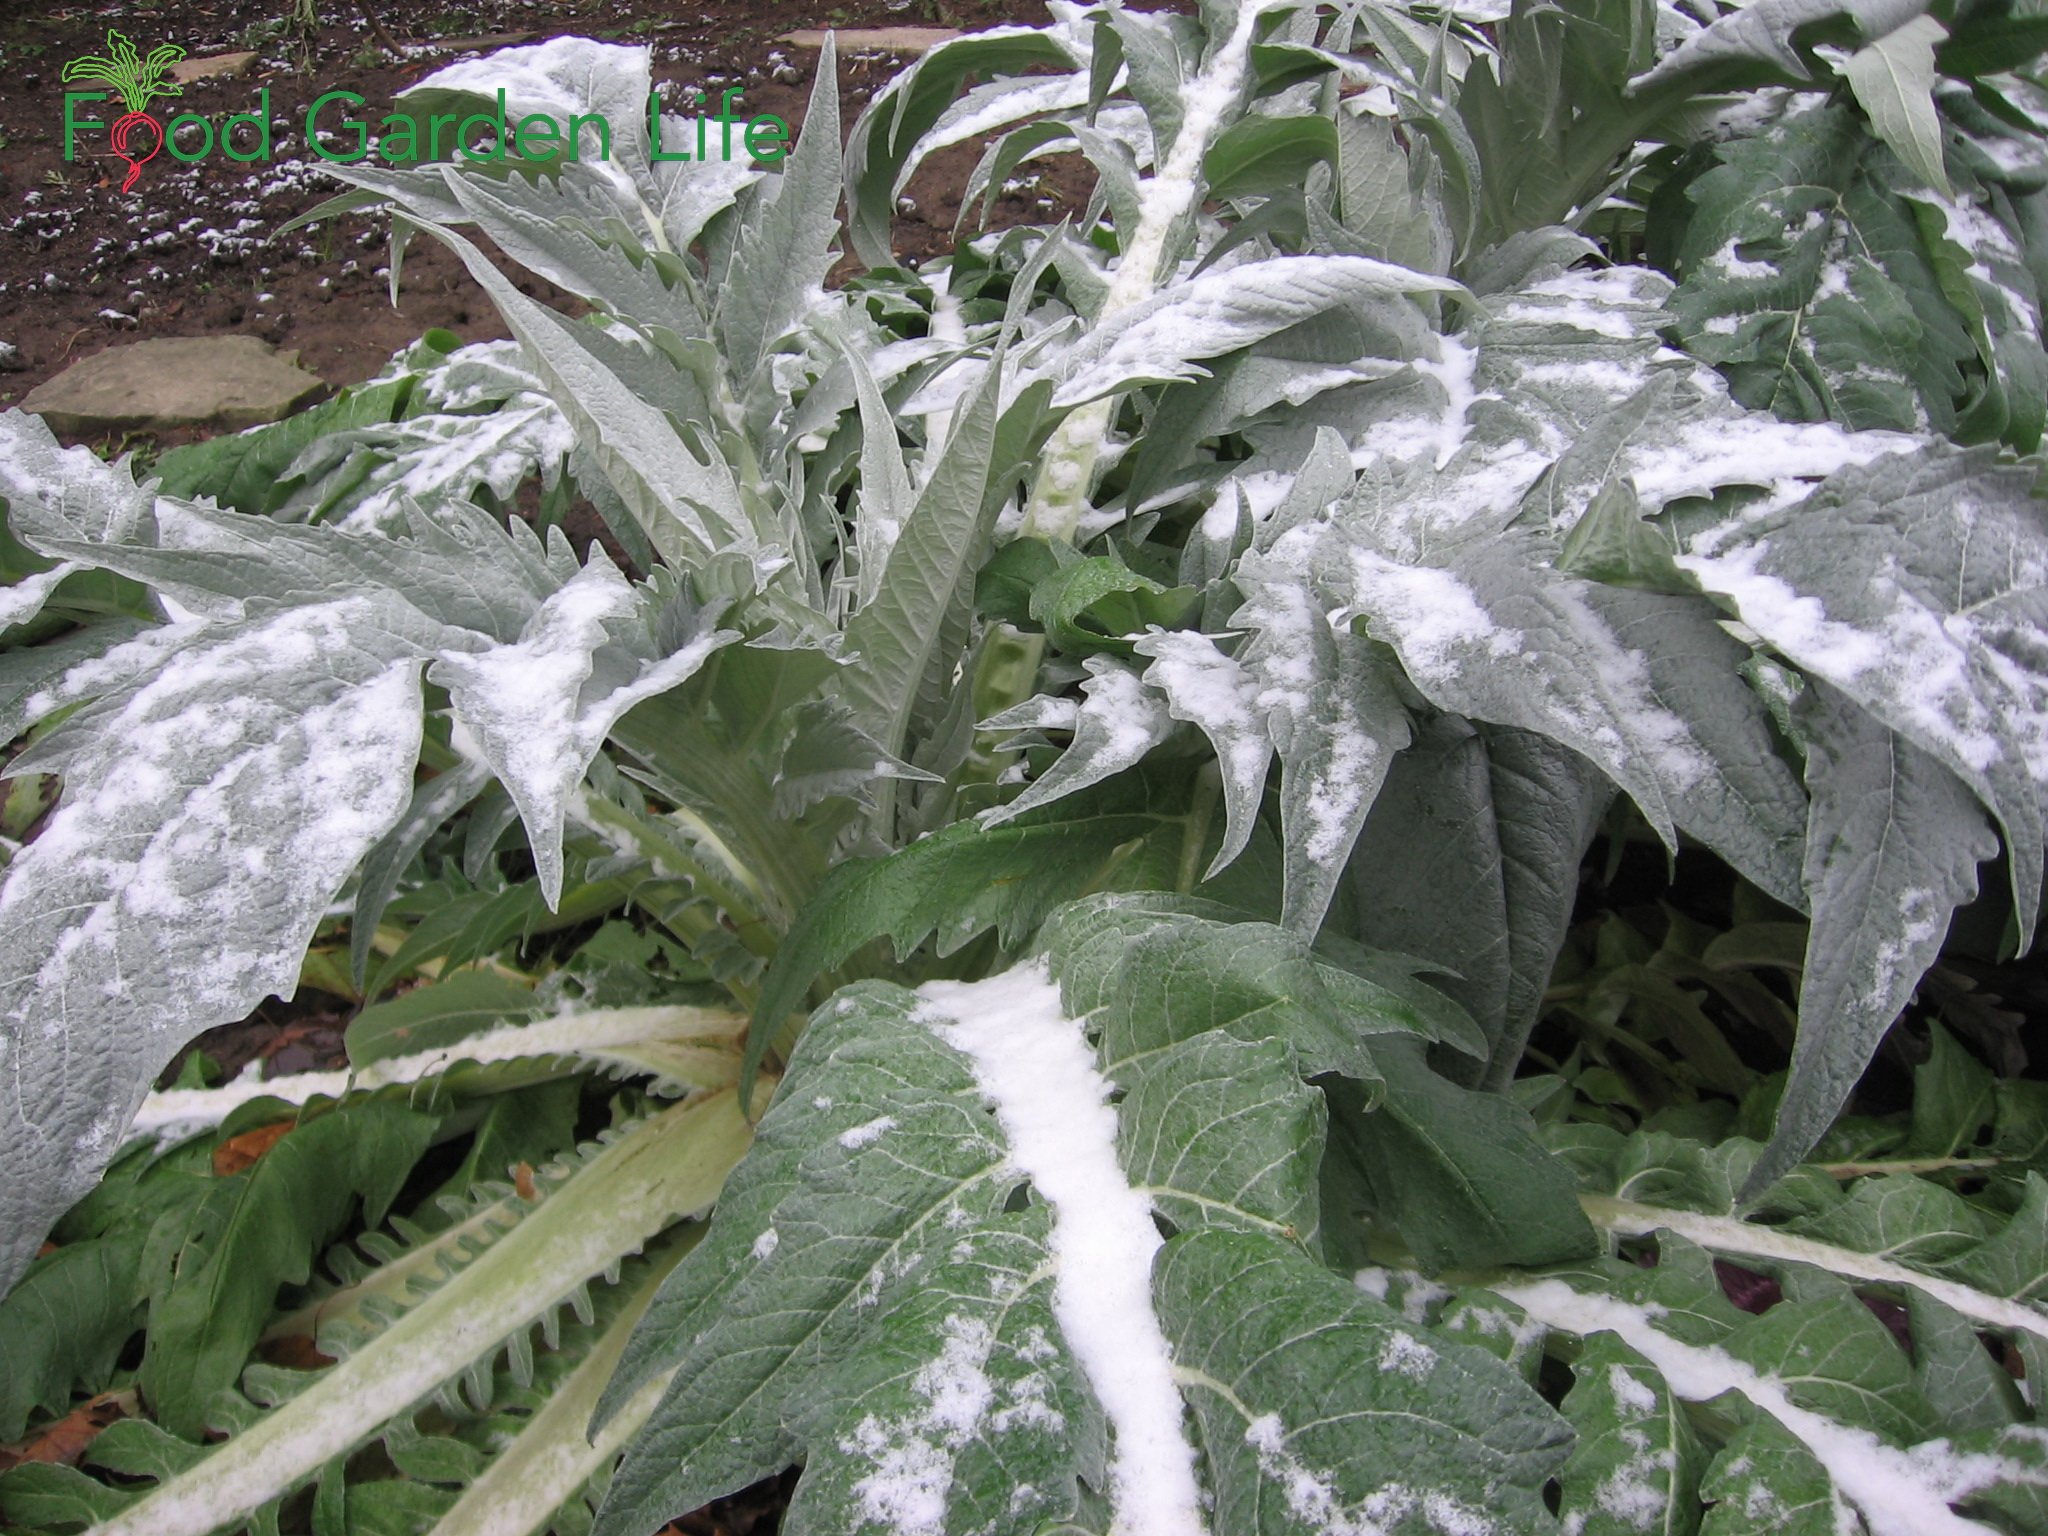
Cardoon for Fall and Winter Interest
Cardoon plants soldier on when cold fall weather arrives. When brushed with frost, they droop a bit, and then spring back as the sun burns off the frost.
As very cold weather with hard freezes arrives, the cardoon plants will be done for the year.
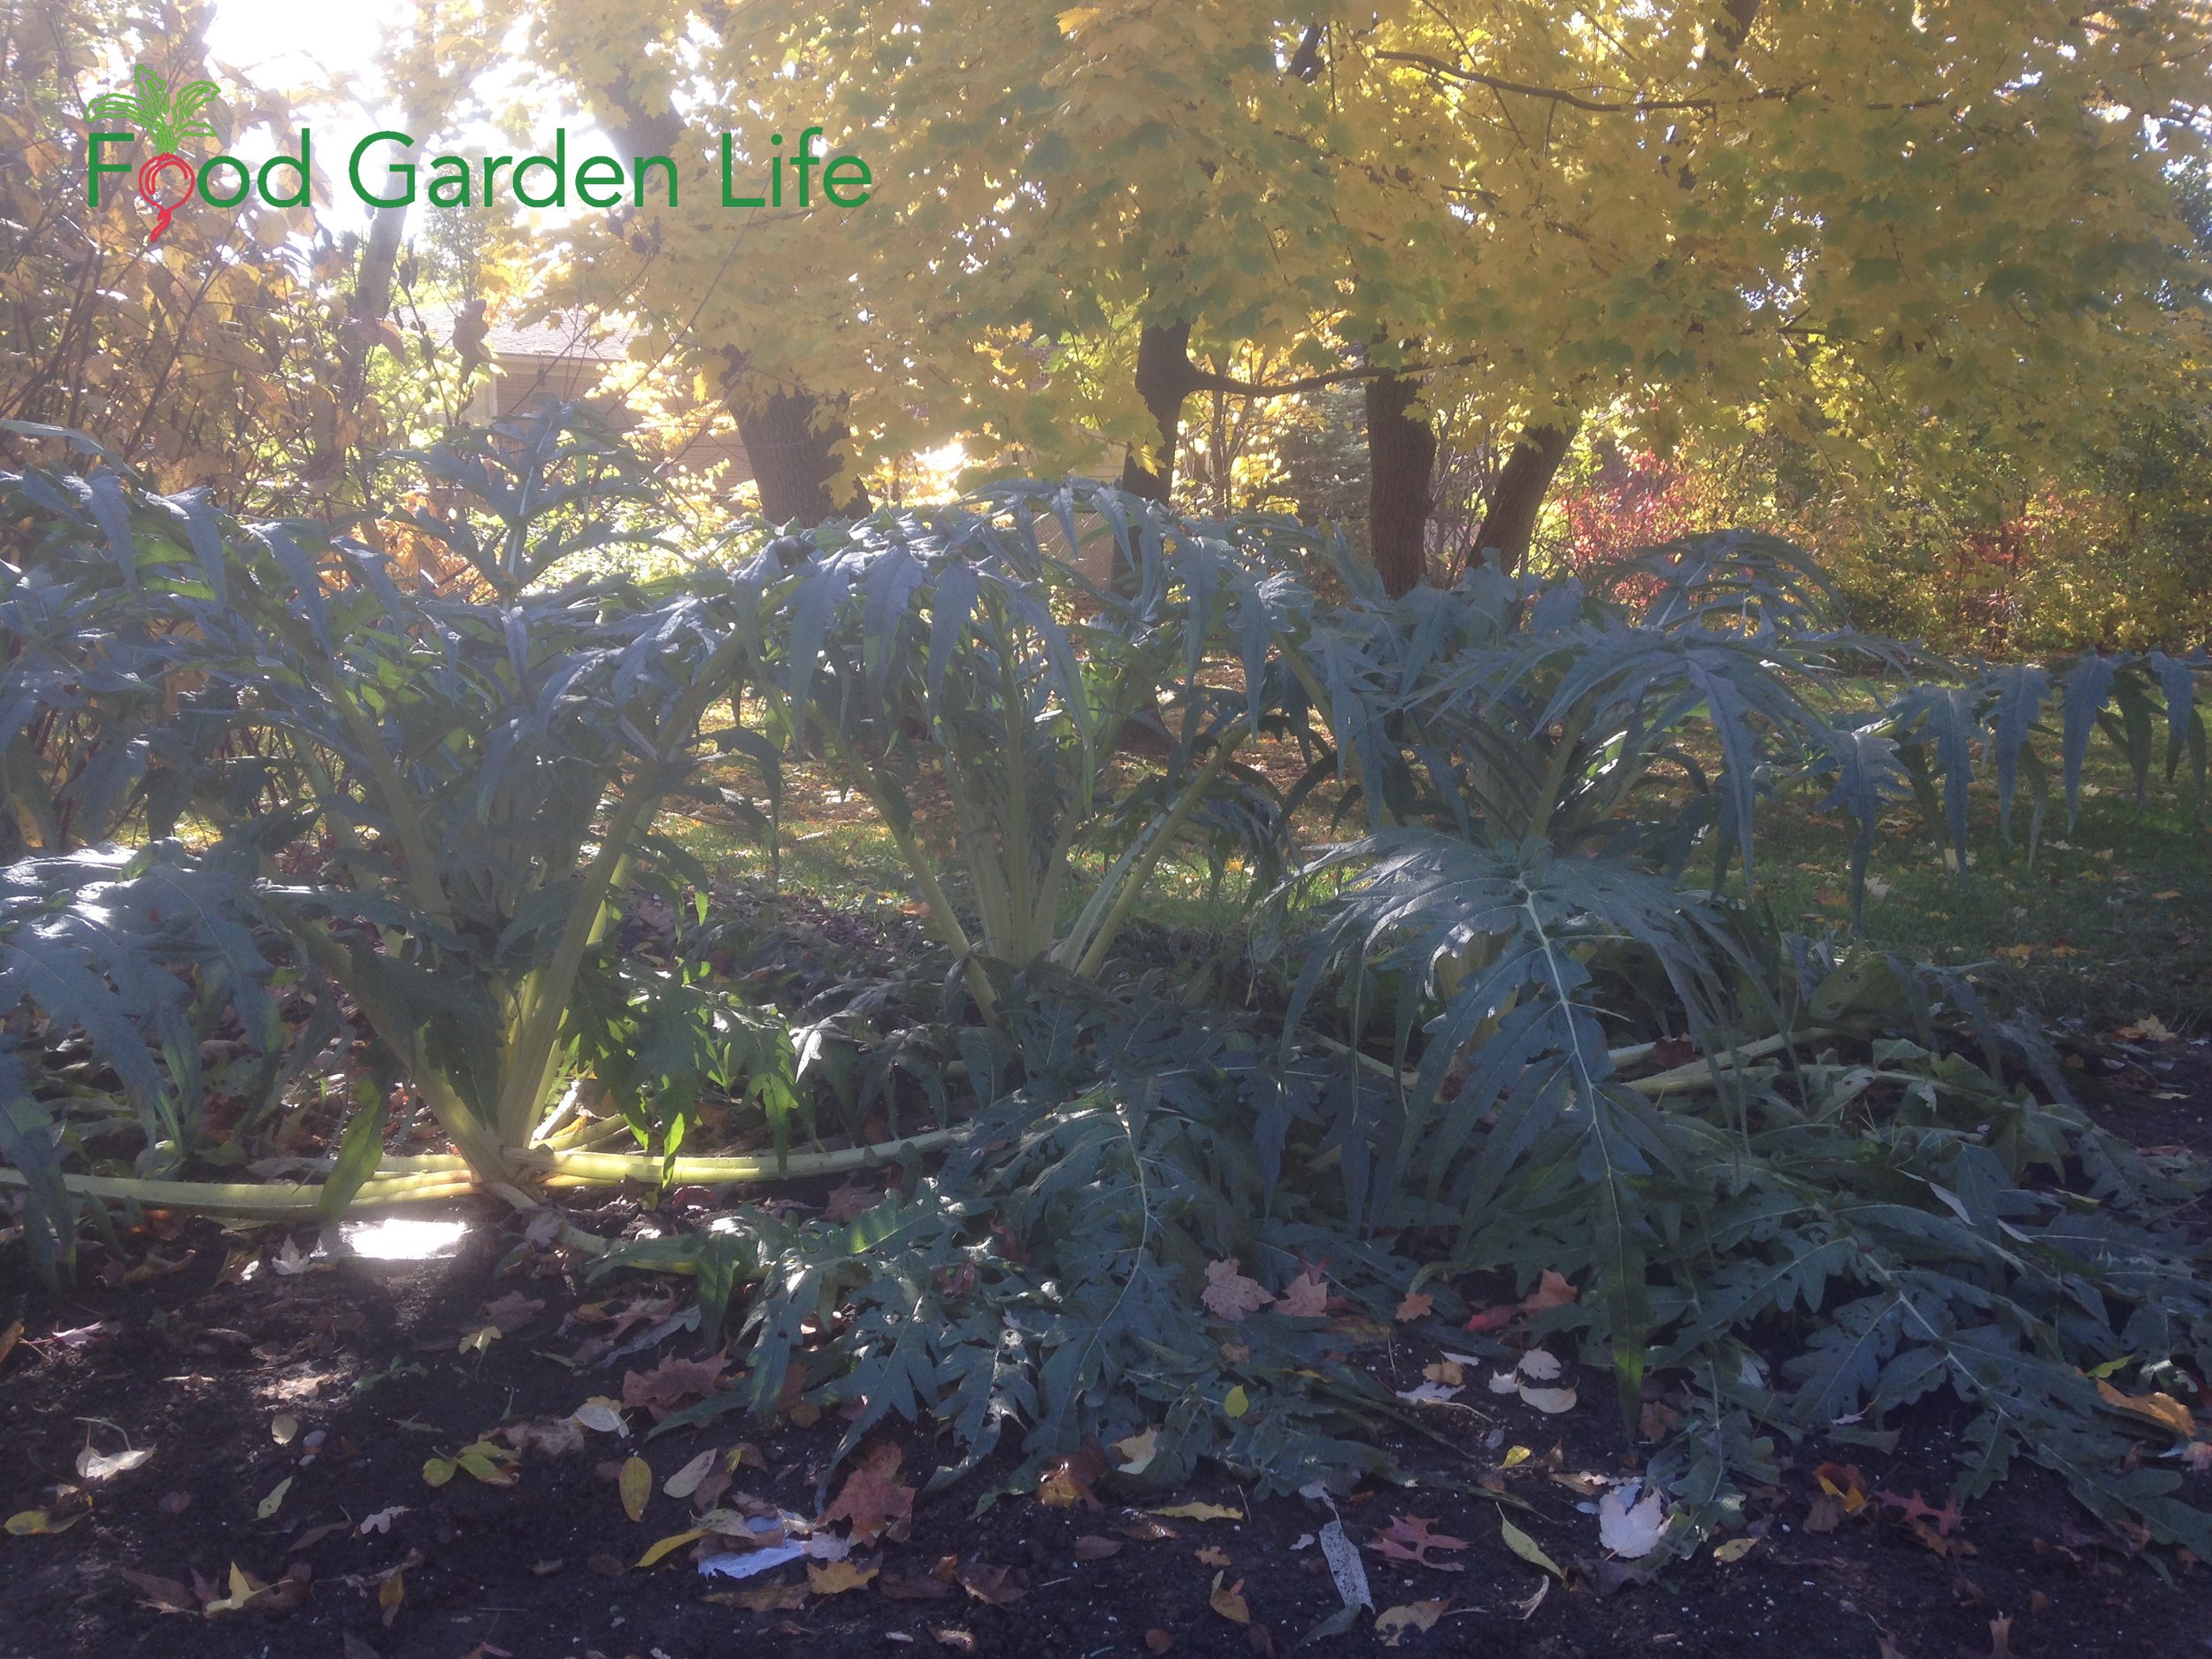
Cardoon as a Cut Flower
No need to say too much here. These bold, dramatic flowers are a great addition to flower arrangements.
Cardoon in the Kitchen
How to Eat Cardoon
I’ve sent home many visitors with leaf stalks from that dashing row of cardoon plants in my front yard.
But take care if you’ve never cooked it!
“Wow, that was disgusting!” my wife and I stammered to each other after our first attempt at eating steamed cardoon.
But I’ve heard from people who love cardoon, and a festive seasonal cardoon soup served in parts of Italy.
Preparing Cardoon Stalks
Use a knife or vegetable peeler to remove the stringy, outer part of the stalk.
Inner stalks on plants that have been blanched are less stringy.
Best Way to Cook Cardoon
I have found that the best way to cook cardoon is to cut stalks into inch-long (2.5-cm) pieces, then bread and deep-fry them, giving crunchy morsels that are a perfect vehicle for a dip.
Minimize Bitterness
Cook cardoon to minimize bitterness, using these pointers from a chef who heard about my reaction the first time I cooked it:
Deep frying helps counter bitterness
Add salt to the water if boiling cardoon (and it’s best to change the water at least once during cooking)
Or roast and lightly char stalks to counter bitterness
Other Ways to Use Cardoon
Cardoon as Rennet Substitute
Extracts from the cardoon flower are used to make a vegetarian substitute for rennet—which is used to make cheese.
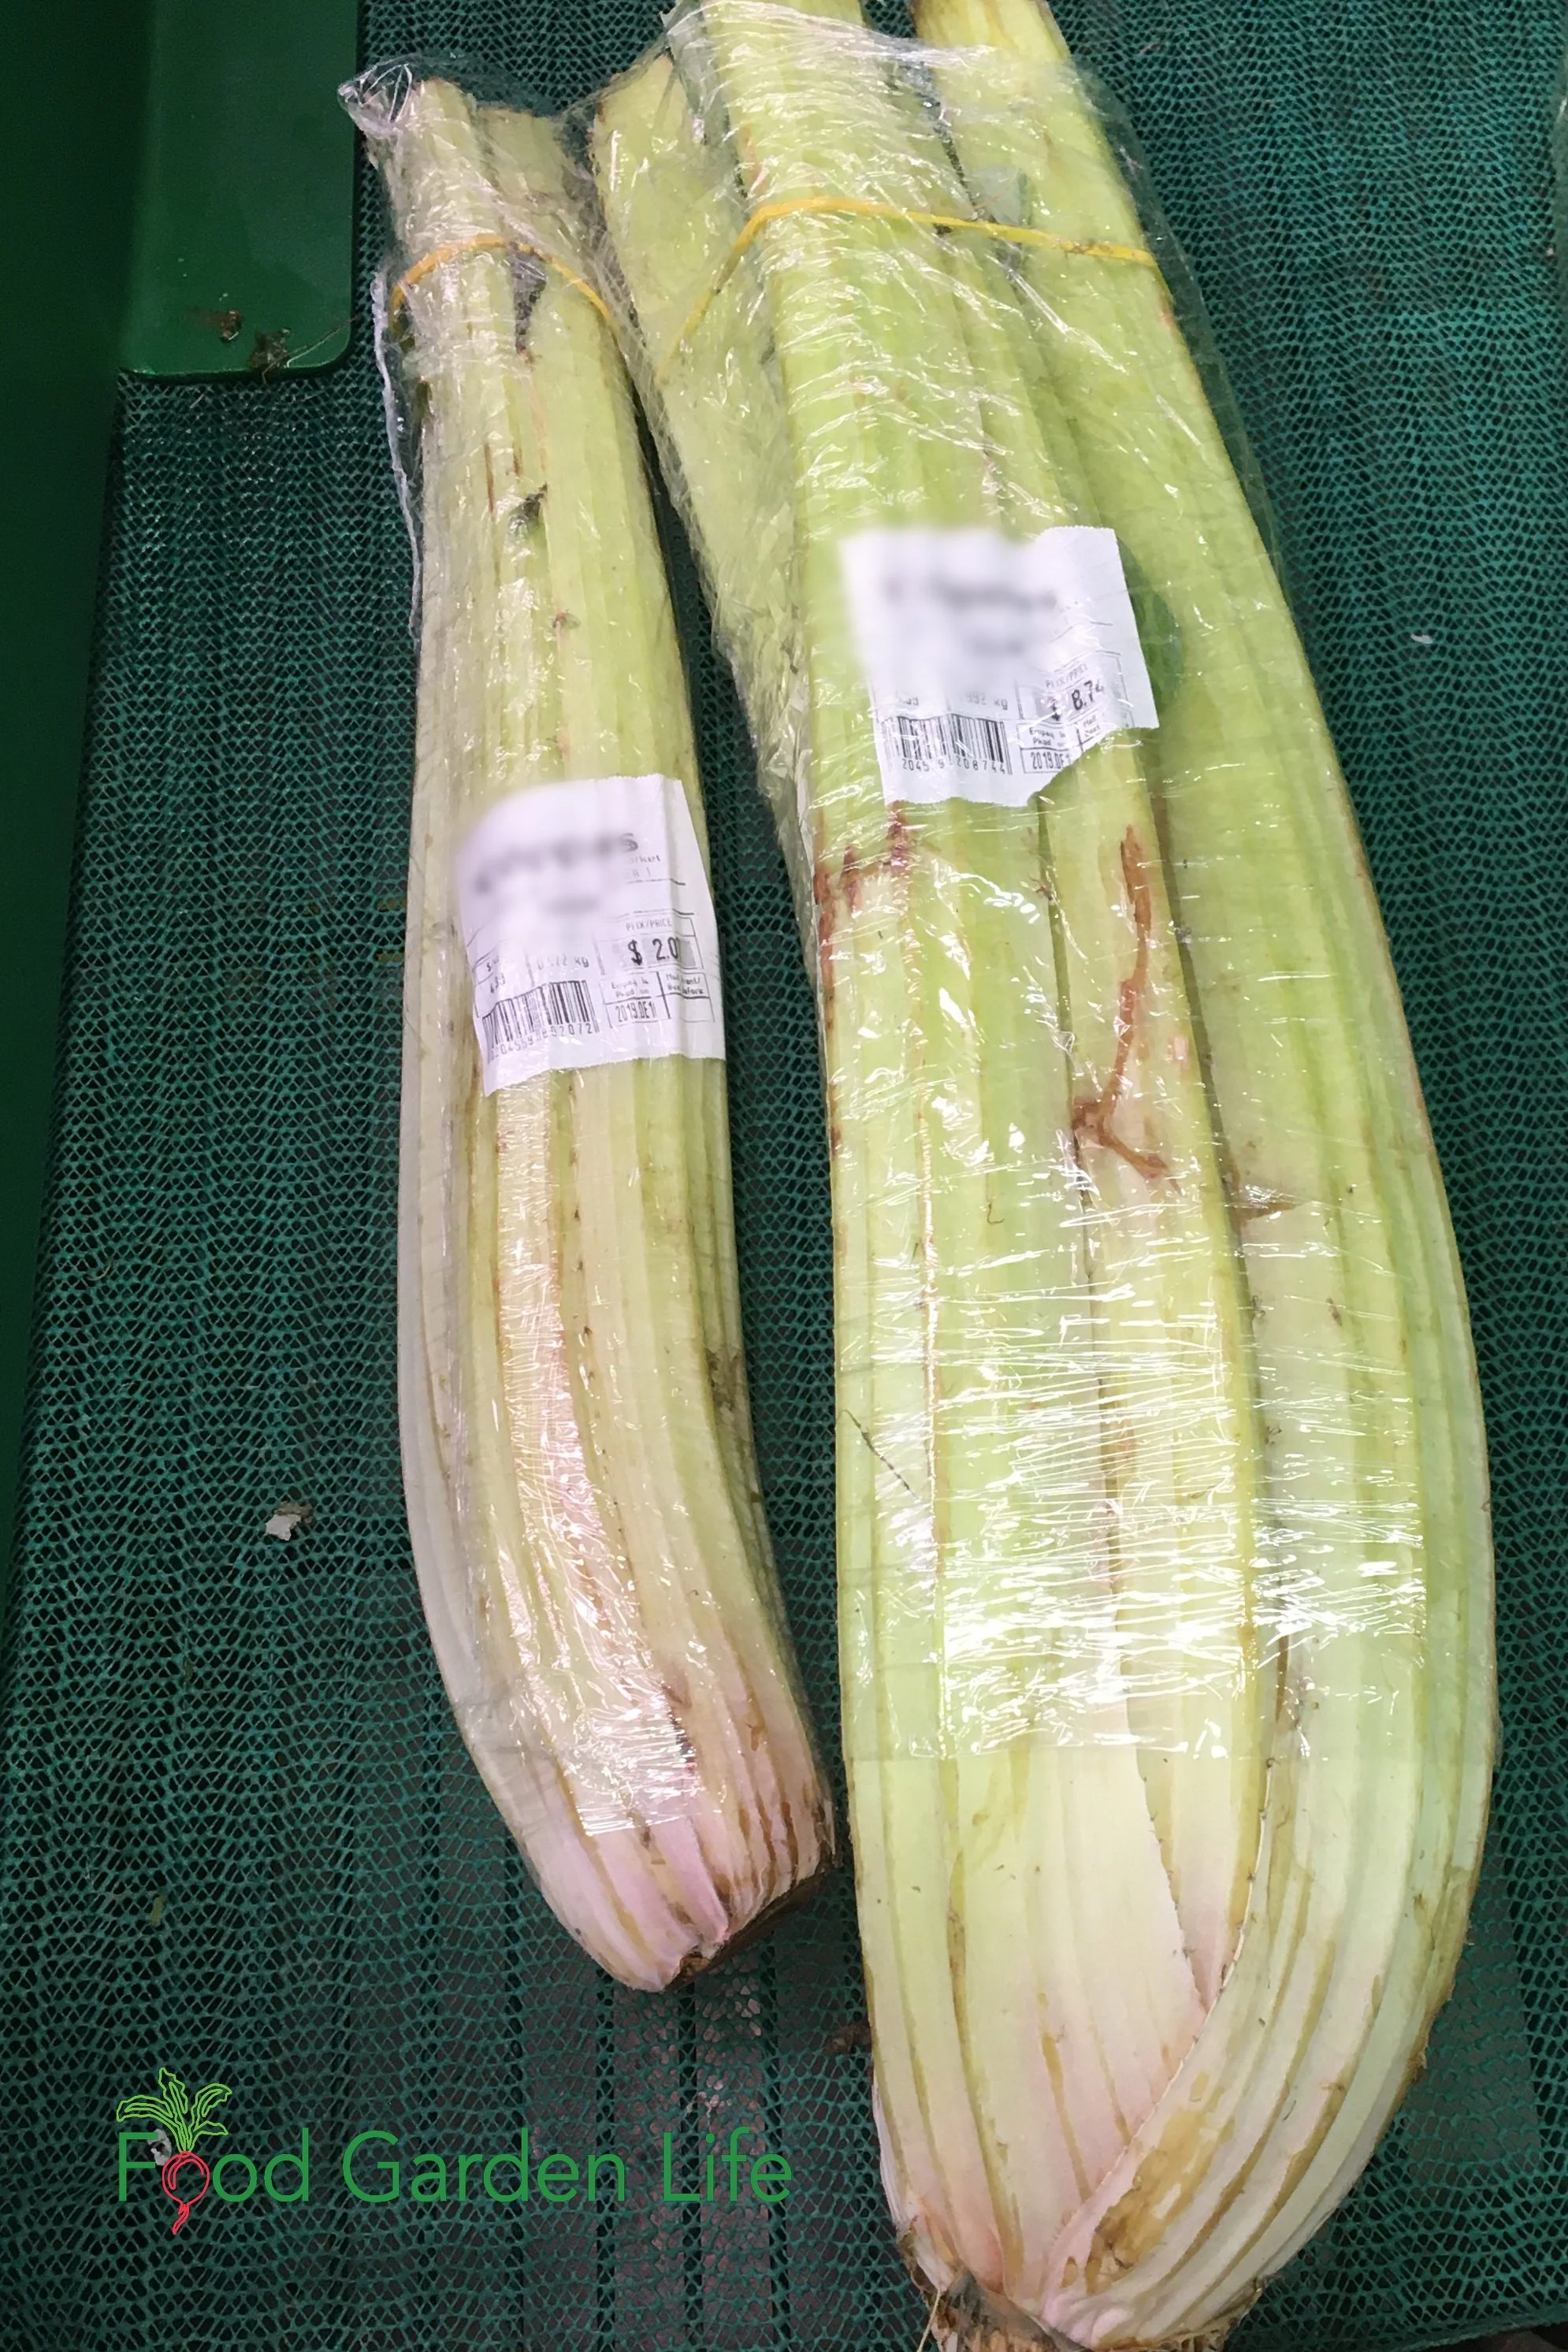
Shopping for Cardoon Stalks
Cardone Vegetable
If you want to buy cardoon stalks, they might not be labelled “cardoon.”
At a local grocery store, cardoon stalks are labelled as “cardone.”
Find This Helpful?
Enjoy not being bombarded by annoying ads?
Appreciate the absence of junky affiliate links for products you don’t need?
It’s because we’re reader supported.
If we’ve helped in your food-gardening journey, we’re glad of support. You can high-five us below. Any amount welcome!
More Vegetable Gardening Ideas
More Mediterranean Crops to Grow in Cold Climates
Guide to Growing an Olive Tree in a Pot
Intro to Growing Figs in Cold Climates
How to Grow Artichoke in Northern Climates
Guide: How to Grow Lemon Trees Indoors That Actually Produce Lemons
Courses to Help You Grow Mediterranean Crops
Books to Help You Grow Mediterranean Crops
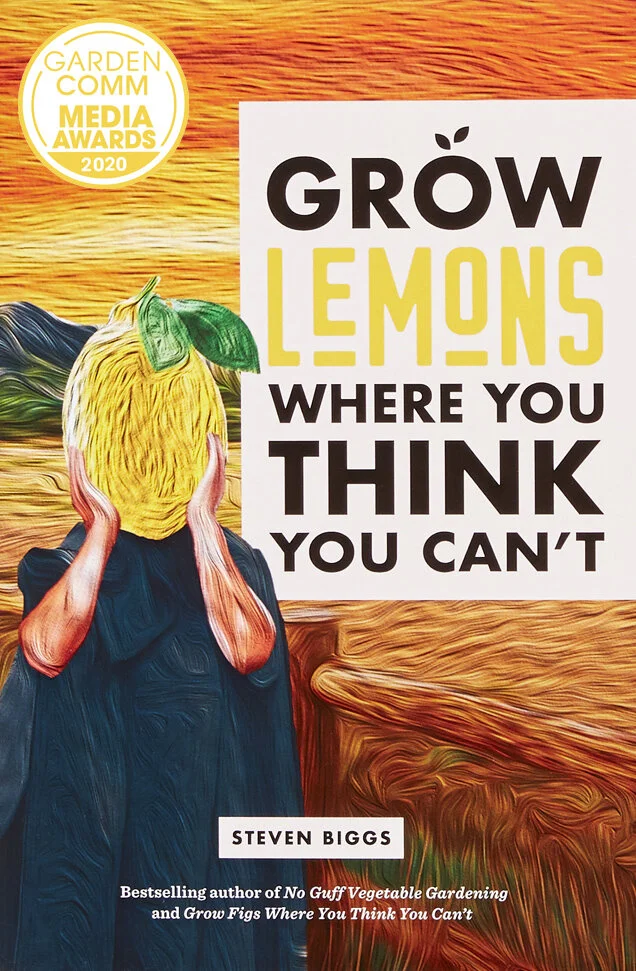
Covering everything from lemon varieties, to location and watering, to pruning and shaping, to overwintering, dealing with pests, and more—and including insights from fellow citrus enthusiasts—this book will give you the confidence you need to grow and harvest fresh lemons in cold climates.
Orders may be shipped from Toronto or printed and shipped directly by our printing partner. Available destinations and shipping charges appear at checkout. All prices are in Canadian dollars.
Prefer an ebook? Find the Kindle edition on Amazon.
These Edible Perennials and Perennial Vegetables Make a Delicious Edible Landscape
Edible perennials are perfect for an edible landscape! Find out which ornamental perennials are edible, and get ideas for perennial herbs and vegetables.
By Steven Biggs
Grow a Grazing Garden with Edible Perennials and Perennial Vegetables
When I was a child my dad showed me how to take a leaf of stonecrop sedum, methodically press the whole surface of the leaf between my thumb and forefinger to soften it, and then gently push sideways to loosen the skin on the front and back.
Once the skin was loose, we’d blow into the sedum leaf to inflate it – like a little balloon!
It’s a fun trick for a kids. And I still have fun showing it to kids who visit my garden.
Multi-Purpose Plants
In a small-space garden, I like to include multipurpose plants, plants that are more than just ornamental. Edible perennials and perennial vegetables are great for small-space gardens.
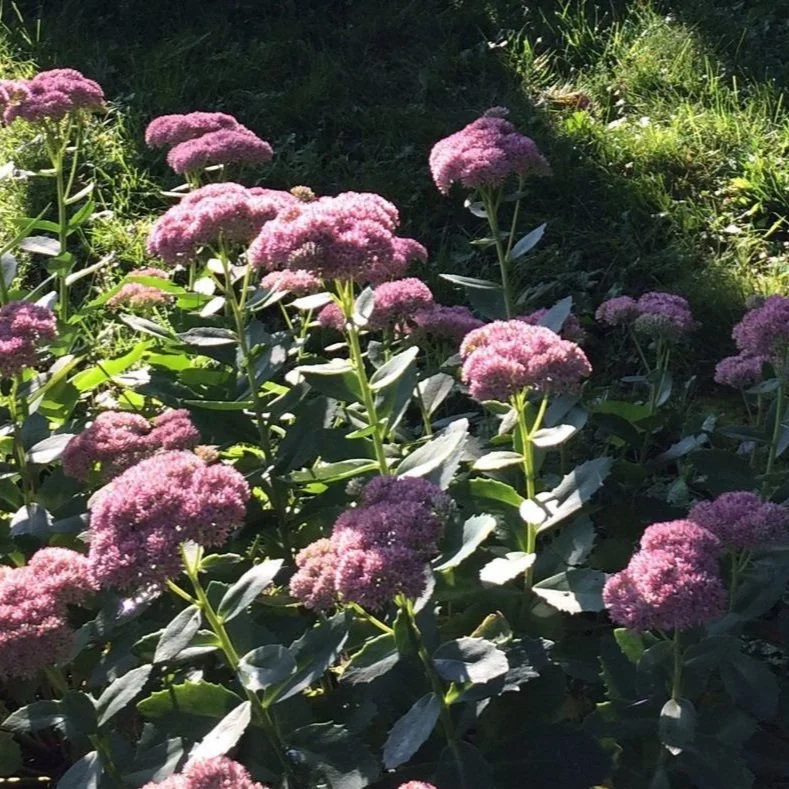
Stonecrop Sedum flowers late in the summer. And it’s edible!
Stonecrop sedum is very ornamental. It’s a reliable, easy-to-grow perennial that flowers in the late summer when most other perennials are done flowering.
It also adds winter interest to the garden. I leave the dry stalks and flower heads in the garden all winter. They add texture and catch the snow.
Beyond it’s ornamental appeal, chalk up two other things for stonecrop sedum (or, as Dad always calls it, frog’s belly.)
The balloon-like leaves are amusing for kids (and adults too!)
It’s edible. You can eat the leaves. They’re mild, slightly lemony.
Keep reading for some of my favourite edible perennials, including herbs, ornamental perennials, and vegetables.
Use Edible Perennials in the Landscape
Traditional vegetable gardening involves a lot of annual crops and annual preparation of the ground. It includes starting transplants indoors, sowing seeds directly into the garden, and preparing the garden soil to make a nice bed.
Even no-dig vegetable gardening systems usually include some sort of soil preparation, whether it’s solarizing the ground (by covering with tarps), scuffing the soil surface to kill small weed seedlings, or mulching.
With this traditional approach to food gardening, there’s often a focus on growing enough to preserve by canning, freezing, or drying.
Perennials for an Edible Landscape
What if you just want to be able to go out into your garden and pick something for the meal you’re about to cook? To see what looks good in the garden – and see what inspires you to be creative in the kitchen?
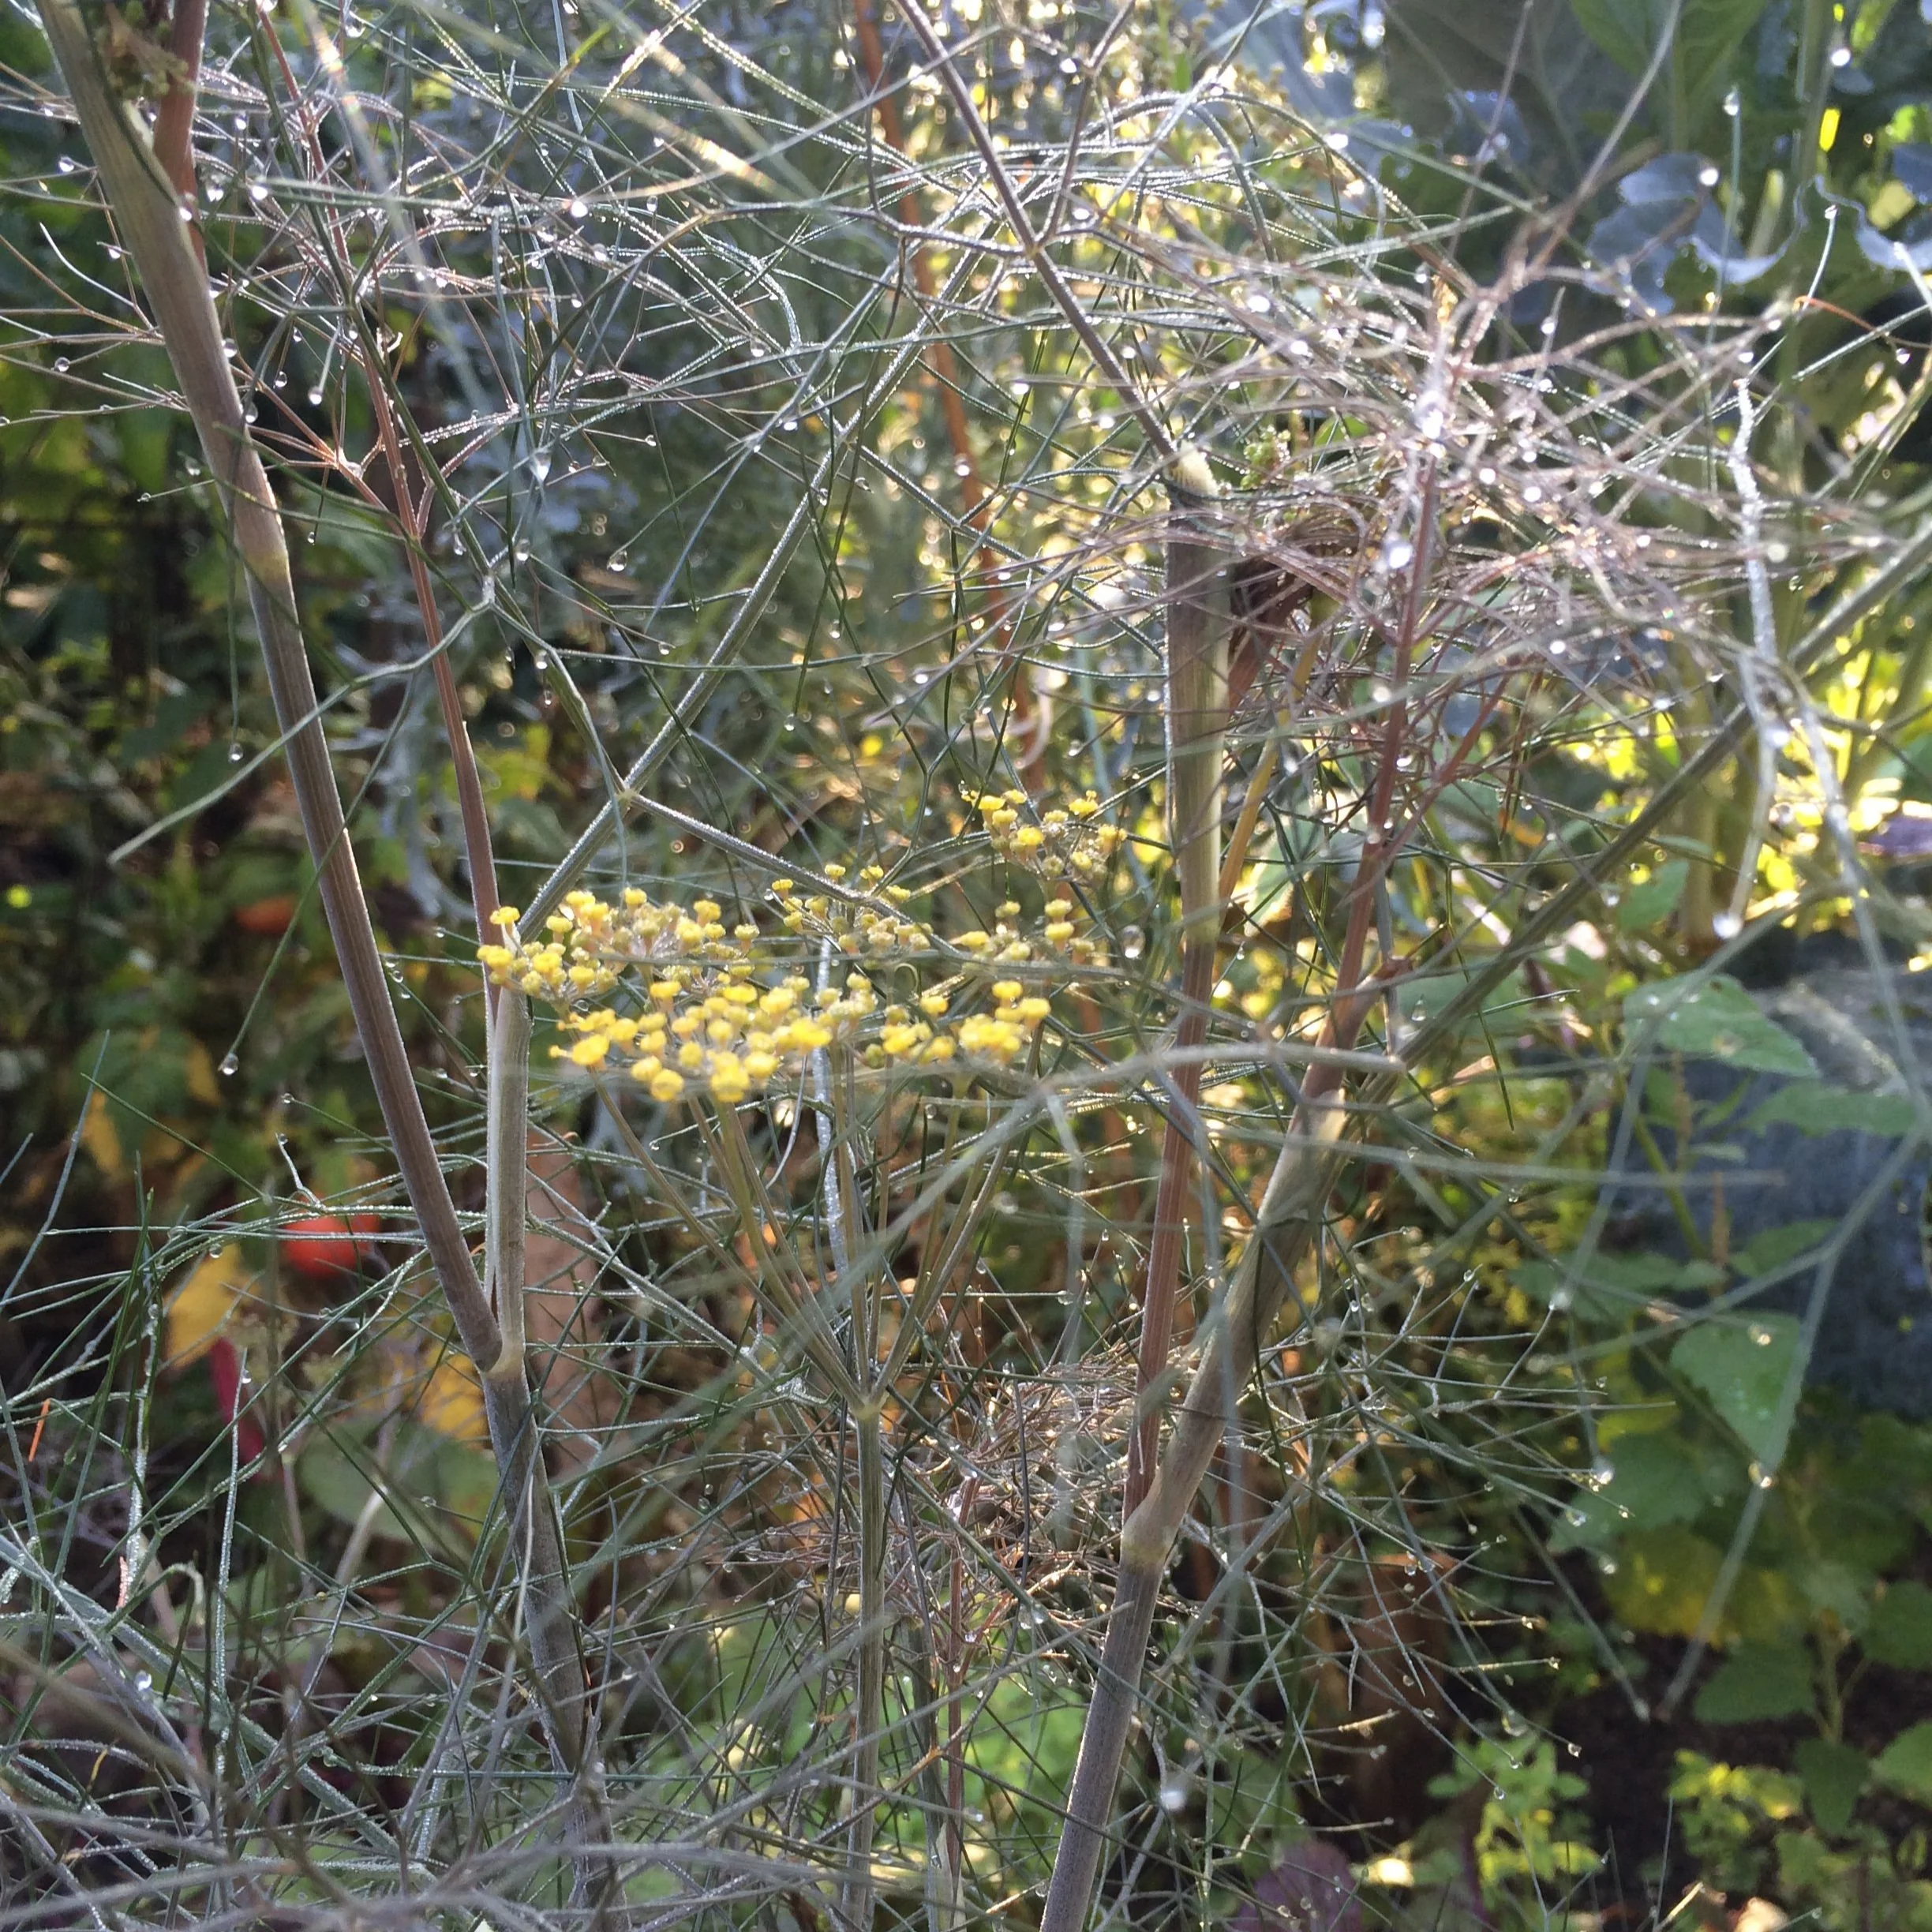
An attractive edible perennial: Airy yellow flowers and a bronze coloured leaf make bronze fennel a beautiful addition to a perennial garden. And leaves and flowers are edible too!
I call this “grazing.” It’s picking just enough for the meal at hand, and letting what you find in the garden inspire what you create in the kitchen.
If you’re a fan of the potager-style garden, which mixes up veggies with herbs, edible flowers, flowers for cutting, and fruit, you’ll get the idea. We’re talking about a grazing garden.
So let’s take this idea of a grazing garden and use it in our perennial flower beds, dotted the landscape with perennial plants that are edible and look nice. This approach to gardening is a great way to grow some of your own ingredients even if you don’t have the space or the time to undertake a more traditional vegetable garden.
Here are some of my favourite edible perennials for a grazing garden:
Perennial Vegetables and Herbs
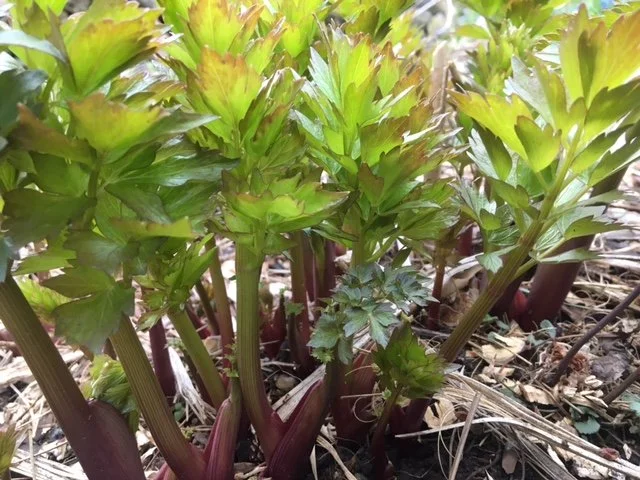
Lovage deserves a space in any ornamental perennial bed. The celery-like leaves are great in soups and salads.
Asparagus: After you’ve finished harvesting asparagus spears in the spring, this perennial grows into a tall, ferny plant that adds great texture and movement to a garden. Because it’s tall, put it at the back of the garden. Support it to prevent it flopping onto its neighbours.
Bronze Fennel: The feathery, bronze leaves are edible, as are the flowers. The pollen can be used to decorate a plate: Tap the flowers over a white plate to adorn it with the brightly coloured yellow pollen. I like to use the seeds when I make sausage.
Chives: Both leaves and flowers are edible. A tidy, well-behaved plant that looks great when used to edge a garden.
Horseradish: The root is grated to make the well-known condiment. Leaf pieces are sometimes added to pickles. This is a bomb-proof plant with a deep root system that’s hard to remove once established, so put some thought into where you would like it to be in the long term.
Pin this post!
Jerusalem Artichoke: This one is in the Weed Guide of Ontario…so beware. But it’s a versatile plant, taking full sun to part shade. The tubers are plentiful.
Lemon Balm: Use young leaves in salads, and dry leaves for tea. This is not a timid plant; it spreads. But I love if for the fragrant foliage. Plant it somewhere where you’ll brush against it while in the garden and you’ll be glad you have it.
Lovage: My neighbour Dave says that this is the secret ingredient for an award-winning tomato soup. Or you might use it in a bouquet garni. It’s a super celery substitute. (Try mature stems as straws when serving Caesars!) This imposing perennial deserves a space in any ornamental perennial bed.
Mint: My daughter got 19 types of mint one year: chocolate mint, spearmint, pineapple mint… There are so many types. It’s excellent for teas, and we enjoy making mint ice cream. Mint can be invasive. So grow it in containers if you don’t want it to overrun your garden. But if you have a shady corner where not much grows, this might be a suitable place to plant your mint in the ground.
Oregano: A well-known herb that is hardy and an excellent ground cover too. When it’s in bloom watch to see what a bee magnet it is.
Rhubarb: My neighbour Chris planted it next to his pond because the big leaves are so beautiful. Easy to grow and productive. Recommended for sun, tolerates part sun very well. Find out how to force rhubarb indoors in the winter.
Sage: Along with the common grey-green leafed sage, there are varietgated and tri-colour varieties. If, like me, you’ve over-saged the thanksgiving turkey stuffing one too many times and don’t care if you ever cook with it again, some of these tricolour sages still make a beautiful addition to a herb garden.
Sorrel: My favourite. Easy to grow, rarely for sale at the supermarket. I use these tangy leaves mixed in with salad greens, to make soups, and when braising fish and poultry. Think of sorrel as a lemon substitute for northern gardeners. There’s wild sorrel, as well as large-leaved cultivated varieties.
Edible Ornamental Perennials
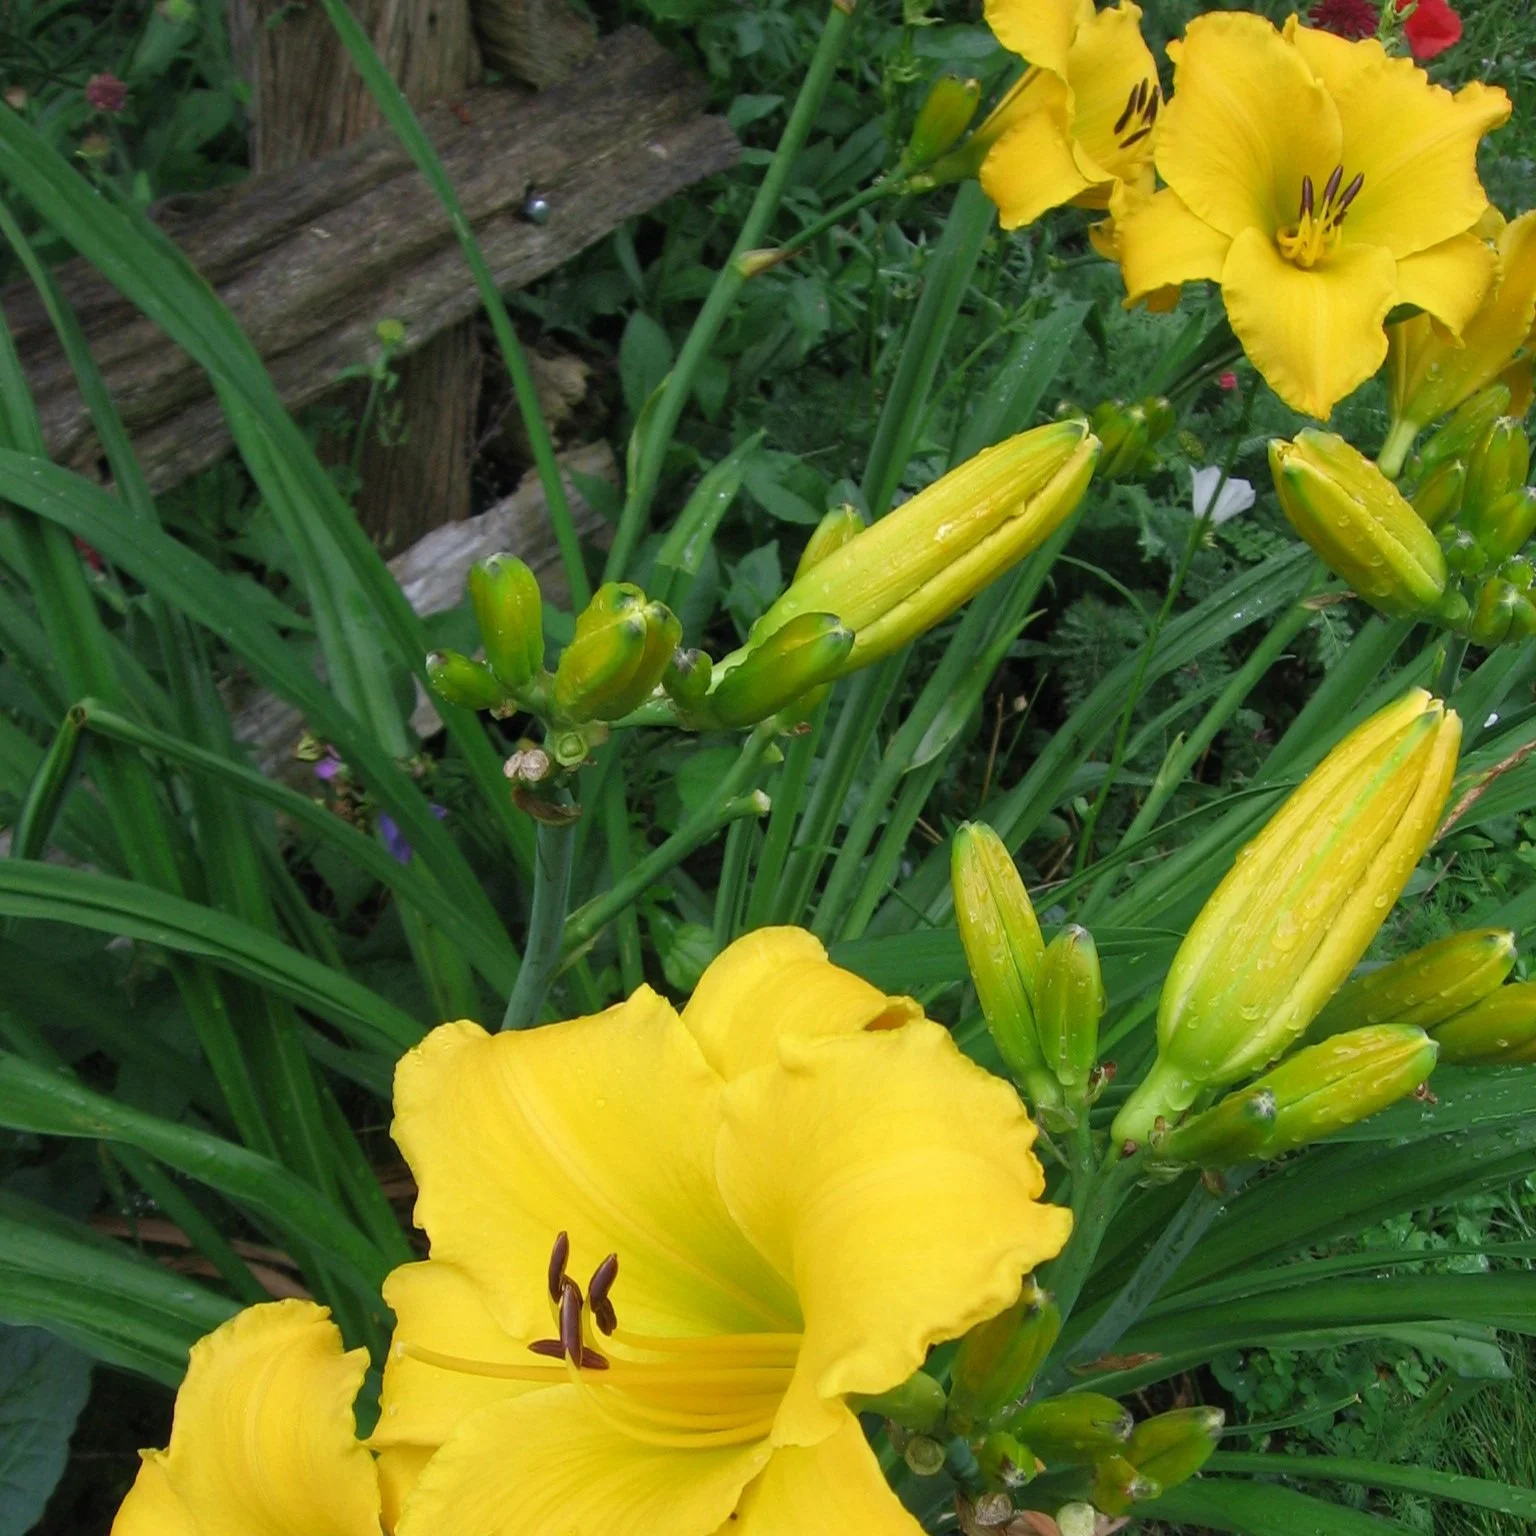
Daylily flowers and buds are edible.
Bergamot: Great for attracting pollinators, very ornamental – and edible. The leaves can be used to make tea. And the edible flowers are nice when tossed into a fruit salad.
Daylily: A perennial that has naturalized in some rural areas here in southern Ontario, it’s grown as a vegetable in other parts of the world. Unopened flower buds are a great addition to a stir-fry. And the flowers are an excellent garnish. Idea: How about a daylily flower instead of an ice cream cone? Daylily thrives near black walnut trees. Are you dealing with black-walnut toxicity? Here’s an article about juglone-tolerant plants that you can grow near black walnut trees.
Hosta: This ornamental perennial is a very widely used perennial. It does well in shade, makes a good ground cover – and the unfurled leaves in spring are nice steamed and buttered. Think this sounds strange? Check out these recipes from the Royal Horticultural Society of Ireland.
Stonecrop: Like hosta, a perennial garden workhorse, with flowers late in the summer when many other plants in the perennial garden are done blooming. But the leaves are edible and can be used in salads. And…there’s the fun of blowing up the leaves!

Stonecrop sedum is an edible perennial, and it's also lots of fun to grow in a kids garden because the leaves are like mini balloons!
Wondering about Shade?
Wondering what vegetable plants and fruit crops grow in the shade? Find out what fruit and vegetables grow well in the shade.
Find This Helpful?
Enjoy not being bombarded by annoying ads?
Appreciate the absence of junky affiliate links for products you don’t need?
It’s because we’re reader supported.
If we’ve helped in your food-gardening journey, we’re glad of support. You can high-five us below. Any amount welcome!
More Edible-Landscape Ideas
Plant ideas, techniques, and creative ideas to transform yards into fantastic edible landscapes.
5 Heat-Tolerant Salad Greens to Grow All Summer Long (Plus a Great Garnish)
Lettuce bolting in hot weather? Here are 5 easy-to-grow and heat-tolerant salad greens to grow in hot weather. (Plus a delicious heat-loving garnish for your salad!)

By Steven Biggs
Pick Crops to Expand Your Hot-Weather Menu
As hot summer weather arrives, many spring greens start to bolt. When they bolt (when they send up flower stalks) they stop producing tender leaves. It’s game over.
Find out how to slow down lettuce bolting.
One way to harvest a steady supply of green leaves over the summer months is with succession crops. Make ongoing plantings of bolt-prone crops such as lettuce, spinach, and arugula. (Look for heat-tolerant lettuces.)
Here's more about succession crops.
But there's another way to get a steady supply of summer salads: Grow heat-tolerant greens.
If you want hot-weather greens, keep reading. As warm weather arrives, add some of these other leafy greens to the garden to spruce up your salads.
5 Leafy Greens for Summer Heat
Here are five of my favourite heat-tolerant greens for the summer garden.
Amaranth Leaves
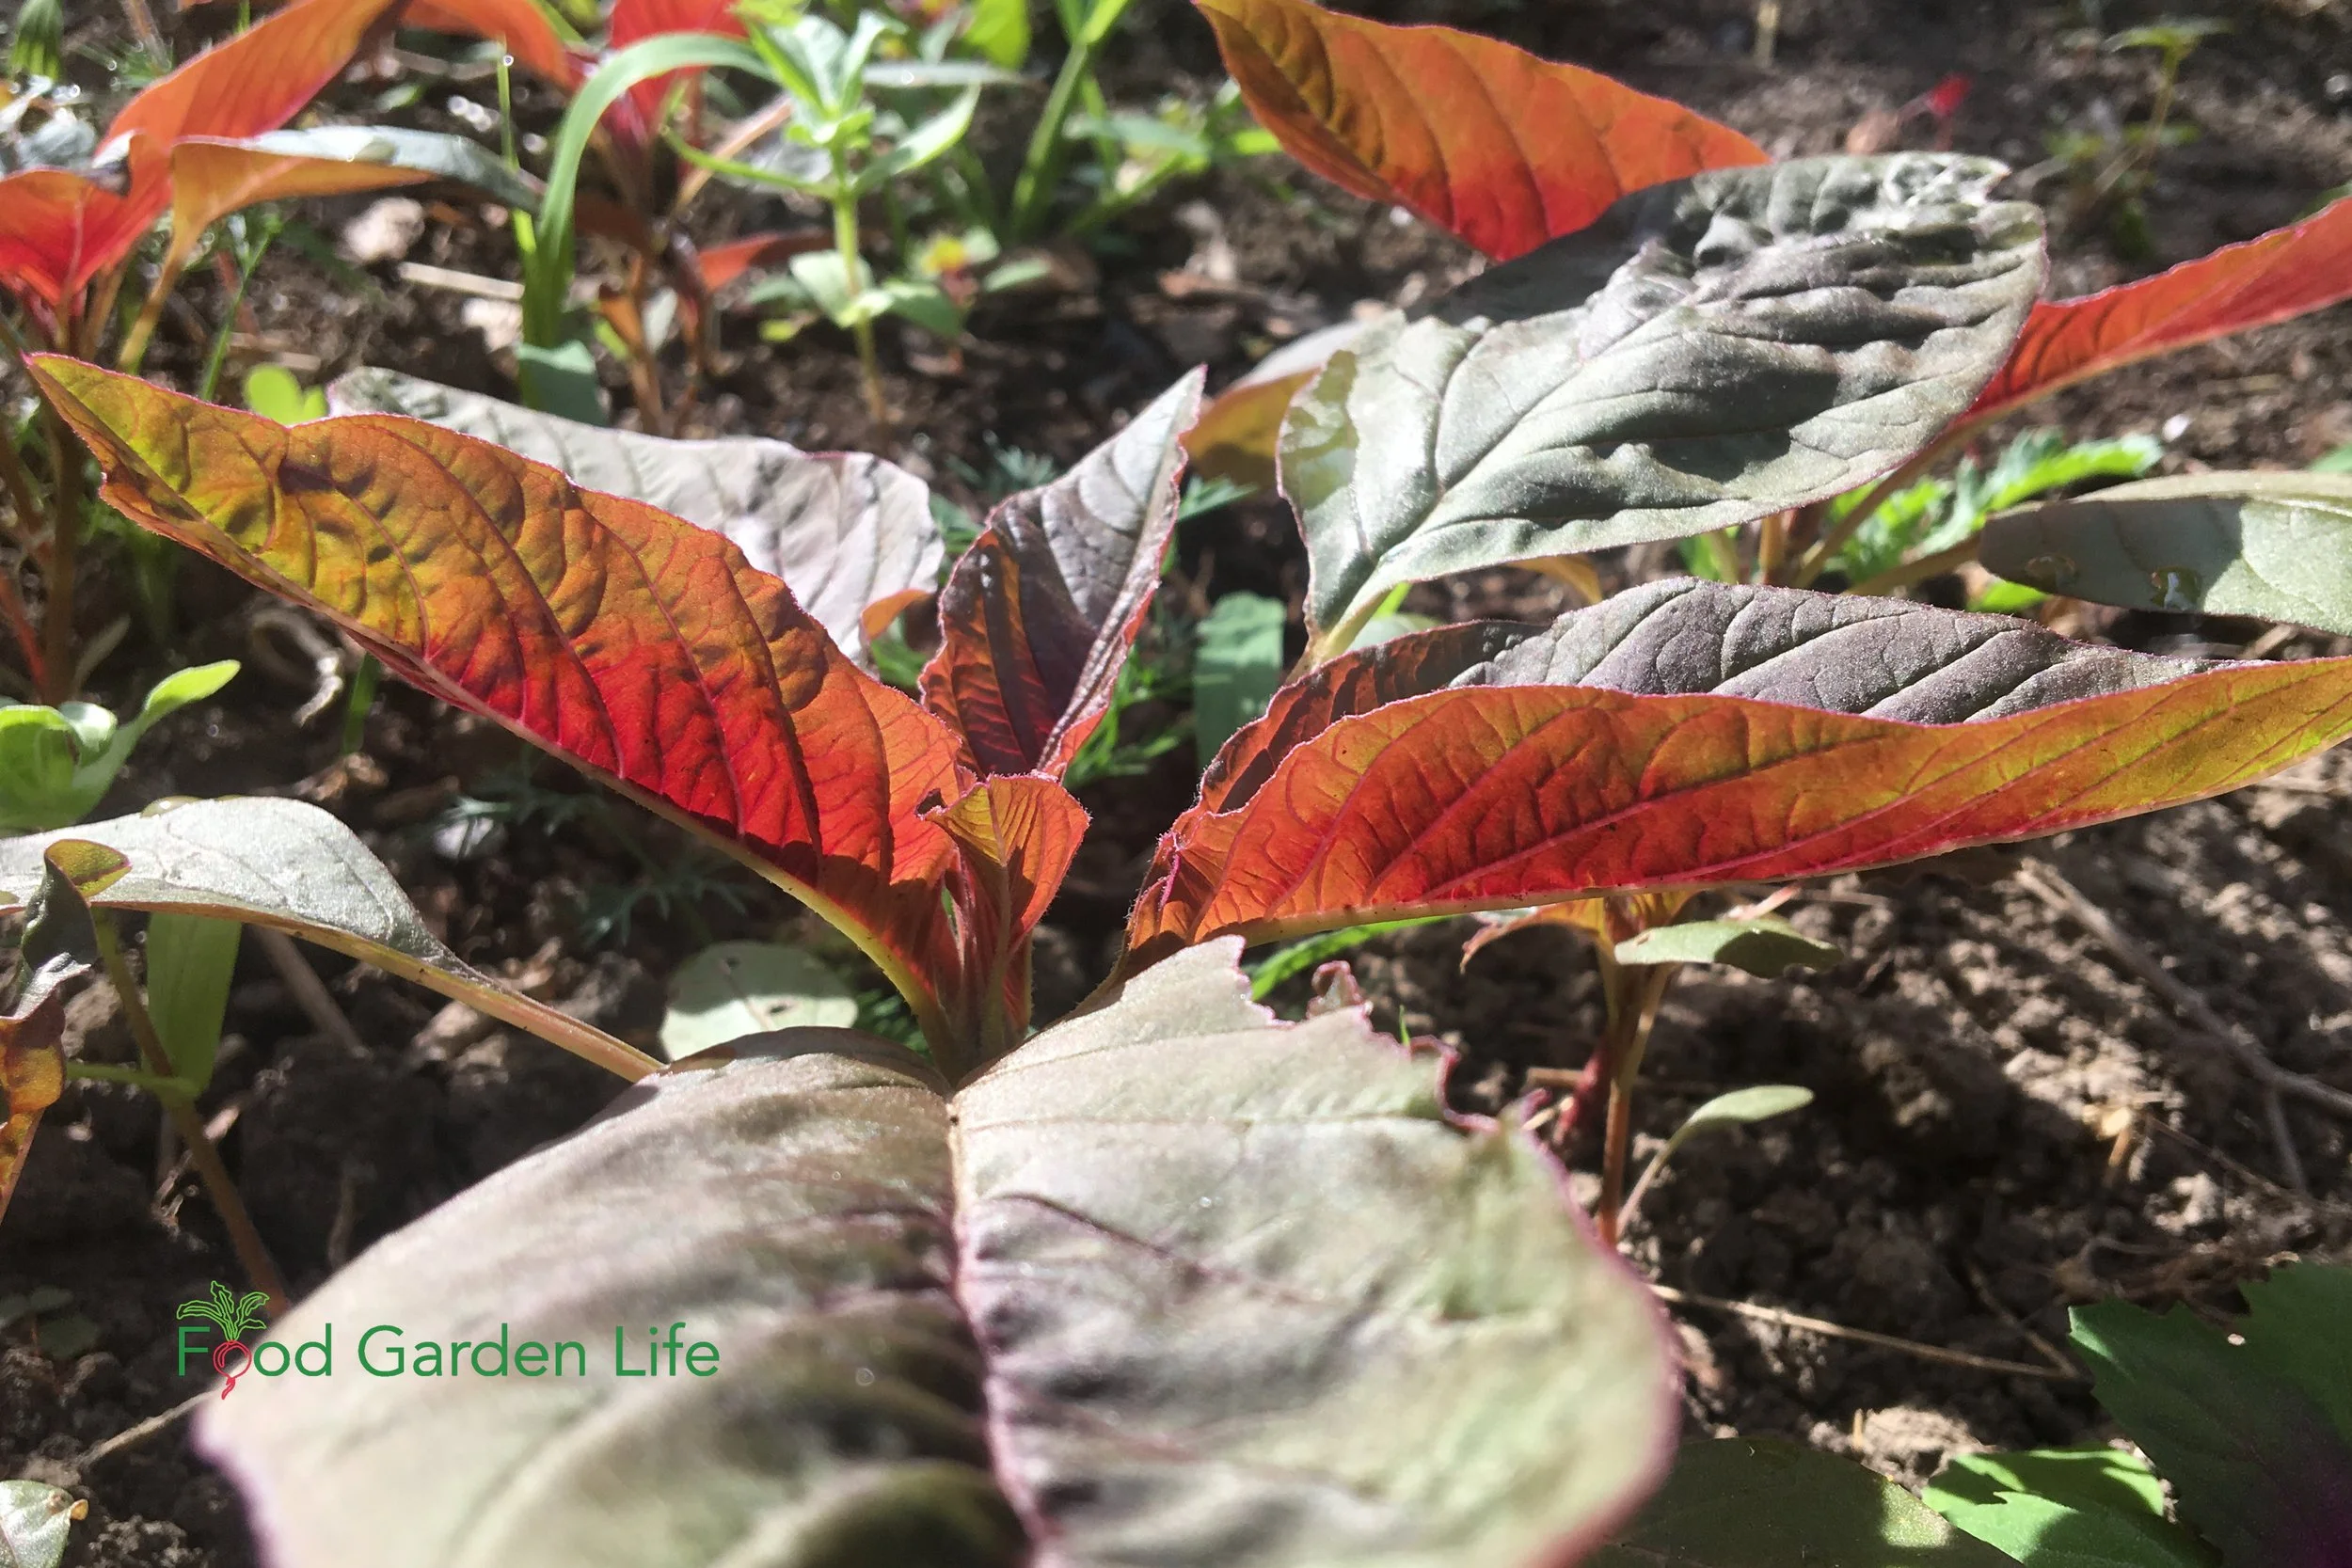
Amaranth is easy to grow and thrives in the heat. It loves hot summers!
Amaranth is a versatile plant and a great choice for spots where you want to weave together the edible and ornamental. It's grown for its edible seeds, its ornamental uses, and for its edible leaves.
The leaves can be eaten raw when young. They taste a bit like spinach. Use larger leaves cooked, in soups and stews.
This is a crop that confidently self-seeds. Grow it once, and you're set for upcoming years. As little amaranth seedlings pop up in my veggie patch, I curate—I pull out some of the small amaranth plants for the salad bowl, and leave a few to grow where I want larger amaranth plants.
Grow a Container Vegetable Garden
And get an early harvest of crops that usually take too long!
Beet Leaves
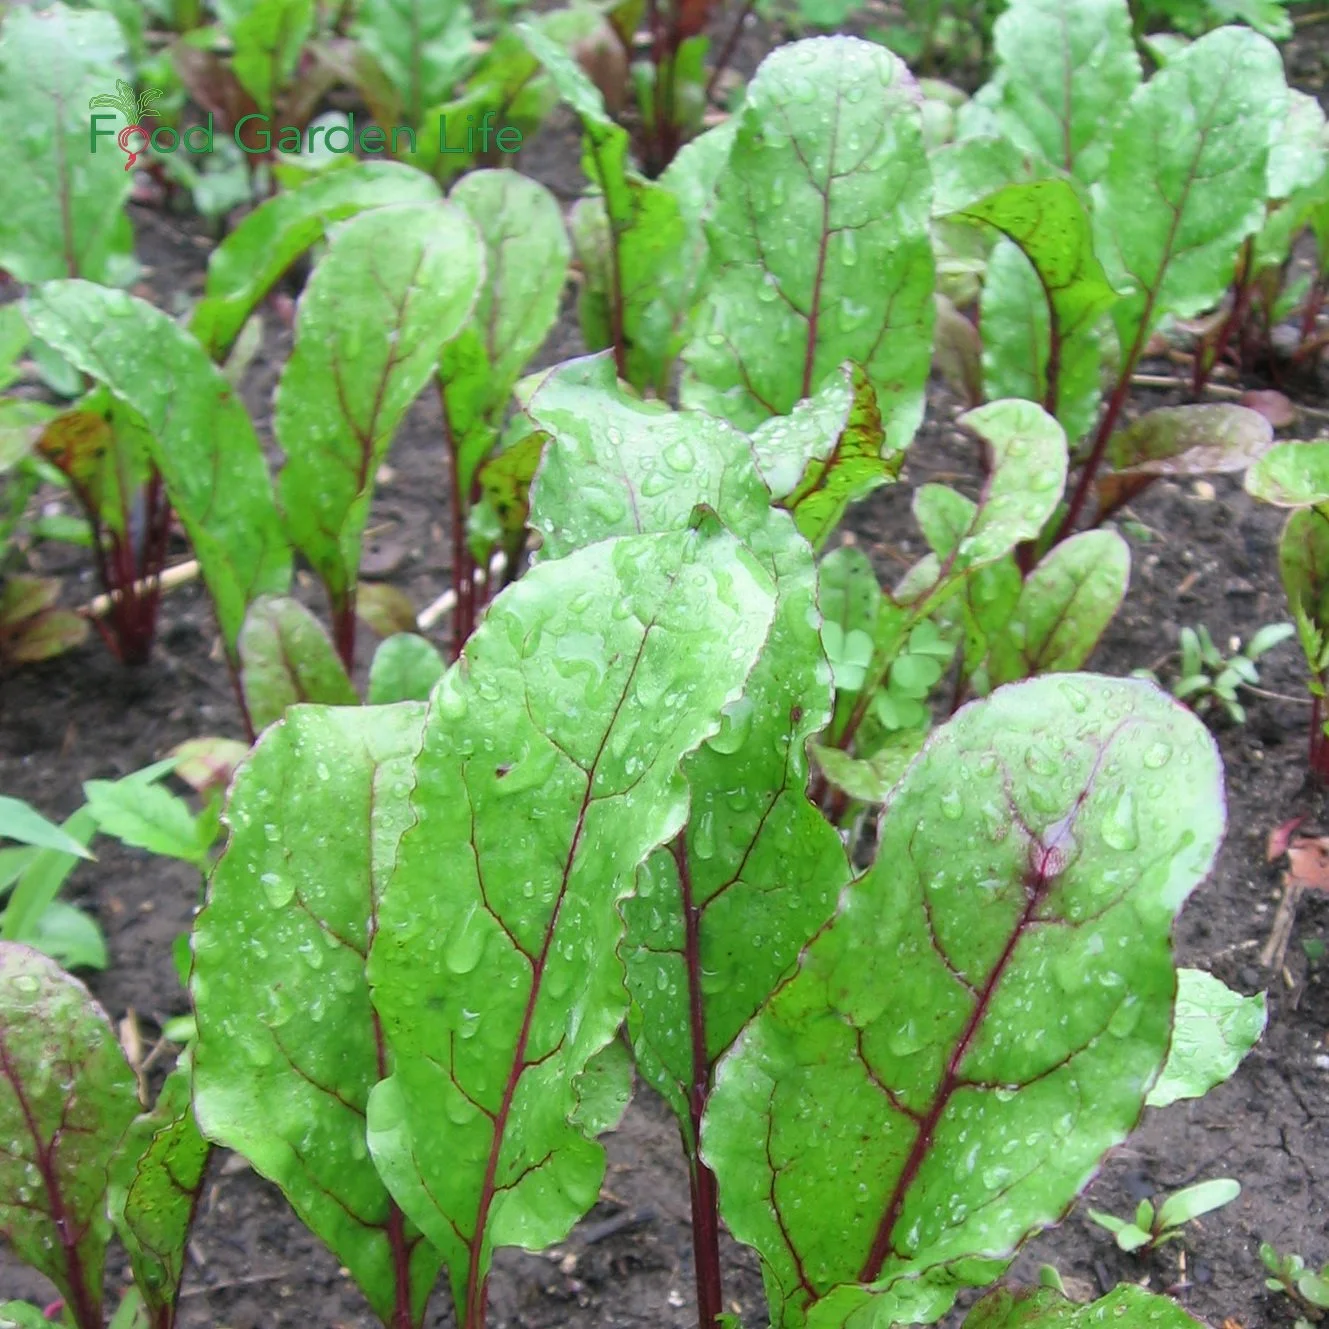
Steal a few leaves from the beet patch to add to summer salads.
As I make salads with summer greens, I like to steal a few small leaves from the beet patch.
Beet greens are edible. Use young leaves raw in salad, and cook larger leaves. (I add mature leaves to borsch. Here's Mom's borsch recipe.) Eaten fresh, these young leaves have a slightly earthy taste, like their kin, Swiss chard.
Even though I grow this crop for its root, taking a few small leaves is no problem; just don't take them all from one plant.
There's one beet variety that I grow especially for its leaves: 'Bulls Blood' has vibrant red leaves that add nice colour to a bowl of summer greens.
Malabar Spinach

Malabar spinach thrives in hot conditions. As a vining plant, it’s also great if you want to add vertical elements to a vegetable garden.
Malabar spinach (Basella alba) thrives in the heat of summer. This vining plant usually takes off as the regular spinach starts to wane in the heat.
Malabar spinach, despite the name, is of no relation to spinach. It has fleshy, mucilaginous leaves that you can eat raw or add to a stir fry. You can also use it to thicken soups.
Best of all, this tropical plant keeps growing all summer long, through the heat.
I don't often see Malabar spinach plants at garden centres. If you want it, plan to grow it from seed. There is a green-leafed type, as well as a strikingly beautiful red-leafed type.
Malabar spinach is also a great crop for vertical gardening. Find out how to save space by adding vertical crops to your garden.
Sorrel
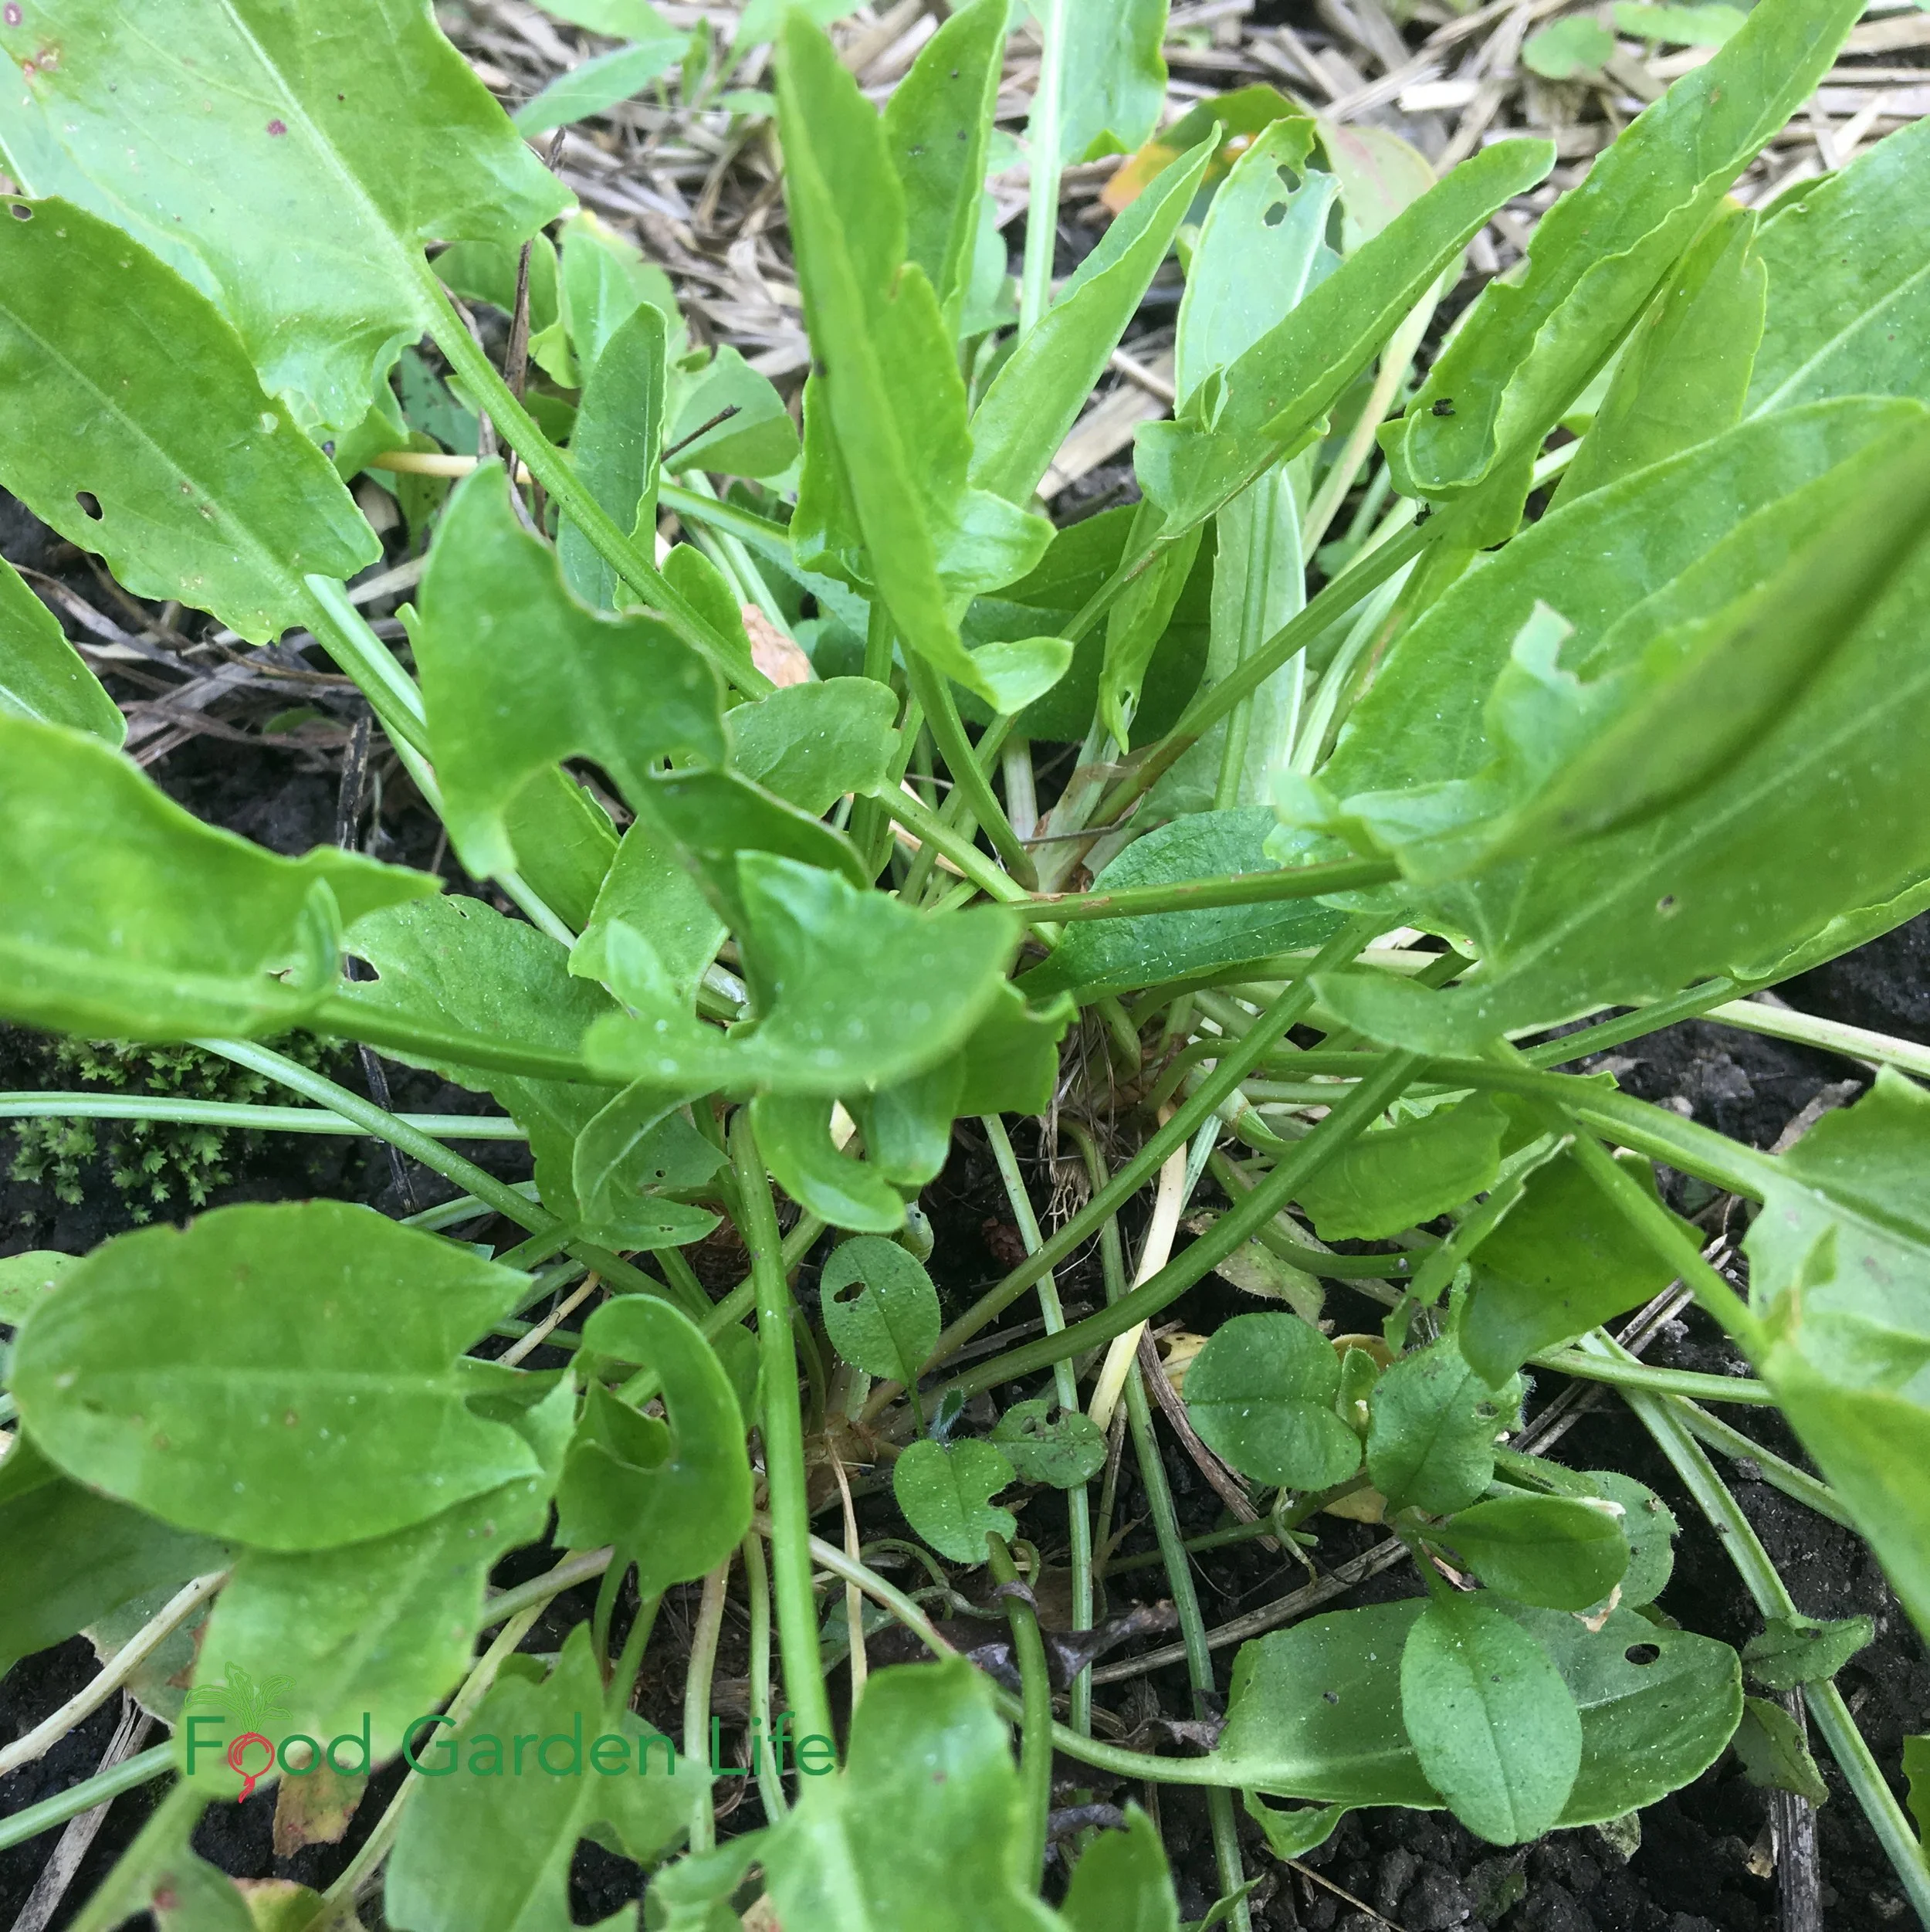
Garden sorrel is a perennial, and a useful salad green over the summer.
This is a favourite in our garden. Sorrel is a perennial leafy green crop that's up early in the spring. It keeps producing tender leaves all summer long.
Sorrel has a tangy taste. I think of it as a lemon substitute for northern gardeners. Add sorrel leaves to a mixed green salad—or when making a sauce add in sorrel, and as the leaves cook into the sauce they add a citrusy tang.
Here's a recipe for sorrel soup.
Garden sorrel (Rumex acetosa) is what you'll find at garden centres. I like ‘Profusion’ garden sorrel, a large-leaved variety that doesn’t bolt.
If you're a forager, you might find sheep sorrel (Rumex acetosella). Both are edible, though I wouldn't plant sheep sorrel in a home garden...it's a spreader.
(There's also a weed called wood sorrel. It's part of the oxalis clan, with clover-like leaves. It's edible too...but I'm not proposing you grow it—it shows up on its own.)
Find out more about how to grow sorrel.
Swiss Chard
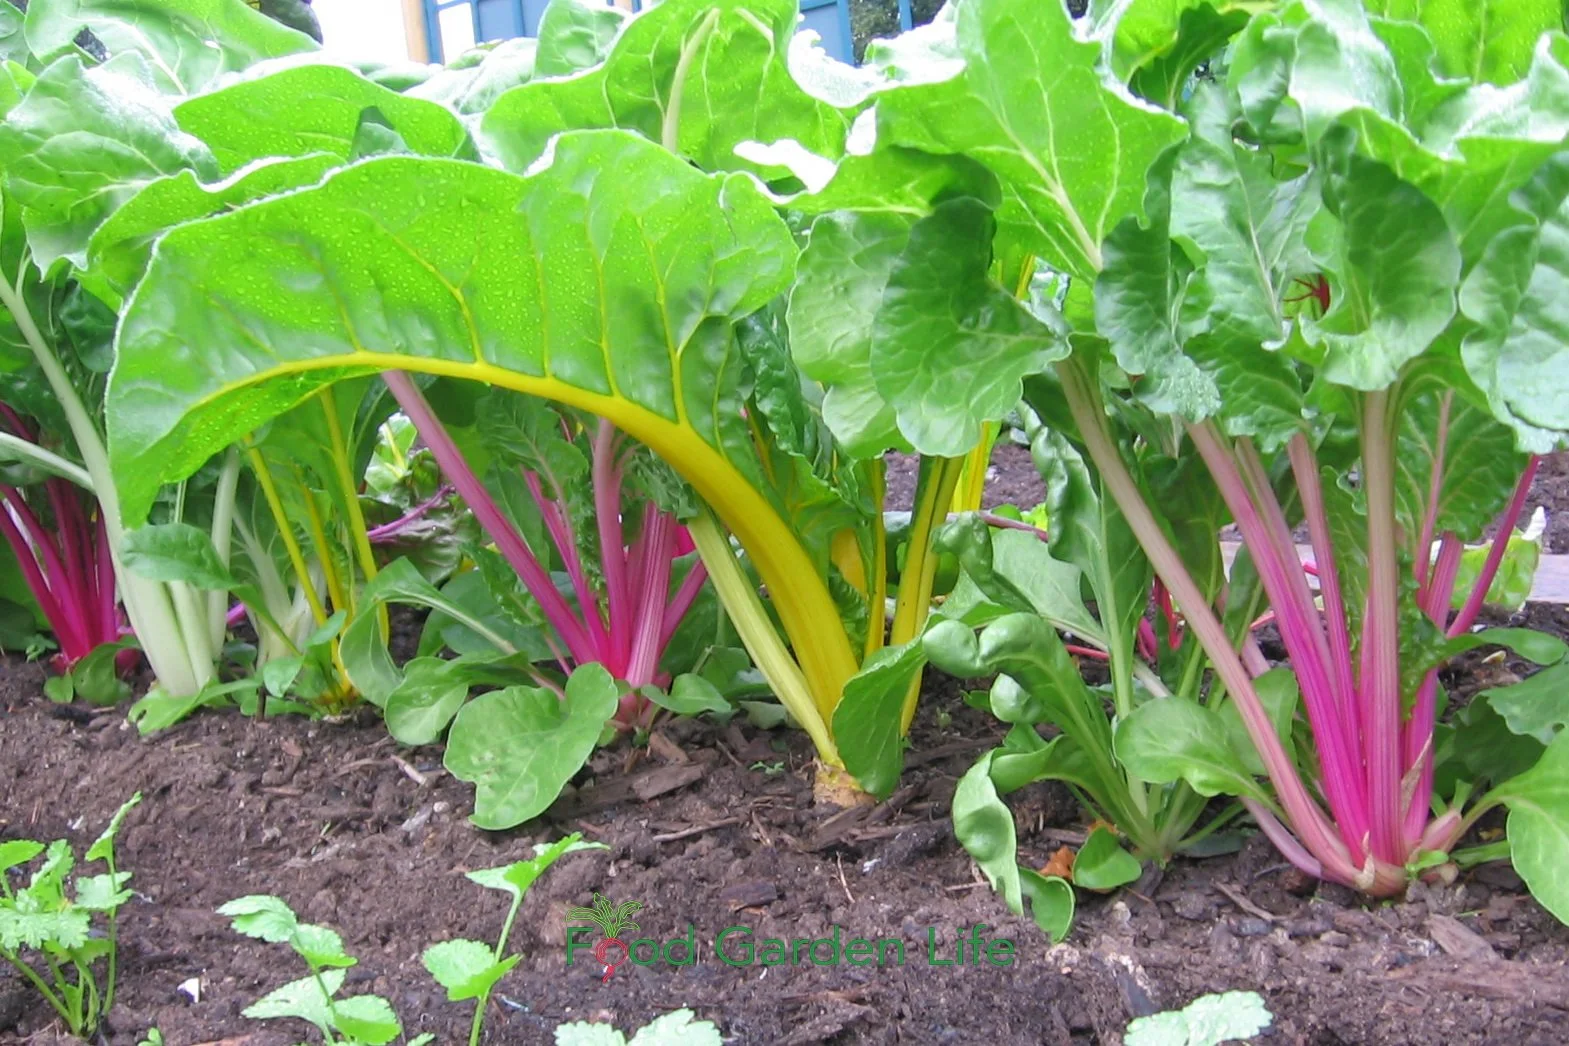
Swiss chard has a two-year life cycle, so during its first year, even during the heat of summer, it keeps on making leaves.
This is my favourite summer green. Swiss chard is a work horse; pick heavily and continually all summer and it keeps growing.
Unlike lettuce and spinach, it doesn't try to flower in its first year. That’s because it has a two-year life cycle...and that makes it a very valuable heat-tolerant green.
When picked young, the small leaves can go straight into the salad. I like larger leaves and the more substantial leaf rib in stir-frys.
Along with green varieties, there are many colourful ones that paint the veg patch a rainbow of colours.
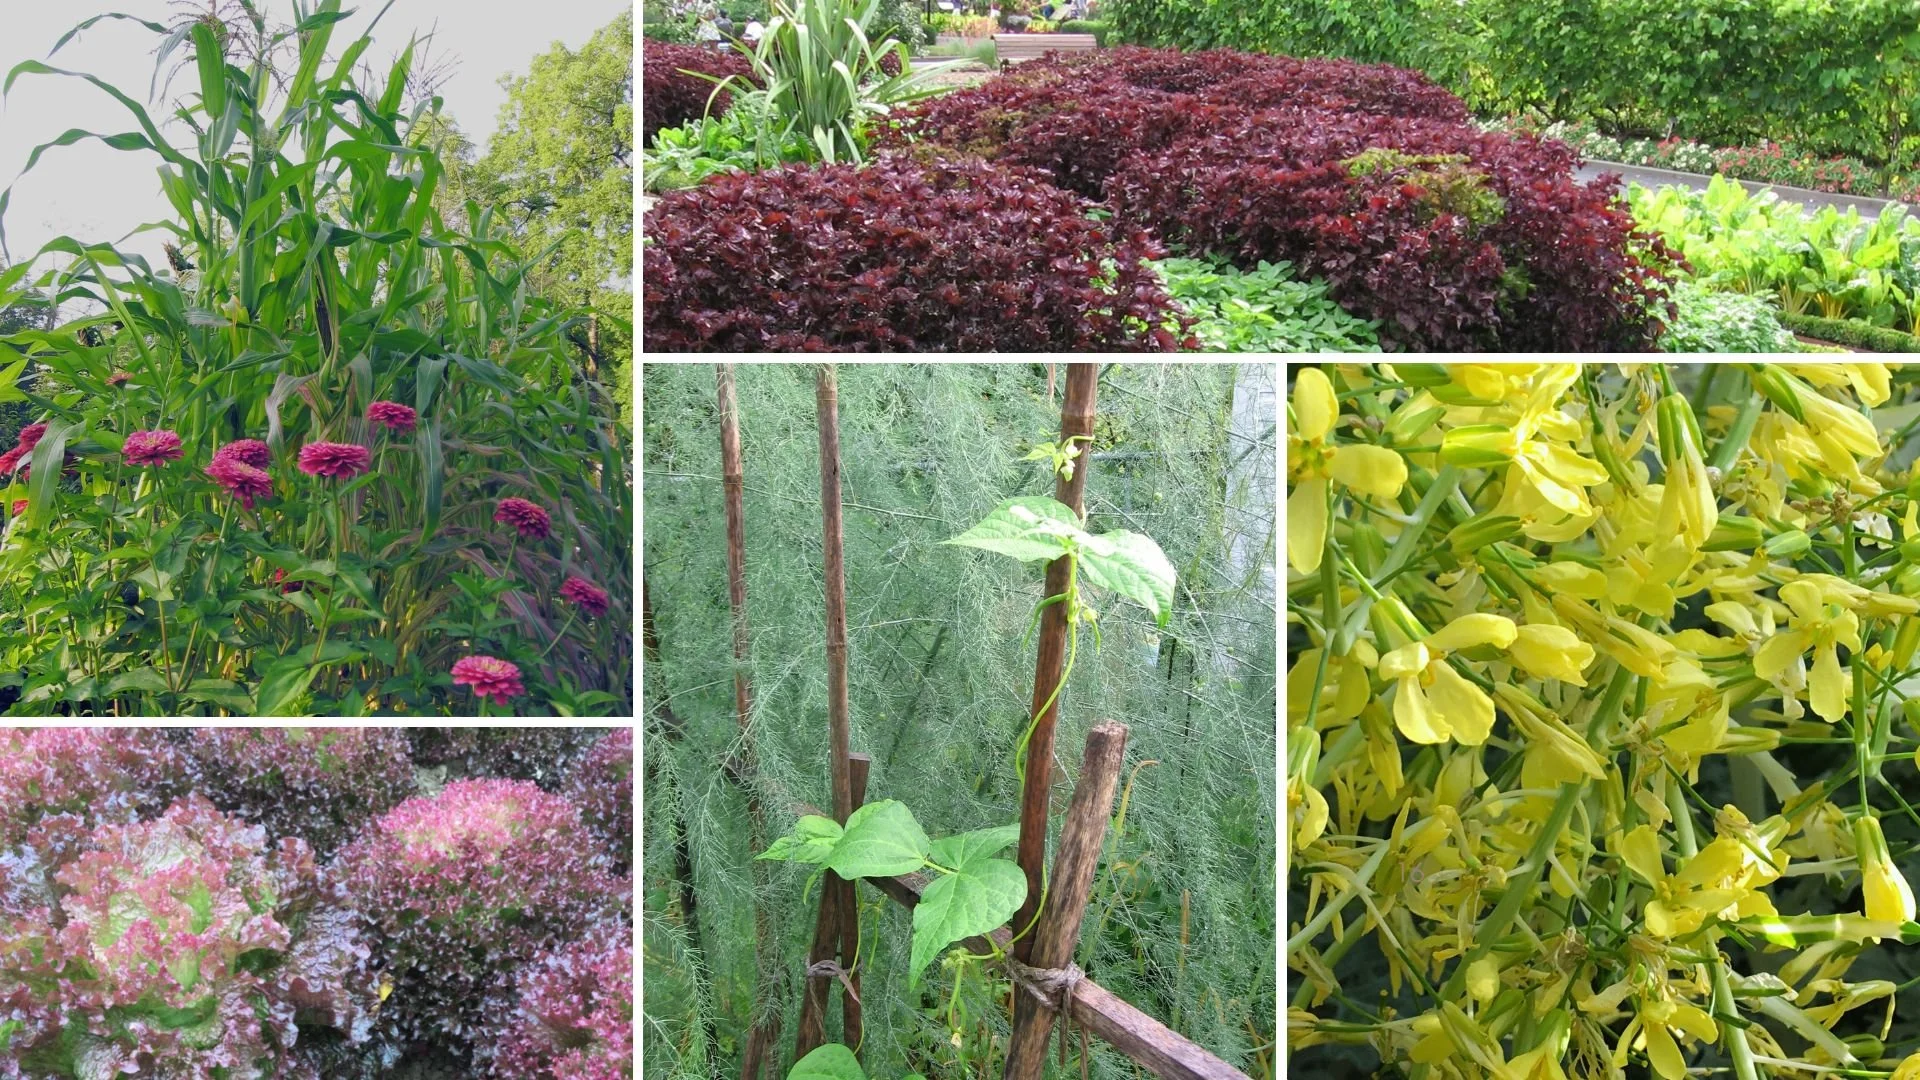
Create Your Own Unique Edible Landscape
That fits for your yard, and your style!
One More Hot-Weather Crop
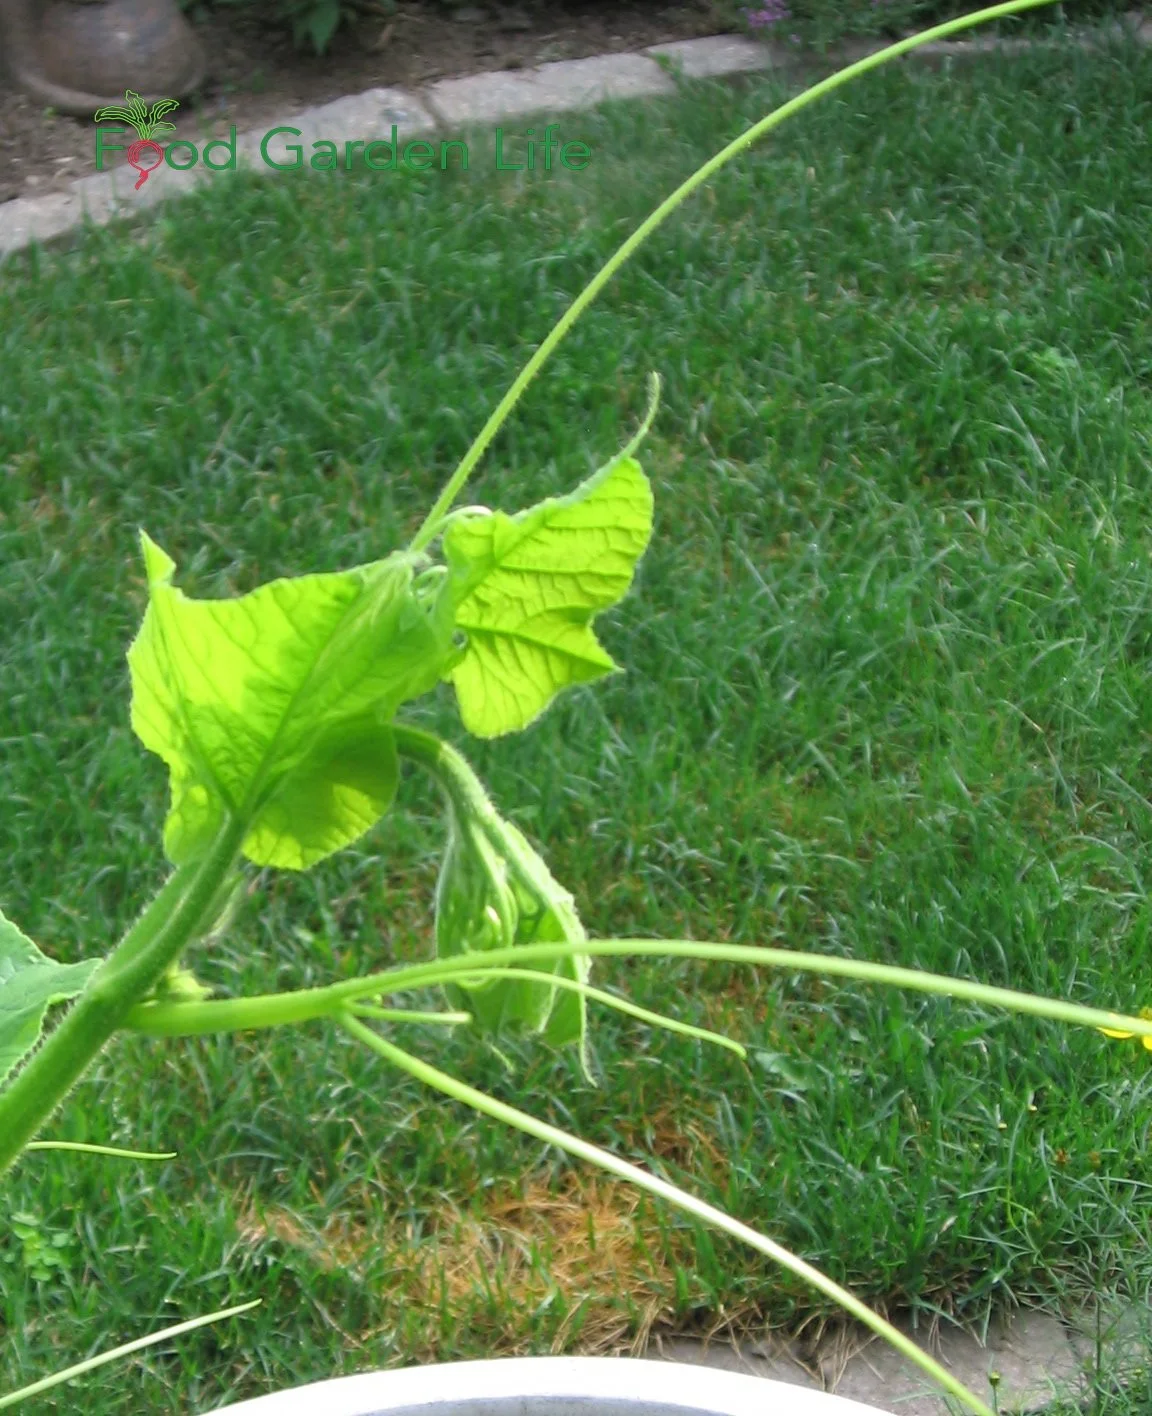
Squash tips and tendrils are edible.
Here’s a crop that doesn’t fit into my list of hot-weather salad greens because we cook it. But I’m including it in this post because it’s a fantastic garnish for a summer salad, and it has great heat tolerance.
Squash Tips
Squash shoot tips, squash tendrils, and squash leaves are all edible.
But…cook them briefly. A quick sauté in olive oil does the trick. That’s because when they’re not cooked, they’re a wee bit prickly. But cooked, they’re transformed.
Squash has many edible parts on the same plant: There's the fruit, the flowers, tender stems, and then the leaves and tips. You can cook larger leaves too, but harvest them before they’re too fibrous.
Find out about other crops with more than one edible part.
Find This Helpful?
Enjoy not being bombarded by annoying ads?
Appreciate the absence of junky affiliate links for products you don’t need?
It’s because we’re reader supported.
If we’ve helped in your food-gardening journey, we’re glad of support. You can high-five us below. Any amount welcome!

More Vegetable Gardening Ideas
Articles
Want to browse our articles and interviews about vegetable gardening? Check out the Vegetable Gardening Home Page
Do you have a shady yard? Here are things you can grow: Crops for Shade
Trying to figure out how to fit as much as possible into your vegetable garden? Try these Vegetable Garden Layout Ideas
Interviews
Courses
Check out our self-paced online courses. The practical information is in bite-size chunks, so you can work through them at your own speed.
More than One Edible Part! These Plants are a Great Addition to an Edible Landscape
Plants with multiple edible parts that make a great fit for an edible landscape.
By Steven Biggs
Harvest More…Harvest Something Different
Whether you're creating a vegetable garden or an ornamental edible garden, plants with more than one edible part are a great way to harvest more from your garden.
They're also a fun addition when preparing meals. There's been growing interest in nose-to-tail cuisine. For vegetable gardeners, the equivalent is stem-to-root cuisine!
Keep reading for 12 plants with more than one edible part.

Radish
Radish is a vegetable garden staple because it's virtues are many:
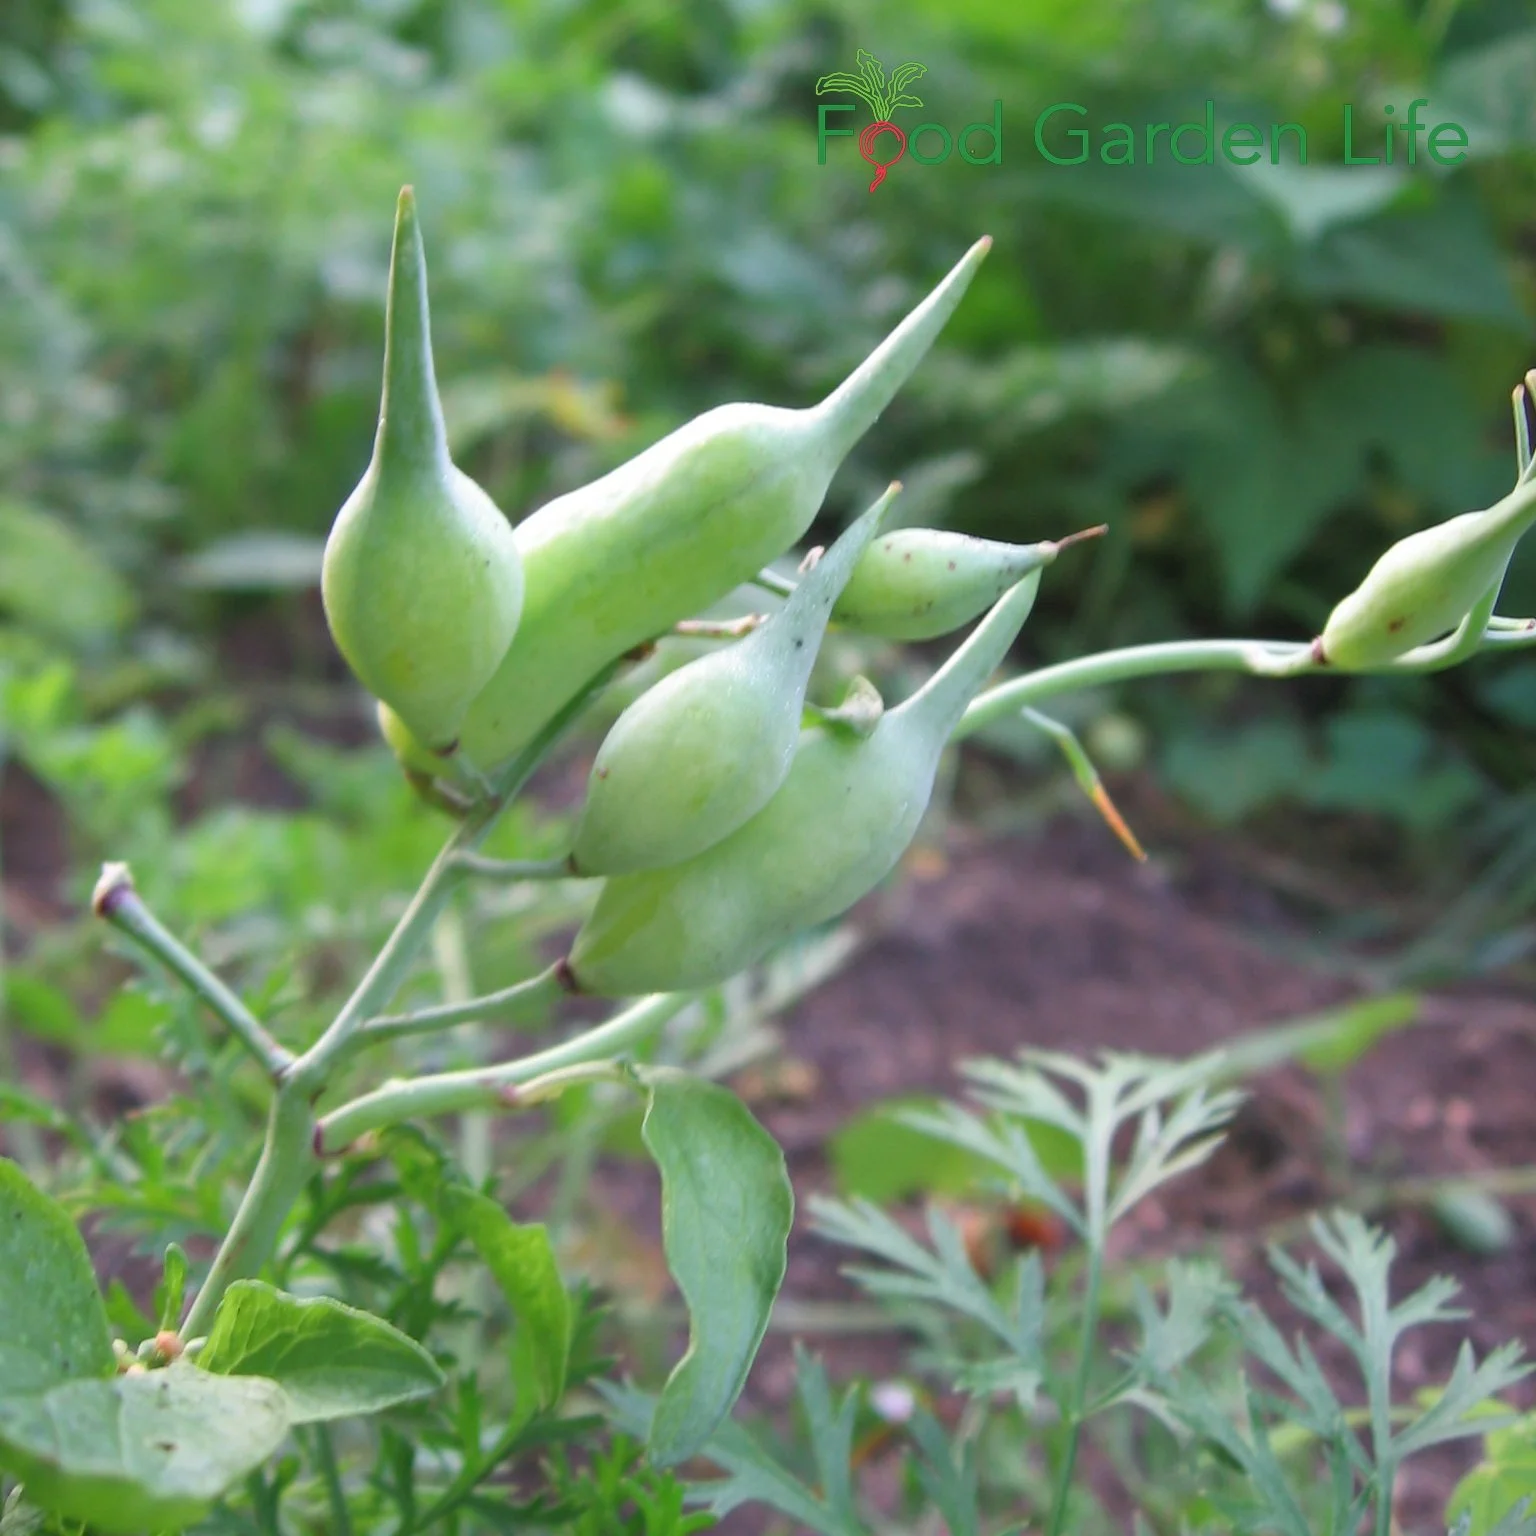
Radish seed pods are a tasty addition to an edible landscape!
Easy to grow.
Quick to mature.
Suited to in-ground beds, raised beds, and containers.
Can be inter-planted with slower-growing vegetables such as beets and carrots, and then harvested as those other crops need more space.
The radish root is what we most often eat. But there's more...
Radish: Other Edible Parts
The crunchy, mildly peppery seed pods are edible too.
The flowers are edible and make a nice garnish—or toss them into a salad
Some people use the leaves too. We've made radish-leaf pesto. Not my favourite—but taste is a personal thing.
Looking for crops for the shoulder seasons? Winter radish is a good winter storage crops. Find out about 25 storage crops to grow.
Rose
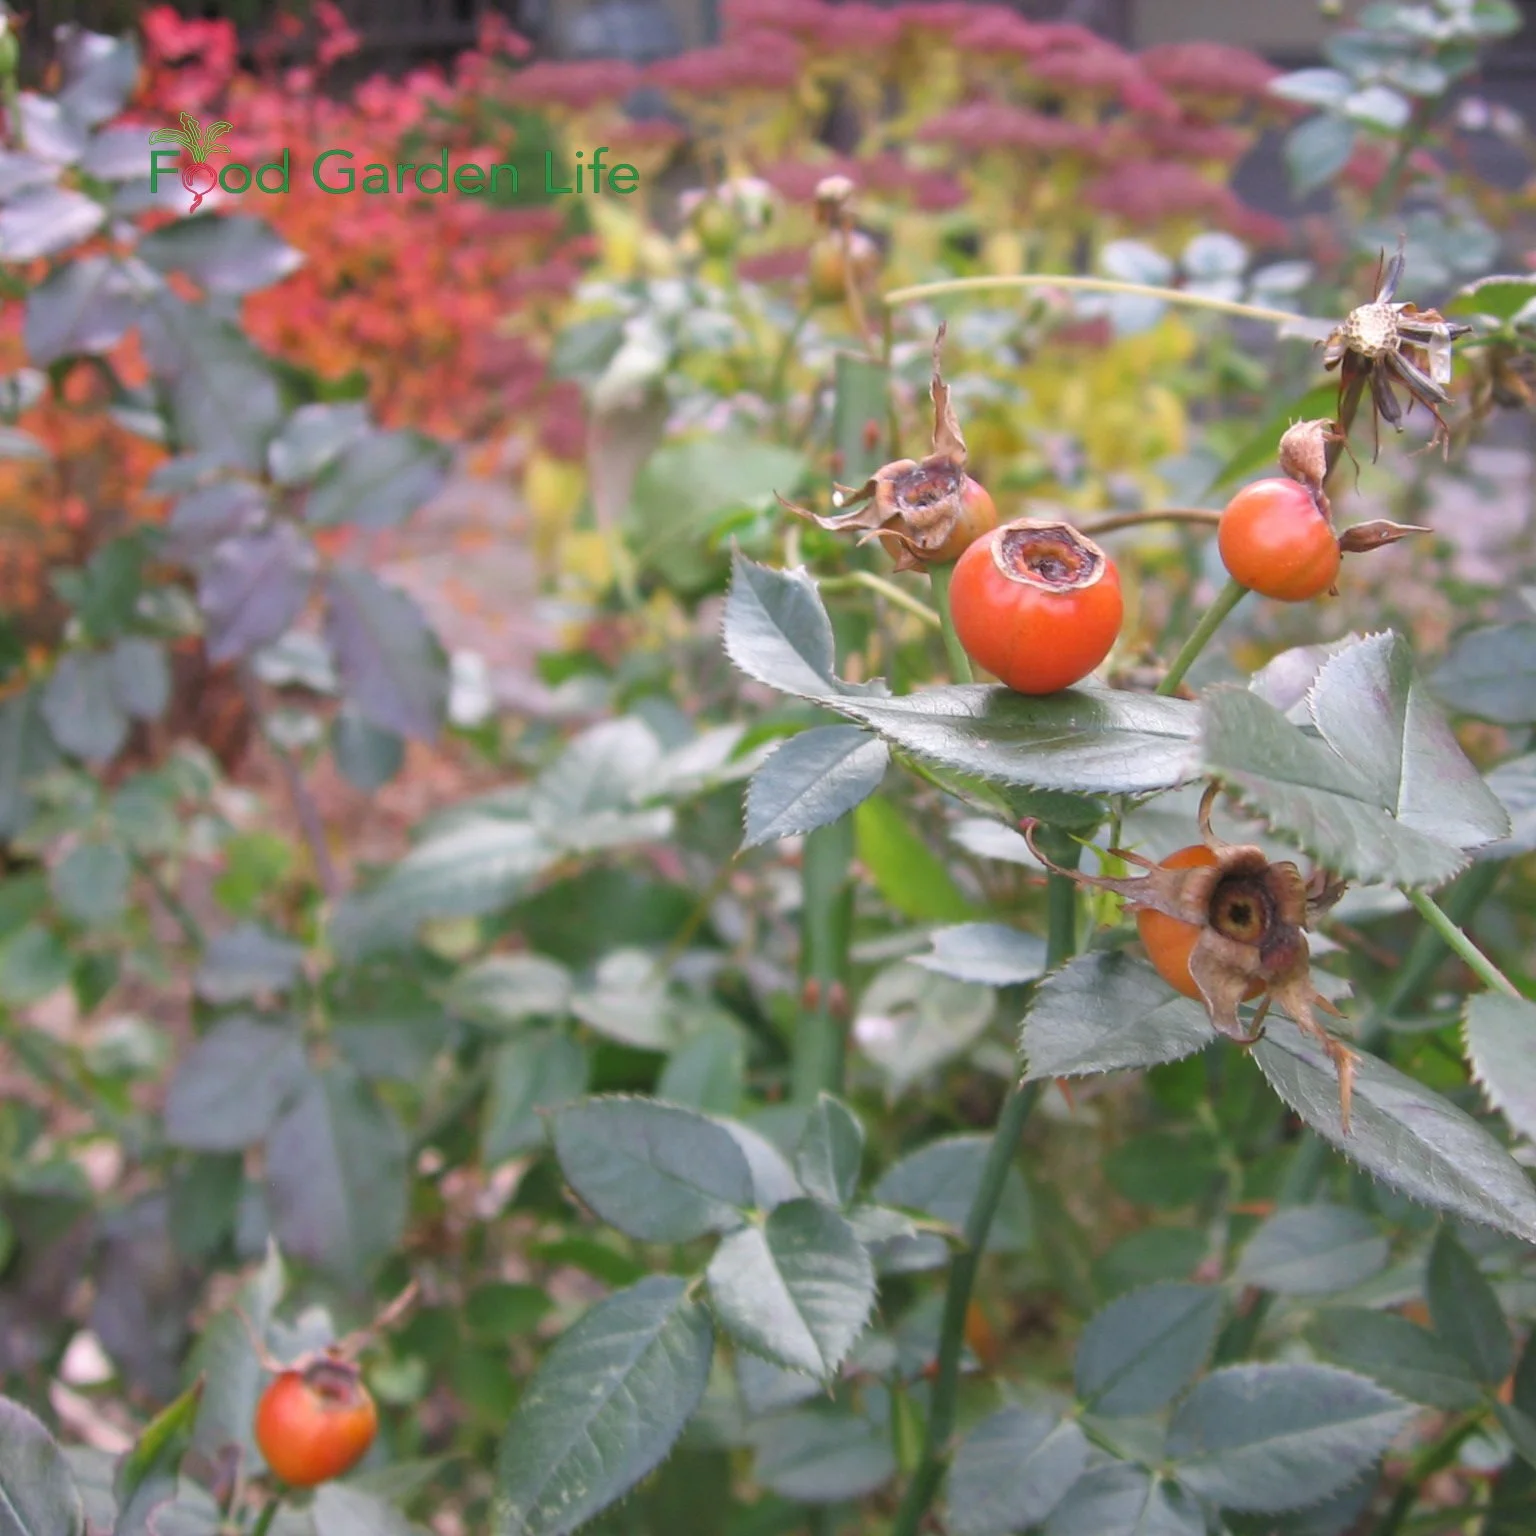
Rosehips and rose petals are both edible and a good fit for edible landscapes.
I swore off growing roses for years, having battled black spot on Mom's roses. But there are some fantastic disease-resistant roses out now. No-fuss for busy gardeners.
Roses are a must-have plant in an edible landscape. They add visual interest, they attract pollinators, they can be a focal point...and they have more than one edible part.
Most people think of rose hips (the fruit) when thinking of roses for edible landscaping. They're used for rosehip tea, rosehip jelly (and I've heard of rosehip vodka!)
Rose: Other Edible Part
You can use the rose flowers too! The petals are edible.
Use rose petals to make a rose petal jam, as a garnish, or add chopped rose petals to a bowl of cherries.
The inner, white portion of the petals can be bitter, and if it is, just remove this part.
Hear edible flower expert Denise Schreiber give her favourite edible-flower tips.
Arugula
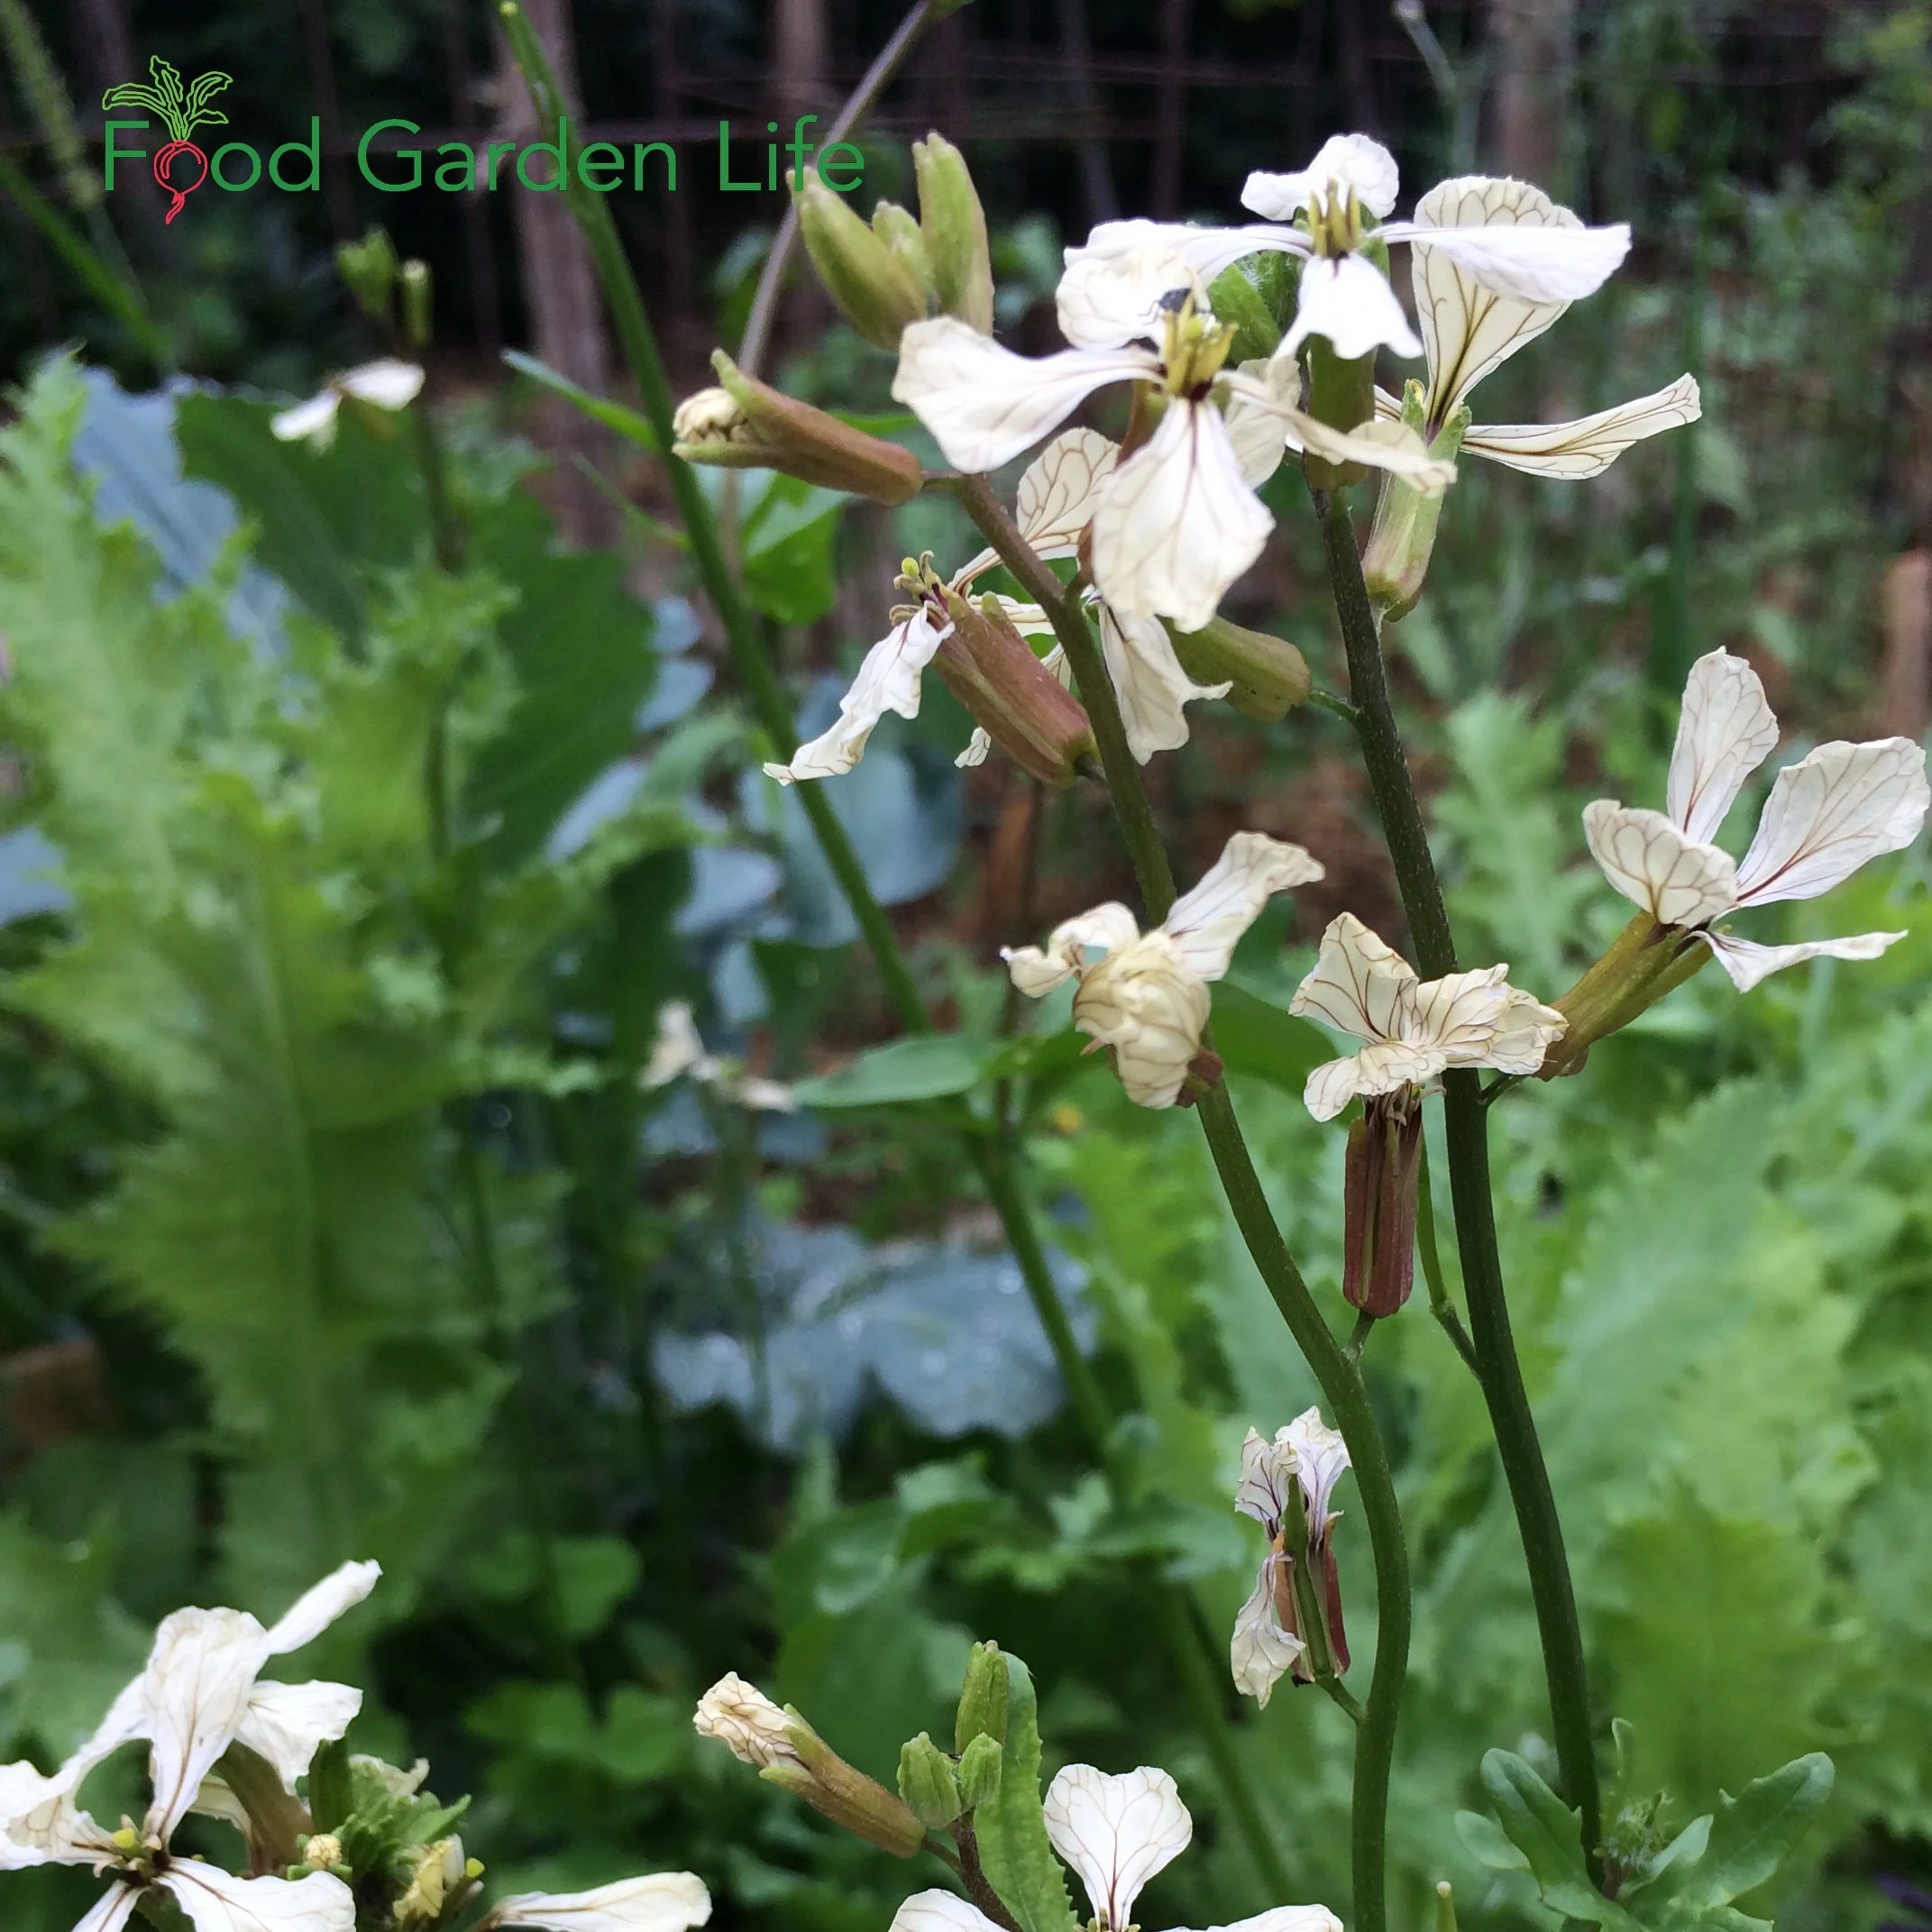
Edible arugula flowers belong in any vegetable garden.
Peppery arugula leaves are a favourite in our household, whether in a salad or wilted on a pizza that's just come out of the oven.
Arugula is a great crop for the early spring edible garden. It tolerates cool conditions, and it's fast growing.
Arugula: Other Edible Part
Along with the leaves, arugula flowers are edible too. Let some of your arugula plants bolt and flower.
We use arugula flowers on salads and as a garnish. Like the leaves, they are mildly peppery.
Grow a Container Vegetable Garden
And get an early harvest of crops that usually take too long!
Fig
Nothing beats a fresh fig! It's an exotic touch for edible gardens in cold climates.
(Remember, if you're in a cold climate, you can still grow figs as a potted plant, or as a plant that you tip over and protect for winter. Find out how here.)
Fig: Other Edible Parts
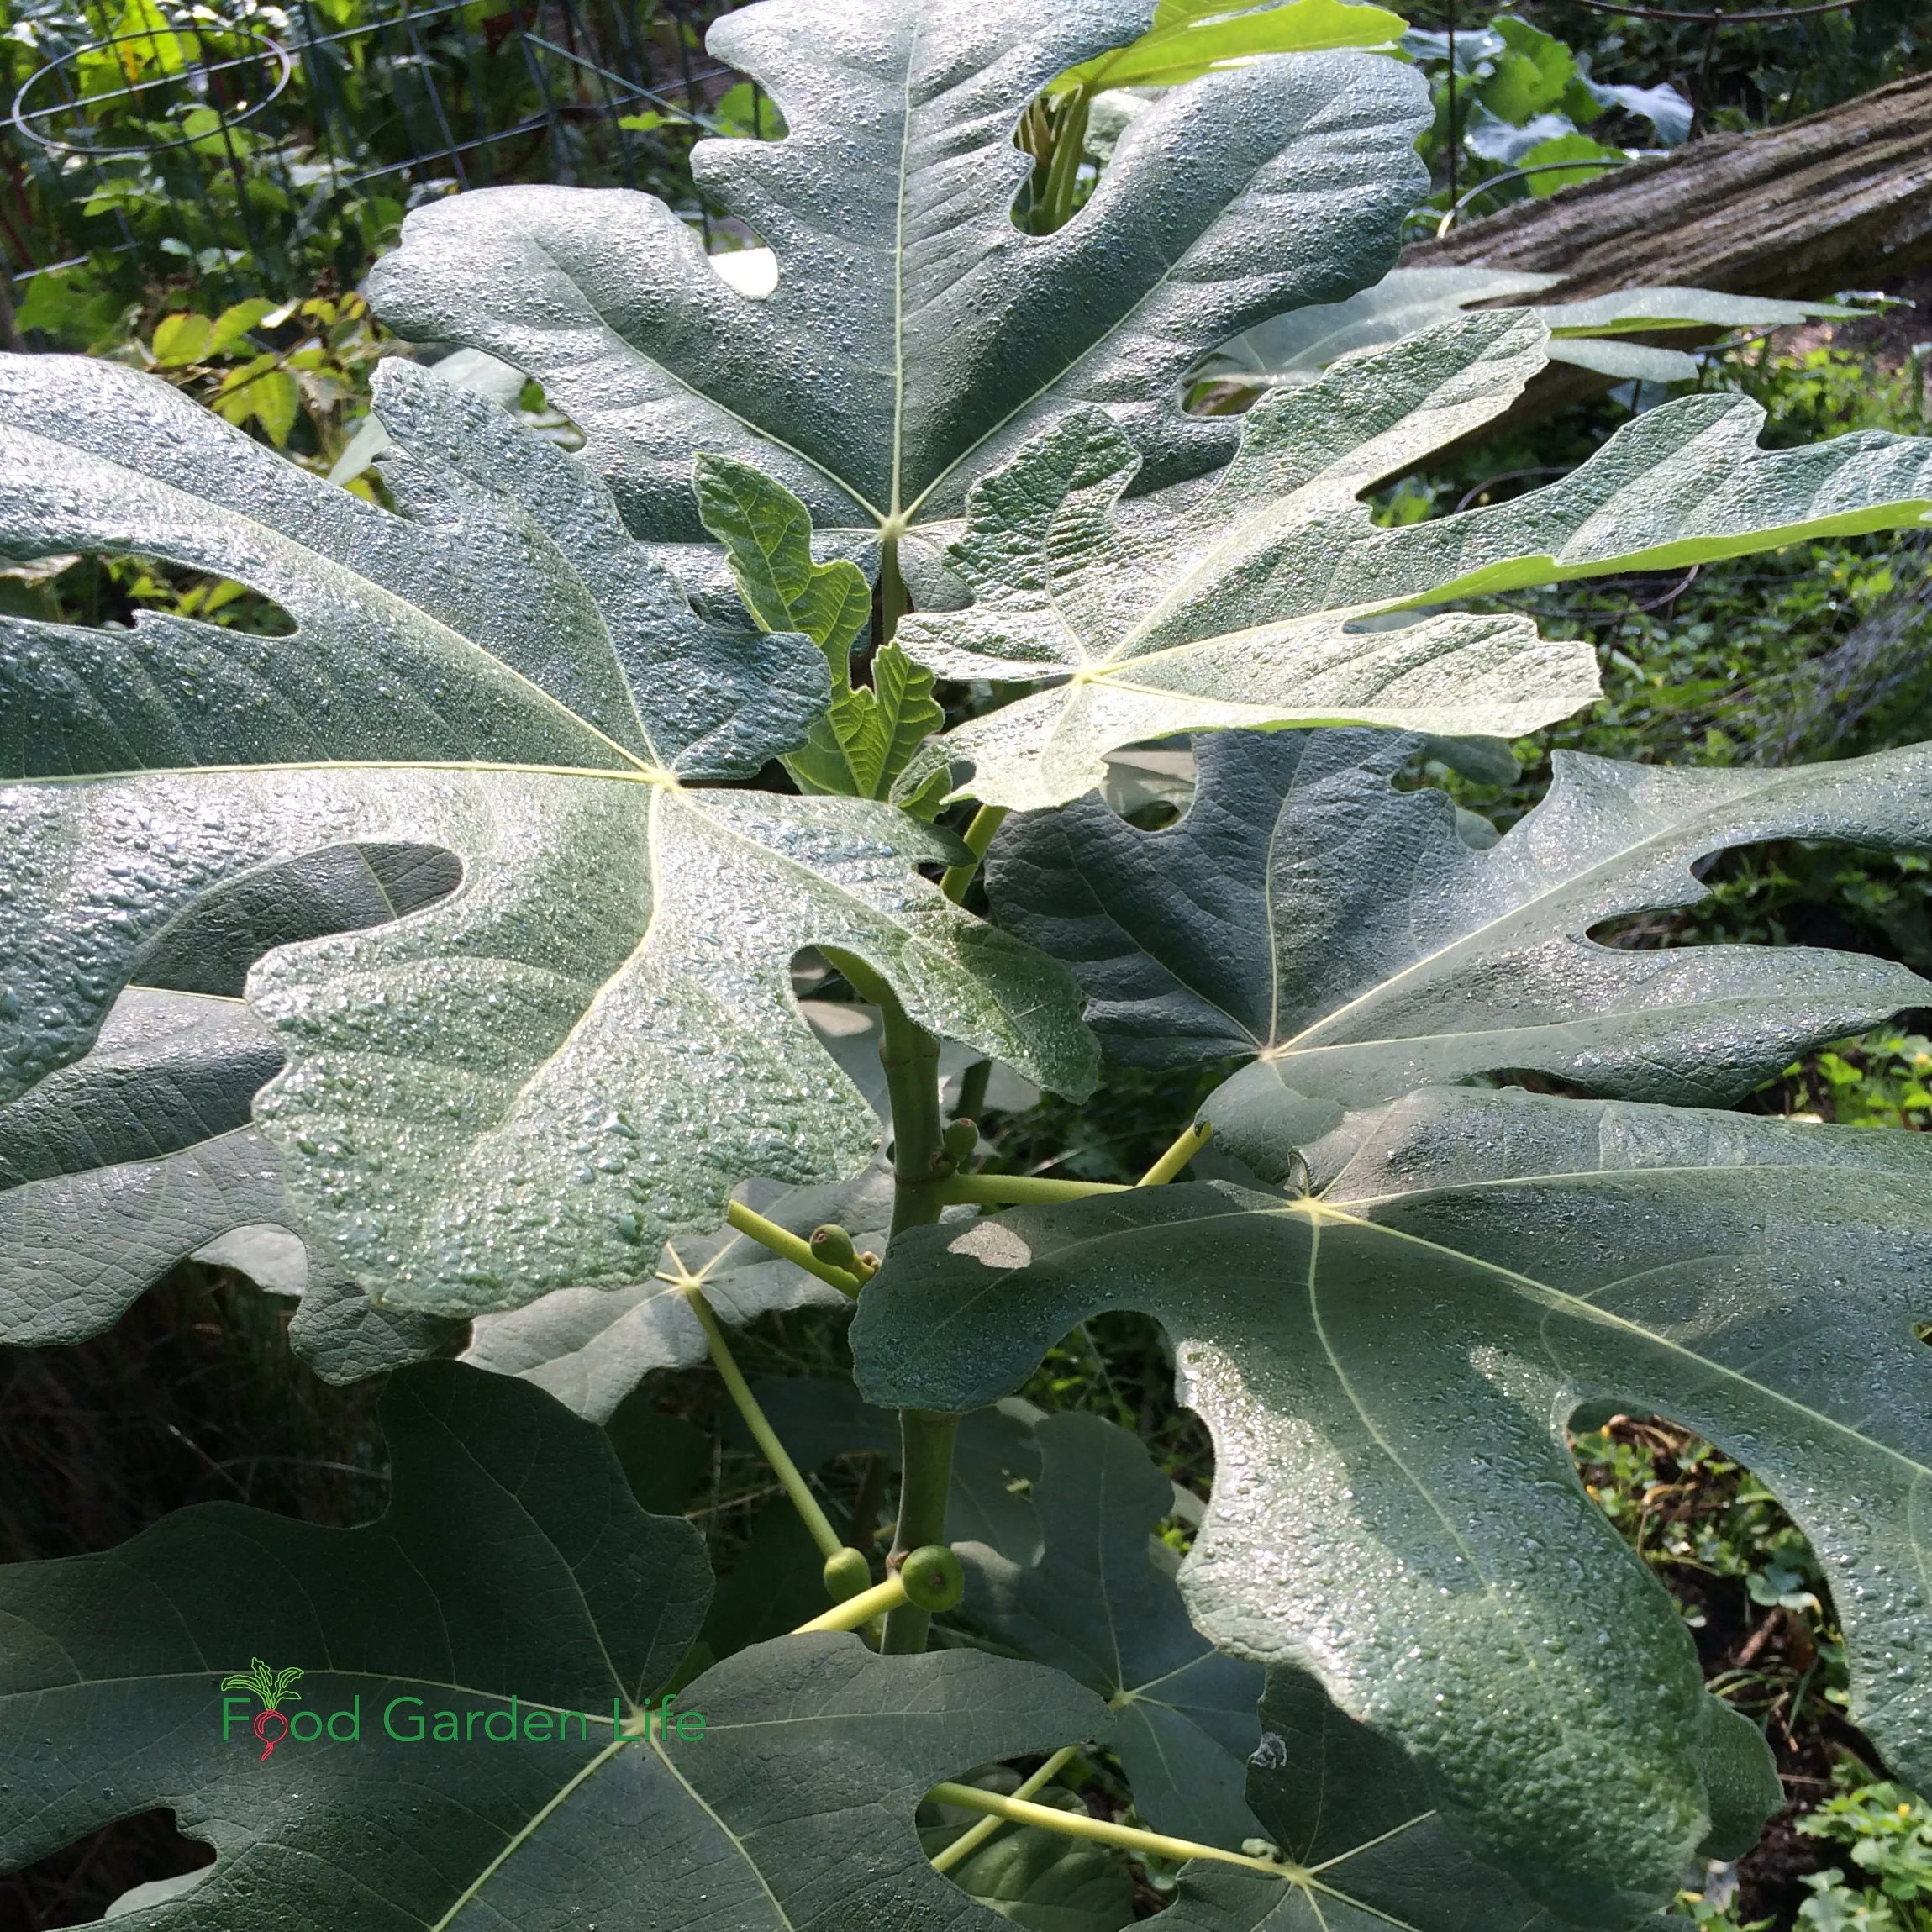
Use fig leaves in cooking for the unique taste.
There are a couple of other parts to the fig plant that make it a fun fit for an edible landscaping.
Fig leaves are packed with flavour. I describe the flavour as a mix of toasted almond and coconut. It's subtle. (You don't actually eat the leaf, but extract flavour from it.)
In our household, we like fig leaf panna cotta and fig leaf granita.
Before we finish with figs, here's one more idea for you:
Save the branches you prune from your fig tree for smoking meat. I like to smoke meat with apple or cherry...but fig smoke has a delicious taste of its own.
Cauliflower and Broccoli
Grown for their flower heads, these plants—along with kohlrabi, which we grow for its stout stem—have more edible parts!
See this recipe for cauliflower steaks!
Other Edible Parts
Use young leaves raw, in salads
Older leaves can be chopped and added to stir fries and soups
If you trim off the end of the stalk as you prepare cauliflower and broccoli heads to cook, keep those bits of stalk for stir fries. (I always add them to my beet borsch)
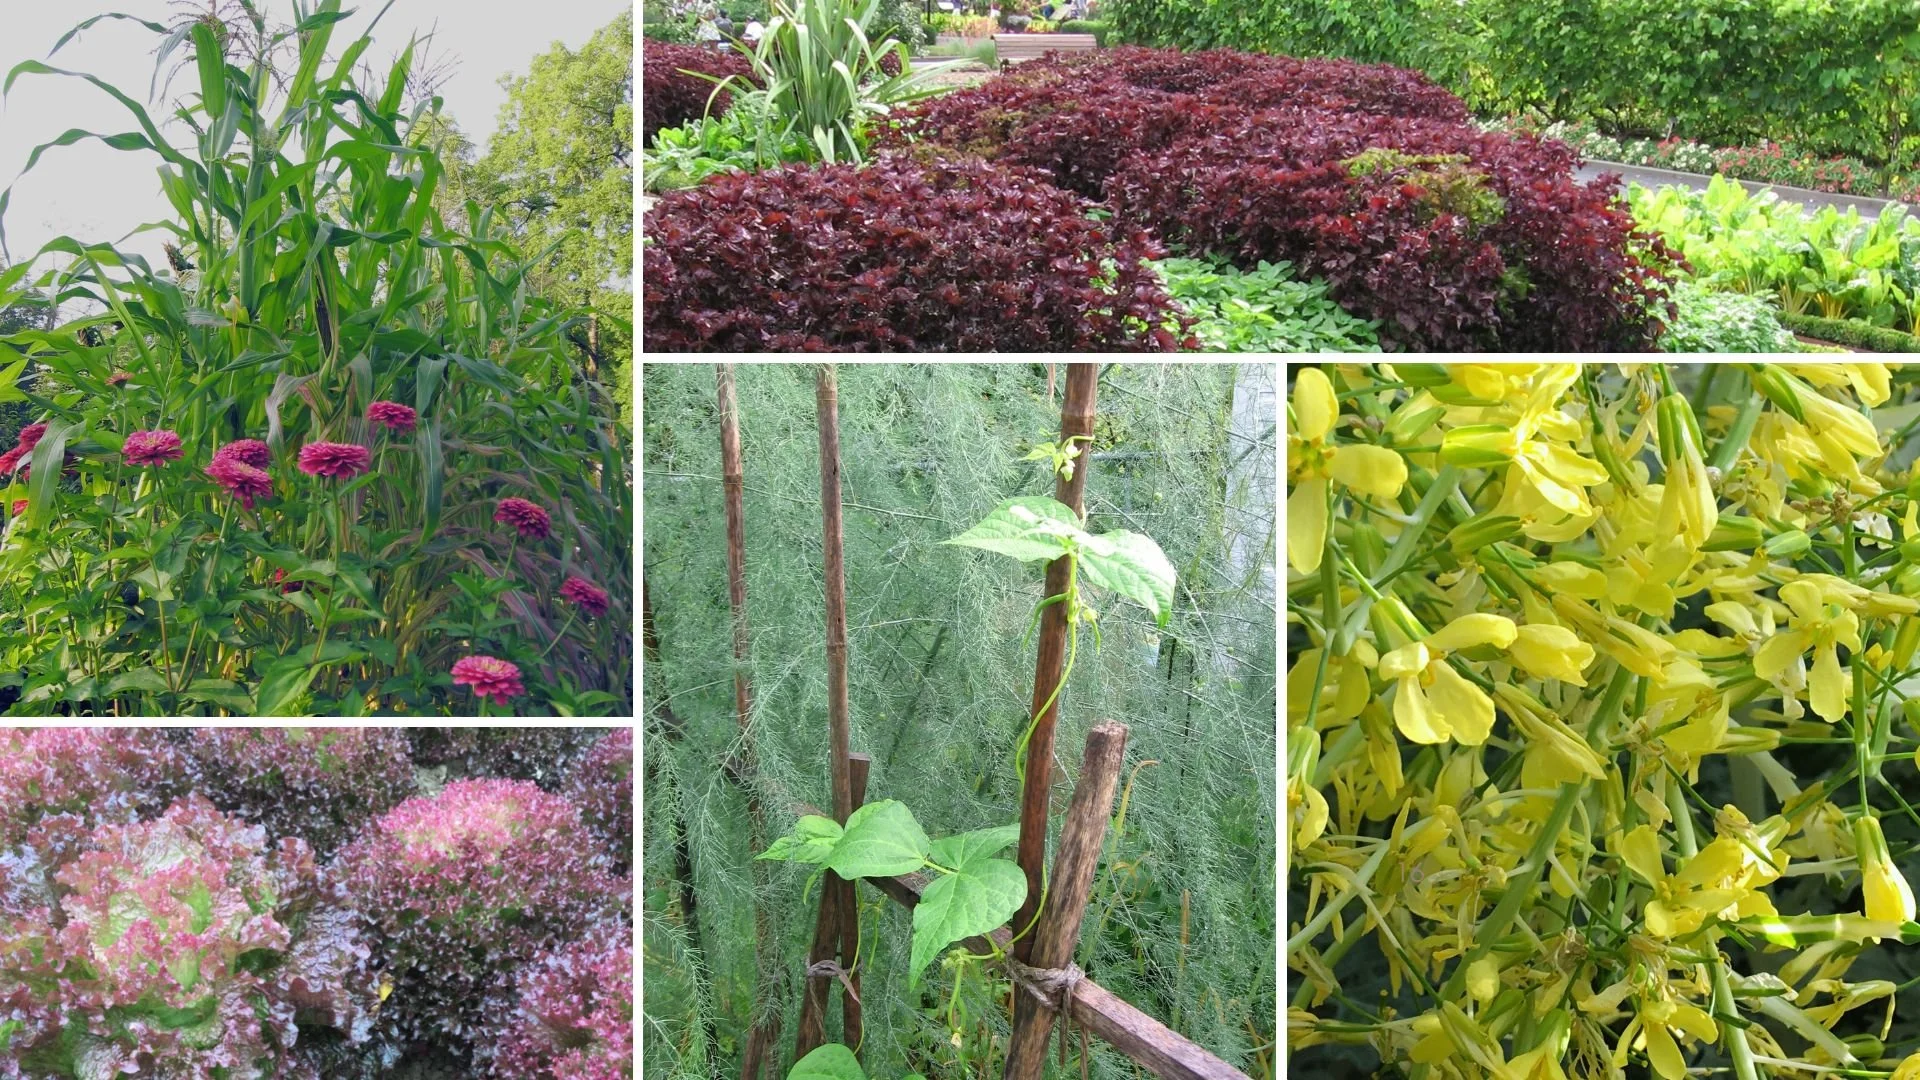
Create Your Own Unique Edible Landscape
That fits for your yard, and your style!
Lemon
Like figs, potted lemon trees make a fine addition to edible landscapes, even in temperate regions.
A potted lemon tree is an elegant touch in a garden design.
Lemons add a sensory element to the garden too. Along with the lemon fruit, there's fragrance of the white flowers. Nothing beats the smell of lemon blossoms on a patio!
Lemon: Other Edible Parts
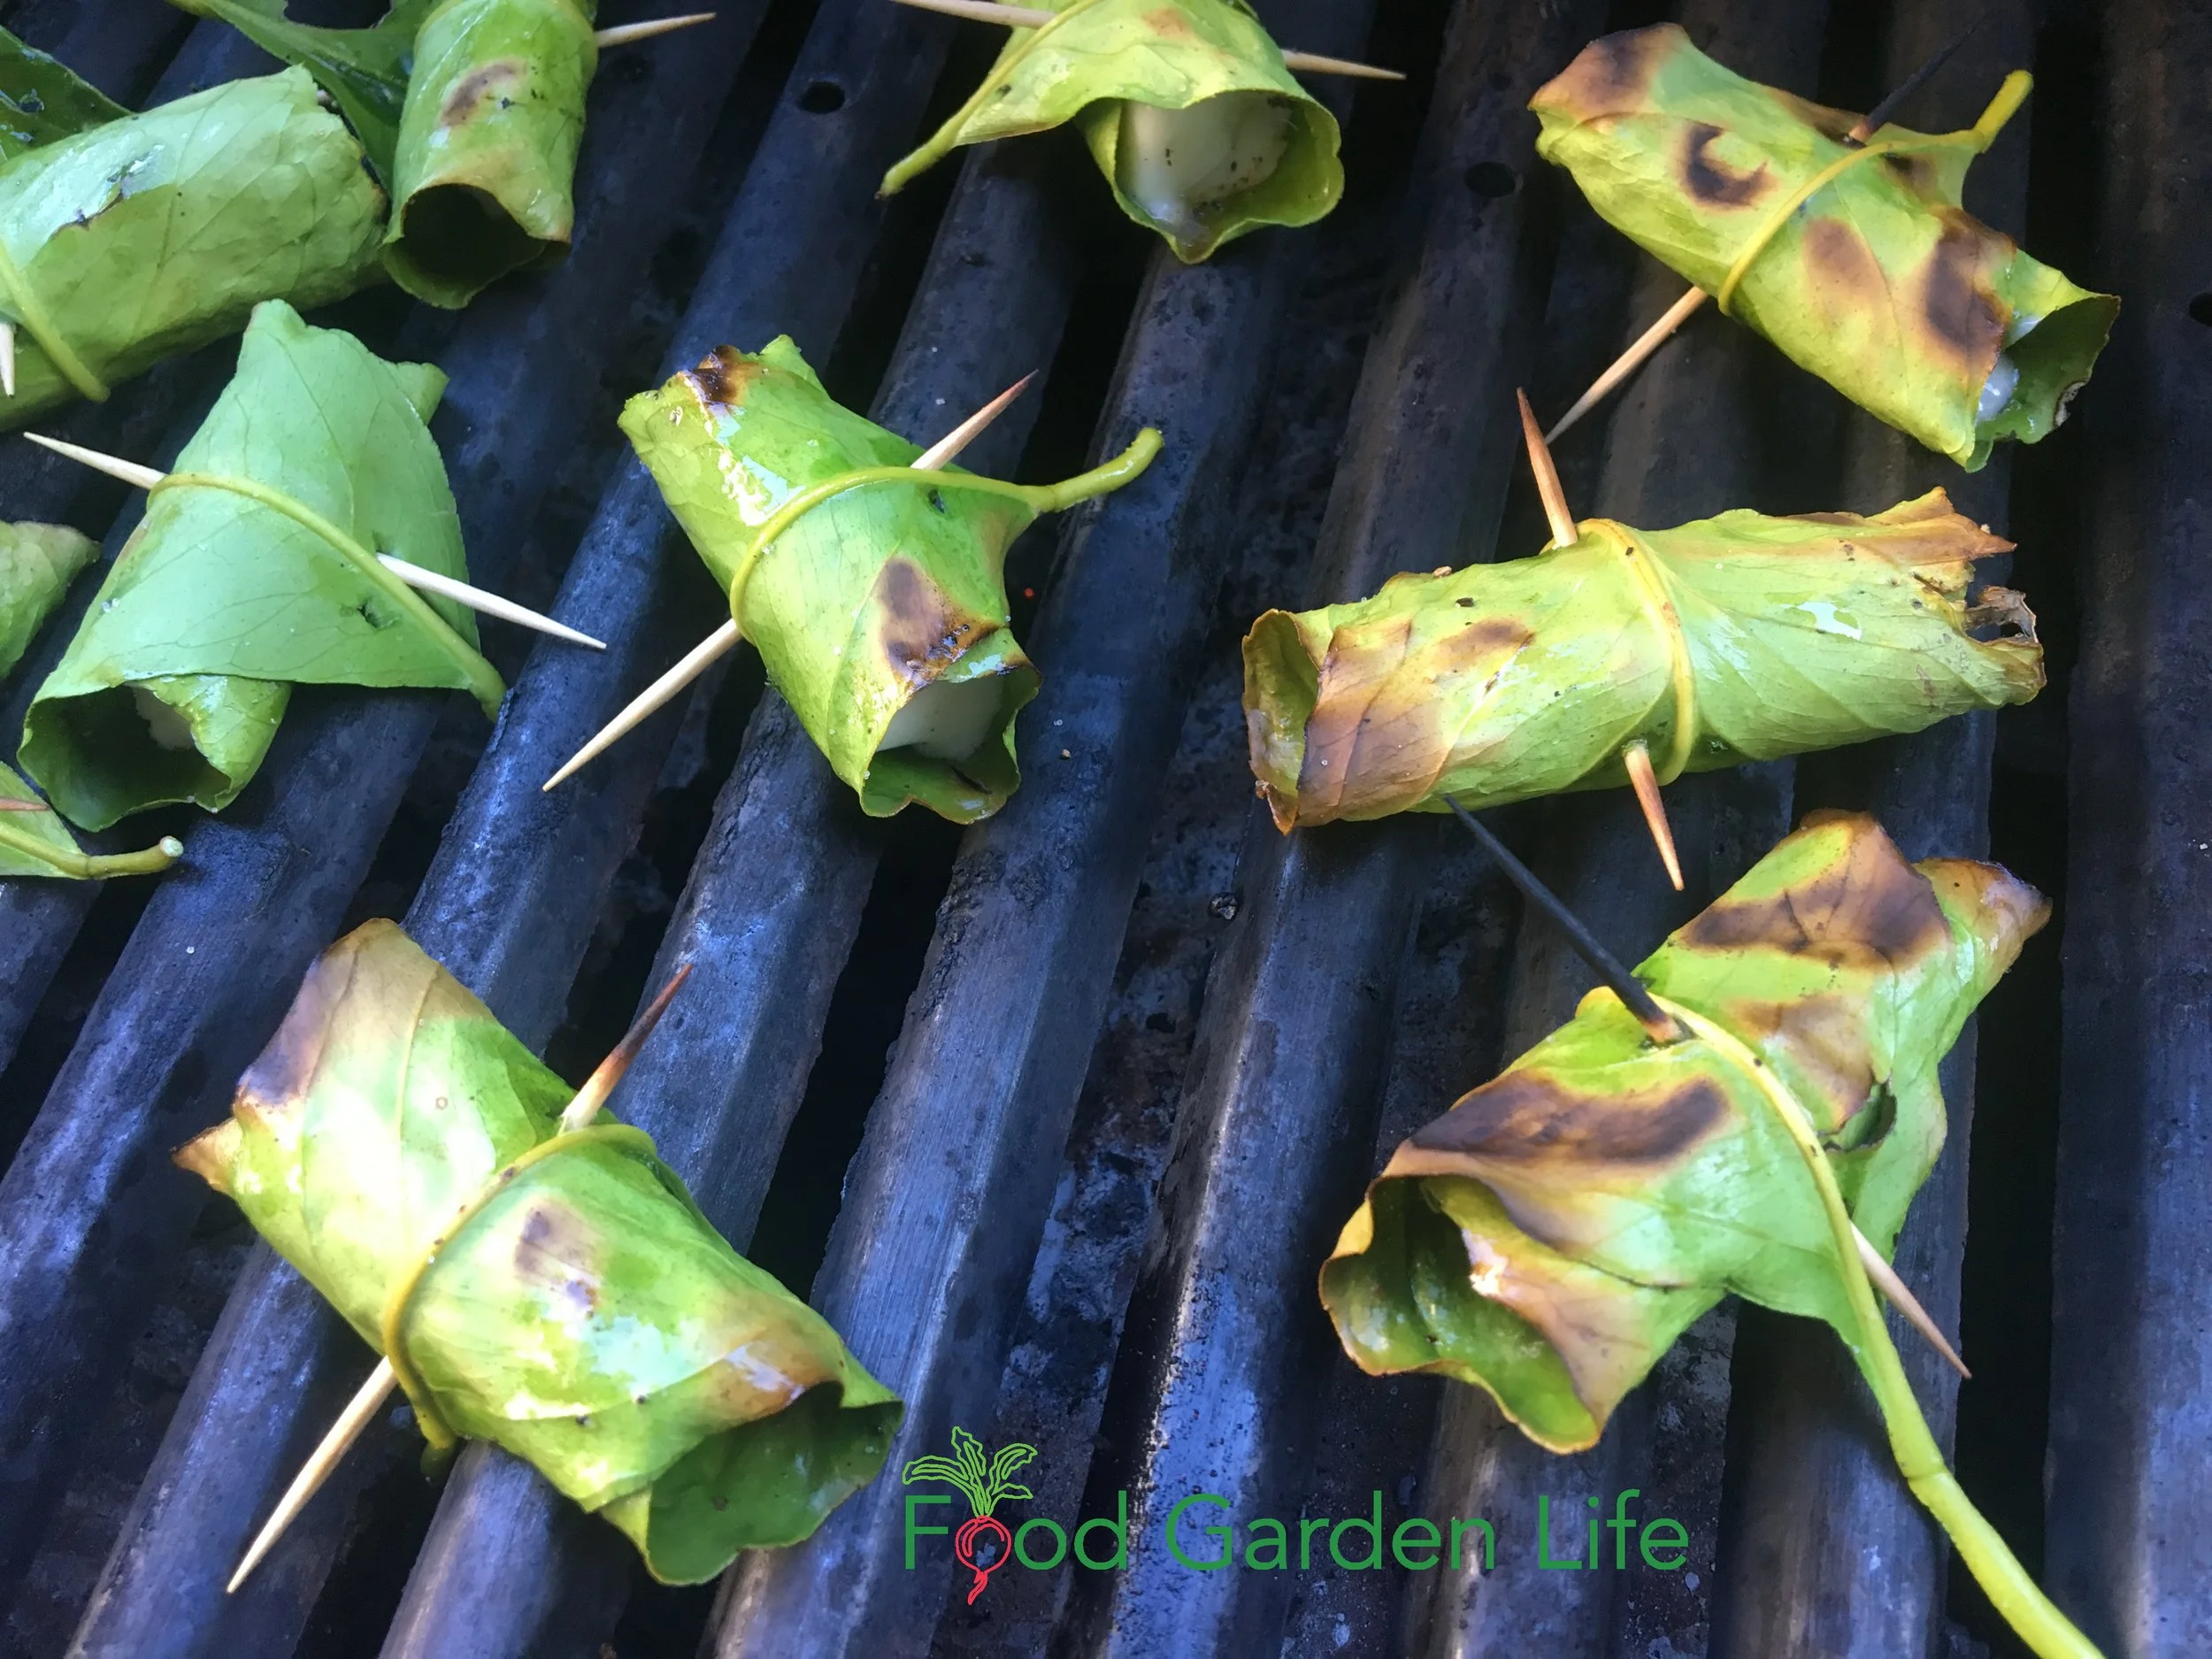
Lemon leaves impart a citrusy taste to food. These are wedges of halloumi cheese wrapped in lemon leaves, cooking on the grill.
Those fragrant lemon blossoms are edible too!
Don't stop there: Lemon leaves are packed with tasty goodness. They're tough—so don't eat the lemon leaves, but use them for their lemony flavour.
Use them like bay leaves.
Or wrap what you're cooking on the grill and it cooks the lemony flavour into the food. (Then just removed the charred leaves.)
Covering everything from lemon varieties, to location and watering, to pruning and shaping, to overwintering, dealing with pests, and more—and including insights from fellow citrus enthusiasts—this book will give you the confidence you need to grow and harvest fresh lemons in cold climates.
Orders may be shipped from Toronto or printed and shipped directly by our printing partner. Available destinations and shipping charges appear at checkout. All prices are in Canadian dollars.
Prefer an ebook? Find the Kindle edition on Amazon.
A favourite in our household is wedges of halloumi cheese wrapped in lemon leaves and grilled. (Halloumi has a high melting point, so you can grill it without it oozing down into the BBQ.)
Find out more about cooking with lemon leaves.
Interested in growing a lemon tree in a pot? Here's more to help you grow a potted lemon tree. Lemons are a great plant to add season-long interest to your edible landscape.
Fennel
Florence fennel, a.k.a. "finocchio." Mom always included sliced fresh finocchio on a veggie platter.
I love to braise fennel bulbs in white wine.
Fennel: Other Edible Parts
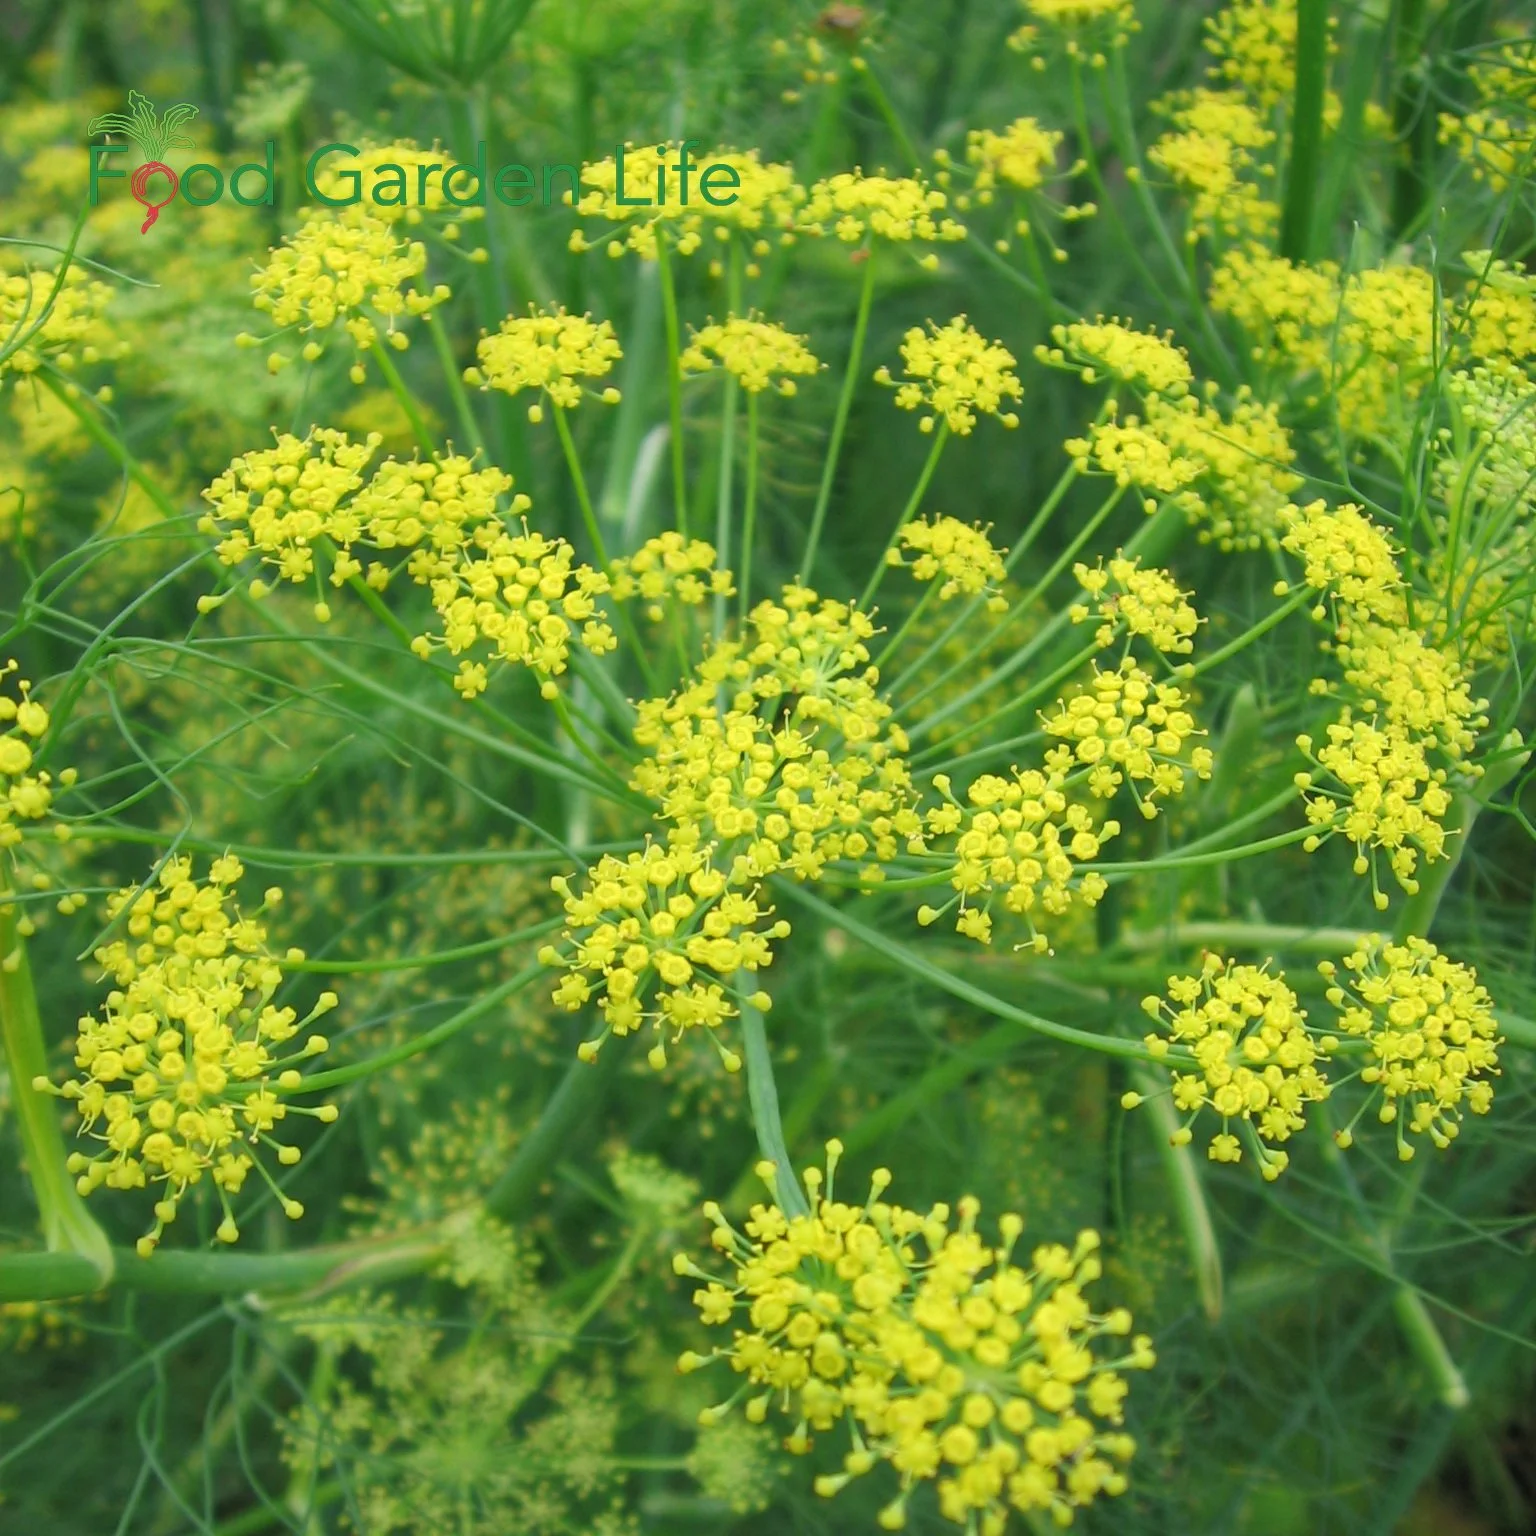
Fennel flowers are edible, and the pollen can be tapped onto plates as decoration.
Beyond the bulb, the fern-like fennel leaves make a fine garnish.
Fennel flowers are edible too. (Or, tap fennel flowers over a white plate to decorate it with the yellow pollen.)
Fennel seeds are edible. Sprinkle a few over a bowl of granola. I like to add them when I make sausage.
There's also a cousin to the bulb-producing Florence fennel: Bronze fennel.
Bronze fennel is a perennial with aptly named bronze-coloured leaves. They're beautiful—and tasty. There's no bulb; this is a perennial edible we grow for its leaves, and its edible flowers.
If you're gardening to attract beneficial insects (pollinators, parasites, predators), fennel is a musts-have plant in vegetable gardens and edible landscapes.
Beet
Beet root is a great root vegetable for winter storage.
Beet: Other Edible Part
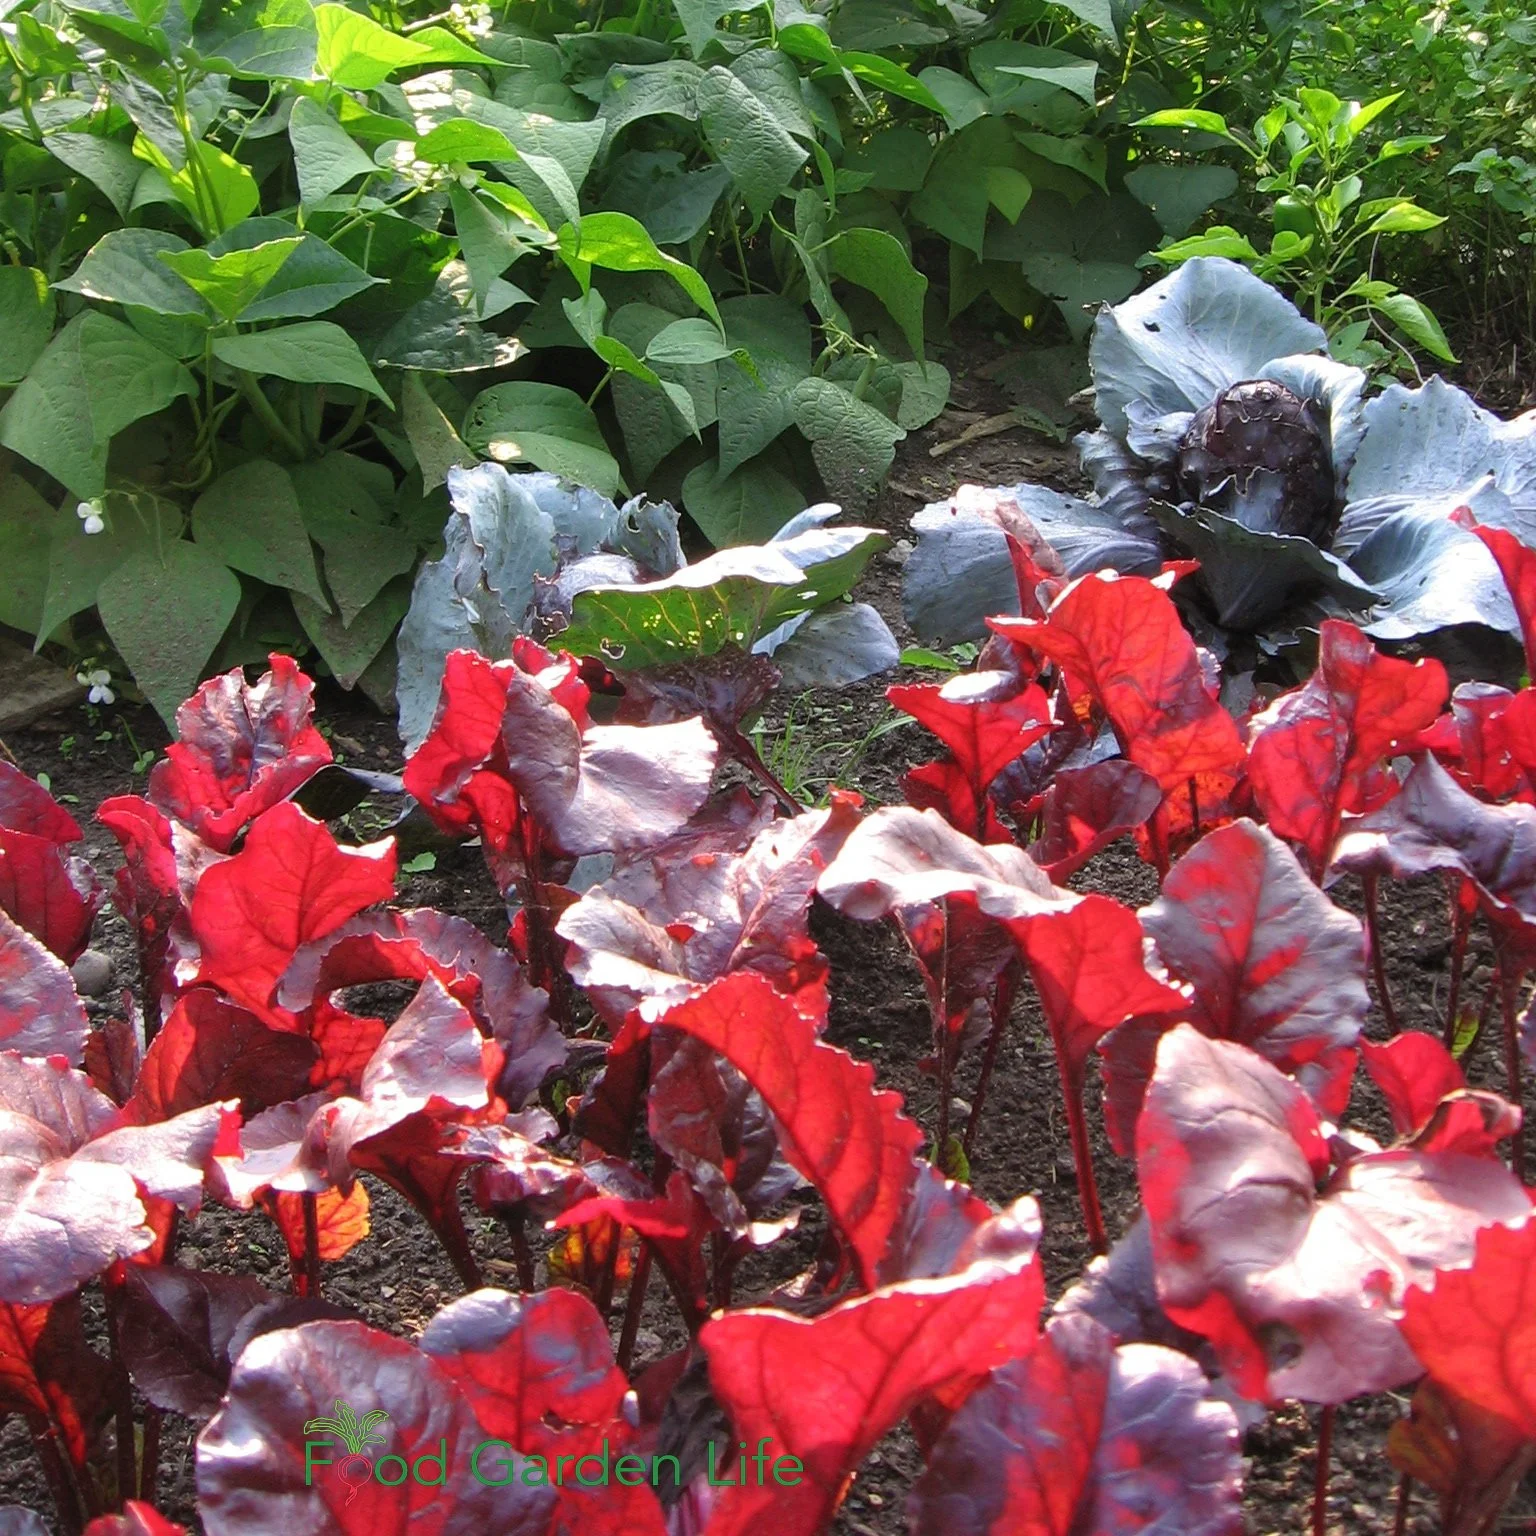
‘Bulls Blood’ beet leaves are a colourful addition to an edible garden.
Beet leaves are often overlooked.
Use small beet leaves fresh, as you would small chard leaves.
Larger leaves can be cooked. (An incomparable trio is beet leaves, sour cream and dill.)
Beet leaves are also nice chopped into a pot of borsch. (Here's how Mom made borsch.)
Most people don't think of beets when looking for visual appeal...but for colourful beet leaves—a vibrant red—check out 'Bull's Blood.'
Carrot
Baby carrots are a favourite summer treat at our house, and over the winter we enjoy carrots stored in our garage.
Carrot: Other Edible Part
Carrot leaves are edible, bringing their own unique flavour when added to sauteed greens or a frittata. Or, make them into a pesto.
Dill
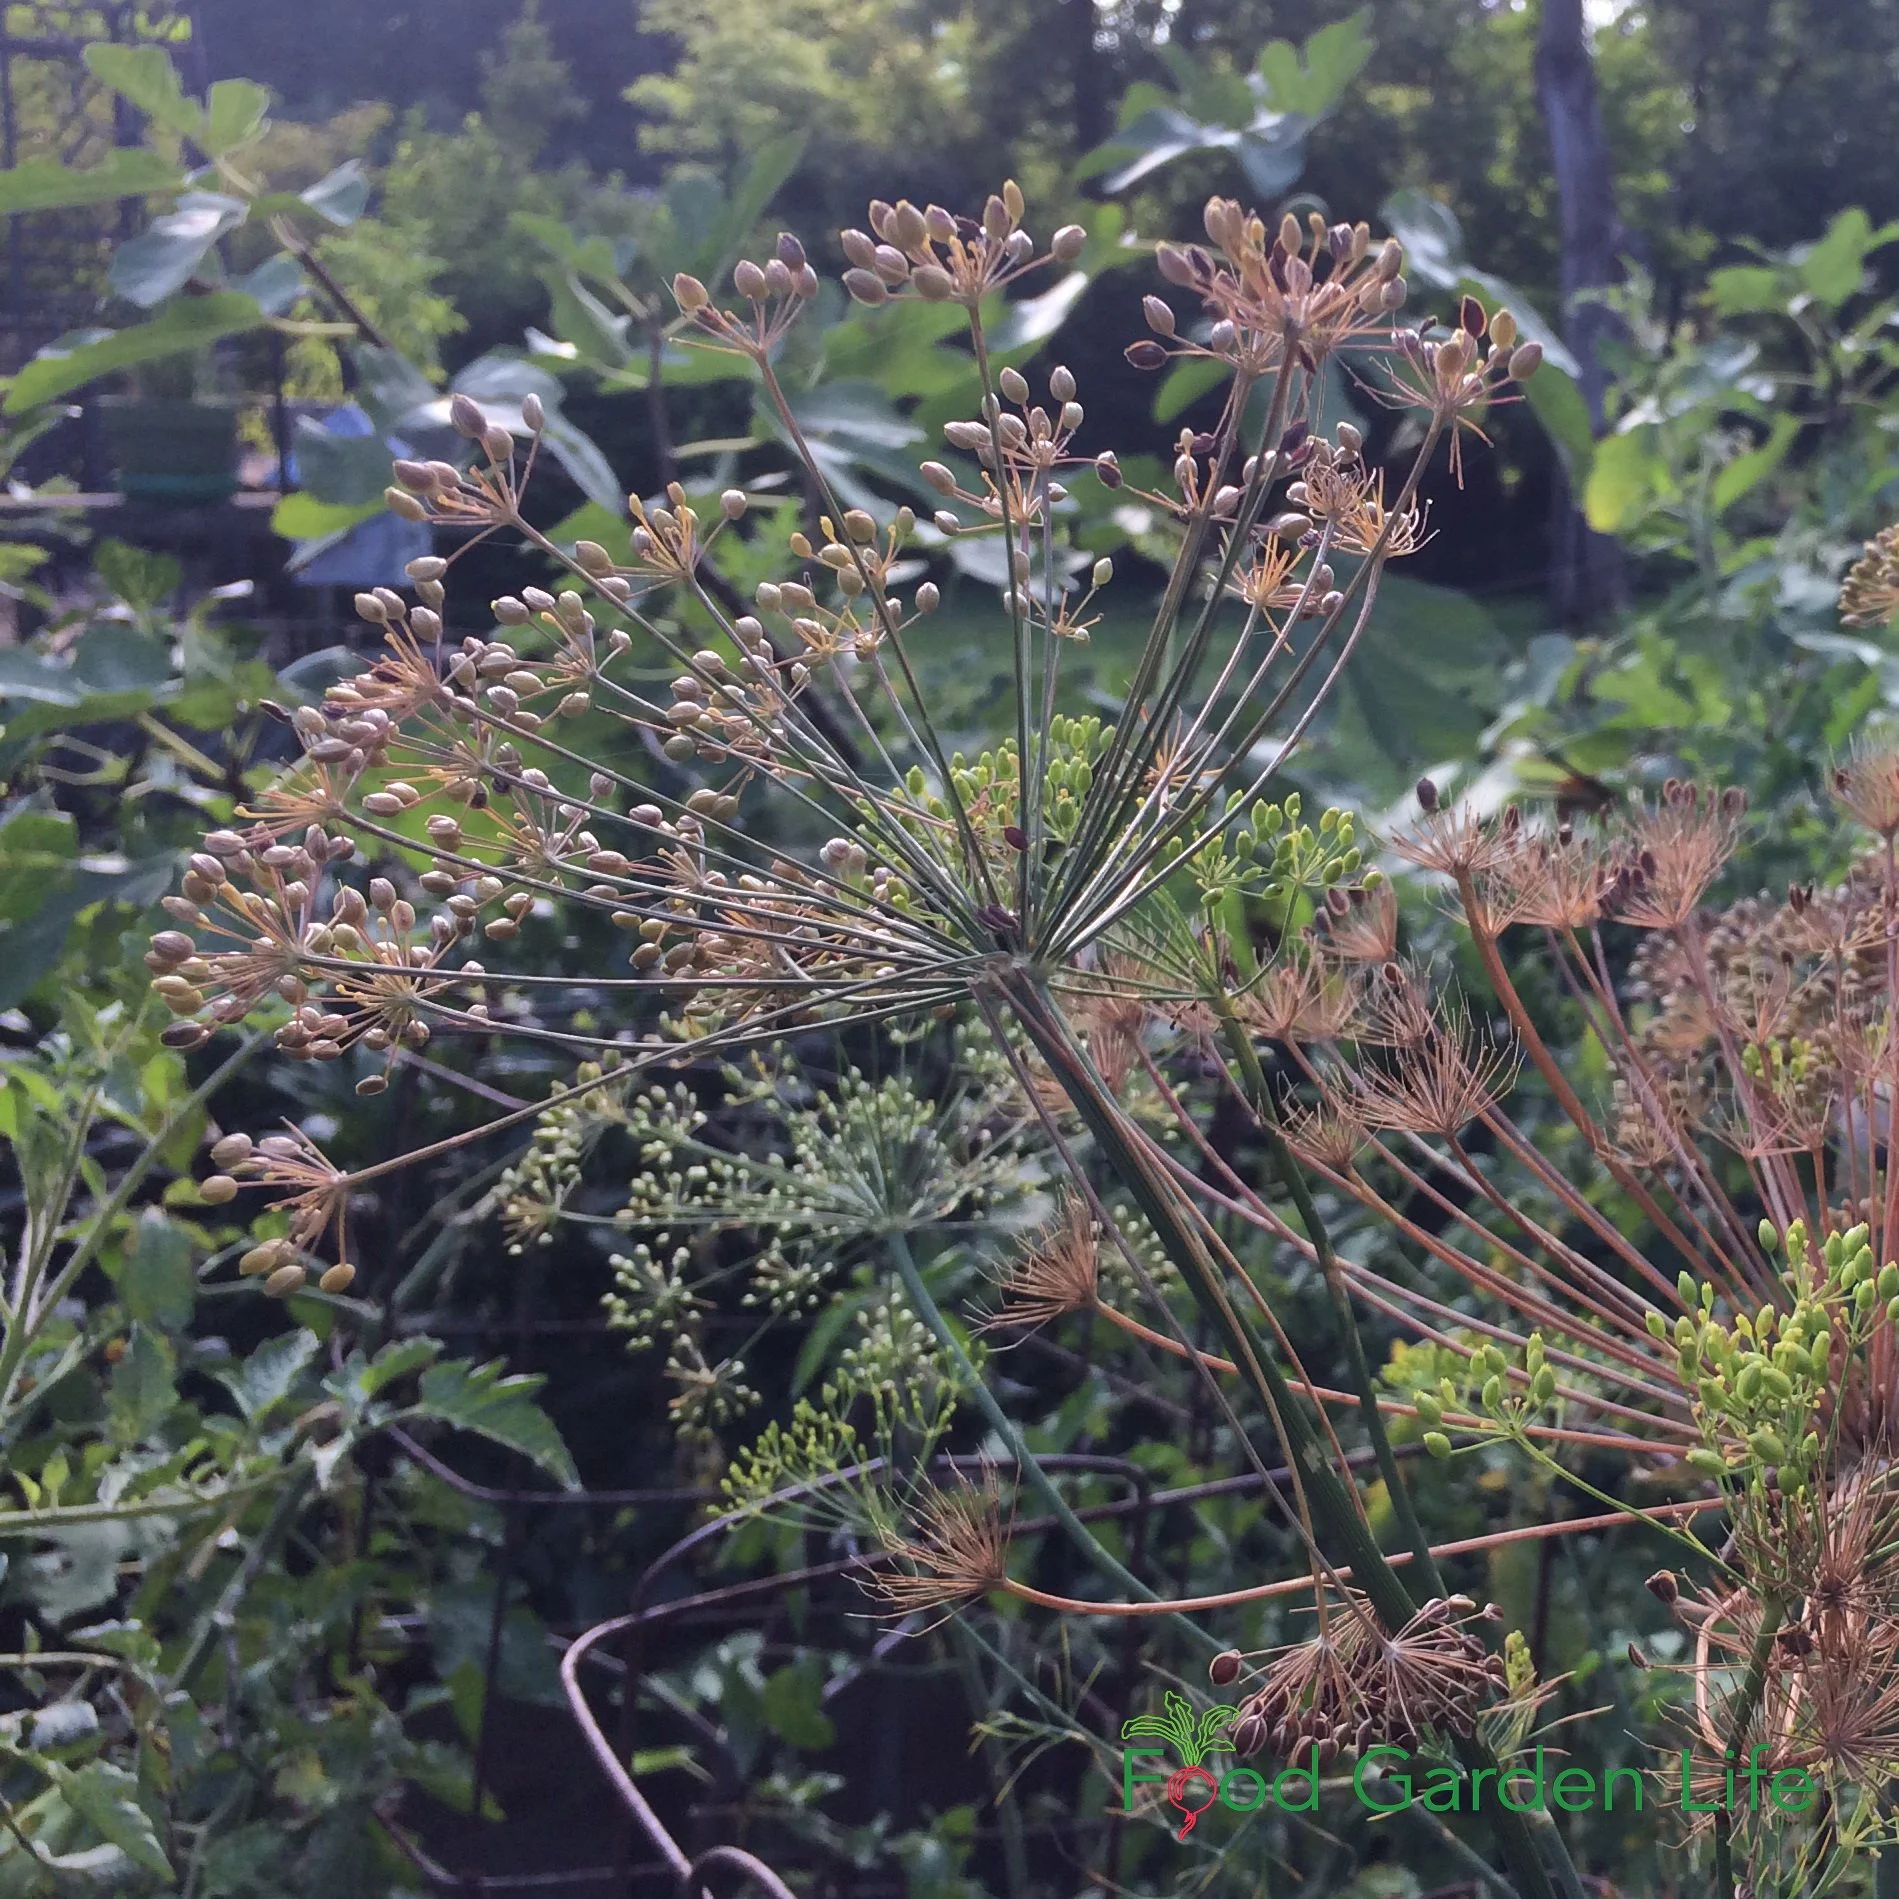
Dill seeds are a great way to enjoy the flavour of dill through the winter.
Dill is up there with fennel when it comes to bringing beneficial insects to your garden. The flowers are a magnet for beneficial insects.
I cook with lots of dill, so when I have a glut of dill in summer I chop and freeze lots for the winter.
Dill: Other Edible Parts
Use dill flowers as you would fennel flowers.
And...I use the seed. Dill seed into a beet-and-feta salad is a delight. Or a few dill seeds into a pot of borsch.
Garlic
Garlic is a great crop for a home garden because you can grow enough of it in a small space for an entire household for a whole year.
And it stores well in a cool basement, even without a proper root cellar.
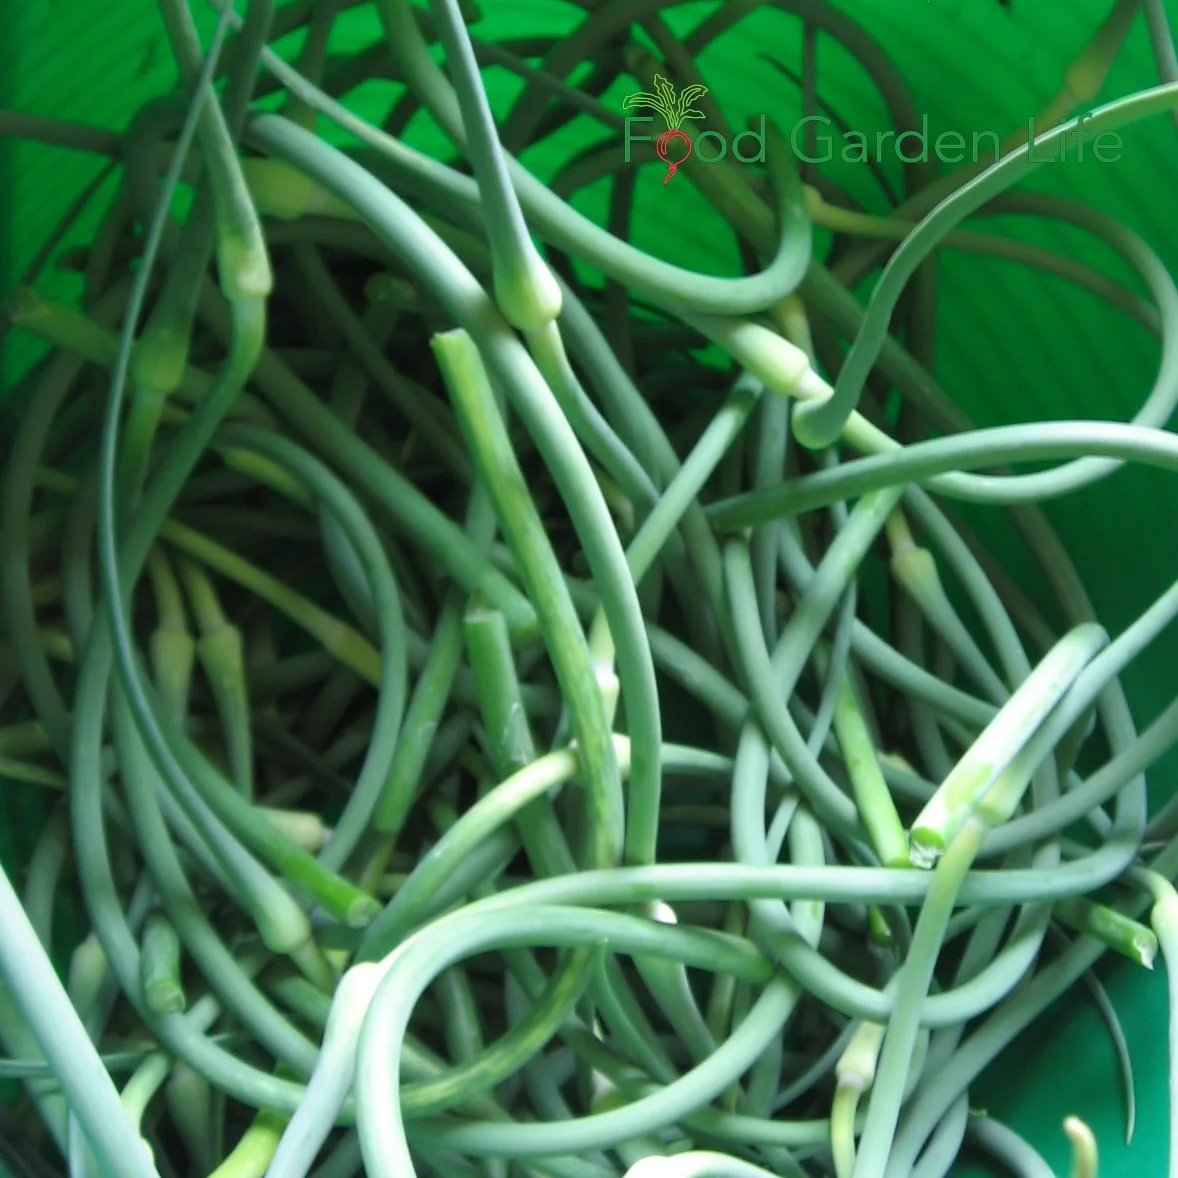
Garlic scapes
Garlic: Other Edible Part
Along with the bulbs, there are the garlic "scapes" that make a fine pesto.
And there's more...hear Doug Oster explain how he gets 5 harvests from his garlic.
Squash
Winter squash is a great storage crop.
Vining squash varieties are also a great addition to vertical gardens.
Squash: Other Edible Part
Eat some of your squash flowers. (Stuff them with a wedge of cheese, dip in batter, and deep fry, you won't regret it.)
Cook squash shoot tips. Hear chef Alan Borgo talk about squash shoot tips.
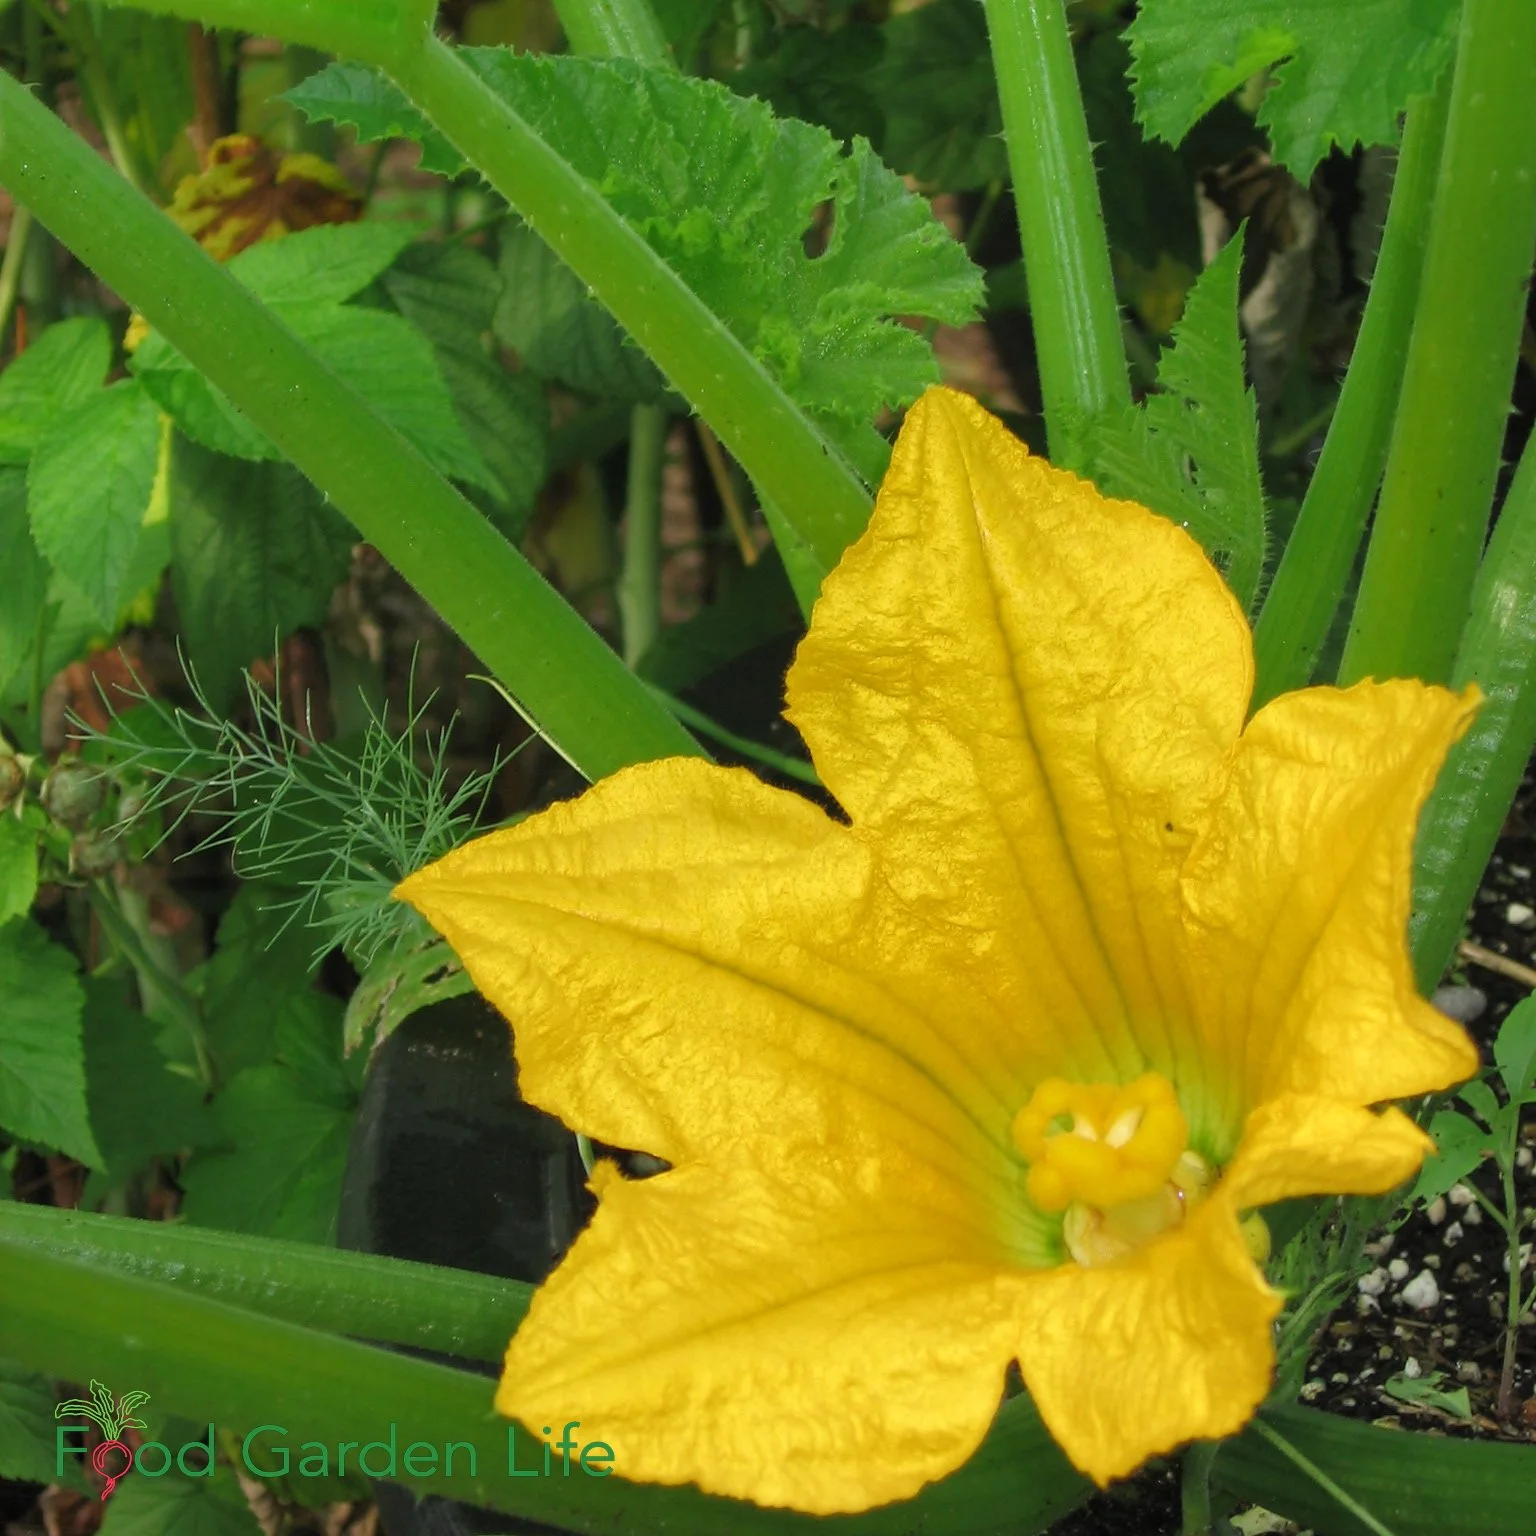
Squash flowers are edible. And don’t forget the edible shoot tips!
Pin this post!
Find This Helpful?
Enjoy not being bombarded by annoying ads?
Appreciate the absence of junky affiliate links for products you don’t need?
It’s because we’re reader supported.
If we’ve helped in your food-gardening journey, we’re glad of support. You can high-five us below. Any amount welcome!
More Edible Landscaping Ideas
Articles: Edible Gardening
7 Vegetable Garden Layout Ideas To Grow More Food In Less Space
These Edible Perennials and Perennial Vegetables Make a Delicious Edible Landscape
Video: Edible Gardening
Edible Landscaping: See My Ornamental Edible Garden
Courses: Edible Gardening
Force Rhubarb Indoors
Force rhubarb indoors and harvest tender, pink rhubarb mid-winter while the snow flies outdoors.
By Steven Biggs
Force Rhubarb Indoors for a Mid-Winter Harvest

Rhubarb and candles?
One day I got chatting with my neighbour’s fence installer, who was interested in my garden.
I was picking rhubarb as we spoke, so I mentioned that I also force rhubarb in my basement over the winter.
That’s what got us on the topic of candles.
He was from Yorkshire, England, an area that once produced 90 per cent of the world’s forced rhubarb. He explained that the tradition there is to tend and harvest the crop, grown in big, dark sheds, by candlelight.
After we chatted I went online to see pictures of Yorkshire forced rhubarb. It’s beautiful! The long stems are bright red, and they’re topped with small yellow leaves. Farmers grow this forced rhubarb in the dark to get very long, tender stems. A small amount of light can change the way the rhubarb grows, but because the candles give a faint light, they don’t affect growth.
It’s easy for home gardeners to force rhubarb over the winter too. (You can opt out of using a candle if its’ not your style! I don’t use one.)

My winter-forced rhubarb. Not quite as nice as what they grow in Yorkshire, but still a nice winter treat.
How Forcing Rhubarb Works
Let’s back up to get a handle on what we’re doing. When we force rhubarb indoors over the winter, we’re tricking a dormant rhubarb root into thinking it’s spring.
We trick it by putting it somewhere warm.
That warmth stimulates growth.
If you’ve ever grown plants in conditions where there’s not enough light, you’ll know that they get lanky, with long stems.
The rhubarb sends up long stems too, and the leaves stay quite small while there’s no light.
If there’s light, upward growth slows, and stems and leaves develop a green colour from photosynthesis. It doesn’t take a lot of light to change the growth. Hence the candles.
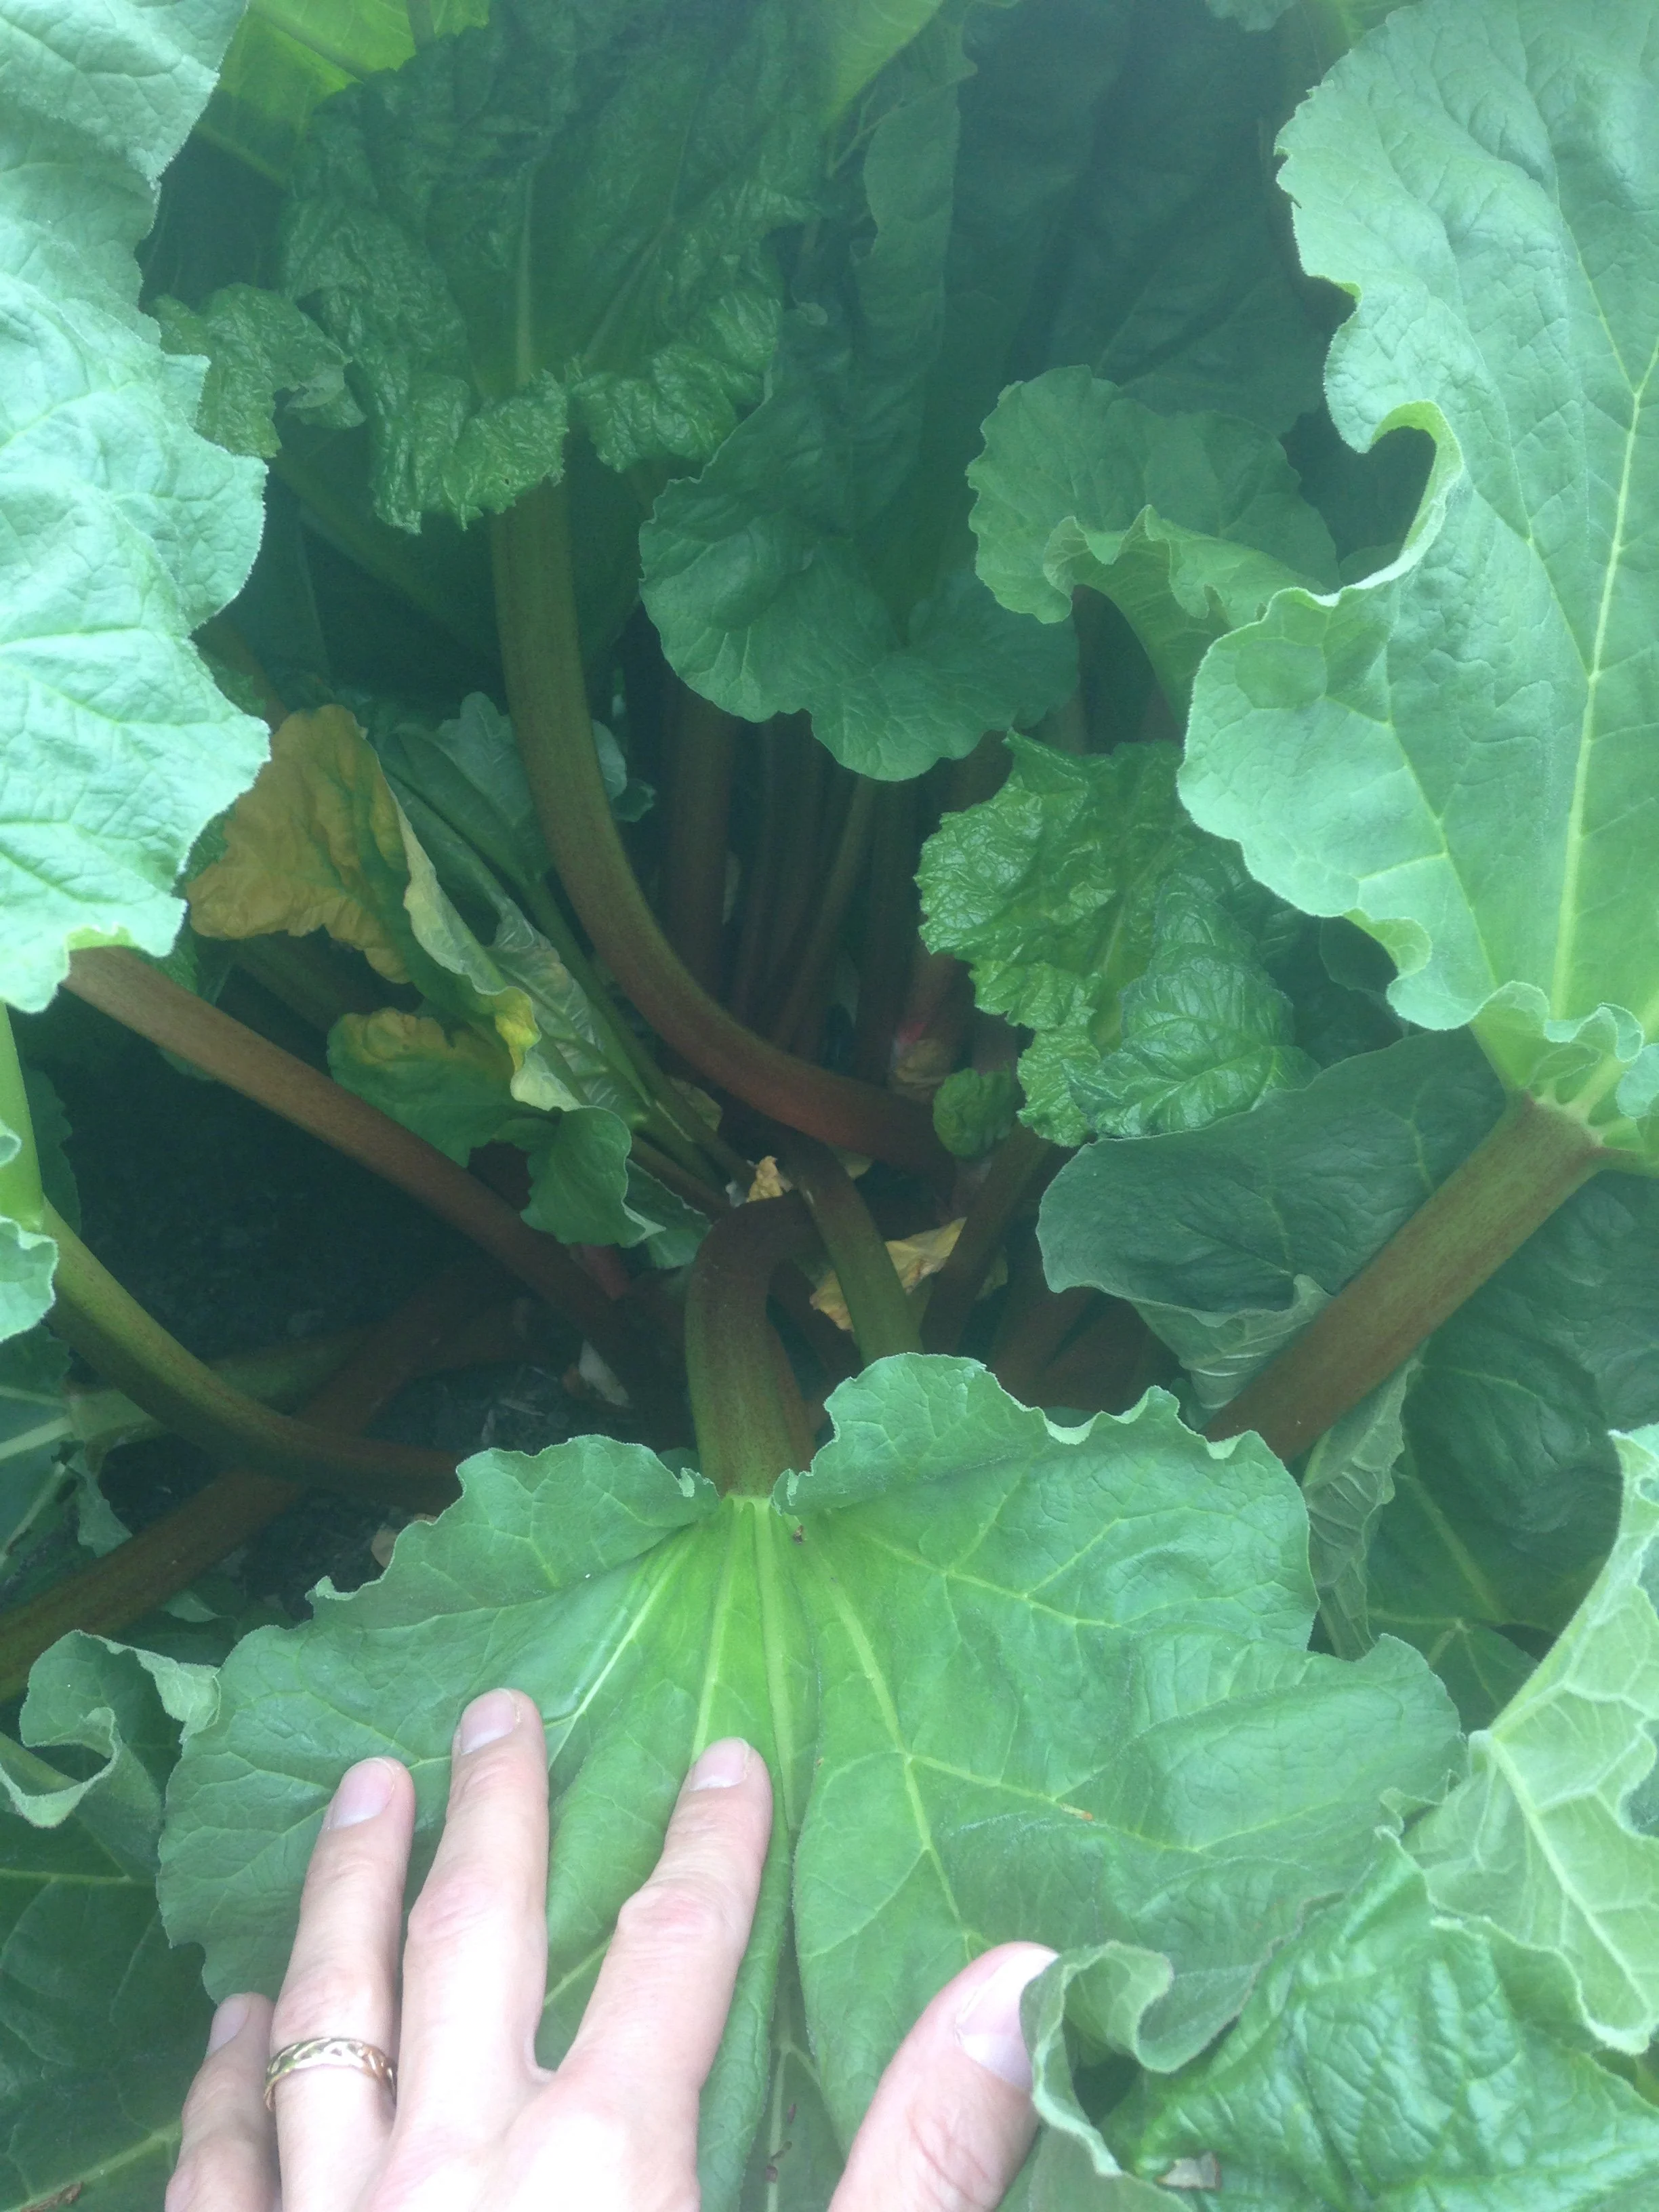
Rhubarb grown in the garden is more green and fibrous than forced rhubarb.
Why Force Rhubarb Indoors
What makes forced rhubarb special is that by excluding light, we get very long, tender stalks with a sweeter, milder flavour than rhubarb grown in the garden.
(Intrigued by the idea of excluding light to change quality? Here’s a fun article about blanching veg.)
Forced and outdoor-grown rhubarb are two very different things. The former has a delicate flavour and beautiful colour. The latter is greener and more fibrous.
Fresh forced rhubarb is a nice addition to the menu over the winter.
There’s one other reason to consider forcing your own rhubarb: It fits in nicely with rhubarb patch care.
In the right location, a patch of rhubarb grows larger each year. When a clump of rhubarb is well established and thriving, you simply “harvest” some of it in the fall by dividing the clump once the leaves have died back and it is dormant. Like plants in a perennial flower garden, dividing and bringing in fresh soil and compost is a good practice to keep a rhubarb patch thriving. As you divide the rhubarb patch, keep the hunk of root that you dig out for forcing.
Steps to Forcing Rhubarb Indoors
In the Summer
When conditions are good, a rhubarb patch gets larger every year. Don’t dig anything yet, but select a part of your patch that you can “harvest” for indoor forcing once the patch is dormant in the fall.
In the Fall
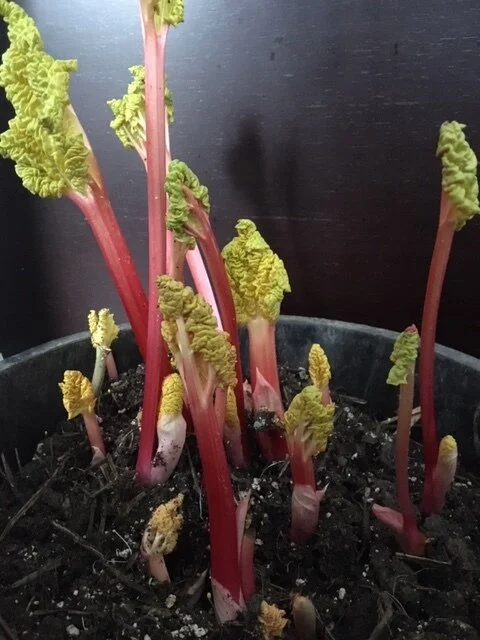
When you divide your clump of rhubarb in the fall, you get roots that you can force indoors over the winter.
The rhubarb should be dormant before you dig out a piece for winter forcing. Wait until the leaves have died back before digging. (But do it before the ground freezes!)
Then harvest the part of your rhubarb patch that you chose during the summer. Rhubarb crowns are woody, so you’ll need a spade to chop down into it.
Pot up the dormant root. Some years I pot the roots into recycling bins. Some years into large black nursery pots. Crates might work well too. Just like a houseplant, you want excess water to be able to drain from the bottom. (Also think about what to put underneath the potted rhubarb root if you don’t want water on the basement floor.)
Once the rhubarb root is potted up, store it somewhere cool until it’s time to force it. I put mine in my garage until mid-winter, when I’m ready to bring it in the house to force it. The roots are very cold tolerant, so if your storage area freezes, that’s fine.
There’s no rush to bring the dormant rhubarb root indoors. Let the root remain dormant and at a cool temperature for a few weeks.
Where to Force Rhubarb Indoors
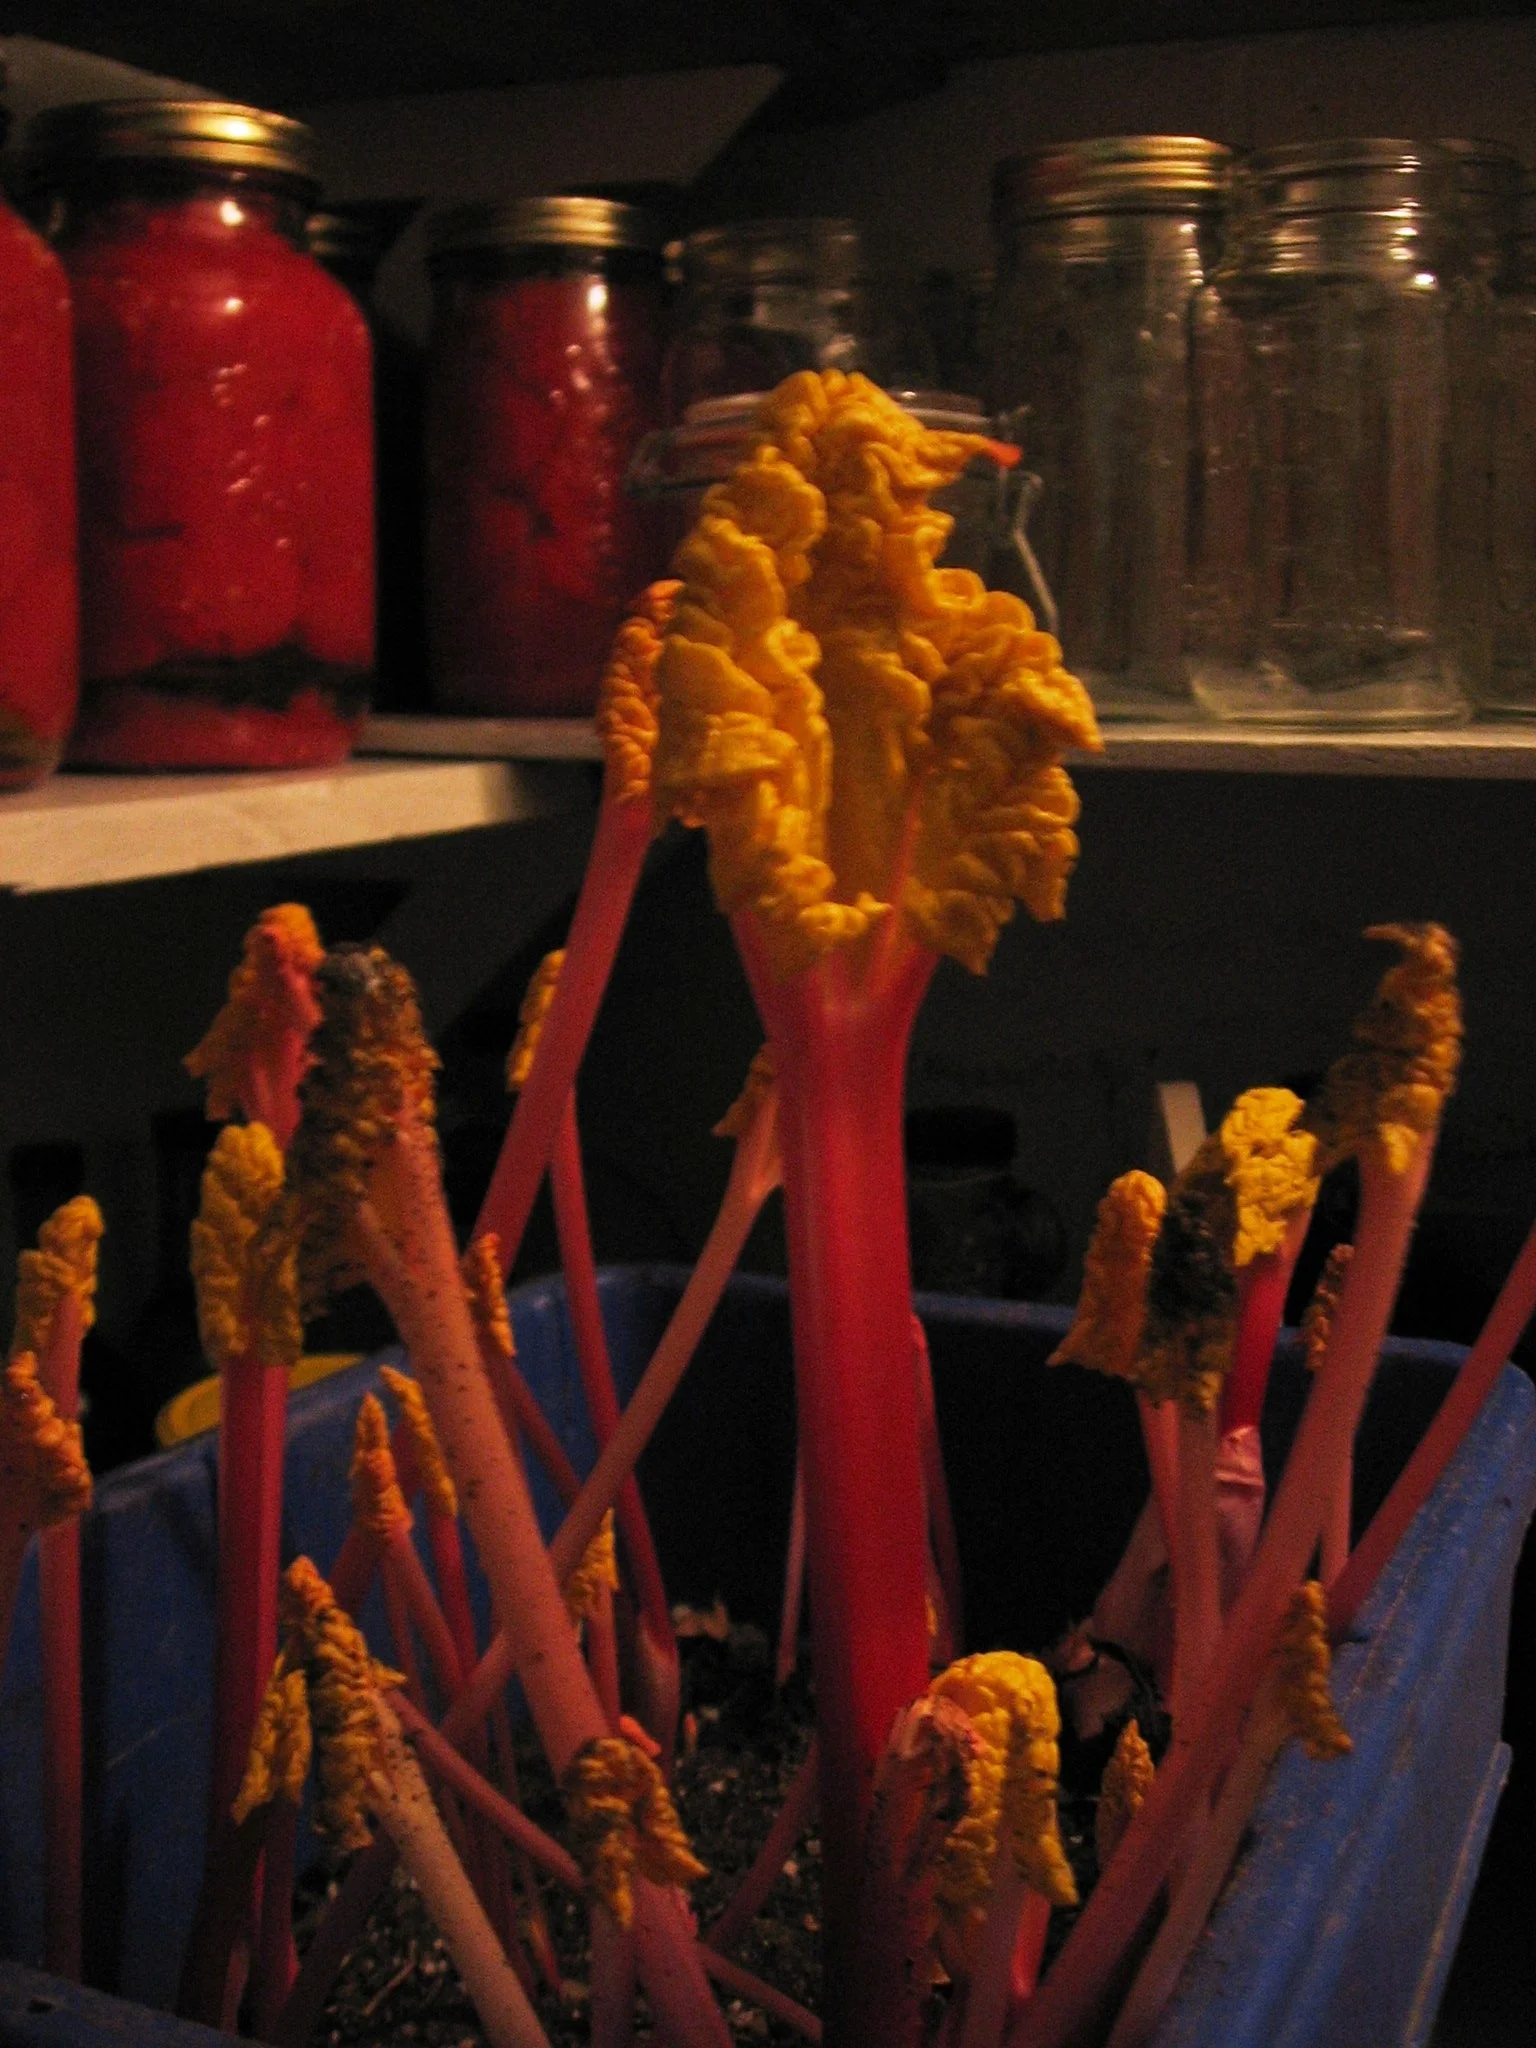
In a previous house I forced rhubarb in the cold cellar under the stairs.
The rhubarb will grow when it is placed somewhere warm. Remember, you’re simply tricking the plant—making it think spring has arrived.
In a previous house, I put the rhubarb in a dark cold cellar under the stairs.
In my current house, I put the rhubarb in my furnace room.
Taking Care of Forced Rhubarb
Care is simple: Just water the soil as it starts to get dry. It should be moist, not wet.
Don’t feed the plant. It is using energy stored in the thick, fleshy roots.
Supplies to Force Rhubarb Indoors
A container to pot up the dormant rhubarb root
Potting soil
Candle (optional!)
Harvesting Forced Rhubarb
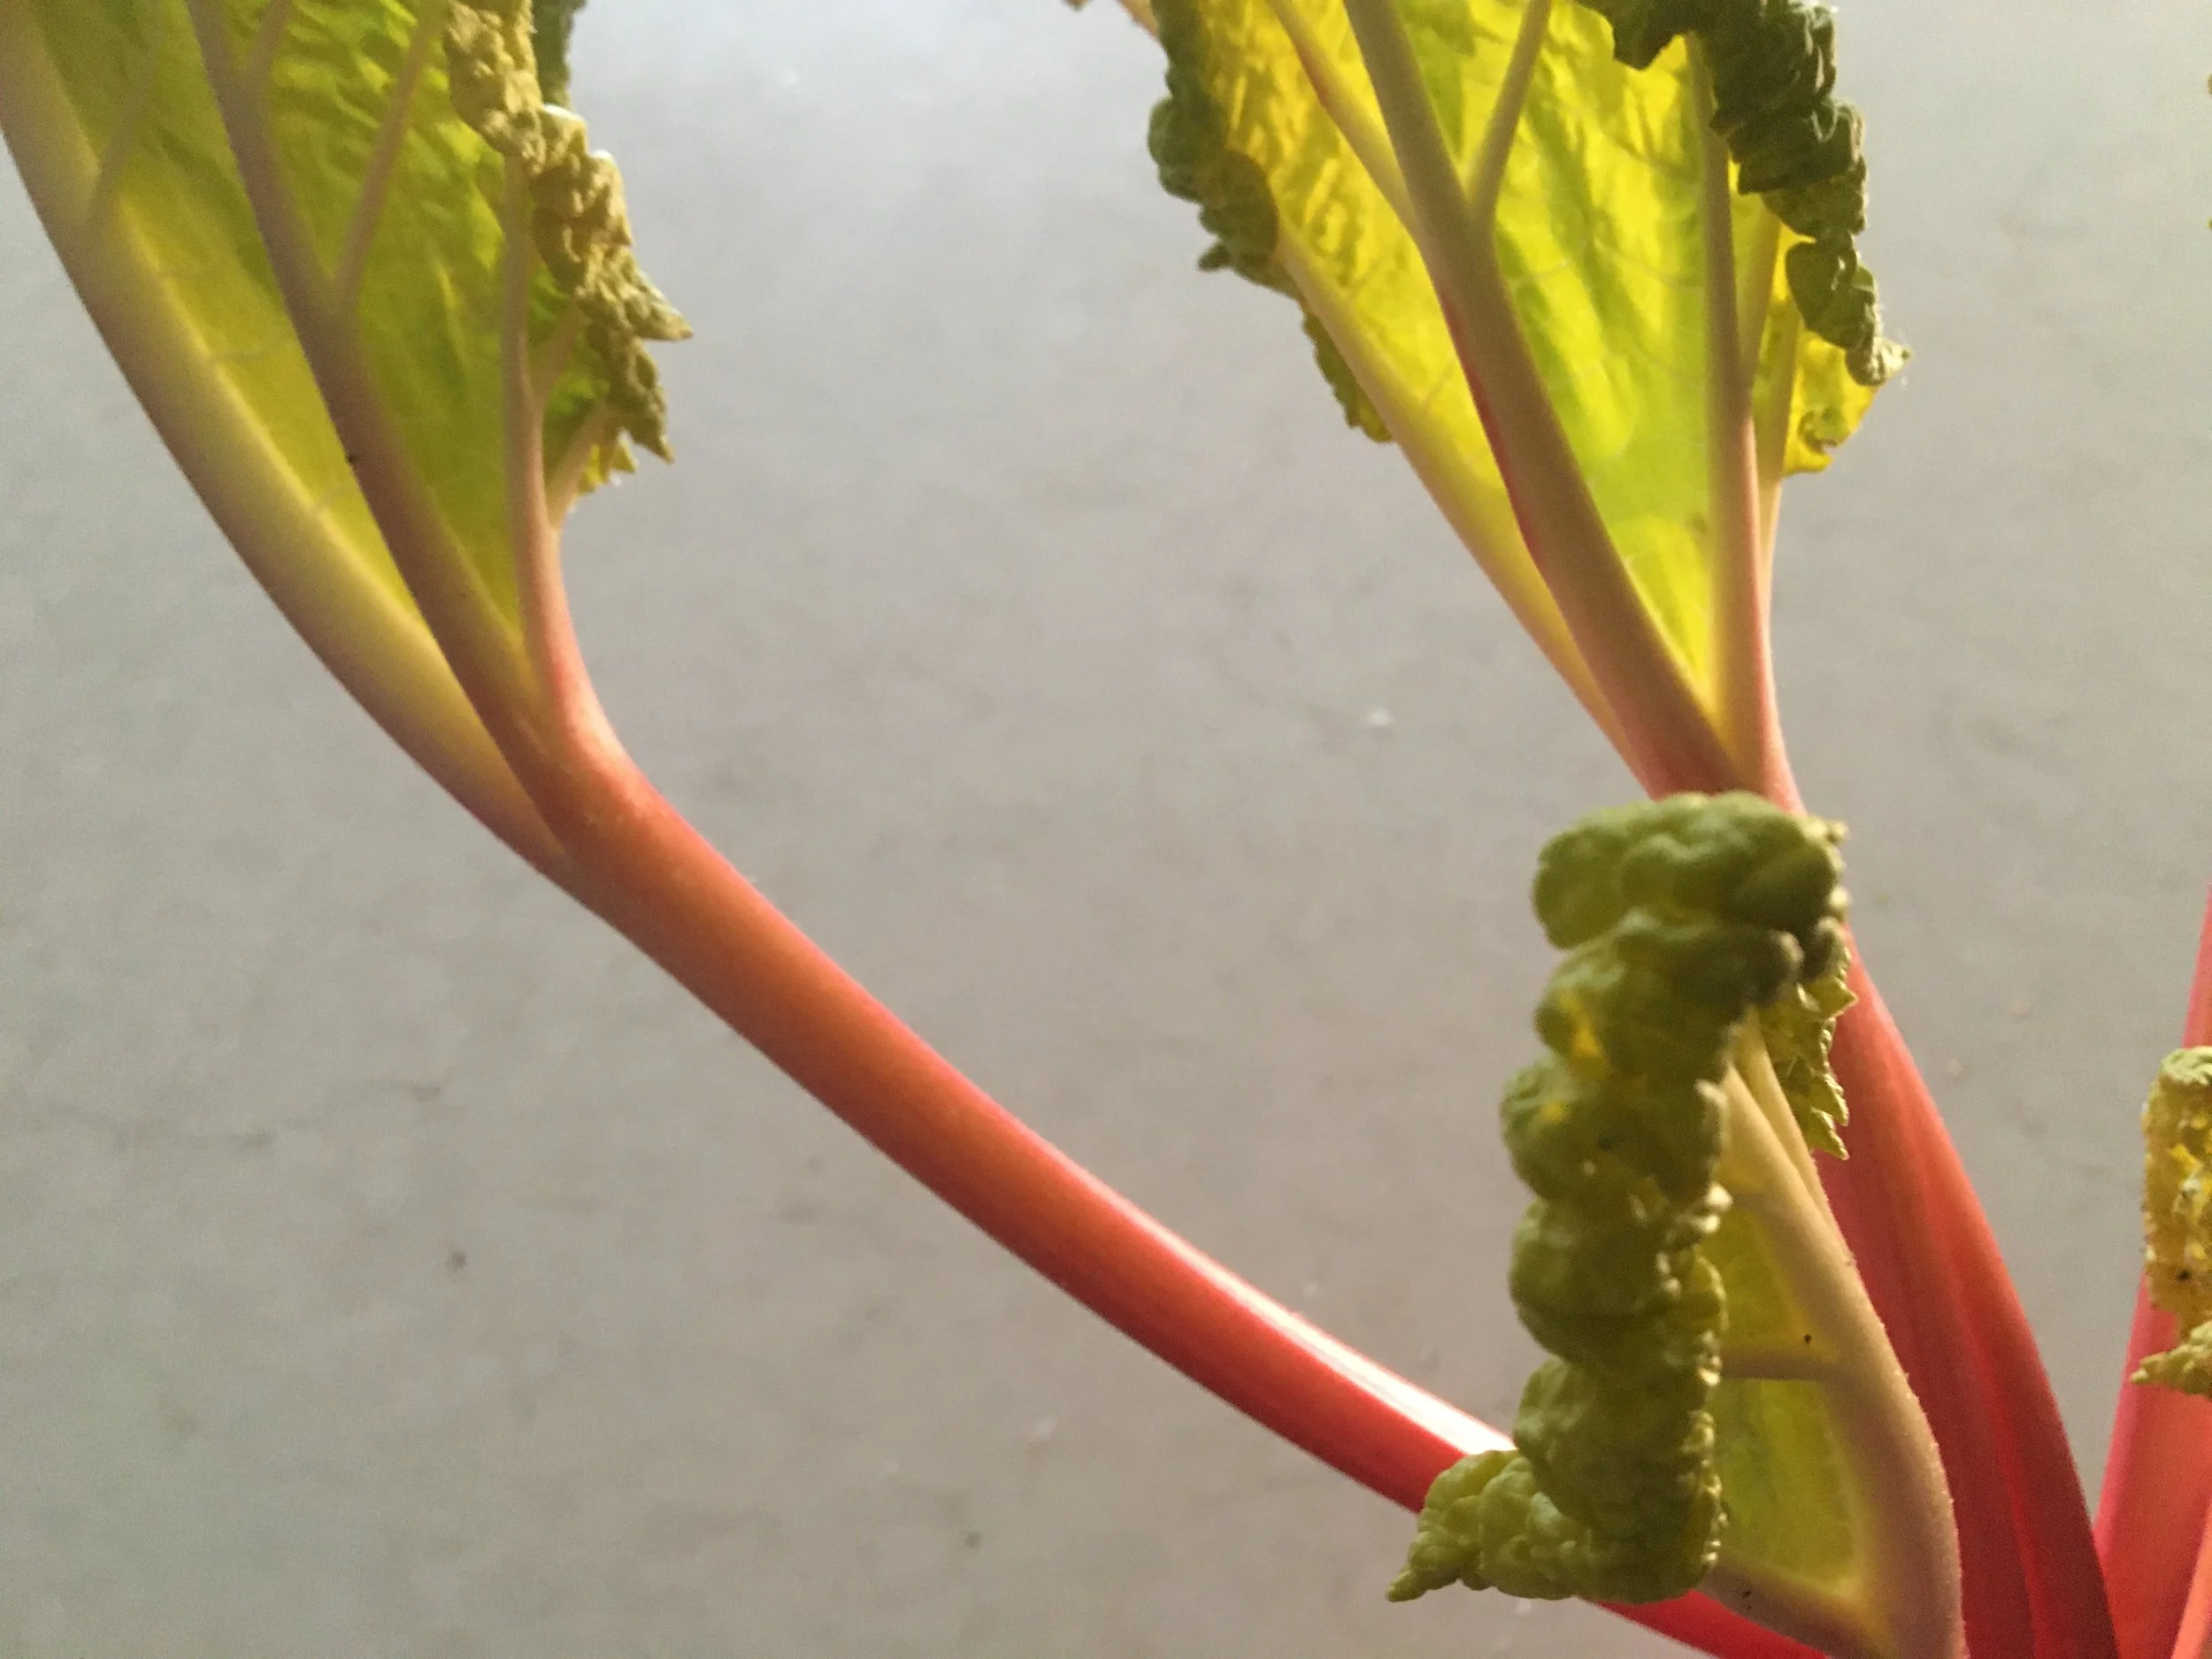
Harvest stalks when long enough to use. How big they get will depend on how much root you dug out, and how much energy was stored in that root.
Repeat a few times.
You’ll find that the longer you leave the forced rhubarb root to produce stalks in the dark, the skinnier and skinnier the stalks become. That’s because as the plant continues to send up stalks in the dark, it’s using up its stored energy.
(I find I get about three harvests before stem size gets too skinny to make it worthwhile harvesting.)
When you find the stalks are very skinny and no longer worth harvesting, you can move the plant to the light to just let it grow. Or, if you don’t have space, put it back into your cold-storage space until spring.
Grow a Container Vegetable Garden
And get an early harvest of crops that usually take too long!
Force Rhubarb Outdoors
By the time spring arrives, your winter-forced rhubarb root will be done producing rhubarb.
But you can also force some of your in-ground rhubarb plants. Again, it’s a combination of darkness and extra heat that gives you long, tender stalks.
You do this spring forcing right in the patch, without disturbing the plant.
Here’s what to do:
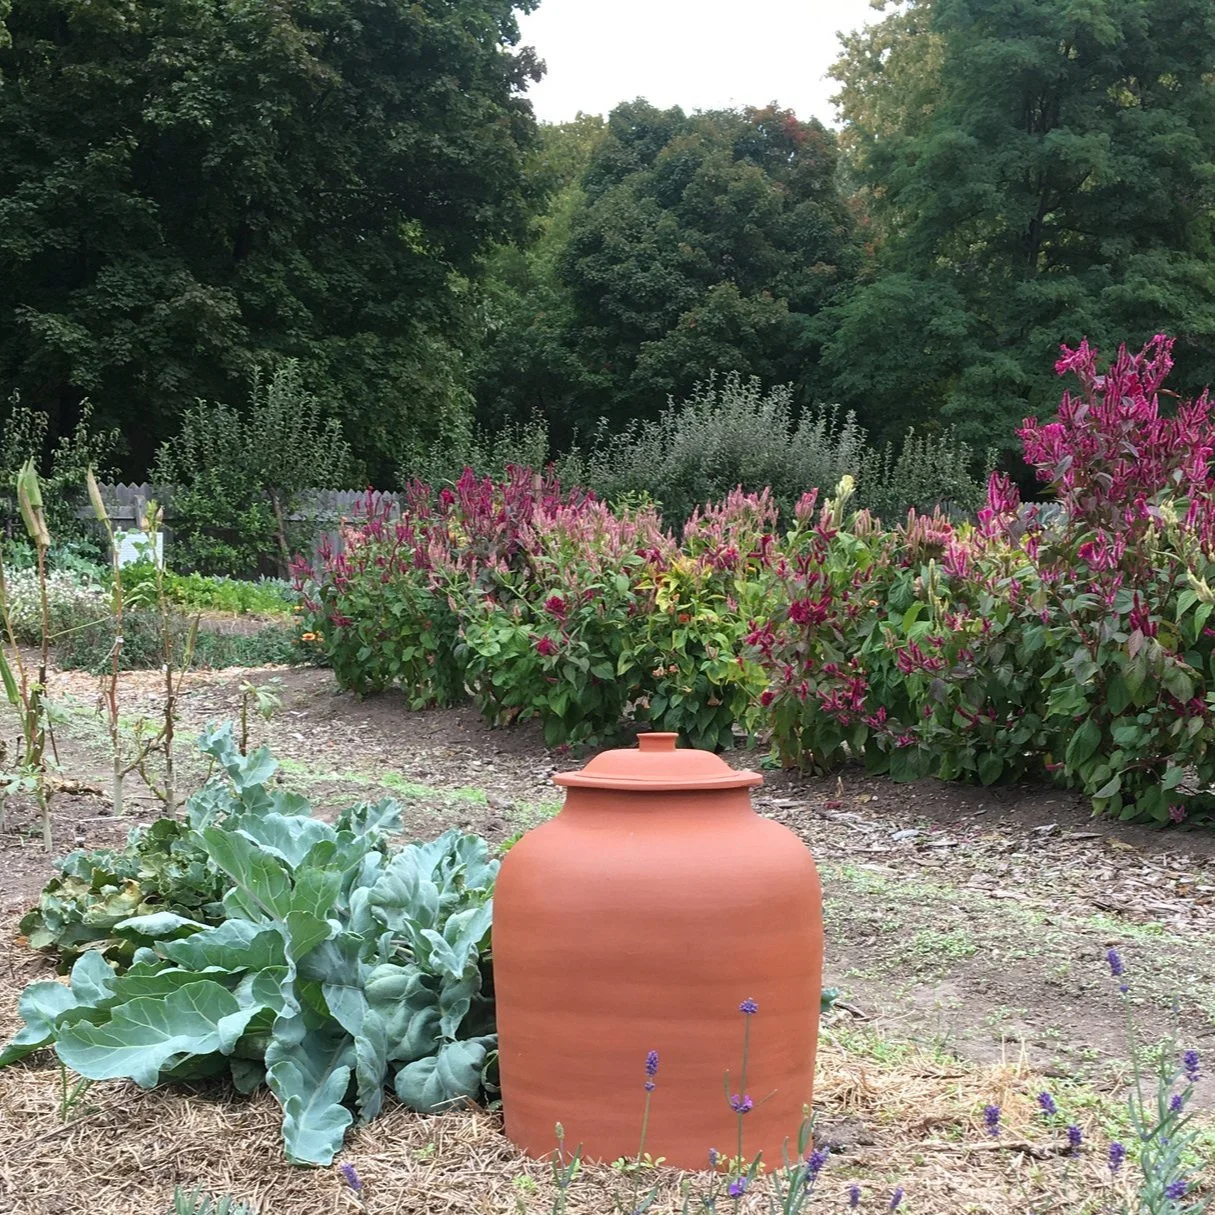
A rhubarb forcer, a purpose-made terracotta pot with a removeable lid for forcing rhubarb.
As you see buds start to swell on the crown, cover a part of the patch with a large inverted pot or garbage can. (To exclude the light and get nice, pink stalks, cover the drainage holes of the pot to keep out light)
You can insulate the sides of pots with leaves or straw if you want to speed up the process by making it warmer inside
Pick once the stalks reach the top of the pot
Give the roots you forced “time off” over the summer to recharge – don’t pick from them
There are also purpose-made terracotta rhubarb forcing pots. They’re beautiful, but I’ve never seen them for sale here in Ontario. And I suspect that if I found them, they’d cost and arm and a leg.
Supplies to Force Rhubarb Outdoors
Healthy, established rhubarb plant
Large pot
Tape to cover holes in the pot
Straw or leaves to insulate the outside of the pot
Rhubarb Forcing FAQ
What if my indoor forcing area has some light in it?
If there is enough light, you will not get the elongated, bright red stalks. Instead the plant will produce more compact stalks with some green chlorophyll in them. Not the end of the world…but you can get green stalks all summer. So create a dark space using a curtain or tarp.

Why are my forced rhubarb stalks smaller than the ones I see at the grocery store?
Commercial growers will often let rhubarb plants grow two or three years without harvesting any stalks before using the root for forcing. That means the root has a lot of stored up energy. In a small home garden, where the gardener is forcing roots that have been harvested from, there won’t be as much stored energy.
What should I do with the rhubarb plant after forcing?
Commercial growers often discard roots that they’ve forced. But you can plant the spent rhubarb root in your garden or share it with a neighbour. But don’t harvest from it for a couple years – allow the plant to recover and store energy.
I just planted my rhubarb. Can I force it?
No. There won’t be enough stored energy in the root to give you good results…and if it’s a small plant, you might kill it. Commercial growers often grow plants in the field without harvesting anything for two or three years to allow the plants to store up energy before forcing.
What about bugs?
Because the potted roots were harvested in cold temperatures, and then stored somewhere cold, don’t worry about bugs.
What’s a rhubarb stick?
Some people refer to rhubarb stalks as “sticks.”
Find This Helpful?
Enjoy not being bombarded by annoying ads?
Appreciate the absence of junky affiliate links for products you don’t need?
It’s because we’re reader supported.
If we’ve helped in your food-gardening journey, we’re glad of support. You can high-five us below. Any amount welcome!
More on Rhubarb
Ontario Farmer Brian French forces 10,000 square feet of rhubarb over the winter.
Hear how he forces rhubarb, and find out his rhubarb-growing tips.
Want More Ideas?

Hi, We’re Steve and Emma!
We help people grow food on balconies, in backyards, and beyond—whether it’s edible landscaping, a vegetable garden, container gardens, or a home orchard.
Courses

Free Food- Garden Guide
Books
Covering everything from lemon varieties, to location and watering, to pruning and shaping, to overwintering, dealing with pests, and more—and including insights from fellow citrus enthusiasts—this book will give you the confidence you need to grow and harvest fresh lemons in cold climates.
Orders may be shipped from Toronto or printed and shipped directly by our printing partner. Available destinations and shipping charges appear at checkout. All prices are in Canadian dollars.
Prefer an ebook? Find the Kindle edition on Amazon.