Guide: How to Grow Ground Cherries and Cape Gooseberries
Guide: How to grow ground cherries and cape gooseberries
By Steven Biggs
Unhusking the Husk Cherries

Looking for an easy-to-grow fruit for a northern garden?
Here are a couple of sweet, tangy annual fruit crops that are a snap to grow. They're great for container gardens too.
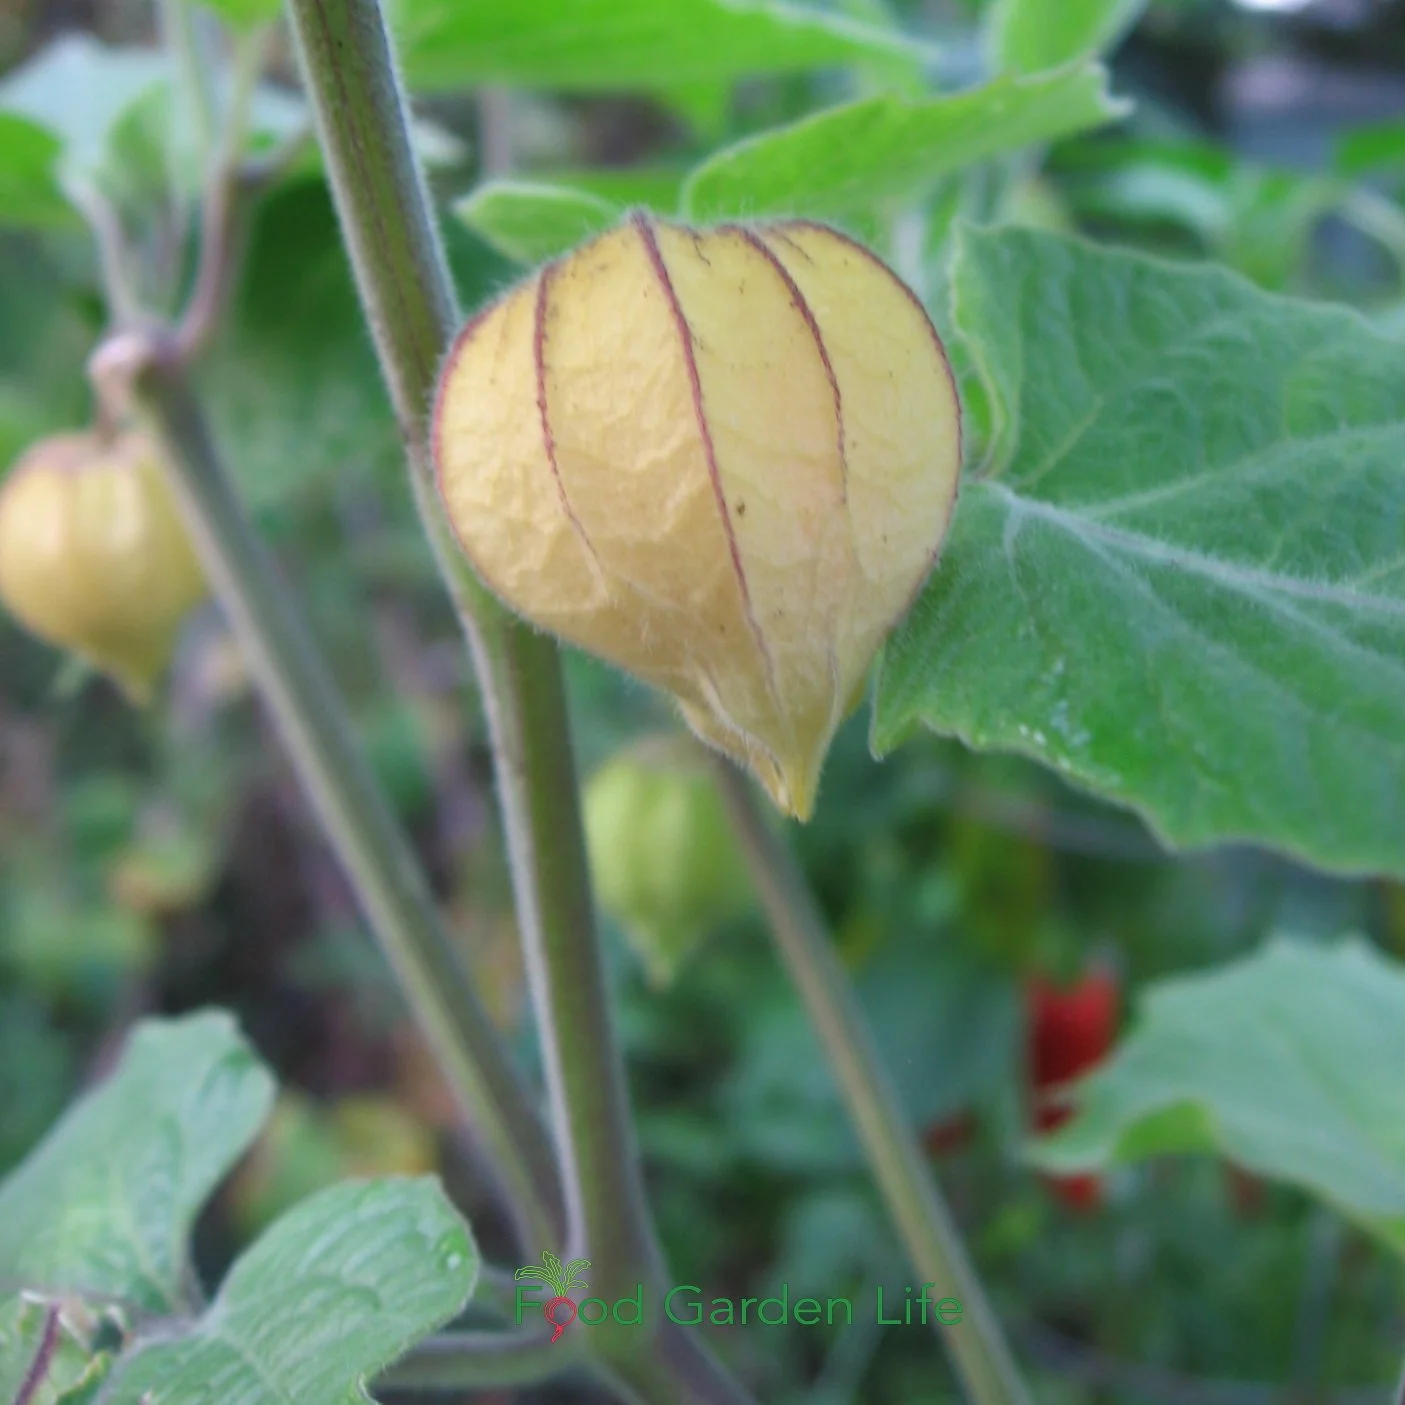
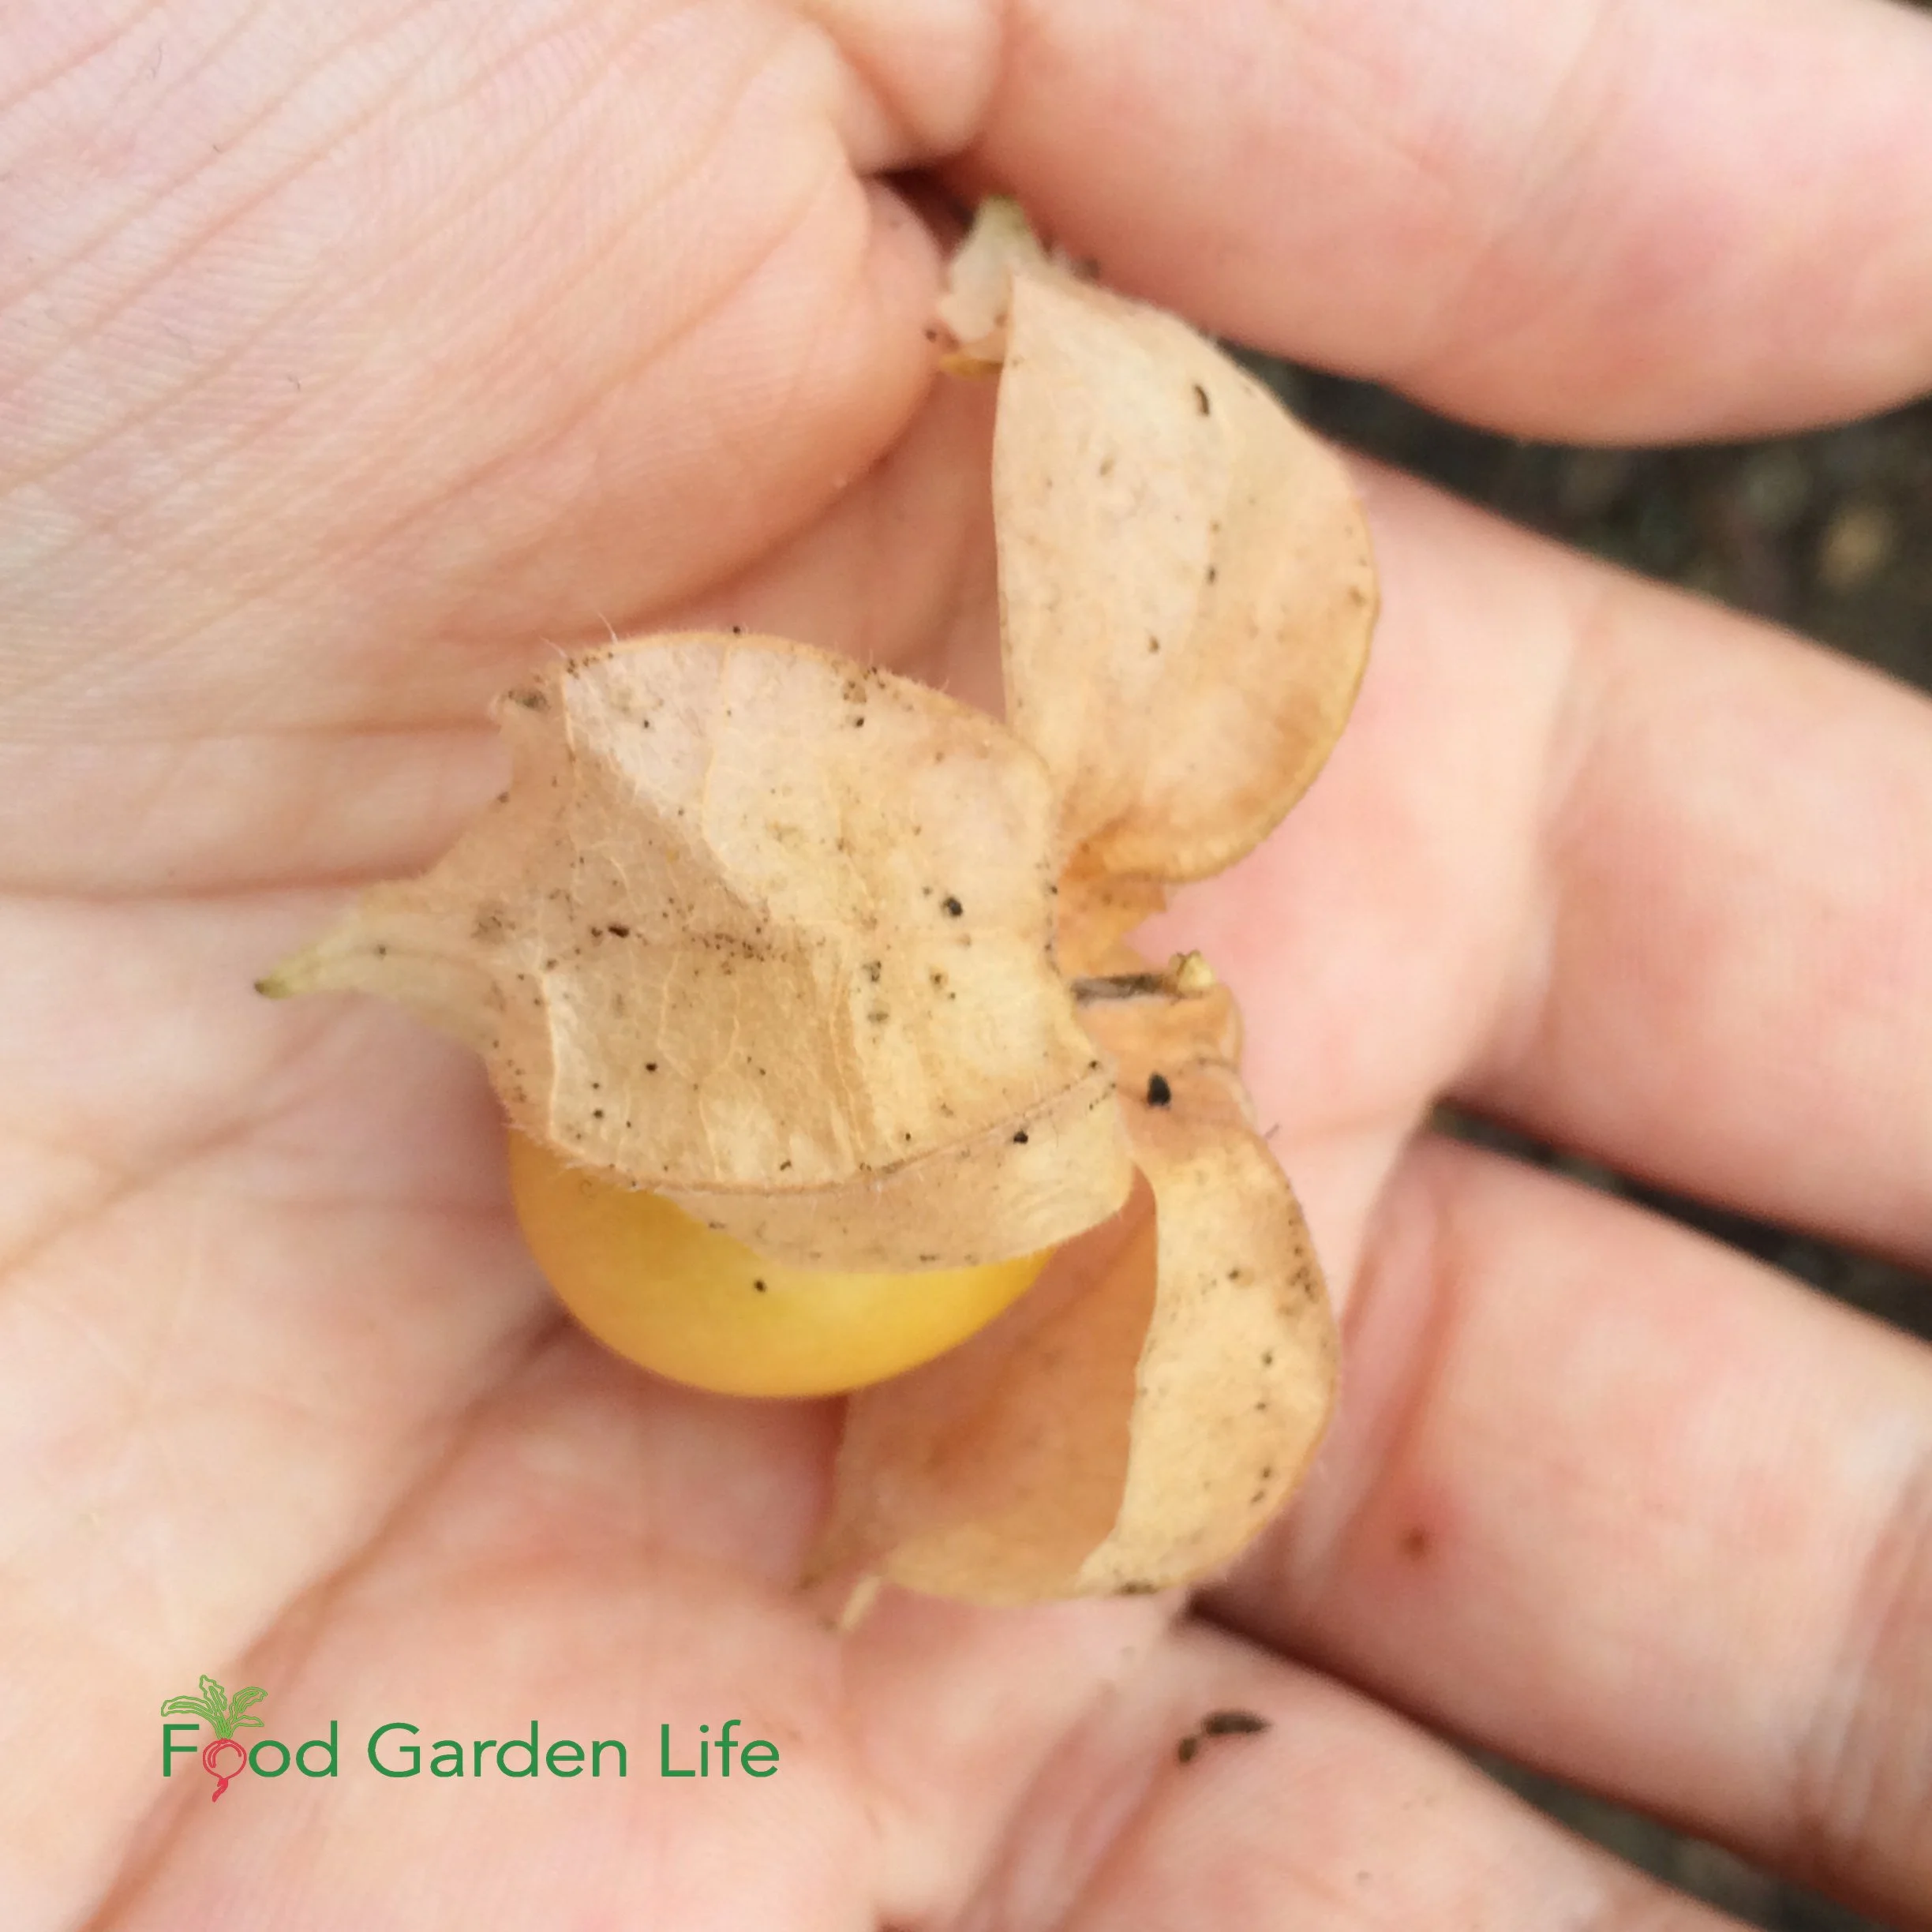
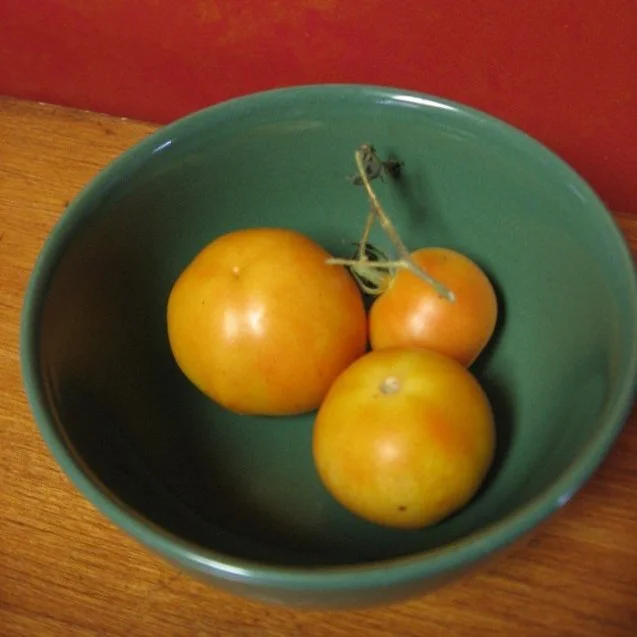
As you peel back the papery husk, inside you find a round, shiny yellow- or orange-coloured fruit.
(The whole business of peeling back the husk makes them very fun for kids...and adults too!)
In this article we take a look at the ground cherry (Physalis pruinosa) and its lesser known cousin, the cape gooseberry (Physalis peruviana). They're both part of the nightshade clan—in the same plant family as tomatoes, peppers, tomatilloes, potatoes, and eggplants.
But they don't taste a bit like epplant or pepper, as you'll read below.
Ground Cherries
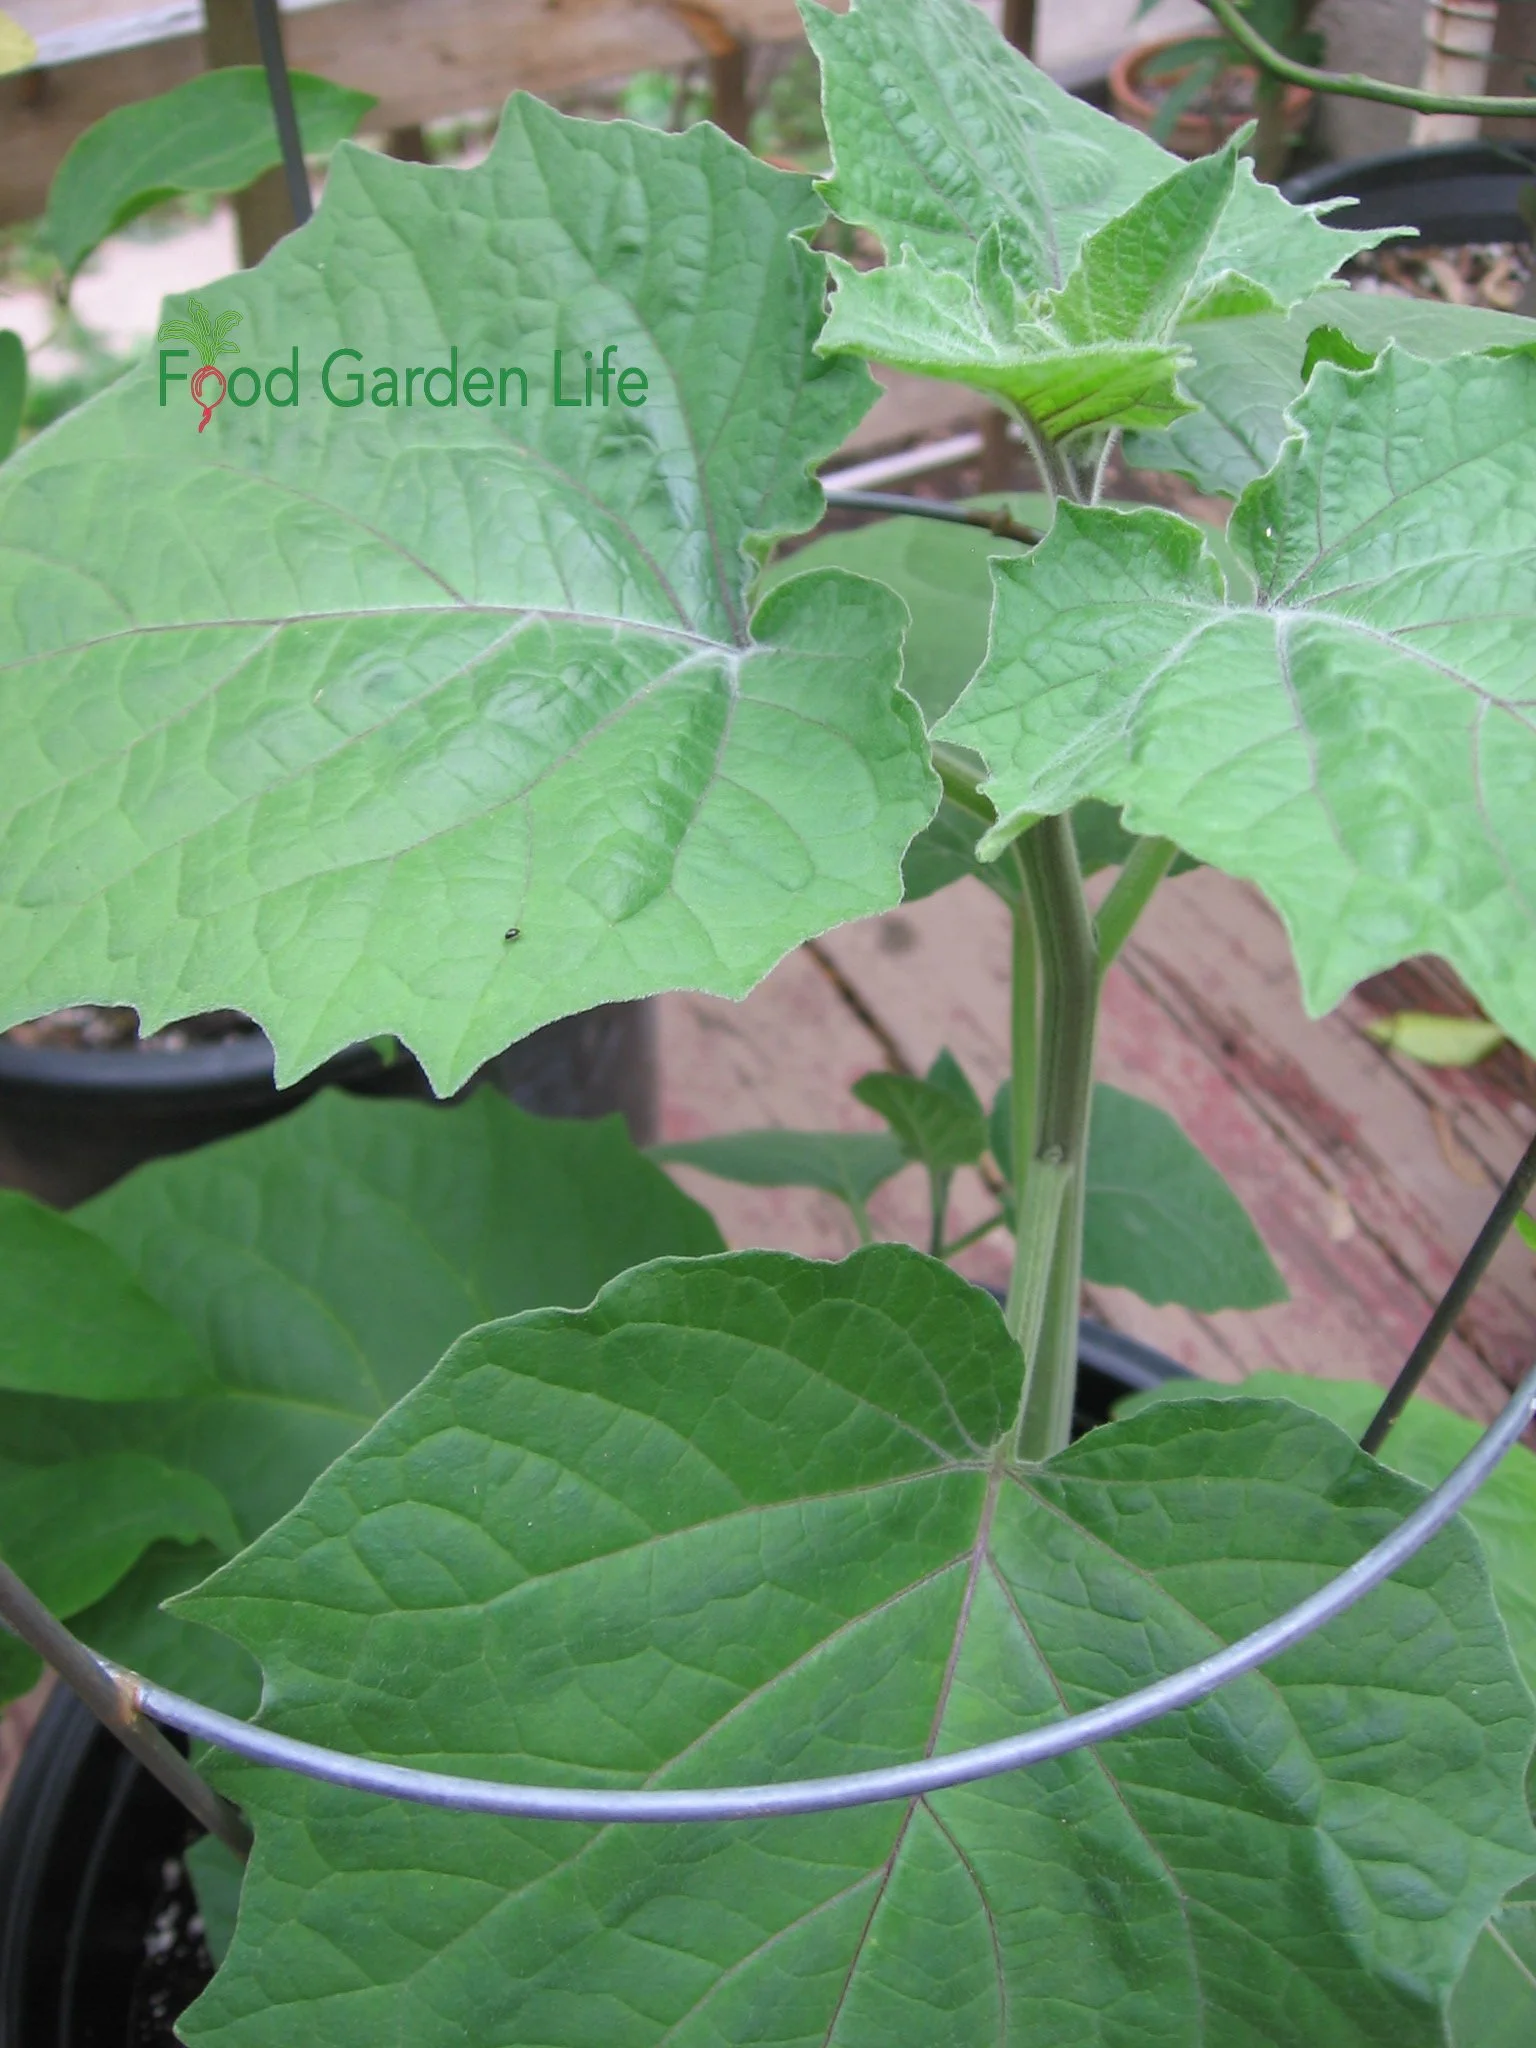
Ground cherry plants are fast-growing and sprawling, with small yellow-and-black flowers. They're probably the easiest to grow out of the nightshade clan.
A ground cherry plant will grow up to about one metre (3') high.
The taste of the berry is sweet and fruity. Some people liken them to pineapple.
Ground cherries are called by a few different names, including husk tomato, husk cherry, strawberry tomato, and golden cherry.
Cape Gooseberries
While it's not related to the true gooseberry, the tanginess of the cape gooseberry might account for it borrowing the name.
I've also seen this fruit called by other names including golden berry, goldenberry, physalis, and Peruvian groundcherry.
Growing cape gooseberry is worth the extra wait. The fruit is slightly larger, more citrusy, and a darker colour than ground cherry fruit.
Cape gooseberry plants are larger and more upright than ground cherry plants, getting up to about 1 ½ metres (4-5') tall. The fruit is slightly larger, citrusy, and a darker colour than ground cherry fruit.
Out of the two husk cherries, I prefer cape gooseberry.
But...there's a tradeoff: It takes longer to mature. As I explain below, there are a couple of things you can do to get cape gooseberries to mature more quickly in a northern garden.
(Cape gooseberry is a perennial in warmer climates...but we grow it as an annual in northern gardens.)
How to Grow Ground Cherries and Grow Cape Gooseberries
Both of these fruits are grown as annual crops in cooler climates. They're a good fit for the veggie garden or a container garden.
To get fruit as early as possible, start seeds indoors.
Start Ground Cherry and Cape Gooseberry Seed Indoors

A tray of ground cherry seedlings. Grow ground cherry and cape gooseberry seeds the same way as tomato seeds.
Treat ground cherry seeds and cape gooseberry seeds the same as you would tomato seeds.
That means:
Plant seeds 6-8 weeks before the average last frost date for your area
Plant cape gooseberry seeds earlier, as plants are slower to mature in cold climates (I aim for 8 weeks with mine, while I plant ground cherries about 6 weeks before the last frost)
Heat from below helps to speed up germination (a heat mat, or placing seed trays on a heated floor or radiator)
One other thing to think about:
Both of these crops self-sow, meaning that fallen fruit that you don't pick up gives you lots of little "volunteer" plants the following year.
Because ground cherries grow fairly quickly, I often let some of these little ground cherry plants grow. They fruit later than my transplants, but are still worth the space. But don't bother with volunteer cape gooseberry plants in a northern garden...they need too long a season.
Grow Ground Cherry Seeds
Ground cherry with the husk peeled back. They make a great garnish!
There are a few varieties of ground cherry seeds available.
Common ground cherry varieties include:
Aunt Molly’s
Cossack Pineapple
Golden Husk
There are also lots of unnamed ground cherry seeds for sale.
When it comes to cape gooseberry, I've never seen any named varieties.
Transplanting Ground Cherry and Cape Gooseberry Seedlings
Time your transplanting as you would for tomatoes.
You can transplant ground cherry and cape gooseberry seedlings into the garden when there is no longer any danger of frost and the daytime temperature is warm. I aim for 15-20°C (60-68°F).
If you've already transplanted your seedlings and the temperature dips, place floating row covers over them to keep them a bit warmer.
And don't forget the soil temperature: Cool soil sends them into a tizzy. If it's been a late spring, and the air is warm but the soil hasn't had time to warm up, it won't hurt to wait a bit before planting them.
Choose a Location
Ground cherries and cape gooseberries grow well in a wide variety of soil types.
Avoid very heavy and wet soils.
A raised bed is a great option for the cape gooseberry plant. That's because the soil in raised beds heats up more quickly in the spring—and that extra soil heat is helpful in a short season.
How to Plant Ground Cherries
When planting outdoors in the garden, space ground cherries and cape gooseberries about 60 cm (2') apart.
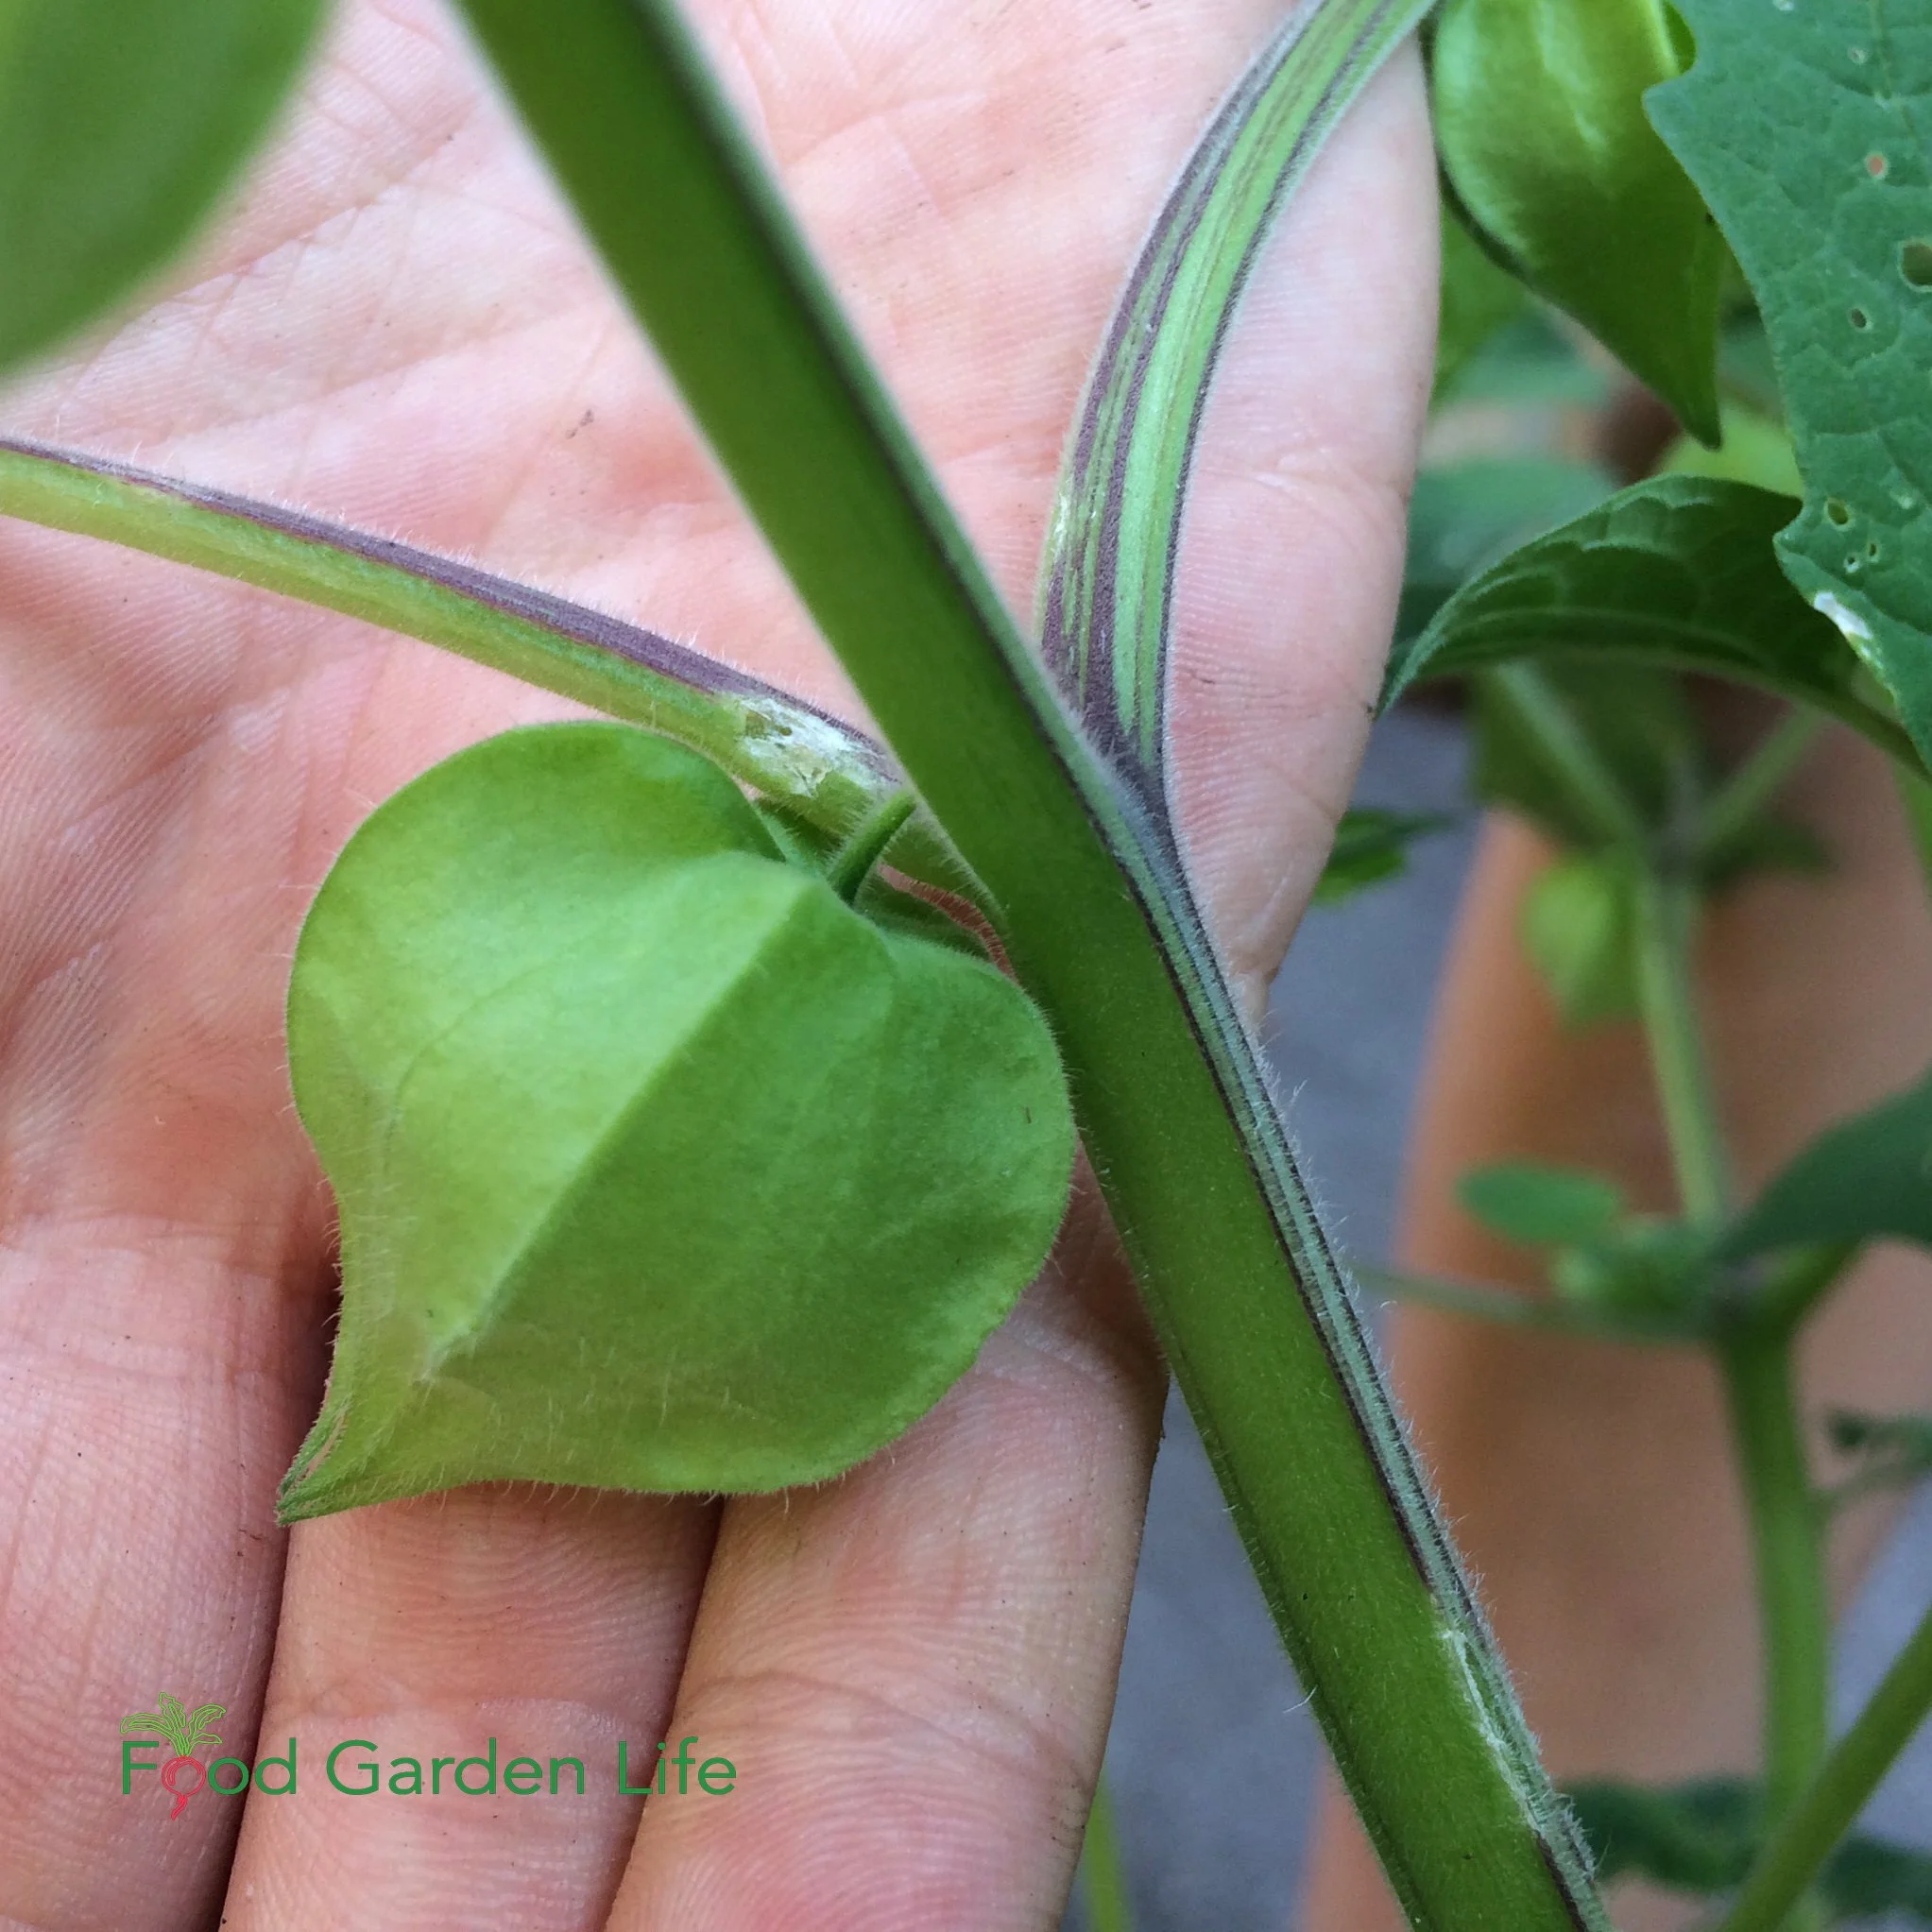
As you transplant seedlings, keep the soil level the same—don't bury the stem as is commonly done with tomatoes. That's because ground cherries and cape gooseberries don't root as readily from the stem as tomato plants do.
And here's something you'll be glad you did once harvest time rolls around: Mulch around the plants so that fruit that falls to the ground stays clean.
Growing Ground Cherries
Because cape gooseberry plants have a more upright growth, they benefit from a tall cage.
With their squat growth, ground cherries don't need any support or special training.
If you want, you can keep the plant a little bit more upright using a cage—but there's really no need.
Growing Cape Gooseberries
Because a cape gooseberry bush has a more upright growth, it benefits from a tall cage—or even from staking so that it doesn’t bend over on a windy day.
How to Grow Ground Cherries in Containers
Grow cape gooseberry and ground cherry in containers for an earlier harvest.
Container growing has two advantages in a home garden:
Warm Soil: The soil in containers heats up faster than the soil in the garden
Heat: You can situate containers for maximum heat and sunlight to speed up harvest (e.g. next to a warm wall or on a warm driveway)
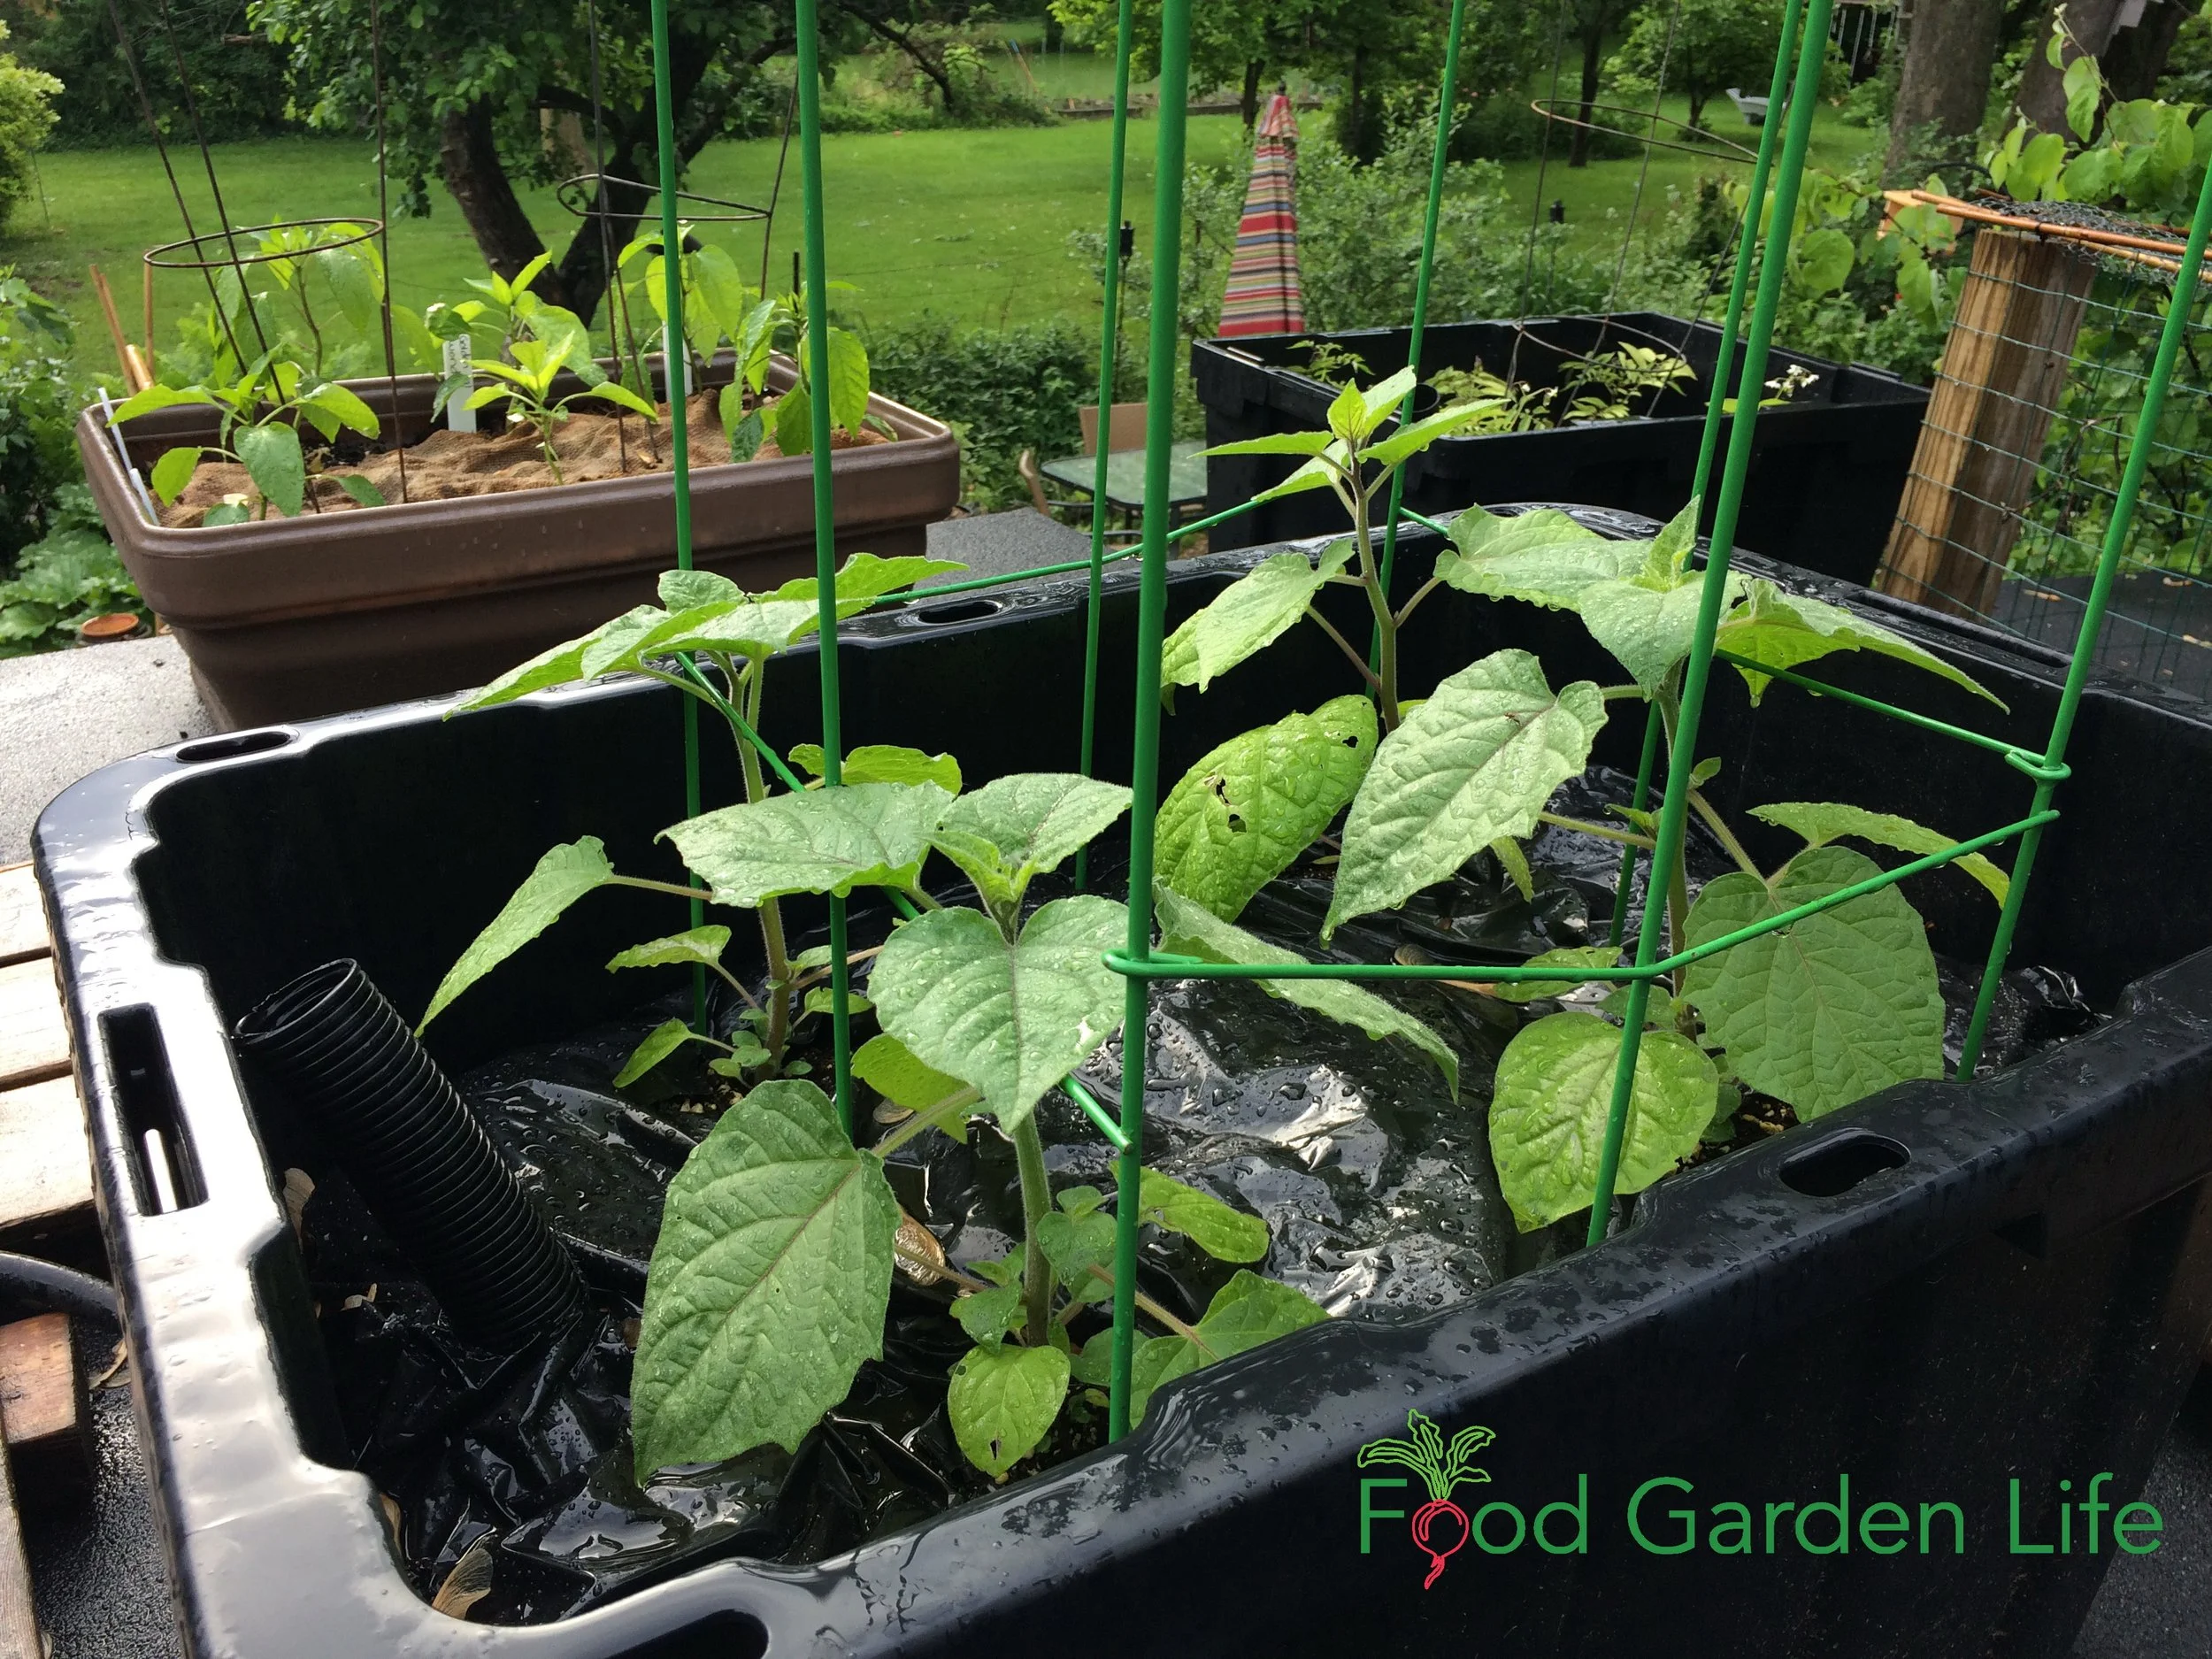
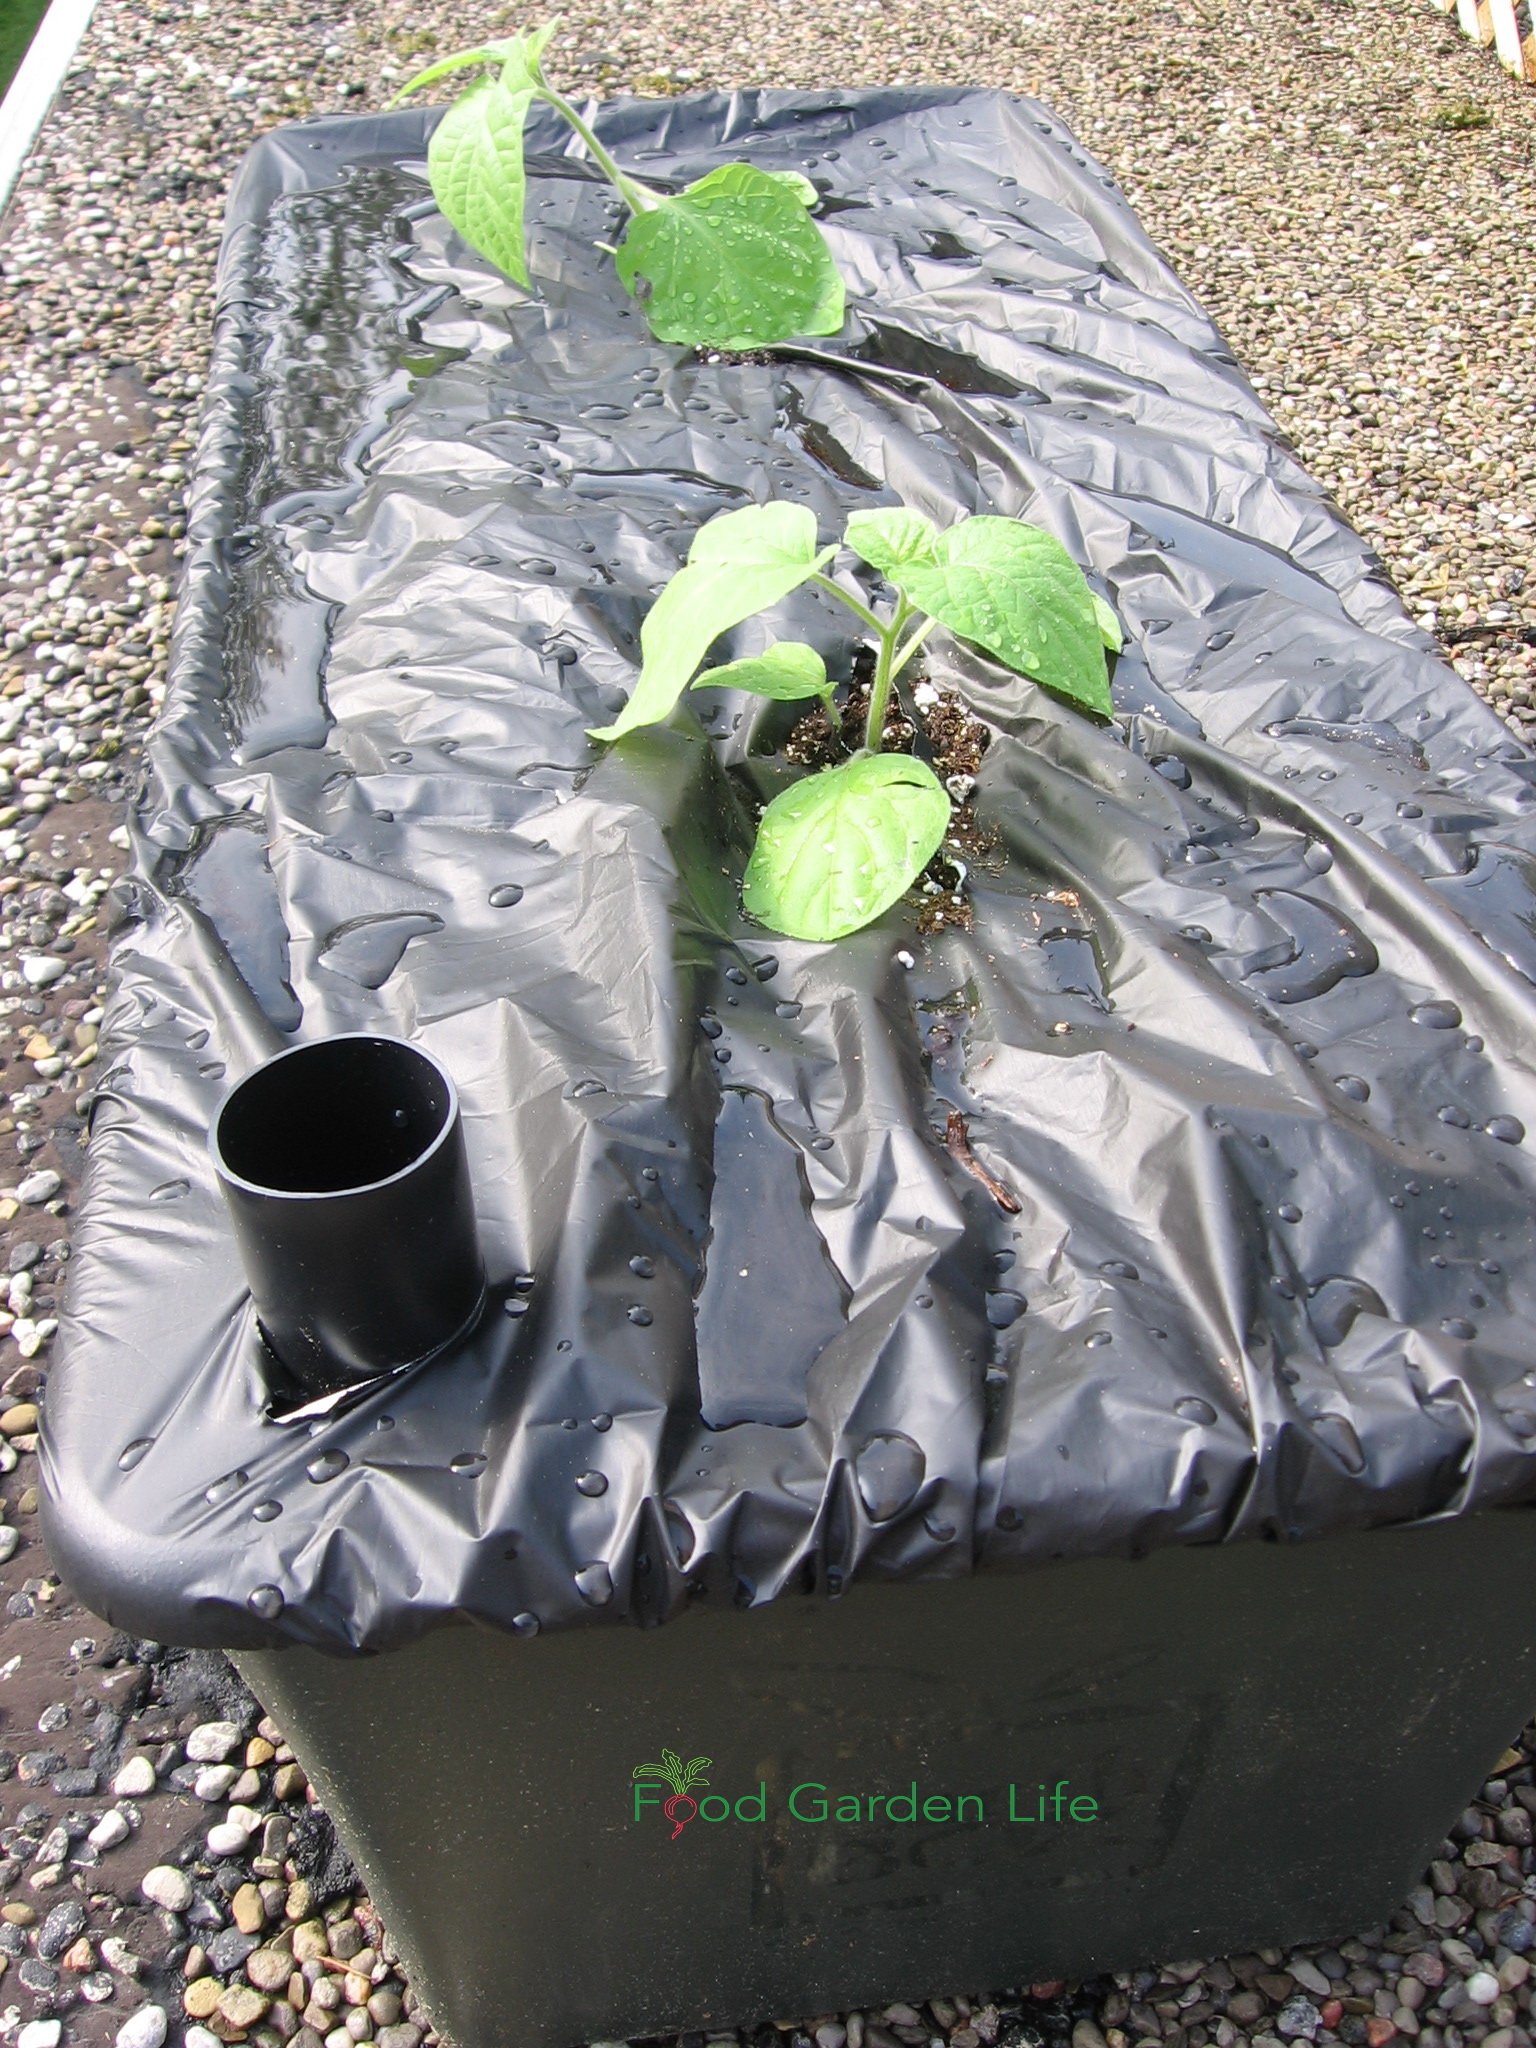
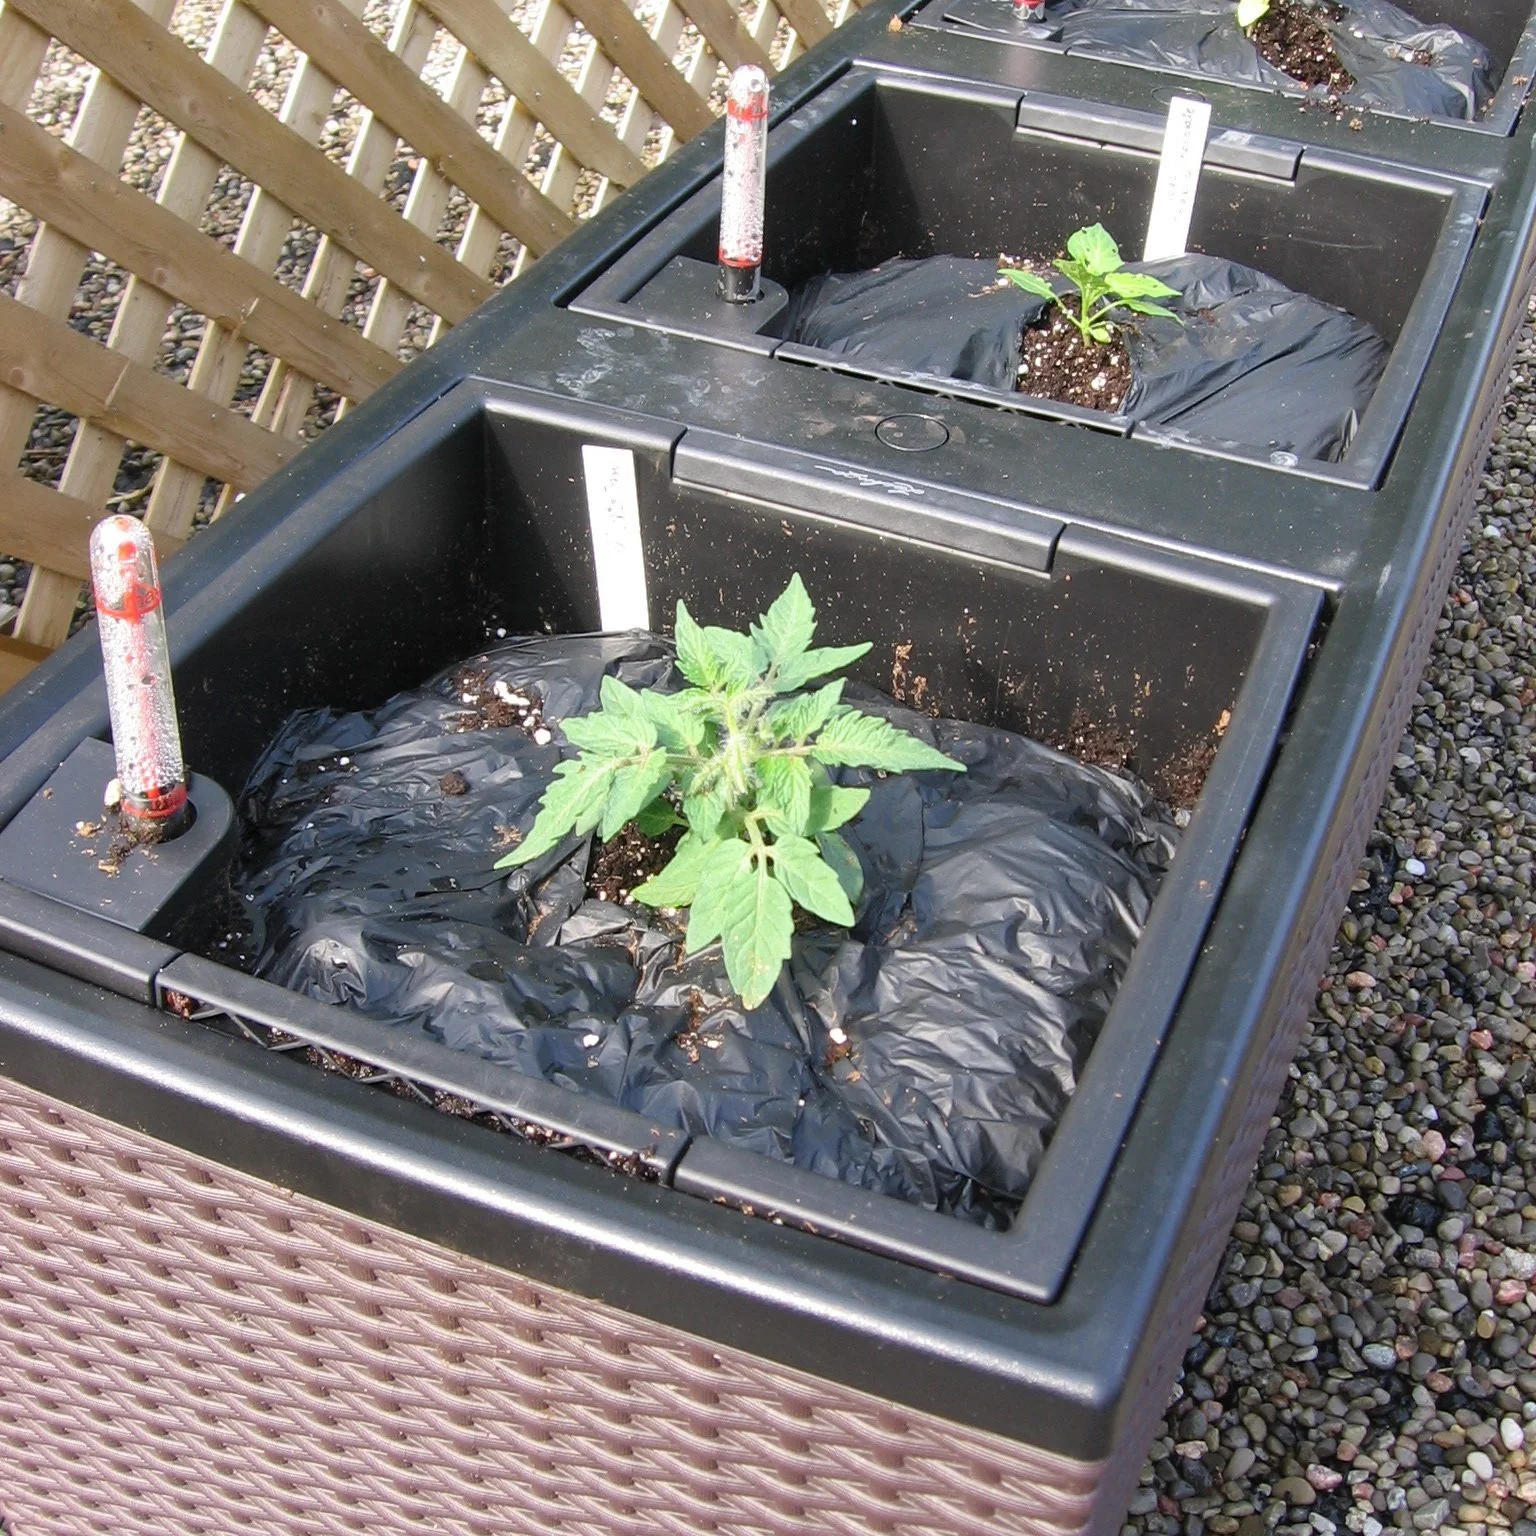
Cape gooseberry plants benefit from extra heat in cool climates with a short season. This black sub-irrigated container has warm soil, and gives constant soil moisture.
Consistent soil moisture, warm soil, and well-fed soil give the best results.
To maintain soil moisture, consider a sub-irrigated pot (self-watering pot.)
Find out how to make your own sub-irrigated pot.
Harvesting Ground Cherries and Cape Gooseberries
The papery husk turns from green to a tan colour as the fruit inside ripens. The colour of the ripe fruit depends on the variety, ranging from light yellow through to a pale orange.
Ripe ground cherries drop off the plant; ripe cape gooseberries remain on the plant.
If the fruit is still green, it's unripe. Don't eat it. That's because, like it's nightshade kin, the stems, leaves, and unripe fruit contain things that can upset your stomach.
Don’t eat green fruit, they contain toxins that cause stomach upset.
If you leave fallen ground cherries on the ground for a while, sometimes all that remains of the papery ground cherry husks is a fine netting—and you can see the golden fruit inside.
Store Ground Cherries and Cape Gooseberries
Plants continue to grow and flower all season long. So when the first fall frost threatens, you'll have green, unripe ground cherries and cape gooseberries.
Pick these green fruit and let them ripen indoors. When spread out to ripen, many of them will ripen. I put mine on a tray, in a cool room in my basement and enjoy them for weeks after the first fall frost.
Save Ground Cherry Seeds

Each ground cherry fruit is full of many small seeds.
Save and dry ground cherry seed for for the following year. They can stay viable for a few years.
I simply smear some of the seed-filled flesh onto a paper towel. Once it's dry, I put it into an envelope and label it.
Save cape gooseberry seeds in exactly the same way.
Eating Ground Cherries and Cape Gooseberries

Emma shows off a ground-cherry-blueberry crostata she made.
I was once in the Lac St-Jean region of Quebec and found locally made ground cherry liqueur. It was divine—a rich yellow colour, both sweet and tangy.
Fresh ground cherries and cape gooseberries are so tasty that we don't often have a lot left for other uses.
Wondering how to eat ground cherries? There's lots you can do with them:
Ground cherries as garnishes (peel back that papery husk and they look quite attractive!)
Ground cherry jam
Ground cherry cobbler
Ground cherry crostata
Dried ground cherries
Ground Cherry Pests

Three-lined potato beetle larvae enjoying cape gooseberry leaves. Easy to solve with soapy water.
Ground cherries and cape gooseberries are about as trouble-free a crop as you'll get.
If you have a problem, the most common is one of the pests that go after other nightshade crops. They include:
Tomato hornworms
Cutworms
Colorado potato beetle
Three-lined potato beetle
In a home garden, hand pick hornworms and colorado potato beetles. When three-lined potato beetle larvae start making holes in my cape gooseberry leaves, a soapy-water treatment solves the problem.
Prevent cutworm damage by using a newspaper collar around young plants as you transplant them into the garden.
One year a raccoon took a shine to my cape gooseberries...and I'd find empty husks on the ground around the cape gooseberry plants. Toronto has an unusually high density of raccoons, so I don't expect this will be an issue for most people. If it is, a simple solution is to physically exclude the raccoons. Cage the plants. It's what we do with our melons.

Landscape with Fruit
That’s easy to grow in a home garden!
FAQ
Can you grow ground cherries indoors?
There is no need to grow your ground cherry plants indoors, even in a northern climate. That's because you can get a sizeable harvest even where there's a short growing season.
These are nicely branched ground cherry plants. They can get up to about one metre high.
If you really want to grow them indoors (I've never tried) the key would be a light setup suitable for indoor growing. A windowsill over the winter would not be bright enough.
Do ground cherries grow back every year?
The plants die over the winter, but ground cherries often "volunteer," which means new plants grow from seeds left over from prior years.
Are tomatillos and ground cherries the same thing?
No.
Tomatillos (a.k.a. husk tomatoes) produce larger fruit than ground cherries. And unlike ground cherries, the fruit completely fills its husk at maturity, and actually bursts open. While ground cherries are consumed as a sweet, tomatillos are usually picked green for use in savoury dishes.
How many ground cherries do you get per plant?
More than you can count!
How do you overwinter ground cherries?
You don't. Start new plants each spring.
Do ground cherries ripen after picking?
Yes. As the first fall frost approaches, pick green cherries that are almost full size but still green. They will continue to ripen.
Find This Helpful?
Enjoy not being bombarded by annoying ads?
Appreciate the absence of junky affiliate links for products you don’t need?
It’s because we’re reader supported.
If we’ve helped in your food-gardening journey, we’re glad of support. You can high-five us below. Any amount welcome!
More Information About Growing Fruit
Articles
Browse our articles about growing fruit.
Guide to Growing Saskatoon Berries: Planting, Pruning, Care
Courses
Want to Water Less and Harvest More? Try Sub-Irrigated Planters
Find out how to make your own sub-irrigated planter (a.k.a. self-watering container).
By Steven Biggs
Wilted by Noon

When I first started container gardening on my garage rooftop, I watered every morning. But in the heat of summer, my plants were parched and wilting by noon.
A sub-irrigated planter is an excellent way to solve the problem of parched plants. We want to prevent wilting, because it’s a sign of stress. Drying out is a stress for the crop.
And that stress can delay (or reduce!) your harvest.
Consistent soil moisture is best. Not sopping wet. Not dry.
And that’s where a sub-irrigated planter helps: It keeps the potting mix consistently moist, but not too wet.
This sort of planter is also known as a SIP, a self-watering container, or a self-watering planter.
Keep reading and I’ll explain how a self-watering system works and how you can make your own.
What are Sub-Irrigated Planters?
Sub-irrigation planters are simply planters with a water reservoir at the bottom. The reservoir is right under the soil.
Through capillary action, water wicks up through the potting mix, giving plant roots a consistent supply of moisture. Then, as the plants use water in the soil (creating a moisture gradient) more water wicks upwards from the reservoir.
There are many commercially produced sub-irrigated planters available. Some are fairly basic and resemble a normal container. Others have a gauge that shows the water level in the reservoir.
Self-Watering Planters vs. SIPS vs. Sub-Irrigation Planters
These are all different terms used to describe the same thing: Containers that have a water reservoir below, so that moisture can wick up into the soil.
By the way, they are not truly “self-watering.” The gardener must still fill the reservoir. (If you like do-it-yourself projects, you can automate this with irrigation, see below.)
Benefits of Sub-Irrigated Planters

Pin this post!
First, though, let’s look at the benefits of these self-watering containers.
Less waste:
There is less waste of water and fertilizer because it's a closed system, with less runoff
Higher yield because:
A continuously moist growing medium means the plant has no water stress (plant growth can slow, or flowers drop when the plant is under stress…)
When gardening in a container, the growing medium is warmer than soil in the garden, and that means that harvest begins earlier
Fewer weeds because:
The soil surface is not regularly moistened from overhead watering, giving dry surface conditions are not as good for weed seeds to germinate
The other reason that the soil surface is not as wet is that the farther you are from the reservoir, the less moist the soil (remember, it's going against gravity!)
Less disease because:
With no overhead watering, there's less splashing of disease organisms from the potting soil onto the leaves
And with tomatoes, SIPS usually solve blossom end rot (which actually is not a disease, but a physiological disorder that's caused by swings in soil moisture)
And the benefit of a SIP system that goes without saying: You spend less time spend watering!
Where to Grow in a Sub-Irrigated Planter
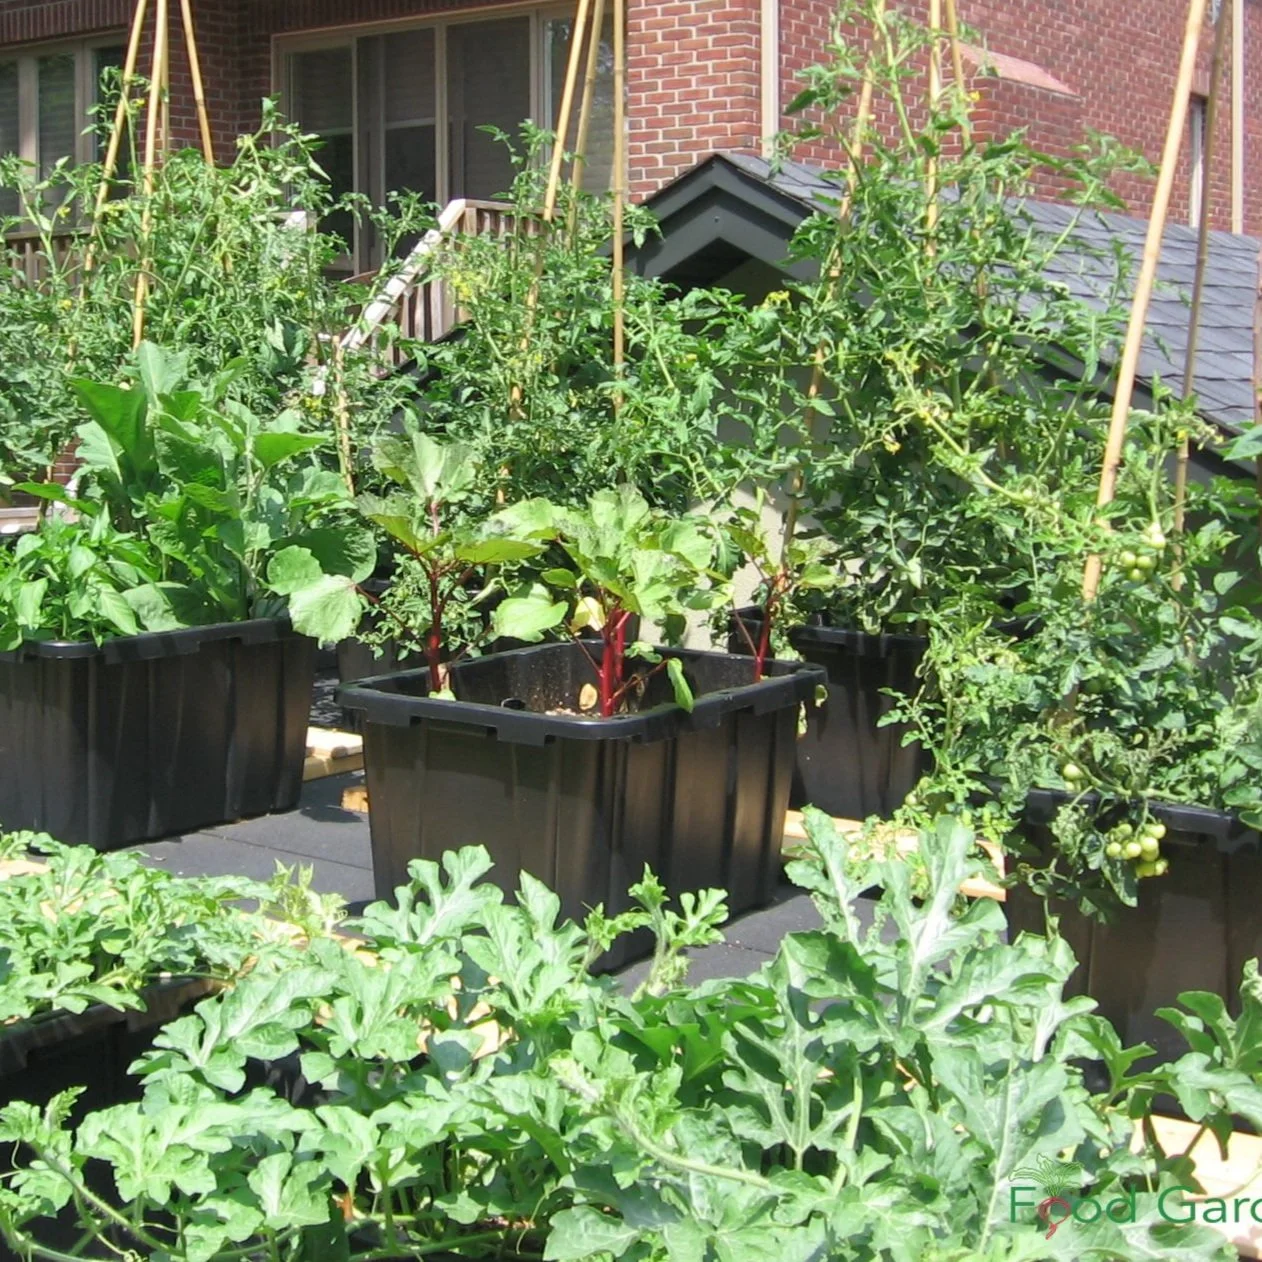
I made a garden on my garage rooftop using sub-irrigated (self-watering) planters.
As with any sort of container garden, a SIP makes it possible to grow on patios, decks, driveways.
You can also use them to grow over top of areas with tree roots or compacted soil.
If you’ve been eyeing up a space next to that water-hungry cedar hedge, this is your solution!
If you’re concerned about soil contamination, making a container garden is a simple solution.
Find out more about soil contamination.
What’s Inside a SIP
Here's what you'll usually find in a self-watering planter.
A water-tight area (the reservoir) at the base of the container (underneath the potting mix)
Something to hold the potting mix above the reservoir area: it could be a false bottom such as mesh, or hollow containers, or tubing
A way to add water to the reservoir (a fill-tube that extends above the soil surface)
A wick (the wick is usually the potting mix itself, but a fabric wick can be used too)
An overflow hole, so that if there's too much water, it can escape
How a Sub-Irrigation Planter Works
Think of how water moves up a sponge. Or put a piece of paper towel in water and watch the water move upwards.
The same thing happens in a self-watering planter.
The water that's stored in the reservoir moves up through the soil.

Create Your Own Unique Edible Landscape
That fits for your yard, and your style!
Plants That Thrive in Sub-Irrigated Planters
Annual vegetable and herb crops do well in sub-irrigation planters.
Avoid plants that are susceptible to root rot when overwatered. (For example, I grow potted lemon trees, and they hate “wet feet,” soil that says consistently wet. Read more about potted lemon trees.)
Potting Soil for Sub-Irrigated Planters
Choose a potting soil with good wicking properties. Do not use garden top soil or sand.
Sometimes this is easier said than done...because you won't find "wicking" on potting soil labels.
(A bargain isn't always a bargain when it comes to potting soil. If you see discounted bags at big-box retailers, be wary.)
The large compressed bales of potting mix made for commercial growers have a more consistently good quality. If in doubt, start with these.
If you're making your own peat-based potting mix, here’s an important point:
There are different qualities of peat. The darker peat from lower down in a bog is not as good at wicking as the lighter coloured, "blond" peat that comes from the top of a bog. Blond peat isn't always available at garden centres; you might need to go to an outlet that supplies commercial growers to find it.
Make Your Own Sub-Irrigated Planter
It's fairly simple to make your own self-watering planters.
Below is a series of pictures from a batch of planters I made for my garage rooftop garden.
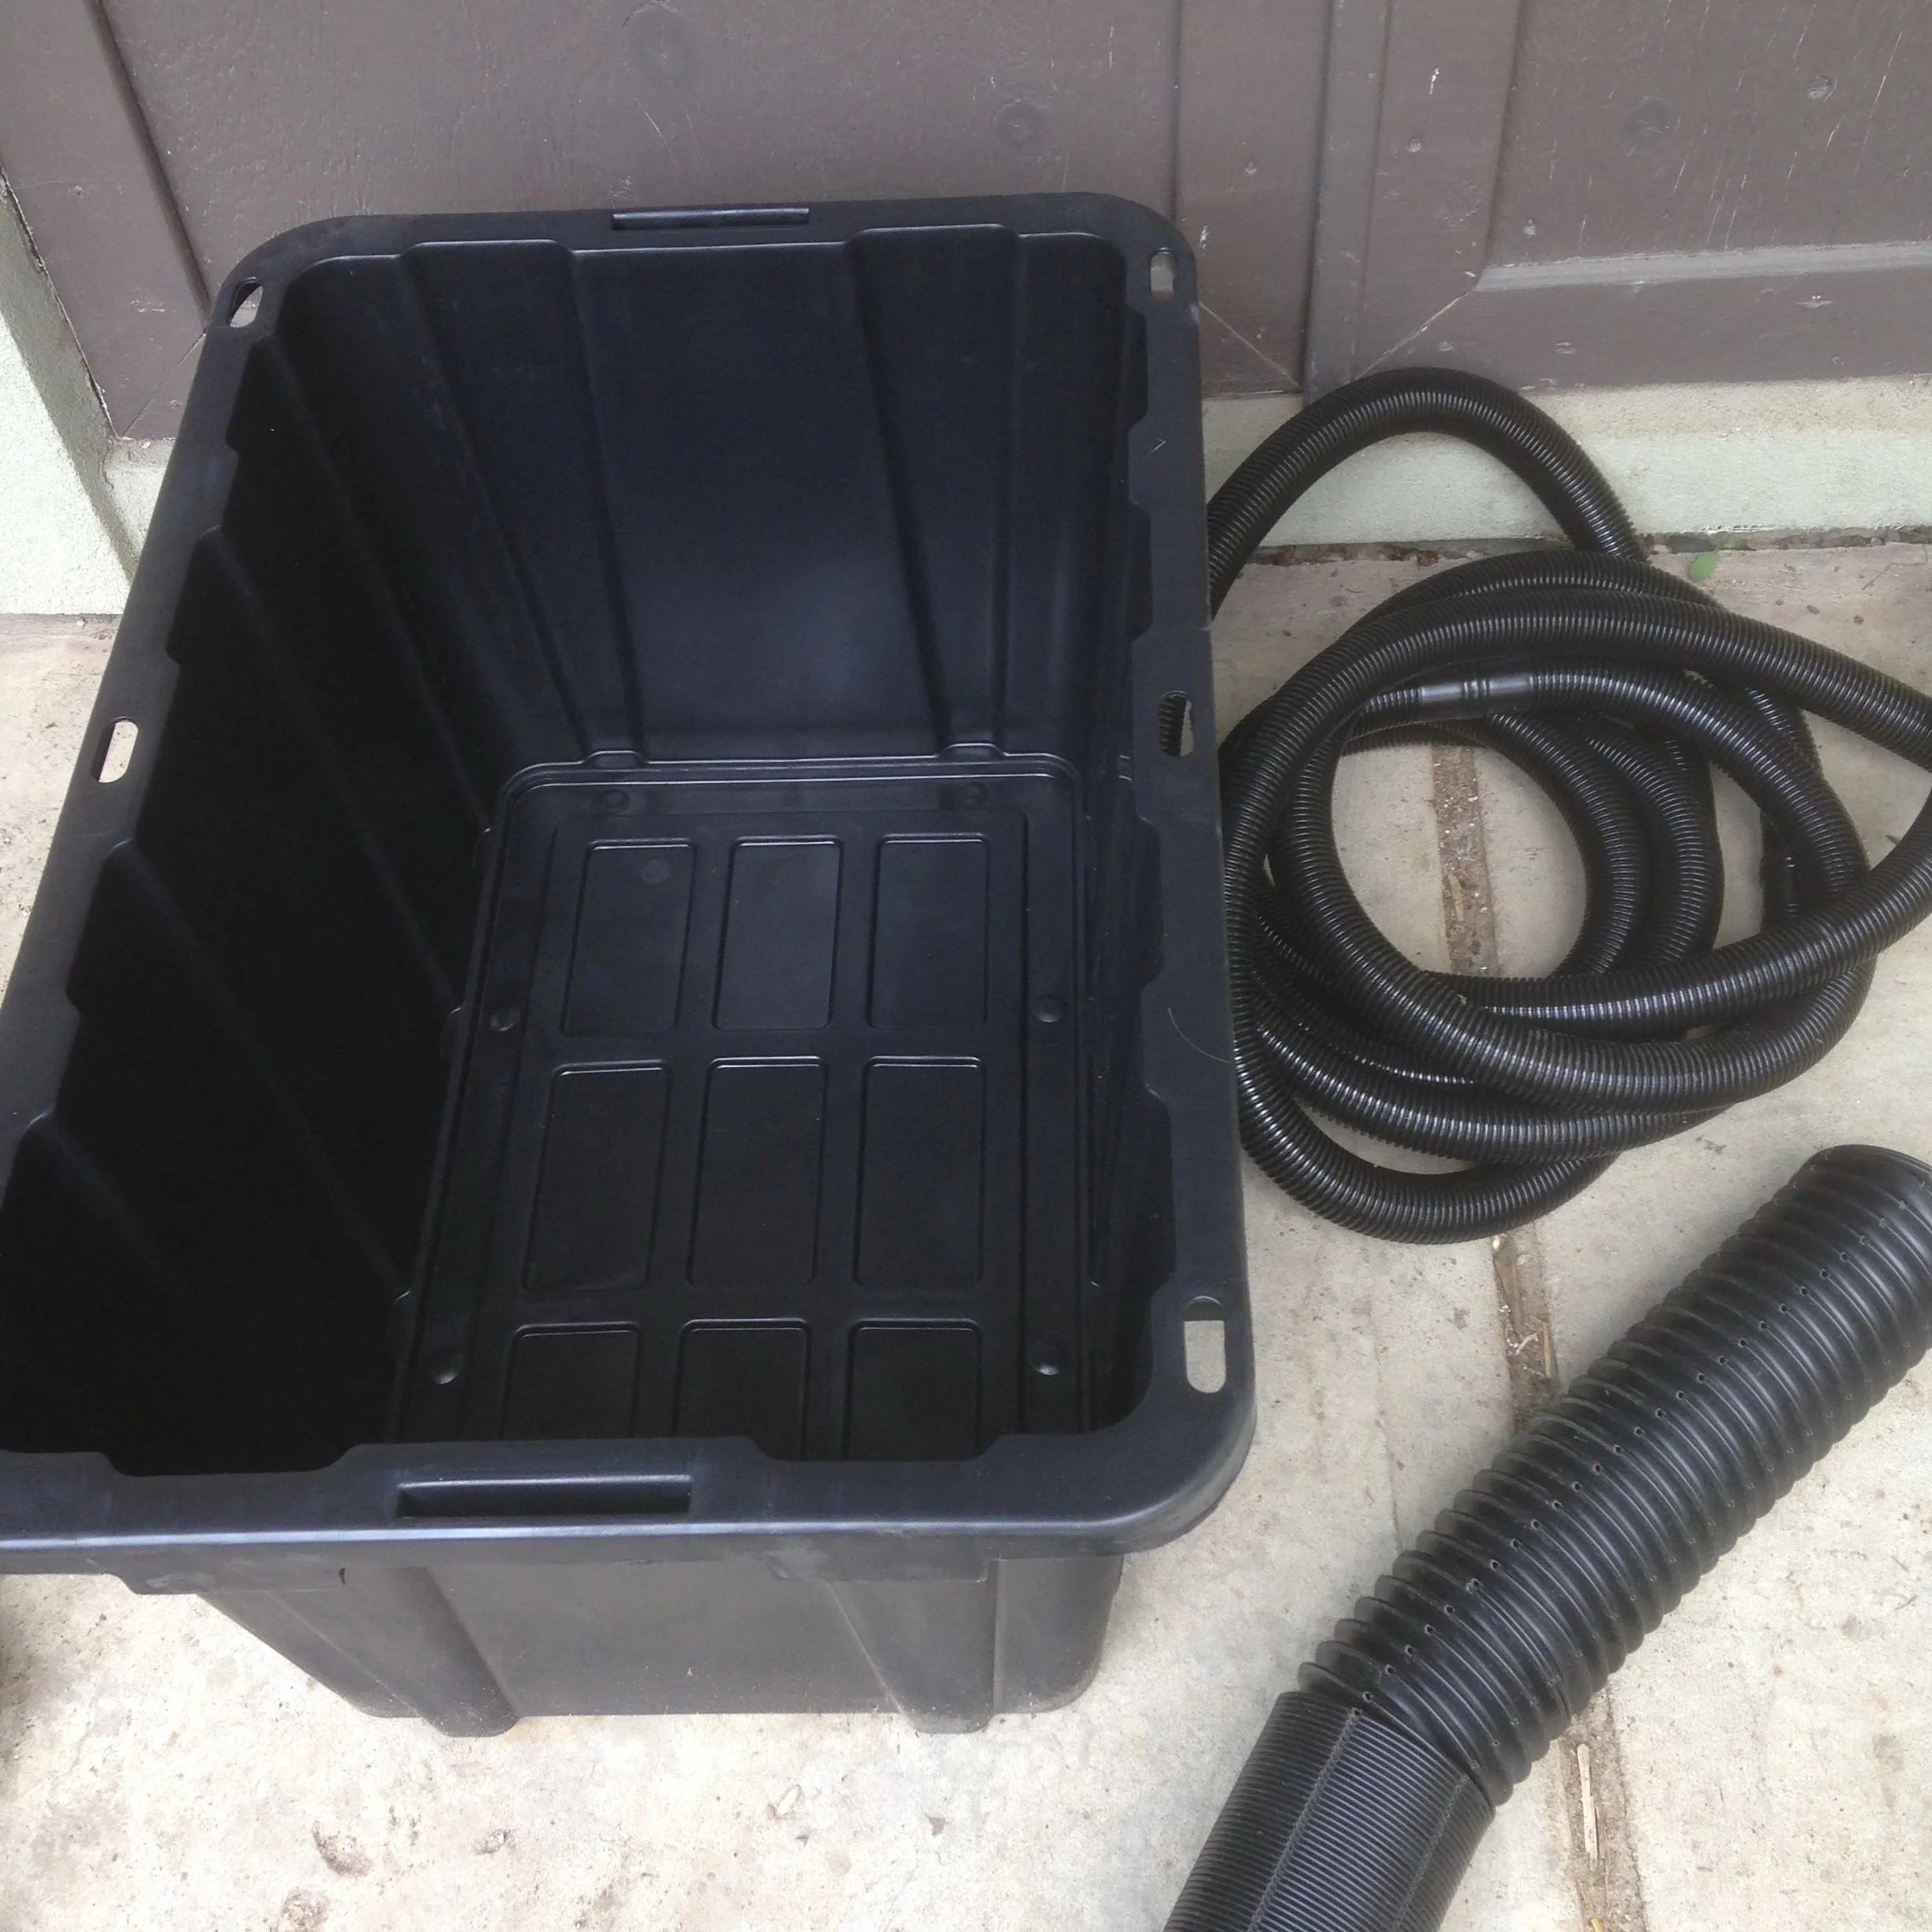
The materials I used were inexpensive, and available at a hardware store:
Plastic storage bin
Weeping tile (4” bendable plastic drain used around the foundation of buildings…the term used for this seems to vary by region)
Dishwasher drain pipes
Landscape fabric
The tools needed to make these were:
Drill to make overflow hole
Saw or utility knife to cut the weeping tile and dishwasher drain pipe
Scissors to cut the landscape fabric
At the time I made these, I spent about $20 per planter, a fraction of what commercially available self-watering planters cost.
Making a Planter, Step by Step
Supplies to Make a Sub-Irrigated Planter
Plastic storage bin
Weeping tile (4” bendable plastic drain used around the foundation of buildings…the term used for this seems to vary by region)
Dishwasher drain pipes
Landscape fabric (not shown)
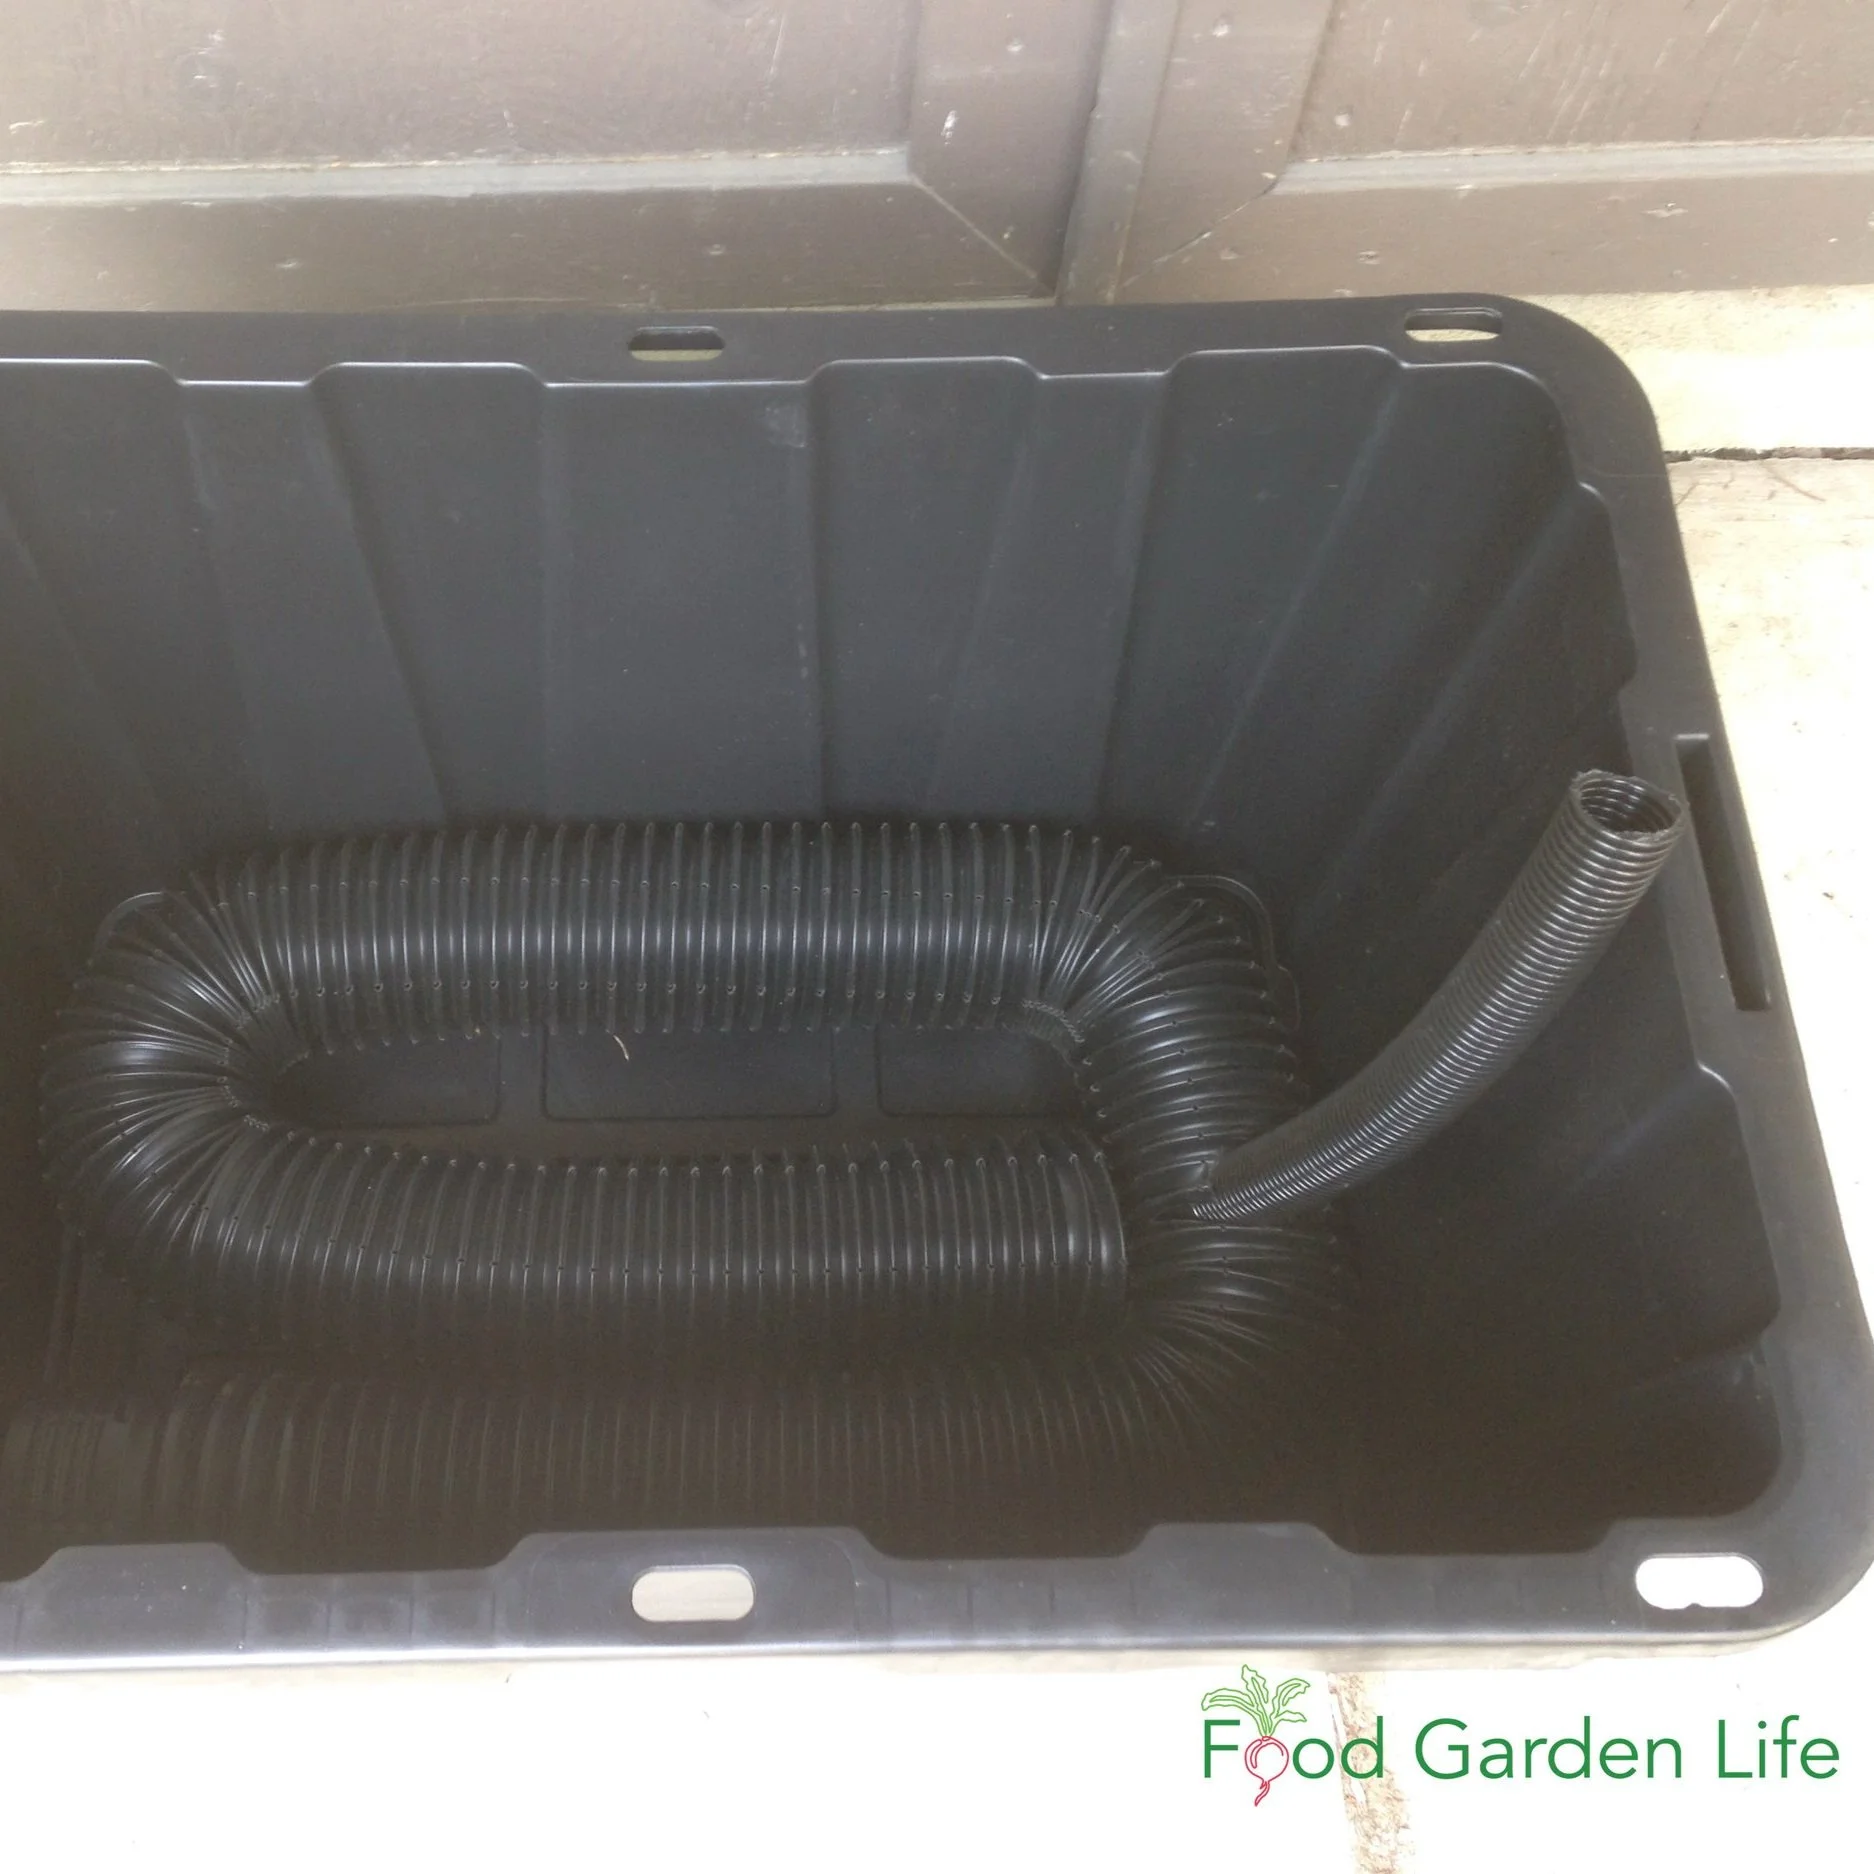
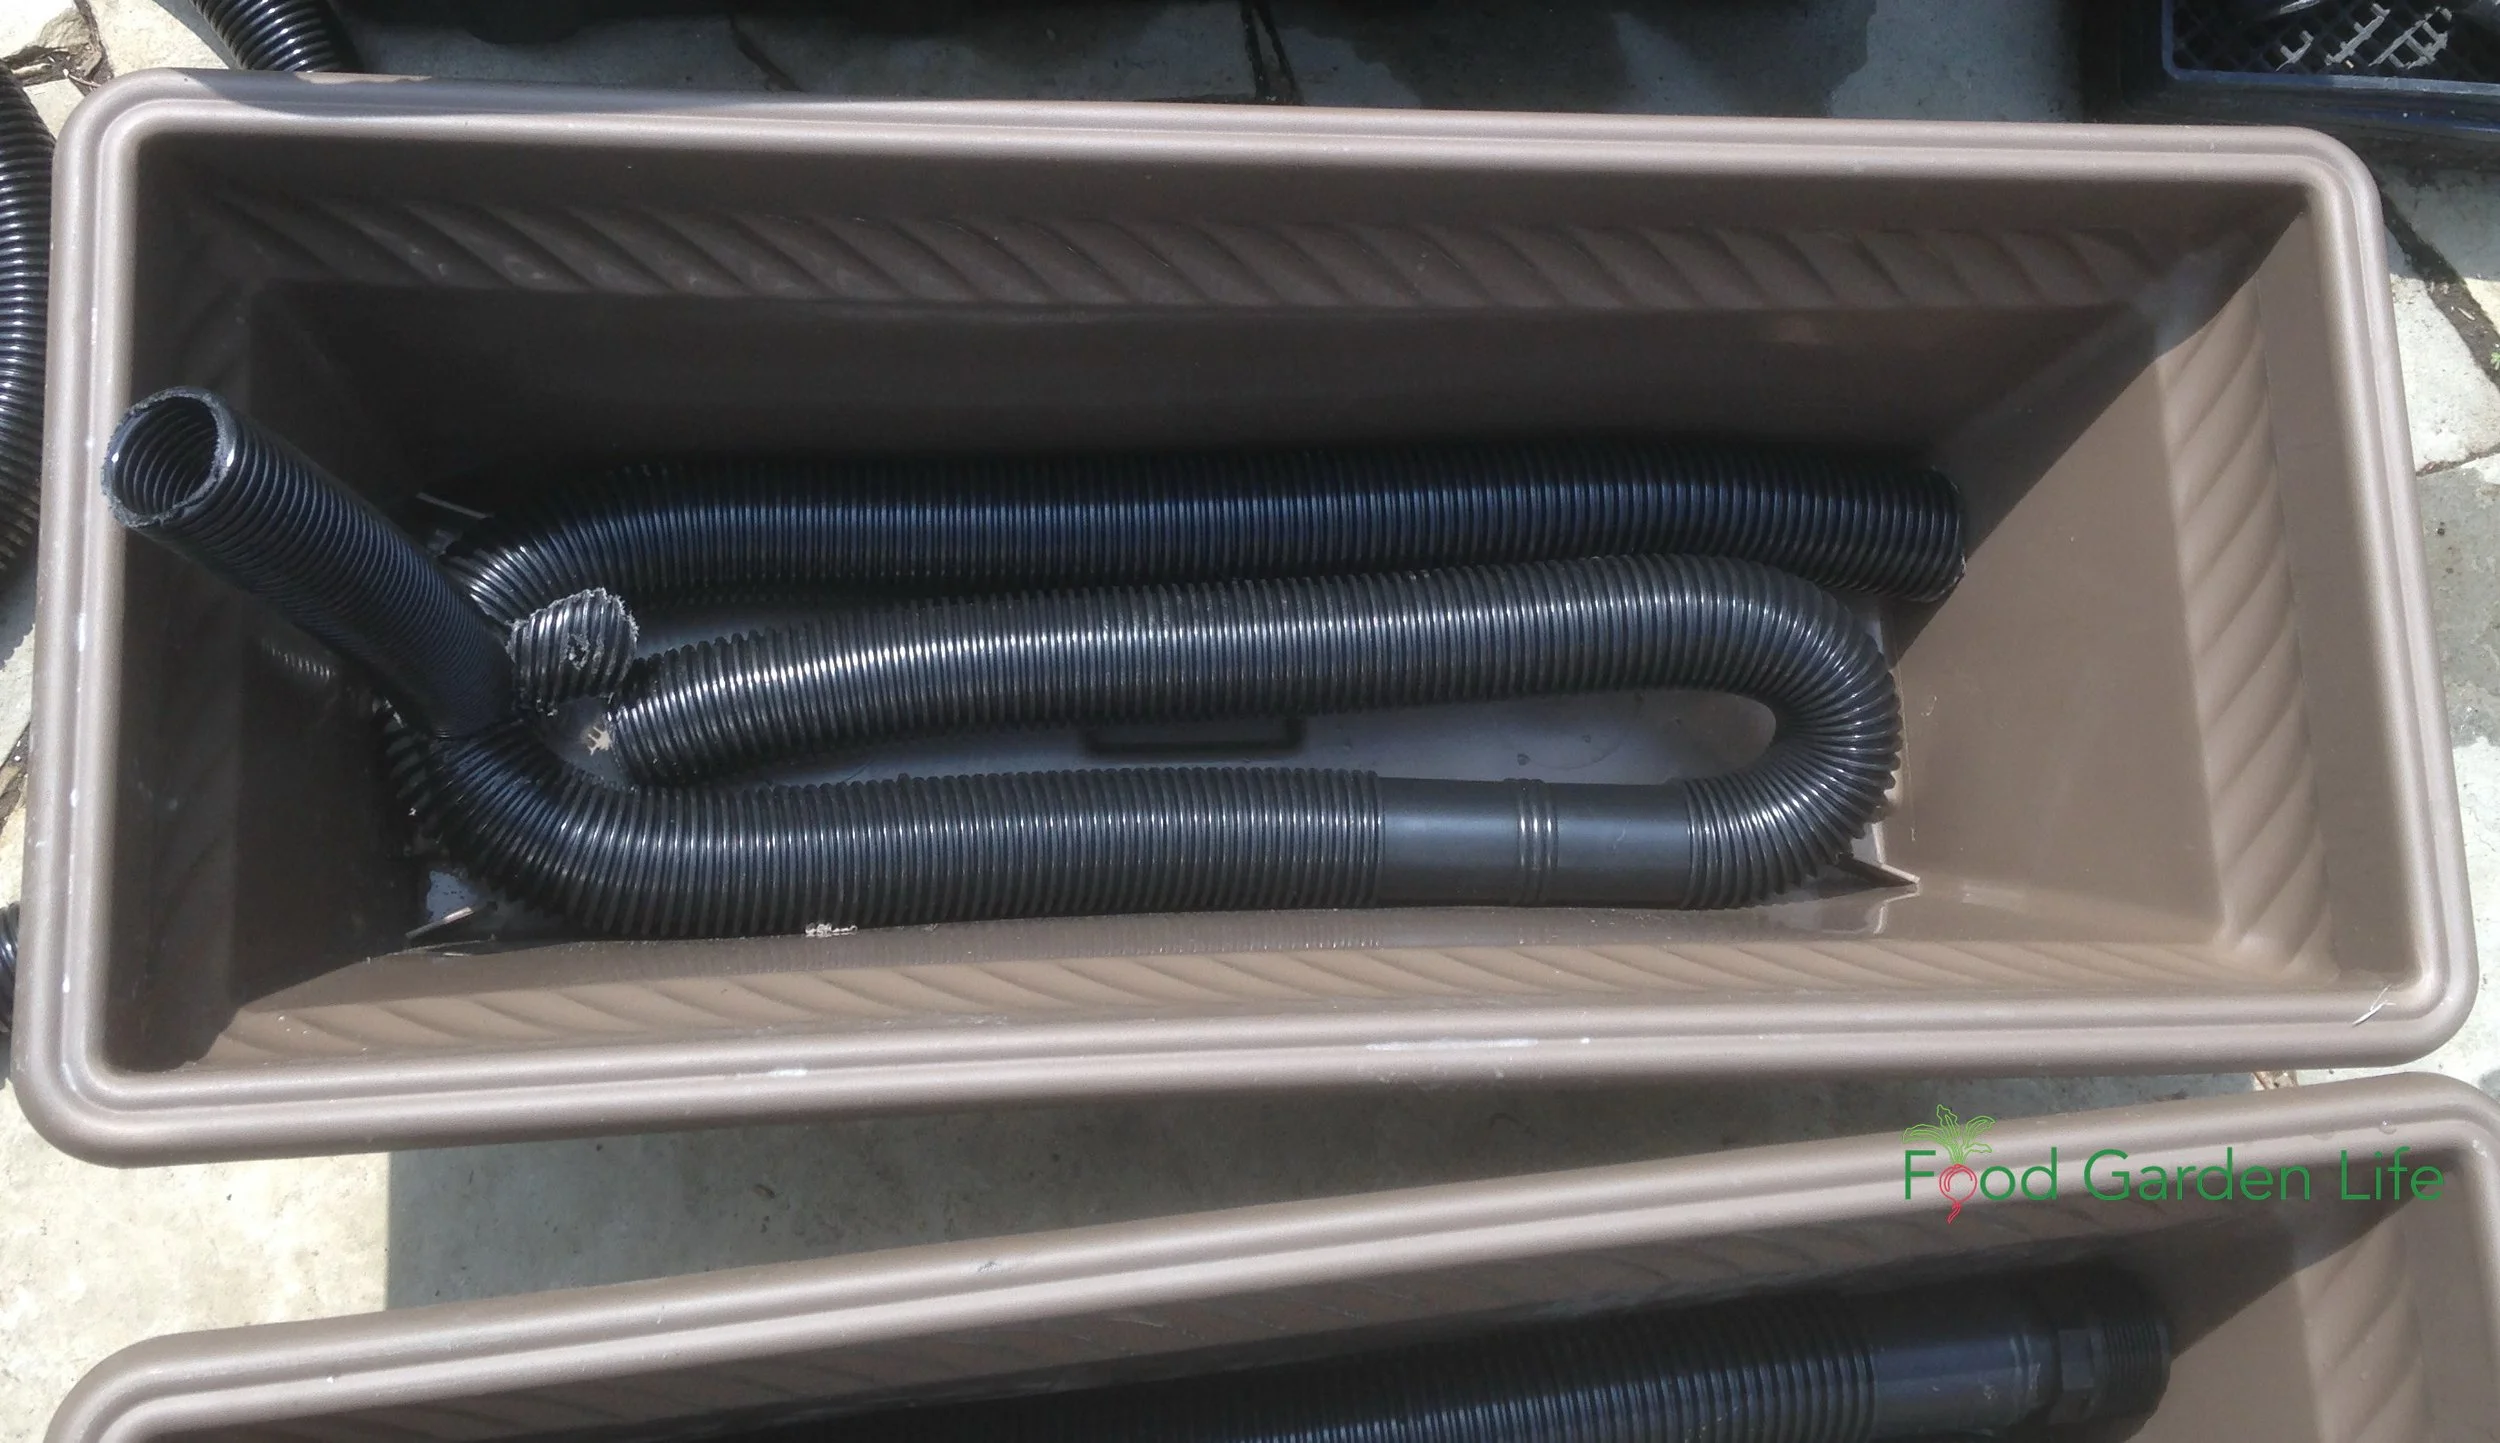
Weeping Tile with Fill Tube
Weeping tile coiled around the bottom of the bin.
A hole cut into the weeping tile with a utility knife allows a piece of dishwasher drain hose to be installed as a fill tube.
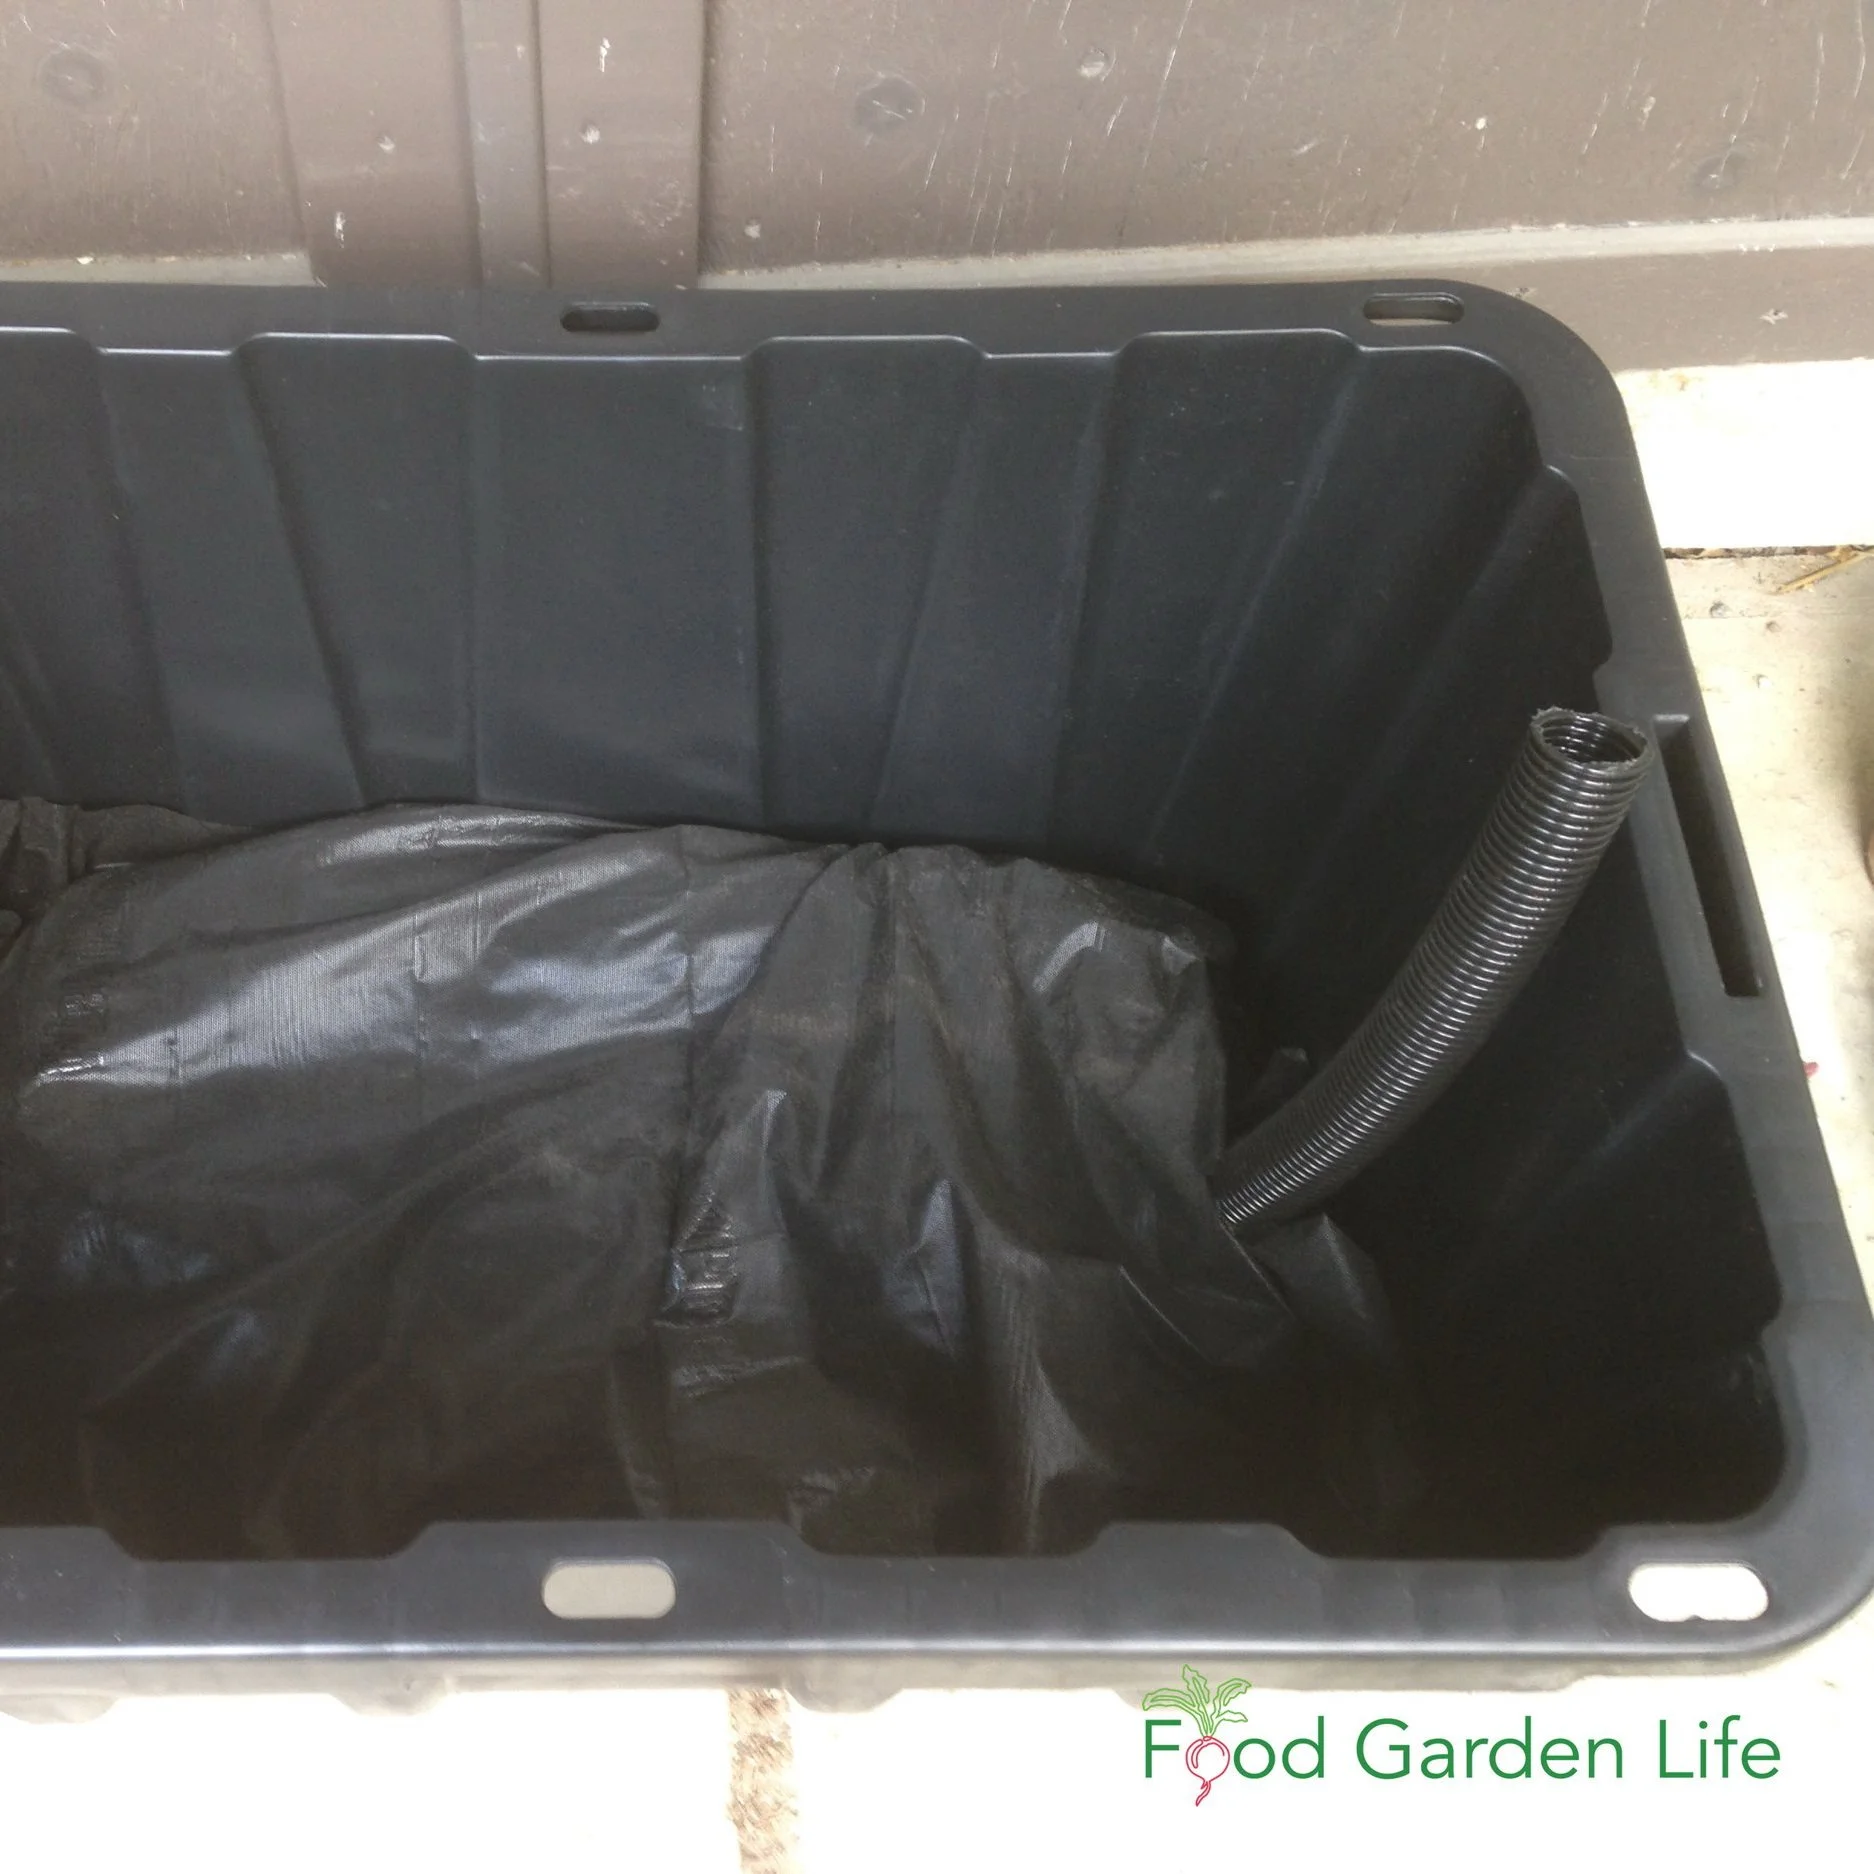
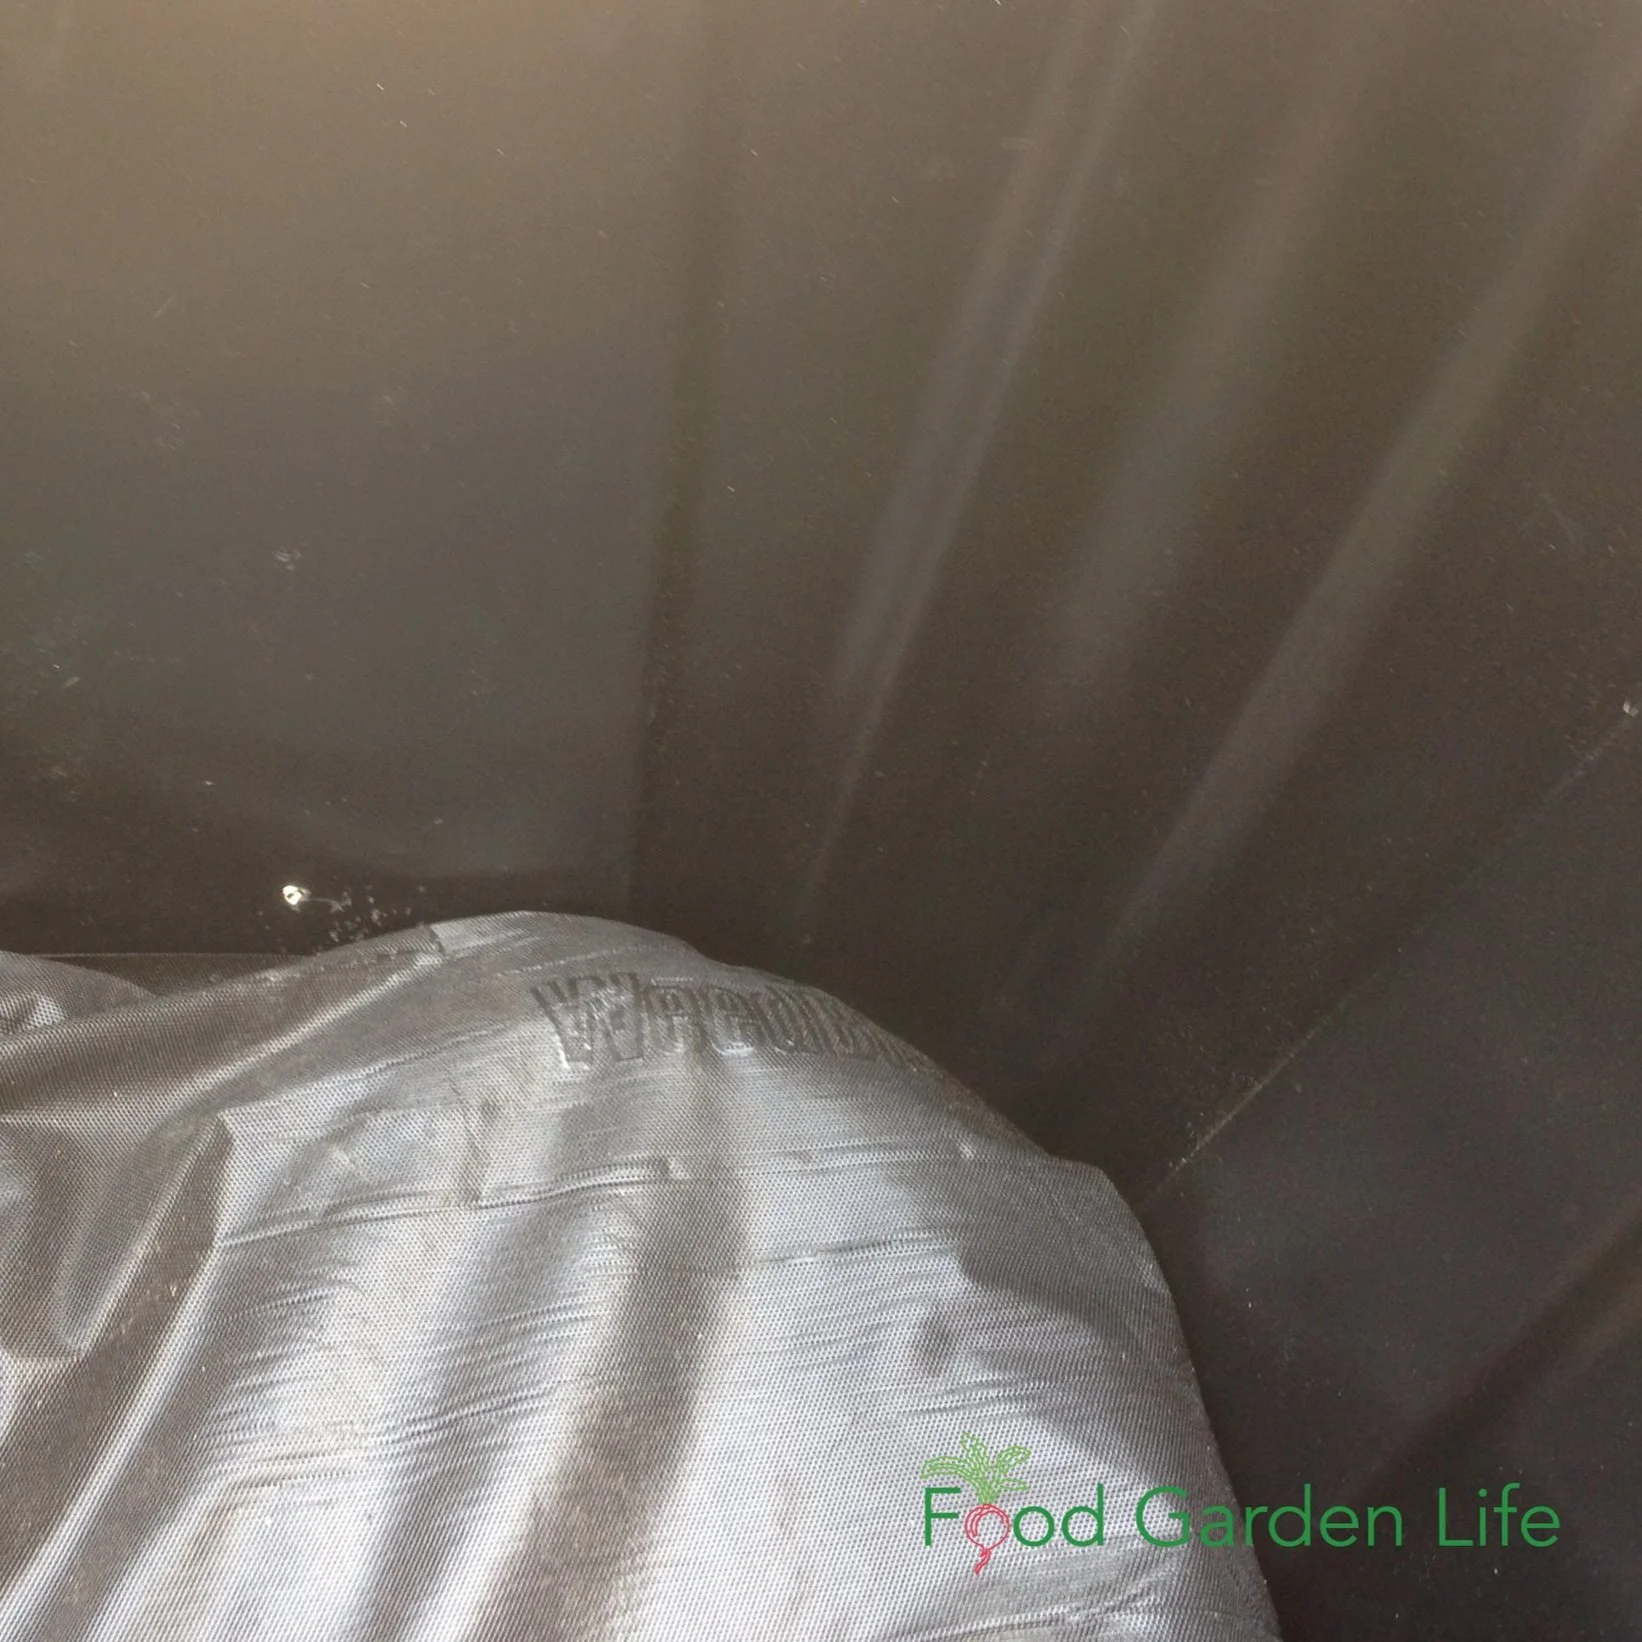
Landscape Fabric
The reservoir space created with the weeping tile is covered with landscape fabric so that potting soil doesn’t fill up the weeping tile.
Don’t Forget This!
Drill a drainage hole near the top of the weeping tile.
The hole shown here was too small…and was blocked by a piece of perlite, so i had to drill a bigger hole.
Recycled Items to Make a Self-Watering Planter
I've also made self-watering systems using materials from the recycling bin, or things we already had on hand.
Here are examples of items you can use:
For the Water-Tight Reservoir

Retrofitting a large plastic pot to make a sub-irrigated planter. The reservoir is made from old flower pots, which are covered with wire mesh. The wick (not shown) is fabric. The mesh is covered with landscape fabric so that the potting soil does not fill up the reservoir.
A water-tight container such as a pail
Or, a liner to make a water-tight area in a container with holes (for example, pond liner or construction plastic)
To Hold the Soil Above the Reservoir Area
Drainage pipe
Downspout extenders
Downspouts
Weeping tile
Upside-down flower pots
Landscape fabric, or old t-shirts
For a Fill Tube
Water bottles
Dishwasher drain hose
Pop bottles (“soda” bottles if you’re in the US)
PVC pipe
Retrofit Containers into a Sub-Irrigated Planter

A hypertufa planter with sub-irrigation.
You can retrofit any traditional pot into a sub-irrigation system…even if they have holes in them.
Use a liner to make a water-tight reservoir area at the bottom, and then create an overflow hole.
Planter Maintenance
Potting mixes lose structure over time as the organic matter decomposes. Plan to refresh the potting mix periodically. How often you need to do this depends on the mix, and the conditions. Pay especial attention to the soil in the lower area that acts as a wick.
If you're using a fabric wick, check it annually to see its condition. Fabrics made from natural fibres break down fairly quickly.
Sub-Irrigated Planter FAQ
How deep should a sub-irrigated planter be?
Making a sub-irrigated planter from a smaller, shallower planter. This is perfect for shallow-rooted crops such as leafy greens.
A soil depth of about 30cm (12") is usually lots. Remember, gravity is working against the wicking action...and when the soil is very deep the water doesn't wick all the way to the top.
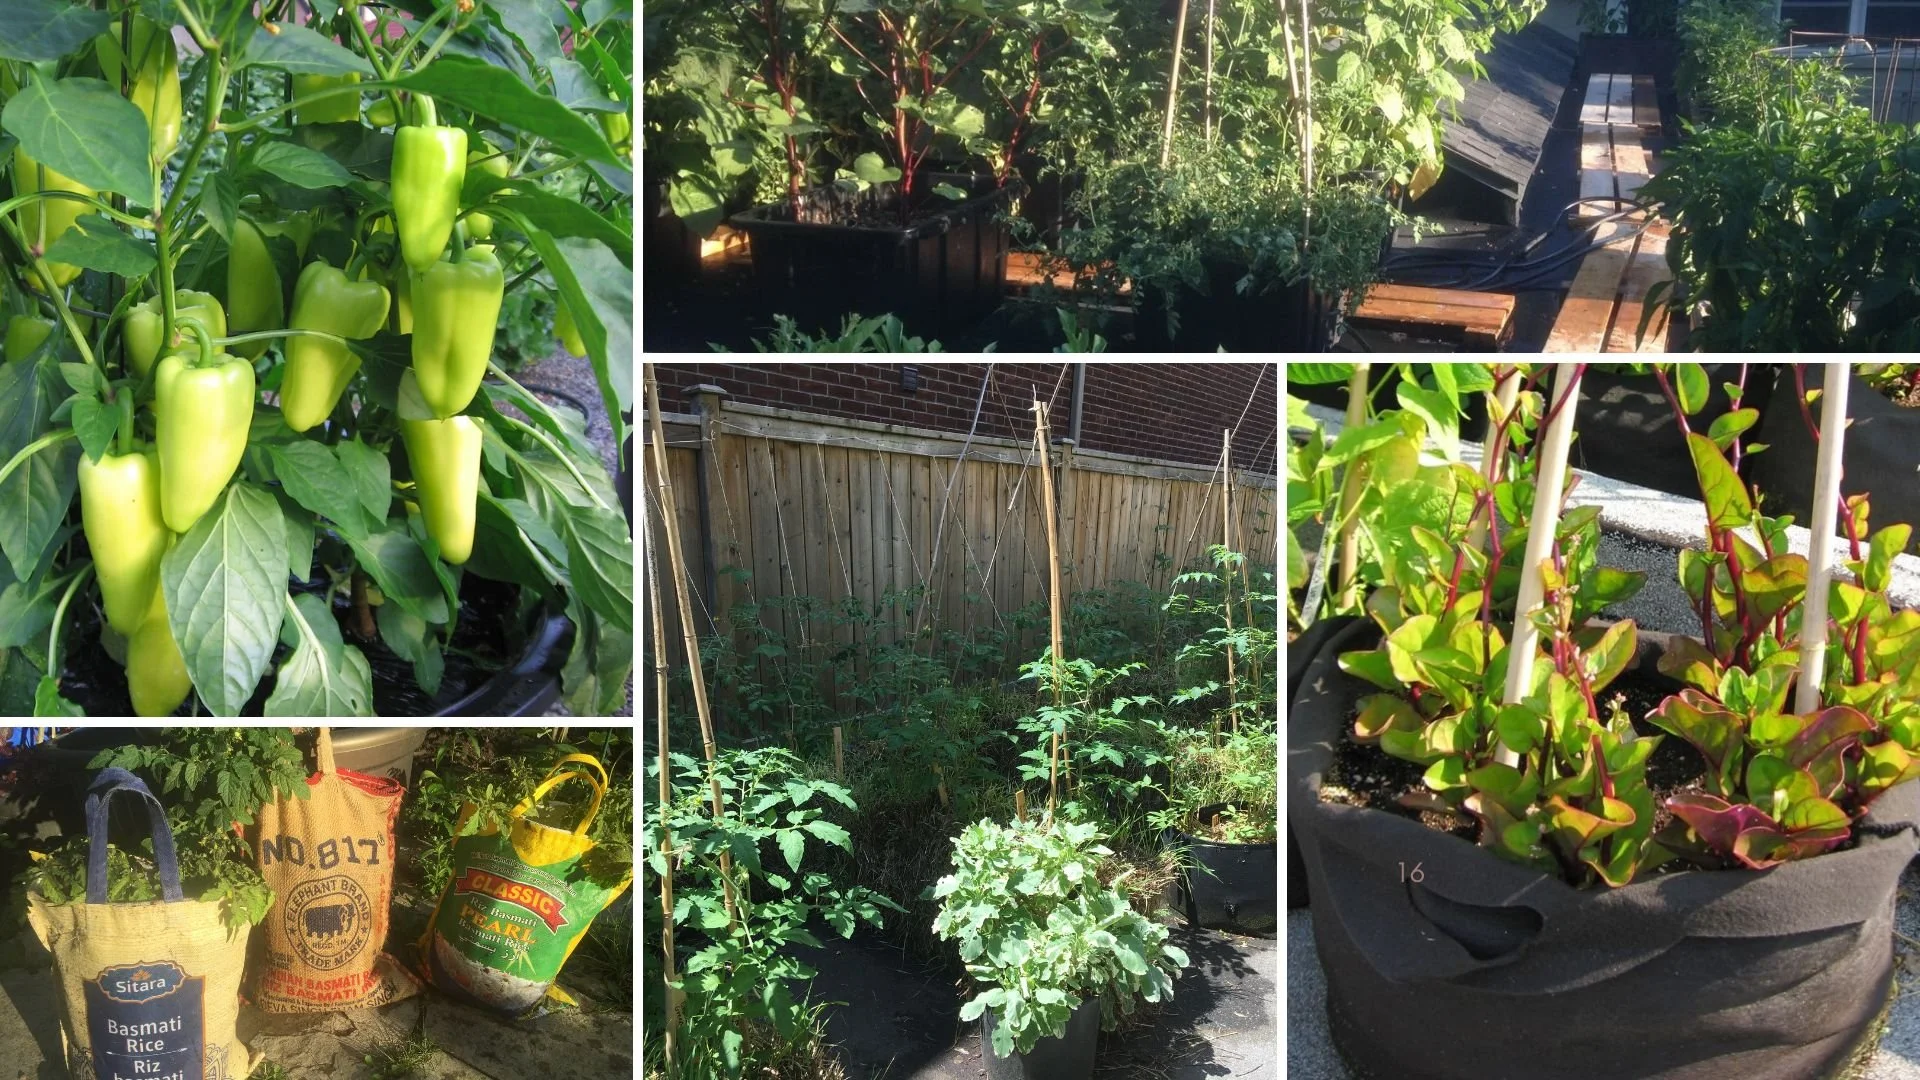
The larger the plant you’re growing, the larger the volume of soil that you'll need. A smaller container with a 15 cm (6") soil depth can be fine for many smaller crops, such as leafy greens. If you're growing something that gets larger, for example bush-type tomatoes, a larger volume of soil is suitable. (That's why I used the storage bins in the example above. Along with determinate tomatoes, we use them for okra, peppers, and eggplant.)
Can I cover the soil on a self-watering planters?
Plastic mulch over the soil holds in moisture and deters squirrels from digging up transplants in the spring.
Yes. A plastic mulch holds in moisture and stops weed seeds from germinating. There are biodegradable plastic mulches that last for a single growing season.
Lay the mulch over the potting mix, and then tuck it in tight at the sides. Once it's snug, you can cut and X in it with a sharp knife, and then plant into the X.
A springtime challenge for us is squirrels digging up newly transplanted seedlings from our planters. A simple solution is the plastic mulch, which seems to deter digging. (Soil is out of sight, and it’s out of their wee little squirrel minds.)
Or, if you don't like the look of the plastic, burlap works well too. (It's a natural fibre, so doesn't hold in as much moisture, but it deters digging and reduces growth of weed seeds.)
What about watering plants in a SIP from above?
This is fine. It will keep the soil surface moister, so there's more chance of weed seeds germinating. But there's nothing wrong with this...other than it can be much slower than filling using a fill tube.
Can I reuse the soil in my self-watering planter?
Over time, as the organic materials in soil break down, potting soil loses its structure. When is has less structure (fewer bigger particles and fewer air pores) it doesn’t wick as well.
So for best wicking, fresh potting mix work best.
But...replacing potting mix every year is both wasteful and expensive. I usually mix in some new soil mix every year, about 20 per cent.
What is an Earthbox?
It is a well-known brand of sub-irrigated planters.
Is a “global bucket” a sub-irrigated planter?
Yes. I suggest you search online to find out more about this easy-to-make pail-in-pail SIP planter that has a reservoir.
What is a wicking bed?

With a wicking bed, we're taking the same ideas we use in a sub-irrigated planter—just on a larger scale. Now we’re talking about a raised bed. A wicking bed has a water reservoir, fill tube, and overflow just like a SIP does.
If you’re researching wicking beds, you’ll see that the names SIP and wicking bed are often used interchangeably. For me, if it’s a moveable planter, it’s a SIP. If it’s a permanent bed, it’s a wicking bed. But don’t sweat the lingo—as long as you understand how it works inside.
Find out more about wicking beds.
Are there any things to watch for with SIPS?
Yes, salt build-up. Normally, excess salts that can accumulate near the soil surface wash away with watering, and then drain from the bottom of a container. But with a SIP, we’re not washing down salts with water, and any runoff is captured.
That means it's a good practice to flush out your SIPs in the spring. Water heavily from the top, enough to cause lots of water to drain through the overflow holes and carry away excess salts.
How can I automate watering in my self-watering planter?

An irrigation spaghetti tube goes into the fill tube on the SIP.
You can set it up with automatic irrigation that refills the reservoirs.
You want what’s called “spaghetti tubes,” small tubes that run from an irrigation line. One tube goes to each planter. (This sort of system is often used to irrigate container gardens, with “drip emitters” at the end of each spaghetti tube to regulate how much water comes out and onto the soil surface in the container.)
But when you’re setting up spaghetti tubes and drip emitters for a SIP garden, just put the tube and drip emitter right into your fill tube, so that when you turn on the irrigation, you’re replenishing the water in the reservoir—not wetting the soil surface. (That way, less water is lost to evaporation, and you’re not creating conditions suited to weed-seed germination.)
Experience will teach you how long to leave on the water supply to fill up the reservoir.
Find This Helpful?
Enjoy not being bombarded by annoying ads?
Appreciate the absence of junky affiliate links for products you don’t need?
It’s because we’re reader supported.
If we’ve helped in your food-gardening journey, we’re glad of support. You can high-five us below. Any amount welcome!
More on Growing Vegetables
Articles and Interviews
Course
Get great ideas for your edible garden in Edible Garden Makeover. Planning. Design. Crops. How-to.
Garden Career Pivot
Thinking about a career in horticulture? Here’s more about the path I’ve taken.
By Steven Biggs
Working in Horticulture

I’ve had a number of readers and students ask about working in horticulture. Some are ready for a career change. Some are thinking about schooling.
But for me, working in horticulture involves going beyond working with plants and soil. It also include the internet and a way of expanding what I can earn in the field of horticulture. Read on to discover what I mean.
(And, yes, snails fit into my own story, as you’ll see below.)
The Great Snail Race
“There is a whole big family of snails I was just getting,” Keaton told me matter-of-factly.
He looked down at them as they moved from his cupped hand onto his shirt. The most daring of the snails was already halfway up his shirt.
But the adventures of the snail family didn’t end with the trek up Keaton’s shirt.
That slow climb up the shirt was just the beginning.
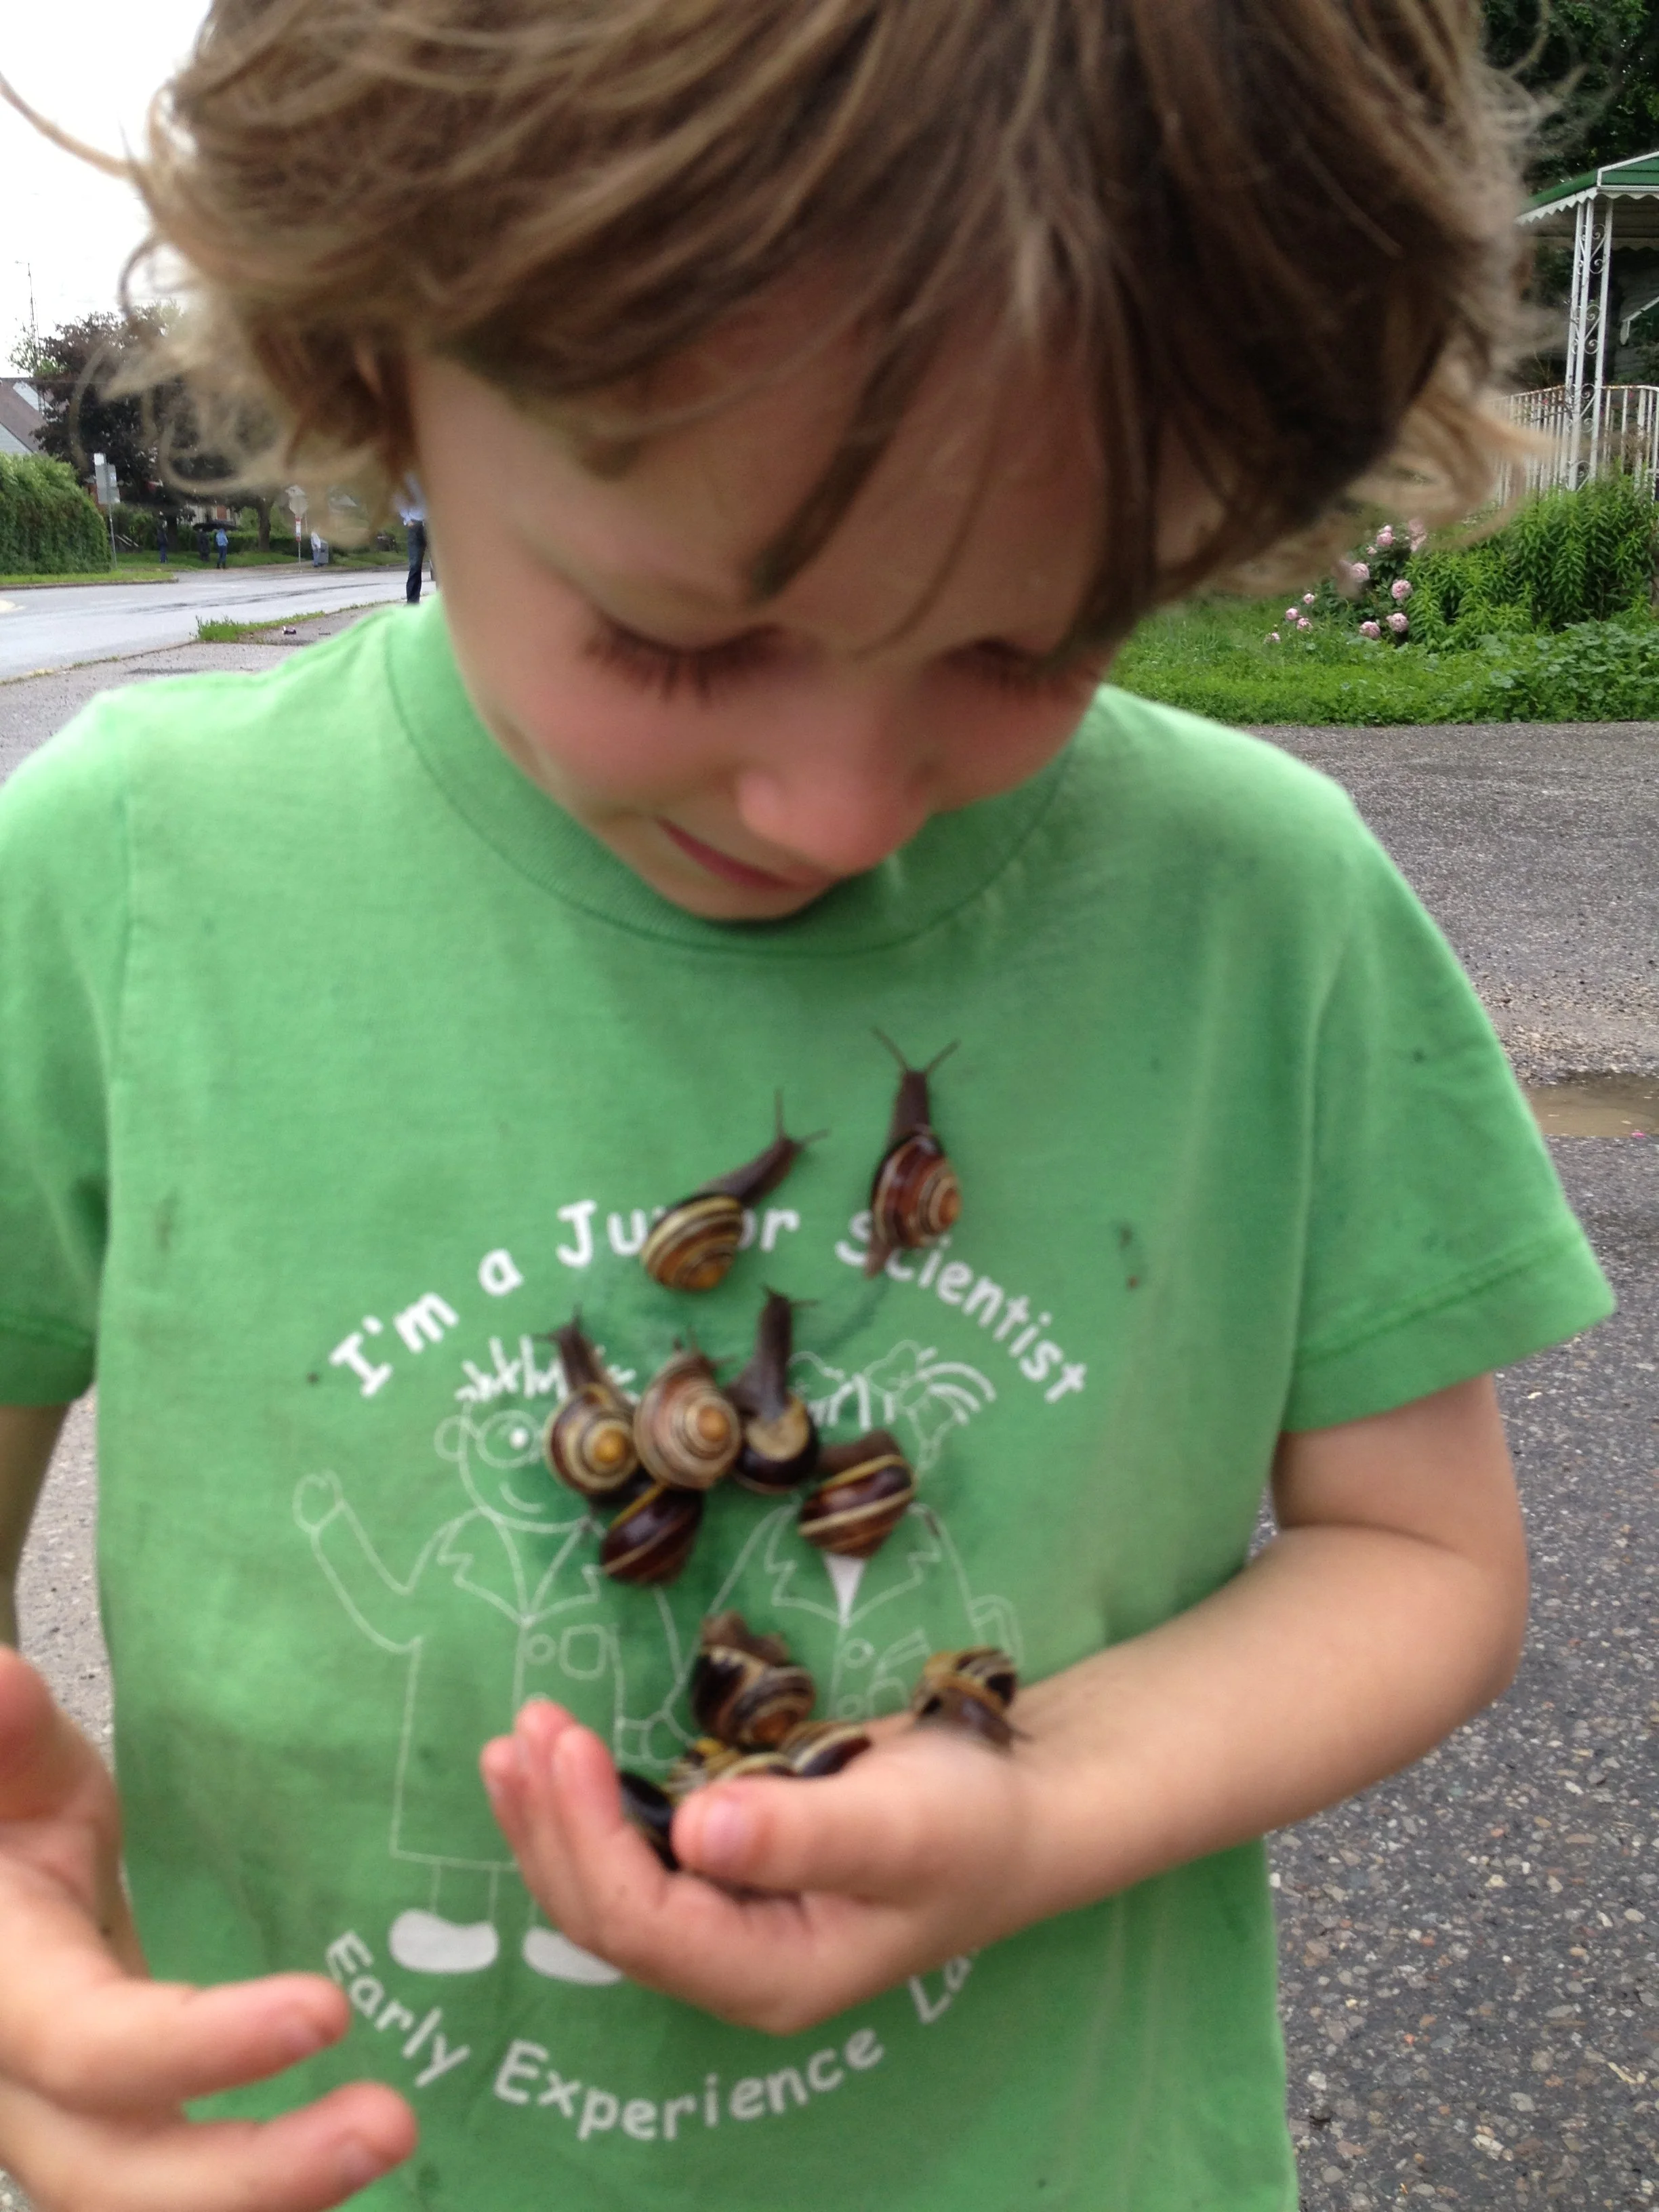
Keaton and the snails.
Next, the snail family sailed across a big puddle on our driveway, on a barely seaworthy scrap of wood. And once they’d sailed to the far side of the puddle, the adventures continued on the slide…with a snail race.
From Rat Race to Snail Race
I cherish that memory. It was a wet walk home from the schoolyard as Keaton collected all those snails.
At the time, my day revolved around walks to and from school. Morning drop-off. Midday drop-off. Afternoon pickup.
It wasn’t all snail races. I was at my desk working before the kids woke up. And between drop-off and pickup I’d snatch moments at my desk whenever I could.
The routine wasn’t something I imagined when I was at my previous job.
The routine was the result of an unwise (but fortunate) decision. I’ll tell you more about that decision in a moment.
But as a result of that decision I was out of the rat race. I was no longer a stressed-out commuter. I enjoyed small pleasures like snail races. And after wanting to quit the city, I was really enjoying city life.
I Started My Garden Work as an Imposter (At Least I Felt Like It)
It was 2006.
Even though the rat race was in the rear-view mirror, I hadn’t quite found myself. At least, I hadn’t convinced myself.
Asked about my profession, I’d hesitatingly respond, “garden and farm writer.” In hindsight, there was no need to hesitate.
My experience checked the right boxes:
I’d been a gardener since I was a kid. As a teen had my own gardening business. As a student I got a degree in agriculture and went straight into the horticulture industry. Check.
And in all of the jobs I’d had along the way, I’d been the person who would put together disparate bits of information into written guides and lists. I get a kick out of sorting and packaging information. Check.
Today

Keaton holding a copy of my first book, No Guff Vegetable Gardening.
My gig today is garden communications. I juggle a few things that relate to gardening and communications. I work as a college instructor, broadcaster, speaker, and writer.
I’ve been honoured to get recognition for my magazine articles, books, and broadcasting. And I was recognized as one of the “green gang” of Canadians making a difference in horticulture.
Most important for me is the flexibility. Almost all of what I do is online. That means I camp with my kids in the summer. If I want to go ice fishing for a day in winter, it’s my call. I can’t not work—but I can weave work around other important parts of my life.
Thinking of a Change?
There’s a need for people in the horticultural industry.
If you’re looking for horticultural work, here are just a few of the roles you can consider:
Landscaping
Landscape design
Greenhouse technician
Retail
Wholesale supplies
Research
Consulting
Here’s a neat apprenticeship option here in Ontario.
Want to grow food? Here’s a neat program near Toronto.
Deciding Who’s the Boss
A lot of people like being an employee: It gives structure and security.
There’s also the option of creating your own work. It’s the path that I followed.
And that brings me back to my unwise decision—the one I mentioned earlier.
How an Unwise Decision Turned Me Into a Garden Writer
My unwise decision was a career change. But I made it for a good reason: Balance.
I was aiming for more family time and less commuting time. To change the balance in my life, I left a job in agricultural marketing to work as a recruiter.
Why as a recruiter?
For no other reason than the office was a bicycle ride from my place. I wanted to be closer to home.
I figured that because I was good at working phones I would be fine in this phone-based work. But there was a problem: I was not good at it…
Months passed. I was still not good at it. Meanwhile, my wife Shelley was just about to wrap up maternity leave, and we weren’t excited about the prospect of daycare. Plus I needed to help my parents more.
It was a collision of life events—not any foresight on my part—that got me to take the leap. The leap from employee to self-employed.
One other thing really helped. An internet connection.
An Internet Connection can be a Gateway
Connecting with work on the internet is easier now than when I started. (I took an HTML coding lesson so I could manage my first website!) Things are much more user-friendly now.
But even though it’s more user friendly, an internet connection or a website or a social media following isn’t a guaranteed income. It’s just a gateway to other people.
So if you’re thinking of creating work, your challenge is to figure out what value you can provide.
First: Take Stock
What are you good at; and what are you not good at?
I suggest you make a checklist for yourself.
For example, my checklist at the time of the great snail race would have looked like this:
Growing food had become a big part of my life — the kind of thing to put on your list as you take stock of your unique experiences
Good on the phone (too much time spent as call-centre slave!)
Not good at being pushy with people
Write well
Can shut up and let people tell me their story (from working on a help desk)
Like to sniff around for leads (from a short career tangent into fraud prevention)
Know how to grow (I’d turned my small urban backyard into a mini farm)
So if you’re thinking of change, stop now and make your own list like this.
Jot down your life experiences. It may seem insignificant; it’s not.
Next: Take Time
As you think about how your different life experiences give you a unique perspective, be open to new ideas.
The final nudge into a garden-focused career arrived when I was on a plane. I unknowingly sat beside an editor for an online magazine. We chatted, and she asked if I wrote…
Then: Grow New Skills
If you want to give people value that they’ll pay for, you might need new skills, or to brush up on skills you have.
In my case, I took night school courses on writing and journalism. Then I joined a garden writer’s association, a farm writer’s association, and a professional writer’s association because I really didn’t know how to go about becoming a “real” writer.
You Might Feel Uncomfortable
I left the house for my first garden writer’s meeting feeling like a fraud. Then I nearly walked out the door when I arrived. It was a sea of grey hair. A bit intimidating for a 30-something. But I met another writer who I then collaborated with to write my first book.
At the first farm writer’s convention I went to, I felt like a misplaced urbanite. But I swapped business cards with an editor, and that led to a decade-long gig writing farm-business articles.
Keep Pivoting
On assignment writing a farm business article, with the kids.
Industries change. Work changes. And your personal needs will change.
When my kids were little I’d pack them up and take them out on assignment to write an article about a farm. We had a few fun adventures.
As they got bigger, I jumped into the topic of gardening with kids, and my daughter Emma and I did videos and books together. (You can see some of that here.)
Now they’re all teenagers. I have my workdays to myself—and I’m blogging and podcasting on a regular schedule. I’ve been honing my interviewing skills, and I love it.
When the pandemic came and people moved to online learning, I pivoted and started teaching my own online gardening courses.
It can feel uncomfortable sometimes, but put yourself outside of your comfort zone.
Set Your Expectations

My daughter Emma signing copies of her book Gardening with Emma.
I see lot’s of online get-rich-quick and passive-income schemes.
My experience is that I can sell something I create when it gives people value and when they want it.
Passive income is an fair goal: After I put the work into a book or online masterclass, there is some passive income from future sales. But there’s also ongoing selling needed. So it’s not entirely passive.
The other thing you’ll want to hash out as you set your expectations is just what you want. This brings me back to the idea of balance.
For me, balance looks like this these days:
Make 3 meals a day for my hungry teenagers
Time with my dad
Time in the garden (so I can write about it)
Write about what I love
Regular garage band practice
No social media apps on my phone
You’ll see my expectations go beyond income-earning activities.
With the expectations I set, I work long days. Some nights I’m teaching until 10 p.m. – then I’m up at 5 a.m. to blog before the morning maelstrom of household teenage emotions puts me in a haze.
Ultimately, the mix you choose should be emotionally and financially sustainable for you. And it should be something that you like enough you can keep doing it. (I’ve had writing assignments that were so painfully mind-numbing that I froze. They weren’t sustainable. I quit those gigs.)
Next Steps
So whether you’re an urban person focused on life balance that includes gardening, or a rural homesteader considering ways to add to the homestead income, here are two questions to start with:
Employee or self-employed
Online work or location-dependent work
As you’re thinking about those questions above, start your creative process:
Take stock of your unique experience and skills
Take time
Grow your skills
Be uncomfortable
Be prepared to pivot
Set your own expectations for success
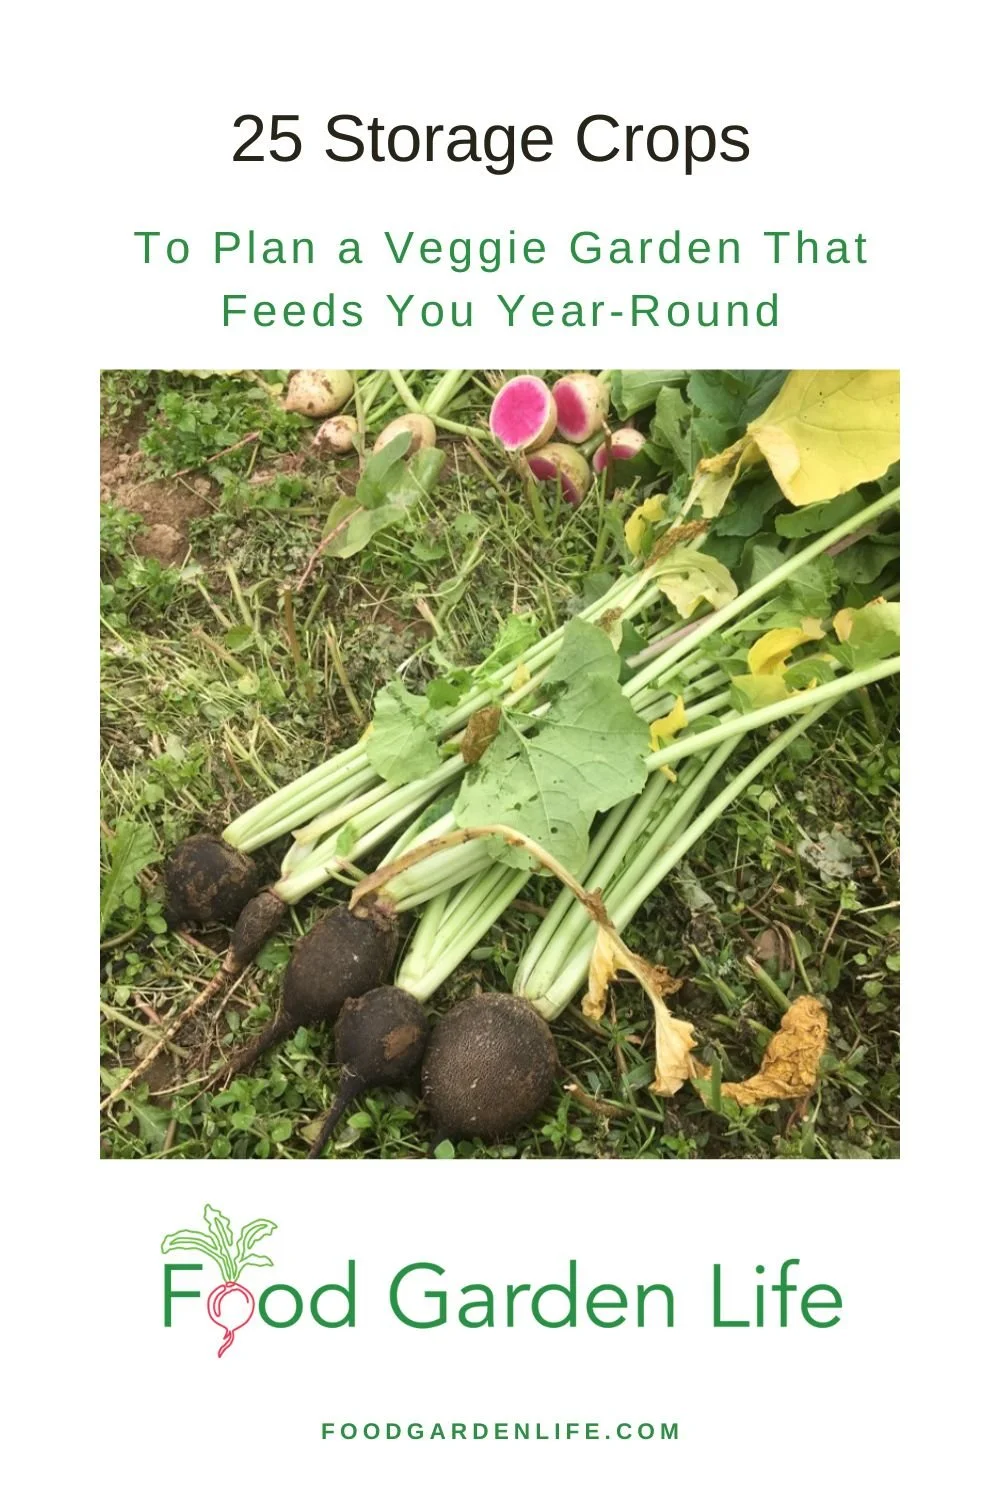
25 Storage Crops to Help You Plan a Vegetable Garden that Feeds You Year-Round
25 storage crop ideas so you can plan a vegetable garden that supplies you with food year-round, even in cold climates, even if you don’t have a greenhouse.
By Steven Biggs
Plan a Vegetable Garden that Includes Storage Crops

I have a plan to turn a room in my basement into a proper root cellar. Braids of onions hanging from the ceiling, homegrown squash on shelves, lots of root vegetables…
But I don’t have a root cellar at the moment.
Maybe it’s the same for you.
The good news is that you can store a lot of homegrown food even if you don’t have a root cellar.
And having lots of vegetables to store starts with your vegetable garden planning. Choose crops that you can store in the garden. And choose crops that store well in protected areas other than a root cellar.
This articles helps you plan a vegetable garden with storage crops in mind.
Storing Crops
Pin this post!
I like to think of crop storage two ways. I recommend a bit of each in your vegetable garden plan.
In-Garden Storage: Leave cold-tolerant crops in the garden to continue harvesting as the growing season wraps up.
Harvest and Store: Harvest crops and store in a protected space.
In-Garden Storage
When cool weather arrives, some plants pack it in and die. Think of basil…a little sniff of cold and it drops its leaves in protest.
But some crops do very well in cool temperatures. They soldier on even as fall frosts arrives.
Even with these cold-tolerant crops, growth slows down and stops as days get shorter and shorter. But you can continue harvesting what’s there.
Leafy Greens for In-Garden Storage
Here are my favourite leafy crops for in-garden storage. And to be clear, I’m not suggesting that I harvest any of these winter-long here in Toronto. I don’t. But they have good cold tolerance, and I’ve often picked them from under a dusting of snow.
(If you want to take you year-round harvesting to another level, think of using a combination of cold frames and cold-tolerant crops.)

Kale is very cold-tolerant. If you can only grow one cold-tolerant green, start with kale.
Kale. For cold-climate gardeners, kale is a great season extender. It’s very freeze tolerant. It keeps going as light frosts arrive in the fall. Then as things freeze hard, it still hangs on. I’ve sometimes picked kale in January from under the snow. (The winter-harvested leaves are a far cry from tender, baby kale, by the way. But if you cook it accordingly, it’s a great homegrown addition to the menu.)
Celery. Reliable until hard freezes arrive. (And if you’re thinking celery isn’t a leafy green, you’re right. Except my favourite type of celery is “leaf” celery. Leaf celery, as the name suggests, is more leaf, less stalk—and it’s far less demanding and easier to grow than regular celery.)
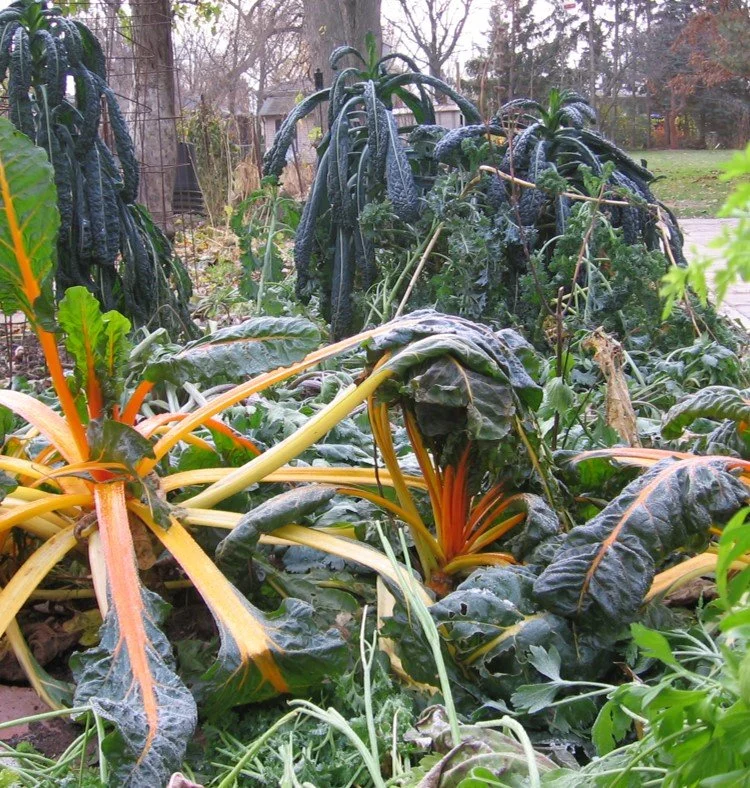
Chard. Reliable through those first fall frosts, until hard freezes arrive. Chard also looks great, so if you’re interested in edible ornamental gardens, consider this as you plan your vegetable garden. (Maybe you have ornamental beds that would benefit from a pop of fall colour from one of the many colourful chard varieties.)
Parsley. Reliable until hard freezes arrive. Like chard, also a great ornamental plant. Use it as edging alongside annuals somewhere near your house, so that during muddy fall weather, it’s easy to quickly grab a few sprigs for supper.
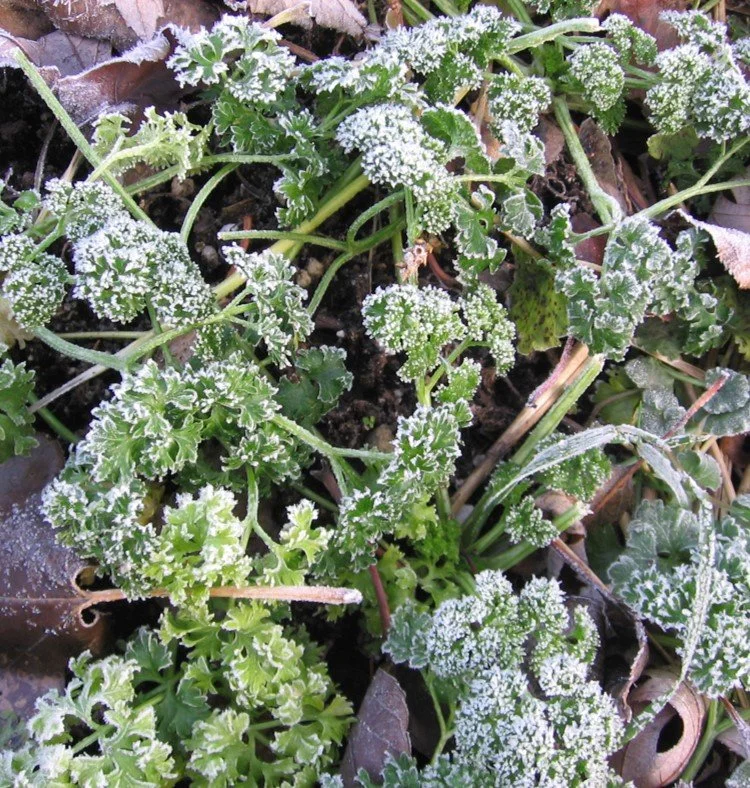
Parsley stands up nicely to fall frosts.
A Couple More In-Garden Storage Crops
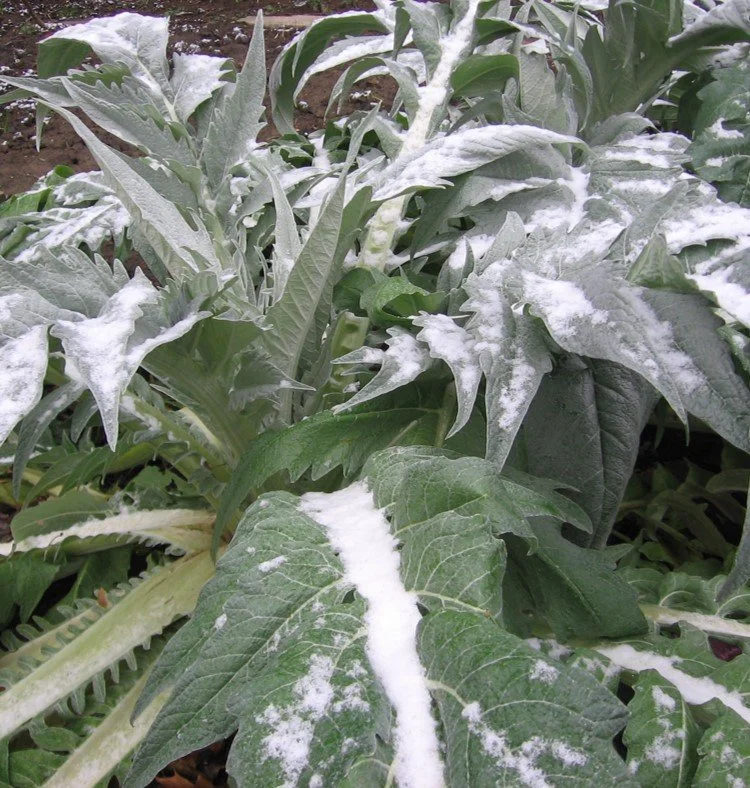
Keep harvesting cardoon until there’s a hard freeze.
Leek. Like kale, a plant you can keep harvesting into winter. And when there’s a mid-winter thaw, you can go get some more. The leaf tips begin to brown mid-winter…but that’s fine because it’s the lower portion we eat.
Cardoon. Cardoon keeps going through light frosts. It’s leaves wilt, and then spring back up as the day warms. (If you haven’t grown cardoon before, remember to blanch it or it’s horrid…my first forays into cooking cardoon didn’t win me any favours with my family!)
In-Garden Storage Using Straw Bales
As fall frosts arrive, there’s no rush to harvest many of the in-ground root crops. Carrots and parsnips are improved by frost.
A simple way to extend the time you can leave them in the ground is to place a straw bale over top of them. It insulates them and the ground below.
With a heavy mulch, you can leave carrots and parsnips in the ground until the soil freezes solid. Where I am, that’s midwinter. And the longer they’re in the ground, the better they last.
One more thought on leaving roots crops in the garden late: Remember that while carrots and parsnips usually grow under the soil and protected from the first freezes, beet roots often shoulder their way above the soil surface. Those exposed shoulders are quicker to freeze…and that affects the quality.
Create Your Own Unique Edible Landscape
That fits for your yard, and your style!
Harvest-and-Store
First things first: A root cellar is nice…but if you don’t have one, there are other ways to successfully store your harvest. Think about your storage options now, as you plan a vegetable garden. That way you can plant accordingly.
Here are different places you might be able to store your harvest:
Swiss chard with some frost on it. It will spring back up once the sun comes out.
Garage. My garage doesn’t freeze, so I use it to store root crops (and apples that I buy by the bushel…great way to save money). My garage stays just above freezing, and is fairly humid, making is well suited to storing produce.
Clamp. This is a traditional way or insulating harvested root vegetables outdoors, using soil and straw.
Cooler area in a heated basement. I have a room in my basement where I shut off the heat vents. It’s cooler (and darker) than the rest of the house. It’s not as humid or cool as a proper root cellar, but is excellent to store winter squash, garlic, and onions.
Unheated basement. A friend had an unheated basement with an earthen floor…perfect for stored crops!
Sunroom. If you have a sunroom that stays just above freezing through the winter, I’d be thinking about food storage…
Breezeway. Some houses have a minimally heated breezeway between the house and garage. It’s just calling out for food storage!
Attic. If you have an accessible attic, another option for cool storage! The logistics of carrying food up to an attic aren’t ideal, but if it’s all you have, worth a try.
Successfully Storing Crops
Storing crops in the right conditions can really extend the storage life.
Root crops can go into perforated plastic bags, or into moist sand or sawdust in crates. This prevents them from drying out.
Newspaper comes in handy too: cover trays of green tomatoes with a sheet of newspaper; and wrap cabbages in a sheet of newspaper.
Only store unblemished produce. If you have crops that aren’t good enough to store, cook them up or freeze them.
Harvest-and-Store Crops
Dry Bean
When the pods turn light brown, just pull up the entire plant to hang upside-down under cover to dry further. Great storage crop for long-term storage.
Beet
Leave a half inch of stem on the roots as you prepare to store beets. Then they won’t “bleed” as much. Look for varieties recommended for storage. A favourite of mine over the years has been ‘Cylindrda.’
My favourite storage crop! (I make beet borsch with some of mine every year.)
Cabbage
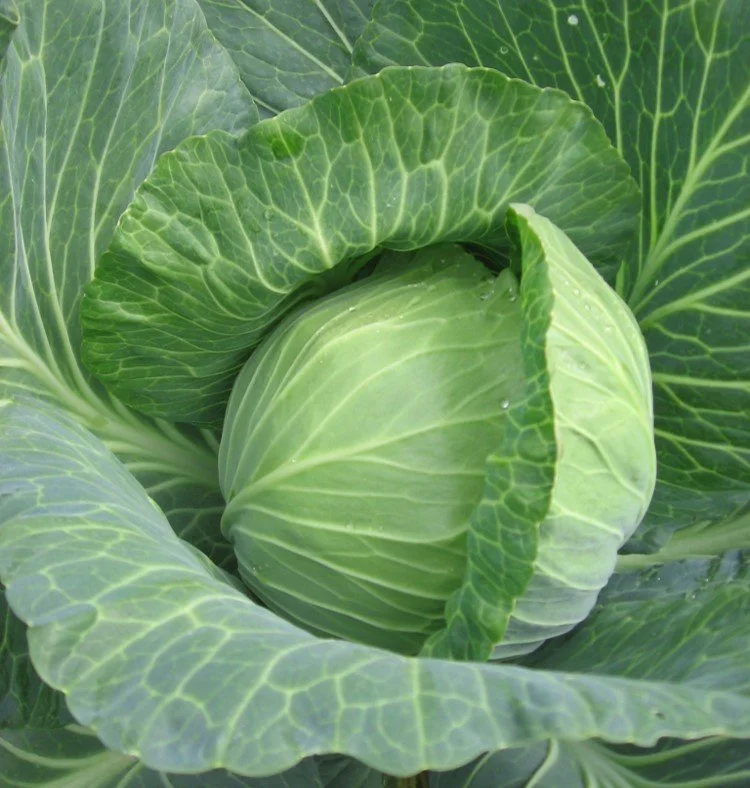
Not a crop that lasts all winter in a root cellar, but you can keep it for a couple of months. The outer leaves dry, and you’ll peel those off as you prep the cabbage for use in the kitchen.
Use midsummer transplants to grow cabbages for winter storage. Harvest as late as possible for storage.
(Don’t forget that you can also use some cabbage to make sauerkraut. Find out how to make your own sauerkraut.)
Cabbage, along with other cole crops such as broccoli, cauliflower, and Brussels sprouts are also excellent for in-garden storage as they keep going through early fall frosts.
Carrot
Use midsummer transplants to grow cabbages for winter storage. Harvest as late as possible for storage.
Sweeter after some frost. Look for varieties recommended for storage. ‘Bolero’ is a variety that I like for storage.
Cerleriac (a.k.a. celery root)
Often overlooked, and a great addition for gardeners growing for storage.
Garlic
Easy to grow lots in a small space, and easy to store for gardeners without many storage options, because it and onions like things dryer than the root crops.
Horseradish
As you’re planning your vegetable garden, remember that this is a deep-rooted perennial. So pick a permanent spot for it.
Jerusalem artichoke
A somewhat invasive perennial, so pick a permanent spot for it.
Onion
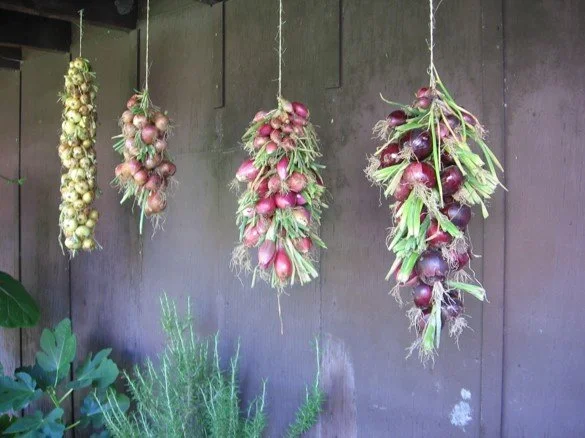
Braided onions drying before going into storage.
Store onions after curing. Like garlic, important to dry and cure for a couple of weeks before storage. If not properly cured, doesn’t last as long.
You don’t have to braid onions. Another way to store them is to hang them in a mesh bag—so there is good air circulation around the onions.
Parsnip
Sweeter after they go through some frost.
(One year I grew far too many parsnips, and had the brilliant idea of making parsnip wine. Alas, it was horrid…couldn’t even use it as cooking wine.)
Peppers
Often overlooked, but smaller, thin-skinned pepper varieties are easy to dry. Once dry, you can hang them in your storage area, where there’s good air circulation.
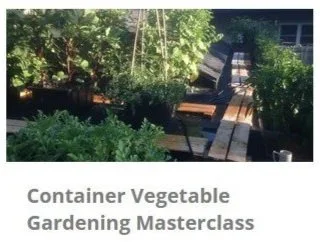
Grow a Container Vegetable Garden
And get an early harvest of crops that usually take too long!
Potato
Plan for your storage potatoes to be ready late in the season. During the summer, storage spaces aren’t usually as cool as they are in the fall—so your potatoes can sprout quickly when stored too early.

Don’t put early potato harvests into storage. Plan for a later harvest for storage.
Radish (winter)
So often overlooked, and a great addition in a storage-focused garden.
Root Parsley
Ditto above.
Rutabaga
My mother-in-law’s must-have cooked veg at the Thanksgiving table!
Squash
Pick before light frosts for best storability.
Tomato (keeper)
Keeper tomatoes in the spring.
It’s easy to overlook tomatoes as a storage crop, but there are thick-skinned tomato varieties that can last until spring! They’re called “keeper” or winter tomatoes or storage tomatoes.
These aren’t great for tomato sauce, but are nice chopped into a salad or bruschetta.
Find out about keeper tomatoes.
Find out my top tips for starting tomato seeds indoors.
Get ideas for different ways to stake tomatoes.
Learn about ripening green tomatoes indoors.
Turnip
A quick-to-mature crop. Remember, the greens are edible too!
Watermelon
Watermelons last a month or so, a nice treat to stow away for a snowy day!
Find This Helpful?
Enjoy not being bombarded by annoying ads?
Appreciate the absence of junky affiliate links for products you don’t need?
It’s because we’re reader supported.
If we’ve helped in your food-gardening journey, we’re glad of support. You can high-five us below. Any amount welcome!
Want Green Veg Over the Winter?
Find out how to grow microgreens indoors.
Need More Ideas to Plan a Vegetable Garden?
Articles and Interviews
Hear an agronomist share top tips for winter vegetable gardening.
7 Vegetable Garden Layout Ideas To Grow More Food In Less Space
Courses on Edible Gardening
5 Types of Cherry Bush to Grow in Edible Landscapes and Food Forests
5 types of cherries to grow as a bush in an edible landscape. Evans cherry, University of Saskatchewan bush cherries, chokecherry, Nanking cherry, Pin cherry
By Steven Biggs
Grow Cherries in an Edible Landscape or Food Forest

A cherry bush is a great addition to an edible landscape or food forest. Here’s a Nanking cherry bush.
The noise!
If you’ve grown cherries, you might have had a flock of birds descend on a cherry tree. Starlings, especially, are so loud that I wonder how they manage to eat and squawk at the same time.
But they do. And they clean out a tree quickly.
The gardener can watch (and listen) – or, go look for a ladder to get up there and compete with the birds for the cherries!
A ladder… Who needs the bother of a ladder in an edible landscape or a food forest?
In a home garden or landscape setting, simplicity is key. Ladders are not simple. Nor are fruit trees that need shaping and regular pruning.
Luckily, there are a number of cherries that grow as bushes.
Some have larger fruit that you can pop right into your mouth. Others, long prized by foragers, have smaller fruit suited for jams, jellies, juices, and wine.
Keep reading for bush cherry crops you can add to your garden.
Benefits of a Cherry Bush vs. a Tree
A bush makes a lot of sense in a home garden or edible landscape.
When you have a bush with multiple stems, you can renew it by lopping of some of the stems so that new stems take over
More branches means more yield
Cherry insurance! (More branches means more chance of some surviving a challenging winter)
Foil the birds…because a bush is easy for you to quickly pick (and easier to net if you’re so inclined)
Cold hardiness, because low-growing branches are insulated by snow
In this article, I have 5 different cherries that you can grow as a bush in your edible landscape or food forest.
These all grow on their own roots (so no grafting required), and are all self-fertile—so you don’t need to worry about growing two varieties to get fruit.
Forget the Ladder…Grow a Cherry Bush
Dwarf Sour Cherry Bushes…from Saskatchewan
The University of Saskatchewan fruit breeding program has produced some great high-yielding hardy bush cherries. (So good that even the BBC wrote about them!)
The bush-like form and the high-quality fruit is the result of breeding Mongolian cherry with European sour cherry.
The bush-cherry cultivars in the University of Saskatchewan “Romance” series have different bloom times, bush size, and fruit colour.
Here are the cultivars:
Carmine Jewel
Romeo
Juliet
Valentine
Cupid
Crimson Passion
Here’s more about the story behind these cherries.
Here’s where you can find out more about ripeness.
Hear bush cherry expert Bob Bors talk about cherry breeding and haskaps at the University of Saskatchewan. https://www.foodgardenlife.com/show/grow-haskap
Landscape with Fruit
That’s easy to grow in a home garden!
Evan’s Cherry in Alberta

Dr. Ieuan Evans with Evans cherries.
Prunus cerasus
When Dr. Ieuan Evans moved to Alberta, he was disappointed to find very few people growing fruit.
But he heard about a very fruitful cherry tree near Edmonton, so he visited – and got pieces of it to propagate. (Just in time, as the property was slated for redevelopment.)
He gave away rooted suckers of this fruitful cherry as fast as he could grow them. It was very cold hardy AND very fruitful.
What’s now known as Evans cherry is an especially cold-hardy cultivar of the European sour cherry.
It can grow as a tree or a bush.
Hear Ieuan Evans talk about finding the Evan’s Cherry in Alberta.
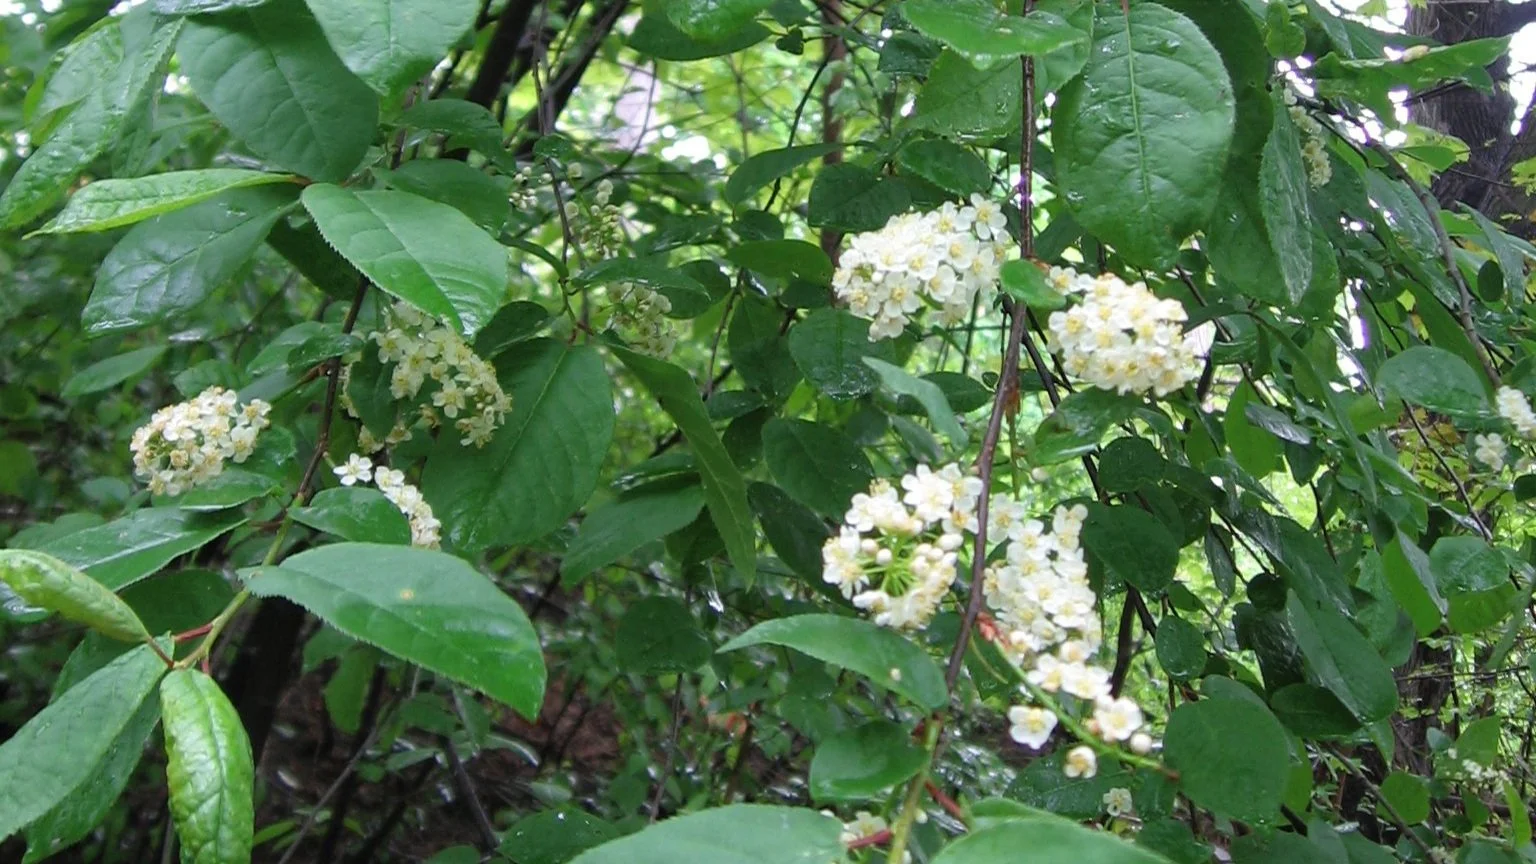
Nanking Cherry Often Overlooked
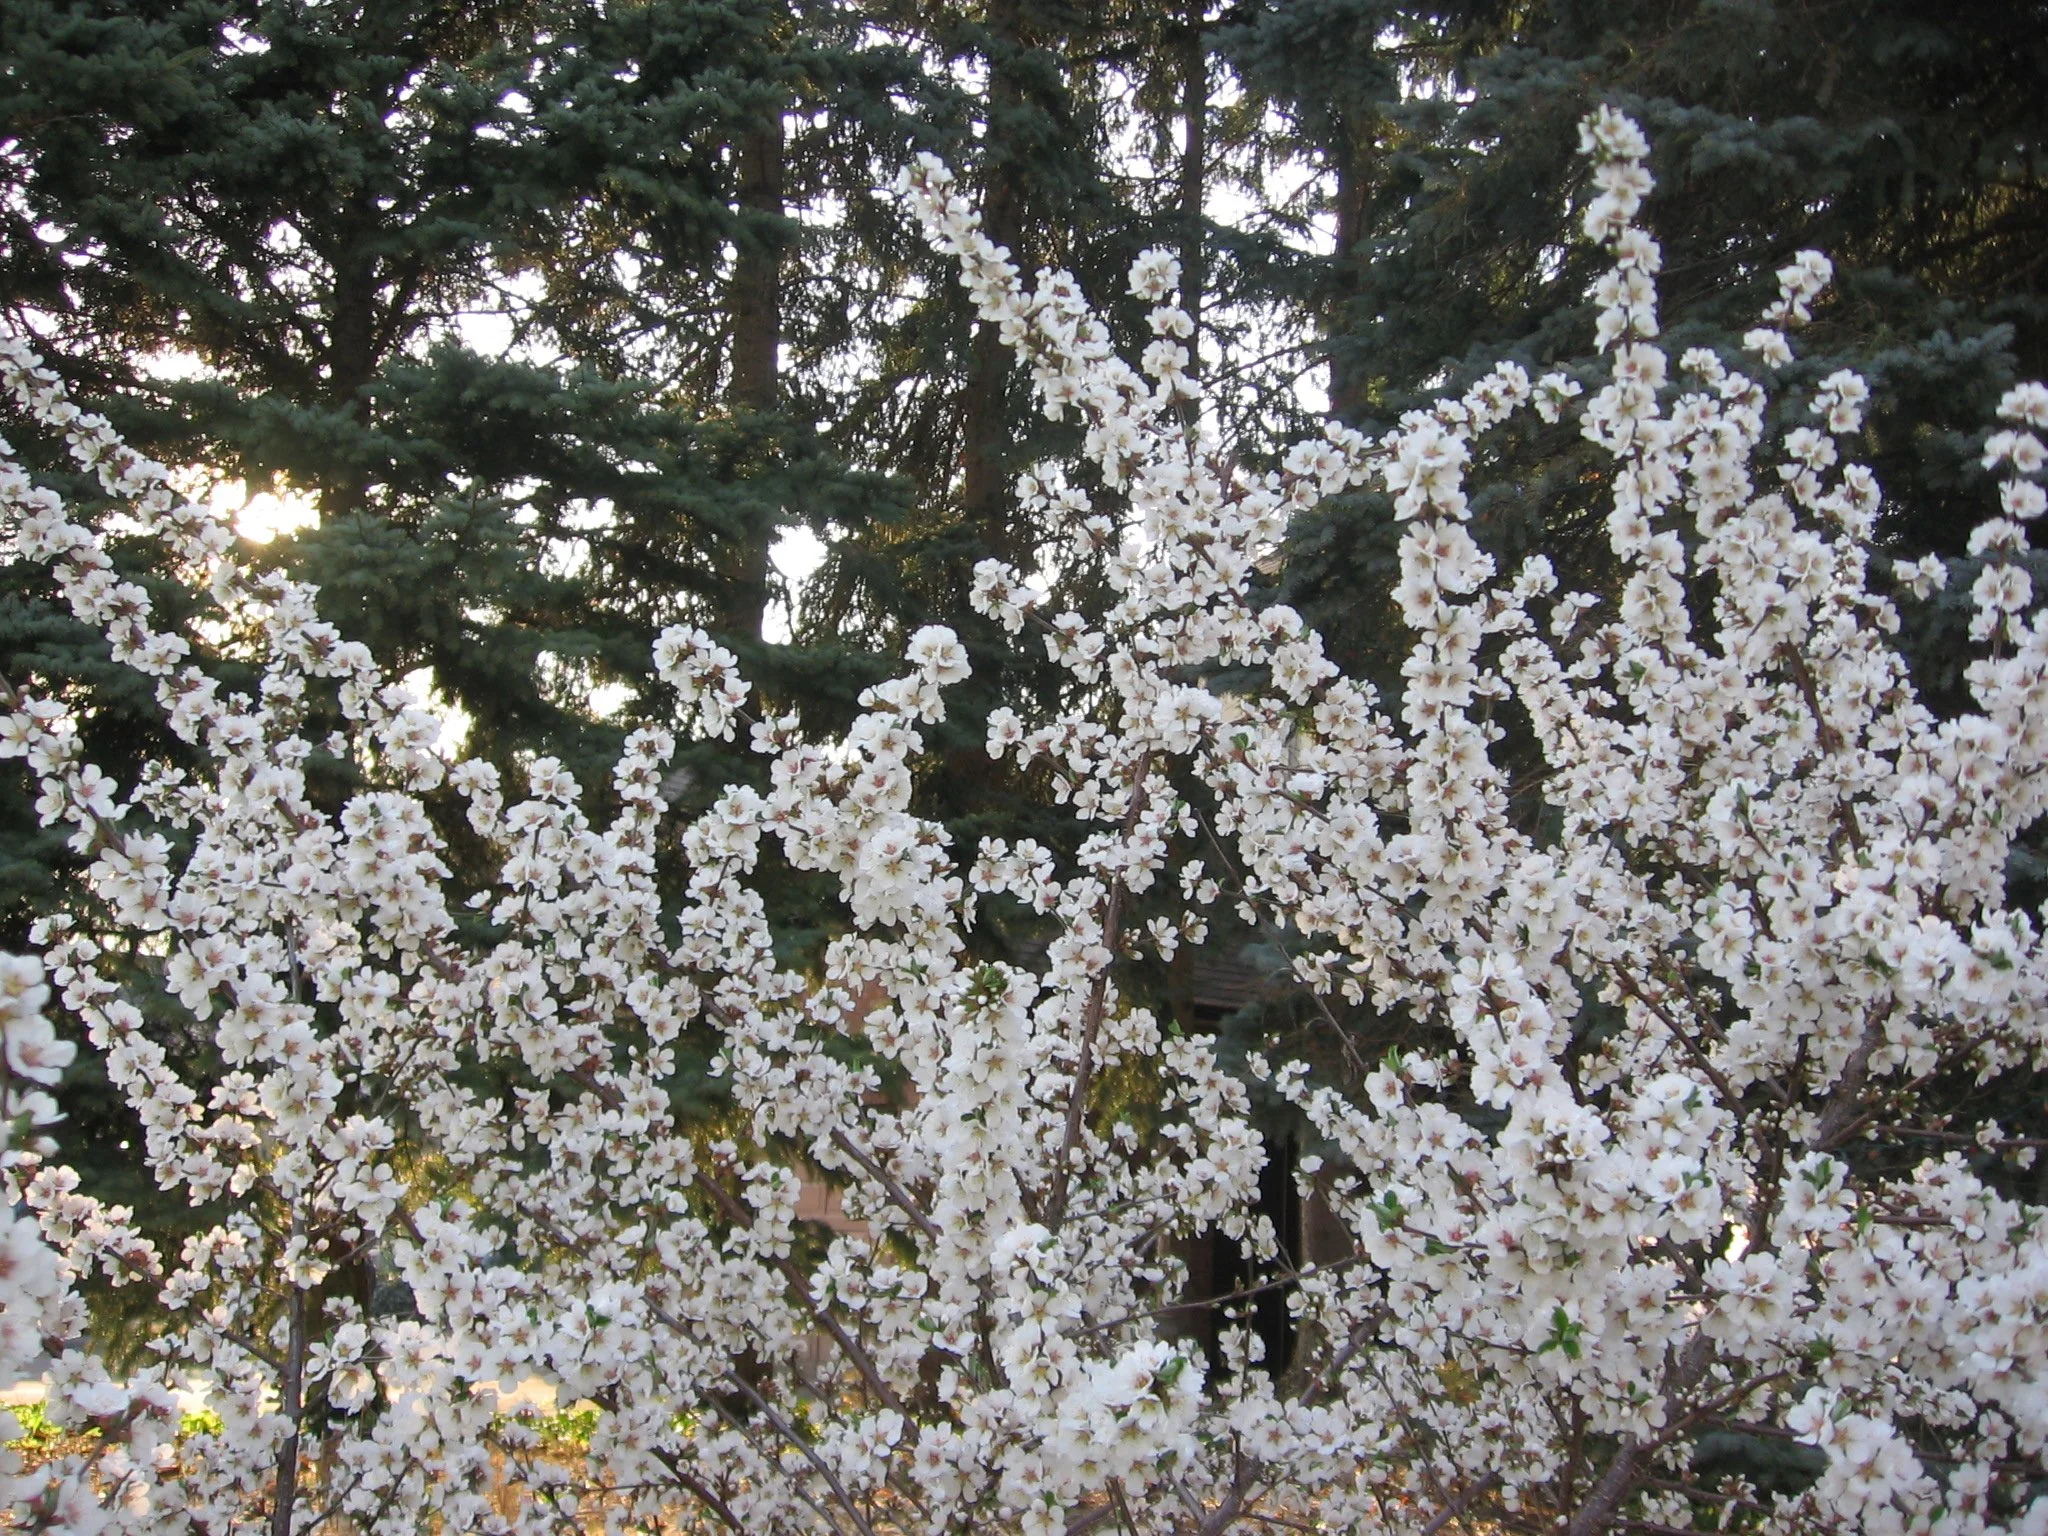
Nanking cherry bush in flower.
Prunus tomentosa
This is the cherry bush that my grandfather grew in his Calgary yard.
It’s compact, extremely fruitful – and a beautiful addition to a landscape. I grow it in my front yard, and when it blooms, pedestrians always stop to take selfies in front of it.
These small sour cherries are delicious fresh. They’re also great for use in the kitchen. I like to make them into a cordial.
The fruit is smaller than the University of Saskatchewan and Evan’s cherries. But they’re absolutely prolific.
I have an article all about them. Find out more about Nanking cherry.
Chokecherry (a.k.a. Choke Cherry)
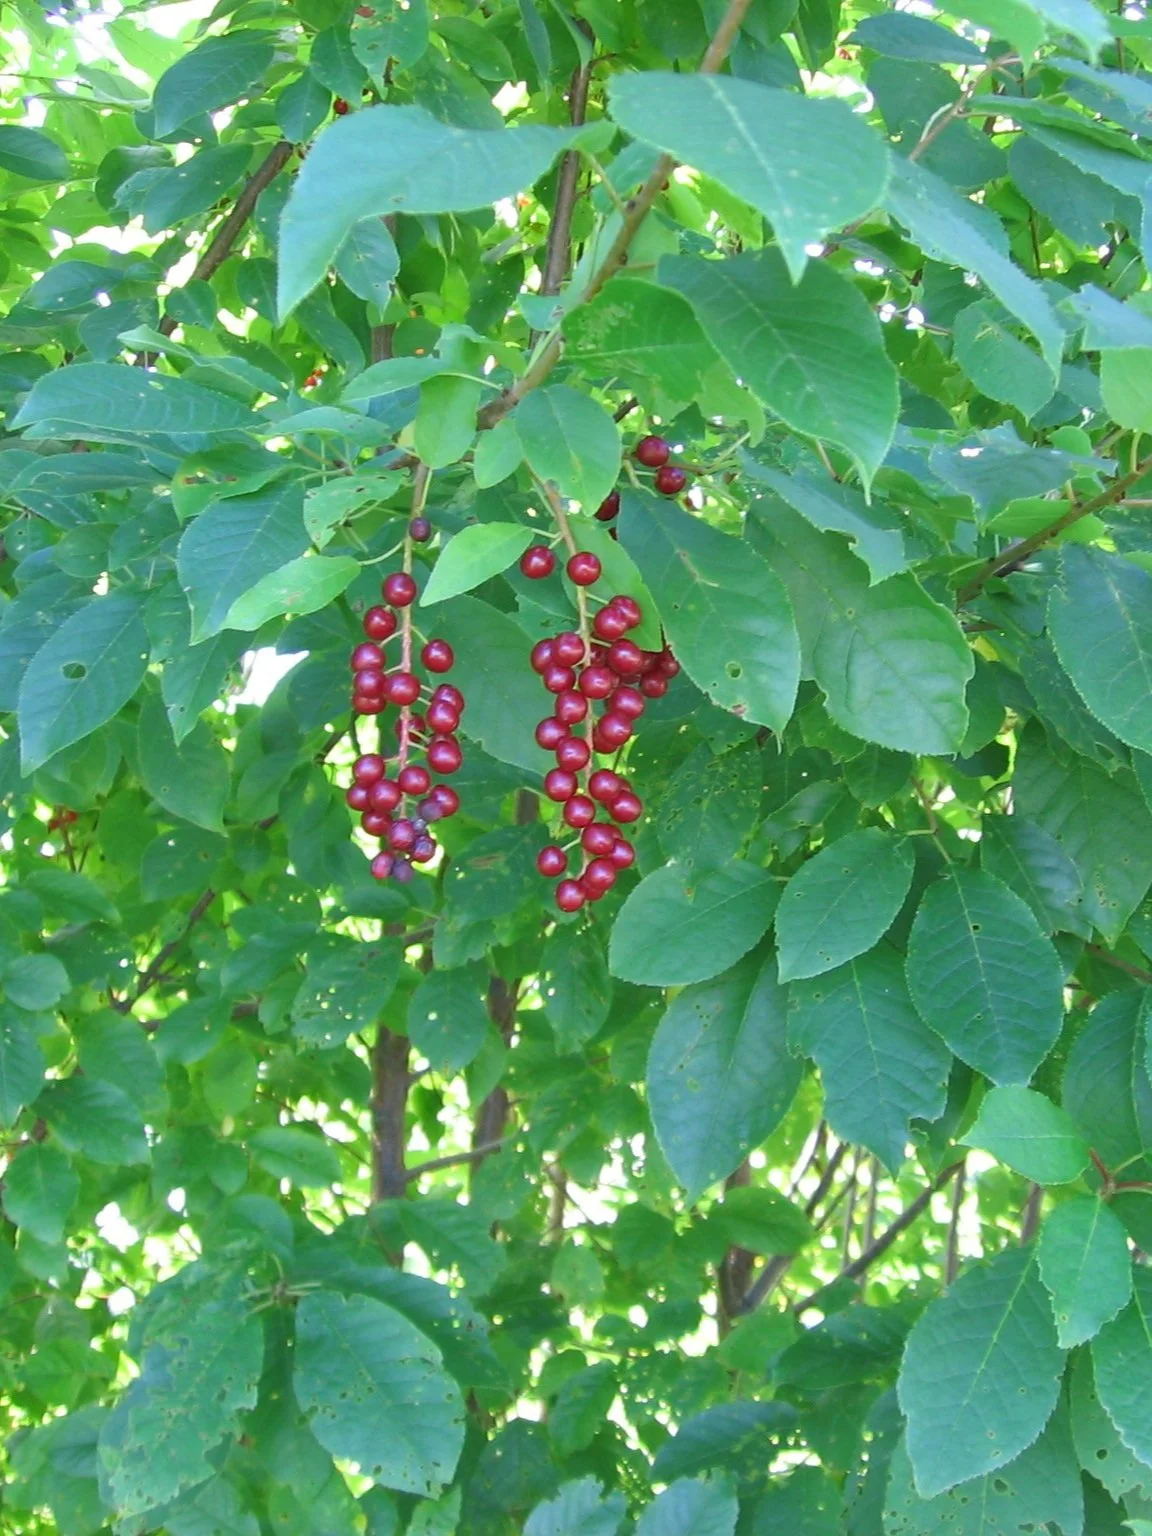
Chokecherry fruit grow in easy-to-pick clusters.
Prunus virginiana
Chokecherry is a native north American species that grows as a bush or small tree. There are a few cultivars, but most people know it because wild chokecherry plants arrives in gardens uninvited—thanks to critters that drop the seeds.
I have a patch of chokecherry in my garden. When a purple-leafed plant appeared, it was the perfect addition to an otherwise underused corner of my garden.
The flowers of chokecherry are a cluster that looks a bit like a bottle brush. And when those flowers become fruit, the pea-sized fruit are all in an easy-to-pick cluster.
This astringent fruit is aptly named. It has supreme pucker power! With processing though, the fruit is delicious. Use them for juice, jam, and syrup.
Hear Quebec agronomist Laurie Brown talk about growing and using chokecherry.
Chokecherry flowers
Pin Cherry (a.k.a. Pincherry)

Brightly coloured pin cherries light up the landscape!
Prunus pensylvanica
Pin cherry is another native North American species that grows as a shrub or small tree. I love the smooth, brownish-red bark.
Like chokecherry, the fruit are small. They’re more suited to fresh eating than chokecherry, giving you a tasty sour cherry taste without all the astringency.
While chokecherry flowers and fruit grow in a bottle-brush-like cylinder, pin cherries are on long, slender stems, with a few stems attaching to a branch in the same spot.
The bright red cherries light up a landscape. Use them to make jelly, juice, syrup, and wine.
Bush Cherry FAQ
Can I swallow the seeds?
All cherry seeds contain a cyanide compound, and consuming large quantities of fruit without removing seeds can make you sick. So spit out the pits!
Can I grow cherry bushes near a black walnut tree?
If you are dealing with black walnut toxicity, a.k.a. juglone toxicity, try growing cherries. Members of the Prunus family cope nicely with the juglone that’s given off by black walnut trees. Here’s a guide to gardening near a black walnut tree.
Find This Helpful?
Enjoy not being bombarded by annoying ads?
Appreciate the absence of junky affiliate links for products you don’t need?
It’s because we’re reader supported.
If we’ve helped in your food-gardening journey, we’re glad of support. You can high-five us below. Any amount welcome!
More on Fruit and Edible Landscapes
Articles
Interviews
Courses
Guide: How to Grow Lemon Trees Indoors That Actually Produce Lemons
Find out how to grow lemon trees indoors (and get lemons!).
By Steven Biggs

Can You Grow a Lemon Tree Indoors? Sure!
If you’ve seen lemon trees growing outdoors in warm climates, you might be wondering how you can grow a potted lemon tree indoors, without it getting too big.
Many lemon varieties grow into small trees when grown in the ground outdoors in warm climates.
(Keep this in mind if you plant a lemon tree in the ground in a greenhouse – it can get big!)
If you know a few simple things about how lemon trees grow and how to care for them indoors, you can enjoy the fragrance of lemon flowers and harvest your own lemon fruit indoors.
This guide to growing a lemon tree indoors explains what you need to know.
Lemon Tree Size
You can keep a lemon plant small. When it comes to the ultimate size of your lemon tree, remember that as the gardener, you’re the boss. You’re the one with the pruning shears!
Here are things (besides pruning shears!) that can affect the size of your lemon tree indoors:
Most commercially produced lemon trees are grafted. That just means that a piece of a lemon variety with nice fruit is attached (“grafted”) onto another variety that has roots with desirable traits (a.k.a. the rootstock). Some rootstock varieties have a dwarfing effect, keeping the lemon tree smaller. (A common dwarfing rootstock is called ‘Flying Dragon’).
If you have grown a lemon tree from seed, or your lemon tree is a rooted cutting, it will be growing on its own roots. There’s a good chance it will get bigger than lemon trees grafted onto a dwarfing rootstock.
Pot Size

This potted lemon tree is over 50 years old. Pruning and pot size keep it compact.
The smaller the pot, the smaller the lemon tree.
Think of how bonsai trees that are hundreds of years old can grow in very small pots.
It’s a combination of a small pot, along with root and stem pruning that will keep your citrus trees small.
Lemon Variety
There are many lemon varieties—just like there are many apple varieties. As well as differences in the fruit, there can be differences in the way the plant grows. Some are more compact than others.
A good example is the Meyer lemon tree, which is naturally dwarf and more bush-like than many other lemon varieties. (Meyer lemon trees are actually a hybrid that has some tangerine genes in its bloodline!)
(I think a potted Meyer lemon tree is a great starting place for first-time gardeners. They're compact, and very fruitful. I've harvest 50 lemons from a knee-high potted Meyer lemon tree.)
Indoor Lemon Tree Leaf Drop

A lemon tree that’s been growing in cool, humid fall conditions outdoors will often drop leaves when brought indoors for the winter. It’s ugly…but common. They grow back.
Lemon plants are evergreen, meaning that they have leaves on them year-round.
It is common for some leaves to drop off as the temperature and light levels change with the season.
(Especially if you have a potted lemon growing in cool, humid autumn conditions outdoors and then you bring it into the dry air of a centrally heated home. It might just drop its leaves in protest!)
What Kind of Light do Indoor Lemon Trees Need?
Bright light is best. Look for a location that has at least 8 hours of bright light per day. That usually means a south-facing window.
When the lemon tree is growing in full sunlight, the growth is more compact, and there will be better fruiting and flowering.
If you don't have bright natural light, try a grow light. (I've seen pictures of an indoor lemon tree doing very well under a grow light...in the Yukon!)
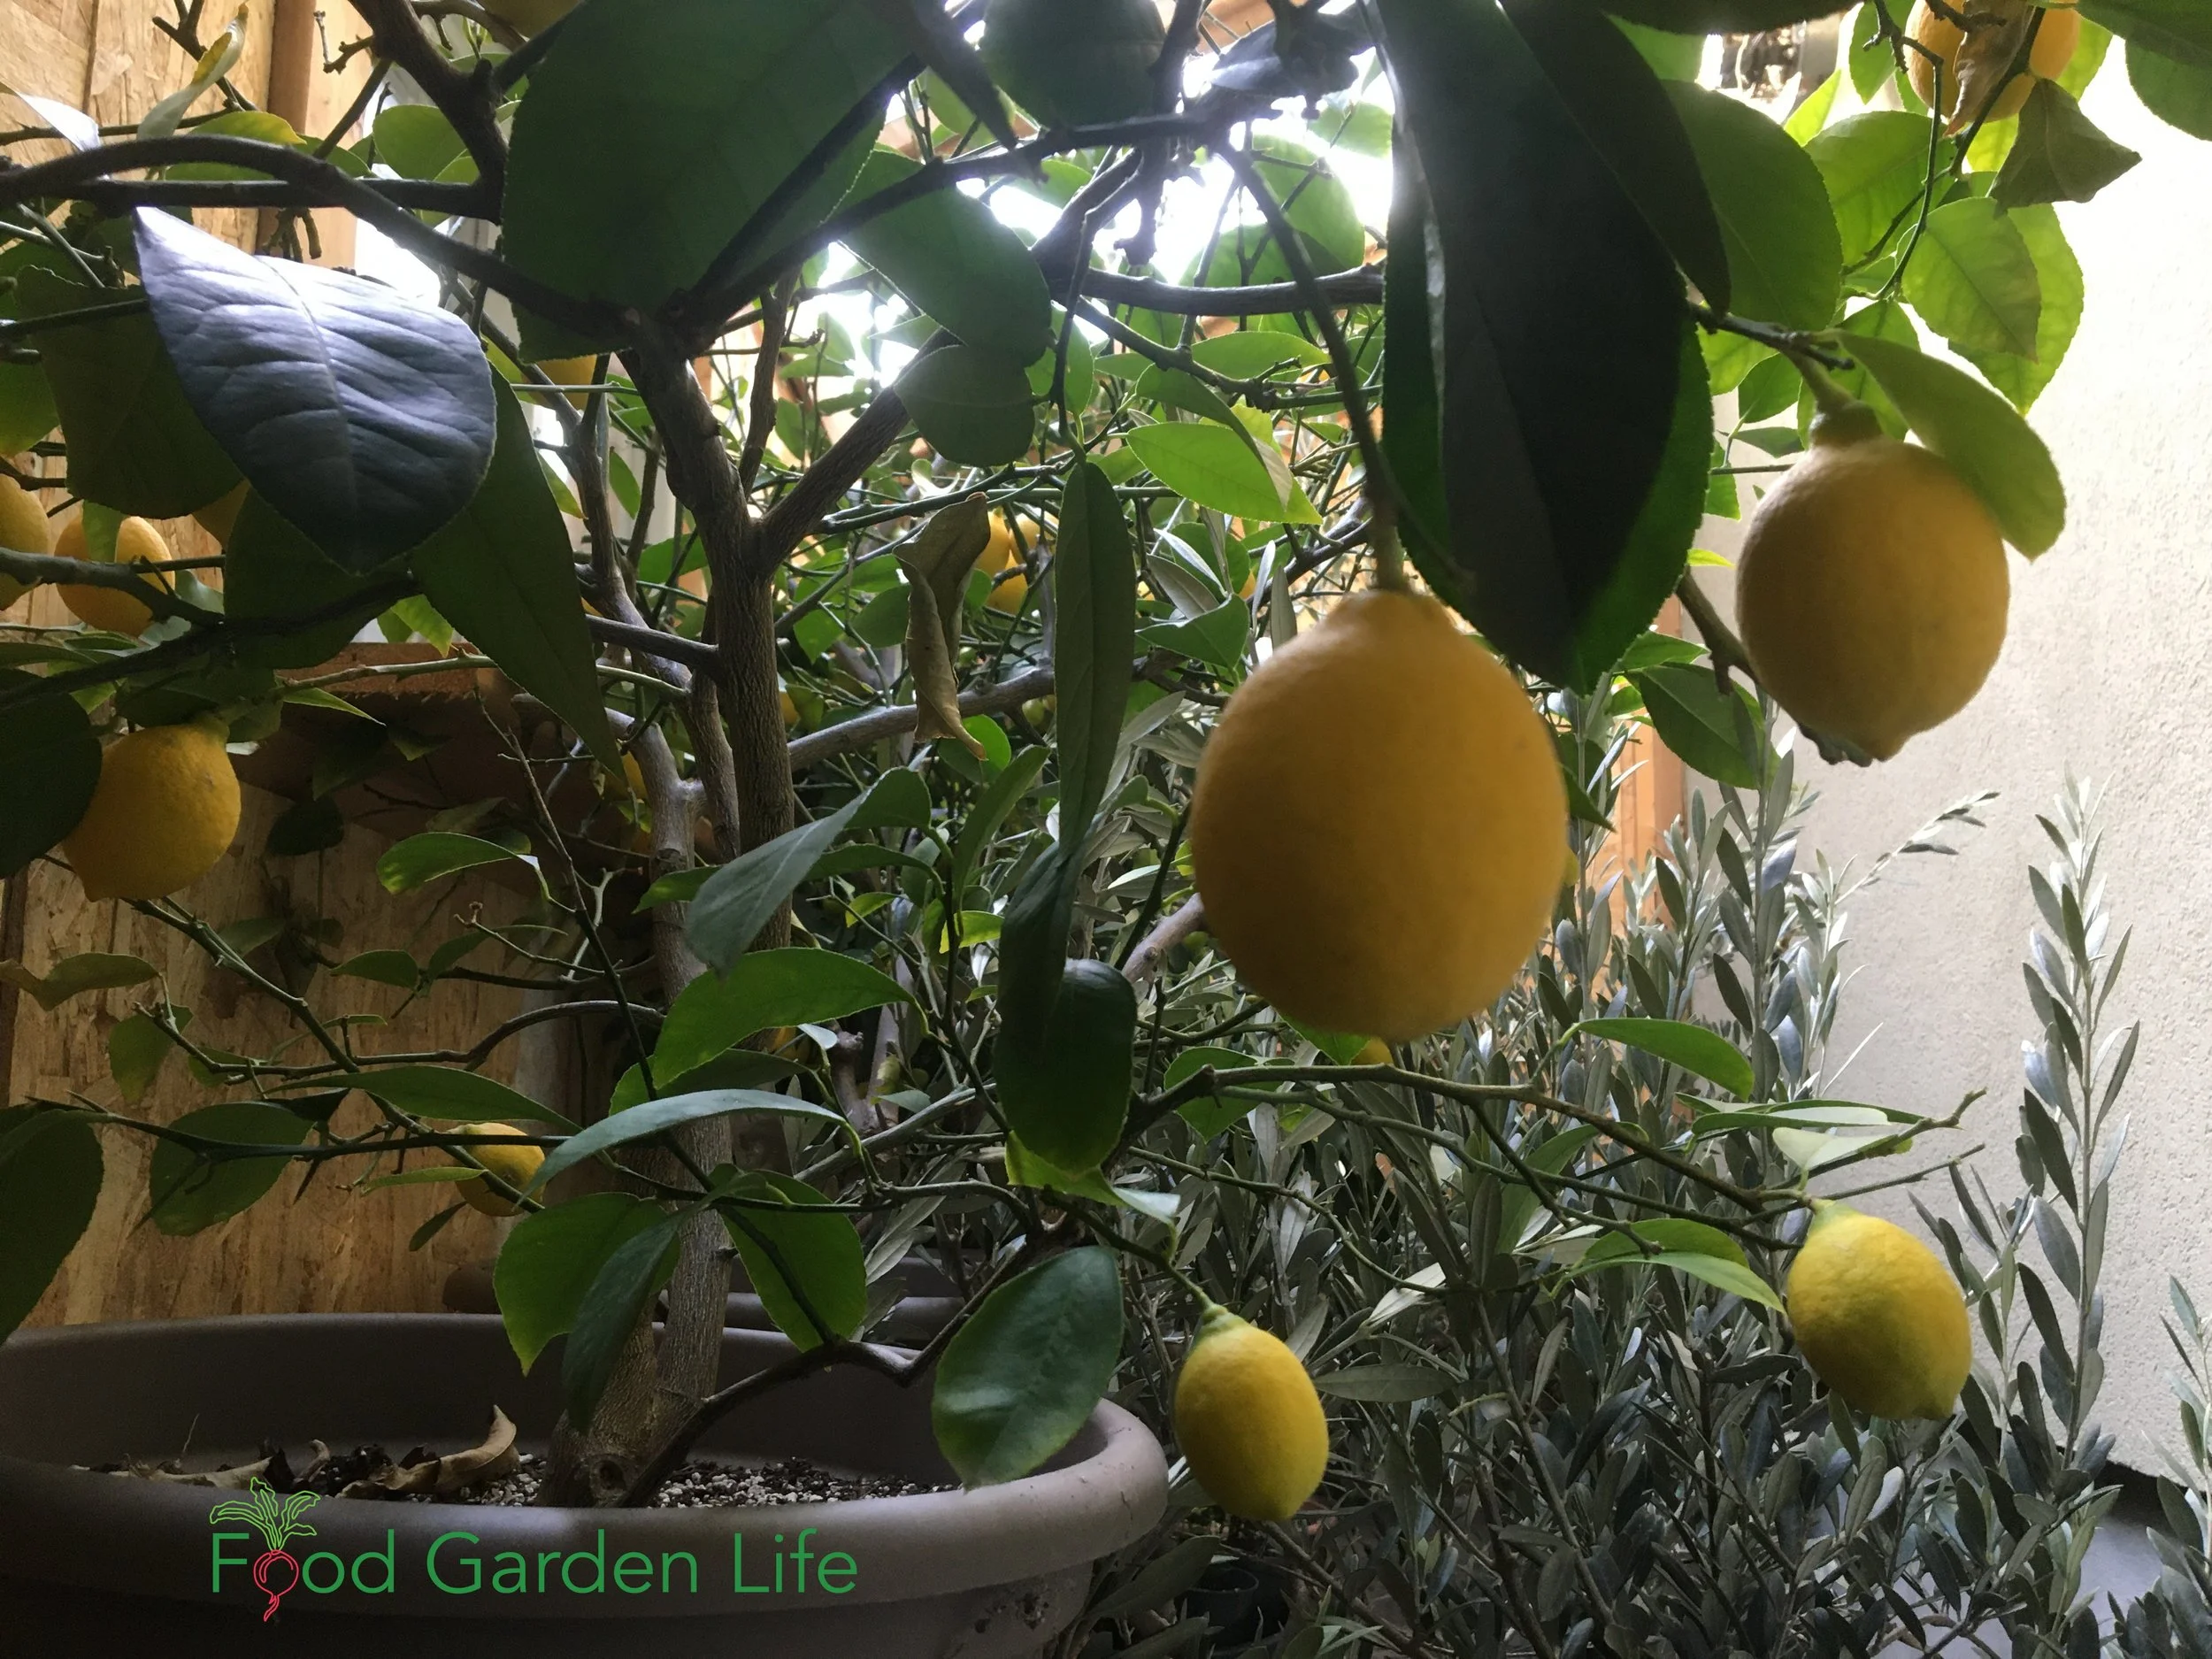
Indoor Lemon Tree Harvest

Lemon trees have flowers and fruit at the same time. Pictured are fruit at different stages of maturity.
Lemon is one of my favourite citrus trees because lemon trees can have fruit and flowers at the same time. That means that while you’re enjoying the smell of lemon blossoms, there might also be small immature fruit on your lemon tree—and some larger ones.
Ripe lemons can remain on the plant for many weeks. There’s no rush to harvest them.
The size of the lemon harvest you can expect depends on a few things:
Variety
Plant size
Growing conditions
Season length
Indoor Lemon Tree Pollination
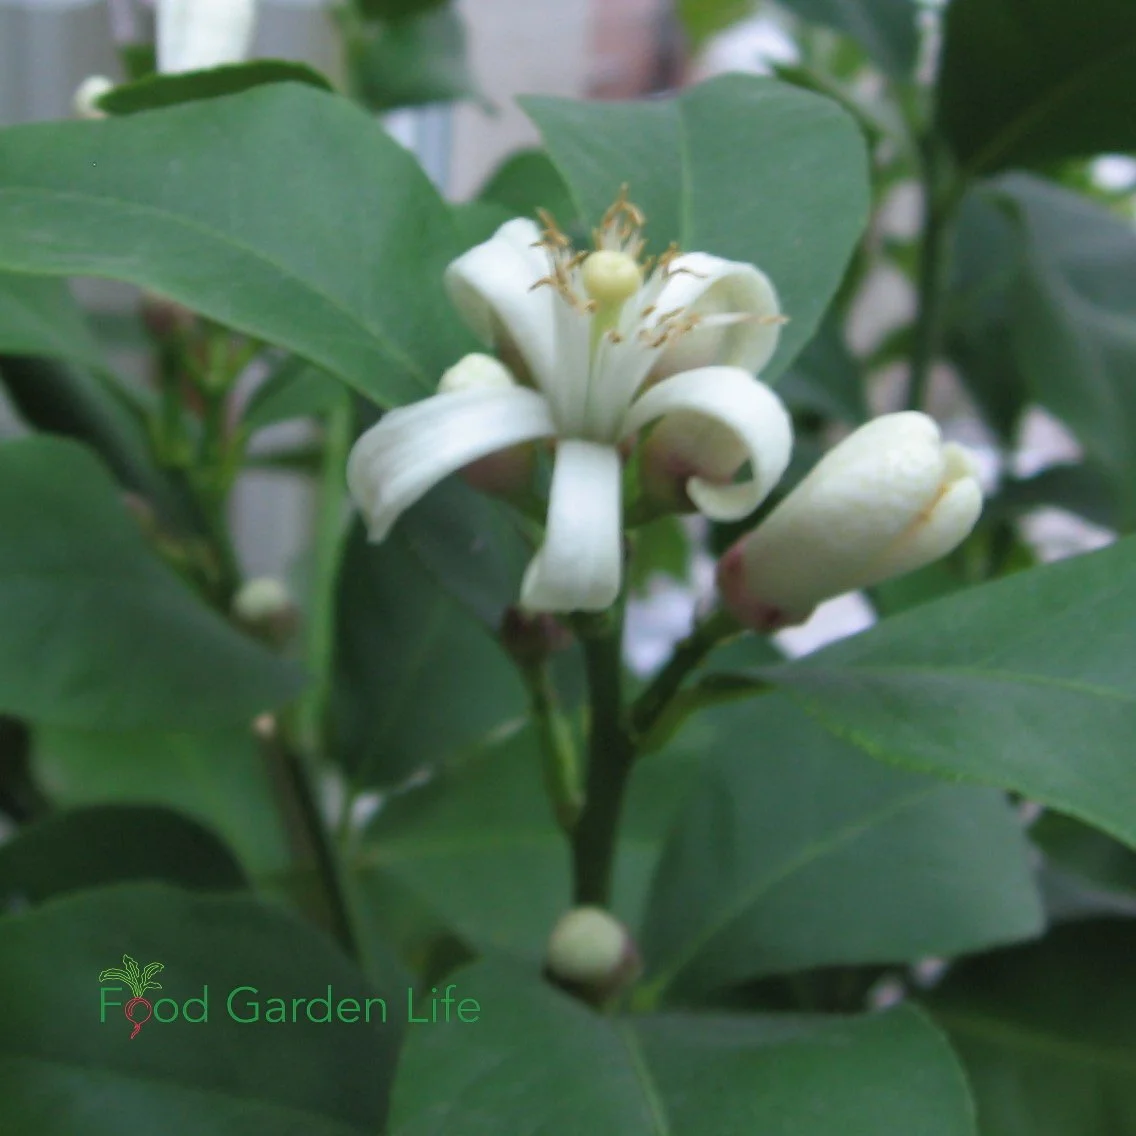
Pollinate flowers on lemon trees growing indoors using a small paintbrush.
Do you need 2 lemon trees to get lemons? No!
Every lemon bloom has male and female parts. They are also “self-fertile,” meaning you don’t need pollen from a different lemon tree to get pollination.
Outdoors, wherever there is a breeze, or a bee, pollen from the male part naturally drops or is transferred onto the female part of the flower and a small fruit starts to form.
Indoors, use a small paintbrush to transfer pollen between flowers.
Partially or imperfectly pollinated blooms can form fruit that drops off early. Not enough water can also cause small fruit to abort.
Tip: Lemons can make a lot of flowers in a cluster. Sometimes up to 12-15 booms. If they all become lemons, it’s a lot of work for the plant. Thin out the little lemons to 3-6 fruit per cluster.

Lemons can make a lot of flowers, sometimes 12-15 booms in a cluster. Thin out the little lemons to 1-6 fruits per cluster.
Indoor Lemon Tree Care
Watering Lemon Trees Indoors
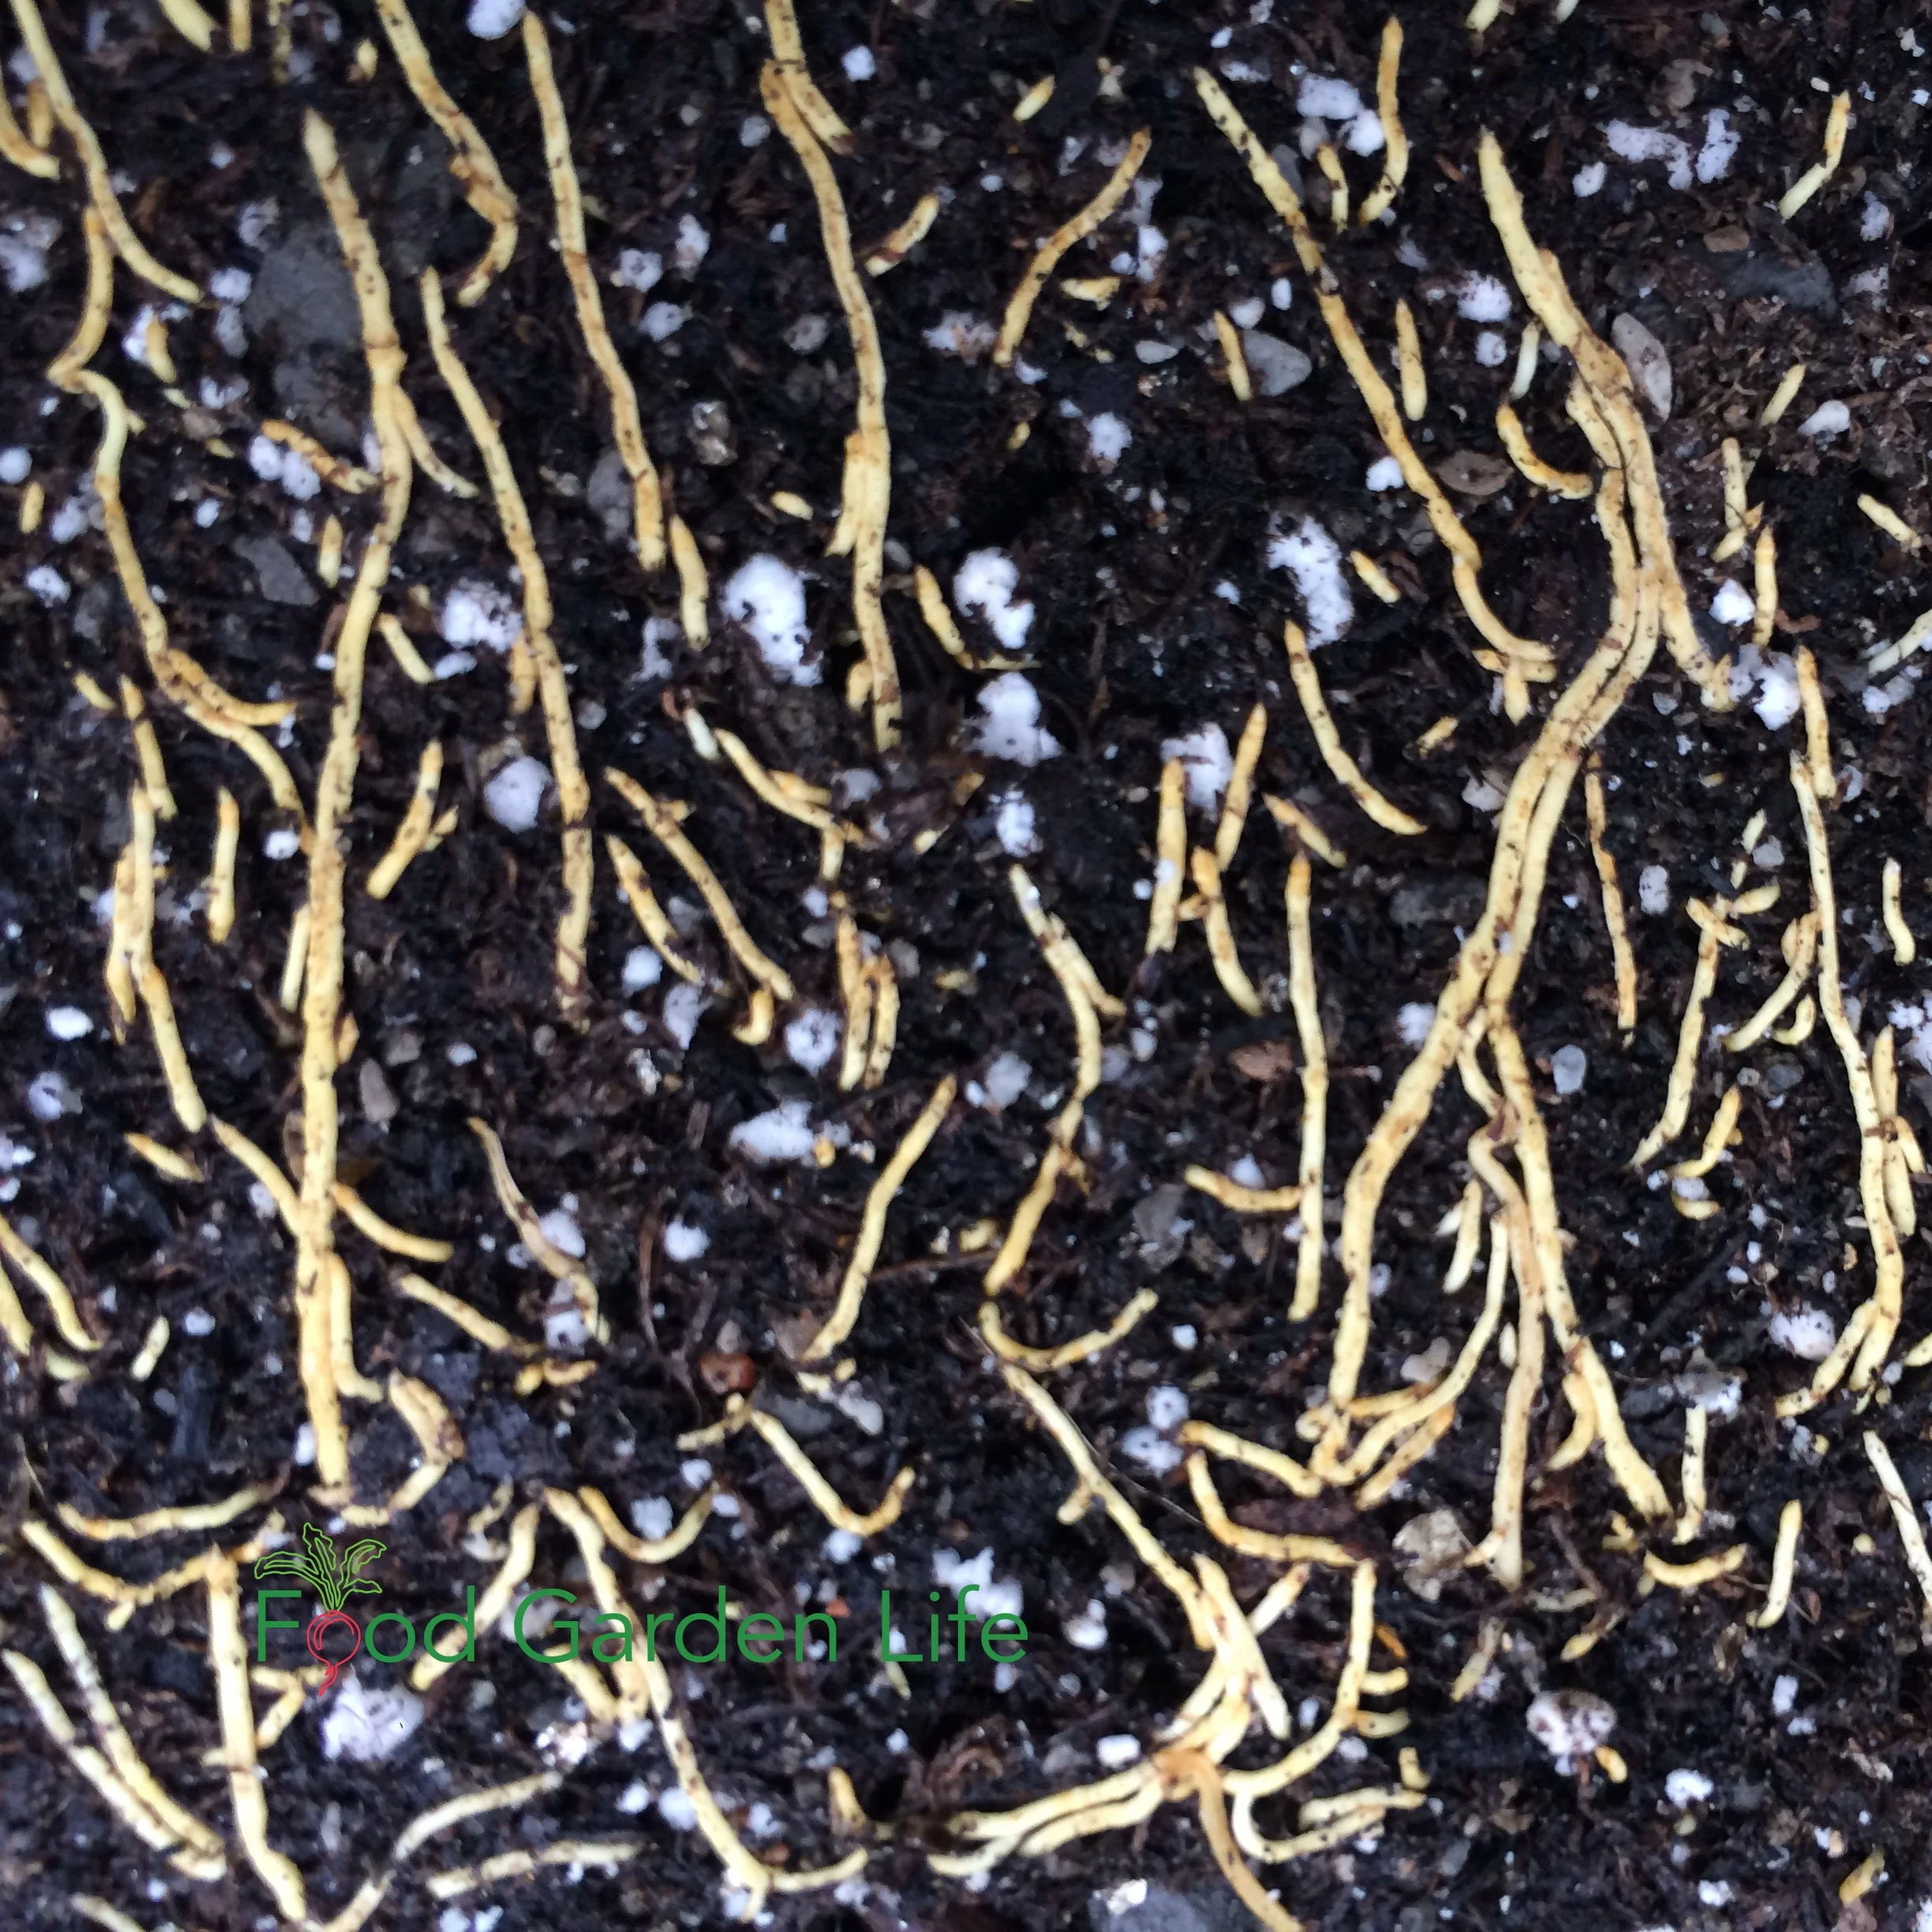
When lemon trees are watered too often, the roots rot. Healthy roots are bright, like the ones pictured.
Top tip for indoor lemon tree care: Watering is the #1 key to success for indoor lemon trees.
Lemon trees don’t like to be in continuously wet soil. They hate having “wet feet”. Too much water can rot the roots.
After watering, the soil at the bottom of the pot remains quite wet until your lemon tree draws on that water – so don’t just water when the soil at the top of the pot looks dry.
When watering your potted lemon tree, touch the surface of the soil, and put your finger into the soil to see if it’s moist below. A good rule of thumb is to keep the soil on the dry side of moist.
In doubt? Pick up the pot to feel how heavy it is.
Frequency of watering will depend on:
Soil
Pot type
Plant size
How fast the plant is growing
How dry the air is
Temperature (and, yes, heated floors will definitely cause the soil to dry out more quickly!)

Keep Your Lemon Tree Through the Winter
And enjoy fresh homegrown lemons!
Pruning an Indoor Lemon Tree
Prune lemon trees so branches are well spaced.
Here are some general pruning tips for lemon plants:
Remove crossing branches
Prune so branches are well-spaced
Cut back to a bud or a branch
Remove fast-growing, upright branches (water shoots)
Remove suckers coming from below the graft union on grafted plants
Indoor Lemon Tree Pests
An indoor lemon tree can get the same pests as an outdoor one...but indoor conditions are often better for the pest!
The two most common pests of indoor lemon trees are:
Scale on an Indoor Lemon Tree

The adult stage of scale insects are immobile and have a shell. Scrape them away with your fingernails, or use a cotton swab soaked with rubbing alcohol.
Scale insects can be dabbed away individually with a cotton swap dipped in rubbing alcohol. If the outbreak of scale is larger, try rubbing them off with your fingers, spraying the tree with a high-pressure water source, or using a biological control such as a predatory mite.
Before noticing scale, you might first notice sticky spots on the floor below, or a dark, sooty coloured film (mould) on leaves. Scale insects give off sticky liquid, and that’s the cause of the sticky spots below, and the mould, which feeds on the liquid. Wash leaves with a soft cloth to remove sooty mould.
Spider Mites on an Indoor Lemon Tree
Watch for spider mites when growing lemon trees indoors. They’re hard to see without a magnifying glass…you might only see little spots moving on a leaf. If leaves begin to look stippled, check for spider mites.
Spider mites do well in the dry air in centrally heated homes. Higher humidity helps minimize leaf drop and make conditions less suited to spider mites
Seasonal Moves for a Potted Lemon Tree

Pin this post!
Moving Your Indoor Lemon Tree Outdoor for Summer?
Gradually harden off plants in the spring over a period of a couple of weeks. Don’t go cold turkey and put them in full sun without hardening them off or there can be sun scald and wind burn.
Moving Lemon Trees from Outdoors to Indoors
If you’re bringing a potted lemon tree indoors for the winter, consider moving it indoors earlier rather than later, so there is less of a drastic change in temperature and humidity. This helps to minimize leaf drop.
While the fragrance of the flowers makes it nice to have lemon trees in a bright kitchen or living room window, your lemon tree does not need to be at room temperature. It will do better in cooler temperatures.
Here are examples of protected spaces that have cooler temperatures:
A bright attic window
A sun room (it does not need to be fully heated, keep the temperature just above freezing)

Find Out How to Grow Your Own Lemons
Harvest more lemons this year. Grow Lemons in Cold Climates Masterclass shows you how to grow a lemon tree in a pot or outside with protection. And get lemons!
Pots for Indoor Lemon Trees
Do not us pots with reservoirs (“self-watering” or “SIP”). This is because this sort of pot keeps the soil constantly moist…and lemon tree roots can rot in wet soil.
A decorative pot with no drainage holes is a recipe for soggy soil and root disease. Make sure to select a pot with drainage holes so that the roots don’t rot!
Lemon Tree Pot Size
When deciding on pot size, consider:
The size of pot you can move
Young plants that have not attained the final desired size can be moved to a bigger pot annually, early in spring or early summer once the roots fill the current pot.
Whether the roots are likely to quickly fill the pot. “Overpotted” lemon plants (plants in pots that are too big) won’t use up soil moisture as quickly—so there is more chance of root rot.
Repotting Lemon Trees

Covering everything from lemon varieties, to location and watering, to pruning and shaping, to overwintering, dealing with pests, and more—and including insights from fellow citrus enthusiasts—this book will give you the confidence you need to grow and harvest fresh lemons in cold climates.
Mature plants don’t need to be repotted annually. Remove and replace the top few centimetres of soil every couple of years.
Soils break down over time and air pores collapse, so you will eventually want to repot the plant in new potting soil.
Lemon Tree Potting Soil
If you’re moving your lemon tree outdoors for the summer, a heavier soil can prevent the pot from tipping over in the wind.
Here’s what I do for potting soil:
For young plants that are growing quickly and that I’m moving to bigger pots regularly, I use a lightweight soilless potting soil. It’s great for fast-growing plants.
For lemon plants that have reached a size I want to keep them at, I add some garden loam to my potting soil for added weight (so they don’t tip over when I put them outside for the summer.)
The potting soil products available to you will depend where you are. The key thing is to tailor your watering to the mix you’re using—and don’t over-water. (I spoke to a grower who make a very well-drained mix because he found he was always heavy-handed on the watering!)
Indoor Lemon Tree Fertilizers
Potted lemon plants must be fed! You’re getting a small amount of soil to support all that plant and fruit development.
Start feeding in the spring, as plants begin to grow. Cut back on feeding in late summer as cooler temperatures and less light cause plant growth to slow.
There are many fertilizing products on the market, both organic and conventional. And each lemon grower has a favourite formula.
Not sure where to start?
Look for “all-purpose” or “general-purpose” product. Make sure it has micronutrients
Decide what suits your style of gardening (do you want to mix solutions regularly – or apply slow-release fertilizer granules just once in the spring)
More on Micronutrients and Potted Lemon Trees

“Interveinal chlorosis” (yellowing between leaf veins) on a lemon tree.
Micronutrient deficiencies are common with lemons. So make sure the fertilizer contains micronutrients.
“Interveinal chlorosis” is a fancy way of saying yellowing between the leaf veins. And it's a common thing to see on lemon tree leaves.
It's often iron, zinc, or manganese deficiencies. These deficiencies can even occur when the micronutrients are present in the soil, but the soil is too alkaline. That alkalinity prevents the lemon plant from taking up the micronutrients.
What to do for Micronutrient Deficiencies in Potted Lemon Trees
Forget lab analyses. Here are some other things you can do:
Use elemental sulphur to lower the soil pH. Available for home gardeners at garden centres.
Occasionally use a water-soluble fertilizer for acid-loving plants.
Some areas have a lot of lime in the water, and it builds up in the potting soil with repeated watering. So just repot your lemon more often.
Flying Dragon rootstock is intolerant of lime – so you might find lemons on their own roots are less troubled by high pH than grafted lemons on Flying Dragon.
Growing a Lemon Tree FAQ
What should I do if I don’t have full sunlight?

Ripe lemons last a long time when left on the the tree.
If you’re growing your lemon tree inside year-round, this can be a problem. You might want to add supplemental light, or grow your lemon under artificial lights.
But…if, like me, you put your lemon tree outdoors for the summer, think of indoor overwintering as simply a way to get your tree to survive the winter.
What about other citrus plants?
Another favourite citrus tree of mine is yuzu, a very cold-tolerant citrus with a very fragrant rind. It grows very well in a pot—and the fruit are very useful in the kitchen. Another very cold-tolerant fruit tree is mandarin orange.
How long can I leave homegrown lemons on the tree?
They last weeks, often months, on the tree. Don't pick what you're not ready to use.
What can I do with my Meyer lemons?

Lemons lined up to process into lemon curd. Meyer lemon curd is my favourite!
Lots of Meyer lemons is a good problem to have. My favourite uses are Meyer lemon curd, or sorbet.
How long before my indoor lemon trees will produce fruit?
Seed-grown fruit trees go through a juvenile stage where they don't bear fruit.
But a rooted cutting or a graft from a mature fruit tree can bear fruit right away. I've seen a six-inch tall lemon tree flower and form fruit. (My recommendation is to pick it off, so that energy is used to grow the plant bigger.)
Can I grow Meyer lemon trees from seed?
If you grow a lemon tree from seed it will likely grow up to be like the parent plant. (This doesn't happen with many fruit trees, apples are a good example of fruit trees that have offspring different from the parent plant.)
Find This Helpful?
Enjoy not being bombarded by annoying ads?
Appreciate the absence of junky affiliate links for products you don’t need?
It’s because we’re reader supported.
If we’ve helped in your food-gardening journey, we’re glad of support. You can high-five us below. Any amount welcome!
Keep Your Lemon Tree Through the Winter
And enjoy fresh homegrown lemons!
More on How to Grow Lemons
Guide to Making the Best Borsch
Recipe for the best borsch, just like Mom made! Here are my 2 must-have ingredients, and tips on making a great stock for your homemade borsch.
By Steven Biggs
How to Make the Best Borsch

When Mom served her homemade borsch we’d empty the pot. It was rich, filling, tangy – and always topped with a dollop of sour cream or “smetana.”
Her borsch was different every time, because she used what she had in the kitchen, and in the garden or cold cupboard.
But it always had beets.
Garden-to-Table Cooking…in Winter
I think about borsch as I plan my vegetable garden because it’s full of vegetables that store well.
Beets, carrots, onions, and garlic all keep well in a cold room or root cellar.
(Mom sometimes used dried lima beans, another food that stores well.)
Borsch Backstory
There are many variations on borsch.

Make the best borsch! Most recipes use red beets, but if you’re growing yellow or white beets, you can use these too (but the final colour of your borsch will be different.
Some are thicker and stew-like; some more soup-like. Some are tarter; some are sweeter.
It’s eaten hot or cold.
There are summer and winter styles, depending on what’s in the garden.
It’s not just the ingredients and cooking styles that vary: So does the spelling of the name. You might come across borscht, borsch, bortsch, borstch, borshtch, borsh, or borshch.
That’s because it’s a staple in many Eastern European cultures.
What most variations share is lots of chopped veggies—especially beets. And there’s usually a combination of tangy and sweet.
Depending on the recipe, the tanginess might come from vinegar, sour cream, sauerkraut, kvass (a drink made from fermented grains), or lemon juice.
The Stock for Making Borsch
Mom’s borsch was decidedly full of meat. The stock depended on what she had on hand.
I simmer a ham bone or smoked pork hock for the better part of a day to get a rich stock.
You can also make a great borsch using vegetable stock. (See the recipe below.)
Essential Ingredients
Here are two ingredients that I love in borsch:
Dill
Sour cream
When there’s fresh dill available, I always use it. Through the winter, I use chopped, frozen dill saved during the summer.
Sometimes I also add dill seed—which is like little nuggets of dill flavour. Use dry dill seed in the winter, and in the summer, try fresh dill seed.
Sometimes a dollop of sour cream is served atop a bowl of borsch. I like that…but I also like to mix a bit into the borsch when I’m almost done cooking to give a tangy, creamy finish.
Create Your Own Unique Edible Landscape
That fits for your yard, and your style!

Pin this post!
Top Borsch-Making Tip
During cooking, you lose colour contrast as the ingredients in your pot of borsch all take on the red colour of the beets.
So create contrast in texture by chopping the different vegetables into different sizes and shapes. (I like long, thin strips of cabbage!)
Then, when it’s serving time, the dollop of sour cream on top is like a white island in the sea of red. If you top this combination with fresh chopped dill, you’ve added two more colours to your ruby-coloured soup.
Serving Ideas
Toasted, buttered rye bread is all that you need with a bowl of borsch. I love a caraway rye bread (which has caraway seeds in it.)
Storage
I make soup by the pot. I keep enough in the fridge for the week, and then freeze some to use at a later time.
Beet Borsch Recipe
Ingredients:
The Veggies
Remember, chop the different veggies in different ways to create texture. The quantities below are approximate. Vary it up depending on what you have on hand, what you like, and the size of the veggies.
6 medium beets, peeled and chopped
¼ - ½ head of cabbage, shredded
2 onions, chopped
2 large carrots, chopped
1 stalk celery, chopped
1 leek, chopped
1 potato, peeled and chopped
3 cloves garlic, crushed
Liquid
4 cups water
1 tbsp. vinegar
2 cups stock (I make mine from a ham bone or smoked pork hock, but you can use chicken or vegetable stock, depending on your preference)
Herbs and Spices
3 tbsp. chopped dill
½ tsp. caraway seeds
Salt and pepper to taste
Thickener
½ cup sour cream or kefir
1 tbsp. flour
Optional
½ cup dry lima beans
Or, if you have shelling beans in the garden, substitute these for the lima beans
I like to chop up and add the beet leaves and stems to the soup too
Directions
Soak lima beans in water overnight
Combine chopped vegetables and liquids in a large pot
Cook over medium heat
Add vinegar as soup begins to boil
Simmer for a couple of hours, until the vegetables are soft
Add dill, caraway seeds, pepper, and salt
Simmer for a few more minutes
Final but important step: The flour thickens the borsch just a little bit. Mix flour into the sour cream or kefir, and then stir this mixture into the soup and simmer for a couple of minutes. (Don’t add the flour straight to the boiling soup or you might get little dumplings!)
Find This Helpful?
Enjoy not being bombarded by annoying ads?
Appreciate the absence of junky affiliate links for products you don’t need?
It’s because we’re reader supported.
If we’ve helped in your food-gardening journey, we’re glad of support. You can high-five us below. Any amount welcome!
Gardening Courses
More Food and Recipe Ideas
Force Rhubarb Indoors
Force rhubarb indoors and harvest tender, pink rhubarb mid-winter while the snow flies outdoors.
By Steven Biggs
Force Rhubarb Indoors for a Mid-Winter Harvest

Rhubarb and candles?
One day I got chatting with my neighbour’s fence installer, who was interested in my garden.
I was picking rhubarb as we spoke, so I mentioned that I also force rhubarb in my basement over the winter.
That’s what got us on the topic of candles.
He was from Yorkshire, England, an area that once produced 90 per cent of the world’s forced rhubarb. He explained that the tradition there is to tend and harvest the crop, grown in big, dark sheds, by candlelight.
After we chatted I went online to see pictures of Yorkshire forced rhubarb. It’s beautiful! The long stems are bright red, and they’re topped with small yellow leaves. Farmers grow this forced rhubarb in the dark to get very long, tender stems. A small amount of light can change the way the rhubarb grows, but because the candles give a faint light, they don’t affect growth.
It’s easy for home gardeners to force rhubarb over the winter too. (You can opt out of using a candle if its’ not your style! I don’t use one.)

My winter-forced rhubarb. Not quite as nice as what they grow in Yorkshire, but still a nice winter treat.
How Forcing Rhubarb Works
Let’s back up to get a handle on what we’re doing. When we force rhubarb indoors over the winter, we’re tricking a dormant rhubarb root into thinking it’s spring.
We trick it by putting it somewhere warm.
That warmth stimulates growth.
If you’ve ever grown plants in conditions where there’s not enough light, you’ll know that they get lanky, with long stems.
The rhubarb sends up long stems too, and the leaves stay quite small while there’s no light.
If there’s light, upward growth slows, and stems and leaves develop a green colour from photosynthesis. It doesn’t take a lot of light to change the growth. Hence the candles.
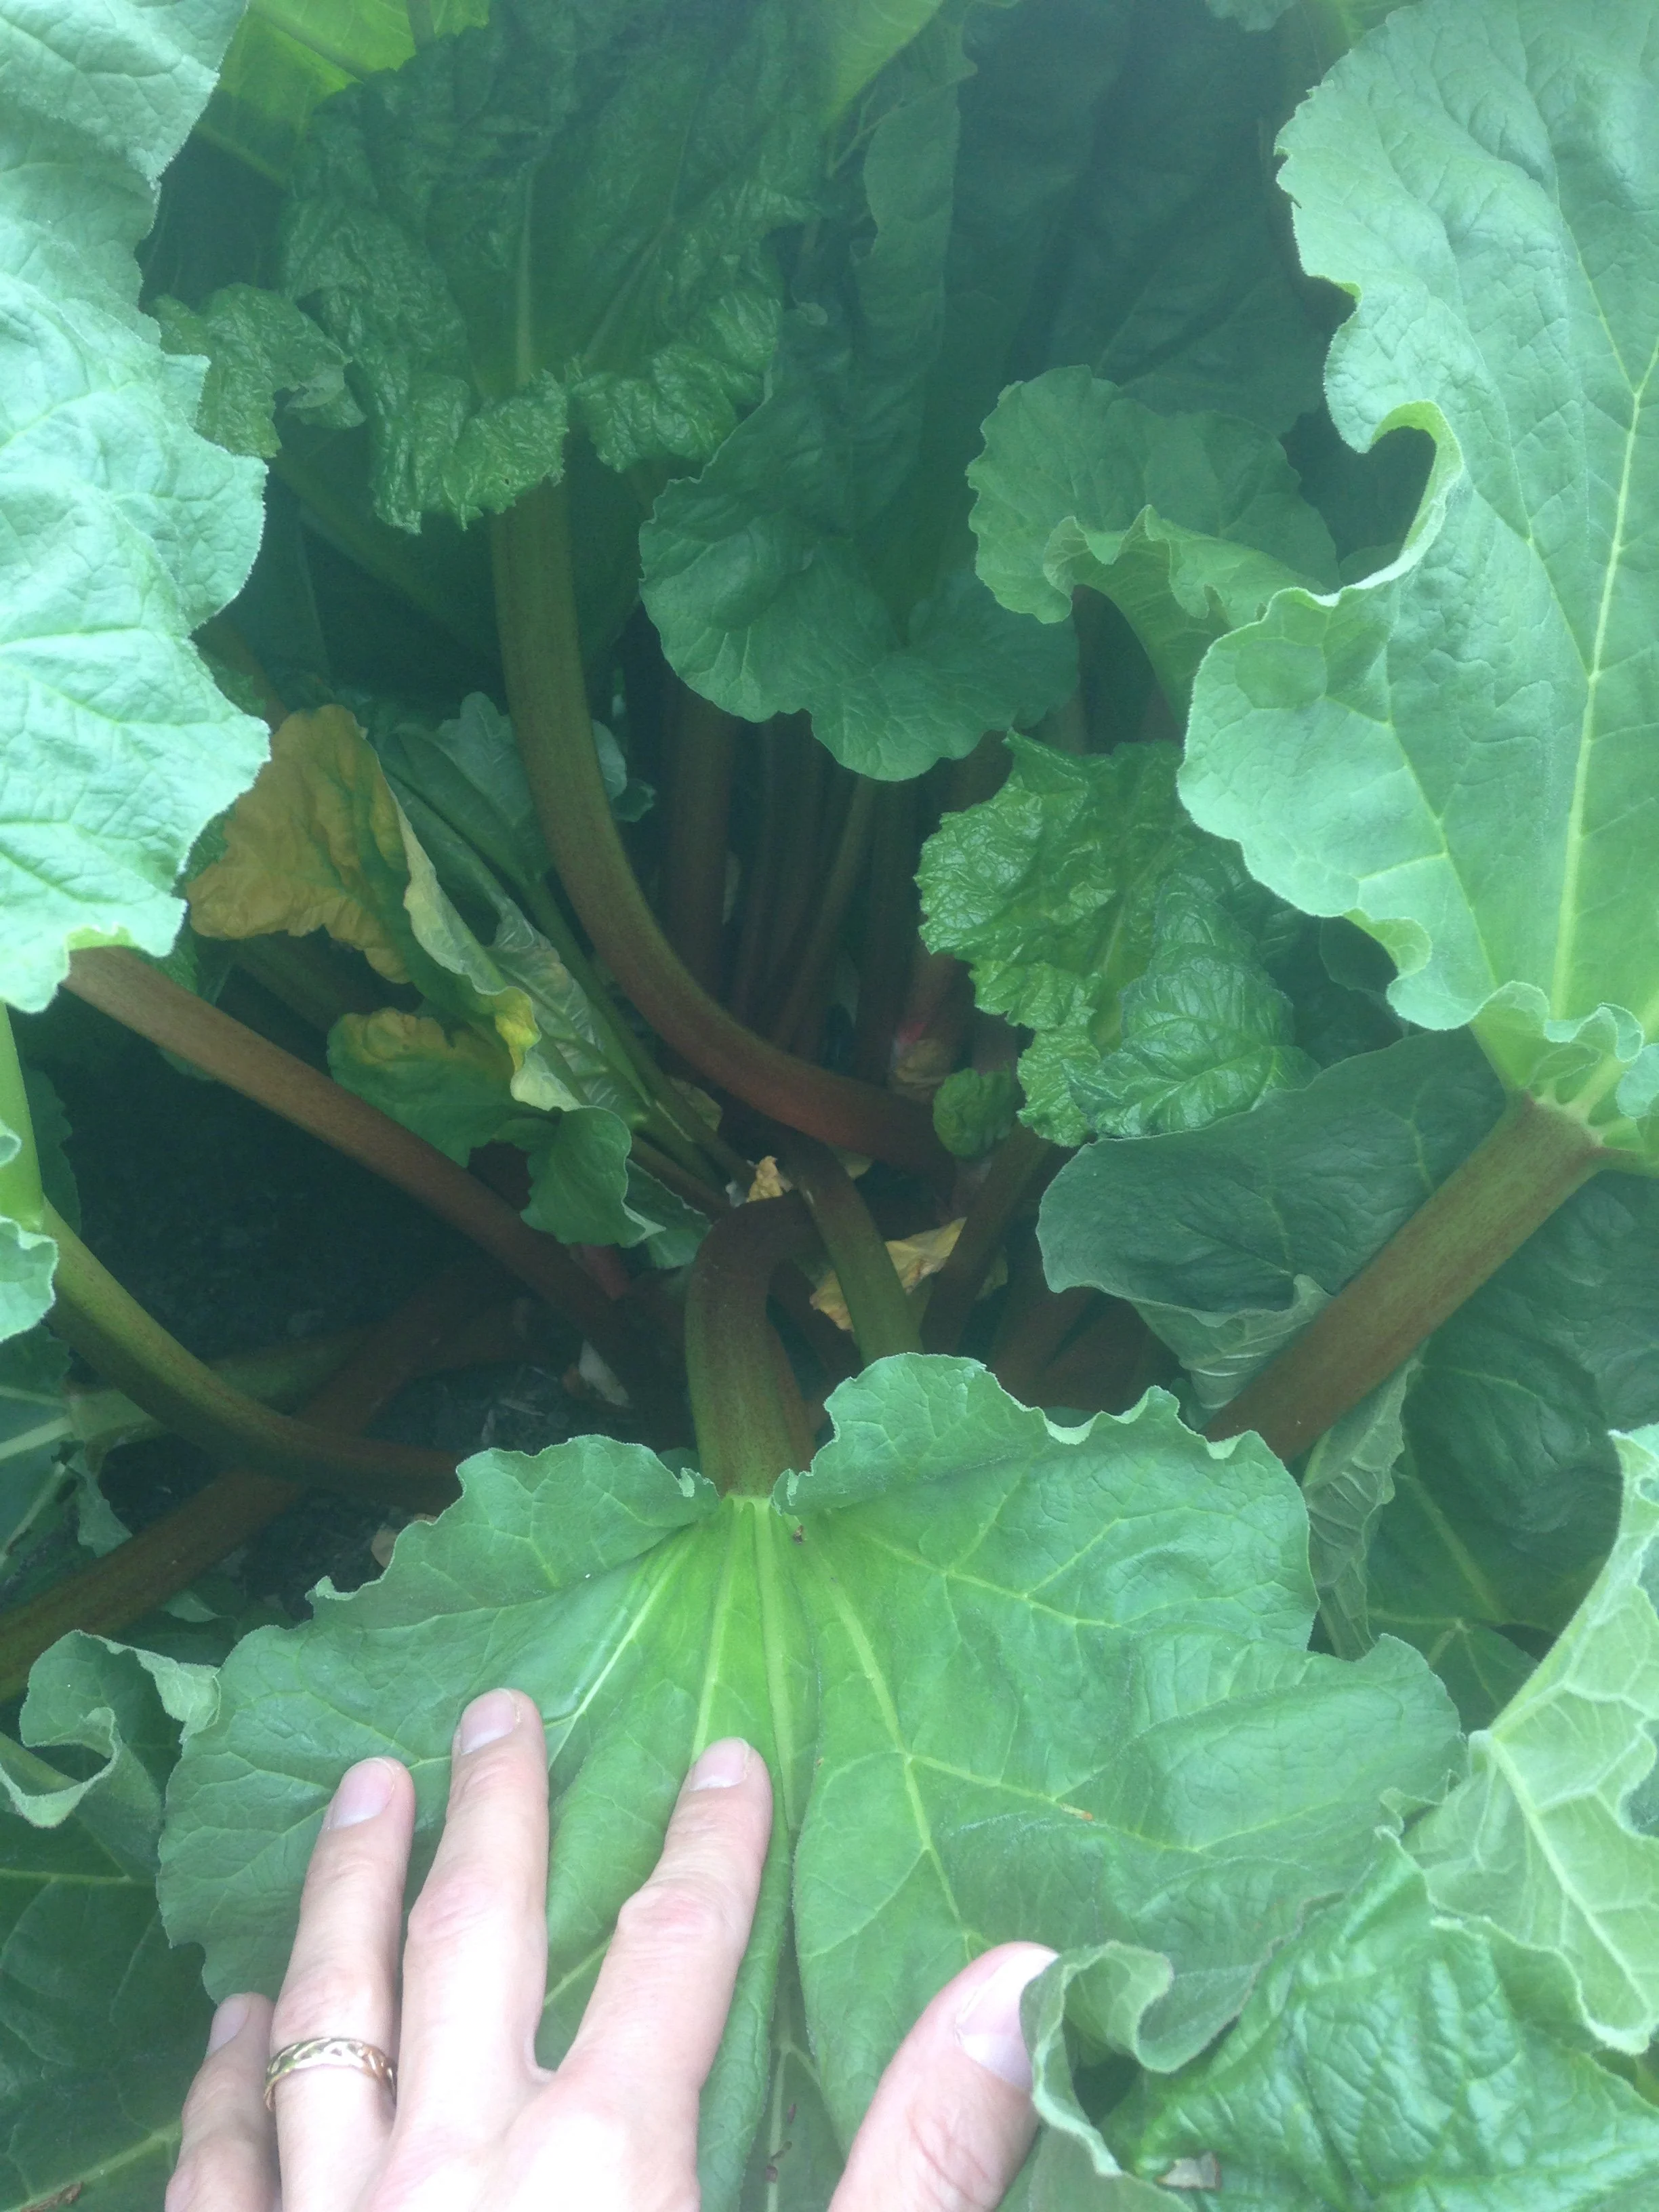
Rhubarb grown in the garden is more green and fibrous than forced rhubarb.
Why Force Rhubarb Indoors
What makes forced rhubarb special is that by excluding light, we get very long, tender stalks with a sweeter, milder flavour than rhubarb grown in the garden.
(Intrigued by the idea of excluding light to change quality? Here’s a fun article about blanching veg.)
Forced and outdoor-grown rhubarb are two very different things. The former has a delicate flavour and beautiful colour. The latter is greener and more fibrous.
Fresh forced rhubarb is a nice addition to the menu over the winter.
There’s one other reason to consider forcing your own rhubarb: It fits in nicely with rhubarb patch care.
In the right location, a patch of rhubarb grows larger each year. When a clump of rhubarb is well established and thriving, you simply “harvest” some of it in the fall by dividing the clump once the leaves have died back and it is dormant. Like plants in a perennial flower garden, dividing and bringing in fresh soil and compost is a good practice to keep a rhubarb patch thriving. As you divide the rhubarb patch, keep the hunk of root that you dig out for forcing.
Steps to Forcing Rhubarb Indoors
In the Summer
When conditions are good, a rhubarb patch gets larger every year. Don’t dig anything yet, but select a part of your patch that you can “harvest” for indoor forcing once the patch is dormant in the fall.
In the Fall
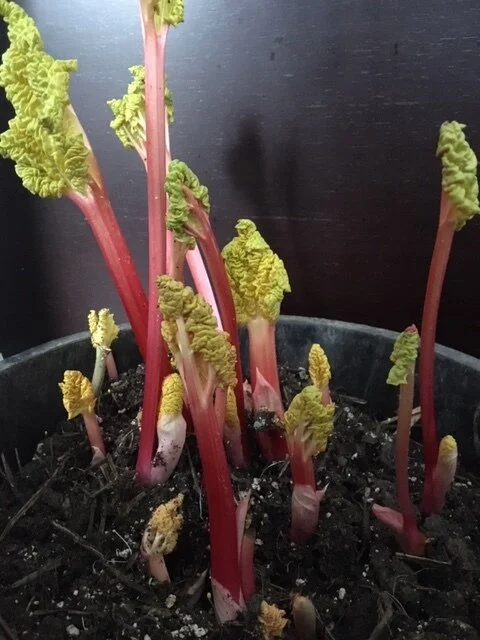
When you divide your clump of rhubarb in the fall, you get roots that you can force indoors over the winter.
The rhubarb should be dormant before you dig out a piece for winter forcing. Wait until the leaves have died back before digging. (But do it before the ground freezes!)
Then harvest the part of your rhubarb patch that you chose during the summer. Rhubarb crowns are woody, so you’ll need a spade to chop down into it.
Pot up the dormant root. Some years I pot the roots into recycling bins. Some years into large black nursery pots. Crates might work well too. Just like a houseplant, you want excess water to be able to drain from the bottom. (Also think about what to put underneath the potted rhubarb root if you don’t want water on the basement floor.)
Once the rhubarb root is potted up, store it somewhere cool until it’s time to force it. I put mine in my garage until mid-winter, when I’m ready to bring it in the house to force it. The roots are very cold tolerant, so if your storage area freezes, that’s fine.
There’s no rush to bring the dormant rhubarb root indoors. Let the root remain dormant and at a cool temperature for a few weeks.
Where to Force Rhubarb Indoors
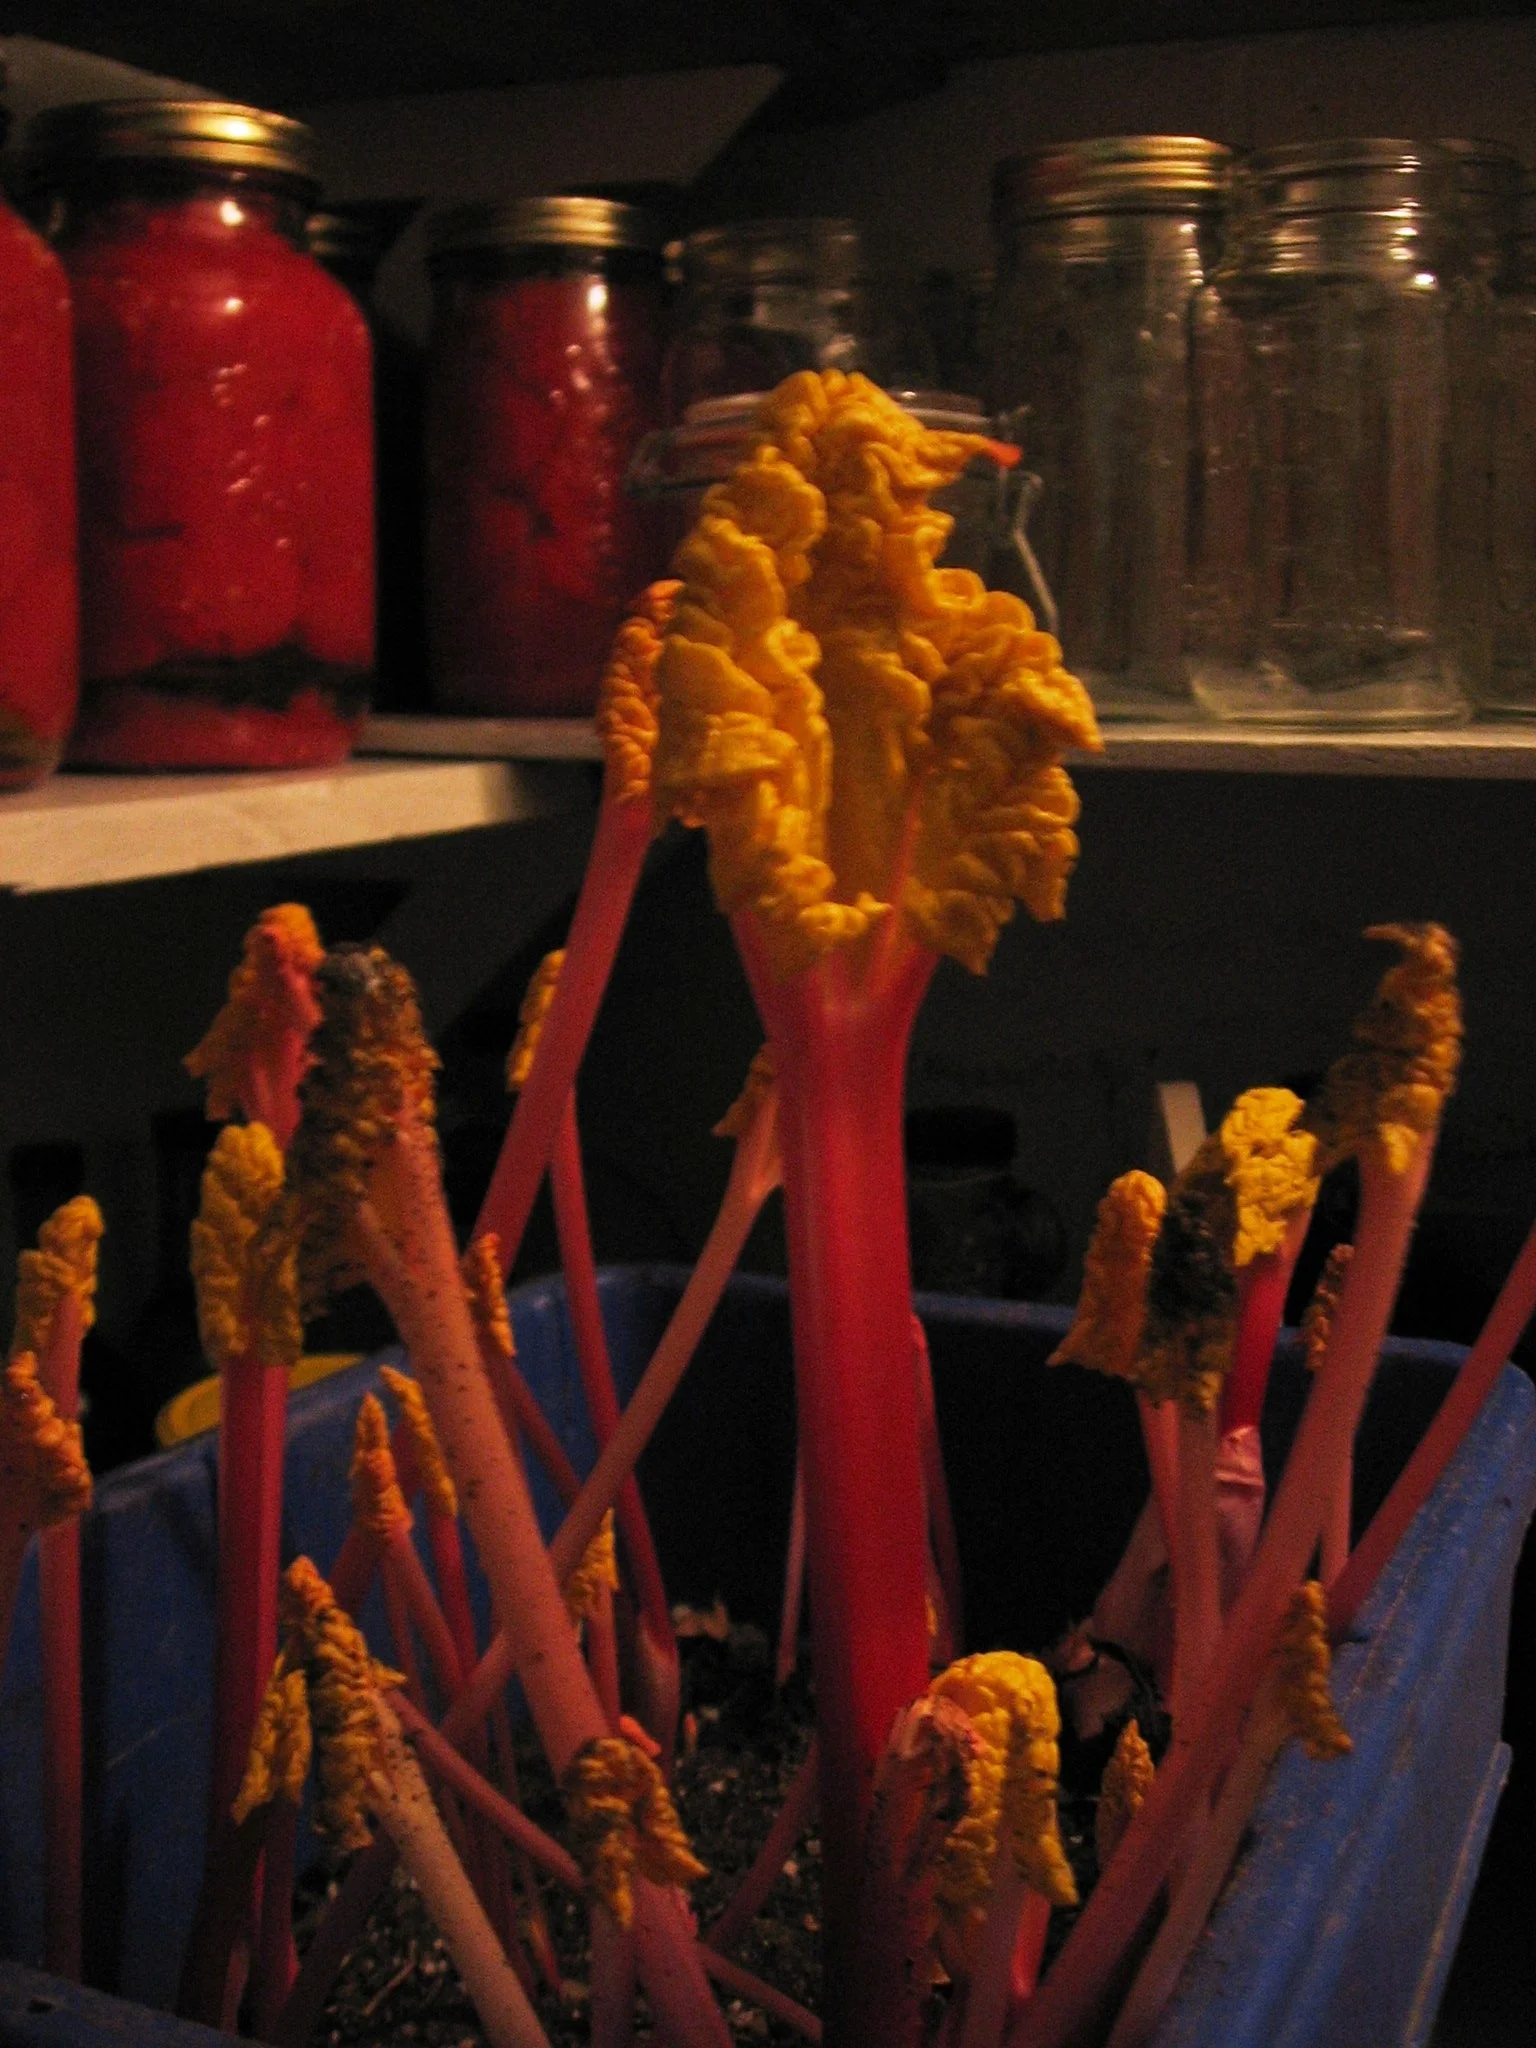
In a previous house I forced rhubarb in the cold cellar under the stairs.
The rhubarb will grow when it is placed somewhere warm. Remember, you’re simply tricking the plant—making it think spring has arrived.
In a previous house, I put the rhubarb in a dark cold cellar under the stairs.
In my current house, I put the rhubarb in my furnace room.
Taking Care of Forced Rhubarb
Care is simple: Just water the soil as it starts to get dry. It should be moist, not wet.
Don’t feed the plant. It is using energy stored in the thick, fleshy roots.
Supplies to Force Rhubarb Indoors
A container to pot up the dormant rhubarb root
Potting soil
Candle (optional!)
Harvesting Forced Rhubarb

Harvest stalks when long enough to use. How big they get will depend on how much root you dug out, and how much energy was stored in that root.
Repeat a few times.
You’ll find that the longer you leave the forced rhubarb root to produce stalks in the dark, the skinnier and skinnier the stalks become. That’s because as the plant continues to send up stalks in the dark, it’s using up its stored energy.
(I find I get about three harvests before stem size gets too skinny to make it worthwhile harvesting.)
When you find the stalks are very skinny and no longer worth harvesting, you can move the plant to the light to just let it grow. Or, if you don’t have space, put it back into your cold-storage space until spring.

Grow a Container Vegetable Garden
And get an early harvest of crops that usually take too long!
Force Rhubarb Outdoors
By the time spring arrives, your winter-forced rhubarb root will be done producing rhubarb.
But you can also force some of your in-ground rhubarb plants. Again, it’s a combination of darkness and extra heat that gives you long, tender stalks.
You do this spring forcing right in the patch, without disturbing the plant.
Here’s what to do:
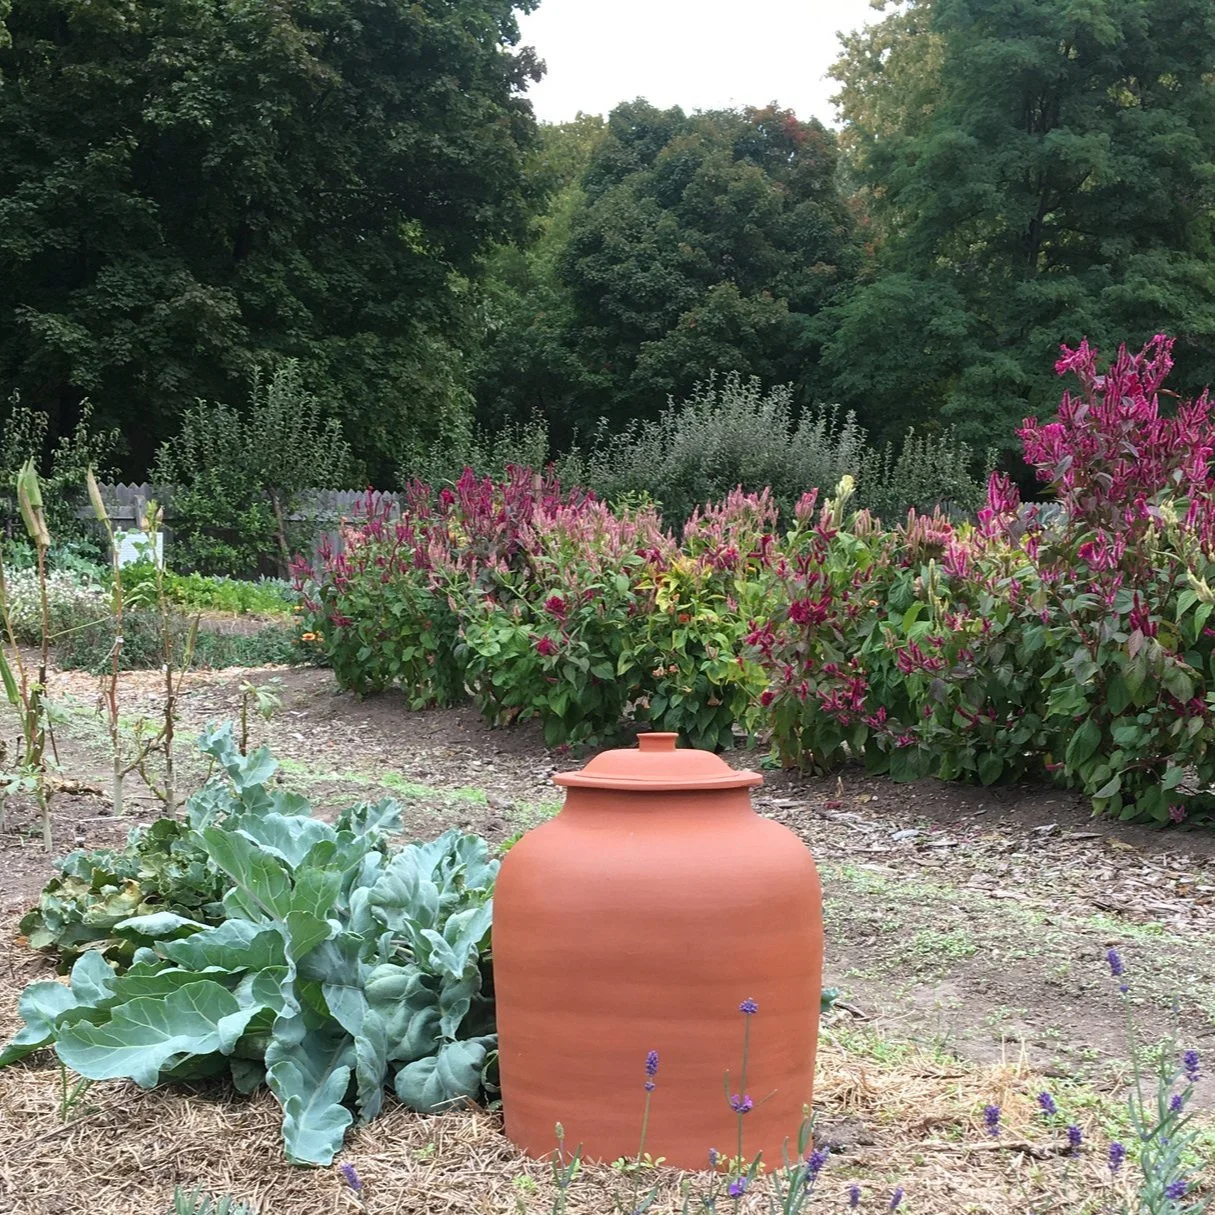
A rhubarb forcer, a purpose-made terracotta pot with a removeable lid for forcing rhubarb.
As you see buds start to swell on the crown, cover a part of the patch with a large inverted pot or garbage can. (To exclude the light and get nice, pink stalks, cover the drainage holes of the pot to keep out light)
You can insulate the sides of pots with leaves or straw if you want to speed up the process by making it warmer inside
Pick once the stalks reach the top of the pot
Give the roots you forced “time off” over the summer to recharge – don’t pick from them
There are also purpose-made terracotta rhubarb forcing pots. They’re beautiful, but I’ve never seen them for sale here in Ontario. And I suspect that if I found them, they’d cost and arm and a leg.
Supplies to Force Rhubarb Outdoors
Healthy, established rhubarb plant
Large pot
Tape to cover holes in the pot
Straw or leaves to insulate the outside of the pot
Rhubarb Forcing FAQ
What if my indoor forcing area has some light in it?
If there is enough light, you will not get the elongated, bright red stalks. Instead the plant will produce more compact stalks with some green chlorophyll in them. Not the end of the world…but you can get green stalks all summer. So create a dark space using a curtain or tarp.

Why are my forced rhubarb stalks smaller than the ones I see at the grocery store?
Commercial growers will often let rhubarb plants grow two or three years without harvesting any stalks before using the root for forcing. That means the root has a lot of stored up energy. In a small home garden, where the gardener is forcing roots that have been harvested from, there won’t be as much stored energy.
What should I do with the rhubarb plant after forcing?
Commercial growers often discard roots that they’ve forced. But you can plant the spent rhubarb root in your garden or share it with a neighbour. But don’t harvest from it for a couple years – allow the plant to recover and store energy.
I just planted my rhubarb. Can I force it?
No. There won’t be enough stored energy in the root to give you good results…and if it’s a small plant, you might kill it. Commercial growers often grow plants in the field without harvesting anything for two or three years to allow the plants to store up energy before forcing.
What about bugs?
Because the potted roots were harvested in cold temperatures, and then stored somewhere cold, don’t worry about bugs.
What’s a rhubarb stick?
Some people refer to rhubarb stalks as “sticks.”
Find This Helpful?
Enjoy not being bombarded by annoying ads?
Appreciate the absence of junky affiliate links for products you don’t need?
It’s because we’re reader supported.
If we’ve helped in your food-gardening journey, we’re glad of support. You can high-five us below. Any amount welcome!
More on Rhubarb
Ontario Farmer Brian French forces 10,000 square feet of rhubarb over the winter.
Hear how he forces rhubarb, and find out his rhubarb-growing tips.
Want More Ideas?
Guide to Blanching in the Vegetable Garden
How to Blanch Celery, Cauliflower, and Other Vegetables. Blanching in the garden refers to covering up part of all of a plant to exclude light.
By Steven Biggs
How to Blanch Celery, Cauliflower, and Other Vegetables

One word, two meanings!
For many people, blanching vegetables means a quick dip in boiling water before freezing them. This type of blanching slows down or stops the enzymes that cause colour and flavour loss.
But there’s another type of blanching, and it’s something that we do right in the garden.
Blanching in the garden refers to covering up part of all of a plant to exclude light. Without light, it grows differently.
The result is a milder tasting and more tender crop.
Keep reading to find out what crops you can blanch—and how to do it.
Common Crops
These are crops that are commonly blanched in the garden. You can grow them without blanching, but blanching improves the quality.
Asparagus
Cardoon
Cauliflower
Celery
Endive and Escarole
Leek
Rhubarb
Different Ways to Blanch

Soil hilled up along a row of leek plants.
Depending on what you’re growing, and how you want to grow it, there are a few ways to blanch vegetables in the garden.
Remember, blanching just means excluding sunlight. Here are some ways to do it:
Cover the plant (e.g. inverted pots)
Hill the plant with soil
Wrap something around the plant (e.g. cardboard or newspaper)
How Long?
The plants are blanched for a few days to weeks before harvest – not the entire life of the plant.
Crop Blanching Tips
Asparagus
If you’ve ever seen white asparagus, these are spears that have been blanched by hilling with soil. It’s a delicacy in Europe, less common in North America.
Cardoon

Blanching cardoon plants by wrapping them in fabric.
I’ve heard of people growing cardoon in a trench…but it’s a pretty big plant needing a pretty big trench. Instead, wrap mature plants 2-3 weeks before harvest, leaving the top of the older leaves exposed, but the base covered. The idea is that the inner leaves are white and tender. Some people use cardboard, but I think the most elegant cardoon blanching I’ve seen was burlap coffee sacks.
Cauliflower
With cauliflower we blanch the head. White-headed cauliflower is blanched to keep it bright white. It is still edible if you don’t blanch it…but can develop a yellow or green tinge, and get a stronger flavour.
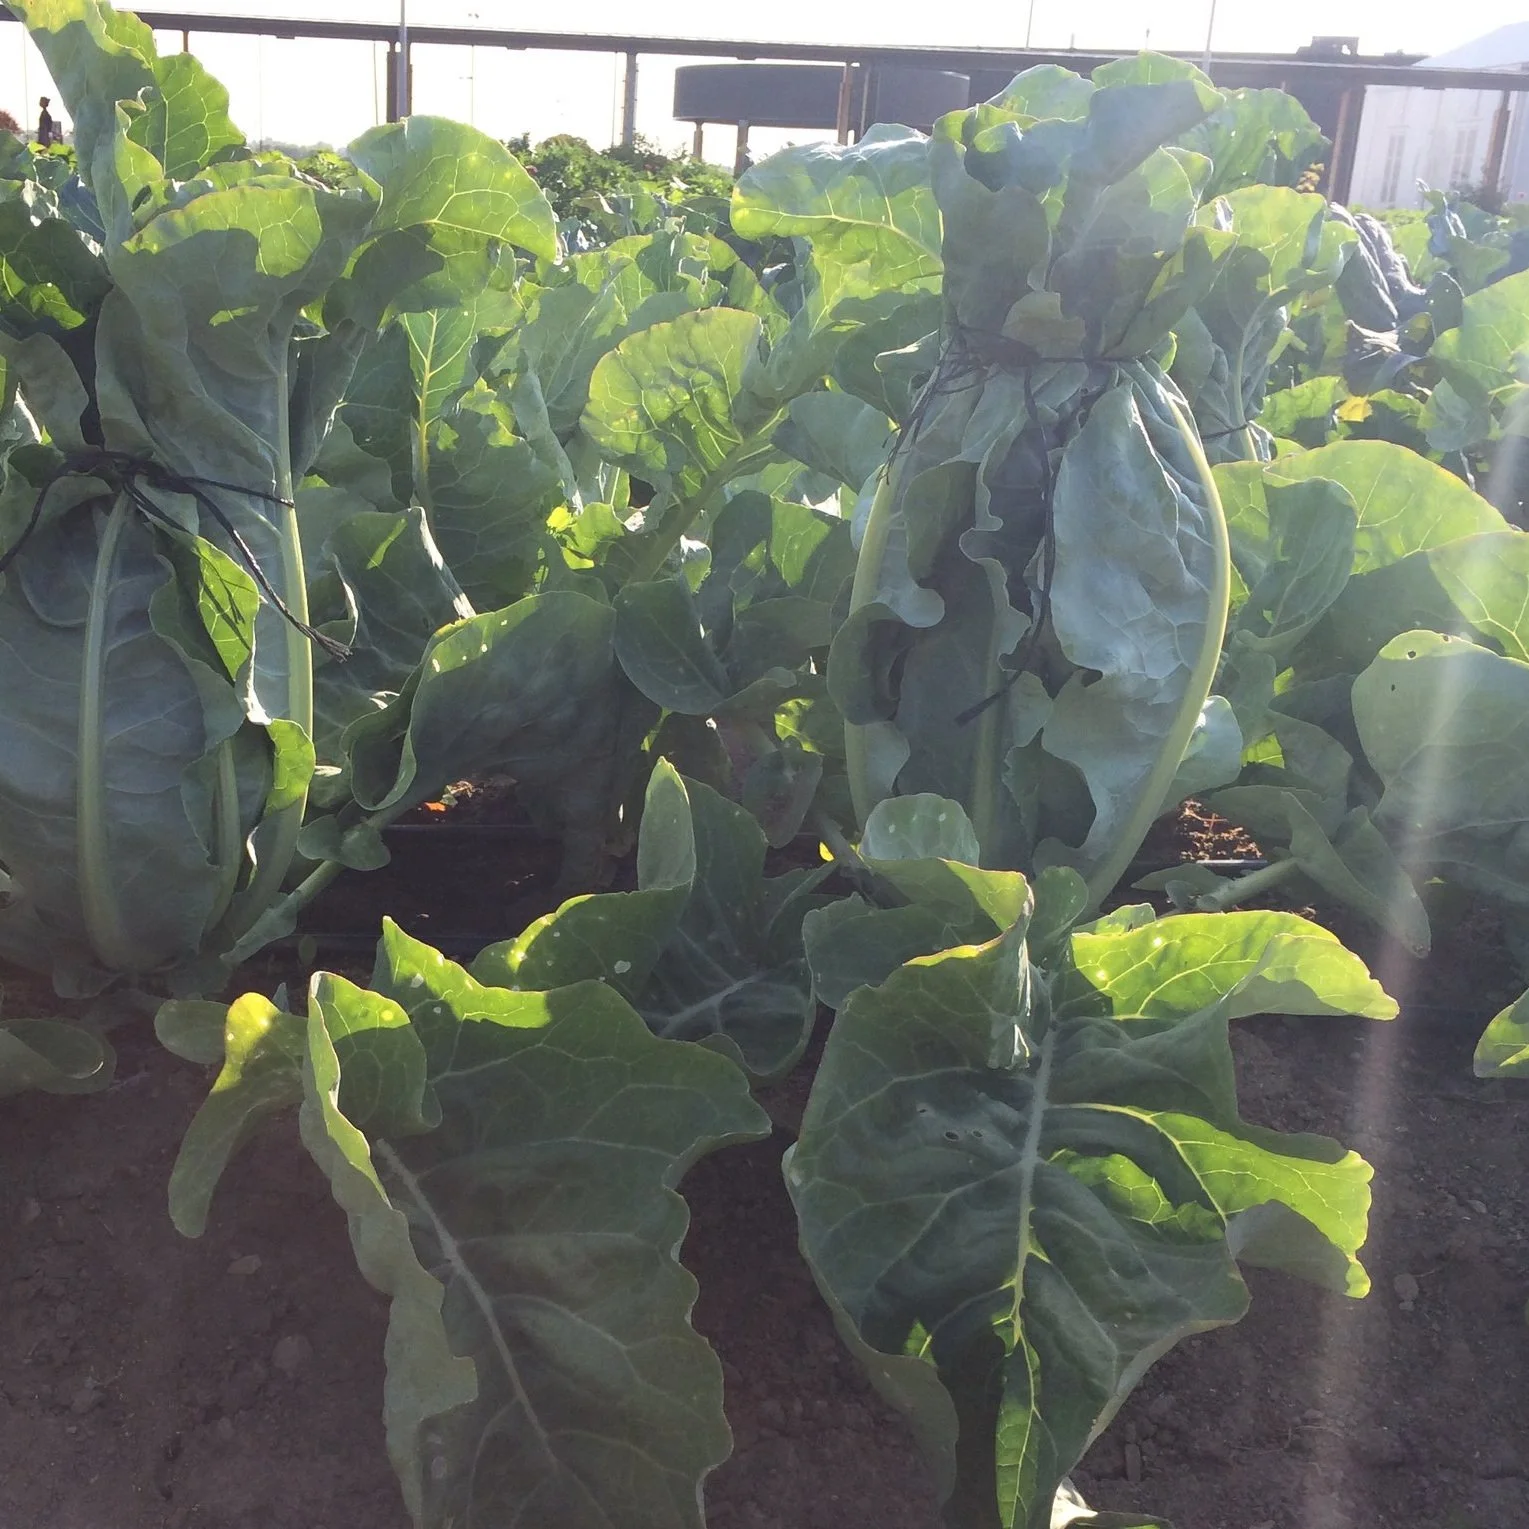
Blanching cauliflower by tying together leaves to cover the head.
As the developing heads begin to expand, tie leaves around them to keep out the light. Don’t wrap the leaves too tightly over the small head as it will need space to expand. I’ve heard of people using paper bags, but if there are leaves there, it’s easier and less wasteful.
There are also “self-blanching” types of cauliflower, with leaves that naturally grow around the developing head. Some of these varieties still benefit from additional wrapping.
Celery
With celery we blanch stalks for 2-3 weeks leading up to harvest, keeping the leaves at the top exposed. Blanching helps reduce bitterness and lighten the stalk colour.

Blanching celery with waxed milk cartons that have the top and bottom cut out.
As with cauliflower, there are also “self-blanching” celery types. These have a lighter colour and milder flavour.
Hilling soil around the stalks is one way to blanch celery. Grow celery in a trench, and then gradually fill in the trench with soil leading up to harvest. If you use soil, first wrap the stalks with newspaper, so you don’t get lots of soil between the stalks.
You can also blanch celery by tying paper around the stalks, covering with waxed cardboard milk cartons or tall narrow tins that have both ends removed, or surround the stalks with boards.

Blanching celery plants with boards.
Grow a Container Vegetable Garden
And get an early harvest of crops that usually take too long!
Endive and Escarole
A board propped up over a row of endive or escarole is an easy way to blanch it.
Many people grow endive and escarole for the bitter taste. But you can blanch them to reduce the bitterness. Cover entire plants for a week before harvesting.
For individual plants, cover with a clay pot or a paper bag. For a whole row of plants, place a board over the row.
Leek
The base of leek plants can be blanched to give tender white flesh. In late summer, hill the base of the plant with soil, or wrap to exclude light. As with celery, leeks can also be grown in a trench that is gradually filled in as the plant gets taller.
Rhubarb

Blanch rhubarb by cover up plants with an inverted bushel basket as they begin to grow in spring.
When rhubarb is blanched it produces tender, elongated stalks that have a bright pink-red colour.
To blanch rhubarb, put an inverted bushel basket over the plant in the spring, as it begins to grow.
Why Not Blanche a Weed!
While a weed for many, dandelions are a kitchen staple for others. Our springtime menu includes dandelion frittata or a mixed salad with dandelion leaf pieces.
But dandelion, like its kin in the chicory clan, can be very bitter. The solution is to blanch dandelion. Simply cover with an inverted clay pot or a board – and you’ll be rewarded with tender, translucent, and mild-tasting leaves.
Blanching Challenges
Blanch dandelion by covering with an inverted pot or a board.
Blanching is easy to do. The biggest challenge is remembering to do it in time.
Another challenge is lightweight covers that blow away on windy days. If you use terracotta pots, they’re heavy enough to stay in place. But plastic coverings can blow away. The solution is to weigh them down with a brick or rock.
Top Blanching Tip
Put a note on your calendar to remind you to blanch your crops ahead of time.
Garden Blanching FAQ
Is Blanching Optional?
You don’t have to blanch these vegetables to eat them. But blanching gives a milder tasting, more tender, and more attractive vegetable.
What is “Self-Blanching?”
Some varieties don’t need help from gardeners with blanching. For example, with cauliflower, self-blanching varieties have leaves that grow to cover the head. Self-blanching celery has stalks with a mild flavour that don’t require blanching.
Why Grow Varieties that are not Self-Blanching?
You might be wondering why bother growing varieties that need blanching when self-blanching varieties are available. As you choose varieties, self-blanching is one trait to consider, along with other things such as having different harvest windows, price, and availability.
Find This Helpful?
Enjoy not being bombarded by annoying ads?
Appreciate the absence of junky affiliate links for products you don’t need?
It’s because we’re reader supported.
If we’ve helped in your food-gardening journey, we’re glad of support. You can high-five us below. Any amount welcome!
Looking for More Ideas?
Gardening Courses
6 Reasons to Grow a Lemon Tree
You can easily harvest your own lemons if you grow a lemon tree in a cold climate. Here are 6 reasons to grow lemons in areas they don't normally survive.
By Steven Biggs

You CAN Grow Lemons Somewhere Cold!
Yes you can grow citrus trees. Even in places where they don’t normally survive the winter.
And I think that the best citrus for cold-climate gardeners to start with is a lemon tree.
There are many ways to successfully keep lemon trees alive over the winter.
You don’t need a greenhouse. And you don’t need a bright, sunny window.
Here are my Top 6 reasons to grow a lemon tree in a cold-climate garden.
1. Lemon Trees are Forgiving
As a student I worked at a small U.K. nursery that had the U.K. National Collection of citrus trees. I brought home a couple of small Meyer lemon trees in my suitcase at the end of that summer.
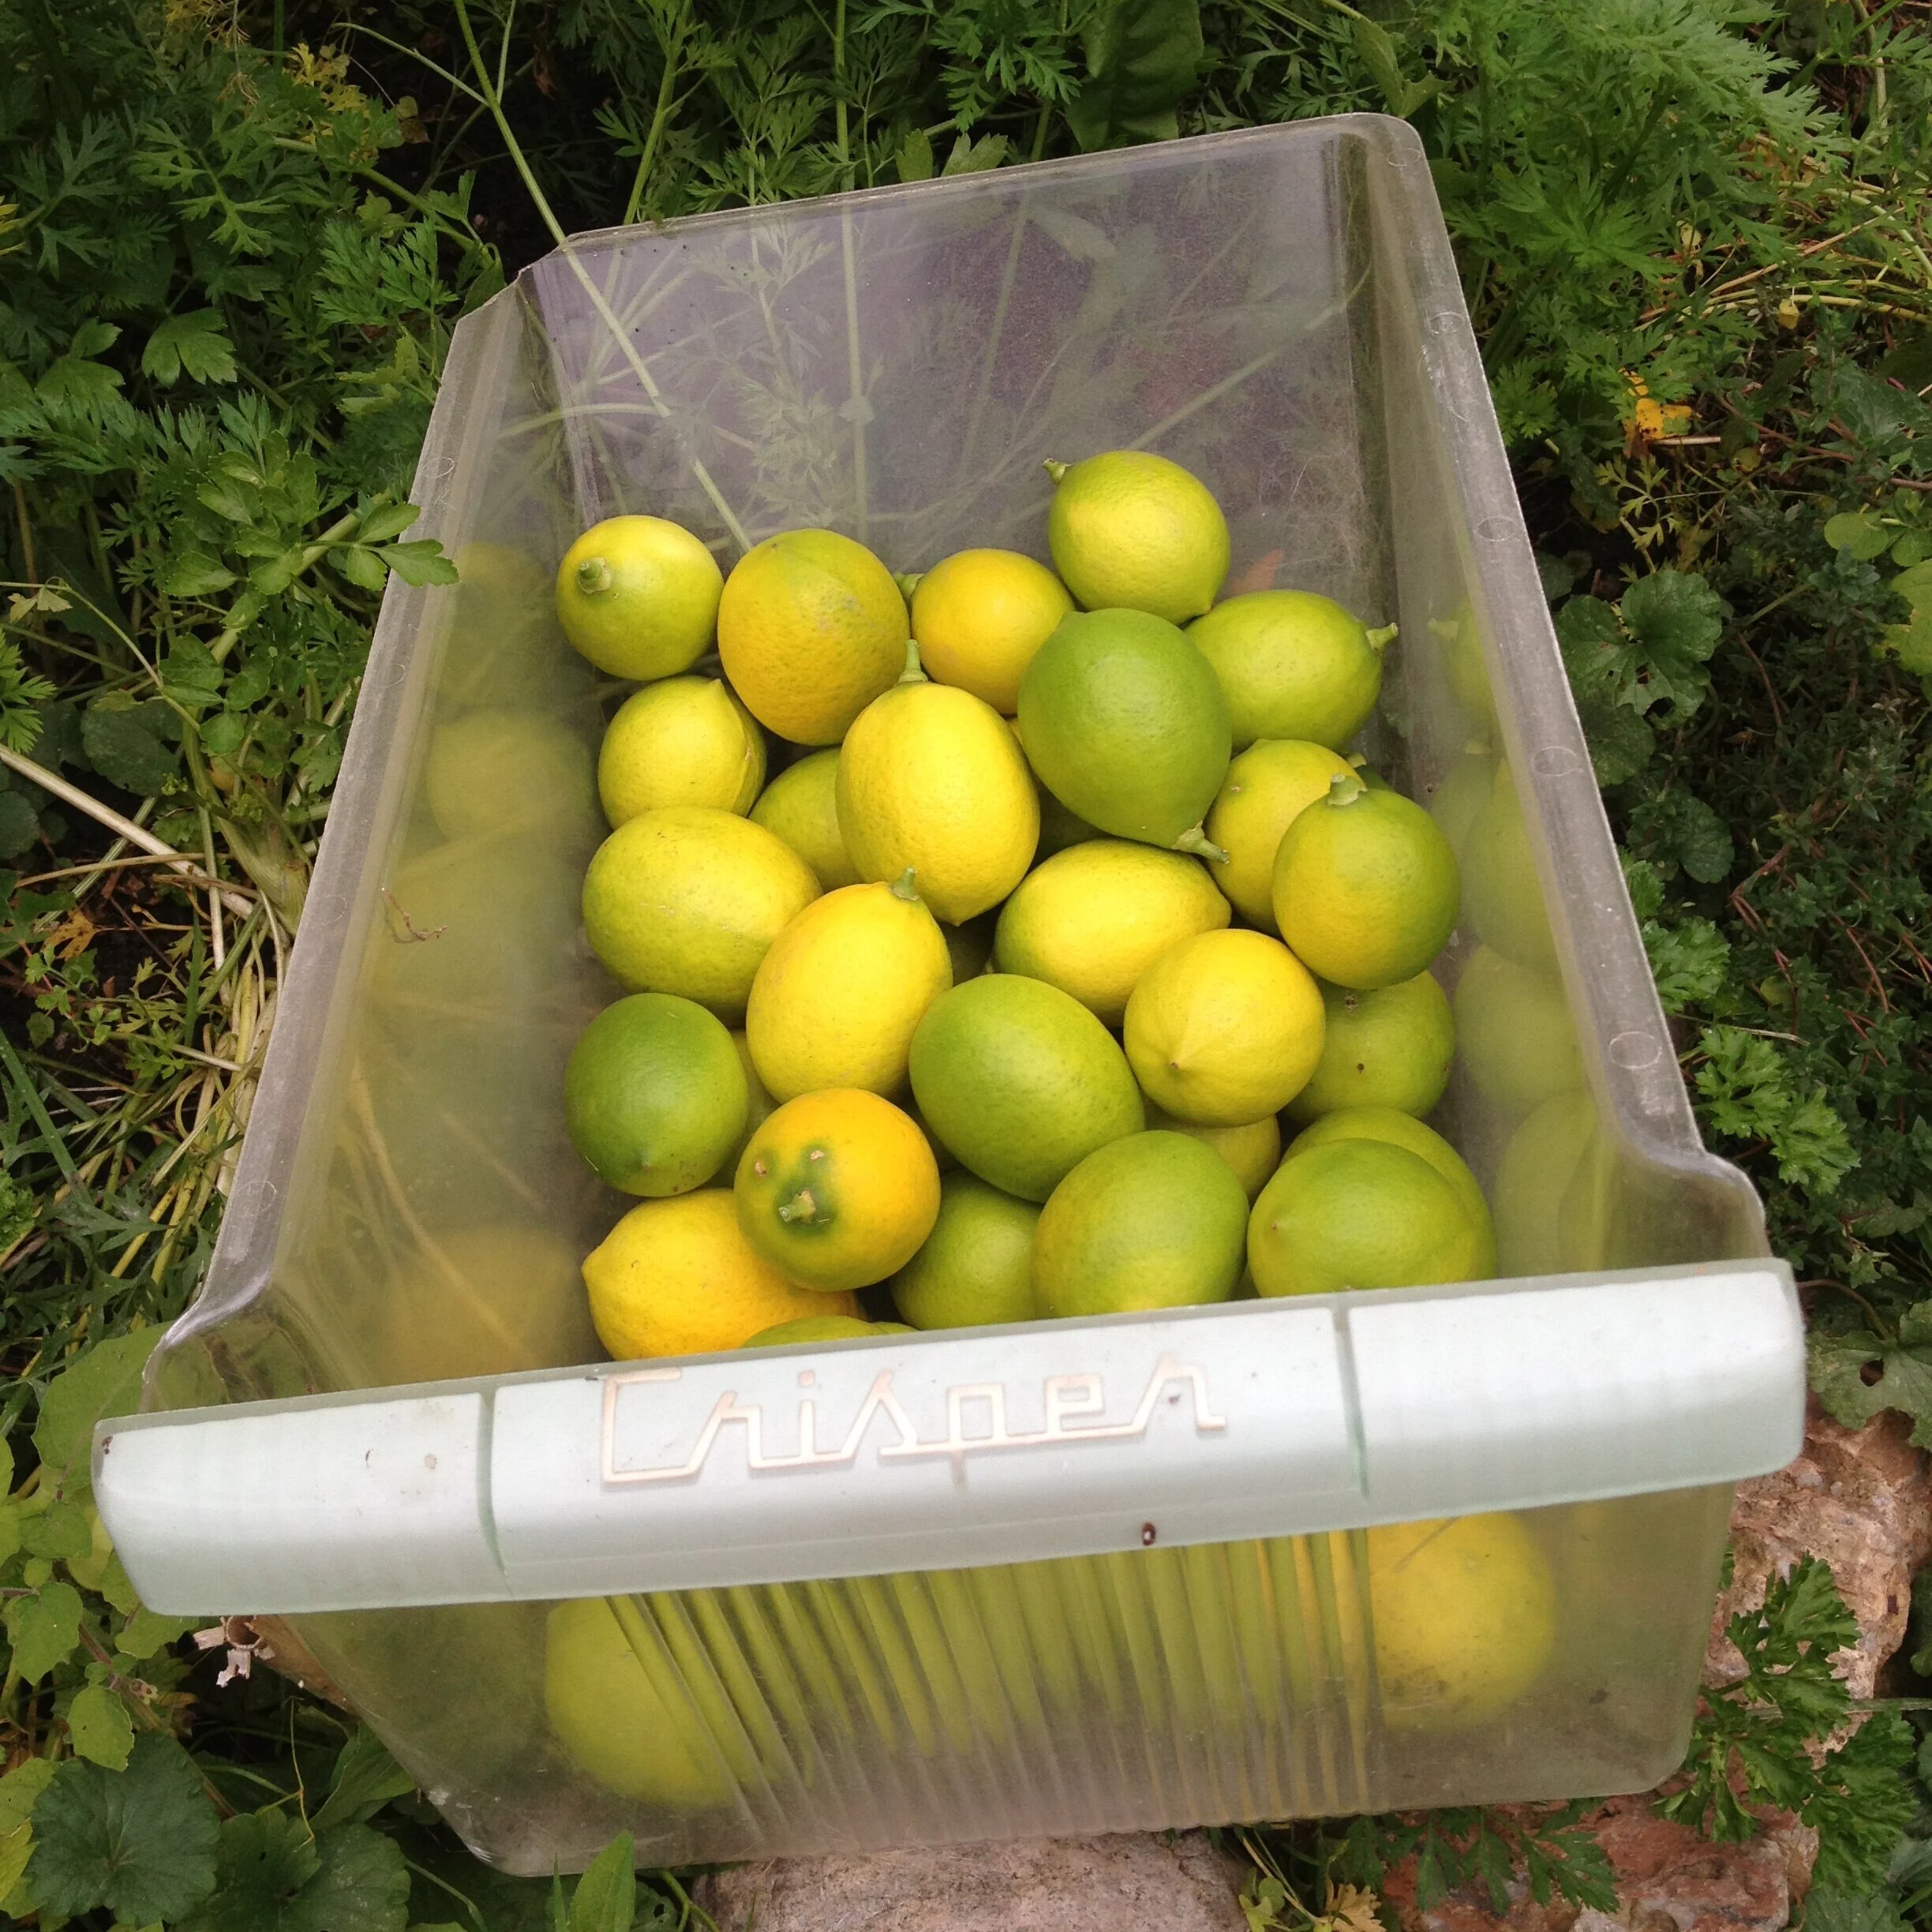
6 Reasons to Grow a Lemon Tree in a cold climate. A Toronto lemon harvest!
Then those lemon trees languished for years. I was a student and moved around a lot, so they went from fluorescent lights to dimly lit apartment windows. It wasn’t until I moved into my first house that I started to pay attention to my lemons.
When one of my now knee-high Meyer lemon trees bore over 50 lemons in one picking — the small tree was so laden with fruit it looked like it was doing yoga stretches — I was hooked!
But until then, that lemon bush withstood a decade of me not knowing what I was doing.
Find out How to a Grow Lemon Tree Indoors (That Actually Produces Lemons)
2. Lemon Trees are Cold-Hardy
When we moved from our bungalow to a house with an old sunroom that stayed just above freezing over the winter, my lemons were happier than they had ever been. The cool winter temperatures suited them. There were fewer insect pests, and when spring came, those trees flowered as they had never flowered before.
3. Lemon Fruits Ripen in Moderate Climates

While Bob grows lemon trees outdoors, he grows oranges and other “sweet” citrus in a greenhouse. Lemons don’t need this extra heat to ripen.
Lemons ripen in climates too cool to properly ripen other citrus.
Canadian citrus expert Bob Duncan lumps citrus into two broad groups: “sweet” citrus such as oranges and grapefruit, and “acid” citrus such as lemons and limes.
This distinction is very useful for cold-climate gardeners to understand because sweet citrus need a sustained high summer heat for sugars to develop in the fruit. Acid citrus, on the other hand, doesn’t need sustained heat to ripen.
Bob lives in the Pacific North-West region of North America, which has a moderate climate. To get his sweet citrus to ripen, he uses an unheated greenhouse. The greenhouse is for additional summer heat — not because of winter hardiness!
BUT THE LEMONS — an acid citrus — don’t need the greenhouse to ripen, even though the summer temperatures are not hot where he is. “With lemons, they don’t need as many summer heat units,” Bob explains. (“Heat units” is a concept often used in agriculture. It considers daily maximum and minimum temperatures and the heat that a plant experiences during a growing season.)
When you consider its combination of cold-hardiness and ripening requirements, lemon makes a very practical citrus for the home gardener in a cold climate.
Keep Your Lemon Tree Through the Winter
And enjoy fresh homegrown lemons!
4. There’s a Thrill in Pushing Boundaries
You may be surprised to learn that there is a history of lemons being grown way beyond the boundaries of where they could survive without human help.
The lemon has a bit of a cold-climate pedigree!

My daughter with a Ponderosa lemon tree and a lemon harvested in the spring. Note the smaller lemons that will ripen later in the year.
Time and again gardeners and farmers in areas that would normally be too cold for lemon cultivation have devised ways to grow lemons.
If you are interested in a delicious mix of history, horticulture, cooking ideas, and travel, check out The Land Where Lemons Grow: The Story of Italy and Its Citrus Fruit. Author Helena Attlee explores the history of citrus fruits in Italy, including some cool-climate adaptations. Of course, I didn’t read the book in the order it’s written. I went straight to the chapters about Amalfi and Lake Garda, which have a history of growing lemons in sub-optimal climates.
If growing a lemon tree in a cool climate sounds like a lot of bother, well, honestly … it is. But maybe you’re like me and enjoy the challenge of growing something that’s not supposed to succeed in your climate. You wouldn’t be the first.
5. Lemons are Versatile in the Kitchen
Some people are surprised to hear that I think it’s worth the effort of growing lemons even though they are widely available in supermarkets.
But trust me, it’s worth the effort.
Lemons are best when they are fresh. It’s no fun trying to zest or juice a shrivelled, dry lemon that has sat out too long. The easiest way to store lemons so that they stay fresh is on the tree—they last a long time on the tree!
In February I can pick a handful of Meyer lemons from the trees stowed in my greenhouse and make sorbet. The juice and rind of this lemon have a unique flavour (often described as a cross between a mandarin orange and a conventional lemon) that really can’t be beat.
There’s Also the Zest
I’ll also zest a Ponderosa lemon into our chicken kebab marinade. Again, a unique taste I can’t buy at the grocery store. The Ponderosa lemon zest is a bit lime-like to my taste buds. (It’s no surprise that it has a unique flavour because it is thought to have some citron, another citrus, in its ancestry.)
Don’t Forget the Leaves
When you grow your own lemon trees, you can harvest more than just the fruit: Mid-winter I will grab a few lemon leaves to wrap around kebabs that I’m cooking on the grill. Lemon leaves are fragrant when bruised or torn, and impart nice flavour into a kebab while keeping it moist.
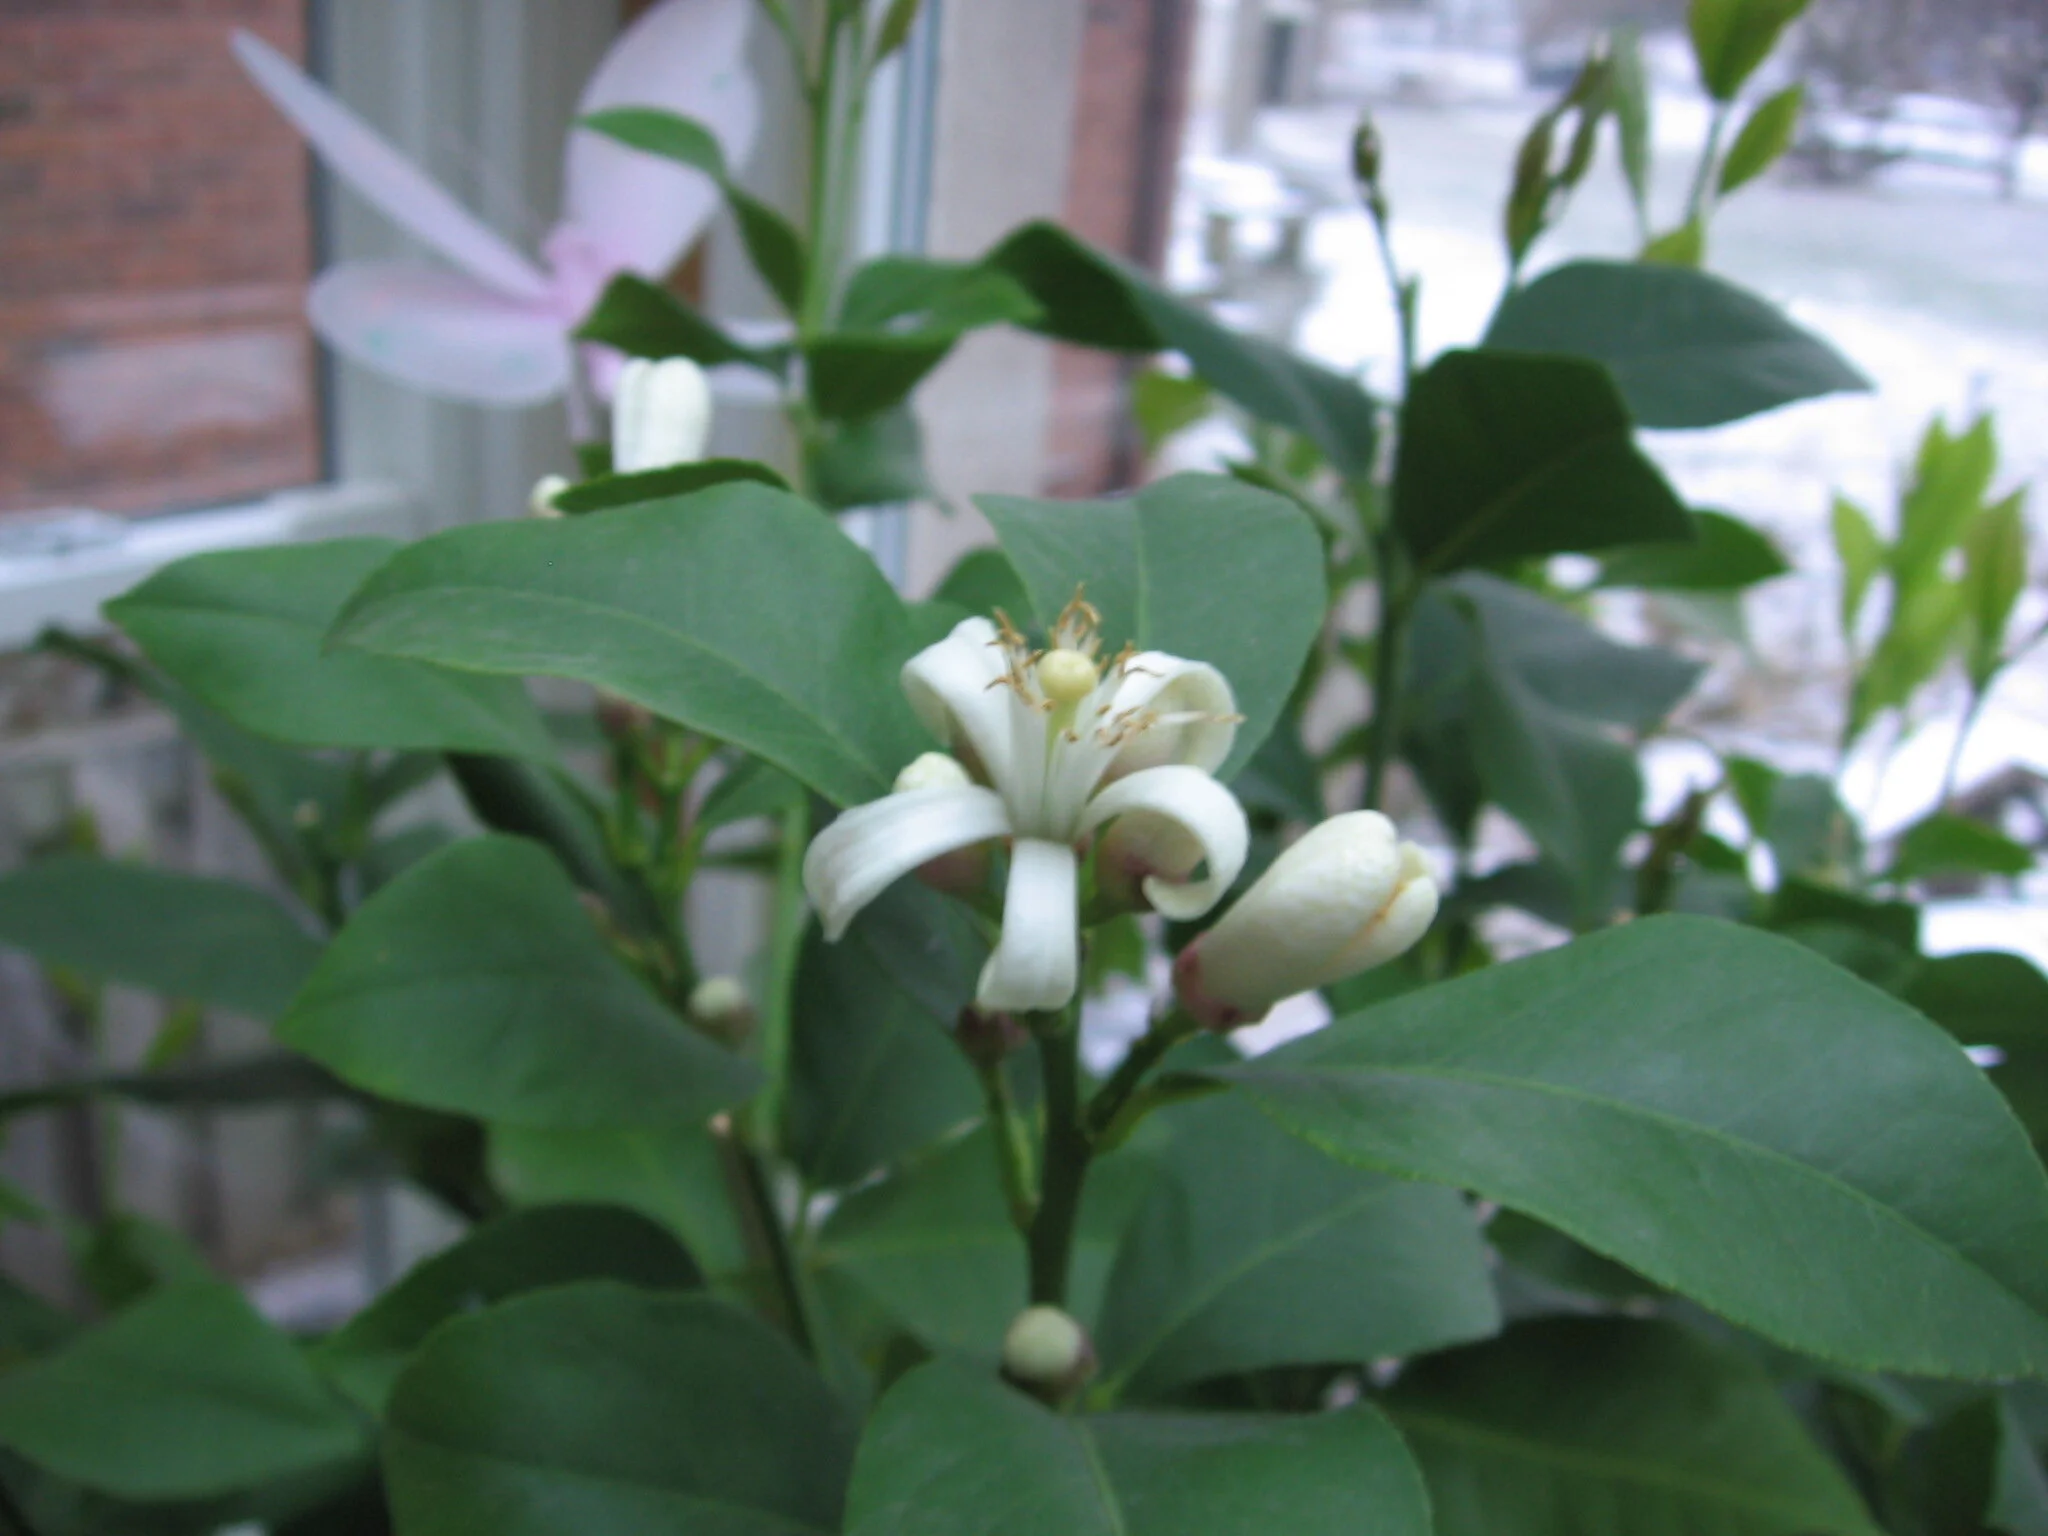
Grow a lemon tree for the fragrant flowers that come out at the same time that fruit is ripening on the plant.
6. You Get Flowers and Fruit at the Same Time
Some citrus plants flower once a year. Bob Duncan’s oranges, for example, bloom once, in the spring.
Not Lemons! Lemons yield fruit at different stages of maturation and flowers all at same time.
Even after the main spring bloom is over, you can still enjoy the fragrance of the flowers. With lemons, home gardeners can enjoy harvesting fruit and the fragrance of blossoms year-round.
Good for the patio: good for the kitchen garden!
Keep Your Lemon Tree Through the Winter
And enjoy fresh homegrown lemons!
Lemon + Citrus FAQ
Do lemons grow on trees or bushes?
Both. How the plant grow depends on two things:
How you prune it.
Natural growth habit of the plant. (Meyer lemons have more of a bush-like growth habit.)
Are there indoor citrus trees?
The conditions in centrally-heated homes tend to be warmer and drier than is ideal for most citrus. You can still grow potted citrus in a bright window — but a cool bright sunroom or greenhouse is better.
For more about how to grow indoors, read this article about how to grow a lemon tree indoors.
How to you feed citrus trees?
Read this article about how to grow a lemon tree indoors.
Can you grow oranges in Canada?
You can grow oranges in a greenhouse, or as a potted plant that gets winter protection.
Find This Helpful?
Enjoy not being bombarded by annoying ads?
Appreciate the absence of junky affiliate links for products you don’t need?
It’s because we’re reader supported.
If we’ve helped in your food-gardening journey, we’re glad of support. You can high-five us below. Any amount welcome!
Want More Lemon-Growing Articles?
Simple Home Preserving
Simple ways you can preserve your garden harvest without canning.
By Steven Biggs
Simple Preserving Techniques

Preserving often brings to mind piping hot mason jars, bags of sugar, the stinging aroma of boiled vinegar, and a hot, steamy kitchen—all hallmarks of canning.
But there are many other preserving strategies that are simpler and less energy-intensive.
Sauerkraut is a great example of a simple method of preserving. All it takes is cabbage, salt, and time.
Preventing Spoilage
We preserve food by preventing the growth of spoilage organisms:
These organisms include fungi (e.g. moulds) and bacteria (e.g. botulism), and insects
We prevent their growth with conditions that don’t suit them: acidic, cold, lacking in oxygen, or dry
Sauerkraut
Enjoy your garden harvest year-round by using a few simple preserving methods. Simple is the key word: the simpler it is, the more likely it is to get done.
I was pretty excited the first time I made sauerkraut. No more insipid, store-bought kraut: I wanted the good stuff. With fennel seeds, juniper berries. Maybe even some apple slices. My great aunt Anna later taught me to put a whole head of cabbage near the bottom of the crock, so I could have whole sour cabbage leaves for making cabbage rolls.
You can’t get more tactile in food prep than making sauerkraut. It takes repeated punches to the salted, shredded cabbage until a film of liquid starts to show. The arm motion I find works best is a bit of a punch with a twist.
Once the cabbage is softened and there’s liquid, I added a bit of brine so I have enough liquid to pin down all the shredded cabbage under a weighted plate and have it submerged.
Then it’s time to let it ferment.
The first time I made it I kept the crock in the house. It didn’t win me any favours with my wife, Shelley.
It stank. I remember her saying to a technician at the door, I’m sorry about the smell, it’s my husband, he’s making sauerkraut.”
Now I make sauerkraut in the garage.
Bugs Too

A stint in the oven at low heat, or storing dry beans in the refrigerator is a simple way to deal with bean weevils.
Insects are spoilage organisms too. One year I found lots of scampering weevils drilling holes into my dried beans.
After making sure our stored food is insect-free, the next thing to do is have food in a sealed container — where insects can’t get to it.
Make sure that there are no hidden travellers or eggs: Even though my dried beans were in a closed jar, they included weevil eggs. If I had used a heat treatment to kill the eggs, I wouldn’t have had a jar full of weevils.
Fermentation

Lactic-acid-fermented dilly garlic cucamelons.
Lactic-acid fermentation is what makes sauerkraut sour. It’s a naturally occurring process during which lactic-acid forming bacteria multiply rapidly, giving off enough lactic acid to preserve the cabbage.
Despite the sour flavour, sauerkraut is made without vinegar.
This same fermentation process can be used for other vegetables too. Brined (fermented) dill pickles taste different from pickles made with vinegar—it’s the lactic acid that makes these pickles tangy.
Like sauerkraut, brined cucumbers undergo a fermentation process that produces acidity. This acidity then prevents the growth of spoilage organisms. Other vegetables such as cucamelons, beets, carrots, beans, and onions can also be fermented.
Other Preserving Techniques
Drying herbs. TIP: If drying herbs in the sunlight, cover them with a paper bag to get dry herbs that aren’t bleached by the sun.
DRYING is a simple preserving technique that works because most spoilage organisms need moisture to grow. While the drying of fleshier produce with a high moisture content might be best done in the oven or a food dryer, other crops dry very easily.
Herbs are one of the easiest things to dry. They hang in bundles from my garage ceiling, while linden flowers and elderberries are spread out on metal pie plates or cookie sheets. The dry bean plants hang by the roots to dry until the fall, when the beans are removed from the shell and stored in jars.
A dedicated drying room or shed isn’t necessary. Try drying herbs in the kitchen window. We’ve had good luck with strings of hot peppers or the wild mushrooms that we dry in the kitchen—we’ve even used the hot dashboard of a car to dry plates of elderberries.
FREEZING doesn’t kill all spoilage organisms, but it puts growth on hold.
My favourite freezing method is a simple technique for herbs. I love dill—and lots of it. In late spring there’s so much in the garden that I have to weed it out from the other crops. Instead of drying it in the sunny shed, where the sunlight causes it to fade to grey, I simply chop it then freeze it in a plastic tub or jar. I have ready-chopped dill all season long. The same technique works well for parsley too.
The Easiest Preserving Technique
What’s the easiest preserving technique? Leave the crop in the garden as long as possible.
Parsley can be retrieved from under the snow
In winter, the few leeks that remain in the garden make a nice stew during a mid-winter melt
Carrots and parsnips can be kept in the garden well after the first frost—in fact, they sweeten up with the cold weather as starches are converted to sugars
Ripe lemons can remain on the tree for months
Here are 25 storage crops you can grow in your garden to store for the winter.
I’ve had fun over the years getting my kids to help punch down the shredded cabbage to make sauerkraut!
Find This Helpful?
Enjoy not being bombarded by annoying ads?
Appreciate the absence of junky affiliate links for products you don’t need?
It’s because we’re reader supported.
If we’ve helped in your food-gardening journey, we’re glad of support. You can high-five us below. Any amount welcome!
Foraging for Morel Mushrooms (and a Morel Sauce Recipe)
Here is the recipe for my morel sauce.
By Steven Biggs
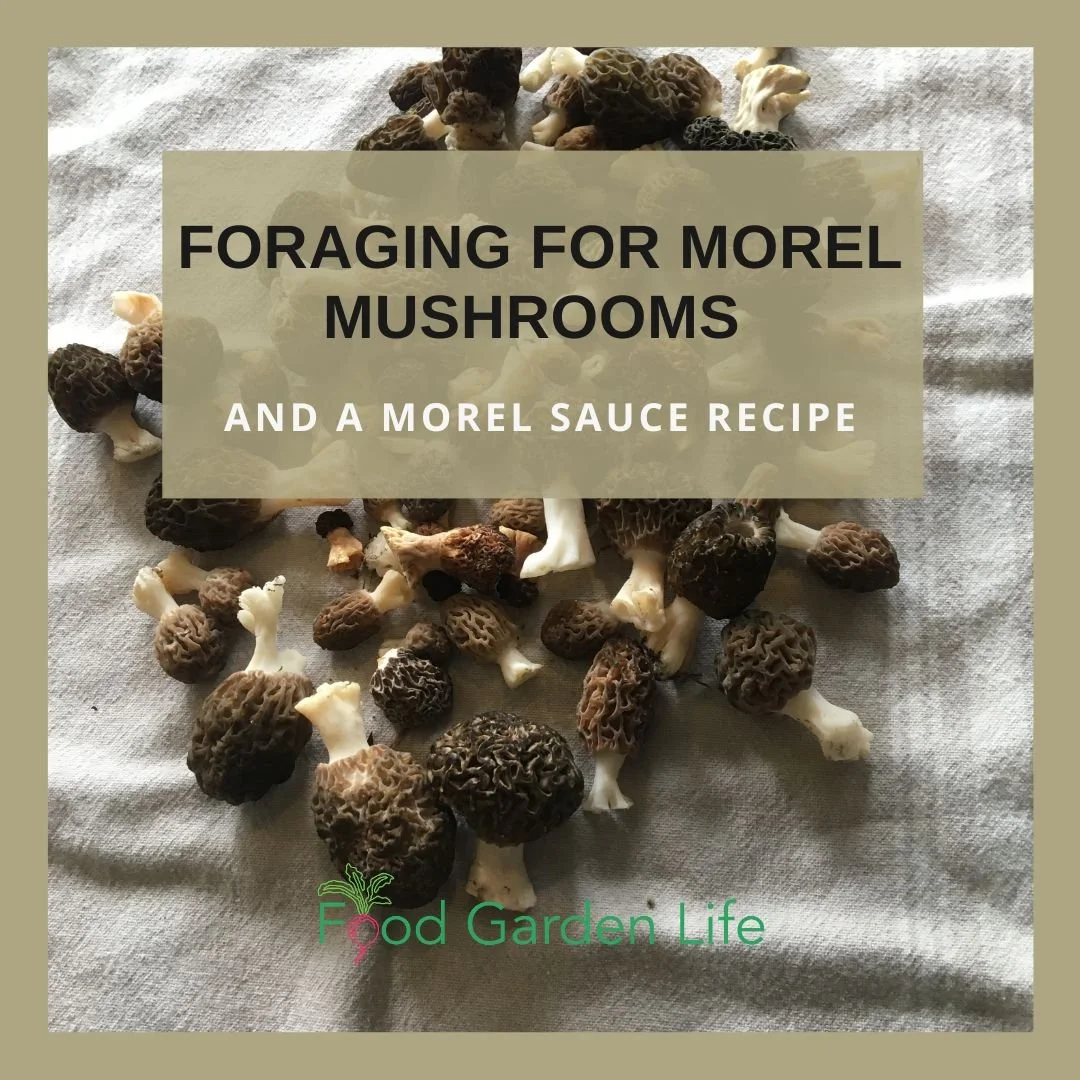
How to Find Morel Mushrooms
I recently posted a picture of morels on social media and mentioned I make them into a sauce. I had a few requests for the recipe, so here it is. I hope your family enjoys it as much as mine!
I love a springtime walk through the woods to look for morel mushrooms. I love cooking with morel mushrooms.
But there’s something else I love too: the hunt.
Walking slowly, scanning the ground: It takes intense focus. And I find that time spend in the woods, focusing on what I’m seeing, is a beautiful time for me.
When I spot a morel, I stop in my tracks and then scan the ground all around it — because where there is one there are often more. And I don’t want to step on any of them!
When the lilacs bloom, I figure it’s time to look for morels. Some years I get lots; some years not as many. Either way, it’s a spring ritual I love.
Keep reading to find out more about foraging for morel mushrooms—and for my recipe for a delicious morel sauce.
Morel mushrooms can be difficult to spot. But once you see one, look all around, as there will often be more in the area.
A Great Family Activity
My wife, Shelley, and I started mushroom hunting before we had kids. And once we had kids, we kept on mushrooming.
I’d carry babies on my back…though it’s harder to bend over to pick the mushrooms! Or we’d choose locations where we could pull along a wagon.
For small children, a basket makes morel hunting fun. Maybe they’ll find morels — maybe leaves or pine cones or snail shells.
One thing is for certain: Kids are lower to the ground, and they can be very observant. We’ve had many trips to the woods where the kids spot mushrooms before we do.

My daughter Emma on a springtime morel hunt with us when she was little.

Kids are lower to the ground, and they can be very observant. We’ve had many trips to the woods where the kids spot mushrooms before we do.
Morel Sauce Recipe
This sauce is great for lubricating crepes filled with ham and steamed asparagus (make sure to put some sauce inside the crepe before you wrap it up, and then put more sauce over the top of the crepe once it’s all wrapped up!)
It’s nice on grilled poultry. Or, use it spooned over a fried egg. (And…you might just want to taste a couple of spoonfuls of sauce on its own, just don’t let anyone see you do it!)

Crepes with morel sauce, inside and out. Don’t be stingy with the sauce!
This recipe uses the trinity of mushrooms, cream, and white wine. It’s not adulterated with lots of herbs, so the mushroom flavour shines through.
Depending on the time of year, you can use dry or fresh morels. (Of course, you can use other mushrooms too…but the morels are my favourite.)
Ingredients:
10 morels, coarsely chopped
1 shallot, minced*
½ cup white wine
3 cups stock (chicken or veg both work well)
1 cup heavy cream (don’t wimp out with light cream – you want good, heavy cream…this isn’t supposed to be a low-fat sauce)
1 tbsp butter
Salt and pepper to taste
*Don’t worry if you don’t have a shallot…use a cooking onion instead and it will be fine.
If using dried morels:
Start by reconstituting them in ½ cup of water for about 30 minutes before chopping
Reserve the liquid (strain if needed)
Instructions
Cook shallots in butter until translucent
Add morels, salt, and pepper and cook another 2-3 minutes
Add wine and stock (and reserved liquid, if using dry morels) – and cook until reduced by about 2/3
Add cream and simmer about 20 minutes, until the sauce will coat the back of a spoon
I love morels. And I love the hunt for morels!
A Final Note on Morels and Mushroom Hunting
Don’t eat what you can’t identify.
Full stop.
Neither Shelley or I grew up with morels. We didn’t know where to look for them or how to identify them. But experienced friends took us out mushroom hunting.
Then we joined a local mycological society (the fancy term for a mushroom club) which had forays to nearby woods. The forays were a great way to be around people who were knowledgeable about mushrooms and could help us identify what to eat — and what not to eat.
Find This Helpful?
Enjoy not being bombarded by annoying ads?
Appreciate the absence of junky affiliate links for products you don’t need?
It’s because we’re reader supported.
If we’ve helped in your food-gardening journey, we’re glad of support. You can high-five us below. Any amount welcome!
Make a Bug Vacuum
Make a bug vacuum.
By Steven Biggs
A Bug Vacuum is Fun for Kids

Not sure how to make the garden a fun place for kids?
It doesn’t always have to be about plants. Some kids might want to climb trees. Some might enjoy mud.
And some kids LOVE bugs.
My son Keaton has always gravitated towards bugs. When he was smaller he’s spend big chunks of time scouring our yard for bugs to suck up and inspect in his bug vacuum.
Make a Bug Vacuum with your Kids
You can purchase bug vacuums. But those battery-powered gadgets soon break.
Instead, make this bug vacuum with some easy-to-find materials.
Even better, make it with your kids. It’s a fun and easy project to tackle together.
Here’s a simple bug vacuum that you can make at home (from the book Gardening with Emma.)
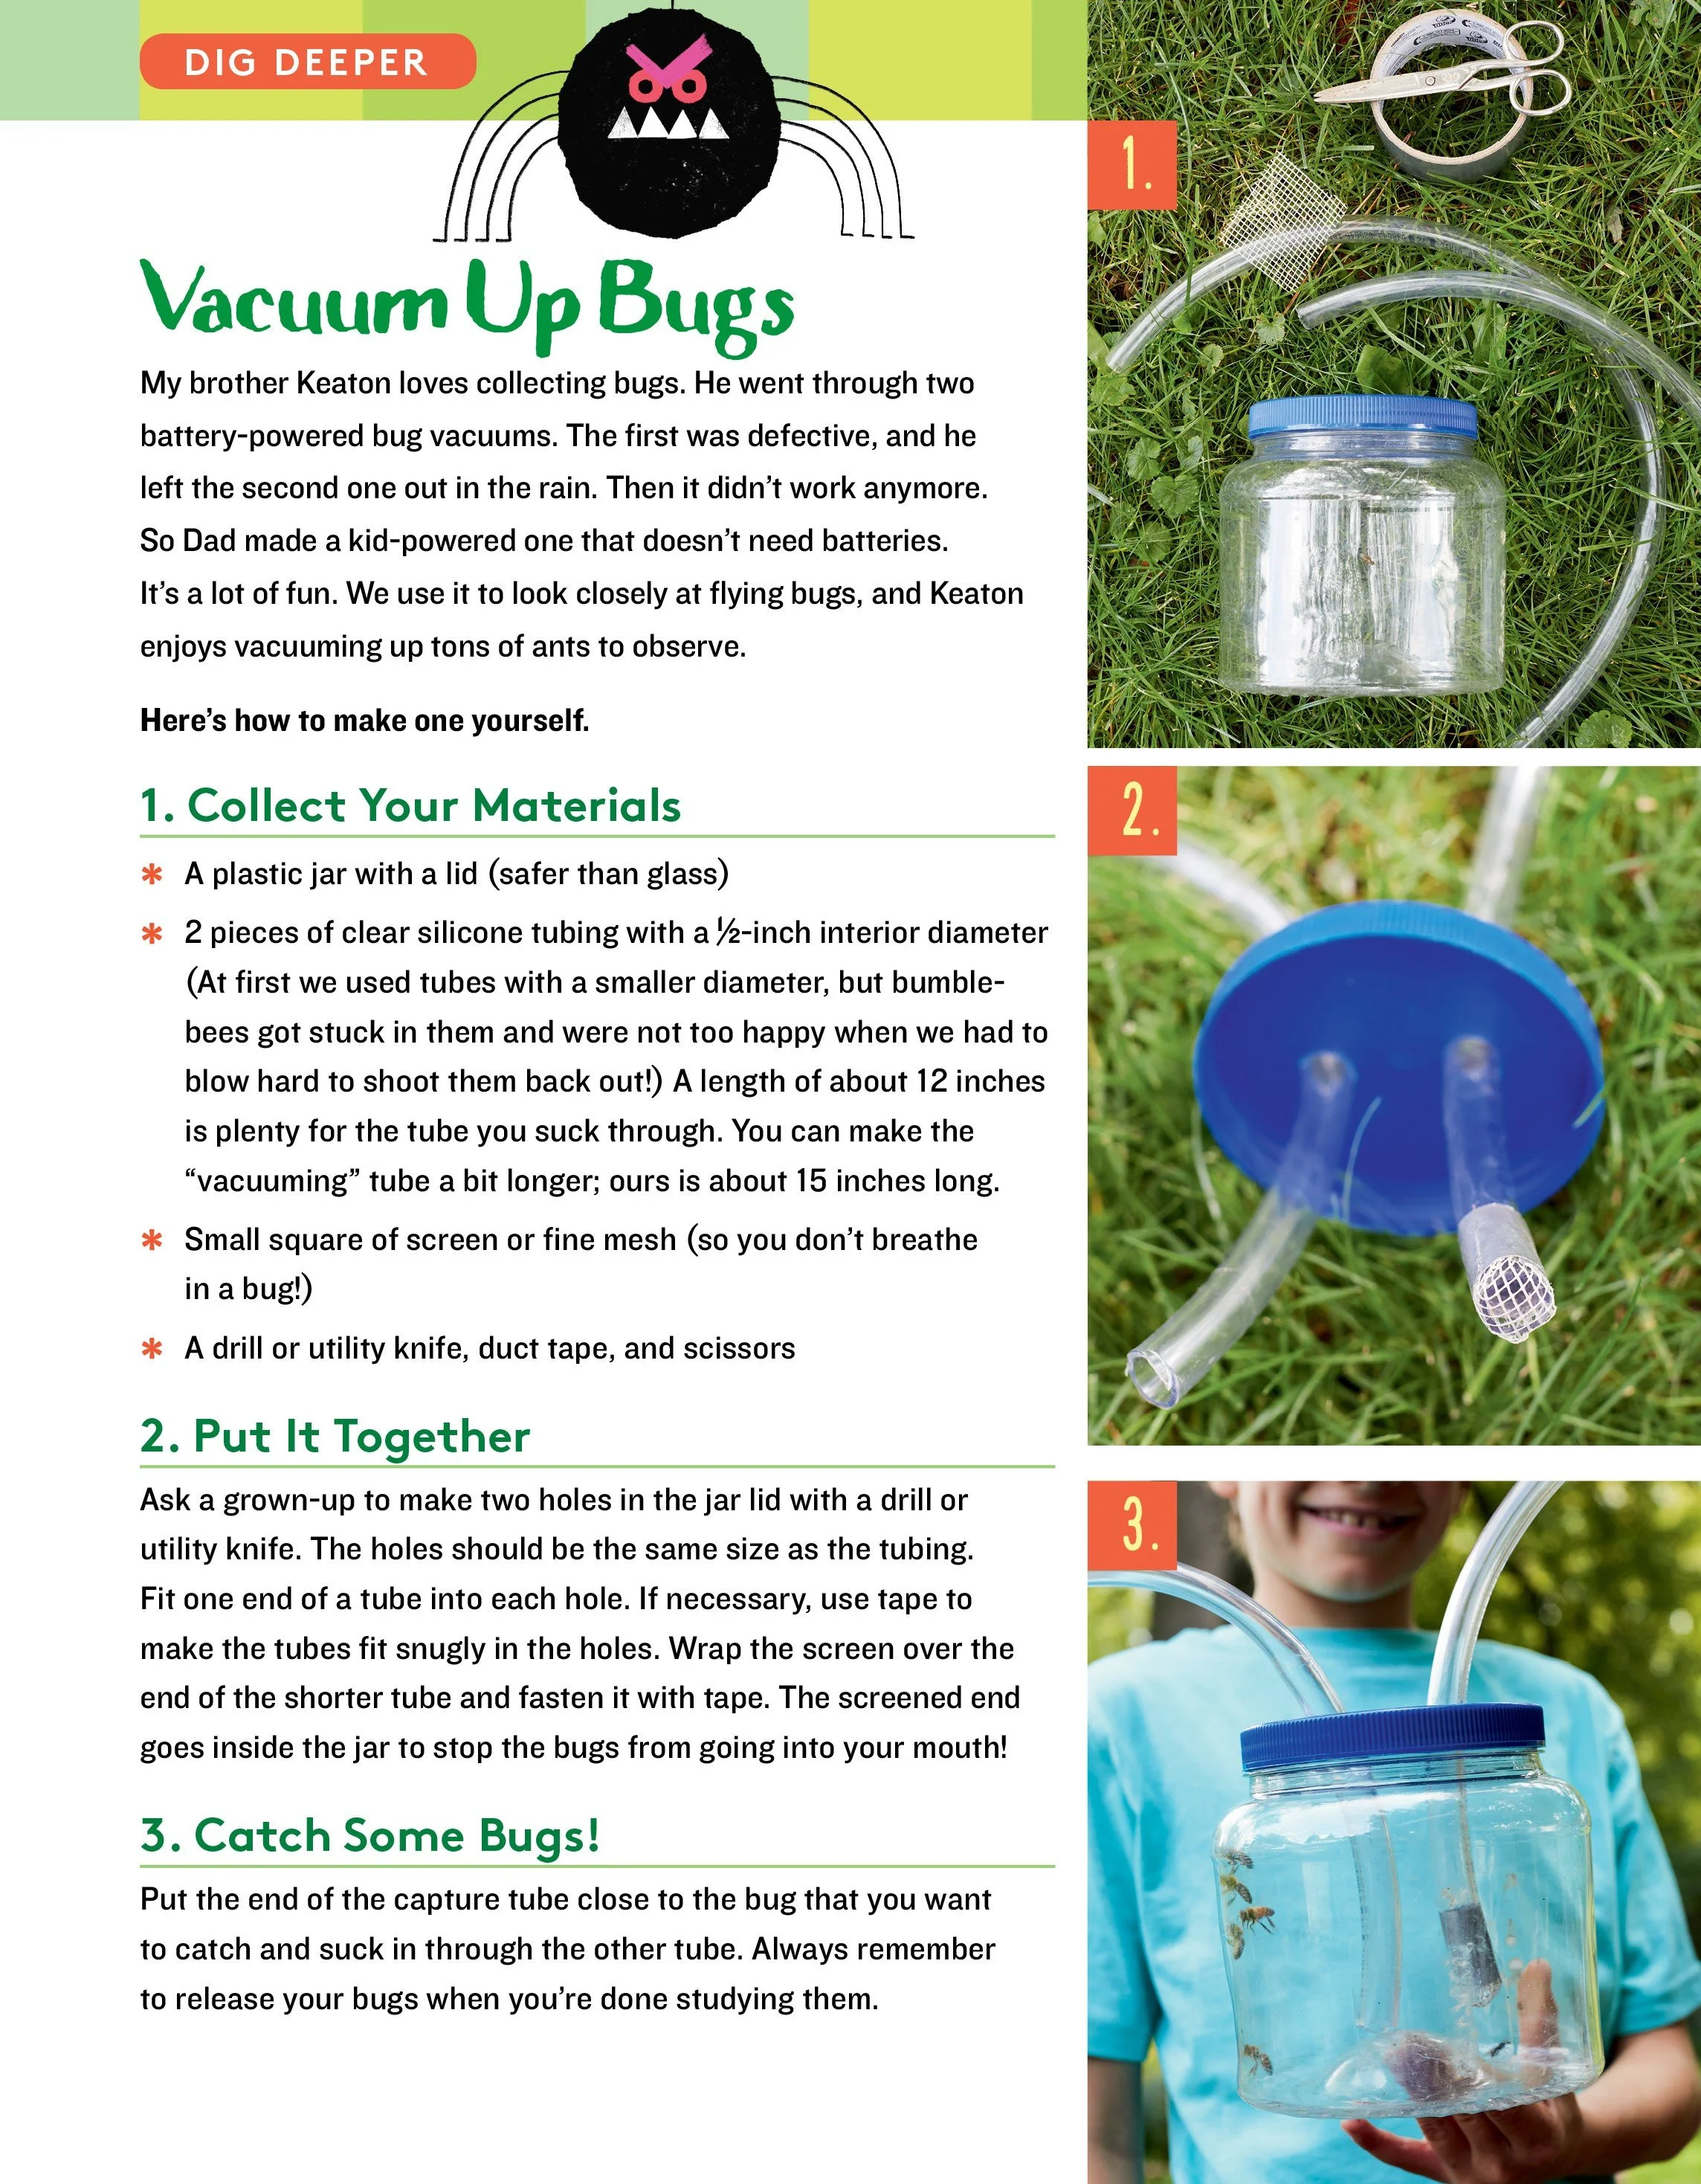

My son Keaton catches a pollinator with his bug vacuum. After watching it, he unscrews the lid to release it. Photo Donna Dawson.
Find This Helpful?
Enjoy not being bombarded by annoying ads?
Appreciate the absence of junky affiliate links for products you don’t need?
It’s because we’re reader supported.
If we’ve helped in your food-gardening journey, we’re glad of support. You can high-five us below. Any amount welcome!
Looking for more fun ideas to make the garden a fun place for kids?
Check out Gardening with Emma for lots of fun ideas and projects for kids (and parents!) in the garden.
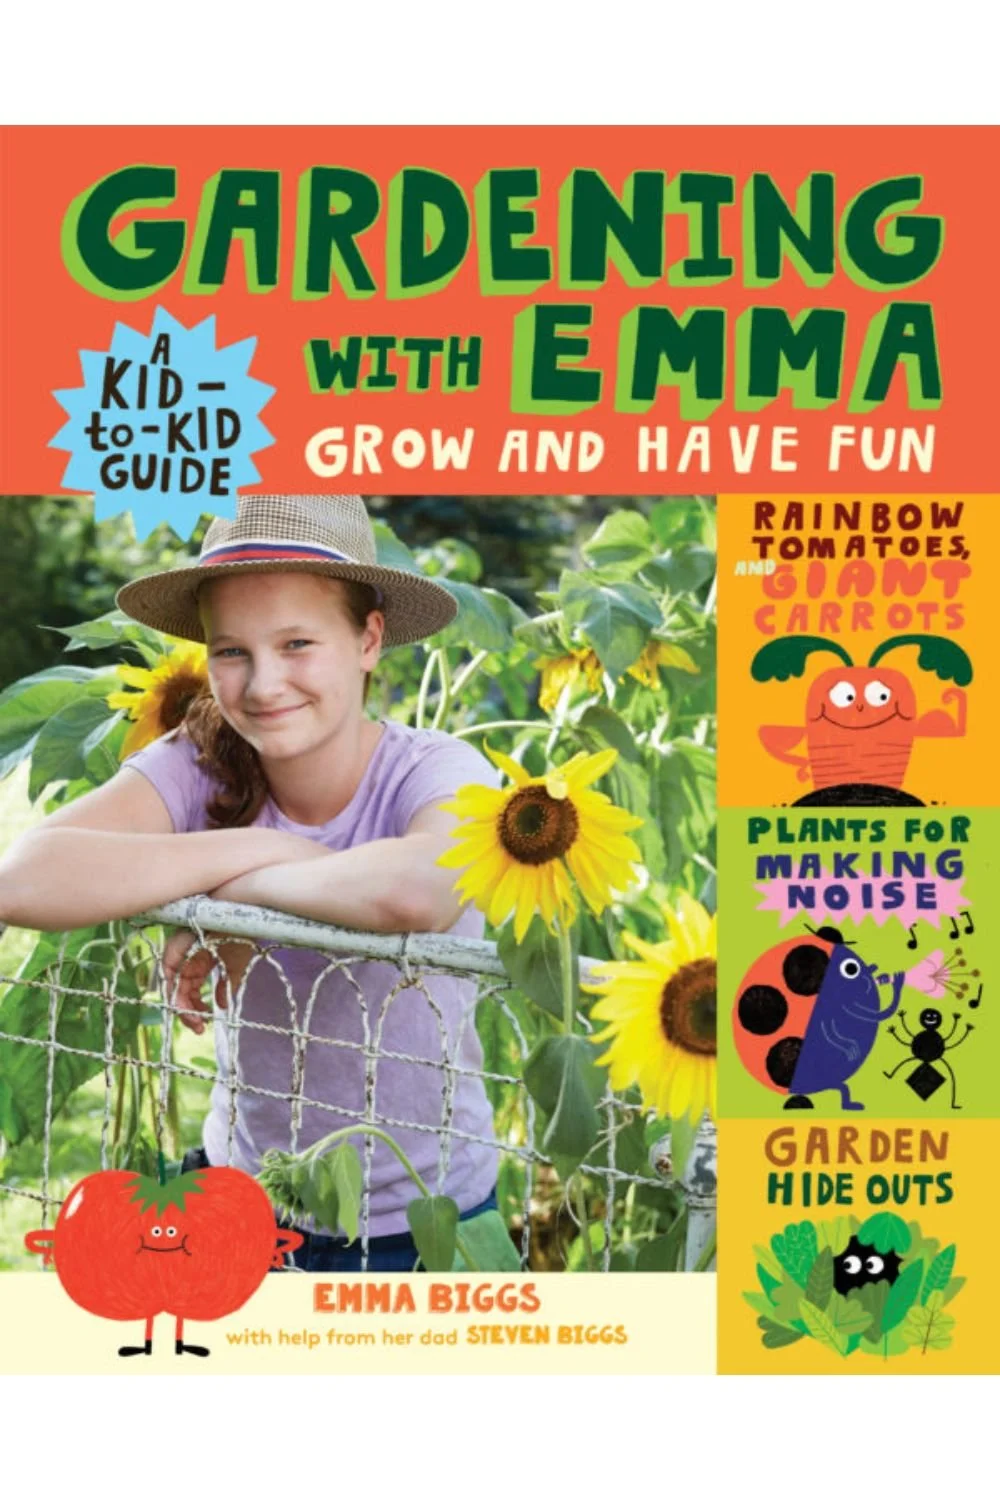
Written for kids by a kid, this guide helps kids see the fun side of gardening, whether it’s growing giant vegetables, making a bug vacuum, or making a sound-themed garden.
Emma shares lots of inspiring ideas for young gardeners about how to grow healthy food, raise cool plants, and have fun outdoors.
Copies from the Food Garden Life shop are signed by Emma!
Grow Vegetables in Straw Bales
Straw bale vegetable gardening is an easy way to create more growing space.
By Steven Biggs
Make More Growing Space with Straw Bale Gardens
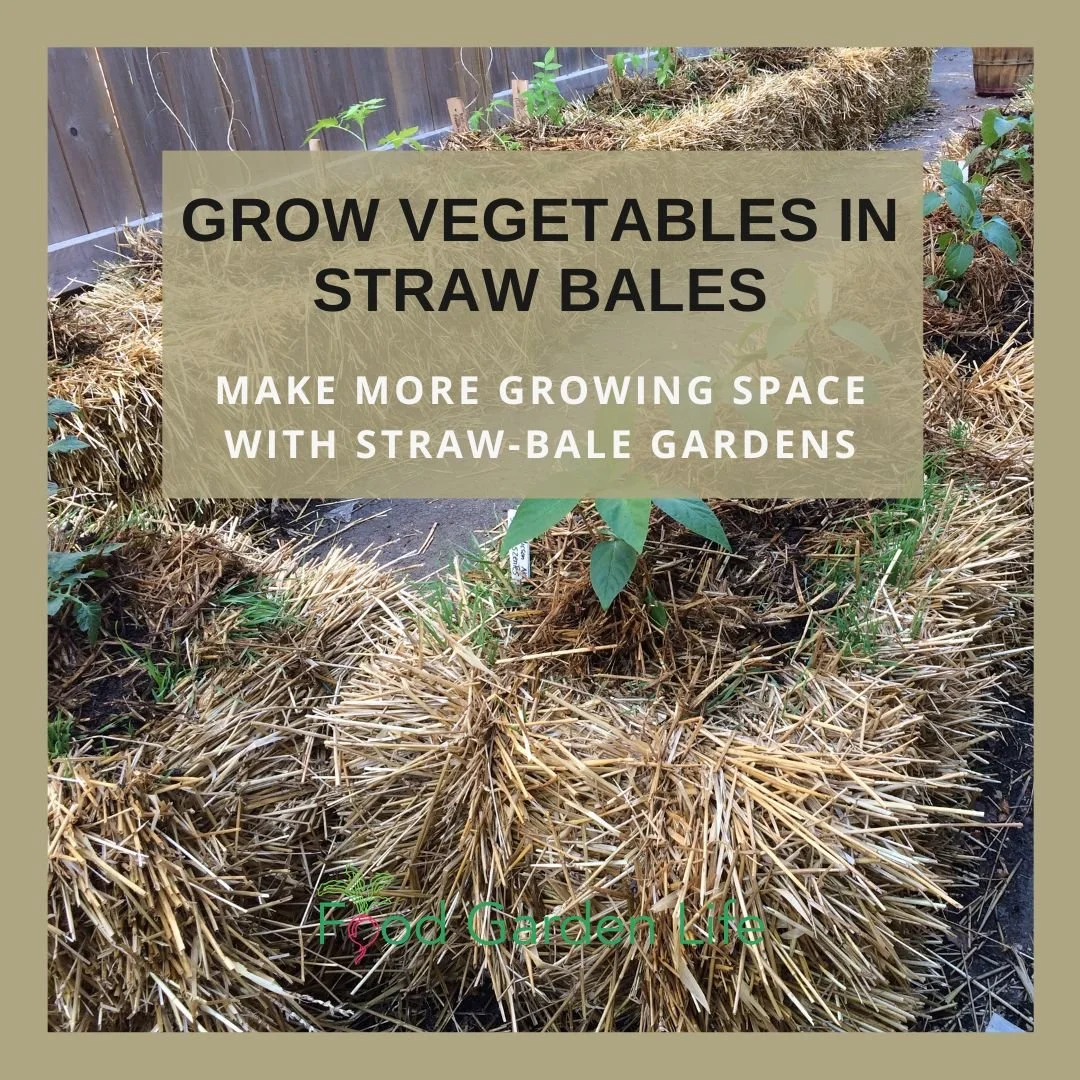
I started straw bale gardening to solve a problem.
The problem? We needed more growing space for my daughter Emma’s 100-plus tomato varieties.
We have a big yard for the city. But there’s a black walnut tree that makes much of the yard unsuited to growing tomatoes.
(That’s because black walnuts give off a compound that kills the tomato plants…and a number of other plants too.)
With a long and ugly driveway that could fit a couple of school buses, Emma and I began to imagine a tomato plantation on the driveway.
In this post I’ll talk about how to use straw bales to make gardens on paved areas or over soil that’s not great for gardening.
Straw Bale Driveway Garden
Straw bales are an easy way to create a near-instant garden on paved surfaces and areas with poor soil. That’s because the straw bale is both the growing medium and the container.
Here’s how it works: As the straw bale decomposes, it creates an ideal growing medium that is well aerated and holds lots of moisture. It’s like a big sponge. It’s perfect for plant roots – better than many garden and container soils.
In short, you’re composting a bale of straw, and growing your vegetable plants in it at the same time.
Straw Bale Gardening: Top Tip

Our straw bale driveway garden
The most important thing to remember is that bales should be “conditioned” before you grow in them.
Conditioning means kick starting the microbial action. And you know when it’s working because as the microbes start to break down the straw, the temperature inside the bale goes up. We don’t plant in it yet…it might be too warm for our plants.
As the temperature comes down, your bale is ready to plant. Some people use a thermometer. I stick in my finger. It’s not an exact thing.
I allow 3-4 weeks for this conditioning process. It might be less if you’re somewhere warmer than me.
Since the bales in our driveway garden are for heat-loving tomato plants that we put out in late May, we start conditioning the bales late-April to make sure they’re ready for the planting date. I just work back four weeks from my planting date.
Straw Bale Garden Setup

Emma conditioning the newly arrived straw bales.
Before your bales become heavy from watering them, it’s a good time to think about how you want to arrange them. There’s no right or wrong, it depends on your situation:
If you’re planning to use a long soaker hose, you might want them in a long line.
If you’re gardening with kids, arranging them in a square makes for a nice hidoute once the plants get bigger
If you’re watering with a hose, arrange the bales so you can easily move amongst the bales with the hose
How to Orient Straw Bales
Once you know how you want to arrange the bales, think about how you’re orienting them. You can place them so that the loops of twine are on the top and bottom – or the twine is at the sides. Both ways of orienting the bales are fine.
But here’s how I do it: When positioned so that the twine is at the sides, the straw within is mainly oriented vertically. Bales positioned this way absorb more water, so it’s less likely to run off of the side of the bale.
How to Condition Straw Bales
To condition the bales – which just means getting the microbes working – we need 2 things:
Water
Nitrogen
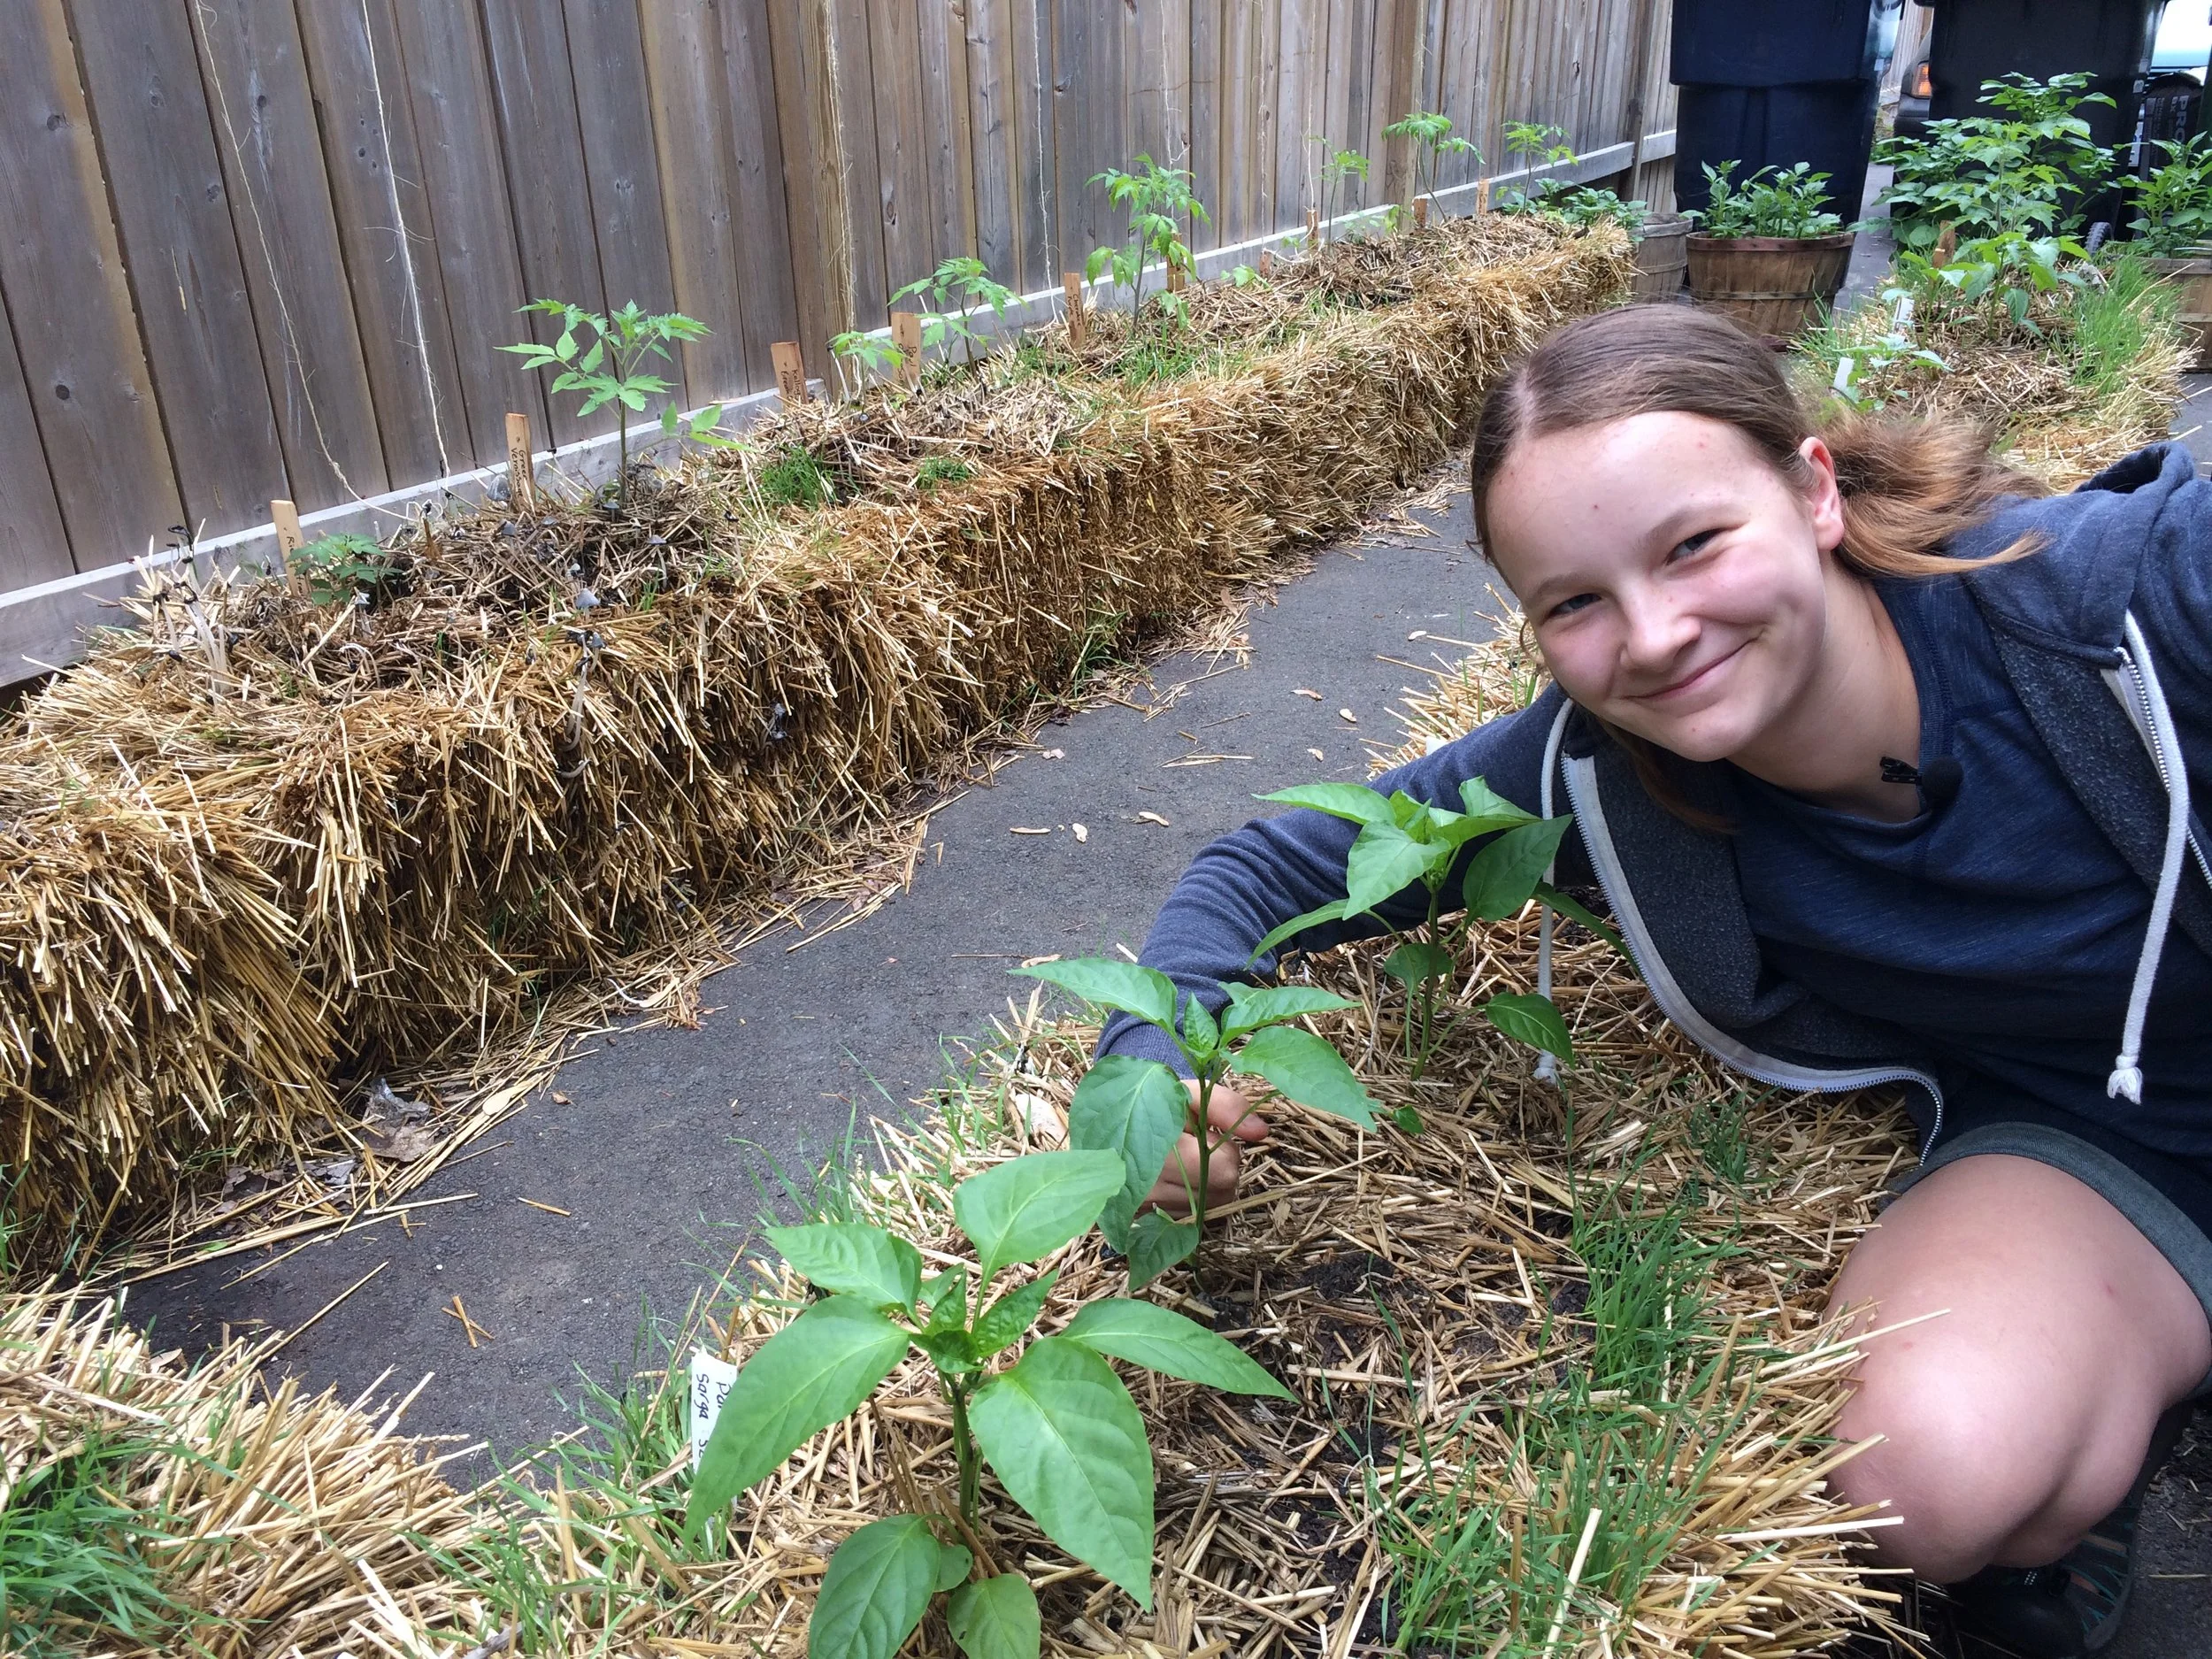
In this picture the bales are oriented with the twine at the top and bottom of the bales. We now prefer to have the twine at the side for easier water penetration.
Place a nitrogen source on top of the bales and water well. The goal is for the water to soak into the bale and move some of the nitrogen into the bale. Use a low pressure and volume so that water doesn’t flow over the sides of the bale (and take the nitrogen with it).
More on the nitrogen source: When you’re looking at the numbers in the fertilizer formulation, you want the first number, the nitrogen, to be higher than the others. For example, blood meal is 12-0-0. That’s what I usually use.
Other years I’ve also used a high-nitrogen organic fertilizer derived from guano, and a lawn fertilizer.
Here’s how I condition straw bales with blood meal:
I water well every day for the first week.
Starting on the first day, and again every other day, I put a 2 cups of blood meal on the bale BEFORE watering (so the water moves some of the blood meal into the bale).
I give 3 applications of blood meal.
As we get into week 2, the bale should be warming up nicely inside!
After 2 weeks, fertilize the bales with a balanced, all-purpose fertilizer.
During this conditioning process, the temperature can go up to about 50°C (120°F), and then it drops. You can plant in the straw bales once the temperature has dropped below about 26°C (80°F).
Grow a Container Vegetable Garden
And get an early harvest of crops that usually take too long!
Straw-bale Garden Plant Layout

Plant densely to make the best use of space in your straw bale garden.
Wondering about plant spacing in a straw-bale garden? Because a well-managed straw bale garden provides plants lots of moisture and an excellent growing medium, you can plant densely.
We aim for two or three tomato plants per bale. Around those tomatoes we sow bush beans and leafy greens.
Something else to think about with straw bales is that you can plant into the side of the bale too. We’ve grown dwarf tomato plants out the side of bales, while at the top are normal determinate and indeterminate varieties.
How to Support Plants in Straw Bale Gardens
Because there is a paved surface below, and because the bales decompose and start to collapse over the summer, regular staking is not an option.
Here’s what I do instead of staking:
Use 3-4 stakes positioned over the bale to create a self-supporting tee-pee.
Put the bales next to a fence and grow vining crops up the fence.
Looking for tomato-staking ideas? Find out how to stake and support tomato plants.
Straw Bale Garden Planting and Care
How to Plant in Straw Bales
When I show pictures of straw bale gardens to groups, I’m asked where the soil is. There doesn’t have to be soil, because the straw is the growing medium.
When transplanting, use a trowel to pry an opening into the bale. Then place the transplant into the opening, and close up the opening. Be sure to cover the transplant roots with straw so they remain moist.
With large seeds like beans, we just insert them right into the bale. Again, no soil necessary.
When direct seeding smaller seeds onto a straw bale, a thin layer of soil is helpful. We add about an inch of soil over the top of the bale if we’re seeding leafy greens. Use a potting soil or good garden soil that won’t cake with frequent watering.
Straw Bale Garden Fertilizer and Water
Once your bales are conditioned and planted, feed with a balanced, all-purpose feed and keep them well watered. Because the inside of the bale remains well aerated, excess water is not likely to harm the plants. But excess water will wash away nutrients.
If there are not many bales in your garden, hand watering might be fine.
For larger gardens, drip irrigation or a soaker hose works well. Position the soaker hose to sprays downwards, into the bale.
Grasses and Mushrooms on Straw Bales
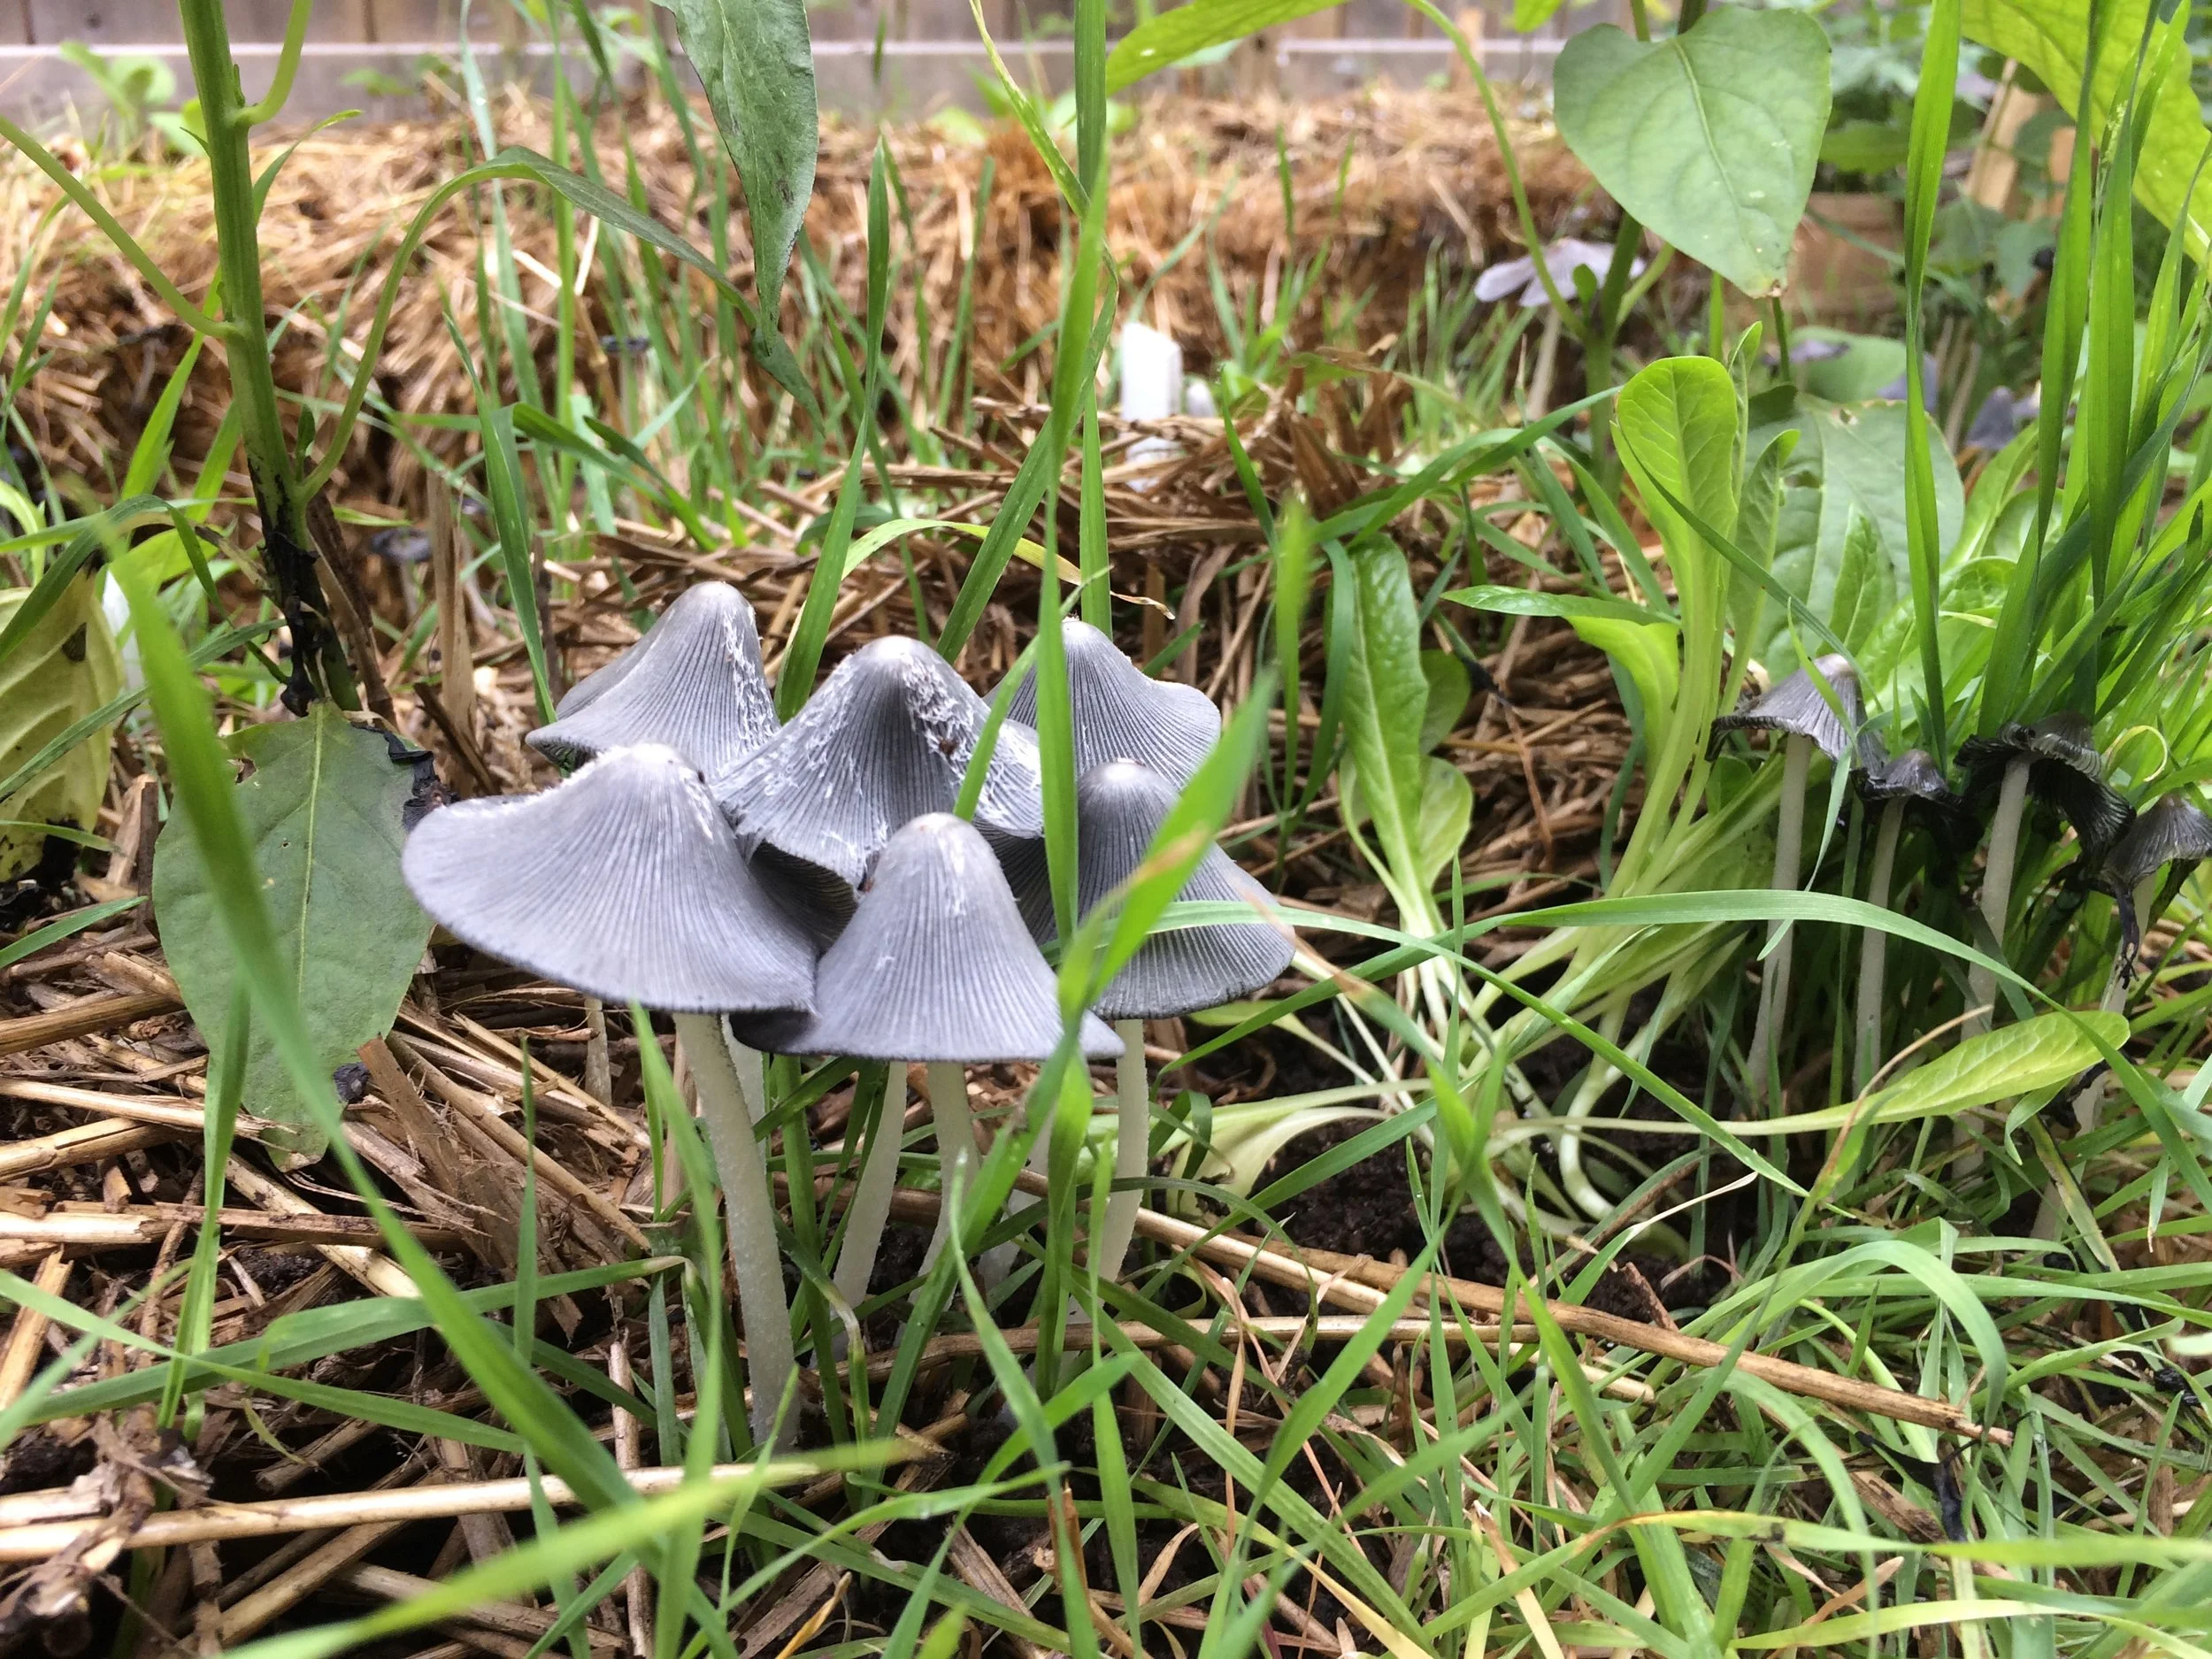
It’s normal to get mushrooms growing on straw bales. It means you’ve created good growing condtions.
Don’t be surprised to see little grass-like plants and mushrooms growing on the bales. These are good – it means you’ve created good growing conditions.
The grasses are any residual grain within the bale that germinates and grows. They won’t out-compete your crops. Just pull them off.
Straw Bale FAQ
What do you do with Straw Bales After Harvest?
After a year of growing I use the straw to mulch gardens, on pathways, and in my compost pile.
How Many Years do Straw Bales Last?
I’ve sometimes used bales a second year. How fast a bale decomposes varies with your weather conditions. Friends in warmer areas report that one year is the maximum for them.
What if the Twine Breaks?
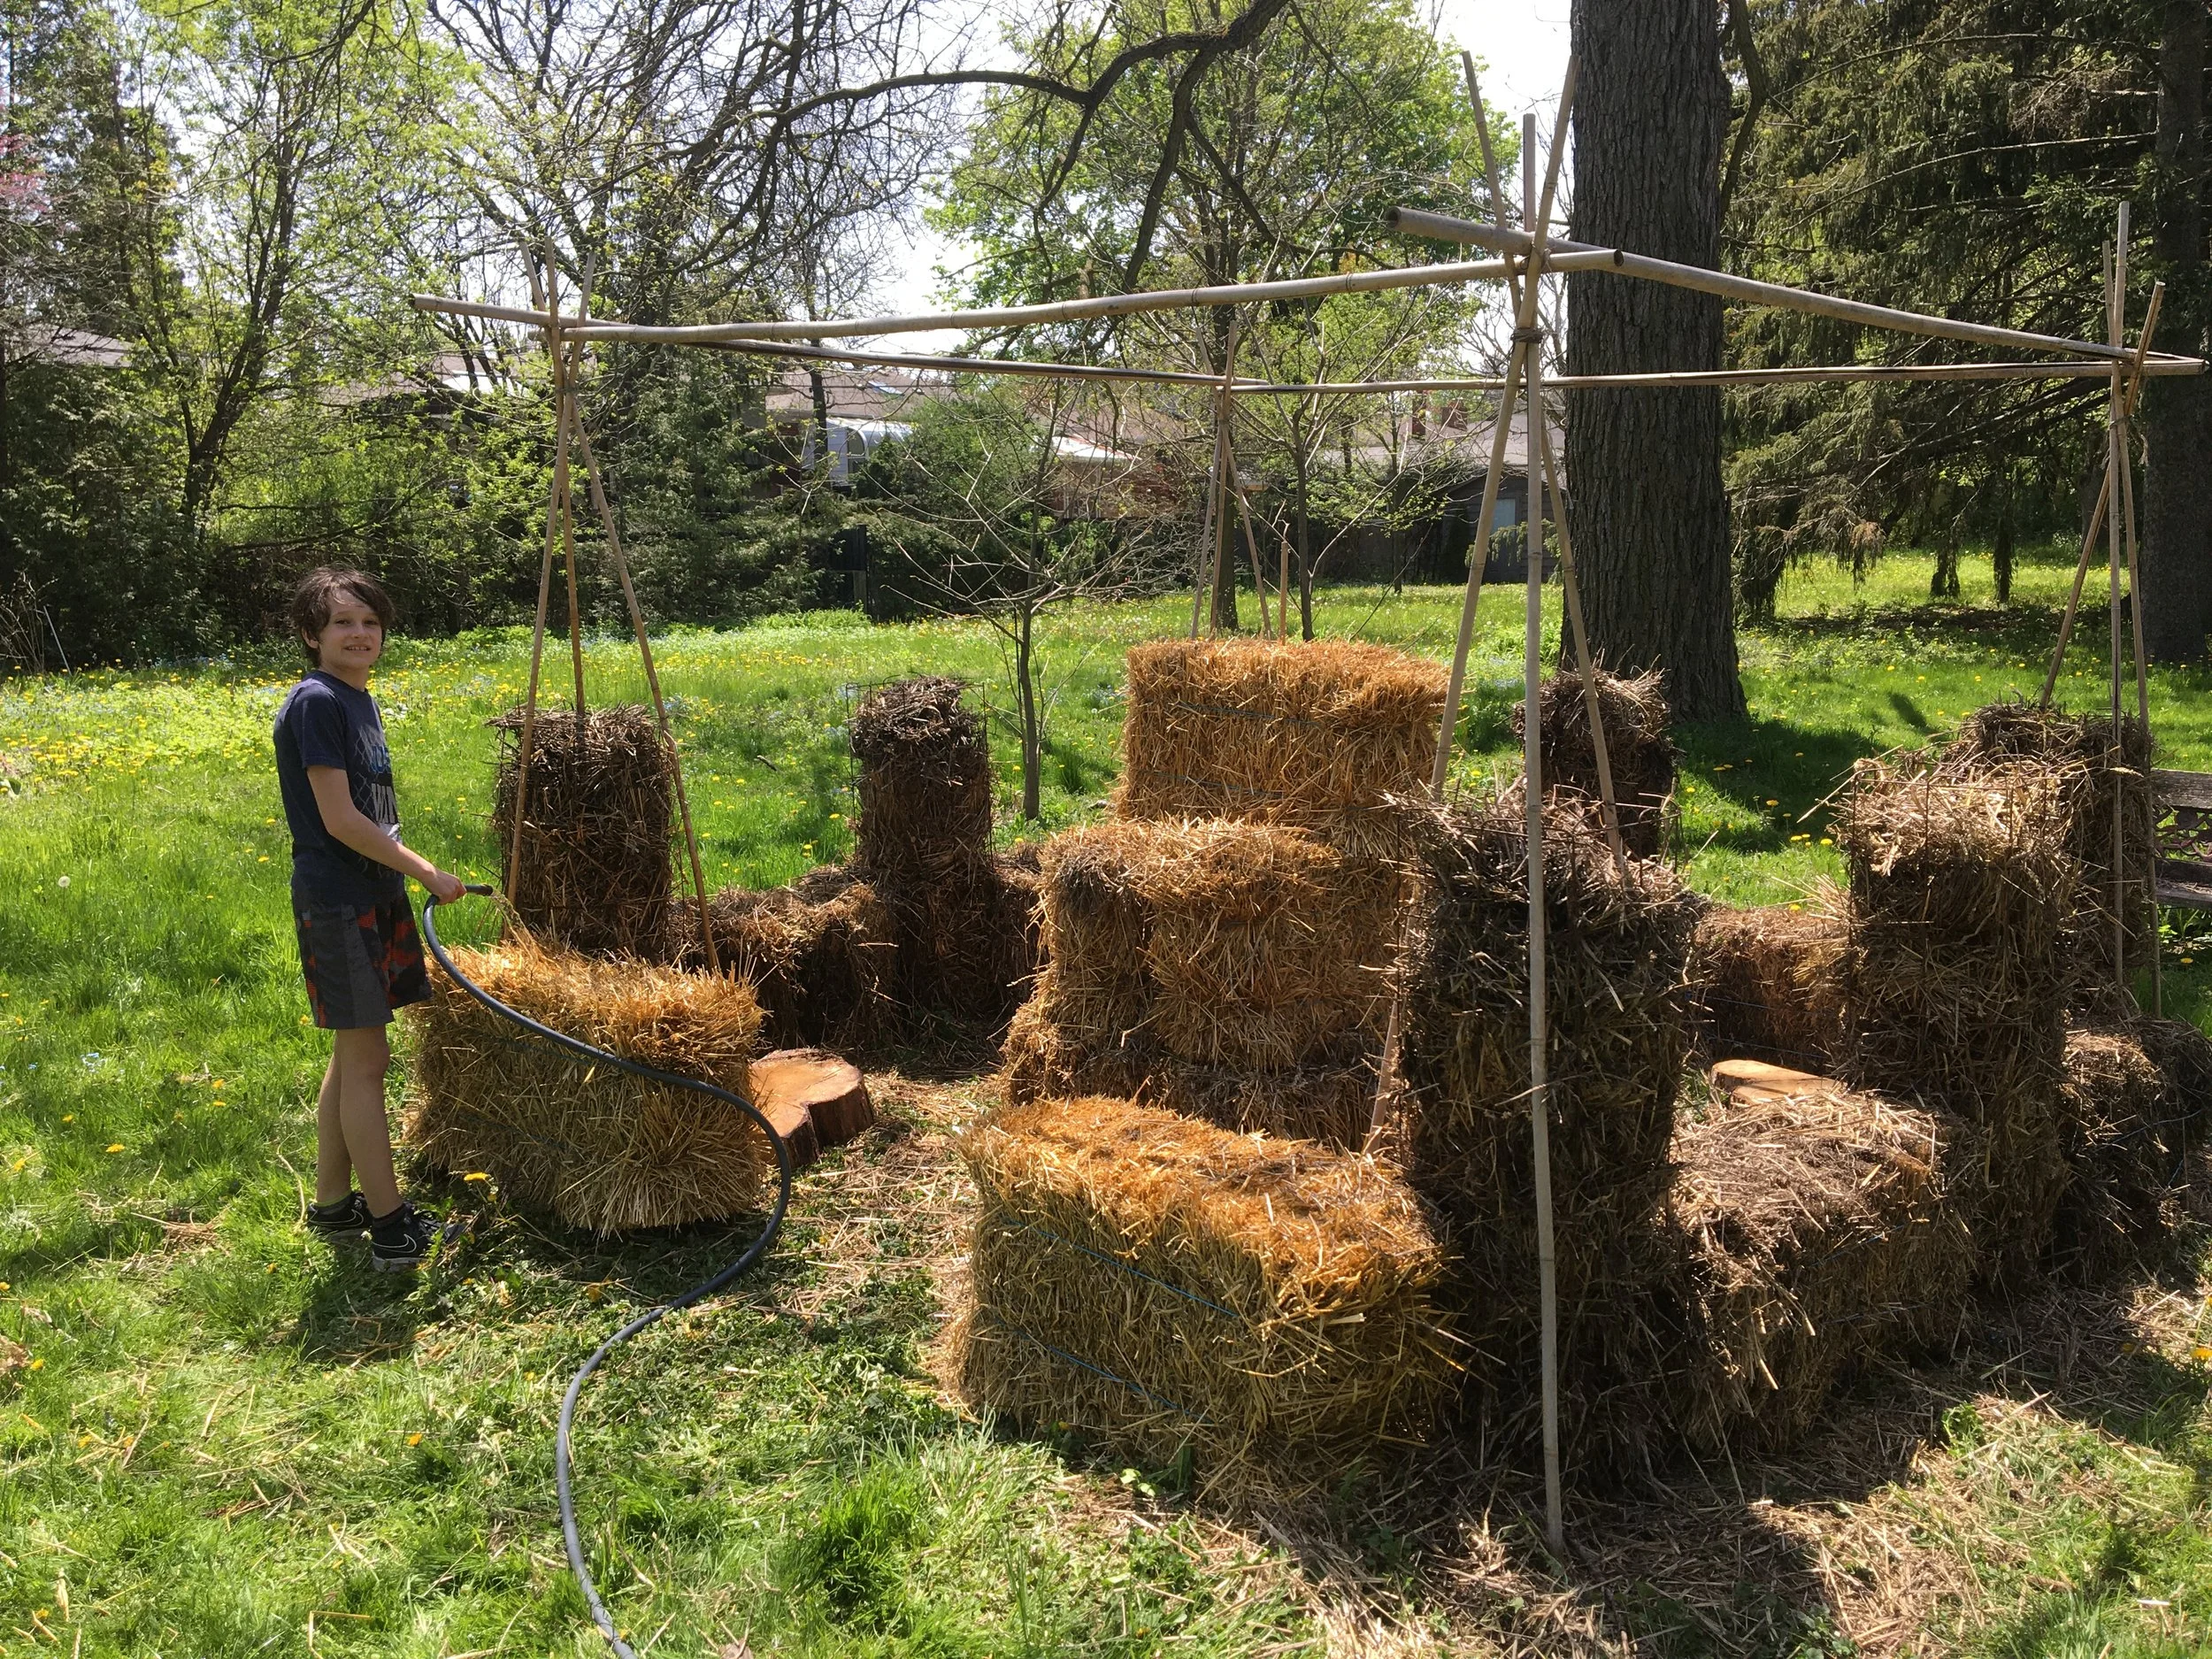
Broken bales? No problem. In this straw bale garden the tall sections are tomato cages filled with loose straw from broken bales.
If possible, tie it back together; or use a new, longer piece of twine to tie together the bale. If that doesn’t work, you can pack straw into a cage or pot instead.
As you carry the straw bales, try to do it in such a way that the twine does not slide off the side of the bale.
Do Straw Bales Leave Marks?
Yes. Straw bales can darken paved surfaces.
I don’t recommend using them on wood because it creates conditions that could speed up the decay of the wood.
One year I had them against a board fence, and it resulted in dark marks on the fence – so I now position the bales a couple of inches away from the fence.
What About Hay Bales?
Hay bales can also make an excellent growing medium, but there are a couple of reasons they’re not used as frequently as straw bales:
Hay often includes lots of grass seed – not something you want to introduce to your garden
Hay is often more expensive than straw
What are the Best Plants for the Straw-Bale Gardening method?
You can grow a wide range of vegetable crops in straw bales.
Heat-loving crops benefit from the warm root zone in the bales
Root crops develop very well in the well-aerated growing medium
Leafy greens grow well and can be planted underneath other crops such as tomatoes
Cascading plants such as nasturtiums (for edible flowers!) can drape down over the side of the bales
Where can I Buy Straw Bales?
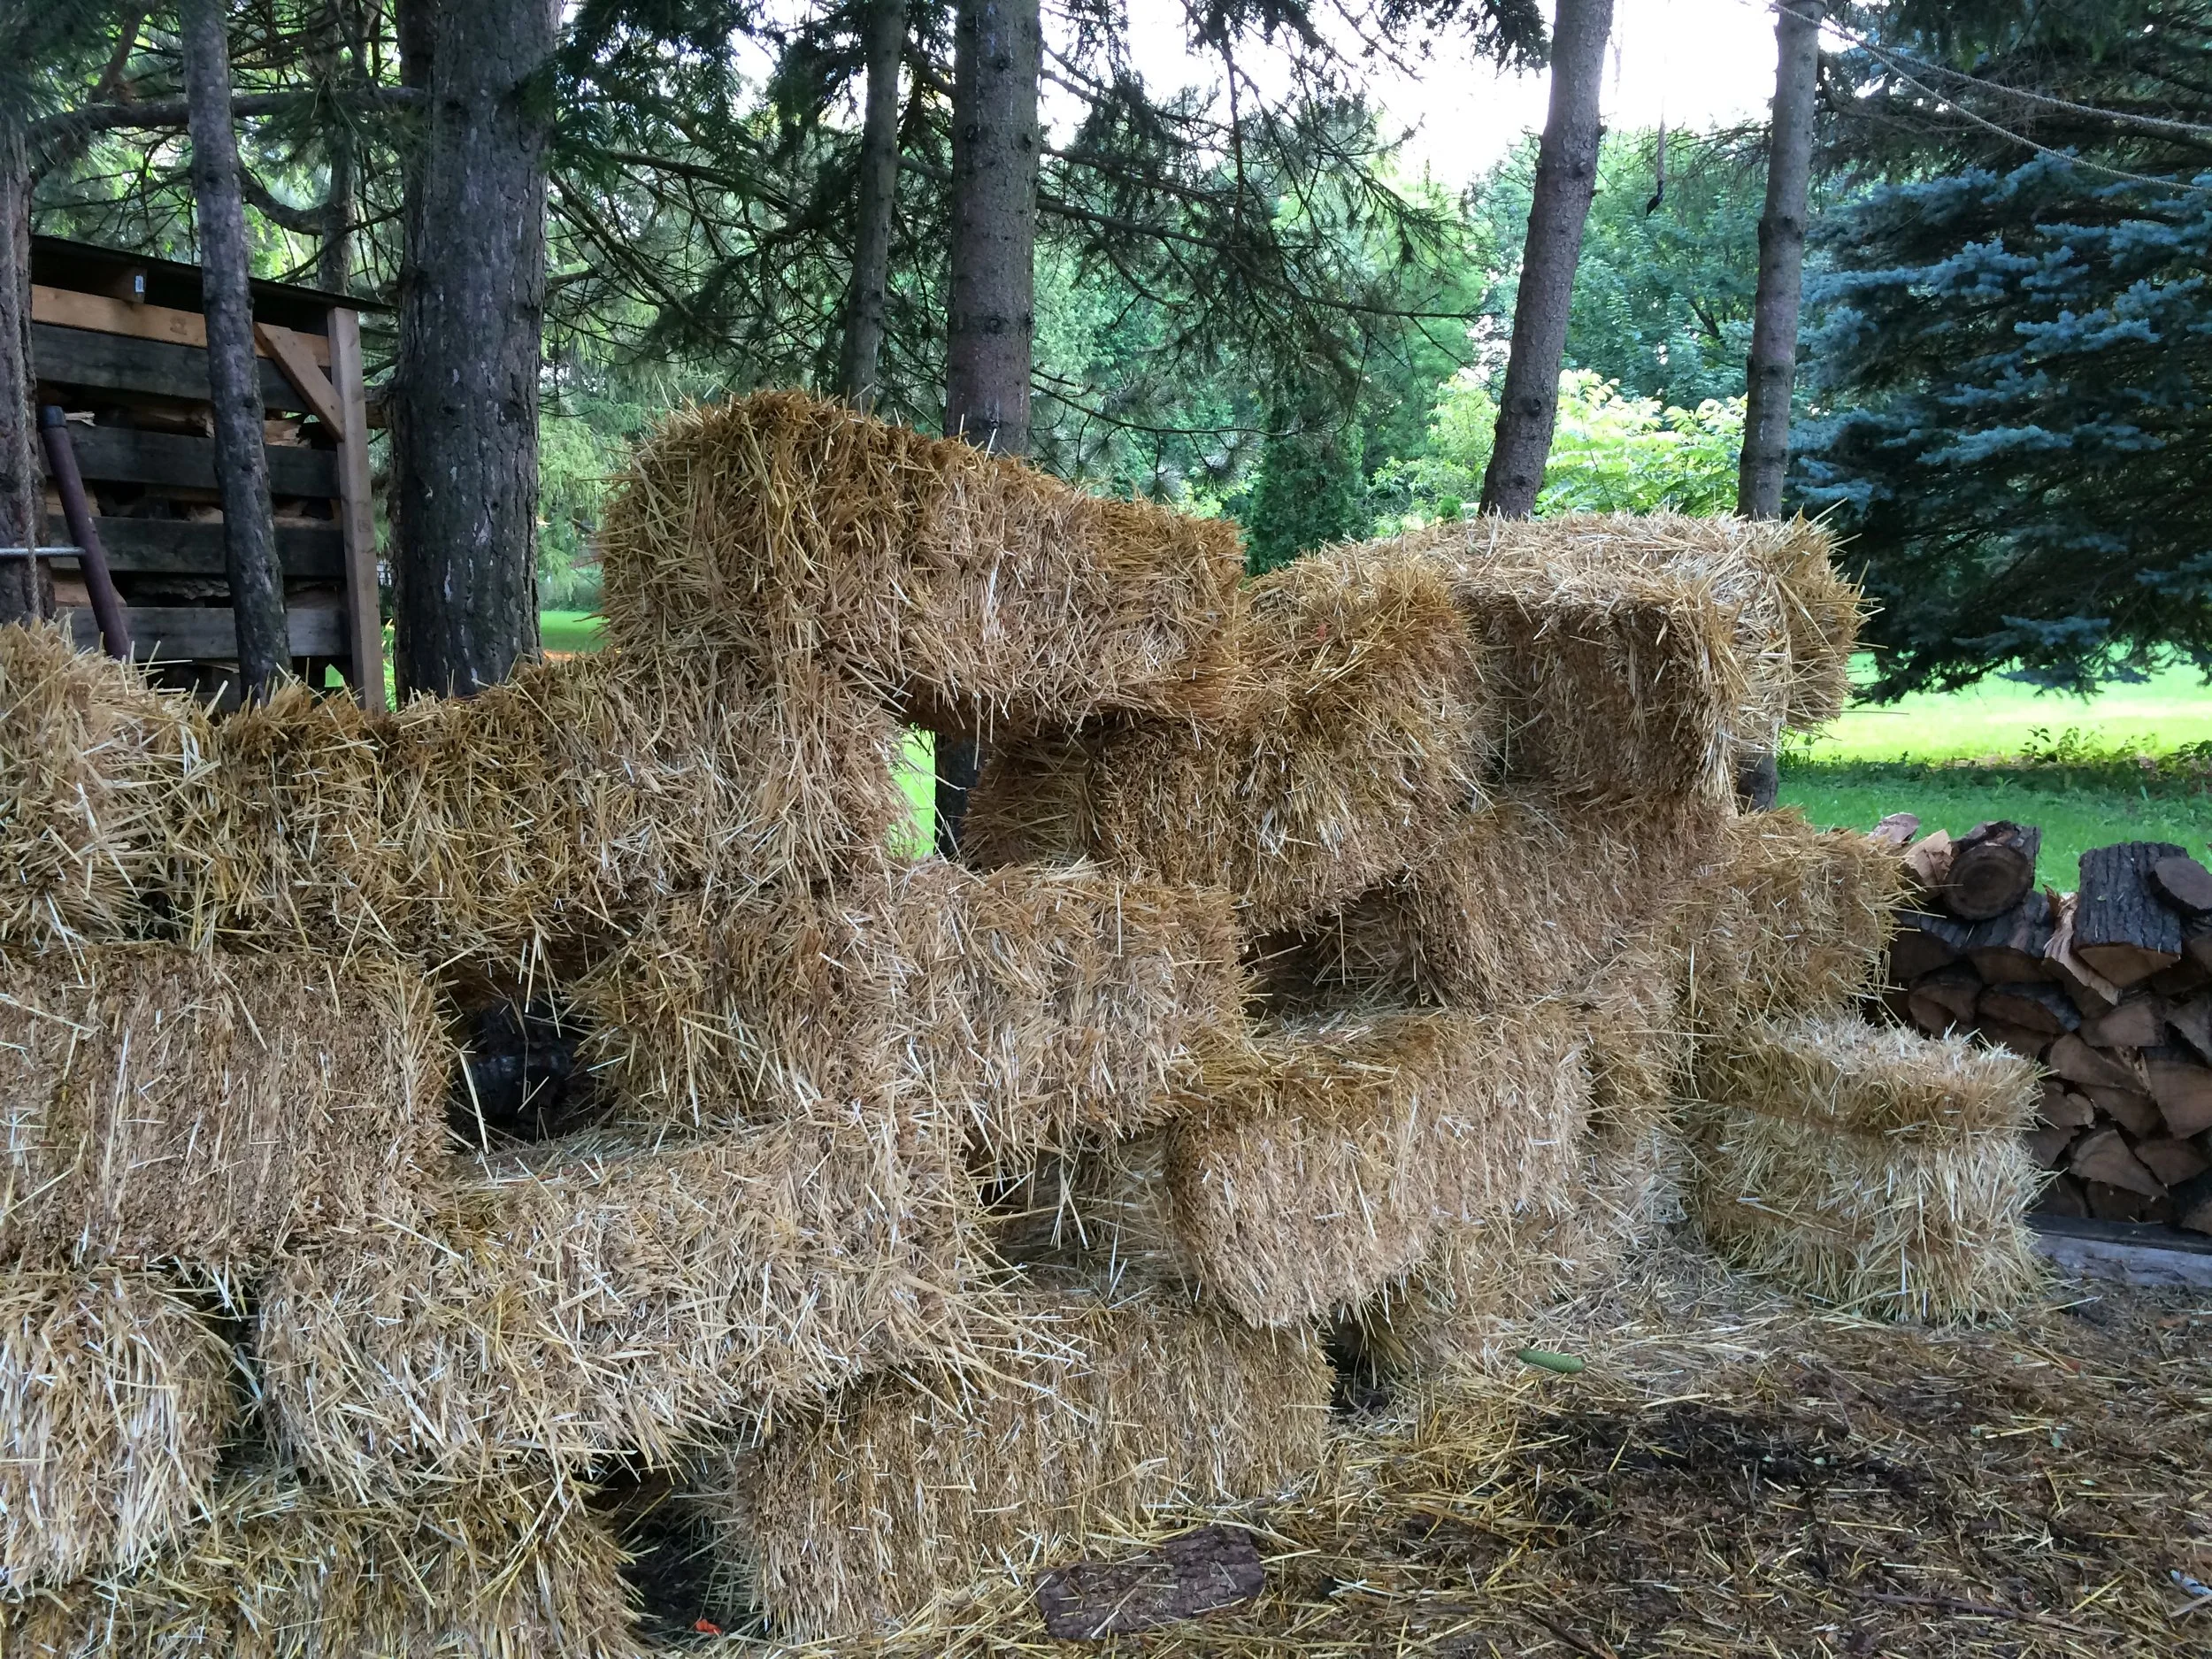
Straw bales are fun for kids.
I used to bring home loads of bales in my minivan. And my family hated all the prickly little bits of straw it left everywhere. So now I just get straw delivered.
To find a farmer, use an online classified advertising website.
And if you have kids: Get straw bales earlier than you need them – for your kids. Straw bales are like giant, biodegradable Lego blocks.
Don’t Straw Bales attract Rats?
The mention of straw has some people wondering whether straw bale gardens will be overrun with rats.
It’s a good question. Not in my experience.
The thing to remember with rats and mice is that they’re looking for food, shelter, and water.
A bale on a paved surface doesn’t give them burrowing room. Doesn’t give them water. Doesn’t give them much food.
What’s more likely to attract rats is bird baths, bird feeders, leaving out pet food, and improperly stored garbage. (On that note, gardening itself, and growing plants with seeds and fruit that are food for rodents, attracts rats.) Remember too, that they’re already abundant in many areas – just not out and about at times that we see them.
Find This Helpful?
Enjoy not being bombarded by annoying ads?
Appreciate the absence of junky affiliate links for products you don’t need?
It’s because we’re reader supported.
If we’ve helped in your food-gardening journey, we’re glad of support. You can high-five us below. Any amount welcome!