Make a Bug Vacuum
Make a bug vacuum.
By Steven Biggs
A Bug Vacuum is Fun for Kids

Not sure how to make the garden a fun place for kids?
It doesn’t always have to be about plants. Some kids might want to climb trees. Some might enjoy mud.
And some kids LOVE bugs.
My son Keaton has always gravitated towards bugs. When he was smaller he’s spend big chunks of time scouring our yard for bugs to suck up and inspect in his bug vacuum.
Make a Bug Vacuum with your Kids
You can purchase bug vacuums. But those battery-powered gadgets soon break.
Instead, make this bug vacuum with some easy-to-find materials.
Even better, make it with your kids. It’s a fun and easy project to tackle together.
Here’s a simple bug vacuum that you can make at home (from the book Gardening with Emma.)
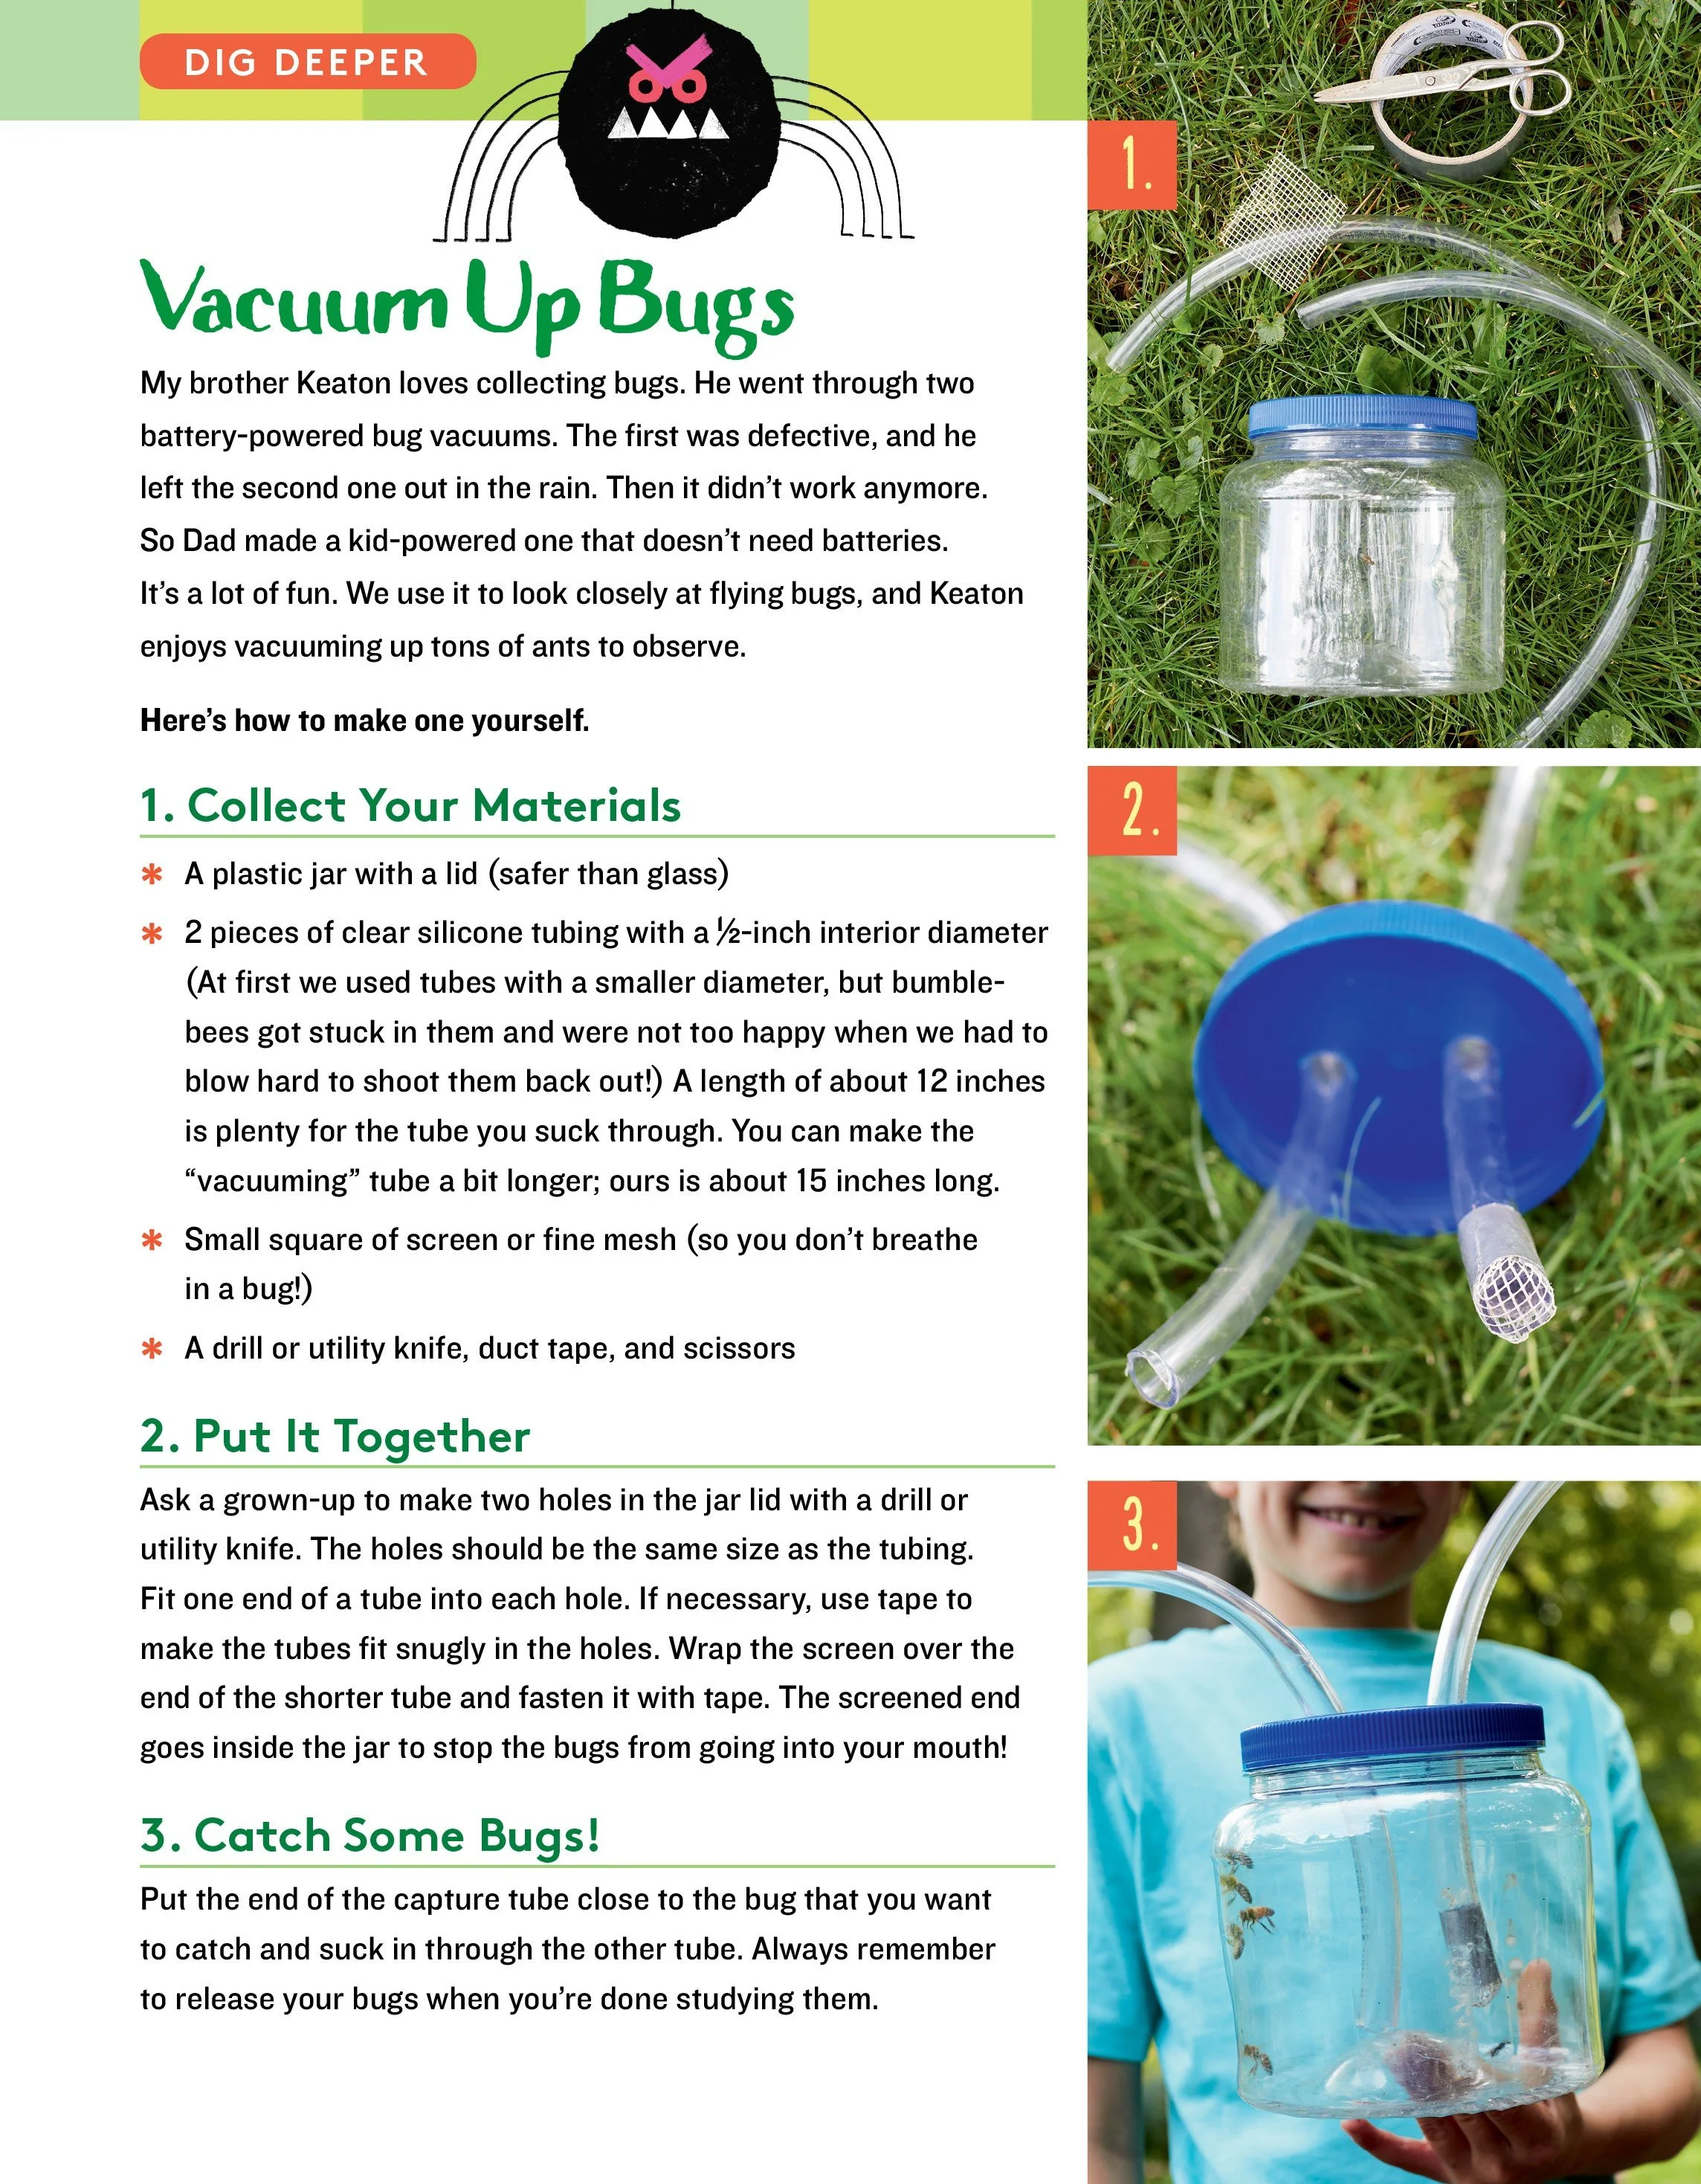

My son Keaton catches a pollinator with his bug vacuum. After watching it, he unscrews the lid to release it. Photo Donna Dawson.
Find This Helpful?
Enjoy not being bombarded by annoying ads?
Appreciate the absence of junky affiliate links for products you don’t need?
It’s because we’re reader supported.
If we’ve helped in your food-gardening journey, we’re glad of support. You can high-five us below. Any amount welcome!
Looking for more fun ideas to make the garden a fun place for kids?
Check out Gardening with Emma for lots of fun ideas and projects for kids (and parents!) in the garden.
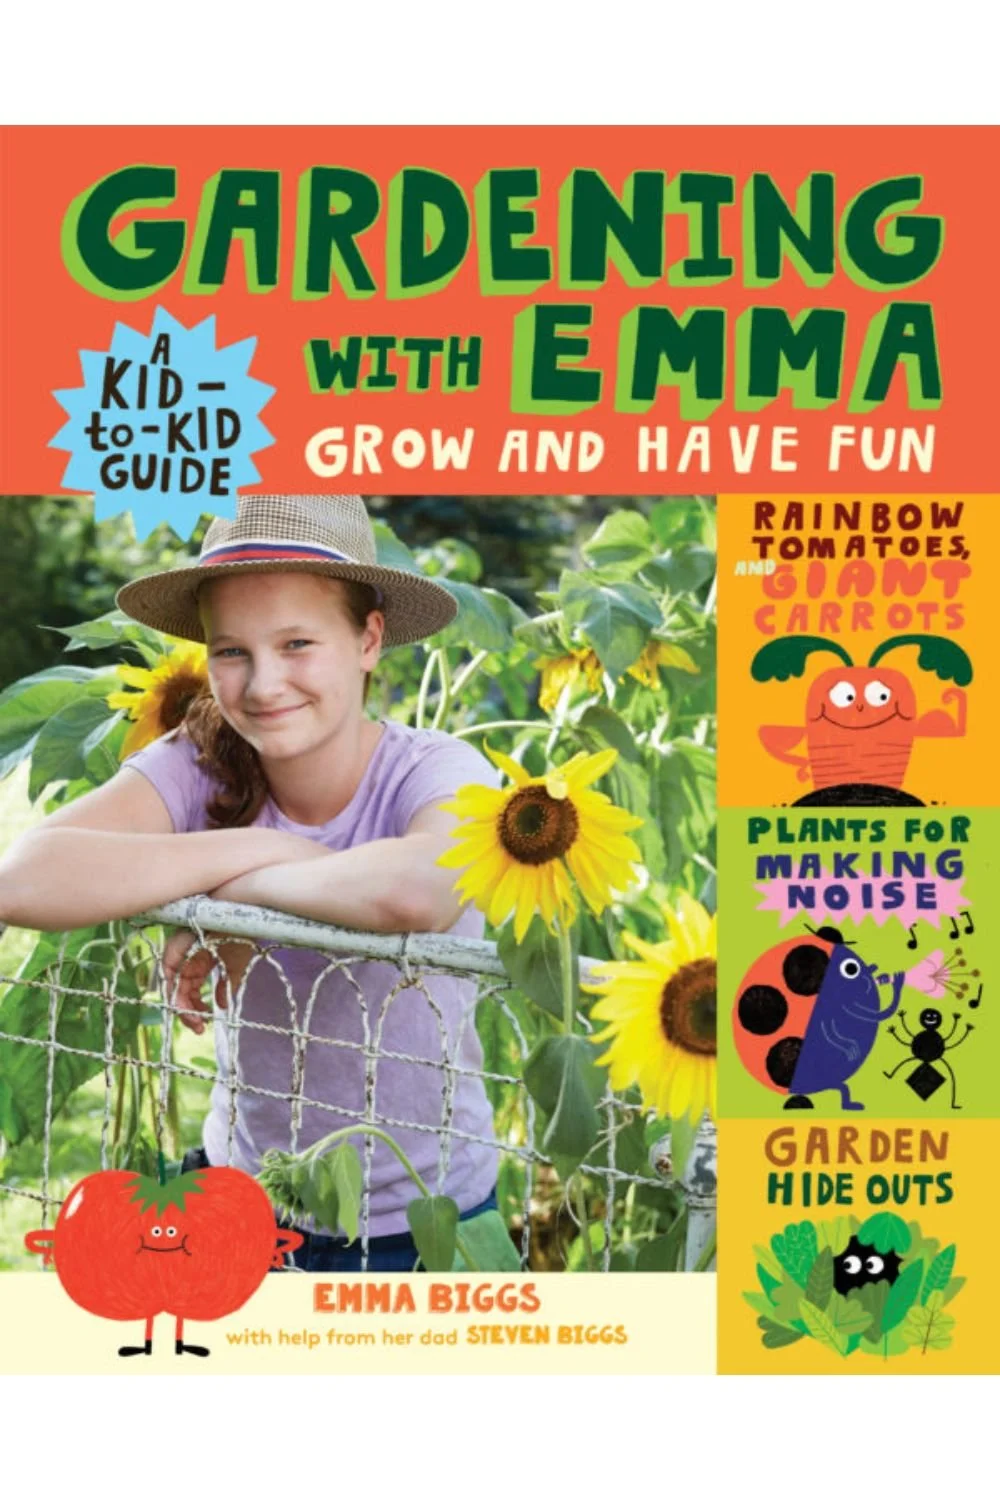
Written for kids by a kid, this guide helps kids see the fun side of gardening, whether it’s growing giant vegetables, making a bug vacuum, or making a sound-themed garden.
Emma shares lots of inspiring ideas for young gardeners about how to grow healthy food, raise cool plants, and have fun outdoors.
Copies from the Food Garden Life shop are signed by Emma!
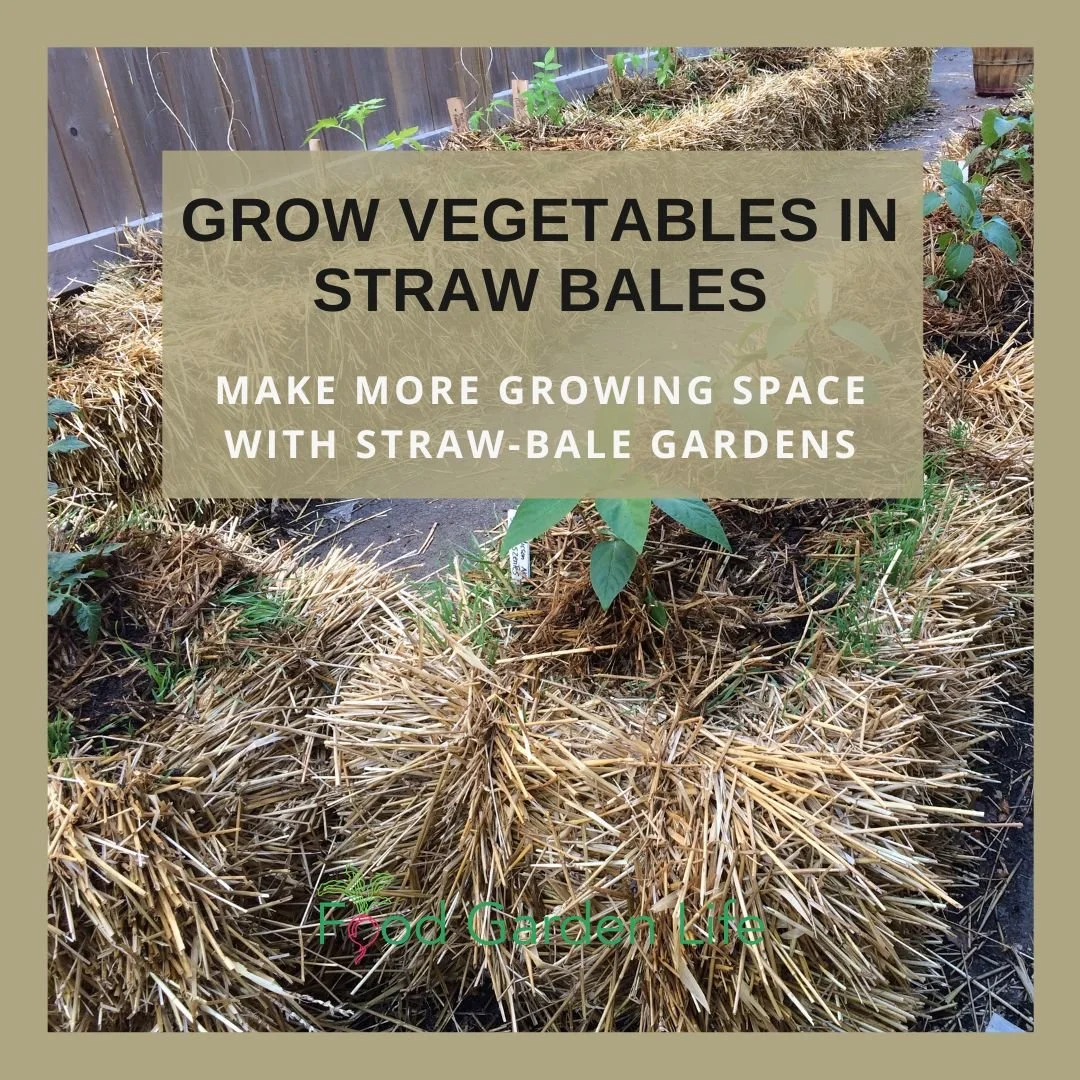
Grow Vegetables in Straw Bales
Straw bale vegetable gardening is an easy way to create more growing space.
By Steven Biggs
Make More Growing Space with Straw Bale Gardens
I started straw bale gardening to solve a problem.
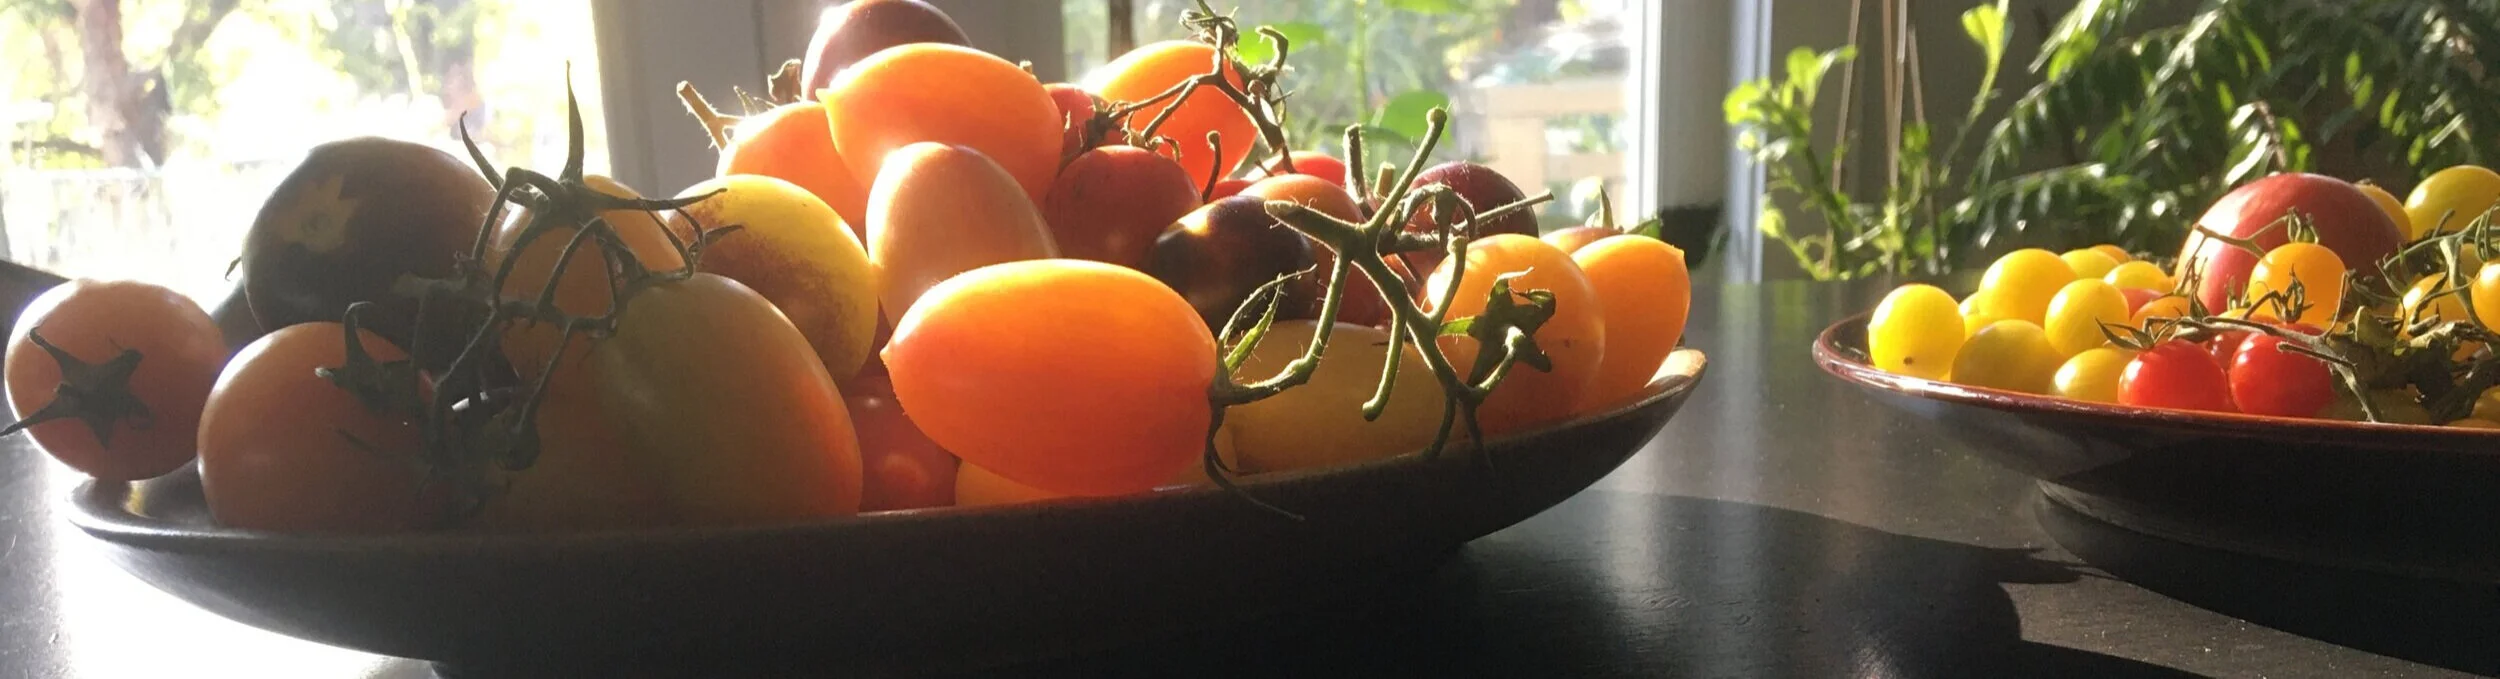
The problem? We needed more growing space for my daughter Emma’s 100-plus tomato varieties.
We have a big yard for the city. But there’s a black walnut tree that makes much of the yard unsuited to growing tomatoes.
(That’s because black walnuts give off a compound that kills the tomato plants…and a number of other plants too.)
With a long and ugly driveway that could fit a couple of school buses, Emma and I began to imagine a tomato plantation on the driveway.
In this post I’ll talk about how to use straw bales to make gardens on paved areas or over soil that’s not great for gardening.
Straw Bale Driveway Garden
Straw bales are an easy way to create a near-instant garden on paved surfaces and areas with poor soil. That’s because the straw bale is both the growing medium and the container.
Here’s how it works: As the straw bale decomposes, it creates an ideal growing medium that is well aerated and holds lots of moisture. It’s like a big sponge. It’s perfect for plant roots – better than many garden and container soils.
In short, you’re composting a bale of straw, and growing your vegetable plants in it at the same time.
Straw Bale Gardening: Top Tip

Our straw bale driveway garden
The most important thing to remember is that bales should be “conditioned” before you grow in them.
Conditioning means kick starting the microbial action. And you know when it’s working because as the microbes start to break down the straw, the temperature inside the bale goes up. We don’t plant in it yet…it might be too warm for our plants.
As the temperature comes down, your bale is ready to plant. Some people use a thermometer. I stick in my finger. It’s not an exact thing.
I allow 3-4 weeks for this conditioning process. It might be less if you’re somewhere warmer than me.
Since the bales in our driveway garden are for heat-loving tomato plants that we put out in late May, we start conditioning the bales late-April to make sure they’re ready for the planting date. I just work back four weeks from my planting date.
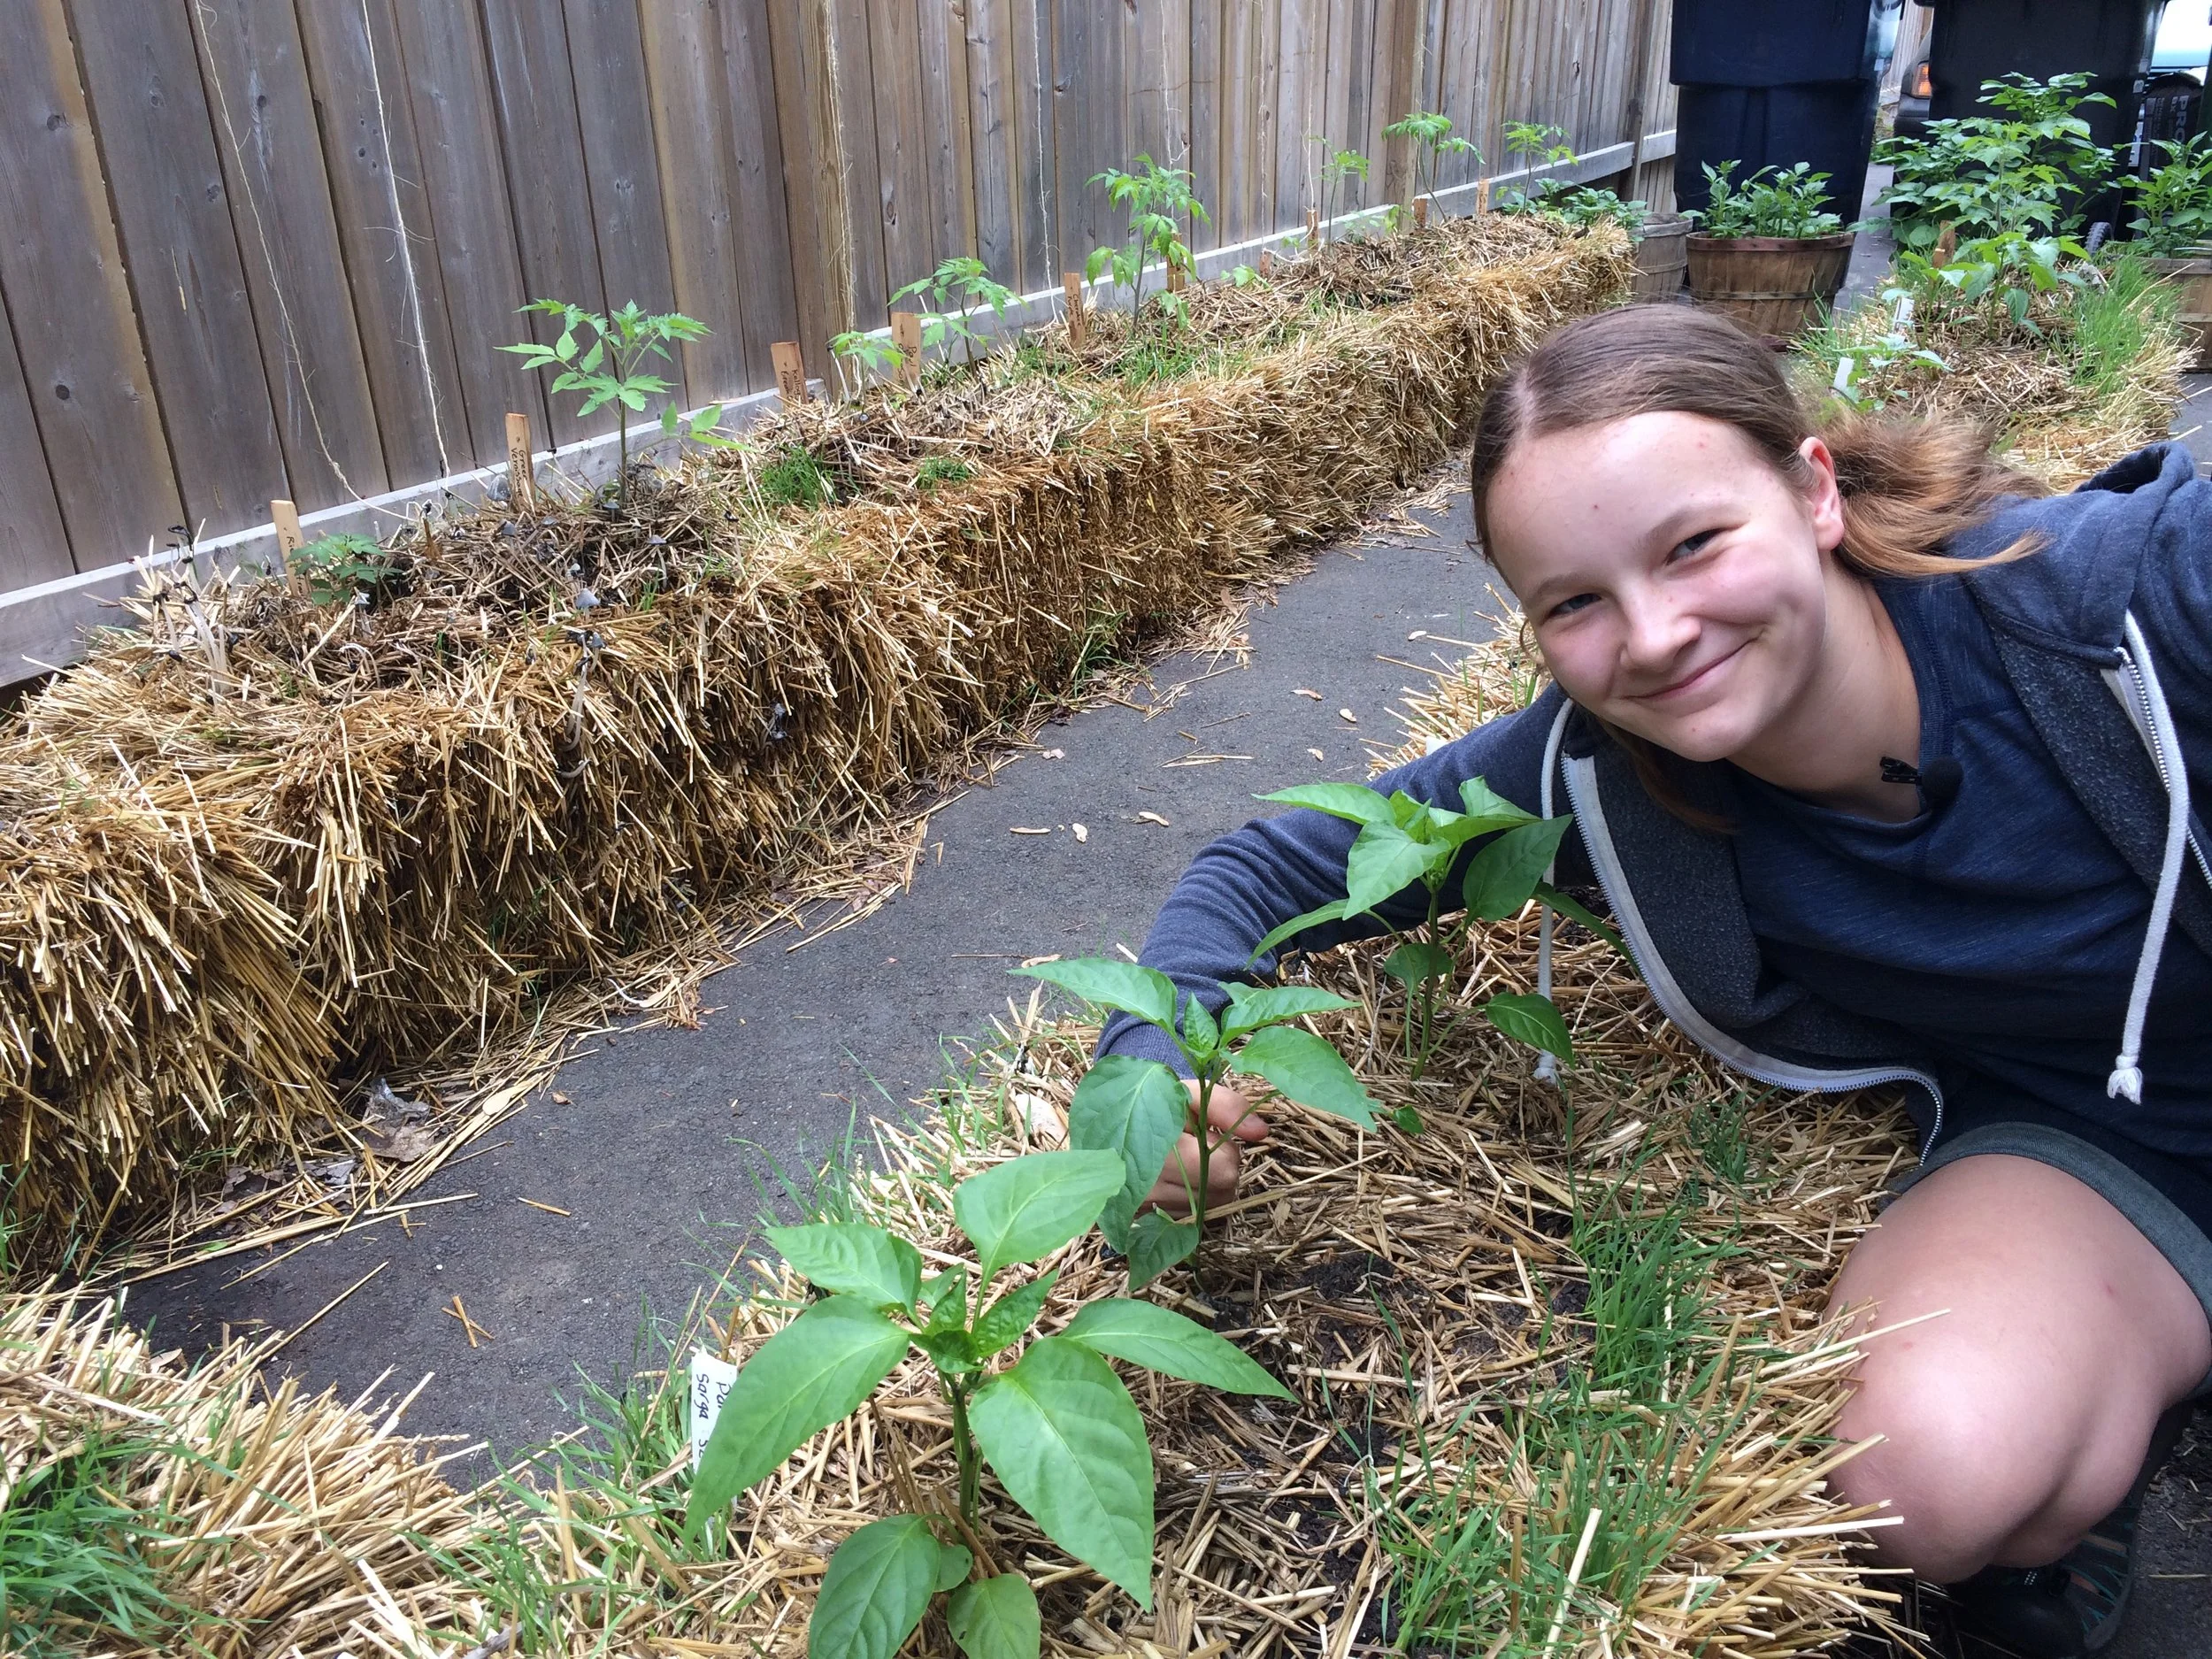
Straw Bale Garden Setup

Emma conditioning the newly arrived straw bales.
Before your bales become heavy from watering them, it’s a good time to think about how you want to arrange them. There’s no right or wrong, it depends on your situation:
If you’re planning to use a long soaker hose, you might want them in a long line.
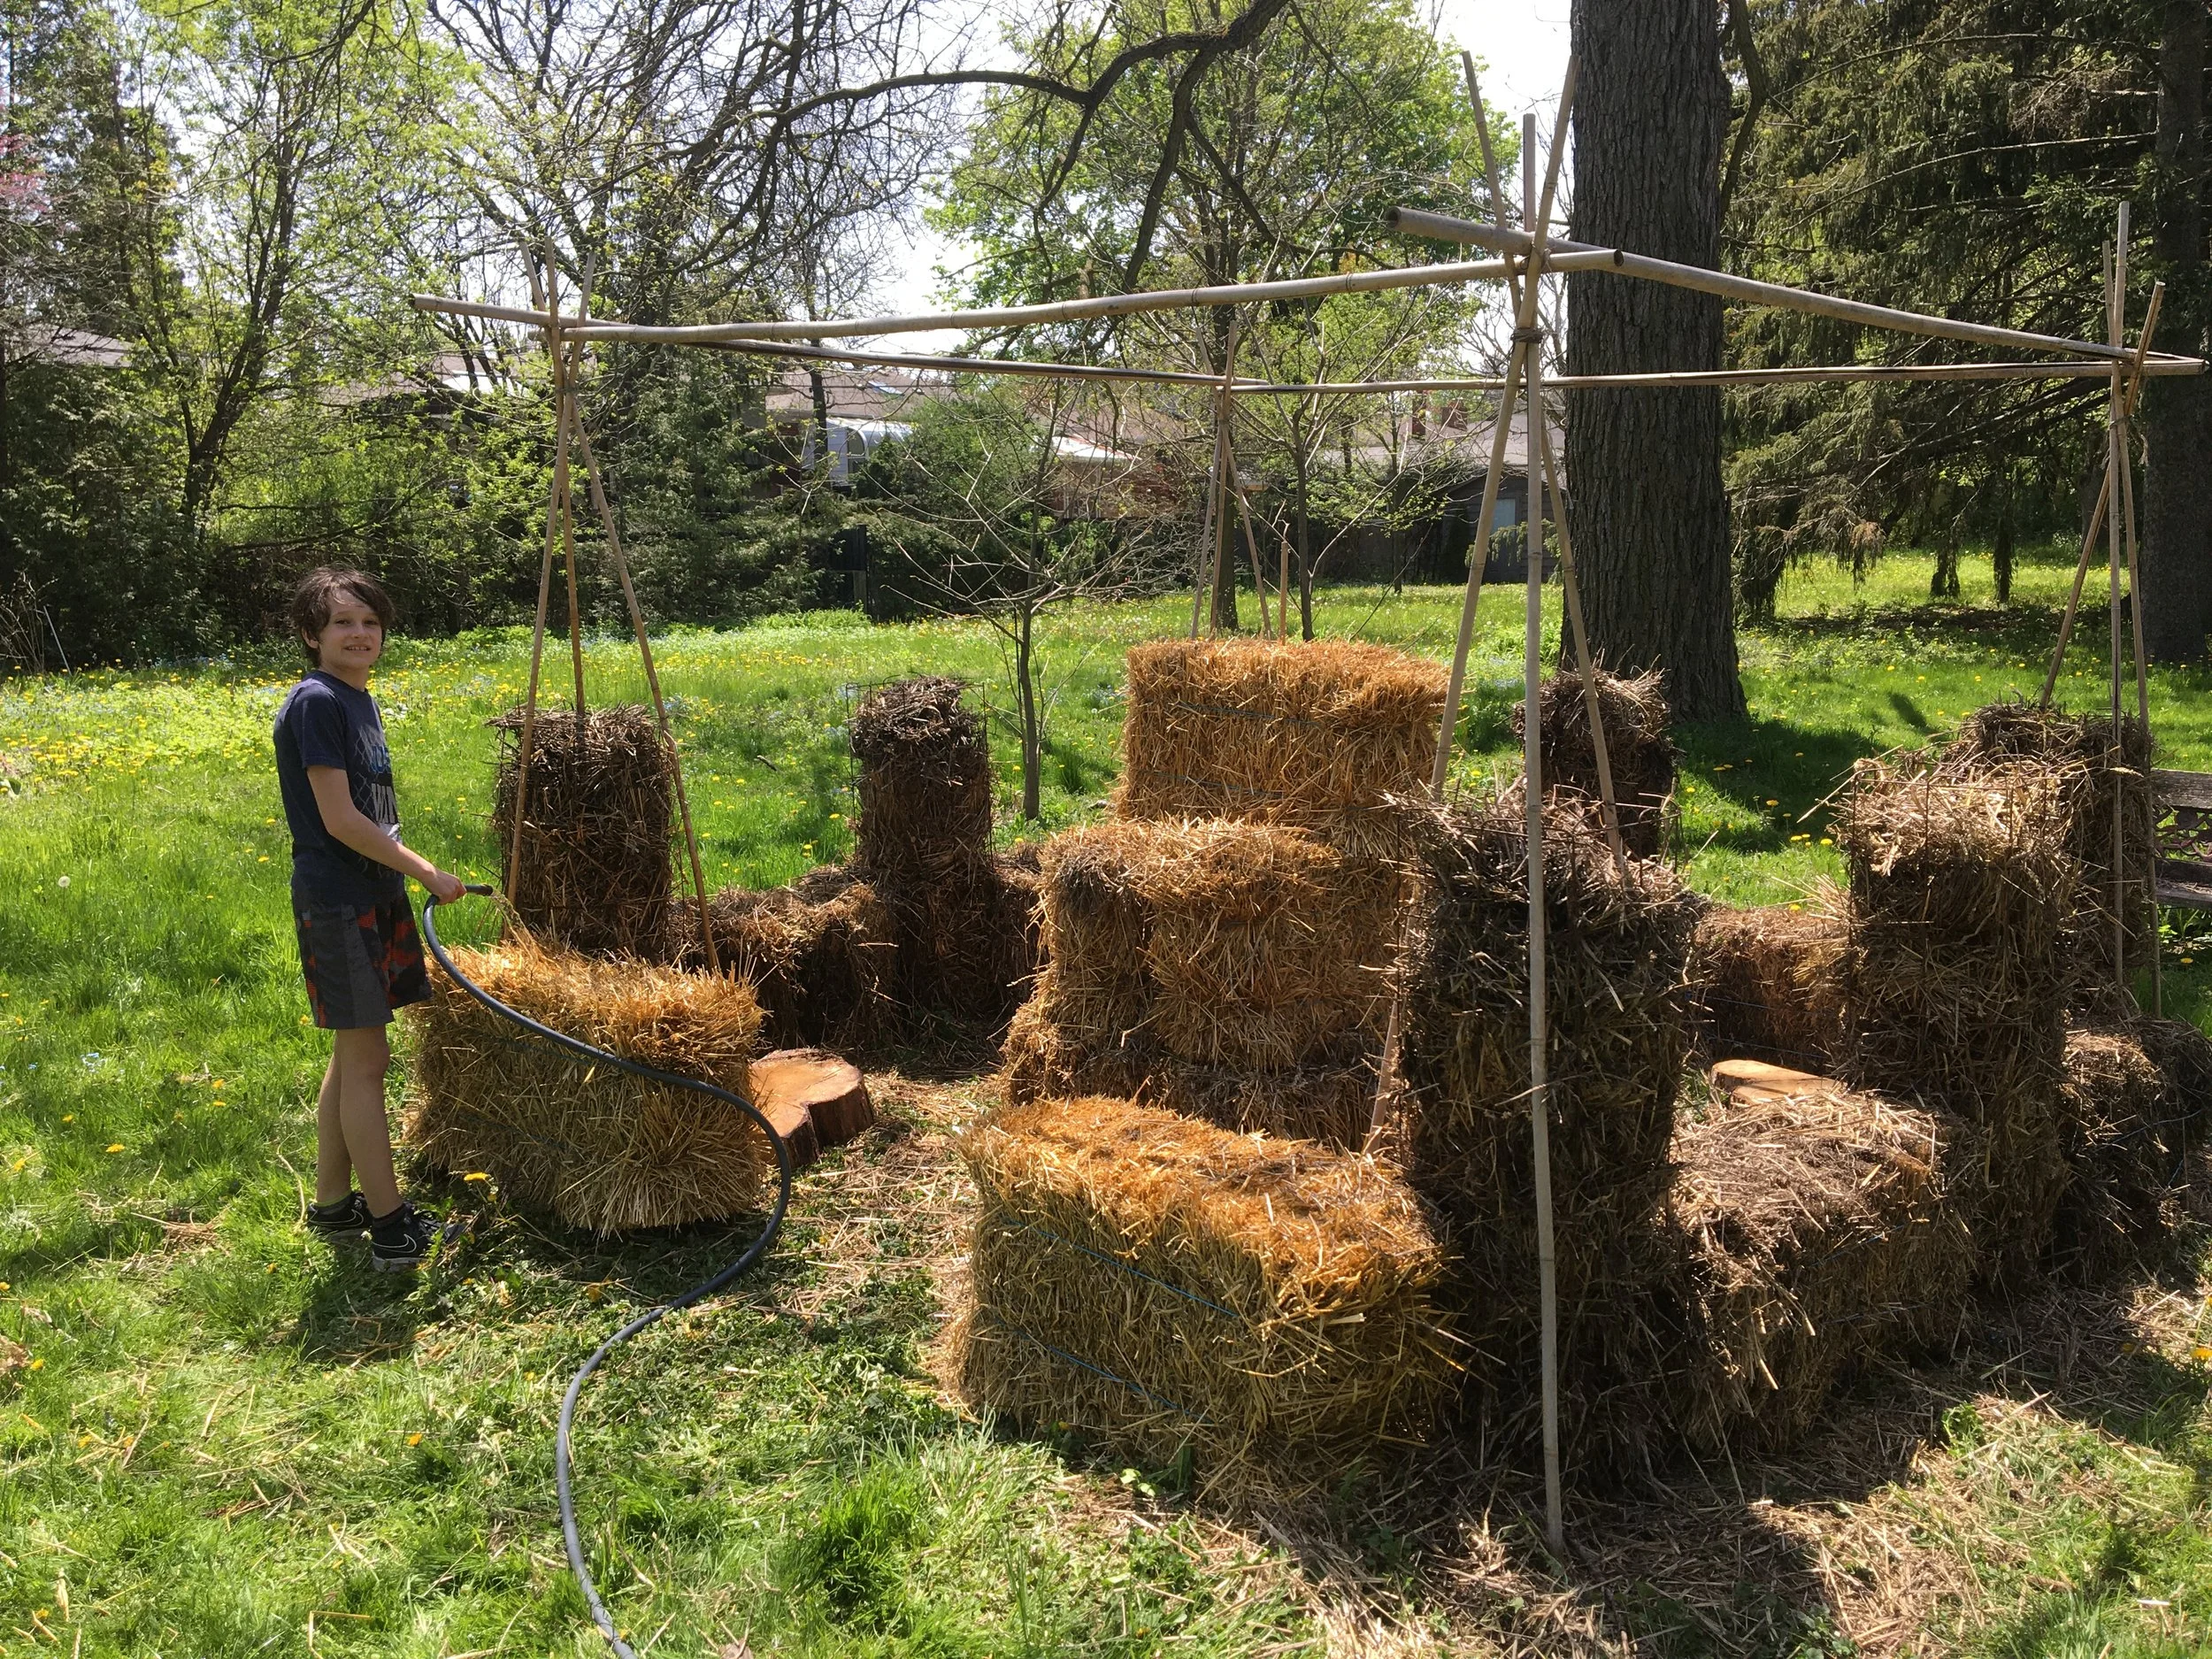
If you’re gardening with kids, arranging them in a square makes for a nice hidoute once the plants get bigger
If you’re watering with a hose, arrange the bales so you can easily move amongst the bales with the hose
How to Orient Straw Bales
Once you know how you want to arrange the bales, think about how you’re orienting them. You can place them so that the loops of twine are on the top and bottom – or the twine is at the sides. Both ways of orienting the bales are fine.
But here’s how I do it: When positioned so that the twine is at the sides, the straw within is mainly oriented vertically. Bales positioned this way absorb more water, so it’s less likely to run off of the side of the bale.
How to Condition Straw Bales
To condition the bales – which just means getting the microbes working – we need 2 things:
Water
Nitrogen
In this picture the bales are oriented with the twine at the top and bottom of the bales. We now prefer to have the twine at the side for easier water penetration.
Place a nitrogen source on top of the bales and water well. The goal is for the water to soak into the bale and move some of the nitrogen into the bale. Use a low pressure and volume so that water doesn’t flow over the sides of the bale (and take the nitrogen with it).
More on the nitrogen source: When you’re looking at the numbers in the fertilizer formulation, you want the first number, the nitrogen, to be higher than the others. For example, blood meal is 12-0-0. That’s what I usually use.
Other years I’ve also used a high-nitrogen organic fertilizer derived from guano, and a lawn fertilizer.
Here’s how I condition straw bales with blood meal:
I water well every day for the first week.
Starting on the first day, and again every other day, I put a 2 cups of blood meal on the bale BEFORE watering (so the water moves some of the blood meal into the bale).
I give 3 applications of blood meal.
As we get into week 2, the bale should be warming up nicely inside!
After 2 weeks, fertilize the bales with a balanced, all-purpose fertilizer.
During this conditioning process, the temperature can go up to about 50°C (120°F), and then it drops. You can plant in the straw bales once the temperature has dropped below about 26°C (80°F).
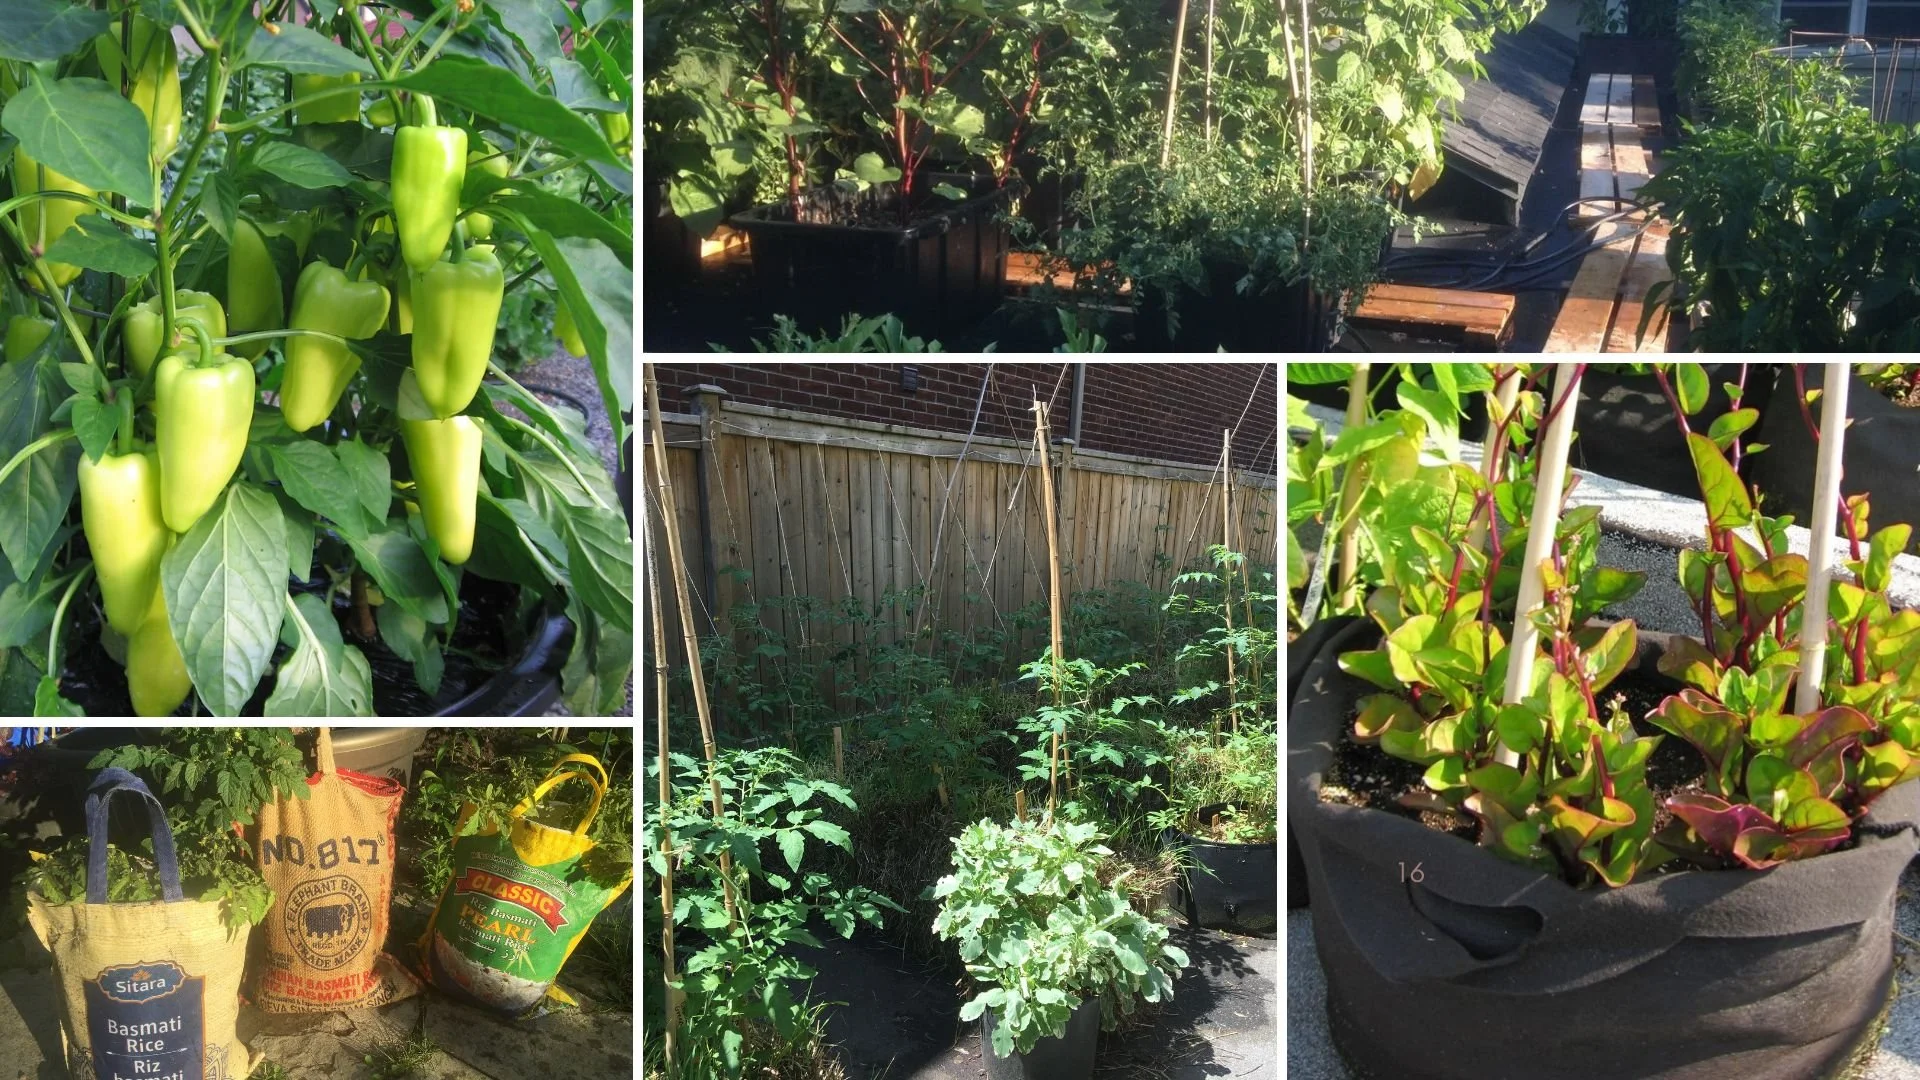
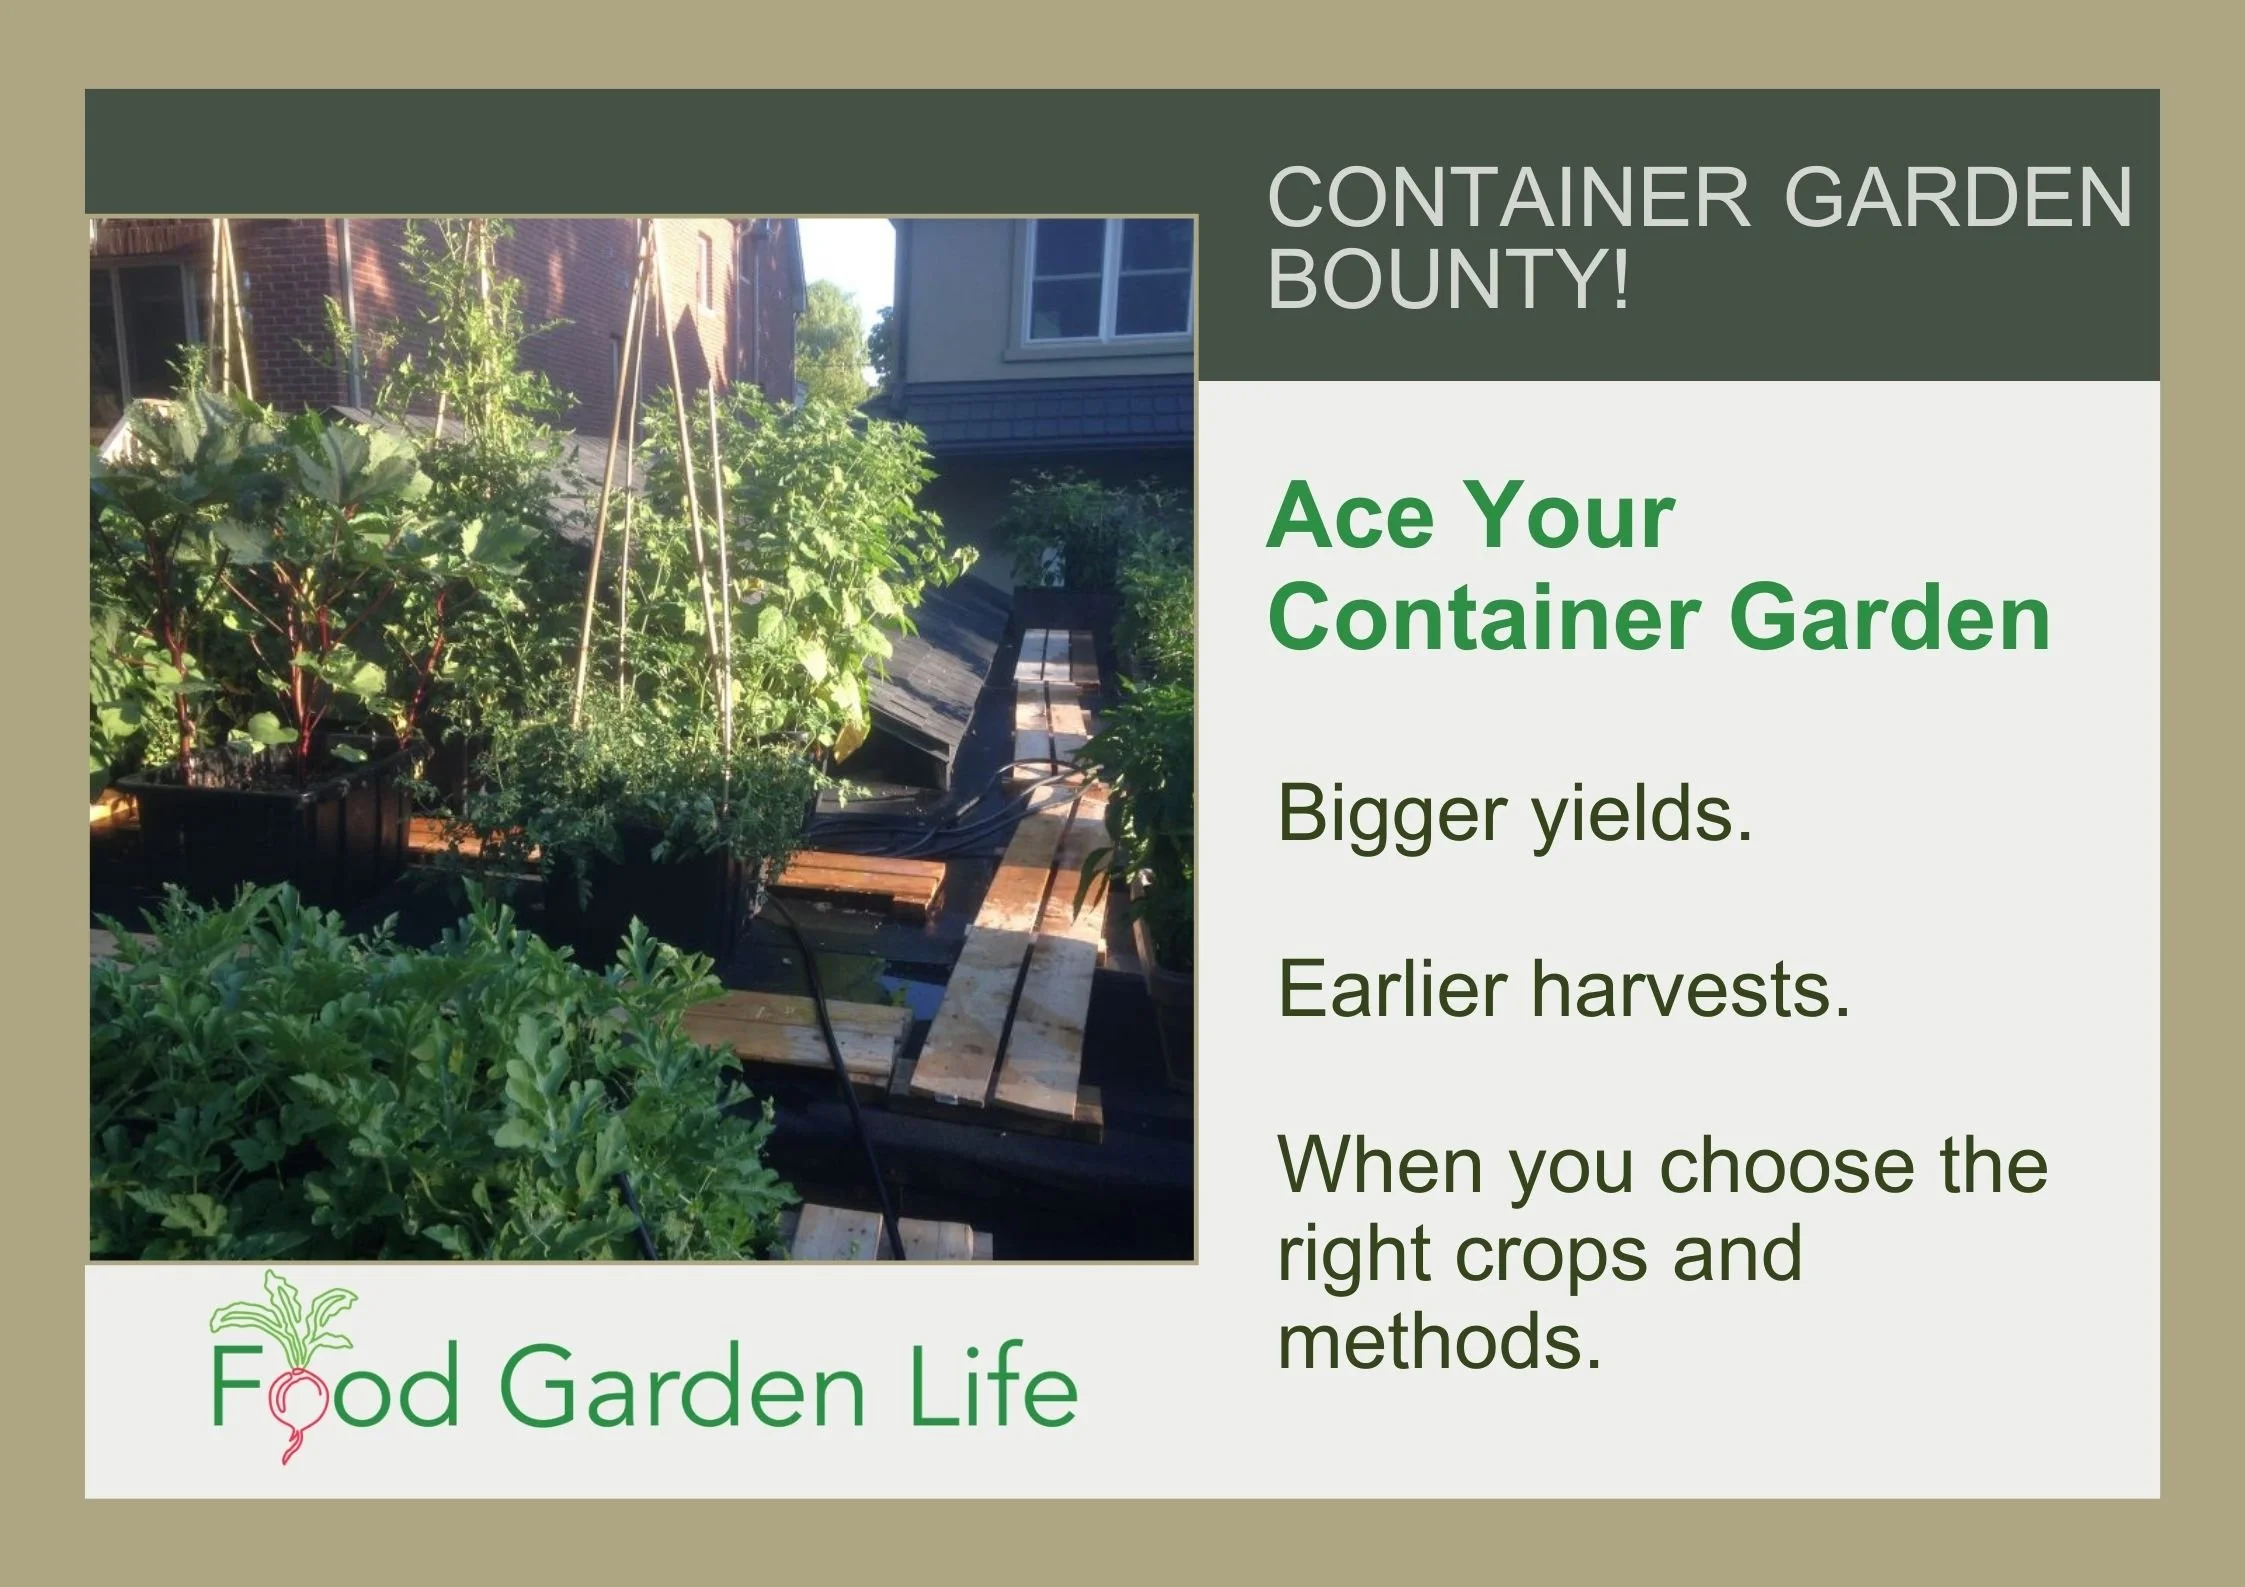
Grow a Container Vegetable Garden
And get an early harvest of crops that usually take too long!
Straw-bale Garden Plant Layout

Plant densely to make the best use of space in your straw bale garden.
Wondering about plant spacing in a straw-bale garden? Because a well-managed straw bale garden provides plants lots of moisture and an excellent growing medium, you can plant densely.
We aim for two or three tomato plants per bale. Around those tomatoes we sow bush beans and leafy greens.
Something else to think about with straw bales is that you can plant into the side of the bale too. We’ve grown dwarf tomato plants out the side of bales, while at the top are normal determinate and indeterminate varieties.
How to Support Plants in Straw Bale Gardens
Because there is a paved surface below, and because the bales decompose and start to collapse over the summer, regular staking is not an option.
Here’s what I do instead of staking:
Use 3-4 stakes positioned over the bale to create a self-supporting tee-pee.
Put the bales next to a fence and grow vining crops up the fence.
Looking for tomato-staking ideas? Find out how to stake and support tomato plants.
Straw Bale Garden Planting and Care
How to Plant in Straw Bales
When I show pictures of straw bale gardens to groups, I’m asked where the soil is. There doesn’t have to be soil, because the straw is the growing medium.
When transplanting, use a trowel to pry an opening into the bale. Then place the transplant into the opening, and close up the opening. Be sure to cover the transplant roots with straw so they remain moist.
With large seeds like beans, we just insert them right into the bale. Again, no soil necessary.
When direct seeding smaller seeds onto a straw bale, a thin layer of soil is helpful. We add about an inch of soil over the top of the bale if we’re seeding leafy greens. Use a potting soil or good garden soil that won’t cake with frequent watering.
Straw Bale Garden Fertilizer and Water
Once your bales are conditioned and planted, feed with a balanced, all-purpose feed and keep them well watered. Because the inside of the bale remains well aerated, excess water is not likely to harm the plants. But excess water will wash away nutrients.
If there are not many bales in your garden, hand watering might be fine.
For larger gardens, drip irrigation or a soaker hose works well. Position the soaker hose to sprays downwards, into the bale.
Grasses and Mushrooms on Straw Bales
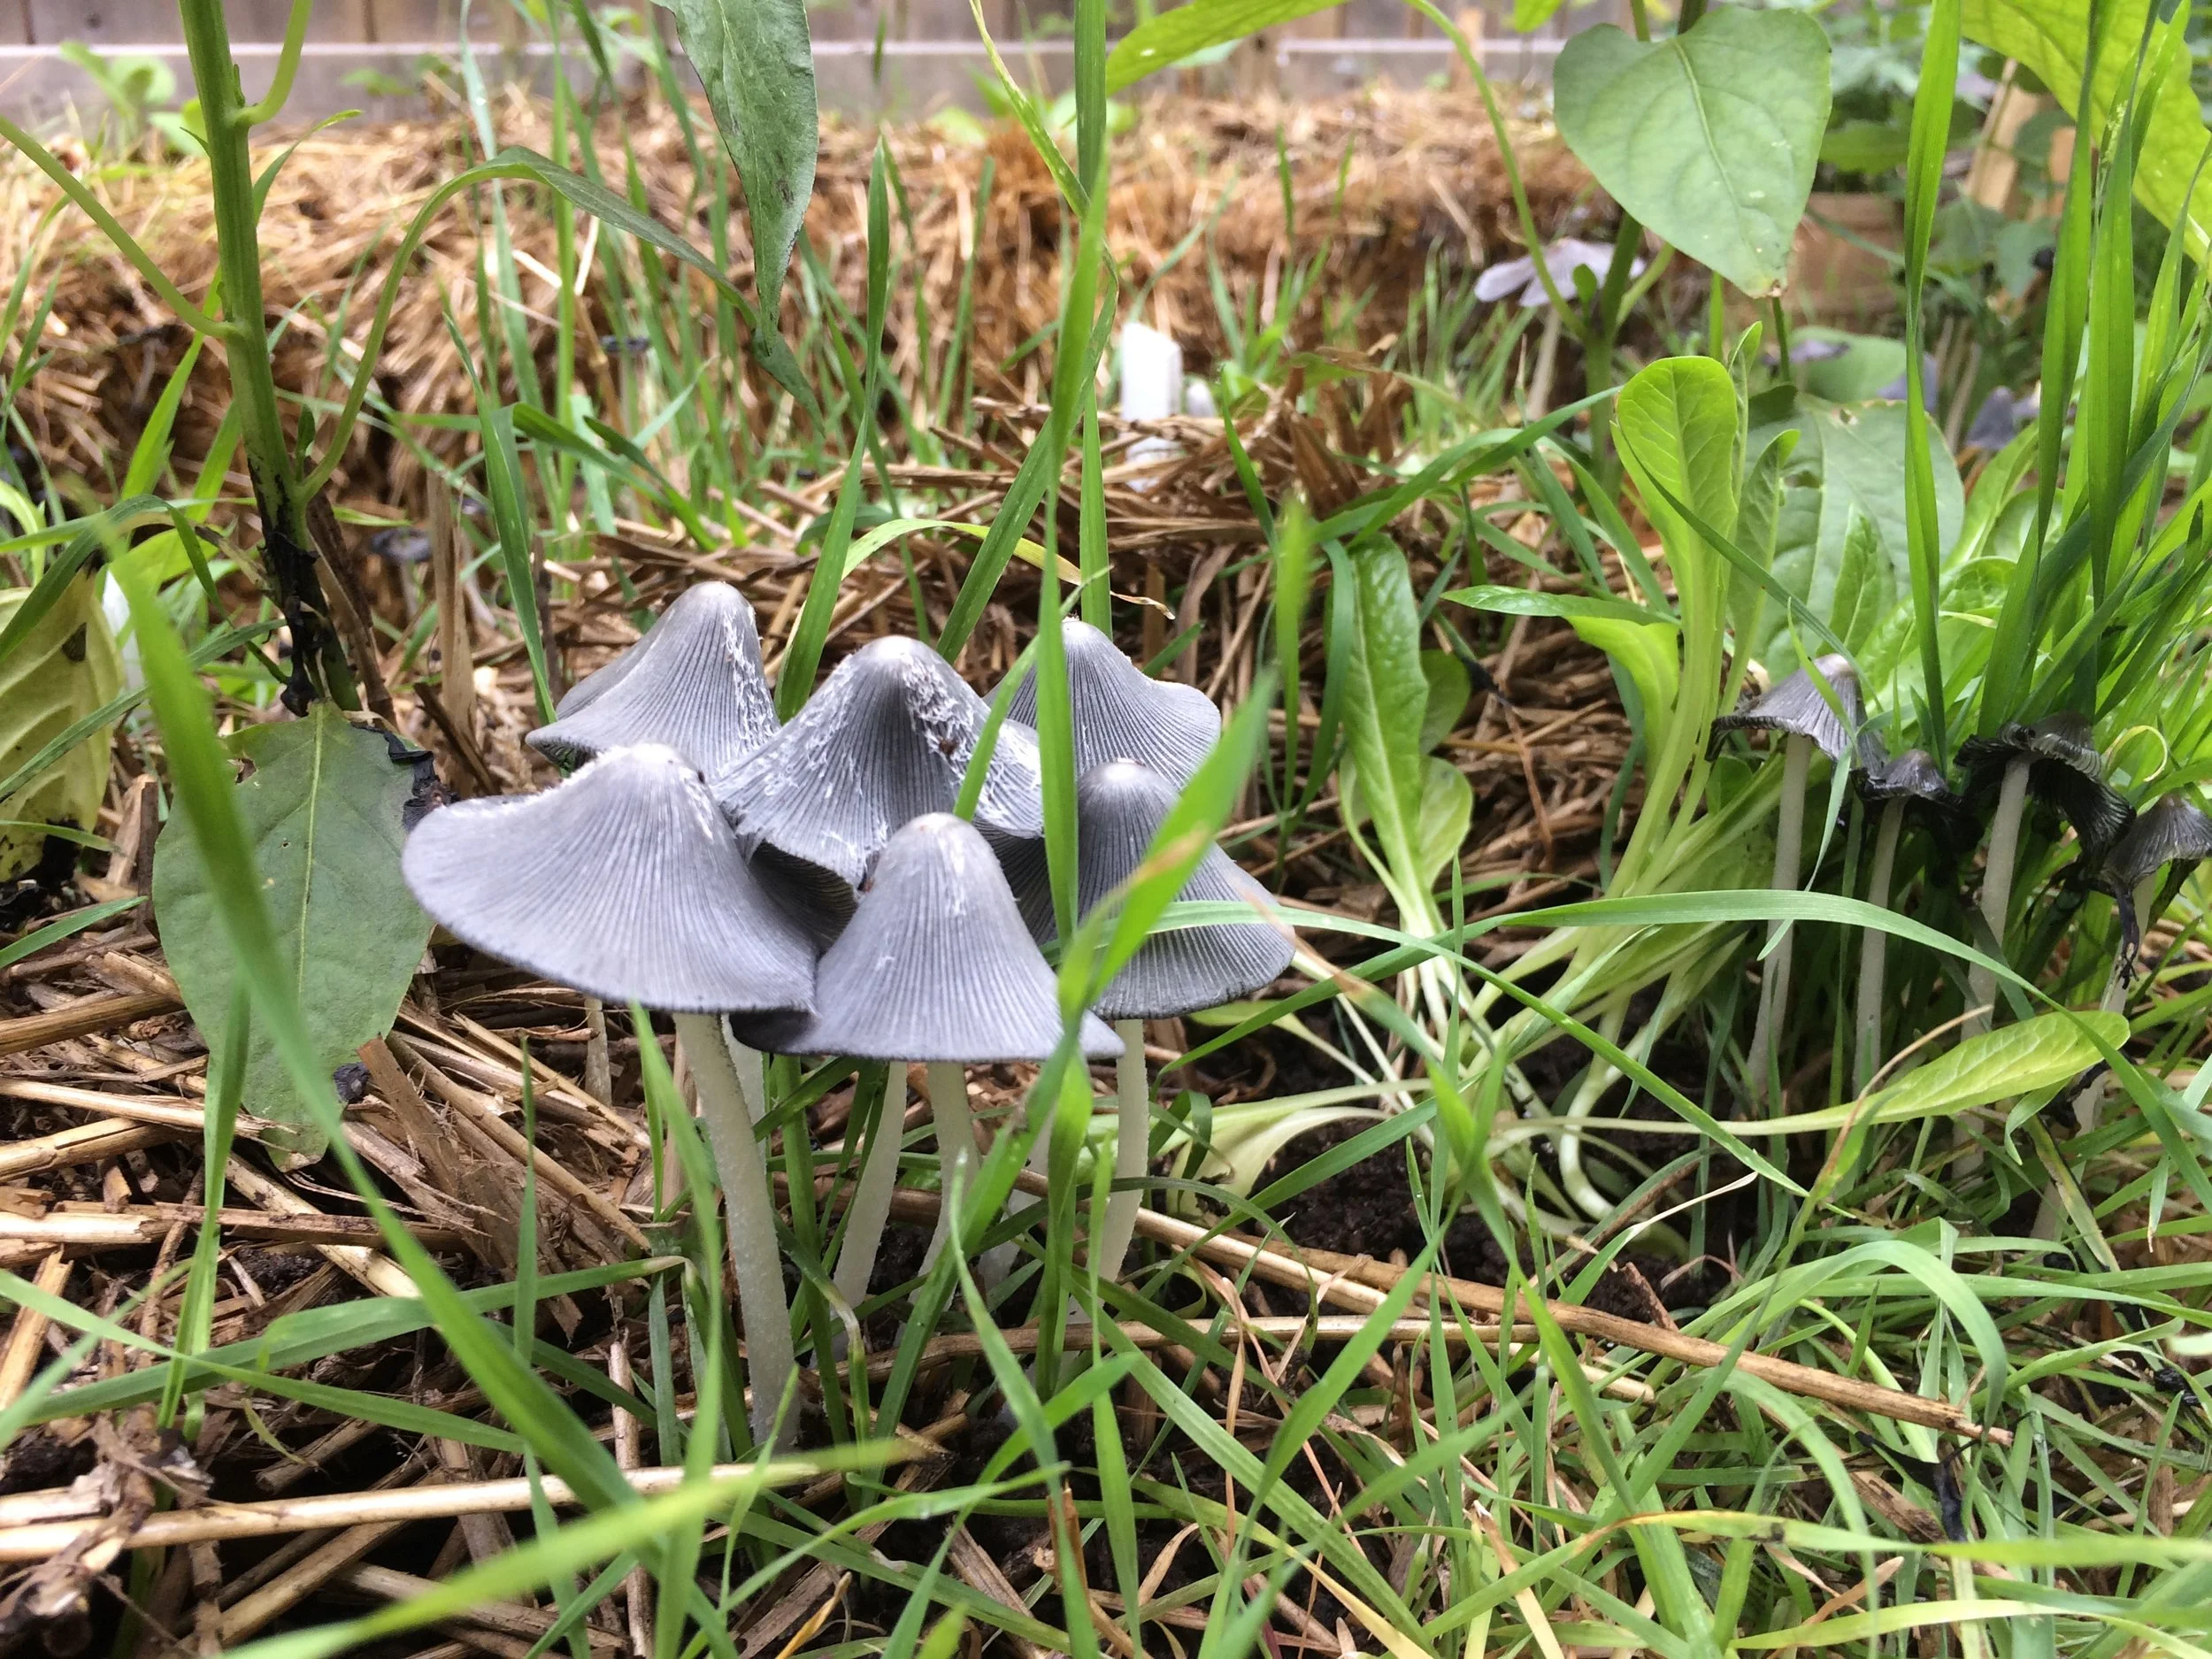
It’s normal to get mushrooms growing on straw bales. It means you’ve created good growing condtions.
Don’t be surprised to see little grass-like plants and mushrooms growing on the bales. These are good – it means you’ve created good growing conditions.
The grasses are any residual grain within the bale that germinates and grows. They won’t out-compete your crops. Just pull them off.
Straw Bale FAQ
What do you do with Straw Bales After Harvest?
After a year of growing I use the straw to mulch gardens, on pathways, and in my compost pile.
How Many Years do Straw Bales Last?
I’ve sometimes used bales a second year. How fast a bale decomposes varies with your weather conditions. Friends in warmer areas report that one year is the maximum for them.
What if the Twine Breaks?
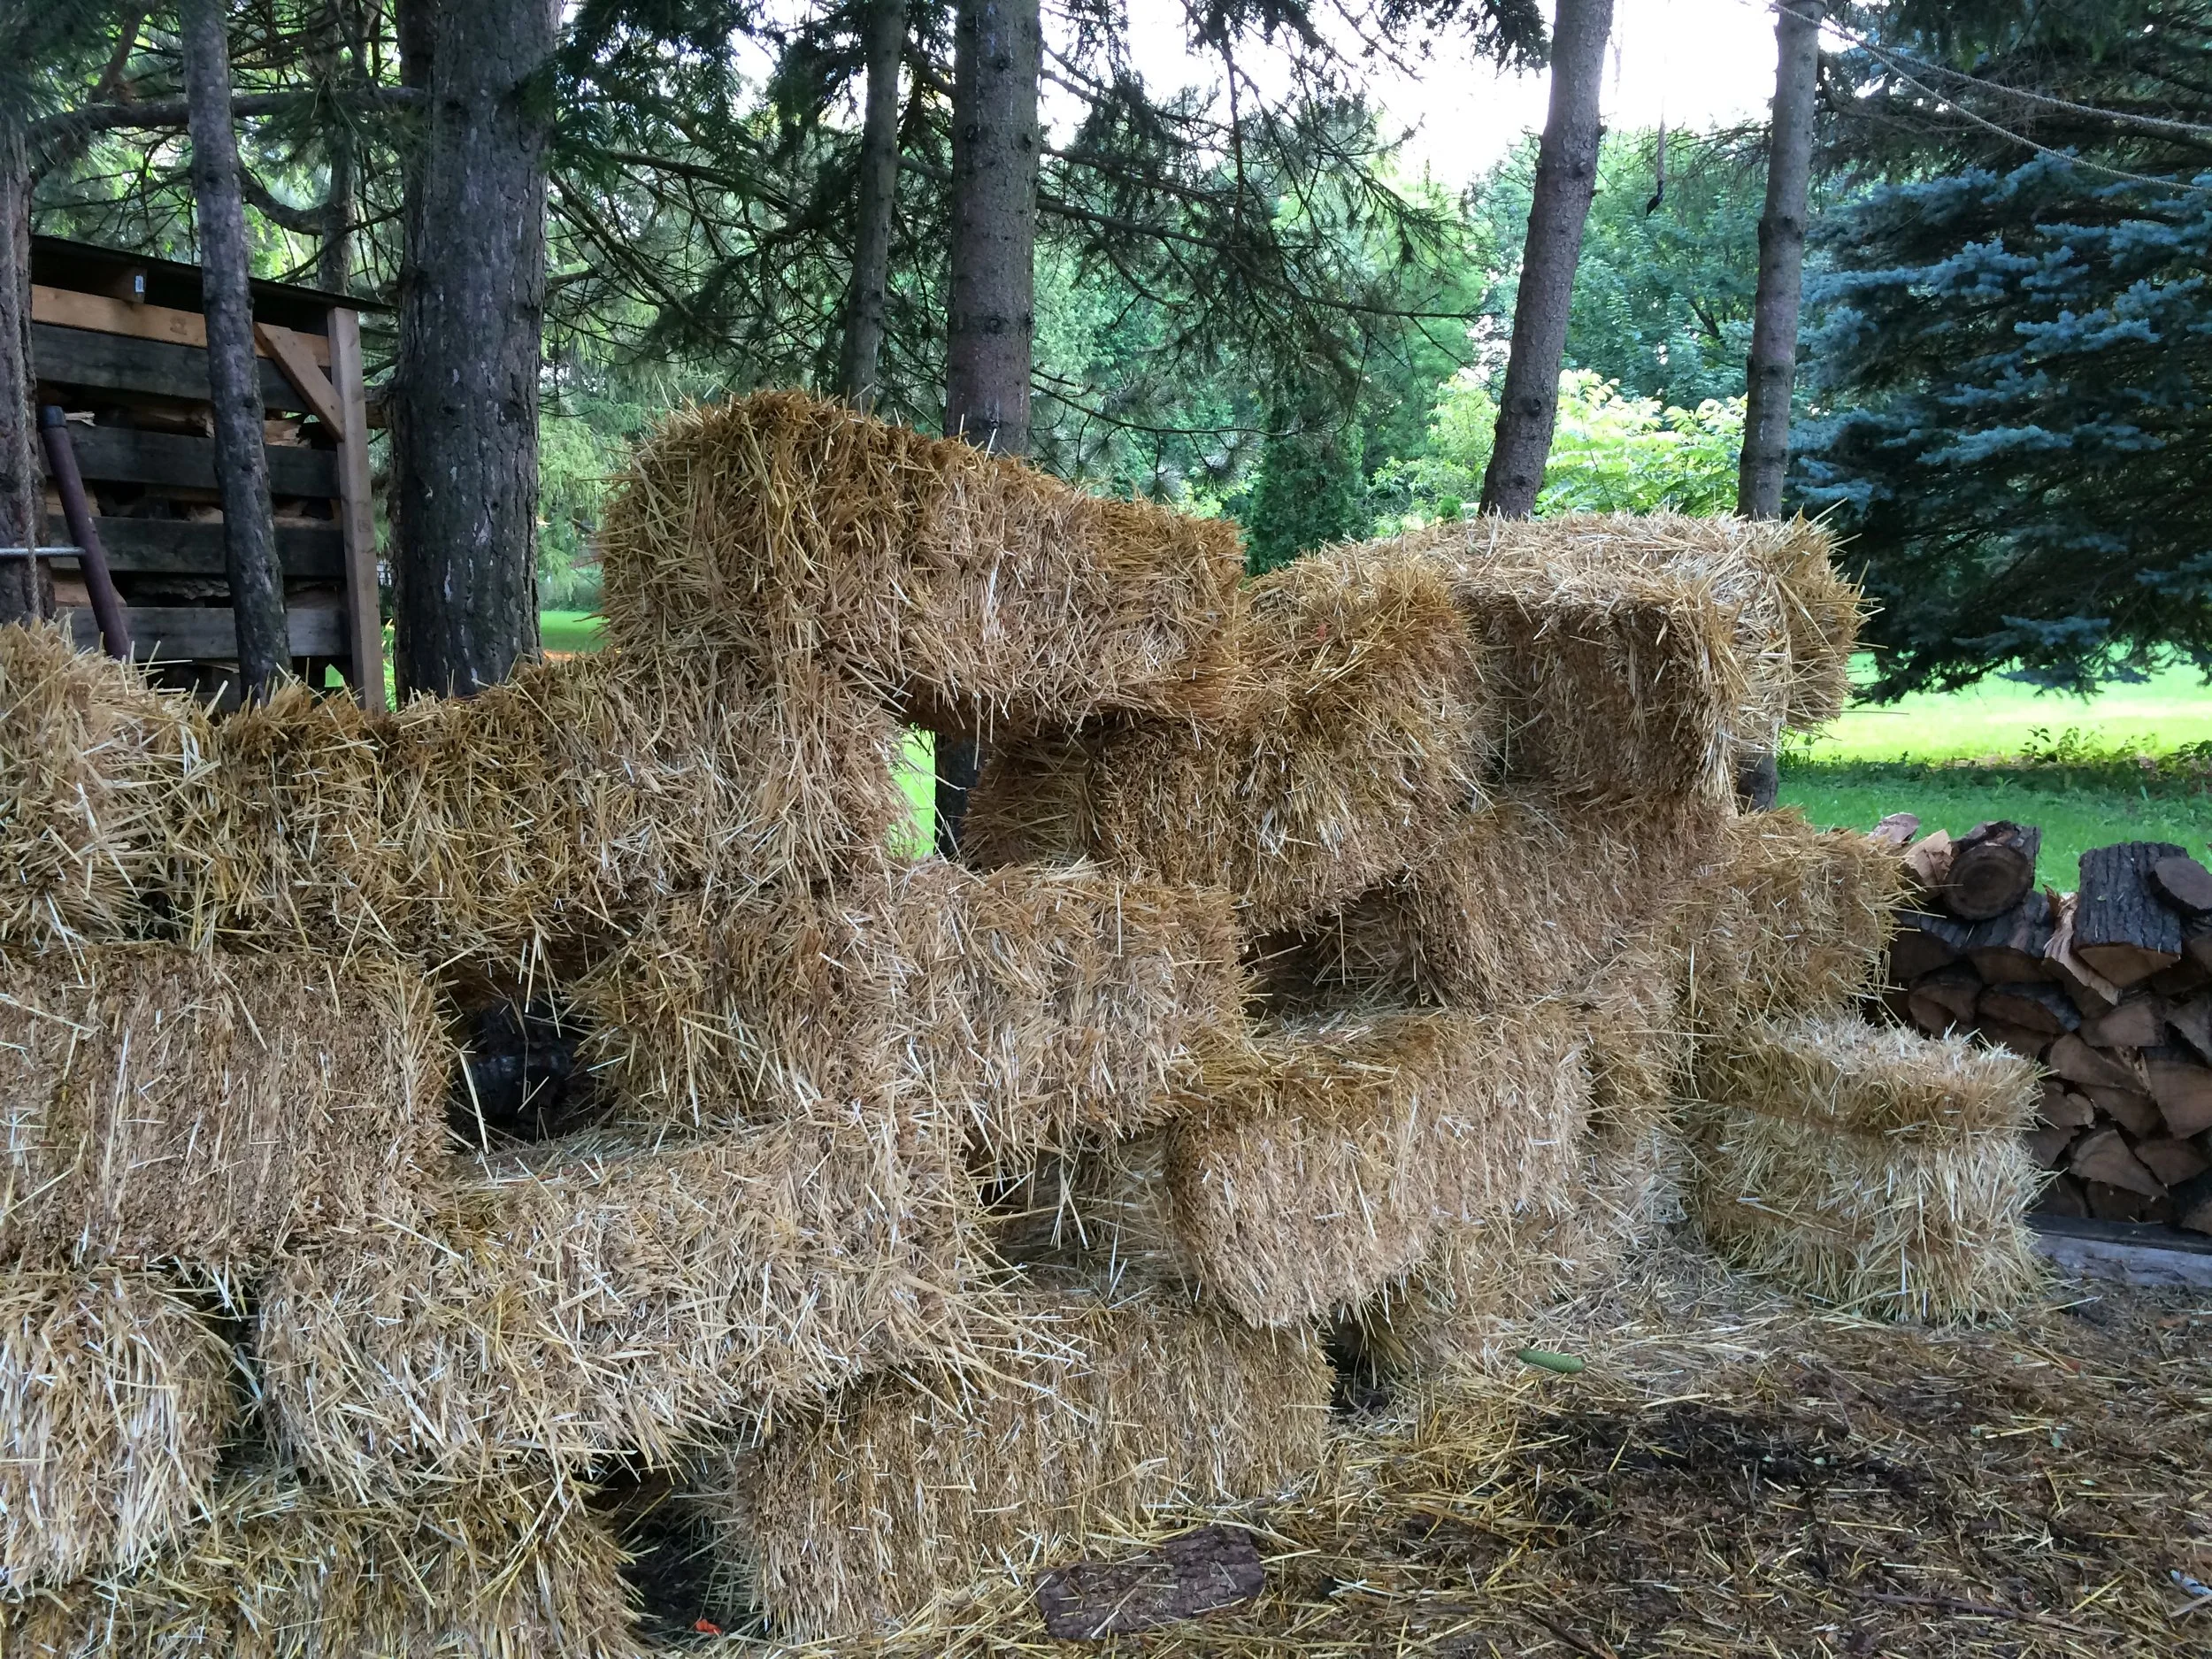
Broken bales? No problem. In this straw bale garden the tall sections are tomato cages filled with loose straw from broken bales.
If possible, tie it back together; or use a new, longer piece of twine to tie together the bale. If that doesn’t work, you can pack straw into a cage or pot instead.
As you carry the straw bales, try to do it in such a way that the twine does not slide off the side of the bale.
Do Straw Bales Leave Marks?
Yes. Straw bales can darken paved surfaces.
I don’t recommend using them on wood because it creates conditions that could speed up the decay of the wood.
One year I had them against a board fence, and it resulted in dark marks on the fence – so I now position the bales a couple of inches away from the fence.
What About Hay Bales?
Hay bales can also make an excellent growing medium, but there are a couple of reasons they’re not used as frequently as straw bales:
Hay often includes lots of grass seed – not something you want to introduce to your garden
Hay is often more expensive than straw
What are the Best Plants for the Straw-Bale Gardening method?
You can grow a wide range of vegetable crops in straw bales.
Heat-loving crops benefit from the warm root zone in the bales
Root crops develop very well in the well-aerated growing medium
Leafy greens grow well and can be planted underneath other crops such as tomatoes
Cascading plants such as nasturtiums (for edible flowers!) can drape down over the side of the bales
Where can I Buy Straw Bales?
Straw bales are fun for kids.
I used to bring home loads of bales in my minivan. And my family hated all the prickly little bits of straw it left everywhere. So now I just get straw delivered.
To find a farmer, use an online classified advertising website.
And if you have kids: Get straw bales earlier than you need them – for your kids. Straw bales are like giant, biodegradable Lego blocks.
Don’t Straw Bales attract Rats?
The mention of straw has some people wondering whether straw bale gardens will be overrun with rats.
It’s a good question. Not in my experience.
The thing to remember with rats and mice is that they’re looking for food, shelter, and water.
A bale on a paved surface doesn’t give them burrowing room. Doesn’t give them water. Doesn’t give them much food.
What’s more likely to attract rats is bird baths, bird feeders, leaving out pet food, and improperly stored garbage. (On that note, gardening itself, and growing plants with seeds and fruit that are food for rodents, attracts rats.) Remember too, that they’re already abundant in many areas – just not out and about at times that we see them.
Find This Helpful?
Enjoy not being bombarded by annoying ads?
Appreciate the absence of junky affiliate links for products you don’t need?
It’s because we’re reader supported.
If we’ve helped in your food-gardening journey, we’re glad of support. You can high-five us below. Any amount welcome!
More Vegetable Garden Techniques
Ornamental Vegetables for Fall
By Steven Biggs
Vegetable Crops That Look Great in the Fall
As I write this, it’s spring. But I’m picturing my fall garden.
I was just scouting out the spot where my Swiss chard will go this year.
I always fit in chard close to my kitchen window.
An Ornamental Edible
In the garden outside my kitchen window I weave together the ornamental and the edible. I especially treasure edible plants with ornamental appeal.
And that’s where chard fits in.
Swiss chard paints this part of my garden in yellows, reds, pink, and orange.
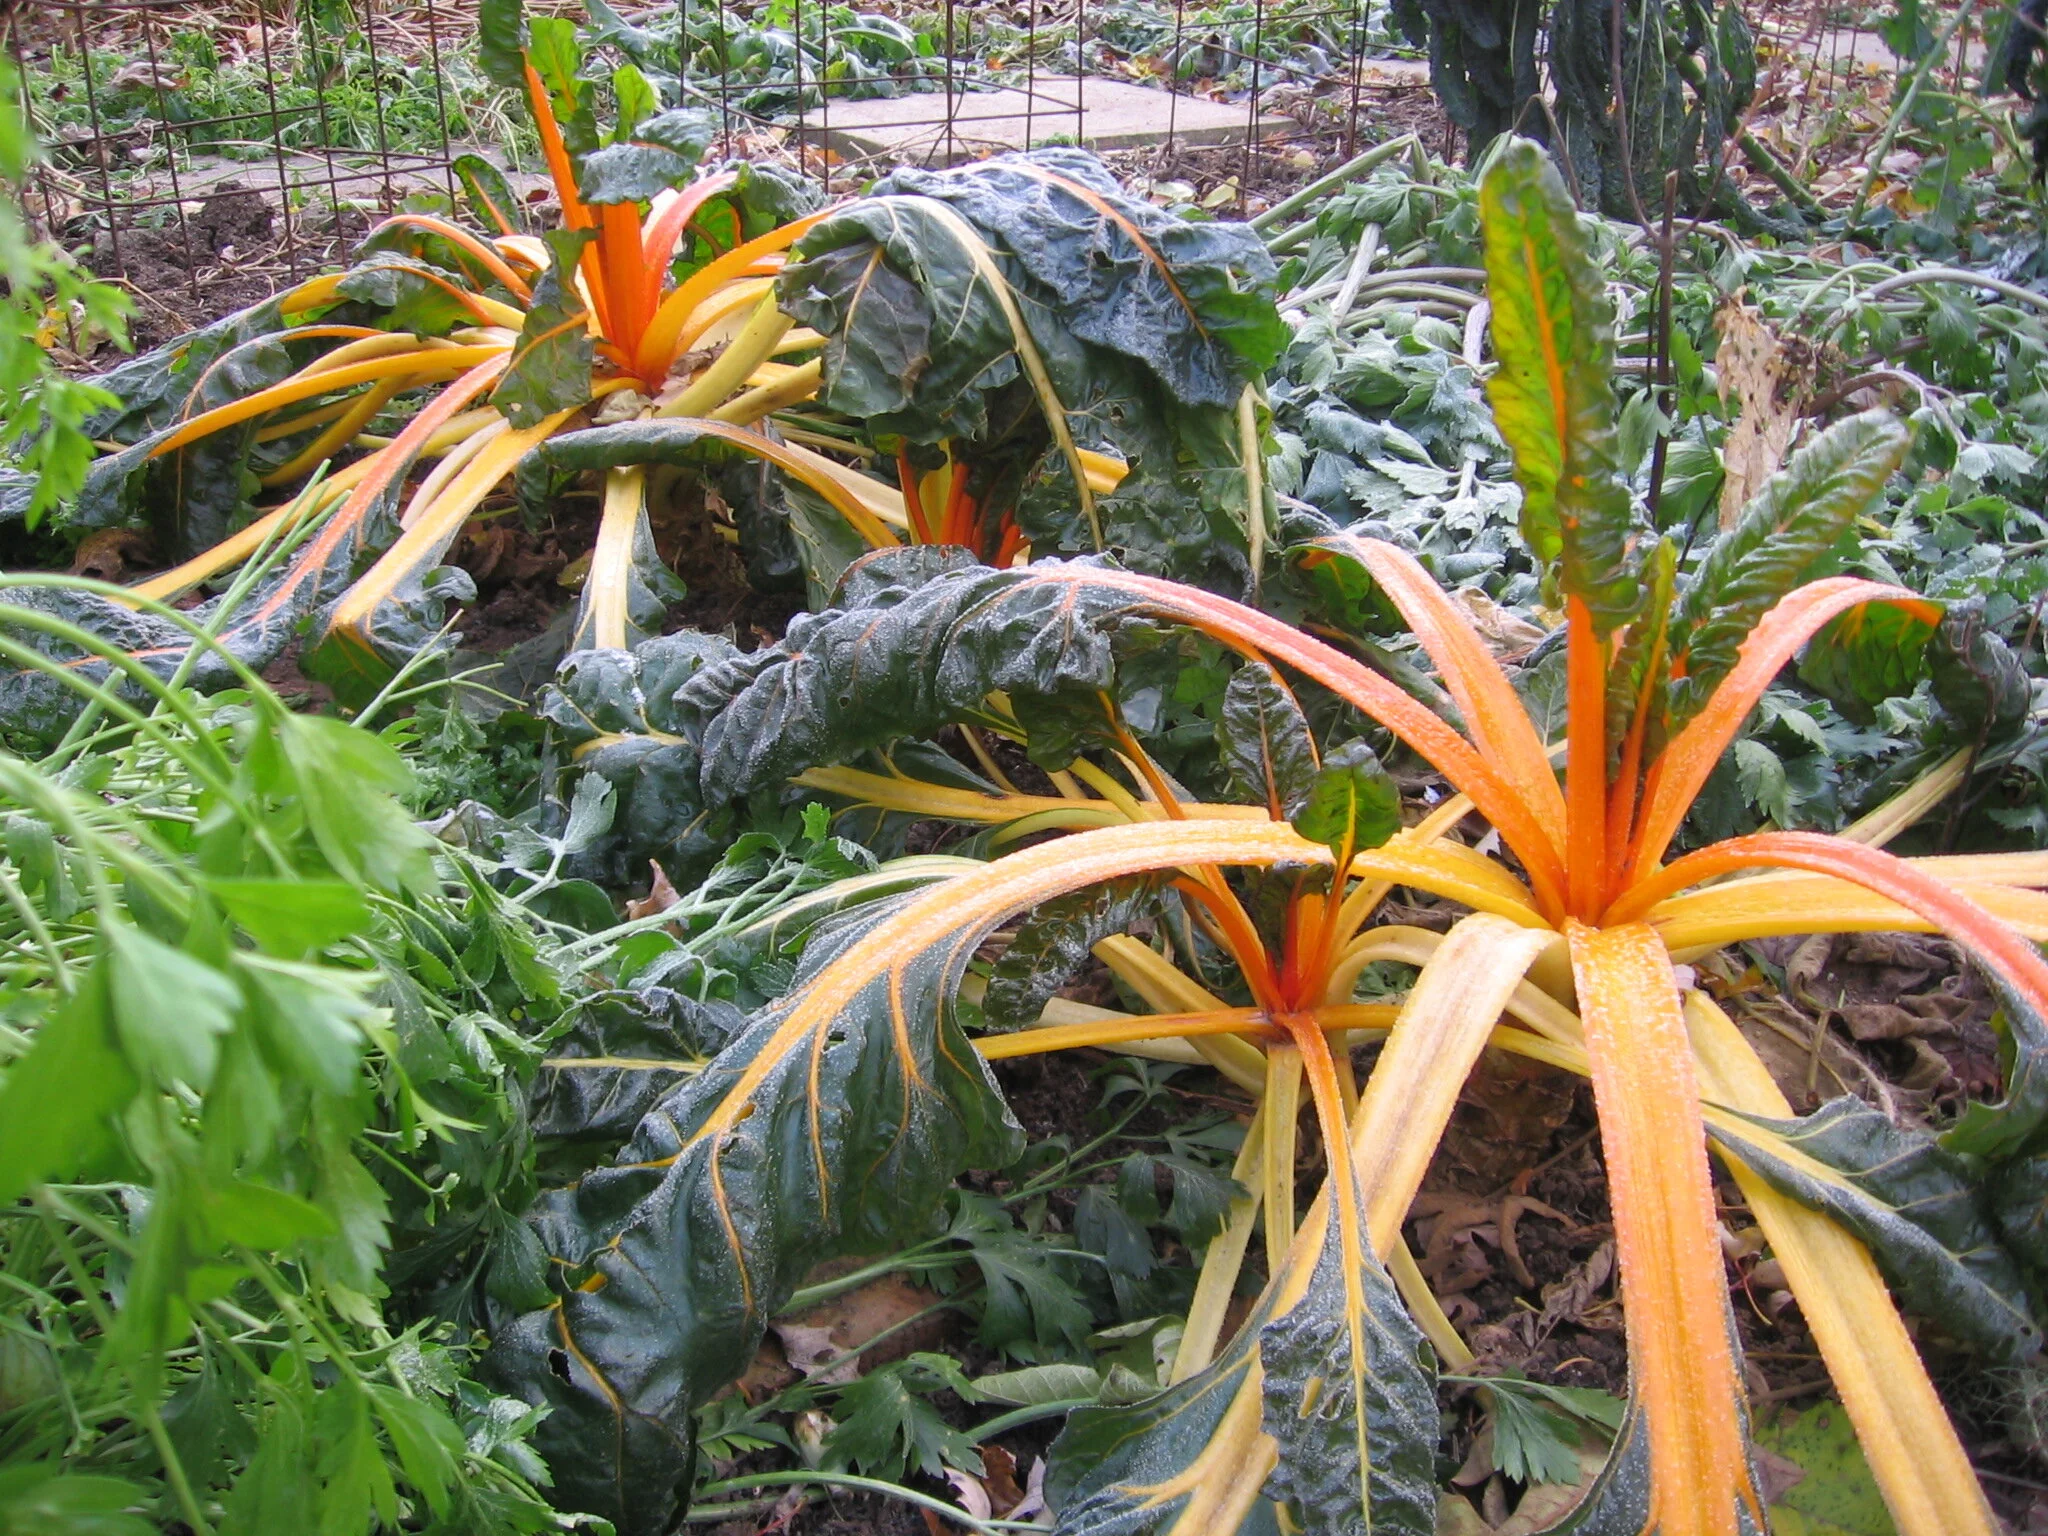
As cool, grey fall weather arrives, Swiss chard is a bright spot in a fading garden.
Summer-Long Production
Leafy greens like lettuce, spinach, and arugula come and go with summer heat.
They bolt
They get leathery
They get bitter
But Swiss chard sails through the heat with a prodigious output of tender leaves.
A Long-Lasting Edible
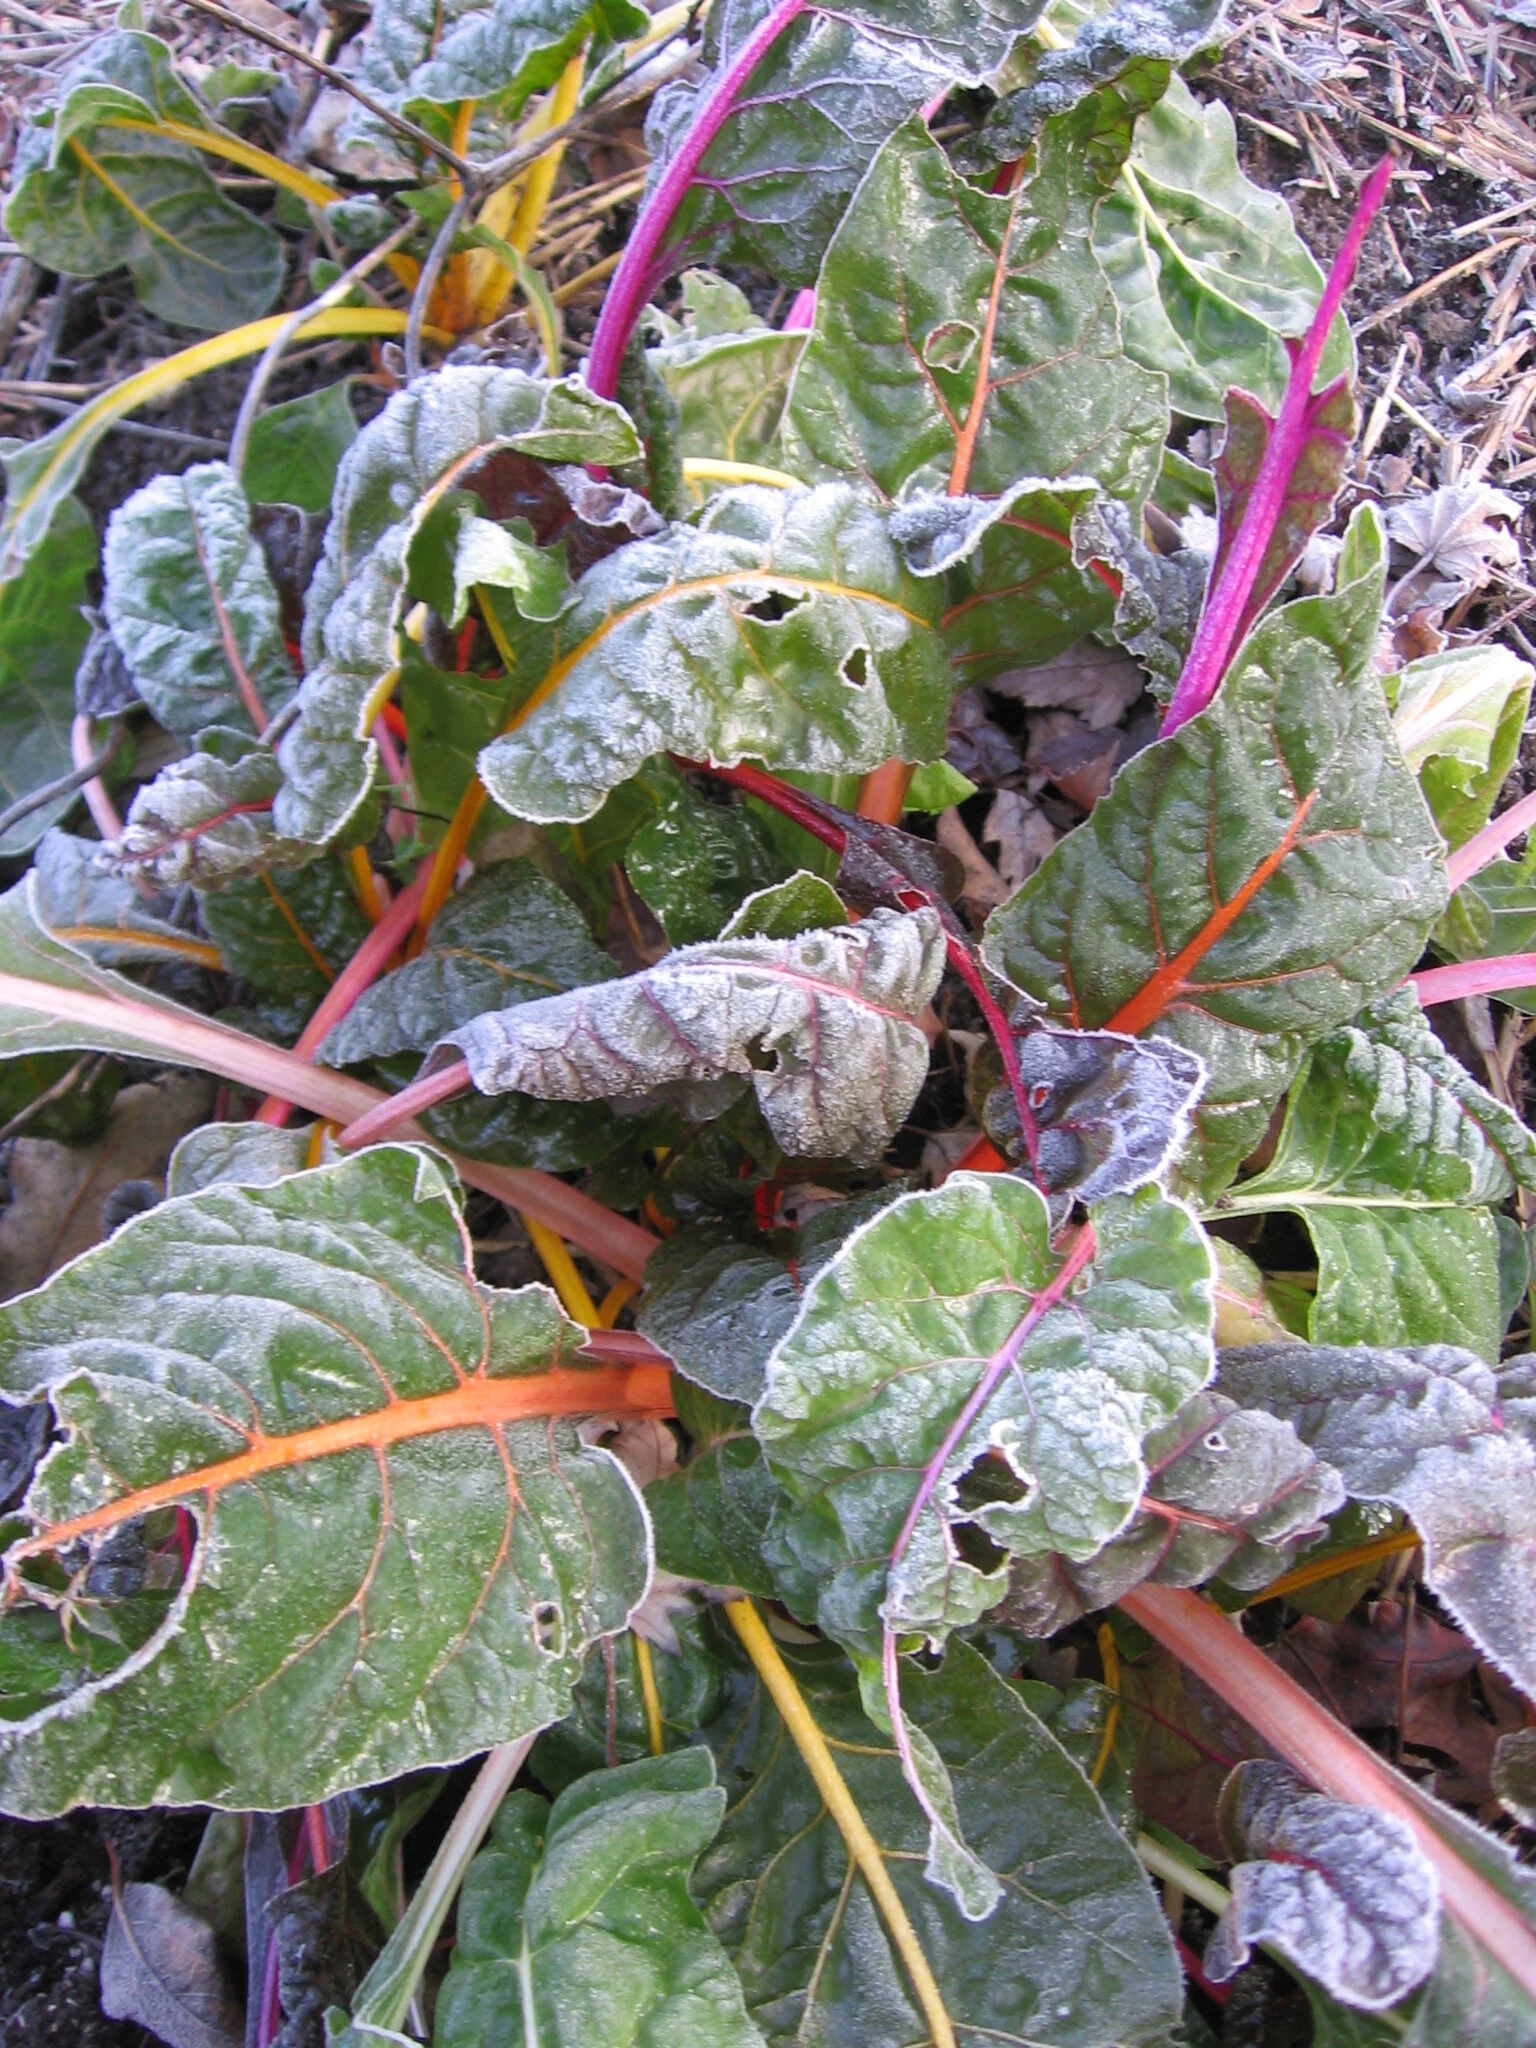
Swiss chard paints this part of my garden in yellows, reds, pink, and orange.
As cool, grey fall weather arrives, Swiss chard is a bright spot in a fading garden.
It shines.
When frost renders swathes of the garden a wilted green-brown, chard still shines. The bright leaves bow to the frost, then spring back up as sunshine warms them.
It perseveres until a hard freeze.
Put Chard Where You Can See it in the Fall
I’m picturing the spot where my chard will go, and making sure it’s somewhere I can enjoy looking at it from my kitchen window through the fall.
More Ornamental Vegetables for the Fall Garden
Cardoon is another ornamental vegetable that looks great in the fall. Find out more about cardoon.
Artichokes hold up nicely in fall weather. Find out how to grow artichoke.
Find This Helpful?
Enjoy not being bombarded by annoying ads?
Appreciate the absence of junky affiliate links for products you don’t need?
It’s because we’re reader supported.
If we’ve helped in your food-gardening journey, we’re glad of support. You can high-five us below. Any amount welcome!
Home Garden Soil Contamination
By Steven Biggs

Understanding the Risk of Soil Contamination Around Your Home
AFTER MOVING INTO MY WORLD WAR I-ERA HOUSE, I decided to find out if the paint-chip-studded soil next to the house was safe for growing edible crops.
Many pre-1991 paints contained lead, and those that are pre-1960s—particularly exterior paints—are thought to be the worst culprits.
Lead was also used as a gasoline additive into the 1990s. So urban areas with older buildings, where there have been years of car exhaust—and maybe even industrial emissions—tend to have higher soil lead levels than rural, agricultural areas.
With this in mind, I wanted to understand what, if any, risk lay hidden in my soil.
If you’ve wondered what, if anything, to check with the soil in your garden, keep reading for a practical way to approach soil contamination.
Conflicting Information

With an older house, I was worried about lead contamination from paint.
The more I delved into the question of urban soil contamination, the less clear the issue became.
I found a government fact sheet saying there was minimal risk to consuming veggies grown in soil with lead levels below 200 parts per million (ppm)
But one from another jurisdiction advising 300 ppm.
Both noted increased risk for children (think soil moving hand to mouth), in which case one gave a safe upper limit of 100 ppm.
I was left wondering whether I should go with 100, 200 or 300 ppm.
So I Got on the Phone
When I called Ontario’s Ministry of the Environment, I was told that contaminant levels in typical agricultural soil are often less than urban areas, but there should be no concern as long as the readings for my soil fell below the residential standards, as set out in the provincial Environmental Protection Act.
But…I should also keep in mind that a reading above that residential level isn’t necessarily unsafe.
Understanding soil contamination was starting to seem as fun as doing my tax return.
So, after scanning the Act, I added 45 ppm lead (for typical agricultural soil), 120 ppm lead (for residential standards), and a big question mark (for “isn’t necessarily unsafe”) to my growing list of values.
This was getting to be as much fun as preparing a tax return!
And just as filling in a tax return isn’t black and white—think of deciding what’s tax deductible and what’s not—I sensed balancing soil contamination and growing edibles had shades of grey, too.
So I set out to see how urban veggie growers can best tackle the question of soil contamination without being mired in conflicting numbers.
What Other Growers Do
Travis Kennedy, an agrologist involved in community garden projects, also raises produce at his Lactuca Micro Farm in Edmonton. “Pragmaculture,” he responds with a laugh, when I ask how he deals with possible soil contamination. His pragmatic approach to urban agriculture is to always use raised beds, bringing in soil he knows is safe, because he always assumes that there may be contamination.
Ward Teulon, also an agrologist, runs City Farm Boy in Vancouver, designing and building vegetable gardens. Teulon explains that sending backyard soil samples to a laboratory doesn’t always give a clear picture of what’s in the soil because urban soils are moved around a lot and are not uniform. He agrees, however, that interpreting results from expensive tests, which can cost hundreds of dollars, can be daunting. If there is a cause for concern, he believes money is better spent bringing in soil to make a raised bed. “Find out your property’s history,” he advises, because many urban soils are perfectly fine.
Luckily for me, my property’s history seems clear-cut, from agricultural to residential.
So, aside from the paint-chip-infested soil beside the house, I’m not worried. Gardeners who don’t know the history of their site could ask neighbours about past use and nearby properties, or check municipal records or archives.
Grow a Container Vegetable Garden
And get an early harvest of crops that usually take too long!
Asssessing the Risk
In 2014, Toronto Public Health created a plain-language guide to help gardeners understand the issues surrounding possible soil contamination and growing edibles.
Josephine Archbold, who helped write the Guide for Soil Testing in Urban Gardens, says it’s wrong to think only experts can figure out when to grow and when to worry.
The guide moves away from the notion that soil is either safe or unsafe—a black-and-white approach.
“I think we need to move beyond the concept of ‘safe’ and ‘not-safe’ cut-off levels that tell gardeners to either garden (100 per cent) or not garden at all (0 per cent),” she says. Instead, the guide is intended to help gardeners think about the risk of contamination for a site, and gives options to deal with the situation. Testing is expensive, and raised beds can be expensive, too, so the guide encourages taking such actions only when the risk of contamination makes them appropriate.
Three-Step Guide
Step 1
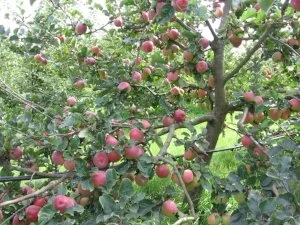
Former orchard land is among those sites considered medium concern because of the legacy of old metal-containing sprays.
In the three-step guide, the first step is to establish a level of concern by looking at former land use. With high-concern sites (e.g., former gas stations), contamination is very likely, so the guide recommends skipping expensive tests and using risk-minimizing measures such as raised beds, container gardening, or cultivating fruit and nut trees—for which contaminant uptake isn’t a concern. Nor is soil testing recommended for low-risk sites (e.g., long-term residential areas).
There are medium-concern situations (e.g., hydro corridors and former commercial land) where testing is recommended, but even then, if gardens are smaller than 170 square feet (16 sq. m), raised beds are suggested because the cost of raised beds for such a surface area is likely less than testing. Surprisingly, former orchard land is among those sites considered medium concern because of the legacy of old metal-containing sprays.
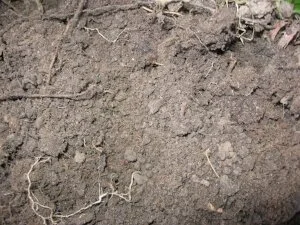
After investigating the history of the garden site, another part of establishing a level of concern is physically inspecting soil: dig in a few random spots to see if there are unusual stains or odours, and note old equipment, tanks and debris that might provide clues to dumping. Dumping, burning, smells and staining can make for a high-concern site.
Step 2
When it comes to step two, testing the soil, the guide lists common contaminants, including some metals (such as lead, arsenic and cadmium), along with PAHs (polycyclic aromatic hydrocarbons), which Archbold explains are compounds that indicate past industrial activity. “Our soil screening values are specifically for urban gardening,” she says.
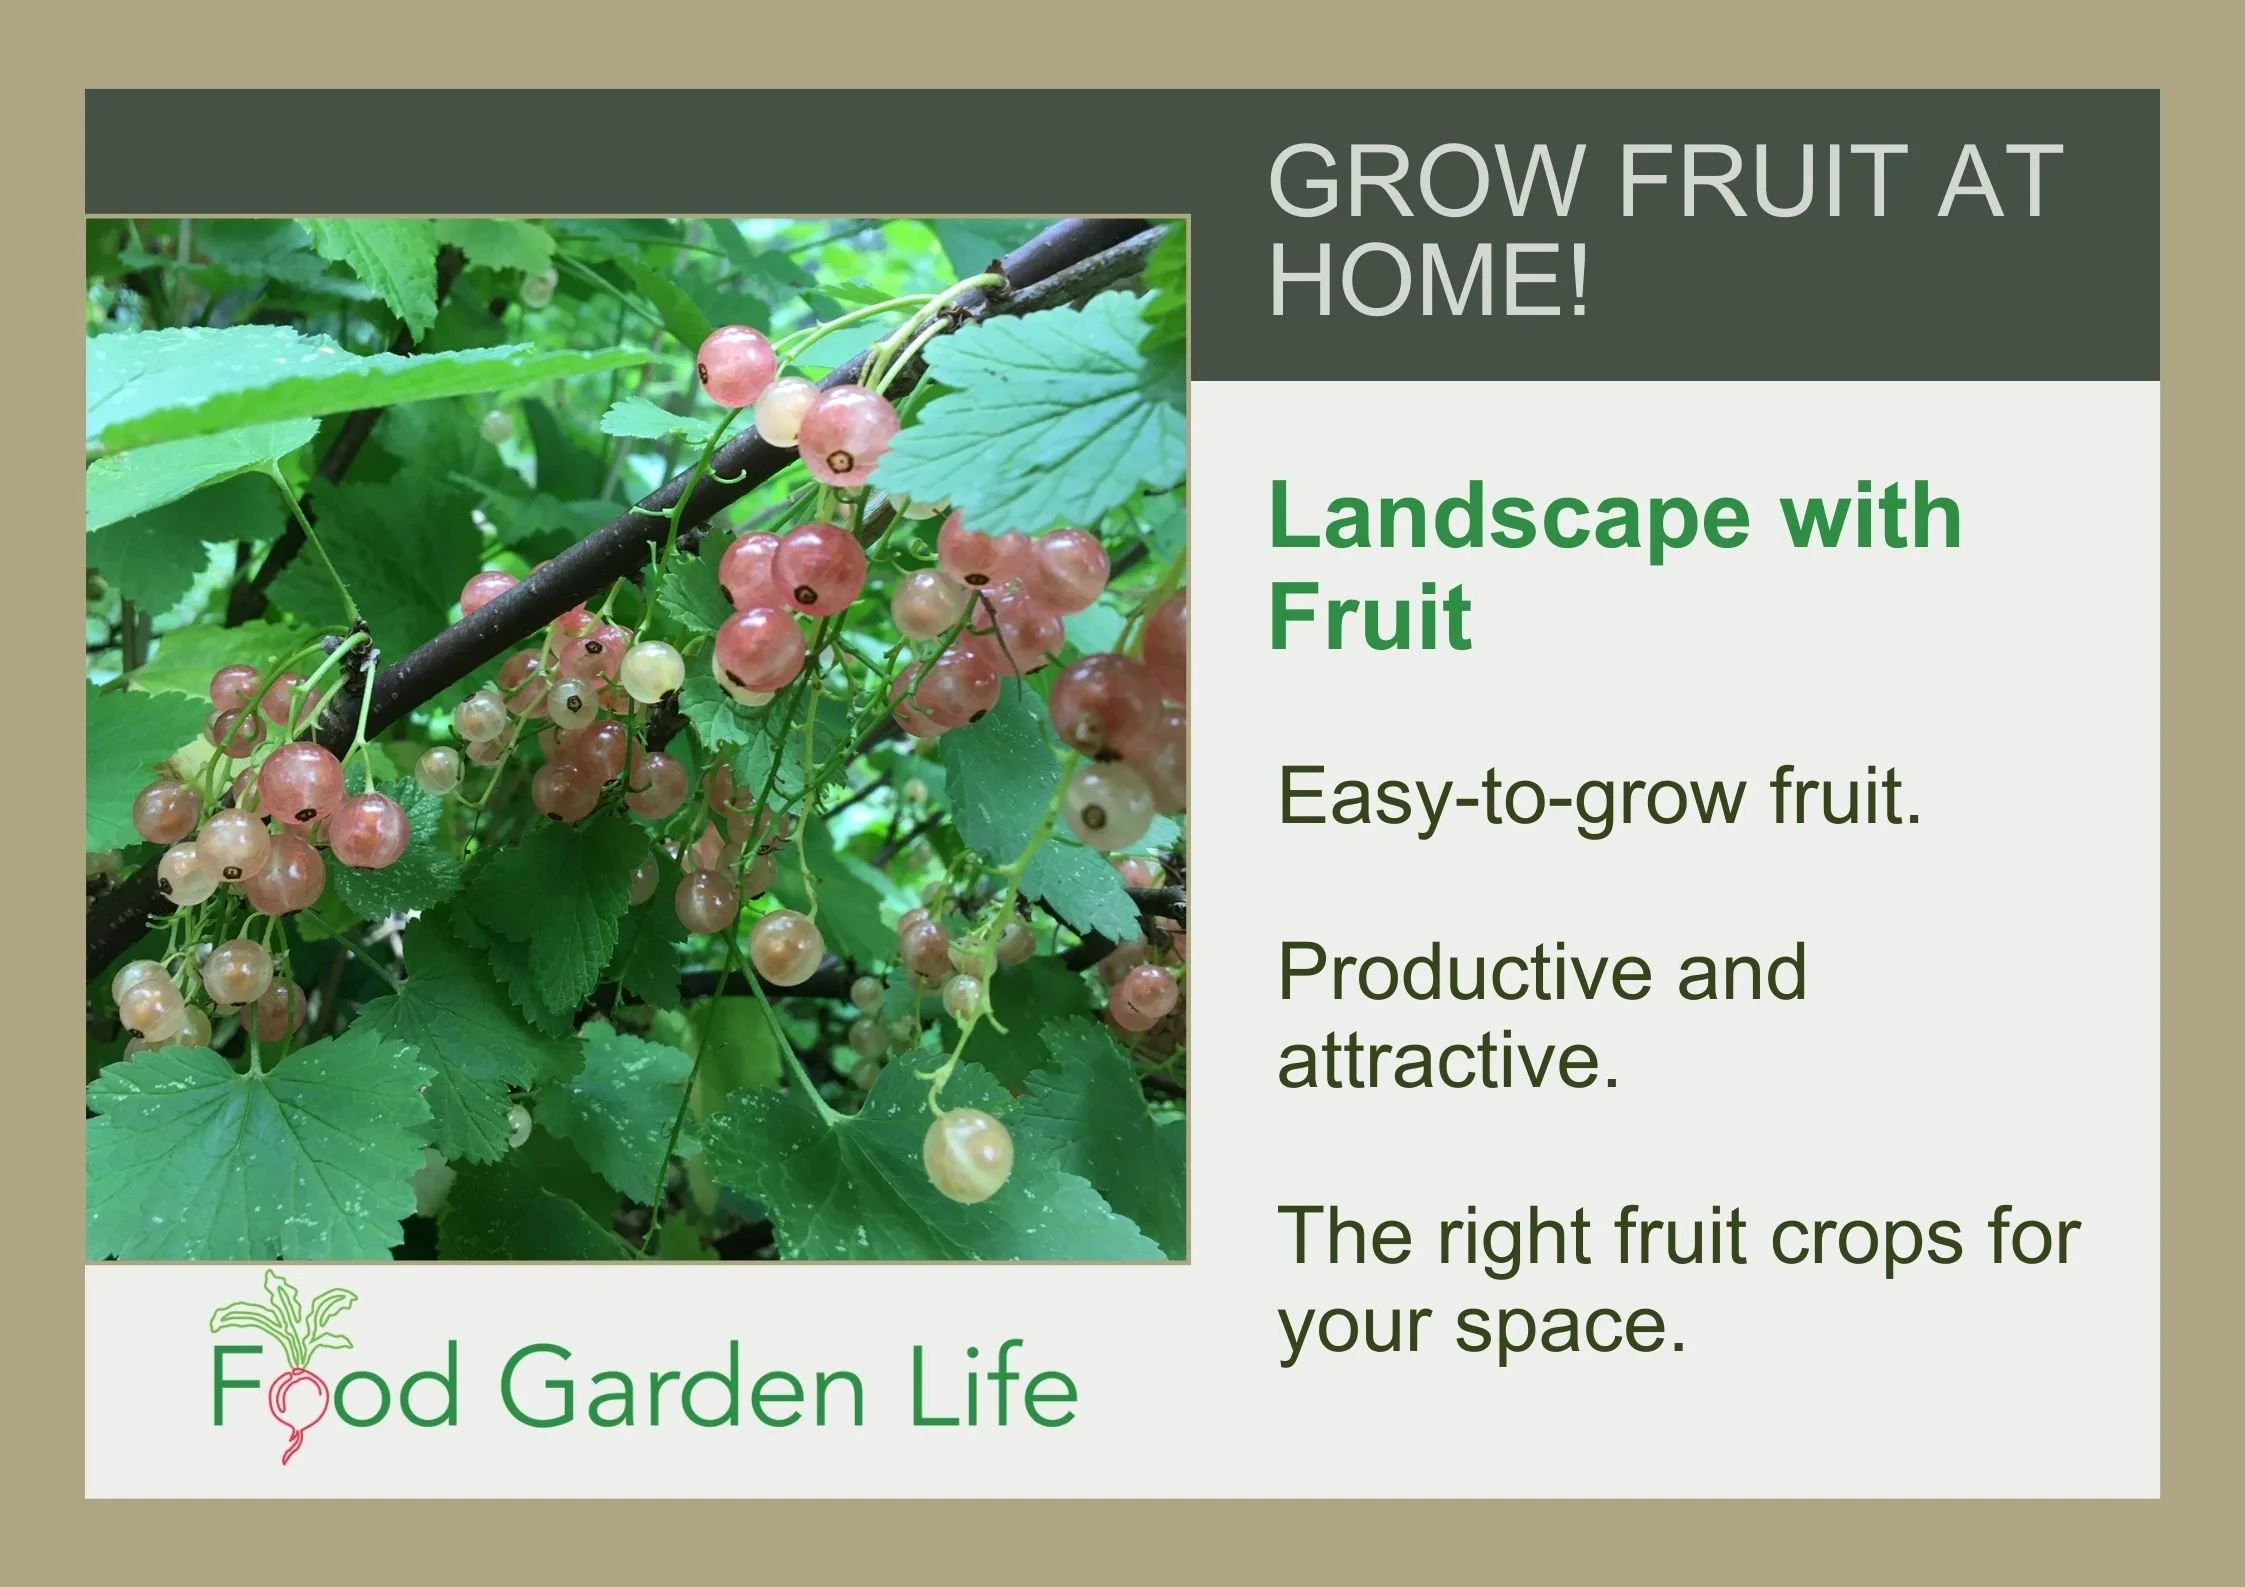
Create Your Own Unique Edible Landscape
That fits for your yard, and your style!
Step 3
The third step is to take actions to reduce risk. In keeping with the guide’s approach, the screening values don’t tell gardeners to either garden or not garden. The values help guide the actions of gardeners. For example, if test results or site history present a medium concern, suggested tactics are lowering the level of contaminants by adding clean soil and organic matter. Archbold says adding organic matter makes many contaminants less mobile.
Another example of how to reduce risk is reducing soil dust by covering soil with a mulch, peeling root vegetables before eating and avoiding crops more likely to accumulate contaminants (cabbage family, beets and spinach).
Suspect Contamination?
If you suspect contamination and opt for testing instead of raised beds, containers, or fruit and nut trees, the guide gives pointers about how to find an accredited lab in your area. When collecting soil samples, there are some important steps to follow—and the guide gives instructions for this as well.
As for the strip beside my house, I will plant a fruit tree. I still don’t know how many parts per million lead are in the soil there, but because the site inspection (namely, digging and seeing all those paint chips) points to a possibility of contamination, my guess is that lead levels could be on the high side. It’s a very small space, so I’ve ruled out expensive testing.
I’ve also ruled out a raised bed because I don’t want to redirect water into my neighbour’s yard. So, a fruit tree seems to me to be the most practical approach—and is an acceptable shade of grey for me.
Find This Helpful?
Enjoy not being bombarded by annoying ads?
Appreciate the absence of junky affiliate links for products you don’t need?
It’s because we’re reader supported.
If we’ve helped in your food-gardening journey, we’re glad of support. You can high-five us below. Any amount welcome!
More Food Gardening Ideas
Library of Articles
Courses

Lemon Mussels Gremolata Recipe
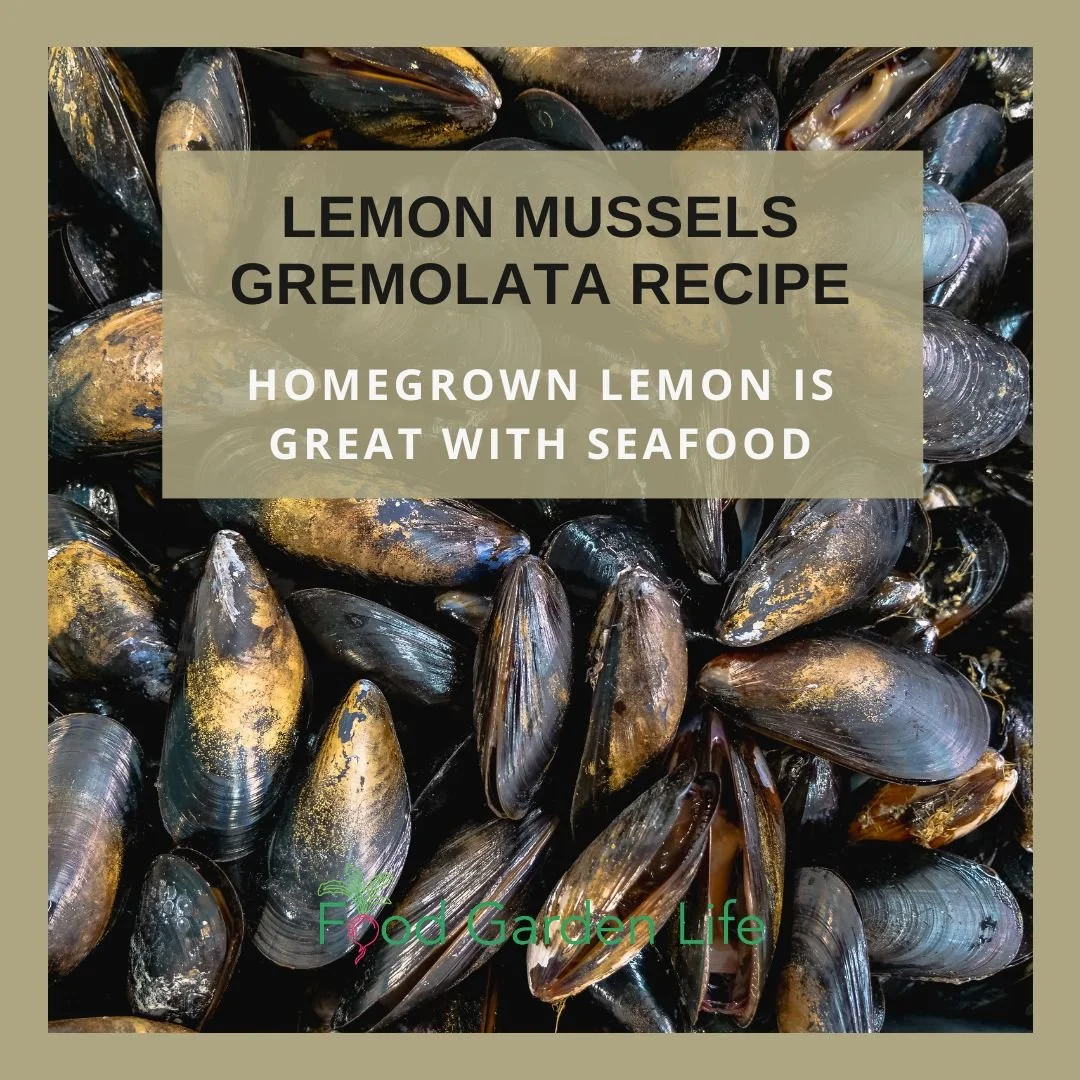
Homegrown Lemon is Great with Seafood
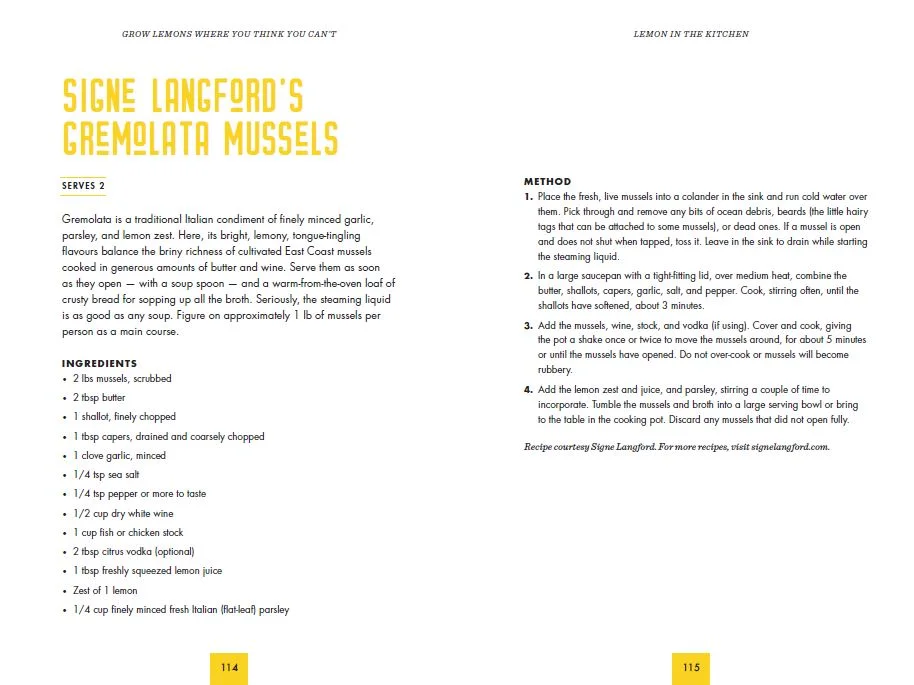
If you are growing a lemon tree indoors and wondering what you will do with your homegrown lemons, here’s a recipe I love and included in my book Grow Lemons Where You Think You Can’t: Lemon Mussels Gremolata.
Thanks to author, storyteller, and chef Signe Langford for sharing this recipe.
And if you’re a gardener, keep in mind that a potted lemon tree is a great addition to the garden. As well as fresh lemons, you get fragrant flowers, and flavour-packed leaves that are very useful in the kitchen!
Lemons: A Perfect Patio Plant
Lemon trees are more cold-tolerant than many people realize, which makes them an ideal potted plant for decks, patios, balconies, and gardens in northern climates. That’s because the cold-tolerance means there are many ways to overwinter lemon trees.
You don’t need a greenhouse or a bright south-facing window indoors!
As well as the fruit, if you grow lemon you will get deliciously fragrant flowers and very aromatic leaves that you can use to flavour all sorts of dishes (I love wrapping lemon leaves around a firm cheese and grilling on the BBQ!)
Read about why lemons are a great choice for northern gardens
6 Reasons to Grow a Lemon Tree in a Cold Climate
Read about how cold lemon trees can get over the winter
Find out more about my book Grow Lemons Where You Think You Can’t
Find This Helpful?
Enjoy not being bombarded by annoying ads?
Appreciate the absence of junky affiliate links for products you don’t need?
It’s because we’re reader supported.
If we’ve helped in your food-gardening journey, we’re glad of support. You can high-five us below. Any amount welcome!
More Lemon Resources
Book: How to Grow a Lemon Tree in a Cold Climate

Course: Grow Lemons

Keep Your Lemon Tree Through the Winter
And enjoy fresh homegrown lemons!
Meyer Lemon Sorbet Recipe
By Steven Biggs
Meyer Lemon Zest is a Big Part of this Sorbet

If you are growing a Meyer lemon tree and are wondering what to make, here’s a great way to enjoy the unique flavour of Meyer lemons: Meyer Lemon Sorbet.
I included this family favourite in my book Grow Lemons Where You Think You Can’t: We make it using our own homegrown lemons.
This recipe uses both the juice and the fragrant zest.
If you’re growing other citrus, you can use this same recipe to make your own sorbet. For sweeter citrus, you might want to use a bit less sugar. For other citrus such as yuzu, you might add a bit more sugar.
Find out more about yuzu, a fragrant citrus that’s a great container plant for a home garden.


Find This Helpful?
Enjoy not being bombarded by annoying ads?
Appreciate the absence of junky affiliate links for products you don’t need?
It’s because we’re reader supported.
If we’ve helped in your food-gardening journey, we’re glad of support. You can high-five us below. Any amount welcome!
Looking for More Lemon Ideas?
Here’s another lemon recipe: Mussels Gremolata with Lemon.
For more recipes and information about growing potted lemon trees in cold climates, go to the Lemon Home Page.
More on Growing Lemons
If you want to grow a potted lemon tree (that actually fruits) in a cold climate, below are a couple more resources to help you on your journey. I grow lemons and other citrus here, in Toronto, Canada. (My oldest potted lemon tree is from 1967!)
Book: Grow a Lemon Tree in a Cold Climate
Course: How to Grow a Lemon Tree in a Cold Climate
Keep Your Lemon Tree Through the Winter
And enjoy fresh homegrown lemons!
Watering Lemon Trees
By Steven Biggs

Watering is the #1 Issue for Lemon Trees
In this excerpt from my book Grow Lemons Where You Think You Can’t, I talk about watering lemon trees:
How often you water your lemon depends on your soil mix, pot type, pot size, plant size, the weather, and if the plant is growing or dormant.
“I consider overwatering to be the number one issue,” Bob Duncan says as we chat about the problems he most often sees with lemons.
If the soil is constantly soggy — lemons hate soggy soil — the roots rot, which will eventually kill the plant.
How Much Water?
Watering is the number one issue for lemon trees.
When watering a potted lemon, apply enough water so that water comes out the drainage holes at the bottom of the pot — that’s when you know you have given it enough water. The other benefit to having water come out of the drainage holes at the bottom is that this also flushes out excess salts.
Another important watering consideration is that the lower soil in the pot remains more wet than the soil at the top — something you won’t be aware of unless you take the plant out of the pot. Don’t decide to water based only on how dry the top of the soil feels. Looks can be deceiving.
You want to give the plant time to use up the moisture in the bottom of the pot but not leave it to the point where the soil is too dry.
Once you get the hang of it, it’s not difficult. The following considerations will help you decide if it’s time to water:
Keep Your Lemon Tree Through the Winter
And enjoy fresh homegrown lemons!
Knowing When to Water
In the summer, when the lemon is growing, it will need regular watering.
Your lemon will still need some water in the winter, even if it’s not growing much. That’s because lemons are evergreen — they keep their leaves — so the plant will continue to lose some water through the leaves. (If you upset them, however, they might drop their leaves.)
I like Bob’s watering lingo for lemons stored in a cool place over the winter: “Keep them on the dry side of moist.”
If the pot is small enough, with a little practice you’ll be able to tell if your lemon needs water just by picking it up and feeling the weight of it.
If in doubt, stick your finger into the soil.
Don’t forget: The type of pot that you have affects how often you have to water. Soil in unglazed terracotta pots dries out more quickly than soil in plastic pots.
In summary: Don’t water a little bit each day!
Find This Helpful?
Enjoy not being bombarded by annoying ads?
Appreciate the absence of junky affiliate links for products you don’t need?
It’s because we’re reader supported.
If we’ve helped in your food-gardening journey, we’re glad of support. You can high-five us below. Any amount welcome!
More Lemon-Growing Information
Lemons: Articles and Interviews
Drop by the lemon home page for more articles and interviews to help you grow lemon trees at home.
Here’s a chat with a lemon expert to help you grow more lemons:
Lemons: Book on Lemons in Cold Climates

How Cold can Lemon Trees Get?
By Steven Biggs
Overwintering Lemon Trees
There are many ways to overwinter lemon trees, because they tolerate colder temperatures than many people realize.
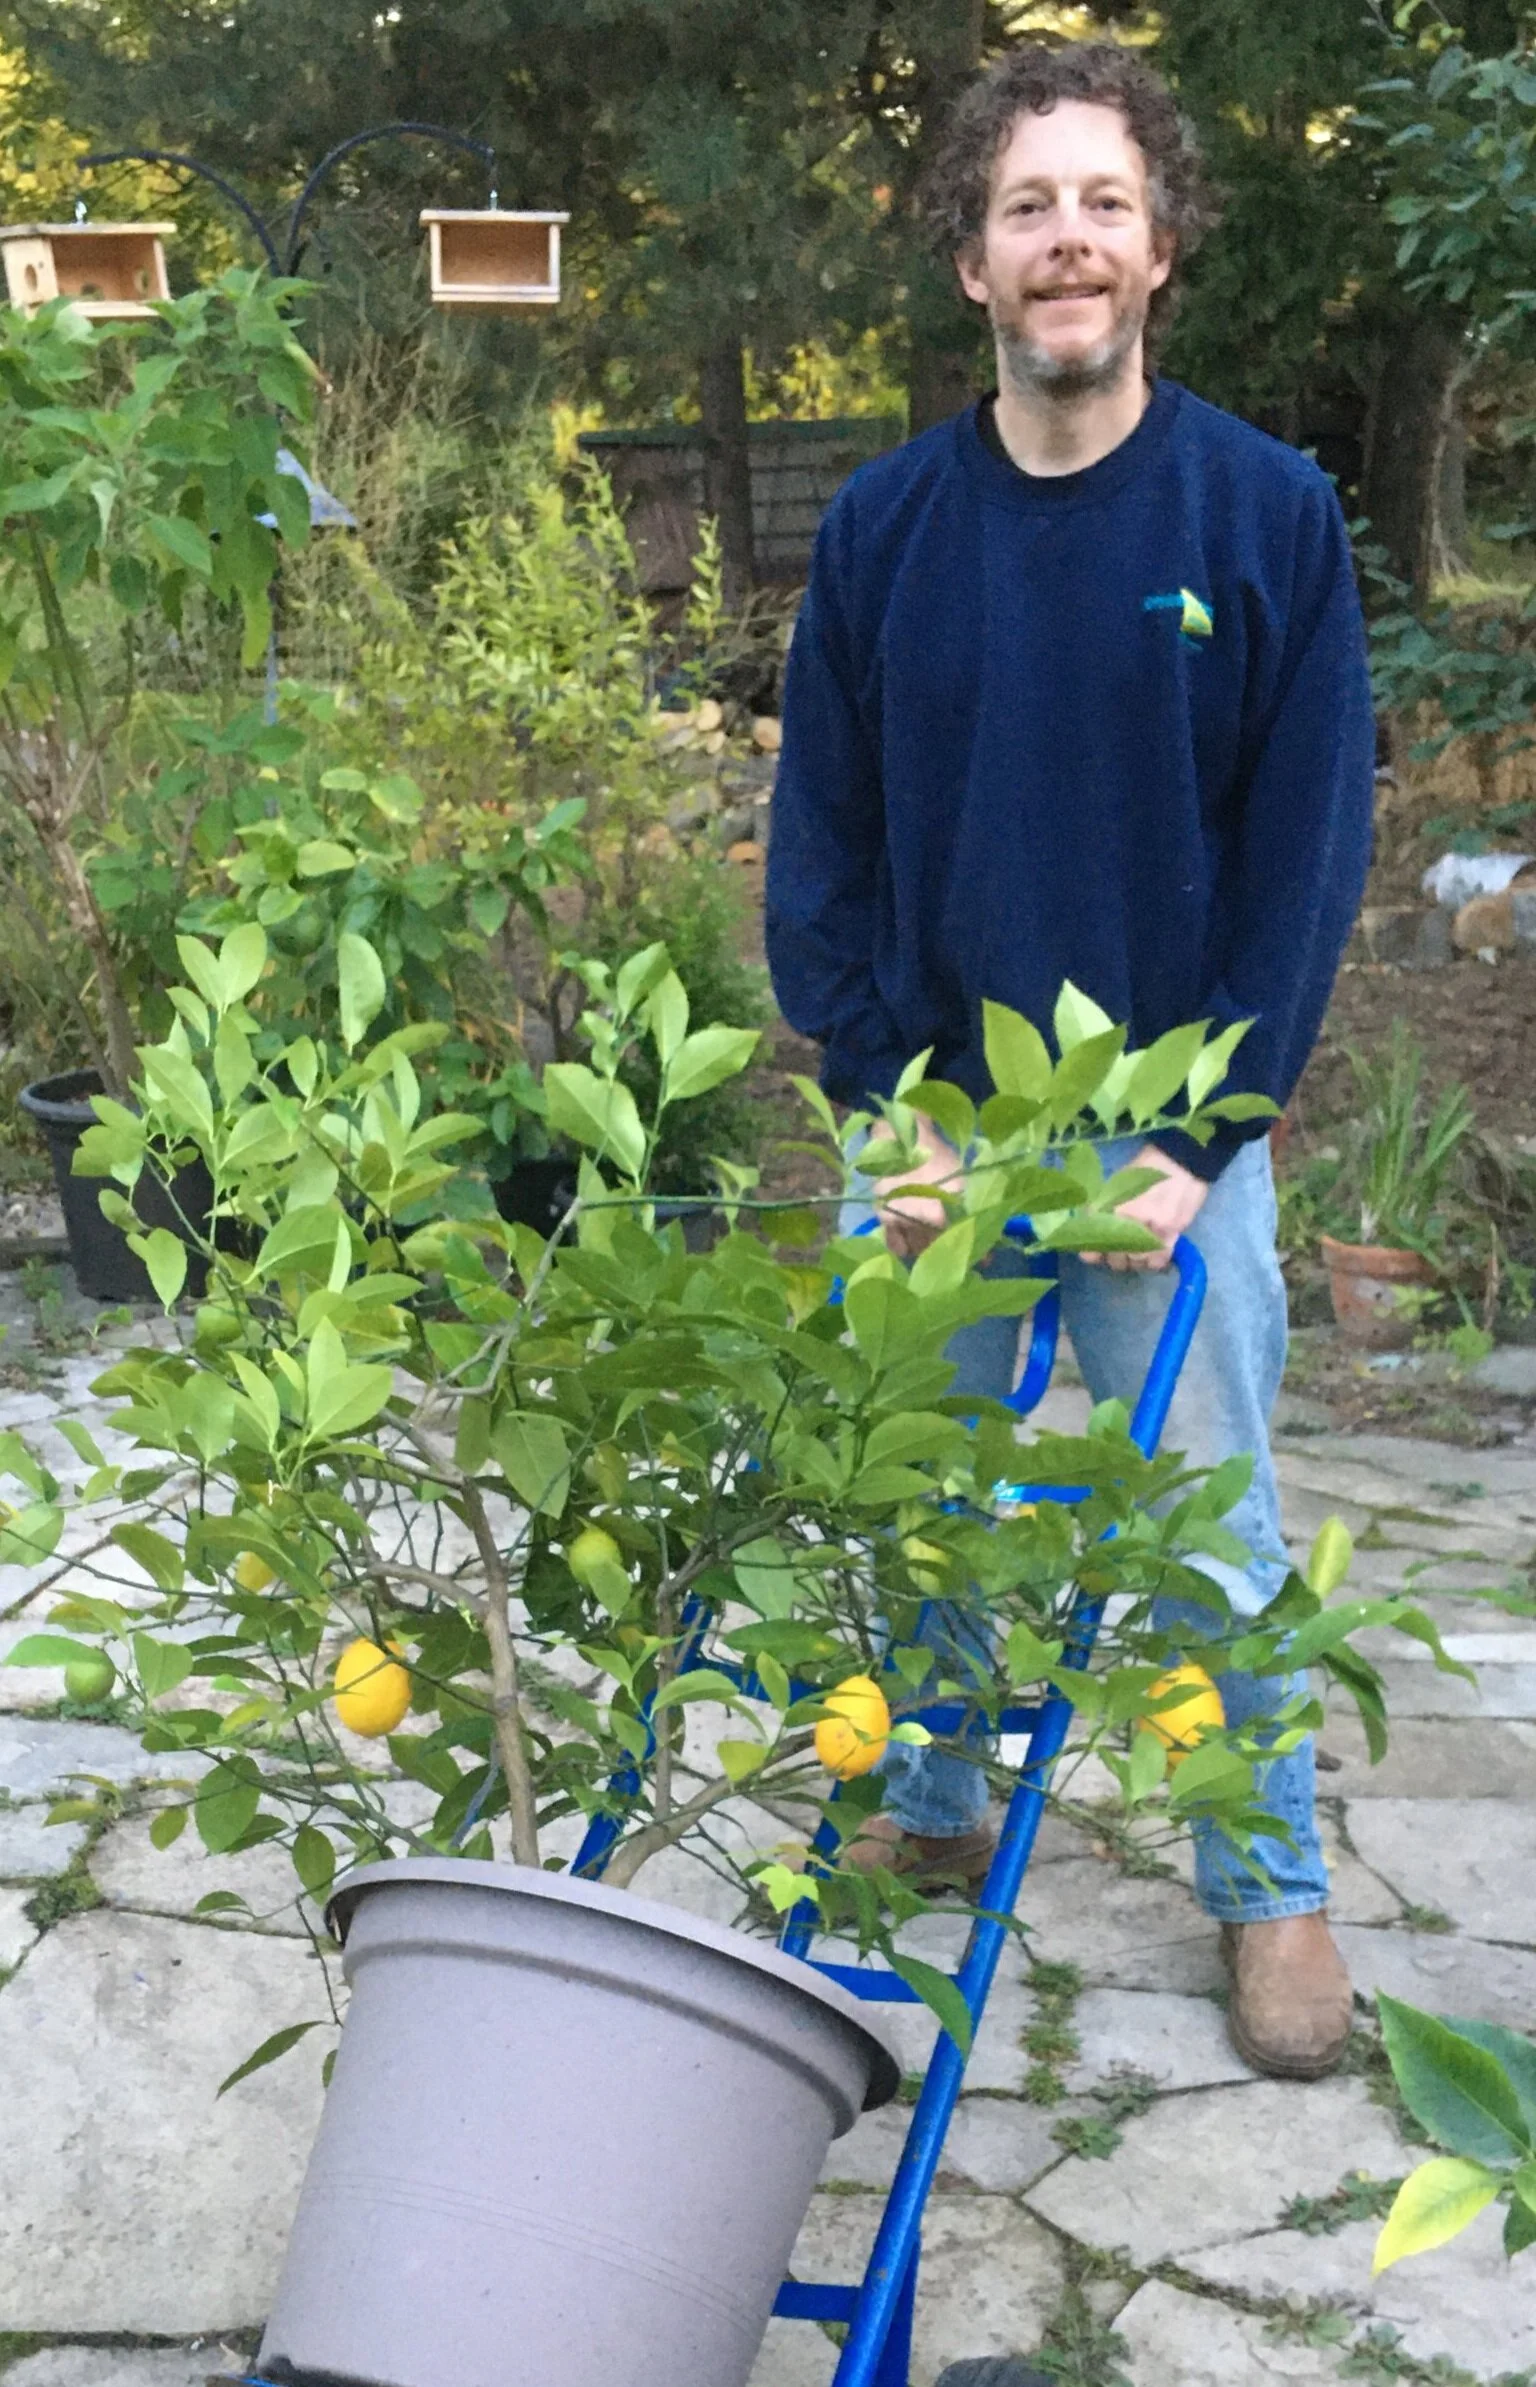
In the picture below, I’ve loaded up a potted Meyer lemon plant to move into a protected area for the winter.
In the beginning, I used to grow it in the kitchen all winter.
Then, I started leaving it in the dark, cold garage for the winter.
These days, I put it in a greenhouse that I keep just above freezing.
Wondering what to do with a potted lemon tree for the winter? In this excerpt from my book Grow Lemons Where You Think You Can’t, I talk about how cold-hardy lemon trees are.
MY LEMON TREES DID VERY WELL when I moved into a house with an old sunroom that stayed just above freezing in the depth of winter.
There are many options for overwintering lemon trees in cold climates because they tolerate cold.
Sadly (for me), the dilapidated sunroom succumbed to a house renovation and my precious lemons were banished to an insulated garage for the winter. Normally, I kept an electric heater in the garage that I could flick on if the temperature plummeted.
But while we renovated, there was no power to the garage, and during a particularly cold spell, the temperature inside the garage dropped well below freezing.
I was heartbroken to think I’d lost my lemons.
Happily, they survived. Only a few branch tips died. For plants that I associated with Mediterranean climates,
I was delighted to learn that lemons are amazingly cold tolerant!
Many factors determine cold hardiness
It’s not an exact science.
For example:
Young plants are more tender.
Fruit and young shoots will be affected before older, woodier stems.
If the plant is already dormant from cool temperatures, it can better withstand cold than an actively growing plant.
With grafted lemon plants, some rootstock are more cold-tolerant than others.
Keep Your Lemon Tree Through the Winter
And enjoy fresh homegrown lemons!

Citrus expert Bob Duncan of Fruit Trees and More on Vancouver Island says to remember the temperature at which the fruit freezes.
The MOST Important Temperature to Remember
When I asked citrus guru Bob Duncan from the nursery Fruit Trees and More about lemon hardiness and minimum winter temperatures, he stopped me and took me back a step, saying:
“With lemons the fruit is on the tree in the winter. The question to ask is ‘What temperature does the fruit freeze at?’”
Bob went on to explain that the fruit of citrus is at risk at anything below -3°C (27°F).
Find This Helpful?
Enjoy not being bombarded by annoying ads?
Appreciate the absence of junky affiliate links for products you don’t need?
It’s because we’re reader supported.
If we’ve helped in your food-gardening journey, we’re glad of support. You can high-five us below. Any amount welcome!
More Lemon-Growing Ideas
Lemon Book

Hi, We’re Steve and Emma!
We help people grow food on balconies, in backyards, and beyond—whether it’s edible landscaping, a vegetable garden, container gardens, or a home orchard.