
Charcoal BBQ Rotisserie Turkey
How we cook a whole turkey on a charcoal barbecue using a rotisserie spit.
By Steven Biggs
BBQ a Turkey

Our kitchen is a busy place around Thanksgiving and Christmas holidays. There’s family, guests, and lots of food prep underway.
But we cook our turkey outdoors, roasting it on our charcoal BBQ.
We barbecue a whole turkey outdoors for our Thanksgiving and Christmas meals. It frees up space in the oven. It’s also a social thing – Dad and me outside, tending the BBQ. And, most importantly, it makes for a very delicious turkey.
If you’re new to roasting a whole turkey – or new to charcoal cooking, it might seem daunting. But it’s not difficult.
I show you the steps of our outdoor turkey-roasting process below.
Rinse the Turkey?
Mom taught me to put the turkey in the sink and rinse it, both inside and out. This is a step some people swear by – while others recommend skipping it.
The rationale for not rinsing is that rinsing can spread around microbes from the raw poultry – increasing the chance of contaminating other food. (That’s also what the Turkey Farmers of Canada recommends.)
So I skip rinsing. Sorry Mom!
Prepare the Cavity

We cook our Thanksgiving turkey outdoors, roasting it on a charcoal BBQ.
Some turkeys come with the giblets placed inside the cavity. (Giblets are the liver, heart, gizzard, and neck.)
Put your hand in and feel around for the giblets. Sometimes they’re wrapped in plastic…and you definitely don’t want that roasting away inside your turkey. I’ve sometimes found the neck in the cavity, and the liver under the flap of skin where the neck used to be…so check both these places.
After I’ve retrieved the giblets, I rub salt around the inside of the cavity.
Make a Rich Gravy with the Giblets
My father-in-law loves fried giblets. It’s a treat for him while the turkey is cooking. Nobody in my house likes to eat the giblets – but that doesn’t mean I let them go to waste. I put the giblets into a saucepan with water, and simmer them to make a flavourful stock. I usually simmer the giblets with bay leaves, an onion, garlic, celery, and parsley. After it’s reduced by about half, I discard the giblets, and use the stock to make gravy.
Whether to Stuff Your Charcoal BBQ Rotisserie Turkey
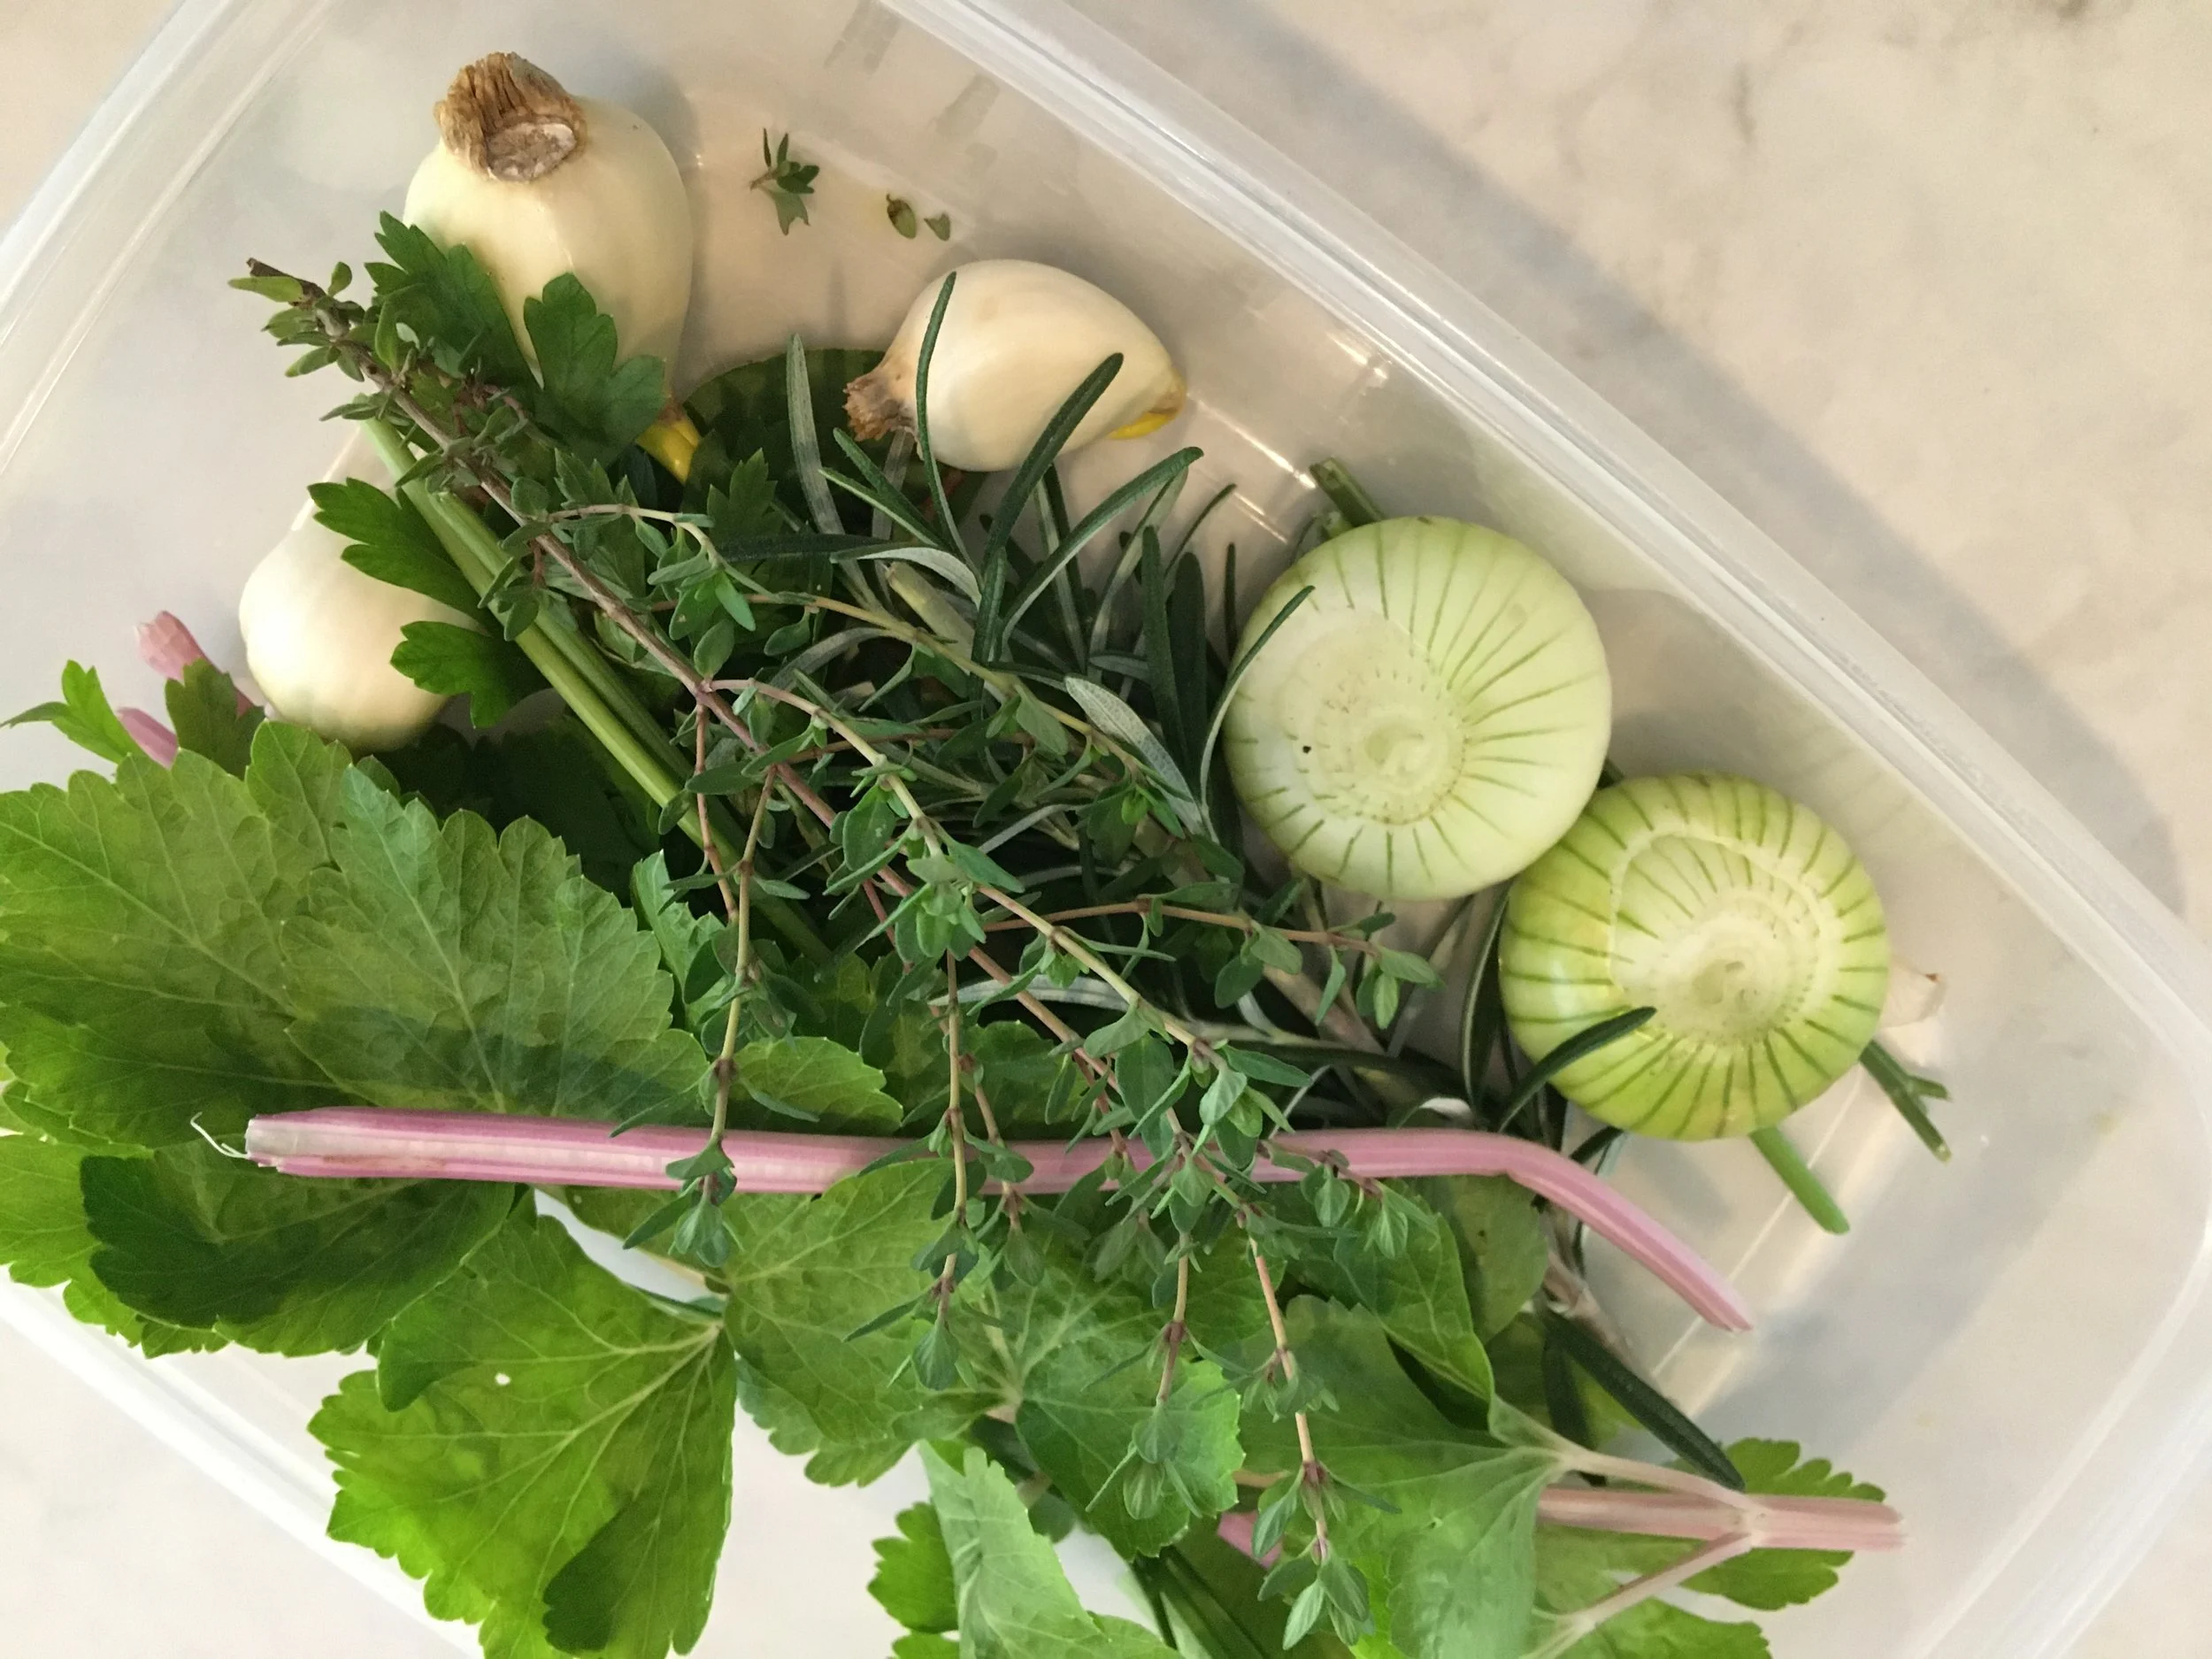
I put bay leaves, rosemary, parsley, thyme, an onion, garlic cloves, and celery into the cavity.
I don’t stuff rotisserie turkey. It’s easier to cook stuffing separately, in the oven. I’ve had too many episodes of escaping stuffing.
While I don’t cook my bread stuffing in the bird, I do put things inside the turkey to give a nice flavour as it cooks. Here are things that I put in the cavity while it cooks:
Bay leaves (or, lemon leaves)
The squeezed out lemon halves (from the lemon I use for basting, see below)
Parsley
Sprig of thyme
Sprig of rosemary
Onion, halved
Garlic cloves
Stalk of celery
Flavour the Skin
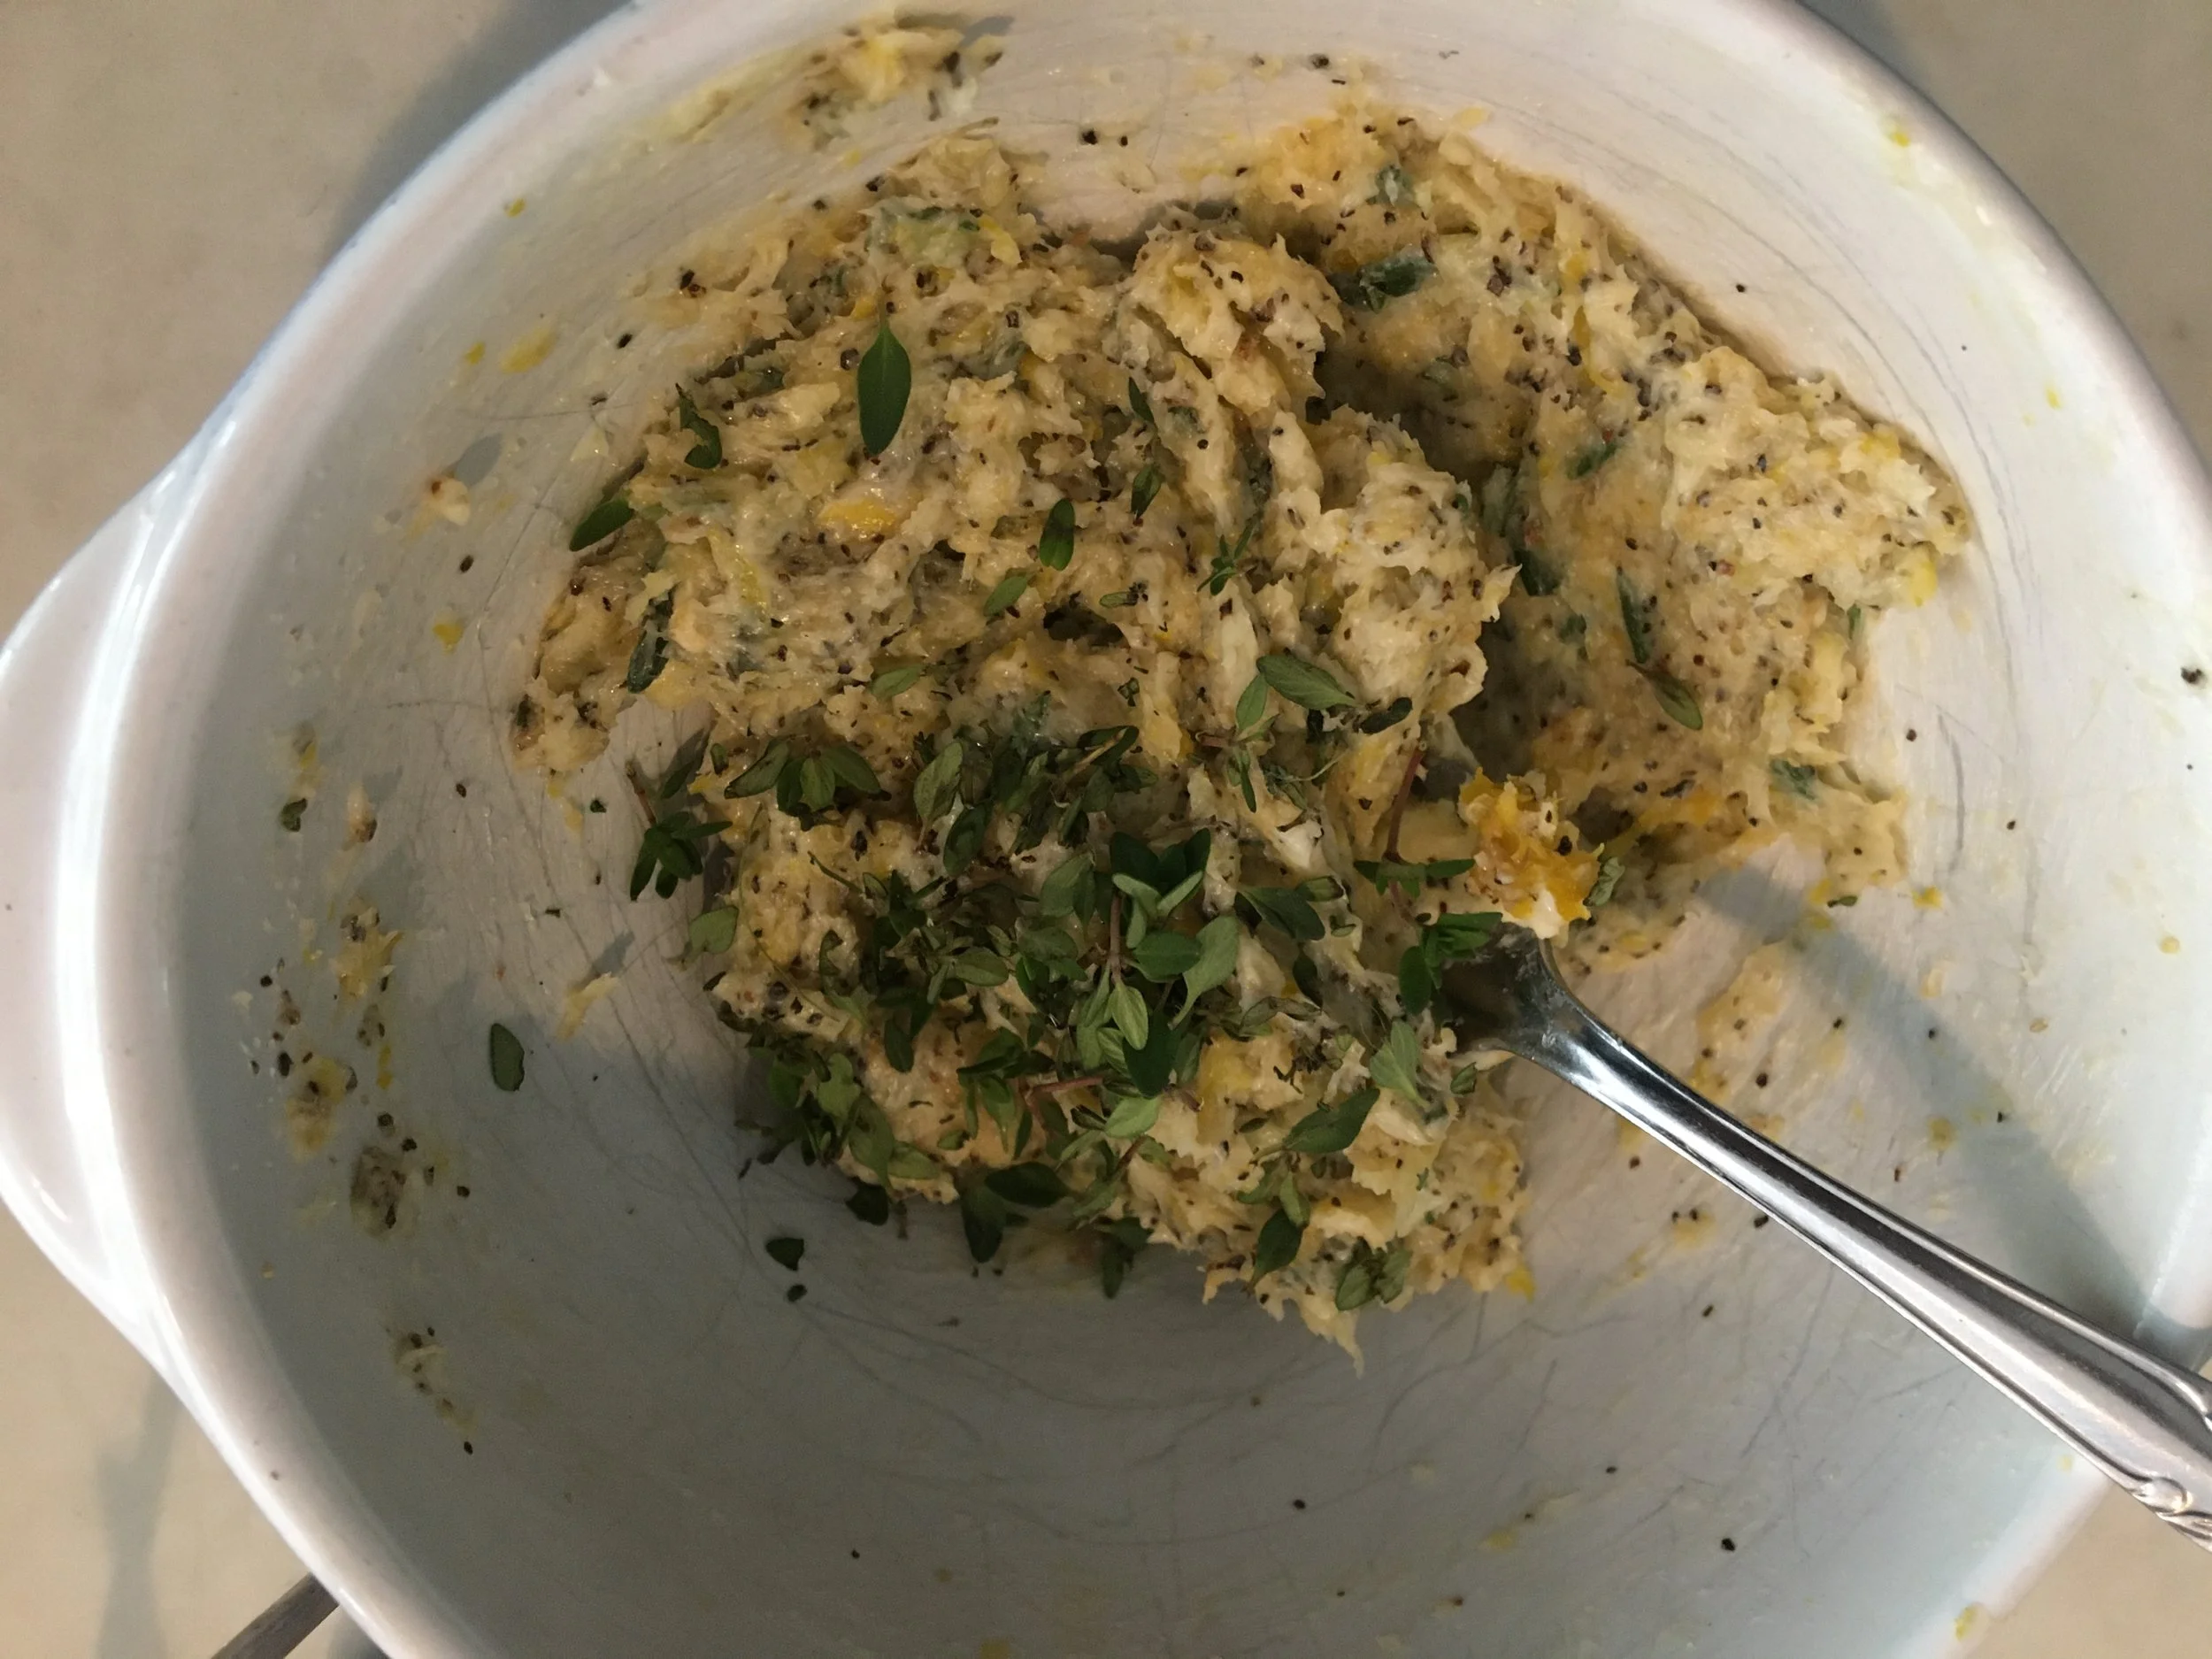
I make up a rub that I put on the skin before cooking. As the bird turns, it bastes itself.
I make up a rub that I put on the skin before cooking. As the bird turns, it bastes itself.
I mix together:
Lemon zest
Soft butter
Generous amount of salt
Copious amount of crushed garlic
Black pepper
Thyme
I know a lot of people like sage. I have overdone it with the sage too many times – and it’s a strong flavour. I skip the sage.
Mount the Turkey on the Spit
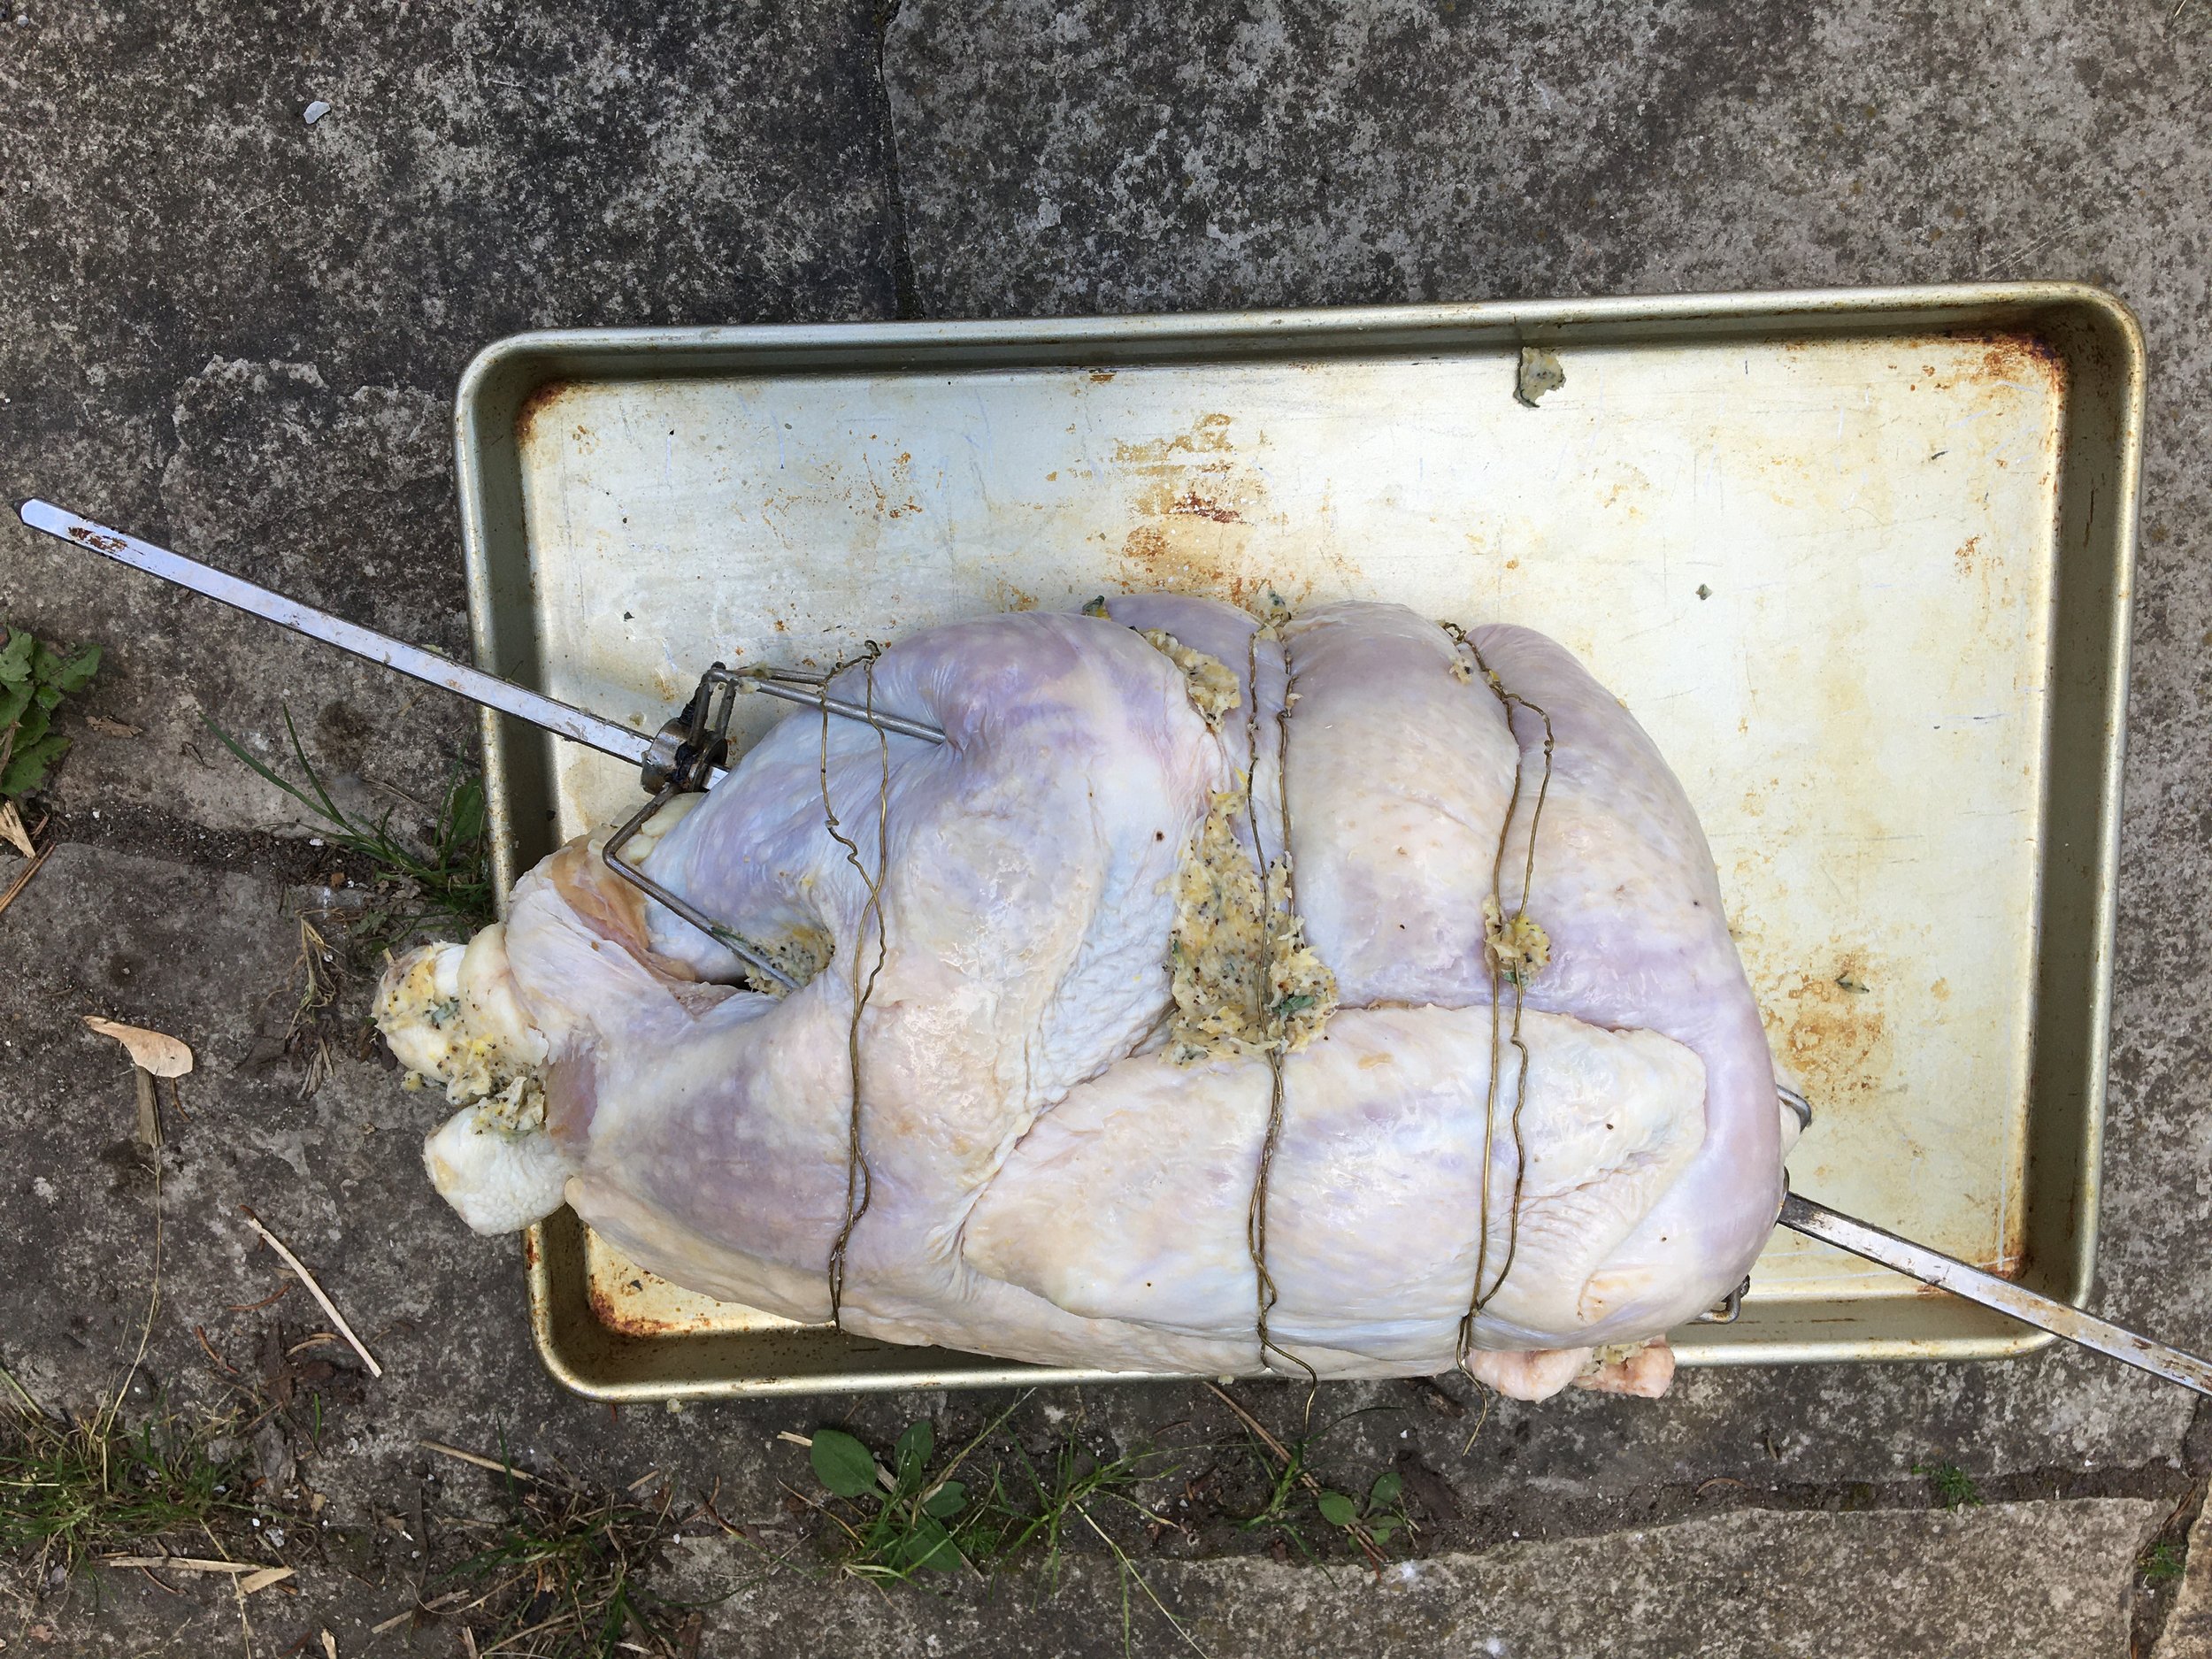
Mount the turkey on the spit so that the weight is balanced. Try turning the spit with your hands; it should rotate a couple of times, not just flop down because one side is more heavy than the other.
It doesn’t have to be perfect – but balanced enough so that the motor isn’t strained from turning a lopsided roast. You don’t want that motor to burn out while you’re cooking!
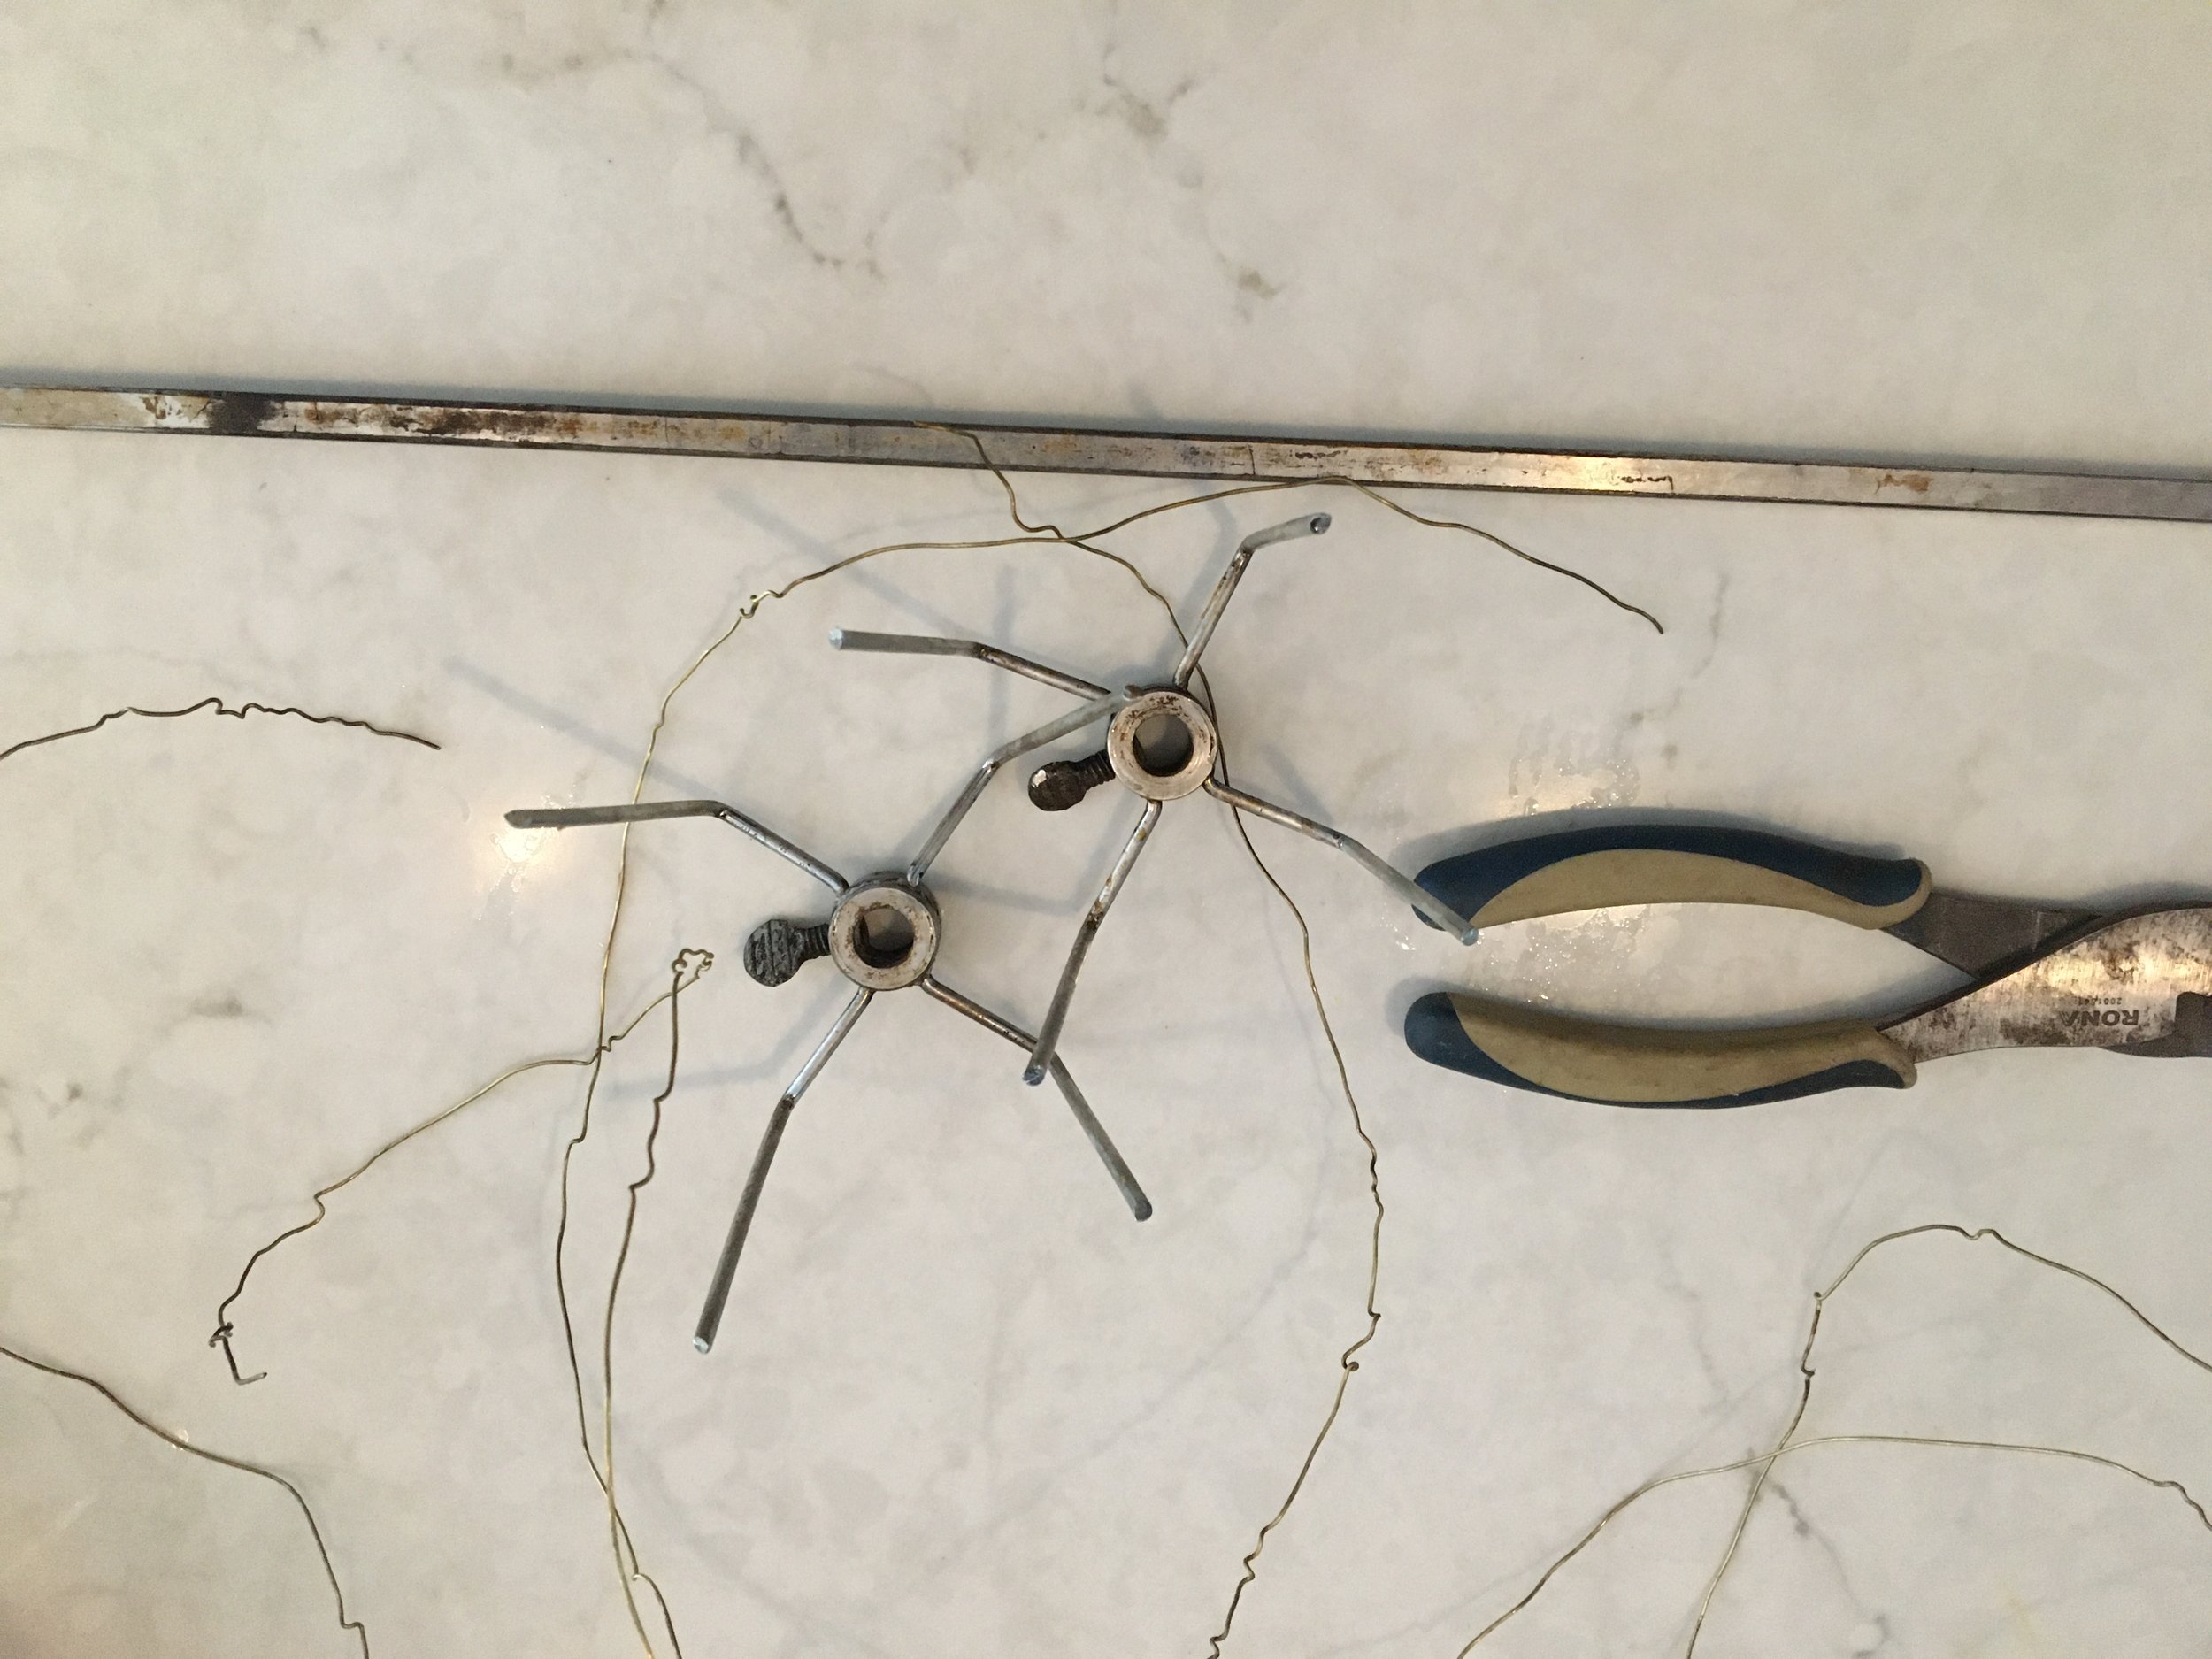
Truss the bird. Tie in the wings tightly. Sometimes there’s a strong flap of skin you can tuck the legs under to hold them in place. If not, tie the legs too. You don’t want your roast flapping its wings as it goes around. I truss with wire – no worries about it breaking in the heat as butcher twine sometimes does.
There are “spit forks” that slide over the spit, and press against and into the turkey. Get these nice and snug so that the turkey doesn’t move around as it turns on the spit.
Preparing the Charcoal BBQ
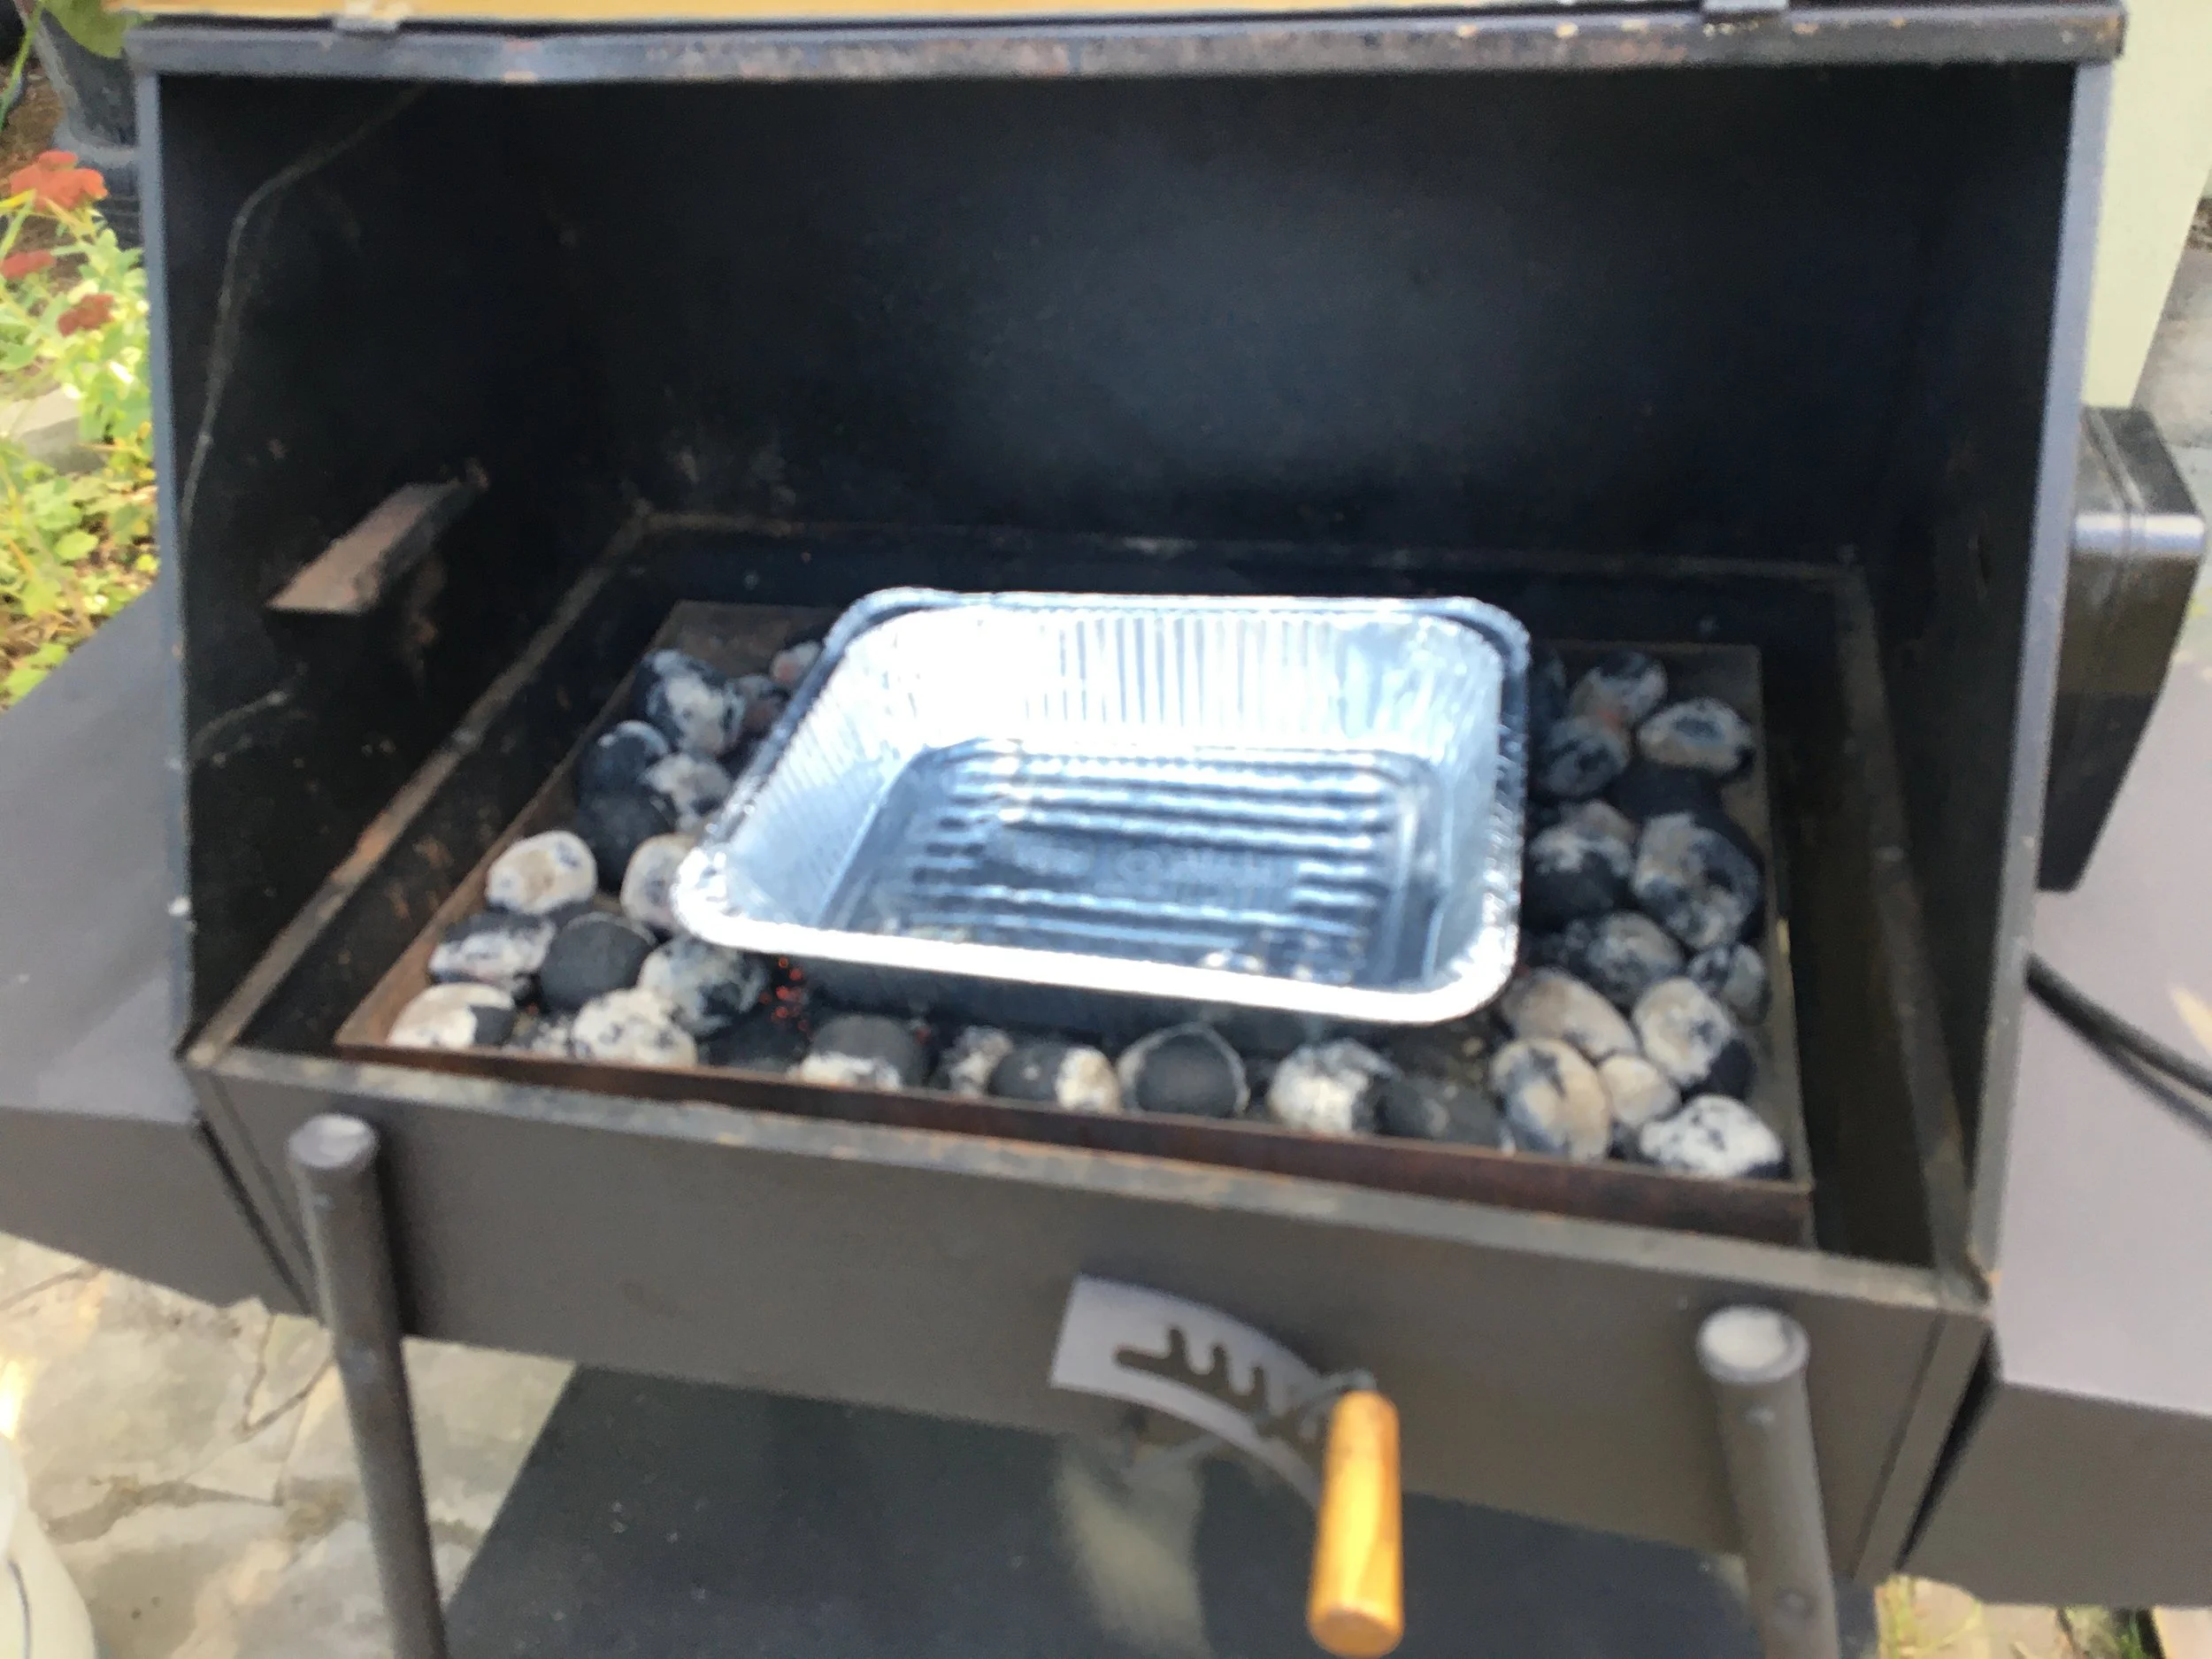
Briquette charcoal placed around a drip tray in the centre of the BBQ.
I use briquette charcoal, which lasts for a long time. I pile the charcoal over an electric starter on an old cookie sheet. Then I place the charcoal around the drip tray, which is in the centre of the BBQ.
The drip tray is important. It catches fat to prevent flare ups. (And some of that fat goes into the gravy.)
Basting Your Rotisserie Turkey
The great thing about cooking on a rotisserie is that the roast bastes itself as it turns.
But I baste it even more as it cooks. The reason is that turkey tends to be a dry meat. Barbecued turkey skin can be leathery, but if you baste it as cooks, you get crispy, golden, flavourful skin.
Here’s what I baste with:

The pot with liquid for basting staying warm on top of the BBQ. It’s a mix of lemon juice, butter, thyme, and salt.
Juice of a lemon
Butter
Thyme
Salt (don’t be stingy)
Enhancing the Smoke Flavour
By cooking your turkey on a charcoal barbecue you already have a smoky flavour. But you can make a nicer smoky flavour with wood from fruit trees. Fruit woods such as apple, cherry, pear, and plum improve smoke flavour.
The trick is to add a bit of fruit wood to the charcoal, without causing a flare-up. To avoid flare-ups, I cut up branches into small pieces, and soak them in water. Then, as the roast cooks, I add a few now and then.
(In my opinion cherry wood gives a delicious flavour, and I save branches I prune from my Nanking cherry bush for when I cook turkey. Find out more about Nanking cherry, a perfect cherry bush for home gardens.)
Check Your Turkey as it Roasts
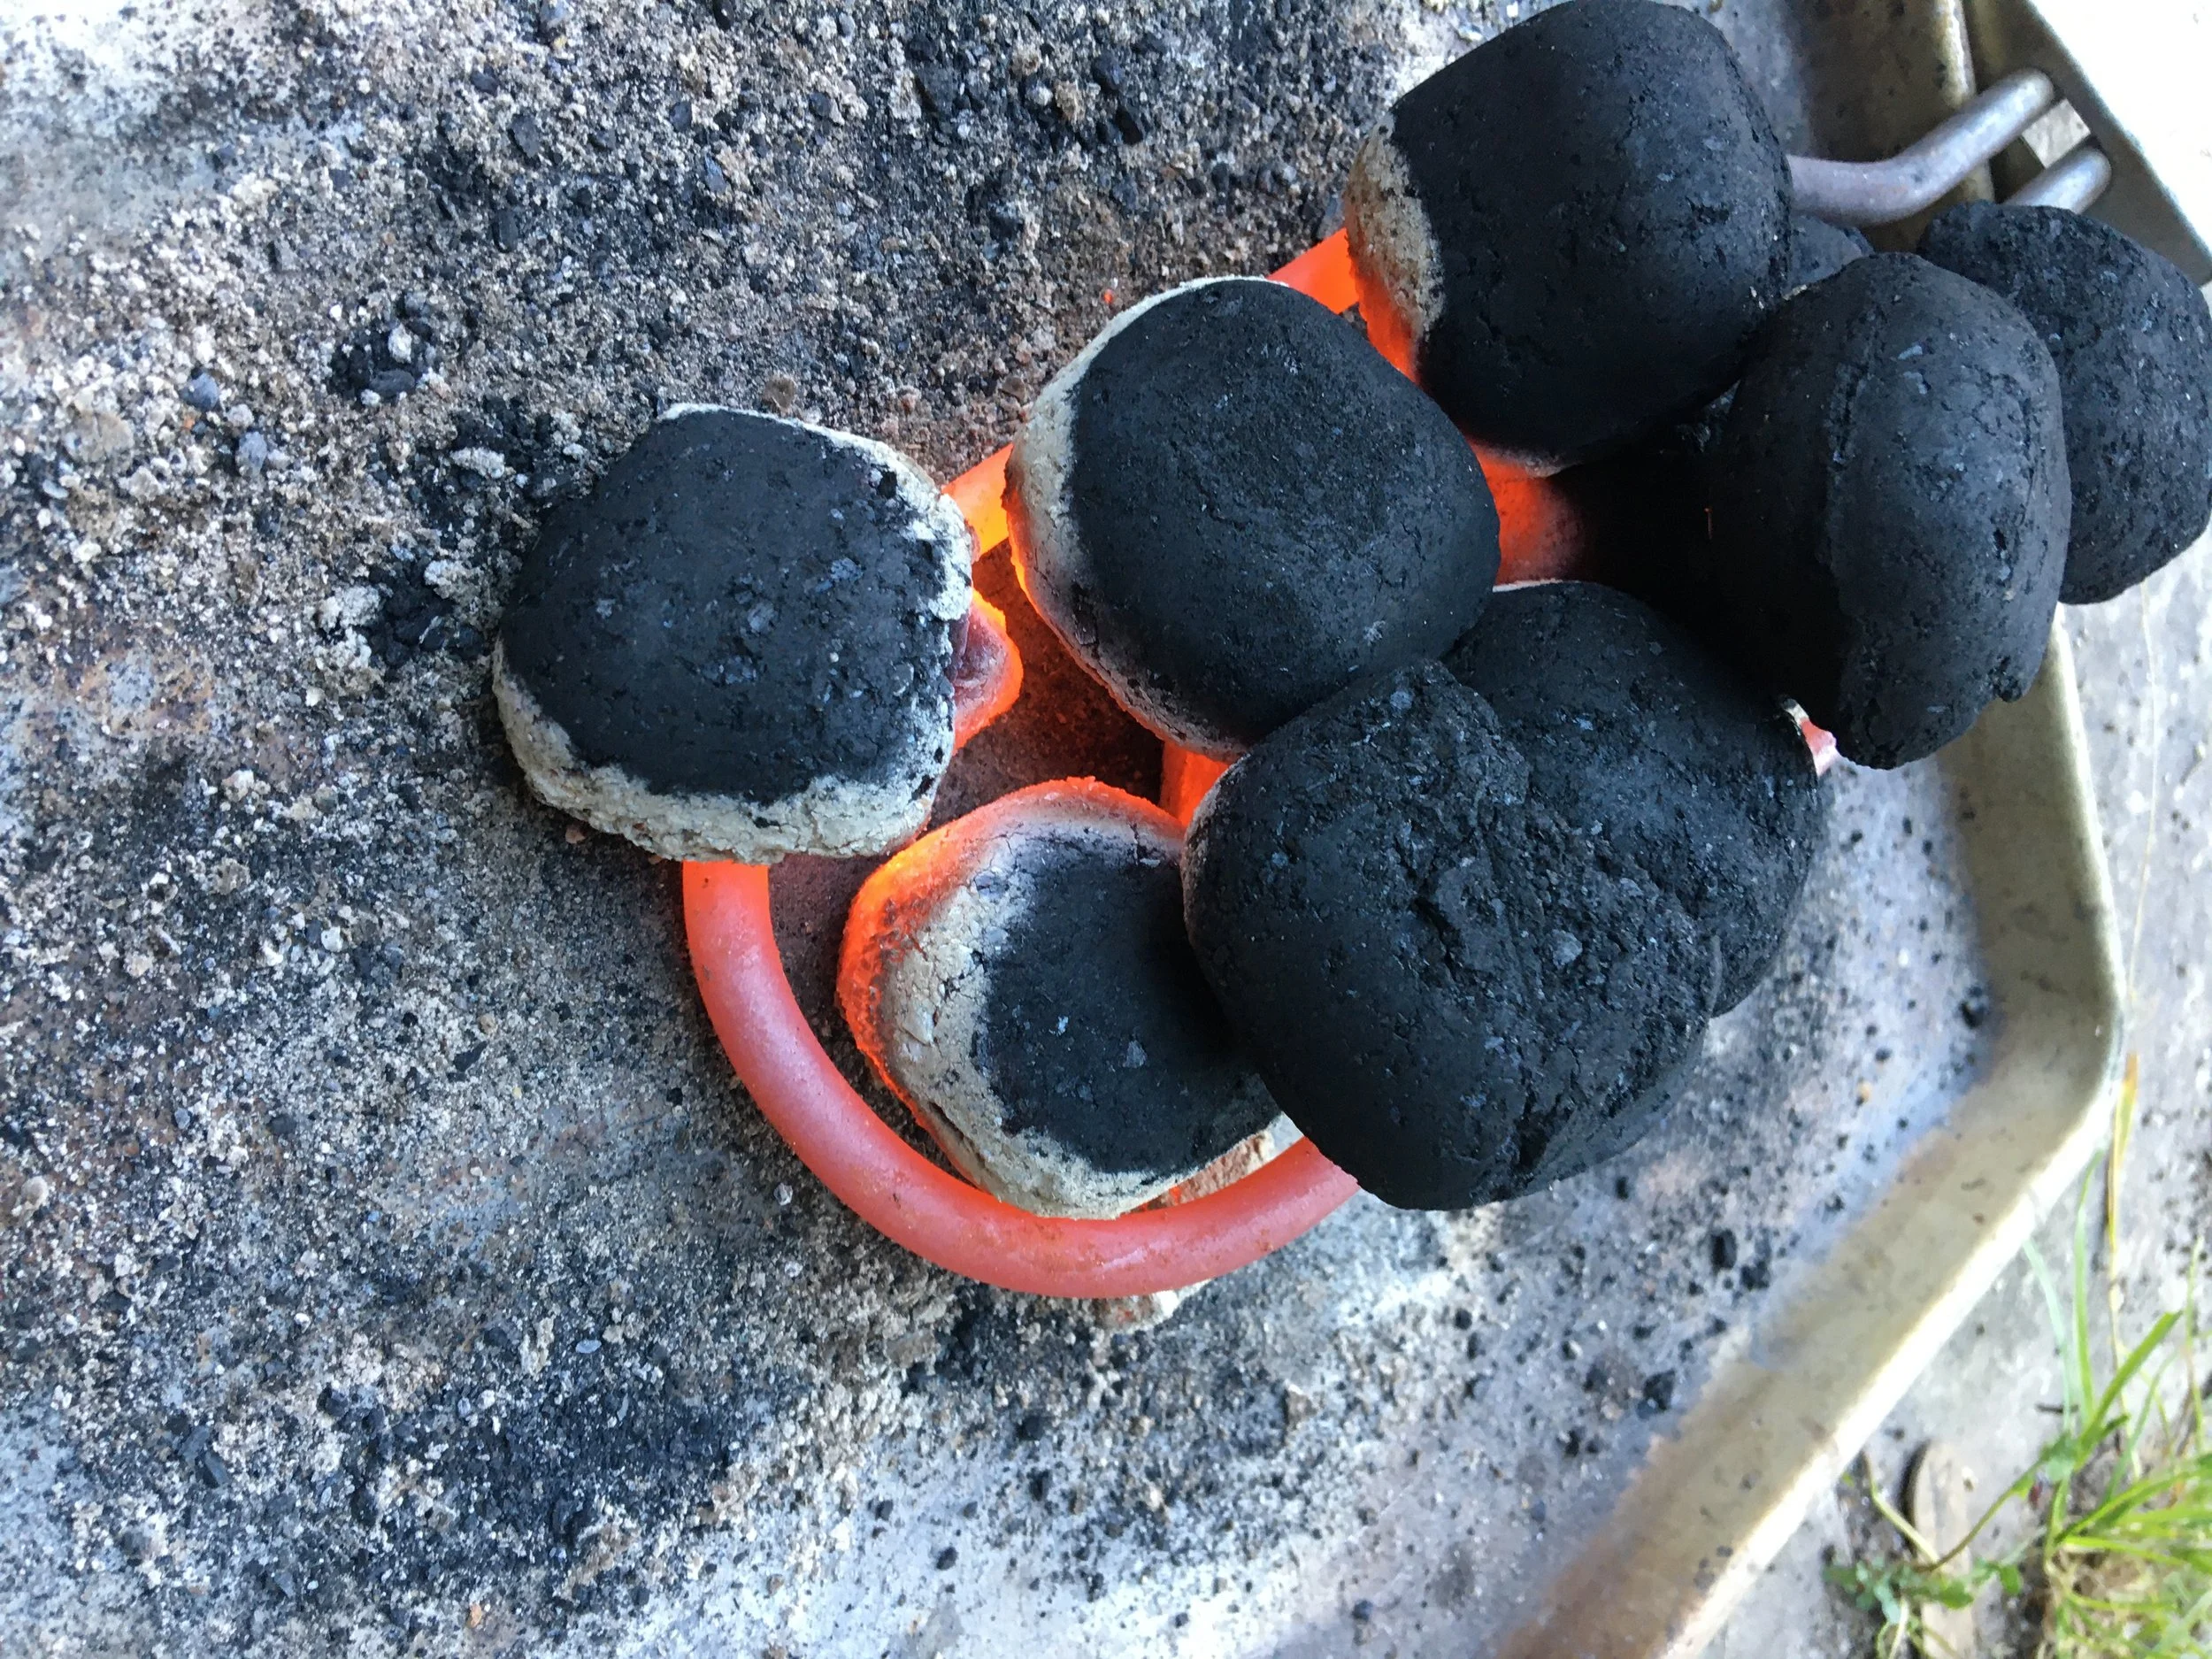
Starting briquette charcoal with an electric lighter on an old cookie sheet. When it’s ready, I use tongs to place it around the drip tray.
Sometimes I re-balance the turkey and tighten the forks if I see the turkey is wiggling a bit as it turns.
Along with making sure that roast is balanced, make sure there is still enough heat from the charcoal. I replenish the charcoal at least once while roasting a turkey. I start a new batch on the cookie sheet and transfer the briquettes (using tongs) around the drip pan.
My BBQ doesn’t not have a temperature gauge. So I touch it to see if it’s hot enough.
If I touch the top of my barbecue and it’s too hot to hold my hand there, I’m happy with the heat.
If I can hold my hand there for a moment, it’s time for more charcoal. It’s not an exact science.
One year, Dad and a friend were responsible for the Thanksgiving turkey. They got distracted (wine tasting, maybe!) and forgot to add more charcoal. That year we had our roast at about 10 p.m.!
Knowing when Your Charcoal Rotisserie Turkey is Ready
At risk of offending food safety experts, I go with what Mom taught me. She didn’t use a meat thermometer. She explained to me that when you pull back a leg and poke a fork into that area where the let attaches to the bird, you want the juice that comes out to be clear. If the juice is still reddish, cook more. That’s my rule of thumb.
If you new to roasting, you might feel more comfortable with a meat thermometer. That’s probably a good idea. And while you don’t want to undercook turkey, you don’t want to overcook it because turkey is dry to begin with.
Once your roast is fully cooked, let it sit, tented with foil, for a few minutes. And during this time you can work on your gravy.
What Kind of Charcoal BBQ?
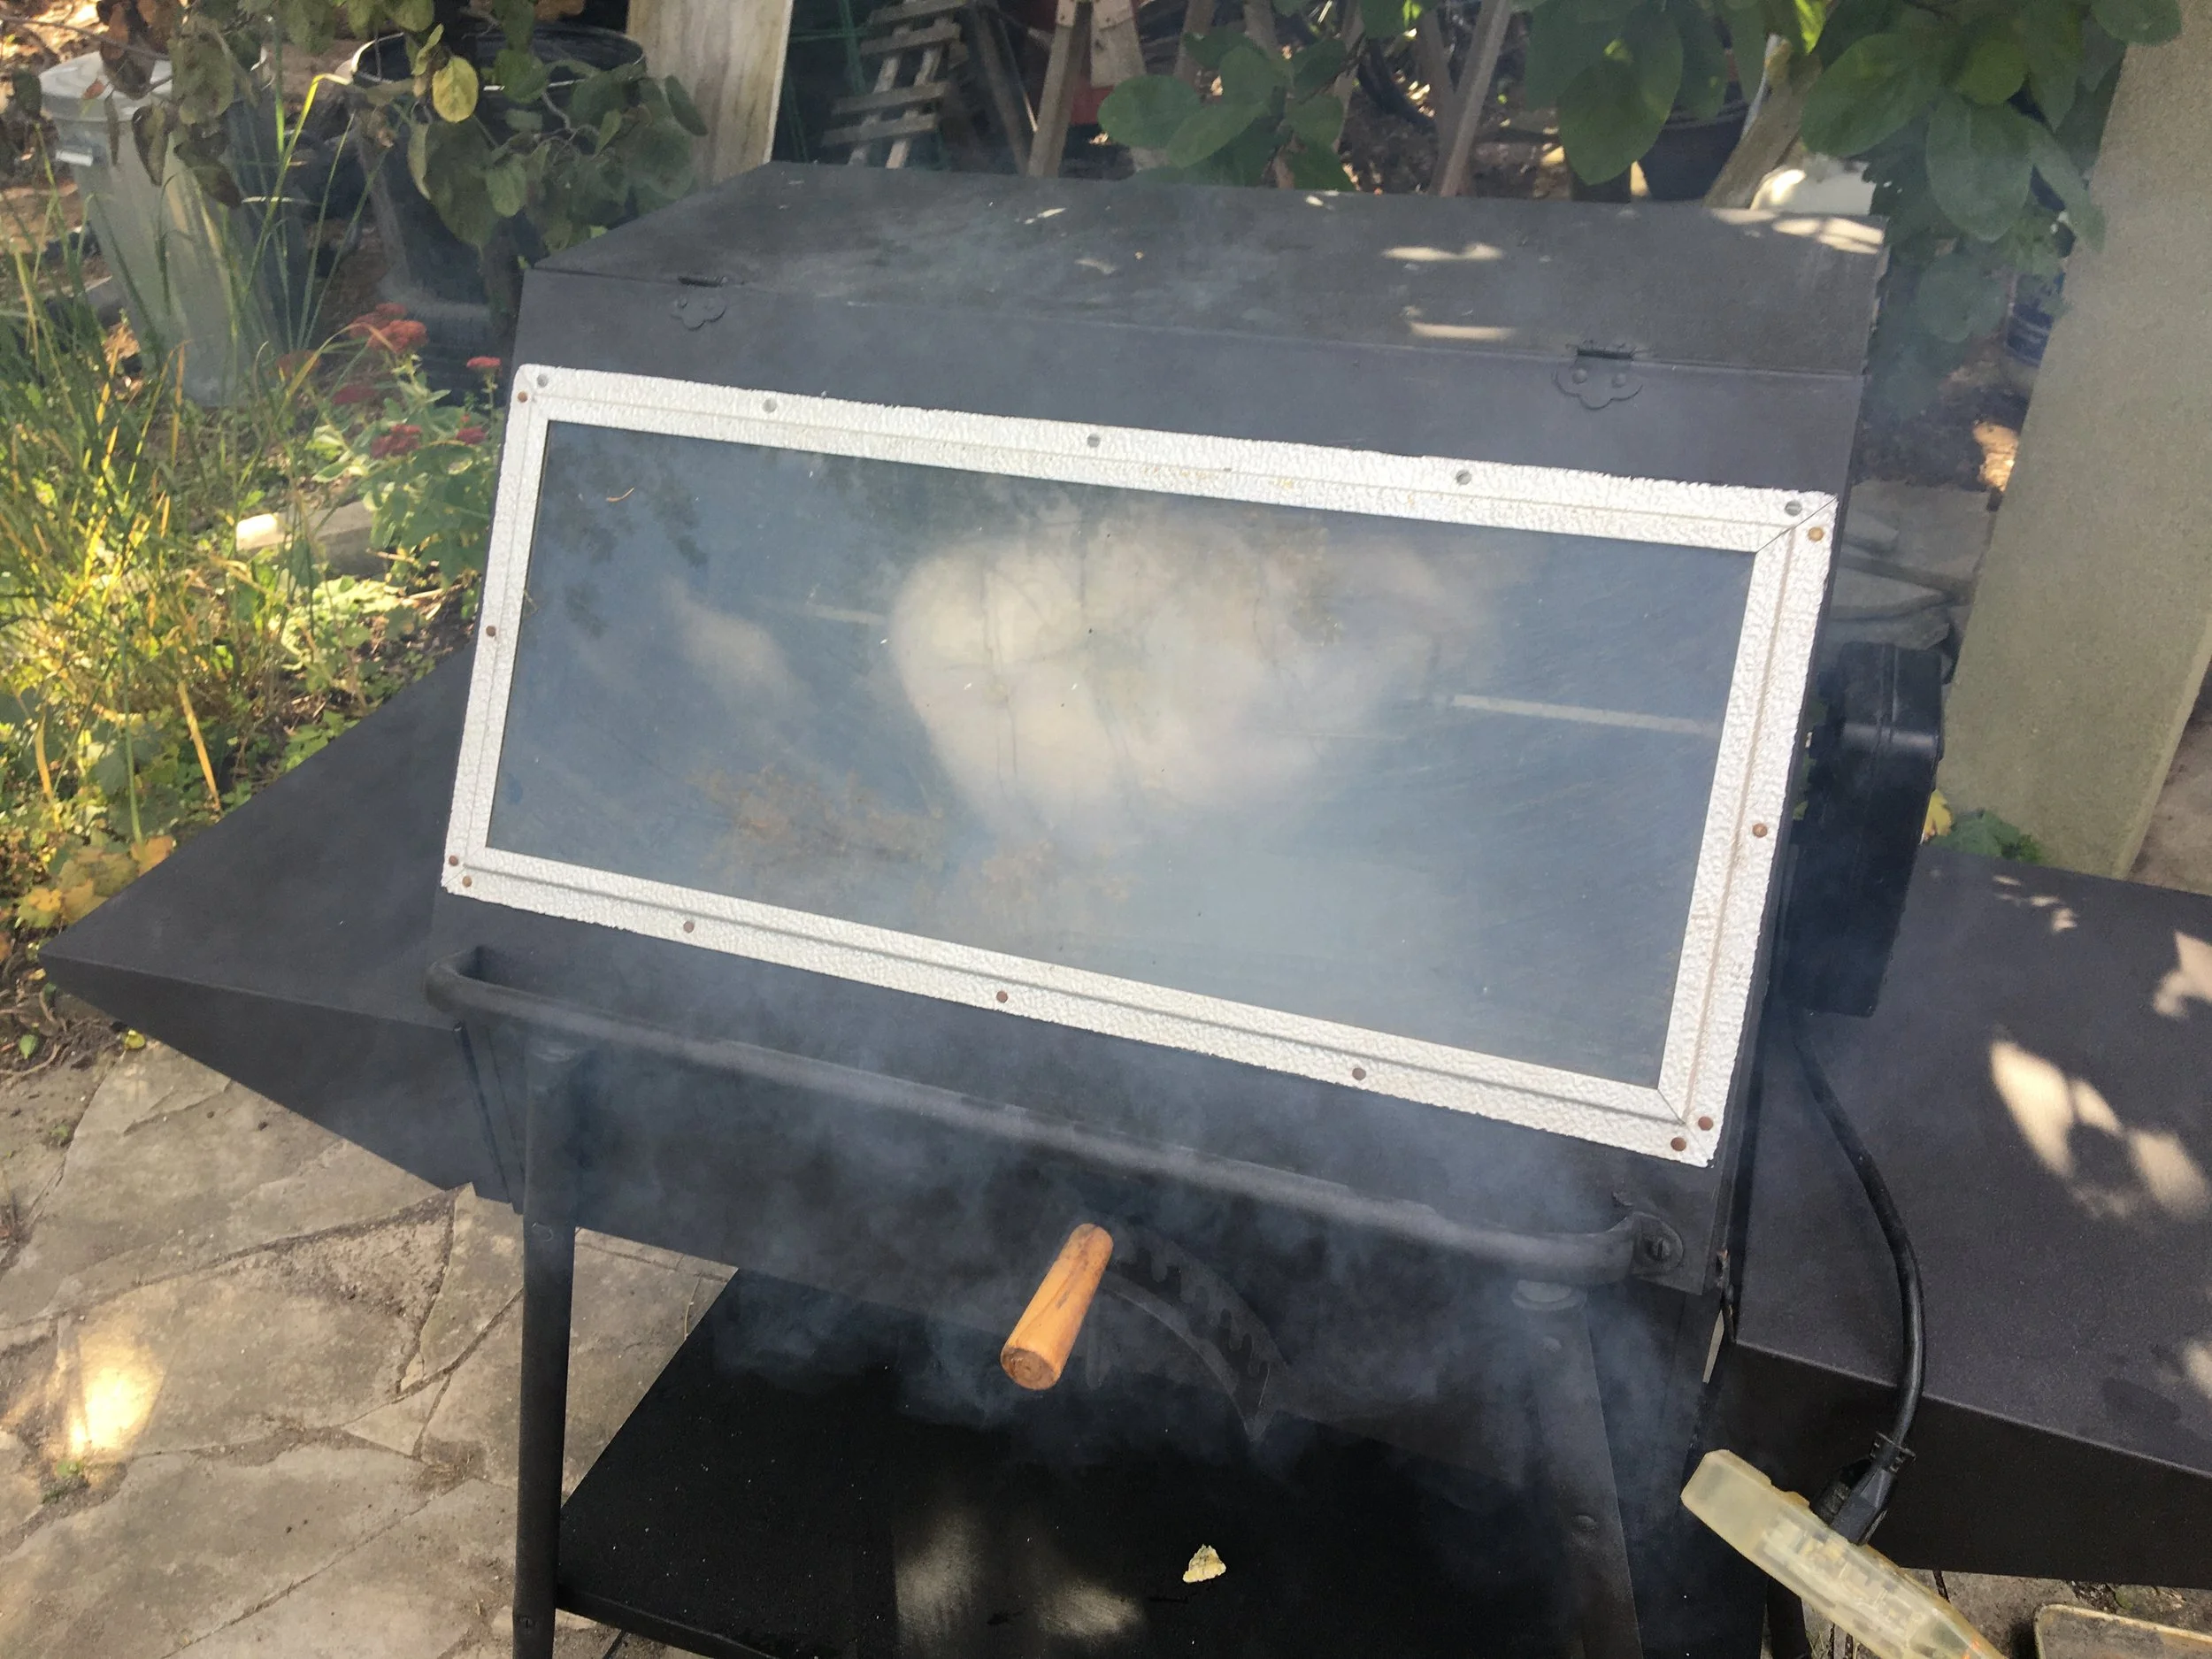
Our “new” charcoal BBQ that we use to roast turkey.
For years Dad used an old charcoal barbecue given to him by a friend. It was pretty wobbly by the time he moved from his house, but I brought the BBQ here and rehabilitated it a bit – a prosthetic leg to replace the once that had completely rotted out, a new tray inside, and a paint job.
That old barbecue did the trick for another decade. I’m sure it was 50+ years old when it finally rusted right through.
I couldn’t’ find anything like it for sale – something with a flip-open door. I like a flip-open door design as it holds in more heat when you’re checking the roast. Many new models have a lid that lifts off completely.
But when an old house down the street from me sold, somebody put the exact same barbecue to the curb on garbage day. It looked unused – so it must have sat in a garage for decades.
With this “new” barbecue, I’m set to keep our family tradition going – and hope that one of my kids will take over this barbecue in time.
Gas Barbecue
I’ve never done my roast turkey on a gas barbecue, but I’ve seen posts about people doing it. It’s the same idea, with a drip pan below your rotisserie turkey to catch the drippings.
A Very Important Note
Don’t get a turkey that’s too big for your BBQ. Dad and I know from experience that the biggest turkey we can cook on the spit in our BBQ is 12 pounds. Any bigger than that and it will rub against the door on every turn.
Find This Helpful?
Enjoy not being bombarded by annoying ads?
Appreciate the absence of junky affiliate links for products you don’t need?
It’s because we’re reader supported.
If we’ve helped in your food-gardening journey, we’re glad of support. You can high-five us below. Any amount welcome!
Looking for More Food and Cooking Ideas?
Green Tomato Mincemeat Recipe
Don’t let the frost nip your green tomatoes! Find out how to make delicious mincemeat using green tomatoes that you pick at the end of the season.
By Steven Biggs

Great Recipe for the Fall Glut of Green Tomatoes
Before the first fall frost, I pick ALL of the green tomatoes in our garden.
Then I sort them:
Those that are mostly sized up and will ripen well indoors (find out more about ripening green tomatoes indoors)
Those that are damaged and need to be watched closely as I ripen them…in case they begin to spoil
Those that are nowhere near the final size, and don’t have good prospects for ripening
It’s those last ones, that are small and likely won’t ripen into anything worth eating, that are great candidates for making into green tomato mincemeat.
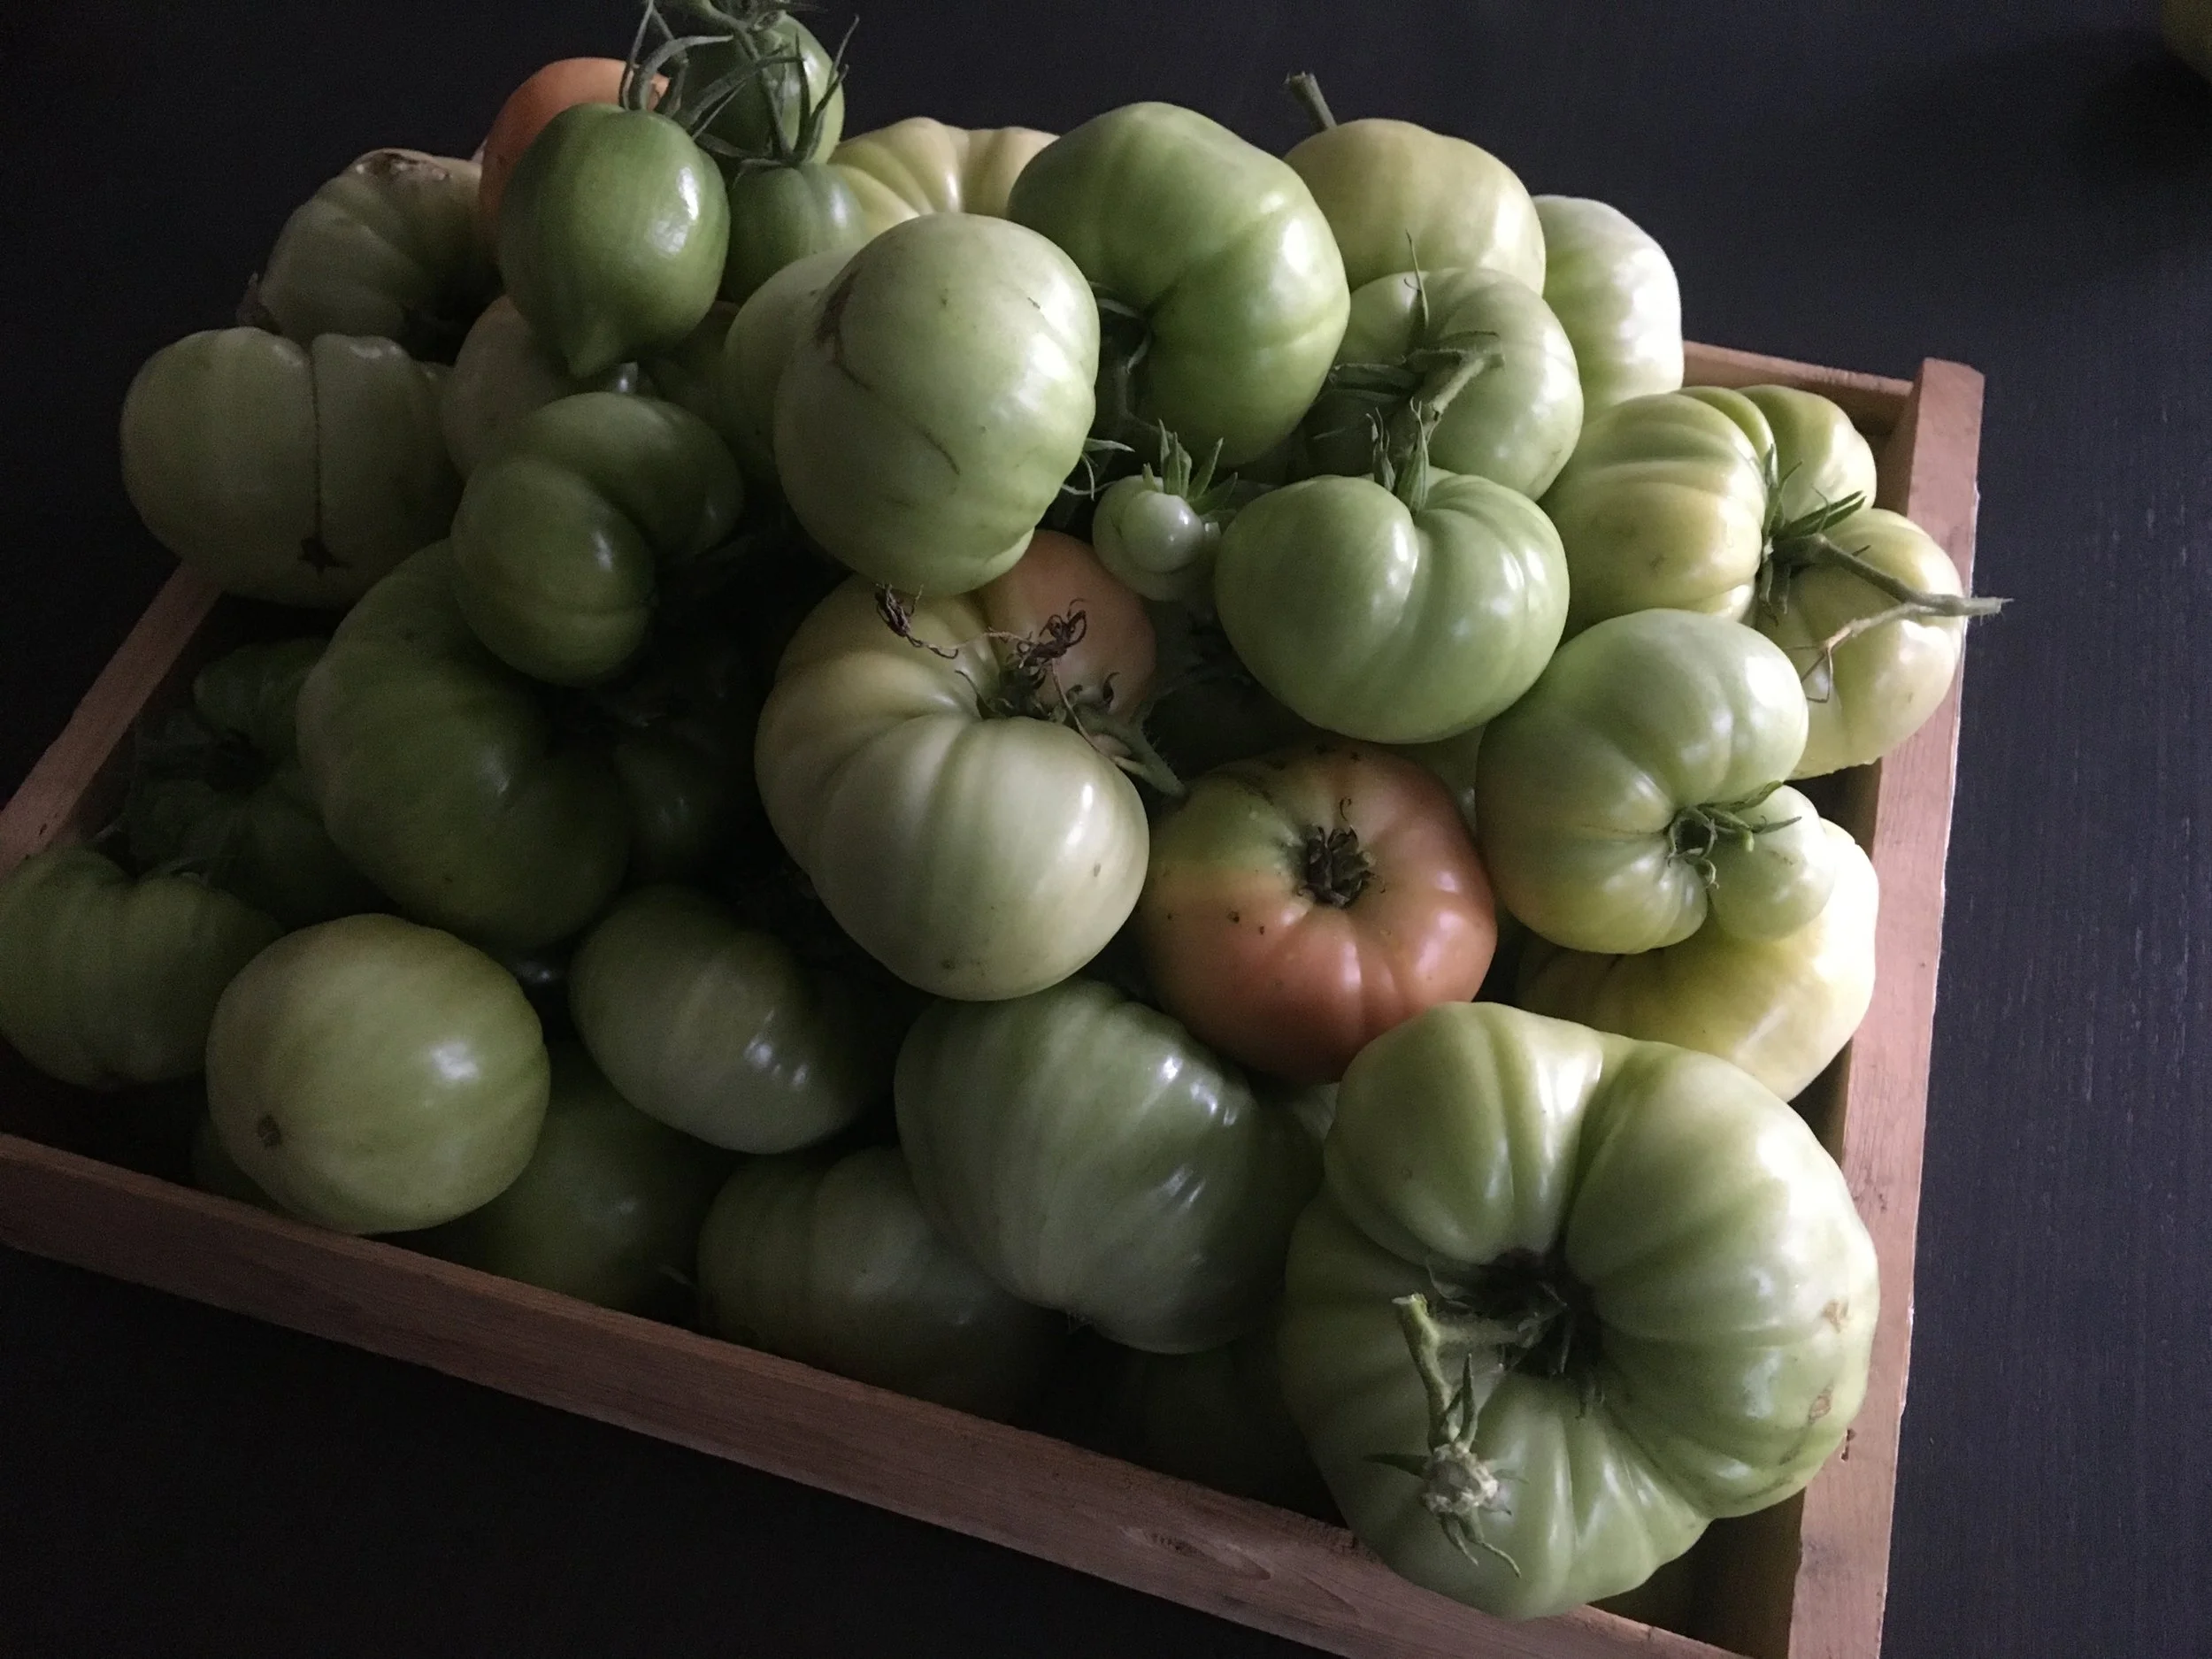
The annual glut of green tomatoes, ready to be sorted. Those that are quite undersized are great candidates for green tomato mincemeat.
Green Tomato Mincemeat
Our family friend Cathy gave me this green tomato mincemeat recipe. It’s a great way to use up undersized green tomatoes that likely won’t ripen. The green tomato is the filler in this recipe.
Ingredients

11-quart basket of green tomatoes, finely ground
20 apples, finely chopped
1 ½ lbs. raisins
2 lbs. dried currants (dried currants—not red or black currants, which are different)
1 lb. mixed peel
5 lbs. white sugar
1 cup suet, finely ground
2 tsp. ground cinnamon
2 tsp. ground clove
2 tsp. ground nutmeg
2 tsp. salt
Making the Mincemeat
Cover the ground green tomato with boiling water, and leave for 10 minutes.
Pour off water and repeat.
Drain.
Add the rest of the ingredients.
Boil slowly for a couple of hours.
More Tomato Articles
Tomato Interviews
Find This Helpful?
Enjoy not being bombarded by annoying ads?
Appreciate the absence of junky affiliate links for products you don’t need?
It’s because we’re reader supported.
If we’ve helped in your food-gardening journey, we’re glad of support. You can high-five us below. Any amount welcome!
Course: Tomato Overload Masterclass
Want to up your game growing tomatoes?
This self-paced course helps you choose great varieties, grow great seedlings, give plants the care they need, and enjoy an abundant harvest.
More on Growing Vegetables
Articles: Grow Vegetables
Courses: Grow Vegetables

Make Apple Cider at Home
Making apple cider at home is a fun fall tradition.
By Steven Biggs
Home Cider-Making

My kids helping make apple cider.
Fresh apple cider has been part of our fall family get-togethers ever since I was a kid. Auntie Annie, Uncle Bill, and my cousins made apple cider every year, a few blocks from us in Willowdale. They “bottled” it in old milk cartons or, sometimes, unlabelled red-and-white cartons that Uncle Bill had bought somewhere. Then they’d drop by for a visit with a couple of cartons. It was delicious.
It was a family tradition that I didn’t think anything of at the time.
One Thanksgiving, after I had grown up, we got together with my aunt, uncle and cousins and made cider while the turkey was roasting in the oven. It was then that I started to appreciate what a good opportunity cider making was to hang out together.
If you’re interested in making your own apple cider, keep reading to find out how I do it—and for my cider-making tips.
Apple Season
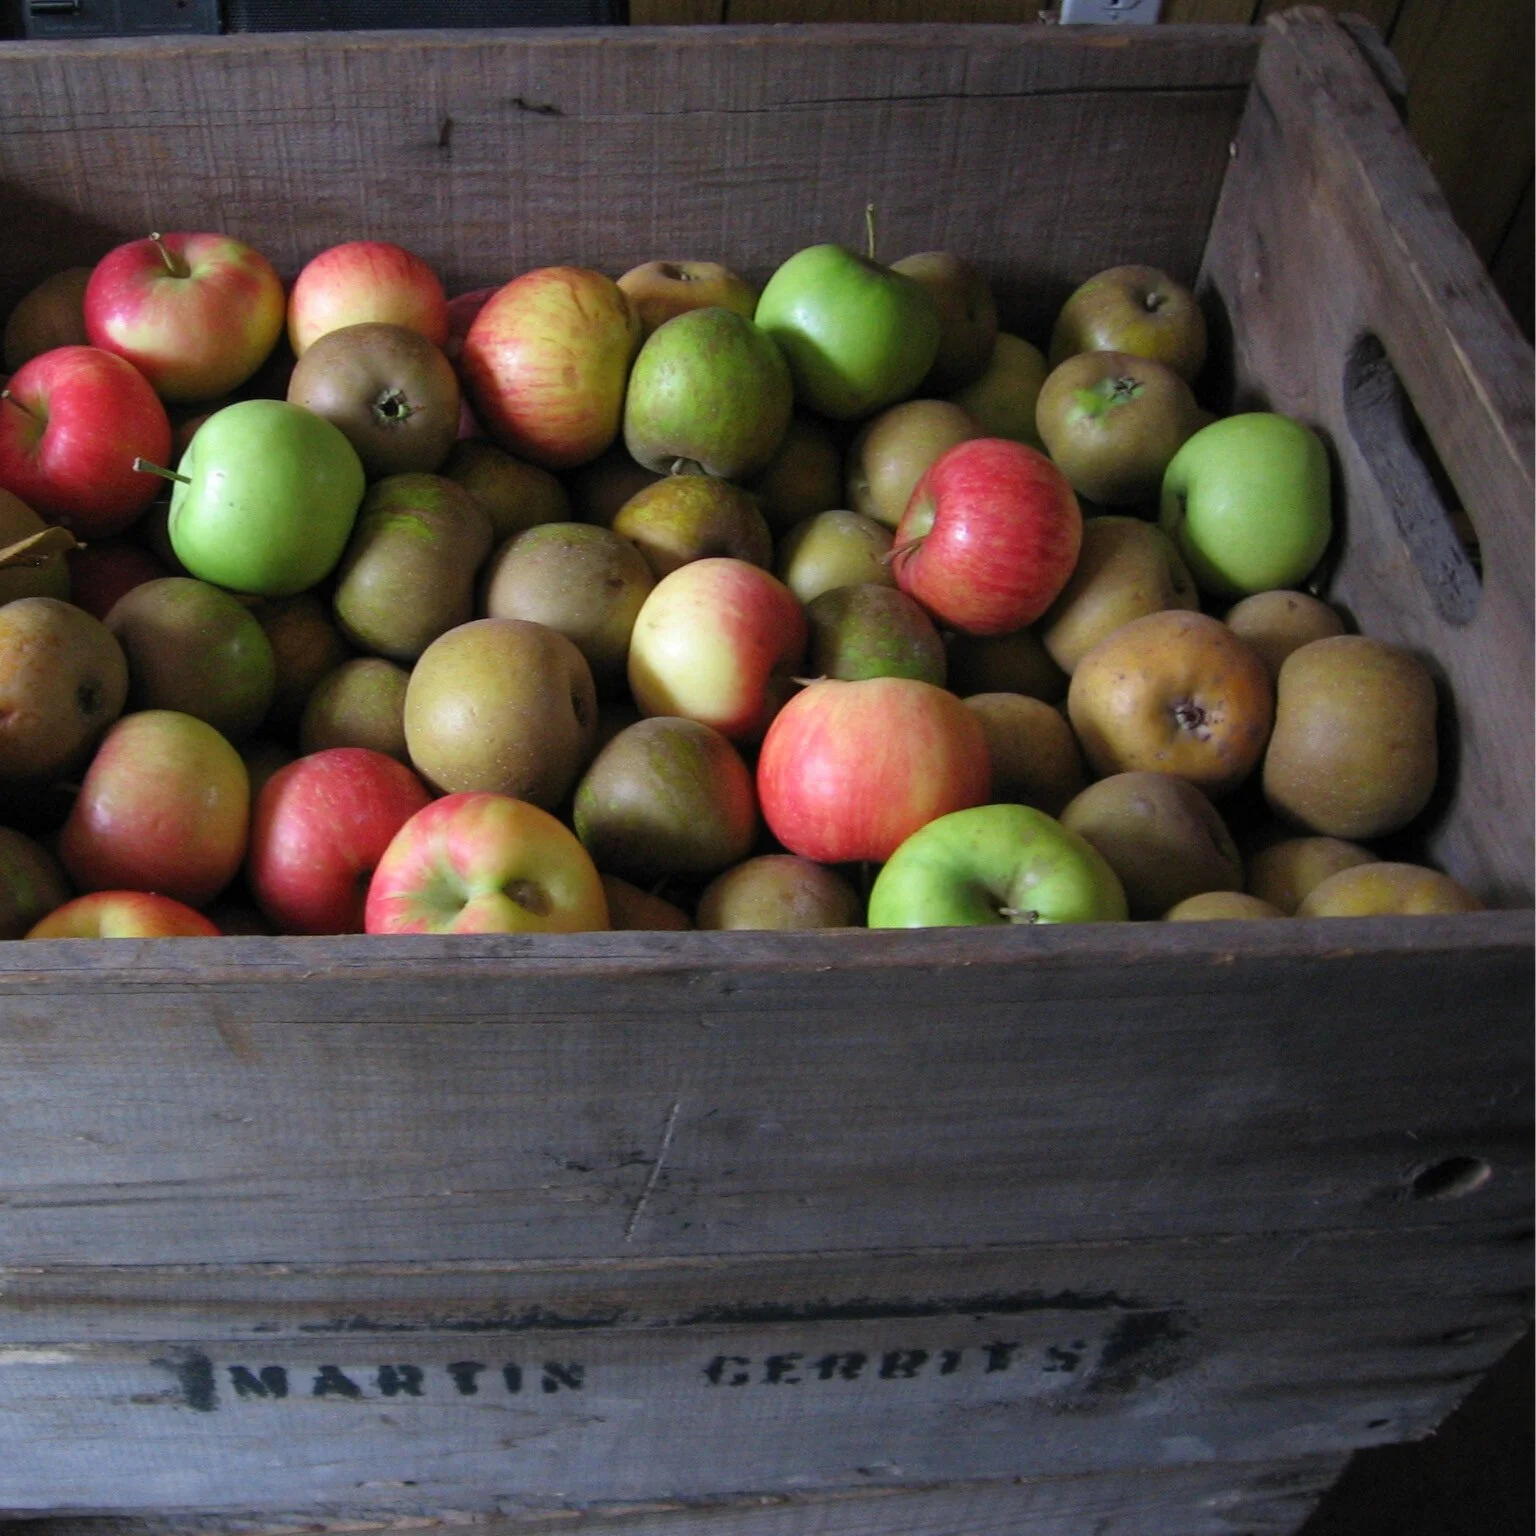
I enjoy fall trips to apple orchards. There is nothing quite like polishing a freshly picked apple on my shirt and then taking a bite. The smell reminds me of childhood walks with my dad past an old apple tree in Willowdale that had very sour apples: We’d kick fallen apples, hoping that we could make one last for the two-block walk home. I enjoy apple shopping, too—bins full of apples at roadside stands smell divine. And when I find an orchard selling something different from the grocery store—maybe a spicy ‘Tolman Sweet’ or the white-fleshed ‘Snow’—I feel as though I’ve struck gold.
Making Cider
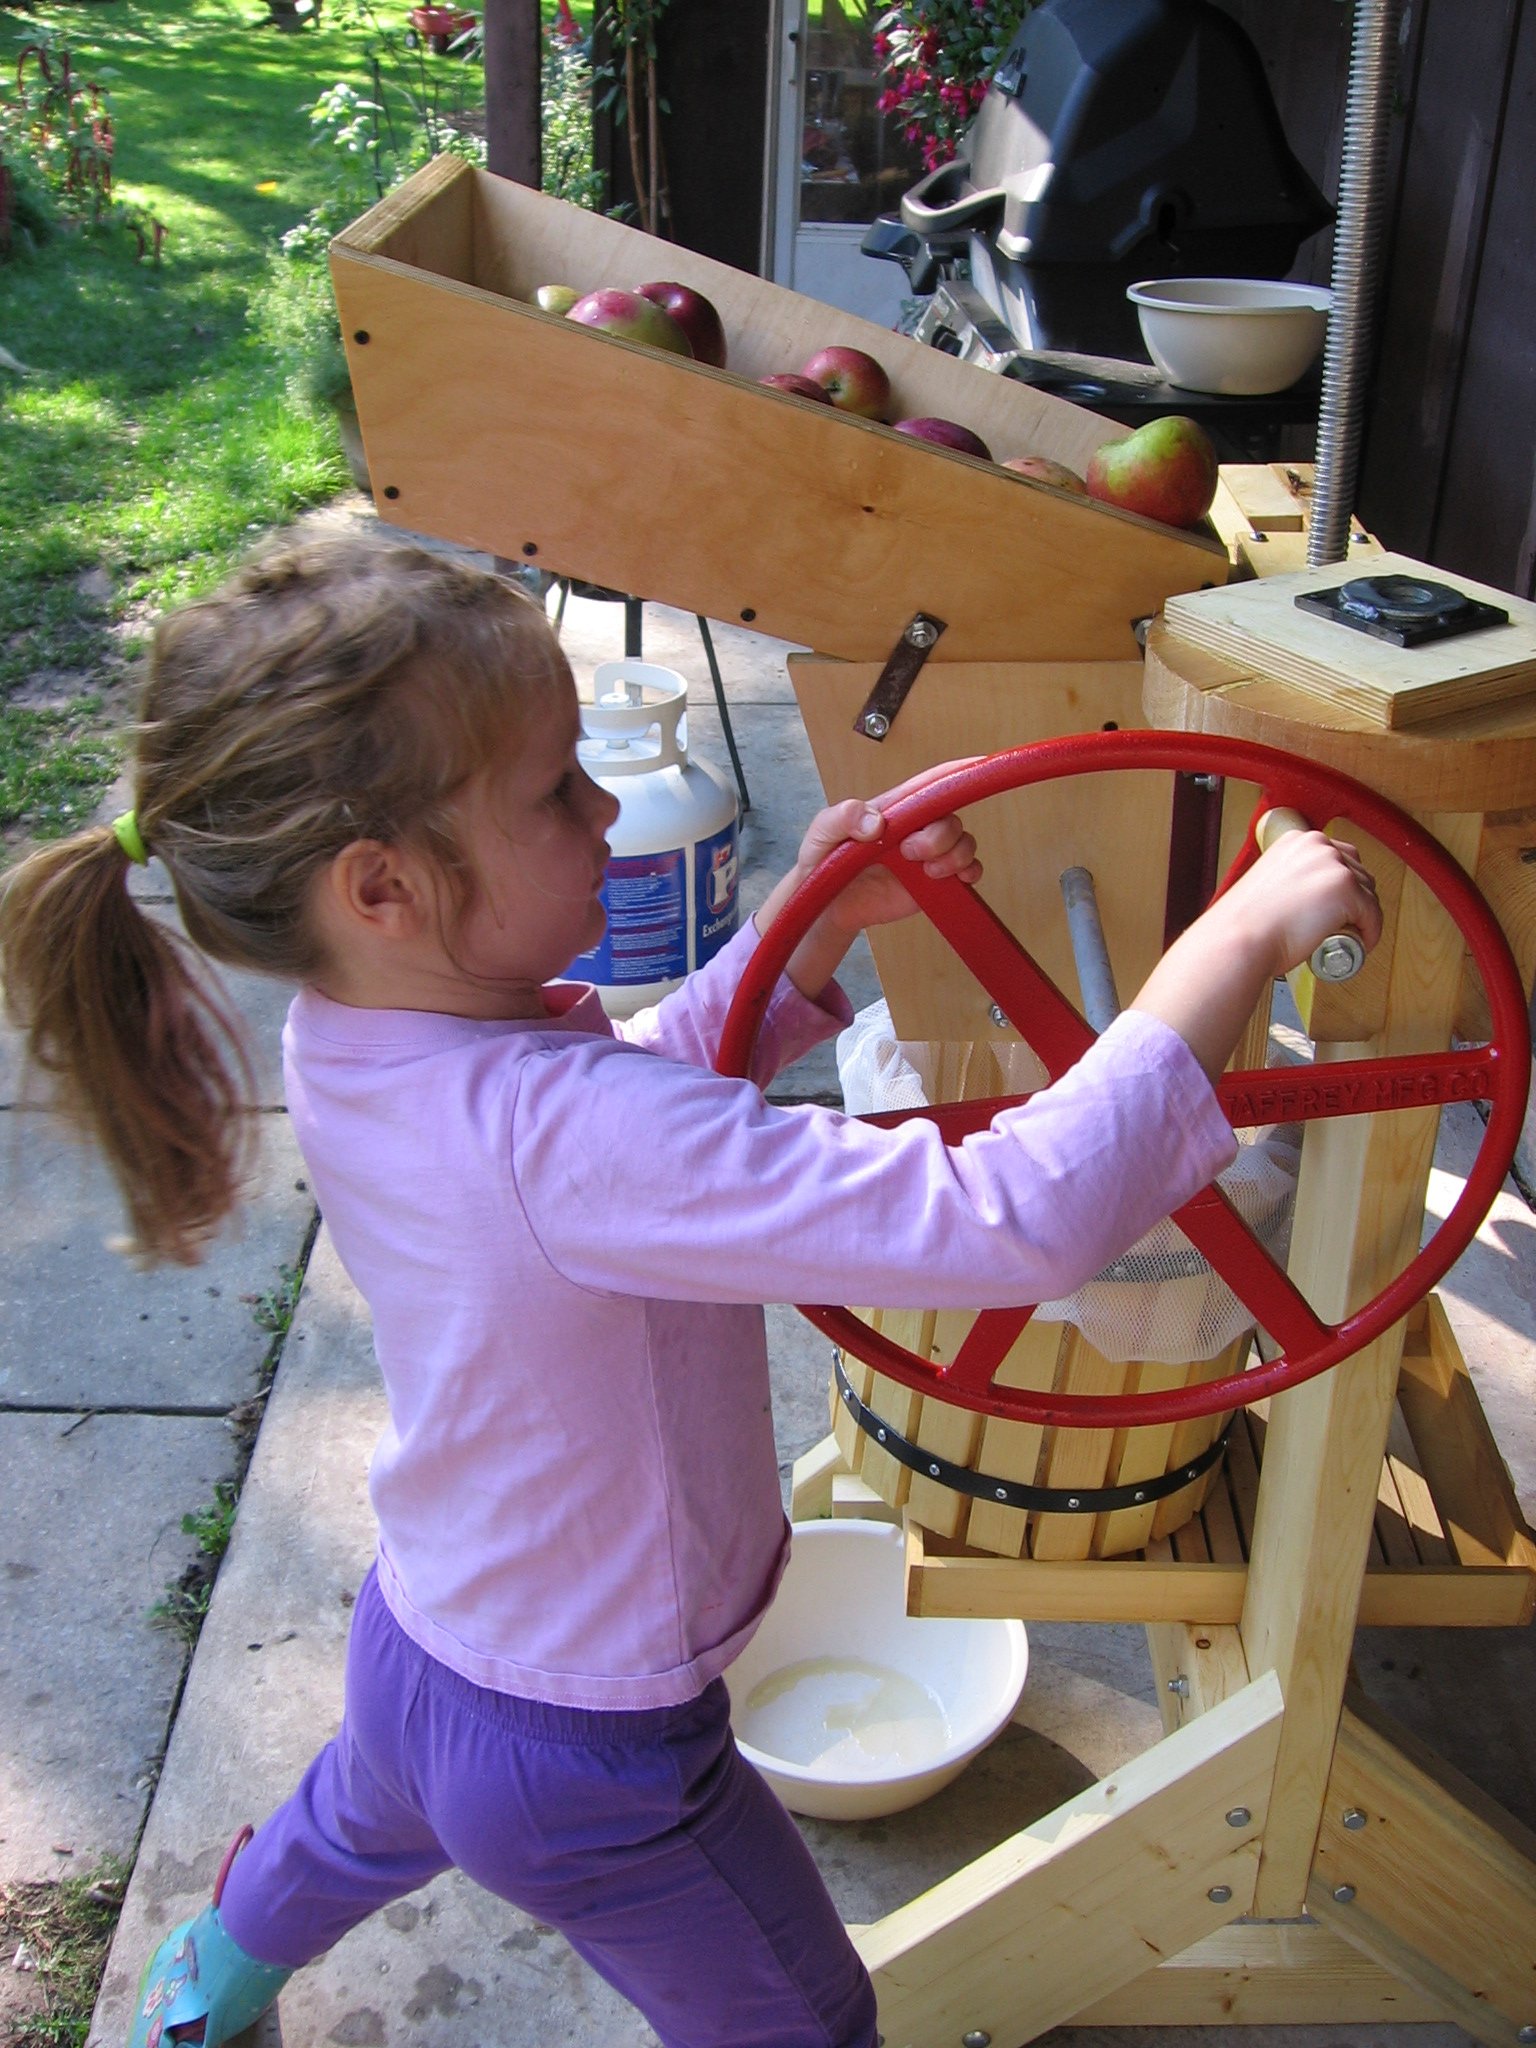
My apple cider press is fairly simple. A metal-studded wooden cylinder grinds the apples, then the apple bits fall into a slatted tub where I use a hand-operated screw press to press them.
Apple juice runs down the tub into a tray and pours out of a hole into our cups. We guzzle the first few glasses. Then we fill jugs for immediate use, and freezer-safe containers to store cider for later in the year.
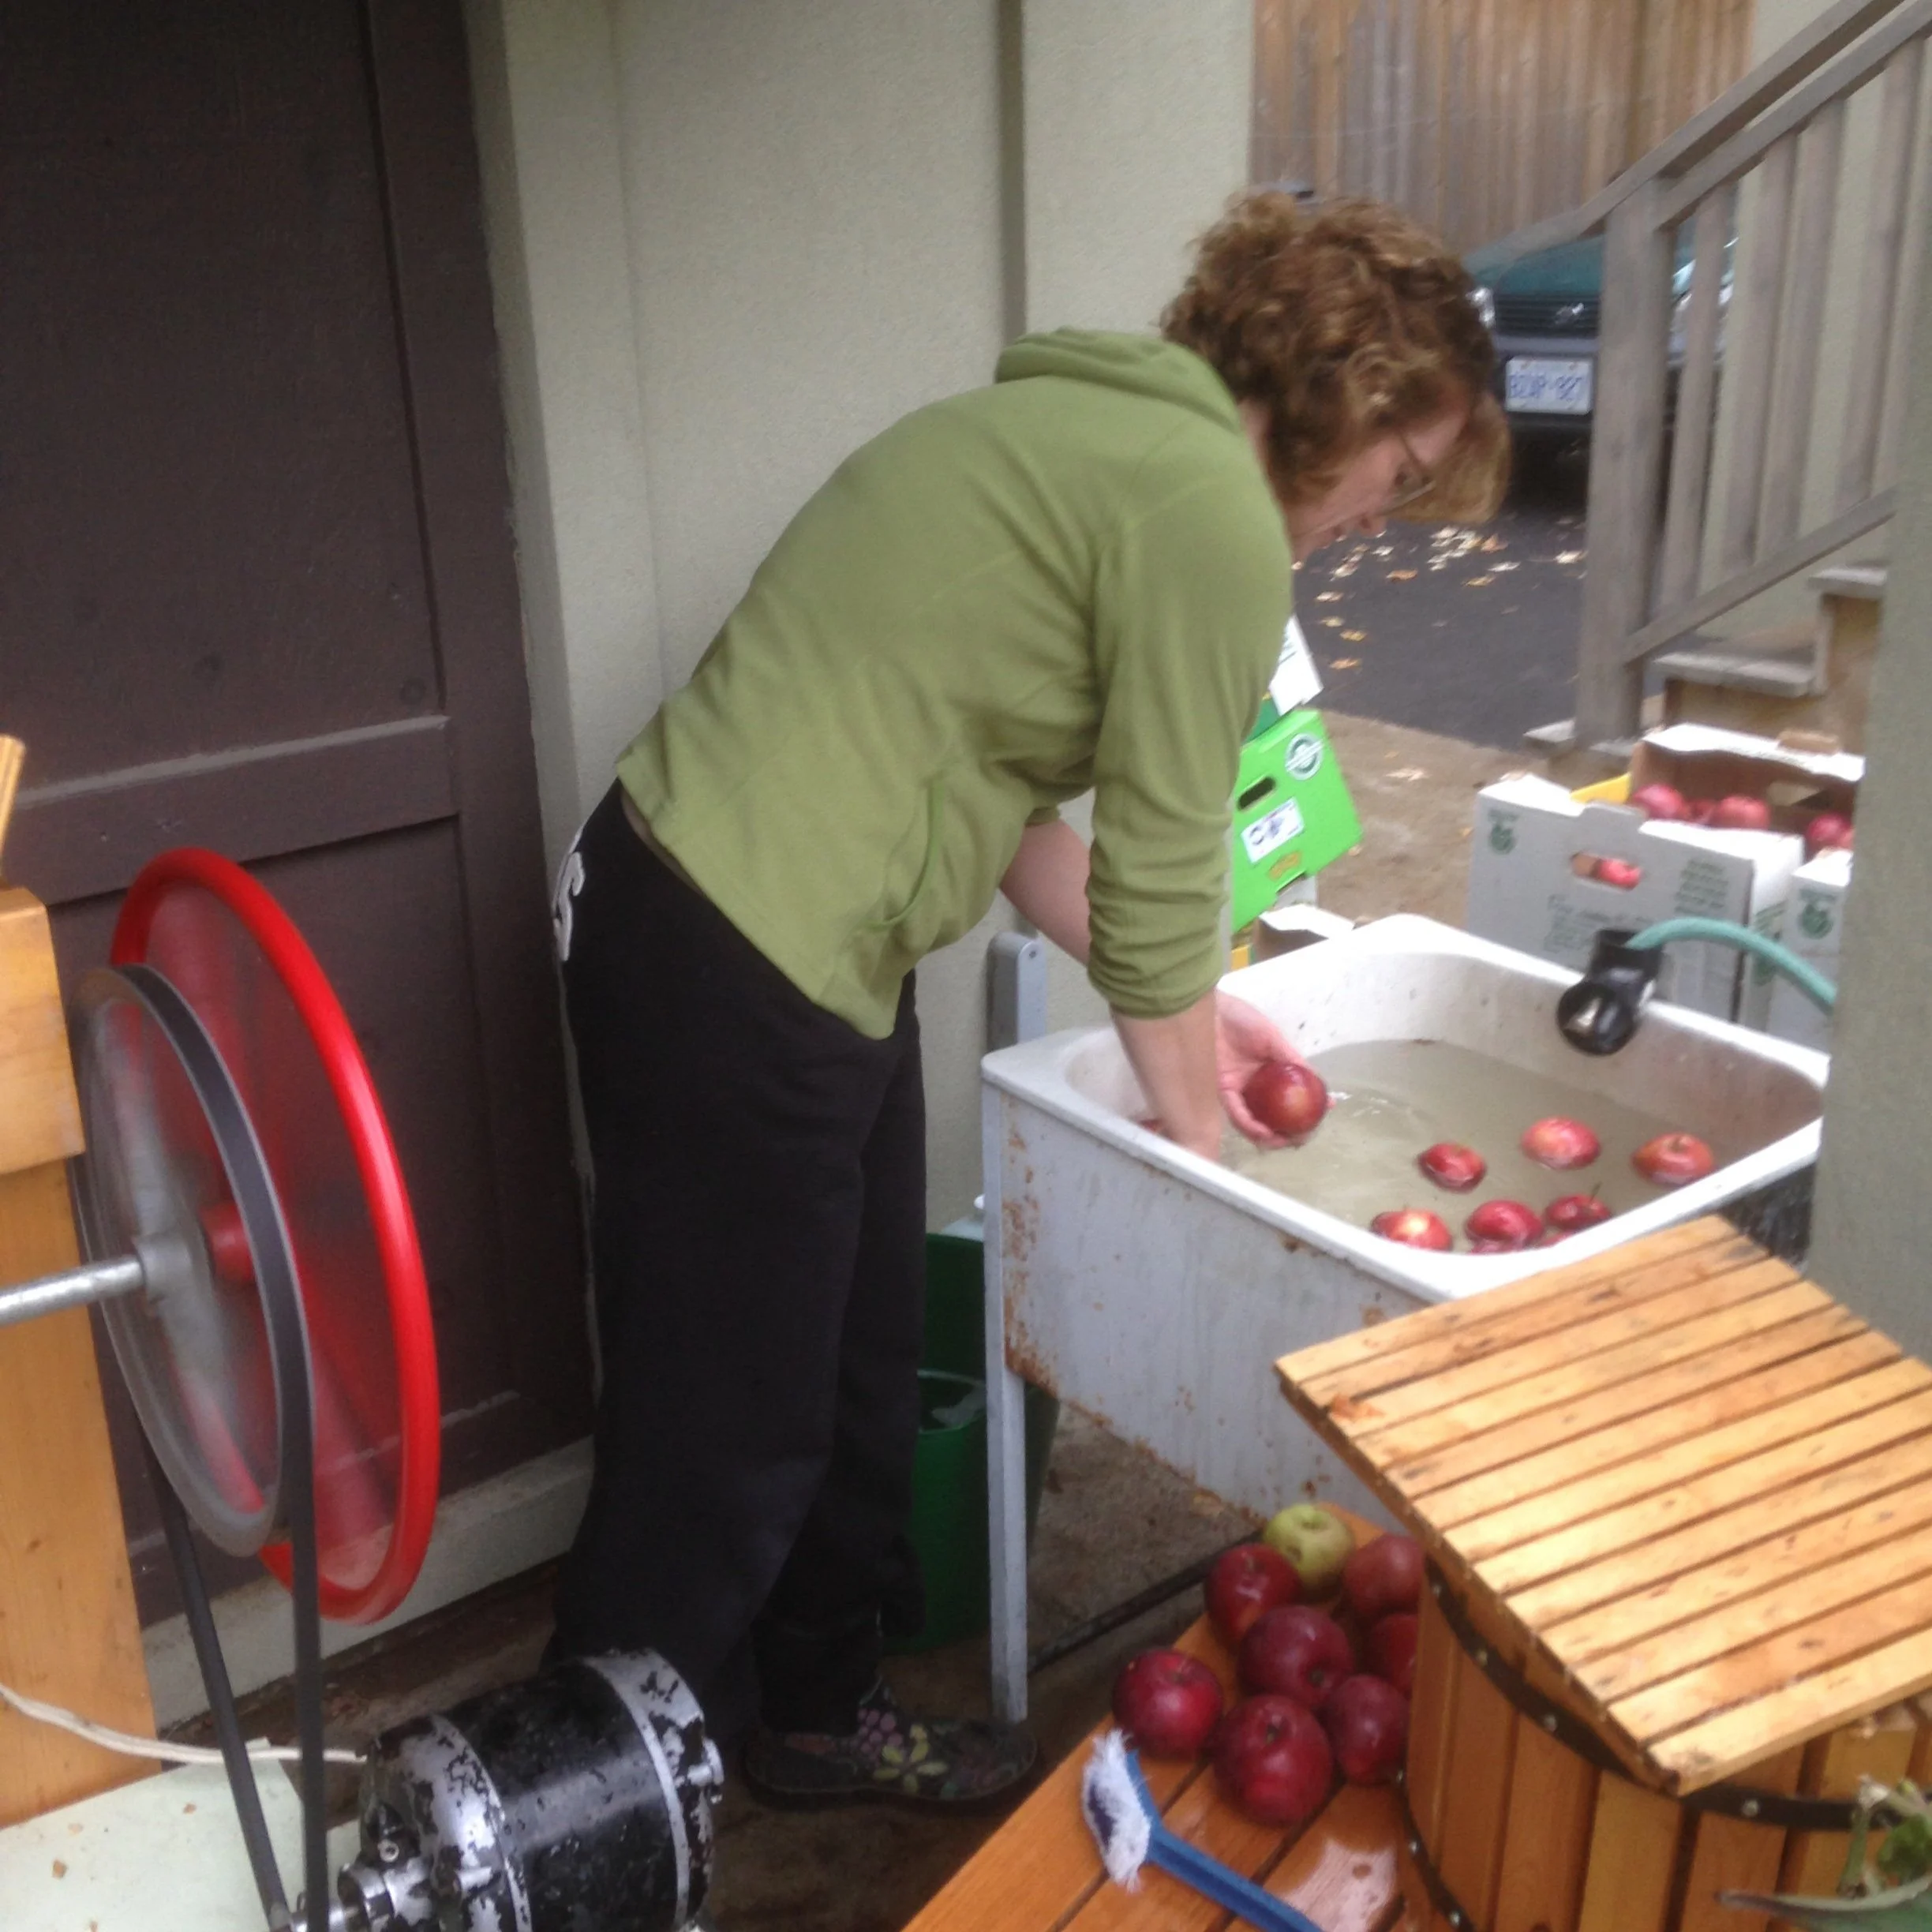
My wife Shelley rinsing apples for pressing into cider.
Some years October presents summer-like weather, and the drowsy yellowjackets hang out with us, intoxicated by the smell of the apples; other years, there are flurries, so we dress warmly.
Cidering 2.0
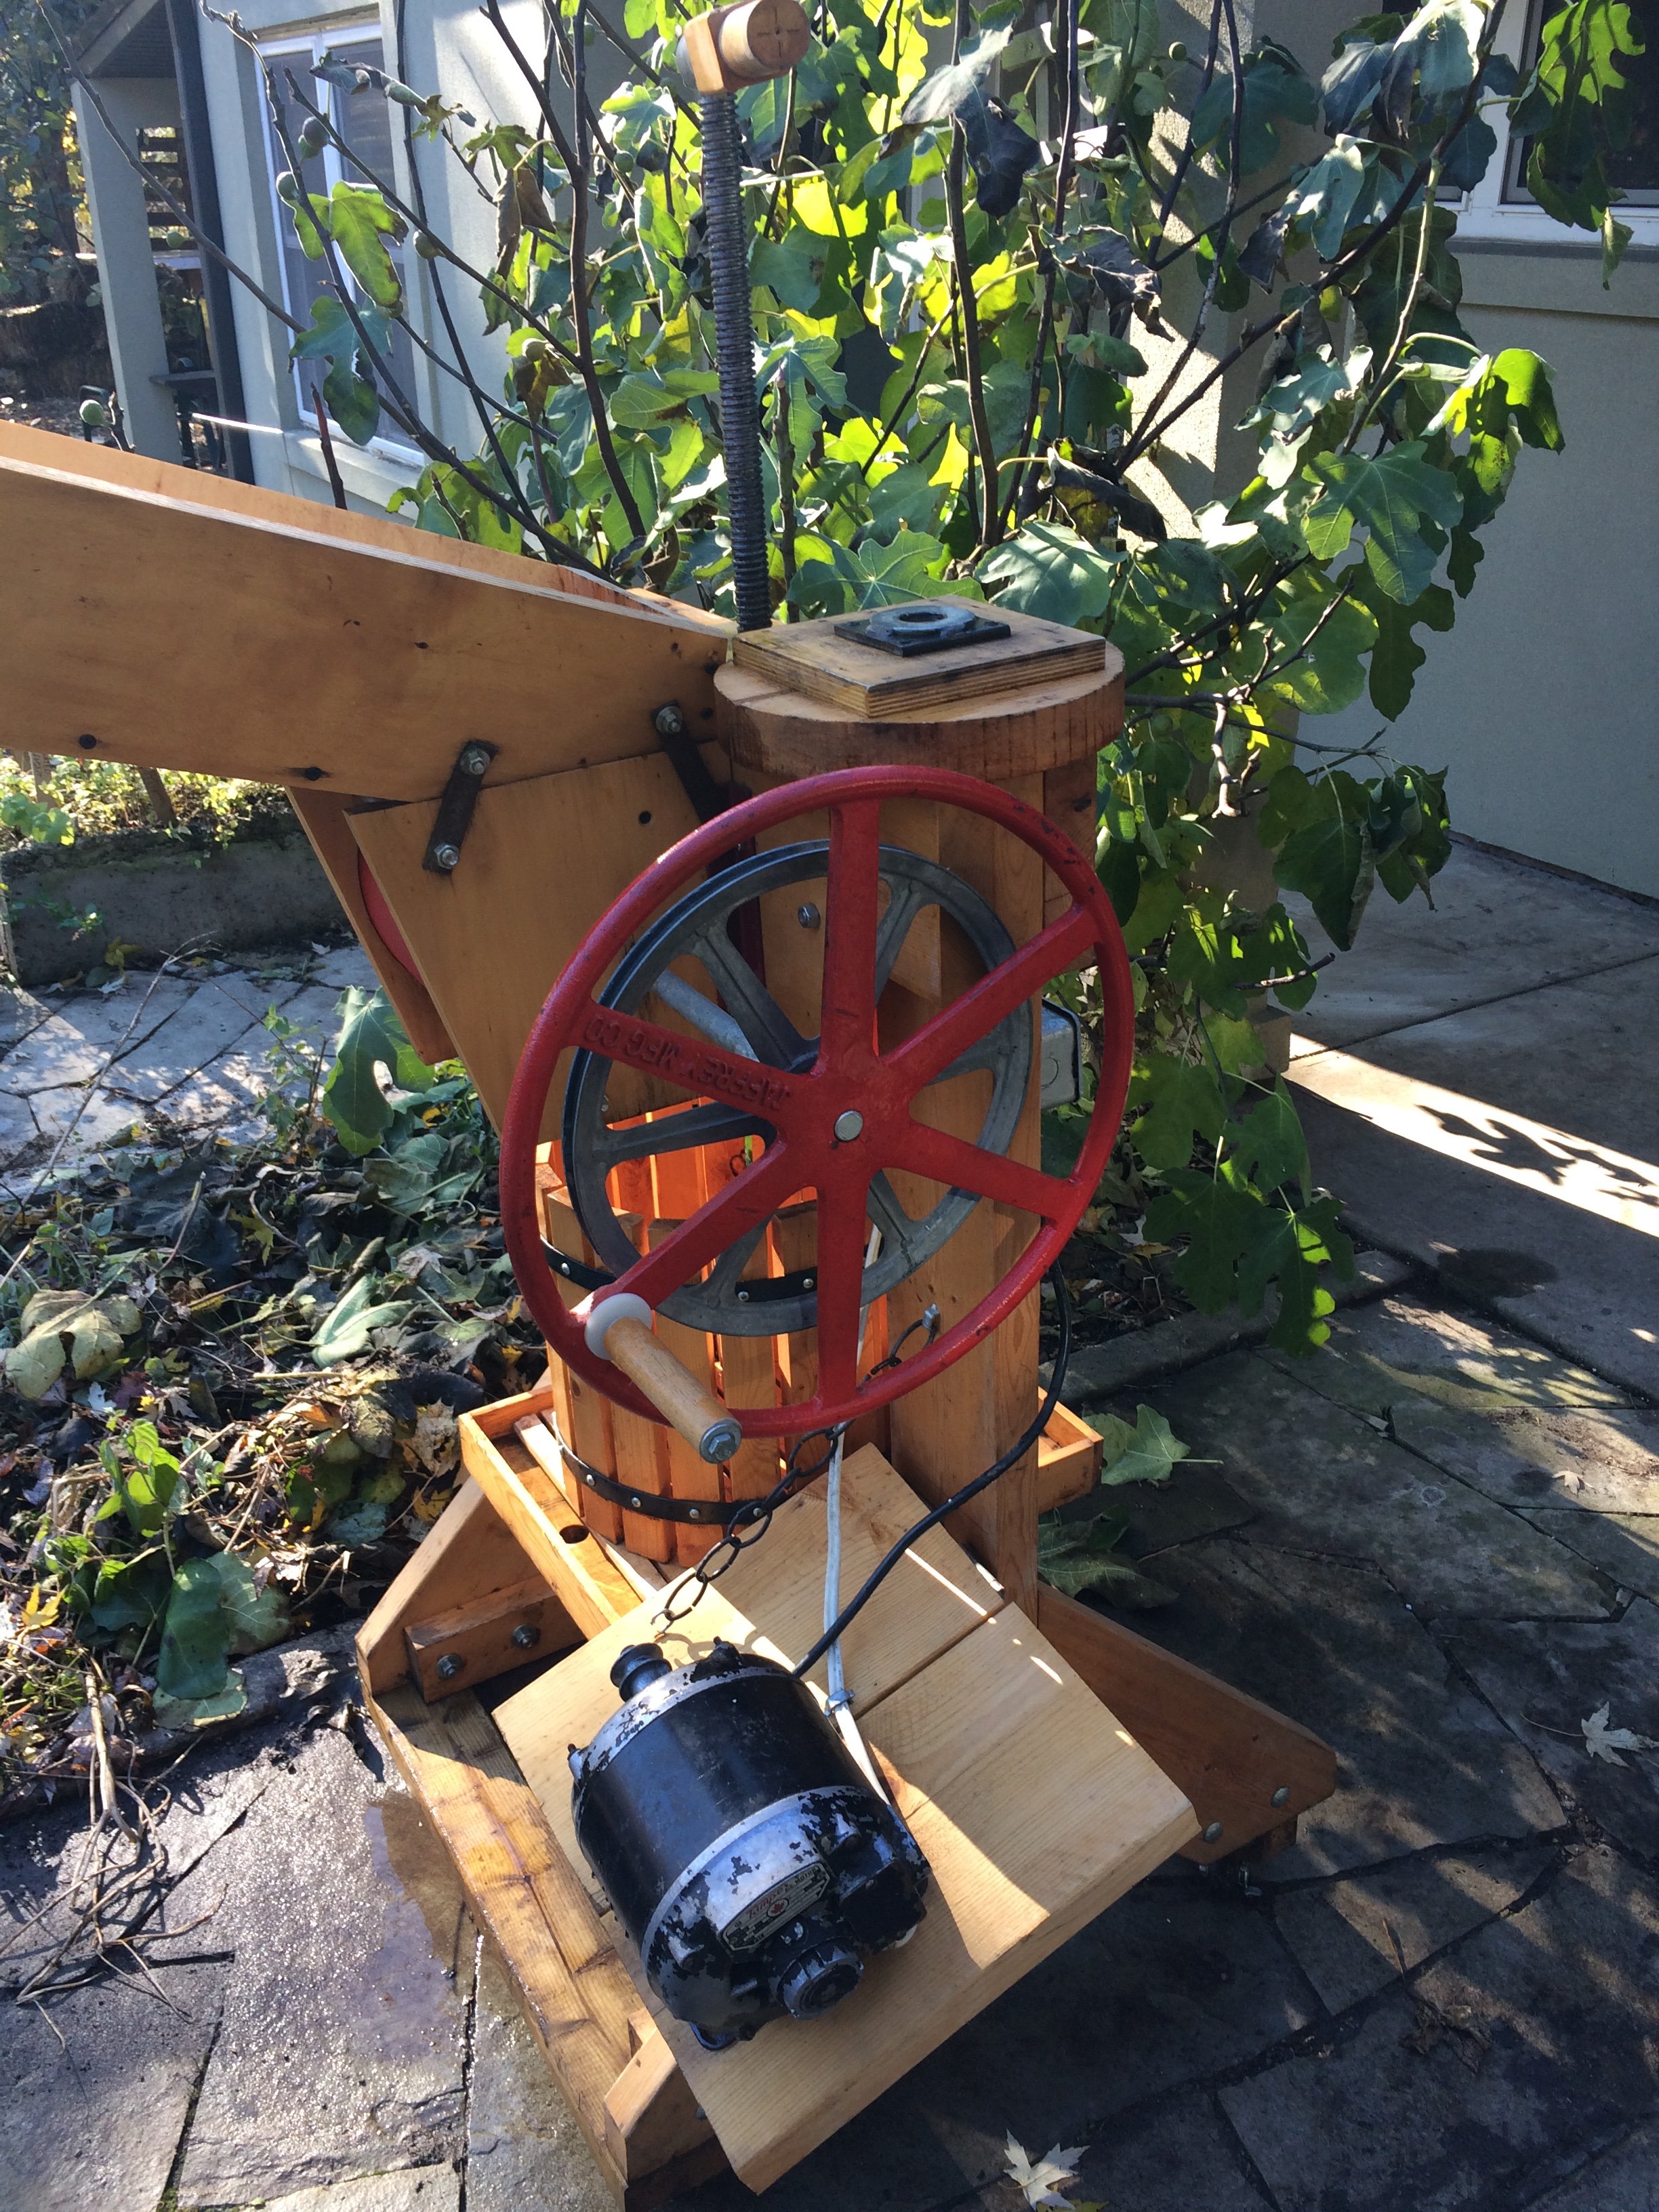
Hand-grinding apples is fun at first, but less so after a dozen bushels! My mechanical aptitude is marginal, but I knew it was possible to install a small electric motor on the grinder. Lucky for me, my friend Dave took one look at the press and knew what to do.
Some presses, like my Uncle Bill’s, have two tubs. But my press has only one tub to both catch apple from the grinder and press it. That means I can’t press and grind simultaneously.
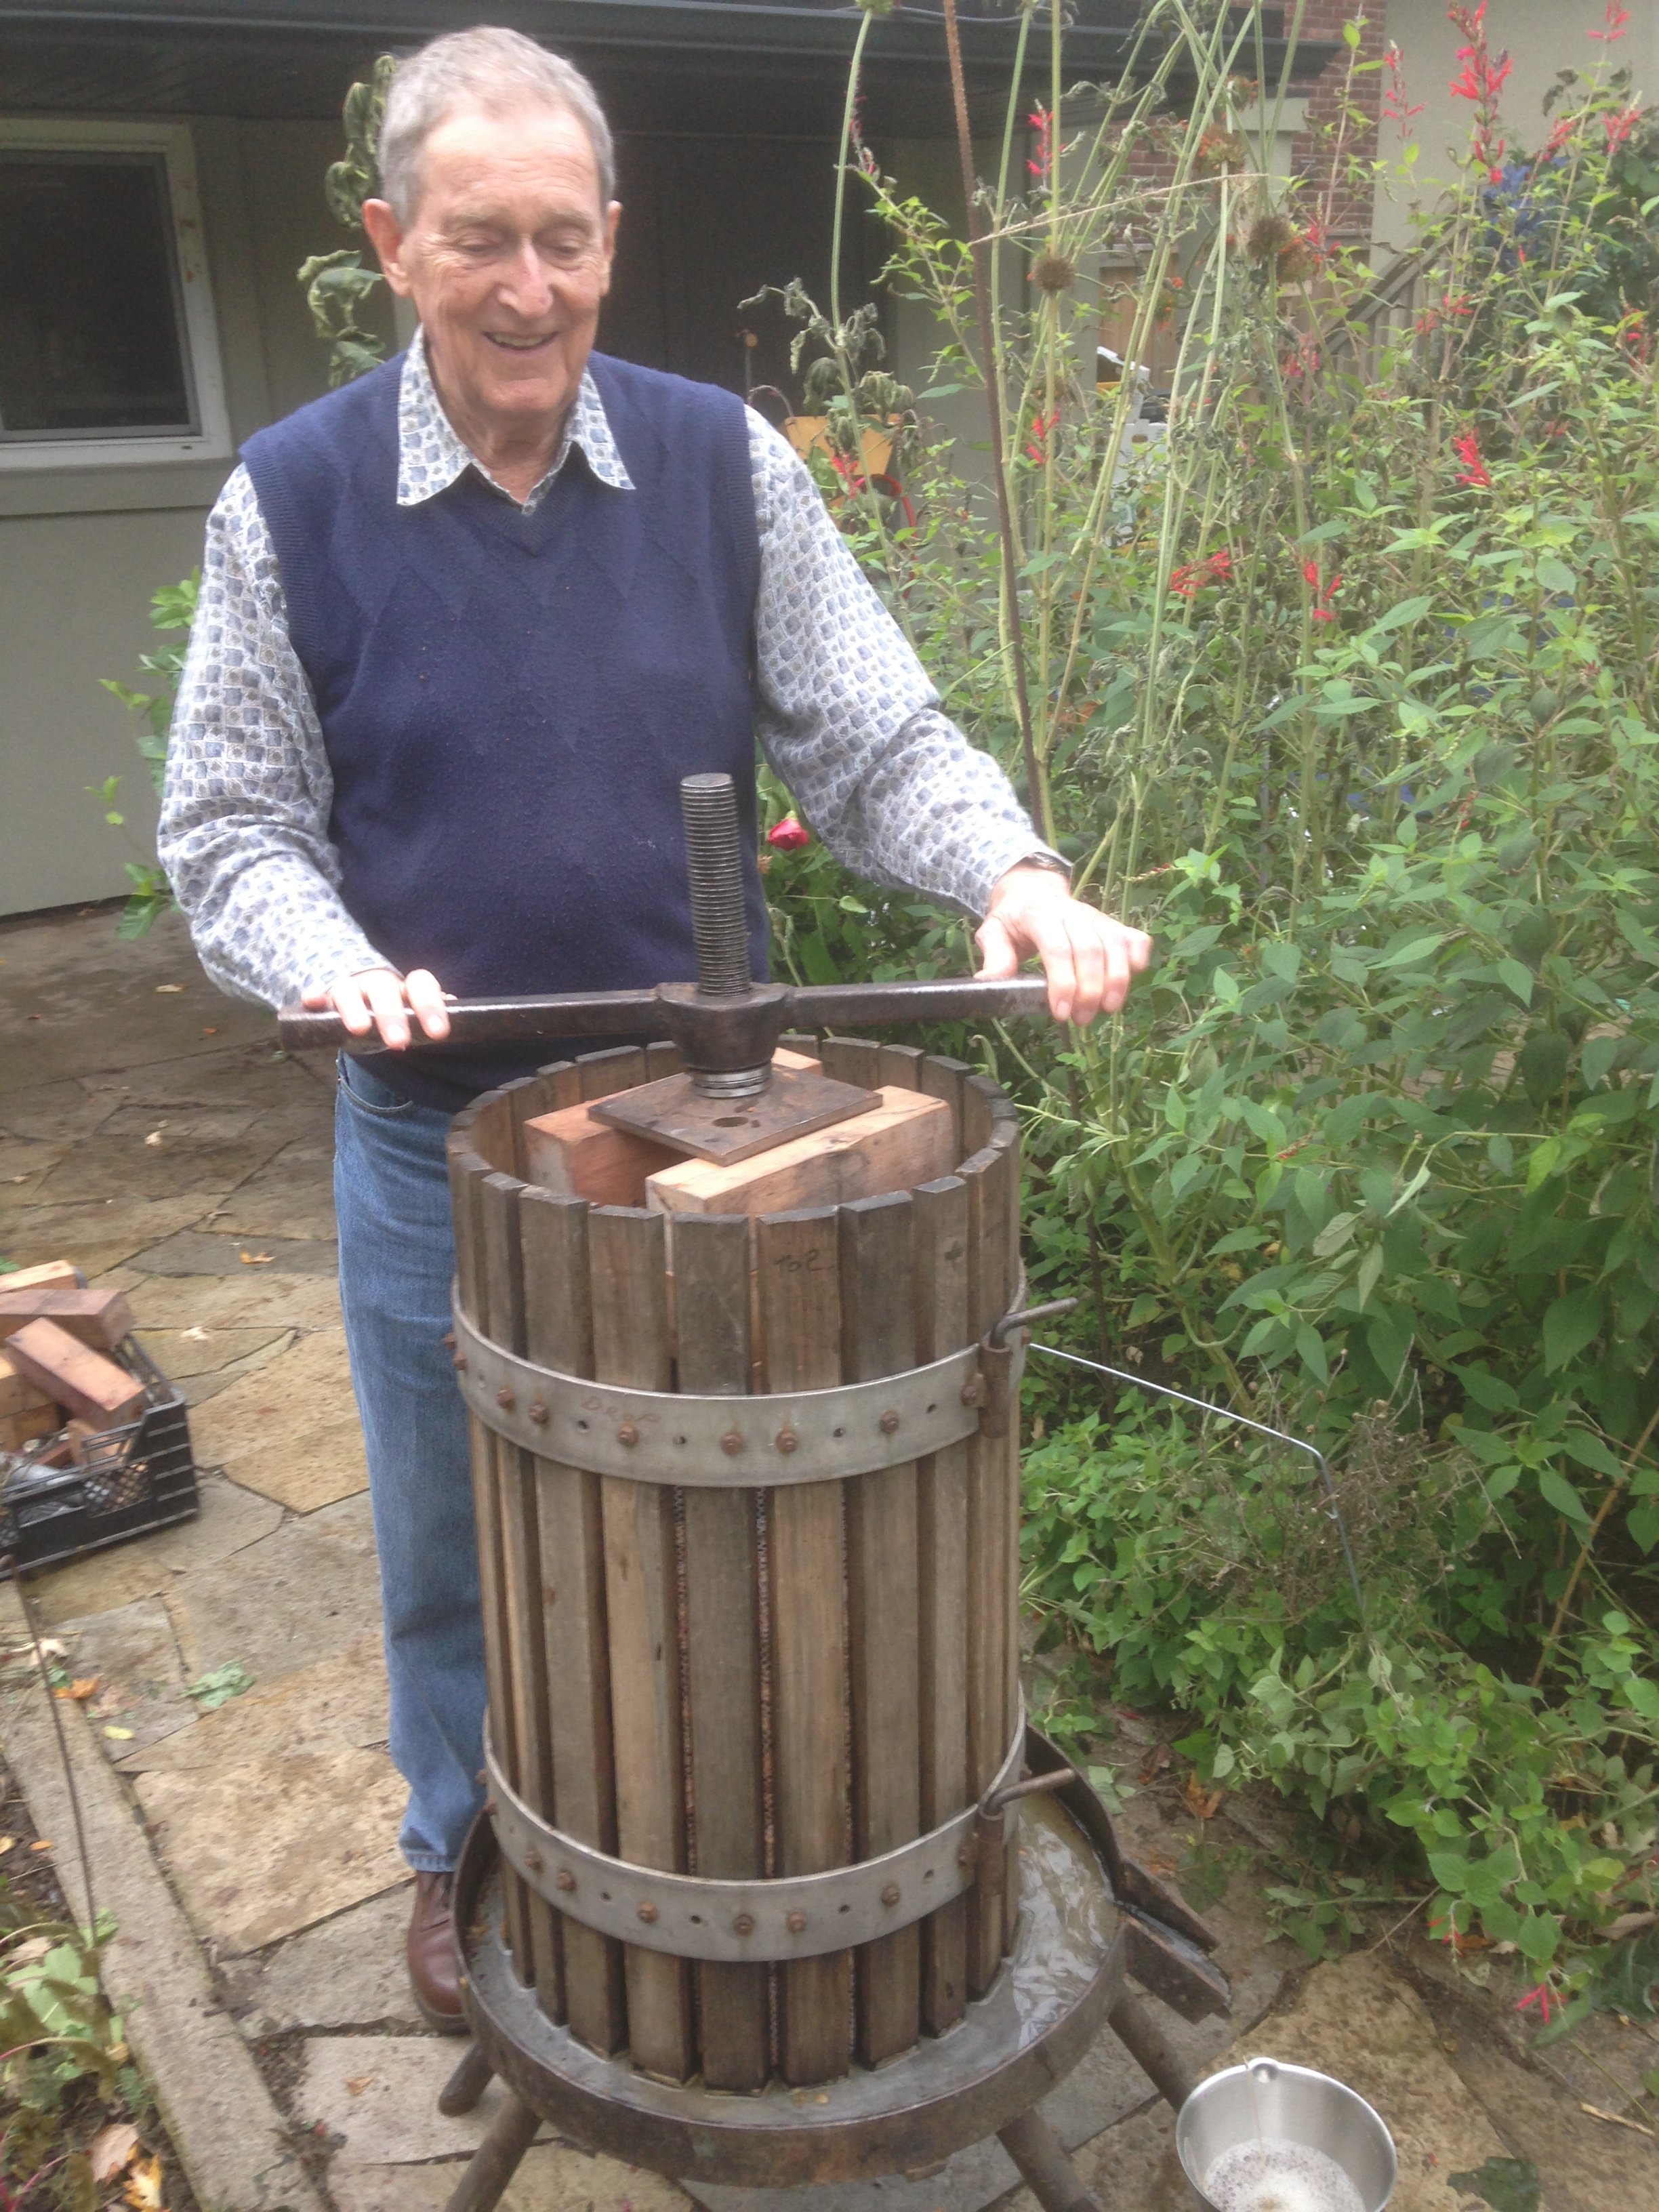
Luckily, my friend Tony gave me an old grape press which solved the bottleneck. Now I can grind the apples on my original unit while I press cider on Tony’s grape press. Not only is the tub on his press much bigger than mine, but the screw press has better compression, so I can squeeze out more cider.
Cider vs. Cider
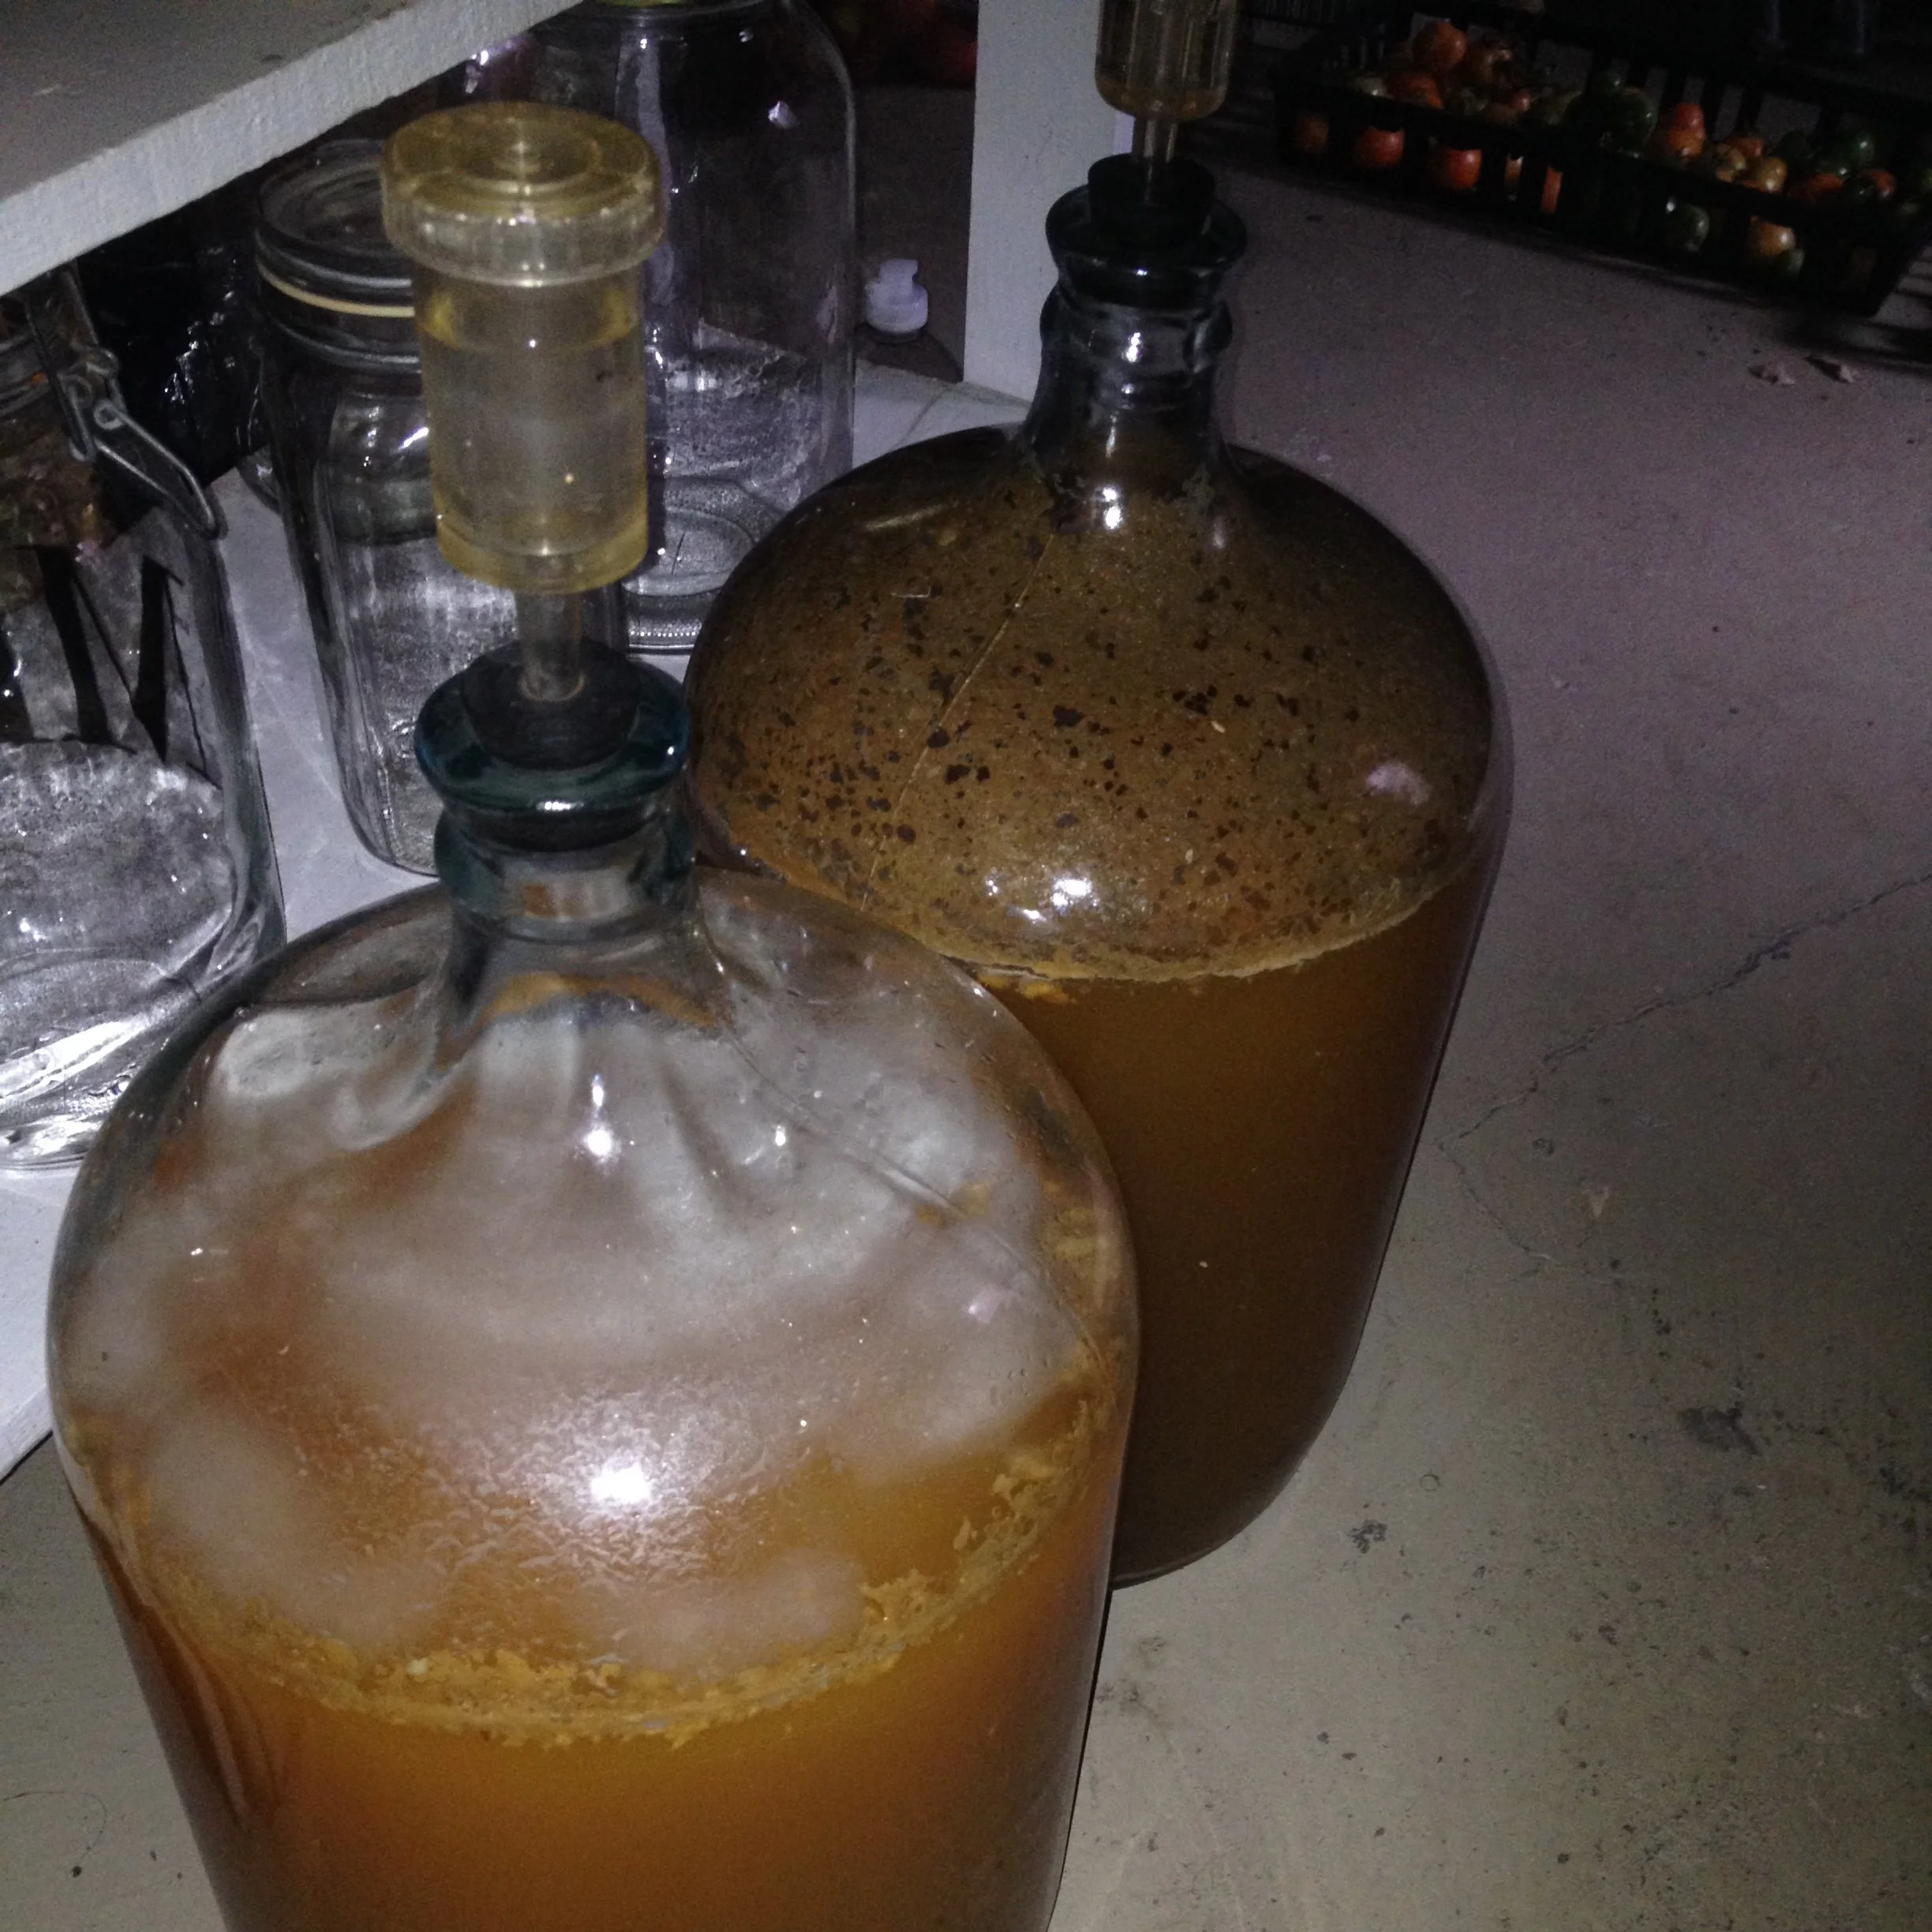
The word “cider” confuses: It makes some people think of sweet, fresh-pressed juice (sweet cider), while others think of its more potent fermented cousin (hard cider).
Making hard cider is another reason for a get-together. My friends Dave and Rob have collaborated with me for a few batches.
Fermenting carboys of cider fill the basement with a delicious smell. We’ve tried the all-natural approach, letting naturally occurring yeasts on the apples drive the fermentation. The result tasted a bit like … socks. Champagne yeast gives us better results. Batches not fit for drinking are useful in the kitchen (see my Cider-Making Tips below).
Cider-Making Tips
APPLE PRESS. I’ve never seen them for sale in stores, but you can find both new and used presses online. Be warned: they are not cheap. But I’d say they offer better long-term value than a new large-screen TV.
APPLE SHOPPING. There’s no need for blemish-free apples. Go to roadside stands or orchards and look for “C” (sometimes called “cee”) grade apples, which are misshapen, blemished, or smaller or larger than retailers want. Some varieties are juicier than others: ‘Macintosh,’ for example, is quite juicy, while ‘Russets’ are more dry and mealy (but they can be very sweet!). Some varieties are sweet, some are tart, some are aromatic—and some are astringent. For a more complex flavour, especially if you’re fermenting it, try to use a blend. One year I saw a couple of pecks of crabapples for sale so added them to the apples I was grinding for a carboy of hard cider. Crabapples often have more tannins, which can be a nice addition. Another year, my friend Dave picked the crabapples growing in the schoolyard.
STORING CIDER. Refrigerate fresh cider. It will last 1 to 2 weeks in the fridge before it begins to ferment. For freezing, milk cartons and plastic juice bottles work well. Don’t fill containers to the top because cider expands as it freezes, and you’ll end up with a bunch of little cider volcanoes in your freezer.
CIDER FOR COOKING. I use lots of cider in my cooking. My approach to French onion soup combines consommé, red wine, and apple cider that have simmered all day. Apple-cider baked beans are a big hit with my kids. And I use cider in marinades and glazes.
GROWING APPLES. Growing apples in an urban garden is hit and miss. Some years the old ‘Mutsu’ apple tree in my yard is laden; other years start off well until the squirrels make off with nearly all of the fruit. Without thinning, apples tend to bear fruit in alternate years. I grew espaliered apple trees with some unusual cider apple varieties: some died because of a nearby black walnut tree; and the others, which were coming along nicely, have just been gnawed back to the trunk by a squirrel that used the branches to make a nest. Maybe next year…

Find This Helpful?
Enjoy not being bombarded by annoying ads?
Appreciate the absence of junky affiliate links for products you don’t need?
It’s because we’re reader supported.
If we’ve helped in your food-gardening journey, we’re glad of support. You can high-five us below. Any amount welcome!
Want to Store More of Your Own Food?
25 Storage Crops
Growing crops that store well is one way to store more of your own homegrown food. Here are 25 storage crops for your garden.
Interested in Growing Fruit?
Find out how to grow fruit at home with these articles.
Or take the Fruit Masterclass to find out about easy-to-grow fruit and landscaping with fruit.
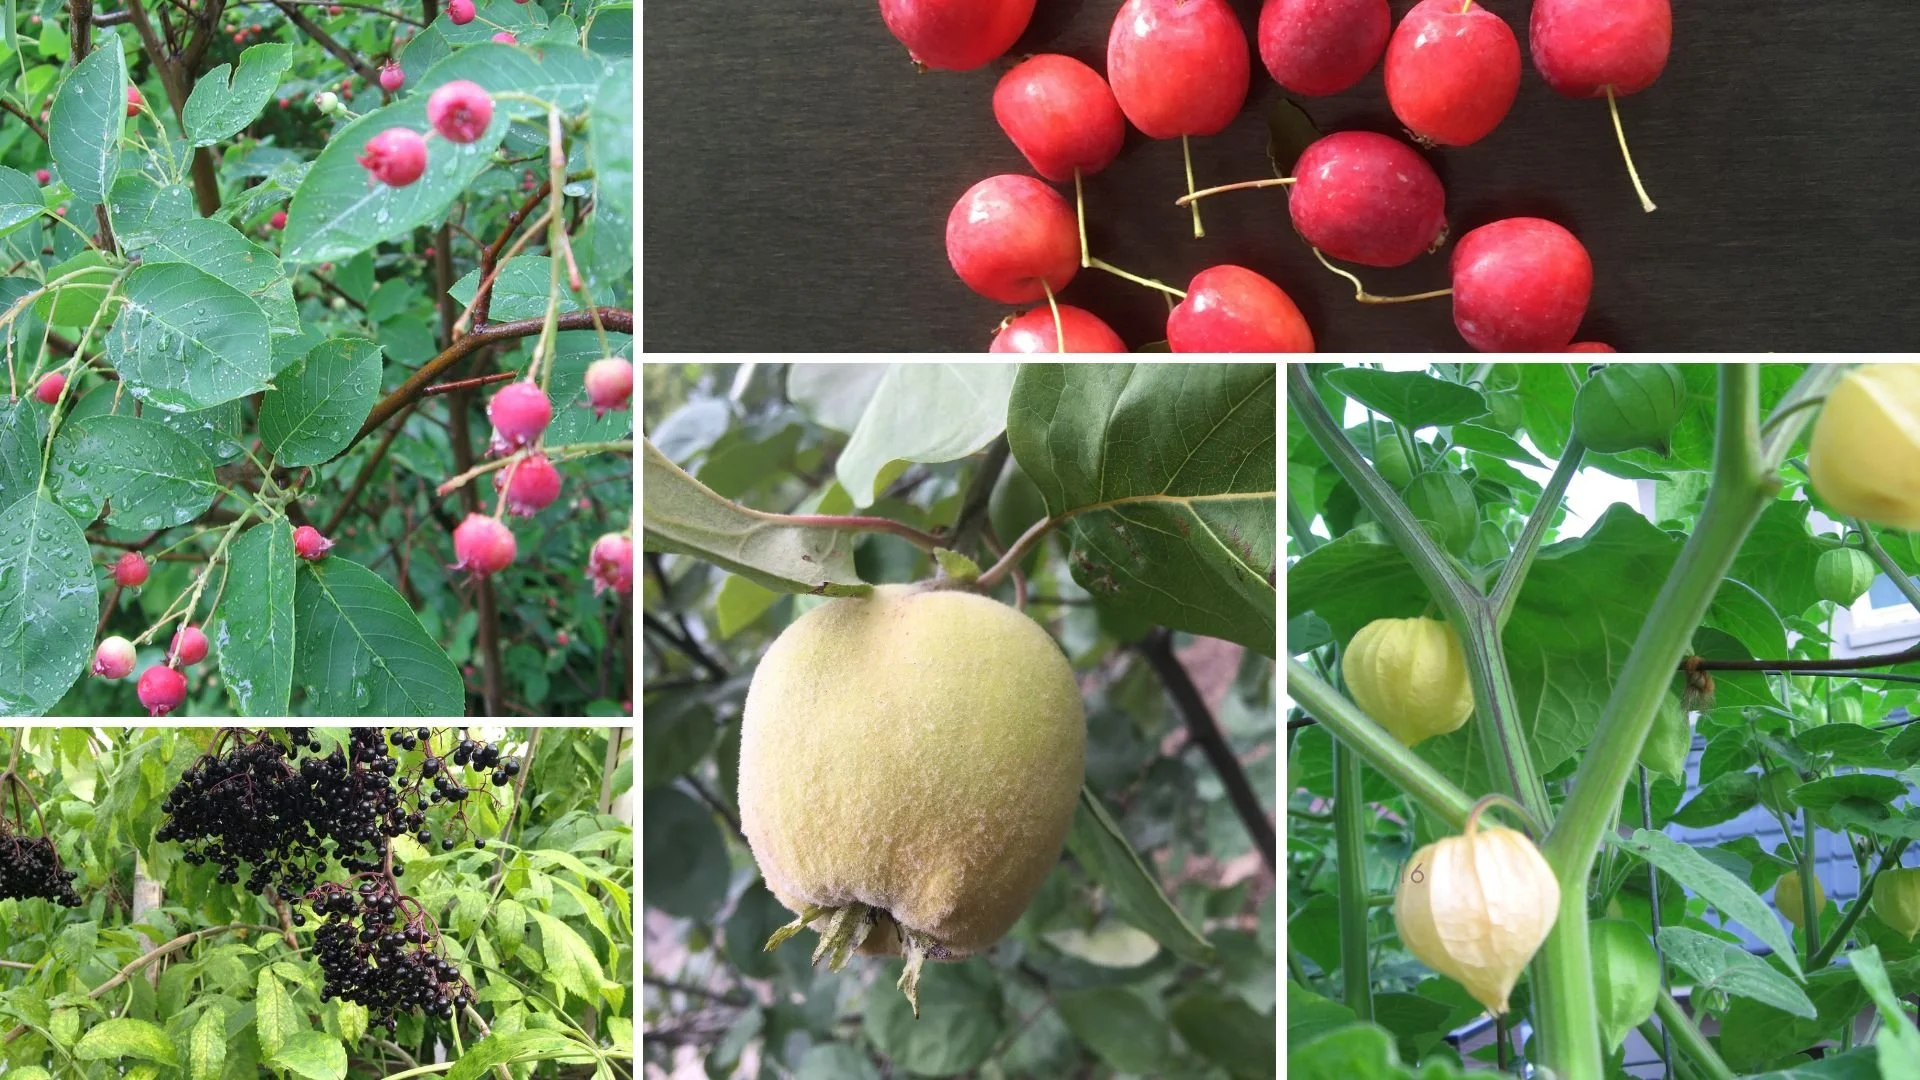
Landscape with Fruit
That’s easy to grow in a home garden!
Guide to Making the Best Borsch
Recipe for the best borsch, just like Mom made! Here are my 2 must-have ingredients, and tips on making a great stock for your homemade borsch.
By Steven Biggs
How to Make the Best Borsch
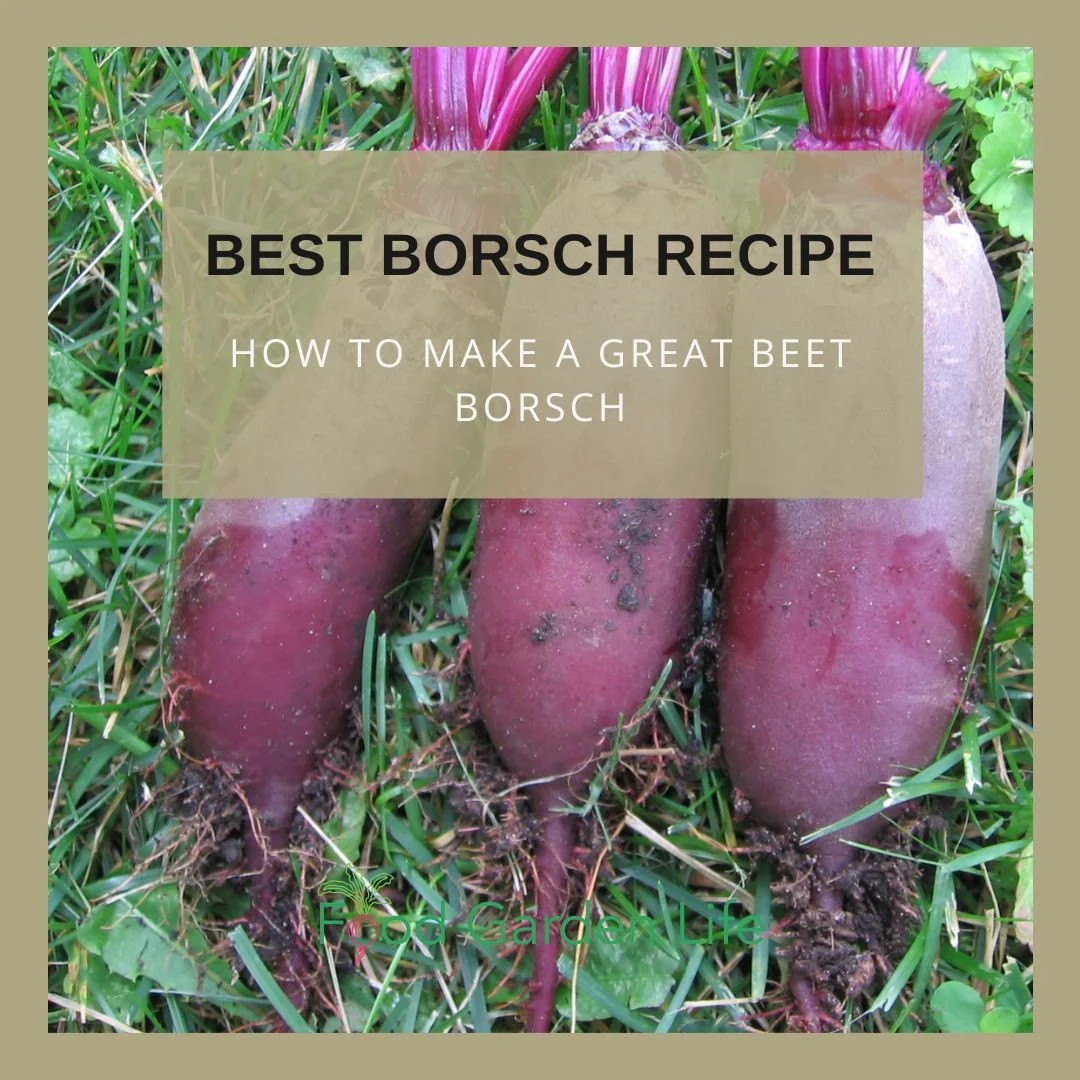
When Mom served her homemade borsch we’d empty the pot. It was rich, filling, tangy – and always topped with a dollop of sour cream or “smetana.”
Her borsch was different every time, because she used what she had in the kitchen, and in the garden or cold cupboard.
But it always had beets.
Garden-to-Table Cooking…in Winter
I think about borsch as I plan my vegetable garden because it’s full of vegetables that store well.
Beets, carrots, onions, and garlic all keep well in a cold room or root cellar.
(Mom sometimes used dried lima beans, another food that stores well.)
Borsch Backstory
There are many variations on borsch.
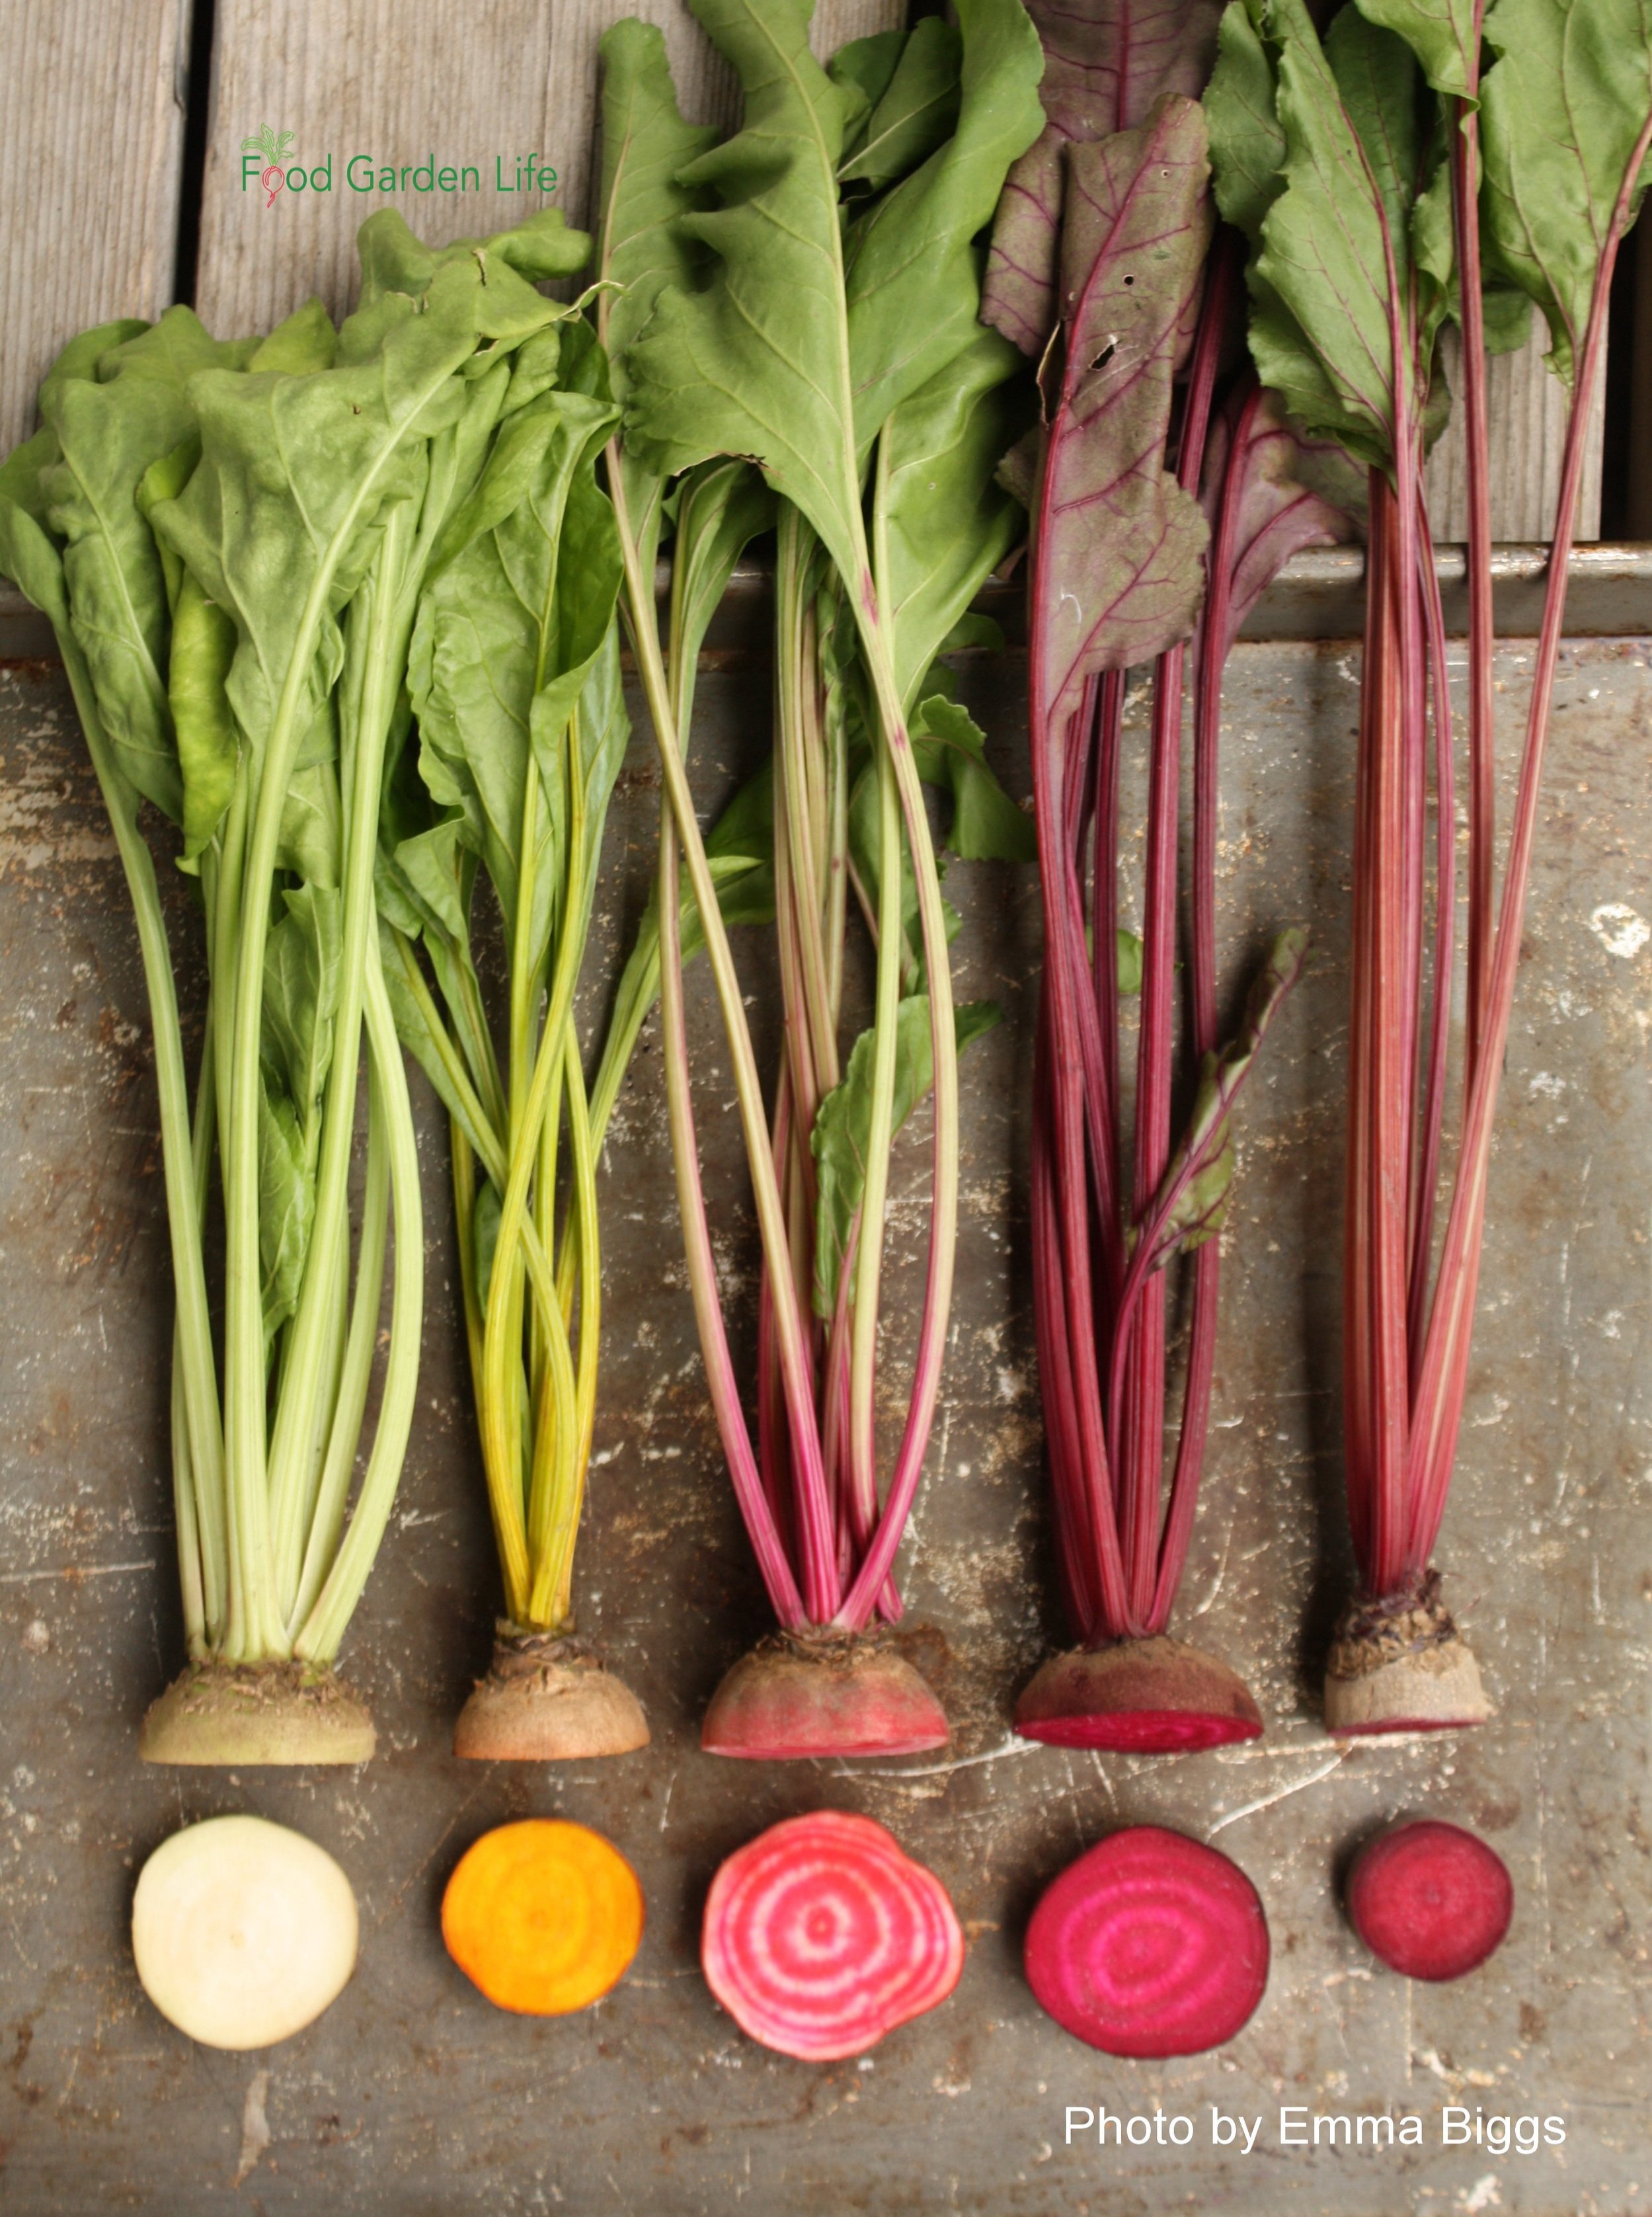
Make the best borsch! Most recipes use red beets, but if you’re growing yellow or white beets, you can use these too (but the final colour of your borsch will be different.
Some are thicker and stew-like; some more soup-like. Some are tarter; some are sweeter.
It’s eaten hot or cold.
There are summer and winter styles, depending on what’s in the garden.
It’s not just the ingredients and cooking styles that vary: So does the spelling of the name. You might come across borscht, borsch, bortsch, borstch, borshtch, borsh, or borshch.
That’s because it’s a staple in many Eastern European cultures.
What most variations share is lots of chopped veggies—especially beets. And there’s usually a combination of tangy and sweet.
Depending on the recipe, the tanginess might come from vinegar, sour cream, sauerkraut, kvass (a drink made from fermented grains), or lemon juice.
The Stock for Making Borsch
Mom’s borsch was decidedly full of meat. The stock depended on what she had on hand.
I simmer a ham bone or smoked pork hock for the better part of a day to get a rich stock.
You can also make a great borsch using vegetable stock. (See the recipe below.)
Essential Ingredients
Here are two ingredients that I love in borsch:
Dill
Sour cream
When there’s fresh dill available, I always use it. Through the winter, I use chopped, frozen dill saved during the summer.
Sometimes I also add dill seed—which is like little nuggets of dill flavour. Use dry dill seed in the winter, and in the summer, try fresh dill seed.
Sometimes a dollop of sour cream is served atop a bowl of borsch. I like that…but I also like to mix a bit into the borsch when I’m almost done cooking to give a tangy, creamy finish.
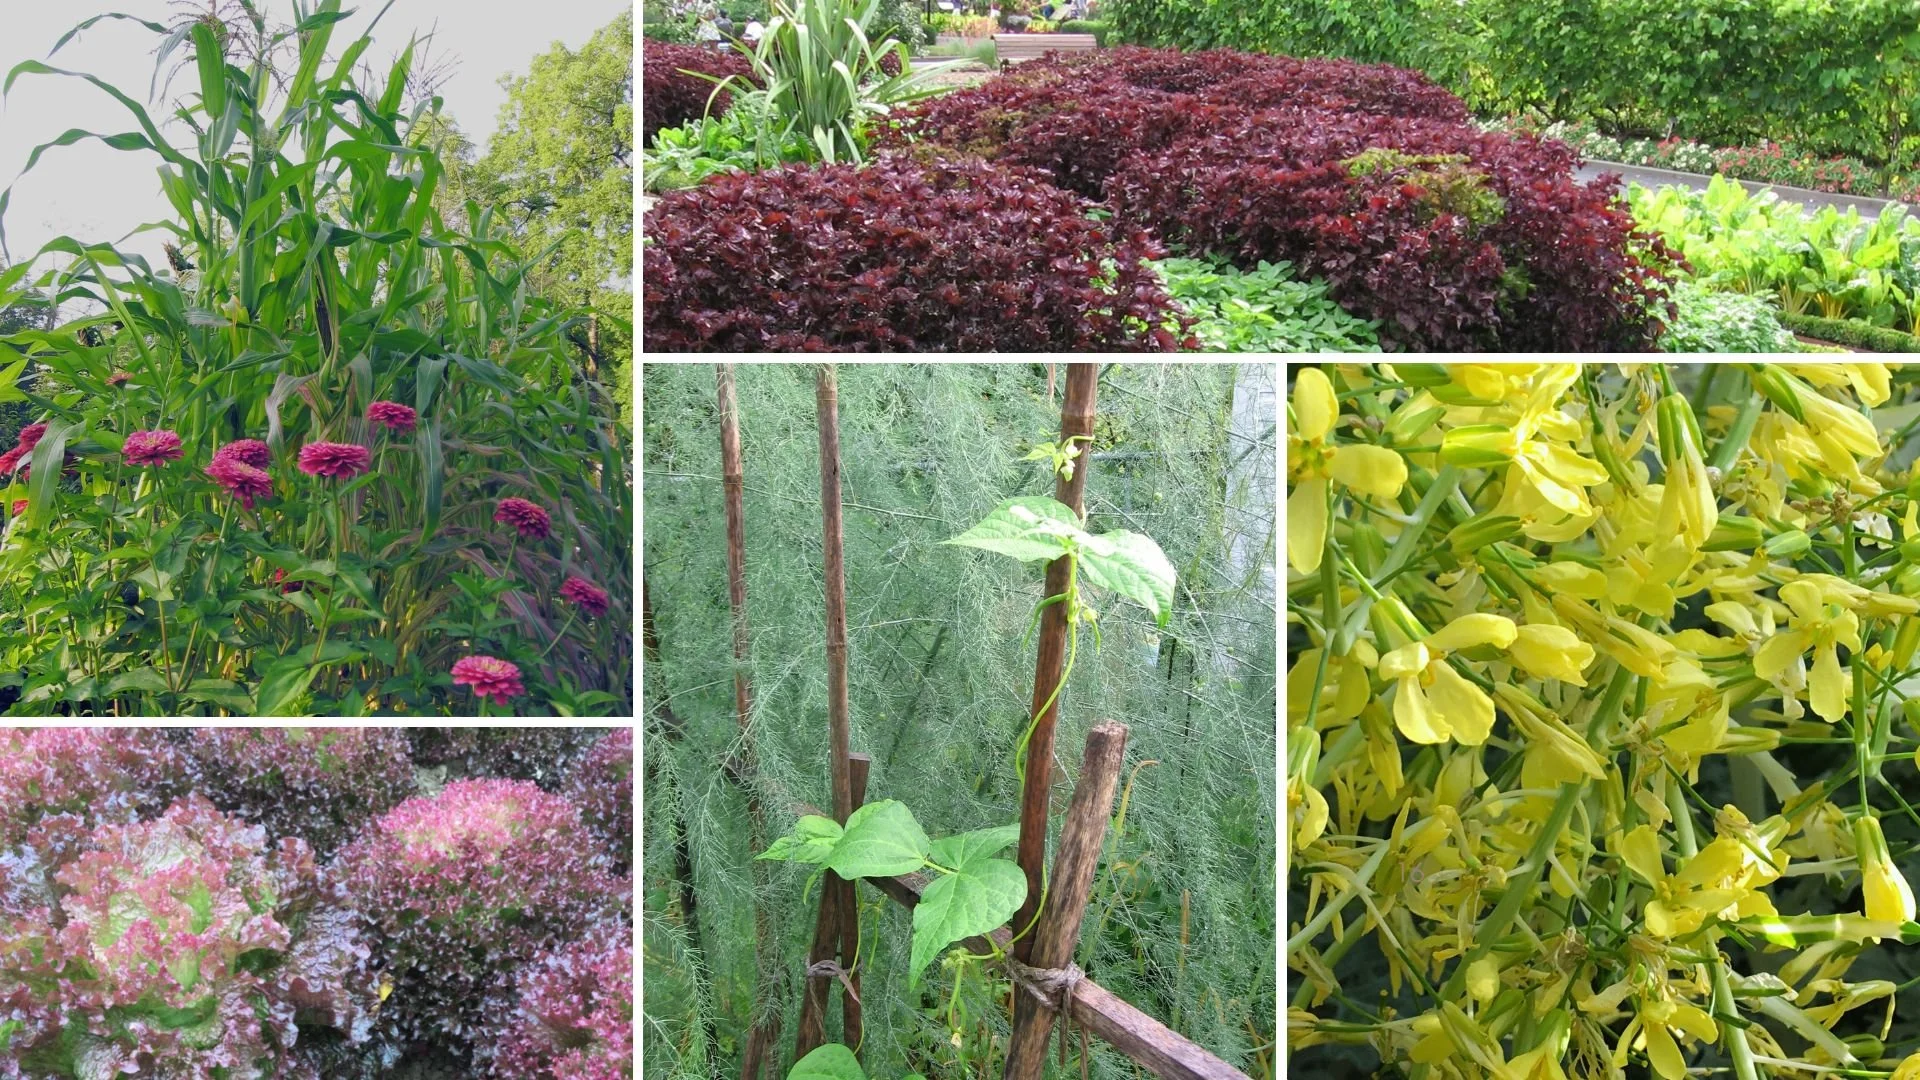
Create Your Own Unique Edible Landscape
That fits for your yard, and your style!

Pin this post!
Top Borsch-Making Tip
During cooking, you lose colour contrast as the ingredients in your pot of borsch all take on the red colour of the beets.
So create contrast in texture by chopping the different vegetables into different sizes and shapes. (I like long, thin strips of cabbage!)
Then, when it’s serving time, the dollop of sour cream on top is like a white island in the sea of red. If you top this combination with fresh chopped dill, you’ve added two more colours to your ruby-coloured soup.
Serving Ideas
Toasted, buttered rye bread is all that you need with a bowl of borsch. I love a caraway rye bread (which has caraway seeds in it.)
Storage
I make soup by the pot. I keep enough in the fridge for the week, and then freeze some to use at a later time.
Beet Borsch Recipe
Ingredients:
The Veggies
Remember, chop the different veggies in different ways to create texture. The quantities below are approximate. Vary it up depending on what you have on hand, what you like, and the size of the veggies.
6 medium beets, peeled and chopped
¼ - ½ head of cabbage, shredded
2 onions, chopped
2 large carrots, chopped
1 stalk celery, chopped
1 leek, chopped
1 potato, peeled and chopped
3 cloves garlic, crushed
Liquid
4 cups water
1 tbsp. vinegar
2 cups stock (I make mine from a ham bone or smoked pork hock, but you can use chicken or vegetable stock, depending on your preference)
Herbs and Spices
3 tbsp. chopped dill
½ tsp. caraway seeds
Salt and pepper to taste
Thickener
½ cup sour cream or kefir
1 tbsp. flour
Optional
½ cup dry lima beans
Or, if you have shelling beans in the garden, substitute these for the lima beans
I like to chop up and add the beet leaves and stems to the soup too
Directions
Soak lima beans in water overnight
Combine chopped vegetables and liquids in a large pot
Cook over medium heat
Add vinegar as soup begins to boil
Simmer for a couple of hours, until the vegetables are soft
Add dill, caraway seeds, pepper, and salt
Simmer for a few more minutes
Final but important step: The flour thickens the borsch just a little bit. Mix flour into the sour cream or kefir, and then stir this mixture into the soup and simmer for a couple of minutes. (Don’t add the flour straight to the boiling soup or you might get little dumplings!)
Find This Helpful?
Enjoy not being bombarded by annoying ads?
Appreciate the absence of junky affiliate links for products you don’t need?
It’s because we’re reader supported.
If we’ve helped in your food-gardening journey, we’re glad of support. You can high-five us below. Any amount welcome!
Gardening Courses
More Food and Recipe Ideas
Simple Home Preserving
Simple ways you can preserve your garden harvest without canning.
By Steven Biggs
Simple Preserving Techniques

Preserving often brings to mind piping hot mason jars, bags of sugar, the stinging aroma of boiled vinegar, and a hot, steamy kitchen—all hallmarks of canning.
But there are many other preserving strategies that are simpler and less energy-intensive.
Sauerkraut is a great example of a simple method of preserving. All it takes is cabbage, salt, and time.
Preventing Spoilage
We preserve food by preventing the growth of spoilage organisms:
These organisms include fungi (e.g. moulds) and bacteria (e.g. botulism), and insects
We prevent their growth with conditions that don’t suit them: acidic, cold, lacking in oxygen, or dry
Sauerkraut
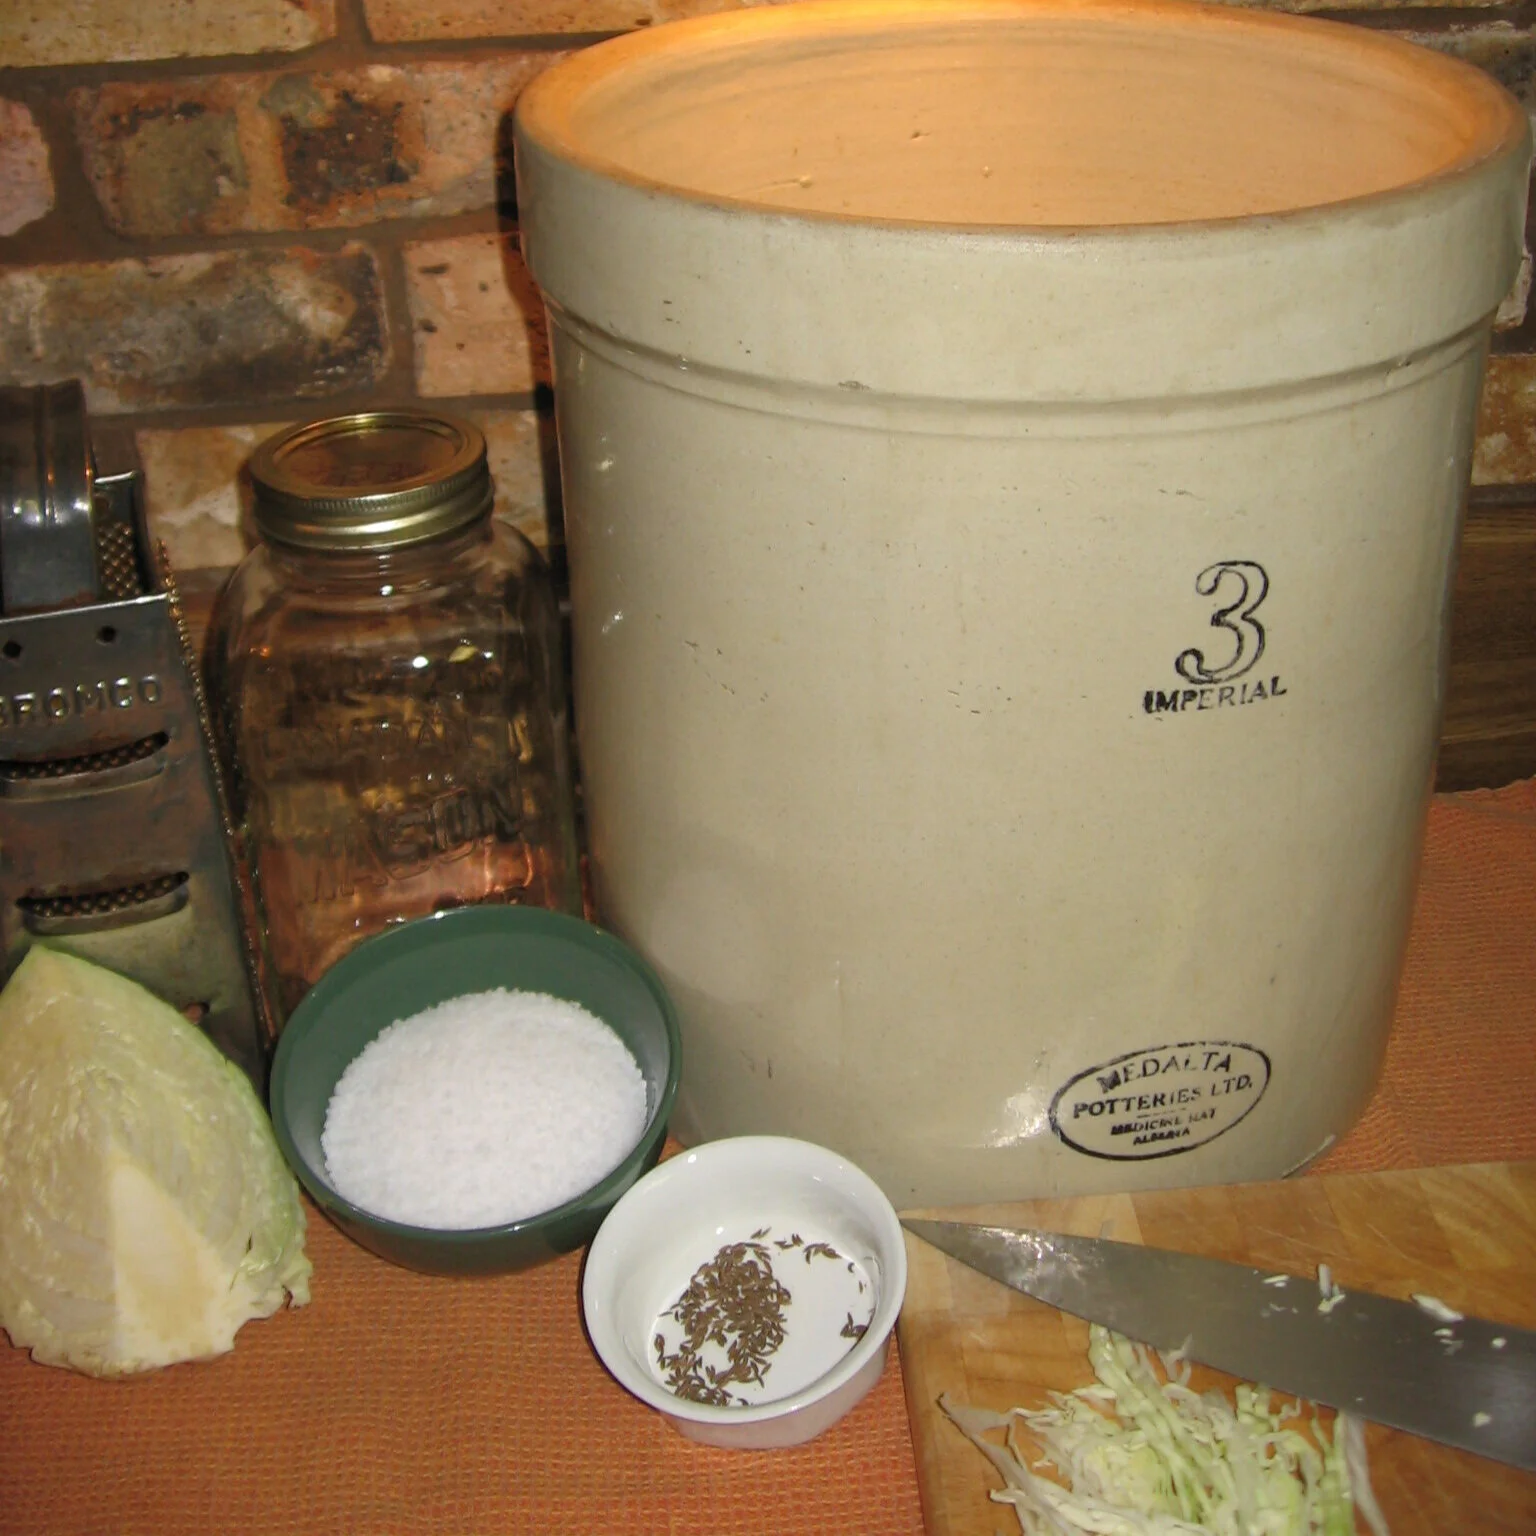
Enjoy your garden harvest year-round by using a few simple preserving methods. Simple is the key word: the simpler it is, the more likely it is to get done.
I was pretty excited the first time I made sauerkraut. No more insipid, store-bought kraut: I wanted the good stuff. With fennel seeds, juniper berries. Maybe even some apple slices. My great aunt Anna later taught me to put a whole head of cabbage near the bottom of the crock, so I could have whole sour cabbage leaves for making cabbage rolls.
You can’t get more tactile in food prep than making sauerkraut. It takes repeated punches to the salted, shredded cabbage until a film of liquid starts to show. The arm motion I find works best is a bit of a punch with a twist.
Once the cabbage is softened and there’s liquid, I add a bit of brine so I have enough liquid to pin down all the shredded cabbage under a weighted plate and have it submerged.
Then it’s time to let it ferment.
The first time I made it I kept the crock in the house. It didn’t win me any favours with my wife, Shelley.
It stank. I remember her saying to a technician at the door, “I’m sorry about the smell, it’s my husband, he’s making sauerkraut.”
Now I make sauerkraut in the garage.
Bugs Too
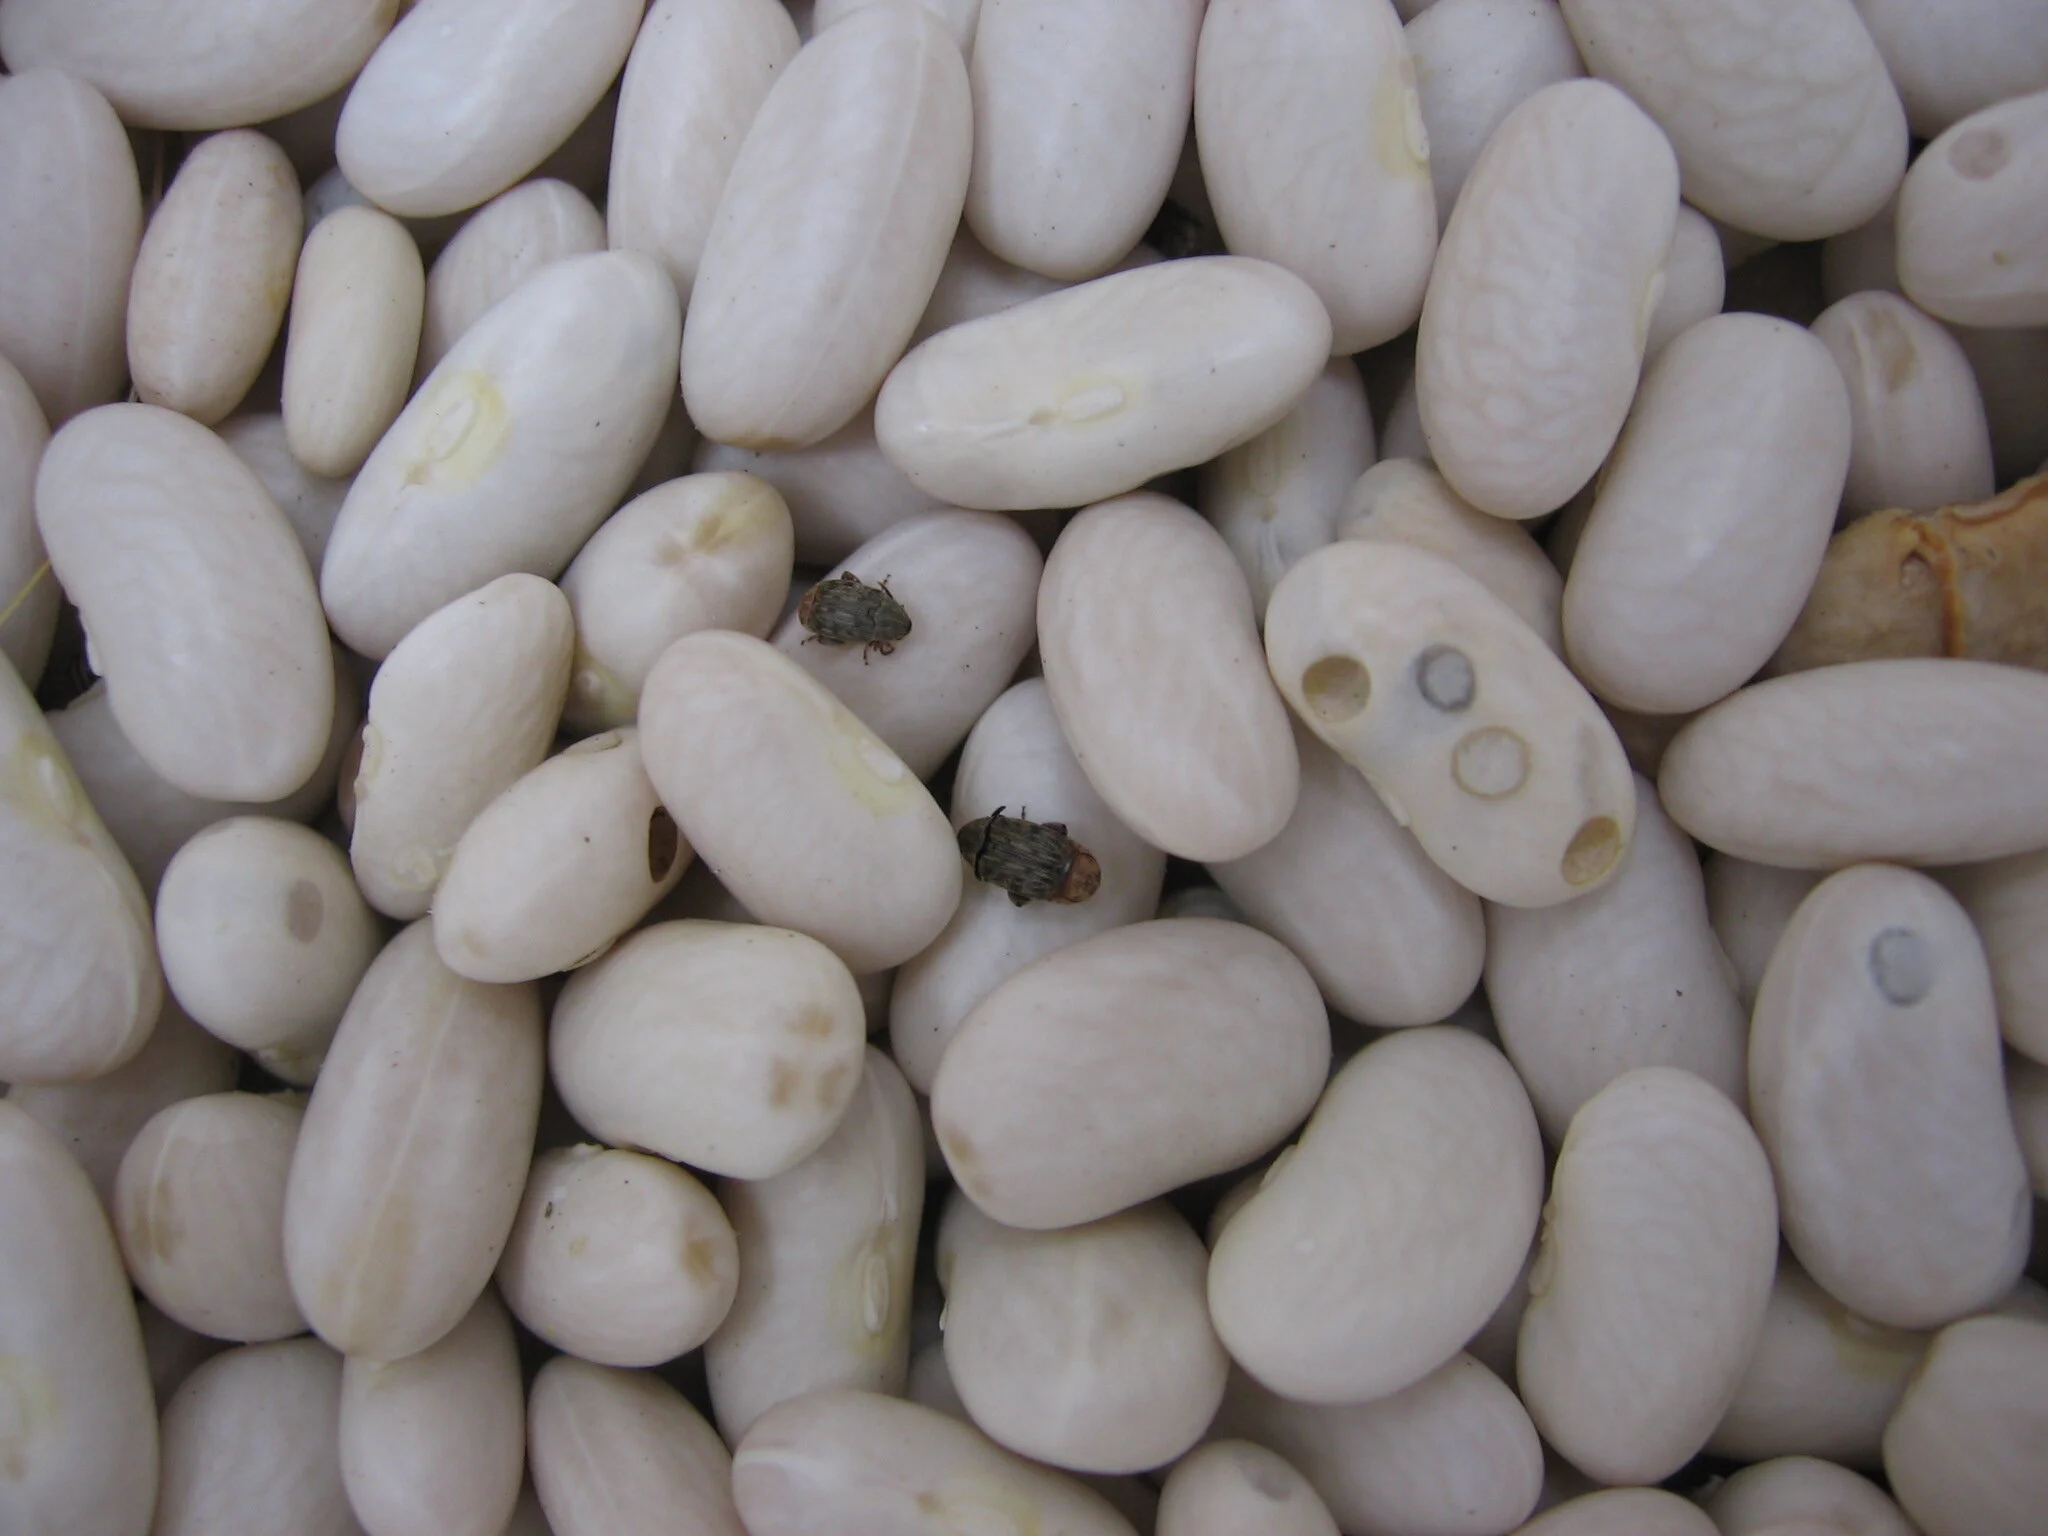
A stint in the oven at low heat, or storing dry beans in the refrigerator is a simple way to deal with bean weevils.
Insects are spoilage organisms too. One year I found lots of scampering weevils drilling holes into my dried beans.
After making sure our stored food is insect-free, the next step is to store it in a sealed container, where insects can’t get to it.
Make sure that there are no hidden travellers or eggs: Even though my dried beans were in a closed jar, they included weevil eggs. If I had used a heat treatment to kill the eggs, I wouldn’t have had a jar full of weevils.
Fermentation

Lactic-acid-fermented dilly garlic cucamelons.
Lactic-acid fermentation is what makes sauerkraut sour. It’s a naturally occurring process during which lactic-acid forming bacteria multiply rapidly, giving off enough lactic acid to preserve the cabbage.
Despite the sour flavour, sauerkraut is made without vinegar.
This same fermentation process can be used for other vegetables too. Brined (fermented) dill pickles taste different from pickles made with vinegar—it’s the lactic acid that makes these pickles tangy.
Like sauerkraut, brined cucumbers undergo a fermentation process that produces acidity. This acidity then prevents the growth of spoilage organisms. Other vegetables such as cucamelons, beets, carrots, beans, and onions can also be fermented.
Other Preserving Techniques
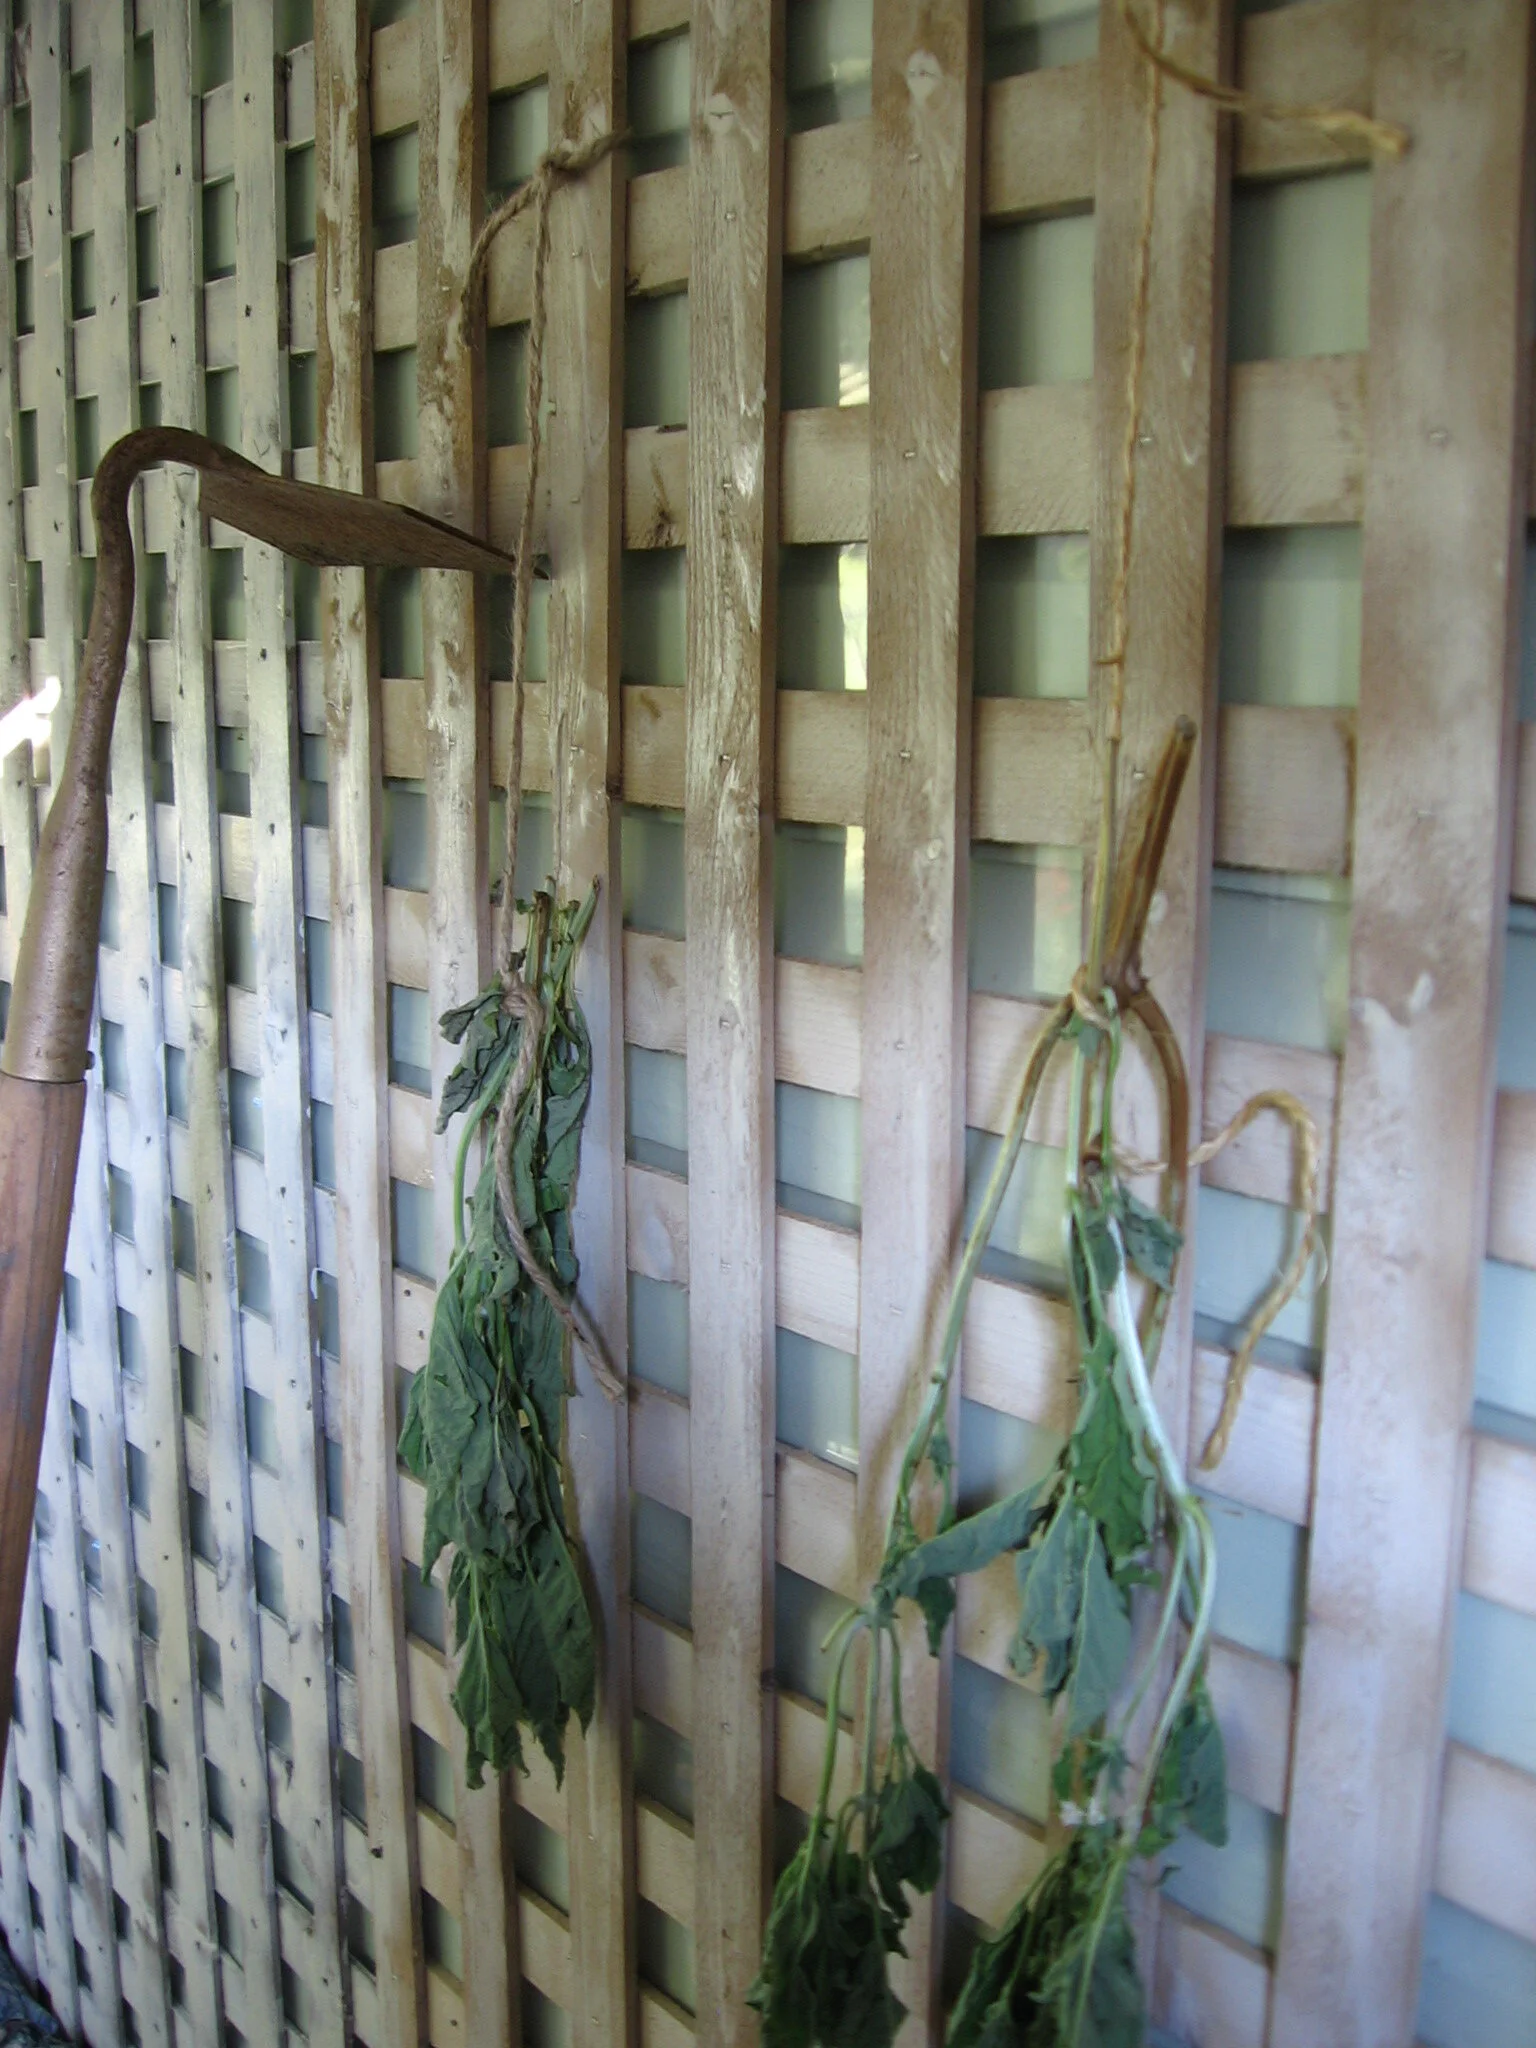
Drying herbs. TIP: If drying herbs in the sunlight, cover them with a paper bag to get dry herbs that aren’t bleached by the sun.
DRYING is a simple preserving technique that works because most spoilage organisms need moisture to grow. While the drying of fleshier produce with a high moisture content might be best done in the oven or a food dryer, other crops dry very easily.
Herbs are one of the easiest things to dry. They hang in bundles from my garage ceiling, while linden flowers and elderberries are spread out on metal pie plates or cookie sheets. The dry bean plants hang by the roots to dry until the fall, when the beans are removed from the shell and stored in jars.
A dedicated drying room or shed isn’t necessary. Try drying herbs in the kitchen window. We’ve had good luck with strings of hot peppers or the wild mushrooms that we dry in the kitchen—we’ve even used the hot dashboard of a car to dry plates of elderberries.
FREEZING doesn’t kill all spoilage organisms, but it puts growth on hold.
My favourite freezing method is a simple technique for herbs. I love dill—and lots of it. In late spring there’s so much in the garden that I have to weed it out from the other crops. Instead of drying it in the sunny shed, where the sunlight causes it to fade to grey, I simply chop it then freeze it in a plastic tub or jar. I have ready-chopped dill all season long. The same technique works well for parsley too.
The Easiest Preserving Technique
What’s the easiest preserving technique? Leave the crop in the garden as long as possible.
Parsley can be retrieved from under the snow
In winter, the few leeks that remain in the garden make a nice stew during a mid-winter melt
Carrots and parsnips can be kept in the garden well after the first frost—in fact, they sweeten up with the cold weather as starches are converted to sugars
Ripe lemons can remain on the tree for months
Here are 25 storage crops you can grow in your garden to store for the winter.
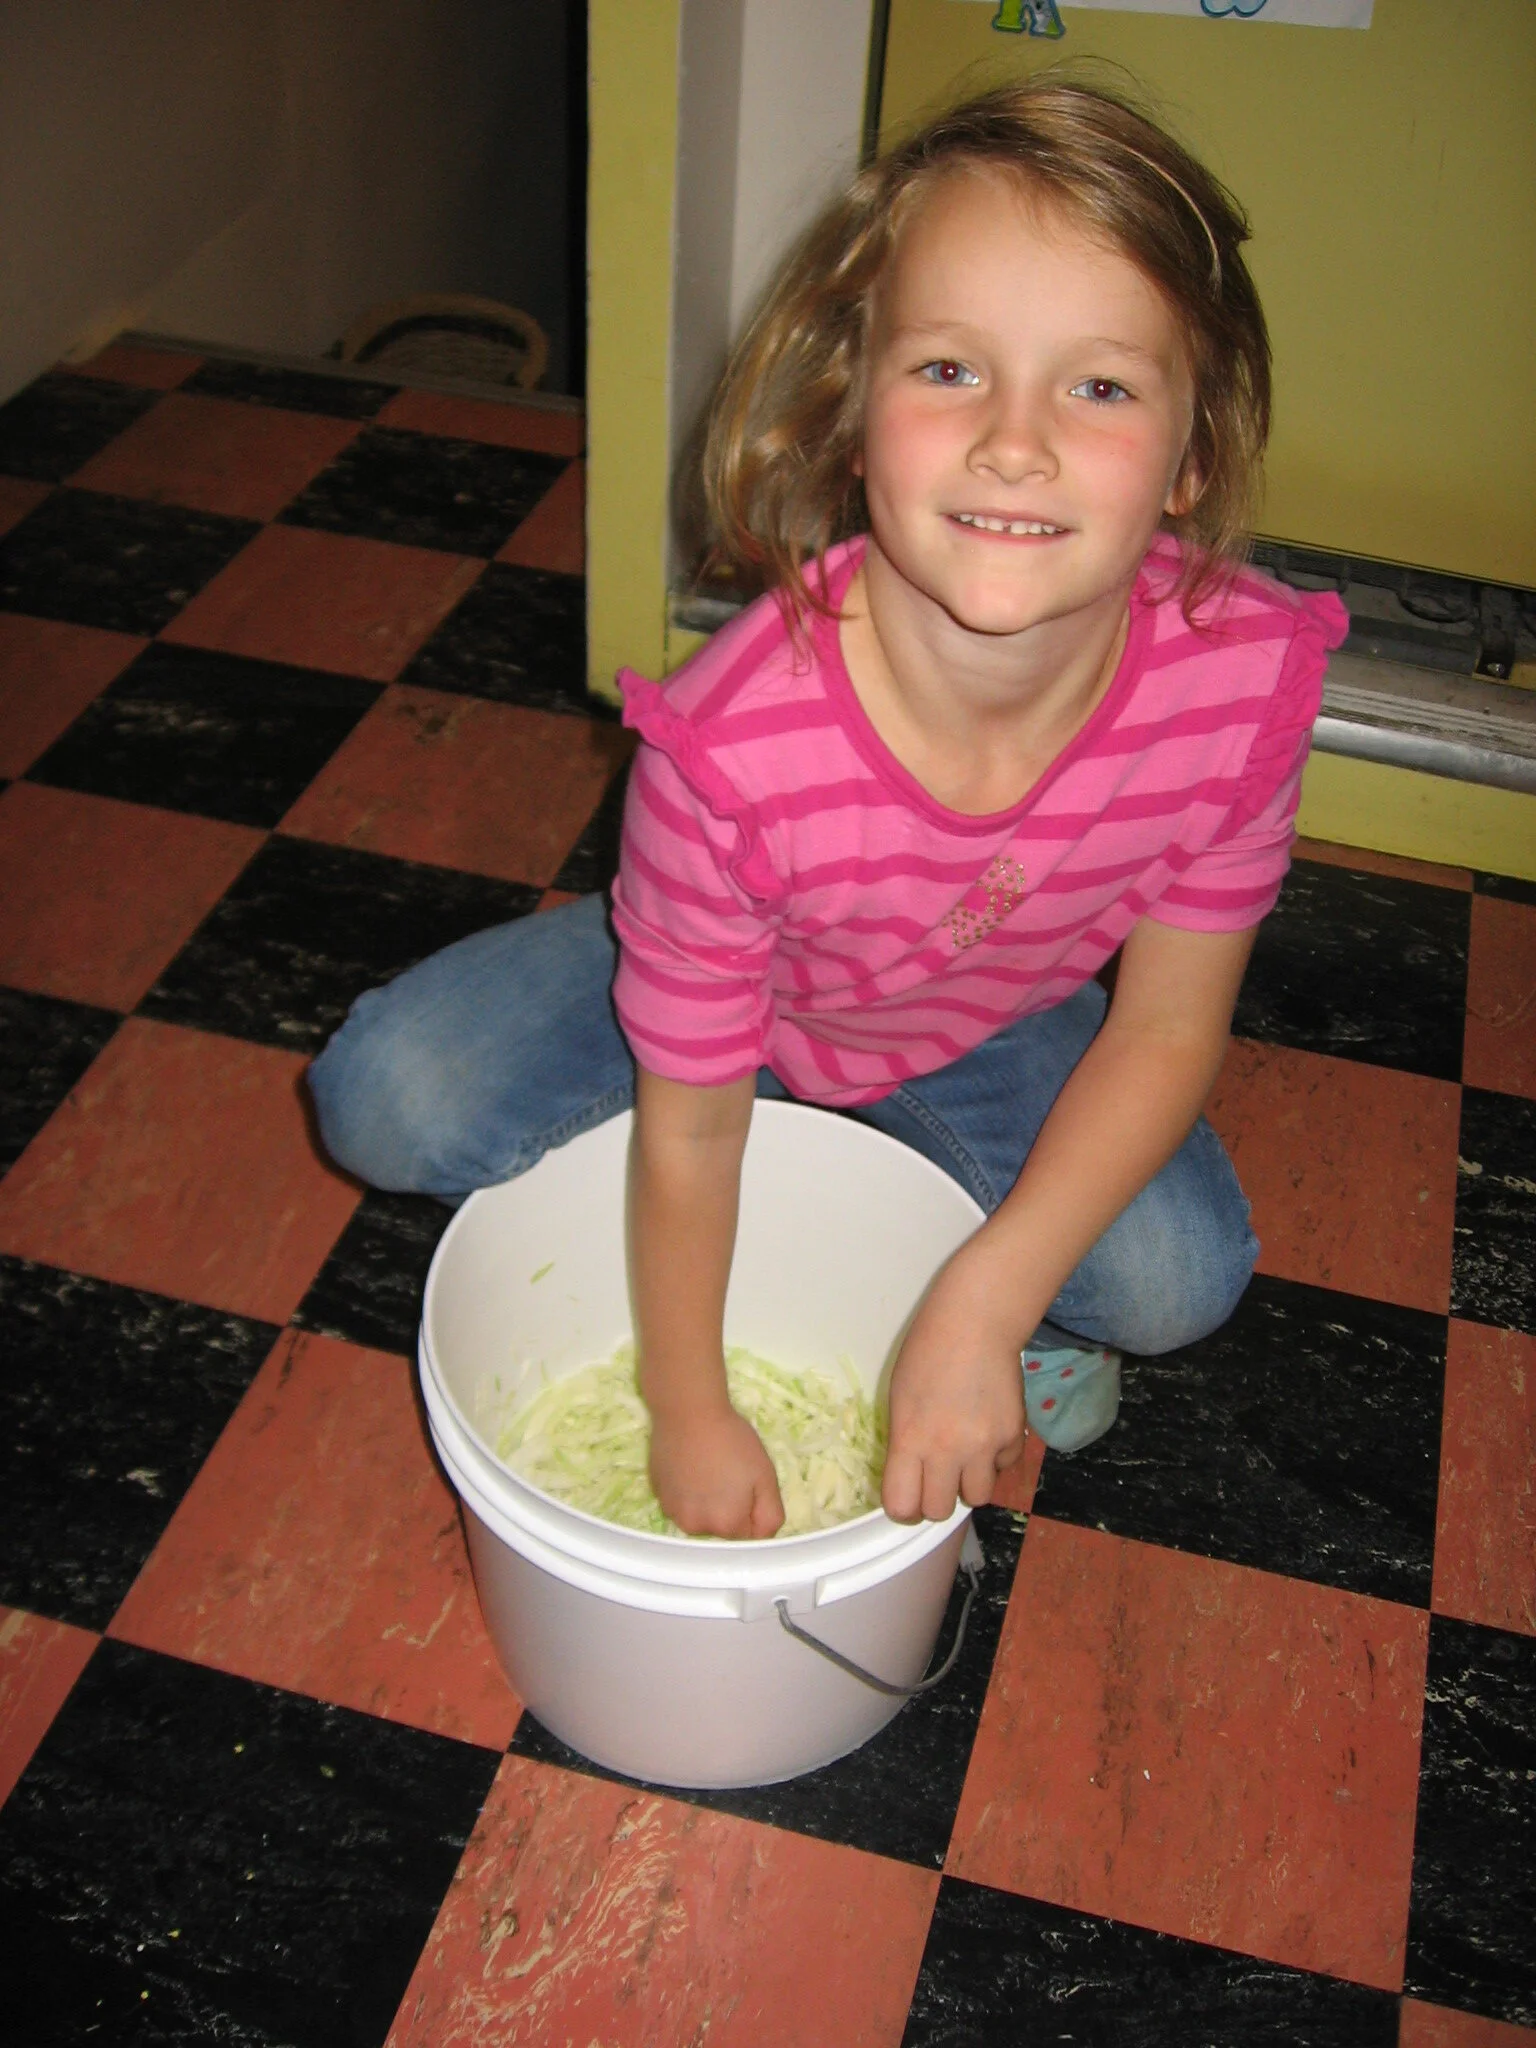
I’ve had fun over the years getting my kids to help punch down the shredded cabbage to make sauerkraut!
Find This Helpful?
Enjoy not being bombarded by annoying ads?
Appreciate the absence of junky affiliate links for products you don’t need?
It’s because we’re reader supported.
If we’ve helped in your food-gardening journey, we’re glad of support. You can high-five us below. Any amount welcome!
Foraging for Morel Mushrooms (and a Morel Sauce Recipe)
Here is the recipe for my morel sauce.
By Steven Biggs

How to Find Morel Mushrooms
I recently posted a picture of morels on social media and mentioned I make them into a sauce. I had a few requests for the recipe, so here it is. I hope your family enjoys it as much as mine!
I love a springtime walk through the woods to look for morel mushrooms. I love cooking with morel mushrooms.
But there’s something else I love too: the hunt.
Walking slowly, scanning the ground: It takes intense focus. And I find that time spend in the woods, focusing on what I’m seeing, is a beautiful time for me.
When I spot a morel, I stop in my tracks and then scan the ground all around it — because where there is one there are often more. And I don’t want to step on any of them!
When the lilacs bloom, I figure it’s time to look for morels. Some years I get lots; some years not as many. Either way, it’s a spring ritual I love.
Keep reading to find out more about foraging for morel mushrooms—and for my recipe for a delicious morel sauce.
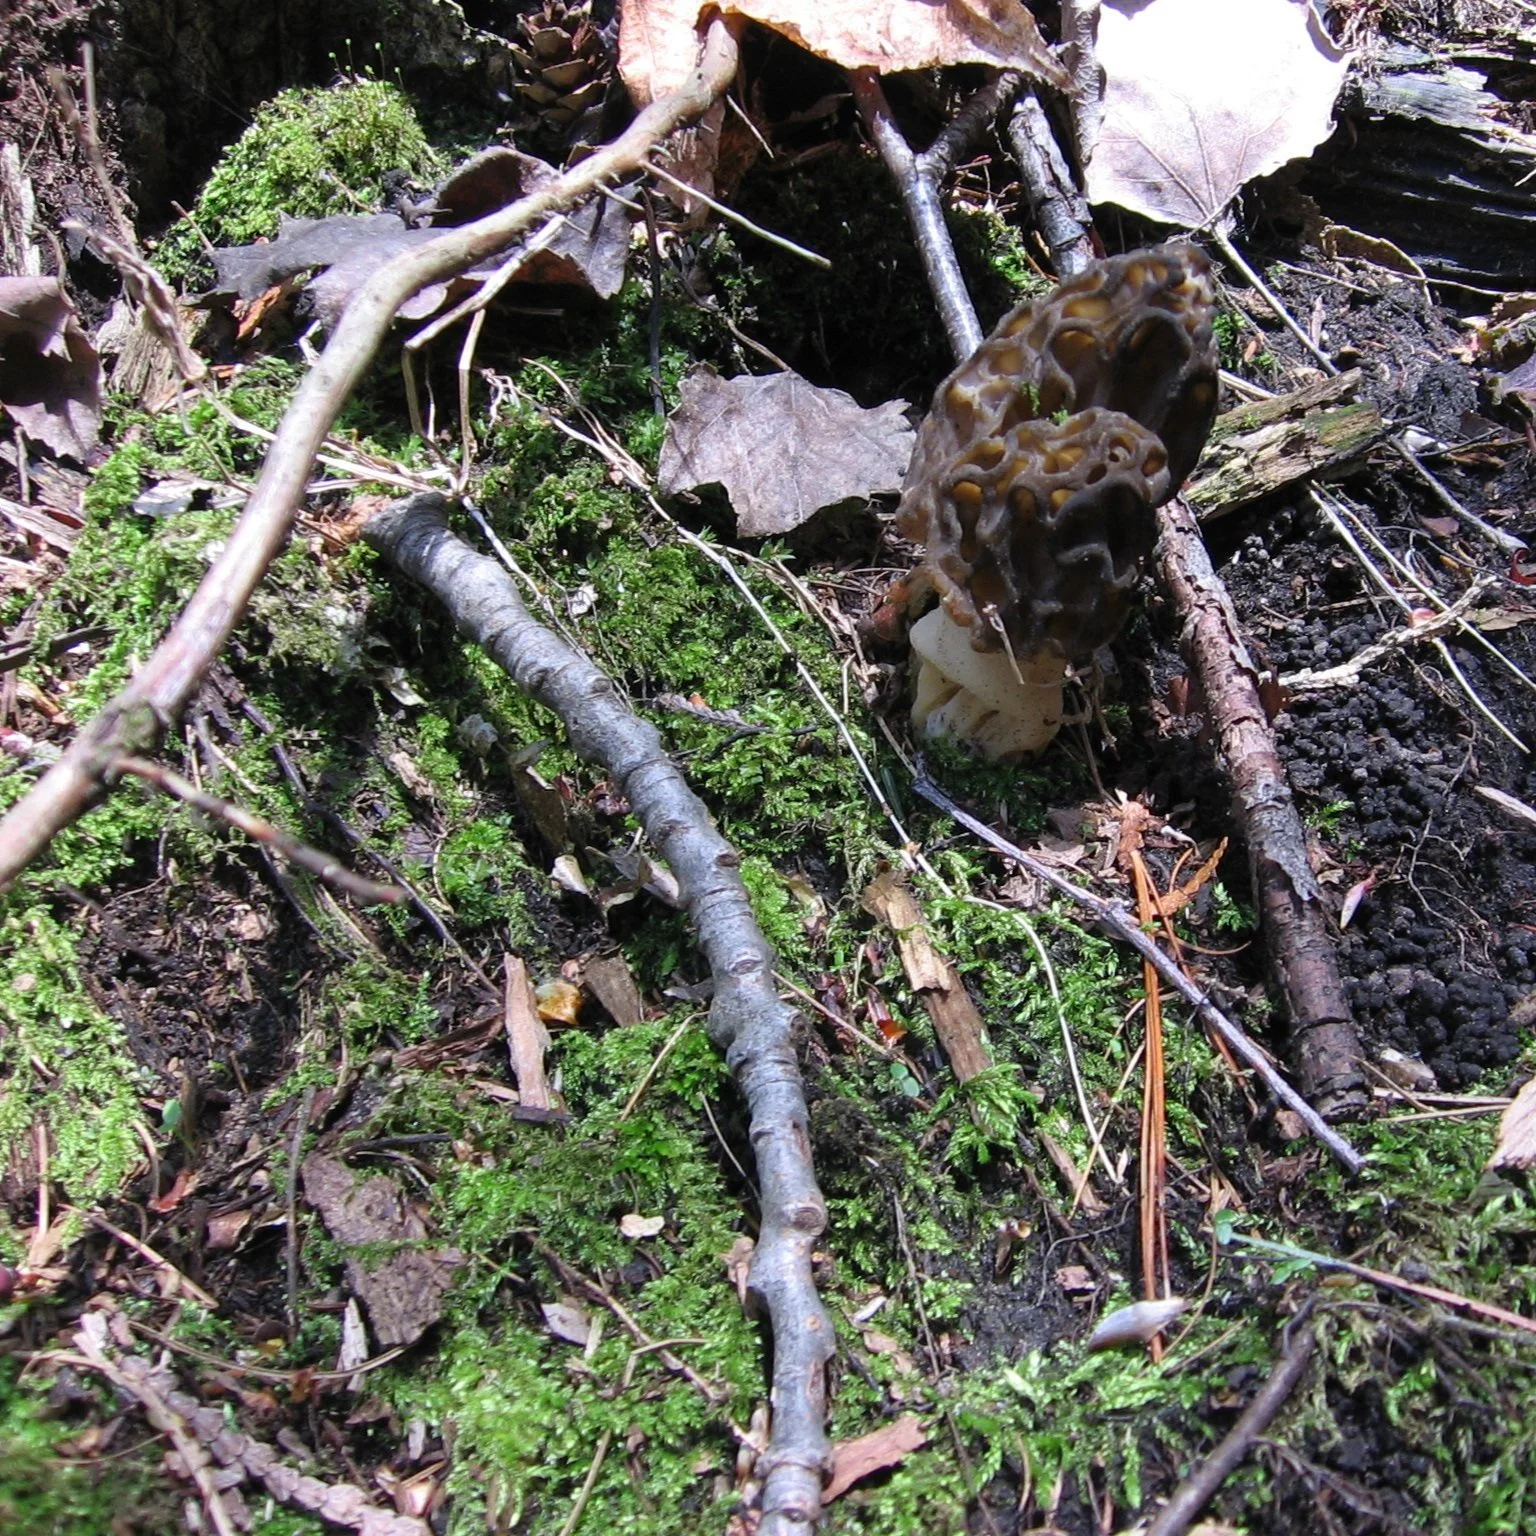
Morel mushrooms can be difficult to spot. But once you see one, look all around, as there will often be more in the area.
A Great Family Activity
My wife, Shelley, and I started mushroom hunting before we had kids. And once we had kids, we kept on mushrooming.
I’d carry babies on my back…though it’s harder to bend over to pick the mushrooms! Or we’d choose locations where we could pull along a wagon.
For small children, a basket makes morel hunting fun. Maybe they’ll find morels — maybe leaves or pine cones or snail shells.
One thing is for certain: Kids are lower to the ground, and they can be very observant. We’ve had many trips to the woods where the kids spot mushrooms before we do.

My daughter Emma on a springtime morel hunt with us when she was little.

Kids are lower to the ground, and they can be very observant. We’ve had many trips to the woods where the kids spot mushrooms before we do.
Morel Sauce Recipe
This sauce is great for lubricating crepes filled with ham and steamed asparagus (make sure to put some sauce inside the crepe before you wrap it up, and then put more sauce over the top of the crepe once it’s all wrapped up!)
It’s nice on grilled poultry. Or, use it spooned over a fried egg. (And…you might just want to taste a couple of spoonfuls of sauce on its own, just don’t let anyone see you do it!)
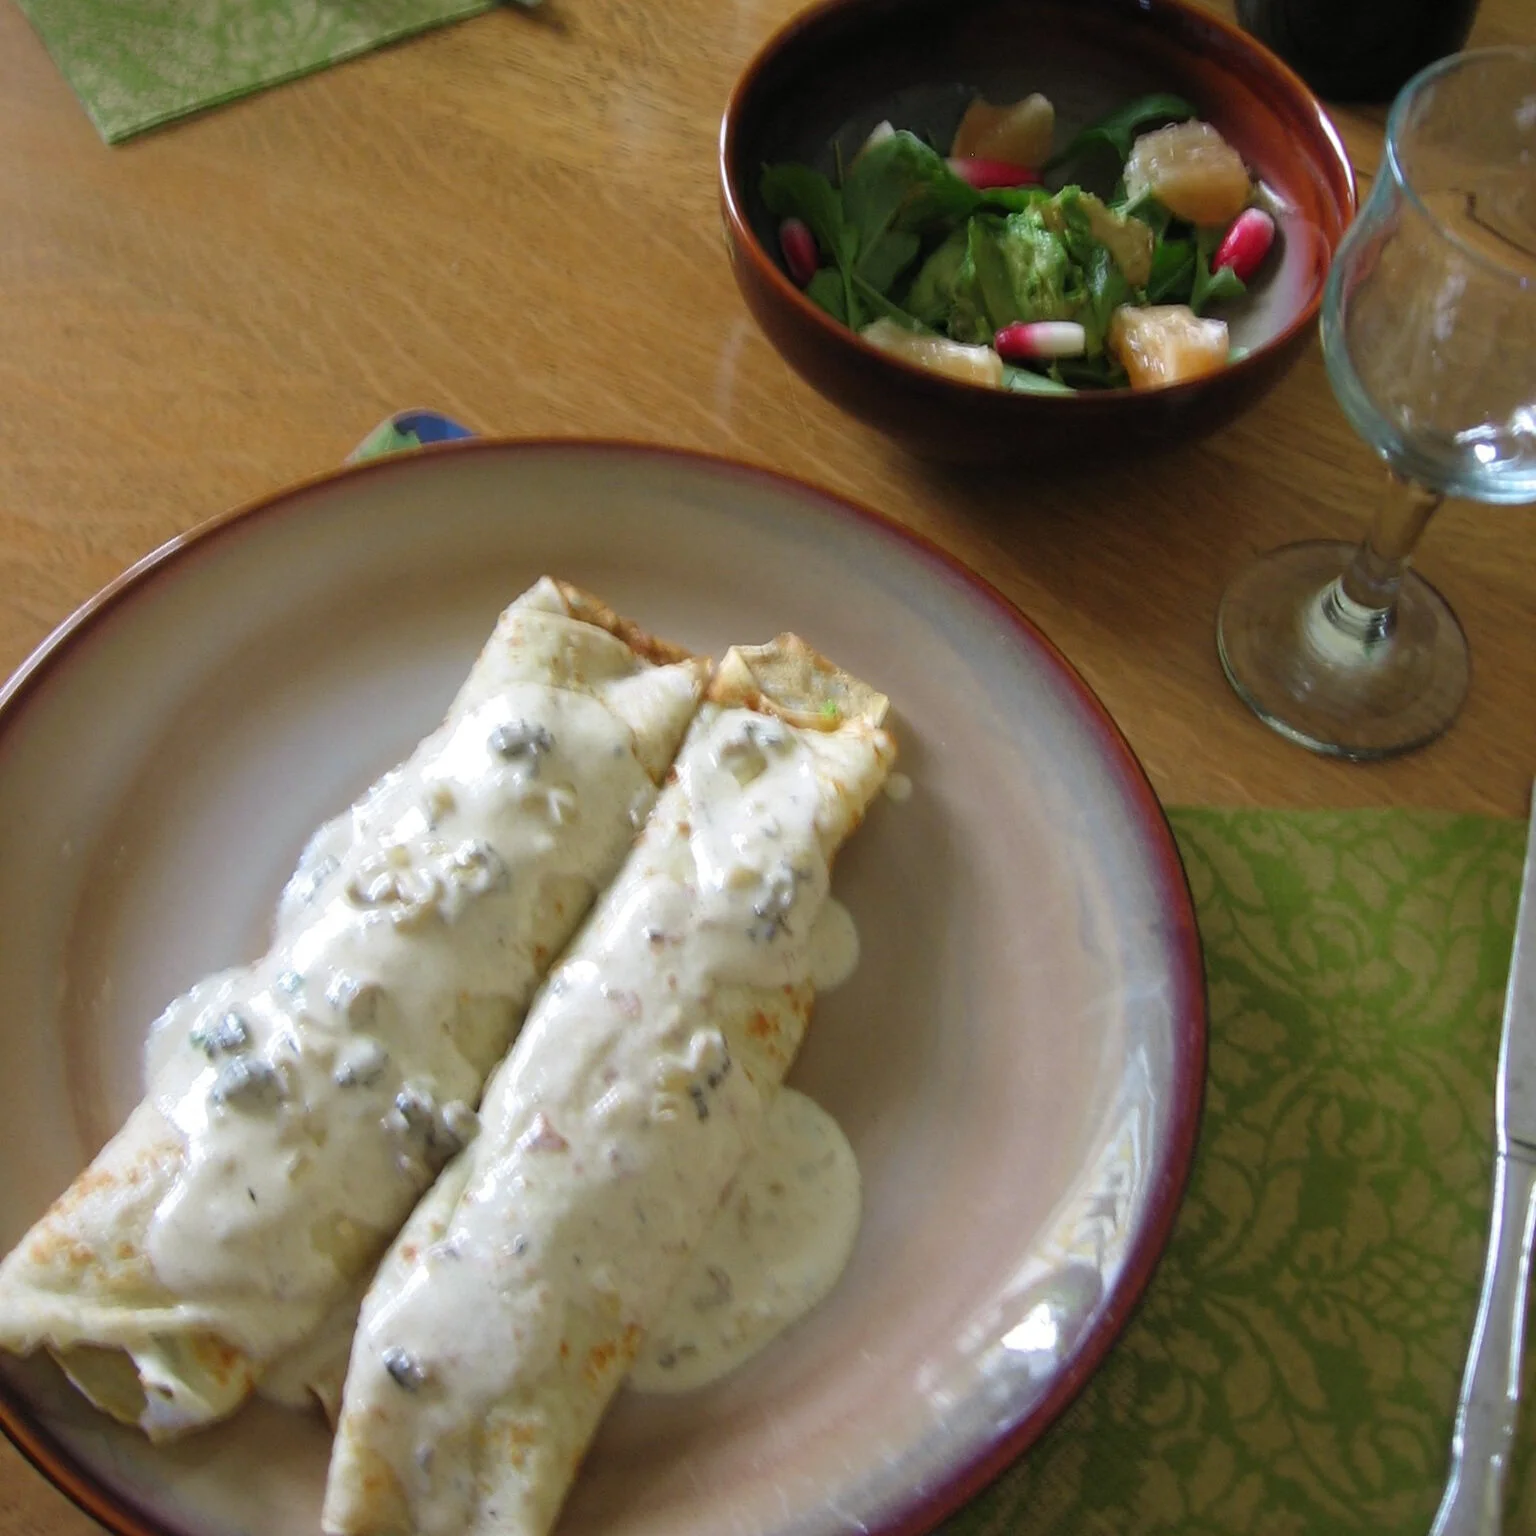
Crepes with morel sauce, inside and out. Don’t be stingy with the sauce!
This recipe uses the trinity of mushrooms, cream, and white wine. It’s not adulterated with lots of herbs, so the mushroom flavour shines through.
Depending on the time of year, you can use dry or fresh morels. (Of course, you can use other mushrooms too…but the morels are my favourite.)
Ingredients:
10 morels, coarsely chopped
1 shallot, minced*
½ cup white wine
3 cups stock (chicken or veg both work well)
1 cup heavy cream (don’t wimp out with light cream – you want good, heavy cream…this isn’t supposed to be a low-fat sauce)
1 tbsp butter
Salt and pepper to taste
*Don’t worry if you don’t have a shallot…use a cooking onion instead and it will be fine.
If using dried morels:
Start by reconstituting them in ½ cup of water for about 30 minutes before chopping
Reserve the liquid (strain if needed)
Instructions
Cook shallots in butter until translucent
Add morels, salt, and pepper and cook another 2-3 minutes
Add wine and stock (and reserved liquid, if using dry morels) – and cook until reduced by about 2/3
Add cream and simmer about 20 minutes, until the sauce will coat the back of a spoon
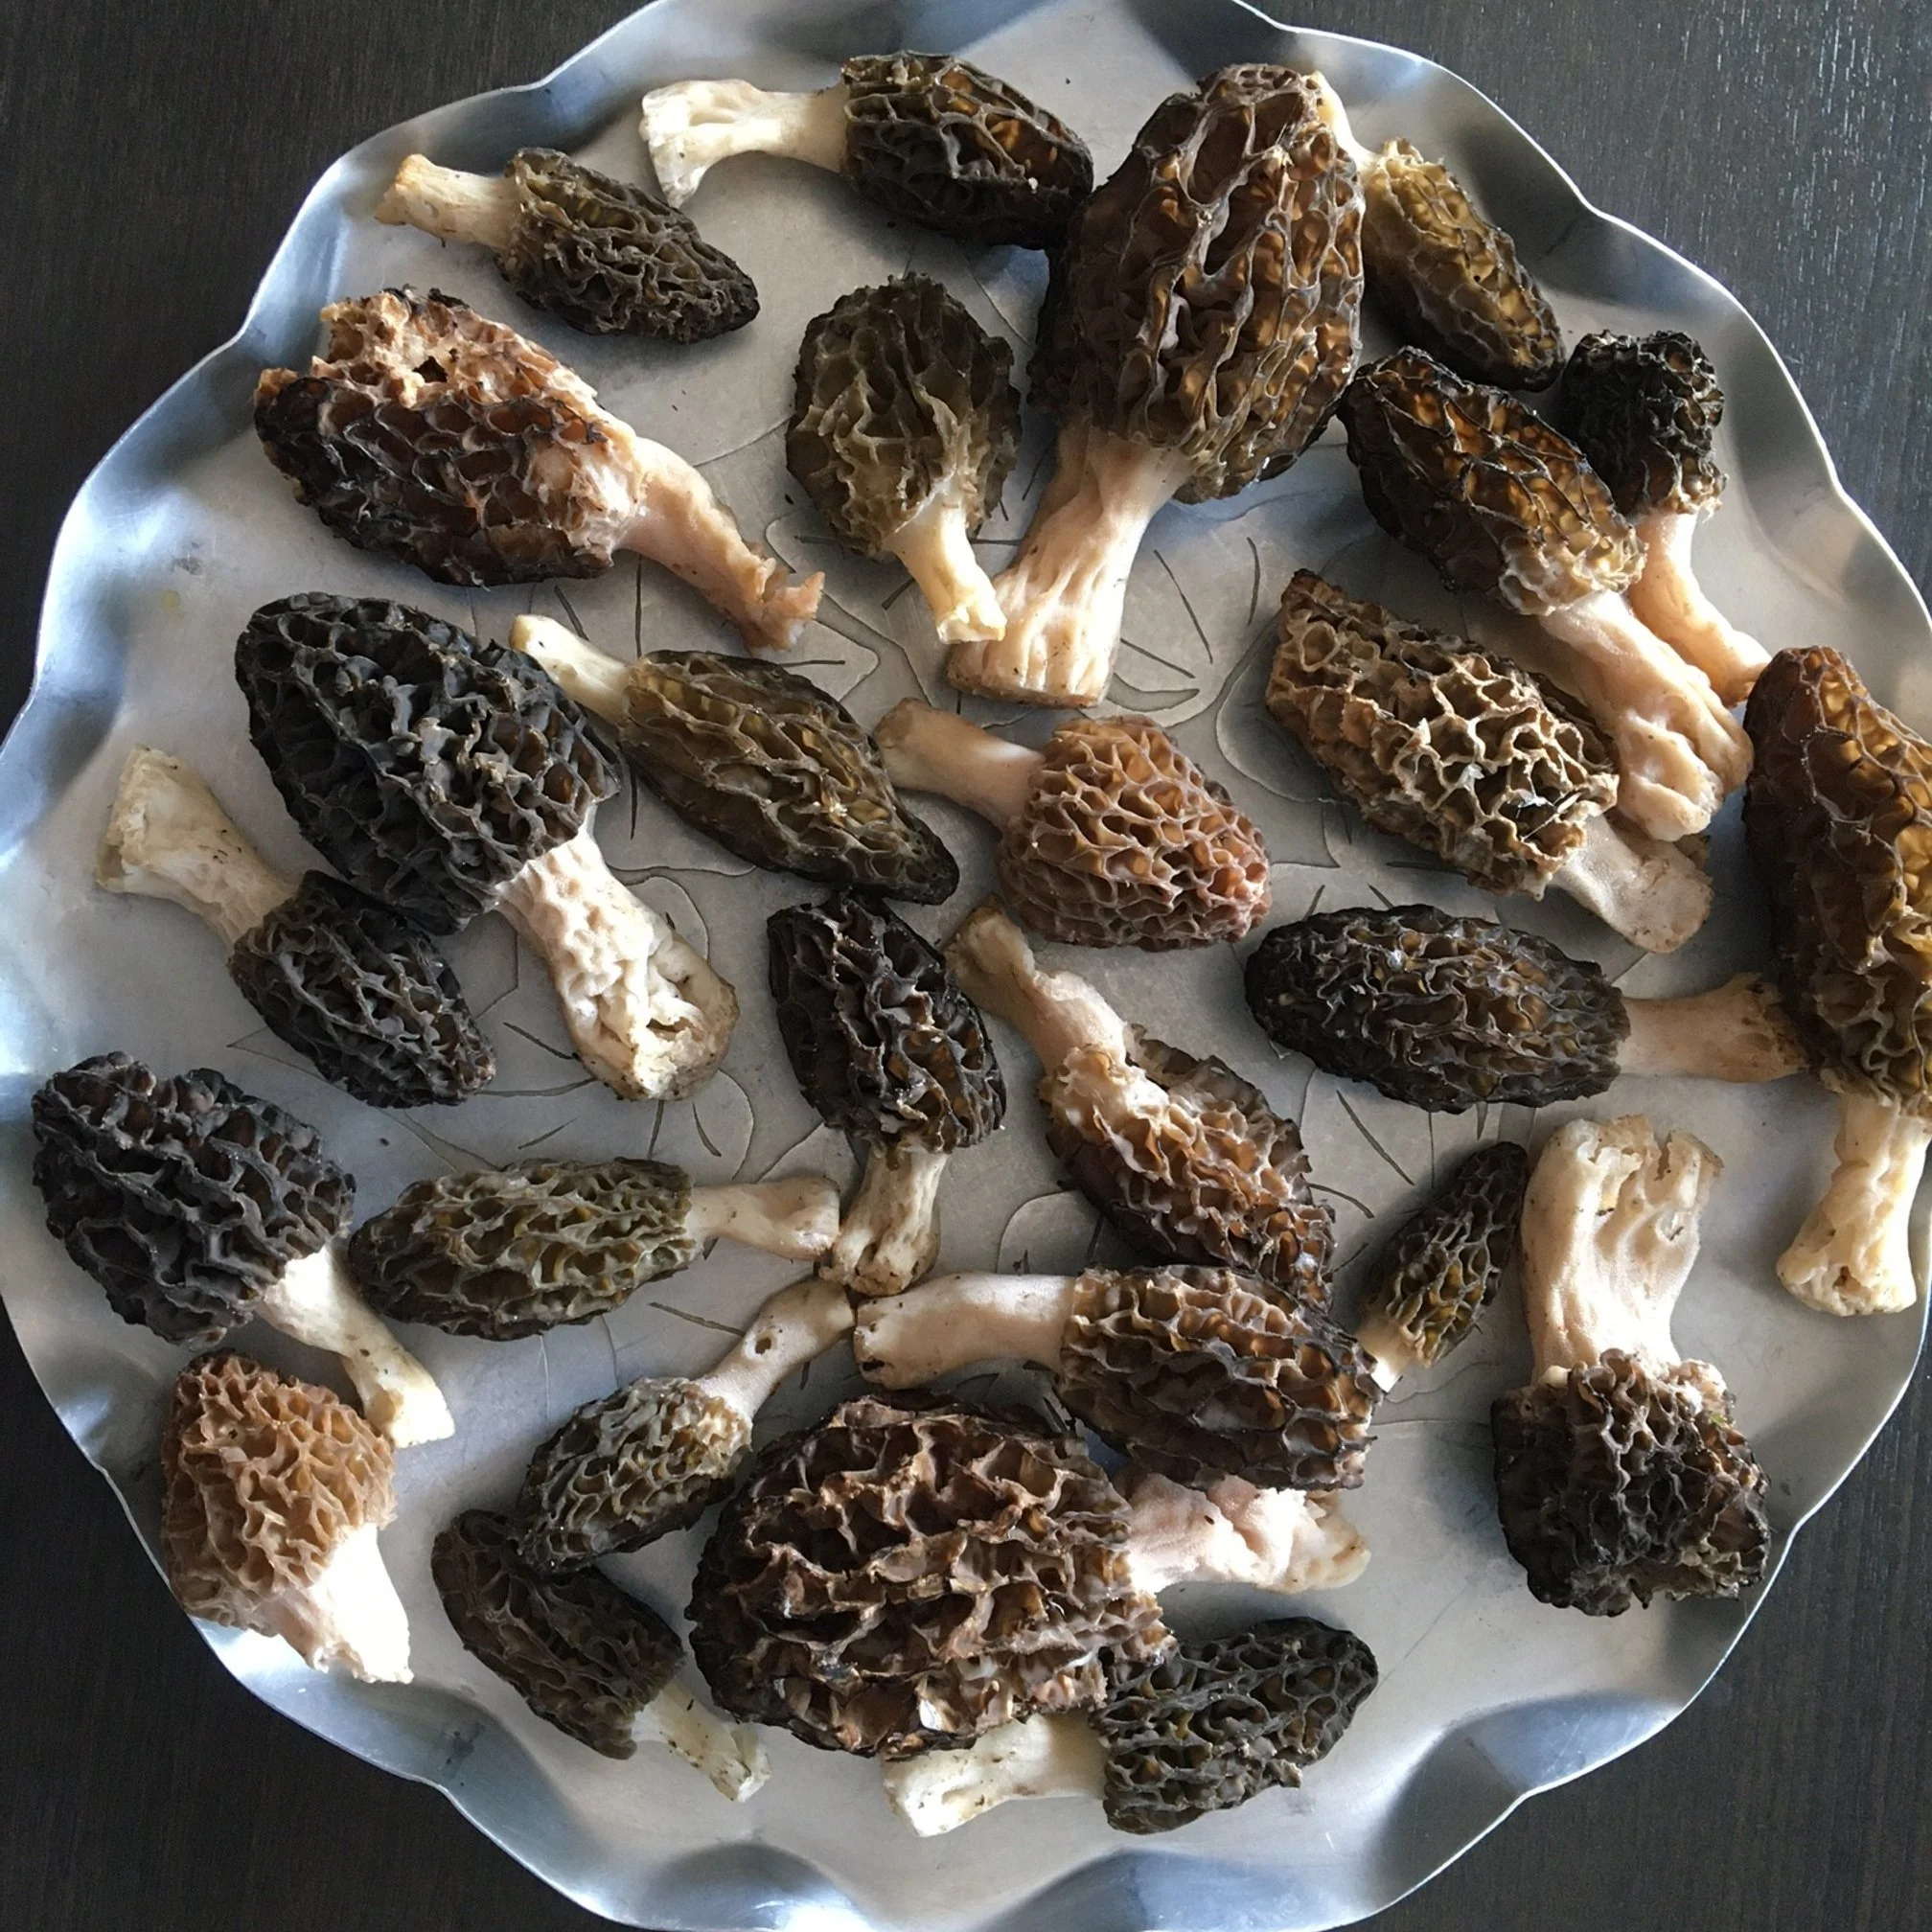
I love morels. And I love the hunt for morels!
A Final Note on Morels and Mushroom Hunting
Don’t eat what you can’t identify.
Full stop.
Neither Shelley or I grew up with morels. We didn’t know where to look for them or how to identify them. But experienced friends took us out mushroom hunting.
Then we joined a local mycological society (the fancy term for a mushroom club) which had forays to nearby woods. The forays were a great way to be around people who were knowledgeable about mushrooms and could help us identify what to eat — and what not to eat.
Find This Helpful?
Enjoy not being bombarded by annoying ads?
Appreciate the absence of junky affiliate links for products you don’t need?
It’s because we’re reader supported.
If we’ve helped in your food-gardening journey, we’re glad of support. You can high-five us below. Any amount welcome!
Lemon Mussels Gremolata Recipe
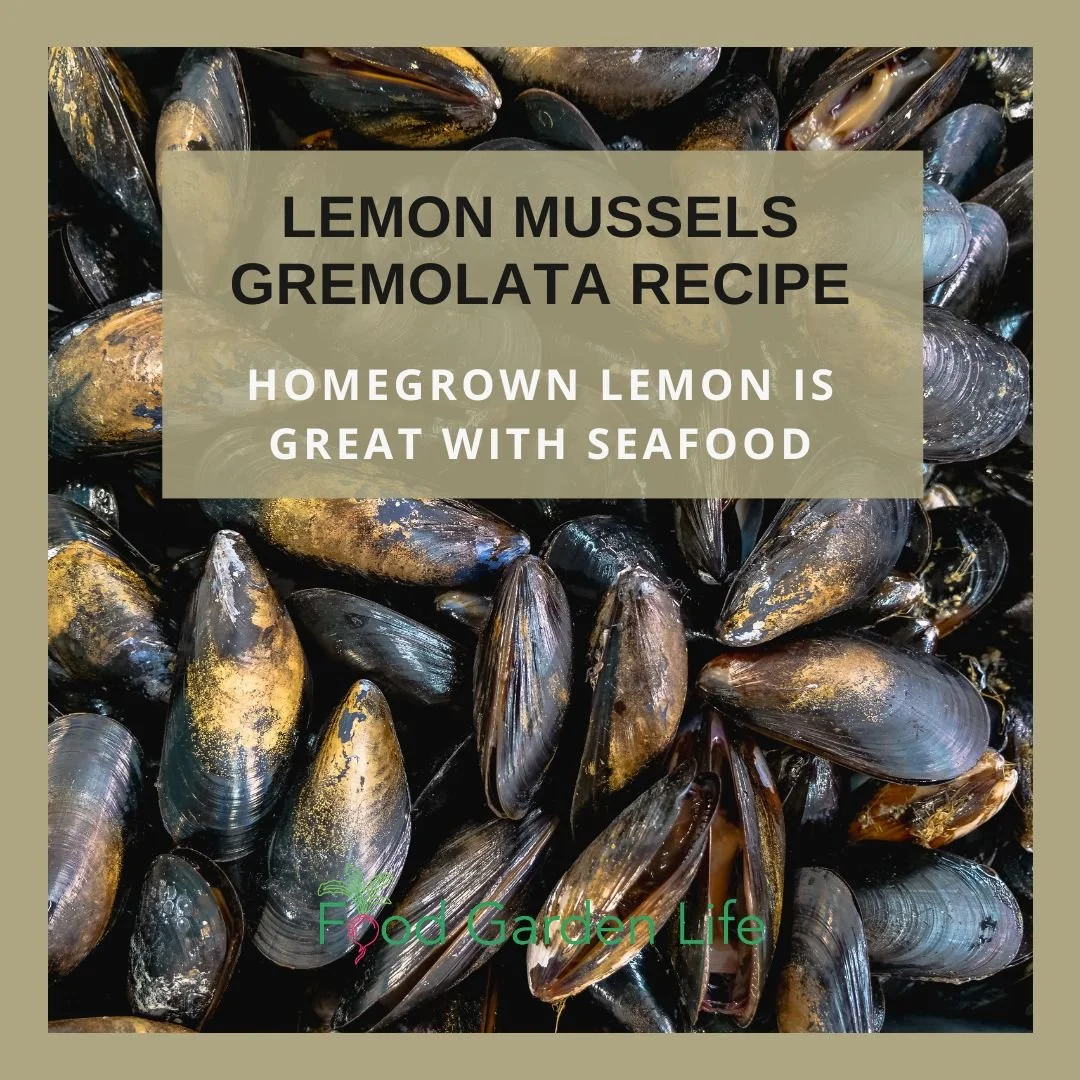
Homegrown Lemon is Great with Seafood
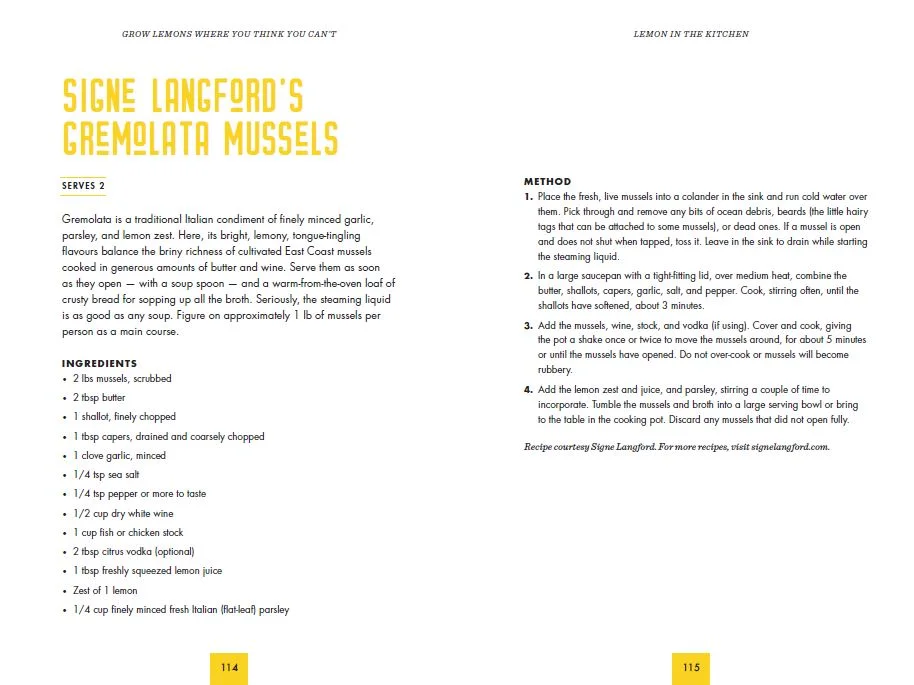
If you are growing a lemon tree indoors and wondering what you will do with your homegrown lemons, here’s a recipe I love and included in my book Grow Lemons Where You Think You Can’t: Lemon Mussels Gremolata.
Thanks to author, storyteller, and chef Signe Langford for sharing this recipe.
And if you’re a gardener, keep in mind that a potted lemon tree is a great addition to the garden. As well as fresh lemons, you get fragrant flowers, and flavour-packed leaves that are very useful in the kitchen!
Lemons: A Perfect Patio Plant
Lemon trees are more cold-tolerant than many people realize, which makes them an ideal potted plant for decks, patios, balconies, and gardens in northern climates. That’s because the cold-tolerance means there are many ways to overwinter lemon trees.
You don’t need a greenhouse or a bright south-facing window indoors!
As well as the fruit, if you grow lemon you will get deliciously fragrant flowers and very aromatic leaves that you can use to flavour all sorts of dishes (I love wrapping lemon leaves around a firm cheese and grilling on the BBQ!)
Read about why lemons are a great choice for northern gardens
6 Reasons to Grow a Lemon Tree in a Cold Climate
Read about how cold lemon trees can get over the winter
Find out more about my book Grow Lemons Where You Think You Can’t
Find This Helpful?
Enjoy not being bombarded by annoying ads?
Appreciate the absence of junky affiliate links for products you don’t need?
It’s because we’re reader supported.
If we’ve helped in your food-gardening journey, we’re glad of support. You can high-five us below. Any amount welcome!
More Lemon Resources
Book: How to Grow a Lemon Tree in a Cold Climate

Covering everything from lemon varieties, to location and watering, to pruning and shaping, to overwintering, dealing with pests, and more—and including insights from fellow citrus enthusiasts—this book will give you the confidence you need to grow and harvest fresh lemons in cold climates.
Orders may be shipped from Toronto or printed and shipped directly by our printing partner. Available destinations and shipping charges appear at checkout. All prices are in Canadian dollars.
Prefer an ebook? Find the Kindle edition on Amazon.
Course: Grow Lemons

Keep Your Lemon Tree Through the Winter
And enjoy fresh homegrown lemons!
Meyer Lemon Sorbet Recipe
By Steven Biggs
Meyer Lemon Zest is a Big Part of this Sorbet

If you are growing a Meyer lemon tree and are wondering what to make, here’s a great way to enjoy the unique flavour of Meyer lemons: Meyer Lemon Sorbet.
I included this family favourite in my book Grow Lemons Where You Think You Can’t: We make it using our own homegrown lemons.
This recipe uses both the juice and the fragrant zest.
If you’re growing other citrus, you can use this same recipe to make your own sorbet. For sweeter citrus, you might want to use a bit less sugar. For other citrus such as yuzu, you might add a bit more sugar.
Find out more about yuzu, a fragrant citrus that’s a great container plant for a home garden.


Find This Helpful?
Enjoy not being bombarded by annoying ads?
Appreciate the absence of junky affiliate links for products you don’t need?
It’s because we’re reader supported.
If we’ve helped in your food-gardening journey, we’re glad of support. You can high-five us below. Any amount welcome!
Looking for More Lemon Ideas?
Here’s another lemon recipe: Mussels Gremolata with Lemon.
For more recipes and information about growing potted lemon trees in cold climates, go to the Lemon Home Page.
More on Growing Lemons
If you want to grow a potted lemon tree (that actually fruits) in a cold climate, below are a couple more resources to help you on your journey. I grow lemons and other citrus here, in Toronto, Canada. (My oldest potted lemon tree is from 1967!)
Book: Grow a Lemon Tree in a Cold Climate
Covering everything from lemon varieties, to location and watering, to pruning and shaping, to overwintering, dealing with pests, and more—and including insights from fellow citrus enthusiasts—this book will give you the confidence you need to grow and harvest fresh lemons in cold climates.
Orders may be shipped from Toronto or printed and shipped directly by our printing partner. Available destinations and shipping charges appear at checkout. All prices are in Canadian dollars.
Prefer an ebook? Find the Kindle edition on Amazon.
Course: How to Grow a Lemon Tree in a Cold Climate
Keep Your Lemon Tree Through the Winter
And enjoy fresh homegrown lemons!

Hi, We’re Steve and Emma!
We help people grow food on balconies, in backyards, and beyond—whether it’s edible landscaping, a vegetable garden, container gardens, or a home orchard.
Courses




Free Food- Garden Guide
Books
Covering everything from lemon varieties, to location and watering, to pruning and shaping, to overwintering, dealing with pests, and more—and including insights from fellow citrus enthusiasts—this book will give you the confidence you need to grow and harvest fresh lemons in cold climates.
Orders may be shipped from Toronto or printed and shipped directly by our printing partner. Available destinations and shipping charges appear at checkout. All prices are in Canadian dollars.
Prefer an ebook? Find the Kindle edition on Amazon.