
To Taste This Fruit, You'll Need to Grow it! (Meet the Medlar)
How to grow medlars in cold climates…and how to make medlar jelly.
By Steven Biggs

Medlar (Mespilus germanica): A little-known fruit that’s easy to grow and a great fit for a home garden.
The Guide to Medlar
Medlar Stumps Museum Staff
“Anyone know what this is?” read the online post.
The post, by a local historical museum, showed a photo of a fruit carving on an old piece of furniture. The curators couldn’t identify the fruit.
“It’s medlar,” I replied.
This obscure fruit, popular in past centuries, was unknown even to historical interpreters.
And that obscurity means that if you want to taste medlar, you’ll probably have to grow it yourself (or share this post with someone who will grow it for you!)
Grow Medlar at Home
Even though the fruit is little known, the plant deserves of a spot in more home gardens. Here’s what I like about medlar:
Low maintenance. It needs minimal pruning.
Ornamental. It has flowers, fall colour, and winter interest.
Hardy. It’s winter hardy, and resistant to diseases and pest.
Suited to cold climates. The late bloom means fruit production isn’t affected by a late spring frost.
And there’s one other intriguing thing about medlar: For gardeners who love the idea of enjoying homegrown food throughout the year, medlar adds to the winter fruit larder.
Medlars are Ornamental
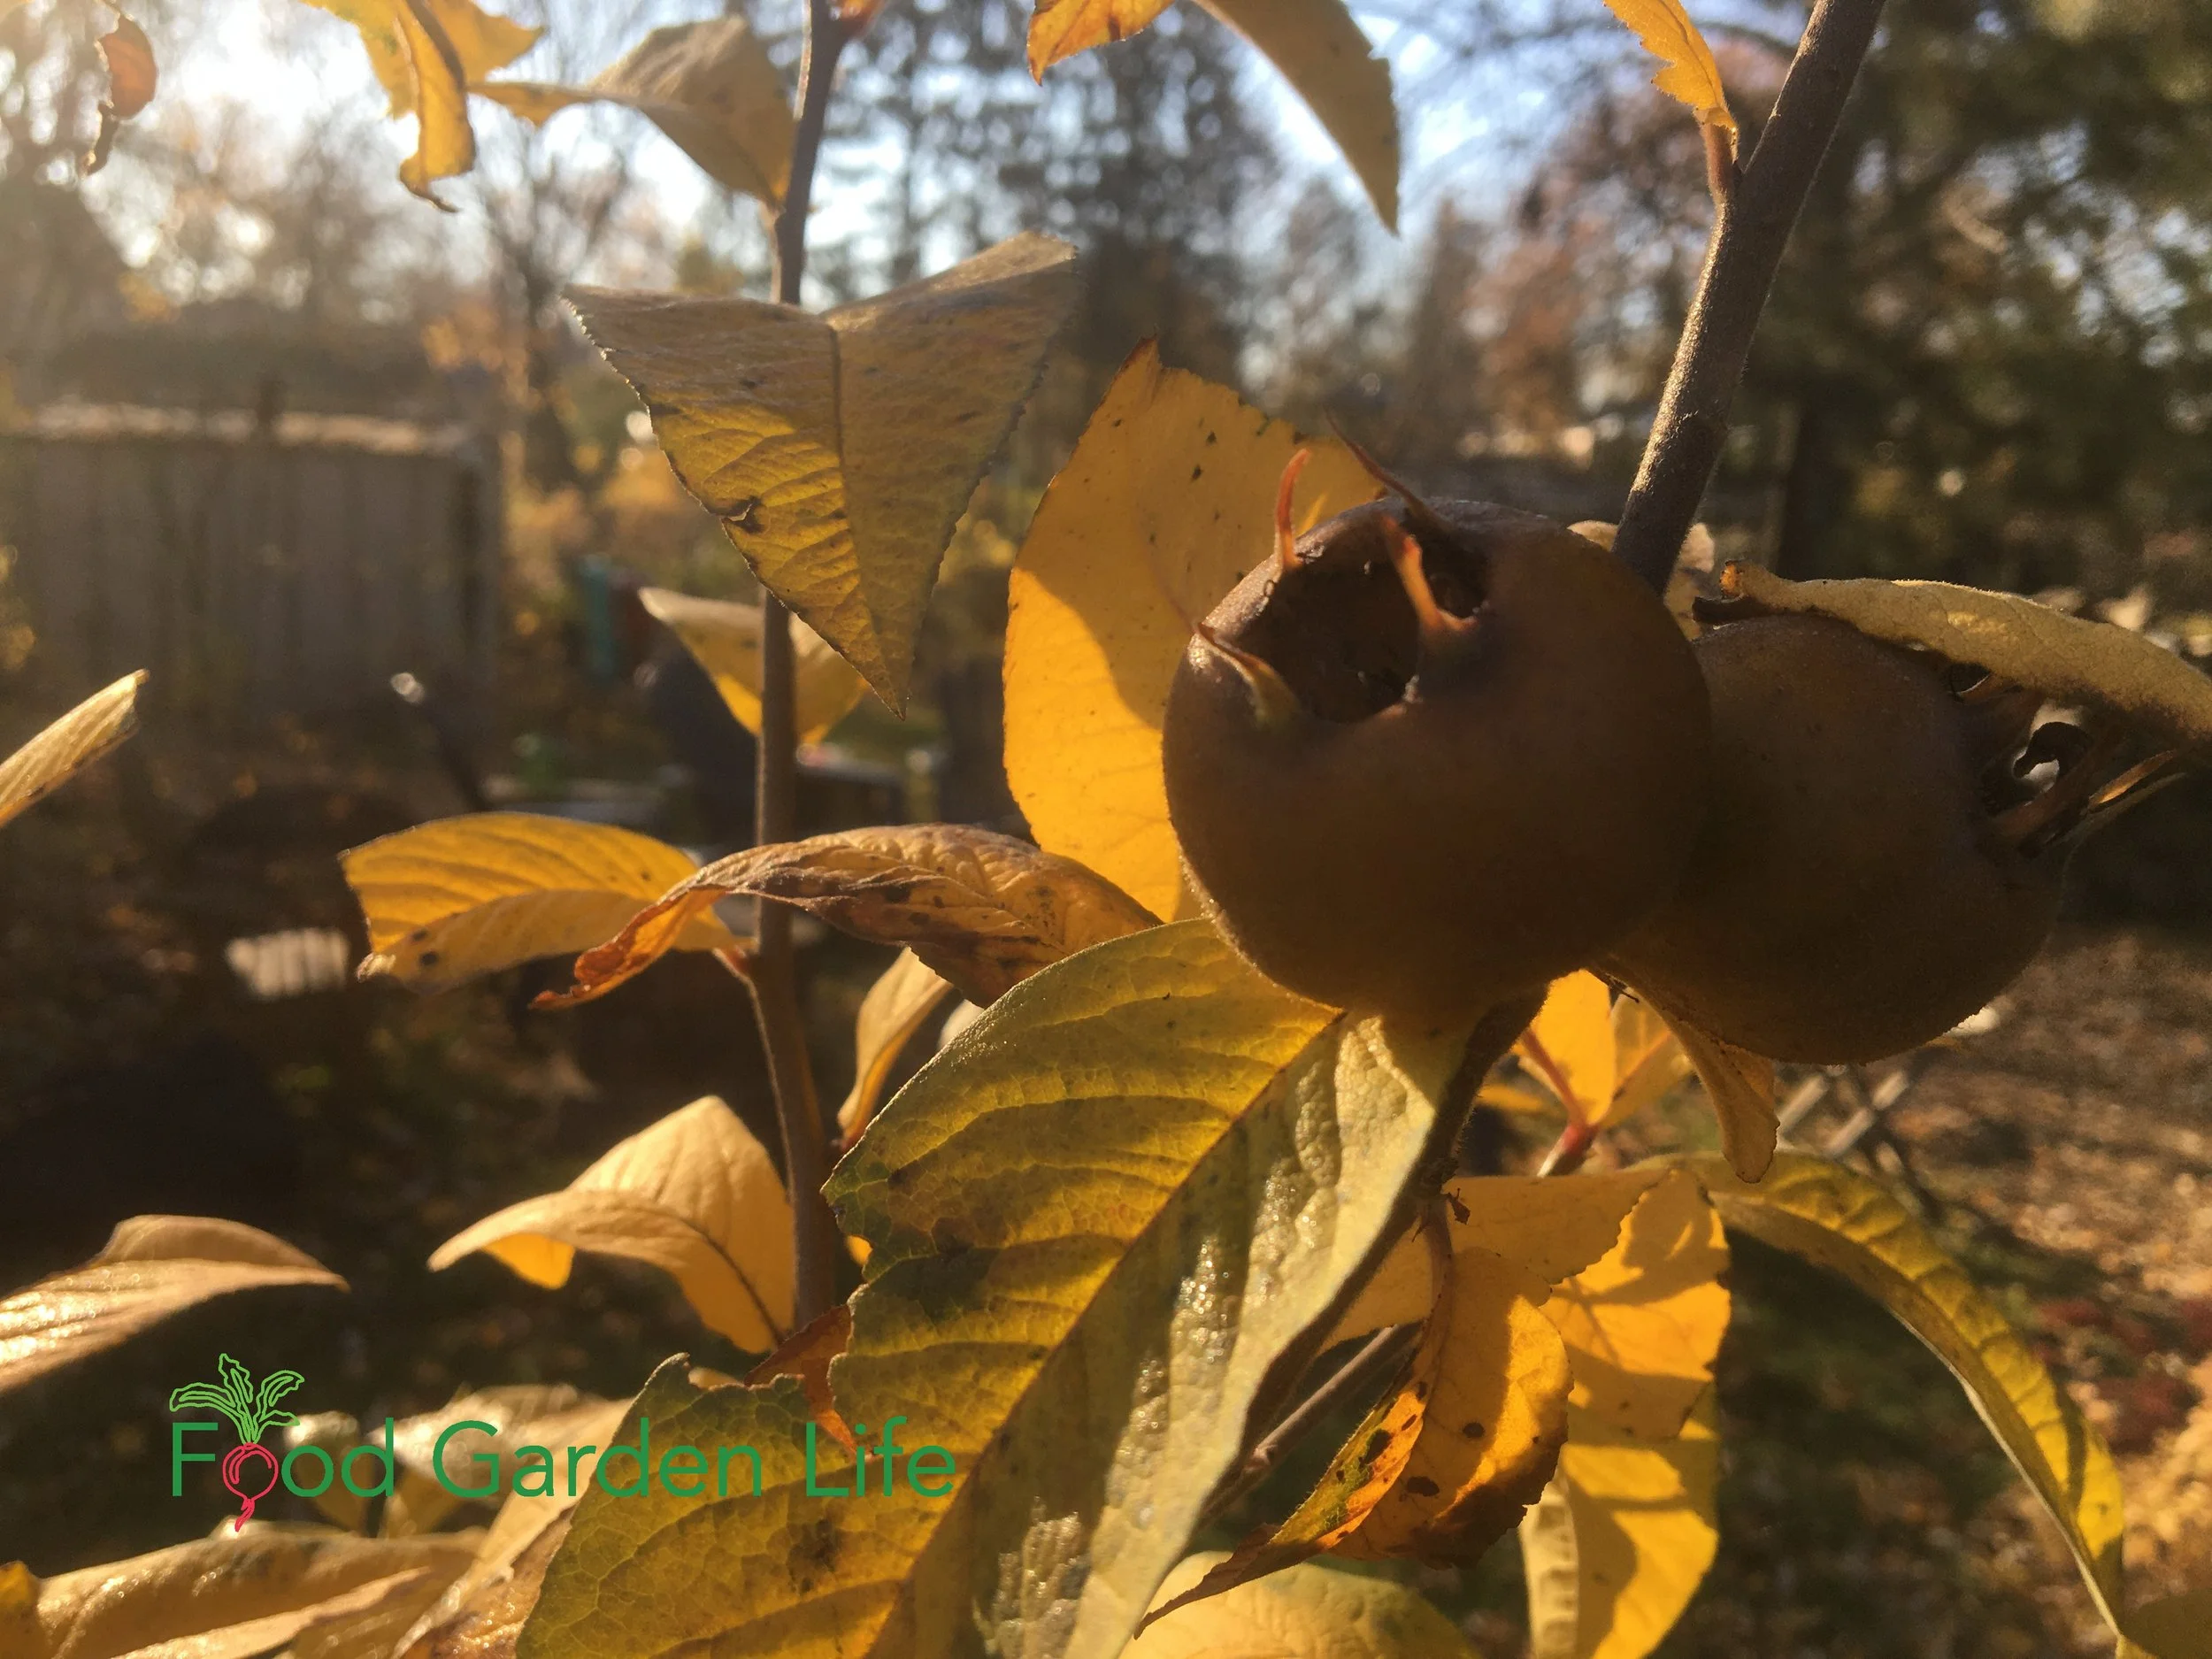
Medlar plants have nice leaf colour in the fall. Depending on the year, the leaves can turn a vibrant gold, taking on hues of orange and copper.
Medlar plants have large star-shaped white blossoms in spring, and nice leaf colour in the fall. Depending on the year, the dark-green, leathery, oblong leaves can turn a vibrant gold, taking on hues of orange and copper. If you’ve ever admired the fall leaf colour of cherries, medlar are just as good.
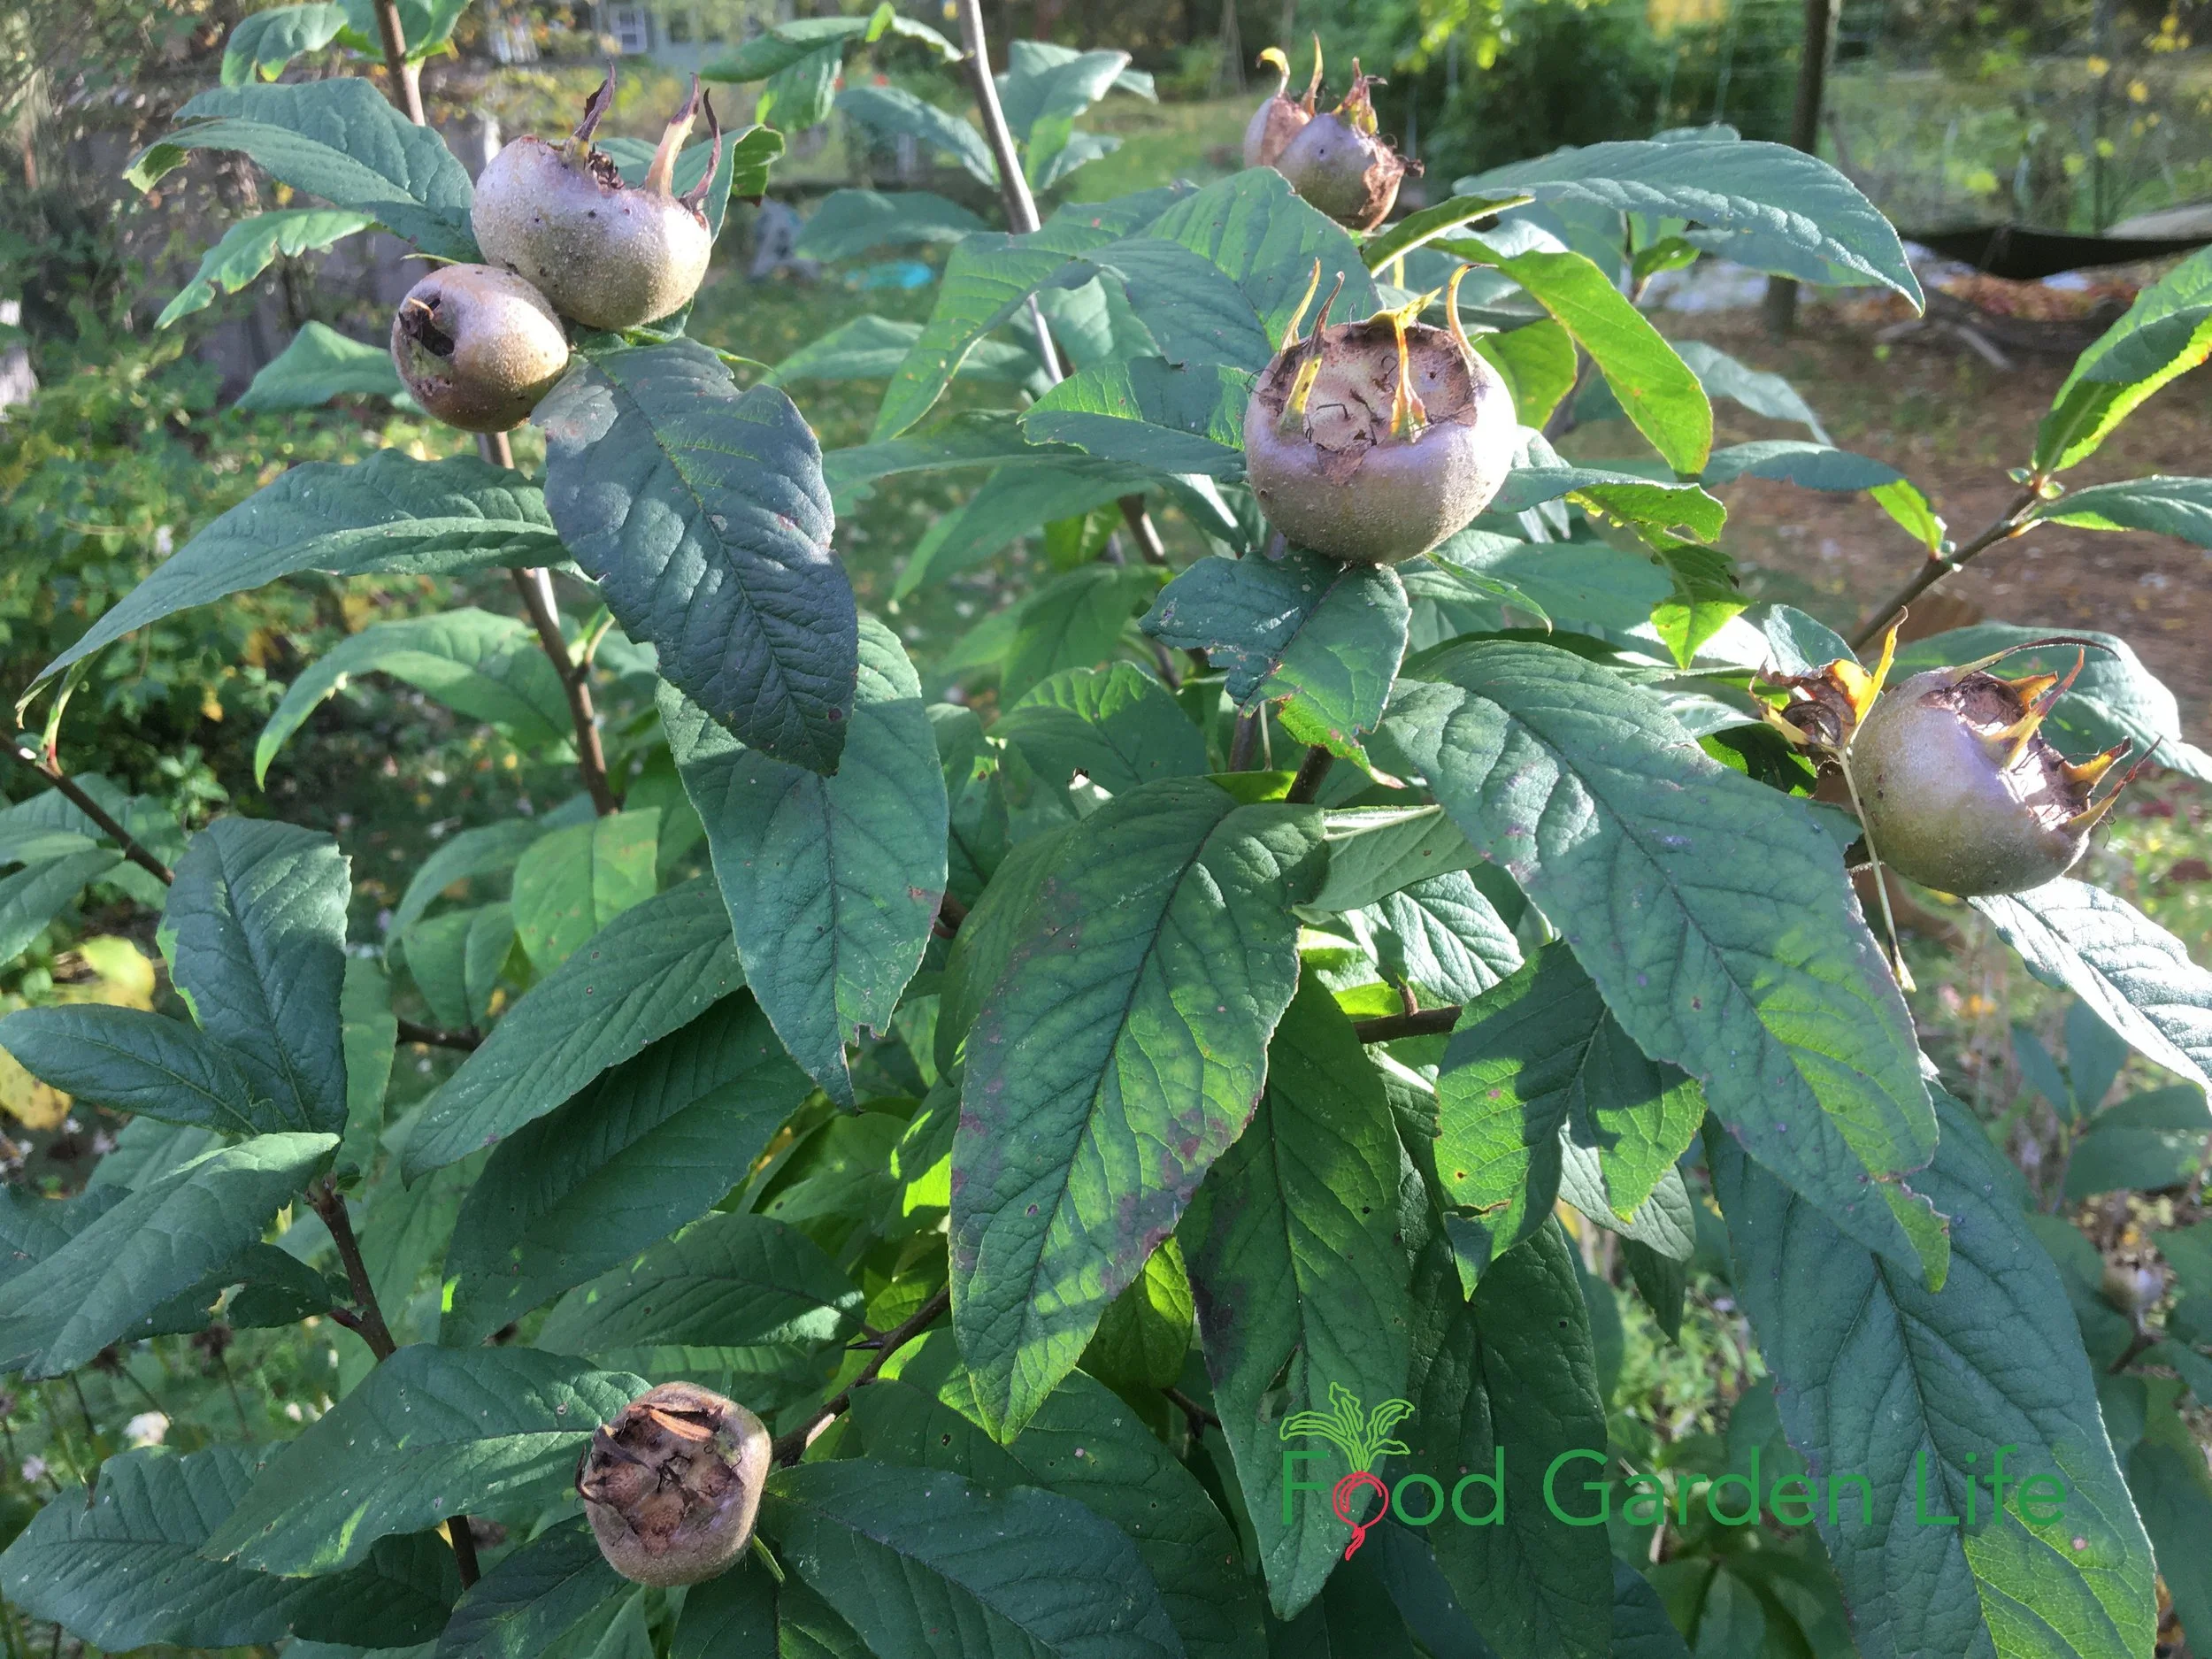
The fruit is decorative too. I pick my medlar fruit in mid- to late-November, once the leaves have dropped. And in years that I harvest late, those fruit are still there, adding winter interest to my garden. They really dress up the naked medlar bush.
How Medlar Plants Grow
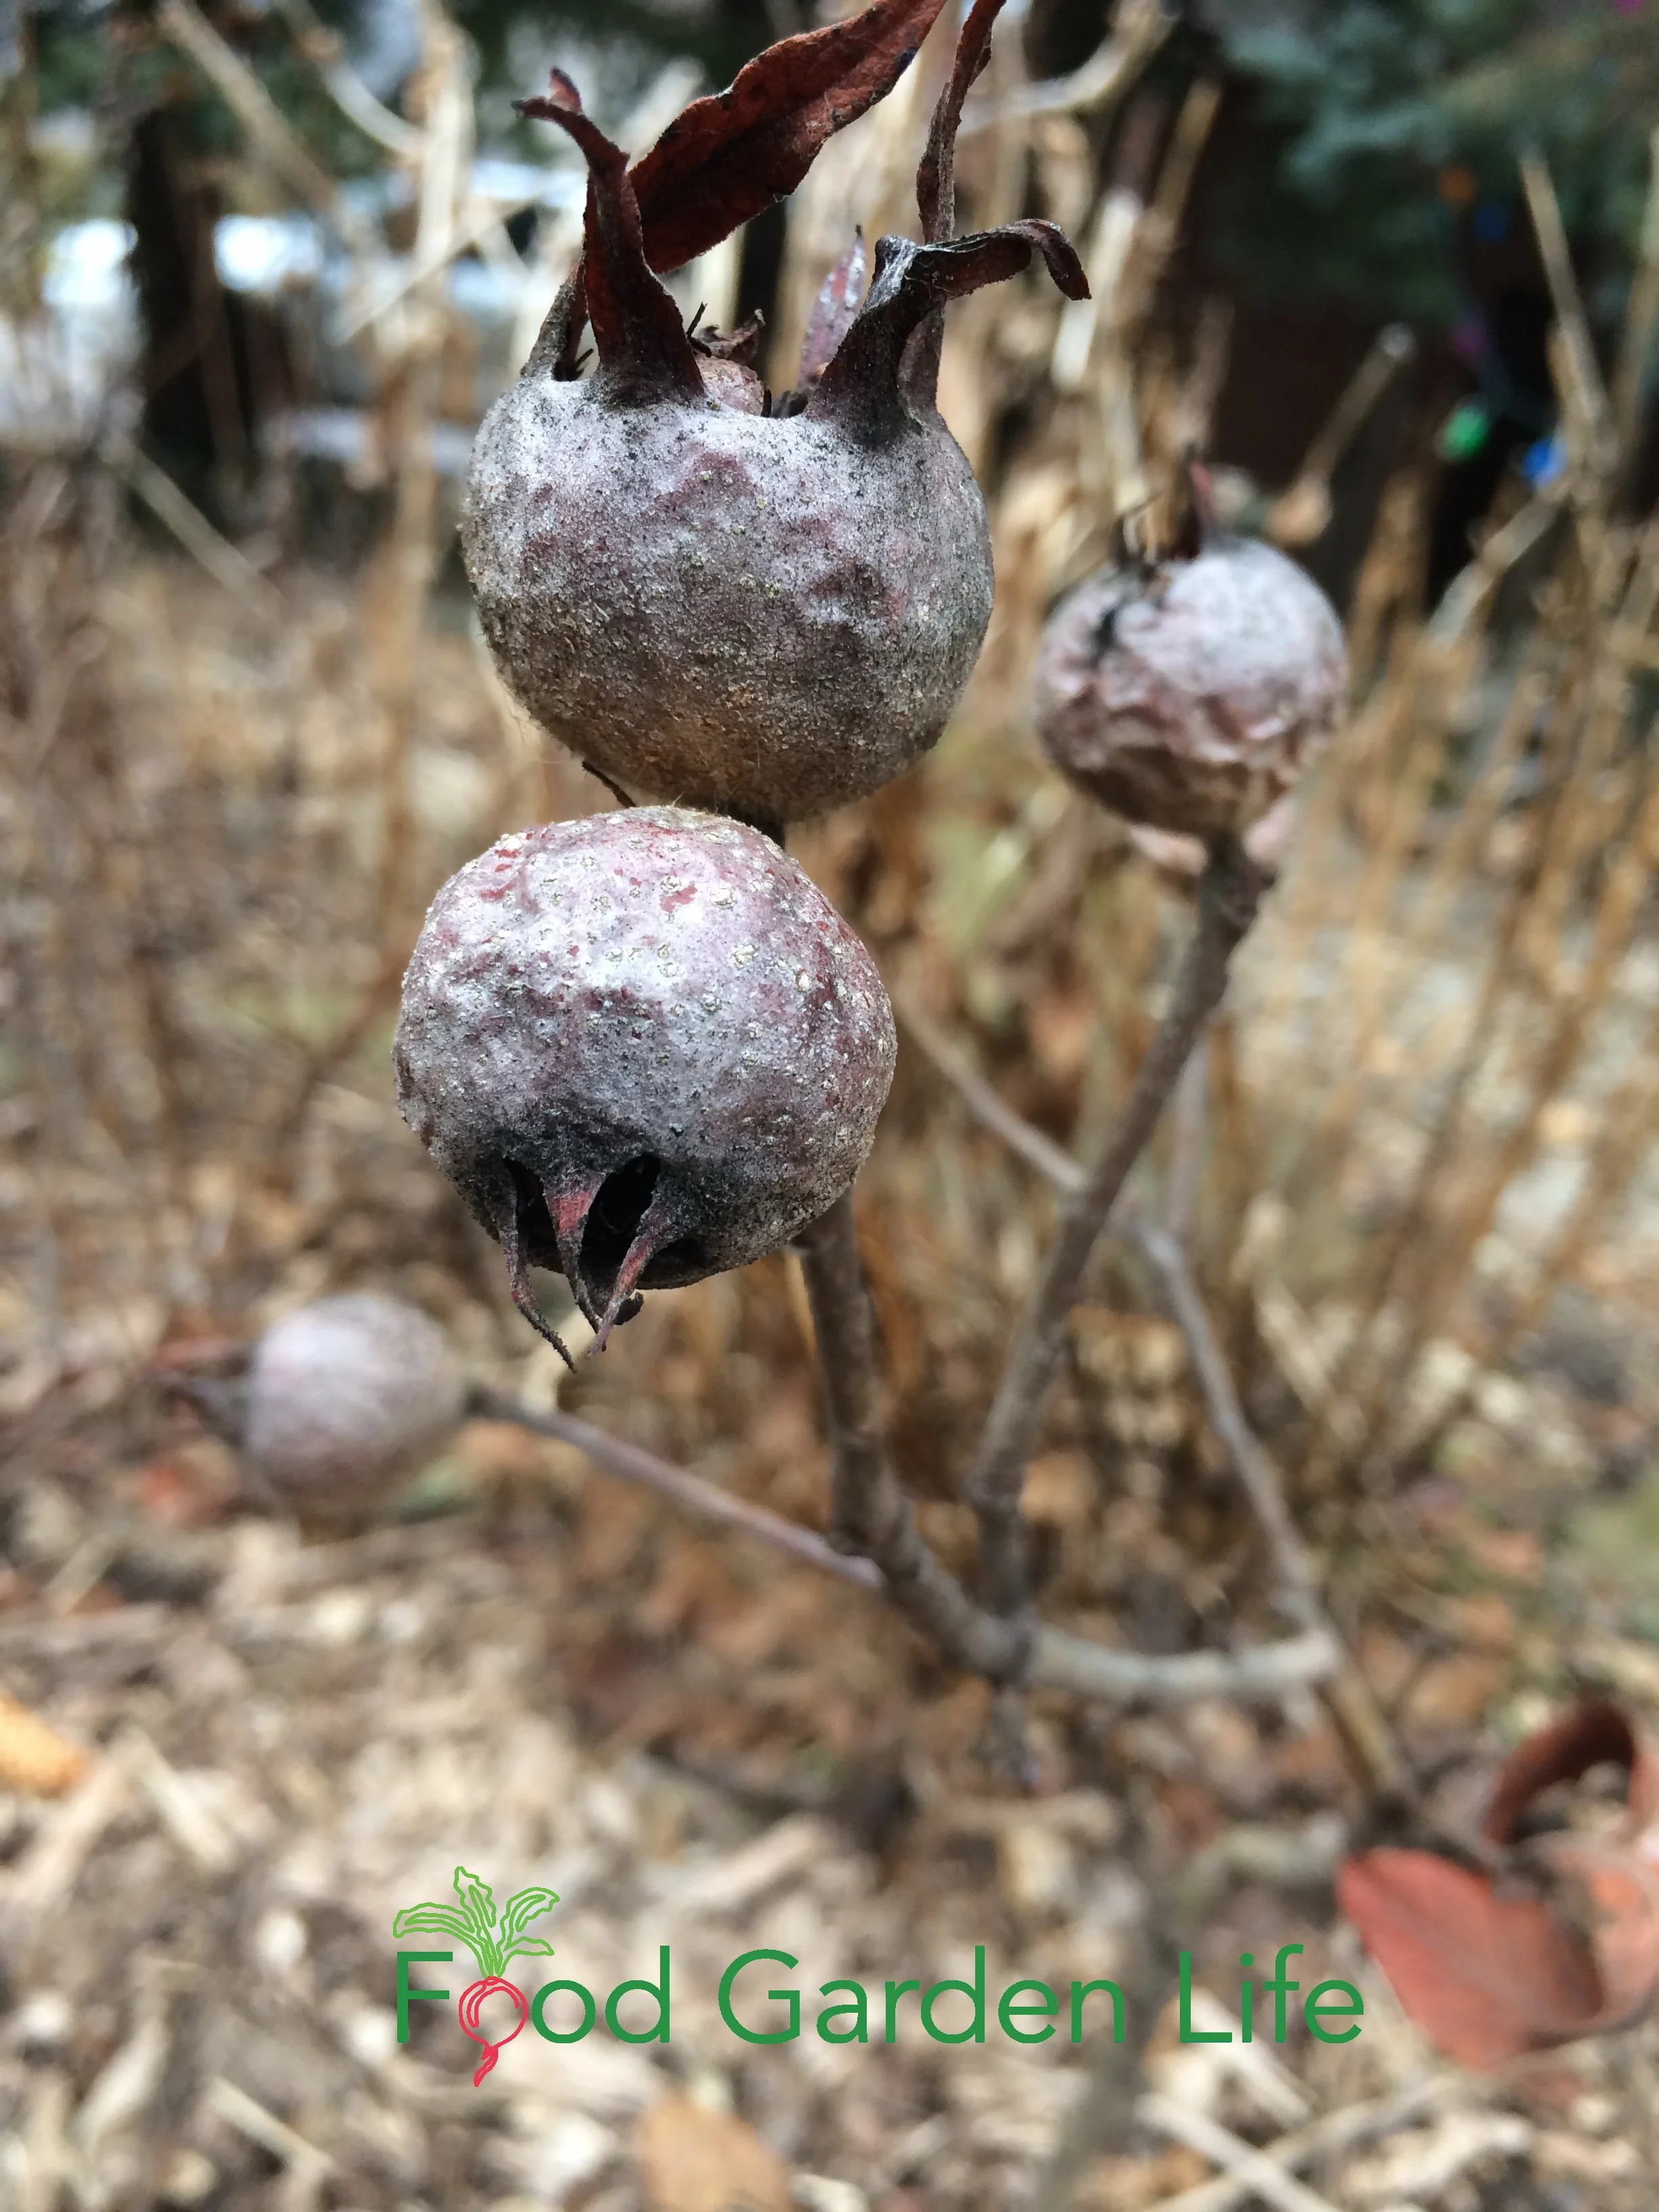
If you don’t harvest all of your medlar, they add winter interest to the garden.
Medlar is fairly slow growing. But as it fills in, it takes on a fascinating gnarled look thanks to the ways the branches grow into a nest of twisted shoots.
My medlar is a bush. No taller than me. But it can be either a large shrub or a small tree. Like apples, you determine shape and size with pruning – and like apples, it can be grown on a rootstock that dwarfs it. A medlar tree on its own roots can get bigger, 4-6 metres (13-20’) high.
Ultimately, the size depends on the rootstock, the growing conditions, and how you prune it.
Best Site for a Medlar
Medlar grows best in full sun, but does respectably well in partial shade. Mine is underneath a towering silver maple, where it gets 4-6 hours of sun a day.
It’s not fussy about soil. The important thing is that the soil is well drained.
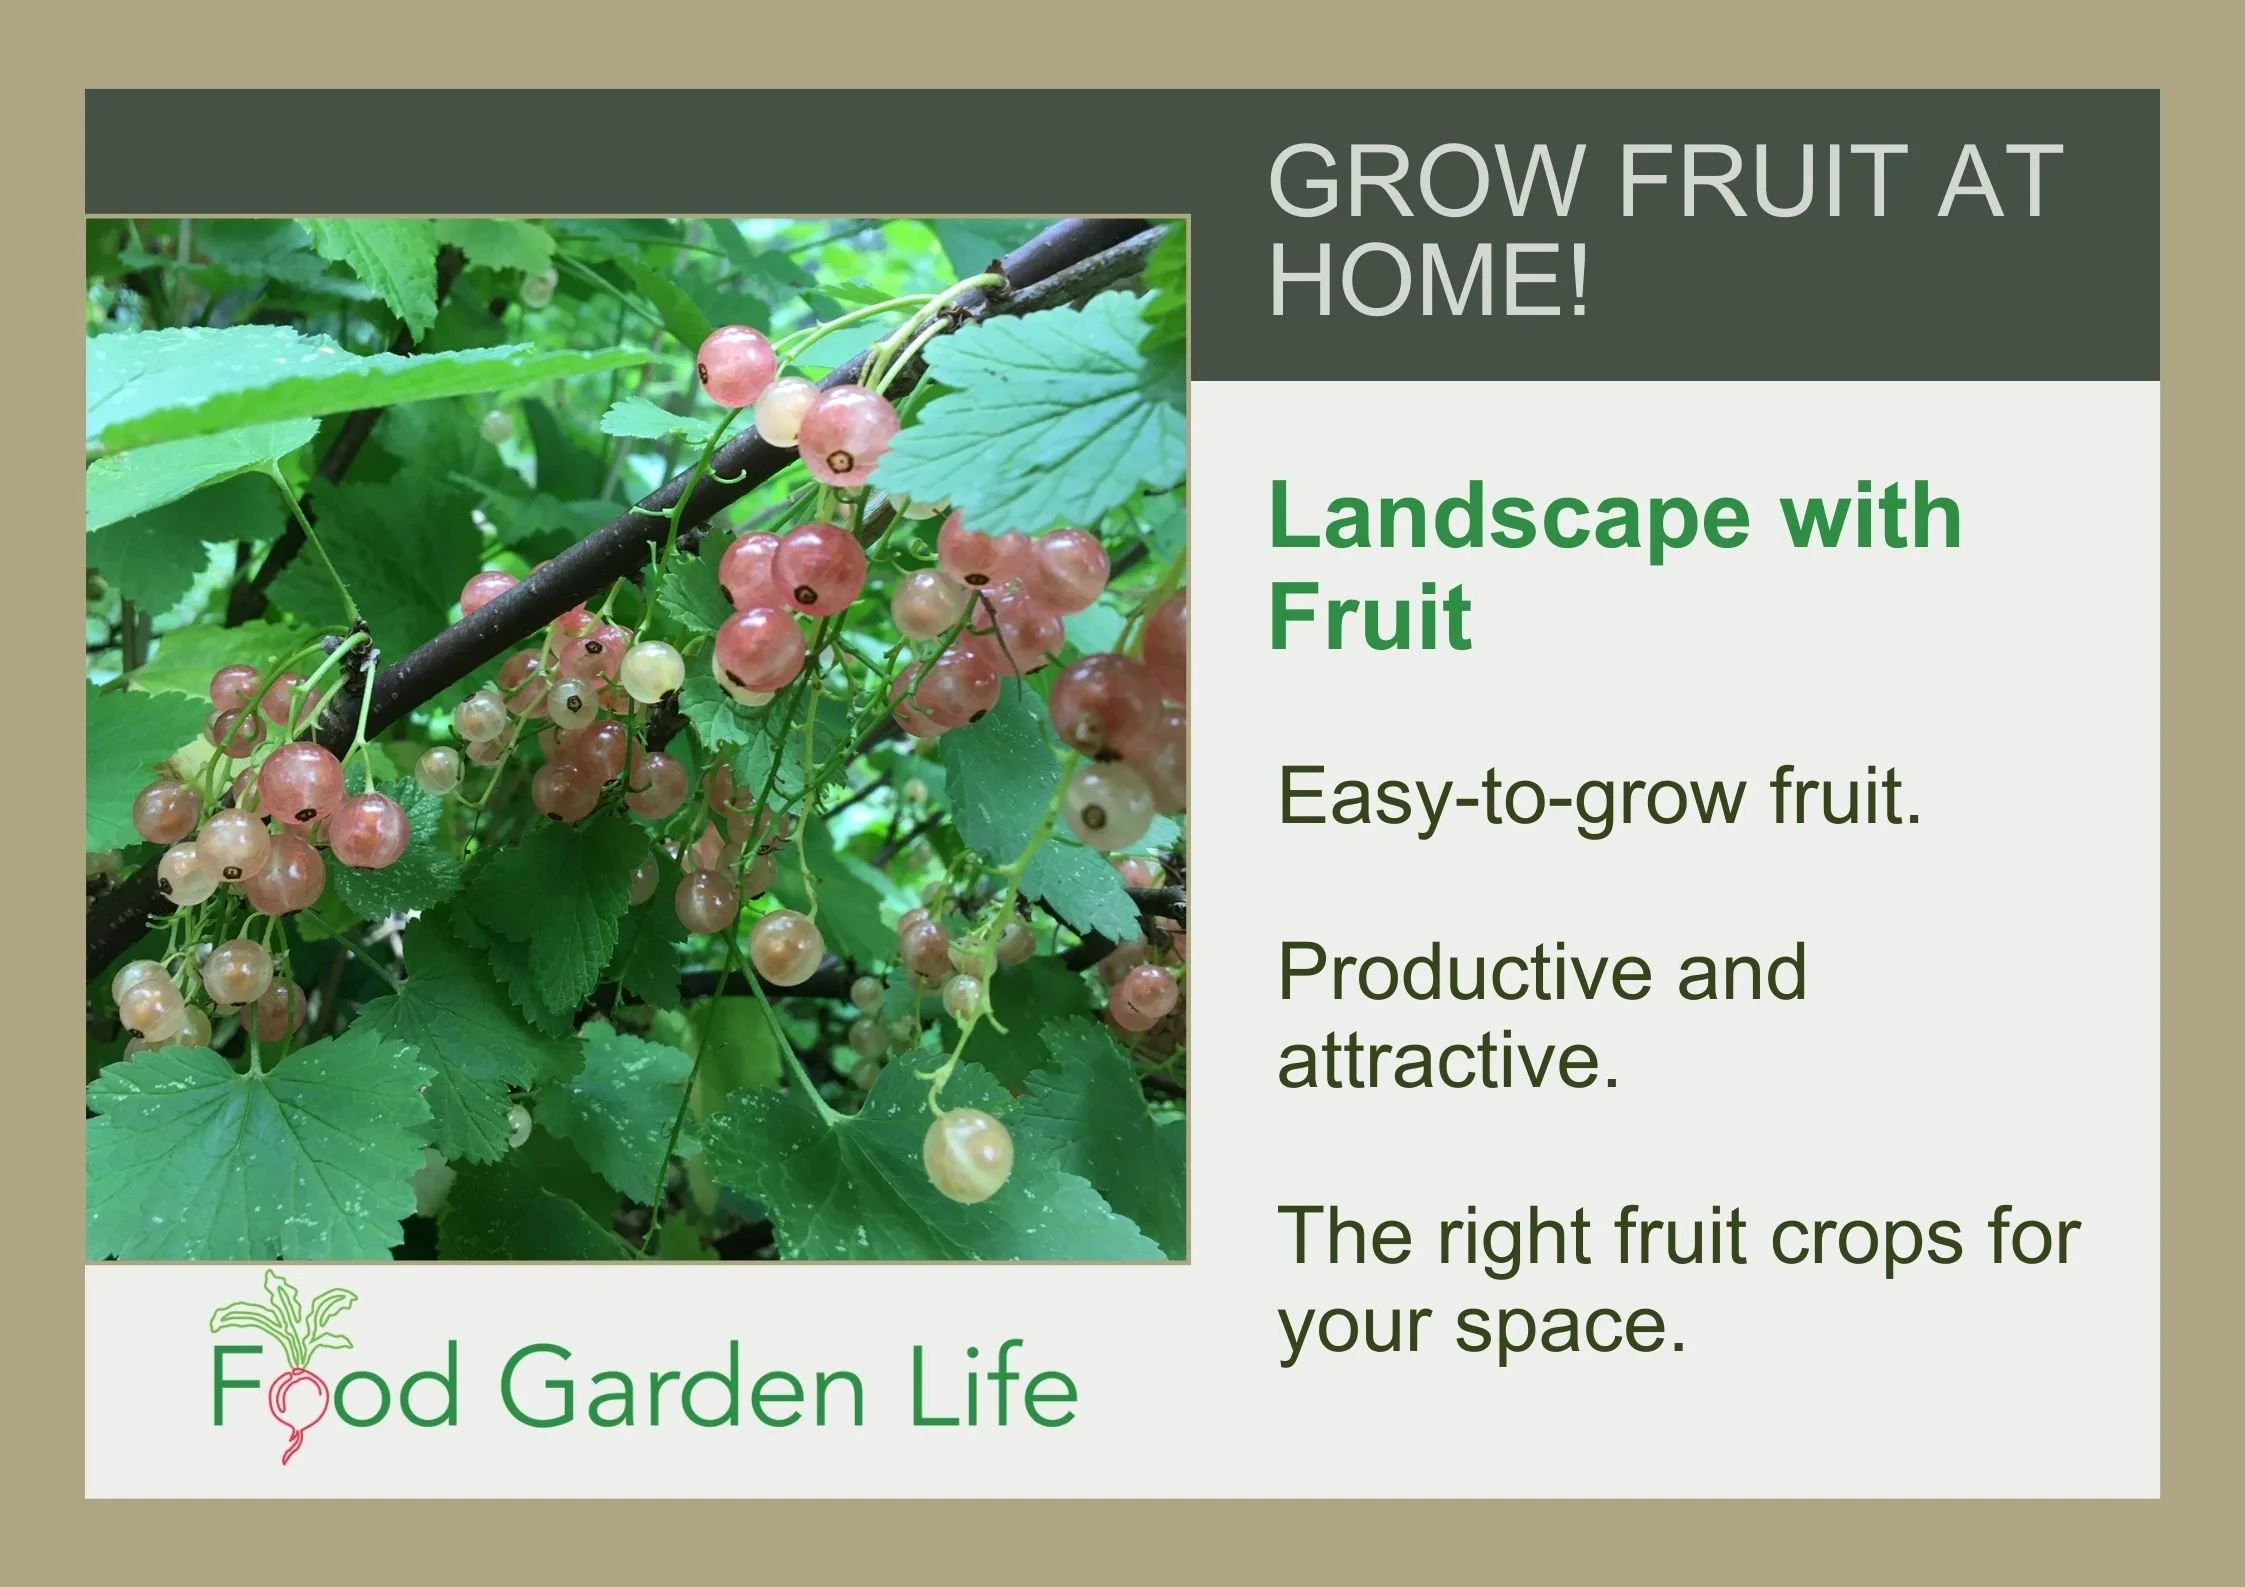
Landscape with Fruit
That’s easy to grow in a home garden!
Does Medlar need a Mate?
Medlar is self-fertile.
That means that if you have just one plant, you’ll still get fruit.
How to Prune Medlar
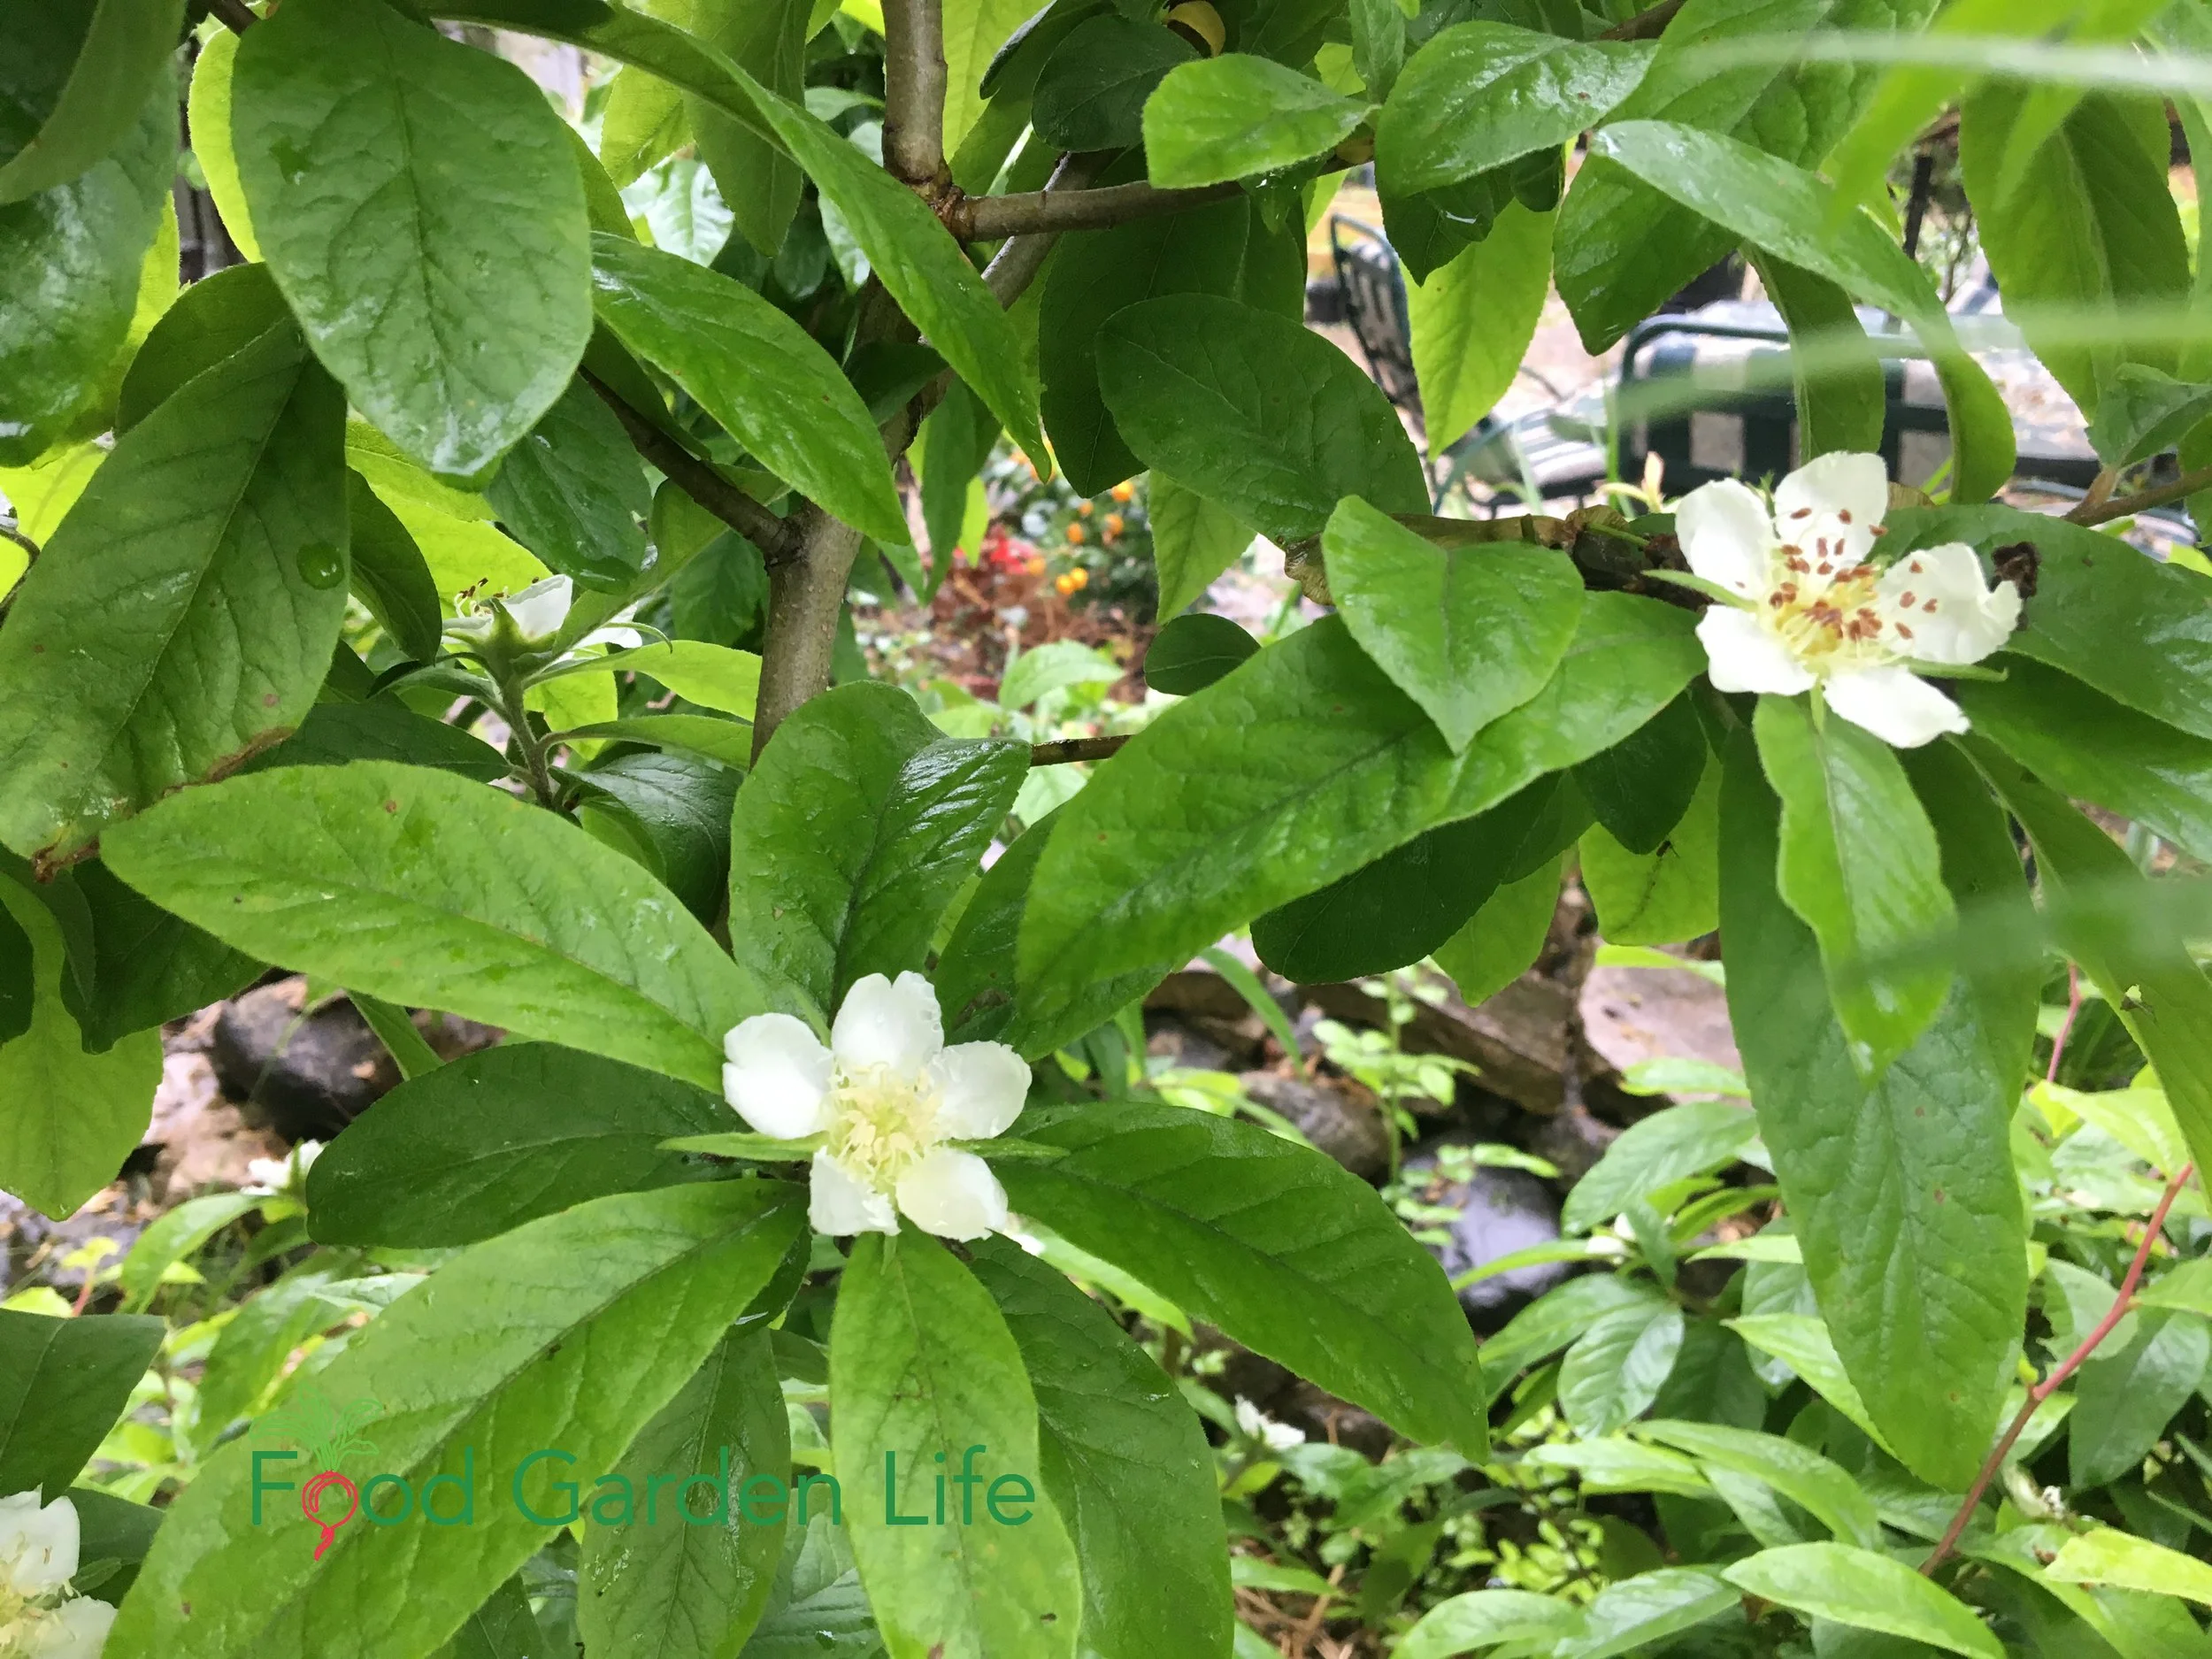
Medlar plants have large star-shaped white blossoms in spring.
Nursery-grown medlar bushes and trees are often pruned to have a length of bare trunk before side shoots are allowed to grow. This is so that when the branches are bent from the weight of fruit, they are high enough above the ground that they don’t touch it.
I prune my medlar once a year, in late winter, while it’s dormant. There’s an art to pruning many fruit trees, but pruning medlar is simple. Like most fruit trees and bushes, we want an open framework of branches that gives good air circulation and lets in some light.
Here are tips for pruning your medlar:
Remove dead, damaged, spindly, diseased, and crossing branches
Shorten long branches that might touch the ground when bearing a heavy crop of fruit (fruit forms on spurs on branches, so when you remove the tip of a branch, you’ll still get fruit)
Remove any suckers that grow from the base
Prune your medlar while it’s dormant, in late winter.
(And if you don’t get around to pruning for a year or two? Sometimes life gets busy for home gardeners. Your medlar will keep growing, and you can prune it the following year.)
Medlar in the Landscape
A medlar bush is a great addition to a forest garden and an edible landscape.
I hope that with the increasing interest in edible landscapes and forest gardens, more people will try to grow medlar.
Forest Gardens
In forest gardens and polycultures, a medlar bush can be part of the lower canopy; or a medlar tree as part of the canopy.
Edible Landscapes
In edible landscapes, where aesthetics matter too, the addition of a medlar bush brings spring flowers, fall colour, winter interest.
Food Gardens
For hard-core food gardeners, you can use a more intensive approach to maximize your medlar production. I’ve seen medlar in a demonstration orchard being trained in a high-density system, tightly spaced, and trained along horizontal wires.
Harvest Medlar Fruit
Medlar harvest, after the leaves have fallen
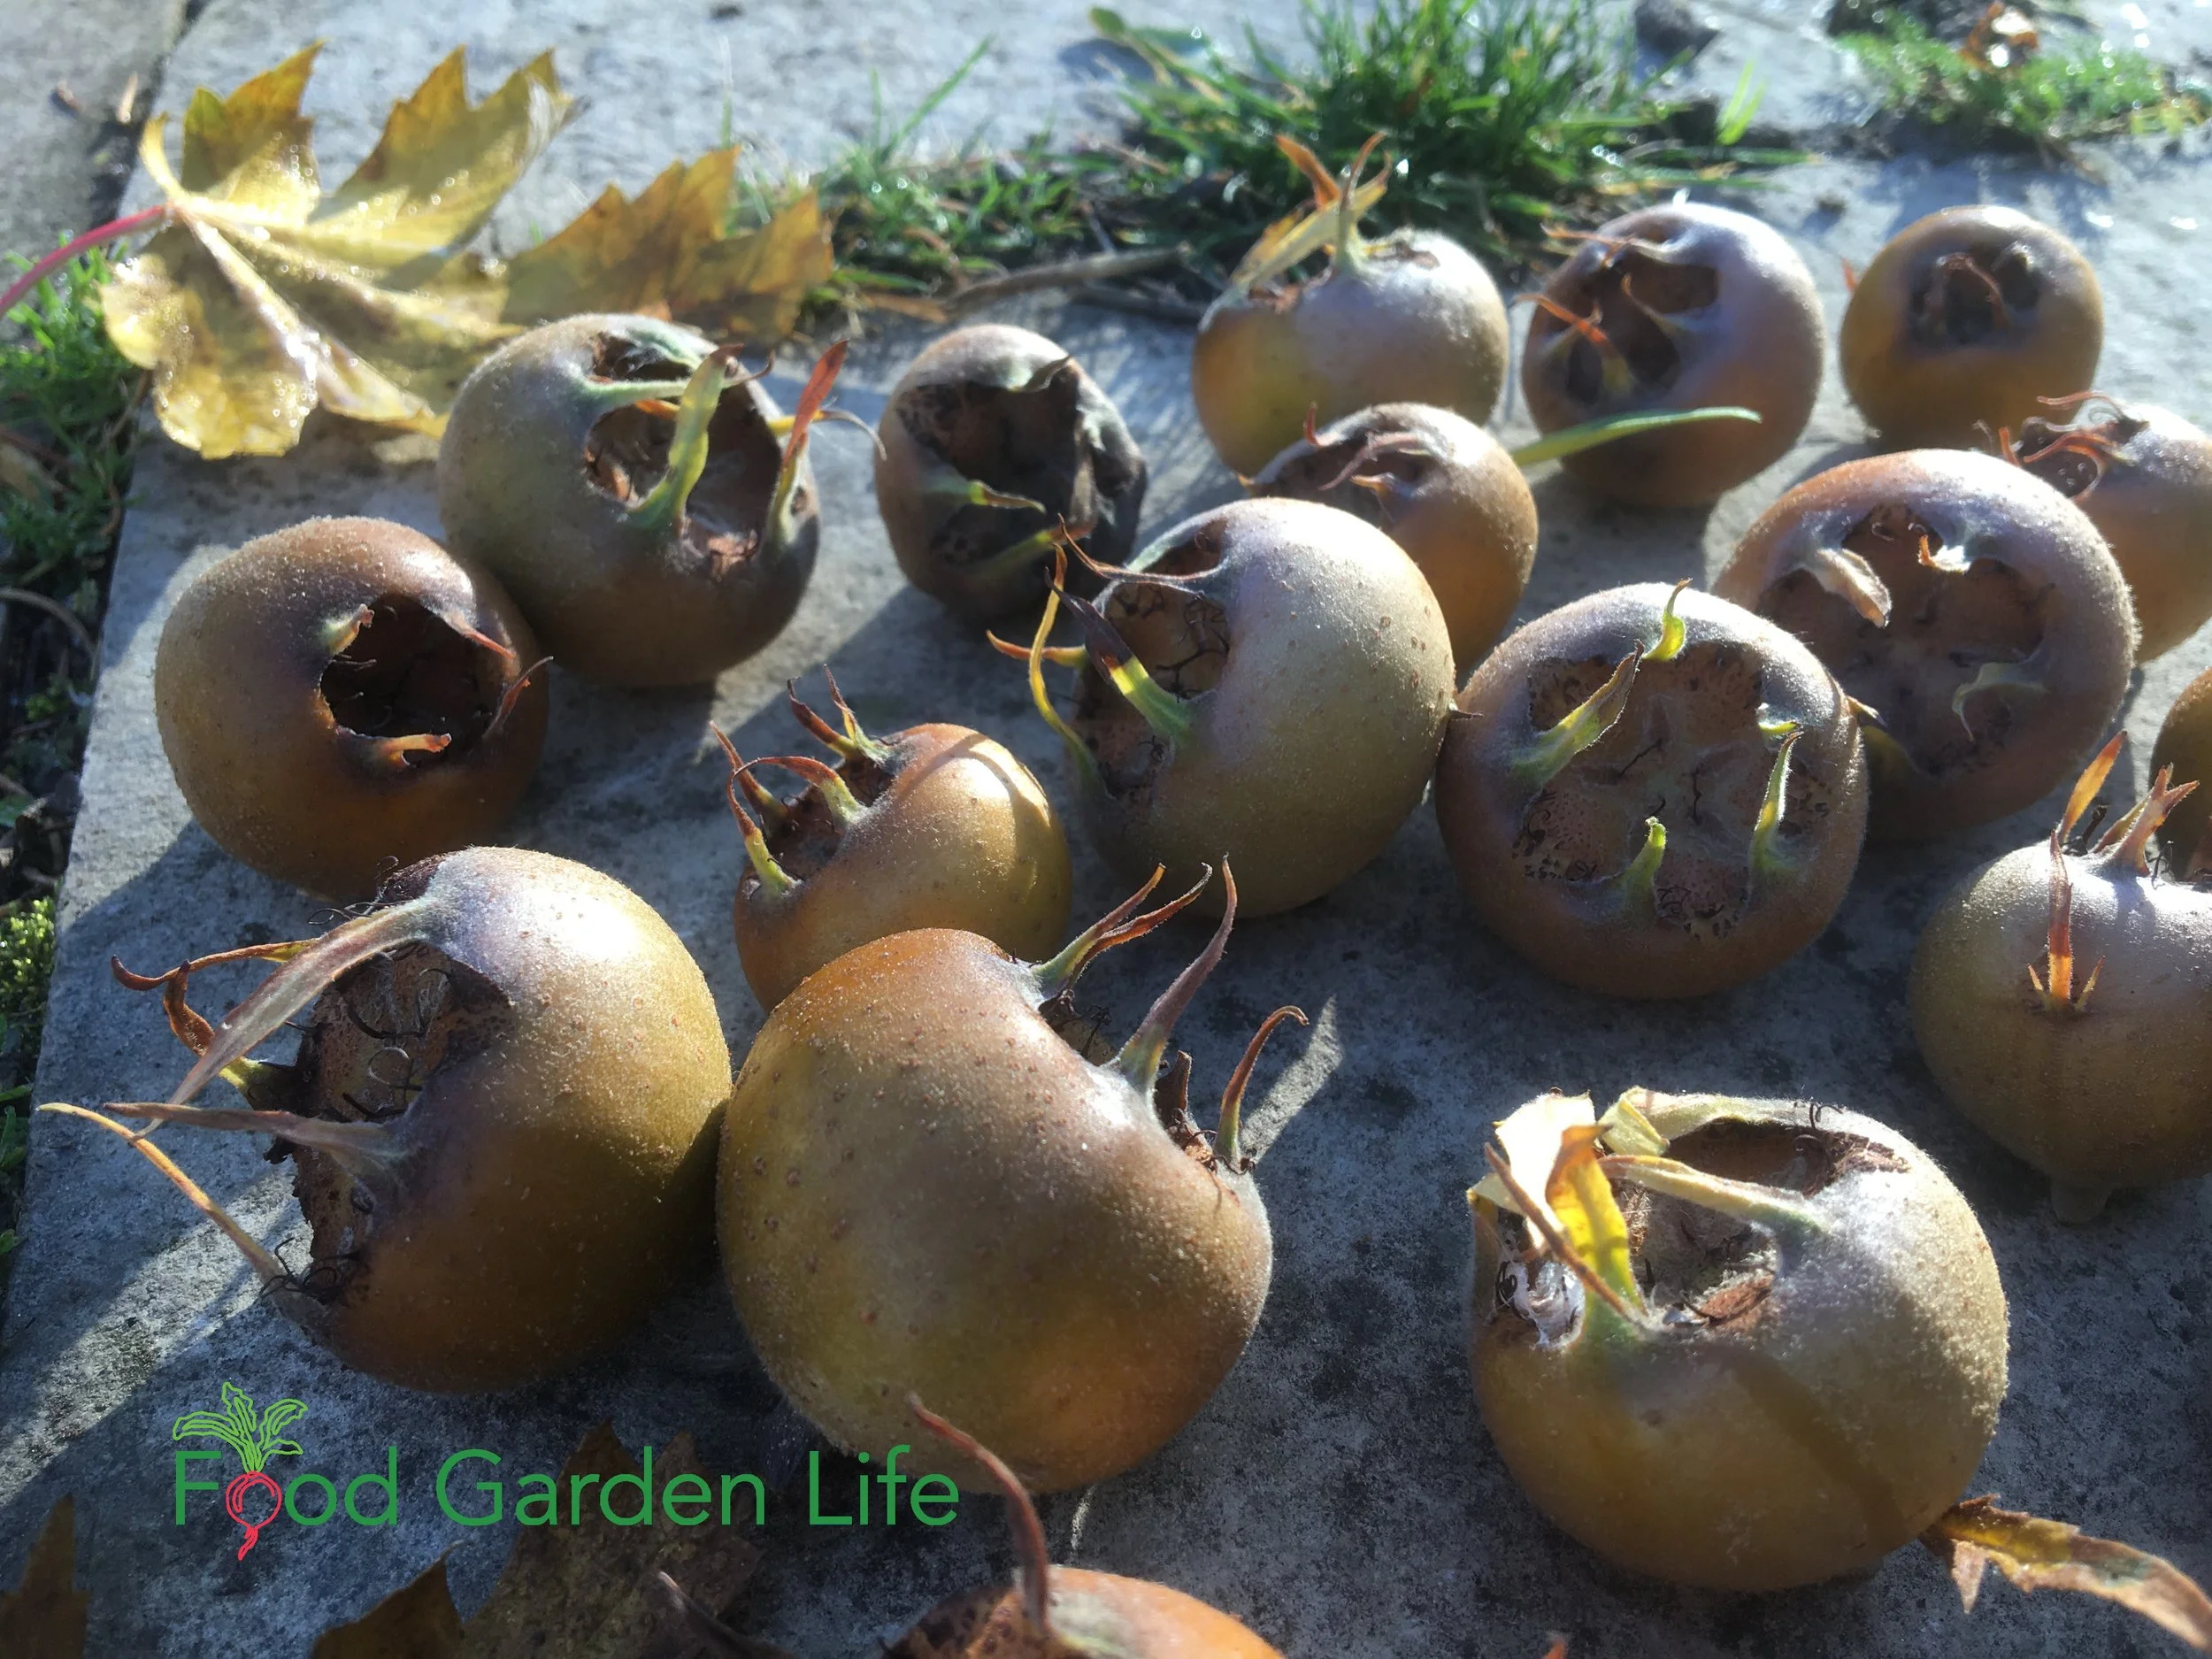
The fruit size depends on the variety and growing conditions, but they’re often 3 - 6 cm (1 ¼ - 2 ½”) across. They’re a bit fuzzy when small, and as they grow the skin starts to look like a russet apple. You’ll find 5 large seeds inside.
Pick medlar fruit in the fall, once the fruit has fully sized up. It will be greenish-brown. Don’t rush to pick it, though, as it is fine with some light frost. This is a fruit that takes a long time to mature, so you want to give it as much time on the plant as you can. And besides, it’s a winter treat, so don’t rush to pick it while there are still apples and other fall fruit to eat.
I pick my medlars here in southern Ontario in mid-November, after the leaves on my medlar bush start to fall. You’ll know it’s time when the fruit detaches from the branch fairly easily.
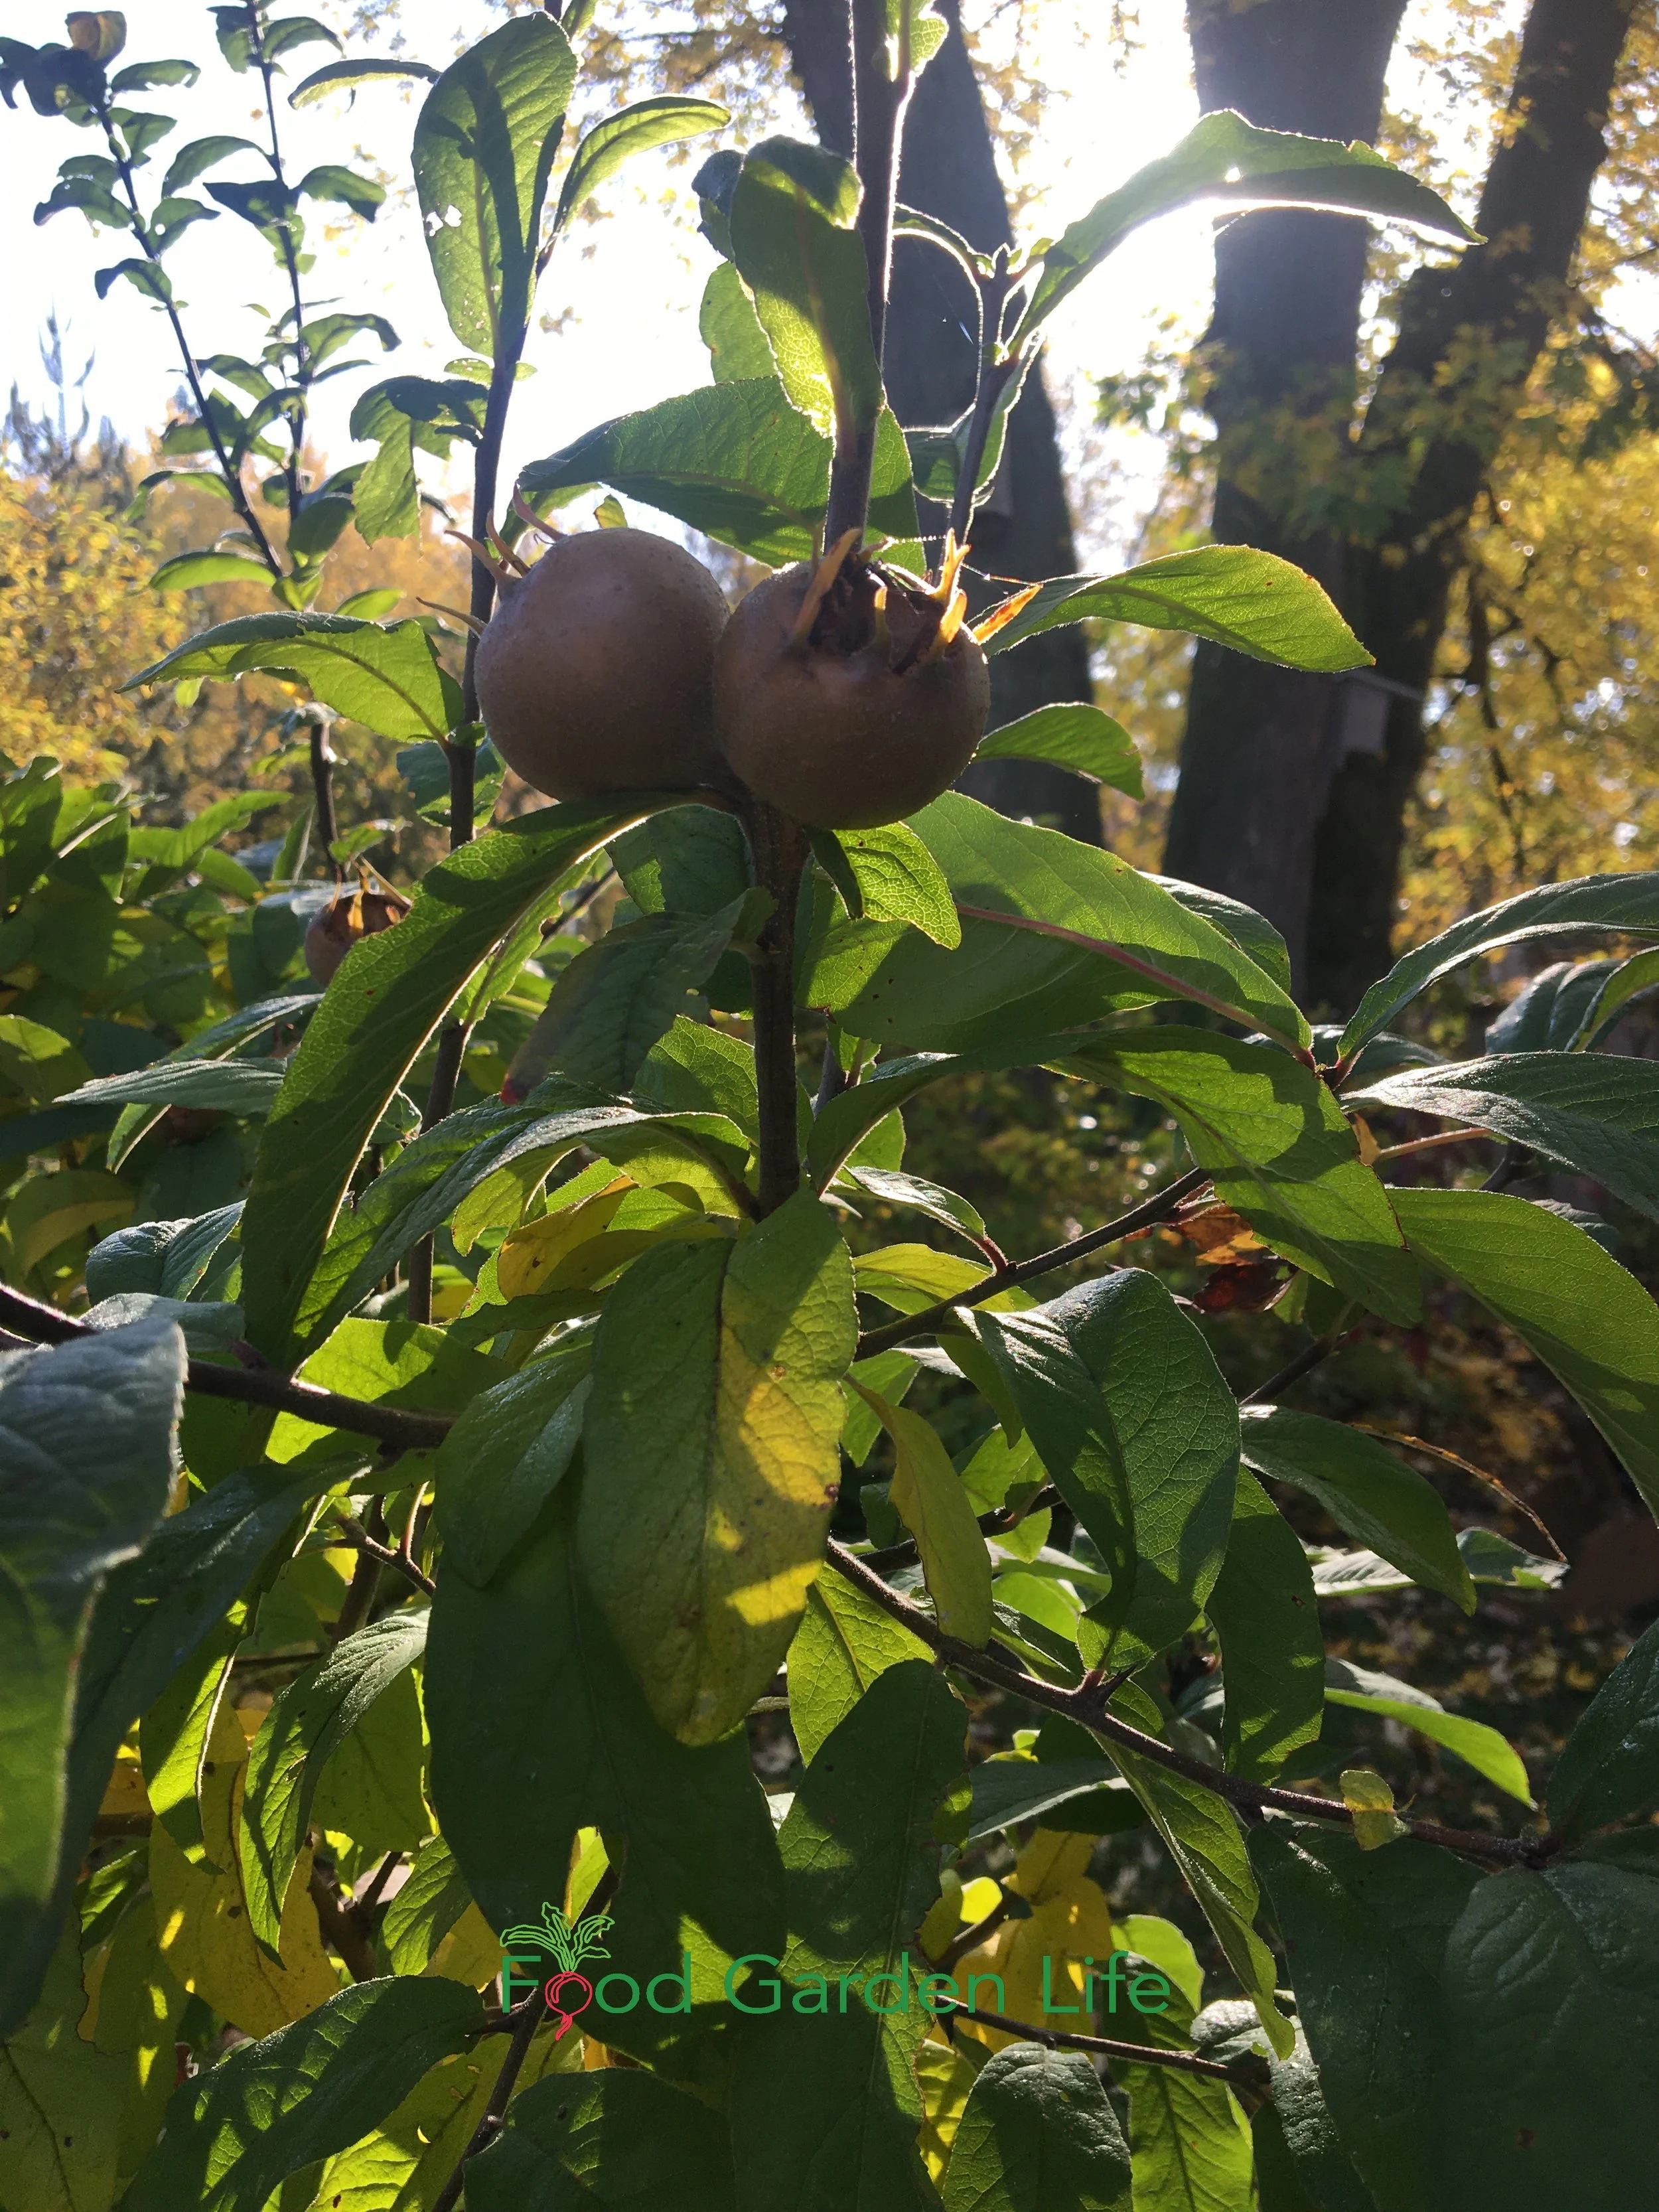
Don’t pick medlars too early. Even though the trees in the background are changing colour, these medlar fruit can stay on the bush until it drops its leaves.
(You can harvest earlier, if the fruit are fully sized up…but without the frost, it takes longer for them to be ready to eat, after a treatment called “bletting.”)
Bletting Medlar
There’s a special word we use with medlar, the verb “to blet.” It means to give the fruit time to ripen and soften. I’ve seen some sources liken this to “decay” though I think that’s a bit harsh. We give wine time to reach its best, so why not medlars!
Don’t skip the bletting process. You won’t try to eat an unbletted medlar more than once because of the pucker power! Just like an unripe persimmon.
But when bletted, the white, acrid flesh becomes a brown apple-like puree with a sweet taste. To me it tastes a bit like very sweet fig with a touch of citrus.
Here’s more on bletting:
To make them last longer, blet your medlars in a cool spot
If you want them sooner, blet them on a plate in the kitchen
Either way, the timeframe measures in weeks
Face the eye (called the calyx) downwards
Some people place them in sawdust or a bed of straw, although I’ve never done this
As bletting progresses, the skin turns a darker brown and begins to wrinkle.
If you’re picking medlar from your garden in late fall or early winter and it’s already soft, it might not need further bletting. A taste test will tell you.
Landscape with Fruit
That’s easy to grow in a home garden!
Medlar in the Kitchen
The first thing to do if you haven’t tasted medlar before it to take a well-bletted medlar and just scoop out some of the insides—a bit like baked apple—with a spoon. Then taste it as is.
Other uses are to make jam or jelly – or to make a “cheese,” where the pulp is retained, cooked down, then put into a mould to set. (It sets nicely because medlar fruit has lots of pectin.) Fruit cheeses are a nice addition to a cheese platter.

More medlar ideas:
Medlar fruit leather
Medlar compote
Medlar Pedigree
Medlar is in the same family as apples, rose, quince, hawthorn, and pear. But you won’t confuse it with any of these relatives because of its long strap-like leaves.
Because they’re in the same family, medlar is often grafted onto quince and hawthorn rootstock.
Where to Find it

Pin this post!
Pity it’s not more easy to find medlar at garden centres. You’ll probably have to find a specialist nursery if you want to buy a medlar plant. Or, if you’re lucky, a fruit-growing enthusiast who can share a plant with you.
I’ve never found feral medlar trees here in southern Ontario. But in some places you might. In Cultivated Fruits of Britain, author F.A. Roach talks about medlar growing in hedges of southern Europe and being used as a hedging material in Florida.
Propagate Medlar
Medlar is usually propagated by grafting onto hawthorn or quince rootstock.
Just like apples, seeds don’t grow to be like the parent plants. They don’t “come true” from seed.
I’ve never tried growing medlar from seed, but it’s said to be tricky because the hard seed coat causes erratic germination. Seeds need a cold treatment (called stratification). This cold treatment can be from leaving potted seeds somewhere protected from rodents (a shed or garage) or in the fridge.

Get Your Fig Trees Through Winter
And eat fresh homegrown figs!
Medlar FAQ
What are the growing zones for medlar?
Hardiness is never an exact science, and different sources report different levels of hardiness. Many sources suggest USDA hardiness zones 5-8…but I’ve also seen USDA zone 4. A microclimate can help push zone boundaries. You might also be able to track down cold-adapted varieties..I’ve seen medlar near Montreal.
Are there named Medlar varieties?
Yes. But not many. Unlike apples, with countless varieties, there are very few improved varieties of medlar. ‘Nottingham’ and ‘Breda Giant’ are two varieties that I’ve come across here in Canada. But your choice will probably be dictated by what your local specially fruit nursery carries.
Is there another name for medlar?
Yup. The large eyes (calyx) on the bottom of the fruit inspired a number of bawdy references in the past. There are lots of aliases for medlar. A common one is “open-arse.” I’ll leave you to research the rest.
Is it true that the Romans at medlar?
Apparently. I’m no historian, but here’s a very fun article that tells you about the history of medlar.
What is the botanical name?
Mespilus germanica
Medlar Jam Recipe

Medlar jam
Ingredients
Medlar fruit, well bletted
Lemon
Sugar
Water
Directions
Cut up medlars and put in a pan (if you are saving seeds to grow, remove them now, before cooking)
Add enough water to cover the fruit
Simmer until you have a brown pulp
Strain (some people use cheese cloth or a jelly bag to make a very clear jelly…but I just use a coarse sieve…which lets through some pulp, giving me jam)
Measure the liquid you’ve just strained out – and for each pint of liquid, add 1 ½ cups of granulated sugar, and the juice of ½ a lemon
Boil until you get to the setting point
A note on setting point. I’m no expert at making preserves, but here’s what I do:
I put a saucer into the freezer for a few minutes before I need to test for the setting point. Then, when I’m ready to test, I put a spoonful of the jelly on the plate. If I press into it and get wrinkles, I figure I’m done.
Find This Helpful?
Enjoy not being bombarded by annoying ads?
Appreciate the absence of junky affiliate links for products you don’t need?
It’s because we’re reader supported.
If we’ve helped in your food-gardening journey, we’re glad of support. You can high-five us below. Any amount welcome!
More About Growing Fruit
Find out How to Harvest More in These Masterclasses

Articles and Interviews
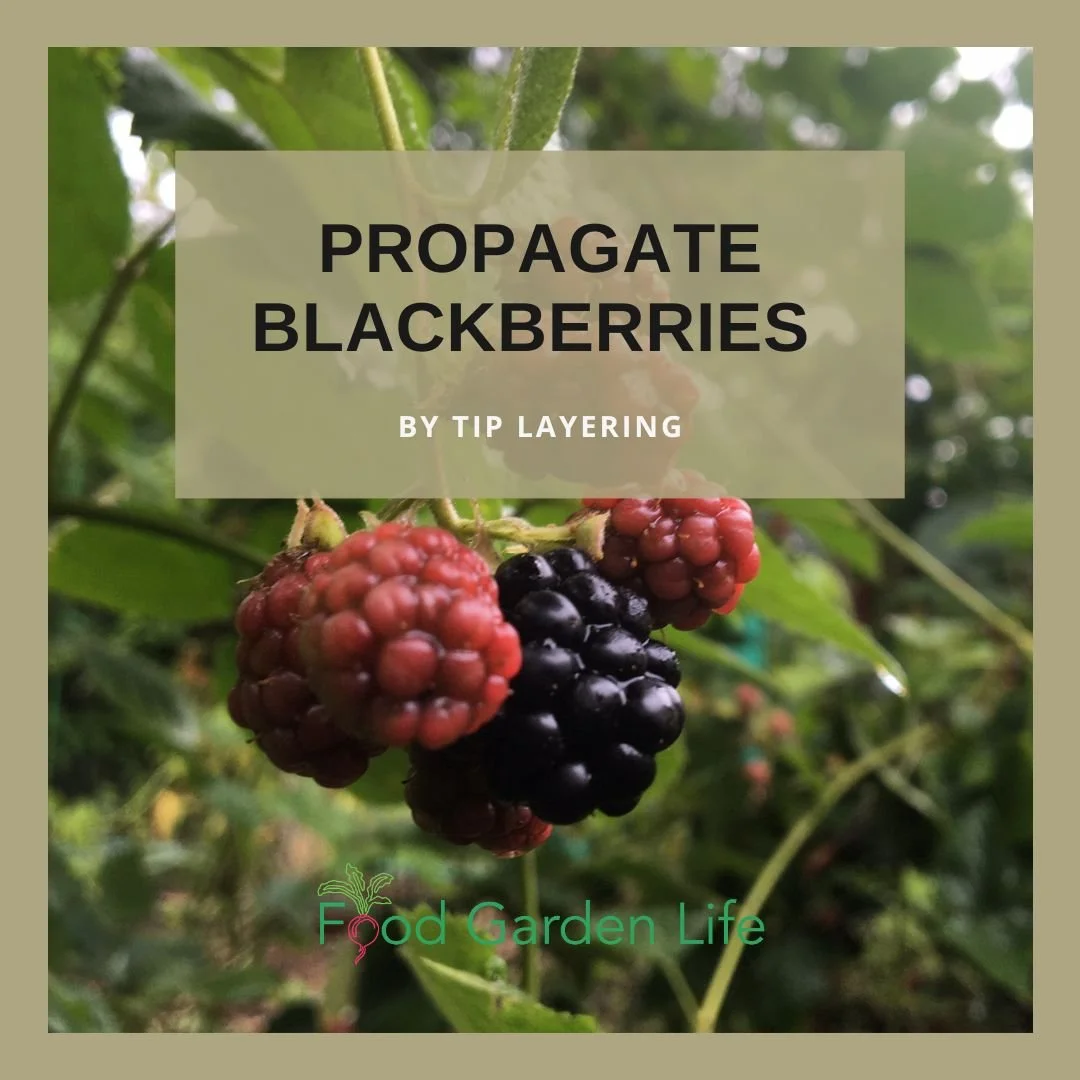
Propagate Blackberries by Tip Layering
Propagate your blackberry plants with tip layering.
By Steven Biggs
A Simple Way to Grow Your Own Blackberries
What is the easiest way to make more blackberry plants?
It's called "tip layering."
In mid-summer, as their long, arching canes reach the ground, blackberry plants often propagate themselves by tip layering.
If you want to make more blackberry plants, it’s an easy way to do it. I once tip-layered a single blackberry plant into a 30-foot stretch of blackberries along a chain-link fence!
This article tells you about this simple approach to propagating blackberries.
What is "Layering"?
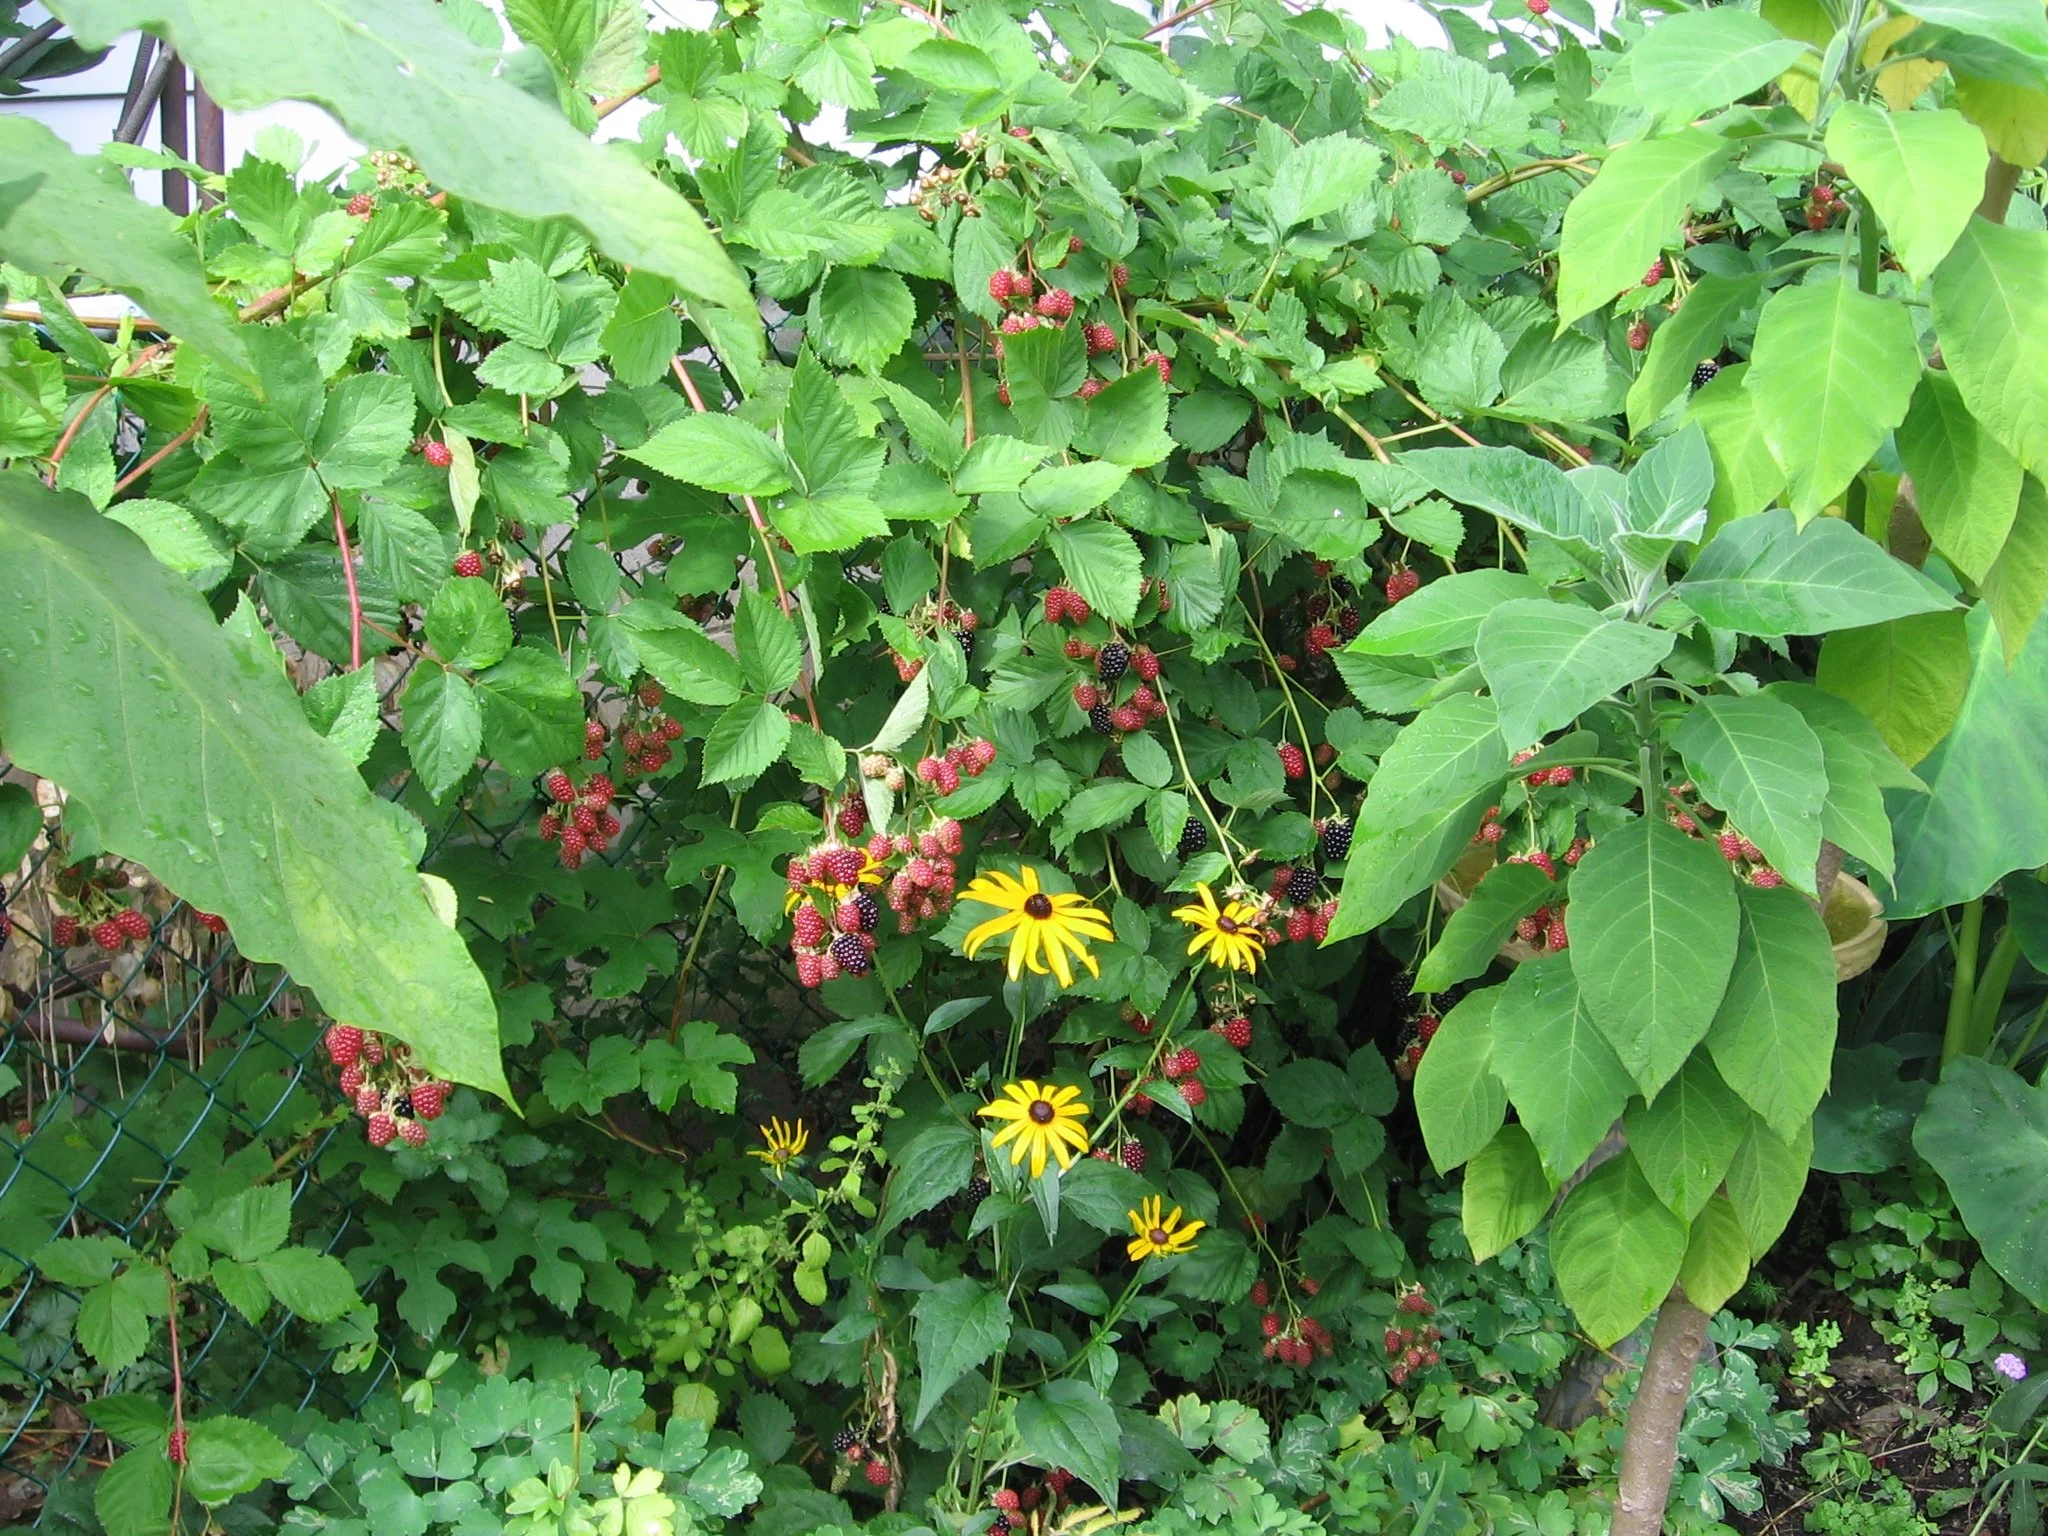
I once tip-layered a single blackberry plant into a 30-foot living blackberry-plant wall along a chain-link fence.
Layering is when roots form on a stem while it's still attached to a parent plant.
Many plants naturally layer when low-lying branches touch the soil. (I find currant "layers"—rooted currant branches—in my currant patch. Find out more about how to grow and propagate currants.)
Some plants don't layer as easily, and gardeners can help the process by:
Wounding the stem where it will contact the soil
Applying a rooting hormone
Pinning the stem to the ground (or burying a portion of it)
Once it has its own root system, the rooted layer can be detached from the parent plant.
What is "Tip Layering"?
Tip layering is when the tip of a stem touches the soil and forms roots. (It's sometimes called "tip rooting.")
Unlike blackberry stem cuttings, which need ongoing care, blackberry tip layering is a hands-off blackberry propagation method.
Landscape with Fruit
That’s easy to grow in a home garden!
How Blackberry Plants Grow
A blackberry plant has long arching stems, called canes. The canes grow upwards, and when they get tall enough, they start to bend. They keep growing, and the tip of the can will often bend over and touch the ground.
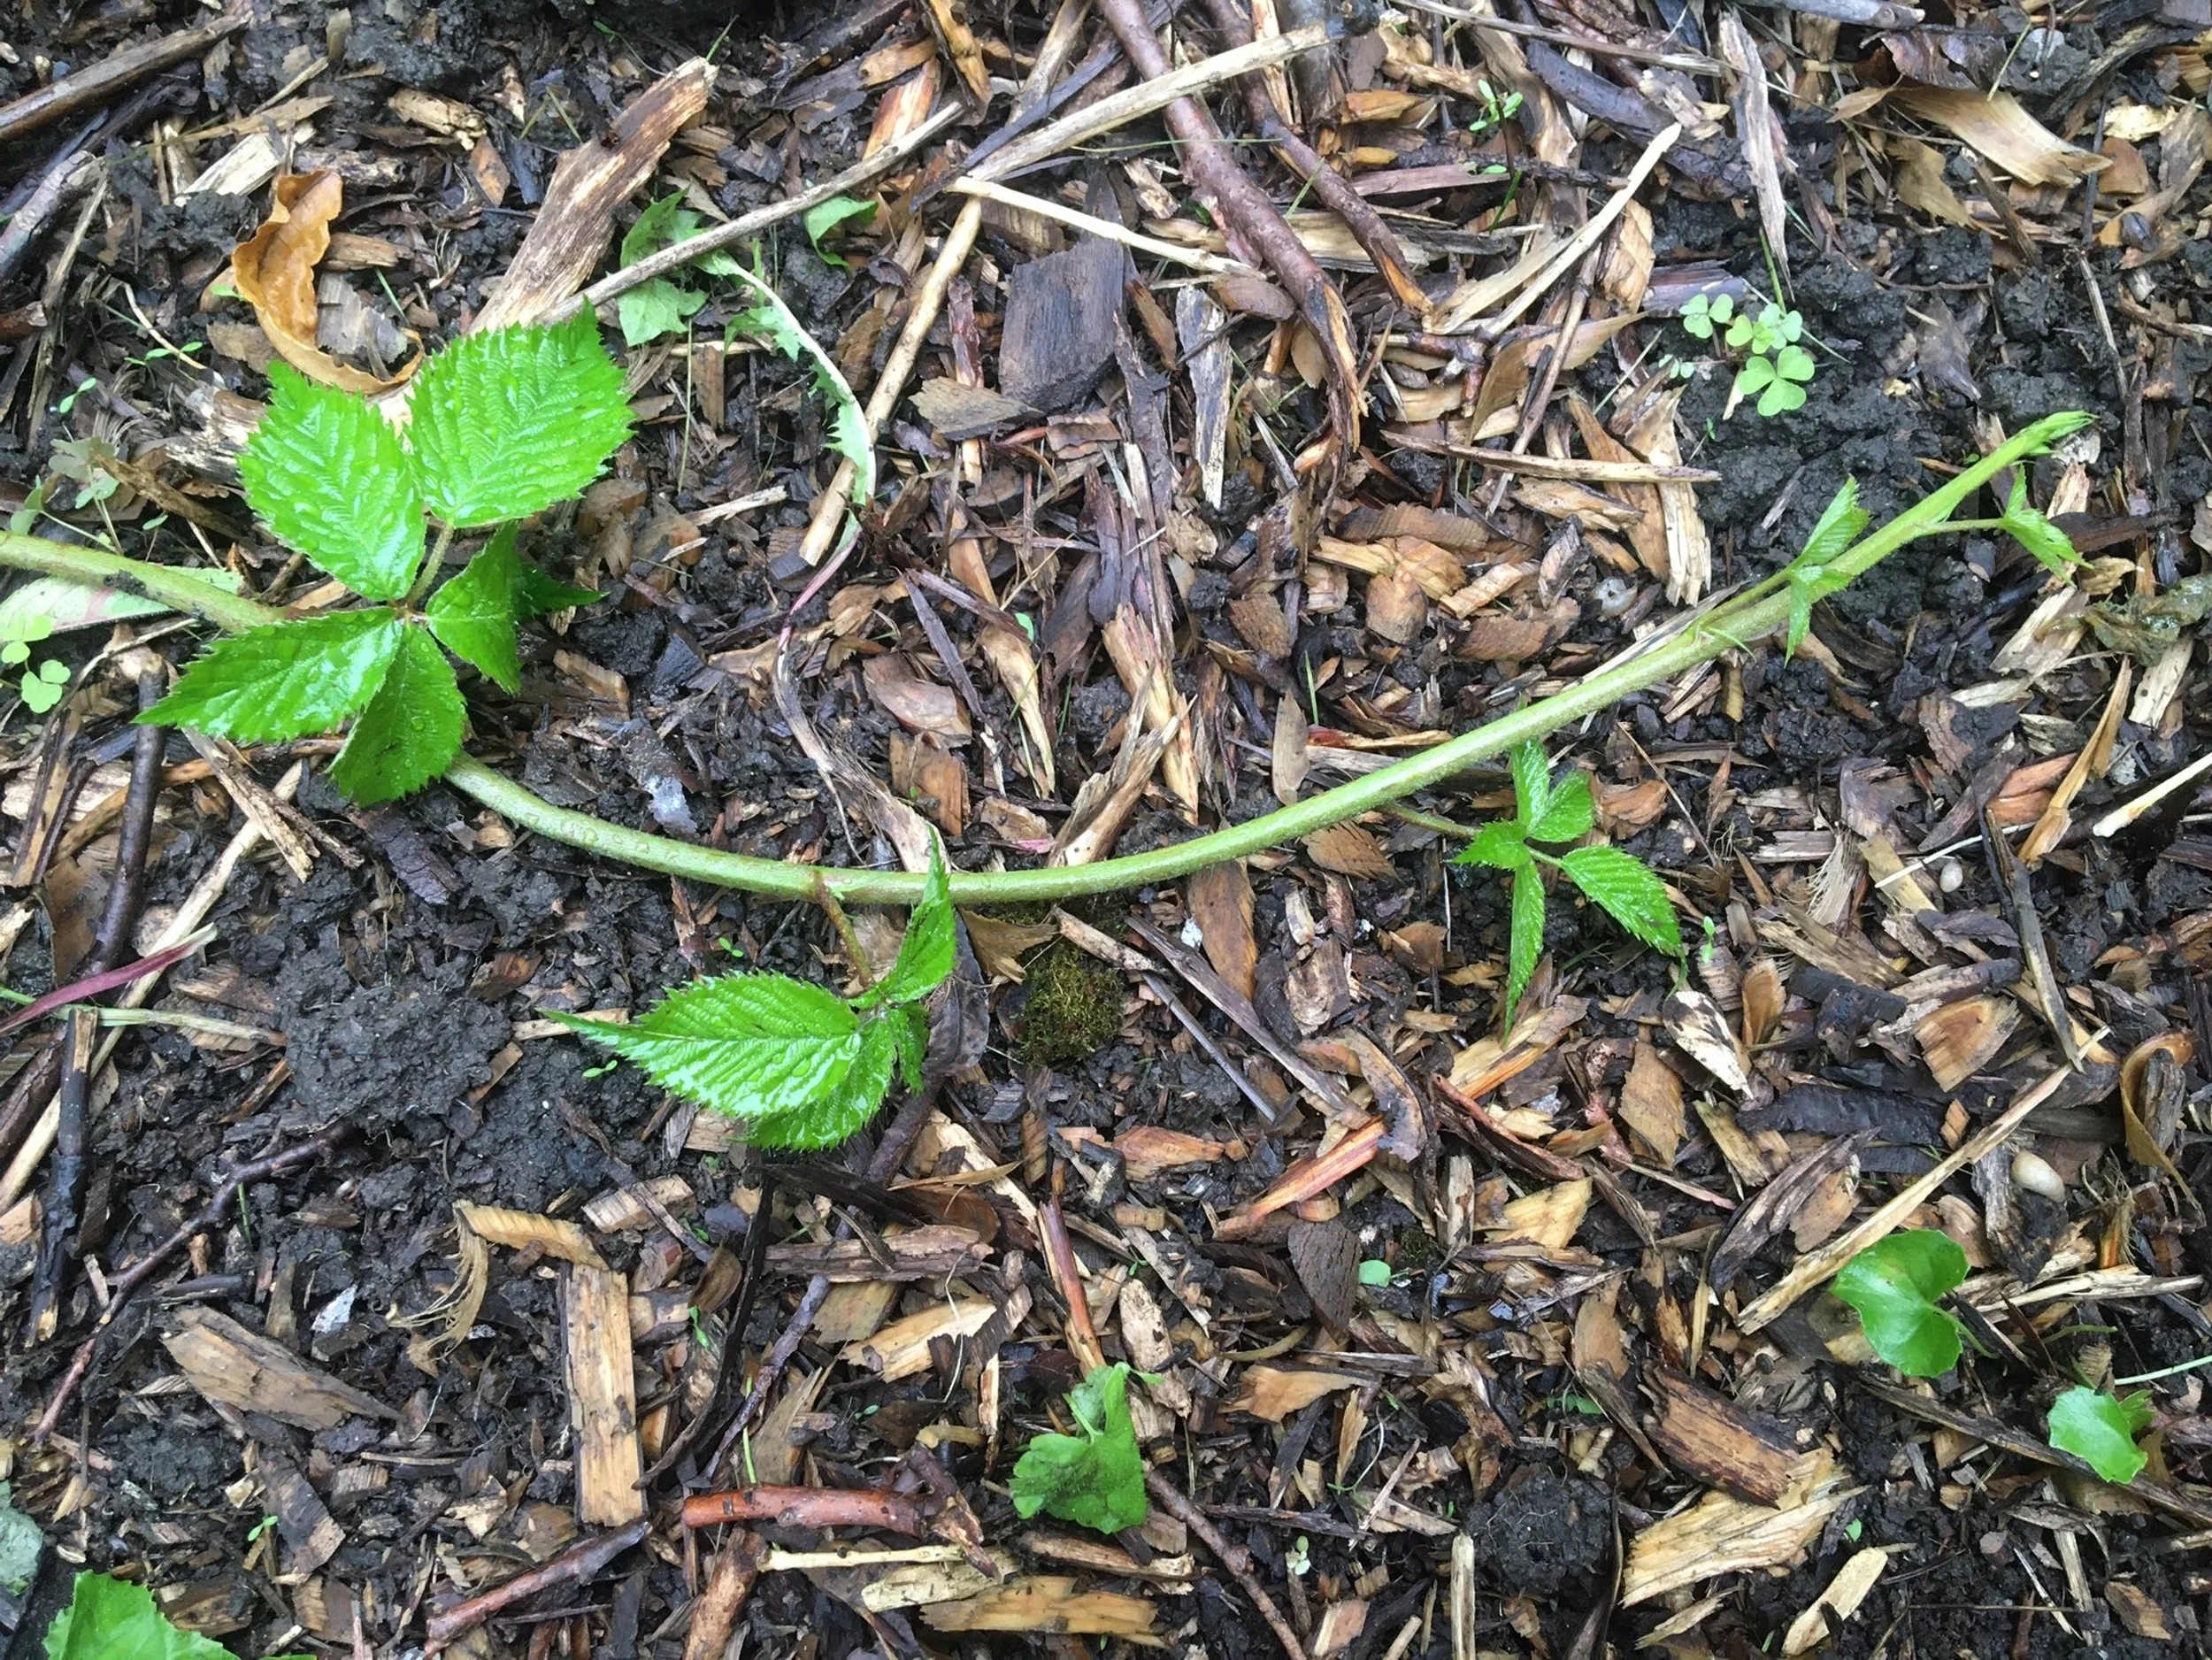
Once the tip of the blackberry cane touches the ground, it will grow roots. This cane has reached the ground and will stop getting longer, and instead form roots.
Once the tip of the blackberry cane touches the ground, it will grow roots. When the roots are well developed, you can cut the cane to detach it from the parent plant, and you now have a new blackberry plant.
Other Cane Fruit for Tip Layering
Purple and black raspberries can also be propagated by tip layering.
(Red and yellow raspberries are different. They send out lots of suckers and grow into a patch. To make more red and yellow raspberry plants, simply dig up plants around the edge of the patch.)
Training to Prevent Tip Layering
Tip layering is an easy blackberry propagation method. But you can have too much of a good thing…
I've seen enthusiastic gardeners inadvertently allow and an impenetrable thicket of new blackberry plants to form!
Where you don't want additional plants, train the canes to keep them off the ground. If you have a fence, simply tie them to the fence. Or put in a few stakes to which you can tie the canes to keep them above the ground.
Pruning Blackberry Plants
One other thing to keep in mind as you grow blackberries is that the canes only live for two years.
Year 1: Stems grow upwards from the base of the plant, and as they get tall enough, arch over
Year 2: The stems produce fruit
So if you want to keep pruning simple, at the end of the growing season, remove any canes that have produced fruit.
FAQ Blackberry Tip Layering
Pin this post!
What time of year do you propagate blackberries?
The blackberry canes often begin to tip layer on their own mid-summer, as the canes get long enough to bend over and touch the ground.
Are there other types of layering?
Yes. Along with the basic layering and tip layering we talk about above, there is:
Serpentine (compound) layering, where we make several layers on a long stem by burying several sections of it.
Stool (mound) layering where a shrub or tree is cut to ground level, causing it to send up multiple shoots, which are then mounded with soil. This gives multiple, rooted stems. (It's what I use to propagate my apple rootstock.)
Air layering, where soil or a damp medium is wrapped around an above ground portion of stem to induce root formation. (I sometimes use this if want to root a long, gangly fig branch. Find out more about fig propagation.)
Why grow so many blackberry plants?
For blackberry daiquiris, of course.
Find This Helpful?
Enjoy not being bombarded by annoying ads?
Appreciate the absence of junky affiliate links for products you don’t need?
It’s because we’re reader supported.
If we’ve helped in your food-gardening journey, we’re glad of support. You can high-five us below. Any amount welcome!
More on Growing Fruit

Guide: How to Grow Ground Cherries and Cape Gooseberries
Guide: How to grow ground cherries and cape gooseberries
By Steven Biggs
Unhusking the Husk Cherries

Looking for an easy-to-grow fruit for a northern garden?
Here are a couple of sweet, tangy annual fruit crops that are a snap to grow. They're great for container gardens too.
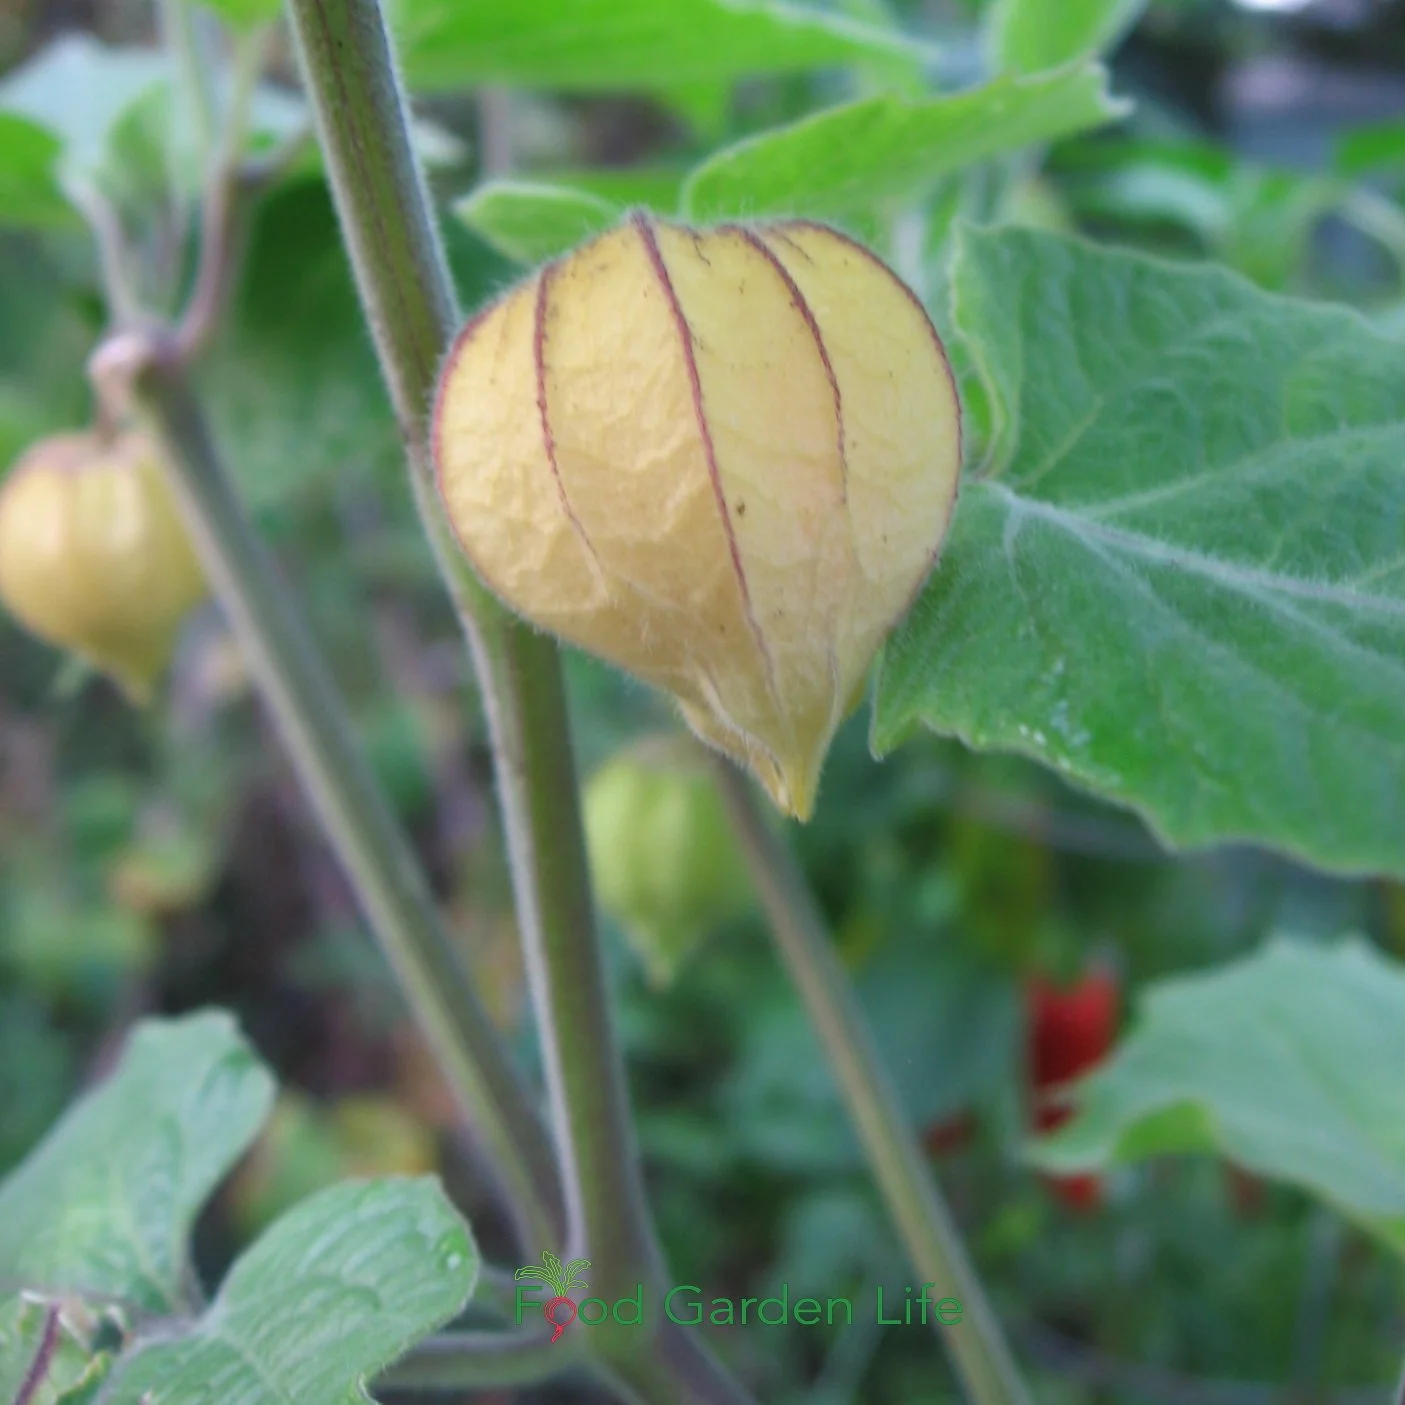
As you peel back the papery husk, inside you find a round, shiny yellow- or orange-coloured fruit.
(The whole business of peeling back the husk makes them very fun for kids...and adults too!)
In this article we take a look at the ground cherry (Physalis pruinosa) and its lesser known cousin, the cape gooseberry (Physalis peruviana). They're both part of the nightshade clan—in the same plant family as tomatoes, peppers, tomatilloes, potatoes, and eggplants.
But they don't taste a bit like epplant or pepper, as you'll read below.
Ground Cherries
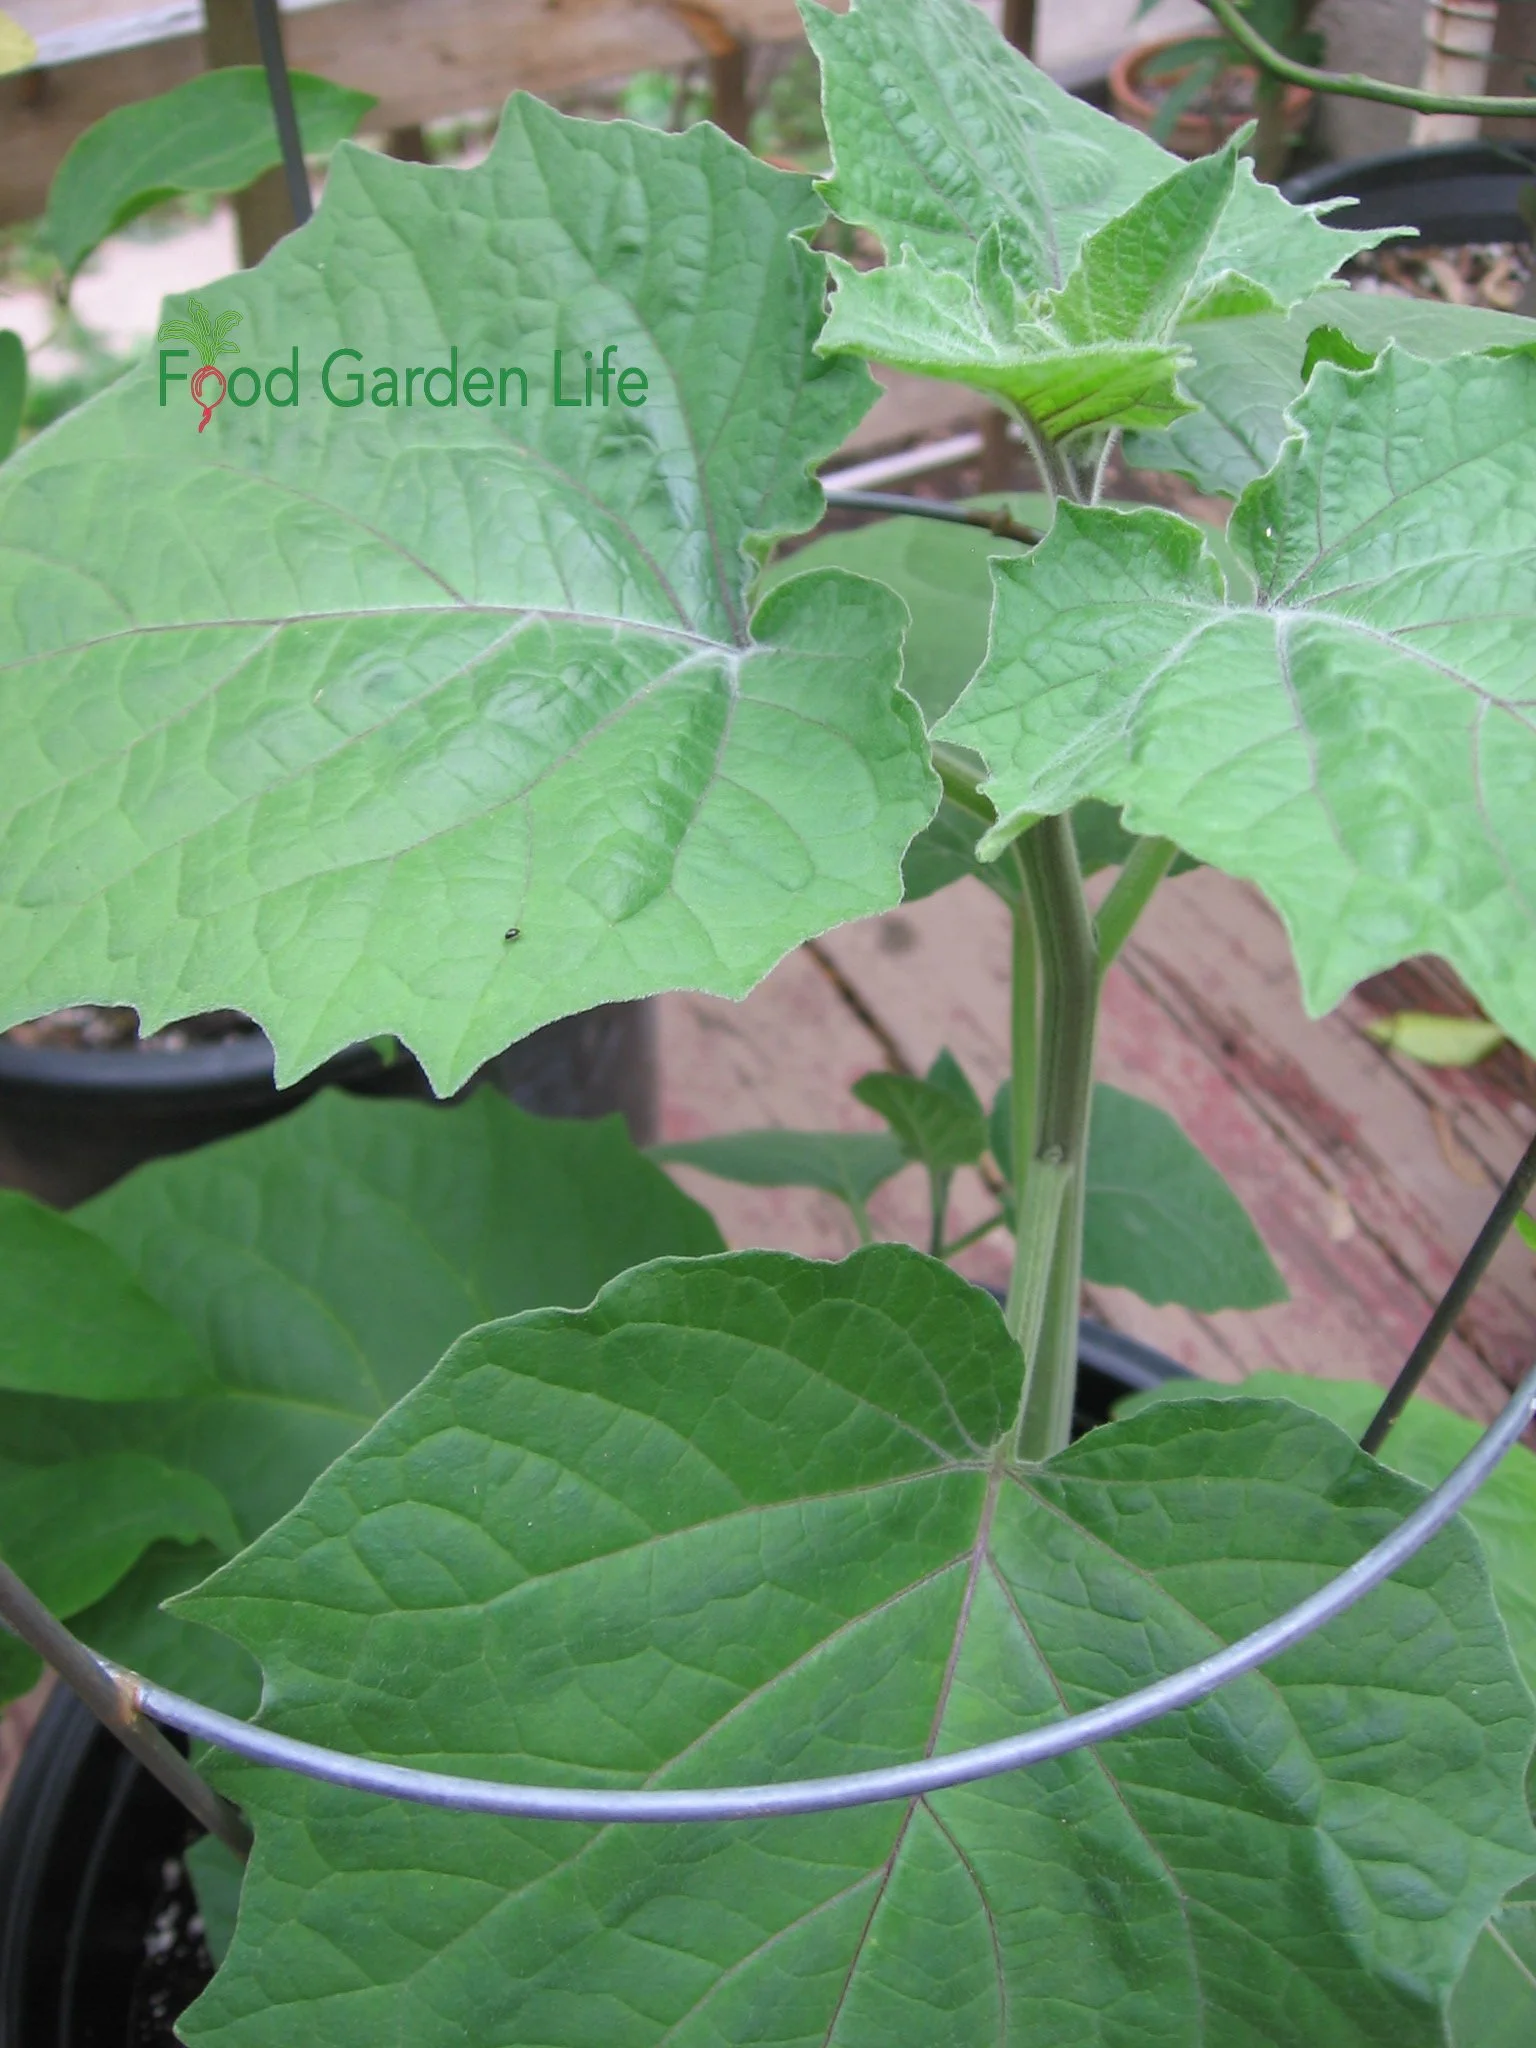
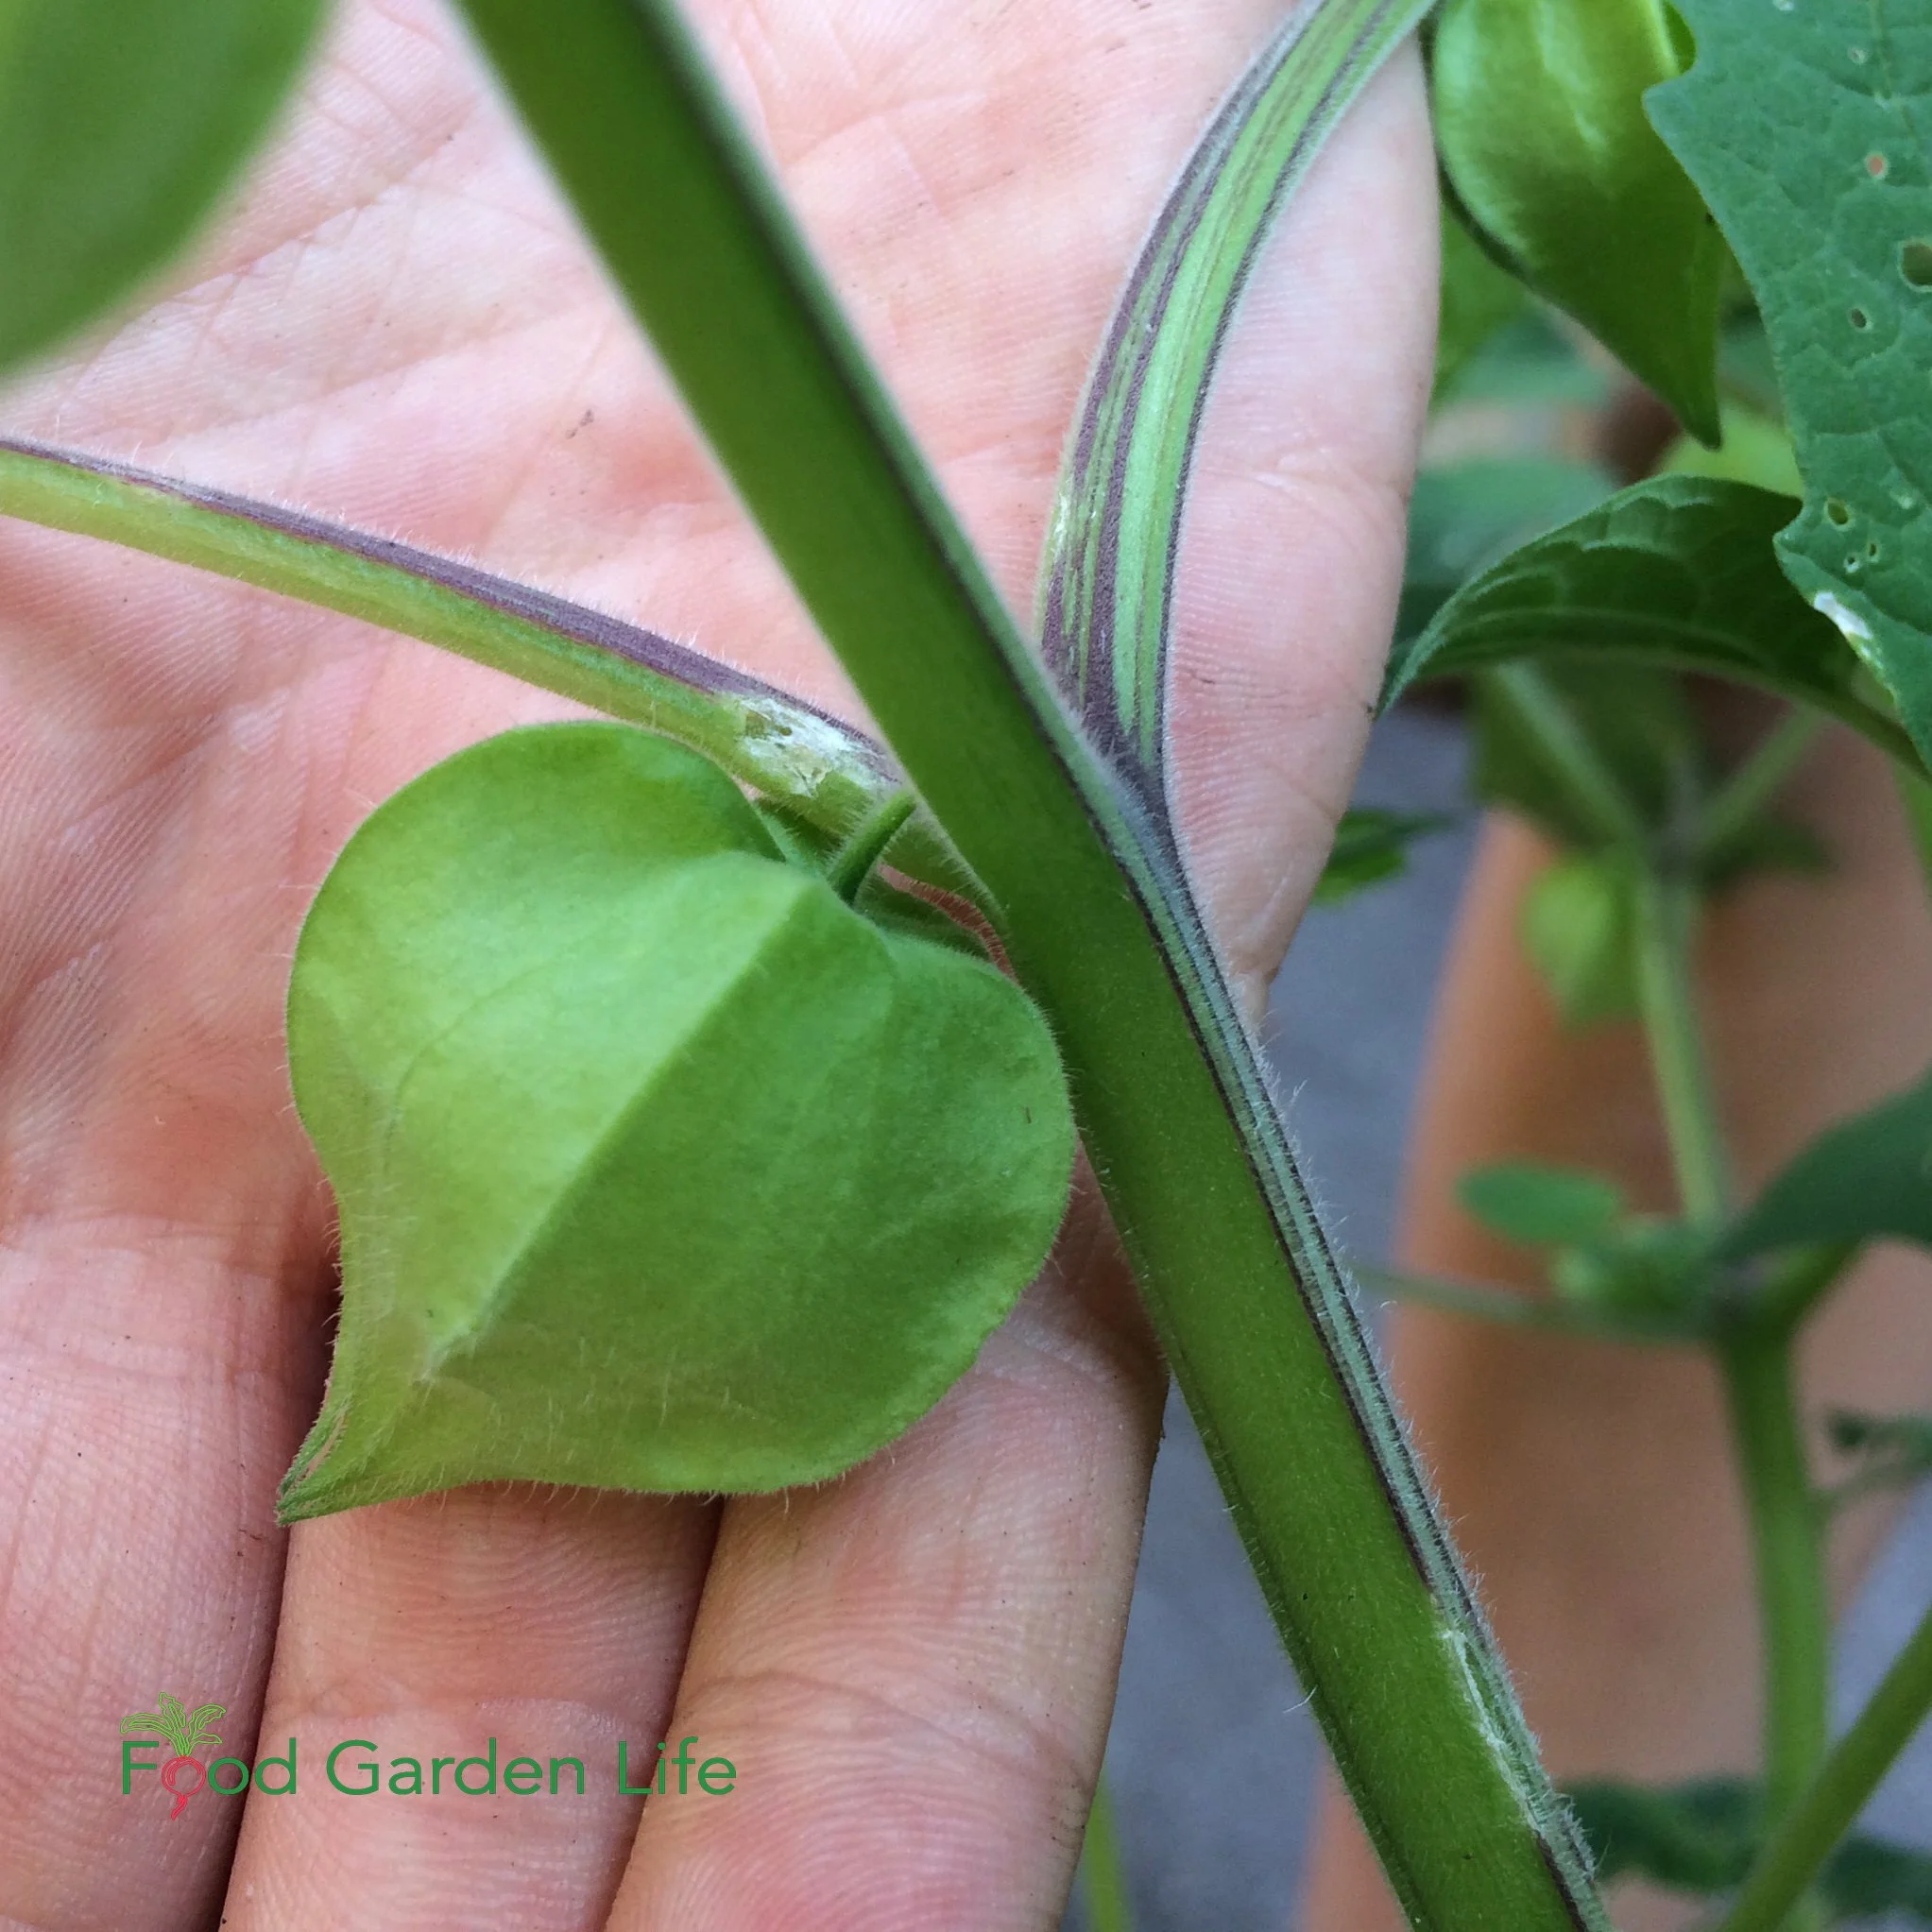
Ground cherry plants are fast-growing and sprawling, with small yellow-and-black flowers. They're probably the easiest to grow out of the nightshade clan.
A ground cherry plant will grow up to about one metre (3') high.
The taste of the berry is sweet and fruity. Some people liken them to pineapple.
Ground cherries are called by a few different names, including husk tomato, husk cherry, strawberry tomato, and golden cherry.
Cape Gooseberries
While it's not related to the true gooseberry, the tanginess of the cape gooseberry might account for it borrowing the name.
I've also seen this fruit called by other names including golden berry, goldenberry, physalis, and Peruvian groundcherry.
Growing cape gooseberry is worth the extra wait. The fruit is slightly larger, more citrusy, and a darker colour than ground cherry fruit.
Cape gooseberry plants are larger and more upright than ground cherry plants, getting up to about 1 ½ metres (4-5') tall. The fruit is slightly larger, citrusy, and a darker colour than ground cherry fruit.
Out of the two husk cherries, I prefer cape gooseberry.
But...there's a tradeoff: It takes longer to mature. As I explain below, there are a couple of things you can do to get cape gooseberries to mature more quickly in a northern garden.
(Cape gooseberry is a perennial in warmer climates...but we grow it as an annual in northern gardens.)
How to Grow Ground Cherries and Grow Cape Gooseberries
Both of these fruits are grown as annual crops in cooler climates. They're a good fit for the veggie garden or a container garden.
To get fruit as early as possible, start seeds indoors.
Start Ground Cherry and Cape Gooseberry Seed Indoors
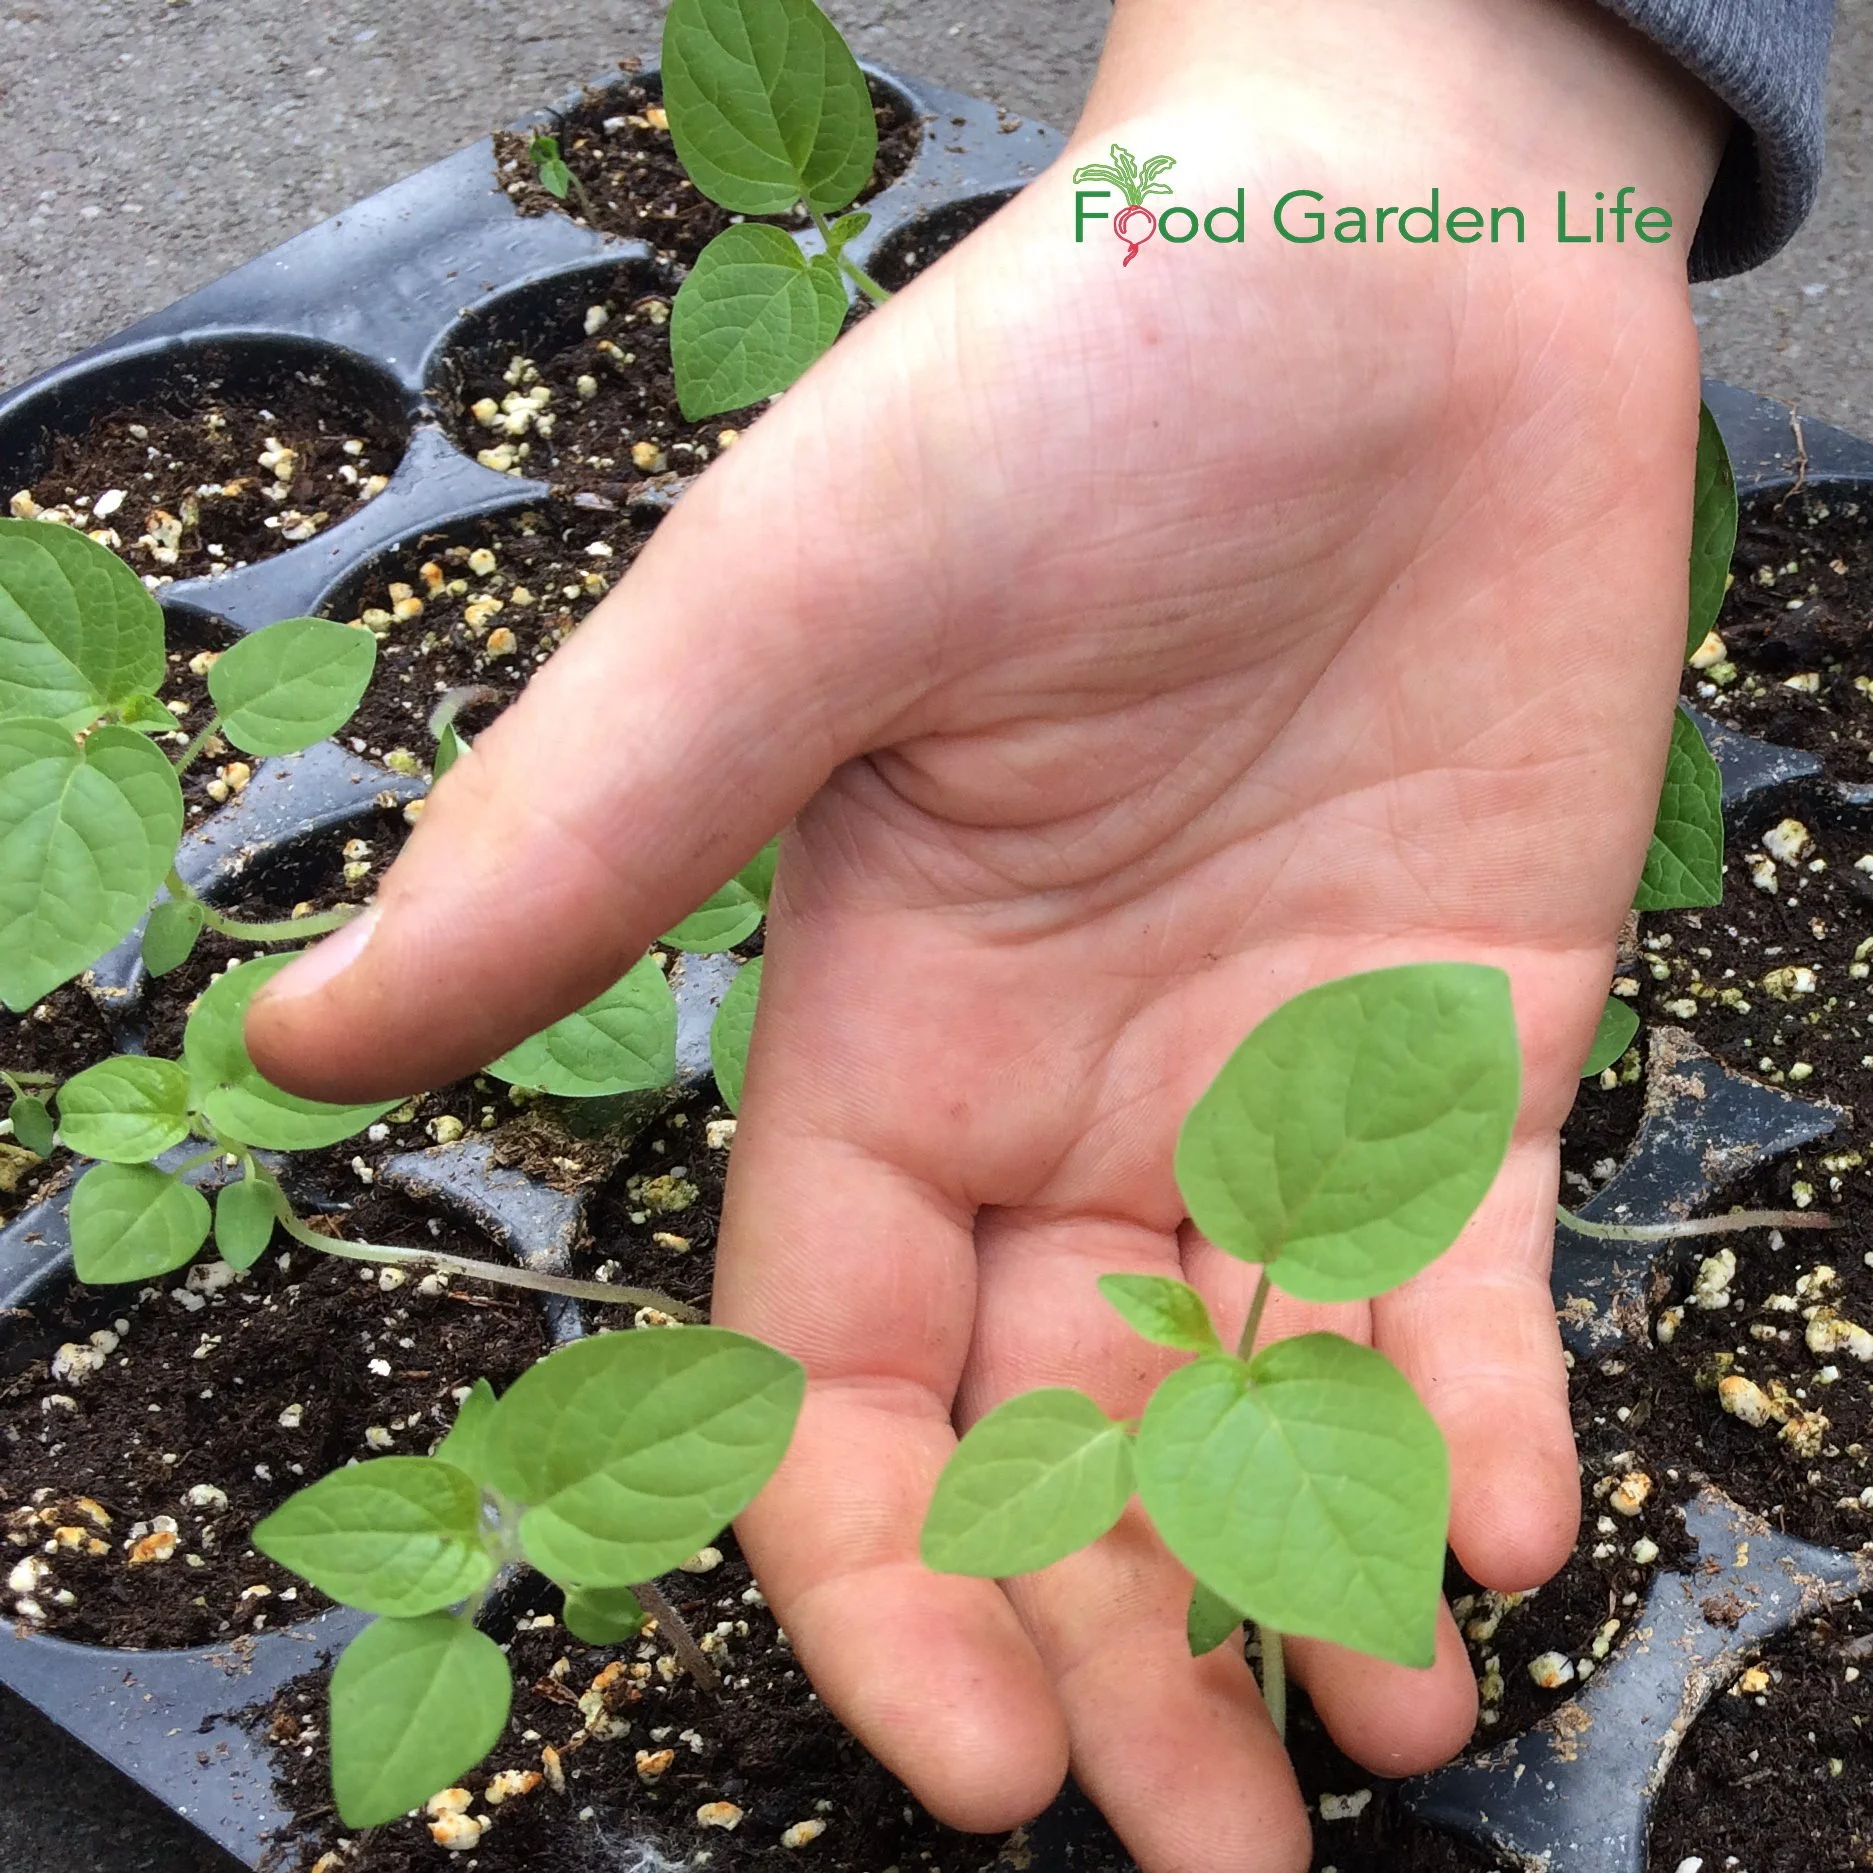
A tray of ground cherry seedlings. Grow ground cherry and cape gooseberry seeds the same way as tomato seeds.
Treat ground cherry seeds and cape gooseberry seeds the same as you would tomato seeds.
That means:
Plant seeds 6-8 weeks before the average last frost date for your area
Plant cape gooseberry seeds earlier, as plants are slower to mature in cold climates (I aim for 8 weeks with mine, while I plant ground cherries about 6 weeks before the last frost)
Heat from below helps to speed up germination (a heat mat, or placing seed trays on a heated floor or radiator)
One other thing to think about:
Both of these crops self-sow, meaning that fallen fruit that you don't pick up gives you lots of little "volunteer" plants the following year.
Because ground cherries grow fairly quickly, I often let some of these little ground cherry plants grow. They fruit later than my transplants, but are still worth the space. But don't bother with volunteer cape gooseberry plants in a northern garden...they need too long a season.
Grow Ground Cherry Seeds
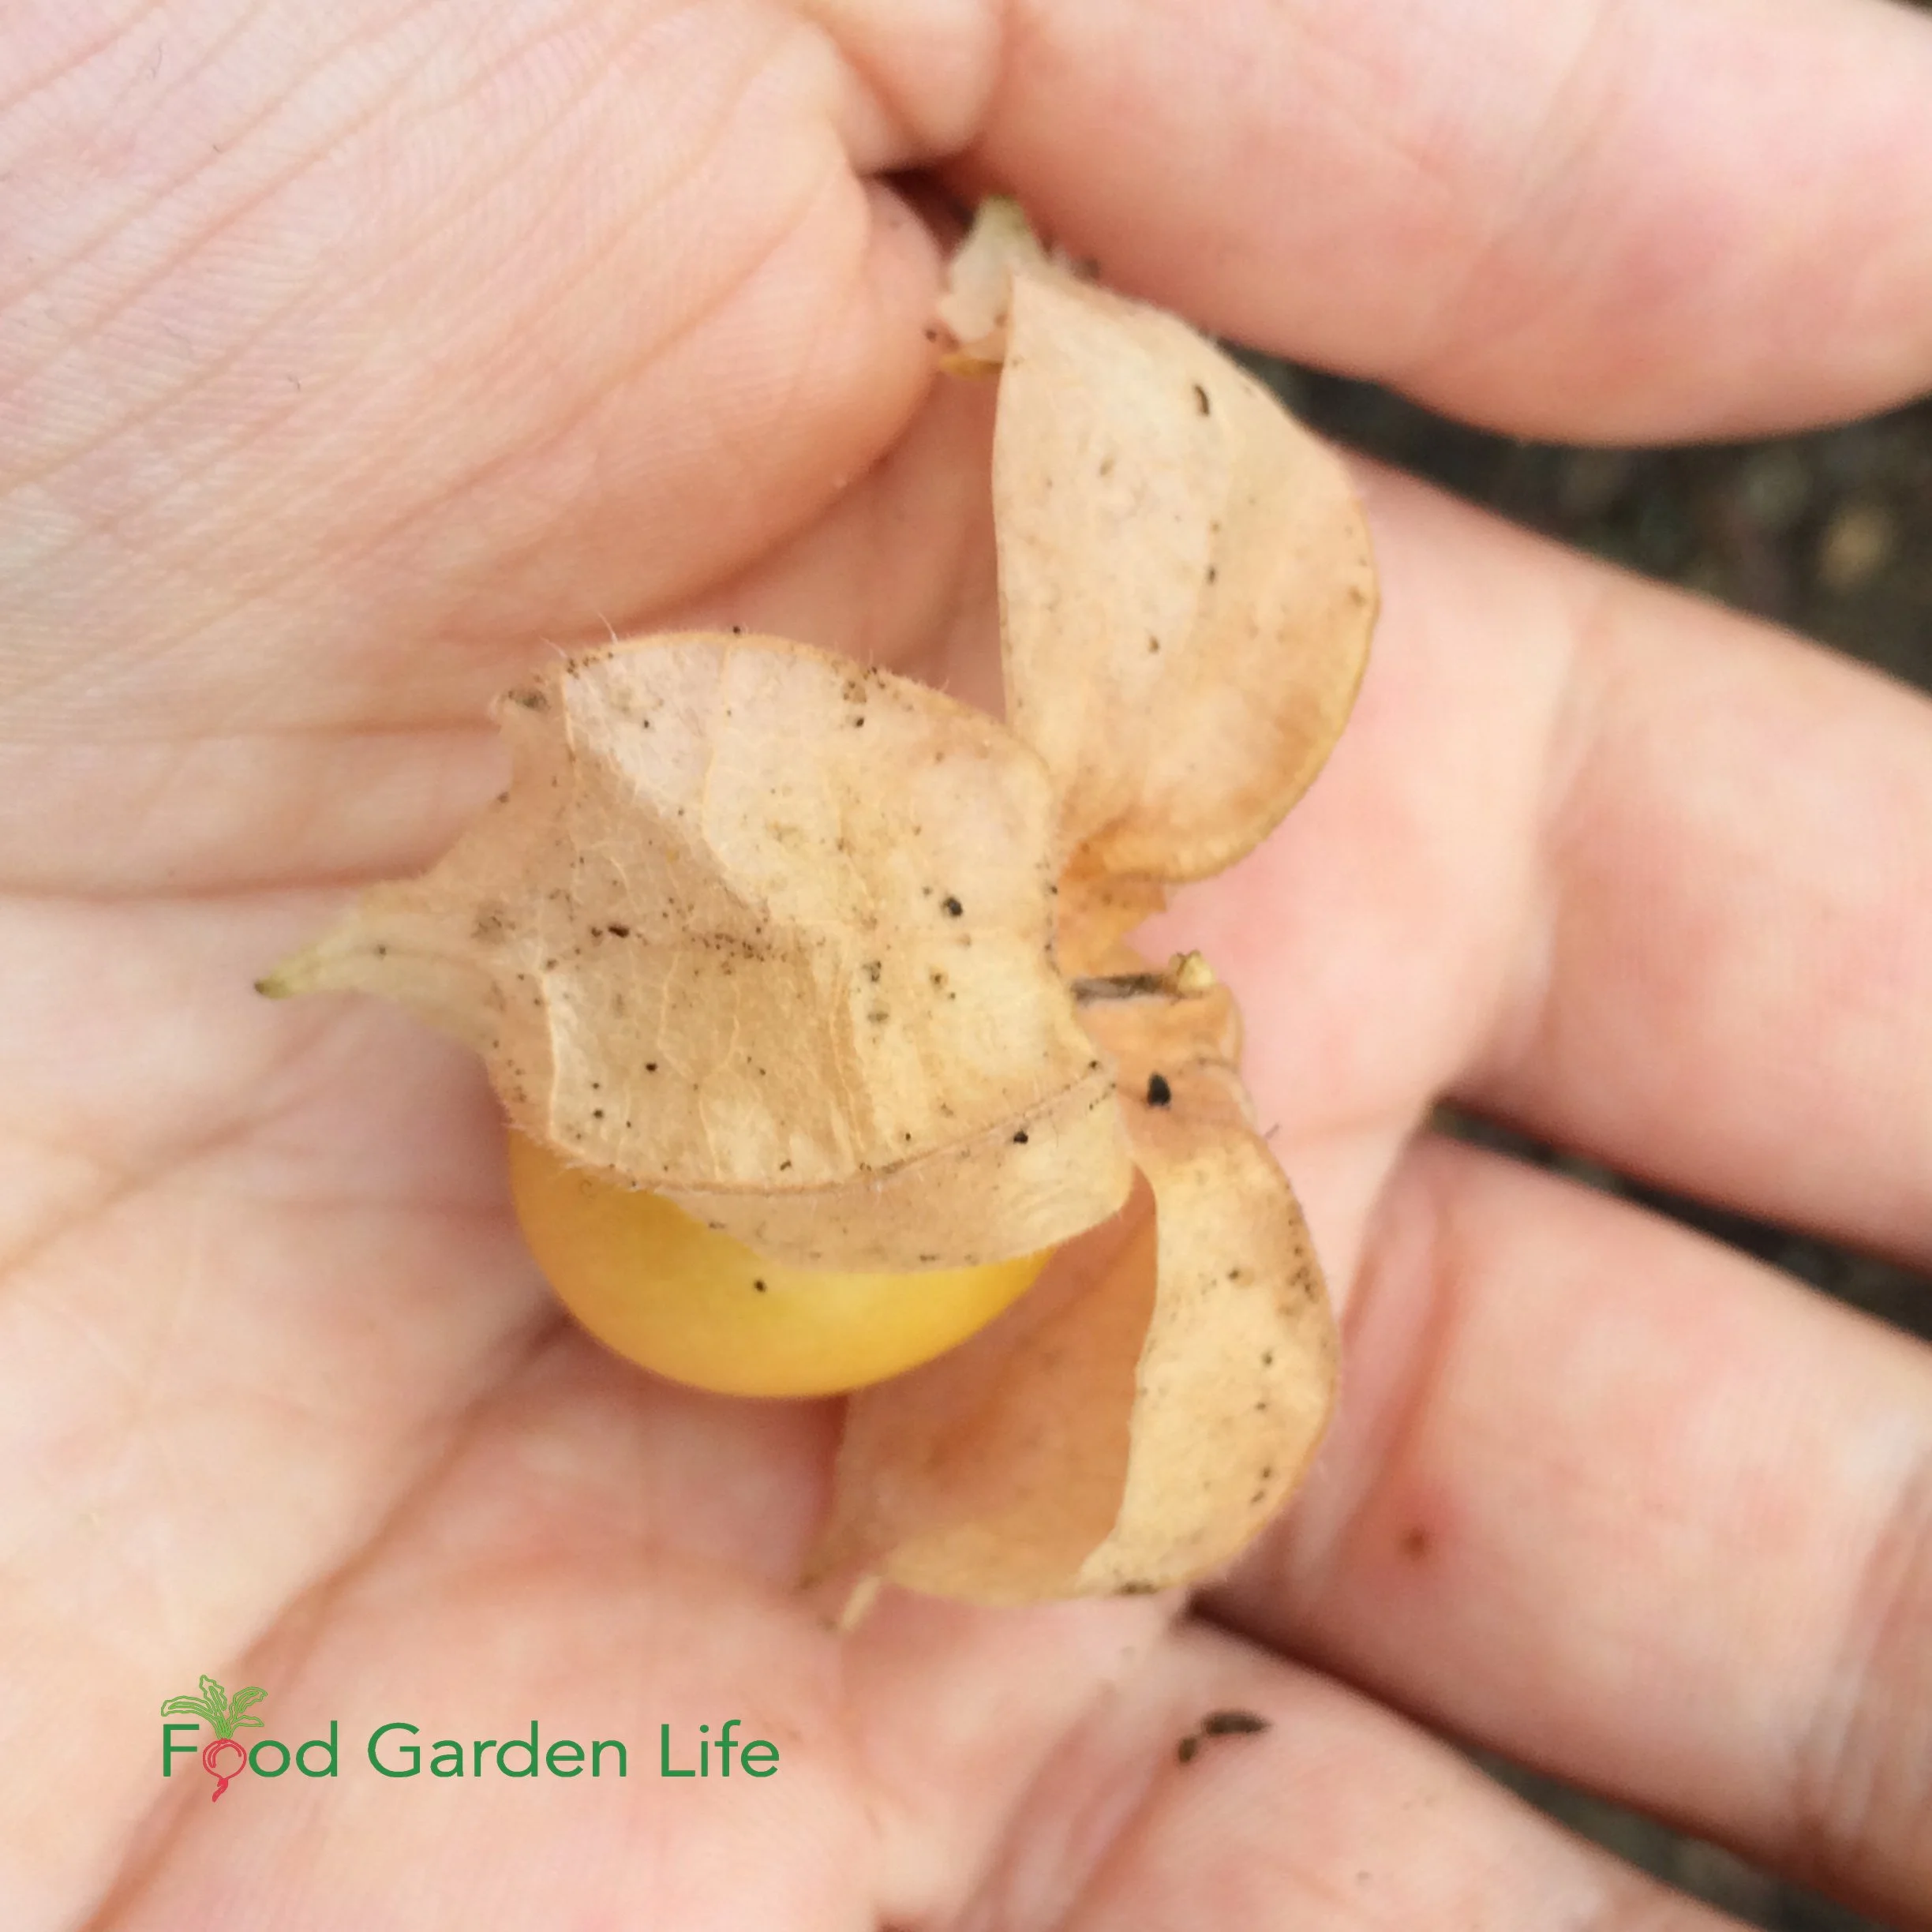
Ground cherry with the husk peeled back. They make a great garnish!
There are a few varieties of ground cherry seeds available.
Common ground cherry varieties include:
Aunt Molly’s
Cossack Pineapple
Golden Husk
There are also lots of unnamed ground cherry seeds for sale.
When it comes to cape gooseberry, I've never seen any named varieties.
Transplanting Ground Cherry and Cape Gooseberry Seedlings
Time your transplanting as you would for tomatoes.
You can transplant ground cherry and cape gooseberry seedlings into the garden when there is no longer any danger of frost and the daytime temperature is warm. I aim for 15-20°C (60-68°F).
If you've already transplanted your seedlings and the temperature dips, place floating row covers over them to keep them a bit warmer.
And don't forget the soil temperature: Cool soil sends them into a tizzy. If it's been a late spring, and the air is warm but the soil hasn't had time to warm up, it won't hurt to wait a bit before planting them.
Choose a Location
Ground cherries and cape gooseberries grow well in a wide variety of soil types.
Avoid very heavy and wet soils.
A raised bed is a great option for the cape gooseberry plant. That's because the soil in raised beds heats up more quickly in the spring—and that extra soil heat is helpful in a short season.
How to Plant Ground Cherries
When planting outdoors in the garden, space ground cherries and cape gooseberries about 60 cm (2') apart.
As you transplant seedlings, keep the soil level the same—don't bury the stem as is commonly done with tomatoes. That's because ground cherries and cape gooseberries don't root as readily from the stem as tomato plants do.
And here's something you'll be glad you did once harvest time rolls around: Mulch around the plants so that fruit that falls to the ground stays clean.
Growing Ground Cherries
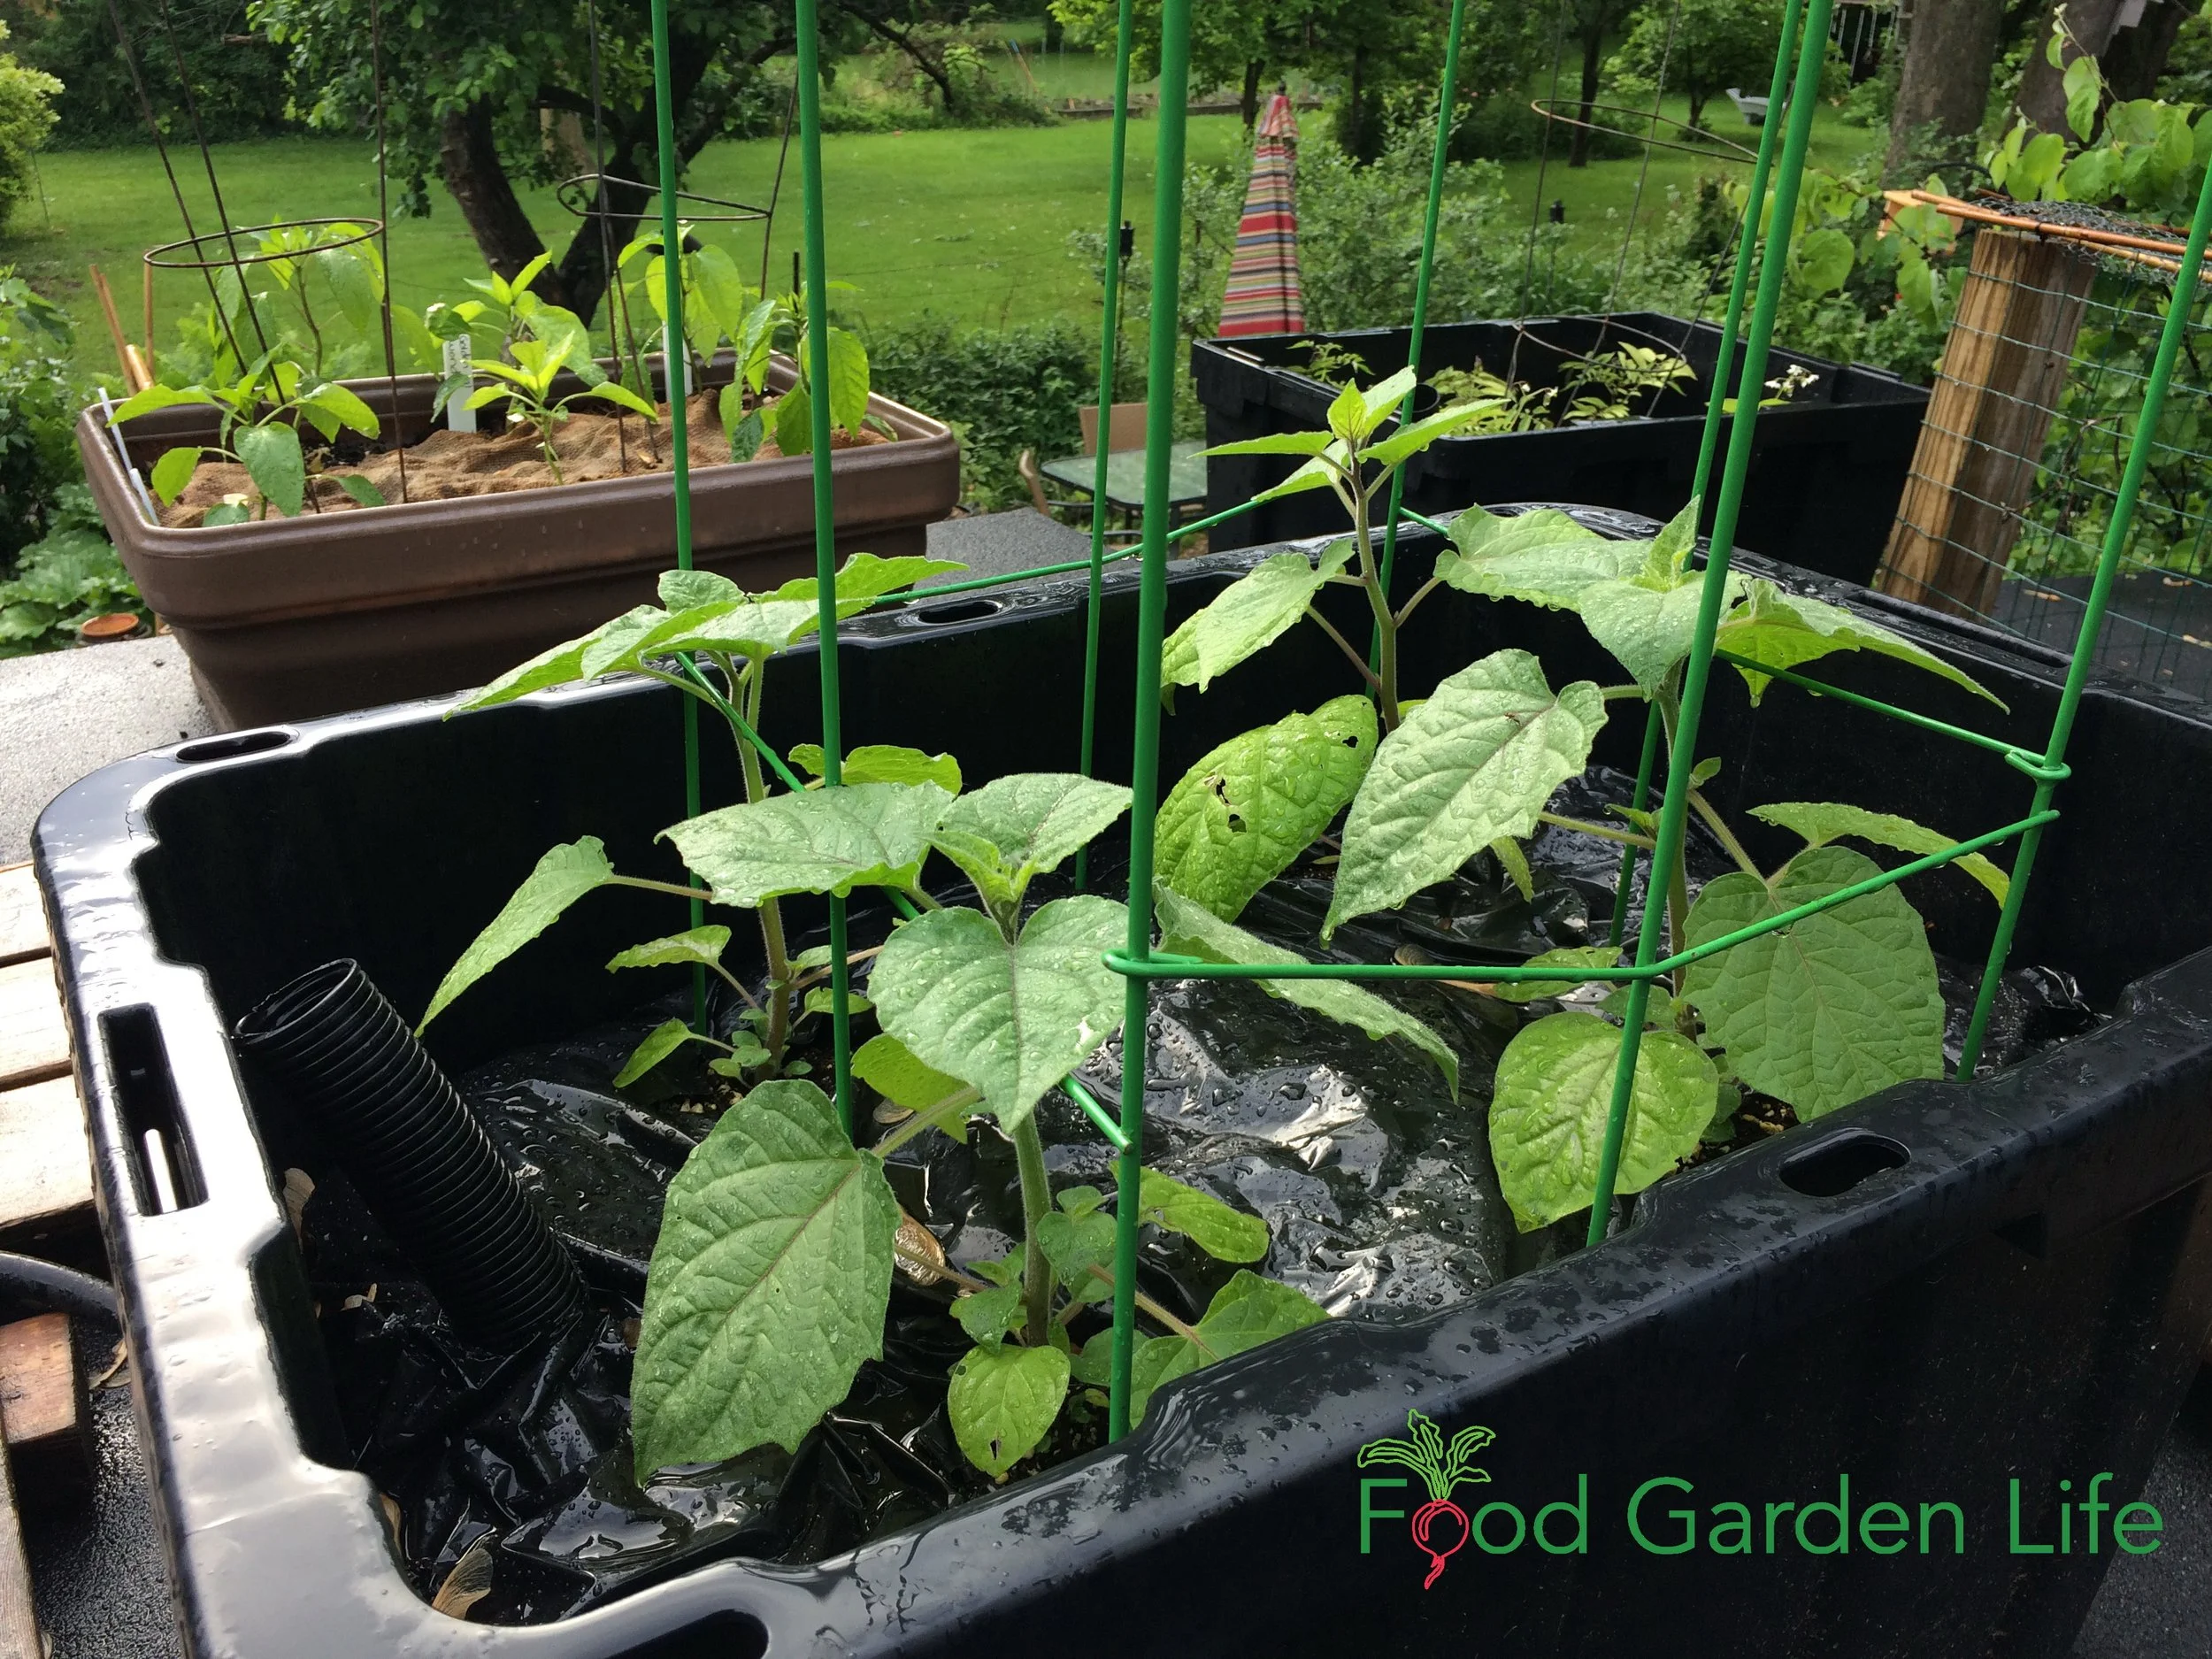
Because cape gooseberry plants have a more upright growth, they benefit from a tall cage.
With their squat growth, ground cherries don't need any support or special training.
If you want, you can keep the plant a little bit more upright using a cage—but there's really no need.
Growing Cape Gooseberries
Because a cape gooseberry bush has a more upright growth, it benefits from a tall cage—or even from staking so that it doesn’t bend over on a windy day.
How to Grow Ground Cherries in Containers
Grow cape gooseberry and ground cherry in containers for an earlier harvest.
Container growing has two advantages in a home garden:
Warm Soil: The soil in containers heats up faster than the soil in the garden
Heat: You can situate containers for maximum heat and sunlight to speed up harvest (e.g. next to a warm wall or on a warm driveway)
Cape gooseberry plants benefit from extra heat in cool climates with a short season. This black sub-irrigated container has warm soil, and gives constant soil moisture.
Consistent soil moisture, warm soil, and well-fed soil give the best results.
To maintain soil moisture, consider a sub-irrigated pot (self-watering pot.)
Find out how to make your own sub-irrigated pot.
Harvesting Ground Cherries and Cape Gooseberries
The papery husk turns from green to a tan colour as the fruit inside ripens. The colour of the ripe fruit depends on the variety, ranging from light yellow through to a pale orange.
Ripe ground cherries drop off the plant; ripe cape gooseberries remain on the plant.
If the fruit is still green, it's unripe. Don't eat it. That's because, like it's nightshade kin, the stems, leaves, and unripe fruit contain things that can upset your stomach.
Don’t eat green fruit, they contain toxins that cause stomach upset.
If you leave fallen ground cherries on the ground for a while, sometimes all that remains of the papery ground cherry husks is a fine netting—and you can see the golden fruit inside.
Store Ground Cherries and Cape Gooseberries
Plants continue to grow and flower all season long. So when the first fall frost threatens, you'll have green, unripe ground cherries and cape gooseberries.
Pick these green fruit and let them ripen indoors. When spread out to ripen, many of them will ripen. I put mine on a tray, in a cool room in my basement and enjoy them for weeks after the first fall frost.
Save Ground Cherry Seeds
Each ground cherry fruit is full of many small seeds.
Save and dry ground cherry seed for for the following year. They can stay viable for a few years.
I simply smear some of the seed-filled flesh onto a paper towel. Once it's dry, I put it into an envelope and label it.
Save cape gooseberry seeds in exactly the same way.
Eating Ground Cherries and Cape Gooseberries

Emma shows off a ground-cherry-blueberry crostata she made.
I was once in the Lac St-Jean region of Quebec and found locally made ground cherry liqueur. It was divine—a rich yellow colour, both sweet and tangy.
Fresh ground cherries and cape gooseberries are so tasty that we don't often have a lot left for other uses.
Wondering how to eat ground cherries? There's lots you can do with them:
Ground cherries as garnishes (peel back that papery husk and they look quite attractive!)
Ground cherry jam
Ground cherry cobbler
Ground cherry crostata
Dried ground cherries
Ground Cherry Pests
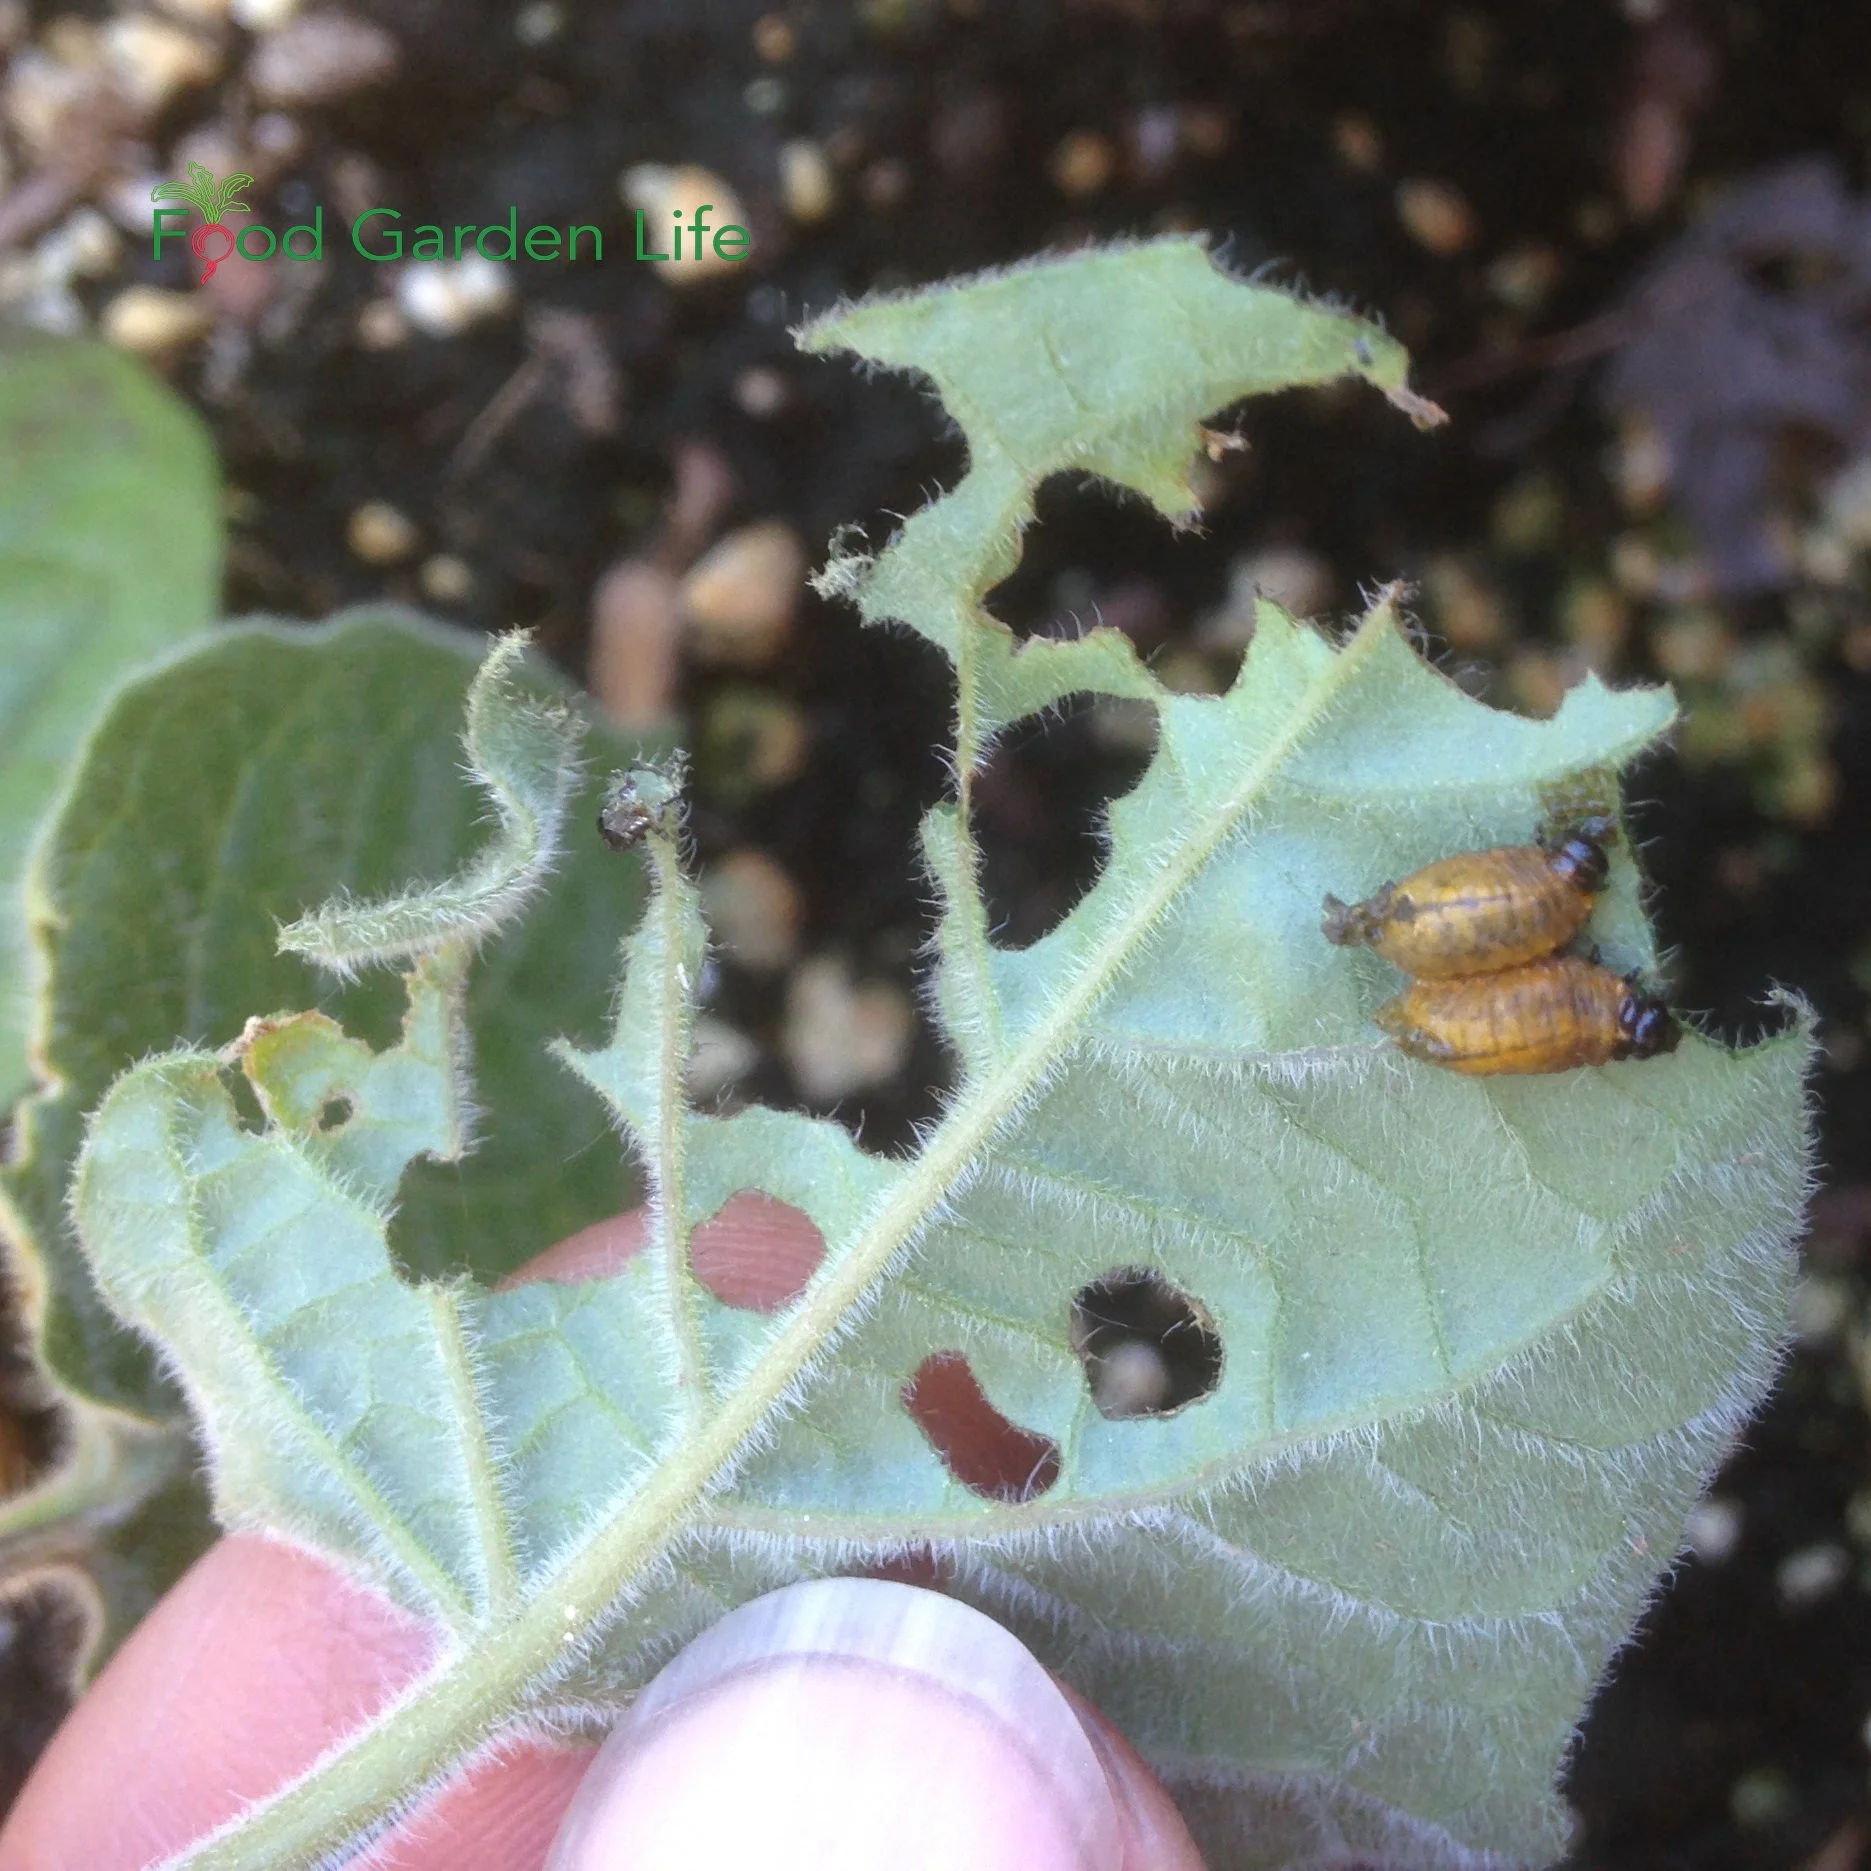
Three-lined potato beetle larvae enjoying cape gooseberry leaves. Easy to solve with soapy water.
Ground cherries and cape gooseberries are about as trouble-free a crop as you'll get.
If you have a problem, the most common is one of the pests that go after other nightshade crops. They include:
Tomato hornworms
Cutworms
Colorado potato beetle
Three-lined potato beetle
In a home garden, hand pick hornworms and colorado potato beetles. When three-lined potato beetle larvae start making holes in my cape gooseberry leaves, a soapy-water treatment solves the problem.
Prevent cutworm damage by using a newspaper collar around young plants as you transplant them into the garden.
One year a raccoon took a shine to my cape gooseberries...and I'd find empty husks on the ground around the cape gooseberry plants. Toronto has an unusually high density of raccoons, so I don't expect this will be an issue for most people. If it is, a simple solution is to physically exclude the raccoons. Cage the plants. It's what we do with our melons.
Landscape with Fruit
That’s easy to grow in a home garden!
FAQ
Can you grow ground cherries indoors?
There is no need to grow your ground cherry plants indoors, even in a northern climate. That's because you can get a sizeable harvest even where there's a short growing season.
These are nicely branched ground cherry plants. They can get up to about one metre high.
If you really want to grow them indoors (I've never tried) the key would be a light setup suitable for indoor growing. A windowsill over the winter would not be bright enough.
Do ground cherries grow back every year?
The plants die over the winter, but ground cherries often "volunteer," which means new plants grow from seeds left over from prior years.
Are tomatillos and ground cherries the same thing?
No.
Tomatillos (a.k.a. husk tomatoes) produce larger fruit than ground cherries. And unlike ground cherries, the fruit completely fills its husk at maturity, and actually bursts open. While ground cherries are consumed as a sweet, tomatillos are usually picked green for use in savoury dishes.
How many ground cherries do you get per plant?
More than you can count!
How do you overwinter ground cherries?
You don't. Start new plants each spring.
Do ground cherries ripen after picking?
Yes. As the first fall frost approaches, pick green cherries that are almost full size but still green. They will continue to ripen.
Find This Helpful?
Enjoy not being bombarded by annoying ads?
Appreciate the absence of junky affiliate links for products you don’t need?
It’s because we’re reader supported.
If we’ve helped in your food-gardening journey, we’re glad of support. You can high-five us below. Any amount welcome!
More Information About Growing Fruit
Articles
Browse our articles about growing fruit.
Guide to Growing Saskatoon Berries: Planting, Pruning, Care
Courses
5 Types of Cherry Bush to Grow in Edible Landscapes and Food Forests
5 types of cherries to grow as a bush in an edible landscape. Evans cherry, University of Saskatchewan bush cherries, chokecherry, Nanking cherry, Pin cherry
By Steven Biggs
Grow Cherries in an Edible Landscape or Food Forest

A cherry bush is a great addition to an edible landscape or food forest. Here’s a Nanking cherry bush.
The noise!
If you’ve grown cherries, you might have had a flock of birds descend on a cherry tree. Starlings, especially, are so loud that I wonder how they manage to eat and squawk at the same time.
But they do. And they clean out a tree quickly.
The gardener can watch (and listen) – or, go look for a ladder to get up there and compete with the birds for the cherries!
A ladder… Who needs the bother of a ladder in an edible landscape or a food forest?
In a home garden or landscape setting, simplicity is key. Ladders are not simple. Nor are fruit trees that need shaping and regular pruning.
Luckily, there are a number of cherries that grow as bushes.
Some have larger fruit that you can pop right into your mouth. Others, long prized by foragers, have smaller fruit suited for jams, jellies, juices, and wine.
Keep reading for bush cherry crops you can add to your garden.
Benefits of a Cherry Bush vs. a Tree
A bush makes a lot of sense in a home garden or edible landscape.
When you have a bush with multiple stems, you can renew it by lopping of some of the stems so that new stems take over
More branches means more yield
Cherry insurance! (More branches means more chance of some surviving a challenging winter)
Foil the birds…because a bush is easy for you to quickly pick (and easier to net if you’re so inclined)
Cold hardiness, because low-growing branches are insulated by snow
In this article, I have 5 different cherries that you can grow as a bush in your edible landscape or food forest.
These all grow on their own roots (so no grafting required), and are all self-fertile—so you don’t need to worry about growing two varieties to get fruit.
Forget the Ladder…Grow a Cherry Bush
Dwarf Sour Cherry Bushes…from Saskatchewan
The University of Saskatchewan fruit breeding program has produced some great high-yielding hardy bush cherries. (So good that even the BBC wrote about them!)
The bush-like form and the high-quality fruit is the result of breeding Mongolian cherry with European sour cherry.
The bush-cherry cultivars in the University of Saskatchewan “Romance” series have different bloom times, bush size, and fruit colour.
Here are the cultivars:
Carmine Jewel
Romeo
Juliet
Valentine
Cupid
Crimson Passion
Here’s more about the story behind these cherries.
Here’s where you can find out more about ripeness.
Hear bush cherry expert Bob Bors talk about cherry breeding and haskaps at the University of Saskatchewan. https://www.foodgardenlife.com/show/grow-haskap
Landscape with Fruit
That’s easy to grow in a home garden!
Evan’s Cherry in Alberta
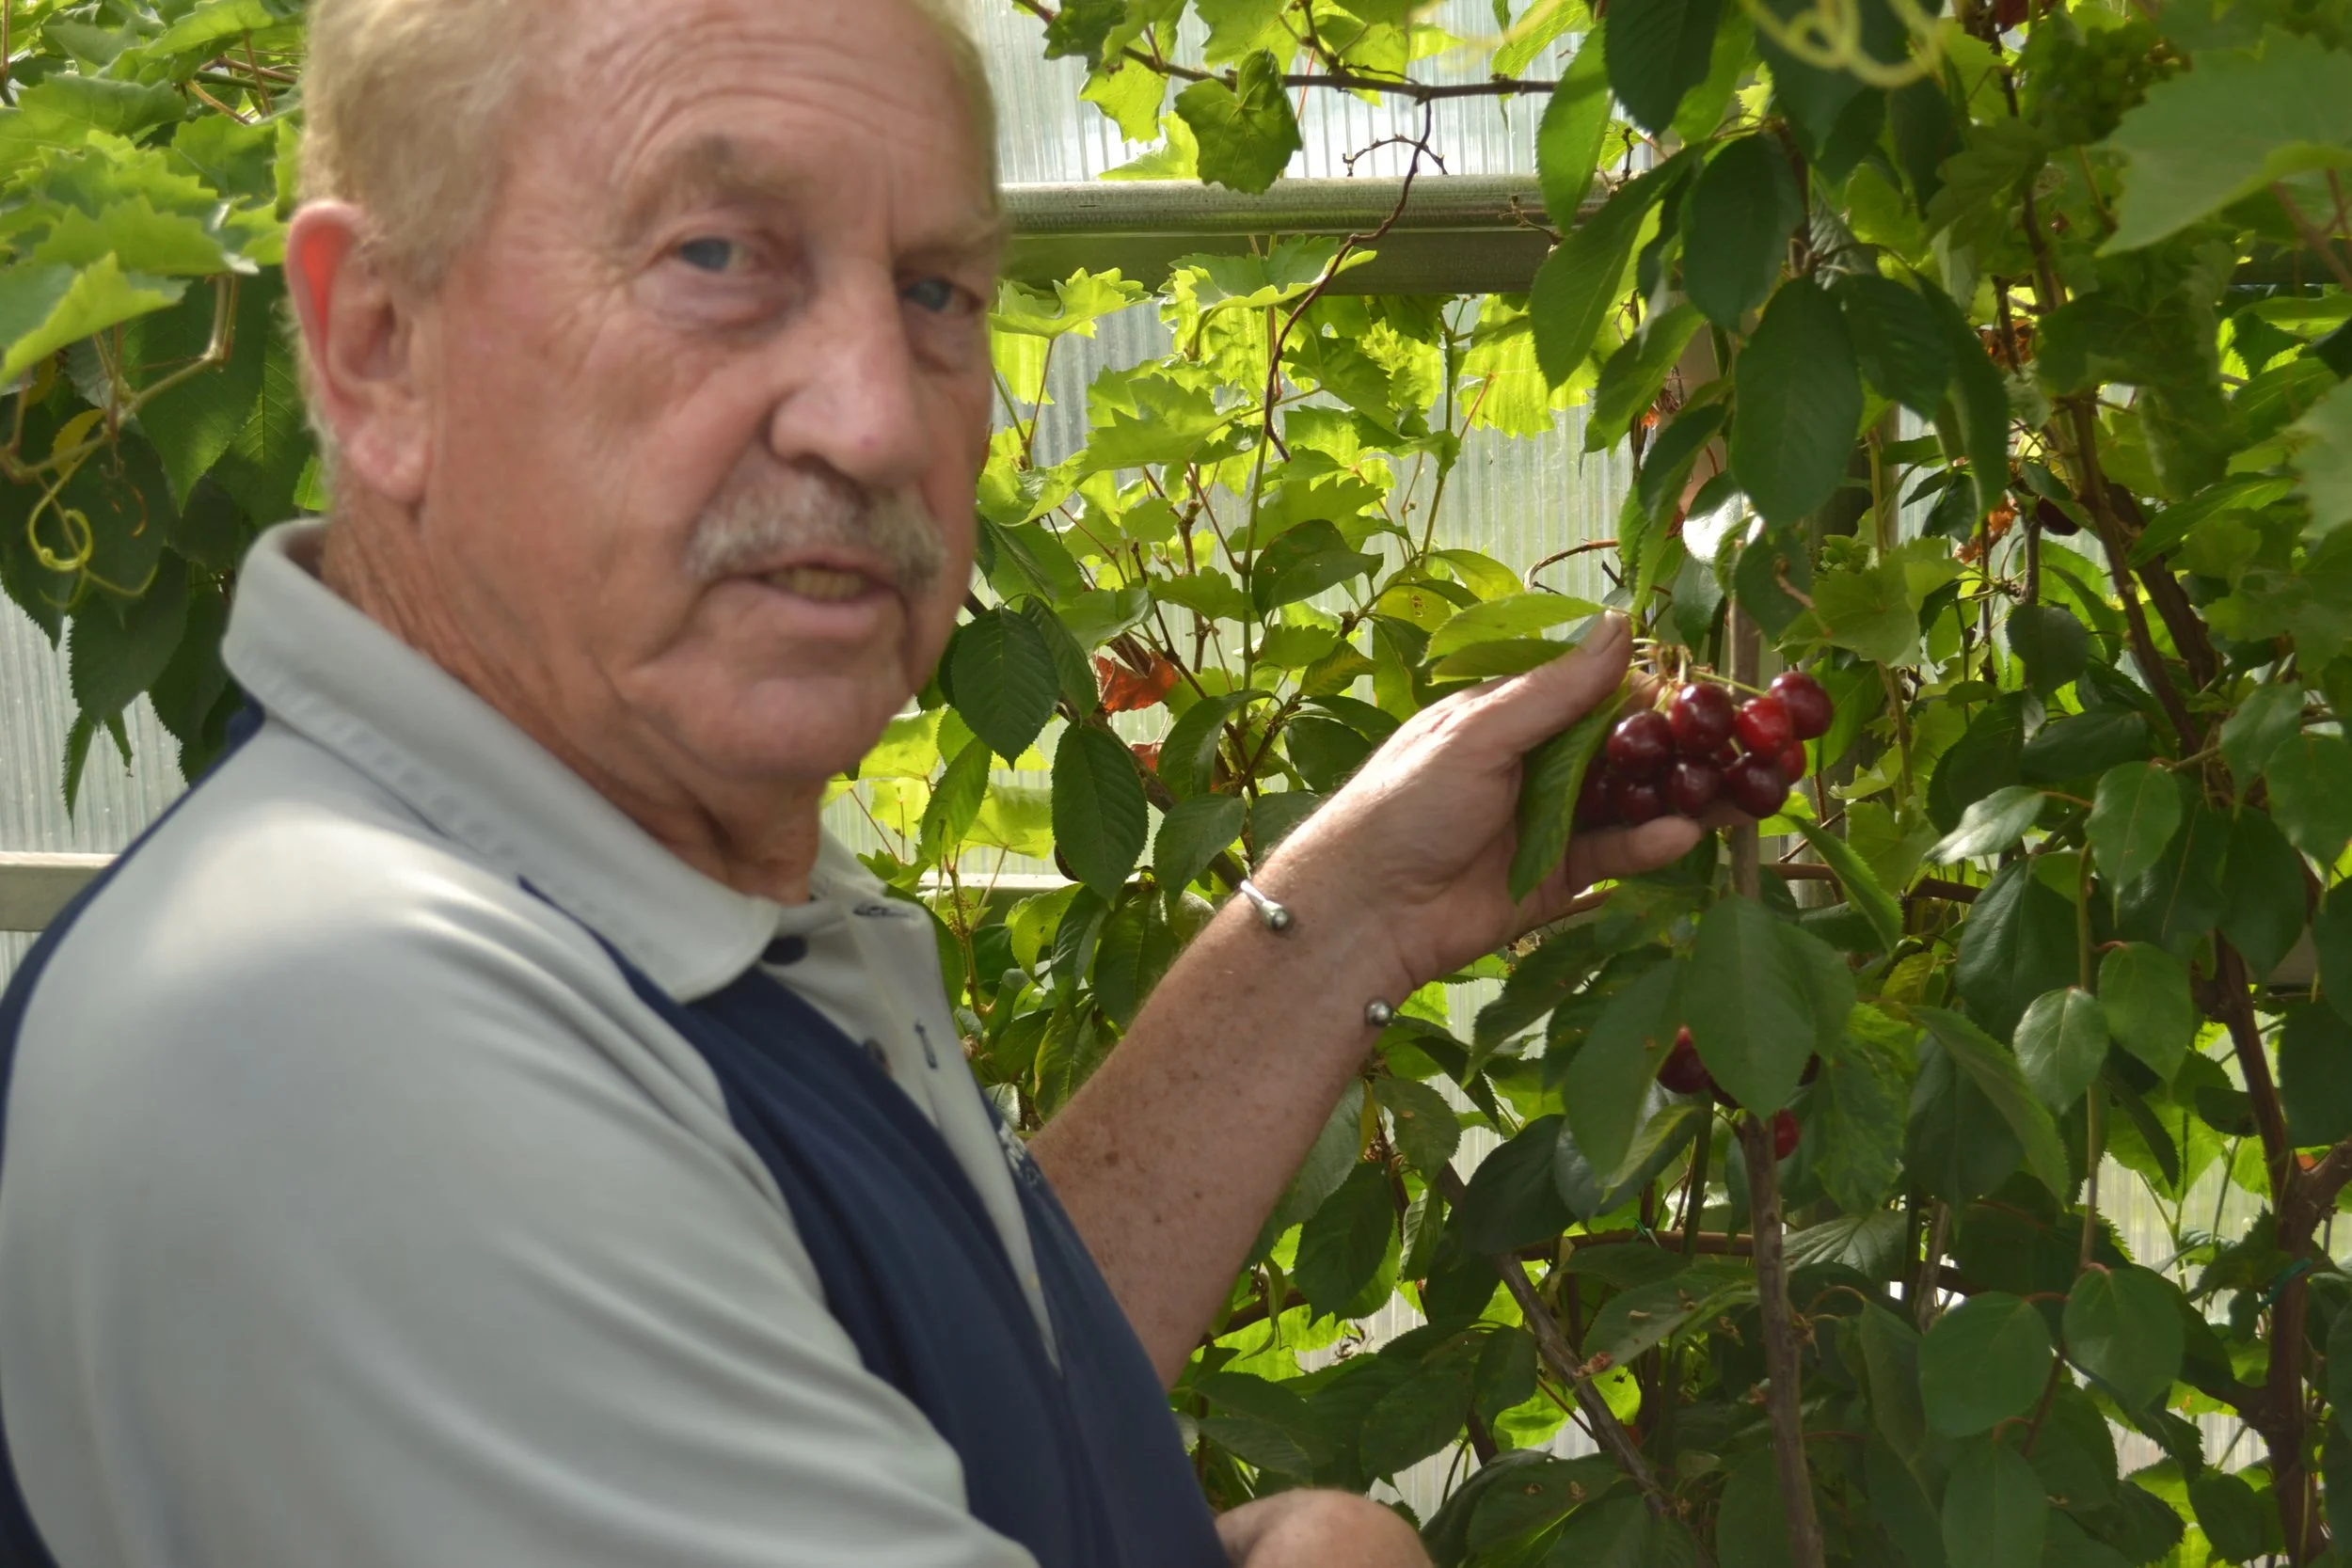
Dr. Ieuan Evans with Evans cherries.
Prunus cerasus
When Dr. Ieuan Evans moved to Alberta, he was disappointed to find very few people growing fruit.
But he heard about a very fruitful cherry tree near Edmonton, so he visited – and got pieces of it to propagate. (Just in time, as the property was slated for redevelopment.)
He gave away rooted suckers of this fruitful cherry as fast as he could grow them. It was very cold hardy AND very fruitful.
What’s now known as Evans cherry is an especially cold-hardy cultivar of the European sour cherry.
It can grow as a tree or a bush.
Hear Ieuan Evans talk about finding the Evan’s Cherry in Alberta.
Nanking Cherry Often Overlooked
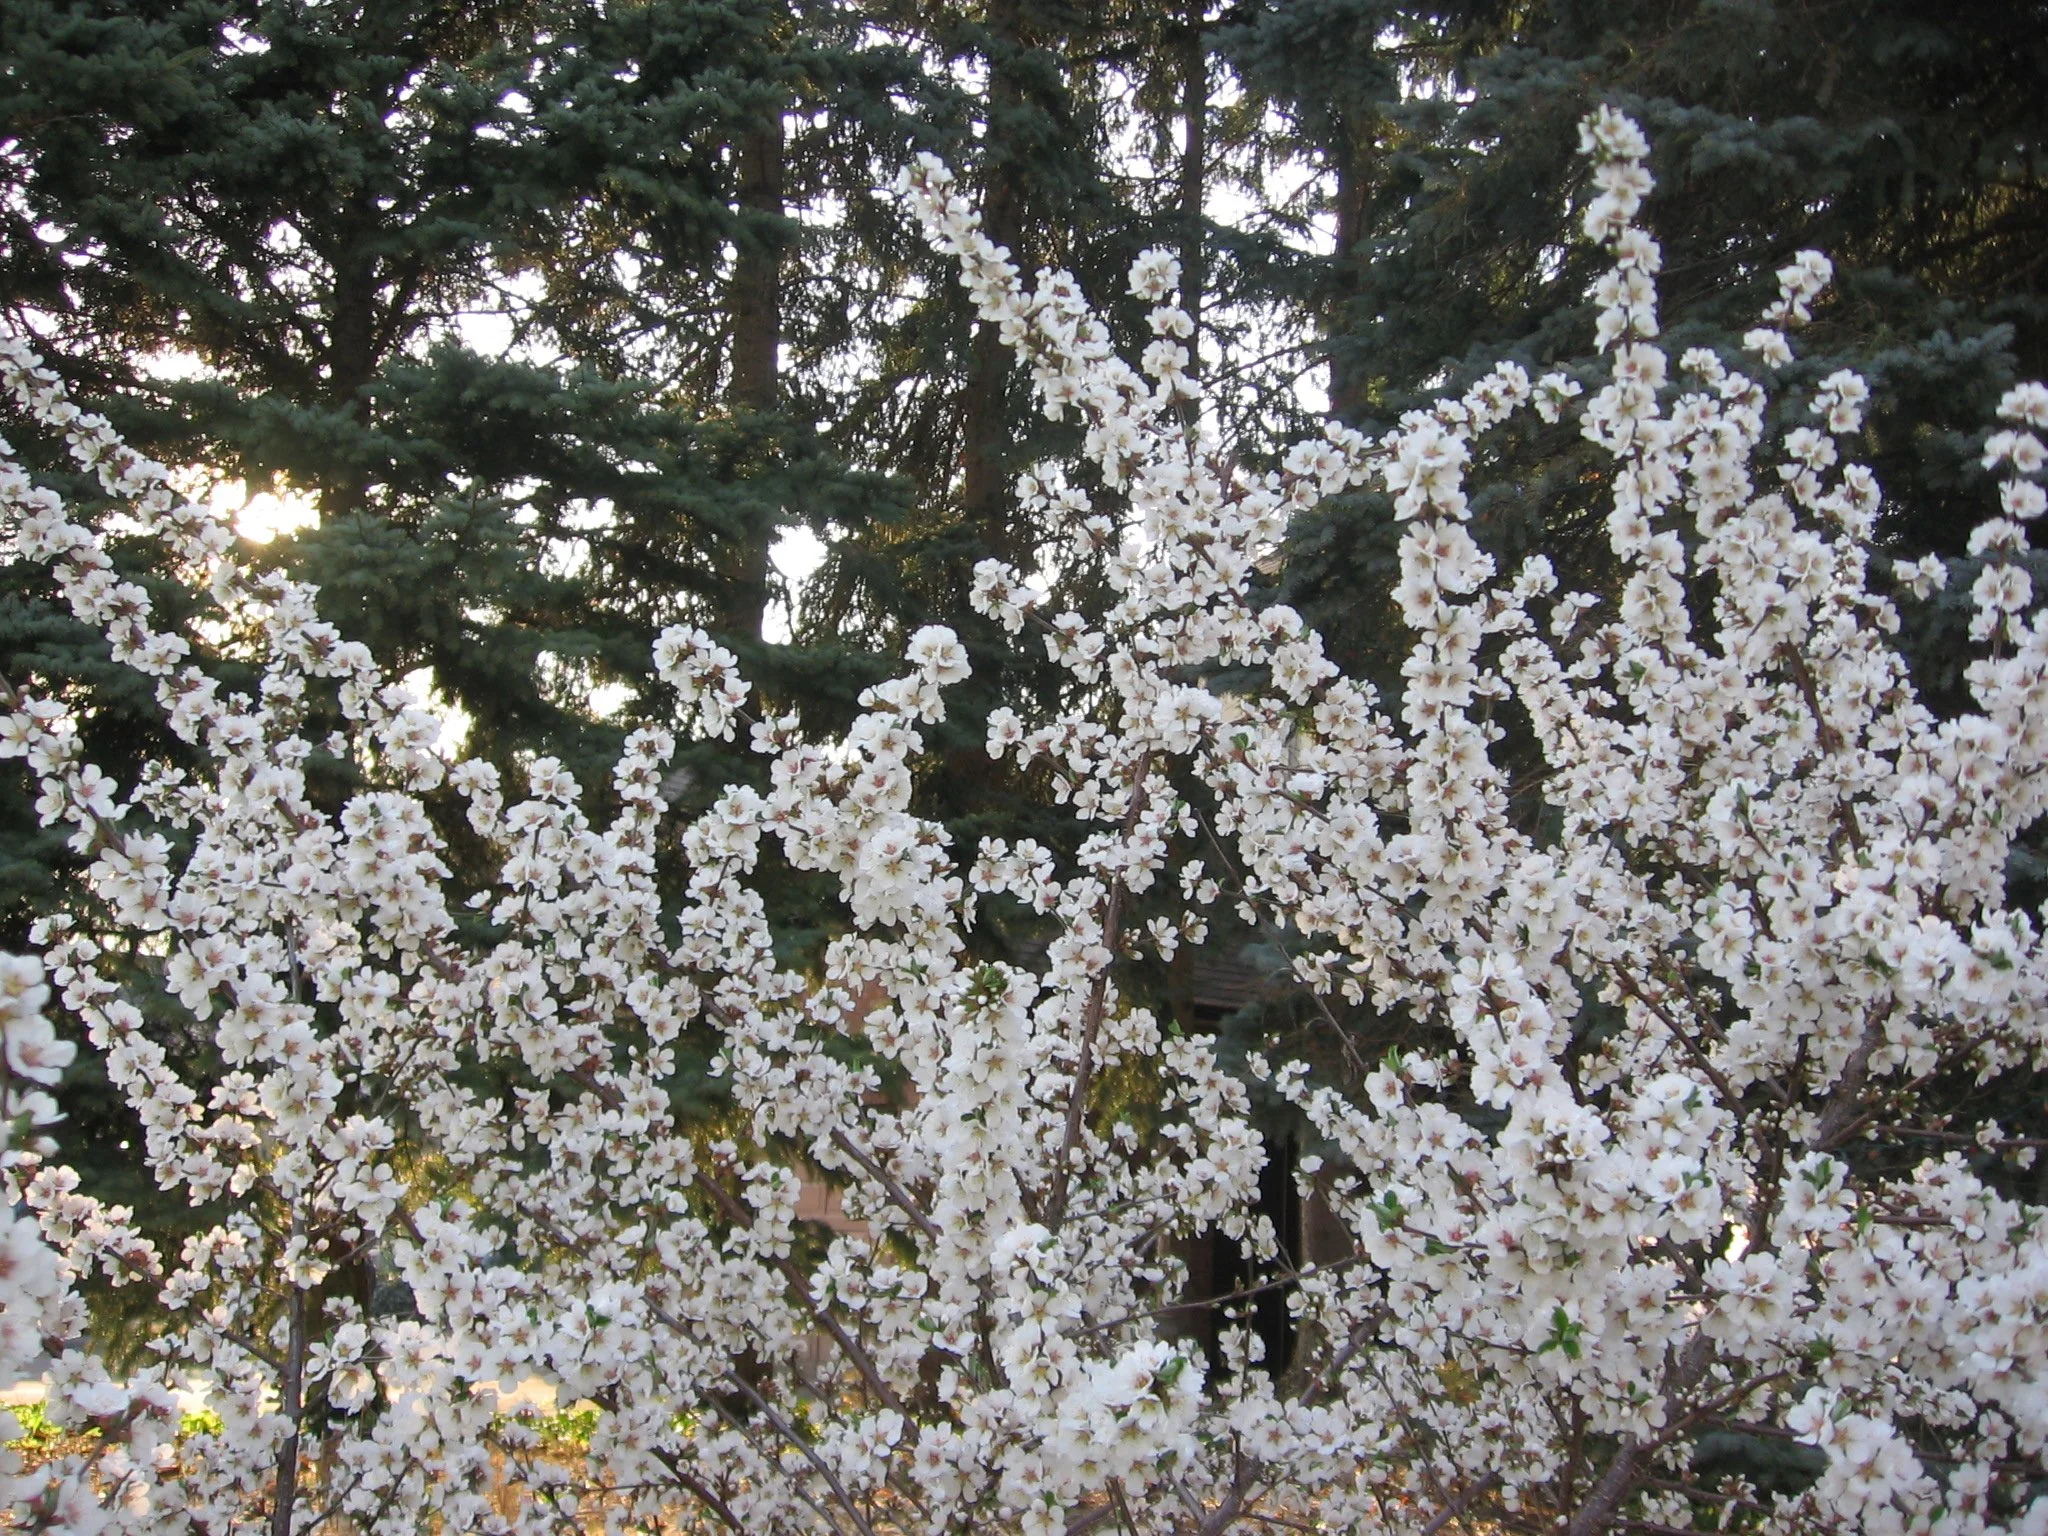
Nanking cherry bush in flower.
Prunus tomentosa
This is the cherry bush that my grandfather grew in his Calgary yard.
It’s compact, extremely fruitful – and a beautiful addition to a landscape. I grow it in my front yard, and when it blooms, pedestrians always stop to take selfies in front of it.
These small sour cherries are delicious fresh. They’re also great for use in the kitchen. I like to make them into a cordial.
The fruit is smaller than the University of Saskatchewan and Evan’s cherries. But they’re absolutely prolific.
I have an article all about them. Find out more about Nanking cherry.
Chokecherry (a.k.a. Choke Cherry)
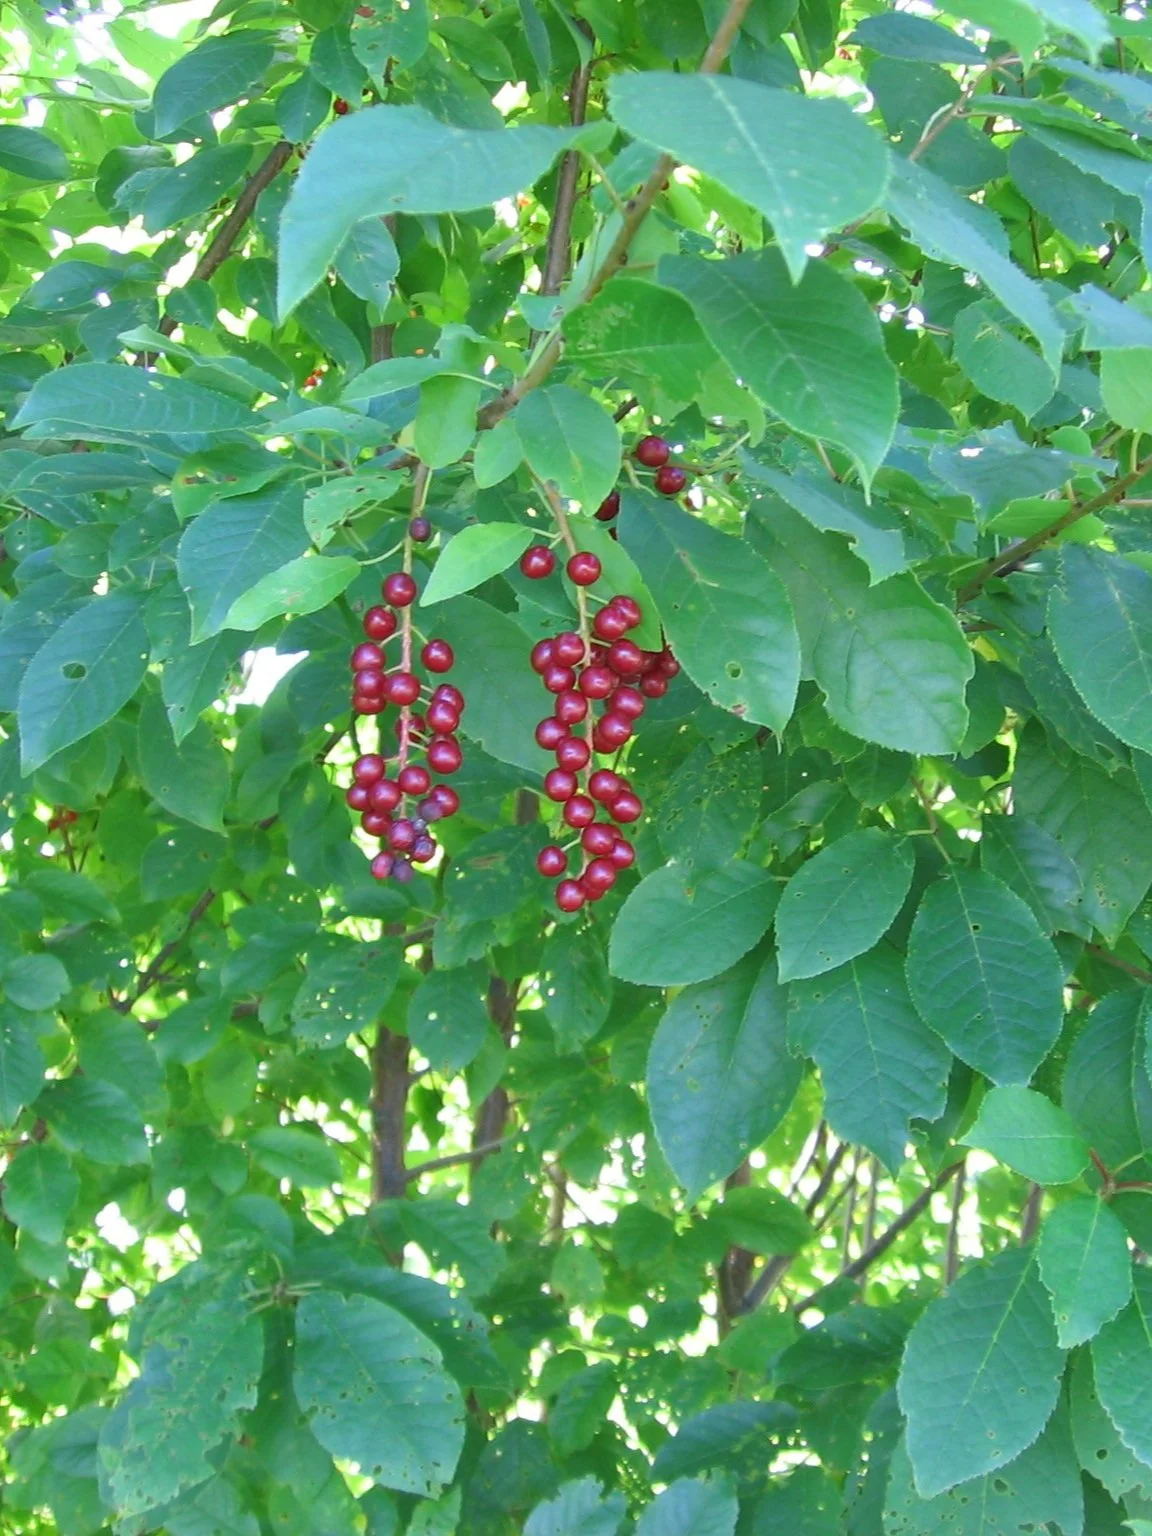
Chokecherry fruit grow in easy-to-pick clusters.
Prunus virginiana
Chokecherry is a native north American species that grows as a bush or small tree. There are a few cultivars, but most people know it because wild chokecherry plants arrives in gardens uninvited—thanks to critters that drop the seeds.
I have a patch of chokecherry in my garden. When a purple-leafed plant appeared, it was the perfect addition to an otherwise underused corner of my garden.
The flowers of chokecherry are a cluster that looks a bit like a bottle brush. And when those flowers become fruit, the pea-sized fruit are all in an easy-to-pick cluster.
This astringent fruit is aptly named. It has supreme pucker power! With processing though, the fruit is delicious. Use them for juice, jam, and syrup.
Hear Quebec agronomist Laurie Brown talk about growing and using chokecherry.
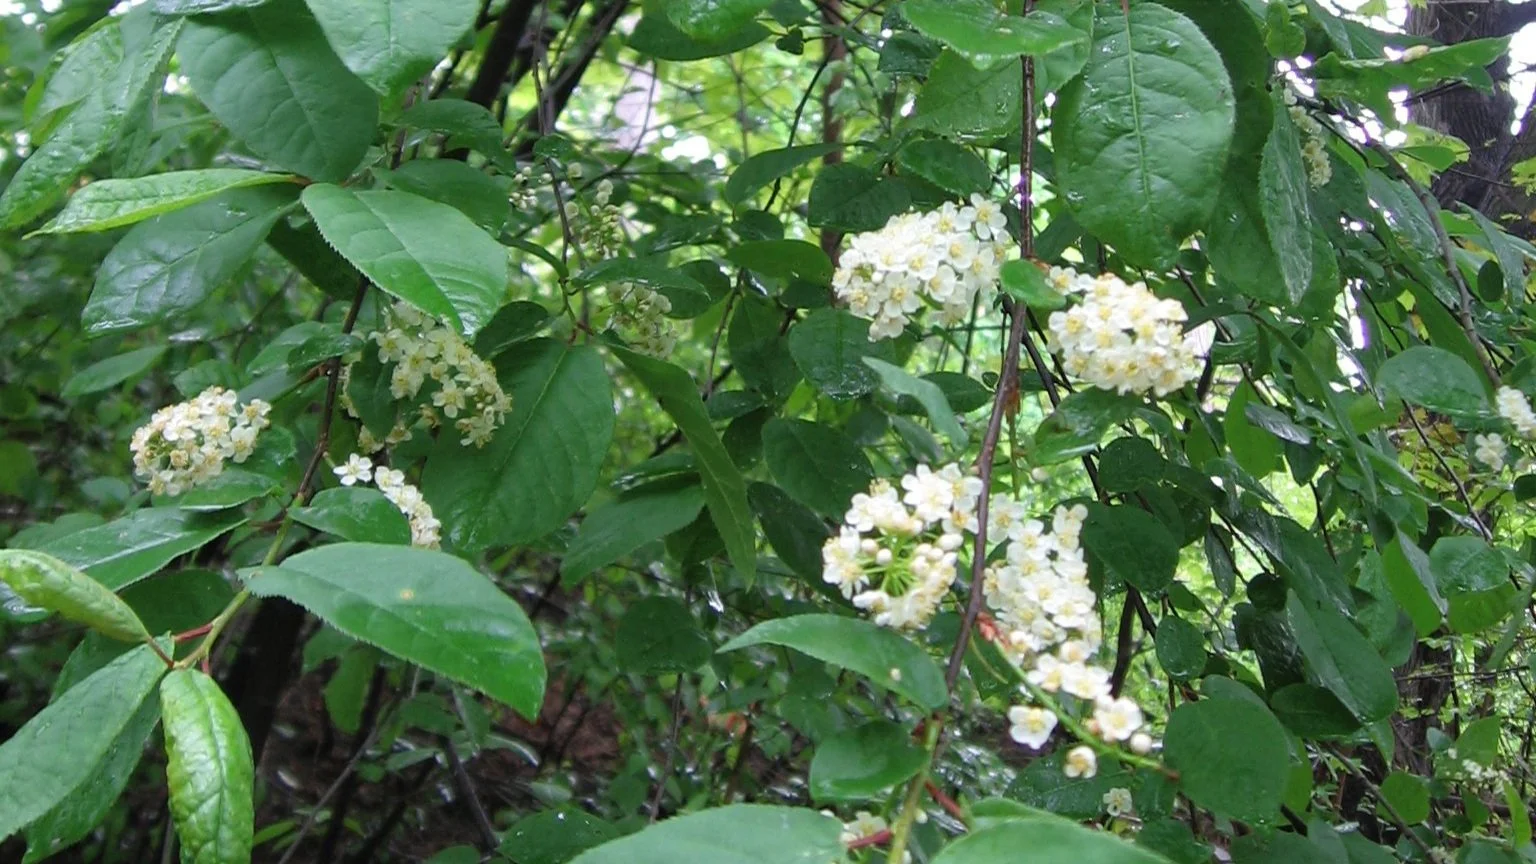
Chokecherry flowers
Pin Cherry (a.k.a. Pincherry)

Brightly coloured pin cherries light up the landscape!
Prunus pensylvanica
Pin cherry is another native North American species that grows as a shrub or small tree. I love the smooth, brownish-red bark.
Like chokecherry, the fruit are small. They’re more suited to fresh eating than chokecherry, giving you a tasty sour cherry taste without all the astringency.
While chokecherry flowers and fruit grow in a bottle-brush-like cylinder, pin cherries are on long, slender stems, with a few stems attaching to a branch in the same spot.
The bright red cherries light up a landscape. Use them to make jelly, juice, syrup, and wine.
Bush Cherry FAQ
Can I swallow the seeds?
All cherry seeds contain a cyanide compound, and consuming large quantities of fruit without removing seeds can make you sick. So spit out the pits!
Can I grow cherry bushes near a black walnut tree?
If you are dealing with black walnut toxicity, a.k.a. juglone toxicity, try growing cherries. Members of the Prunus family cope nicely with the juglone that’s given off by black walnut trees. Here’s a guide to gardening near a black walnut tree.
Find This Helpful?
Enjoy not being bombarded by annoying ads?
Appreciate the absence of junky affiliate links for products you don’t need?
It’s because we’re reader supported.
If we’ve helped in your food-gardening journey, we’re glad of support. You can high-five us below. Any amount welcome!
More on Fruit and Edible Landscapes
Articles
Interviews
Courses

Hi, We’re Steve and Emma!
We help people grow food on balconies, in backyards, and beyond—whether it’s edible landscaping, a vegetable garden, container gardens, or a home orchard.
Courses


Free Food- Garden Guide
Books

Covering everything from lemon varieties, to location and watering, to pruning and shaping, to overwintering, dealing with pests, and more—and including insights from fellow citrus enthusiasts—this book will give you the confidence you need to grow and harvest fresh lemons in cold climates.

Didn’t think you can grow your own figs in a cold climate? Here’s all you need to know to grow exotic fresh figs, even if you live somewhere with cold winters. Find out about choosing the right location, watering, pruning—and how to conquer winter. You’ll also learn about varieties, dealing with pests, and get tips from cold-climate fig experts.

This book will help you apply creative “fig thinking” in your garden and harvest fresh figs even if you have a short summer or cold winters. With some fig thinking, you can harvest figs in areas where they don’t normally survive the winter! In this book, I share many of the questions I have been asked about growing figs in temperate climates, along with my responses.